
Document 79258
Table of Contents
Title Page
Copyright Page
Dedication
Acknowledgements
Introduction
APPLEBEE’S MUD SLIDE
APPLEBEE’S PERFECT APPLE MARGARITA
APPLEBEE’S PERFECT SUNRISE
APPLEBEE’S ONION PEELS
APPLEBEE’S BAKED FRENCH ONION SOUP
APPLEBEE’S SANTA FE CHICKEN SALAD
APPLEBEE’S ALMOND RICE PILAF
APPLEBEE’S BOURBON STREET STEAK
APPLEBEE’S CHICKEN FAJITA ROLLUP
APPLEBEE’S CRISPY ORANGE CHICKEN BOWL
APPLEBEE’S HONEY GRILLED SALMON
APPLEBEE’S TEQUILA LIME CHICKEN
APPLEBEE’S WHITE CHOCOLATE & WALNUT
BLONDIE
BENIHANA GINGER SALAD DRESSING
BENIHANA JAPANESE ONION SOUP
BENIHANA MANDARIN ORANGE CHEESECAKE
BENNIGAN’S THE MONTE CRISTO
BUFFALO WILD WINGS BUFFALO WINGS AND
SAUCES
CALIFORNIA PIZZA KITCHEN CALIFORNIA COSMO
CALIFORNIA PIZZA KITCHEN THAI CRUNCH SALAD
CALIFORNIA PIZZA KITCHEN CALIFORNIA CLUB PIZZA
CALIFORNIA PIZZA KITCHEN JAMAICAN JERK
CHICKEN PIZZA
CARRABBA’S BREAD DIPPING BLEND
CARRABBA’S HOUSE SALAD DRESSING (CREAMY
PARMESAN)
CARRABBA’S CHICKEN MARSALA
THE CHEESECAKE FACTORY MINI CRABCAKES
THE CHEESECAKE FACTORY SWEET CORN TAMALE
CAKES
THE CHEESECAKE FACTORY CHICKEN MADEIRA
THE CHEESECAKE FACTORY BANG-BANG CHICKEN
& SHRIMP
THE CHEESECAKE FACTORY ORIGINAL
CHEESECAKE
THE CHEESECAKE FACTORY WHITE CHOCOLATE
RASPBERRY TRUFFLE CHEESECAKE
CHEVYS FRESH SALSA
CHEVY’S MANGO SALSA
CHEVYS CHILE CON QUESO
CHEVYS GARLIC MASHED POTATOES
CHEVYS SWEET CORN TOMALITO
CHEVYS FLAN
CHILI’S SALSA
CHILI’S BONELESS BUFFALO WINGS
CHILI’S BONELESS SHANGHAI WINGS
CHILI’S CHICKEN CRISPERS
CHILI’S CHILI QUESO
CHILI’S LETTUCE WRAPS
CHILI’S SOUTHWESTERN EGGROLLS
CHILI’S CHICKEN ENCHILADA SOUP
CHILI’S SOUTHWESTERN VEGETABLE SOUP
CHILI’S HONEY MUSTARD DRESSING
CHILI’S GRILLED BABY BACK RIBS
CHILI’S CHOCOLATE CHIP PARADISE PIE
CHILI’S MOLTEN CHOCOLATE CAKE
CLAIM JUMPER GARLIC CHEESE BREAD
CLAIM JUMPER FIRE-ROASTED ARTICHOKE
CLAIM JUMPER CHEESE POTATOCAKES
CLAIM JUMPER SPICY THAI SLAW
CLAIM JUMPER MEATLOAF
DENNY’S FABULOUS FRENCH TOAST
DENNY’S BBQ CHICKEN SANDWICH
DENNY’S CLUB SANDWICH
HARD ROCK CAFE HOMEMADE CHICKEN NOODLE
SOUP
HARD ROCK CAFE BAR-B-QUE BEANS
HARD ROCK CAFE COLESLAW
HARD ROCK CAFE PIG SANDWICH
HOUSTON’S CHICAGO-STYLE SPINACH DIP
HOUSTON’S HONEY-LIME VINAIGRETTE
HOUSTON’S COLESLAW
IHOP CINN-A-STACKS
IHOP COUNTRY GRIDDLE CAKES
IHOP COUNTRY OMELETTE
IHOP HARVEST GRAIN ’N NUT PANCAKES
IHOP PUMPKIN PANCAKES
ISLANDS CHINA COAST SALAD DRESSING
ISLANDS ISLAND FRIES
ISLANDS TORTILLA SOUP
ISLANDS YAKI SOFT TACOS
JOE’S CRAB SHACK BLUE CRAB DIP
JOE’S CRAB SHACK GARLIC KING CRAB LEGS
LONE STAR STEAKHOUSE LETTUCE WEDGE SALAD
LONE STAR STEAKHOUSE BAKED SWEET POTATO
LONE STAR STEAKHOUSE LONE STAR CHILI
MARGARITAVILLE CRAB, SHRIMP AND MUSHROOM
DIP
MARGARITAVILLE JAMAICA MISTAICA WINGS
MARGARITAVILLE KEY LIME PIE
MARIE CALLENDER’S LEMON CREAM CHEESE PIE
MARIE CALLENDER’S PUMPKIN PIE
MIMI’S CAFE CARROT RAISIN BREAD
MIMI’S CAFE CORN CHOWDER
MIMI’S CAFE FRENCH MARKET ONION SOUP
OLIVE GARDEN LIMONCELLO LEMONADE
OLIVE GARDEN BRUSCHETTA
OLIVE GARDEN SICILIAN SCAMPI
OLIVE GARDEN STUFFED MUSHROOMS
OLIVE GARDEN TOASTED RAVIOLI
OLIVE GARDEN PASTA E FAGIOLI
OLIVE GARDEN MINESTRONE SOUP
OLIVE GARDEN CHICKEN SCAMPI
OLIVE GARDEN CHOCOLATE LASAGNA
OLIVE GARDEN FROZEN TIRAMISU
OLIVE GARDEN LEMON CREAM CAKE
OLIVE GARDEN TIRAMISU
ORIGINAL PANCAKE HOUSE APPLE PANCAKE
ORIGINAL PANCAKE HOUSE GERMAN PANCAKE
OUTBACK STEAKHOUSE HONEY WHEAT BUSHMAN
BREAD
OUTBACK STEAKHOUSE GRILLED SHRIMP ON THE
BARBIE
OUTBACK STEAKHOUSE KOOKABURRA WINGS
OUTBACK STEAKHOUSE BLEU CHEESE DRESSING
OUTBACK STEAKHOUSE CAESAR SALAD DRESSING
OUTBACK STEAKHOUSE HONEY MUSTARD SALAD
DRESSING
OUTBACK STEAKHOUSE RANCH SALAD DRESSING
OUTBACK STEAKHOUSE TANGY TOMATO DRESSING
OUTBACK STEAKHOUSE CINNAMON APPLE
OBLIVION
OUTBACK STEAKHOUSE SYDNEY’S SINFUL SUNDAE
P. F. CHANG’S MAI TAI
P. F. CHANG’S CHANG’S SPARE RIBS
P. F. CHANG’S CHICKEN IN SOOTHING LETTUCE
WRAPS
P. F. CHANG’S SHRIMP DUMPLINGS
P. F. CHANG’S GARLIC SNAP PEAS
P. F. CHANG’S CHANG’S SPICY CHICKEN
P. F. CHANG’S DAN-DAN NOODLES
P. F. CHANG’S LEMON PEPPER SHRIMP
P. F. CHANG’S MONGOLIAN BEEF
P. F. CHANG’S OOLONG MARINATED SEA BASS
P. F. CHANG’S ORANGE PEEL CHICKEN
P. F. CHANG’S CHOCOLATE TORTE
RED LOBSTER TARTAR SAUCE
RED LOBSTER CHEDDAR BAY BISCUITS
RED LOBSTER BACON-WRAPPED STUFFED SHRIMP
RED LOBSTER CHEDDAR BAY CRAB BAKE
RED LOBSTER PARROT BAY COCONUT SHRIMP
RED LOBSTER NEW ENGLAND CLAM CHOWDER
RED LOBSTER TERIYAKI GLAZED FRESH FISH
RED ROBIN SEASONING
RED ROBIN 5 ALARM BURGER
RED ROBIN BANZAI BURGER
RED ROBIN TERIYAKI CHICKEN BURGER
ROADHOUSE GRILL ROADHOUSE RITA
ROADHOUSE GRILL ROADHOUSE CHEESE WRAPS
ROADHOUSE GRILL BABY BACK RIBS
ROMANO’S MACARONI GRILL CHICKEN PORTOBELLO
ROMANO’S MACARONI GRILL CHICKEN SCALOPPINE
ROMANO’S MACARONI GRILL PENNE RUSTICA
RUBY TUESDAY CREAMY MASHED CAULIFLOWER
TGI FRIDAY’S BLACK BEAN SOUP
T.G.I. FRIDAY’S BROCCOLI CHEESE SOUP
T.G.I. FRIDAY’S PECAN-CRUSTED CHICKEN SALAD
T.G.I. FRIDAY’S SIZZLING SHRIMP
TONY ROMA’S BLUE RIDGE SMOKIES SAUCE
TONY ROMA’S BAKED POTATO SOUP
TONY ROMA’S MAPLE SWEET POTATOES
TONY ROMA’S CAROLINA HONEYS BBQ SALMON
WAFFLE HOUSE WAFFLES
TRADEMARKS
INDEX
A PLUME BOOK
TOP SECRET RESTAURANT RECIPES 2
TODD WILBUR is the top-selling QVC cookbook author.
He’s appeared on The Oprah Winfrey Show, Today, and
Live with Regis and Kathie Lee, among others. He lives in
Las Vegas
“Many of [Wilbur’s] dishy imitations come, like a box of
Cracker Jacks, with a surprise inside.”
—Mademoiselle
“These probably come as close as you can get to the
original recipes.”
—Boston Herald
“The recipes are simply written and easy to do. This book
offers great-tasting fun for the whole family,”
—The Clinton Chronicle (South Carolina)
PLUME
Published by Penguin Group
Penguin Group (USA) Inc., 375 Hudson Street, New York, New York 10014, U.S.A. •
Penguin Group (Canada), 90 Eglinton Avenue East, Suite 700, Toronto, Ontario,
Canada M4P 2Y3 (a division of Pearson Penguin Canada Inc.) Penguin Books Ltd., 80
Strand, London WC2R ORL, England Penguin Ireland, 25 St. Stephen’s Green, Dublin
2, Ireland (a division of Penguin Books Ltd.) Penguin Group (Australia), 250
Camberwell Road, Camberwell, Victoria 3124, Australia (a division of Pearson
Australia Group Pty Ltd.) • Penguin Books India Pvt. Ltd., I I Community Centre,
Panchsheel Park, New Delhi - , India • Penguin Books (NZ) cnr Airborne and Rosedale
Roads, Albany, Auckland 1310, New Zealand (a division of Pearson New Zealand Ltd.)
Penguin Books (South Africa) (Pty) Ltd., 24 Sturdee Avenue, Rosebank, Johannesburg
2196, South Africa Penguin Books Ltd., Registered Offices: 80 Strand, London WC2R
ORL, England
First published by Plume, a member of Penguin Group (USA) Inc. Previously published
under the title Super Secret Restaurant Collection.
First Printing, January
Some of the recipes in this edition are selected from Top Secret Restaurant Recipes,
published by Plume.
Copyright © Todd Wilbur, 1997,2007
All rights reserved.
Pages 391-392 constitute an extension of this copyright page.
This book was not prepared, approved, licensed, or endorsed by any of the owners of
the trademarks or brand names referred to in this book. Terms mentioned that are
known or believed to be trademarks or service marks have been indicated as such. See
section on “Trademarks.”
Top Secret Recipes is a registered trademark of Todd Wilbur.
REGIS TERED TRADEMARK—MARCA REGISTRADA
CIP data is ava lable.
eISBN : 978-1-429-54845-8
Without limiting the rights under copyright reserved above, no part of this publication
may be reproduced, stored In or Introduced into a retrieval system, or transmitted, in
any form, or by any means (electronic, mechanical, photocopying, recording, or
otherwise), without the prior written permission of both the copyright owner and the
above publisher of this book.
PUBLISHER’S NOTE
The scanning, uploading, and distribution of this book via the Internet or via any other
means without the permission of the publisher is illegal and punishable by law. Please
purchase only authorized editions, and do not participate in or encourage electronic
piracy of copyrighted materials. Your support of the author’s rights is appreciated.
BOOKS ARE AVAILABLE AT QUANTITY DISCOUNTS WHEN USED TO PROMOTE
PRODUCTS OR SERVICES FOR INFORMATION PLEASE WRITE TO PREMIUM
MARKET DIVISION, PENGUIN GROUP (USA) INC., 375 HUDSON STREET, NEW
YORK, NEW YORK 10014
http://us.penguingroup.com
For Ajay and Roxie
MANY THANKS ...
Cloning these famous recipes requires thousands of hours
of work locked up alone in a kitchen with only the sounds of
the dishwasher and Howard 101 to keep me company.
However, a book like this could never have been made
without the support and efforts of many others on the
outside whom I must now thank.
I feel privileged to have hooked up with Plume in the early
1990s for the very first Top Secret Recipes cookbook.
Since then we have published seven more trade
paperbacks together, plus two special QVC editions and
several other special market volumes. Plume has made
this culinary publishing journey a pleasure every step of the
way, and I wart to thank everyone there for your
contributions, opinions and collaborations through the
years. Specifically I must thank Barbara O’Shea, Clare
Ferraro, Trena Keating, Emily Haynes, Sandra Dear
Cherisse Dike, Kimberly Cagle, and Marie Coolman from
the bottom of my heart for all of your hard work and support
on this book.
Thanks to everyone behind the scenes at QVC and all
the great on-air hosts for making these books the topselling cookbook series on the shopping network. To
Anthony Corrado, my man in the kitchen at QVC who
always makes the food look so good on TV: Thanks, bud.
You’re not only an awesome food stylist, but also a great
friend.
Thanks to Robert Wortham of W&A Marketing and his
assistant, John Lowry, for the great cover photos. It’s more
like a party than work, really And I’m happy to see that you
didn’t leave hungry.
Thank you to all of the waiters, waitresses and
bartenders who take the time to answer my annoying
questions when I’m on a cloning mission. Creating these
recipes wouldn’t be possible without the little tidbits of
information and clues that you provide regarding
ingredients and/or preparation techniques of these famous
dishes.
Thanks to my family and friends for your anxious and
helpful taste-testing of many of these recipes. As always, if
you’ve got taste buds and an opinion, I’ve got free food.
Thanks to Nobu the Akita for taking over where Zebu the
Wonder Dog left off. Those are some big paw prints to fill,
but you’re doing great so far.
And last, thank you to Pamela, the love of my life. When
I’m stuck, you yank me out. When I’m down, you lift me up.
No matter what life dishes out, I know it’s going to be much
better with you sharing my plate.
INTRODUCTION
I feel out of place at the ritzy Stirling Club in Las Vegas—
like a Macho Nacho Burrito at a caviar tasting. But there I
am attending an invite-only shindig where impressionist
Rich Little speaks in his own voice, and Lifestyles of the
Rich and Famous host Robin Leach works the room. It’s a
very Vegas moment.
Then someone drags singer Clint Holmes over to our
group. He’s the Tom Jones-esque crooner headlining at
Harrah’s who was voted “Best All Around Entertainer in Las
Vegas.” I mention that I saw him perform in Atlantic City at
the 1990 Miss America Pageant I was covering as a TV
news reporter. When he ignores my comment I wonder,
“Did I just insult the man?” Now I’m not sure what to say
Thankfully, a friend cuts through the awkwardness to tell
Clint what I do for a living, “Todd writes cookbooks.”
She looks back my way, expecting me to elaborate. “The
books are called Top Secret Recipes,” I tell him. “They
show people how to make famous food at home with
common ingredients.”
From past experience I realize that at this point I haven’t
provided enough information to make Clint understand my
strange career path, so here’s where I open up my stance
and bend forward as though I’m carefully studying a piece
of food. “I reverse-engineer brand-name foods, like a Big
Mac or a Twinkie or Red Lobster Cheddar Bay Biscuits,
and then create clone recipes that instruct you how to easily
duplicate the taste of these foods in your own kitchen using
ingredients you can find in any supermarket.”
Now I wait to see if the ball will fall on red or black. About
half of the people appreciate the unusual cookbook
concept, and many of them have used the recipes before,
either from the books or off the website. But the other half—
and these are usually people who don’t like to cook—shoot
me a blank, puzzled stare followed by a cordial nod of fake
acknowledgment. It’s a look that says, “Why the heck would
I want to duplicate food that I can just go out and buy?” It
seems like the Best All Around Entertainer of the Year is in
the latter category. Let’s just say the roulette ball fell on
green that night, since Clint was whisked away before I
could continue with my explanation.
If I’d had the chance to explain in more detail why so
many people enjoy cloning famous foods, I think I could
have won Clint over. I’d tell him how cool it is making
America’s most popular food in our own kitchens and then
watching people freak out when they take a bite. I would
suggest that we can save money by making these dishes at
home, and that with these formulas we have the freedom to
customize our favorite brand-name foods for special tastes
and dietary requirements. I’d remark that unlike any other
cookbook, when you cook for the first time from a Top
Secret Recipes cookbook, you know in advance what the
finished product will taste like.
By this time, I’m sure I’d see the huge lightbulb over
Clint’s head pop on. And then he would ask the next
inevitable question: “How do you get away with this?”
Now I would explain to Clint that these are original,
personally copyrighted recipes that I create from scratch in
my own laboratory (I know, ha ha; it’s really my kitchen,
Clint). I’d describe to him the time-consuming process of
dissecting multiple samples, of sniffing out ingredients, of
straining sauces and calculating measurements. And then
I’d finish by explaining that I never represent these recipes
as the actual recipes for the brand-name foods, because I
respect the success and trademarks of the companies, and
that I imitate as a compliment to the corporate chefs. It’s
flattery in its sincerest form, I’d say.
By now Clint would be ignoring everyone else. As he
starts to understand the multiple benefits of this niche
concept of culinary deconstruction/reconstruction, he would
refuse to sing a song for the crowd, because he wants to
hear more. “How exactly do you get these recipes? Do you
get a job at the restaurants and steal them?” When he still
doesn’t completely grasp what I’m saying, I’d spend more
time with him, and I would make sure to talk very slowly.
I would tell Clint that creating these recipes is a game.
Each Top Secret Recipe is a little mystery to be unraveled
without full knowledge of the original formula. I’d tell him that
I have never worked at any of these chains, nor have I ever
obtained corporate recipes. I would explain how the game
must be played using certain kitchen sleuthing techniques
that I have developed over the past 20 years. I will, for
example, order the food to go, but ask that all of the
elements of the dish be packed up separately (sauces,
garnishes, etc.) so that back in the lab can copy each
component of the dish one at a time. I’d also describe my
extensive research in cookbooks and on the Internet to
understand ways that similar recipes are crafted. I’d tell him
that only then do I write out the recipe and make my first
attempt. After that, it’s like sculpting, I’d say. I add a little of
this, take out a little of that, until many, many batches later a
good clone is formed.
Clint and I would really hit it off as we went on and on
about cloning America’s favorite brand-name foods.
Eventually he’d realize that he has fallen way behind on his
schmoozing, and say that, regretfully, he has to go. He’d
offer me front-row tickets to his next show and then he’d
ask when the new book is coming out. I’d tell him it’s called
Top Secret Restaurant Recipes 2, it’ll be out very soon,
and I’m writing the introduction right now. I’d also tell him
that it’s my best work.
He’d shake my hand and move into the crowd, and I’d
feel like I just made a new friend. Before he’s too far away,
he’d turn back and offer me an enlightening Clint Holmes
nugget of wisdom : “Hey, Todd,” he’d say “Don’t spend too
much time on that introduction. It sounds to me like it’s
those clone recipes people really want.”
I’d promise to take his advice, because, deep down, I
know Mr Clint Holmes gets it. And he’s right.
If you’re new to Top Secret Recipes, you are about to
experience a cookbook concept unlike any other. This
book is a collection of 150 original recipes to clone
signature items from America’s largest casual restaurant
chains. All the recipes have been created from a process
of reverse-engineering, using common ingredients and
simplified steps.
In the 10 years since Top Secret Restaurant Recipes
was released, I have received thousands of e-mails and
letters filled with cloning requests for chain restaurant
appetizers and entrees and desserts that I hadn’t thought
about before, or that I never got around to dissecting for the
first book. I’m happy to say that this latest collection is
assembled with replica recipes from those mouthwatering
suggestions. There are more full-service restaurant clone
recipes included in this book than in any previous Top
Secret Recipes volume.
In a full house, where the kitchen is the hub of activity, the
process of preparing tasty meals can be a rewarding event
in which all can participate. The reason I first created these
Top Secret Recipes is that I found cooking home
duplicates of favorite famous dishes adds an extra
sprinkling of joy to the process. It’s a real kick digging into a
dish you made at home that comes out tasting just like a
menu item from a famous restaurant chain. And now, with
these clone recipes to assist you, a combination of tastealike versions of your favorite courses from different chains
can be served in one meal creating a dining experience
you couldn’t have in any one restaurant.
These days we spend nearly half of the money
designated for food on dining outside of our homes. Emeril
Lagasse, Rachael Ray and Martha Stewart are more
popular than ever, but on any given day 44 percent of adults
are filling their bellies in a diner, cafe, coffeehouse, bistro,
sub shop, dinnerhouse, pizza joint, cafeteria or buffet
somewhere in America rather than preparing food in their
own shiny home kitchens. Speed and convenience are
obviously major factors that play into our decision to pay
someone to make food for us, but what about the cost? Out
of curiosity, I priced each ingredient for a dozen recipes in
this book and then broke those totals down by serving. If
you’re into saving a little coin, you’ll see from this list how
making food at home will usually cost much less than dining
out:
I first started hammering out these recipes immediately
following the release of Top Secret Restaurant Recipes,
so what you have here is the culmination of work that spans
a decade. The process is time-consuming and tedious,
and I resisted releasing this book before it contained the
very best collection of clone recipes I could muster. Within
the mix are many recipes that required repeated tooling
over 6 months or more before I finally struck gold. If a recipe
doesn’t pierce the bull’s-eye, I keep shooting until I score. If
the final product isn’t a direct hit, that recipe doesn’t make
the cut. Because of this strict process, I believe in my
formulas, and I’m confident that you will find the results
rewarding.
If you’d like additional input on these recipes, check out
t h e Top
Secret
Recipes
website
(www.TopSecretRecipes.com), where fellow clone rangers
have added their comments and suggestions for many of
these formulas. The important thing is to enjoy the creative
freedom you now have with this collection. Cooking at
home means having the liberty to experiment with a variety
of ingredients, and the ability to customize recipes to suit
varying tastes and dietary requirements. I encourage you to
make these recipes uniquely yours.
Until next time, I’ll be down here in the top secret
underground lab, dissecting away, to come up with another
big batch of recipes that helps you create kitchen clones of
America’s favorite brand-name foods. Happy cloning!
APPLEBEE’S MUD SLIDE
MENU DESCRIPTION: “Bury your sweet tooth with
smooth Kahlua, creamy vanilla ice cream, whipped
cream and rich Hershey’s chocolate syrup.”
Sure, there’s a little Kahlua in there, but this famous
Applebee’s drink is more dessert than cocktail, really And
the presentation will make you look like a pro because you
spiral the chocolate syrup around the inside the glass
before adding the drink. It looks cool and it’s easy to do ...
even after you’ve had a couple. Grab a straw and prepare
to crave another when this one’s gone. No wonder this
drink also comes in a larger size.
2 cups vanilla ice cream
2 ounces Kahlua coffee liqueur
Hershey’s chocolate syrup (in a
squirt bottle)
canned whipped cream
1. Measure 2 cups of ice cream into your blender.
Add the Kahlua and blend until smooth.
2. Prepare a 16-ounce wine glass by swirling
chocolate syrup around the inside of the glass. Hold
the wine glass by the stem with one hand and twirl the
wine glass as you squeeze the chocolate. Slowly move
the chocolate up toward the rim of the glass so that the
chocolate makes a continuous spiral around the inside
of the glass.
3. Pour the drink from the blender into the glass,
Add a pile of whipped cream to the top of the drink
and drizzle additional chocolate syrup over the
whipped cream. Add a straw and serve.
• MAKES I DRINK.
APPLEBEE’S PERFECT APPLE
MARGARITA
Here’s a great twist on the traditional margarita. Sour apple
schnapps and apple juice join forces with tequila and sweet
and sour mix in a martini glass that’s rimmed with
cinnamon sugar Hey, it’s like drinking apple pie! This
recipe makes one drink, but it’s easy to double up. That’s a
good thing, since it seems like one is never enough.
2 tablespoons granulated sugar
¼ teaspoon ground cinnamon
1 ounce Sauza Hornitos tequila
1 ounce DeKuyper Sour Apple
Pucker schnapps
2 ounces sweet-and-sour mix
2 ounces cold apple juice
GARNISH
olive
lime wedge
1. Mix sugar and cinnamon together in a small
bowl, then pour the mixture onto a saucer or small
plate. Moisten a napkin or clean towel with water. Run
the wet napkin around the rim of the martini glass.
Invert the glass and dip the moistened rim into the
cinnamon/sugar. Set the glass aside for now.
2. Drop a handful of ice into a cocktail shaker.
3. Add the tequila, schnapps, sweet-and-sour,
and apple juice. Shake vigorously
4. Strain drink into the prepared martini glass,
spear an olive and small lime wedge on a toothpick
and drop it in the drink, and serve it up along with the
shaker if there’s any left over.
• SERVES 1.
APPLEBEE’S PERFECT
SUNRISE
Applebee’s latest cocktail creation is a tasty warm-weather
companion. The combination of tequilas, juices and syrups
is served up in a chilled martini glass as the perfect recreation of the classic tequila sunrise.
1¼ ounces 1800 Silver tequila
¼ ounce 1800 Reposado tequila
½ ounce simple syrup (see
Tidbits)
½ ounce lime juice
1½ ounces sweet-and-sour mix
4 ounces orange juice
½ ounce grenadine
GARNISH
maraschino cherry
1. Fill a 10-ounce martini glass with ice and add
cold water to chill the glass.
2. Drop a handful of ice into a shaker Add
tequilas, simple syrup, lime juice, sweet-and-sour and
orange juice. Shake well.
3. Dump ice water out of the glass and strain the
drink into it.
4. Drop a maraschino cherry into the drink and
serve it up with the grenadine on the side in a shot
glass.
• MAKES I DRINK.
TIDBITS
Make simple syrup by combining equal parts hot water and
granulated sugar. Stir until sugar is dissolved. Allow syrup
to cool before using. Simple.
APPLEBEE’S ONION PEELS
MENU DESCRIPTION: “Crisp-fried tender onion strips
served with a creamy horseradish dipping sauce.”
This signature appetizer from Applebee’s is the chain’s
reaction to overwhelming success of Outback’s Bloomin’
Onion and Chili’s Awesome Blossom. But, while accurate
kitchen cloning of a Bloomin’ Onion requires a special
slicing device, cloning Onion Peels requires only the most
basic kitchen prep and tools: Slice the onion, separate the
slices, dip the slices in batter and fry. Just remember to
make the essential horseradish dipping sauce in advance
so that the ingredients can mingle and really get to know
one another as they chill out in the fridge.
CREAMY HORSERADISH DIPPING
SAUCE
½ cup mayonnaise
1 tablespoon prepared
horseradish
2 teaspoons white vinegar
1 teaspoon water
1 teaspoon paprika
1 teaspoon ketchup
¼ teaspoon medium grind black
pepper
⅛ teaspoon dried oregano
⅛ teaspoon cayenne pepper
dash garlic powder
dash onion powder
6 to 10 cups vegetable shortening
(as required by fryer)
1 large white onion
BATTER
½ cup all-purpose flour
½ cup Progresso plain
breadcrumbs
½ teaspoon salt
½ teaspoon ground black pepper
1 ½ cups milk
1. Make horseradish dipping sauce by combining
ingredients in a medium bowl with a whisk. Mix until
creamy then cover and chill the sauce.
2. Heat the shortening to 350 degrees in a deep
fryer.
3. Slice the stem end and the root end off onion,
then, with the onion resting on a flat side, cut down
through the onion, slicing it in half. Slice each half 4 to
5 more times in a spoke fashion to create wedges of
onion. Separate the onion pieces.
4. Create batter by combining all dry ingredients
in a medium bowl. Whisk in milk until batter is smooth
then let the batter sit for 5 minutes. It should thicken.
Whisk batter again.
5. When the oil is hot dip each onion piece in the
batter, let some of the batter drip off then drop the
coated onion piece carefully into the hot oil. Fry 8 to 12
peels at a time for I to 2 minutes or until light brown.
Drain on a rack or paper towels. Repeat until the onion
is used up, stacking the newer batches on top of the
old ones to keep them warm. When they’re all done,
serve the fried onion slices on a plate or in a paperlined basket with horseradish dipping sauce on the
side.
• Serves 4 TO 6.
TIDBITS
While shortening works best for this recipe, you may also
fry these with vegetable oil or canola oil.
APPLEBEE’S BAKED FRENCH
ONION SOUP
It may not be listed on the menu, but this is Applebee’s
most ladled soup each and every day. Just be sure you
have some oven-safe soup bowls on hand before you jump
into this clone, since you’re going to pop the dish under the
broiler to brown and melt the cheese on top. Under the
gooey melted provolone of the original version you get from
Applebee’s is a unique round crouton that’s made from
bread that looks like a hamburger bun. In fact, that’s exactly
what we’ll use for our clone. The round shape of the buns is
perfect for topping the soup.
3 tablespoons vegetable oil
6 medium white onions, sliced
8 cups beef broth (Swanson is
best)
1 cup water
2½ teaspoons salt
½ teaspoon garlic powder
¼ teaspoon ground black pepper
5 plain hamburger buns
10 slices provolone cheese
10 teaspoons shredded Parmesan
cheese
1. Add 3 tablespoons oil to a large soup pot or
saucepan over medium/high heat. Add the sliced
onions and saute for 20 minutes until the onions begin
to soften and start to become translucent. You don’t
want them to brown.
2. Add the beef broth, water, salt, garlic powder
and black pepper to the pan and bring mixture to a
boil. When soup begins to boil, reduce heat and
simmer for 45 minutes.
3. To make the croutons cut off the top half of
each top of the hamburger bun so that the bread is the
same thickness as the bottom half of each bun. Throw
the top crusts away. Now you should have 10 round
pieces of bread—5 bottom buns, and 5 top buns with
the tops cut off. Preheat oven to 325 degrees. Place
the bread in the oven directly on the rack and bake for
15 to 20 minutes or until each piece is golden brown
and crispy Set these croutons aside until you need
them.
4. When the soup is done, spoon about I cup into
an oven-safe bowl. Float a crouton on top of the soup,
then place a slice of provolone cheese on top of the
crouton. Sprinkle ½ teaspoon of shredded parmesan
cheese over the provolone.
5. Place the bowl into your oven set to high broil.
Broil the soup for 5 to 6 minutes or until the cheese is
melted and starting to brown (you may need to broil
longer if you are making more than one bowl at a
time). Sprinkle an additional ½ teaspoon of shredded
parmesan cheese over the top of the soup and serve.
Repeat process to prepare remaining servings.
• MAKES 10 SERVINGS.
APPLEBEE’S SANTA FE
CHICKEN SALAD
MENU DESCRIPTION: “Grilled chipotle chicken breast
with guacamole and sour cream on a bed of greens
tossed with two cheeses, pico de gallo, tortilla stnps and
our Mexi-ranch dressing.”
Create a robust chipotle marinade that fills your chicken
fillets with flavor. As you wait for the chicken to marinate you
have plenty of time to throw together clones of the Mexiranch dressing and fresh pico de gallo. Now most of the
work is done, and you’re standing in front of the gate to
salad heaven. When you’re ready to enter, simply grill the
chicken, assemble your salads and open wide.
You should know that if you don’t have buttermilk for the
dressing, and don’t want to buy a whole carton to use just a
single tablespoon, simply substitute regular milk. You’ll find
ground chipotle pepper where all the spices are in the
market (I use McCormick). If you can’t track down ground
chipotle, use ground cayenne pepper Just be sure to
measure roughly half the amount, since cayenne packs
more heat than chipotle.
MARINADE
2 cups water
⅓ cup soy sauce
3 tablespoons granulated sugar
2 tablespoons salt
2 tablespoons apple cider vinegar
1 tablespoon ground chipotle
pepper (or 1 ½ teaspoons
ground cayenne pepper)
2 teaspoons hickory smoke
flavoring
2 teaspoons paprika
2 teaspoon garlic powder
1 teaspoon onion powder
I teaspoon ground black pepper
4 skinless chicken breast fillets
MEXI-RANCH DRESSING
½ cup mayonnaise
2 tablespoons minced onion
2 tablespoons diced tomato
1 tablespoon buttermilk
1 tablespoon white vinegar
2 teaspoons minced fresh cilantro
I teaspoon canned chopped mild
green chiles
¾ teaspoon paprika
½ teaspoon granulated sugar
¼ teaspoon salt
pinch dried dill weed
pinch ground cumin
pinch cayenne pepper
PICO DE GALLO
2 medium tomatoes, diced
⅓ cup diced red onion
1 jalapeno, seeded and diced
2 teaspoons lime juice
8 cups chopped iceberg lettuce
8 cups chopped romaine lettuce
1 cup chopped red cabbage
1 cup fancy shredded Cheddar
cheese
2 teaspoons minced fresh Cilantro
¼ teaspoon salt
¼ teaspoon ground black
pepper
1 cup fancy shredded Monterey
Jack cheese
4 handfuls tortilla stnps or chips
½ cup sour cream
½ cup guacamole
1. You want to mannate the chicken for 2 hours in
advance, so make the marinade first by combing all
the ingredients for the marinade in a medium bowl. Stir
well until the sugar has dissolved. Drop the chicken
breasts into the marinade, then cover and chill for 2
hours. You don’t want to marinate for much more than
2 hours or the chicken could get tough.
2. While the chicken marinates, make the Mexiranch dressing by combining the ingredients in a
medium bowl. Cover and chill so the flavors will
develop as the chicken marinates.
3. You’ll also make the pico de gallo in advance
so that it can rest a bit in the fridge. Combine all the
ingredients in a medium bowl, then cover and chill this
as well.
4. When the chicken has marinated for 2 hours,
fire up the grill to medium/high heat. Grill the chicken
breasts for 4 to 7 minutes per side or until chicken is
done. Take the chicken off the grill then let it rest for a
bit while you prepare the salads.
5. Build each salad in a large bowl by first tossing
2 cups chopped iceberg lettuce and 2 cups chopped
romaine lettuce with ¼ cup chopped red cabbage and
about ¼ cup of the dressing.
6. Combine the shredded cheeses then add,
about ½ cup to each salad on the lettuce. Sprinkle a
handful of tortilla strips or crumbled chips on next.
7. Slice each chicken breast into strips and
arrange each one on each of the salads. Sprinkle
about ¼ cup of pico de gallo over the top.
8. Finish off each salad by adding a 2-tablespoon
scoop of sour cream on one side of each salad, then a
2-tablespoon scoop of guacamole on the other side of
the salad.
• Serves 4.
APPLEBEE’S ALMOND RICE
PILAF
You’re grilling some steaks or baking some chicken and
don’t know what to serve on the side? Try out this simple
clone for a dish that’s served along with several of
Applebee’s entrees. Since the recipe requires converted
rice (because instant rice is gross) you have to plan ahead
about 25 minutes to give the rice time to cook. It’s worth the
wait. The secret to an authentic, great-tasting rice pilaf is
sautéing the uncooked rice kernels in butter first, before
adding the liquid—in this case chicken broth. Then, as the
rice is cooking, you have plenty of time to saute the
almonds, celery, and onions that are tossed into the rice at
the end.
3 tablespoons butter
1 cup uncooked converted rice
2¼ cups chicken broth
⅛ teaspoon salt
cup sliced or slivered almonds
¼ cup diced celery
¼ cup diced onion
1 teaspoon dried parsley
1. Melt 2 tablespoons butter over medium heat in
a medium saucepan. Be sure to use a saucepan with
a lid. Add I cup uncooked converted rice and saute
rice for 2 to 4 minutes in the butter or until some of the
rice begins to turn light brown. As the rice is cooking
heat chicken broth on high in microwave for 3 to 4
minutes or until the broth begins to bubble. When the
rice begins to brown, quickly add the hot stock and salt
to the pan. Cover the pan, reduce heat to low and
simmer rice for 20 minutes.
2. As rice cooks, melt remaining I tablespoon
butter in a medium skillet over medium heat. Add
almonds and saute for I to 2 minutes or until the
almonds begin to brown. Add celery and onion and
saute for another couple of minutes or until the onion
begins to turn translucent.
3. When the rice has cooked for 20 minutes,
remove it from the heat. Add almonds, celery, onion
and parsley to the rice, then let it sit, covered, for 5
minutes or until the remaining liquid is absorbed.
• Serves 4.
APPLEBEE’S BOURBON
STREET STEAK
MENU DESCRIPTION: “This succulent 10 oz. steak is
jazzed up with Cajun spices and served with sautéed
onions, mushrooms, garlic mashed potatoes and garlic
toast.”
This Cajun-style dish is named after the famous street in
the French Quarter in New Orleans. No bourbon is needed
to re-create the secret taste of this signature steak entree
from America’s largest casual dining chain. Plan to make
this dish approximately 24 hours in advance, so the steaks
have time to soak up the goodness. This long marinating
time will also give the meat tenderizer a chance to do its
thing, but don’t go longer than 24 hours, or the protein fibers
may become so tender that they turn mushy. I used
McCormick brand tenderizer, which uses bromelian, a
pineapple extract, to tenderize the meat. Lawry’s (Adolph’s)
meat tenderizer, uses papain, from papayas, to tenderize
the proteins, but this brand also brings other spices into the
mix and will alter the flavor of your finished product. Both of
these tenderizers include a lot of salt, so we won’t need to
include salt as part of the marinade formula.
2 10-ounce top sirloin steaks
MARINADE
2 tablespoons Worcestershire sauce
2 tablespoons soy sauce
4 teaspoons chili powder
4 teaspoons minced garlic
1 ½ teaspoons meat tenderizer
(McCormick is best)
2 teaspoons paprika
2 teaspoons ground black pepper
1 teaspoon ground cayenne pepper
1 teaspoon onion powder
½ teaspoon ground oregano
2 cups water
GARLIC BUTTER
3 tablespoons salted butter
⅛ teaspoon garlic powder
pinch salt
ON THE SIDE
1 tablespoon olive oil
1 tablespoon salted butter
2 cups thinly sliced white onion
(about ½ onion)
2 cups sliced white mushrooms
⅛ teaspoon salt
⅛ teaspoon ground black pepper
1. Combine all marinade ingredients in a medium
bowl.
2. Pound steaks with a kitchen mallet until about
¾-inch thick.
3. Submerse steaks in marinade, cover and store
overnight in the refrigerator.
4. When your steaks have marinated for
approximately 24 hours, preheat a barbecue grill to
medium/high heat and grill the steaks for 3 to 5
minutes per side or until cooked as desired.
5. Melt 3 tablespoons butter and combine with ⅛
teaspoon garlic powder and a pinch of salt.
6. Combine I tablespoon butter and I tablespoon
olive oil in a medium skillet over medium/low heat.
When the butter is melted, add 2 cups of sliced onion
and saute for 2 to 3 minutes or until onion begins to
soften. Add sliced mushrooms, ⅛ teaspoon salt and ⅛
teaspoon black pepper to pan, and saute for another 2
to 3 minute or until onion and mushrooms begin to
lightly brown.
7. When the steaks are done, spoon a couple
teaspoons of garlic butter over the top of each steak
and serve with mushrooms and onion on the side.
• Serves 2.
APPLEBEE’S CHICKEN
FAJITA ROLLUP
MENU DESCRIPTION: “A large flour tortilla topped with
melted Monterey Jack and Cheddar cheeses, grilled
chipotle chicken, shredded lettuce and pico de gallo.
Rolled, sliced and served with a Mexi-ranch dipping
sauce”
Take Applebee’s delicious chicken chipotle fajita recipe,
roll it up in a large flour tortilla with lettuce, cheeses and
fresh pico de gallo and you’ve got a meal to wrap your
hands around. The Mexi-ranch dipping sauce is the perfect
creamy compliment for this recipe and you can use what’s
left over for a dressing on your next salad. The sauce is
actually just a kicked-up ranch dressing recipe that includes
a small amount of buttermilk in the ingredients list. But if you
don’t want to buy a whole carton of buttermilk to use just a
tablespoon for this recipe, that’s okay. Substitute the
regular moo juice you’ve got sitting in the fridge. For the
spicy marinade it’s best to use ground chipotle pepper
(dried smoked red jalapeno) made by McCormick. If you
can’t find that stuff, cut the amount in half and use cayenne
pepper For the cheeses, many major brands make a
Cheddar/Jack blend that will work great here if you’d rather
not buy the cheeses separately That’s helpful if you’re about
to tip the limit for the express lane checkout line.
MARINADE
2 cups water
⅓ cup soy sauce
3 tablespoons granulated sugar
2 tablespoons salt
2 tablespoons white vinegar
1 tablespoon ground chipotle
pepper(or 1½ teaspoons
ground cayenne pepper)
2 teaspoons hickory smoke
flavoring
2 teaspoons paprika
2 teaspoon garlic powder
I teaspoon onion powder
I teaspoon ground black pepper
4 skinless chicken breast fillets
MEXI-RANCH DIPPING SAUCE
½ cup mayonnaise
2 tablespoons minced onion
2 tablespoons diced tomato
1 tablespoon buttermilk
1 tablespoon white vinegar
2 teaspoons minced fresh cilantro
I teaspoon canned chopped mild
green chiles
¾ teaspoon paprika
½ teaspoon granulated sugar
¼ teaspoon salt
pinch dried dill weed
pinch ground cumin
pinch cayenne pepper
PICO DE GALLO
2 medium tomatoes, diced
⅓ cup diced red onion
1 jalapeno, seeded and
diced
2 teaspoons lime juice
2 teaspoons minced fresh
cilantro
¼ teaspoon salt
¼ teaspoon ground black pepper
4 large flour tortillas
1 cup fancy shredded Cheddar
cheese
I cup fancy shredded Monterey
Jack cheese
4 cups shredded iceberg lettuce
1. The chicken needs to marinate for 2 hours, so
make the marinade first by combining the ingredients
in a medium bowl. Stir well until the sugar has
dissolved. Add four chicken breasts to the marinade,
cover and chill for 2 hours. Don’t let the chicken
marinate for much more than that or it could get tough.
2. While the chicken marinates, prepare the
dipping sauce by combining the ingredients in a
medium bowl. Stir well then cover and chill. This will
allow all the flavors to develop nicely while parked in
the fridge.
3. The pico de gallo will also develop nicely in the
fridge. Combine all those ingredients, then cover and
chill it as well.
4. When you’re ready to make your roll-ups,
preheat your grill to medium/high heat. Grill the chicken
breast for 4 to 7 minutes per side or until done.
5. Build each roll-up by first laying a large flour
tortilla in a large skillet over low-heat. Sprinkle about ½
cup of the combined cheeses over the surface of the
tortilla while it heats up in the pan. When the cheese
begins to melt, remove the tortilla from the pan.
Sprinkle about I cup of shredded lettuce in a strip
across the center of the tortilla, followed by about 3
tablespoons of pico de gallo. Slice one grilled chicken
breast into bite-size chunks and arrange the chicken
on the lettuce. Fold the ends of the tortilla over the
filling, then roll the tortilla from the bottom. Make a
diagonal cut across the center of the roll-up and serve
with a small dish of the dipping sauce on the side.
• Serves 4.
APPLEBEE’S CRISPY
ORANGE CHICKEN BOWL
MENU DESCRIPTION: “Breaded boneless chicken
breast is delicately spiced and covered in a spicy-sweet
orange glaze. Served in a big bowl over almond rice pilaf
and a flavorful mixture of mushrooms, broccoli, red
pepper, sugar snap peas and shredded carrots. Topped
with toasted almonds and crispy noodles.”
Concoct a carbon copy of the delicious spicy orange glaze
that’s tossed over the crispy chicken and you’re well on
your way to re-creating this Applebee’s signature meal-ina-bowl. The sweet, tangy and spicy sauce is made easily
from simmering a mixture of orange juice, brown sugar,
marmalade and a few other secret ingredients. As for the
crispy chicken, rather than going to the trouble of breading
and frying the chicken from scratch, I’ve cut a lot of time off
the prep by including frozen breaded chicken fingers that
you simply bake in the oven just before you’re ready to
assemble the dish. I used Claim Jumper brand chicken
tenderloins for this recipe, since one 20-ounce box was
perfect for the two servings this recipe yields. These are
mongo-huge restaurant-size portions, so you’ll be able to
divide this recipe up into four modest servings with ease.
SPICY ORANGE SAUCE
1 cup orange juice
½ cup light brown sugar
3 tablespoons orange marmalade
2 tablespoons soy sauce
1 tablespoon vegetable oil
½ teaspoon minced parsley
¼ teaspoon chili flakes
4 cups almond rice pilaf (from
recipe on page 15)
20 ounces breaded chicken
fingers, baked
(approx. 12 strips)
1½ cups broccoli florets
¼ teaspoon minced garlic
⅛ teaspoon dried thyme
1 tablespoon rice vinegar
1 cup sliced red bell pepper
I cup sliced mushrooms
¾ cup sugar snap peas
¼ cup shredded carrot
½ cup crispy chow mein noodles
¼ cup sliced or slivered almonds
1. Make the spicy orange sauce by combining all
ingredients, except vinegar, in a medium saucepan.
Simmer over medium/ low heat for 15 minutes or until
thick. Remove from heat and add vinegar.
2. If you haven’t already baked your chicken
fingers, now is the time to cook them following the
directions on the package.
3. Steam the broccoli, red bell pepper,
mushrooms, sugar snap peas and carrot in a steamer
basket in a covered saucepan over simmering water
for 10 minutes or until the broccoli is tender. Salt and
pepper the veggies.
4. Prepare each dish by spooning 2 cups of the
rice pilaf into two large bowls. Divide the steamed
vegetables in half and spoon them over the rice. Cut
each of the chicken fingers in half and slide them into a
large bowl. Pour the orange sauce over the chicken
and toss. Spoon the chicken and sauce onto the
veggies in each bowl. Sprinkle ¼ cup of chow mein
noodles over each dish, followed by about 2
tablespoons of almonds, and serve.
• Serves 2.
APPLEBEE’S HONEY GRILLED
SALMON
MENU DESCRIPTION: “Flame-grilled Atlantic Salmon
with Applebee’s Honey Pepper Sauce served with a side
of almond rice pilaf, seasoned vegetables and toasted
garlic bread.”
It’s all about the sauce. This sweet, tangy and slightly spicy
sauce goes perfectly with salmon, but can also be used on
chicken or ribs. Just be sure to watch the sauce closely as
it cooks in case it starts to bubble over. If it sounds like I’m
speaking from experience, you’re right—oh, what a
beautiful mess I made on one attempt. So cook the sauce
slowly, and watch it closely as it thickens. If it gets too thick,
you can always add a bit of water to thin it out. I suggest
serving this salmon with almond rice pilaf as they do in the
restaurant. You’ll find that clone recipe on page 15.
HONEY PEPPER SAUCE
¾ cup honey
⅓ cup soy sauce
¼ cup dark brown sugar,
packed
¼ cup pineapple juice
juice of I lemon (about 2
tablespoons)
2 tablespoons white vinegar
2 teaspoons olive oil
1 teaspoon ground black pepper
½ teaspoon cayenne pepper
½ teaspoon paprika
¼ teaspoon garlic powder
4 8-ounce salmon fillets (without
skin)
vegetable oil
1. Make the sauce by combining all ingredients in
a medium saucepan over medium/low heat. Stir
occasionally until sauce begins to boil, then simmer
uncovered for 15 minutes or until syrupy Watch the
sauce closely to be sure it doesn’t bubble over
2. Preheat barbecue grill to medium heat. Rub
each salmon fillet with vegetable oil, then add a light
sprinkling of salt and pepper. Grill the salmon for 4 to 7
minutes per side or until done. Serve salmon with a
small cup of the honey pepper sauce on the side.
• Serves 4.
APPLEBEE’S TEQUILA LIME
CHICKEN
MENU DESCRIPTION: “A tender boneless chicken
breast marinated with lime juice and tequila flavors and
grilled. Served on a bed of crisp tortilla strips. Topped with
a Mexi-ranch and Jack-Cheddar sauce. Served with
Southwest rice and pico de gallo.”
Because of the huge success of this dish, Applebee’s has
recently changed the name to “Fiesta Lime Chicken” and
trademarked the name. Most people still know this dish by
its original title, so that’s what I’m going with for this book.
When making your clone, just be sure not to marinate the
chicken for much longer than the 2 to 3 hours specified, or
the acid in the lime juice may toughen your chicken. The
bed of crispy corn tortilla strips can be easily made by
simply crumbling store-bought tortilla chips, or, if you want
strips more closely resembling those served at the
restaurant, just follow the Tidbits below. Serve this dish with
your choice of rice, and some salsa or pico de gallo on the
side.
MARINADE
1 cup water
⅓ cup teriyaki sauce
2 tablespoons lime juice
2 teaspoons minced garlic
1 teaspoon liquid mesquite smoke
½ teaspoon salt
¼ teaspoon ground ginger
¼ teaspoon tequila
4 skinless chicken breast fillets
MEXI-RANCH SAUCE
¼ cup mayonnaise
¼ cup sour cream
1 tablespoon milk
2 teaspoons minced tomato
1½ teaspoons white vinegar
1 teaspoon minced canned
jalapeno slices (nacho slices)
1 teaspoon minced onion
¼ teaspoon dried parsley
¼ teaspoon Tabasco pepper sauce
⅛ teaspoon salt
⅛ teaspoon dried dill weed
⅛ teaspoon paprika
⅛ teaspoon cayenne pepper
⅛ teaspoon ground cumin
⅛ teaspoon chili powder
dash garlic powder
dash ground black pepper
1 cup shredded Cheddarl
Monterey Jack cheese blend
2 cups crumbled tortilla chips or
fried tortilla strips (see Tidbits)
1. Prepare marinade by combining marinade
ingredients in a medium bowl. Add the chicken to the
bowl, cover and chill for 2 to 3 hours.
2. Make the Mexi-ranch dressing by combining all
of the ingredients in a medium bowl. Mix well until
smooth, then cover the dressing and chill it until it’s
needed.
3. When you are ready to prepare the entree,
preheat the oven to high broil. Also, preheat your
barbecue or indoor grill to high heat. When the grill is
hot cook the marinated chicken breasts for 3 to 5
minutes per side, or until they’re done.
4. Arrange the cooked chicken in a baking pan.
Spread a layer of Mexi-ranch dressing over each
piece of chicken (you’ll have plenty left over), followed
by ¼ cup of the shredded cheese blend. Broil the
chicken for 2 to 3 minutes, or just until the cheese has
melted.
5. Spread a bed of ½ cup of the tortilla strips or
crumbled tortilla chips on each of four plates. Slide a
chicken breast onto the chips on each plate and serve
with your choice of rice, and pico de gallo or salsa.
• Serves 4.
TIDBITS
Crumbling store-bought tortilla chips is the easy way to
make the bed of crunchy chips that the tequila lime chicken
rests on. But, you can make tortilla strips like those served
at the restaurant by cutting a stack of eight 6-inch corn
tortillas in half. Stack the halves on top of each other and
slice the tortillas into thin strips. Fry the tortilla strips in
batches in 2 cups of preheated oil in a large skillet for 3 to
5 minutes or until crispy. Salt lightly and cool on paper
towels.
APPLEBEE’S WHITE
CHOCOLATE & WALNUT
BLONDIE
MENU DESCRIPTION: “Dare to indulge with a white
chocolate and walnut blondie under a scoop of ice cream
and chopped walnuts. Served warm and topped at your
table with a rich, sizzling maple butter sauce.”
For Applebee’s regulars, this dessert is a hands-down
favorite. In a hot skillet comes a delicious slice of white
chocolate and walnut cake (it’s similar to a brownie in
texture) topped with a scoop of ice cream and warm maple
butter sauce bubbling as it hits the pan. Commence with
the salivating. To re-create this pile of pleasure at home
you start by making the cake from scratch. For the white
chocolate, get a couple of 4-ounce bars or one 8-ounce bar
and chop it into chunks. White chocolate chunks work best
in this recipe, but you can certainly use white chocolate
chips in a pinch. While the blondie cake is baking, whip up
the sauce—it will be fluffy at first. When you’re ready to
serve the dessert, zap the sauce in the microwave until it’s
hot and creamy Arrange the decadence in a hot skillet and
serve it sizzling to happy drooling mouths.
BLONDIE
4 egg whites
½ cup butter, softened (I stick)
½ cup light brown sugar packed
¼ cup granulated sugar
1 teaspoon vanilla extract
2¼ cups all-purpose flour
1 teaspoon baking soda
½ teaspoon baking powder
¼ teaspoon salt
½ cup milk
8 ounces white chocolate (cut into
chunks)
½ cup chopped walnuts
SAUCE
½ cup butter, softened (1 stick)
½ cup powdered sugar
¼ cup cream cheese, softened
2 tablespoons maple syrup
¼ teaspoon salt
8 scoops vanilla ice cream
½ cup chopped walnuts
1. Preheat oven to 325 degrees.
2. To make the blondie cake whip the egg whites
until they are stiff and form peaks. Add softened butter,
½ cup packed brown sugar, ¼ cup granulated sugar,
and vanilla and mix with an electric mixer until smooth.
In a separate bowl sift together flour, baking soda,
baking powder and ¼ teaspoon salt. Add the dry
ingredients to the wet ingredients and mix well until
smooth. Mix in milk, white chocolate chunks, and
walnuts. Pour ingredients into a greased 9x13-inch
baking pan and bake for 40 to 45 minutes or until cake
is golden brown on top. Slice cake into 8 equal slices
when cool.
3. While cake bakes, combine all ingredients for
the sauce in a medium bowl with an electric mixer
4. To prepare dessert, heat a small skillet on your
stove over high heat for about 5 minutes. A cast-iron
skillet is the best. (You can also serve the dessert on a
plate, but you’ll miss out on the showy sizzle.) Arrange
the cake in the center of the skillet or plate. Heat up the
sauce for 30 to 60 seconds in the microwave until hot.
Place a scoop of vanilla ice cream on the cake, then
drizzle some of the sauce over the top, followed by a
tablespoon of chopped walnuts. Serve immediately.
• Serves 8.
BENIHANA GINGER SALAD
DRESSING
Before your meal at the Benihana chain of hibachi grill
restaurants you are served a side salad doused in this
tangy, slightly sweet, fresh ginger dressing. When spooned
over a simple iceberg lettuce salad this easy clone
transforms your bowl of greens into a great start for any
meal. Making the dressing is as simple as dumping the
ingredients into a blender, whizzing it up, and popping it
into the cooler to chill. I’ve seen many attempts to duplicate
this coveted formula, but I think the original clone recipe
presented here comes closer to the real thing than any
other recipe out there.
½ cup minced onion
½ cup peanut oil
cup rice vinegar
2 tablespoons water
2 tablespoons minced fresh ginger
2 tablespoons minced celery
2 tablespoons ketchup
4 teaspoons soy sauce
2 teaspoons granulated sugar
2 teospoons lemon juice
½ teaspoon minced garlic
½ teaspoon salt
¼ teaspoon ground black pepper
Combine all ingredients in a blender. Blend on high speed
for about 30 seconds or until all of the ginger is pureed.
Chill.
• MAKES 1¾ CUPS.
BENIHANA JAPANESE ONION
SOUP
MENU DESCRIPTION: “It takes half a day to make this
perfect combination of onion, celery, carrot and garlic.”
Before a skilled chef appears tableside to perform his
culinary prestidigitation on the hot hibachi grill at Benihana,
you’re treated to a tasty bowl of chicken broth-based soup
with fried onions, sliced mushrooms and green onions
floating cheerfully on top. The restaurant menu claims this
soup takes a half a day to make, but we can clone it in a
fraction of that time using canned chicken broth (I use
Swanson brand). This soup works great as a prelude to
your favorite Asian dishes or other Benihana clones since
it’s so light and won’t fill up anyone before the main course.
I’ve included a simple technique here for making the
breaded fried onions from scratch (for the most accurate
clone), but you can skip that step by substituting French’s
canned French Fried Onions that are sold in most markets.
4 cups canned chicken broth
2 cups water
1 white onion (see Tidbits)
½ carrot, coarsely chopped (about
¼ cup)
½ celery stalk, coarsely chopped
(about ¼ cup)
1 small clove garlic, sliced
½ teaspoon salt
1 cup vegetable oil
I cup milk
1 cup all-purpose flour
6 medium mushrooms, thinly
sliced
4 green onions, diced (green part
only)
1. Combine chicken broth and water in a large
saucepan over high heat. Slice the white onion in half,
and then coarsely chop one half (save the other half for
later). Add coarsely chopped onion, carrot, celery,
garlic, and salt to the saucepan and bring to a boil.
Reduce heat and simmer for 10 minutes, or until the
onion starts to become translucent.
2. As the broth simmers, heat up I cup of
vegetable oil in a small saucepan over medium heat.
Slice the remaining white onion into very thin slices.
Separate the slices, dip the slices into the milk, then
into the flour. Fry the breaded onion, a handful at a
time in the oil until golden brown. Drain on a paper
towel.
3. When the soup has simmered for 10 minutes,
strain the vegetables out of the broth and toss them
out. Pour the broth back into the pan and keep it hot
over low heat.
4. To serve soup, ladle about I cup of broth into a
bowl. Drop a few pieces of fried onion into the soup,
followed by 6 to 8 mushroom slices (about I mushroom
each) and a couple pinches of diced green onion.
When the fried onion sinks to the bottom of the bowl (a
couple of minutes), serve the soup.
MAKES 6 SERVINGS.
TIDBITS
You will only need ½ of a white onion if you opt to use the
canned French’s French Fried Onions for this recipe—the
small can will be enough—rather than frying your own. You
also won’t need the vegetable oil, milk or flour listed in the
ingredients.
BENIHANA MANDARIN
ORANGE CHEESECAKE
This charismatic cheesecake is a specialty at the world’s
largest Benihana restaurant located in the Hilton hotel and
casino in Las Vegas. But don’t expect to find this amazing
dessert on the menu at any of the other 69 Benihana
eateries, since it’s custom-made just for the Sin City
location and probably unlike any cheesecake you’ve had.
Check it out: The lightly orange-flavored, fluffed-up cream
cheese sits on layer of soft white cake, the edge is frosted
and coated with crunchy hazelnut crumbs, and the top is
covered with wedges of mandarin oranges in an orangeflavored gelatin. Every element of this top secret kitchen
clone is made from scratch, and the finished product is well
worth the work you put in. For the cake layer, we whip up
just enough of a simple white cake batter to fit into the
bottom of a 9-inch springform pan. The cheese layer in our
clone is created with a special custom combination of
gelatin, Dream Whip, and cream cheese so that no baking
is required to firm it up. You could, of course, use a storebought white frosting for the edge of the cake, but since you
only need a small amount of frosting the clone recipe here
makes it cheaper. The hazelnuts are candied with sugar
and reduced to crumbs in a food processor (you can find a
½-cup bag of chopped hazelnuts in most supermarkets that
is perfect for this). And two 15-ounce cans of mandarin
orange wedges is just the right amount for garnishing the
top. Just be sure to save ½-cup of the liquid from the cans
of orange wedges to create the gel that holds the topping in
place.
CAKE
¼ cup all-purpose flour
¼ teaspoon baking powder
pinch of salt
2 tablespoons butter, softened
¼ cup granulated sugar
2 tablespoons milk
⅛ teaspoon vanilla extract
/ egg
CREAM CHEESE LAYER
I envelope unflavored gelatin
¾ cup granulated sugar
1 cup boiling water
I envelope Dream Whip
½ cup low-fat milk
3 8-ounce pkgs. cream cheese,
softened
I teaspoon vanilla extract
¼ teaspoon orange extract
¼ teaspoon lemon juice
5 drops yellow food coloring
I drop red food coloring
TOPPING
2 15-ounce cons mandarin
oranges (in light syrup)
1 teaspoon unflavored gelatin
NUT CRUST
I tablespoon water
2 tablespoons granulated sugar
½ cup chopped hazelnuts
(2.25 ounce bag)
ICING
¼ cup vegetable shortening
½ cup powdered sugar
1 tablespoon milk
⅛teaspoon vanilla extract
1. I To make cake layer, combine flour, baking
powder and salt in a small bowl. Cream together butter
and sugar with an electric mixer in a medium bowl.
Add dry ingredients to the butter and mix well. Mix in
milk, vanilla and I egg. Pour into a well-greased 9-inch
springform pan (or line it with parchment paper). Slam
pan down on the counter a few times to even out the
batter. Bake in a preheated 350 degree oven for 15
minutes or until the cake is light brown on top.
2. For the cream cheese layer, combine gelatin
with ¾ cup sugar in a medium bowl. Add boiling water
and stir until gelatin is dissolved. Set this aside.
3. Prepare Dream Whip by whipping together I
envelope of Dream Whip and ½ cup milk with an
electric mixer in another medium bowl. Whip it good
until the topping makes stiff peaks.
4. In another bowl, whip the cream cheese with
vanilla, orange extract, lemon juice and food coloring in
a large bowl until smooth. Slowly add the gelatin
mixture while beating.
5. Add half (about I cup) of the Dream Whip to the
cream cheese mixture and beat until smooth.
6. Pour this mixture over the cake layer in the
springform pan. Chill for 2 hours or until firm.
7. Drain the liquid from the cans of mandarin
oranges, saving ½ cup. Heat the ½ cup liquid in the
microwave on high for 1 to I ½ minutes or until hot.
Dissolve I teaspoon unflavored gelatin in the liquid.
Combine liquid with orange wedges and pour over the
top of the firmed-up cheesecake that’s still in the
springform pan. Chill the cake for at least 2 more
hours.
8. For the crunchy nut crust, combine I tablespoon
water with 2 tablespoons sugar in a small saucepan
over medium heat. When sugar is dissolved and liquid
begins to boil, add the hazelnuts and stir until nuts are
coated. Stir often until the water has cooked off, then
continue to stir until the sugar begins to caramelize
and turn light brown. Be careful not to burn the nuts.
The nuts are done when they are light brown and
glazed with candied sugar Pour the nuts onto a plate
and let them cool completely When the candied nuts
are cool, chop them up in a food processor until they
are the consistency of crumbs.
9. Make the icing by combining shortening with
powdered sugar, milk and vanilla.
10. When the mandarin orange gelatin has firmed
up on top of the cake, remove the cake from the
springform pan. Use a spatula to spread the icing
around the edge of the cake. Press the hazelnut
crumbs onto the icing around the edge of the cake
(you’ve got more than enough hazelnut crumbs and
much of it will fall off as you press it on the sides). Chill
the cake for at least another hour before serving. To
serve, cut cake into 12 slices.
• MAKES 12 SERVINGS.
BENNIGAN’S THE MONTE
CRISTO
MENU DESCRIPTION: “A delicious combination of ham
and turkey, plus Swiss and American cheeses on wheat
bread. Lightly battered and fried until golden. Dusted with
powdered sugar and served with red raspberry preserves
for dipping.”
It sounds crazy, but tastes great: A triple-decker ham,
turkey, and cheese sandwich is dipped in a tempura-style
batter; fried to a golden brown; then served with a dusting
of powdered sugar and a side of raspberry preserves. For
over ten years tons of cloning requests for this one have
stacked up at TSR Central, so it was time for a road trip.
There are no Bennigan’s in Las Vegas, and since the
Bennigan’s chain made this sandwich famous, I headed out
to the nearest Bennigan’s in San Diego. Back home, with
an ice chest full of original Monte Cristo sandwiches wellpreserved and ready to work with, I was able to come up
with this simple clone for a delicious sandwich that is crispy
on the outside, and hot, but not greasy, on the inside (the
batter prevents the shortening from penetrating). This
recipe makes one sandwich, which may be enough for two.
If you want to make more, you’ll most likely have to make
more batter so that any additional sandwiches get a real
good dunking.
8 to 12 cups vegetable shortening
SANDWICH
3 slices whole wheat sandwich
bread
1 slice Swiss cheese (deli-style)
3 ounces sliced turkey (deli-style)
I slice American cheese
(deli-style)
3 ounces sliced ham (deli-style)
BATTER
2 egg yolks
1 cup ice water
1 cup all purpose flour
1 teaspoon baking soda
ON TOP
powdered sugar
ON THE SIDE
raspberry preserves
1. Heat 8 to 12 cups of shortening in a deep fryer
or large saucepan to 375 degrees. You will need the
hot shortening to be at least 4 inches deep.
2. Make the sandwich by arranging the slice of
Swiss cheese on a piece of wheat bread. Arrange the
turkey breast on the Swiss cheese. Place a piece of
wheat bread on the turkey. Place the slice of American
cheese on the wheat bread. Arrange the ham slices on
the American cheese. Top off the sandwich with the
third slice of bread. Make sure the meat is not hanging
over the edge of the sandwich. Press down on the
sandwich with the palm of your hand to flatten it a bit.
3. Make the batter by beating the egg yolks. Stir in
the ice water Measure the flour and baking soda into a
sifter, and sift the mixture into the ice water and egg
yolk. Stir with a large spoon, but don’t mix it too well.
You should still have many visible lumps in the batter.
4. Slice the sandwich in half from corner to corner
Dip one half of the sandwich in the batter, while holding
it together with your fingers (the batter will hold the
sandwich together in the shortening). Coat the
sandwich well, but let any excess batter fall off. Drop
the battered sandwich half into the oil. If your pan or
fryer can fit the other half of the sandwich, batter that
piece and drop it into the fryer as well. If your fryer is
small, you may only be able to fry only one half at a
time. Fry the sandwich for 6 to 8 minutes, turning it
over halfway through cooking time. It should be golden
brown when done.
5. Remove the sandwich halves to paper towels to
drain. When you can touch the sandwich, slice each
half in half making four pieces. Dust the sandwich with
powdered sugar and serve it with a small bowl of
raspberry preserves.
• MAKES I SANDWICH.
BUFFALO WILD WINGS
BUFFALO WINGS AND
SAUCES
MENU DESCRIPTION: “Here they are in all their lip-
smacking, award-winning glory: Buffalo, New York—style
chicken wings spun in your favorite signature sauce.”
Since Buffalo, New York, was too far away, Jim Disbrow
and Scott Lowery satisfied their overwhelming craving in
1981 by opening a spicy chicken wing restaurant close to
home in Kent, Ohio. With signature sauces and a festive
atmosphere, the chain has now evolved from a college
campus sports bar with wings to a family restaurant with
over 300 units. While frying chicken wings is no real secret
—simply drop them in hot shortening for about 10 minutes
—the delicious spicy sauces make the wings special.
There are 12 varieties of sauce available to coat your
crispy chicken parts at the chain, and three of the traditional
hot sauces are cloned here. These sauces are very thick,
almost like dressing or dip, so we’ll use an emulsifying
technique that will ensure a creamy final product where the
oil won’t separate from the other ingredients. These are
clones for the most popular sauces: Spicy Garlic, Medium,
and Hot. I’ve also added another big seller, Caribbean
Jerk, to the list, followed by the cooking and coating
technique for the wings. The first three sauce recipes might
look the same at first glance, but each has slight variations.
The bottom line is that you can make your sauce hotter or
milder by adjusting the level of cayenne pepper. You can
find Frank’s pepper sauce by the other hot sauces at the
market. If you can’t find that brand, you can also use Crystal
brand Louisiana hot sauce.
SPICY GARLIC WING SAUCE
I cup Frank’s cayenne pepper
sauce
cup vegetable oil
1 teaspoon granulated sugar
I teaspoon garlic powder
½ teaspoon coarse ground black
pepper
½ teaspoon cayenne pepper
½ teaspoon Worcestershire sauce
I egg yolk
2 teaspoons water
2 teaspoons cornstarch
MEDIUM WING SAUCE
I cup Frank’s cayenne pepper
sauce
cup vegetable oil
I teaspoon granulated sugar
½ teaspoon cayenne pepper
½ teaspoon garlic powder
½ teaspoon Worcestershire sauce
⅛ teaspoon coarse ground black
pepper
I egg yolk
2 teaspoons water
2 teaspoons cornstarch
HOT WING SAUCE
I cup Frank’s cayenne pepper
sauce
cup cup vegetable oil
I teaspoon granulated sugar
I ½ teaspoons cayenne pepper
½ teaspoon garlic powder
½ teaspoon Worcestershire sauce
⅛ teaspoon coarse ground black
pepper
I egg yolk
2 teaspoons water
2 teaspoons cornstarch
1. Combine all ingredients except egg yolk, water
and cornstarch for the sauce of your choice in a small
saucepan. Heat sauce over medium heat until boiling,
then reduce heat and simmer for 5 minutes. Remove
pan from the heat and allow it to cool, uncovered, for
10 minutes.
2. While the sauce cools, vigorously whisk egg
yolk with 2 teaspoons water in a medium bowl for
about 2 minutes or until color is pale yellow. Whisk in
cornstarch until dissolved.
3. Drizzle the hot sauce mixture into the egg yolk
mixture in a steady stream while rapidly whisking. This
will create a thick, creamy emulsion that will prevent
the oil from separating. Cover the sauce and chill it
until it’s needed.
• MAKES ½ CUPS.
CARIBBEAN JERK SAUCE
The chain sells each of its 12 signature sauces in the
restaurant because many of them work great as a baste or
side sauce for a variety of home cooked masterpieces.
This sauce is a favorite for that reason (ranking at the top of
the list with Spicy Garlic as the chain’s best-seller), so I
thought it would be a useful clone that doesn’t require you to
fill up the fryer to make chicken wings. You can use this
sauce on grilled chicken, pork, ribs, salmon or anything you
can think of that would benefit from the sweet, sour and
spicy flavors that come from an island-style baste.
3 tablespoons margarine
2 tablespoons minced green onion
(white and light green parts
only)
1 cup water
¾ cup ketchup
½ cup plus 2 tablespoons dark
brown sugar
¼ cup apple cider vinegar
2 tablespoons white vinegar
2 tablespoons Frank’s cayenne
pepper sauce
2 teaspoons ground black pepper
2 teaspoons Worcestershire sauce
2 teaspoons lemon juice
1 ½ teaspoons cayenne pepper
1 teaspoon dried parsley flakes
1 teaspoon cornstarch
½ teaspoon salt
½ teaspoon garlic powder
½ teaspoon dried thyme
¼ teaspoon onion powder
⅛ teaspoon ground cloves
⅛ teaspoon ground nutmeg
⅛ teaspoon ground allspice
⅛ teaspoon rubbed sage
1. Melt margarine over medium/low heat. Add
minced green onions and cook for 5 minutes. You just
want to sweat the onions to soften them up. You’re not
looking to brown them.
2. Remove the pan from the heat, and whisk in the
remaining ingredients. Put the pan back on the stove
and bring the mixture to a boil over medium heat.
Reduce heat and simmer for 45 minutes or until the
sauce darkens and thickens. Cover sauce, then cool
and chill until it’s needed.
• MAKES 2 cups.
WINGS
20 chicken wing pieces
6 to 12 cups vegetable shortening
ON THE SIDE
celery sticks
1. Heat shortening in your fryer to 350 degrees.
2. Drop the wings into the shortening and fry for
10 to 12 minutes, or until the wings are turning light
brown. Remove wings to a rack or paper towels to
drain for 1 minute.
3. Put the wings into a plastic container with a lid.
Add ¼ cup to ⅓ cup of your sauce of choice to the
container, put the lid on and give it a good shake. Pour
wings out onto a plate and add celery on the side. Oh,
and get the napkins ready.
• SERVES 2 TO 4 AS AN APPETIZER.
CALIFORNIA PIZZA KITCHEN
CALIFORNIA COSMO
MENU DESCRIPTION: “Our Original! Featuring Ciroc
Snap Frost vodka, an all grope vodka, combined with red
grope juice and accented with the sweet orange flavor of
Cointreau and frozen red seedless grapes.”
While other vodkas are made from potatoes, wheat,
molasses, corn, or rye, Ciroc is the first vodka to be
distilled from late harvest French grapes. These super
sweet grapes and the 5-step distilling process makes this
vodka unique and extra smooth, with a subtle fruity flavor
that goes great with grape juice and the orange flavor of
Cointreau. Plan ahead for this drink by piercing three red
seedless grapes on a toothpick and popping them into the
freezer for at least an hour. Or, if you’re like me, you’ll have
a dozen or so of these garnishes sitting in a small bag in
the freezer ready to go when guests show up for happy
hour.
1 ¼ ounces Ciroc Vodka
½ ounce Cointreau
2 ounces red grape juice
GARNISH
3 red seedless grapes on a toothpick, frozen
1. Fill an 8-ounce martini glass with ice to chill the
glass.
2. Fill a cocktail shaker with ice.
3. Measure Ciroc Vodka, Cointreau and grape
juice into the shaker. Cover and shake vigorously.
4. Dump the ice out of the martini glass, and strain
the cocktail into the glass.
5. Garnish with three grapes that have been
pierced onto a toothpick and frozen. Serve it up, or sip
it yourself.
• MAKES I COCKTAIL.
CALIFORNIA PIZZA KITCHEN
THAI CRUNCH SALAD
MENU DESCRIPTION: “Shredded napa cabbage,
chilled grilled chicken breast, julienne cucumbers,
edamame, crispy wontons, peanuts, cilantro, julienne
carrots, red cabbage and scallions tossed with a limecilantro dressing. Topped with crispy rice sticks and Thai
peanut dressing.”
Plan ahead for this amazing salad clone by first grilling the
chicken, then chilling it, and preparing the cilantro-lime
dressing and the peanut sauce in advance. The menu
description says that the salad is topped with “crispy rice
sticks,” but upon close inspection I determined they are
actually crispy bean threads, cooked in a flash when
dropped into hot oil for a few seconds. The crispy wontons
are made from frying thinly sliced wonton wrappers in the
same hot oil, For the edamame (soybeans), look in the
frozen food section, and if they’re still in their pods, be sure
to take them out before measuring and tossing them into
the salad. Once you’ve got everything chilled and chopped,
building each dish is a breeze, and you’ll have four huge
dinner-size salads that will each be enough for a meal.
LIME-CILANTRO DRESSING
½ cup vegetable oil
¼ cup rice vinegar
½ cup coarsely chopped cilantro
¼ cup minced red bell pepper
¼ cup honey
4 teaspoons Dijon mustard
2 teaspoons sesame oil
2 teaspoons lime juice
2 cloves garlic
dash salt
dash ground black pepper
SPICY PEANUT SAUCE
½ cup crunchy peanut butter
6 tablespoons hoisin sauce
2 tablespoons soy sauce
2 tablespoons rice vinegar
2 tablespoons light brown sugar
1tablespoon chili sauce
(or chili-garlic sauce)
1 teaspoon sesame oil
½teaspoon minced ginger
½ cup water
2 to 3 cups vegetable oil or
vegetable shortening
8 wonton wrappers
I handful bean threads
4 small skinless chicken breast
fillets
I cup cooked edamame
1 cup unsalted peanuts
12 cups chopped napa cabbage,
chopped (I large head)
2 cups thinly sliced red cabbage
2 cups shredded or julienned
carrot
I cup julienned cucumber
4 green onions, chopped
(green part only)
1. Make lime-cilantro dressing by combining all
ingredients in a blender on high speed for 20 seconds,
or until cilantro is chopped fine but not entirely pureed.
Cover and chill.
2. Make spicy peanut sauce by combining all
ingredients in a small saucepan over medium/low
heat. Heat until sauce is hot, but not boiling, and sugar
is dissolved. Pour mixture into a blender and blend for
about 20 seconds. Cover and chill.
3. Flatten chicken breasts by covering them with
plastic wrap and pounding them thin with a kitchen
mallet. Rub oil on each breast, sprinkle each with a
little salt and pepper, and grill for 3 to 4 minutes per
side or until done. Wrap and chill the cooked chicken.
4. Make crispy wontons by heating 2 cups of
vegetable shortening or oil in a medium saucepan to
375 degrees. Slice a stack of 8 wonton wrappers into
¼-inch wide strips. Slice those strips in half. Fry them
in hot oil for about 30 seconds or until light brown.
Drain on paper towels.
5. Fry a big handful of beans threads in hot oil for
about 10 seconds or until they float to the top of the oil.
Drain on paper towels.
6. Cook edamame following the directions on the
package. If the soybeans are in the pods, remove
them and chill the beans after they have cooked.
7. Toast the peanuts by heating them up in a
skillet over medium/ low heat for 3 to 4 minutes or just
until they start to brown. Immediately remove them from
the heat so that they don’t burn.
8. Now you’re ready to build the salads. For each
serving, combine 3 cups napa cabbage, ½ cup red
cabbage, ½ cup carrot, ¼ cup cucumber, ¼ cup
edamame, ¼ cup toasted peanuts, ¼ cup crispy
wontons, and a couple tablespoons of chopped green
onion in a large bowl. Thinly slice a cold chicken breast
into bite-size pieces and add it to the salad. Pour 4 to
5 tablespoons of cilantro-lime dressing over the salad
and toss well.
9. Carefully pour tossed salad onto a serving
plate. Sprinkle about ½ cup crispy bean threads on top
of the salad.
10. Spoon spicy peanut sauce into a squirt bottle
and squirt the sauce in a sweeping motion over the top
of the salad. Repeat for remaining servings.
• MAKES 4 LARGE SALADS.
CALIFORNIA PIZZA KITCHEN
CALIFORNIA CLUB PIZZA
MENU DESCRIPTION: ‘Applewood smoked bacon,
grilled chicken and Mozzarella cheese, hearth baked,
then topped with Roma tomatoes, chilled chopped lettuce
tossed in mayonnaise and fresh sliced avocados.”
There’s no better way to clone the great pizzas from this
creative chain than to start with dough made from scratch.
And since the only way to re-create commercial-style pizza
dough is to use the same slow-rising technique the pros
use, you’re going to have to plan ahead at least 24 hours.
This is the length of time it will take for the gluten in the flour
to work its magic while resting comfortably in your
refrigerator. And, if you’ve got the patience, I think 48 hours
is even better. Once the dough is ready to go, you should
bake your pizzas—this recipe makes two—on a preheated
pizza stone in your oven. If you don’t already have one, you
can find one of the round or rectangular stones in just about
any house-ware store. This cooking method is the absolute
best way to produce an evenly baked finished product with
a texture and taste that mirrors the amazing pies CPK
whips out of rocket-hot brick pizza ovens.
PIZZA DOUGH
¾ cup worm water
(105 to 115 degrees)
1½ teaspoons yeast
2 teaspoons granulated sugar
I ¾ cups bread flour
I teaspoon salt
2 chicken breasts, pounded thin
olive oil cooking spray
2 cups shredded mozzarella
cheese
½ cup cooked thick bacon,
crumbled (about 6 slices)
2 tablespoons olive oil
3 cups chopped iceberg lettuce
1 cup chopped romaine lettuce
4 tablespoons mayonnaise
2 large roma tomatoes, sliced into
8 slices each
1 avocado, sliced into 16 slices
1. Make the pizza dough by dissolving yeast and
granulated sugar in ¾ cup warm water in a small bowl
or glass measuring cup. Let the mixture sit for 5
minutes or until it gets foamy on top.
2. Combine flour and salt in a large bowl. Make a
depression in the flour and pour the yeast mixture and
oil into it. Stir the liquid gradually drawing more flour
into it, until you can form the dough into a ball. Use your
hands to knead the dough on a lightly floured surface
for 10 minutes, or until the texture of the dough is
smooth. Coat dough with oil, cover it and let it sit in a
warm spot for 1 to 2 hours or until it doubles in size.
Punch down the dough, cover it again and let it sit for
24 to 48 hours in your fridge.
3. Cover chicken breasts and pound them to
about ½-inch thick with a kitchen mallet. Spray chicken
liberally with olive oil cooking spray (or rub with olive
oil), then sprinkle on some salt and pepper. Grill the
chicken on a preheated grill for 3 to 4 minutes per side
or until it’s done. You can also saute chicken in a skillet
on your stove for 4 to 5 minutes per side or until done.
Cool and chop chicken into ½-inch cubes.
4. When it gets close to pizza time, remove the
dough from the refrigerator. It needs to warm up for
about 2 hours before you use it. Also, place a pizza
stone in your oven and crank the temperature up to
500 degrees.
5. Assemble each pizza by dividing the dough in
half and rolling one half into a 10-inch circle on a lightly
floured surface. Place the dough onto a pizza pan or a
pizza peel that will be used to slide the dough onto the
hot pizza stone. Be sure to flour the pan or pizza peel
liberally with flour so that the assembled pizza will slide
off easily
6. Spray the pizza dough with a generous amount
of olive oil spray. Spread I cup of shredded mozzarella
cheese on the dough. Sprinkle half of the bacon on
next, followed by half of the chicken. Slide the pizza
onto the pizza stone and bake for 9 to 10 minutes or
until the cheese and crust begins to brown.
7. While pizza bakes, combine 1½ cups chopped
iceberg lettuce with ½ cup of chopped romaine in a
bowl. Stir in 2 tablespoons of mayonnaise and mix well
until all of the lettuce is coated with mayo.
8. When the pizza comes out of the oven, slice it
into 8 pieces. Spoon the lettuce mixture over the top,
then place a roma tomato slice on each slice of pizza.
Finish off your pie by placing an avocado slice on each
slice of pizza. Repeat the process for the remaining
pizza.
• MAKES 2 PIZZAS, 8 SLICES EACH.
CALIFORNIA PIZZA KITCHEN
JAMAICAN JERK CHICKEN
PIZZA
MENU DESCRIPTION: “Grilled Jamaican Jerk spiced
chicken breast with our spicy sweet Caribbean sauce,
mozzarella cheese, applewood smoked bacon, mild
onions, roosted red & yellow peppers and scallions.”
This CPK creation is a top pick at the 162-unit chain, most
likely because chefs slather on a delicious sweet and spicy
Caribbean sauce where tomato sauce usually sits on
traditional Italian-style pies. Making the sauce from scratch
is the way to go for true clone rangers, but if you’d like a
shortcut, find Tiger Sauce in your local market where the
bottled hot sauces are sold, and use that. If you want
another shortcut, rather than mixing your own jerk
seasoning from scratch, use any jerk blend you can find in
the store or snag a bottle of our own Top Secret Island Rub
at
the
TopSecret
Recipes
website
(www.TopSecretRecipes.com). I do recommend making
the pizza dough from scratch rather than buying prepared
dough, however. You’ll need to plan ahead on this part of
the recipe so that the dough has a chance to slowly rise in
your fridge overnight. I also recommend that you use a
pizza stone to bake the two pizzas this recipes makes to
re-create the baking results of CPK’s stone ovens.
PIZZA DOUGH
¾ cup warm water
(105 to 115 degrees)
1½ teaspoons yeast
2 teaspoons granulated sugar
1¾ cups bread flour
I teaspoon salt
2 tablespoons olive oil
CARIBBEAN SAUCE
½ cup light brown sugar
¼ cup water
¼ cup ketchup
¼ cup light corn syrup
¼ cup minced white onion
2 tablespoons red wine vinegar
I teaspoon minced garlic
I teaspoon lemon juice
½ teaspoon salt
½ teaspoon crushed red pepper
flakes
¼ teaspoon ground black pepper
⅛ teaspoon dried thyme
⅛ teaspoon ground allspice
JERK SEASONING
2 tablespoons light brown sugar
1½ teaspoons salt
½ teaspoon ground black pepper
½ teaspoon ground paprika
½ teaspoon ground allspice
2 chicken breasts, pounded thin
olive oil cooking spray
I red bell pepper
1 yellow bell pepper
2 cups plus 4 tablespoons
shredded mozzarella cheese
¼ teaspoon garlic powder
¼ teaspoon onion powder
⅛ teaspoon ground cayenne
pepper
pinch ground cinnamon
½ cup cooked thick bacon,
crumbled (about 6 slices)
½ cup thinly sliced white onion
2 tablespoons chopped green
onion (green part only)
1. Make the pizza dough by dissolving yeast and
granulated sugar in ¾ cup warm water in a small bowl
or glass measuring cup. Let the mixture sit for 5
minutes or until it gets foamy on top.
2. Combine flour and salt in a large bowl. Make a
depression in the flour and pour the yeast mixture and
oil into it. Stir the liquid gradually drawing more flour
into it, until you can form the dough into a ball. Use your
hands to knead the dough on a lightly floured surface
for 10 minutes, or until the texture of the dough is
smooth. Coat dough with oil, cover it and let it sit in a
warm spot for 1 to 2 hours or until it doubles in size.
Punch down the dough, cover it again and let it sit
overnight in your fridge.
3. You can also make the sauce a day ahead by
combining all ingredients in a medium saucepan.
Simmer over medium/low heat for 7 minutes. Puree
cooled sauce in a blender for 10 seconds, then cover it
and let it chill out in the fridge.
4. When it gets close to pizza time, remove the
dough from the refrigerator. It needs to warm up for
about 2 hours before you use it. Also, place a pizza
stone in your oven and crank the temperature up to
500 degrees.
5. Combine all of the ingredients for the jerk
seasoning. Cover chicken breasts and pound them to
about ½-inch thick with a kitchen mallet. Spray chicken
liberally with olive oil cooking spray (or rub with olive
oil), then sprinkle on some seasoning. Grill chicken on
a preheated grill for 3 to 4 minutes per side or until
done. You can also saute chicken in a skillet on your
stove for 4 to 5 minutes per side or until done. Cool
and chop into ½-inch cubes.
6. Roast red bell peppers by setting them directly
over a high flame on a gas stove. Turn the peppers as
the skin chars black, then plunge them into ice water
and remove the blackened skin. If you don’t have a gas
stove, you can also roast the peppers on a baking
sheet in a 450-degree preheated oven for 45 minutes
or until skin is charred, then peel the skin off in cold
water. Dice about 2 tablespoons of each pepper for
each pizza. Seal the rest of the roasted pepper and
refrigerate. It will keep for about two days.
7. Assemble each pizza by dividing the dough in
half and rolling one half into a 10-inch circle on a lightly
floured surface. Place the dough onto a pizza pan or a
pizza peel that will be used to slide the dough onto the
hot pizza stone. Be sure to flour the pan or pizza peel
liberally with flour so that the assembled pizza will slide
off easily.
8. Spray the pizza dough with a generous amount
of olive oil spray. Spoon 3 to 4 tablespoons of sauce
onto the dough, followed by I cup of shredded
mozzarella. Sprinkle I cup of diced chicken on next,
followed by ¼ cup of the cooked bacon. Sprinkle 2
tablespoons of diced roasted red bell pepper and 2
tablespoons of diced roasted yellow bell pepper on the
pizza. Sprinkle ¼ cup of thinly sliced onion on next,
followed by just a couple tablespoons of additional
mozzarella. Slide the pizza onto the pizza stone and
bake for 9 to 10 minutes or until the cheese and crust
begins to brown. Remove from the oven and sprinkle
with 1 tablespoon chopped green onion.
9. Slice pizza into 8 pieces and serve. Repeat for
remaining pizza.
• MAKES 2 PIZZAS, 8 SLICES EACH.
CARRABBA’S BREAD
DIPPING BLEND
When you sit down for Italian-style grub at one of the more
than 168 nationwide Carrabba’s restaurants, you’re first
served a small plate with a little pile of herbs and spices in
the middle to which the waiter adds olive oil. Now you’re set
up to dip your sliced bread in the freshly flavored oil. To
craft a version of this tasty blend at home you’ll need a
coffee bean grinder or a small food processor to finely
chop the ingredients.
1 tablespoon minced fresh basil
I tablespoon chopped fresh parsley
I tablespoon minced fresh garlic
I teaspoon dried thyme
I teaspoon dried oregano
I teaspoon ground black pepper
(freshly ground is best)
½ teaspoon minced fresh rosemary
½ teaspoon ground sea salt or
kosher salt
¼ teaspoon crushed red pepper
½ teaspoon olive oil
⅛ teaspoon fresh lemon juice
1. Combine all the ingredients, except oil and
lemon juice in a small food processor or coffee bean
grinder Chop briefly until all ingredients are about the
same size.
2. Stir in oil and lemon juice.
3. To serve, combine about 1 teaspoon blend to 3
to 4 tablespoons extra virgin olive oil on a small dish.
Dip sliced bread in mixture.
• MAKES ABOUT ¼ CUP BLEND.
CARRABBA’S HOUSE SALAD
DRESSING (CREAMY
PARMESAN)
When Johnny Carrabba and his uncle Damian Mandola
opened the first Carrabba’s restaurant in 1986, they used a
collection of their own traditional family recipes to craft a
terrific Italian menu. You’ll even find the names of friends
and family in several of those dishes including Polio Rosa
Maria, Chicken Bryan, Scampi Damian and Insalata
Johnny Rocco. Now we can easily re-create the taste of the
delicious dressing that’s tossed into the salad served
before each Carrabba’s entree. And we need only six
ingredients. For the grated Parmesan cheese, go ahead
and use the stuff made by Kraft that comes in the green
shaker canisters. And if you don’t have any buttermilk, you
can substitute regular milk. Since it’s so thick, this dressing
is best when tossed into your salad before serving it, just
like the real thing.
½ cup mayonnaise
¼ cup grated Parmesan cheese
¼ cup buttermilk
1½ teaspoons minced garlic
½ teaspoon minced fresh parsley
½ teaspoon lemon juice
Whisk together all ingredients in a small bowl.
• MAKES I CUP.
CARRABBA’S CHICKEN
MARSALA
MENU DESCRIPTION: “Fire-roosted chicken breast
topped with mushrooms, prosciutto and our Florio
Marsala wine sauce.”
To reverse-engineer this big-time favorite entree, I ordered
the dish to go, with the sauce on the side, so that I could
separately analyze each component. After some trial and
error in the underground lab, I found that recreating the
secret sauce from scratch is easy enough with a couple
small cans of sliced mushrooms, a bit of prosciutto, some
Marsala wine, shallots, garlic and a few other good things.
Cooking the chicken requires a very hot grill. The restaurant
chain grills chicken breasts over a blazing real wood fire,
so crank your grill up high enough to get the flames nipping
at your cluckers (no, that’s not an euphemism). If your grill
has a lid, keep it open so you can watch for nasty flare-ups.
MARSALA SAUCE
⅓ cup butter
1 slice prosciutto, diced
2 teaspoons minced shallots
2 teaspoons minced garlic
2 4-ounce cans sliced mushrooms
(drained)
¼ cup Marsala wine
¼ teaspoon ground black pepper
1 cup chicken broth
2 teaspoons cornstarch
1 teaspoon minced fresh parsley
2 tablespoons heavy cream
CHICKEN SEASONING
1¼ teaspoons salt
1 teaspoon ground black pepper
½ teaspoon dried oregano
½ teaspoon dried thyme
½ teaspoon dried parsley
¼ teaspoon marjoram
¼ teaspoon garlic powder
¼ teaspoon onion powder
4 skinless chicken breasts fillets
olive oil
1. Melt butter over low heat in a medium
saucepan.
2. Turn heat up to medium/high to saute the
prosciutto in the melted butter for about 2 to 3 minutes
(be careful not to burn the butter). Add shallots and
garlic and saute for about 30 seconds. Add Marsala
wine, simmer for another 30 seconds or so, then add
drained mushrooms and black pepper Simmer over
medium/high heat for 5 minutes.
3. Dissolve cornstarch in chicken broth. Add broth
to the saucepan and simmer for an additional 5
minutes.
4. Add parsley and cream to the sauce and
simmer for 3 to 4 minutes or until thick. Remove pan
from the heat, then cover it until needed.
5. Preheat barbecue grill on high heat. Combine
ingredients for chicken seasoning in a small bowl. Use
your thumb and fingers to crush the herbs and spices
in the bowl to make a finer blend.
6. Wrap each chicken breast in plastic wrap and
pound with a kitchen mallet until uniform in thickness.
Brush each chicken breast generously with olive oil.
Sprinkle seasoning blend over both sides of each
chicken breast and grill for 6 to 8 minutes per side or
until done. Give chicken a one-quarter turn on each
side while cooking to make criss-cross grill marks.
7. Serve entree by arranging each chicken breast
on a plate. Spoon one quarter of the Marsala sauce
over each serving of chicken and dig in.
• SERVES 4.
THE CHEESECAKE FACTORY
MINI CRABCAKES
MENU DESCRIPTION: “Served with remoulade sauce.”
The secret to great crab cakes starts with great crab.
Freshly cooked blue crab is the crab of choice for these
crustacean cakes, but you can often find high quality
canned backfin blue crab in some stores. One such brand
comes in 16-ounce cans from Phillips Seafood and is sold
at Costco, Sam’s Club, Wal-Mart and Von’s stores. Once
you’ve got the crab grabbed you need to pick up some
panko. Panko is Japanese-style breadcrumbs usually
found near the other Asian foods in your market. The
Factory uses a little bit of panko to coat each of these small
crab cakes for a great, lightly crunchy texture. One order of
this appetizer at the restaurant gets you 3 crab cakes; this
recipe makes 6 cakes from ½-pound of crab. If you have a
1-pound can of crabmeat, you can save the leftover ½pound for another recipe or double-up on this one. Any
surplus crab cakes will keep for 24 hours in the fridge
before you need to get them in a pan. Oh, and one other
thing to remember when making crab cakes: Be gentle.
Don’t stir the crab too much into the other ingredients.
Rather, fold the mixture gingerly with a spatula to combine.
You want any big chunks of tasty crab to stay as big chunks
of tasty crab in the finished product.
2 tablespoons mayonnaise
2 tablespoons minced green onion
(green part only)
2 tablespoons minced red bell
pepper
½ beaten egg
1 teaspoon minced fresh parsley
1 teaspoon Old Bay seasoning
½ teaspoon yellow prepared
mustard
½ pound lump crab meat
3 tablespoons plain breadcrumbs
(such as Progresso)
¼ cup panko (Japanese
breadcrumbs)
vegetable oil
REMOULADE SAUCE
½ cup mayonnaise
2 teaspoons capers
2 teaspoons chopped dill pickle
slices (hamburger pickles)
1 teaspoon lemon juice
½ teaspoon minced fresh parsley
½ teaspoon paprika
½ teaspoon chili powder
¼ teaspoon cayenne pepper
¼ teaspoon ground cumin
⅛ teaspoon salt
1. Measure all the ingredients for the crab cakes
—except the breadcrumbs, crab, panko and vegetable
oil—into a large bowl. Use a whisk to blend
ingredients together. Carefully fold the crab and
breadcrumbs into the whisked ingredients. Be sure not
to over stir the mixture or those tasty lumps of crab will
fall apart. The best crab cakes have nice big chunks of
crab in ’em.
2. Rub a light coating of oil in six cups of a
nonstick standard size muffin tin, then use your hands
or a spoon to fill the cups with equal amounts of the
crab mixture. Press down a bit on each crab cake so
that the top is flat. Don’t press too hard or the crab
cakes may be hard to get out. Cover the muffin tin with
plastic wrap and pop it in the fridge for an hour or so.
This step will help the cakes stay together when they’re
browned in the oil.
3. Make the remoulade sauce by combining all
the ingredients in a small bowl. Cover and chill the
sauce until you’re ready to serve up the crab cakes.
4. After the crab cakes have chilled through, heat
up about ¼-inch of vegetable oil in large skillet over
medium/low heat. Fill a shallow bowl with the panko
breadcrumbs.
5. Carefully turn the crab cakes out onto a plate.
Gently roll each crab cake around in the panko
breadcrumbs. Each crab cake should be wearing a
light coating of panko.
6. Test the oil by dropping a pinch of panko into
the pan. It should sizzle, Saute the crab cakes in the
hot oil for I ½ to 3 minutes on each side or until the
cakes are golden brown.
7. Drain crab cakes on paper towels or a rack
very briefly, then serve them up hot with the remoulade
sauce alongside in a little dish.
• MAKES 6 SMALL CRAB CAKES.
THE CHEESECAKE FACTORY
SWEET CORN TAMALE
CAKES
MENU DESCRIPTION: “Topped with sour cream, salsa,
avocado and salsa verde.”
Nestled between slickfull-page ads on page 7 of the huge
19-page spiral-bound menu from The Cheesecake
Factory, is a long list of fabulous appetizers that includes
this Southwestern-style crowd pleaser. Hand-formed
tamale cakes are arranged on fresh salsa verde, topped
with sour cream and a creamy Southwestern sauce, with a
fresh avocado and cilantro garnish. It’s happiness on a
plate. And, while the ingredients list below may seem
intimidating at first, the three sauces are very simple to
make, and your crew will be rewarded and impressed by
your effort. (The flavors in the sauces develop after sitting
for a bit so you can prepare them all in advance and let
them chill in the fridge until chow time.) If you get anything
short of a standing ovation for this dish, it’s important to
encourage kudos by waving the pages of this recipe in front
of your diners while casually wiping your brow. Sometimes
you have to milk it.
SALSA VERDE
2 tomatillos, chopped (remove
popery skin)
1 4-ounce can mild green
chilies
1 green onion, chopped
2 tablespoons fresh cilantro
1¼ teaspoons granulated
sugar
¼ teaspoon ground cumin
¼ teaspoon salt
⅛ teaspoon ground
black pepper
TOMATO SALSA
I medium tomato, diced
I tablespoon minced Spanish
onion
1 tablespoon minced, fresh
cilantro
¼ teaspoon lime juice
½ small fresh jalapeno, minced
dash salt
dash ground black pepper
SOUTHWESTERN SAUCE
½ cup mayonnaise
I teaspoon white vinegar
I teaspoon water
¾ teaspoon granulated sugar
½ teaspoon chili powder
¼ teaspoon paprika
⅛ teaspoon cayenne pepper
⅛ teaspoon onion powder
dash salt
dash garlic powder
CAKES
1 ½ cups frozen sweet corn
½ cup butter, softened (I stick)
3 tablespoons granulated sugar
⅛ teaspoon salt
½ cup masa harina (corn flour)
2 tablespoons all-purpose flour
GARNISH
¼ cup sour cream
½ avocado, chopped
2 tablespoons coarsely chopped,
fresh cilantro
1. Prepare salsa verde by combining all
ingredients (tomatillos, green chilies, green onion,
cilantro, sugar, cumin, salt, and pepper) in a food
processor on high speed. Cover and chill.
2. Prepare tomato salsa by combining all
ingredients (diced tomato, onion, cilantro, lime juice,
jalapeno, salt, and pepper) in a small bowl. Cover and
chill.
3. Prepare Southwestern sauce by combining all
ingredients (mayonnaise, vinegar, water, sugar, chili
powder, paprika, cayenne, onion powder, salt, and
garlic powder) in a small bowl. Cover and chill.
4. Preheat oven to 400 degrees.
5. Prepare the tamale cakes by chopping 1 cup of
the frozen corn in a food processor until it’s coarsely
pureed. Combine pureed corn with softened butter,
sugar, and salt. Blend well with electric mixer until
smooth.
6. Add masa and flour and blend well. Mix in the
remaining ½ cup of frozen corn kernels by hand.
7. Measure ½ cup portions of the mixture and
form it into 3-inch wide patties with your hands.
Arrange the patties on a baking sheet and bake for 25
to 30 minutes or until the cakes are browned on the
bottom. Carefully flip all cakes with a spatula and bake
for an additional 5 to 7 minutes or until other side is
browned.
8. While the cakes are baking, spoon a portion of
the salsa verde onto a plate or platter (you may want to
heat up your plate in the oven for a bit to help warm the
sauce). You’ll need to use enough salsa verde to coat
the entire plate—it should be about ¼-inch deep.
Arrange the tamale cakes side-by-side on the salsa
verde. Spoon a dollop of sour cream onto each tamale
cake. Drizzle the Southwestern sauce over the cakes
in a criss-cross pattern (use a squirt bottle if you’ve got
one—see Tidbits). Spoon some tomato salsa over the
cakes, followed by the chopped avocado. Finish off
the plate by sprinkling the coarsely chopped cilantro
leaves over the top.
TIDBITS
Save your empty plastic mustard or ketchup bottles to use
in recipes such as this one. Use the squirt bottle to drizzle
the southwestern sauce over your dish to give it that slick
professional look, And if you want to cut out some of the fat
in the sauce, you can easily substitute light mayo for the
regular stuff.
You’ll find tomatillos in the produce section, usually near
the tomatoes or peppers. Be sure to remove the papery
skin before using them.
Masa harina, or corn flour, is found in the baking aisle by
the other flours or where the Mexican foods are stocked.
• SERVES 4.
THE CHEESECAKE FACTORY
CHICKEN MADEIRA
MENU DESCRIPTION: “Our most popular chicken dish!
Sautéed chicken breast topped with fresh asparagus and
melted mozzarella cheese, covered with fresh mushroom
madeira sauce. Served with mashed potatoes.”
What makes this chicken dish The Cheesecake Factory’s
“most popular” is the sweet and tangy madeira wine
reduction sauce spooned over the top. Man, I could slurp
that rich nectar straight from a glass (mushrooms might
clog up a straw). It’s that good. And—get this—it’s easy.
Even though the real stuff appears to include veal stock, we
can concoct a great knockoff using canned beef broth. Get
sliced mozzarella cheese from your deli section and be
sure to pound the chicken breasts very thin using plastic
wrap to cover each one before you whack on it. Also, in
typical Cheesecake Factory style, their entree is huge,
including two chicken fillets and a giant pile of mashed
potatoes on the side. This recipe makes a total of four
chicken fillets, which divides into two servings if you’re at
the restaurant. At home though, this is probably the perfect
amount for a gaggle of four.
1 tablespoon olive oil
4 skinless chicken breast fillets
8 asparagus spears
4 mozzarella cheese slices
MADEIRA SAUCE
2 tablespoons olive oil
2 cups sliced fresh
white mushrooms
3 cups madeira wine
2 cups beef broth
1 tablespoon butter
¼ teaspoon ground
black pepper
1. Heat up I tablespoon olive oil in a large skillet
over medium heat. Cover each chicken breast with
plastic wrap then use a mallet to flatten the chicken to
about ¼-inch thick. Sprinkle each fillet with salt and
pepper.
2. Saute the chicken fillets for 4 to 6 minutes per
side, or until the chicken has browned just a bit.
Remove chicken fillets from the pan and wrap them
together in foil to keep the fillets warm while you make
the sauce. Don’t clean the pan. You want all that
cooked-on goodness to stay in the skillet to help make
the sauce.
3. With the heat still on medium, add two
tablespoons of oil to the skillet. Add the sliced
mushrooms and saute for about two minutes. Add the
madeira wine, beef broth, butter and pepper Bring
sauce to a boil, then reduce heat and simmer for about
20 minutes or until sauce reduces to about one-quarter
of its original volume. When the sauce is done it will
have thickened and turned a dark brown color.
4. As the sauce is simmering, bring a medium
saucepan filled about halfway with water to a boil. Add
a little salt to the water. Toss the asparagus into the
water and boil for 3 to 5 minutes, depending on the
thickness of your asparagus spears. Drop the
asparagus in a bowl of ice water to halt the cooking.
The asparagus should be slightly tender when done,
not mushy.
5. Set oven to broil. Prepare the dish by arranging
the cooked chicken fillets on a baking pan. Cross two
asparagus spears over each fillet, then cover each
with a slice of mozzarella cheese. Broil the fillets for 3
to 4 minutes or until light brown spots begin to appear
on the cheese.
6. To serve, arrange one or two chicken breasts
on each plate, then spoon 3 or 4 tablespoons of
madeira sauce over the chicken.
• MAKES 2 TO 4 SERVINGS.
THE CHEESECAKE FACTORY
BANG-BANG CHICKEN &
SHRIMP
MENU DESCRIPTION: “A spicy Thai dish with the
flavors of curry, peanut, chile, and coconut. Soutéed with
vegetables and served over rice.”
This dish ranks very high among the most frequent entree
clone requests from this growing chain’s huge menu, and
anyone who is a fan of Thai dishes falls in love with it. I dig
recipes that include scratch sauces that can be used with
other dishes. The curry and peanut sauces here are good
like that. They can, for example, be used to sauce up grilled
skewers of chicken or other meats, or as a flavorful drizzle
onto lettuce wraps. But even though I’ve included the peanut
sauce recipe from scratch here, you can take the quick
route and save a little prep time by picking up a premade
peanut sauce found near the other Asian foods at the
market. Since the sauce is used sparingly in a drizzle over
the top of this dish it won’t make a big difference which way
you go. This recipe produces two Cheesecake Factory
size servings—anyone who’s been there knows that means
“off-the-hook big.” If your diners aren’t prepared to process
the gargantuan gastronomy and you’re all out of doggie
bags, you can easily split this recipe into four more
sensible portions.
CURRY SAUCE
2 teaspoons chili oil
¼ cup minced onion
2 tablespoons minced garlic
2 teaspoons minced ginger
1 cup chicken broth
½ teaspoon ground cumin
½ teaspoon ground coriander
½ teaspoon paprika
¼ teaspoon salt
¼ teaspoon ground black
pepper
¼ teaspoon ground mace
¼ teaspoon turmeric
3 cups coconut milk
2 medium carrots, julienned
I small zucchini, julienned
½ cup frozen peas
PEANUT SAUCE
¼ cup creamy peanut butter
2 tablespoons water
4 teaspoons granulated sugar
1 tablespoon soy sauce
½ teaspoon chili oil
I teaspoon rice vinegar
I teaspoon lime juice
2 skinless chicken breast fillets
16 large raw shrimp, shelled
¼ cup cornstarch
½ cup vegetable oil
4 cups cooked white rice
GARNISH
1½ cups flaked coconut
½ teaspoon dried parsley,
crumbled
2 tablespoons chopped peanuts
2 green onions, julienned
1. Make the curry sauce by heating the chili oil in a
large saucepan over medium heat. When the oil is hot
add the onion, garlic, and ginger Saute for about 30
seconds then add the chicken broth. Add the spices
(cumin, coriander, paprika, salt, black pepper, mace,
and turmeric) and stir well. Simmer for 5 minutes then
add the coconut milk. Bring mixture back up to a boil,
then reduce heat and simmer for 20 minutes or until
sauce begins to thicken. Add the julienned carrots and
zucchini, and the frozen peas. Simmer mixture for 10
minutes or until carrots become tender
2. Make peanut sauce by combining peanut
butter, water, sugar, soy sauce, rice vinegar, lime juice,
and chili oil in a small saucepan over medium heat.
Heat just until mixture begins to bubble, then cover the
pan and remove it from the heat.
3. Toast the flaked coconut by preheating your
oven to 300 degrees. Spread coconut on a baking
sheet and toast it in the oven. Stir the coconut around
every 10 minutes so that it browns evenly, but watch it
closely in the last 5 minutes so it doesn’t get too dark.
After 25 to 30 minutes the coconut should be light
brown. Take it out of the oven and let it cool,
4. Cut the chicken breasts into bite-size pieces.
Coat the chicken and shrimp with cornstarch. Heat the
vegetable oil in a wok or large skillet over medium
heat. Add the coated chicken to the pan and saute it
for a couple minutes, turning as it cooks. Add the
shrimp to the pan. Cook the shrimp and chicken for a
couple minutes, until it’s done, then remove everything
to a rack or towel to drain.
5. Build the two plates (or you can divide the meal
into four portions) by filling a soup bowl with 1 or 2
cups of white rice. Press down on the rice. Invert the
bowl onto the center of a plate, tap it a bit, and then lift
off the bowl leaving a formed pile of rice in the center
of each plate. Arrange an equal portion of chicken and
shrimp around the rice. Spoon the curry sauce and
vegetables over the chicken and shrimp, being careful
not to get any sauce on top of the rice.
6. Drizzle peanut sauce over the dish
concentrating most of it on the rice. Sprinkle ½
teaspoon of crumbled, dried parsley over the center of
the rice. Add a tablespoon of chopped peanuts on the
parsley, and then place a pile of julienned green
onions on top. Sprinkle ½ cup to % cup of toasted
coconut over the chicken and shrimp and serve it up.
• MAKES 2 TO 4 SERVINGS.
THE CHEESECAKE FACTORY
ORIGINAL CHEESECAKE
DESCRIPTION: “Our famous Original
cheesecake recipe! Creamy and light, baked in a graham
cracker crust. Our most popular cheesecake!”
MENU
Oscar and Evelyn Overton’s wholesale cheesecake
company was successful quickly after it first started selling
creamy cheesecakes like this clone to restaurant chains in
the early 1970s. When some restaurants balked at the
prices the company was charging for high-end desserts,
Oscar and Evelyn’s son David decided it was time to open
his own restaurant, offering a wide variety of quality meal
choices in huge portions, and, of course, the famous
cheesecakes for dessert. Today the chain has over 87
stores across the country, and consistently ranks number
one on the list of highest grossing single stores for a U.S.
restaurant chain.
Baking your cheesecakes in a water bath is part of the
secret to producing beautiful cheesecakes at home with a
texture similar to those sold in the restaurant. The water
surrounds your cheesecake to keep it moist as it cooks,
and the moisture helps prevent ugly cracking. You’ll also
start the oven very hot for just a short time, then crank it
down to finish. I also suggest lining your cheesecake pan
with parchment paper to help get the thing out of the pan
when it’s done without a hassle.
CRUST
1½ cups graham cracker crumbs
¼ teaspoon ground cinnamon
⅓ cup melted margarine
4 8-ounce pkgs. cream cheese
1 ¼ cups granulated sugar
½ cup sour cream
2 teaspoons vanilla extract
5 eggs
TOPPING
½ cup sour cream
2 teaspoons granulated sugar
OPTIONAL GARNISH
canned whipped cream
1. Preheat oven to 475 degrees. Place a large
pan or oven-safe skillet (that the cheesecake pan will
fit inside) filled with about ½-inch of water into the oven
while it preheats. This will be your water bath.
2. Combine I ½ cups graham cracker crumbs and
¼ teaspoon cinnamon into a medium bowl. Mix in ⅓
cup melted margarine. Press the crumb into a 9-inch
spring form pan that has been lined on the bottom and
side with parchment paper Use the bottom of a
drinking glass to press the crumb mixture flat into the
bottom of the pan and about ⅔ the way up the side.
Wrap a large piece of foil around the bottom of the pan
to keep the cheesecake dry when placed in the water
bath in the oven. Put the crust in your freezer until the
filling is done.
3. Use an electric mixer to combine the cream
cheese with the sugar, sour cream, and vanilla. Blend
mixture for a couple minutes or until the ingredients are
smooth and creamy. Be sure to scrape down the sides
of the bowl. Whisk the eggs in a medium bowl and
then add them to the cream cheese mixture. Blend the
mixture just enough to integrate the eggs.
4. Remove the crust from the freezer and pour the
filling into it.
5. Carefully place the cheesecake into the
preheated water bath. Bake for 12 minutes at 475
degrees, then turn the oven down to 350 degrees and
bake for 50 to 60 minutes or until the top of the
cheesecake turns a light brown or tan color. Remove
the cheesecake from the oven to cool.
6. When the cheesecake has cooled, combine ½
cup sour cream and 2 teaspoons sugar. Spread the
sweetened sour cream over the entire top surface of
the cheesecake. Cover and chill the cheesecake in the
refrigerator for at least 4 hours. To serve, slice the
cheesecake into 12 equal portions. Apply a pile of
canned whipped cream to the top of each slice and
serve.
• MAKES 12 SERVINGS.
THE CHEESECAKE FACTORY
WHITE CHOCOLATE
RASPBERRY TRUFFLE
CHEESECAKE
MENU DESCRIPTION: “Our creamy cheesecake with
chunks of white chocolate and swirls of imported seedless
raspberries throughout. Baked in a chocolate crust and
finished with white chocolate shavings and whipped
creom.”
I’m not sure why “truffle” is in the name of this great dessert,
but who cares when you’ve got raspberry preserves swirled
throughout the cream cheese filling upon a layer of white
chocolate chunks and crumbled chocolate cookie wafer
crust. Yum. No wonder this cheesecake is the number one
pick from the chain’s massive list of flavored cheesecake
choices.
CRUST
1 ½ cups chocolate cookie
crumbs or 20 crumbled Oreo
cookies (with filling removed)
⅓ cup margarine, melted
½ cup raspberry preserves
¼ cup water
4 8-ounce pkgs. cream cheese
1 ¼ cups granulated sugar
½ cup sour cream
2 teaspoons vanilla extract
5 eggs
4 ounces white chocolate,
chopped into chunks
OPTIONAL GARNISH
2 ounces shaved white chocolate
canned whipped cream
1. Preheat oven to 475 degrees. Place a large
pan or oven-safe skillet filled with about ½-inch of
water into the oven while it preheats. This will be your
water bath.
2. Combine the raspberry preserves with ¼ cup
water in a medium microwave-safe bowl. Heat for 1½
minutes on high in your microwave. Stir until smooth.
Strain to remove the raspberry seeds (toss ’em out),
then let the strained preserves sit to cool, then put the
bowl in the refrigerator until later.
3. Measure 1½ cups chocolate cookie crumbs (or
crush 20 Oreo cookie wafers—with the filling scraped
out—in a resealable plastic bag) into a medium bowl.
Mix in ⅓ cup melted margarine. Press the crumb into a
9-inch spring form pan that has been lined on the
bottom and side with parchment paper. Use the
bottom of a drinking glass to press the crumb mixture
flat into the bottom of the pan and about ⅔ the way up
the side. Wrap a large piece of foil around the bottom
of the pan to keep the cheesecake dry when placed in
the water bath. Put the crust in your freezer until the
filling is done.
4. Use an electric mixer to combine the cream
cheese with the sugar, sour cream, and vanilla. Mix on
medium speed for a couple minutes or until the
ingredients are smooth and creamy. Be sure to scrape
down the sides of the bowl. Whisk the eggs in a
medium bowl and then add them to the cream cheese
mixture. Blend the mixture just enough to integrate the
eggs.
5. Remove the crust from the freezer and sprinkle
4 ounces of white chocolate chunks onto the bottom of
the crust. Pour half of the cream cheese filling into the
crust. Drizzle the raspberry preserves over the entire
surface of the filling. Use a butter knife to swirl the
raspberry into the cream cheese. just a couple passes
is fine, you don’t want to blend the raspberry and
cream cheese together too much. Pour the other half
of the filling into the crust.
6. Carefully place the cheesecake into the water
bath in the oven. Bake for 12 minutes at 475 degrees,
then turn the oven down to 350 degrees and bake for
50 to 60 minutes or until the top of the cheesecake
turns a light brown or tan color. Remove the
cheesecake from the oven to cool. When the
cheesecake is cool, use the foil from the bottom to
cover the cheesecake and chill it in the refrigerator for
at least 4 hours.
7. Before serving, sprinkle the entire top surface
of cheesecake with 2 ounces of shaved white
chocolate. To serve, slice the cheesecake into 12
equal portions. Apply a pile of canned whipped cream
to the top of each slice and serve.
• MAKES 12 SERVINGS,
CHEVYS FRESH SALSA
Whip out the food processor and fire up the grill because
you’ll need these essential tools to clone one of the best
restaurant salsas in the business. The key to recreating the
flavor of the real deal is to fire roast the tomatoes and the
jalapenos, and to add a little mesquite-flavored liquid
smoke. The restaurant chain uses a mesquite grill, so these
steps are crucial to getting the same smoky flavor as the
addictive restaurant version. Chevys uses chipotle
peppers, which are smoked red jalapenos. But unless you
grow your own jalapenos, it may be difficult to find the riper
red variety in your local supermarket. For this recipe, the
green jalapeno peppers will work fine if you can’t find the
red ones. Adjust the number of jalapenos you use based on
the size of the peppers that are available: If you have big
jalapenos you need only 6, and you’ll need around 10 if your
peppers are small.
6 medium tomatoes
6 to 10 jalapenos (use more if
small, fewer if large)
¼ of a medium Spanish onion
2 cloves garlic
2 tablespoons chopped fresh
cilantro
2 tablespoons white vinegar
2 teaspoons salt
1 ½ teaspoons liquid mesquite
smoke
1. Preheat your barbecue grill to high
temperature.
2. Remove any stems from the tomatoes, then rub
some oil over each tomato. Leave the stems on the
jalapenos and rub some oil on them, too.
3. Place the tomatoes on the grill when it’s hot.
After about 10 minutes, place all of the jalapenos onto
the grill. In about 10 minutes you can turn the tomatoes
and the peppers. When almost the entire surface of the
peppers has charred black you can remove them from
the grill. The tomatoes will turn partially black, but when
the skin begins to come off they are done. Put the
peppers and tomatoes on a plate and let them cool.
4. When the tomatoes and peppers have cooled,
remove most of the skin from the tomatoes and place
them into a food processor. Pinch the stem end from
each of the peppers remove any skin that has burned,
and place the peppers into the food processor with the
tomatoes.
5. Add the remaining ingredients to the food
processor and puree on high speed for 5 to 10
seconds or until the mixture has a smooth consistency.
6. Place the salsa into a covered container and
chill for several hours or overnight so that the flavors
develop.
• MAKES APPROXIMATELY 2 CUPS.
CHEVY’S MANGO SALSA
This zippy mango salsa clone from America’s “Fresh Mex”
chain is great sprinkled over fajitas, burritos, tacos, salads,
sandwiches ... you name it. The salsa is so good on its own
you may be tempted to eat it straight from the bowl with a
spoon. A little bit of fresh habanero pepper brings the heat
to this concoction, but if you can’t track down fresh peppers
use a couple drops of your favorite bottled habanero sauce.
1 peeled mango, seeded and
diced (about 2 cups)
¼ cup minced white onion
2 tablespoons minced red bell
pepper
1 teaspoon minced fresh cilantro
1 teaspoon fresh lime juice
½ teaspoon finely minced
habanero pepper
⅛ teaspoon salt
Combine all ingredients in a medium bowl, Cover and chill
before serving.
• MAKES 2CUPS.
CHEVYS CHILE CON QUESO
This top secret clone of the cheesy appetizer from this 107unit Mexican food chain is perfect to whip out for your
festive fiestas. This recipe will make enough of the spicy
cheese concoction for plenty of party-time double dipping.
The Anaheim chile has a mild spiciness, so we’ll toss a
jalapeno in there for an extra spicy kick. If you can’t find an
Anaheim pepper, use any mild green chilies that are
available, as long as you get about ½ cup of diced pepper
in the mix.
one 16-ounce box Velveeta, diced
¾ cup whole milk
1 green Anaheim pepper, seeded
and diced (about ½ cup)
¼ cup diced white onion
1 jalapeno pepper, seeded and
diced
2 teaspoons minced cilantro
juice of 1 lime
¼ teaspoon dried oregano
¼ teaspoon ground black pepper
(freshly ground is best)
pinch of salt
pinch of dried thyme
2 medium tomatoes, seeded and
diced (about cup)
GARNISH
¼ cup ranchero cheese, crumbled
tortilla chips for dipping
1. Combine Velveeta and milk in a medium
saucepan over medium/low heat. Stir often as cheese
melts. Be careful not to burn it.
2. When cheese is melted add all remaining
ingredients except the tomatoes. Continue to cook
over medium/low heat for 7 minutes, stirring often to
prevent burning. Stir in tomatoes and remove the
queso from the heat.
3. Pour queso into a serving dish, top with
crumbled ranchero cheese and serve with tortilla chips
for dipping.
• MAKES ABOUT 2 CUPS.
TIDBITS
Ranchero cheese is a crumbly Mexican cheese that can be
found near the cream cheese in your supermarket.
CHEVYS GARLIC MASHED
POTATOES
This easy-to-clone dish comes alongside many of the tasty
entrees at this Mexican restaurant chain, or it can be
ordered up, pronto, on the side. It’s a nice clone to have
around since it goes well with so many of your homemade
dishes, Mexican or otherwise. Get yourself four large russet
potatoes and start peeling, but you don’t need to peel all
the skin off. Leave a little skin on there for texture. And
when you boil the potatoes, toss the whole garlic cloves
right in the pot. That way the garlic begins to flavor the
potatoes as they boil, and when you mash the potatoes the
cooked garlic gets mashed up too. Cool, eh?
6 to 7 cups water
4 medium/large russet potatoes
6 cloves garlic
6 tablespoons butter (¾ stick)
½ cup heavy cream
¾ teaspoon salt
¼ teaspoon ground black pepper
1. Peel potatoes, but leave some skin on. Slice
the potatoes into quarters.
2. Boil the potatoes and garlic for 30 minutes in
the water in a large saucepan or pot. Make sure the
water completely covers the potatoes. When potatoes
are tender drain them. Don’t lose the garlic—keep it
with the potatoes.
3. Pour potatoes and garlic back into the pan.
Commence with the thorough mashing. Mashing is fun.
Stir in butter, cream, salt and pepper and reheat over
medium/low heat until hot.
• SERVES 6 TO 8.
CHEVYS SWEET CORN
TOMALITO
Other Mexican food chains such as Chi-Chi’s and El Torito
call it “Sweet Corn Cake.” But at Chevy‘s, the corn-filled,
pudding-like stuff that’s served with most entrees is known
as “Tomalito:’ That masa harina in there (corn flour) is
what’s used to make tamales, and it can be found in your
supermarket either with the corn meal and flour, or
wherever the other Mexican/Spanish items are stocked.
Everything else here is basic stuff. While other corn cake
recipes may require canned corn or canned cream-style
corn, Chevys’ “no cans in the kitchen” commandment
requires that we use frozen corn for a proper clone. Of
course, you may also use corn that’s been cut fresh from
the cob, if you’re up for the task.
4 cups frozen corn, thawed
⅓ cup butter, softened (⅔ stick)
½ cup granulated sugar
¾ cup milk
½ cup masa harina
½ cup corn meal
½ teaspoon baking powder
½ teaspoon salt
1. Preheat oven to 325 degrees.
2. Cream softened butter together with sugar in a
large bowl with an electric mixer until smooth. Add milk
and masa and mix well.
3. Use a blender or food processor to puree 2
cups of corn until smooth. Add pureed corn to
butter/masa mixture and mix well. Add corn meal,
baking powder, salt, and remaining corn and mix until
combined.
4. Pour mixture into an ungreased 8x8-inch
baking pan. Cover with foil and place it into a 9x 13inch baking pan. Add hot water to the larger baking
pan until it’s about ⅓ full. Bake for I ½ to 2 hours or until
corn cake is firm in the center. Let it sit covered for 10
minutes before serving. To serve, scoop out ½ cup
portions with a large spoon.
• MAKES 8 SERVINGS.
CHEVYS FLAN
Abiding by this large Mexican food chain’s “no cans in the
kitchen” edict, we’ll craft our clone of the delicious flan
dessert with fresh whole milk, rather than canned
sweetened condensed milk required by most flan recipes
out there. The canned stuff has a bit of a funky taste to it,
plus it’s much too sweet to be an accurate Chevys
knockoff. When you’re ready to clone this one, be sure to
get some parchment paper (it’s near the wax paper in the
supermarket). When laid over the top of the baking pan, the
parchment paper helps the flan cook faster and more
evenly than if left uncovered. Aluminum foil doesn’t seem to
work as well since it tends to reflect the heat away from
your ramekins of sweet, creamy goodness.
2½ cups granulated sugar
½ teaspoon ground cinnamon
¼ cup hot water
3 cups whole milk
4 eggs
3 egg yolks
1 teaspoon vanilla extract
1. Preheat oven to 300 degrees.
2. Combine cinnamon with 2 cups granulated
sugar in a medium saucepan over medium/low heat.
When sugar begins to melt, stir often until all sugar has
dissolved and solution is light brown. Add water to pan
and stir until smooth. Pour about ¼ cup sugar solution
into each of six 6-ounce ramekins (custard cups). Swirl
the sugar around the inside edge of each of the
ramekins. Arrange the ramekins in a 9x 13-inch baking
pan.
3. Heat milk in another medium saucepan over
medium heat until it starts to bubble.
4. As milk heats up whisk together eggs, egg
yolks, vanilla and remaining ½ cup sugar in a large
bowl. Mix until sugar has dissolved.
5. When milk starts to bubble remove it from the
heat. Carefully pour about ¼ cup of hot milk into the
egg mixture while stirring. This will temper the eggs so
they don’t cook while adding the rest of the hot milk.
Slowly add the remaining milk while mixing.
6. Fill the ramekins to the top with the custard
mixture. Remove any foam from the top of each
ramekin. Add water to the pan so that it goes halfway
up the sides of the ramekins. Place a piece of
parchment paper over the ramekins and bake for 75 to
90 minutes or until custard is firm and a knife inserted
into the middle of the custard comes out clean.
7. Cool flan and cover each one with plastic wrap.
Chill thoroughly before serving. To serve, simply cut
around the inside edge of the ramekin with a knife,
then turn the flan over onto a plate. The golden,
caramelized sugar will spill down over the edges of the
flan. Forget about the leftover hardened sugar that
stays inside the ramekin. Let the dishwasher deal with
it.
● MAKES 6 SERVINGS.
CHILI’S SALSA
This super simple salsa can be made in a pinch with a can
of diced tomatoes, some canned jalapenos, fresh lime
Juice, onion, spices and a food processor (or blender).
Plus you can easily double the recipe by sending in a larger
28-ounce can of diced tomatoes, and simply doubling up
on all the other ingredients. Use this versatile salsa as a dip
for tortilla chips or plop it down onto any dish that needs
flavor assistance—from eggs to taco salads to wraps to
fish—for that extra special restaurant-style zing. You can
adjust the heat level to suit your taste by tweaking the
amount of canned jalapenos in the mix.
one 14.5-ounce can diced
tomatoes
3 tablespoons bottled or
canned diced jolapenos
1 tablespoon lime juice
I teaspoon salt
¼ teaspoon ground cumin
½ cup diced white or yellow onion
1. Combine diced tomatoes, jalapenos, lime juice
and spices in a food processor. Run food processor
on high speed for just a few moments until the
tomatoes have been nearly pureed, yet still chunky.
The jalapenos should be chopped into visible minced
bits. Be careful not to over-process.
2. Pour the mixture into a bowl and add the sliced
onion. Stir well, cover and store overnight for the
flavors to properly develop.
• MAKES 2 CUPS.
CHILI’S BONELESS BUFFALO
WINGS
MENU DESCRIPTION: “Breaded chicken breast tossed
in spicy wing sauce. Served with cool bleu cheese
dressing.”
This clone gives us the zesty flavor of traditional Buffalo
chicken wings, but the bones and skin are left back in
Buffalo. That’s because these “wings” are actually nuggets
sliced from chicken breast fillets, then breaded and fried,
and smothered with the same type of spicy wing sauce
used on traditional wings. If you like the flavor of Buffalo
wings, but wish you could use a fork, your spicy dreams
have come true. Serve up these puppies with some celery
sticks and bleu cheese dressing on the side for dipping.
1 cup all-purpose flour
2 teaspoons salt
½ teaspoon ground black pepper
¼ teaspoon cayenne pepper
¼ teaspoon paprika
1 egg
1 cup milk
2 skinless chicken breast fillets
6 to 10 cups vegetable or canola
oil (amount required by your
fryer)
¼ cup Frank’s or Crystal hot
sauce
I tablespoon margarine
ON THE SIDE
bleu cheese dressing (for dipping) celery sticks
1. Combine flour, salt, peppers and paprika in a
medium bowl.
2. In another small bowl, whisk together egg and
milk.
3. Slice each chicken breast into 6 pieces.
Preheat 6 to 10 cups of vegetable oil in a deep fryer to
375 degrees.
4. One or two at a time, dip each piece of chicken
into the egg mixture, then into the breading blend; then
repeat the process so that each piece of chicken is
double-coated.
5. When all chicken pieces have been breaded,
arrange them on a plate and chill for 15 minutes.
6. When the chicken is done resting, drop each
piece into the hot oil and fry for 5 to 6 minutes or until
breading is golden brown.
7. As chicken fries, combine the hot sauce and
margarine in a small bowl. Microwave sauce for 20 to
30 seconds or just until the margarine is melted, then
stir to combine. You can also use a small saucepan for
this step. Just combine the hot sauce and margarine in
the saucepan over low heat and stir until margarine is
melted and ingredients are blended.
8. When chicken pieces are done frying, remove
them to a plate lined with a couple paper towels.
9. Place the chicken pieces into a covered
container such as a Tupperware bowl or large jar with
a lid. Pour the sauce over the chicken in the container,
cover, and then shake gently until each piece of
chicken is coated with sauce. Pour the chicken onto a
plate and serve the dish with bleu cheese dressing
and celery sticks on the side.
• Serves 2 TO 4 AS AN APPETIZER.
CHILI’S BONELESS
SHANGHAI WINGS
MENU DESCRIPTION: “Crispy breaded chicken breast
topped with sweet and spicy ginger-citrus sauce. Served
with spicy-cool wasobiranch dressing for dipping.”
So you’re into boneless wings but you need a break from
the traditional cayenne flavor of the Buffalo style. If fresh
ginger-laced sweet-and-sour sauce sounds seducing, here
is a variation worth snacking on. Along with the secret
sauce recipe is an easy way to fabricate a carbon copy of
Chili’s great wasabi-ranch dressing simply by adding a few
ingredients to Hidden Valley Ranch dressing. I’ve even
suggested a drop of green food coloring to give the
dressing the exact same green tint of the original. The
wasabi powder won’t really add much color, so this is the
trick. By the way, you can find the dry, powdered form of
wasabi horseradish in the supermarket aisle with the other
Asian foods.
GINGER-CITRUS SAUCE
1 ¼ cups water
1 tablespoon cornstarch
¾ cup dark brown sugar
¼ cup soy sauce
2 tablespoons minced fresh ginger
1 teaspoon minced garlic
2 tablespoons lime juice
1 tablespoon lemon juice
¼ teaspoon crushed red pepper
flakes
WASABI-RANCH DRESSING
½ cup Hidden Valley Ranch
bottled salad dressing
2 tablespoons buttermilk (or
whole milk)
I teaspoon prepared horseradish
½ teaspoon powdered wasabi
I drop green food coloring
1 cup all-purpose flour
2 teaspoons salt
½ teaspoon ground black pepper
¼ teaspoon cayenne pepper
¼ teaspoon paprika
1 egg
1 cup milk
2 skinless chicken breast fillets
6 to 10 cups vegetable or canola
oil (amount required by your
fryer)
1. Combine flour, salt, peppers and paprika in a
medium bowl.
2. In another small bowl, whisk together egg and
milk.
3. Slice each chicken breast into 6 pieces.
Preheat 6 to 10 cups of canola oil in a deep fryer to
375 degrees.
4. One or two at a time, dip each piece of chicken
into the egg mixture, then into the breading blend; then
repeat the process so that each piece of chicken is
double-coated.
5. When all chicken pieces have been breaded,
arrange them on a plate and chill for 15 minutes.
6. As the chicken is resting, make the gingercitrus sauce by dissolving the cornstarch in the water.
Pour the mixture into a medium saucepan along with
the rest of the sauce ingredients and bring the mixture
to a boil over medium heat. When the sauce begins to
bubble, reduce heat and simmer for 10 to 15 minutes
or until thick. Remove the sauce from the heat and let it
cool a bit.
7. Make the wasabi-ranch dressing while your
ginger-citrus sauce is simmering. Simply whisk
together the ranch dressing, buttermilk, prepared
horseradish, powdered wasabi, and green food
coloring in a small bowl. Cover and chill this until the
wings are done.
8. When the chicken has rested and you’re ready
to cook, lower the boneless wings into the oil and fry
for 5 to 6 minutes or until each piece is browned.
Depending on the size of your fryer, you may want to
fry the chicken in batches so that the chicken isn’t too
crowded in there.
9. When chicken pieces are done frying, remove
them to a draining rack or a plate lined with a couple
paper towels.
10. When all the chicken is fried, place the pieces
into a covered container such as a large jar with a lid.
Pour the ginger-citrus sauce over the chicken in the
container, cover it up, and then gently shake everything
around until each piece of chicken is coated with
sauce. Pour the chicken onto a plate and serve the
dish with wasabi-ranch dressing on the side.
• SERVES 2 TO 4 AS AN APPETIZER.
CHILI’S CHICKEN CRISPERS
MENU DESCRIPTION: “Strips of hand-battered chicken
fried to perfection. Served w/sweet corn on the cob, honeymustard dressing and homestyle fries,”
When biting into Chili’s delicious trademarked Chicken
Crispers, I detect the distinct flavor of MSG, or
monosodium glutamate. Although there is no English word
for it, the Japanese call this flavor umami, and it delivers a
taste sensation that is different from bitter, salty, sweet or
sour flavors. This fifth flavor is created naturally by glutamic
acid, an amino acid, and it can be found in mushrooms,
ripe tomatoes, fish and dairy products. But rather than
adding something like Accent Flavor Enhancer—which is
pure NSG—to this recipe, I thought of another approach. To
clone the flavorful batter for this Chili’s entree, I decided to
bring canned chicken broth into the mix. Most chicken
broths, including Swanson brand, contain autolyzed yeast
extract. These yeast enzymes release flavor-enhancing
compounds that work just like MSG, amplifying flavors in
much the same way. Plus, the chicken broth is made with
other goodies such as carrot, onion and celery that will
contribute to a tasty crunchy coating. As for the frying,
Chili’s has recently switched to a shortening that contains
no trans fat. So, if you want the best clone, use shortening,
but find the kind that has no trans fat. Crisco now makes a
version, and so does Smart Balance. Shortening produces
a superior clone, but you can also use vegetable or canola
oil, if that’s what you dig.
HONEY MUSTARD DRESSING
⅔ cup mayonnaise
¼ cup honey
2 tablespoons Dijon mustard
pinch paprika
pinch salt
BATTER
I egg, beaten
¼ cup whole milk
¾ cup chicken broth (Swanson)
6 to 10 cups shortening or
vegetable oil (amount required
by fryer)
1 ½ teaspoons salt
½ teaspoon ground black pepper
1 cup self-rising flour
10 chicken tenderloins
½ cup flour
1. Make honey mustard sauce by combining
ingredients in a small bowl. Cover and chill until
needed.
2. Heat shortening or oil in fryer to 350 degrees.
3. Combine beaten egg, milk, chicken broth, salt
and pepper in a medium bowl. Whisk for about 30
seconds to dissolve salt. Whisk in I cup self-rising flour.
Let batter sit for 5 minutes.
4. When you are ready to fry the chicken, coat
each piece with dry flour (½ cup in a medium bowl),
then dunk the chicken into the batter Let a little batter
drip off the chicken and lower it into the hot oil and fry
for 7 to 9 minutes or until it’s golden brown. Depending
on the size of your fryer, you should be able to fry 3 or 4
tenderloins at a time. Drain fried chicken strips on a
rack or paper towels for a minute or so, and serve with
the honey mustard dressing on the side for dipping.
• SERVES 4 AS AN APPETIZER OR 2 AS AN ENTREE.
CHILI’S CHILI QUESO
MENU DESCRIPTION: “Our appetizing cheese dip with
seasoned beef. Served with warm tostada chips.”
Take your chips for a dip in this top secret take on Chili’s
Queso Dip that comes to your table in a small cast-iron
skillet along with a big bowl of tortilla chips. A popular
recipe that’s been circulating calls for combining Velveeta
with Hormel No-Beans chili. Sure, it’s a good start, but
there’s more to Chili’s spicy cheese dip than that. Toss a
few other ingredients into the saucepan and after about 20
minutes you’ll have a great dip for picnic, party, or game
time.
1 16-ounce box Velveeta Cheese
1 15-ounce can Hormel Chili
(No Beans, Not Chunky)
I cup milk
4 teaspoons chili powder
2 teaspoons paprika
1 tablespoon lime juice
½ teaspoon ground cayenne
pepper
½ teaspoon ground cumin
I. Cut the Velveeta into cubes. Combine the cheese with the
remaining ingredients in a medium saucepan over medium
heat. Stir frequently until cheese melts, then reduce heat
and simmer for 20 minutes. Serve hot with tortilla chips for
dipping.
CHILI’S LETTUCE WRAPS
MENU DESCRIPTION: “Grilled Asian-spiced chicken
w/carrots, water chestnuts, green onions & almonds.
Served with crisp Bibb lettuce and sesame-ginger &
peanut sauces for dipping.”
Chili’s take on the appetizer made popular at P. F. Chang’s
Asian Bistro got diners across the country wrapping lettuce
around chopped chicken. Now you can bring Chili’s version
of the Asian tacos home along with the mega-addictive
sesame-ginger and peanut dipping sauces. After you make
the sauces and prepare the chicken, assemble the wraps
by arranging some sliced chicken into the center of a leaf of
butter lettuce, sprinkle on some shredded carrot, perhaps a
few crunchy bean threads, add a little dipping sauce and
open wide.
STIR FRY SAUCE
¼ cup water
1 teaspoon arrowroot
⅓ cup soy sauce
¼ cup granulated sugar
¼ cup white vinegar
I tablespoon dried chives
1 tablespoon vegetable oil
2 teaspoons sesame seeds
I teaspoon red pepper flakes
I teaspoon chili oil
I teaspoon peanut butter
½ teaspoon finely minced ginger
SESAME-GINGER DIPPING SAUCE
¼ cup water
¾ teaspoon arrowroot
⅓ cup granulated sugar
cup white vinegar
¼ cup soy sauce
I teaspoon finely minced ginger
I teaspoon vegetable oil
½ teaspoon sesame seeds
¼ teaspoon garlic powder
dash red pepper flakes
dash parsley
PEANUT DIPPING SAUCE
½ cup peanut butter
cup water
2 tablespoons white vinegar
½ teaspoon finely minced ginger
⅛ teaspoon crushed red pepper
I tablespoon vegetable oil
4 skinless chicken breast fillets
4 green onions
¼ cup granulated sugar
¼ teaspoon garlic powder
½ teaspoon chili oil
½ teaspoon vegetable oil
I tablespoon brown sugar
¼ cup minced water chestnuts
¼ cup sliced almonds
I head butter lettuce
GARNISH
fried bean threads (see Tidbits) shredded carrots
1. To prepare the stir-fry sauce, combine the
water and arrowroot in a small bowl and stir until
arrowroot is dissolved. Add this solution to the other
stir-fry sauce ingredients in a small saucepan over
medium heat. Bring to a boil, and then reduce heat to
low and simmer for 5 to 6 minutes, or until thick.
2. To make the sesame-ginger dipping sauce
combine the water and arrowroot in a small bowl and
mix until arrowroot is dissolved. Combine this solution
with the other dipping sauce ingredients in small
saucepan over medium heat. Bring to a boil, and then
reduce heat to low and simmer for 2 minutes.
3. Combine all ingredients for the peanut dipping
sauce in a small saucepan over medium/low heat.
Heat while whisking until sauce becomes smooth.
Remove from heat when done.
4. To prepare the chicken heat I tablespoon of
vegetable oil in a large skillet over medium heat. Cook
the chicken breasts until done—3 to 5 minutes per
side—turning every couple of minutes. You can tell
when the chicken is done by pressing down on the
middle of each chicken breast. It should be firm.
5. Remove the cooked chicken breast to a cutting
board and slice it into strips with a sharp knife. Keep
the pan hot. Load the chicken back into the same pan
over medium/high heat, and add the water chestnuts.
Heat for 1 minute.
6. Add 5 tablespoons of the stir-fry sauce to the
chicken and heat for 2 minutes, stirring often. The
sauce should be bubbling.
7. Add the sliced green onions and stir. The
chicken is done.
8. Prepare each serving plate with a bed of bean
threads. Spoon one-fourth of the chicken onto the bean
threads. Sprinkle the chicken with about a tablespoon
of sliced almonds. Add three leaves of butter lettuce to
the plate, along with a garnish of shredded carrots.
Repeat for the remaining servings. Serve with the
sesame-ginger dipping sauce and peanut dipping
sauce on the side.
• MAKES 4 SERVINGS.
TIDBITS
Bean threads can be found in the Asian food section of
your supermarket. Before using as a garnish the threads
must be flash-fried in a skillet in 2 inches of hot vegetable
oil. When the threads float to the top remove them to a
towel to drain.
CHILI’S SOUTHWESTERN
EGGROLLS
MENU DESCRIPTION: “Smoked chicken, black beans,
corn, jalapeno Jack cheese, red peppers and spinach
wrapped inside a crispy flour tortilla, We serve it with our
avocado-ranch dipping sauce.”
Chili’s was the first chain to popularize the Southwesternstyle eggroll, but as with any successful menu item, clones
have been popping up on other major chains’ appetizer
menus over the past several years. Even though it’s more
like a small chimichanga than an eggroll, this appetizer is a
fabulous creation with monster flavor. A flour tortilla is
stuffed with a spicy blend of corn, green onions, black
beans, spinach, jalapeno peppers, Monterey Jack cheese
and spices; then it’s deep-fried. Slice the rolls diagonally,
dunk the wedges into a creamy avocado ranch sauce, and
you’ve done your taste buds a solid. Make these several
hours before you plan to serve them so that they can freeze
before frying (it’s a great dish to make a day ahead of a
party or event). This freezing step will help the outside fry to
a golden brown, but the eggrolls will stay folded, and oil
won’t seep in. Assembling the eggrolls takes a little time,
so if you like these, I suggest making a double batch, Since
you’ll be freezing them, you’ll have extra on hand in the
freezer ready to cook with just a little additional effort.
1 skinless chicken breast fillet
1 tablespoon vegetable oil
2 tablespoons minced red bell
pepper
2 tablespoons minced green onion
⅓ cup frozen corn
¼ cup canned black beans, rinsed
and drained
2 tablespoons thawed and
drained frozen spinach
2 tablespoons diced, canned
jalapeno peppers
½ tablespoon minced fresh
parsley
½ teaspoon ground cumin
½ teaspoon chili powder
¼ teaspoon salt
dash cayenne pepper
¾ cup shredded Monterey Jack
cheese
five 7-inch flour tortillas
6 to 10 cups vegetable or
canola oil
AVOCADO-RANCH DIPPING SAUCE
¼ cup smashed, fresh avocado
(about half of an avocado)
¼ cup mayonnaise
¼ cup sour cream
1 tablespoon buttermilk
1 ½ teaspoons white vinegar
⅛ teaspoon salt
⅛ teaspoon dried parsley
⅛ teaspoon onion powder
dash dried dill weed
dash garlic powder
dash pepper
GARNISH
2 tablespoons chopped tomato
I tablespoon chopped onion
1. Preheat barbecue grill to high heat.
2. Rub the chicken breast with some vegetable oil
then grill it on the barbecue for 4 to 5 minutes per side
or until done. Lightly salt and pepper each side of the
chicken while it cooks. Set chicken aside until it cools
down enough to handle.
3. Preheat 1 tablespoon of vegetable oil in a
medium-size skillet over medium-high heat.
4. Add the red pepper and onion to the pan and
saute for a couple minutes until tender
5. Dice the cooked chicken into small cubes and
add it to the pan. Add the corn, black beans, spinach,
jalapeno peppers, parsley, cumin, chili powder, salt,
and cayenne pepper to the pan. Cook for another 4
minutes. Stir well so that the spinach separates and is
incorporated into the mixture.
6. Remove the pan from the heat and add the
cheese. Stir until the cheese is melted.
7. Wrap the tortillas in a moist cloth and
microwave on high for 1 ½ minutes or until hot.
8. Spoon approximately one-fifth of the mixture
into the center of a tortilla. Fold in the ends and then
roll the tortilla over the mixture. Roll the tortilla very tight,
then pierce it with a toothpick to hold it together.
Repeat with the remaining ingredients until you have
five eggrolls. Arrange the eggrolls on a plate, cover the
plate with plastic wrap and freeze for at least 4 hours.
Overnight is best.
9. While the eggrolls freeze prepare the avocadoranch dipping sauce by combining all of the
ingredients in a small bowl.
10. Preheat 6 to 10 cups oil (use the amount
required by your fryer) to 375 degrees.
11. Deep fry the eggrolls in the hot oil for 12 to 15
minutes and remove to paper towels or a rack to drain
for about 2 minutes.
12. Slice each eggroll diagonally lengthwise and
arrange on a plate around a small bowl of the dipping
sauce. Garnish the dipping sauce with the chopped
tomato and onion.
• SERVES 3 TO 4 AS AN APPETIZER.
CHILI’S CHICKEN ENCHILADA
SOUP
It’s an item that you won’t find on the menu at this national
restaurant chain, but ask your server about the soups du
jour and you’ll find this one is available every day of the
week. This soup also happens to be one of Chili’s most
raved-about items, and the subject of many a recipe search
on the TSR website (www.TopSecretRecipes.com). Part of
the secret in crafting your clone is the addition of masa
harina—a corn flour that you’ll find in your supermarket near
the other flours, or where all the Mexican foodstuffs are
stashed.
1 tablespoon vegetable oil
1 Ib. of skinless chicken breast
fillets (approx. 3 fillets)
½ cup diced onion
1 clove garlic, pressed
4 cups chicken broth
I cup masa harina
3 cups water
I cup enchilada sauce
one 16-ounce box Velveeta, diced
1 teaspoon salt
1 teaspoon chili powder
½ teaspoon ground cumin
GARNISH
shredded Cheddar cheese
crumbled corn tortilla chips
salsa or pico de gallo
1. Add I tablespoon of oil to a large pot over
medium heat. Add chicken breasts to pot and brown
for 4 to 5 minutes per side. Set chicken aside.
2. Add onion and garlic to the pot and saute over
medium heat for about 2 minutes, or until onion begins
to become translucent. Add chicken broth.
3. Combine masa harina with 2 cups of water in a
medium bowl and whisk until blended. Add masa
mixture to pot with onion, garlic and broth.
4. Add remaining water, enchilada sauce, cheese
and spices to pot and bring mixture to a boil.
5. Shred the chicken into small, bite-size pieces
and add it to the pot. Reduce heat and simmer soup
for 30 to 40 minutes or until thick.
6. Serve soup in cups or bowls, and garnish with
shredded Cheddar cheese, crumbled corn tortilla
chips, and a spoonful of your favorite salsa or pico de
gallo.
• MAKES APPROXIMATELY 12 SERVINGS.
CHILI’S SOUTHWESTERN
VEGETABLE SOUP
If you like soup that’s packed with veggies, that’s low in fat,
and has some of that Southwestern za-za-zing to it, this is
the soup for you. Just toss all the ingredients in a pot and
simmer. Garnish with some shredded cheese and
crumbled tortillas, and prepare to take the chill off.
6 cups chicken broth (Swanson is
best)
114.5-ounce can diced tomatoes,
with juice
1 cup water
1 cup canned dark red kidney
beans, with liquid
1 cup frozen yellow cut corn
1 cup frozen cut green beans
14-ounce con diced
green chilies
½ cup diced Spanish onion
½ cup tomato sauce
6 corn tortillas, minced
1 ½ teaspoons chili powder
dash garlic powder
GARNISH
1 cup grated CheddarlJack
cheese blend
1 cup crumbled corn tortilla chips
1. Combine all the soup ingredients in a large
saucepan or soup pot over high heat. Be sure to mince
the corn tortillas into small pieces with a sharp knife
before adding them to the soup.
2. Bring soup to a boil, then reduce the heat and
simmer for 45 minutes to 1 hour, or until the soup has
thickened and tortilla pieces have mostly dissolved.
3. To serve soup ladle 1 ½ cups into a bowl.
Sprinkle a heaping tablespoon of the grated
Cheddar/Jack cheese blend over the top of the soup,
and then a heaping tablespoon of crumbled corn
tortilla chips over the cheese.
• MAKES 6 SERVINGS.
CHILI’S HONEY MUSTARD
DRESSING
One of America’s favorite casual chains brings us a
popular salad dressing that you can’t buy in stores. Instead,
buy these six simple ingredients at a store and make your
own version cheaply and quickly.
⅔ cup mayonnaise
¼ cup honey
2 tablespoons Grey Poupon Dijon
mustard
1 teaspoon white vinegar
pinch paprika
pinch salt
Combine all ingredients in a medium bowl and whisk until
combined.
• MAKES I CUP
TIDBITS
Use low-fat mayo for a lighter version, but you already
figured that out, huh?
CHILI’S GRILLED BABY BACK
RIBS
MENU DESCRIPTION: “Full rock of ribs ‘double-basted’
w/BBQ sauce. Served w/cinnamon apples & homestyle
fries.”
One day the suits are sitting around a conference table
taking in a pitch for TV ads filled with songs about baby
back ribs and barbecue sauce. Soon after that Chili’s
launches its campaign featuring choreographed cooks in
the back kitchen banging on pots and pans and belting out
a jazzy ode to the meaty entrée. Silly as it may seem, the
tune was catchy, and the baby back ribs racked up big
sales. Now you can sing your own tune as you re-create the
Chili’s baby back experience without leaving the house.
The flavor is found in the sauce, and the cooking secret is a
slow-braising technique prior to grilling that will keep the
meat juicy and tender like the original. And, hopefully, no
one will see you dance.
SAUCE
1½ cups water
1 cup apple cider vinegar
½ cup tomato paste
1 tablespoon yellow mustard
⅔ cup dark brown sugar, packed
1 teaspoon liquid hickory smoke
1 ½ teaspoons salt
½ teaspoon onion powder
¼ teaspoon garlic powder
¼ teaspoon paprika
4 racks baby back ribs
1. Make the barbecue sauce by combining all of
the ingredients forthe sauce in a medium saucepan
over medium heat. When it comes to a boil, reduce
heat and simmer sauce, stirring often, for 45 to 60
minutes or until sauce is thick.
2. When you’re ready to make the ribs, preheat
the oven to 275 degrees.
3. Brush sauce over the entire surface of each
rack of ribs. Wrap each rack tightly in aluminum foil
and arrange the packets on a baking sheet with the
seam of the foil facing up. Bake for 2 to 2½ hours or
until the meat on the ribs has pulled back from the cut
ends of the bones by about ½ inch. When the ribs are
just about done, preheat your barbecue grill to medium
heat.
4. Remove the ribs from the foil (careful not to
burn yourself—the liquid inside will be hot!) and grill
them on the barbecue for 4 to 8 minutes per side or
until the surface of the ribs is beginning to char Brush
sauce on both sides of the ribs a few minutes before
you remove them from the grill. Just be sure not to
brush on the sauce too soon or it could burn.
5. Serve the ribs with extra sauce on the side and
lots of napkins.
• MAKES 4 SERVINGS.
CHILI’S CHOCOLATE CHIP
PARADISE PIE
MENU DESCRIPTION: “We start with a worm, chewy bar
layered with chocolate chips, walnuts and coconut.
Topped with vanilla ice cream and drizzled with hot fudge
and caramel.”
One thing that makes this dessert special is the way it
comes to your table sizzling in a cast-iron skillet just like
fajitas. The chocolate chip cookie and graham cracker
crust “pie” sits in a hot skillet on top of bubbling cinnamon
butter. It’s topped with a scoop of vanilla ice cream, and
then finished with walnuts, chocolate and caramel syrup. If
you’re a cloning perfectionist and want to present this
dessert exactly like they do at the restaurant, you’ll need a
small skillet for each serving. Small cast-iron skillets are the
best, but any 6 or 8-inch frying pan will do fine. You just
have to be sure your pan is good and hot to get that
authentic Chili’s “sizzle” when you lay in the goodies. If
you’ve got a big crew to feed and don’t have enough
skillets for each serving, you can add the cinnamon butter
to individual serving plates, microwave the plates until the
butter melts, then build each serving on the warm plates. It
may not have the sizzle of the real thing, but it’ll still taste
like paradise.
COOKIE LAYER
1 cup all-purpose flour
½ teaspoon baking soda
¼ teaspoon baking powder
½ cup butter, softened ( I stick)
⅓ cup granulated sugar
1 egg
I tablespoon milk
½ teaspoon vanilla extract
½ cup shredded coconut
CRUST LAYER
6 tablespoons butter (¾ stick)
¼ cup sugar
1 ½ cups graham cracker crumbs
1 ¼ cups semi-sweet chocolate
chips
½ cup chopped walnuts
CINNAMON BUTTER
½ cup butter, softened (I stick)
3 tablespoons granulated sugar
1 ½ teaspoons ground cinnamon
9 scoops vanilla ice cream
chocolate syrup
caramel syrup
6 tablespoons chopped walnuts
1. Preheat the oven to 325 degrees.
2. Combine the flour, baking soda and baking
powder in a medium bowl.
3. In a separate large bowl, beat together the
butter and sugar with an electric mixer. Continue
beating for about 30 seconds or until mixture turns
lighter in color, Add the egg, milk, and vanilla and beat
until smooth.
4. Slowly mix the dry mixture into the wet mixture.
Beat until combined and then mix in the coconut flakes.
Set this cookie dough aside for now.
5. Melt 6 tablespoons of butter in a medium bowl
in the microwave on high for about 30 seconds. Add
the sugar and stir well for 30 seconds. Add the graham
cracker crumbs and stir. Press this mixture into the
bottom of a 9x9-inch baking dish or pan.
6. Sprinkle the cup of chocolate chips evenly over
the graham cracker crust.
7. Press the cookie dough into the dish, covering
the chocolate chips. Use flour on your fingers to keep
the soft dough from sticking.
8. Sprinkle the chopped walnuts over the dough.
Use your fingers to press the nuts into the dough.
9. Bake for 40 to 45 minutes or until the edges of
the “pie” become light brown.
10. Prepare the cinnamon butter by creaming
together the butter, sugar and cinnamon in a small
bowl with an electric mixer on high speed.
11. When you are ready to make your dessert,
heat up a small skillet over medium heat. When the
skillet is hot, remove it from the heat then add about I
tablespoon of the cinnamon butter to the pan. It should
quickly melt and sizzle. Slice the “pie” into 9 pieces
and place one into the hot skillet. If the “pie” has
cooled, you can reheat each slice by zapping it in the
microwave for 30 to 40 seconds.
12. Place a scoop of ice cream on top of the
“pie.” Drizzle chocolate and caramel syrup over the
dessert and then sprinkle about 2 teaspoons of
chopped walnuts over the top. Repeat for the
remaining ingredients and serve sizzling in the skillet.
• MAKES 9 DESSERTS.
CHILI’S MOLTEN CHOCOLATE
CAKE
DESCRIPTION: “Warm chocolote coke
w/chocolate fudge filling. Topped wlvanilla ice cream
under a crunchy chocolate shell.”
MENU
Get out your “easy” button forthis one. While the clone
recipe for this top-requested Chili’s dessert is extremely
simple to make—and can even be made days ahead of
time—the resulting presentation is impressive. A chocolate
fudge cake mix is all you need for the cake part of the
recipe. The cake batter is poured into the large cups of a
Texas-size muffin pan. When the cakes are done and
cooled, invert them and cut a cylindrical chunk out of the
bottom where the hot chocolate is loaded. Keep the cakes
covered in the fridge until dessert time. To serve, nuke
each cake for 45 seconds, plop a scoop of vanilla ice
cream on top, thereby concealing the fudge compartment,
and top it off with a little Smucker’s Magic Shell (a
chocolate topping that hardens on ice cream). When your
diners dig into the cake, a delicious hot fudge center oozes
out of the warm chocolate cake, and you’re launched up to
superhero status.
CAKE
1 18,25-ounce box chocolate
fudge or dark chocolate coke
mix
1⅓ cups water
½ cup vegetable oil
3 eggs
1 bottle Hershey hot fudge
topping
8 scoops vanilla ice cream
Smucker’s Magic Shell chocolate
topping
GARNISH
caramel sauce
1. Make cake batter following directions on the
box and pour ½ cup of batter into the greased cups of
a large (Texas-size) muffin pan. If your pan has six
cups, bake the cakes in two batches of 4 cakes each.
Bake for 30 to 40 minutes, or until a toothpick stuck
into the center of one cake comes out clean. Turn all of
the cakes out of the pan and let them cool.
2. The cakes will be served upside down, so you
may have to slice a bit of the domed top off the cakes
to help them lay flat when inverted. A serrated
sandwich knife works best for this. After you’ve flipped
over all of the cooled cakes, use a sharp paring knife
to cut out a 1 ½-inch diameter cylindrical chunk in the
center of the bottom (now the top) of each cake. The
hole should be about 1½ inches deep. After slicing
straight down into the cake in a circle, scoop out the
chunk of cake with a teaspoon and discard the piece.
Now you have a secret compartment to conceal the hot
fudge pay-load.
3. Spoon about 2 tablespoons of fudge into each
of the holes you’ve made in the cakes, then store the
cakes in a sealed container in the refrigerator
4. When you’re ready to serve, drizzle caramel
sauce on each serving plate. Heat one cake at a time
in the microwave for 40 to 45 seconds on high, or until
you see the fudge begin to bubble. Remove the cake
from the microwave and let it rest for 30 seconds or
so. Put the cake on the plate, then add a scoop of
vanilla ice cream on top. Pour a coating of Magic Shell
chocolate topping over the ice cream and serve.
• MAKES 8 DESSERTS.
CLAIM JUMPER GARLIC
CHEESE BREAD
Claim Jumper restaurants may only be found in the West,
but the chain can claim national recognition for its delicious
garlic cheese bread and toast. That’s because you can find
boxed loaves of the stuff ready for baking in the frozen food
section of your well-stocked local supermarket. The recipe
is such a simple one though, that it doesn’t take much
longer to make the cheesy goodness from scratch, and you
save a few shekels to boot. Plus, it’s nice to use fresh
bread—your choice of either Texas toast or your favorite
French loaf. (The restaurant serves the Texas toast version,
and the supermarket version is a French loaf.) All you have
to do for a clone is mix together a few basic ingredients,
spread it generously on the bread of your choice, and pop it
in the oven.
SPREAD
½ cup butter (1 stick)
¾ cup shredded Cheddar cheese
2 tablespoons grated Parmesan
cheese
½ teaspoon garlic powder
¼ teaspoon Worcestershire sauce
¼ teaspoon salt
dash ground black pepper
dash paprika
BREAD
12 slices Texas toast (thick-sliced
white bread) or I large
French bread loaf, sliced
through the middle
1. Preheat oven to 400 degrees.
2. Combine all ingredients for the spread in a
small bowl.
3. Smear spread generously on one side of each
slice of Texas toast or on the face of each half of
French bread loaf.
4. Bake for 10 to 12 minutes or until cheese
begins to brown and bubble. Cut each slice of Texas
toast in half before serving, as they do in the
restaurant. For the French bread, slice it as thick as
you like.
• MAKES ABOUT 12 SLICES TOAST OR TWO LARGE
HALVES OF FRENCH BREAD.
CLAIM JUMPER FIREROASTED ARTICHOKE
MENU DESCRIPTION: “Marinated Fire-Roosted Split
Artichokes Served with Tomato Relish and Garlic Mayo.”
I’ve been searching for the chain restaurant with the best
recipe for roasted artichokes, and I think I’ve found it. With
roasted garlic mayonnaise and a delicious tomato relish on
the side, Claim jumper takes the prize. This recipe is for
just one artichoke, but feel free to add another if more than
a couple hungry mouths are waiting. Just be sure to double
up on the tomato relish.
1 large artichoke
8 cups water
3 tablespoons salt
juice of 2 lemons
4 cups ice
ROASTED GARLIC MAYONNAISE
⅓ cup mayonnaise
1 head garlic
I tablespoon olive oil
¼ teaspoon lemon juice
dash salt
TOMATO RELISH
I medium tomato, diced (about
½ cup)
I clove garlic, minced (about
1 teaspoon)
1 teaspoon minced onion
2 basil leaves, minced
½ teaspoon olive oil
½ teaspoon balsamic vinegar
¼ teaspoon salt
dash ground black pepper
I tablespoon butter, melted
1. Prepare the artichoke by cutting about an inch
off the top with a sharp knife. Use scissors to clip the
thorny tips off of all the outer leaves so no one gets
punctured. Cut the artichoke in half down through the
middle. Dissolve 3 tablespoons salt in 8 cups of water
in a large bowl. Add juice of 2 lemons and ice, then
drop the artichoke halves in the cold brine to marinate
for 2 to 3 hours.
2. While artichoke is marinating, roast the head of
garlic by preheating your oven to 325 degrees. Cut the
top off of a head of garlic and cut the bottom (the root
end) so that the garlic will sit flat. Remove most of the
papery skin from the garlic, but leave just enough to
hold the garlic together. Drizzle I tablespoon of olive oil
over the garlic, then place it in a small oven-safe
casserole dish. Cover it with a lid or aluminum foil and
bake for 1 hour or until the garlic begins to brown.
When you can handle the garlic, squeeze about 1
tablespoon of roasted garlic from the head and
combine it with the mayo, lemon juice and salt. Stir
well.
3. While the garlic is roasting prepare the tomato
relish by combining all of the ingredients in a small
bowl. Stir well, then cover and refrigerate until needed.
4. When you are ready to cook the artichoke,
bring some water to a boil in a large saucepan with a
steamer basket. You don’t want the water to touch the
artichoke if you can help it. If you don’t have a steamer
basket, fill the pan with just an inch or so of water
When the water is simmering, add the artichoke
halves, cover, and steam for 40 to 50 minutes or until
the artichoke is tender While artichoke halves are
steaming, preheat your barbecue grill to high heat.
5. When the steamed artichokes are cool enough
to handle, use a spoon to scrape out the fuzzy choke
inside each half. Brush melted butter over the entire
surface of each steamed artichoke half and place
each half, flat-side down on the preheated grill. Grill for
4 to 6 minutes or until dark charring marks appear on
the face of each half. Serve grilled-side-up with tomato
relish (strain the liquid from the relish before serving)
and roasted garlic mayonnaise on the side.
• SERVES 2 AS AN APPETIZER.
CLAIM JUMPER CHEESE
POTATOCAKES
MENU DESCRIPTION: “(Our most popular appetizer.)
Parmesan, Cheddar & Monterey Jack cheeses, cilantro,
onion, fresh dill & mashed potato lightly breaded and fried
crispy topped with fresh cut chives. Served with herbed
ranch salsa.”
This top-seller is a versatile side dish alternative to mashed
potatoes, but also stands well on it’s own as an appetizer.
With cilantro, green onion, and three different cheeses in
there, the flavor is the bomb. When you add a crispy
breading and some herbed ranch salsa drizzled over the
top, it’s clear why this is the most popular appetizer on the
huge Claim Jumper menu. Try dropping a pinch or two of
cayenne pepper into the herbed ranch salsa for an extra
spicy boost.
HERBED RANCH SALSA
½ cup sour cream
¼ cup seeded and diced tomato
(about ½ tomato)
2 tablespoons minced onion
1 tablespoon white vinegar
1 teaspoon fresh minced cilantro
½ teaspoon salt
¼ teaspoon ground black pepper
pinch dried dill weed
POTATOCAKES
4 medium red potatoes, with skin
(about I pound)
¼ cup shredded Cheddar cheese
¼ cup shredded Monterey Jack
cheese
2 tablespoons shredded Parmesan
cheese
I green onion, chopped
½ teaspoon minced fresh cilantro
½ teaspoon salt
¼ teaspoon ground black pepper
¼ teaspoon garlic powder
BREADING
⅔ cup unseasoned breadcrumbs
(Progresso is good)
⅓ cup all-purpose flour
½ teaspoon dried dill weed
I egg, beaten
1 cup milk
2 to 3 cups vegetable shortening
GARNISH
fresh cut chives
1. Boil potatoes for 25 to 30 minutes or until
mostly soft, but still slightly firm. Be careful not to
overcook those boys. Your potatocakes will hold
together best when the potatoes aren’t too mushy.
2. As the potatoes boil make your herbed ranch
salsa by combining all of the ingredients in a small
bowl. Cover and chill this sauce until you need it.
3. Drain the potatoes and mash them with the skin
on in a medium bowl. You don’t need a completely
smooth consistency for the potatoes. There should be
some small chunks of potato in there. Add the
remaining ingredients for the potatocakes and mix
well.
4. Combine breadcrumbs with flour and ½
teaspoon dill in a large bowl. Combine beaten egg
and milk in another large bowl. Measure about ⅓ cup
of the potato mixture into your hands and shape it into
a patty about the size of a hamburger patty. Drop the
potato mixture into the breading mixture, then into the
egg and milk, then back into the breading, being sure
to cover the entire surface of the potatocake with the
breading. Arrange the potatocake on a plate and
repeat the process with the remaining potato mixture.
Cover and chill the potatocakes for about I hour, so
that they’ll be sure to stick together when fried.
5. Heat up the shortening in a skillet over
medium/low heat. You should have about I inch of
shortening in the pan. Fry the potatocakes for 2 to 4
minutes or until golden brown, then drain on a rack or
paper towels.
6. Serve potatocakes with a bit of ranch salsa
poured over the top and sprinkle with fresh cut chives.
• MAKES 6 POTATOCAKES.
CLAIM JUMPER SPICY THAI
SLAW
MENU DESCRIPTION: “Mixed greens, carrots, zucchini,
green onions, peanuts and crunchy cappellini. Tossed in
a sweet and spicy dressing.”
If you dig the sweet, sour, and spicy flavor combinations of
Thai food, you’ll love this tasty twist on coleslaw. Just find
yourself a medium-size head of napa cabbage and a few
other special ingredients and you’re on your way to a
perfect side dish for grilled grub, sandwiches, or as a quick
solo snack. The menu mentions cappellini but we’ll
substitute with soba noodles that can be found in the
supermarket aisle with other Asian foods (the rice vinegar
and chili paste will be over there too). If you can’t find soba
noodles, the thicker chow mein noodles will also work. The
mixed baby greens can often be found in ready-to-serveplastic bags in the produce section. But the real secret
ingredient for great tasting slaw is patience. The flavors of
coleslaw improve after several hours in the cool box, and
letting it sit overnight is even better
DRESSING
⅓ cup rice vinegar
½ cup granulated sugar
1 tablespoon chili paste
(sambal)
4 teaspoons fresh lime juice
2 teaspoons canola oil
½ teaspoon salt
2 ounces soba noodles, cooked
(1½ cups)
10 cups thinly sliced napa
cabbage (approx. I head)
2 cups mixed baby greens
I ½ cups julienned carrot (approx.
I carrot)
1 cup Julienned zucchini, (approx.
½ zucchini)
I cup chopped fresh cilantro
1 cup dry roasted unsalted
peanuts
½ cup sliced almonds
1. Prepare the dressing first by combining the
ingredients in a small bowl or glass measuring cup.
Heat up this mixture in the microwave on high for 30 to
60 seconds or until dressing is hot, but not boiling. This
will help to dissolve the sugar and salt. Stir the
dressing well and set it aside to cool.
2. Cook 2 ounces of soba noodles following the
directions on the package (the directions will say
something like: “Cook noodles for 5 minutes in rapidly
boiling water”). Drain the soba noodles, run cold water
over them and let them sit to cool while you prepare
the other ingredients.
3. Use a large sharp knife to thinly slice a medium
head of napa cabbage. You can also use a mandoline
to slice the cabbage into thin, uniform strips so that you
have 10 cups of sliced cabbage. You can use a
mandoline with a julienne attachment for slicing the
carrots and zucchini as well. Make sure to chop the
julienne slices into bite-size strips.
4. Chop the soba noodles into bite-size pieces,
then combine them with the cabbage, baby greens,
carrot, zucchini, cilantro, and nuts in a large bowl. Toss
everything around real well while adding the dressing,
then cover and chill the bowl for at least 4 hours. If you
have the patience, wait overnight for it, because the
cole slaw will taste even better. Your slaw should last
for up to a week covered in the fridge.
• MAKES APPROXIMATELY 10 CUPS.
CLAIM JUMPER MEATLOAF
MENU DESCRIPTION: “Our own special recipe made
with fresh ground chuck pork, mild onions, green peppers
and more. Served with mashed potatoes, brown gravy and
garlic toast.”
Here’s a great meatloaf recipe to add to your mealtime
repertoire. This luscious loaf combines ground chuck with
ground pork along with breadcrumbs, green onion, garlic,
carrot and green pepper for one of the best flavor
experiences you’ll get from a good old-fashioned American
loaf of meat. Use a perforated nesting meatloaf pan if
you’ve got one so that the fat drains out into the pan below.
If you don’t have one of those a regular loaf pan will still
work fine. But use a large one. This recipe makes a pretty
big beefy slab of goodness.
2 teaspoons vegetable oil
I green onion, minced
2 cloves garlic, minced
2 tablespoons minced green bell
pepper
2 tablespoons grated carrot
2 eggs, beaten
1 cup milk
2 teaspoons salt
½ teaspoon ground black pepper
½ teaspoon garlic powder
½ teaspoon onion powder
I ½ pounds ground chuck
¾ pound ground pork
I cup breadcrumbs (such as
Progresso)
½ cup all-purpose flour
¼ cup ketchup plus on additional
¼ cup ketchup (for top)
1. Preheat oven to 350 degrees.
2. Saute green onion, garlic, green pepper, and
carrot in vegetable oil over medium heat for a couple
minutes.
3. Combine beaten eggs with milk, salt, black
pepper, garlic powder, and onion powder in a medium
bowl.
4. In a large bowl, mix breadcrumbs and flour into
ground chuck and ground pork with your hands. Add
egg and milk mixture, sautéed veggies, ¼ cup ketchup
and mix it up using your hands. Get in there and squish
it all around for a while. Enjoy yourself.
5. Press the mixture into a meatloaf pan (the kind
of pan with drainage holes in the bottom) or a large
loaf pan. Bake for 30 minutes, then spread ¼ cup of
ketchup over the top of the meatloaf and bake it for
another hour. Let it sit for a bit after you remove it from
the oven before you slice it to serve.
• SERVES 8.
DENNY’S FABULOUS FRENCH
TOAST
MENU DESCRIPTION: “Three thick slices grilled golden
brown and sprinkled with powdered sugar.”
This popular breakfast choice at America’s number one
diner chain takes center stage on the cover of the menu.
Three slices of thick bread are dipped in a slightly sweet
egg batter, browned to perfection and served up with a
dusting of powdered sugar, some soft butter and thick
maple syrup on the side. Find the thick-sliced Texas toast
bread in your bakery, or use any white bread that’s sliced
around ¾-inch thick. This recipe will make enough for two
servings of three slices each, and it’s the perfect recipe for
waking up a special someone with breakfast in bed. (Many
points will be earned.)
4 eggs
cup whole milk
cup all-purpose flour
cup granulated sugar
½ teaspoon vanilla extract
¼ teaspoon salt
⅛ teaspoon ground cinnamon
6 slices thick bread (such as Texas
toast)
3 tablespoons butter
GARNISH
powdered sugar
butter
ON THE SIDE
maple syrup
1. . Whisk together eggs, milk, flour, sugar, vanilla,
salt, and cinnamon in a large bowl.
2. Heat a large cast-iron or nonstick skillet over
medium/low heat. When the pan is hot, add I
tablespoon of butter If butter smokes, your pan is too
hot, turn down the heat.
3. Drop each bread slice into the batter for about
30 seconds per side. Let some of the batter drip off
then drop the bread into the buttered pan. Cook each
battered bread slice for 1½ to 2 minutes per side or
until golden brown. Add more butter to the pan as
needed to cook all the French toast.
4. Serve three slices of French toast per plate.
Dust each serving with a little powdered sugar (tap it
through a strainer), and include some maple syrup on
the side.
• MAKES 2 SERVINGS.
DENNY’S BBQ CHICKEN
SANDWICH
MENU DESCRIPTION: “A seasoned, grilled chicken
breast topped with Cheddar cheese and a stack of thin
cnsp onion rings on a sesame seed bun with lettuce,
tomato and a sweet hickory spread, Served with a side of
BBQ sauce.”
With 1,527 restaurants across the country, Denny’s is on
top as America’s largest full-service family restaurant chain.
Sure, the chain’s famous for its Grand Slam Breakfasts, but
Denny’s menu is filled with tasty choices for grub way past
breakfast time. One such item is this chicken sandwich built
with grilled chicken breast, lettuce, tomato, Cheddar
cheese, crispy onion rings, and a secret sweet hickory
spread. That hickory spread is one of the ingredients that
makes this sandwich special. So the clone is here, and it
requires an ingredient called hickory salt. You can find this
blend of salt and hickory flavoring in the spice section from
Spice Islands under the name “Old Hickory Smoked Salt.” If
you can’t find that stuff, just substitute with ⅛ teaspoon salt
and ⅛ teaspoon liquid hickory smoke. For even more
flavor, Denny’s serves the sandwich with a small dish of
barbecue sauce that tastes remarkably similar to Bull’s-Eye
Original, so that’s what we’ll use. While homemade crunchy
onion rings are the way to go for a true clone, you can
certainly shortcut this step by using the canned French’s
French Fried Onions found in practically every
supermarket.
SWEET HICKORY SPREAD
3 tablespoons butter
1 cup minced onion
2 teaspoons all-purpose flour
¼ cup molasses
¼ cup water
2 tablespoon white vinegar
⅛ teaspoon hickory salt
CRUNCHY ONION RINGS (SEE
TIDBITS)
1 cup thinly sliced onion,
separated into rings
I cup milk
I cup all-purpose flour
1 teaspoon salt
½ teaspoon ground black pepper
2 cups canola oil
2 skinless chicken breast fillets
vegetable oil
salt
ground black pepper
2 sesame seed hamburger buns
2 tablespoons melted butter
2 leaves green leaf lettuce
4 tomato slices
2 slices Cheddar cheese
ON THE SIDE
Bull’s-Eye Original Barbecue Sauce
1. Prepare sweet hickory spread by melting 3
tablespoons butter over medium/low heat. Add I cup
minced onion and saute for 7 to 10 minutes or until the
onions start to brown. Add 2 teaspoons flour and stir
until the flour is mixed in. Let this cook for a minute or
two, then add molasses, water, vinegar, and hickory
salt. Simmer sauce for 3 to 4 minutes or until thick.
Remove from heat and cover
2. Make the crunchy onion rings by pouring milk
into a large bowl. Combine flour, salt, and black
pepper in another bowl. Dip onions in flour mixture
first, then into milk and back into flour. Arrange all of
the coated rings to a plate to rest while you heat up 2
cups canola oil in a large saucepan over medium/low
heat (you can also use a deep fryer for this step, just
use the amount of oil required by the fryer
manufacturer and set the temperature to 375
degrees). Test the oil by dropping in a pinch of flour. It
should bubble. When the oil is hot, fry a handful of
onion rings at a time in the oil until golden brown (3 to
5 minutes). Drain them on paper towels. (See Tidbits.)
3. To cook the chicken, preheat a skillet or griddle
pan over medium heat. Pound your chicken with a
kitchen mallet so that it has a uniform thickness of
about ½ inch (it will plump a bit as you cook it), then
trim any excess meat away that would hang off the
sandwich. Rub each chicken breast with some canola
oil, then sprinkle each breast with salt and a pinch of
pepper Grill chicken breast fillets for 4 to 6 minutes per
side until done.
4. As your chicken cooks, spread a little melted
butter on the faces of your two hamburger buns and
toast the faces of the buns on another skillet or griddle
set to medium heat until light brown.
5. Build each sandwich by first spreading some of
the sweet hickory spread on the face of the bottom
bun.
6. Tear a leaf of green leaf lettuce to fit on the
bottom bun.
7. Arrange two tomato slices on the lettuce on
each sandwich.
8. Stack the grilled chicken breast on the tomato
slices.
9. Place a slice of Cheddar on the chicken breast
on each sandwich.
10. Stack a handful of crunchy onion rings on the
sandwich, then top the sandwich off with the crown
bun. Serve with a small bowl of barbecue sauce on the
side.
• MAKES 2 SANDWICHES.
TIDBITS
You can skip step #2 by using the canned French’s French
Fried Onions. A small can will be plenty.
DENNY’S CLUB SANDWICH
MENU DESCRIPTION: “Thinly sliced turkey, crisp
bacon, lettuce and tomato on toasted white bread.”
Get out your toothpicks, because you’ll have a hard time
keeping the slices of this triple-decker sandwich from
falling apart when slicing the only way you slice a true club
sandwich: from corner to corner. This trusty, old-fashioned
club sandwich recipe seems like it’s been around forever,
and yet this sandwich is still one of the top choices from
Denny’s for lunch. One day you’ll find yourself with some
white bread, sliced turkey, bacon, lettuce, tomato and
mayo, and you’ll realize you’re just a Top Secret Recipe
away from the secret stacking order to making the perfect
club sandwich.
3 slices toasted white bread
4½ teaspoons mayonnaise
3 ounces sliced turkey breast
(deli-sliced)
2 iceberg lettuce leaves
2 to 3 slices cooked bacon
2 tomato slices
1. . Spread about 1½ teaspoons mayonnaise on
one side of each toasted white bread slice.
2. Arrange the turkey breast on one slice of toast.
3. Tear or fold one iceberg lettuce leaf to fit on the
sliced turkey.
4. Stack on another slice of toast with the mayo
side facing up.
5. Break 2 or 3 slices of cooked bacon to fit on
top of the second slice of toast.
6. Tear or fold the second lettuce leaf to fit on top
of bacon.
7. Arrange the two tomato slices to fit on the
lettuce.
8. Top off the sandwich with the last piece of toast
turned with the mayo-coated side facing down.
9. Pierce the sandwich with four toothpicks
between the corners, so that when the sandwich is
sliced twice from corner to corner with a serrated knife,
the toothpicks wind up in the center of each of the four
slices.
• MAKES I SANDWICH.
HARD ROCK CAFE
HOMEMADE CHICKEN
NOODLE SOUP
Give this simple soup clone a shot and I guarantee you’ll
never again want to eat chicken soup from a can. The
recipe is a breeze since you use pre-cut chicken fillets—
rather than cutting up a whole chicken—and you don’t have
to create a stock from scratch. Swanson sells a 32-ounce
carton of chicken broth that’s the perfect amount (4 cups)
for this recipe.
I pound skinless chicken breast
fillets
I pound skinless chicken thigh
fillets
2 tablespoons vegetable oil
I tablespoon butter
I cup diced onion (about ½ of a
medium onion)
I cup diced carrot (about
2 medium carrots, peeled)
½ cup diced celery (about
1 stalk)
4 cups chicken broth
4 cups water
I teaspoon salt
I teaspoon freshly ground black
pepper
I teaspoon minced fresh parsley
3 cups wide egg noodles (dry)
GARNISH
minced fresh parsley
1. Heat 2 tablespoons vegetable oil in a large
skillet over medium heat. Saute chicken breasts and
thighs for 10 to 15 minutes or until lightly browned on
both sides and cooked through. Remove chicken from
the skillet to a cutting board to cool a bit.
2. Reduce heat to medium/low, add butter to
skillet then toss in onion, carrot and celery. Slowly cook
the veggies (sweat them) for 10 minutes, stirring often,
or until carrots are beginning to soften.
3. Chop the chicken, then dump all of it, plus the
veggies, chicken broth, water, salt, pepper and I
teaspoon parsley into a large soup pot. Bring soup to
a boil then reduce heat and simmer for 10 minutes.
Add noodles and simmer for an additional 15 minutes
or until noodles are soft. Serve with a pinch of minced
fresh parsley sprinkled on top.
• MAKES 8 SERVINGS.
HARD ROCK CAFE BAR-BQUE BEANS
If you like baked beans you’ll go nuts over this clone recipe
from the world’s first theme restaurant chain. It’s really easy
to make too, since you just stir the ingredients into a
covered casserole dish, and bake for an hour and a half.
This makes the dish handy if transporting to another
location for a party or potluck, since you can fill the dish,
cover it, then pop it into the oven once you arrive. The only
element that may give you pause is the pulled pork from the
recipe that follows (on page 164) for Hard Rock Cafe Pig
Sandwich. It’s an effortless addition if you’ve got some of
that pork on hand. If not, just leave that ingredient out. Or
you could add a couple tablespoons crumbled cooked
bacon. Either way the beans will still come out great as a
nosh-worthy side dish or solo snack.
2 15-ounce cans pinto beans
(with liquid)
2 tablespoons water
2 teaspoons cornstarch
½ cup ketchup
cup white vinegar
¼ cup brown sugar
2 tablespoons diced onion
I teaspoon prepared mustard
½ teaspoon chili powder
¼ teaspoon salt
¼ teaspoon coarse ground black
pepper
½ cup shredded pork (from recipe
on page 164)
1. Preheat oven to 350 degrees.
2. Pour entire contents of the can of pinto beans
into a casserole dish (with a lid).
3. Dissolve the cornstarch in a small bowl with the
2 tablespoons of water Add this solution to the beans
and stir.
4. Add the remaining ingredients to the dish, stir
well and cover
5. Bake for 90 minutes or until the sauce thickens.
Stir every 30 minutes. After removing the beans from
the oven, let the beans cool for 5 to 10 minutes before
serving.
• SERVES 6 TO 8 AS A SIDE DISH.
HARD ROCK CAFE
COLESLAW
Smashing a guitar and hanging it on the wall will not give
you the true Hard Rock Cafe experience unless you then
eat a sandwich with this coleslaw served on the side. You
have to be patient, though, since it’s not something you can
enjoy right away. Good coleslaw needs a little time to chill
in the cool box—24 hours at least. The cabbage needs a
chance to get it together with the other ingredients before
rocking out at the gig inside your mouth.
1 cups mayonnaise
3 tablespoons white vinegar
2 tablespoons plus 2 teaspoons
granulated sugar
2 tablespoons milk
dash salt
8 cups chopped cabbage
(I head)
½ cup shredded carrot
1. Combine all ingredients except the cabbage
and carrots in a large bowl and blend until smooth with
an electric mixer.
2. Add cabbage and carrots and toss well.
3. Cover and chill overnight in the refrigerator. The
flavors fully develop after 24 to 48 hours.
• SERVES 6 TO 8 AS A SIDE DISH.
HARD ROCK CAFE PIG
SANDWICH
MENU DESCRIPTION: “Select pork, hickory-smoked
then hand-pulled, so it’s tender and juicy. ‘An old
Southern delicacy’ with our famous vinegar-based bar-bque sauce. Served with fries, ranch beans and
homemade coleslaw.”
Take a big honkin’ bite out of one of these and you’ll soon
know why it’s the Hard Rock Cafe’s most popular
sandwich. The pork is hickory smoked for 10 hours, but
since we’re impatient hungry people here, we’ll cut that
cooking time down to under 4 hours using a covered grill
and carefully arranged charcoal. Just sprinkle wet hickory
chips over the hot charcoal arranged around the inside
edge of a grill (such as a round Weber), and let the
smoking begin. You can certainly use an actual smoker if
you’ve got one, and go the full 10 hours with this puppy. But
while you’re still waiting for your sandwiches, the rest of us
will have already dragged our full, round bellies over to the
couch for a nap. By the way, you should try to make your
marinated cabbage a day ahead of time so it has time to
soak up the flavors.
MARINATED CABBAGE
2 tablespoons white vinegar
I tablespoon granulated sugar
4 cups thinly sliced cabbage
4 cups hickory smoking chips
RUB
2 tablespoons kosher salt
2 teaspoons cracked black pepper
1 teaspoon paprika
½ teaspoon onion powder
½ teaspoon ground sage
½ teaspoon dried thyme
¼ teaspoon ground cayenne
pepper
I boneless pork loin roast (3 to 4
pounds)
vegetable oil
SAUCE
2 15-ounce cans tomato puree
1 cup apple cider vinegar
¾ cup brown sugar
2 tablespoons vegetable oil
½ teaspoon onion powder
½ teaspoon liquid hickory smoke
I clove garlic, minced
¼ teaspoon salt
¼ teaspoon coarse ground black
pepper
8 kaiser rolls
1. Make the marinated cabbage at least one day
prior to building your sandwiches. Like coleslaw, this
garnish needs some time to develop in the fridge.
Combine the vinegar and sugar in a medium bowl.
Add the cabbage, stir, cover the bowl and store it in
the refrigerator until you are ready to make the
sandwiches.
2. Put the wood chips in a bowl and cover with
water. Let the wood soak for at least I hour. Light the
charcoal after it has been arranged around the inside
edge of your grill. You don’t want coals directly under
your pork. When the coals are hot, drain the water from
the wood chips and sprinkle the chips over the top of
the coals. You should now have smoke.
3. Combine the ingredients for the rub in a small
bowl and mix well.
4. Rub some vegetable oil over the surface of the
pork roast. Sprinkle the rub over the entire surface of
the roast.
5. Place the roast in the center of your grill and put
the lid on. Let the pork cook for 3 to 4 hours or until the
internal temperature of the roast reaches 170 degrees.
6. As the pork cooks, make the sauce by
combining the ingredients in a medium saucepan over
medium/low heat. Let the sauce simmer for 15 to 20
minutes, then cover and remove from heat. Set this
aside until your pork is ready.
7. When the pork is done, remove it from the grill
and let it sit to cool for 15 to 20 minutes or until you can
handle it. Now you want to tear the meat along the
grain, making bite-size strips of shredded pork.
8. Put the shredded pork into a large saucepan
over medium heat. Add 2 cups of the sauce to the pan
and stir Keep the rest of the sauce for later to serve on
the side. Cook the pork for 15 minutes or until it is
heated through.
9. Grill the faces of the rolls and stack about I cup
of pork onto the bottom half of each roll. Add a
rounded tablespoon of marinated cabbage on top of
the pork, add a tablespoon or so of extra sauce on top
of that, then cap off each sandwich with the top half of
the roll. Serve with clones for the Hard Rock’s coleslaw
(page 163) and baked beans (page 160) on the side,
if desired.
• MAKES 8 SANDWICHES.
HOUSTON’S CHICAGO-STYLE
SPINACH DIP
These days just about every casual dining chain has its
version of this appetizer: spinach and artichoke hearts
mixed with cheese and spices, served up hot with chips or
crackers for dipping. Making the rounds over the years, I’ve
tried many of them, and most formulas are nearly identical.
That is, except for this one. Houston’s makes their spinach
dip special by using a blend of sour cream, Monterey Jack
cheese
and
Parmigiano-Reggiano—the
ultimate
Parmesan cheese. Parmigiano-Reggiano is born in Italy
and is usually aged nearly twice as long as other, more
common Parmesan cheeses. That ingredient makes the
big difference in this dip. So hunt down some of this special
Parm at your well-stocked market or gourmet store, and
you’ll find out why Houston’s spinach dip has been one of
the most requested recipe clones at TSR Central.
One 12-ounce box frozen
chopped spinach, thawed
½ cup chopped canned artichoke
hearts (not marinated)
1 tablespoon chopped white onion
¼ cup heavy cream
¼ cup sour cream
1 ¼ cups shredded Monterey Jack
cheese
⅓ cup grated ParmigianoReggiano cheese
¼ teaspoon garlic salt
ON THE SIDE
Corn tortilla chips
1. Mix together the spinach, chopped artichoke
hearts, and onion in a microwave-safe glass or
ceramic bowl. Cover bowl with plastic wrap, then cut a
small slit in the center of the wrap so that the steam
can sneak out. Microwave on high for 4 minutes. Keep
spinach covered while you prepare the cream sauce.
2. Combine cream, sour cream, Jack cheese,
grated Parmigiano-Reggiano cheese, and garlic salt
in a medium saucepan over medium/low heat. Heat
this up slowly for about 10 minutes or until the sauce
reaches a simmer and thickens. Just don’t let the
mixture boil.
3. Add the spinach mixture to the sauce and
continue to heat over medium/low. Cook for about 10
more minutes or until mixture reaches a thick dip-like
consistency. Pour into a bowl and serve with tortilla
chips for dipping (or crackers, bread, whatever you
want).
• MAKES 2 CUPS.
HOUSTON’S HONEY-LIME
VINAIGRETTE
This 38-unit casual dining chain may be small compared to
many of the other chains whose food I’ve cloned, but
Houston’s has a huge following of loyal customers
throughout the country. I know this because for many years
the restaurant sat at the top of my “most requested clones”
list. I was finally ready to take on the challenge, but since
there are no Houston’s where I live in Las Vegas, it
required a road trip—this time to Orange County,
California. A couple plane rides, a bit of driving, some
walking and a stumble or two later, I had a cooler full of
Houston’s goodies secured safely back at the underground
lab. After a few hours of chopping and mixing this simple
sweet-and-sour salad slather from Houston’s was cracked.
cup vegetable oil
¼ cup rice vinegar
¼ cup honey
2 tablespoons Grey Poupon Dijon
mustard
I tablespoon chopped fresh
cilantro
2½ teaspoons fresh lime juice
1 teaspoon sesame oil
1 ½ teaspoons minced red bell
pepper
I teaspoon minced onion
¼ teaspoon freshly ground black
pepper
pinch salt
1. Combine all ingredients in a small glass or
ceramic bowl. Stir well.
2. Heat dressing in the microwave on high for I to
1½ minutes or until mixture begins to bubble. Remove
dressing from microwave and whisk for I minute. This
will emulsify the dressing and it should begin to thicken
as it cools.
3. Cover and chill for 2 hours before serving.
• MAKES I CUP.
HOUSTON’S COLESLAW
It’s not your typical coleslaw. The sweet pickle relish and
green onion is a nice touch, and all that parsley really sets
this dish apart from any other coleslaw I’ve tried. If you like
coleslaw and you’ve never had this version at the
restaurant, I encourage you to give this one a go.
¾ cup mayonnaise
3 tablespoons white vinegar
2 tablespoons granulated sugar
⅛ teaspoon salt
8 cups chopped green cabbage
(I head)
½ cup chopped fresh parsley
½ cup chopped green onion
(green part only)
2 tablespoons sweet pickle relish
½ teaspoon celery seed
1. Whisk together mayonnaise, vinegar, sugar,
and salt in a medium bowl.
2. Combine cabbage, parsley, green onion, and
relish in a large bowl.
3. Pour the dressing over the cabbage and mix
well. Add celery seed and mix, then cover the bowl and
chill for at least 4 hours before munching out. Chilling
the slaw overnight is even better
• MAKES 8 SERVINGS.
IHOP CINN-A-STACKS
Put away the maple syrup. Next time you whip up pancakes
or French toast, try something new with this clone that
makes your stacks taste like freshly baked cinnamon rolls.
Spread the cinnamon sauce on each pancake or on each
slice of French toast as you stack ’em up. Then drizzle the
delicious cream cheese icing over the top. As for the
pancakes, we’ve got some great clone recipes on pages
175 (IHOP Country Griddle Cakes) and 180 (IHOP Harvest
Grain ’N Nut Pancakes). And there’s a simple clone for
Denny’s Fabulous French Toast on page 148. This
mouthwatering new product from America’s favorite
pancake chain is a “limited time only” offering, but a
fabulous home clone is yours whenever you crave it.
CINNAMON SAUCE
¼ cup butter (salted)
¾ cup dark brown sugar
3 tablespoons half-and-half
I tablespoon ground cinnamon
⅛ teaspoon salt
⅛ teaspoon ground cloves
I tablespoon all-purpose flour
CREAM CHEESE ICING
4 ounces cream cheese, softened
I ¼ cups powdered sugar
1 teaspoon lemon juice
¼ teaspoon vanilla extract
GARNISH
whipped cream
1. Melt butter in a small saucepan over medium
heat. Add brown sugar, 2 tablespoons half-and-half,
cinnamon, salt and cloves and cook while stirring
constantly until mixture comes to a simmer.
Immediately remove sauce from the heat, add
remaining tablespoon of half-and-half and stir in the
flour.
2. Combine ingredients for cream cheese icing in
a medium bowl. Beat on low speed with an electric
mixer until smooth. Spoon icing into a squirt bottle.
3. To assemble your dish, spread about a
tablespoon of cinnamon sauce on top of each
pancake, or on each slice of French toast as you stack
them. A typical serving at the restaurant is two
pancakes or two slices of French toast. Drizzle cream
cheese icing over the top, and finish off your stack with
a dollop of whipped cream.
• MAKES ENOUGH FOR AT LEAST 4 SERVINGS.
IHOP COUNTRY GRIDDLE
CAKES
MENU DESCRIPTION: “Delicious blend of buttermilk
and real Cream of Wheat.”
This nationwide chain, which is known for its big bargain
breakfasts, serves an impressive number of non-breakfast
items as well. In 1997, IHOP dished out over 6 million
pounds of french fries and over half a million gallons of soft
drinks. But it’s the Country Griddle Cakes on the breakfast
menu that inspired this Top Secret Recipe. The unique
flavor and texture of this clone comes from the Cream of
Wheat in the batter. Now you can have your pancakes, and
eat your cereal too.
nonstick spray
1 ¼ cups all-purpose flour
1 ½ cups buttermilk
cup instant
Cream of Wheat (dry)
1 egg
cup granulated sugar
1 teaspoon baking powder
1 teaspoon baking soda
¼ cup vegetable oil
½ teaspoon salt
1. Preheat a skillet over medium heat. Apply
nonstick spray.
2. Combine all ingredients in a large bowl with a
mixer set on medium speed. Mix until smooth, but
don’t over mix.
3. Pour the batter by ⅓-cup portions into the hot
pan and cook pancakes for 1 to 3 minutes per side or
until brown. Repeat with remaining batter
• MAKES 8 TO 10 PANCAKES.
IHOP COUNTRY OMELETTE
Sure, IHOP is famous for pancakes, but the joint makes a
pretty killer omelette when put to the task. What makes this
three-egg creation so cool is the top secret folding method.
For all of IHOP’s omelettes, the beaten eggs are mixed
with the appropriate chunky ingredients, and the whole
thing is poured out thin on a giant griddle. When the eggs
have firmed up, two sides are folded over, the filling is
positioned, and the omelette is rolled over once, twice,
three times so it ends up looking like a burrito, sort of. Now
we can execute the same egg origami at home with a 12inch electric skillet, or a 12-inch stovetop griddle pan. You
can find easy-to-cook hash brown potatoes in bags in the
freezer section.
3 eggs
⅛ teaspoon salt
2 tablespoons diced cooked ham
2 tablespoons diced white onion
½ tablespoon butter
3 tablespoons cooked shredded
hash brown potatoes
¼ cup shredded Cheddar cheese
GARNISH
2 tablespoons sour cream
1. Heat a 12-inch electric skillet to 275 degrees
(or heat a 12-inch griddle pan over medium low heat).
Preheat oven to 300 degrees.
2. Add salt to eggs and beat for about 30
seconds. Stir in diced cooked ham and white onion.
3. Melt ½ tablespoon of butter in hot griddle or
pan. When butter melts pour eggs into the pan and
swirl the pan around to coat the bottom evenly. Use a
spatula to evenly distribute ham and onion.
4. Cook eggs for 4 to 6 minutes or until top of
omelette is mostly firm. Fold over 1-inch of top and
bottom of the omelette. Sprinkle 2 tablespoons
shredded cheddar cheese down omelette at about
one-third of the way from the left side of the omelette.
Arrange about 3 tablespoons of cooked hash brown
potatoes on top of the cheese. Starting at the left end,
use a spatula to roll the eggs over the filling
ingredients. Continue rolling the omelette two more
times. Use a spatula to lift the omelette onto an oven
safe plate. Sprinkle 2 tablespoons of shredded
Cheddar over the top of the omelette and place the
plate in the 300 degree oven for I to 2 minutes or until
the cheese has melted. If you’re making more than one
omelette, set your oven to 200 degrees to keep readyto-eat omelettes on hold.
5. Just before serving, spoon 2 tablespoons of
sour cream onto the middle of the omelette.
• MAKES 1 SERVING.
IHOP HARVEST GRAIN ’N NUT
PANCAKES
MENU DESCRIPTION: “Hearty grains, wholesome oats,
almonds and English walnuts.”
Wholesome grains and nuts get it on in this clone for the
signature pancakes from the country’s largest pancake
chain. The whole wheat flour and oats add more flavor,
while the nuts pitch in for a crunch in every bite. Take a
break from gummy, bland traditional pancakes. Make a
breakfast that pacifies your pancake urge and leaves you
feeling peppy.
¾ cup Quaker oats
¾ cup whole wheat flour
⅓ cup all-purpose flour
2 teaspoons baking soda
I teaspoon baking powder
½ teaspoon salt
1 ¼ cups buttermilk
⅓ cup whole milk
¼ cup vegetable oil
2 eggs
¼ cup granulated sugar
3 tablespoons finely chopped
blanched almonds
3 tablespoons finely chopped
walnuts
1. Lightly oil a skillet or griddle and preheat it to
medium heat.
2. Grind the oats in a blender or food processor
until fine, like flour.
3. Combine oat flour, whole wheat flour, allpurpose flour, baking soda, baking powder and salt in
a medium bowl.
4. In another bowl combine buttermilk, milk, oil,
eggs and granulated sugar with an electric mixer until
smooth. Combine dry ingredients with wet ingredients,
add nuts and mix well by hand.
5. Ladle ⅓ cup of the batter onto the hot skillet
and cook the pancakes for I to 3 minutes per side or
until brown.
• MAKES 12 PANCAKES.
TIDBITS
You can cover and freeze these after they cool. To reheat,
just put a stack in the microwave on high for 1 to 2 minutes.
IHOP PUMPKIN PANCAKES
During the holiday season this particular pancake flavor
sells like ... well, you know. It’s one of 16 varieties of
pancakes served at this national casual diner chain. You
can make your own version of these delicious flapjacks with
a little canned pumpkin, some spices and traditional
buttermilk pancake ingredients. Get out the mixer, fire up
the stove, track down the syrup.
nonstick spray
2 eggs
1 ¼ cups buttermilk
4 tablespoons butter, melted
3 tablespoons canned pumpkin
¼ cup granulated sugar
¼ teaspoon salt
I ¼ cups all-purpose flour
½ teaspoon baking powder
½ teaspoon baking soda
¼ teaspoon ground cinnamon
¼ teaspoon ground allspice
1. Preheat a skillet over medium heat. Coat pan
with oil cooking spray.
2. Combine eggs, buttermilk, butter, pumpkin,
sugar, and salt in a large bowl. Use an electric mixer to
blend ingredients.
3. Combine remaining ingredients in a small bowl.
Add dry ingredients to wet ingredients and blend with
mixer on medium speed until smooth.
4. Pour the batter in cup portions into the hot
pan.
5. When the batter stops bubbling and edges
begin to harden, flip the pancakes. They should be
dark brown. This will take from 1 to 3 minutes.
6. Flip the pancakes and cook other side for the
same amount of time, until brown.
• MAKES 8 TO 10 PANCAKES.
ISLANDS CHINA COAST
SALAD DRESSING
This 30-store Hawaiian-themed chain of restaurants is
known for its handmade burger buns, specialty sandwiches
and taco platters with names like Shorebird, Pelican,
Sandpiper, Baja, and Northshore. Some people, though,
go to the Islands just for the China Coast salad. It’s a huge
bowl filled with sliced chicken breast, lettuce, red cabbage,
julienned carrots, fried noodles, sesame seeds, mandarin
orange wedges and chives, and then tossed with this top
secret dressing. Many diners think the dressing’s so good
they ask for extra and discreetly smuggle it home. No more
smuggling required. Now, with this simple formula, you can
make your own clone at home and use it on any of your
favorite bowls of green.
½ cup mayonnaise
5 tablespoons rice vinegar
2 tablespoons granulated sugar
2 tablespoons sesame oil
I tablespoon soy sauce
¼ teaspoon garlic powder
Combine all ingredients in a medium bowl and mix with an
electric mixer until blended and sugar is dissolved. Chill.
• MAKES 1 CUP
ISLANDS ISLAND FRIES
MENU DESCRIPTION: “Our famous fries are fresh cut
daily from whole potatoes with the skins left on.”
Not only can I show you the best way to make french fries at
home in this clone of Islands’ top-selling version, but I’m
also supplying you with a super simple way to make the
same type of salt blend that Islands uses to make those
fries so dang addicting. As with any good french fry recipe,
you’ll need to slice your potatoes into strips that are all
equal thickness. That means you need a mandoline, or
similar slicing device, that makes ¼-inch slices. Once
you’ve got your potatoes cut, you must rinse and soak them
in water to expel the excess starch. The frying comes in two
stages: A quick blanching stage, and the final frying to put a
crispy coating on the suckers. Islands uses a combination
of peanut and vegetable oils in their fryers, so you simply
combine the two in your home fryer. The whole process is
not that tough once you get going, and certainly worth the
effort if hungry mouths are waiting for the perfect
homemade french fries. However, if you want to simplify the
process because your hungry mouths aren’t of the patient
sort, you could certainly buy frozen french fries, cook ’em up
following the instructions on the bag, and then sprinkle on
this garlic/onion salt blend for a quick-and-easy kitchen
clone.
GARLICIONION SALT
I tablespoon garlic salt
I teaspoon onion salt
¼ teaspoon ground black pepper
FRIES
2 medium russet potatoes
3 to 5 cups vegetable oil (fryer
filled halfway)
3 to 5 cups peanut oil (fryer filled
rest of the way)
1. Combine garlic salt, onion salt, and pepper in a
small bowl.
2. Slice potatoes with a slicer or mandoline set to
¼-inch thick slices. Hold potato at a slight angle when
slicing to produce fries that are about 2 to 3 inches in
length.
3. Drop sliced potatoes into a bowl of water to
rinse away starch. Pour out water, then fill bowl again.
Pour out that water, then fill bowl again with water and
add some ice. Let potatoes sit for I hour in the ice
water.
4. Heat oils in fryer to 350 degrees.
5. When the potatoes are done soaking, drain
them, then pour them out onto a clean dish towel. Blot
fries dry.
6. When fries are dry drop about half into the hot
oil and blanch for 2 to 3 minutes (fries should be soft in
the center). Remove the fries onto a towel to cool.
When all the fries are blanched, let them sit to cool for
about 30 minutes. When fries are cool, fry them for the
second time for 5 to 7 minutes or until fries are golden
and crispy.
7. Pour fries onto a rack or towels to drain. Toss
fries with several pinches of the garlic/onion salt and
serve hot.
• SERVES 4.
ISLANDS TORTILLA SOUP
The entire process for making this soup, which Islands
serves in “bottomless bowls,” takes as long as 3 hours, but
don’t let that discourage you. Most of that time is spent
waiting for the chicken to roast (up to 90 minutes—although
you can save time by using a precooked chicken, see
Tidbits) and letting the soup simmer (1 hour). The actual
work involved is minimal—most of your time is spent
chopping the vegetable ingredients. This recipe produces
soup with an awesome flavor and texture since you’ll be
making fresh chicken stock from the carcass of the roasted
chicken. As for the fried tortilla strip garnish that tops the
soup, you can go the hard way or the easy way on that step.
The hard way makes the very best clone and it’s really not
that hard: Simply slice corn tortillas into strips, fry the strips
real quick, then toss the fried strips with a custom
seasoning blend. The easy way is to grab a bag of the new
habanero-flavored Doritos, which happen to be similar in
spiciness to the strips used at the restaurant. Simply
crumble a few of these chips over the top of your bowl of
soup, and dig in.
4 to 5 pound whole roasting
chicken
2 tablespoons butter, melted
16 cups (1 gallon) water
1 medium Spanish onion, diced
(2 cups)
1 medium red bell pepper, diced
(I cup)
2 medium carrots, diced
(1 cup)
2 Anaheim peppers, diced
(¾ cup)
2 cloves garlic, minced
(I tablespoon)
4 6-inch yellow corn tortillas, diced
(I ½ cups)
juice of 2 large limes
(3 tablespoons)
I tablespoon salt
1 teaspoon chili powder
1 teaspoon ground cayenne
pepper
2 tablespoons minced fresh
cilantro
TORTILLA STRIPS
2 cups vegetable oil
6 6-inch yellow corn tortillas
1 teaspoon chili powder
I teaspoon paprika
¾ teaspoon ground cayenne
pepper
½ teaspoon salt
GARNISH
1 cup shredded Monterey Jack
cheese
2 avocados, diced
1. Preheat oven to 375 degrees.
2. Rub the chicken with melted butter and sprinkle
with salt and pepper Place your clucker breast-side-up
on a rack in a roasting pan. Roast chicken for 70 to 90
minutes or until the temperature in the center of the
breast is 160 degrees. Remove chicken from the oven
to cool, but don’t get rid of the drippings in the roasting
pan.
3. When chicken has cooled enough to handle,
tear the meat off the bone. Throw away the skin, but
keep all the bones. Add the bones to 16 cups of water
in a soup pot. Bring to a boil, then reduce heat to a
rapid simmer and find something to keep you busy for
30 minutes. This is a good time to finish chopping the
veggies.
4. Spoon a tablespoon of fat from the roasting
pan into a large skillet over medium heat. When the
pan is hot, saute onion, peppers, carrot and garlic for
10 minutes over medium/low heat.
5. After 30 to 45 minutes of simmering, remove
chicken bones from the water, and add the sautéed
vegetables, plus the chicken meat, lime juice, salt, chili
powder and cayenne pepper. Simmer soup for I hour,
adding the cilantro to the pot about 30 minutes in.
6. As your soup simmers, heat up 2 cups of
vegetable oil in a medium saucepan. Make your spicy
tortilla strips by cutting a pile of 6 small corn tortillas in
half. Slice the stacks into ¼-inch strips. Test the oil by
dropping in one strip. If it bubbles rapidly, it’s hot
enough. Wait 4 minutes, then take out the sample and
make sure it’s crunchy. If your oil is ready, fry half of the
strips at a time for 4 to 5 minutes or until they all come
out crispy. Drain on paper towels. Combine the
seasonings for the strips (chili powder, paprika,
cayenne and salt) in a small bowl. Toss the tortilla
strips with the seasoning in a large bowl until the strips
are coated.
7. Serve each bowl of soup topped with a couple
tablespoons of shredded Jack cheese, a couple
tablespoons of diced avocado (one-quarter of an
avocado), and handful of tortilla strips on top.
• MAKES 8 SERVINGS (1½ CUPS EACH).
TIDBITS
Home-roasting a chicken is easy, but if you want to save a
little time you can just as well use one of the precooked
whole chickens usually found in the deli section of your
market. If you go that route, just pick up the recipe from step
#3.
ISLANDS YAKI SOFT TACOS
MENU DESCRIPTION: “Three flour tortillas stuffed
wlmarinated chicken, teriyaki sauce, Jack cheese,
pineapple, lettuce, tomatoes & scallions.”
If you love the sweet taste of teriyaki-marinated chicken,
you’ll dig the Yaki Soft Tacos at this Hawaiian-themed
burger chain. Sure, Islands is famous for its burgers, but
many also go for the several choices of soft tacos—and the
one I’ve cloned here is the top-seller. After testing all
popular brands of teriyaki sauce on the market, I found that
none have the heavy ginger notes of the chain’s version, so
you’ll want to make the sauce from scratch. Which is really
no big deal, since it’s an easy process and you’ll end up
with a teriyaki sauce/marinade that’s better than any store
version, and you can use it in all sorts of recipes. When you
buy the canned pineapple, go for the 20-ounce can or get
two 8-ounces cans. You’ll need that much since you’ll use
the pineapple chunks in both the sauce and on the tacos
(and you’ll even use some of the juice from the can in your
teriyaki sauce). When chopping the chunks, take the time to
slice each chunk into quarters (lengthwise, with the grain)
so you get thin pineapple pieces that are the exact size of
the stuff they use in the restaurant. Or you can find smaller
pineapple chunks in some stores (see Tidbits).
TERIYAKI SAUCE
1¾ cups water
1 tablespoon cornstarch
¾ cup light brown sugar
½ cup soy sauce
½ cup canned pineapple chunks
(chunks sliced into quarters)
¼ cup juice from can of pineapple
chunks
½ teaspoon garlic powder
¼ teaspoon onion powder
2 teaspoons minced fresh ginger
12 chicken tenderloins
12 7-inch flour tortillas
2 cups shredded Monterey Jock
cheese
4 cups iceberg lettuce, chopped
very thin or shredded
1½ cups canned pineapple
chunks, (chunks sliced into
quarters)
1½ cups diced tomatoes (about
2 medium tomatoes)
½ cup chopped green onion
(green part only)
1. Make the teriyaki sauce by whisking cornstarch
into the water in a medium saucepan. Add remaining
ingredients, then bring mixture to a boil. Reduce heat
and simmer for 7 to 10 minutes or until thicker. Let
sauce cool before you use it for marinating.
2. When the sauce is cool, measure out I cup of
sauce and set it aside. Use the remaining sauce to
pour over chicken tenders in a medium bowl, Cover
chicken and let it marinate for at least 6 hours.
Overnight is even better.
3. When chicken has marinated, preheat a large
skillet over medium/low heat. Wipe the pan with a little
oil. Remove the chicken from the marinade (and toss
out the marinade) and saute chicken in the pan for 8 to
10 or until chicken is cooked through and browned on
both sides. Slice each chicken filet into 3 or 4 pieces
and spoon all the chicken into a medium bowl.
Microwave the leftover I cup of teriyaki sauce in the
oven for 30 to 60 seconds or until it’s hot. Pour the
sauce over the sliced chicken in the bowl.
4. When you’re ready to build the tacos, preheat
another skillet over medium heat. Toss a tortilla into
the pan for a minute, then flip it over and add 2 to 3
tablespoons of shredded cheese across the center of
the tortilla. Let the tortilla sit in the pan for about a
minute or so (until the cheese starts melting) then
remove the tortilla and immediately spoon the
equivalent of one chicken tender into the tortilla (3 or 4
chunks of chicken). Spoon about 1½ tablespoons
teriyaki sauce from the cooked chicken bowl over the
chicken in each taco.
5. Arrange about cup shredded lettuce over the
chicken in each taco. Follow that up with 1 to 2
tablespoons of pineapple chunks, 1 to 2 tablespoons
diced tomato, and a couple pinches of chopped green
onion. Repeat process for remaining tacos. The
restaurant serves 3 tacos with each order.
• MAKES 12 TACOS (4 SERVINGS).
TIDBITS
If you can find them, Del Monte offers canned pineapple
that’s pre-cut into the perfect size for this recipe. And I love
the name: They’re called “Tidbits.”
JOE’S CRAB SHACK BLUE
CRAB DIP
The number one appetizer on Joe’s menu is called Blue
Crab Dip, but you don’t need blue crab to clone it. You don’t
even need to use fresh crab, I used some delicious lump
crabmeat from Phillips Seafood that comes in 16-ounce
cans (you’ll find it at Costco, Sam’s Club, Wal-Mart, and
Von’s) and the dip came out amazing. You could also use
crabmeat that comes in 6-ounce cans found at practically
every supermarket—you’ll need two of them. Just be sure
to get the kind that includes leg meat, and don’t forget to
drain off the liquid before you toss it in.
one 8-ounce pkg. cream cheese,
softened
2 cups crabmeat (canned is fine)
¼ cup diced green onion
I tablespoon minced mild red chili
pepper
1 tablespoon mild green chili
pepper (Anaheim)
¼ teaspoon salt
¼ teaspoon ground white pepper
2 tablespoons shredded Parmesan
cheese
GARNISH
paprika
1 teaspoon minced fresh parsley
1. Preheat oven to broil.
2. Combine cream cheese with crab, green onion,
chili peppers, salt and white pepper in a medium bowl.
Stir well to combine.
3. Spread mixture into the bottom of an oven-safe
dish. Use a wide dish for this so that the dip is only
about an inch deep in the bottom.
4. Sprinkle Parmesan cheese over the surface of
the dip.
5. Broil for 3 to 4 minutes or until cheese on top
begins to brown.
6. Sprinkle paprika over the dip, followed by fresh
minced parsley. Serve with tortilla chips or crackers for
dipping.
• MAKES APPROX. 2 CUPS (SERVES 4 TO 6 AS AN
APPETIZER).
JOE’S CRAB SHACK GARLIC
KING CRAB LEGS
These legs from the king of crabs come already cooked at
your supermarket (usually previously frozen), so we won’t
have to boil them long to finish them off. But we do want to
give them a long enough bath to get the flavor of garlic into
the meat. To aid in this process we need to poke several
holes in the shell along each leg so that the garlic water can
seep in. Use the handle end of a nutcracker (the kind that is
often served with crab to help crack the shells), or the back
end of a wooden spoon to make those holes. This step
also makes removing the shells easier when eating the
crab. And you don’t have to worry about peeling the garlic
cloves. Just pound ‘em flat with a mallet or foil-wrapped
brick and toss ’em into the water.
I cup vegetable oil
2 large heads garlic
1 tablespoon dried parsley flakes
2 pounds king crab legs
ON THE SIDE
melted butter
1. Fill a large pot halfway with water. Add oil and
bring to a boil. Crush all of the unpeeled garlic cloves
with a mallet. When the water and oil comes to a boil
add the garlic and parsley flakes and boil for 15
minutes.
2. Cut the crab legs in half so that they will fit into
the pot. Use the handle end of a thin wooden spoon or
nutcracker to poke several holes in the shell of each
crab leg. This will allow the flavor of the garlic to seep
into the crab. Lower the crab into the pot and boil for 5
to 6 minutes.
3. Remove crab legs and drain. Arrange one
pound of crab on each plate. Serve with melted butter
on the side.
• SERVES 2.
LONE STAR STEAKHOUSE
LETTUCE WEDGE SALAD
Why waste time chopping up the lettuce when you can just
hack a head into four chunks, dress it up and serve? This
unique presentation is not only easy to make, but is also a
deliciously different way to serve your next salad. The
creamy bleu cheese dressing is a breeze to craft from
scratch and tastes much better than anything you’ll buy in a
store. Add a bit of extra crumbled bleu over the top, some
freshly diced tomatoes, and you’re well on your way to a
fancy-pants side salad that’ll surely impress.
BLEU CHEESE DRESSING
¾ cup mayonnaise
½ cup buttermilk
¼ cup crumbled bleu cheese
½ teaspoon granulated sugar
¼ teaspoon ground black pepper
¼ teaspoon garlic powder
⅛ teaspoon onion powder
⅛ teaspoon salt
I head iceberg lettuce
I cup crumbled bleu cheese
1 cup diced tomato (1 large
tomato)
1. Use an electric mixer to combine all ingredients
for bleu cheese dressing in a medium bowl.
2. Slice a head of iceberg lettuce into quarters
through the stem end. Cut the stem off of the wedges
and arrange each one on a plate.
3. Spoon about ¼ cup of bleu cheese dressing
over each lettuce wedge.
4. Sprinkle ¼ cup of crumbled bleu cheese over
the dressing.
5. Sprinkle ¼ cup of diced tomato over the top
and serve.
• MAKES 4 SERVINGS.
LONE STAR STEAKHOUSE
BAKED SWEET POTATO
Sweet potatoes are not related to the more common russet
potatoes and are often confused with yams in the grocery
store and on menus (the yam is actually starchier and less
flavorful). just be sure you’re buying sweet potatoes when
you get to the produce section—even the produce stockers
get mixed up! Although these puppies are not really
potatoes, the baking times are the same. And when you
spoon on some butter and sprinkle cinnamon /sugar over
the top, you’ve got a treat that tastes more like dessert than
a versatile side dish.
4 sweet potatoes
vegetable oil
3 tablespoons granulated sugar
1 ½ teaspoons ground cinnamon
½ cup whipped butter
1. Preheat oven to 350 degrees. Rub a little oil on
the skin of the sweet potato and bake it for 45 to 75
minutes (bigger sweet potatoes take longer to cook).
When they are done, the outside will have darkened
and the inside will be soft. You may see liquid from the
sweet potato oozing out when it’s close to done.
2. As potatoes bake, combine sugar and
cinnamon in a small bowl.
3. To serve, slice a sweet potato down the center.
Add two tablespoons of whipped butter, and sprinkle
some cinnamon/ sugar over the top.
• MAKES 4 SERVINGS.
LONE STAR STEAKHOUSE
LONE STAR CHILI
MENU DESCRIPTION: “Meaty and spicy, served piping-
hot with chopped onions, shredded cheddar, and a whole
jalapeno.”
This chain makes a tasty chili that warms the bones on a
nippy day. This clone recipe is easy to make, low in fat, and
delicious. And if it’s super brisk outside, you might want to
add an additional tablespoon of diced jalapeno to the pot
to aggressively stoke those internal flames.
1 pound ground beef
1 diced onion
1 tablespoon diced fresh jalapeno
pepper
1 15-ounce can kidney beans with
liquid
1 14.5-ounce can peeled diced
tomatoes
I 8-ounce can tomato sauce
1 cup water
1 tablespoon apple cider vinegar
I teaspoon salt
1 teaspoon chili powder
¼ teaspoon garlic powder
1 bay leaf
GARNISH
grated Cheddar cheese
diced onion
canned whole jalapeno
chili peppers
1. Brown ground beef in a large saucepan over
medium heat. Drain fat.
2. Add onion and pepper and saute for about two
minutes.
3. Add remaining ingredients and simmer for 1
hour, stirring occasionally. Serve one cup in a bowl
with the optional cheese, diced onion and whole
jalapeno garnish on top.
• MAKES 4 SERVINGS.
MARGARITAVILLE CRAB,
SHRIMP AND MUSHROOM DIP
MENU DESCRIPTION: “Our signature appetizer ...
jumbo lump blue crab meat, gulf shrimp and mushrooms,
simmered in a Cajun cream sauce and served with
toasted garlic bread. We make it here so you know it’s
good!”
This dips rocks, and I’m not the only one who thinks so.
According to the Margaritaville menu, it’s the theme chain’s
signature appetizer And what’s not to like: Delicious blue
crab, little bay shrimp and sliced mushrooms are all
swimming in a Cajun-style cream sauce, topped with
melted Cheddar and Jack cheeses, and broiled until the
cheese melts ... oh, hold me back. Serve up your clone with
slices of freshly toasted buttery garlic bread and you’ve got
a great party snack. The restaurant version is a tiny little
serving that’s barely enough for two, so I’ve supersized this
clone recipe to make enough dip to satisfy the Brady Bunch
—if Alice sits out.
DIP
2 tablespoons butter
¼ cup minced celery
¼ cup minced white onion
1 teaspoon crushed red pepper
flakes
2 cups heavy cream
1 ½ cups sliced white mushrooms
I cup blue crab
I cup bay shrimp, cooked
(smallest shrimp)
¼ teaspoon salt
1 cup shredded Cheddar
cheese
1 cup shredded Monterey Jack
cheese
2 green onions, sliced
BREAD
2 loaves Italian bread
½ cup butter, melted (1 stick)
½ teaspoon dried parsley flakes
¼ teaspoon garlic powder
1. Melt 2 tablespoons of butter over low heat in a
large saucepan. Add celery, white onion and red
pepper flakes and simmer slowly (sweat) the
ingredients over low heat for 20 minutes. You don’t
want the ingredients to turn brown; rather, you want
them to cook slowly until the celery softens and the
onion begins to turn translucent.
2. Add cream, mushrooms, crab, shrimp and salt
to the pan. Turn the heat up a bit until the liquid begins
to bubble, then bring the heat back down and let the
mixture simmer for 20 minutes or until it reduces to
about ½ the volume and becomes thick. Watch the
saucepan carefully to make sure the mixture doesn’t
bubble over. In the meantime, crank your oven up to
broil.
3. Prepare the bread by cutting the loaves into ½inch thick slices. Combine the dried parsley flakes and
garlic powder with a stick of melted butter in a small
bowl. Brush some of this garlic butter on each side of
each bread slice and toast the bread under the hot
broiler for 1 to 2 minutes per side or until the bread is
toasted to a light brown.
4. When the dip has thickened pour it into an 8x8inch casserole dish. Combine the shredded Cheddar
and Jack cheese and sprinkle the cheese mixture over
the dip. Broil the dip for 3 to 4 minutes or until the
cheese is melted. Sprinkle sliced green onions over
the top and serve hot with the garlic toast on the side,
and some spoons or forks for spreading the dip onto
the toast.
• MAKES 6 TO 8 SERVINGS.
MARGARITAVILLE JAMAICA
MISTAICA WINGS
MENU DESCRIPTION: “Come back to Jamaica! Our
wings tossed in habanero-honey wing sauce with
cucumber sticks and house-made mango ranch dipping
sauce.”
Oh, wings. You gotta love those flavorful little nonfunctioning chicken parts. When they’re good, they’re real
good. And these little guys from Jimmy Buffett’s chain of
island-themed restaurants rock my tiny inflatable boat. The
preparation is no big secret: fry the wings, add the sauce.
But it’s that habanero honey sauce recipe that makes these
suckers so addicting. Add to that an easy-to-make mango
ranch dipping sauce and you’re off on a nonstop cruise to
chicken wing paradise. The restaurant serving size is for 10
wings, but these Top Secret sauces will be enough for 30
wings, and you’ll need it! If I have one word of caution it’s to
be very careful mincing that habanero. You may even want
to use rubber gloves to handle it. This is the hottest pepper
in the world, folks, so if you touch the minced pieces with
your bare fingers, and then proceed to touch a crucial and
sensitive body part, you’ll discover one big “mistaica” real
fast.
HABANERO HONEY SAUCE
1 cup water
I 6-ounce can tomato paste
½ cup Worcestershire sauce
¼ cup honey
¼ cup molasses
1 teaspoon minced habanero
pepper (1 pepper)
1 teaspoon crushed red pepper
flakes
1 teaspoon ground black pepper
½ teaspoon onion powder
½ teaspoon chili powder
½ teaspoon dried minced onion
½ teaspoon dried parsley
¼ teaspoon garlic powder
⅛ teaspoon liquid hickory smoke
⅓ cup white vinegar
MANGO RANCH DIPPING SAUCE
1 8-ounce bottle Hidden Valley
Ranch dressing
¼ cup mango juice (Kern’s is
good)
½ jolapeno, minced
6 to 10 cups vegetable oil (as
required by fryer)
10 chicken wings
salt
pepper
ON THE SIDE
cucumber sticks
1. Prepare habanero honey sauce by combining
all ingredients except the vinegar in a large saucepan.
Bring mixture to a boil, then reduce heat and simmer
sauce for 1 hour uncovered, or until sauce reduces to
about half of its original volume and thickens. Remove
sauce from heat, mix in ⅓ cup white vinegar and cover.
2. Make the mango ranch dipping sauce by
combining the ingredients in a small bowl. Cover and
chill sauce until needed.
3. In your deep fryer, bring 6 to 10 cups of
vegetable oil (or whatever is required by your fryer) to
375 degrees.
4. Drop in the wings and fry for 8 to 12 minutes or
until the wings become golden brown. Drain wings for
a few minutes on paper towels. Sprinkle with salt and
pepper.
5. Put wings in a large metal or glass bowl, add ½
cup of the habanero honey sauce and toss the wings
until they are all coated. Serve with dipping sauce on
the side and cucumber sticks, if desired.
• MAKES 10 WINGS (PLUS SAUCE FOR 20 MORE).
MARGARITAVILLE KEY LIME
PIE
MENU DESCRIPTION: “A true taste of the tropics.
National award-winning recipe.”
Many of the key lime pie recipes circulating, including the
recipe found on bottles of key lime juice, have a glaring
error: They don’t make enough filling to fit properly into a
standard 9-inch graham crust pie shell. That’s probably
because those recipes are designed around one 14-ounce
can of sweetened condensed milk. But come on, if we’re
going to make a beautifully thick key lime pie like the one
served at Jimmy Buffett’s Margaritaville restaurants we
need to use something like 1½ cans of sweetened
condensed milk, or, more accurately, two cups of the stuff.
The clone recipe for the pie is a simple one that’s for sure,
with only four ingredients including the pie shell. But don’t
stop there. I’m also including a special way to make mango
sauce by simply reducing a couple cans of Kern’s mango
juice. And there’s a raspberry sauce recipe here that’s
made easily with frozen raspberries. These two sauces are
used to jazz up the plate at the restaurant and are certainly
optional for your clone version, even though I’ve made them
as easy as, um, you know.
2 cups sweetened condensed milk
6 egg yolks
cup key lime juice
1 graham cracker pie shell
MANGO SAUCE
2 11.5-ounce cans Kern’s mango juice
RASPBERRY SAUCE
I ½ cups water
2 cups frozen raspberries
½ cup granulated sugar
GARNISH
canned whipped cream 4 thin lime slices, halved
1. Preheat oven to 325 degrees.
2. Use an electric mixer on medium speed to
combine sweetened condensed milk, egg yolks, and
lime juice. Mix just until ingredients are combined.
3. Pour filling into graham pie shell and bake on
middle rack for 20 minutes or until filling jiggles only
slightly when shaken. Cool. Cover pie and chill in
refrigerator for a couple hours before serving.
4. Make mango sauce by bringing two cans of
Kern’s mango juice to a boil in a medium saucepan
over medium heat. Reduce heat and simmer for 30
minutes or until sauce thickens. Cover and chill.
5. Make raspberry sauce by combining water and
raspberries in a medium saucepan over medium heat.
Bring to a boil then reduce heat and simmer
raspberries for 10 minutes. Use a potato masher or a
large spoon to crush the raspberries as they boil.
Strain raspberry seeds from water, then put the liquid
back into the saucepan and add the sugar. Bring
mixture back to a boil, reduce heat and simmer for 15
to 20 minutes or until the sauce thickens. Cover and
cool sauce until you are ready to serve the pie.
6. Prepare dessert by dribbling some mango
sauce and some raspberry sauce onto a small plate
(you can use spoons or squirt bottles for this). Place a
slice of pie onto the sauce, add a dollop of whipped
cream to the top of the pie slice with one half of a thin
lime slice on top of the whipped cream.
• MAKES 8 SERVINGS,
MARIE CALLENDER’S LEMON
CREAM CHEESE PIE
MENU DESCRIPTION: “Our melt-in-your-mouth cream
cheese pie with a tangy lemon topping.”
Here’s a great double-layered pie with lemon topping
covering a creamy cheesecake filling. It’s two great pies in
one dessert. This creation has been huge seller for Marie
Callender’s, and I’ve had nothing but raves from anyone
who’s tried it—including a couple high fives and one
affectionate rabbit punch. Make the crust from scratch like
the pros using the recipe here, or take the easy route with a
premade graham cracker crust found in the baking aisle.
Either way it’s pie heaven.
CRUST
1 cup graham cracker crumbs
¼ cup butter, melted (½ stick)
2 tablespoons granulated sugar
CREAM CHEESE FILLING
one 8-ounce pkg. cream cheese,
softened
¼ cup granulated sugar
½ teaspoon vanilla extract
I egg
LEMON FILLING
½ cup granulated sugar
2 tablespoons cornstarch
dash salt
1 cup water
2 egg yolks
2 tablespoons fresh lemon juice
I tablespoon butter
1. Preheat oven to 350 degrees.
2. Make the crust by combining the graham
cracker crumbs with melted butter and sugar in a small
bowl. Press the crust mixture into an 8-inch pie pan.
3. Prepare the cream cheese filling by mixing
cream cheese with ¼ cup sugar, vanilla and an egg
using an electric mixer. Mix well until smooth. Pour
cream cheese filling into graham cracker crust and
bake for 30 to 35 minutes or until center is cooked. A
knife stuck in the middle of the filling should come out
mostly clean.
4. As the pie cools, make the lemon filling by
combining ½ cup sugar with cornstarch, salt and water
in a small saucepan. Set mixture over low heat and
bring to a simmer, stirring often.
5. Whisk in egg yolks, then add lemon juice and
butter When mixture simmers again immediately
remove it from the heat.
6. Pour the lemon filling over the cream cheese
filling, and let the pie cool. When cool, chill pie in the
refrigerator for several hours before serving. Slice into
6 pieces to serve restaurant-size portions.
• MAKES 6 SERVINGS.
MARIE CALLENDER’S
PUMPKIN PIE
MENU DESCRIPTION: “Our famous pumpkin pie has
just the right amount of spice.”
The vittles from Marie Callender’s have made an
impression beyond the chain’s West Coast roots with
home-style packaged entrees and side dishes available in
frozen food sections of supermarkets across the country.
But pie making is where the chain excels. A fresh slice of a
Marie Callender’s pie is as close as you’ll get to
homemade heaven this side of grandma’s porch window.
This clone is an obvious selection, since the restaurant
sells more pumpkin pies than any other, even in non-holiday
months. This clone is a perfect opportunity to improve on
icky pumpkin pie recipes (like those found on cans of
canned pumpkin, for example) in many ways. For one thing,
there’s no need to use canned evaporated milk when fresh
whole milk and cream is so much better. Also, I’ve added a
little brown sugar in there to contribute hints of molasses
that go so well with the pumpkin and spices. And three
eggs, versus two found in many recipes, will add to the
richness and firmness of the cooked filling. After mixing the
filling we’ll let it sit for a bit while waiting for the oven to
preheat. This way it can come closer to room temperature,
and the pie filling will bake more evenly. And then, of
course, you’ve got the crust. Marie Callender’s pie crust is
a treat, and the clone recipe included here—which uses a
chilled combination of butter and shortening—results in the
perfect mix of flavor and flakiness.
¼ cup butter, softened (½ stick)
¼ cup vegetable shortening
1 ¼ cups all-purpose flour
1 tablespoon granulated sugar
¼ teaspoon salt
1 egg yolk
2 tablespoons ice water
FILLING
3 eggs
1 15-ounce can pumpkin
½ cup granulated sugar
¼ cup packed dark brown sugar
I teaspoon ground cinnamon
½ teaspoon salt
½ teaspoon ground ginger
¼ teaspoon ground cloves
¼ teaspoon ground nutmeg
¾ cup whole milk
¼ cup heavy cream
1. Prepare the crust by beating together the butter
and shortening until smooth and creamy. Chill until firm.
2. Sift together the flour, sugar and salt in a
medium bowl.
3. Using a pastry knife or fork, cut the chilled
butter and shortening into the dry ingredients until the
flour is mixed in and it has a crumbly texture. Mix egg
yolk and ice water into the dough with a spoon then
form it into a ball with your hands. Don’t work the
dough too much or your crust will lose its flakiness.
Flakey crust is good crust. Cover dough ball with
plastic wrap to sit until the filling is ready.
4. Prepare filling by beating eggs. Add pumpkin
and stir well to combine.
5. Combine sugars, cinnamon, salt, ginger,
cloves, and nutmeg in a small bowl. Stir spice mixture
into the pumpkin. Mix in milk and cream.
6. Preheat oven to 425 degrees. While oven
preheats let filling sit so that it can come closer to
room temperature.
7. Unwrap pie dough, then roll it flat on a floured
surface and line a 9-inch pie dish.
8. When oven is hot pour filling into pie shell, and
bake for 15 minutes. Reduce heat to 350 degrees and
bake for another 50 to 60 minutes or until a knife stuck
in the middle comes out clean.
9. Cool pie, then chill. Slice chilled pie into 6
pieces to serve restaurant-size portions. Whipped
cream on top is optional, but highly recommended.
• MAKES 6 SERVINGS.
MIMI’S CAFE CARROT RAISIN
BREAD
It’s dark, moist and delicious, and it comes in a
breadbasket to your table at this French-themed West
Coast casual restaurant chain. Now the tastiest carrot
bread ever can be yours to create at home with a couple of
grated carrots, molasses, raisins and chopped walnuts.
You’ll be baking this one in the oven for at least an hour.
That should be enough time to warm up the house and
send amazing smells wafting through every room. Line the
carpet with newspaper to catch the family drool.
1½ cups all-purpose flour
1 teaspoon cinnamon
2 teaspoons baking powder
¼ teaspoon baking soda
¾ teaspoon salt
I cup vegetable oil
1 cup plus 2 tablespoons
granulated sugar
3 eggs
3 tablespoons molasses
I teaspoon vanilla extract
1 cup shredded carrot
¼ cup crushed pineapple
1 cup raisins
¾ cup chopped walnuts
1. Preheat oven to 350 degrees.
2. Combine flour, cinnamon, baking powder,
baking soda, and salt in a large mixing bowl.
3. In another bowl, combine oil, sugar, eggs,
molasses, and vanilla with an electric mixer. Add
shredded carrot and pineapple and mix. Add raisins
and walnuts and mix well by hand.
4. Pour flour mixture into the other ingredients and
stir until combined.
5. Pour batter into two greased 8-inch loaf pans.
Bake for 60 minutes, or until done.
• MAKES 2 LOAVES.
MIMI’S CAFE CORN CHOWDER
Arthur Simms was in the restaurant business for many
years before he opened the first Mimi’s Cafe with his son,
Tom, in Anaheim, California in 1978. Back in the Golden
Age of Hollywood Arthur was the guy running things in the
MGM Studios commissary where, on any given day, Jean
Harlow, Clark Gable and Judy Garland might stop in for a
grazing. Arthur named his New Orleans-influenced, bistrostyle restaurant after a woman he met and fell in love with in
Paris during the war. Today it’s Tom who runs the show at
this growing 93-unit chain where regulars return for the
staple favorites including the French Market Onion Soup
(on page 230), Carrot Raisin Bread (on page 225) and the
delicious Corn Chowder, cloned here.
2 tablespoons butter
2 large celery stalks, chopped
(about ½ cups)
½ cup diced white onion
4 cups water
1 russet potato, peeled and cut
into ½-inch cubes (about
2 cups)
1 bay leaf
1 15-ounce can cream-style corn
(with liquid)
1 15-ounce can whole kernel corn
(with liquid)
2 teaspoons granulated sugar
½ teaspoon salt
⅛ teaspoon ground white pepper
½ cup all-purpose flour
1 ½ cups half-and-half
GARNISH
minced fresh parsley
1. Sauté celery and onion in the butter for 5
minutes in a large saucepan or stock pot. Don’t brown.
2. Add 4 cups of water, chopped potato, and bay
leaf. Bring to a boil, then reduce heat and simmer for
15 minutes, stirring occasionally.
3. Add creamed corn (with liquid), canned whole
corn (with liquid), sugar, salt, and white pepper and
simmer for 20 minutes, stirring occasionally.
4. Combine flour with half-and-half and stir until
smooth. Add this mixture to the soup and simmer for
an additional 10 to 15 minutes, until thick.
5. Serve by spooning a I-cup portion into a small
bowl and sprinkle a little minced fresh parsley on top.
• MAKES 2 QUARTS (EIGHT I -CUP SERVINGS).
MIMI’S CAFE FRENCH
MARKET ONION SOUP
You might not think that a tough World War II flying ace
would open a restaurant called “Mimi’s,” but that’s exactly
what happened in the 1970s. Arthur J. Simms flew spy
missions over France during the war and helped liberate a
small French town near Versailles. After the war, Arthur ran
the commissary at MGM studios in Hollywood, stuffing the
bellies of big-time celebs like Judy Garland, Clark Gable
and Mickey Rooney. He later joined his son, Tom, in
several restaurant ventures including one called “French
Quarter” in West Hollywood. This was the prototype for the
French-themed Mimi’s Cafe. In 1978, the first Mimi’s
opened in Anaheim, California. Today there are over 90
Mimi’s in the chain with a new one opening every other
week; all of them serving this amazing French onion soup
that’s topped with not one, not two ... three different
cheeses. Oui!
¼ cup butter
3 medium white onions, sliced
3 14-ounce cans beef broth
(Swanson is best)
1 teaspoon salt
¼ teaspoon garlic powder
3 tablespoons Kraft grated
Parmesan cheese
6 to 12 slices French bread
(baguette)
6 slices Swiss cheese
6 slices mozzarella cheese
6 tablespoons shredded Parmesan
cheese
1. Saute onions in melted butter in a large soup
pot or saucepan for 15 to 20 minutes or until onions
begin to brown and turn transparent.
2. Add beef broth, salt and garlic powder to
onions. Bring mixture to a boil, then reduce heat and
simmer uncovered for I hour. Add the grated
Parmesan cheese in the last 10 minutes of cooking
the soup.
3. When soup is done, preheat oven to 350
degrees and toast the French bread slices for about
10 to 12 minutes or until they begin to brown. When
bread is done, set oven to broil.
4. Build each serving of soup by spooning about 1
cup of soup into an oven-safe bowl. Float a toasted
slice or two of bread on top of the soup, then add a
slice of Swiss cheese on top of that. Place a slice of
mozzarella on next and sprinkle I tablespoon of
shredded Parmesan cheese over the top of the other
cheeses.
5. Place the soup bowl on a baking sheet and
broil for 5 to 6 minutes or until the cheese begins to
brown.
• MAKES 6 SERVINGS.
OLIVE GARDEN LIMONCELLO
LEMONADE
Need a simple cocktail for a hot day when the thought of
lemonade makes your mouth water? Try this one. You start
crafting this new signature blender drink by making lemon
syrup from scratch from lemon juice, sugar and water.
Track down some limoncello—an Italian lemon liqueur—
and Smirnoff citrus vodka (or your favorite citrus vodka).
Now you’re just a press of the blender button away from
being refreshed.
¼ cup hot water
¼ cup granulated sugar
4 teaspoons lemon juice
1 ounce Smirnoff citrus vodka
1 ounce limoncello liqueur
4 ounces lemonade (Minute Maid
or Country Time)
I to 2 cups ice
GARNISH
slice of lemon
1. Make lemon syrup by combining hot water,
sugar and lemon juice.
2. When syrup is cool, make drink by combining
¾ ounce of lemon syrup with citrus vodka, limoncello,
lemonade and ice in a blender. Blend on high speed
until ice is crushed. Start with one cup of ice and add
additional ice, if needed, to make drink slushy. Serve
in a 16-ounce glass with a straw and a thin slice of
lemon on the rim of the glass.
• MAKES I DRINK.
OLIVE GARDEN BRUSCHETTA
MENU DESCRIPTION: “A traditional topping of roma
tomatoes, fresh basil and extra-virgin olive oil. Served
with freshly toasted ciabatta bread.”
Olive Garden’s recently redesigned bruschetta recipe
improves on the Italian chain’s previous version. The
tomato salad includes a little sun-dried tomato and
balsamic vinegar, and it is now served in a separate dish
rather than on the bread. Now the bread doesn’t get soggy.
The tomatoes are finely diced before mixing with the other
ingredients, and the ciabatta bread is sprinkled with a little
grated Parmesan cheese before it’s toasted. Try to find a
nice, chewy loaf of Italian bread for this dish—get the best
bread in the store. The better your bread, the better your
bruschetta.
3 firm roma tomatoes, finely
diced (about 1 ½ cups)
1 tablespoon minced fresh basil
2 teaspoons minced garlic
2 teaspoons diced marinated
sun-dried tomatoes
2 teaspoons extra virgin olive oil
I teaspoon balsamic vinegar
¼ teaspoon salt
9 to 10 slices ciabatta bread (or
Italian bread)
1 tablespoon grated Parmesan
cheese
pinch dried parsley flakes
1. Toss diced tomatoes with basil, garlic, sundried tomatoes, olive oil, vinegar, and salt in a medium
bowl. Cover and chill 1 hour.
2. When you are ready to serve the dish, preheat
oven to 450 degrees.
3. Combine Parmesan cheese with dried parsley
in a small bowl. Arrange the bread slices on a baking
sheet. Sprinkle a couple pinches of the Parmesan
cheese mixture over each bread slice. Bake for 5
minutes or until the bread starts to crisp.
4. Pour tomato mixture into a serving dish (strain
off the liquid), and serve it up alongside the toasted
bread slices.
• SERVES 4.
OLIVE GARDEN SICILIAN
SCAMPI
MENU DESCRIPTION: “Large shrimp sautéed in extra-
virgin olive oil with white wine, garlic and lemon.”
Once you have the onion, garlic and parsley all chopped up,
this clone of a top appetizer pick at the Garden takes only a
few minutes to assemble. Cooks at Olive Garden speed up
the process by using what they call “scampi butter”—chilled
blocks of butter with all the spices, garlic, and onions
already in it—so that each serving is prepared quickly and
consistently without any tedious measuring. When the
shrimp is done, each one is placed on the inside end of five
toasted Italian bread slices which have been arranged on
the plate in a spoke-like fashion (you can also use a French
baguette with the slices cut at an extreme angle). One
shrimp is also placed in the middle of the plate, and the
delicious sauce is poured over the top. I’ve included diced
roma tomato here as an optional garnish, since one Olive
Garden used it, but another location on the other side of
town did not. As for the shrimp, use medium-size (they’re
called 31/40) that are already peeled, but with the tails left
on. Then all you have to do to butterfly them is make a deep
cut (don’t go all the way through) on the outside of the
shrimp where the vein was. As the shrimp cooks, they will
curl and spread open.
2 tablespoons butter
I tablespoon olive oil
I teaspoon minced white onion
I teaspoon minced garlic
I tablespoon Chablis wine
6 fresh medium shrimp, butterfly
cut with tails on
I teaspoon lemon juice
½ teaspoon minced fresh parsley
pinch salt
pinch ground black pepper
pinch crushed red pepper flakes
1 tablespoon heavy cream
1 tablespoon sliced canned black
olives
5 slices Italian bread, toasted
OPTIONAL GARNISH
½ diced roma tomato freshly grated Parmesan
cheese
1. Toast the sliced Italian bread on a sheet pan in
your oven set to broil, or in a toaster oven. The bread
should toast for 1 to 2 minutes on each side, or until
light brown. Arrange the bread slices in a spoke-like
fashion on a serving plate then dance over to the stove
to whip up the scampi.
2. Heat a small skillet over medium heat. Add 2
tablespoons butter and 1 tablespoon olive oil to the
pan.
3. When the butter has melted add the minced
onion and garlic. Make sure your heat isn’t up too high
or the garlic may burn, and turn brown and bitter. When
the onion and garlic have sautéed for just a few
seconds, add the wine to the pan.
4. Immediately add the shrimp to the pan.
5. After you add the shrimp, quickly add the lemon
juice, parsley, salt, black pepper, and crushed red
pepper and cook shrimp for 1 to 2 minutes, tossing
occasionally.
6. After a minute or two, when the shrimp is done,
add the cream and olives. Cook for 15 seconds or so,
then use tongs to place one shrimp on the end of each
bread slice (the ends that are in the center of the
plate), and place one shrimp in the center of the plate
(not on bread). Pour the sauce from the pan over the
shrimp and serve the dish with a diced roma tomato
sprinkled over the top and freshly grated Parmesan
cheese, if that’s your thing.
• MAKES AN APPETIZER FOR TWO.
OLIVE GARDEN STUFFED
MUSHROOMS
MENU DESCRIPTION: “Parmesan, Romano and
mozzarella cheese, clams and herb breadcrumbs baked
in mushroom caps.”
Breadcrumbs, clams and three types of cheese are baked
into white mushroom caps in this clone of a top pick from
Olive Garden’s appetizer menu. Simply mix all the stuffing
ingredients together in a bowl, fill the mushroom caps,
sprinkle on some minced red bell pepper, cover the
mushrooms with a blanket of mozzarella cheese slices, and
bake. After 15 minutes you’ll have a great appetizer or hors
d’oeuvre for 4 to 6 people—that’s twice the serving size of
the dish from the restaurant.
⅓ cup Progresso breadcrumbs
(herb flavor)
¼ cup canned minced clams
(drain liquid)
I tablespoon shredded Parmesan
cheese
1 tablespoon shredded Romano
cheese
½ teaspoon minced garlic
3 tablespoons chicken broth
12 medium white button
mushrooms with stems
removed
3 tablespoons butter, melted
2 tablespoons minced red bell
pepper
2 to 3 slices mozzarella cheese
½ teaspoon minced fresh parsley
1. Preheat oven to 450 degrees.
2. Combine breadcrumbs, clams, Parmesan
cheese, Romano cheese, and garlic in a medium
bowl. Use your hands to mix everything together Add
the chicken broth I tablespoon at a time and stir after
each addition with a spoon. Keep the stuffing fluffy by
not over stirring.
3. Fill each of the mushroom caps with 1 to 2
teaspoons of the stuffing (depending on the size of the
mushroom). Keep the filling pretty loose but make the
top surface flat to support the sliced cheese. Arrange
the stuffed mushrooms in a shallow baking dish with
the stuffing facing up.
4. Use a brush to dab melted butter over each
mushroom. Add enough so that the butter trickles
down the sides of each mushroom and rests in the
baking dish. Pour any leftover butter into the dish, then
scoot the mushrooms next to each other.
5. Sprinkle the minced red bell pepper over the
tops of the stuffed mushrooms.
6. Arrange the slices of cheese over the
mushrooms. Tear the slices to cover all of the
mushrooms leaving no stuffing uncovered.
7. Bake the mushrooms for 12 to 15 minutes or
until the cheese is golden brown.
8. When the mushrooms come out of the oven
immediately sprinkle them with ½ teaspoon of minced
parsley and serve.
• SERVES 4 TO 6 AS AN APPETIZER.
OLIVE GARDEN TOASTED
RAVIOLI
Sold as a finger-food appetizer along with marinara
dipping sauce, Olive Garden’s delicious breaded ravioli
can be cloned with ease using one of several varieties of
premade raviolis carried in just about any supermarket. It’s
best to use the fresher raviolis found in the refrigerated
section, but you can also use frozen raviolis; you just have
to let them thaw first before breading them. The Toasted
Ravioli at O.G. has a beefy inside, but you can use any
ravioli that tickles your fancy including chicken, sausage,
vegetarian, or cheese. As for the breading, find Progresso
brand Italian style breadcrumbs. Contadina is another
popular brand, but their version is much too salty for a good
clone.
6 to 10 cups canola oil (as
required by fryer)
1 egg, beaten
I cup milk
1 cup Progresso Italian style
breadcrumbs
12 premade beef raviolis (fresh, or
if frozen, thawed)
1 tablespoon grated Parmesan
cheese
ON THE SIDE
½ cup marinara sauce, wormed
1. Preheat the oil in your deep fryer to 325
degrees.
2. Combine the beaten egg with the milk in
shallow bowl. Pour the breadcrumbs into another
shallow bowl.
3. Bread the ravioli by dipping each one in the
milk and egg, then into the breadcrumbs. Arrange the
breaded ravioli on a plate and let them sit for 5
minutes so that the breading sticks like a champ.
4. When the raviolis have rested, drop a handful
into the oil. Depending on the size of your fryer, you
may want to fry the raviolis in batches so they aren’t
too crowded. Fry the breaded raviolis for 1 to 2
minutes or until they’re golden brown. Remove them to
a draining rack or a paper-towel lined plate.
5. When all the raviolis are cooked, arrange them
on a serving plate and sprinkle 1 tablespoon of grated
Parmesan cheese over the top. Serve the dish with a
small bowl of warmed marinara sauce on the side for
dipping.
• SERVES 3 TO 4 AS AN APPETIZER.
OLIVE GARDEN PASTA E
FAGIOLI
MENU DESCRIPTION: “White and red beans, ground
beef, tomatoes and pasta in a savory broth.”
It’s amazing how many lousy clone recipes for this delicious
chili-like soup are floating around the Internet. Cooking
message boards, and questionable sites that claim to have
“actual restaurant recipes” have for years passed off
numerous versions only to have disappointed home chefs
waste ingredients. What’s puzzling is they leave out major
ingredients that you can clearly see in the real thing, like the
carrots, or ground beef, or two kinds of beans. Others don’t
even get the pasta right—it’s obviously ditali pasta, which
are short little tubes. So, if you want the taste of Olive
Garden’s famous Pasta e Fagioli at home, this may be the
only recipe out there that will live up to a side-by-side taste
test. Beware of imitation imitations!
1 pound ground beef
1 small onion, diced (I cup)
1 large carrot, julienned (I cup)
3 stalks celery, chopped (I cup)
2 cloves garlic, minced
2 14.5-ounce cans diced tomatoes
1 15-ounce can red kidney beans
(with liquid)
1 15-ounce can Great Northern
beans (with liquid)
1 15-ounce can tomato sauce
1 12-ounce can V-8 juice
1 tablespoon white vinegar
1 ½ teaspoons salt
1 teaspoon dried oregano
1 teaspoon dried basil
½ teaspoon ground black pepper
½ teaspoon dried thyme
½ pound (½ pkg.) ditali pasta
1. Brown the ground beef in a large saucepan or
pot over medium heat. Drain off most of the fat.
2. Add onion, carrot, celery and garlic and saute
for 10 minutes.
3. Add remaining ingredients, except pasta, and
simmer for 1 hour.
4. About 50 minutes into the simmering, cook the
pasta in 1½ to 2 quarts of boiling water over high heat.
Cook for 10 minutes or just until pasta is al dente, or
slightly tough. Drain.
5. Add the pasta to the large pot of soup. Simmer
for 5 to 10 minutes more and serve.
• SERVES 8.
OLIVE GARDEN MINESTRONE
SOUP
MENU DESCRIPTION: “Fresh vegetables, beans and
pasta in a light tomato broth—a vegetarian classic.”
This classic Italian soup is jam-packed with beans,
zucchini, onion, tomatoes, carrots, pasta, and spices; but
O.G.’s secret formula doesn’t include chicken broth.
Canned vegetable broth found in the soup aisle of most
markets works as a base here in this secret formula that
bursts with flavor as a purely vegetarian dish.
3 tablespoons olive oil
I cup minced white onion (about
I small onion)
½ cup chopped zucchini
½ cup frozen cut Italian green
beans
¼ cup minced celery (about
½ stalk)
4 teaspoons minced garlic (about
4 cloves)
4 cups vegetable broth (Swanson
is good)
2 15-ounces cans red kidney
beans, drained
2 15-ounce cans small white
beans or Great
Northern beans,
drained
1 14-ounce can diced tomatoes
½ cup julienned or shredded
carrot
2 tablespoons minced fresh
parsley
1½ teaspoons dried oregano
1½ teaspoons salt
½ teaspoon ground black pepper
½ teaspoon dried basil
¼ teaspoon dried thyme
2 bay leaves
3 cups hot water
4 cups fresh baby spinach
½ cup small seashell pasta
1. Heat olive oil over medium heat in a large
saucepan or stockpot. Saute onion, zucchini, green
beans, celery and garlic in the oil for 5 minutes or until
onion begins to turn translucent.
2. Add broth to pot, plus drained beans,
tomatoes, carrot, spices, bay leaves, and hot water
Bring soup to a boil, then reduce heat and simmer for
20 minutes.
3. Add spinach leaves and pasta and cook for an
additional 20 minutes or until desired soupy thickness.
• MAKES ABOUT EIGHT 1½-CUP SERVINGS.
OLIVE GARDEN CHICKEN
SCAMPI
MENU DESCRIPTION: “Chicken breast tenderloins
sautéed with bell peppers, roosted garlic and onions in a
garlic cream sauce over angel hair.”
This dish is a big favorite of Olive Garden regulars.
Chicken tenderloins are lightly breaded and sautéed along
with colorful bell peppers and chopped red onion. Angel
hair pasta is tossed into the pan along with a healthy dose
of fresh scampi sauce. Then it’s time to ring the dinner bell.
If you’re cooking for two, you can prepare this dish for the
table in one large skillet, saving the remaining ingredients
for another meal. If you’re making all four servings at once,
you need two skillets. By the way, if you can’t find fresh
chicken tenderloins (the tender part of the chicken breast),
you can usually find big bags of them in the freezer section,
If that’s how you buy them, you’ll have plenty left over after
this recipe, but they’re really good to have around.
SCAMPI SAUCE
3 tablespoons butter
2 tablespoons minced white onion
¼ cup minced garlic (8 to 12
cloves)
1½ cups Chablis wine
½ teaspoon salt
½ teaspoon Italian seasoning
½ teaspoon crushed red pepper
flakes
¼ teaspoon ground black
pepper
2 teaspoons minced fresh
parsley
1 cup heavy cream
5 to 6 quarts water
16 ounces angel hair pasta
4 tablespoons olive oil
12 chicken tenderloins
½ cup all-purpose flour
1 green bell pepper, cut into
bite-size strips
1 red bell pepper, cut into bitesize strips
1 yellow bell pepper, cut into bitesize
strips
1 chopped red onion
2 teaspoons minced fresh parsley
OPTIONAL GARNISH
freshly grated Parmesan cheese
1. Make scampi sauce by melting butter in a
preheated pan over medium/low heat. Add 2
tablespoons minced white onions and saute for 2 to 4
minutes or until the onion begins to brown. If the butter
begins to burn, turn down the heat. When the onion is
beginning to brown, add the minced garlic and saute
for another 30 seconds. Don’t let the garlic burn. After
about 30 seconds add the wine, salt, Italian seasoning,
red pepper flakes, and black pepper, and bring
mixture to a simmer. Simmer for approximately 15 to
18 minutes or until the sauce has reduced by half. Add
parsley and heavy cream and simmer uncovered for
about 10 minutes. Do not let mixture reach a boil.
2. Bring 4 quarts of water to a boil in a large pot.
Add the angel hair pasta and cook for about 4 minutes
or until pasta is al dente, or mostly tender with just a
slight toughness. Drain the pasta in a colander or
sieve when done, then hit it with some cold water to
prevent sticking and to keep it from cooking further
3. If preparing all four servings, preheat the oil in 2
large skillets over medium heat (if making just 2
servings, you’ll need only one skillet and half of the total
ingredients—save the rest for another meal). Lightly
salt and pepper the chicken tenderloins, then coat
each one in the flour that has been measured into a
large bowl. Arrange all of the coated tenderloins on a
plate before sautéing 6 tenderloins in each pan. Cook
the tenderloins for 3 to 5 minutes on one side or until
golden brown.
4. When the chicken is brown on one side, flip
each of the pieces, and move them to the side of the
pans, then add an even amount of the sliced peppers
and chopped red onion to the center of each skillet.
Continue cooking the chicken and vegetables for 4 to
6 minutes or until the chicken is browned and the
veggies are beginning to brown on the edges.
5. Divide the scampi sauce in half and pour it over
the chicken and other ingredients in each pan. Add 2
portions of pasta to each pan, then toss everything a
bit and continue to cook for a couple minutes or until
the pasta is heated through. Prepare each dish by
serving equal amounts of pasta onto each of four
plates. Use a spoon or tongs to add the peppers and
onion on top of each pile of pasta. Arrange three
chicken tenderloins onto the center of the pasta.
6. Sprinkle each plate with about ½ teaspoon of
fresh parsley and serve it up with freshly grated
Parmesan cheese if desired.
• MAKES 4 SERVINGS (BUT CAN BE EASILY DIVIDED
INTO 2 SEPARATE SERVINGS FOR 2).
OLIVE GARDEN CHOCOLATE
LASAGNA
MENU DESCRIPTION: “Layers of rich chocolate cake
and sweet buttercreom icing.”
To simplify this clone recipe, we’ll start with a box of cake
mix and tweak it a bit to add a little cherry flavor. The
buttercream frosting spread between the three layers of the
“lasagna” is a breeze to make from scratch. The real secret
to this Top Secret Recipe is how we put it all together
You’ve got to make two slices through the edge of the
baked cake to create the three thin layers, so grab a long
serrated knife. Lay down some wax paper under the cake
to help you turn the cake while you slice. Slide the whole
thing over near the edge of the counter so that you can
keep the knife parallel to the countertop, and you should
have no trouble at all. Another technique is to drag a long
piece of dental floss through the cake twice. The floss will
glide right through the cake with ease, giving you two clean
slices. You can use your favorite chocolate cake mix for the
recipe, but be sure not to use one with pudding in it or one
that is “extra moist.” (Duncan Hines Moist Deluxe is one
such brand.) These mixes make slicing and layering difficult
because the baked cake falls apart so easily.
1 18.25-ounce box dark
chocolate or chocolate fudge
coke mix (not too moist)
1¼ cups water
⅓ cup vegetable oil
3 eggs
2 teaspoons cherry extract
vegetable shortening
BUTTERCREAM FROSTING
1 ½ cups butter, softened
(3 sticks)
4 cups powdered sugar
¼ cup milk
½ teaspoon vanilla extract
4 ounces semi-sweet chocolate, chilled
1. Make the cake in a 13x9-inch baking pan
following instructions on the box of cake mix, but add
cherry extract to the mix. (Preheat oven to 350
degrees; mix cake mix, water, oil, and eggs together in
a large bowl; pour batter into pan greased generously
with shortening.) Allow the cake to cool completely.
2. When cake is cool, make buttercream frosting
by first whipping the soft butter in a large bowl with an
electric mixer on high speed. Add two cups of the
powdered sugar, mix well, then add remaining
powdered sugar. Add ¼ cup of whole milk and vanilla,
then mix on high speed for 2 minutes or until frosting is
smooth and creamy.
3. Turn cake out of the pan onto wax paper. Using
both hands, carefully flip the cake over, so that it’s
right-side up, onto another strip of wax paper. Now
you’re going to cut through the cake twice, creating
three layers. We’ll start at the bottom slice. First slide
the cake over to the edge of your kitchen counter. This
way you can drop your hand with the knife down below
the counter at the edge to get a nice, straight cut
through the cake. Using a long bread knife or other
long serrated knife, cut through the bottom third of the
cake. Spin the cake and wax paper so that you can cut
through all sides (your knife probably won’t get all the
way through to the other side). When the cake is
sliced, carefully flip the top section over onto the other
sheet of wax paper Frost the bottom layer of cake with
approximately ⅓ of the buttercream frosting. Break the
chilled semi-sweet chocolate into little bits that are a
tad smaller than chocolate chips. A good way to do
this is to put the chilled chocolate into a large zip-top
bag, then use the handle of a butter knife to smash the
unsuspecting chocolate into pieces. Sprinkle about ⅓
of the chocolate bits over the frosting on the bottom
layer.
4. Turn the top section back over onto the bottom
layer Again, slice through the top section creating the
final two layers. Carefully flip the top over onto the wax
paper, and frost the new layer as you did with the first
layer, adding chocolate bits as well. You may, at this
point, wish to slice the top into thirds across the width
of the cake. This makes flipping over the top layer
much easier. It’s also how you’re going to slice the
cake later, so you’ll never see the cuts. Any cracks or
breaks are no big deal since you’ll just cover up the
goofs with frosting.
5. Carefully reassemble the top section on the rest
of the cake. If you have a large bulge in the center of
the cake, you may wish to slice that off so that the cake
is flatter on top. Throw that slice away. Frost the top of
the cake with the remaining frosting, then sprinkle on
the remaining chocolate bits.
6. The cake is served as triangular slices. So,
slice it up by first cutting through the middle of the
cake, lengthwise. Next cut across the cake through the
middle (widthwise) twice. Now you have six slices that
just need to be cut from corner to corner one time
each, creating 12 triangular slices. Chill any cake you
don’t eat that day.
• MAKES 12 SERVINGS.
OLIVE GARDEN FROZEN
TIRAMISU
The amazing Frozen Tiramisu—a dessert in a glass—
requires espresso syrup that you can clone with sugar and
either espresso or strong coffee. Each serving requires just
a little of the syrup, so you’ll have plenty left over for
additional servings of the cocktail for your happy toasting
partners.
¼ cup hot espresso
¼ cup granulated sugar
¾ ounce Tuaca liqueur
¾ ounce Kahlua liqueur
1 cup vanilla ice cream
I cup ice
GARNISH
whipped cream
cocoa
1. Make espresso syrup by combining hot
espresso with granulated sugar.
2. When espresso syrup is cool, make drink by
combining ½ ounce of the espresso syrup with Tuaca,
Kahlua, vanilla ice cream and ice in a blender on high
speed and blend until smooth. Serve in a tall 16-ounce
glass, with whipped cream on top. Sprinkle a little
cocoa on top of the whipped cream (tap it through a
mesh strainer), and serve drink with a straw.
• MAKES I DRINK.
OLIVE GARDEN LEMON
CREAM CAKE
MENU DESCRIPTION: “Delicate white coke and lemon
cream filling with a vanilla crumb topping.”
I like simple. So, to keep this clone as uncomplicated as
possible, I’ve designed the recipe using a common white
cake mix. I picked Betty Crocker brand, but any white cake
mix you can get your hands on will do. Just note that each
brand (Duncan Hines, Pillsbury, etc.) requires slightly
different measurements of additional ingredients (oil,
eggs). Follow the directions on the box for mixing the
batter, then pour it into a greased 10-inch springform pan
and bake until done. The filling recipe is a no-brainer and
the crumb topping is a cinch. When your cake is
assembled, stick it in the fridge for a few hours, and soon
you’ll be serving up 12 cloned slices of the addictive Olive
Garden dessert.
CAKE
1 18.25-ounce box Betty Crocker
white cake mix
1¼ cups water
⅓ cup vegetable oil
3 egg whites
LEMON CREAM FILLING
8 ounces cream cheese, softened
2 cups powdered sugar
3 tablespoons lemon juice
I cup heavy whipping cream
VANILLA CRUMB TOPPING
½ cup plus 1 tablespoon
all-purpose flour
½ cup plus 2 tablespoons
powdered sugar
pinch salt
¼ cup butter, softened
½ teaspoon vanilla extract
GARNISH
powdered sugar
1. Make white cake following the directions on the
box. Pour batter into a greased 10-inch cake pan or
springform pan, and bake at 350 degrees for 40 to 45
minutes. Allow cake to cool completely when it comes
out of the oven.
2. Make lemon cream filling by mixing cream
cheese and powdered sugar in a medium bowl with an
electric mixer until smooth. Mix in lemon juice.
3. Whip cream in a large bowl with an electric
mixer on high speed until it forms stiff peaks. Fold
cream cheese mixture with whipped cream. Stir gently
by hand until blended.
4. Make crumb topping by combining flour,
powdered sugar, and salt in a medium bowl. Add the
butter and dribble in the vanilla extract. Use your hands
to mix the butter into the flour and sugar until the
mixture is crumbly, with no pieces larger than a pea.
Chill the mixture in the refrigerator and then break up
any large chunks into smaller pieces. Keep the crumb
topping cold until you are ready to use it.
5. When the cake is cool, slice it in half through
the middle and remove the top. Spread all but ½ cup of
the lemon cream mixture onto the bottom half of the
cake, then carefully replace the top half of the cake.
6. Spread the remaining ½ cup of cream filling
over the top and sides of the cake. Sprinkle the crumb
topping on top of the cake and press it onto the sides
all the way around the cake.
7. Now chill the cake for at least 3 hours before
you serve it. When you are ready to dig in, slice cake
into 12 slices. Serve each slice topped with powdered
sugar tapped through a strainer.
• SERVES 12.
OLIVE GARDEN TIRAMISU
MENU DESCRIPTION: “The classic Italian dessert. A
layer of creamy custard set atop espresso-soaked
ladyfingers.”
In Italian, tiramisu means “pick me up” or “cheer me up.”
And when you taste the delicious combination of
mascarpone cheese (sometimes referred to as Italian
cream cheese), cream cheese, ladyfingers, espresso and
Kahlua it will be hard not to smile. Olive Garden’s tiramisu
is very dense, which sets it apart from most tiramisu
recipes that require the cheese mixture to be folded into
whipped cream. This technique, however, makes a tiramisu
that is too fluffy and light to be a decent clone. Besides, the
whipped cream hides the cheese flavors, and that’s just not
a good way to make this tiramisu. So get out your double
boiler for the egg yolks (a metal bowl over a saucepan of
simmering water will also do) and snag some ladyfingers
(ladyfingers are miniature cakes about the size of two
fingers side-by-side). You can either make your own
espresso, use extra strong coffee as a substitute, or, next
time you’re at Starbucks, order up a quadruple shot of
espresso to go.
4 egg yolks
2 tablespoons milk
cup granulated sugar
2 cups mascarpone cheese
¼ teaspoon vanilla extract
1 cup heavy cream
20 to 24 ladyfingers
½ cup cold espresso
¼ cup Kahlua coffee liqueur
2 teaspoons cocoa powder
1. Fill a medium saucepan halfway with water and
bring it to a boil over medium/high heat, then reduce
the heat so that the water is simmering. Whisk egg
yolks, milk and sugar together in a medium metal bowl,
then place the bowl on top of the saucepan (you can
also use a double boiler forthis step). Stir the mixture
often for 8 to 10 minutes or until the mixtures thickens.
Remove the bowl from the heat, and to it add the 2
cups of mascarpone cheese and the vanilla. Get in
there and whisk the cheese like the dickens until it
smoothes out.
2. In a separate bowl, whip the cream with an
electric mixer until thick.
3. Slowly fold the whipped cream into the
mascarpone mixture until it’s completely incorporated,
but don’t over mix or that goodness could lose its fluff
and flatten out on you.
4. Combine the espresso and Kahlua in a large,
shallow bowl. One-by-one, quickly dip each ladyfinger
in the espresso. The ladyfinger will soak up the
espresso/Kahlua mixture like a sponge, so dip quickly.
Arrange half of the dipped ladyfmgers side-by-side on
the bottom of an 8x8-inch serving dish or baking pan.
5. Spoon about half of the cheese mixture over the
ladyfingers, then add another layer of soaked
ladyfingers on top of the cheese mixture.
6. Spoon the remaining cheese mixture over the
second layer of ladyfingers and spread it evenly
7. Put two teaspoons of cocoa powder in a tightmesh strainer and gently tap the side of the strainer to
add an even dusting of cocoa powder over the top of
the dessert.
8. Cover and chill for several hours. To serve,
slice the dessert twice across and down creating 9
even portions. And don’t worry about how that first
serving looks—it’s always the hardest to get out.
• MAKES 9 SERVINGS.
ORIGINAL PANCAKE HOUSE
APPLE PANCAKE
MENU DESCRIPTION: “Oven baked with fresh apples
and pure Sikiyan cinnamon glaze.”
Fresh, high-quality ingredients and traditional recipes are
what make this growing chain a frequent favorite for anyone
who stops in. The star of the show is the incredible apple
pancake, the chain’s signature dish. To make a dead-on
clone, Granny Smith apples are sautéed in butter, brown
sugar and cinnamon, then allowed to cool for a bit. That
way, when the batter is poured into the pan the apples and
glaze stay anchored to the bottom. This technique also
prevents the glaze from penetrating into the batter as the
pancake bakes since there is now an apple barrier
preventing any mixing of the ingredients. When the
pancake comes out of the oven it’s flipped over onto a
plate and the apples are smiling away at you right there on
top, dripping with a delicious cinnamon-sugar glaze. You
won’t need any syrup for this one, that’s for sure. Just a light
dusting of powdered sugar, if you like, then get ready for an
apple pancake unlike any other
2 medium Granny Smith apples,
peeled end sliced (about 16
to 20 slices each)
3 tablespoons butter (salted)
½ cup light brown sugar
¾ teaspoon ground cinnamon
3 eggs
cup whole milk
cup heavy cream
2 tablespoons granulated sugar
¼ teaspoon salt
¼ teaspoon vanilla
½ cup all-purpose flour
OPTIONAL GARNISH
powdered sugar
1. Peel and quarter two Granny Smith apples.
Slice the core from each of the quarters, then slice the
quarters into 4 to 5 slices each. Melt 3 tablespoons
butter in a 9- or 10-inch skillet. If you’ve got a skillet that
isn’t nonstick, such as cast-iron, that’s the best kind for
this recipe, although any oven-safe skillet this size will
still work. Add brown sugar, cinnamon and the sliced
apples and saute for 10 minutes, stirring occasionally.
Turn off the heat and let the pan sit for one hour so that
the apples and glaze will stick to the bottom when the
batter is poured on top.
2. Preheat oven to 475 degrees.
3. In a medium bowl, beat eggs with an electric
mixer. Mix in milk, cream, sugar, salt and vanilla. Mix
until sugar is dissolved. Sift in flour and mix until
smooth. Let batter rest for about 10 minutes.
4. After the apples have cooled for an hour, pour
the batter over the apples and pop the whole thing into
the oven for 16 to 18 minutes or until the top begins to
brown. Remove it from the oven, cool for one minute,
and then use a spatula to loosen the pancake around
the edges. Put a plate on top of the pan and invert the
pan and plate together so that the pancake comes out
upside down on the plate. Serve with an optional
dusting of powdered sugar over the top.
● MAKES I LARGE PANCAKE.
TIDBITS
You can substitute ⅔ cup half and-half for the ⅓ cup heavy
cream and ⅓ cup whole milk, but I found that using the
cream and milk separately makes for a fluffier texture and
better clone.
ORIGINAL PANCAKE HOUSE
GERMAN PANCAKE
MENU DESCRIPTION: “Oven baked. Dusted with
powdered sugar, served with lemon and butter.”
It was in 1953 when Les Highet and Erma Huenke opened
their first Original Pancake House in Portland, Oregon,
using traditional pancake recipes handed down through the
generations. Now, with over 100 restaurants in 25 states,
this breakfast chain is generating a huge cult following.
That’s probably because many of the authentic ethnic
pancake recipes can’t be found at IHOP, and this is a clone
recipe for one of them. The German pancake is baked at a
high temperature in a skillet, where it puffs up radically in
the oven, then settles down as it comes out. It’s dusted with
powdered sugar, and served with whipped butter and
lemon wedges on the side. Delicious. You can also apply
maple syrup, if that’s your thing. A cast-iron skillet seems to
work best for this recipe (just as they used back in the day),
but you can get away with nonstick, if that’s all you’ve got. If
that’s the case, you should know that the pancake will
morph more radically in a nonstick pan and practically
overflow the skillet—especially if it isn’t a deep one. Even
so, once you get it out of the oven it will shrink back down
and taste just as amazing.
3 large eggs
⅓ cup whole milk
⅓ cup heavy cream
2 tablespoons granulated sugar
¼ teaspoon salt
¼ teaspoon vanilla
½ cup oIl-purpose flour
1 tablespoon melted butter
(salted)
GARNISH
powdered sugar
SERVE WITH
lemon wedges
butter
maple syrup
1. Preheat oven to 475 degrees.
2. In a medium bowl, beat eggs with an electric
mixer Mix in milk, cream, sugar, salt and vanilla. Mix
until sugar is dissolved. Sift in flour and mix until
smooth. Let batter rest for about 10 minutes.
3. Coat the bottom of a 9- or 10-inch oven-safe
skillet (cast-iron is best) with melted butter Pour batter
into the pan, and bake for 14 to 16 minutes or until
golden brown on top and dark brown around the
edges. Pancake will rise substantially while cooking.
Remove the pancake from the oven and let it sit for
about a minute. Loosen the pancake around the edge
with a spatula, then slide it out of the pan onto a plate.
Dust with powdered sugar, and serve with lemon
wedges, butter and syrup on the side.
• MAKES I LARGE PANCAKE.
TIDBITS
You can substitute ⅔ cup half-and-half for the ⅓ cup heavy
cream and ⅓ cup whole milk, but I found that using the
cream and milk separately makes for a fluffier texture and
better clone.
OUTBACK STEAKHOUSE
HONEY WHEAT BUSHMAN
BREAD
Along with your meal at this huge national steakhouse
chain, comes a freshly baked loaf of dark, sweet bread,
served on its own cutting board with soft whipped butter
One distinctive feature of the bread is its color. How does
the bread get so dark? Even though this recipe includes
molasses and cocoa, these ingredients alone will not give
the bread its dark chocolate brown color. Usually
commercially produced breads that are this dark—such as
pumpernickel or dark bran muffins—contain caramel color,
an ingredient often used in the industry to darken foods.
Since your local supermarket will not likely have this mostly
commercial ingredient, we’ll create the brown coloring from
a mixture of three food colorings—red, yellow and blue. If
you decide to leave the color out, just add an additional I
tablespoon of warm water to the recipe. If you have a bread
machine, you can use it for kneading the bread (you’ll find
the order in which to add the ingredients to your machine in
Tidbits). Then, to finish the bread, divide and roll the dough
in cornmeal, and bake on a sheet pan in your home oven.
DOUGH
1 ¼ cups warm water
2 teaspoons granulated sugar
2¼ teaspoons (I pkg.) yeast
2 cups bread flour
1¾ cups whole wheat flour
1 tablespoon cocoa
I teaspoon salt
2 tablespoons butter, softened
¼ cup honey
2 tablespoons molasses
COLORING
1 ¼ teaspoons red food coloring
I teaspoon yellow food
colonng
I teaspoon blue food coloring
cornmeal for dusting
1. Mix sugar with warm water, then dissolve the
yeast in the solution. In five minutes the solution will
begin to foam as the yeast begins its gassy dance
party.
2. While the yeast is waking up, mix the flours,
cocoa, and salt in a large bowl. Mix butter into the dry
mixture with your hands. Make an impression in the
middle of the dry mixture. Add the honey and molasses
into the well. Mix the food coloring with the yeast
solution, then pour the solution into the well. Stir from
the middle bringing the dry mixture into the wet stuff,
slowly at first, then quickly as you incorporate all the
ingredients. You will eventually have to use your hands
to combine everything. Knead the dough for 10
minutes on a lightly floured surface, then roll the dough
into a ball and place it into a covered bowl in a warm
place for 1 to 1½ hours or until it has doubled in size.
3. When the dough has doubled, separate it into 6
even portions. Roll each dough portion into logs that
are 6 inches long and 2 inches wide. Pour cornmeal
onto your rolling surface. Moisten your hands then rub
water onto each dough log and roll it in the cornmeal.
Arrange the rolled dough on a baking sheet and cover
it with plastic wrap. Set the dough in a warm spot to
rise for another hour or so until the loaves have
doubled in size.
4. Preheat the oven to 350 degrees. Uncover the
dough and bake it for 35 to 40 minutes in the hot oven.
When the bread is done, take it out of the oven and let
it cool for 10 to 15 minutes. Serve the bread with a
sharp bread knife and butter on the side. If you want
whipped butter, like you get at the restaurant, just use
an electric mixer on high speed to whip some butter
until it’s fluffy.
• MAKES 6 SMALL LOAVES.
TIDBITS
If you’d like to use a bread machine to knead the dough,
just add the ingredients in the following order: Mix the food
coloring with the water, then add the colored water to the
bread pan followed by the flours, sugar, salt, butter, cocoa,
honey, molasses, and yeast. Set the machine to knead and
walk away. When the dough’s done kneading and rising, go
to step #3 of this recipe and take it from there.
OUTBACK STEAKHOUSE
GRILLED SHRIMP ON THE
BARBIE
MENU DESCRIPTION: “Seasoned and served with
Outback’s own Remoulode sauce.”
This recipe makes the same size appetizer serving that you
get in the restaurant. That’s only 6 shrimp—enough for me,
but what are you guys having? Thank goodness the
remoulade sauce and the shrimp seasoning formulas yield
enough for more, so you can grill up to a pound of shrimp
with this cool clone. You can often find bags of frozen
shrimp that have been peeled, but with the tails left on.
Those are perfect for this recipe.
REMOULADE SAUCE
¾ cup mayonnaise
5 teaspoons stone ground
mustard
4 teaspoons milk
2 teaspoons minced celery
2 teaspoons minced green pepper
2 teaspoons minced onion
2 teaspoons sauerkraut
1 teaspoon white vinegar
½ teaspoon paprika
⅛ teaspoon ground black pepper
minced fresh parsley
SHRIMP SEASONING
½ teaspoon salt
¼ teaspoon garlic powder
¼ teaspoon onion powder
¼ teaspoon ground black
pepper
¼ teaspoon chili powder
¼ teaspoon granulated
sugar
⅛ teaspoon cayenne pepper
dash ground allspice
6 large shrimp (2 1 to 25 per
pound), thawed if frozen
fresh lemon juice
I tablespoon butter, melted
minced fresh parsley
1. Preheat your grill to high heat.
2. Make the remoulade sauce by mixing the
ingredients together in a small bowl. Cover and chill
this sauce until you are ready to use it.
3. Prepare the shrimp seasoning by mixing the
spices together in a small bowl.
4. Remove the shell from the shrimp. Keep the
last segment of the shell and the tall. Remove the black
vein that runs down the back of the shrimp. Stick a
skewer through the middle of each shrimp. Push them
together on the skewer so that they are “spooning”
each other,
5. Squeeze some fresh lemon juice over the
cuddling shrimp.
6. Brush melted butter generously over the top of
the shrimp.
7. Sprinkle a bit of the seasoning on next. Don’t
use a heavy coating of seasoning
8. Place the shrimp onto your hot grill with the
seasoning side down. Brush some more butter over
the other side of the shrimp followed by another light
sprinkle of seasoning.
9. After 3 minutes or so the face-down side of the
shrimp should be browned and showing some light
charring. Flip the shrimp over and grill for an additional
2 to 3 minutes or until browned on the other side.
10. Remove the shrimp from the grill and slide
them off the skewer onto a slice of garlic butter coated
bread (see Tidbits). Sprinkle with a pinch of fresh
parsley.
• MAKES 1 TO 2 SERVINGS.
TIDBITS
It is best to use a clone for the Bushman Bread (on page
269) as a bed for your shrimp. Just slice an inch-thick piece
off through the middle of the bread. This will give you a slice
that is about 8 inches long and 2 to 3 inches wide. Crush a
clove of garlic and mix it with your leftover melted butter.
Brush this garlic butter on both sides of the bread and toast
it until lightly brown. If you don’t feel up to making the bread,
you can use any bread you might have around that is in the
shape of a hoagie roll. Or you may just wish to serve the
shrimp on its own without the bread bed.
OUTBACK STEAKHOUSE
KOOKABURRA WINGS
MENU DESCRIPTION: “Known as Buffalo chicken wings
here in the States.”
No, Outback Steakhouse is not the country’s largest
importer of Australian woodland kingfisher wings. Despite
the name, these tasty wings don’t come from the wild birds
also known as kookaburras. Instead, this appetizer is made
the old fashioned way—with good ol’ American chickens.
And as with the traditional recipe, these wings are coated
with Louisiana hot sauce; but it’s the breading that makes
them unique. This clone recipe uses a secret blend of
powdered cheese sprinkles and spices. Kraft powdered
cheese can be found near the Kraft Parmesan cheese or
near the macaroni and cheese kits in your supermarket. If
you can’t track it down, use Molly McButter cheese
sprinkles. If you can’t find that, get a box of macaroni and
cheese (it’s cheap) and use the cheese from inside there.
Keep the leftover macaroni noodles for a pasta recipe later
10 chicken wing drumettes (see Tidbits)
6 to 10 cups vegetable shortening or oil (amount
required by your fryer)
WING COATING
2 tablespoons all-purpose flour
1 tablespoon Kraft Macaroni &
Cheese cheddar cheese
topping (or Molly McButter
cheese sprinkles)
1¼ teaspoons salt
I teaspoon chili powder
¾ teaspoon ground black pepper
½ teaspoon cayenne pepper
¼ teaspoon paprika
¼ teaspoon onion powder
¼ teaspoon garlic powder
⅛ teaspoon ground cumin
dash ground cloves
2 tablespoons Crystal brand
Louisiana hot sauce
I teaspoon water
ON THE SIDE
bleu cheese dressing
celery sticks
1. Preheat shortening (you may also use
vegetable or canola oil) to 375 degrees.
2. Make the spiced breading for your wings by
combining the wing coating ingredients (flour through
cloves) in a medium bowl. Stir well.
3. Dip each wing, one at a time into the breading.
Give each one a light coating of the stuff. Arrange the
breaded wings on a plate and let them sit uncovered in
the refrigerator for about 15 minutes.
4. When the shortening or oil is hot, lower the
wings into it. Fry for 7 to 10 minutes, or until the wings
are brown.
5. While the wings are frying, mix the hot sauce
and water together in a small bowl.
6. When the wings are done, drain them for a
moment on paper towels or a rack. Drop the hot wings
into a large plastic container with a lid. Pour the sauce
over the wings. Cover the container and gently shake it
to coat the wings with sauce.
7. Use tongs to remove the wings from the
container. Arrange them on a plate with bleu cheese
dressing and celery sticks on the side.
• MAKES 2 TO 3 SERVINGS AS AN APPETIZER.
TIDBITS
There are two types of frozen chicken wings out there—the
giant party wings that come with a couple dozen pieces per
bag, and the smaller wings with nearly twice the number per
bag. These smaller wings are what the restaurant uses and
what you should use for this recipe. Because of the size of
the bigger wings, they just don’t fry up as well.
Also, you should know that most restaurants use
shortening for frying. That’s what I suggest you use if you
want your wings closer to the real thing.
OUTBACK STEAKHOUSE
BLEU CHEESE DRESSING
If you’ve had the Kookaburra Wings from Outback, then
you’ve tasted the chain’s thick and creamy bleu cheese
dressing served up on the side. Use this stuff when you
need an excellent dipping sauce for your next batch of
wings, or just pour it over a salad and dive in.
I cup mayonnaise
2 tablespoons buttermilk or whole
milk
I tablespoon crumbled bleu
cheese
⅛ teaspoon coarse ground black
pepper
⅛ teaspoon onion powder
⅛ teaspoon garlic powder
1. Mix all ingredients together by hand in a small
bowl until smooth.
2. Cover and chill for 30 minutes before serving.
• MAKES I CUP.
OUTBACK STEAKHOUSE
CAESAR SALAD DRESSING
You can’t buy it in the stores, but now you can make it from
scratch in mere minutes. Best of all, this dressing keeps for
a couple weeks in the fridge in a covered container... if it’s
even around that long.
I cup mayonnaise
¼ cup egg substitute
¼ cup grated Parmesan cheese
2 tablespoons water
2 tablespoons olive oil
1½ tablespoons lemon juice
I tablespoon anchovy paste
2 cloves garlic, pressed
2 teaspoons granulated sugar
½ teaspoon coarse ground
pepper
¼ teaspoon salt
¼ teaspoon dried parsley flakes,
crushed fine
1. Combine all ingredients in a medium bowl. Use
an electric mixer to beat ingredients for about 30
seconds.
2. Cover bowl and chill for several hours so that
flavors can develop.
• MAKES APPROXIMATELY 2 CUPS.
OUTBACK STEAKHOUSE
HONEY MUSTARD SALAD
DRESSING
Outback makes their sauces and salad dressings from
scratch every day following master formulas in a corporate
cookbook. Now you’ve got a secret recipe of your own that
will easily duplicate the taste of their hugely popular house
honey mustard recipe. You’ll need just three basic
ingredients and about two minutes of free time to make it,
½ cup mayonnaise
¼ cup honey
2 tablespoons Grey Poupon Dijon
mustard
Combine all ingredients in a medium bowl. Cover and chill
to store.
• MAKES ¾ CUP.
OUTBACK STEAKHOUSE
RANCH SALAD DRESSING
This always-popular growing restaurant chain makes a
tasty version of creamy ranch dressing for its house and
Queensland salads. To get the same unique flavor and
creaminess of the original at home, mates, you’ll need one
teaspoon of Hidden Valley Ranch instant salad dressing
mix swimming in there with the mayo and buttermilk and
other spices. Since there’s three teaspoons of dressing
mix per packet, you’ll now be able to make three batches of
dressing with one envelope of dressing mix.
1 teaspoon Hidden Volley Ranch
salad dressing mix (Buttermilk
Recipe)
I cup mayonnaise
½ cup buttermilk
¼ teaspoon coarse grind black
pepper
⅛ teaspoon paprika
⅛ teaspoon garlic powder
1. Combine all ingredients in a medium bowl. Mix
well.
2. Cover bowl and chill dressing for at least 30
minutes before serving.
• MAKES I ½ CUPS.
TIDBITS
Make sure you are using the Hidden Valley Ranch dressing
mix that says “Buttermilk Recipe.” It’s the one that comes in
0.4 ounce packets. Any other mix won’t work as well forthis
clone.
OUTBACK STEAKHOUSE
TANGY TOMATO DRESSING
So many folks expressed interest in a knockoff of this
dressing that I couldn’t put it off any longer. Suited up in
protective gear and tricked out with safety goggles, I set out
to tackle the tangy beast. Now, fresh out of the underground
laboratory, comes this simple formula for re-creating
Outback’s popular sour/sweet salad topper in your own
cozy kitchen. Mix it together, heat it up, cool it down, and
store it in the fridge until salad time.
½ cup plus I tablespoon ketchup
cup water
¼ cup granulated sugar
¼ cup white vinegar
2 tablespoons olive oil
¼ teaspoon paprika
¼ teaspoon coarse grind black
pepper
¼ teaspoon garlic powder
¼ teaspoon cayenne pepper
⅛ teaspoon onion powder
pinch dried thyme
Combine all ingredients in a small saucepan over medium
heat. Bring to a boil, whisking often, then reduce heat and
simmer, uncovered, for 5 minutes. Cover the dressing until
cool, then pop it in the refrigerator to chill out.
• MAKES I CUP.
OUTBACK STEAKHOUSE
CINNAMON APPLE OBLIVION
MENU DESCRIPTION: “Vanilla ice cream covered in
cinnamon apples and pecans topped with caramel
sauce.”
Roll a scoop of creamy vanilla ice cream in homemade
candied pecans. Surround the ice cream with warm
cinnamon apples and drizzle caramel over the top. Sprinkle
fresh cinnamon-butter croutons on the dessert and you’ve
got an irresistible clone that will make your diet cry “uncle!”
For the croutons, the restaurant uses leftover Honey Wheat
Bushman Bread (clone on page 269). But if you don’t have
plans to make that one you can use any sweet bread from
the store, such as Hawaiian Sweet Bread or Pillsbury
Honey White Bread.
CANDIED PECANS
½ cup granulated sugar
2 tablespoons water
½ teaspoon cinnamon
I teaspoon butter
1¼ cups chopped pecans
CINNAMON CROUTONS
2 cups cubed Bushman Bread
(or any sweet bread)
⅓ cup salted butter (⅔ stick)
2 tablespoons granulated sugar
½ teaspoon ground cinnamon
CINNAMON APPLES
I 20-ounce can apple pie filling
¼ teaspoon ground cinnamon
1 tablespoon brown sugar
/ quart vanilla ice cream
½ cup caramel topping
(Smucker’s is good)
/ ½ cups whipped cream
4 fresh strawberries
1. For candied pecans, combine ½ cup
granulated sugar, 2 tablespoons water, I teaspoon
butter, and ½ teaspoon cinnamon in a small saucepan
over medium heat. Heat until mixture boils and all
sugar granules are dissolved.
2. Add chopped pecans to mixture and stir for 1 to
2 minutes over heat. Be sure that all pecans are wellcoated.
3. Pour mixture onto a large plate and continue to
stir until mixture hardens and begins to break up. You
should be able to separate all of the nuts.
4. For the croutons, preheat the oven to 300
degrees. Pour the slice bread cubes onto an
ungreased cookie sheet and bake for 15 to 20
minutes or until the bread has turned light brown. Stir
halfway through cooking time.
5. Melt the butter in a skillet over medium heat.
Pour baked croutons into the pan and saute until the
bread is coated with butter. Combine the 2
tablespoons of sugar and ½ teaspoon of cinnamon in
a small bowl. Sprinkle this mixture over the croutons
while stirring so that the croutons are coated with
cinnamon/sugar Remove croutons from the heat and
pour them onto a plate to cool.
6. Prepare apples by carefully mixing them with ¼
teaspoon cinnamon and 1 tablespoon of brown sugar
in a large bowl. You want to be sure you don’t stir hard
enough to break up the apples. Microwave the apples
for 1 to 2 minutes or until hot.
7. To assemble the dessert, first roll four cup-size
scoops of ice cream in the pecan pieces. You can do
this step ahead of time if you like, keeping the pecancovered scoops in your freezer.
8. Place an ice cream scoop onto a small plate,
then pour about a tablespoon of caramel over the ice
cream. Dribble another tablespoon around the base of
the ice cream onto the plate.
9. Spread the hot apples around the base of the
ice cream being sure to divide them evenly amongst
the four servings.
10. Divide the croutons into four portions and
sprinkle them on the apples around the base of the ice
cream scoop on each plate.
11. Spread a generous portion of whipped cream
onto the top of each scoop of ice cream.
12. Top off each dish with a fresh strawberry
• MAKES 4 SERVINGS.
OUTBACK STEAKHOUSE
SYDNEY’S SINFUL SUNDAE
MENU DESCRIPTION: “Vanilla ice cream rolled in
toosted coconut, covered in chocolete sauce and topped
with whipped creom.”
Here’s an easy-to-make dessert that will give you a cool
way to use the vanilla ice cream that’s calling to you from
the freezer. The key to this recipe is to plan ahead just a bit
by placing your serving plates into the freezer (give ’em at
least 30 minutes). While the plates are chilling out, you
toast some coconut flakes in the oven. After that, it’s all
about the presentation. You can top your master-piece with
canned whipped cream or make your own from the simple
recipe included here.
WHIPPED CREAM
1 cup heavy whipping cream
3 tablespoons granulated sugar
½ teaspoon vanilla extract
pinch salt
1 cup shredded coconut
4 large scoops vanilla ice cream
1 cup fudge topping
8 large, ripe strawberries
1. Put four dinner plates into the freezer
2. Make whipped cream by combining cream with
sugar, vanilla and salt with an electric mixer on high
speed. It helps if the bowl has been chilled ahead of
time. When cream makes stiff peaks, cover and chill
until you need it.
3. Preheat the oven to 300 degrees.
4. Spread the coconut over the bottom of the
inside of a large oven pan. Shake the pan a little to
spread the coconut evenly.
5. Bake the coconut for 25 to 30 minutes or until
the coconut is a light, golden brown. You may have to
stir or shake the coconut in the last 10 minutes to help
it brown evenly. Allow the coconut to cool on a plate or
in a large bowl.
6. Heat up the fudge topping for 15 to 20 seconds
in the microwave. Get the plates out of the freezer and
make a circle of fudge on each of the plates.
7. Roll each scoop of ice cream in the coconut
until it is well coated. Press down on the ice cream to
help the coconut stick. Place a coconut-covered scoop
of ice cream onto the center of the plate, then spoon
about 2 tablespoons of fudge over the top of the ice
cream.
8. Use an ice cream scoop to scoop a large
portion of whipped cream and stack it on each of the
scoops of ice cream.
9. Cut the stems from the strawberries. Cut four of
the strawberries lengthwise into quarters. Position the
sliced strawberries around the base of each scoop of
ice cream on the ring of fudge. Place a whole
strawberry onto the whipped cream on the top of each
dessert. Serve with a spoon and a smile.
• MAKES 4 SERVINGS.
P. F. CHANG’S MAI TAI
MENU DESCRIPTION: “It’s our signature recipe.”
Bring the tropical spirit of this drink to your house with a
clone of this potent cocktail from the growing Chinese
bistro chain. Mai tai is Tahitian for “out of this world,” and P.
F. Chang’s recipe is one of the best and most authentic.
The secret to a true mai tai is found in the original recipe
developed by Trader Vic in 1944: It’s almond-flavored
syrup called “orgeat.” You can find the sweet stuff in stores
that sell coffee flavorings (Torani is one very popular
brand), or from bar supply outlets. Not only can you use the
orgeat for making the best cocktails on the planet, but you
can also use the syrup to wake up your next cup of Java. If
you can’t find orgeat, there’s a clone recipe included in
Tidbits.
1½ ounces Bacordi light rum
¾ ounce triple sec
¾ ounce orgeot syrup
3 ounces orange juice
3 ounces pineapple juice
splash Bacardi 151 rum
splash dark rum
GARNISH
pineapple wedge
maraschino cherry
1. Fill a 16-ounce glass with ice.
2. Add the light rum, triple sec, orgeat, orange
juice, and pineapple juice; then give the drink a quick
stir
3. Splash the 151 and dark rum on top. Do not stir
4. Make a small cut in the pineapple wedge, then
stick a toothpick into the pineapple wedge on the
opposite edge. Pierce a maraschino cherry onto the
toothpick. Slip the pineapple slice onto the rim of the
glass (into the cut that you made). Add a straw, and
serve.
• MAKES I DRINK.
TIDBITS
You can maker a pretty close version of orgeat syrup from
scratch by dissolving ½ cup granulated sugar in ½ cup
boiling water. Add ½ teaspoon of almond extract and ¼
teaspoon coconut extract. Cool before using, then measure
as you would the real thing.
P. F. CHANG’S CHANG’S
SPARE RIBS
MENU DESCRIPTION: “Wok-seared with Chang’s
barbecue sauce.”
One of the most popular eats on P. F. Chang’s kickin’
appetizer menu are the spare ribs that arrive slathered with
Asian-style barbecue sauce. The Asian flavor comes from
the addition of sweet hoisin sauce to a fairly rudimentary
barbecue sauce formula. Chang’s menu says these ribs
are spare ribs although they appear to be much smaller,
more like baby backs. You can certainly use either for this
recipe, just be sure to trim the ribs first, since the restaurant
version is lean, clean ribs with no extra meat or fat hanging
off. There are several ways to cook pork ribs—P. F.
Chang’s likes to boil theirs first then move on to a quick
deep fry. After that, the ribs are tossed with the sauce in
wok and served piping hot. A serving of these ribs at the
restaurant is 6 individual ribs, but since a full rack is as
many as 12 ribs, this recipe will make twice what you get in
a serving at the bustling bistro.
SAUCE
I cup ketchup
1 cup light corn syrup
½ cup hoisin sauce
½ cup water
⅓ cup light brown sugar, packed
2 tablespoons minced onion
I tablespoon rice vinegar
I rack pork spare ribs
4 cups vegetable oil
1 teaspoon sesame seeds
I tablespoon diced green onion
1. Make the sauce by combining ingredients in a
medium saucepan over medium heat. Bring mixture to
a boil, then reduce heat and simmer for 5 minutes, until
thick. Cool.
2. To cook the ribs the P. F. Chang’s way, you will
need to first boil them in water Heat up 12 to 16 cups
of water in a large saucepan or Dutch oven. Add a
couple teaspoons of salt to the water As water boils,
trim the excess fat and meat off the ribs. Slice between
the bones of each rib to separate the ribs. When the
water is boiling, toss the ribs in, bring the water back
to a boil and boil the ribs for 12 to 14 minutes. No pink
will show when they are done. Remove ribs to a plate
to cool.
3. When the ribs have cooled you can either store
them in an airtight bag in the refrigerator until you are
ready for the final cooking step, or you can move on to
that step now by heating up 4 cups of vegetable oil in a
large saucepan over medium heat. The oil should be
about 375 degrees. You can also use a deep fryer for
this step, but your fryer will likely require more oil.
4. When the oil is hot, drop 4 to 6 ribs at a time
into the oil. Fry for 2 to 4 minutes or until the meat
browns. Drain off the ribs on a rack or paper towels.
Fry all the ribs before moving on to the next step.
5. Heat a wok or large skillet over medium heat.
When the pan is hot, toss in all the ribs and coat with
the sauce. Simmer the ribs in the sauce for about a
minute while stirring and dump the ribs onto a serving
plate when they are all coated with sauce.
6. Sprinkle the ribs with sesame seeds and about
a tablespoon of diced green onion, and serve with a
pile of napkins.
• SERVES 2 TO 4 AS AN APPETIZER.
P. F. CHANG’S CHICKEN IN
SOOTHING LETTUCE WRAPS
MENU DESCRIPTION: “Quickly cooked spiced chicken
served with cool lettuce cups.”
Throw in a few initials with a little twist on the last part, and
you have the name of Paul Fleming and Philip Chiang’s
Chinese bistro creation, P. F. Chang’s. Since the first
location opened in Scottsdale, Arizona, in 1993, over 124
new ones have sprouted up across the country—in more
than 33 states. No matter the location, it’s this dish that gets
first raves. Like the very-dead McDonald’s McD.L.T
hamburger, which disappeared around the time the first P
F. Chang’s opened, the contrasting textures of the cool
crispy lettuce and the hot meat filling come together in your
mouth for a tasty oral dance party. According to waiters,
those little dark bits in the chicken filling mix are “black
mushrooms,” and there’s a good chance your local
supermarket doesn’t stock them. But a great alternative
can be found in the Asian food section—canned straw
mushrooms. Just remember to chop the chicken, water
chestnuts and mushrooms up real good for the final saute.
Slip this filling into a lettuce cup, fold it up like a taco, add a
little “special sauce,” get down tonight.
SPECIAL SAUCE
¼ cup granulated sugar
½ cup water
2 tablespoons soy sauce
2 tablespoons rice vinegar
2 tablespoons ketchup
I tablespoon lemon juice
⅛ teaspoon sesame oil
I tablespoon Chinese hot mustard
powder (see Tidbits)
2 teaspoons water
I to 3 teaspoons chili garlic sauce
STIR FRY SAUCE
2 tablespoons soy sauce
2 tablespoons dark brown sugar
½ teaspoon rice vinegar
3 tablespoons vegetable oil
2 skinless chicken breast fillets
1 cup diced canned water
chestnuts (1 8-ounce can)
cup diced canned straw
mushrooms
3 tablespoons chopped green onion
1 teaspoon minced garlic (I clove)
I cup fried maifun rice sticks (see
Tidbits)
4 to 5 iceberg lettuce cups
1. Make the special sauce (for spooning over your
lettuce wraps) by dissolving the ¼cup sugar in ½ cup
water in a small bowl. Add 2 tablespoons soy sauce, 2
tablespoons rice vinegar, 2 tablespoons ketchup, 1
tablespoon lemon juice and ⅛ teaspoon sesame oil.
Mix well and refrigerate this sauce until you’re ready to
serve the lettuce wraps. Combine the 2 teaspoons
water with the Chinese hot mustard and set this aside
as well. Eventually you will add your desired
measurement of Chinese mustard and garlic chili
sauce to the special sauce mixture to pour over your
lettuce wraps. In the restaurant chain, waiters prepare
the sauce at your table the same way, depending on
your desired heat level. I’ll talk more about that later.
2. Prepare the stir fry sauce by mixing the soy
sauce, brown sugar, and rice vinegar together in a
small bowl.
3. To prepare the filling for your lettuce wraps,
bring 2 tablespoons of the vegetable oil to high heat in
a wok or large frying pan. Saute the chicken breasts
for 4 to 5 minutes per side or until done. Remove
chicken from the pan to cool. Keep the oil in the pan.
4. As the chicken cools be sure your water
chestnuts and mushrooms have been diced to about
the size of small peas.
5. When you can handle the chicken, hack it up
with a sharp knife so that no piece is bigger than a
dime. With the wok or pan on high heat, add the
remaining tablespoon of vegetable oil. Add the
chicken, water chestnuts, mushrooms, green onion,
and garlic to the pan. Add the stir fry sauce to the pan
and saute the mixture for a couple minutes then spoon
it into a dish lined with a bed of fried rice noodles
(maifun).
6. Serve chicken with a side of lettuce cups. Make
these lettuce cups by slicing the top off of a head of
iceberg lettuce right through the middle of the head.
Pull your lettuce cups off of the outside of this slice.
7. Make the special sauce at the table by adding
your desired measurement of mustard and chill sauce
to the special sauce blend: I teaspoon each of mustard
and chili sauce for mild, 2 teaspoons each for medium
and 3 teaspoons of each for hot. Stir well.
8. Assemble lettuce wraps by spooning filling into
a lettuce cup, adding special sauce over the top,
folding the sucker up like a taco, then munching down
upon it with reckless abandon.
• SERVES 2 TO 3 AS AN APPETIZER.
TIDBITS
Follow the directions on the package for frying the maifun
(rice sticks)—usually by pouring 2 inches of vegetable oil
into a pan and heating to around 400 degrees. Add maifun,
a little at a time, and when it floats to the top remove it to a
paper towel. The rapid noodle expansion is actually quite
exciting.
Rather than powdered Chinese hot mustard, you can
instead use the kind that comes already prepared in the
bottle so that you don’t have to add water Your choice.
P. F. CHANG’S SHRIMP
DUMPLINGS
MENU DESCRIPTION: “Served with a ginger chili
pepper soy sauce. (Pan-fried or steamed.)”
Shrimp Dumplings from P. F. Chang’s are scrumptious
mounds of shrimp and other yummy ingredients wrapped in
wonton wrappers and steamed. You can also order them
pan-fried, which makes the bottom of each little package a
nice crispy brown. The dumplings are served with a soybased dipping sauce that can be cloned by combining six
ingredients in a saucepan. Recreating that part was easy.
But those dumplings—oh, man! I must have gone through a
couple boatloads of shrimp trying to figure out the best way
to get my filling to hold together like the real thing. I tried
adding egg and cornstarch and potato starch and flour to
pureed cooked shrimp, but all I got was a shrimp mush that
made the dumplings starchy and less flavorful than the real
deal. It was only when I remembered hearing about how
years ago shrimp molds were created into which pureed
raw shrimp was poured and then cooked, creating uniform
shrimp shapes that still had the taste and texture of
unprocessed shrimp. No binders necessary. So get out
your food processor and prepare yourself for the not-sopretty sight of pulverized raw shrimp. At least you don’t
have to worry about the size of the shrimp you buy for this
recipe, since you’re going to mash up the little dudes
anyway.
SAUCE
½ cup water
¼ cup soy sauce
2 tablespoons granulated sugar
1 tablespoon rice vinegar
I tablespoon chopped green
onion (green part only)
½ teaspoon chili oil
FILLING
½ pound raw shrimp (peeled and
deveined)
1 tablespoon finely minced carrot
I tablespoon finely minced green
onion
1 teaspoon minced fresh ginger
½ teaspoon minced fresh garlic
¼ teaspoon salt
¼ teaspoon granulated sugar
8 wonton wrappers
1. egg, beaten
1. Make dipping sauce by simmering ingredients
over medium heat for 1 minute. Remove the sauce
from the heat and set it aside to cool.
2. Make shrimp filling for the dumplings by
pureeing the shrimp in a food processor until it makes
a smooth paste. Add carrot, green onion, ginger,
garlic, salt, and sugar and pulse the food processor a
couple times to mix.
3. Measure a heaping tablespoon of this filling
into the center of a wonton wrapper. Brush beaten egg
on each of the top four edges. Bring two opposite
corners up to meet in the middle and press together
over the filling. Bring the other two opposite corners up
and pinch all the edges together making a square
package with sealed edges. Repeat with the
remaining ingredients and let the dumplings sit for
about ten minutes in the refrigerator so that the “egg
glue” sets up.
4. Prepare a steamer with hot water When the
water is simmering and steaming nicely drop in the
dumplings (four at a time if your steamer is small) and
steam them for 15 minutes. Serve these immediately if
you want steamed dumplings. To clone the pan-fried
version heat up some vegetable oil that’s about ¼-inch
deep in a skillet over medium heat. When the oil is hot
place the steamed dumpling with the flat side down in
the oil and saute for a couple of minutes or until the
bottom is golden brown. Serve with the dipping sauce.
• SERVES 2 TO 4 (MAKES 8 DUMPLINGS).
P. F. CHANG’S GARLIC SNAP
PEAS
MENU DESCRIPTION: “Stir-fried with garlic.”
This is a standard side dish at the country’s hottest
Chinese dinner chain, and it’ll take you just a couple
minutes to duplicate at home as a good veggie side for any
entrée, Chinese or otherwise. It’s especially good when
you’re pressed to slam together a last-minute vegetable to
go with tonight’s dinner. You can certainly stay traditional
and use a wok for this, but I always just use a medium-size
nonstick skillet. The trick is to saute the snap peas quickly
over pretty high heat, tossing often, until they’re hot, yet still
crispy and bright green. You get the garlic in right at the
end, and then quickly pop it off the heat so the garlic
doesn’t scorch. You don’t want anyone getting “bitter garlic
face.”
2 cups fresh sugar snap peas
2 teaspoons vegetable oil
⅛ teaspoon salt
dash ground black pepper
2 cloves garlic, minced
1. Prepare snap peas by cutting off the tips on
each end of the pods.
2. Preheat oil in a wok or medium skillet over
medium/high heat.
3. Saute snap peas in oil with salt and black
pepper for 2½ to 3 minutes, tossing often, until peas
are cooked, but still crispy.
The pods should begin to get a few dark brown scorched
spots developing on them when they’re done. Add minced
garlic, toss a bit more, then immediately pour the snap
peas out onto a serving platter. If you keep the garlic in too
long it could burn and get bitter on you, so don’t leave it in
the hot pan for any longer than about 10 seconds.
• SERVES 2 TO 4.
P. F. CHANG’S CHANG’S
SPICY CHICKEN
MENU DESCRIPTION: “Lightly dusted, stir-fried in a
sweet Szechwan sauce. (Our version of General Chu’s.)”
The sweet and spicy zing in the secret sauce sets this
recipe apart as one of P. F. Chang’s top picks. If you’re
looking for something simple to make with those chicken
breasts sitting in the fridge, this is a good choice. Once the
sauce is finished all you have to do is saute your chicken
and combine. And you’ll probably want to make up a little
white or brown rice, like at the restaurant. If you can’t find
straight chili sauce for this recipe, the more common chili
sauce with garlic in it will work just as well.
SAUCE
2 teaspoons vegetable oil
2 tablespoons chopped garlic
(3 to 4 cloves)
3 tablespoons chopped green
onions (about 3 onions)
1 cup pineapple juice
2 tablespoons chili sauce
2 tablespoons rice vinegar
4 teaspoons granulated sugar
1 teaspoon soy sauce
2 tablespoons water
½ teaspoon cornstarch
1 cup vegetable oil
2 skinless chicken breast fillets
⅓ cup cornstarch
1. Make the sauce by heating 2 teaspoons
vegetable oil in medium saucepan. Saute the garlic
and onion in the oil for just a few seconds, not allowing
the ingredients to burn, then quickly add the pineapple
juice, followed by chili sauce, vinegar, sugar, and soy
sauce.
2. Dissolve cornstarch in 2 tablespoons water and
add it to the other ingredients in the saucepan. Bring
mixture to a boil and continue to simmer on
medium/high heat for 3 to 5 minutes or until thick and
syrupy.
3. Heat I cup vegetable oil in a wok or a medium
saucepan over medium heat.
4. While oil heats up, chop chicken breast fillets
into bite-size pieces. In a medium bowl, toss chicken
pieces with cornstarch until dusted.
5. Saute coated chicken in the hot oil, stirring
occasionally, until light brown. Remove chicken to a
rack or paper towels to drain for a moment. Pour
chicken into a medium bowl, add sauce and toss well
to coat chicken. Serve immediately with rice on the
side.
• Serves 2.
P. F. CHANG’S DAN-DAN
NOODLES
MENU DESCRIPTION: “Scallions, garlic and chili
peppers stir-fried with ground chicken nesting on hot egg
noodles. Garnished with shredded cucumber and bean
sprouts.”
To clone P. F. Chang’s take on this traditional Chinese
noodle dish you should use a wok, but I found that a large
saucepan works well too. Saute a couple chicken breasts
ahead of time and give them a chance to cool so you can
finely mince them up. The menu says the chicken is
“ground” but it’s actually more of a fine mince. Get out the
cleaver, if you’ve got one, and chop away. Or just use a big
chef’s knife. You can prepare the chicken ahead of time
and keep it covered in the fridge until you’re ready to make
the dish. Once you’ve got the chicken hacked up, you’ll
have tasty noodles on the table in less than 10 minutes.
2 skinless chicken breast fillets,
cooked and minced
(approx. 2 cups)
1 6-ounce pkg. chow mein
noodles, cooked
2 tablespoons vegetable oil
1 tablespoon minced garlic
¼ cup chopped green onions
(green part only)
6 tablespoons soy sauce
½ cup chicken broth
¼ cup dark brown sugar
1 teaspoon chili-garlic sauce
4 teaspoons cornstarch
½ cup water
GARNISH
½ cup julienned English cucumber
½ cup bean sprouts
1. Cook chicken fillets first by simply sautéing
them in a skillet in a little oil for 10 to 12 minutes. Let
the chicken fillets cool, and then mince them into little
bits with a sharp knife.
2. Prepare noodles following the directions on the
package: boil noodles for 3 to 5 minutes in 8 to 10
cups water
3. Make sauce by heating oil over medium heat in
a saucepan or wok. Add garlic and green onion and
saute for just a few seconds, being careful not to burn
the garlic. Add the soy sauce, chicken broth, brown
sugar and chili-garlic sauce. Combine the cornstarch
with ½ cup water and stir it into the sauce. Simmer
sauce for about 2 minutes or until it thickens.
4. When the sauce is thick, add the chicken and
simmer for an additional 5 minutes.
5. Pile cooked noodles onto a serving plate.
Spoon chicken and sauce over the top of the noodles,
then garnish with julienned cucumber on one side and
bean sprouts on the other
• SERVES 4.
P. F. CHANG’S LEMON
PEPPER SHRIMP
MENU DESCRIPTION: “Stir-fried with chives and bean
sprouts,”
Chefs at P F. Chang’s China Bistro cook most dishes in
heavy woks over extremely high heat with sparks flying and
flames nipping at their noses. The special stove is
designed so that the tall fires work at the back end of the
wok, away from the chef The well-ventilated stove is built
with a steady stream of running water nearby to thin sauces
and rinse the woks after each dish is prepared. Since we
don’t have those phat, bad-boy stoves at home, the
challenge is to tweak the recipe for standard kitchen
equipment. Using a gas stove and a wok will get you the
best duplicate, but this recipe can be knocked off nicely
with a large skillet, if that’s all you’ve got. Things are moving
fast back in those P. F. Chang’s kitchens. The chefs are
well-trained, but they eyeball measurements for sauces with
a ladle, so each wok-prepared dish is going to come out a
little different. Considering this, I figured the best way to get
a good clone would be to order the dish several times. I
averaged the flavors by combining several batches of
sauce (requesting extra on the side) into one large bowl,
and then used that mixture to create the recipe. This
technique works great for recipes like this one where the
sauce is key, and measurements at the restaurant aren’t
exactly scientific. The shrimp is lightly breaded—they use
potato starch, but cornstarch is a good substitute—and
flash fried in oil. Strain the shrimp out of the oil, add it back
to the pan with the sauce, and you’ve got yourself a clone.
SAUCE
1 tablespoon vegetable oil
2 tablespoons chopped
garlic
½ teaspoon minced
ginger
cup soy sauce
cup water
2 teaspoons cornstarch
¼ cup dark brown sugar
2 teaspoons lemon juice
2 teaspoons coarse grind black
pepper
I pound medium raw shrimp
(31/40 count), shelled and
deveined
½ cup cornstarch
1 cup vegetable oil
4 thin lemon slices, each cut into
quarters
GARNISH
1 teaspoon vegetable oil
2 large green onions
1 cup bean sprouts
1. Make sauce by heating 1 tablespoon oil in a
wok or large saucepan over medium heat. Saute garlic
and ginger in the hot oil for about 15 seconds being
careful not to burn the garlic. Add the soy sauce, then
dissolve cornstarch in the water and add the mixture to
the pan. Add brown sugar, lemon juice and black
pepper and bring mixture to a boil. Simmer for two
minutes then remove it from the heat.
2. Coat all the shrimp generously with cornstarch.
Let the shrimp sit for about five minutes so that the
cornstarch will adhere better
3. Heat a cup of oil in a wok or large skillet over
medium heat. Add the shrimp to the pan and saute for
3 to 4 minutes or until the shrimp start to turn light
brown. Strain the shrimp out of the oil with a slotted
spoon or spider and dump oil. Replace shrimp back in
the wok along with the lemon slices, saute for a minute,
then add the sauce to the pan. Toss everything around
to coat the shrimp thoroughly. Cook for another minute
or so until the sauce thickens on the shrimp.
4. As the shrimp cooks, heat up I teaspoon of oil
in a separate medium saucepan. Cut the green part of
the green onions into 3-inch lengths. Add those green
onion slices and bean sprouts to hot oil along with a
dash of salt and pepper. Saute for a couple minutes
until green onions begin to soften.
5. Build the dish by pouring the green onions and
sprouts onto a serving plate. Dump the shrimp over the
veggies and serve.
• SERVES 2.
P. F. CHANG’S MONGOLIAN
BEEF
MENU DESCRIPTION: “Quickly cooked steak with
scallions and garlic.”
Beef lovers go crazy over this one at the restaurant. Flank
steak is cut into bite-size chunks against the grain, then it’s
lightly dusted with potato starch (in our case we’ll use
cornstarch), flash-fried in oil, and doused with an amazing
sweet soy garlic sauce. The beef comes out tender as can
be, and the simple sauce sings to your taste buds. I
designed this recipe to use a wok, but if you don’t have one
a skillet will suffice (you may need to add more oil to the
pan to cover the beef in the flash-frying step). P. F. Chang’s
secret sauce is what makes this dish so good, and it’s
versatile. If you don’t dig beef, you can substitute with
chicken. Or you can even brush it on grilled salmon.
SAUCE
2 teaspoons vegetable oil
½ teaspoon minced
ginger
1 tablespoon chopped garlic
½ cup soy sauce
½ cup water
¾ cup dark brown sugar
1 cup vegetable oil
1 pound flank steak
¼ cup cornstarch
2 large green onions
1. Make the sauce by heating 2 teaspoons of
vegetable in a medium saucepan over medium/low
heat. Don’t get the oil too hot or you’ll get a major
spatter when adding the other liquids. Add ginger and
garlic to the pan and quickly add the soy sauce and
water before the garlic scorches. Dissolve the brown
sugar in the sauce, then raise the heat to about
medium and boil the sauce for 2 to 3 minutes or until
the sauce thickens. Remove it from the heat.
2. Slice the flank steak against the grain into ¼inch thick bite-size slices. Tilt the blade of your knife at
about a forty-five degree angle to the top of the steak
so that you get wider cuts.
3. Dip the steak pieces into the cornstarch to
apply a very thin dusting to both sides of each piece of
beef. Let the beef sit for about 10 minutes so that the
cornstarch sticks.
4. As the beef sits, heat up one cup of oil in a wok
(you may also use a skillet for this step as long as the
beef will be mostly covered with oil). Heat the oil over
medium heat until it’s nice and hot, but not smoking.
Add the beef to the oil and saute for just two minutes,
or until the beef just begins to darken on the edges.
You don’t need a thorough cooking here since the beef
is going to go back on the heat later. Stir the meat
around a little so that it cooks evenly. After a couple
minutes, use a large slotted spoon or a spider to take
the meat out and onto papertowels, then pour the oil
out of the wok or skillet. Put the pan back over the
heat, dump the meat back into it and simmer for one
minute. Add the sauce, cook for one minute while
stirring, then add all the green onions. Cook for one
more minute, then remove the beef and onions with
tongs or a slotted spoon to a serving plate. Leave the
excess sauce behind in the pan.
• Serves 2.
P. F. CHANG’S OOLONG
MARINATED SEA BASS
MENU DESCRIPTION: “Broiled and served with sweet
ginger soy, baby corn and spinach.”
Grab a couple half-pound sea bass fillets (not too thick),
whip up a simple marinade and you’re on your way to
cloning one of the most beloved dishes at America’s
fastest growing Chinese bistro chain. The marinade is
made with only six ingredients, so you’ll have that done in
no time. If you can’t find oolong tea, you can use green tea.
Loose tea is best, but if you can only find bags, that’s okay.
One teabag contains I teaspoon of tea, so you’ll just need
half of a teabag for this recipe (in fact, the recipe still works
even without the tea). You will need to plan ahead for this
dish, however, since the fish must marinate for 5 to 7 hours.
Once the fish is marinated, fire up the oven to bake it, then
finish it off under the broiler. Saute some spinach, garlic,
and tiny corn for an optional bed that makes the dish
indistinguishable from the real thing.
MARINADE/SAUCE
2 cups water
cup soy sauce
¾ cup light brown sugar
2 teaspoons minced fresh
ginger
1 teaspoon minced fresh garlic
½ teaspoon oolong tea
Two ½-pound sea bass fillets
OPTIONAL GARNISH
I tablespoon oil
6 handfuls fresh spinach
½ teaspoon minced fresh garlic
1 5.5-ounce can whole baby sweet
corn (6 to 8 baby corns),
drained
1. Make your sauce and marinade by combining
the six ingredients in a medium saucepan over
medium heat. Bring to a boil then reduce heat and
simmer for 5 minutes. Cool uncovered, then strain out
the ginger, garlic, and tea.
2. Put your sea bass fillets in a storage bag or a
covered container with 2 cups of the marinade. Let the
fish have a nice soak in the marinade for 5 to 7 hours
in the fridge. If the sauce doesn’t completely cover the
fish, be sure to turn the fillets a couple hours in so that
all sides get marinated.
3. When you are ready to prepare the fish,
preheat your oven to 425 degrees.
4. Arrange the fillets on a baking sheet. Bake the
fish for 22 minutes or until the edges of the fillets are
starting to turn brown. Crank the oven up to a high broil
and broil fish for 2 to 3 minutes or until you get some
dark patches around the edge of the fillets. Just don’t
let them burn.
5. As your fish is baking, heat up a wok or large
skillet with one tablespoon of vegetable oil over
medium heat. Add the spinach, garlic, and baby sweet
corn, and a dash of salt and pepper to the pan. Saute
the veggies just until the spinach is wilted, then arrange
half of the spinach and corn on each of two plates.
6. When the sea bass is done broiling, use a
spatula to carefully lay each fillet on the bed of spinach
and baby corn. Split the remaining sauce and pour it
over each of the fillets before serving.
• Serves 2.
P. F. CHANG’S ORANGE PEEL
CHICKEN
MENU DESCRIPTION: “Tossed with orange peel and
chili peppers for a spicylcitrus combination.”
Several of P. F. Chang’s top-selling items are similar in
preparation technique: Bite-size pieces of meat are lightly
breaded and wok-seared in oil, then doused with a secret
sauce mixture. That’s the basis for this recipe as well, but I
have a special fondness for the citrusy sweet and spicy
flavors found in this entrée. The heat comes from chili garlic
sauce, which you’ll find in the aisle with the Asian foods in
your supermarket—the rest of the sauce ingredients are
common stuff. The orange peel is julienned into thin strips
before adding it to the dish. Since the flavor from the peel is
so strong, we won’t need to add it until the end. Cook up
some white or brown rice to serve alongside this dish and
get the chop-sticks ready.
SAUCE
1 tablespoon vegetable oil
2 tablespoons minced garlic
4 green onions, sliced
1 cup tomato sauce
½ cup water
¼ cup granulated sugar
2 tablespoons chili garlic sauce
1 tablespoon soy sauce
½ cup vegetable oil
4 skinless chicken breast fillets
½ cup cornstarch
peel from ¼ orange, julienned
(into ⅛-inch-wide strips)
1. Prepare sauce by heating I tablespoon of oil in
a medium saucepan over medium heat. Add minced
garlic and sliced green onions. Add tomato sauce and
water quickly before the garlic burns. Add sugar, chili
garlic sauce, and soy sauce and bring to a boil.
Simmer 5 to 6 minutes or until sauce thickens, then
turn off the heat.
2. Prepare the chicken by heating ½ cup oil in a
wok over medium heat. Slice chicken breast fillets into
bite-size pieces. Coat each piece of chicken with
cornstarch. Arrange coated chicken on a plate until all
chicken is coated. When oil in the wok is hot, add
about half of the chicken to the oil and cook for a
couple minutes or until brown on one side, then flip the
chicken over. When chicken is golden brown, remove
the pieces to a rack or paper towels to drain. Repeat
with the remaining chicken. When all of the chicken is
cooked rinse the oil out of the wok with water and
place it back on the stove to heat up.
3. When wok is hot again add julienned orange
peel and chicken. Heat for 20 to 30 seconds or so,
stirring gently. Add sauce to the pan and cook for
about 2 minutes. Stir the dish a couple times but do it
gently so you don’t knock the coating off the chicken.
Cook until the sauce thickens then serve with white or
brown rice on the side.
• SERVES 3 TO 4.
P. F. CHANG’S CHOCOLATE
TORTE
MENU DESCRIPTION: “Served with vanilla bean and
raspberry sauce.”
P. F. Chang’s contracts with local bakeries to produce
these delicious flourless chocolate cakes in each city
where the Chinese bistros are based. The restaurants
aren’t built for baking, and this way the chain can ensure a
fresh product every day. Now, if you’re a chocolate lover or
there’s one nearby, this is the recipe for you. The torte is
only five ingredients, and the versatile sauces create the
perfect gourmet touch. Any leftover torte and sauce can be
frozen, then thawed at a later date to effortlessly impress.
½ cup butter (1 stick)
3 cups semi-sweet chocolate chips
(18-ounces)
4 eggs
½ cup granulated sugar
1 teaspoon vanilla extract
VANILLA SAUCE
2 cups cream
½ cup granulated sugar
½ of a vanilla bean (split down
the middle)
4 egg yolks
RASPBERRY SAUCE
one 12-ounce bag frozen
raspberries, thawed
3 tablespoons granulated sugar
2 to 4 tablespoons water
2 tablespoons Chambord
raspberry liqueur
1. Preheat oven to 325 degrees.
2. Melt butter in a medium saucepan over low
heat. Add chocolate chips and stir occasionally until
chocolate is completely melted. Be very careful not to
overcook the chocolate or it may burn and taste funny.
Not funny ha-ha—funny bad. Remove chocolate from
the heat when it’s melted.
3. Beat 4 eggs until fluffy in a large bowl, then add
sugar and vanilla and mix well until sugar is dissolved.
4. Temper the egg mixture by stirring in just a few
tablespoons of the warm chocolate at first. This will
keep the eggs from cooking. Slowly add the rest of the
chocolate and mix until well combined.
5. Pour the batter into a 9-inch springform pan that
has been lined on the bottom and sides with
parchment paper (butter the pan before you add the
parchment paper—the butter will make the paper
stick). Bake for 40 to 50 minutes or until middle of the
cake begins to firm up. Remove, cool, cover and chill
the cake until you are ready to serve it.
6. As the torte bakes, prepare vanilla sauce by
combining cream with ¼ cup sugar in a medium
saucepan over medium/low heat. Use a knife to
scrape the seeds from inside the vanilla bean half,
then add the seeds and the bean pod to the pan. Heat
mixture, stirring often, just until boiling then turn off heat.
Watch the cream closely so that it does not boil over
7. In a medium bowl whisk together remaining ¼
cup of sugar and egg yolks until smooth. Temper the
egg yolks by stirring in a few tablespoons of the hot
cream mixture. Pour the entire mixture back into the
saucepan and heat it up again, stirring often until it
begins to boil. Immediately pour the sauce into a
medium bowl that has been set in a larger bowl filled
with ice. This ice bath will help to quickly cool the
sauce so that it doesn’t curdle. Cover and chill the
sauce until you are ready for it.
8. Make the raspberry sauce by pureeing the
thawed raspberries in a blender Add 2 to 4
tablespoons of water to thin the pureed berries a bit—
if your berries have a lot of juice add 2 tablespoons of
water; if they have just a little juice, add 4 tablespoons
of water Strain the seeds from the raspberry puree
then pour the puree into a medium saucepan over
medium heat. Add 3 tablespoons granulated sugar
and 2 tablespoons of raspberry liqueur to the pan.
Heat until boiling then remove raspberry sauce from
heat. Cover and chill it.
9. When you are ready to serve your torte, first
spoon some raspberry sauce and vanilla sauce onto a
plate. Carefully place the slice of torte on the sauces,
but turn it over so that the top of the torte is on the
bottom. This is how a flourless chocolate cake is
served—topside down. The restaurant zaps the cake
for 30 seconds or so in the microwave before serving,
so that it is slightly warm. However, you might prefer
yours cold.
• SERVES 8.
RED LOBSTER TARTAR
SAUCE
Here’s a clone for the dollop of sweet, creamy goodness
that comes alongside your fish entree at the world’s largest
seafood chain. This original kitchen replica gives you a
quick and tasty sauce that has the look and flavor of the real
thing—and it’s only five ingredients! Use the sauce to dress
up your next home-cooked fish platter or as a spread on
fish sandwiches and fish tacos.
½ cup mayonnaise
1½tablespoons finely minced
onion
1 tablespoon sweet pickle relish
1½ teaspoons shredded and
chopped carrot (bits the size
of rice)
1½ teaspoons sugar
Combine all ingredients in a small bowl. Cover and chill.
• MAKES 4 SERVINGS.
RED LOBSTER CHEDDAR BAY
BISCUITS
Order an entree from America’s largest seafood restaurant
chain and you’ll get a basket of some of the planet’s
tastiest garlic-cheese biscuits served up on the side. For
many years this recipe has been the most-searched-for
clone recipe on the Internet, according to Red Lobster. As
a result, several versions are floating around, including one
that was at one time printed right on the box of Bisquick
baking mix.
The problem with making biscuits using Bisquick is that if
you follow the directions from the box you don’t end up with
a very fluffy or flakey finished product, since most of the fat
in the recipe comes from the shortening that’s included in
the mix. On its own, room temperature shortening does a
poor job creating the light, airy texture you want from good
biscuits, and it contributes little in the way of flavor. So, we’ll
invite some cold butter along on the trip—with grated
Cheddar cheese and a little garlic powder. Now you’ll be
well on your way to delicious Cheddar Bay. Wherever that
is.
2½ cups Bisquick baking mix
4 tablespoons cold butter (½ stick)
1 heaping cup grated Cheddar
cheese
¾ cup cold whole milk
¼ teaspoon garlic powder
BRUSH ON TOP
2 tablespoons butter, melted
½ teaspoon garlic powder
¼ teaspoon dried parsley flakes
pinch salt
1. Preheat your oven to 400 degrees.
2. Combine Bisquick with cold butter in a medium
bowl using a pastry cutter or a large fork. You don’t
want to mix too thoroughly. There should be small
chunks of butter in there that are about the size of
peas. Add Cheddar cheese, milk, and ¼ teaspoon
garlic. Mix by hand until combined, but don’t over mix.
3. Drop approximately ¼-cup portions of the
dough onto an ungreased cookie sheet using an ice
cream scoop. Bake for 15 to 17 minutes or until the
tops of the biscuits begin to turn light brown.
4. When you take the biscuits out of the oven, melt
2 tablespoons butter in a small bowl in your
microwave. Stir in ½ teaspoon garlic powder and the
dried parsley flakes. Use a brush to spread this garlic
butter over the tops of all the biscuits. Use up all of the
butter
• MAKES A DOZEN BISCUITS.
RED LOBSTER BACONWRAPPED STUFFED SHRIMP
It’s shrimp, it’s bacon, it’s cheese; what’s not to like? It’s
one of the groovy appetizers on the Red Lobster menu, and
now you can create it at your crib. Find some large shrimp,
a wooden skewer, and cook the bacon about halfway to
done before you begin. Mix up a clone of Red Lobster’s top
secret seasoning and the cilantro-ranch dipping sauce, and
you’re minutes away from scarfing down a delectable dish
that’s meant to be a teaser for what’s to come. Looks like
you’ll need to make the main course a real doozy.
SEASONING
¼ teaspoon salt
¼ teaspoon paprika
pinch ground black pepper
pinch garlic powder
pinch onion powder
pinch cayenne pepper
pinch ground allspice
CILANTRO-RANCH DIPPING SAUCE
cup ranch dressing
1 teaspoon minced fresh cilantro
10 pieces bacon
10 large shrimp
5 fresh jalapeno slices
2 ounces pepper
Jack cheese
1. Preheat oven to 425 degrees.
2. Make the seasoning blend by combining the
ingredients in a small bowl. Set this aside.
3. Make the dipping sauce by combining the
ranch dressing with cilantro in another small bowl.
4. Cook the bacon in a frying pan over
medium/high heat, but don’t cook it all the way to
crispy. You want undercooked bacon that, when cool,
will easily wrap around the shrimp. Cook the bacon
about 3 minutes per side, and don’t let it brown. When
the bacon is done lay it on paper towels to drain and
cool.
5. Shell the shrimp, leaving the last segment of the
shell and the tail. Remove the dark vein from the back
of the shrimp, and then cut down into the back of the
shrimp, without cutting all the way through, so that the
shrimp is nearly butterflied open. This will make a
pocket for the pepper and cheese.
6. Pour I cup of water into a small bowl. Add the
shrimp and jalapeno peppers and microwave for 90
seconds or until the shrimp has just cooked through
and changed color to white. Immediately pour the
water out of the bowl, remove the jalapeno slices and
pour cold water over the shrimp. Place the shrimp and
jalapeno pepper slices onto paper towels to drain off
excess water.
7. Build the appetizer by cutting the jalapeno
slices in half and removing the seeds. You should now
have 10 jalapeno slices. Place one slice into the slit on
the back of a shrimp. Cut an inch-long chunk of cheese
(about ¼-inch thick), and place it on the jalapeno slice.
Wrap a piece of bacon around the shrimp, starting
where the cheese is. Start wrapping with the thinnest
end of the bacon. Go 1½ times around the shrimp and
then cut off the excess bacon and slide a skewer
through the shrimp to hold everything in place. Repeat
with the remaining shrimp and slide them onto the
skewer with the tails facing the same direction. Make
two skewers of 5 shrimp each.
8. Put the skewers onto a baking sheet and
sprinkle a light coating of the seasoning blend over the
shrimp, then bake for 5 to 7 minutes or until the bacon
browns and the cheese begins to ooze. Serve over a
bed of rice if desired. Feed the leftover bacon pieces
to the dog while you scarf out on the shrimp.
• SERVES 4 AS AN APPETIZER.
RED LOBSTER CHEDDAR BAY
CRAB BAKE
Ahoy. Banking on the popularity of the chain’s Cheddar Bay
Biscuits, Red Lobster chefs developed this pizza-shaped
appetizer with crust made from the cheesy biscuit dough,
and crab and Cheddar cheese baked on top. If you like
those tender, cheesy garlic biscuits that come with every
meal at Red Lobster, then you’ll probably like this. If you
don’t like it, then you’re probably not alone. This item is
nowhere to be found on Red Lobster’s menu these days,
and that should tell you something about how well it sold.
But hey, even good dishes get discontinued. If you’re up for
giving this clone a shot, get yourself some fresh crabmeat.
If you want to take a shot a little less expensively, find some
quality canned stuff. If you don’t want to take a shot at all, try
the next recipe.
2 cups Bisquick baking mix
1 ¾ cup finely shredded Cheddar
cheese
cups milk
2 tablespoons butter, melted
¼ teaspoon garlic powder
½ teaspoon dried parsley flakes
cup crabmeat (fresh or canned
lump)
1. Preheat oven to 450 degrees.
2. Combine baking mix, I cup of the Cheddar
cheese, milk, and half of the melted butter in a medium
bowl. Mix by hand until combined.
3. Pat out the dough into circle approximately 8
inches in diameter, with a slight lip around the edge,
like a pizza crust.
4. Sprinkle the parsley over the top of the dough.
Be sure the dried parsley flakes are crushed fine. You
can easily crush the flakes in a small bowl with your
thumb and forefinger
5. Sprinkle the crab over the top of the dough.
6. Sprinkle the remaining cheese over the crab.
Don’t go all of the way to the edge of the dough—leave
a margin of a half-inch or so around the edge.
7. Bake for 14 to 16 minutes or until the cheese
on top begins to brown slightly.
8. Combine the remaining butter with the garlic
powder and brush it over the top of the bake as soon
as it comes out of the oven. Slice it like a pizza into 8
pieces and serve hot.
• MAKES 8 PIECES.
RED LOBSTER PARROT BAY
COCONUT SHRIMP
MENU DESCRIPTION: “Jumbo butterflied shrimp hand-
dipped in batter flavored with Captain Morgan Parrot Bay
Rum & coconut flakes. Served with pina colada dipping
sauce.”
Fans of this dish say the best part is the pina colada
dipping sauce. And it’s true; that sauce is so good you
could eat it with a spoon. But the coconut shrimp is pretty
awesome too, just on its own. Red Lobster’s secret formula
includes Captain Morgan’s Parrot Bay rum, which
sweetens the batter and adds a great coconut flavor (plus
you can whip up a nice cocktail with it while you’re cooking,
if that’s your thing). Panko breadcrumbs—which give a nice
crunch to the batter—can be found in the aisle of your
market where all the Asian foods are parked. This secret
recipe makes two times the size of a serving you get at the
Lobster, so there should be enough for everyone. The real
thing comes with salsa on the side in addition to the pina
colada sauce, but you may not even want to include it.
PINA COLADA DIPPING SAUCE
½ cup sour cream
¼ cup pina colada mix (liquid)
¼ cup crushed pineapple
(canned)
2 tablespoons granulated
sugar
SHRIMP
6 to 10 cups canola oil (amount
required by fryer)
12 large shrimp, peeled and
deveined (about ½ pound)
1½ cups all-purpose flour
2 tablespoons granulated sugar
¼ teaspoon salt
1 cup milk
2 tablespoons Captain Morgan’s
Parrot Bay coconut rum
1 cup panko (Japanese
breadcrumbs)
½ cup shredded coconut
ON THE SIDE
salsa
1. Prepare pina colada dipping sauce first by
combining all the ingredients. Cover this and let it chill
out in the fridge while you make the shrimp.
2. Heat oil to 350 degrees.
3. Measure ¾ cup of flour into a medium bowl. In
another medium bowl mix together the remaining ¾
cup flour, sugar, and salt. Stir milk and rum into flour
mixture. Let this batter stand for five minutes. While the
batter rests, combine panko breadcrumbs and
shredded coconut into a third medium bowl.
4. Butterfly cut each shrimp before you start the
battering: Use a sharp knife to slice through the top of
the shrimp (where the vein was) so that you can
spread the shrimp open. Leave the tail intact.
5. To batter the shrimp, dip each one in the flour,
then the wet batter, then coat each shrimp with the
panko/coconut mixture. Arrange the shrimp on a plate
until all of them are battered.
6. Fry the shrimp by dropping six at a time into the
hot oil for 2 to 3 minutes or until the shrimp are golden
brown. Remove shrimp to a rack or paper towels to
drain.
7. Serve shrimp with pina colada dipping sauce
on the side, along with a small dish of your favorite
salsa, if you like.
• SERVES 3 TO 4 AS AN APPETIZER.
RED LOBSTER NEW
ENGLAND CLAM CHOWDER
Considered one of Red Lobster’s signature items, this dish
has been screaming to be cloned for years now. The tiny
screams, which sound like hundreds of little clams being
plucked from their shells, could no longer be ignored.
What’s great about this clone recipe is that we don’t have
to do any of the plucking ourselves. Rather than going
through the tedious (and expensive) task of steaming fresh
clams and dicing up all the good parts, we can use the
more affordable and convenient canned clams found in any
supermarket. Just remember to not toss out the clam juice
in the cans when you open them, since you’ll need that
flavorful liquid in the first step.
2½ cups water
3 6.5-ounce cans minced clams
(plus liquid)
½ cup all-purpose flour
1 teaspoon minced fresh parsley
½ teaspoon salt
¼ teaspoon ground black pepper
I bay leaf
dash dried thyme
2 white or red potatoes, peeled
and diced (not russet or
yellow potatoes)
I cup heavy cream
1. Combine water and liquid drained from all 3
cans of clams in a large saucepan. Stir in flour,
parsley, salt, pepper, bay leaf and thyme. Turn to
medium heat.
2. When water begins to bubble, add the potatoes
and simmer for 5 minutes. Stir often to keep the
potatoes from sticking to the bottom of the pan.
3. Add the clams to the saucepan and simmer for
10 minutes, stirring often.
4. Add the cream and simmer for an additional 5
minutes. Watch the pan carefully to be sure the
chowder doesn’t bubble over. Turn down the heat if the
soup begins to erupt.
• MAKES 5 SERVINGS.
TIDBITS
Some brands of canned clams seem to be saltier than
others. Depending on the saltiness of the clams you
choose, you may want to add a bit more salt. Start with an
additional ¼ teaspoon of salt if you find the soup on the
bland side.
RED LOBSTER TERIYAKI
GLAZED FRESH FISH
Preheat your grill and put on your sandals for this great
clone that’s perfect when you’ve got a hankering for a
tropical grilled fish dinner. Red Lobster lets you chose your
favorite fish from the menu, then prepares it on the grill with
a basting of tangy citrus and ginger teriyaki glaze. The
delicious pineapple-mango salsa is the perfect finishing
touch. Once you’ve got your favorite fresh fish from the
market, you just need to prepare the sauce and salsa, and
light the tiki torches.
TANGY CITRUS & GINGER TERIYAKI
SAUCE
½ cup thick teriyaki glaze
(Kikkoman)
cup orange juice
2 tablespoons honey
2 teaspoons vegetable oil
I teaspoon lemon juice
¼ teaspoon fresh minced ginger
COOL PINEAPPLE-MANGO SALSA
½ cup diced canned pineapple
½ cup diced fresh mango
¼ cup diced tomato
I tablespoon chopped green onion
1 teaspoon diced canned jalapeno
1 teaspoon minced fresh cilantro
4 SERVINGS OF THE FISH OF YOUR
CHOICE:
salmon, tilapia, rainbow trout, halibut, snapper, or
swordfish
1. Prepare teriyaki sauce by combining all the
ingredients in a blender until ginger is completely
pureed. Chill until needed.
2. Prepare pineapple-mango salsa by combining
the ingredients in a medium bowl. Cover and chill until
needed.
3. Prepare fish by preheating your grill on high
heat. Lightly salt and pepper the fish and grill it until
done. Brush the fish with a coating of the teriyaki
sauce just before it is removed from the heat. Carefully
place each fish serving on the center of the plates.
Spoon a garnish of the pineapple-mango salsa on top
of each serving. Serve extra garnish and teriyaki on
the side, if desired.
• MAKES 4 SERVINGS.
TIDBITS
The P F. Chang’s Mai Tai clone (found on page 294)
makes a great companion cocktail for this dish, and the
Red Lobster Parrot Bay Coconut Shrimp (on page 335) is
the perfect appetizer if you’re rolling with the tropical island
theme.
RED ROBIN SEASONING
Give yourself some time to make a tough decision when
you get to this casual chain because there are nearly two
dozen gourmet burgers on the Red Robin menu to pick
from, not to mention scores of other fantastic food choices.
Red Robin claims the steak fries served with your burger
are world-famous. I’m not sure if that’s been confirmed, but I
do know one thing that makes the fries popular in my book:
They come in an all-you-can-eat bottomless portion. Want
more fries? Just ask, and you can have as many as your
belly can pack in. As you’re stuffing yourself, you may notice
that the burgers and french fries at Red Robin have
something in common that makes them taste so special.
That’s right, it’s the seasoning blend. And I’ve got a clone
for you right here that includes instant tomato soup mix as
the secret ingredient. So, next time you make a burger,
sprinkle some of this TSR version of the seasoning blend
on the patty. When you cook up some frozen steak fries or
french fries, sprinkle a little of this blend on them as soon as
they come out of the oven or fryer. Soon, you’ll discover all
sorts of uses for this versatile spice blend. And the recipe
here makes a portion that fits nicely into an empty spice
bottle.
3 tablespoons salt
1 tablespoon instant tomato soup
mix (Knorr tomato with basil
works great)
2 teaspoons chili powder
¼ teaspoon ground cumin
¼ teaspoon ground black pepper
Combine the ingredients in a small bowl and stir well. Store
in a covered container.
• MAKES ⅓ CUP.
RED ROBIN 5 ALARM
BURGER
MENU DESCRIPTION: “Crank up the heat with Pepper-
Jack cheese, jalapenos, fresh tangy salsa, sliced tomato,
crisp lettuce and chipotle mayo.”
According to Red Robin waiters, this spicy production is
the second most popular choice from a list of 22 delicious
designer burgers on the menu. If you like a peppery punch
from your chow, this is the burger recipe to add to your grilltime repertoire. The hamburger patties on Red Robin
burgers are huge, weighing in at ⅓ of a pound each, so get
out your kitchen scale if you want a good clone. The
restaurant chain uses its secret spice blend to season the
patty, so whip that up first from the clone recipe on page
342 (or you can substitute seasoned salt, such as Lawry’s).
Fresh salsa or pico de gallo can usually be found in the deli
section at the supermarket, and ground chipotle chile
pepper (smoked red jalapenos) can be found next to the
chili powder in the spice aisle. It’s good stuff to have on
hand in your spice cabinet since it’s becoming a more
popular ingredient these days.
CHIPOTLE MAYO
¼ cup mayonnaise
¼ teaspoon ground chipotle chile
pepper
⅛ teaspoon paprika
¼ teaspoon (approx.) Red Robin
Seasoning clone (on page
342)
2 slices pepper jock cheese
1 sesame seed hamburger bun
I 5.5-ounce ground beef patty
4 to 6 bottled jalapeno slices
(nacho slices)
2 tablespoons fresh salsa or pico
de gallo
cup shredded iceberg lettuce
1. Make the chipotle mayo spread by combining
the ingredients in a small bowl. Cover and chill until you
are ready to use it.
2. Preheat barbecue or indoor grill to medium
heat.
3. Since the ground beef will shrink as it cooks,
shape it into a round patty that is slightly larger than the
sesame seed bun. Sprinkle a bit of the seasoning
blend over both sides of the patty. Grill for 3 to 5
minutes per side, or until the patty is cooked the way
you like it. About 1 minute before the burger is done
place a couple slices of pepper Jack cheese on top of
the patty to melt.
4. As the hamburger is grilling toast the face of the
top and bottom sesame seed bun on an indoor griddle
or skillet over medium heat.
5. Build your burger by first spreading
approximately 2 teaspoons of the chipotle mayo on
each of the toasted faces of the top and bottom bun.
6. Stack the hamburger patty on the bottom bun.
7. Stack 4 to 6 jalapeno slices on the patty.
8. Spoon 2 tablespoons of salsa or pico de gallo
over the jalapeno slices.
9. Add about ⅓ cup of shredded lettuce on next,
then finish the burger off with the top bun.
• MAKES 1 BURGER.
RED ROBIN BANZAI BURGER
MENU DESCRIPTION: “Marinated in teriyaki and topped
with grilled pineapple, Cheddar cheese, lettuce, tomatoes,
and mayo, Dude, you’ll be like, ready to ride the pipeline
on 0’ahu’s North Shore after you chomp on this!”
Here’s customer choice number one from Red Robin’s
huge burger menu. According to Red Robin servers, the
beef they use for all their burgers is ground from Angus
flank steak. That meat makes for a great burger to be sure,
but it’s tough to find in the market unless you grind your
own. So if you’re not up for some good old-fashioned meatgrinding fun, just pick up ground chuck for this recipe. If you
can’t find chuck, sirloin will have to do. Just make sure the
fat content is at least 15 percent, since low-fat ground beef
makes burgers that are just too dry and short on flavor. I
tested a half-dozen popular teriyaki glazes in the stores and
nothing comes close to the stuff they use at the restaurant,
so I’ve included a recipe here to make your own. Be sure to
watch your marinated meat and pineapple slices closely on
the grill since the sugar in the teriyaki marinade could burn
over the open flame. If you’re grilling outside, keep the lid
open. And don’t hit the La-Z-Boy until this puppy’s done.
TERIYAKI MARINADE
1 ¾ cups water
I cup soy sauce
I cup light brown sugar
½ teaspoon onion powder
½ teaspoon garlic
powder
1 5.5-ounce ground beef patty
2 canned pineapple slices
2 slices Cheddar cheese
I sesame seed hamburger bun
4 teaspoons mayonnaise
2 tomato slices
cup shredded iceberg lettuce
1. Make teriyaki marinade by combining all the
ingredients in a small saucepan over medium/high
heat. Bring mixture to a boil then reduce heat and
simmer for 10 minutes or until sauce thickens. Cover
and chill marinade in the refrigerator for at least 30
minutes.
2. Form your ground beef into a round patty that is
slightly larger in diameter than the sesame seed bun.
Pour a little of the teriyaki glaze into a plastic container
with a lid (such as Tupperware), then carefully drop in
your patty. Add enough teriyaki glaze to cover the
patty, then seal up the container and pop it into the
fridge for at least 4 hours, but no more than 12 hours.
Put the two pineapple slices into another container
with a lid, add the remaining teriyaki glaze, cover it and
chill the pineapple in the refrigerator for the same time
as the burger.
3. When you are ready to make your hamburger,
preheat barbecue or indoor grill to medium heat.
4. Start grilling the hamburger patty first. Cook it
for 3 to 5 minutes per side or until it reaches your
desired doneness. When you flip the burger add the
pineapple slices to the grill. The pineapple will take
about half as long to cook as the burger. You’ll know
the pineapple slices are done when they have some
nice grill marks on each side. Be careful not to burn the
burger or the pineapple. The teriyaki contains sugar,
which may char if grilled too long. About 1 minute
before the burger is done place 2 slices of Cheddar
cheese on top of the patty to melt.
5. As the hamburger is grilling, toast the face of
the top and bottom sesame seed bun on an indoor
griddle or skillet over medium heat.
6. Build your burger by first spreading
approximately 2 teaspoons of mayo on each of the
toasted faces of the top and bottom bun.
7. Stack the hamburger patty on the bottom bun.
8. Arrange the tomato slices on the patty.
9. Stack the grilled pineapple on top of the tomato
slices.
10. Add about cup of shredded lettuce on next,
then finish the burger off with the top bun.
• MAKES I BURGER.
RED ROBIN TERIYAKI
CHICKEN BURGER
MENU DESCRIPTION: “A premium charbroiled chicken
breast with sweet teriyaki sauce, grilled prneapple, SWISS
cheese, lettuce, tomatoes & mayo. Why did the chicken
cross the Pacific? Now you know.”
You’re out there on the front line hanging over the grill. The
smoke’s in your eyes, the hair on your forearm is singed,
and your sunburn is heading toward 2nd degree. But you
don’t care, because it’s Saturday and you still get all of
Sunday to heal. So whip out some chicken and grab the
mallet—it’s time to pound the flesh for this sweet chicken
sandwich. With the kitchen mallet in hand, not only will you
have an opportunity for further heroic injury, but you’ll also
be able to pound the chicken breast to a uniform thickness
that works best when building sandwiches. The sweet and
salty flavors of the custom secret teriyaki marinade go
perfectly with the grilled pineapple and Swiss cheese (this
recipe is for one sandwich but you’ll have enough teriyaki
marinade to make several sandwiches). Just be sure to
watch the pineapple and chicken carefully while over the
flames, since the teriyaki marinade has sugar in it and
could cause charring from nasty flare-ups. Those small
fires, while exciting, are just not good for your food.
TERIYAKI MARINADE
1 ¾ cups water
1 cup soy sauce
1 cup light brown sugar
½ teaspoon onion powder
½ teaspoon garlic powder
1 5-ounce skinless chicken breast
fillet
2 canned pineapple slices
2 slices Swiss cheese
1 sesame seed hamburger bun
4 teaspoons mayonnaise
2 tomato slices
cup shredded iceberg
lettuce
1. Make teriyaki marinade by combining all the
ingredients in a small saucepan over medium/high
heat. Bring mixture to a boil then reduce heat and
simmer for 10 minutes or until sauce thickens. Cover
and chill marinade in the refrigerator for at least 30
minutes.
2. Cover the chicken breast fillet with plastic wrap
and pound on it with a kitchen mallet so that it is about
½-inch thick. The fillet should be a little larger than the
diameter of your sesame seed bun. Pour a little of the
teriyaki glaze into a plastic container with a lid (such as
Tupperware), then drop the chicken in. Add enough
teriyaki glaze to cover the chicken, but make sure you
save some to marinate the pineapple slices. Seal up
the container and pop it into the fridge for at least 4
hours, but no more than I 2 hours. Put the two
pineapple slices into another container with a lid, add
the remaining teriyaki glaze, cover the container and
chill it in the refrigerator for the same time as the
chicken.
3. When you are ready to make your sandwich,
preheat the barbecue or indoor grill to medium heat.
4. Start grilling the chicken breast first. Cook the
chicken for 4 to 6 minutes per side or until it’s done.
When you flip the chicken add the pineapple slices to
the grill. The pineapple will take less time to cook—
about 3 or 4 minutes. You’ll know the pineapple slices
are done when they have some nice grill marks on
each side. Be careful not to burn the chicken or the
pineapple. The teriyaki contains sugar, which may char
if
grilled too long. About 1 minute before the chicken
is done place 2 slices of Swiss cheese on top of the
fillet to melt.
5. As the chicken is grilling toast the face of the
top and bottom sesame seed bun on an indoor griddle
or skillet over medium heat.
6. Build your sandwich by first spreading
approximately 2 teaspoons of the mayo on each of the
toasted faces of the top and bottom bun.
7. Stack the chicken breast on the bottom bun.
8. Arrange the tomato slices on the chicken.
9. Stack the grilled pineapple on top of the tomato
slices.
10. Add about ⅓ cup of shredded lettuce on next,
then finish the sandwich off with the top bun.
MAKES I SANDWICH.
ROADHOUSE GRILL
ROADHOUSE RITA
If you want to keep this cocktail authentic you’ll need to
rustle up a 32-ounce jar. Bartenders at the Roadhouse Grill
mix this delicious yet potent libation in a large mason jar
normally used for canning. You say you don’t have one of
those lying around? You have yet to enter the canning
phase of your life? Not to worry. Just wash out a hefty
mayonnaise jar—the large size. Those big mayo jars weigh
in at exactly 32 ounces and provide you with an excuse for
finally ditching the yellow gunk that’s been fermenting in the
back of the fridge for the last two years. For non-purists,
any 32-ounce drinking glass or mug will do. Just be sure to
fill your glass nearly to the top with ice before you mix. The
salt on the rim is optional, but aspirin after a couple of these
babies could prove to be essential.
3 ounces Jose Cuervo Gold Tequila
(2 shots)
1 ½ ounces Triple Sec (1 shot)
¾ cup sweet-and-sour mix
¾ cup orange juice
1 ½ ounces Bud Light (I shot)
wedge of lime
OPTIONAL
margarite salt (for rim of glass)
1. If you want salt on the rim of your glass, moisten
the rim of a 32-ounce mason jar (a cup or glass is fine)
and dip it in margarita salt.
2. To make the drink, fill the jar with ice. Add a
couple shots of tequila, a shot of Triple Sec, then some
sweet-and-sour mix and orange juice (in equal
amounts) to within a half-inch of the top of the glass.
Stir.
3. Splash a shot of beer over the top of the drink.
4. Add a wedge of lime and serve with a straw.
• MAKES I SERVING.
ROADHOUSE GRILL
ROADHOUSE CHEESE WRAPS
MENU DESCRIPTION: “Our original ‘eggrolls’ stuffed
with Cheddar and Monterey Jack cheese, green onions
and a touch ofjalapeño peppers. Served with marinara.”
This variation on the popular fried cheese sticks appetizer
conceals spicy jalapeno peppers and green onions in the
middle, and then it’s all wrapped up in large spring roll
wrapper before frying. The marinara sauce on the side is
perfect for dipping the cheesy tidbit, but you might also try
your favorite salsa. To save time-and we all like that—use
your favorite bottled marinara sauce for dipping so you
won’t need to whip up something from scratch.
8 thin slices Monterey Jack cheese
8 thin slices Cheddar cheese
1 jalapeno pepper, seeded and
diced
1 green onion, diced
4 large spring roll wrappers
I beaten egg
6 to 10 cups vegetable oil (as
required by your fryer)
ON THE SIDE
marinara sauce
1. Use a sharp knife to make 8 thin slices each
from the end of standard-size hunks of Cheddar and
Monterey Jack cheeses.
2. Arrange 2 slices of Cheddar and 2 slices of
Jack on your hand, then sprinkle about I teaspoon of
diced jalapeno on top of the cheese. Sprinkle about ¼
teaspoon of diced green onion on next. Sandwich the
peppers and green onion between the cheeses and
roll it all up. Fold the cheese and squeeze it all together
so that the peppers and green onion are sealed into
the middle of the cheeses.
3. Lay a spring roll wrapper with one corner
pointing away from you. Arrange the cheese
lengthwise on the center of the wrapper.
4. Fold one of the side corners over the cheese
filling. Brush a little beaten egg on the tip of the other
side corner and fold it over the first corner so that it
sticks. Brush some beaten egg on the corner pointing
away from you. Fold the bottom corner up and over the
filling. Roll the wrapper up, keeping it tight, until it rolls
over the top corner with the egg on it. It should stick.
Repeat with the remaining ingredients, then cover all
the wraps and chill for at least 30 minutes. This will be
long enough to heat up the oil in a deep fryer or large
saucepan to 350 degrees.
5. When the oil is hot, fry the rolls for 2½ to 3
minutes or until the outside is golden brown. Drain the
rolls on a rack or paper towels for 2 minutes before
serving with your favorite marinara sauce on the side
for dipping.
• SERVES 2 TO 4 AS AN APPETIZER.
ROADHOUSE GRILL BABY
BACK RIBS
MENU DESCRIPTION: “Our award-winning Baby Back
Ribs are slow-roasted, then basted with Jim Beam
Bourbon BBQ Sauce and finished on our Mesquite grill.”
When your crew bites into these baby backs they’ll savor
meat so tender and juicy that it slides right off the bone. The
slow braising cooks the ribs to perfection, while the quick
grilling adds the finishing char and smoky flavor. But the
most important component to any decent rack of ribs is a
sauce that’s filled with flavor, and this version of Roadhouse
Grill’s award-winning sauce is good stuff. I ordered the ribs
naked (without sauce) so that I could see if there was any
detectable rub added before cooking and I didn’t find
anything other than salt and a lot of coarse black pepper So
that’s the way I designed the recipe, and it works. You may
also wish to add a little sauce to the ribs before they go into
the oven as a great variation on the technique.
2 large racks of pork baby back
ribs
salt
coarse ground black pepper
SAUCE
2 tablespoons vegetable oil
¼ cup minced fresh onion
1½ cups water
½ cup tomato paste
½ cup apple cider vinegar
½ cup brown sugar
2 tablespoons honey
I tablespoon Worcestershire sauce
1 ¾ teaspoon salt
I teaspoon liquid mesquite smoke
I teaspoon Jim Beam whiskey
¼ teaspoon coarse ground black
pepper
⅛ teaspoon garlic powder
⅛ teaspoon paprika
1. To make the ribs, cut each large rack of ribs in
half so that you have 4 half-racks. Sprinkle a light
coating of salt and a more generous portion of coarse
pepper over the top and bottom of each rack. Wrap
the ribs in aluminum foil and bake in a preheated 275
degree oven for 2½ hours.
2. As the ribs cook, make the sauce by heating
the oil in a medium saucepan over medium/high heat.
Saute the onions for 5 minutes or until they start to
brown. Add the remaining ingredients and bring
mixture to a boil then reduce heat and simmer for 1¼
hours, uncovered, or until sauce thickens. Remove
from heat and set aside until the ribs are ready.
Preheat your barbecue grill.
3. When ribs are finished in the oven, the meat
should have pull back about ½-inch from the cut ends
of the bones. Remove the ribs from the oven, let them
sit for 10 minutes or so, then remove the racks from
the foil and put them on the grill. Grill the ribs for 3 to 4
minutes per side. They should be slightly charred in a
few spots when they’re finished. Brush barbecue
sauce on the ribs while they’re grilling, just before you
serve them. Don’t add the sauce too early or it may
burn.
• Serves 2 (FULL-RACKS) TO 4 (HALF-RACKS).
ROMANO’S MACARONI GRILL
CHICKEN PORTOBELLO
MENU DESCRIPTION: “Grilled chicken breast with
Portobello mushrooms, smoked mozzarella and demi
glace, with a spinach orzo pasta.”
Fire up the grill for this take on one of Romano’s most
popular entrees. After you grill a couple of portobello
mushroom caps, slice them thinly at an extreme angle to
make wide slices that fit perfectly on top of grilled chicken
breasts that have been rubbed with stone ground mustard
(the kind with the whole mustard seeds in it). Romano’s
delicious demi glace is made from reduced veal stock, but
a nice substitute can be made from a combination of
canned beef broth and chicken broth. With plenty of garlic,
rosemary and thyme in there, you’ll have sauce that will get
everyone in the house drooling as it simmers on the stove.
The fresh julienned spinach tossed into the orzo pasta just
before it’s served scores extra points.
2 portobello mushroom caps
DEMI GLACE
1 tablespoon extra virgin olive oil
6 cloves garlic, crushed
3 cups beef broth
2 cups chicken broth
1 tablespoon cornstarch
2 teaspoons chopped fresh
rosemary
½ teaspoon chopped fresh thyme
¼ teaspoon ground black pepper
ORZO PASTA
I pound orzo pasta
1 tablespoon extra virgin oil
2 tablespoons minced garlic
(4 cloves)
¾ cup diced red bell pepper
(½ pepper)
I cup chicken broth
4 tablespoons butter (½ stick)
I teaspoon salt
½ teaspoon ground black pepper
4 cups julienned fresh spinach
4 skinless chicken breast fillets,
halved (or 8 small fillets)
8 slices smoked mozzarella cheese
8 teaspoons stone ground mustard (such as
Inglehoffer)
1. Preheat your grill to high. Remove the stems
from the portobello mushrooms and brush the caps
with a coating of olive oil. Sprinkle salt and pepper on
the underside of each cap, then grill for about 3
minutes per side. Remove the mushroom caps from
the grill to cool for about 5 minutes. Slice the
mushrooms at an extreme angle with a very sharp
knife so that you get very wide slices. You want the
knife almost parallel to the cutting surface so that your
slices will cover the chicken breast. Take 8 of the
biggest slices, cover them, then chop up the left over
mushroom to use in the sauce.
2. Prepare the demi glace sauce by heating I
tablespoon of extra virgin olive oil in a medium
saucepan over medium/low heat. Crush 6 cloves of
garlic with the palm of your hand and toss them into the
oil along with the chopped mushroom pieces. Sweat
the garlic and mushroom (slowly cook without
browning) for 10 minutes. Add beef broth and chicken
broth, then whisk in cornstarch. Add rosemary, thyme
and black pepper and simmer for 40 minutes, then
remove sauce from heat and cover it.
3. Prepare the orzo pasta by boiling it in a large
pot of water You want it al dente, which means it
should be slightly tough (we’ll be cooking it more later).
That should take about 7 minutes. Drain pasta.
4. Heat up I tablespoon of oil in a large stockpot
or use the same pot you used for cooking the pasta.
Add 2 tablespoons of minced garlic and the diced red
bell pepper and saute for 1 minute. Add the drained
orzo pasta, I cup chicken broth, 4 tablespoons butter, 1
teaspoon salt, and ½ teaspoon ground black pepper.
Cook for 10 minutes over medium heat, stirring
occasionally.
5. Pound the chicken breasts a bit so that they are
uniform in thickness. Rub ½ teaspoon stone ground
mustard on each side of each chicken piece, then rub
each with some oil. Grill the chicken for 4 to 5 minutes
per side or until done. About 2 minutes before the
chicken is done lay a slice of portobello mushroom on
each piece. Lay a slice of mozzarella on the
mushroom on each breast and finish grilling the
chicken. When the cheese is melted, remove the
chicken from the grill.
6. To serve dish, stir spinach into orzo and
immediately spoon an equal helping onto each of four
plates. Arrange two chicken pieces on each of the
plates, then spoon the demi glace over the chicken
and serve.
• MAKES 4 SERVINGS.
ROMANO’S MACARONI GRILL
CHICKEN SCALOPPINE
MENU DESCRIPTION: “Chicken breast, mushrooms,
artichokes, capers & smoked prosciutto in lemon butter
with pasta.”
Mushrooms, artichoke hearts, and prosciutto in a creamy
lemon butter sauce surround sautéed chicken breasts and
angel hair pasta for this unique and satisfying take on a
traditional dish. This clone ranks in the top three most
requested recipes on my hit list from the 227-unit
Romano’s Macaroni Grill. The successful Italian chain is
part of the Brinker group of restaurants that controls several
other high-profile casual eateries including Border Mexican
Grill, Maggiano’s, and Chili’s.
SAUCE
1 tablespoon white wine
2 teaspoons lemon juice
1 cup salted butter (2 sticks)
⅓ cup heavy cream
1 pound angel hair pasta (or
pasta of your choice)
4 skinless chicken breast fillets
½ cup all-purpose flour
3 tablespoons light olive oil
2 tablespoons butter
½ teaspoon lemon juice
2 cups sliced mushrooms
1½ cups canned artichoke
hearts, sliced
(1 14-ounce can)
⅓ cup thick-sliced smoked
prosciutto, chopped (about
1 ½ ounces)
2 tablespoons capers
GARNISH
4 teaspoons minced fresh parsley
1. Make the lemon butter sauce by pouring white
wine and lemon juice into a saucepan over
medium/low heat. Add butter and stir occasionally until
it’s melted. When the butter is melted, add the cream
and whisk thoroughly. Bring mixture to a simmer,
stirring frequently. Simmer for 5 to 6 minutes or until
the sauce is thick. Remove it from the heat and set it
aside.
2. Fold plastic wrap over each chicken breast and
pound them with a mallet until the chicken is about ⅛inch thick. Slice each flattened breast in half, then
lightly salt and pepper each piece. Pour flour onto a
plate, then coat each chicken piece with a light layer of
flour. If you haven’t already done it, this is a good time
to start boiling your pasta. Follow the directions on the
package to cook the pasta al dente, or just slightly
tough.
3. Preheat oven to 250 degrees. Heat 2
tablespoons of light olive oil, 2 tablespoons of butter,
and ½ teaspoon of lemon juice in a large skillet over
medium heat. Add the chicken breast pieces, four at a
time, to the skillet and saute for about 5 minutes per
side or until the chicken is light brown. Place finished
chicken on a baking sheet and keep it warm in the
oven until you are ready to assemble your dish.
4. Rinse out the skillet and place it back over
medium heat. Add I tablespoon of olive oil to the pan.
When the oil is hot add the mushrooms, artichoke
hearts, prosciutto, and capers and saute for 3 to 4
minutes or just until you see some slight browning on
the mushrooms and artichoke hearts. Pourthe lemon
butter sauce into the skillet and remove it from the
heat.
5. Prepare each dish by piling pasta on one side
of the plate. Sprinkle fresh parsley over the pasta.
Arrange 2 chicken pieces on each plate then spoon
the mushroom/artichoke sauce over the chicken
pieces and serve.
• MAKES 4 SERVINGS.
TIDBITS
If you can’t find smoked prosciutto, any prosciutto will do. If
you can, have your deli slice it about ⅛-inch thick.
ROMANO’S MACARONI GRILL
PENNE RUSTICA
MENU DESCRIPTION: “Shrimp, grilled chicken &
smoked prosciutto and Parmesan baked in a creamy
cheese sauce.”
Romano’s top-requested item is so popular they’ve even
trademarked the name. Grilled chicken, shrimp, prosciutto,
and penne pasta bathed in a creamy gratinata sauce is
topped with cheese and paprika, and baked until the top is
a crispy brown. There’s a distinct smoky flavor that comes
from the smoked prosciutto used by the chain, and you
might have a hard time finding such a unique item at your
deli. No big deal. Just use regular prosciutto, and have the
deli cut it pretty thick—⅛-inch will do. The dish will still work
since you’ll get smoky hints from the grilled chicken and
shrimp. The chain serves up the entree in a wide, shallow
baking dish that comes to you straight from the salamander
(overhead oven/broiler). If you don’t have any baking dishes
like that, try using 9-inch glass pie dishes. These make for
a great presentation, especially when served hot right to the
table, garnished with a sprig of rosemary and a few sliced
pimentos on top. Be sure to get the sliced pimentos, not
diced. You want long pieces just like those they use at the
restaurant.
GRATINATA SAUCE
3 tablespoons butter
2 tablespoons minced garlic
3 tablespoons Marsala wine
2 cups heavy cream
1 cup grated Parmesan cheese
½ cup milk
½ cup chicken broth
1 tablespoon cornstarch
1 tablespoon Grey Poupon Dijon
mustard
2 teaspoons minced fresh
rosemary
1. teaspoon salt
½ teaspoon minced fresh thyme
¼ teaspoon ground cayenne
pepper
1 pound penne rigate pasta
12 medium shrimp, peeled and
deveined
2 skinless chicken breast fillets
½ cup (about 2 ounces) thicksliced smoked prosciutto,
chopped
TOPPING
3 tablespoon grated Parmesan
cheese
1½ teaspoons paprika
GARNISH
12 slices pimentos
4 sprigs rosemary
1. Preheat barbecue grill to high.
2. Prepare gratinata sauce by melting 3
tablespoons of butter over medium/low heat in a
medium saucepan. Add garlic and sweat it for about 5
minutes. Be sure the garlic doesn’t brown. Add the
Marsala wine and cook for another 5 minutes. Add the
remaining ingredients for the sauce and whisk well
until smooth. Bring mixture to a simmer and keep it
there for 10 minutes or until it’s thick. Cover sauce and
remove it from the heat.
3. Cook pasta following directions on the
package (7 to 9 minutes in boiling water). You want the
pasta tender, but not mushy (al dente). Drain pasta
and set it aside when it’s done.
4. Pound the thick end of your chicken breasts a
bit with a kitchen mallet to make them a uniform
thickness. Rub chicken with olive oil, then sprinkle on a
bit of salt and pepper Spear the shrimp on skewers (6
per skewer should work fine), then rub them with oil,
and sprinkle with salt and pepper.
5. Grill chicken for 5 to 6 minutes per side. Grill
shrimp for 2 minutes per side. When chicken is done,
slice each breast into strips.
6. Preheat oven to 500 degrees. Build each dish
in a large, shallow baking dish. Or you can use a 9inch glass or ceramic pie plate. Load 3 cups of pasta
into each baking dish. Add one-quarter of the chicken,
3 shrimp and 2 tablespoons of prosciutto onto each
serving. Spoon ¾ of a cup of gratinata sauce on each
serving and toss to coat. Combine 3 tablespoons of
grated Parmesan cheese with 1½ teaspoons paprika,
then sprinkle about 1 tablespoon of this mixture over
the top of each serving. Bake the dishes for 10 to 12
minutes, or until tops begin to brown. Arrange three
pimento slices on the top of each serving, then jab a
sprig of rosemary into the center and serve.
• MAKES 4 SERVINGS.
RUBY TUESDAY CREAMY
MASHED CAULIFLOWER
The low-carb craze is influencing menus of America’s
restaurant chains, but no chain has embraced the trend as
enthusiastically as Ruby Tuesday. Notion’s Restaurant
News awarded the chain “Best Healthy Choice Menu
Selection for 2004,” based on more than 30 new low-carb
dishes added to the menu, including low-carb cheesecake,
burgers in high-fiber tortilla wraps, and other low-carb
stand-ins such as Creamy Mashed Cauliflower. This most
talked-about of the new selections is a side dish stunt
double for mashed potatoes, with a carb count coming in at
a measly 9 net carbs per ¾-cup serving, according to the
menu. The spices and cream that are added to steamed
and pureed cauliflower give this dish the taste, texture and
appearance of America’s favorite side. Serve this up with
any entrée that goes well with mashed potatoes, and you’ll
never miss the spuds,
1 head cauliflower
¾ cup water
1 tablespoon cornstarch
cup heavy cream
1 teaspoon granulated sugar
¾ teaspoon salt
¼ teaspoon ground white pepper
⅛ teaspoon garlic powder
⅛ teaspoon onion powder
1. Divide a head of cauliflower into florets that are
all roughly the same size. Steam cauliflower pieces
over boiling water for 15 to 20 minutes, or until the
cauliflower is tender. Drain the cauliflower and toss it in
a bowl of ice water to bring the cooking process to a
screeching halt.
2. When the cauliflower has cooled, put the florets
in a food processor along with ½ cup of water. Puree
the cauliflower on high speed until smooth, but with
some very small pieces of cauliflower remaining in the
mix for just a bit of texture.
3. Pour all of the pureed cauliflower into a medium
saucepan. Dissolve the cornstarch in the remaining ¼
cup of water and add the solution to the cauliflower.
4. Add the cream, sugar, salt, white pepper, garlic
powder and onion powder to the cauliflower and stir.
Set the saucepan over medium heat and cook, stirring
often, for 5 to 10 minutes, or until thick.
• MAKES THREE ¾-CUP SERVINGS.
TGI FRIDAY’S BLACK BEAN
SOUP
If you start making black bean soup in the morning using
other recipes out there, you’re lucky to be slurping soup by
lunchtime. That’s because most recipes require dry beans
that have to rehydrate for at least a couple hours, and many
recipes say “overnight.” But you know, tomorrow’s just too
far away when you’re craving soup right now. So, for this
often requested clone recipe, I sped up the process by
incorporating canned black beans, rather than the dry ones.
That way, once you get all the veggies chopped, you’ll be
souped up in less than an hour Friday’s version of this soup
has a slightly smoky flavor that’s easily duplicated here with
just a little bit of concentrated liquid smoke flavoring found
in most markets. Just be sure to get the kind that says
“hickory flavor.”
2 tablespoons vegetable oil
¾ cup diced white onion
¾ cup diced celery
½ cup diced carrot
¼ cup diced green bell pepper
2 tablespoons minced garlic
4 15-ounce cans black beans
4 cups chicken broth
2 tablespoons apple cider vinegar
2 teaspoons chili powder
½ teaspoon cayenne pepper
½ teaspoon ground cumin
½ teaspoon salt
¼ teaspoon liquid hickory smoke
GARNISH
shredded CheddarlMonterey
Jack cheese blend
chopped green onion
1. Heat 2 tablespoons of oil in a large saucepan
over medium/ low heat. Add onion, celery, carrot, bell
pepper, and garlic to the oil and simmer slowly (sweat)
for 15 minutes or until the onions are practically clear.
Keep the heat low enough that the veggies don’t
brown.
2. While you cook the veggies, pour the canned
beans into a strainer and rinse them under cold water
3. Measure 3 cups of the drained and rinsed
beans into a food processor with I cup of chicken
broth. Puree on high speed until smooth.
4. When the veggies are ready, pour the pureed
beans, the whole beans, the rest of the chicken broth,
and every other ingredient in the list (down to the liquid
smoke), to the pot. Bring mixture to a boil, then reduce
heat and simmer uncovered for 50 to 60 minutes or
until soup has thickened and all the ingredients are
tender. Serve the soup topped with a couple
tablespoons of the cheese blend and a teaspoon or so
of chopped green onion.
• MAKES SIX 1 -CUP SERVINGS.
T.G.I. FRIDAY’S BROCCOLI
CHEESE SOUP
So good, and yet so easy. Now you can re-create this one
at home just by tossing a few ingredients into a saucepan.
Try to find one of the large 32-ounce cartons of chicken
broth from Swanson—there’s four cups in there, so it’s
perfect for this recipe. One big head of broccoli should
provide enough florets to get you set. Use only the florets
and ditch the stem, but be sure to cut the florets into bitesize pieces before dropping them in.
4 cups chicken broth
1 cup water
I cup half-and-half
4 slices Kraft Cheddar Singles
½ cup all-purpose flour
½ teaspoon dried minced onion
¼ teaspoon ground black pepper
4 cups broccoli florets (bite-size
pieces)
GARNISH
½ cup shredded Cheddar cheese
2 teaspoons minced fresh parsley
1. Combine chicken broth, water, half-and-half,
cheese, flour, onion and pepper in a large saucepan.
Whisk to combine and to break up any lumps of flour,
then turn heat to medium/ high.
2. Bring soup to a boil, then reduce heat to low.
3. Add broccoli to soup and simmer for 15 to 20
minutes or until broccoli is tender but not soft.
4. For each serving spoon one cup of soup into a
bowl and garnish with a tablespoon of shredded
cheese and a pinch of parsley.
• MAKES 6 SERVINGS.
T.G.I. FRIDAY’S PECANCRUSTED CHICKEN SALAD
MENU DESCRIPTION: “Pecan-crusted chicken, served
sliced and chilled on salad greens tossed with Balsamic
Vinaigrette dressing, topped with mandarin oranges,
sweet-glazed pecans, celery, dried cranberries and Bleu
cheese.”
With dried cranberries, mandarin orange wedges, bleu
cheese, pecan-crusted chicken breast, and a delicious
sweet and sour balsamic vinaigrette, it’s no wonder this
salad is the top pick at one of America’s first casual dining
chains. And don’t be intimidated by all the ingredients here.
The dressing is a cakewalk since you just pour everything
(except the garlic) into a blender. The pecan-crusted
chicken is a simple breading procedure, and the chicken
cooks up in a snap. You’ll be spending most of your time at
the chopping block as you hack pecans into little pieces
and get the lettuce, garlic and celery ready. I’ve made this
recipe to serve four, but if there are only two of you, you can
easily cut it in half.
PECAN-CRUSTED CHICKEN
4 skinless chicken breast fillets
½ cup finely chopped pecans
½ cup corn flake crumbs
¾ teaspoon salt
1 cup milk
2 eggs, beaten
1 cup all-purpose flour
½ cup canola oil
BALSAMIC VINAIGRETTE
1 cup canola oil
cup balsamic vinegar
4 teaspoons Grey Poupon Dijon
mustard
4 teaspoons granulated sugar
½ teaspoons salt
2 teaspoons minced garlic
(2 cloves)
I cup dried cranberries
3 tablespoons dark brown sugar
½ cup finely chopped pecans
12 cups chopped romaine lettuce
(2 heads)
1 cup sliced celery (2 stalks)
2 11 -ounce cans mandarin
orange segments, drained
½ cup crumbled bleu cheese
1. We’ll make the pecan-crusted chicken first
since it is served cold. Pound each chicken fillet to
about ½-inch thick. You can do this easily by covering
each chicken breast in plastic wrap, and pounding
away with a kitchen mallet. Combine ½ cup finely
chopped pecans, corn flake crumbs, and ¾ teaspoon
salt in a shallow bowl. Combine milk with beaten eggs
in another shallow bowl. Dump the flour into another
shallow bowl. Bread each chicken breast by coating
each with flour. Dip the flour-dusted chicken into the
egg mixture, and then coat the chicken with a thick
coating of the pecans and corn flake crumbs. Preheat
½ cup of canola oil in a large skillet over medium/low
heat. When the oil is hot, saute the chicken fillets for 3
to 4 minutes per side or until golden brown. Cool
chicken on a rack or paper towels. When you can
handle the chicken, cover it and refrigerate for at least
two hours.
2. As the chicken chills, you can make the
balsamic vinaigrette by combining I cup canola oil,
balsamic vinegar, mustard, granulated sugar and ½
teaspoon salt in a blender. Blend on low speed for just
a few seconds, or until the dressing begins to thicken.
Don’t blend too long or your vinaigrette will get too
thick, like mayonnaise. Pour vinaigrette into a small
bowl and mix in minced garlic. Chill this until you’re
ready to use it.
3. When you’re ready to build your salads, toss
lettuce and celery with about ¾ cup of the balsamic
vinaigrette.
4. Arrange the lettuce on four plates, then sprinkle
the cranberries over the lettuce (about ¼ cup per
serving).
5. Combine the 3 tablespoons of brown sugar
with ½ cup finely chopped pecans. Sprinkle 2
tablespoons of this mixture on each salad.
6. Sprinkle about ½ can of drained mandarin
segments over each salad, followed by about 2
tablespoons of crumbled bleu cheese.
7. Sliced each chicken fillet into thin strips.
Arrange one sliced chicken fillet on top of each salad
and serve.
• MAKES 4 SERVINGS.
T.G.I. FRIDAY’S SIZZLING
SHRIMP
The TG.I. Friday’s chain engineered a system-wide
rejuvenation by upgrading the look of the restaurants and
replacing many old menu items with new, creative dishes
including several Atkinsapproved low-carb selections.
Though not low-carb (because of the potatoes) this new
menu addition is still a healthy entree choice, and the
presentation is very cool with the dish coming to your table
in a sizzling iron skillet just like fajitas. This clone recreates
that same sizzling presentation in a large serving for two (if
you want to serve more, simply add another 8 to 10 shrimp
to the dish—there are plenty of peppers and other stuff in
there so the recipe still works). All you have to do is pop an
oven-safe skillet into the oven as the potatoes are baking.
This way, when the dish is ready to serve, you simply
transfer it to this blazing hot pan before bringing it to the
table. Ah, nice sizzle, Since this pan will be heating up in a
very hot oven, be sure not to use a skillet with a plastic
handle that could melt. A large cast-iron skillet is the best
choice, if you’ve got one. If you don’t have an oven-safe
pan, you can always heat up your skillet on the stovetop.
POTATOES
2 medium red potatoes
2 teaspoons light olive oil
2 pinches salt
2 pinches ground black pepper
2 pinches minced fresh parsley
1 tablespoon light olive oil
1 green bell pepper, sliced
1 red bell pepper, sliced
½ Spanish onion, sliced
I teaspoon ground cumin
¾ teaspoon Italian seasoning
(herb blend)
¾ teaspoon salt
¾ teaspoon ground black pepper
¼ teaspoon cayenne pepper
I 14.5-ounce can diced
tomatoes
24 to 28 medium shrimp, peeled
and deveined
4 cloves garlic, minced
(2 tablespoons)
1 tablespoon lime juice
GARNISH
½ cup crumbled ranchero or cotija
cheese
1 tablespoon minced fresh parsley
1. Preheat oven to 475 degrees. Make sure your
oven has two racks so that you have room to heat up
the serving skillet. Place a large cast-iron skillet or an
oven-safe skillet (that does not have plastic handles)
on the lower rack of the oven. This is the pan that will
make the shrimp sizzling hot. Slice each of the
potatoes lengthwise into 8 wedges. Toss the potatoes
in a bowl with 2 teaspoons olive oil, plus a couple
pinches each of salt, ground black pepper and minced
parsley. Arrange the potato wedges in a nonstick
baking pan (or in a pan lined with parchment paper),
and bake for 25 to 30 minutes or until potatoes turn
golden brown. When the potatoes are done, take them
out and turn off the oven. Keep the empty skillet in
there on the lower rack. We’ll use that at the end.
2. Heat I tablespoon of olive oil in a large skillet
over medium heat. When the oil is hot, add the red and
green bell peppers, and onion. Stir in the cumin, ¾
teaspoon salt, ¾ teaspoon ground black pepper,
Italian seasoning, and cayenne pepper. Saute the
vegetables for 8 minutes, stirring often.
3. When peppers and onion have sautéed for 8
minutes, add the can of diced tomatoes, including the
liquid to the skillet. Add the shrimp, garlic and lime
juice. Cook for another 5 minutes, stirring often.
4. Use a thick hot pad to carefully remove the hot
skillet from the oven. Pour the entire contents of the
dish into the hot skillet, then arrange the potato
wedges around the edge of the dish. Quickly sprinkle
crumbled ranchero or cotija cheese over the center of
the dish, followed by about a tablespoon of minced
fresh parsley. Serve it up immediately—while it’s still
sizzling.
• Serves 2,
TONY ROMA’S BLUE RIDGE
SMOKIES SAUCE
Of the four famous barbecue sauces served on those
delicious, tender ribs at Tony Roma’s, this is the only one
that wasn’t cloned in the first restaurant book, Top Secret
Restaurant Recipes. This sweet, smoky sauce is great on
pork spareribs cooked with the Tony Roma’s clone recipe
in that book, or you can use either of the techniques found
in this book: for Chili’s Baby Backs on page 123, and for
Roadhouse Grill Baby Backs on page 359. Or you can use
the sauce on a recipe of your own for pork or beef ribs,
even chicken. Now Tony Roma’s sells each of its four
sauces at the restaurant chain, separately, or in gift sets.
But if you don’t have a Tony Roma’s close by, or you just
like to dabble, this is a good way to get that one-of-a-kind
barbecue taste at home.
1 cup ketchup
1 cup red wine vinegar
½ cup brown sugar
¼ cup molasses
1½ teaspoons liquid hickory
smoke
½ teaspoon salt
rounded ¼ teaspoon ground black
pepper
¼ teaspoon garlic powder
¼ teaspoon onion powder
1. Combine all of the ingredients in a medium
saucepan over high heat, and whisk until smooth.
2. Bring sauce to a boil, then reduce heat and
simmer uncovered for 30 to 40 minutes or until sauce
has thickened.
• MAKES 1½ CUPS.
TONY ROMA’S BAKED
POTATO SOUP
MENU DESCRIPTION: “A house specialty full of baked
potatoes and topped with cheddar cheese, bacon and
green onions.”
The thick-and-creamy texture and rich taste of Tony Roma’s
best-selling soup is duplicated with a little flour, some halfand-half, and most notably, instant mashed potatoes. Give
yourself an hour to bake the potatoes and around 30
minutes to prepare the soup. Garnish each serving with
shredded cheese, crumbled bacon and green onions, and
then humbly await your due praise.
2 medium russet potatoes
3 tablespoons butter
1 cup diced white onion
2 tablespoons all-purpose flour
4 cups chicken broth
2 cups water
¼ cup cornstarch
1 ½ cups instant mashed
potatoes, dry
1 teaspoon salt
¾ teaspoon ground black pepper
½ teaspoon dried basil
⅛ teaspoon dried thyme
I cup half-and-half
GARNISH
½ cup shredded Cheddar cheese
¼ cup crumbled cooked bacon
2 green onions, chopped
(green part only)
1. Preheat oven to 400 degrees and bake the
potatoes for I hour or until done. When potatoes have
cooked remove them from the oven to cool.
2. As potatoes cool, prepare soup by melting
butter in a large saucepan, and saute onion until light
brown. Add the flour to the onion and stir to make a
roux.
3. Add broth, water, cornstarch, mashed potato
flakes, and spices to the pot and bring to a boil.
Reduce heat and simmer for 5 minutes.
4. Cut potatoes in half lengthwise and scoop out
contents with a large spoon. Discard skin. Chop
baked potato with a large knife to make chunks that
are about ½-inch in size.
5. Add chopped baked potato and half-and-half to
the saucepan, bring soup back to a boil, then reduce
heat and simmer the soup for another 15 minutes or
until it is thick.
6. Spoon about 1 ½ cups of soup into a bowl and
top with about a tablespoon of shredded Cheddar
cheese, a half tablespoon of crumbled bacon and a
teaspoon or so of chopped green onion. Repeat for
remaining servings.
• SERVES 6 TO 8.
TONY ROMA’S MAPLE SWEET
POTATOES
Here’s a clone for a new menu item at Tony Roma’s that’s
served alongside the Carolina Honeys BBQ Salmon
(cloned in the following recipe on page 387). With maple
syrup, cinnamon and pecans in there, this is a great new
way for you to easily prepare sweet potatoes that everyone
at the table will surely scarf down with unbridled glee.
1 large sweet potato
1 tablespoon butter
¼ of a white onion, chopped
(about ½ cup)
3 tablespoons finely chopped
pecans
3 tablespoons maple syrup
¼ teaspoon cinnamon
1. Bake sweet potato for 40 to 45 minutes at 400
degrees. This will bake the potato nearly all the way
through, while still leaving it firm enough to slice when
cool. Remove the sweet potato from the oven and let it
cool so that you can handle it. When the sweet potato
has cooled, remove the skin and slice it into 1 -inch
bite-size cubes.
2. Melt I tablespoon of butter in a large skillet. Add
onion and pecans and saute for a couple minutes or
until onion begins to brown.
3. Add cubed sweet potato, maple syrup and
cinnamon and saute for 3 to 5 minutes, stirring often,
or until the sweet potato pieces are hot and tender.
• SERVES 2 TO 4.
TONY ROMA’S CAROLINA
HONEYS BBQ SALMON
Take one of Tony Roma’s famous sauces, brush it over
some grilled salmon and you’ve got a bravo moment. But
it’s not just about saucing up the fish. The salmon is first
rubbed with a secret seasoning blend before it’s grilled.
The sauce doesn’t appear in the show until the end. For
your encore, serve this dish along with the preceding recipe
for Maple Sweet Potatoes (page 386) on the side just like
in the restaurant, and absorb the applause.
SAUCE
1 cup ketchup
1 cup white vinegar
½ cup molasses
½ cup honey
1 teaspoon liquid hickory smoke
½ teaspoon salt
¼ teaspoon garlic powder
¼ teaspoon onion powder
¼ teaspoon Tabasco pepper
sauce
SEASONING
1 teaspoon salt
½ teaspoon ground black pepper
¼ teaspoon paprika
¼ teaspoon garlic powder
¼ teaspoon cayenne pepper
4 6-ounce salmon fillets (without
skin)
canola or olive oil nonstick spray
1. Combine all ingredients for the sauce in a
saucepan over medium/high heat. Blend the
ingredients with a whisk until smooth. When the
mixture comes to a boil, reduce heat and simmer
uncovered for 30 minutes or until mixture thickens.
Remove from heat.
2. Combine all ingredients for seasoning in a
small bowl. Preheat barbecue or indoor grill to high
heat.
3. Sprinkle seasoning lightly over both sides of the
salmon, spray each fillet lightly with olive or canola oil
nonstick spray. Grill the salmon for about 3 minutes
then rotate it 90 degrees to make criss-crossing grill
marks. Grill for another 3 minutes then turn the salmon
over for 3 minutes and rotate it again to make crisscrossing grill marks on that side. Grill until done.
Remove salmon fillets from the grill, brush with the
sauce and serve.
• SERVES 4.
WAFFLE HOUSE WAFFLES
It was two friendly Atlanta, Georgia, neighbors who got
together in 1955 to build the first Waffle House in their
eventual 1,479-restaurant chain. With the dimpled
breakfast hotcake as a signature item (and this is 3 years
before IHOP was founded!), the privately held chain grew
into 20 Southern U.S. states. Today tasty food at rockbottom prices, plus 24-hour-a-day service, makes Waffle
House a regular stop for devoted customers any time of the
day or night. And don’t even think about referring to your
server as a waitress; they’re called “associates.”
For the best clone of the 50-year-old secret formula for
these waffles you really should chill this batter overnight in
the fridge as they do in each of the restaurants. But hey,
sometimes you just can’t wait. If you need instant
gratification, the recipe still works fine if you cook up the
waffles the same day. At least wait for 15 to 20 minutes
after you make the batter so that it can rest and thicken a
bit. That’ll give you time to dust off the waffle iron and heat it
up.
1 ½ cups all-purpose flour
1 teaspoon salt
½ teaspoon baking soda
1 egg
½ cup plus I tablespoon
granulated sugar
2 tablespoons butter, softened
2 tablespoons vegetable
shortening
½ cup half-and-half
½ cup milk
¼ cup buttermilk
¼ teaspoon vanilla extract
1. Combine flour, salt and baking soda in a
medium bowl. Stir to combine.
2. Lightly beat the egg in another medium bowl.
Add the sugar, butter, and shortening and mix well with
an electric mixer until smooth. Add the half-and-half,
milk, buttermilk and vanilla. Mix well.
3. Add the wet mixture to the dry mixture while
beating. Mix only briefly. It’s okay if there are small
lumps in the batter since over beating could produce
waffles that are too tough.
4. Cover and chill overnight. (You can use batter
right away if you like, but a good 12-hour chill makes a
better batter.)
5. Rub a light coating of vegetable oil on your
waffle iron or use a non-stick oil spray. Preheat the
waffle iron. Leave the batter out of the refrigerator to
warm up a bit as your waffle iron is preheating.
6. Spoon ⅓ to ½ cup of batter into the waffle iron
and cook for 3 to 4 minutes or until the waffles are
brown.
• MAKES 6 WAFFLES.
TRADEMARKS
Applebee’s is a registered trademark of Applebee’s
International, Inc.
Benihana is a registered trademark of Benihana, Inc.
Bennigan’s is a registered trademark of S&A Restaurant
Corp.
Best Foods and Hellman’s are registered trademarks of
Unilever.
Buffalo Wild Wings is a registered trademark of Buffalo
Wild Wings Grill & Bar
California Pizza Kitchen is a registered trademark of
California Pizza Kitchen, Inc.
Carrabba’s is a registered trademark of Carrabba’s Italian
Grill, Inc.
The Cheesecake Factory, Sweet Corn Tamale Cakes,
Bang-Bang Chicken & Shrimp, and White Chocolate
Raspberry Truffle are registered trademarks of The
Cheesecake Factory, Inc.
Chevys is a registered trademark of Chevys, Inc.
Chili’s, Romano’s Macaroni Grill, and Penne Rustica are
registered trademarks of Brinker International.
Claim Jumper is a registered trademark of Claim Jumper
Restaurants LLC.
Denny’s is a registered trademark of DFO, Inc.
Hard Rock Cafe is a registered trademark of Hard Rock
Cafe International, Inc.
Houston’s is a registered trademark of Hillstone Restaurant
Group.
IHOP Country Griddle Cakes, and Harvest Grain ’N Nut are
registered trademarks of IHOP Corp.
Islands is a registered trademark of Islands Restaurants.
Joe’s Crab Shack is a registered trademark of Landry’s
Restaurants, Inc.
Lone Star Steakhouse is a registered trademark of Lone
Star Steakhouse & Saloon, Inc.
Margaritaville is a registered trademark of Margantaville
Restaurants.
Marie Callender’s is a registered trademark of Marie
Callender Pie Shops, Inc.
Mimi’s Cafe is a registered trademark of SWH
Corporation.
Olive Garden and Red Lobster are registered trademarks
of Darden Concepts, Inc.
Original Pancake House is a registered trademark of
Original Pancake House Franchising, Inc,
Outback Steakhouse, Kookaburra Wings, Cinnamon Apple
Oblivion, and Sydney’s Sinful Sundae are registered
trademarks of Outback Steakhouse, Inc.
P F Chang’s is a registered trademark of P F. Chang’s
China Bistro, Inc.
Red Robin and Banzai Burger are registered trademarks
of Red Robin International, Inc.
Roadhouse Grill is a registered trademark of Roadhouse
Grill, Inc.
Ruby Tuesday is a registered trademark of Ruby Tuesday,
Inc.
T.G.I. Friday’s is a registered trademark of T.G.I. Friday’s,
Inc.
Tony Roma’s, Blue Ridge Smokies, and Carolina Honeys
are registered trademarks of NPC International, Inc.
Waffle House is a registered trademark of Waffle House,
Inc.
INDEX
Applebee’s Almond Rice P laf
Applebee’s Baked French Onion Soup
Applebee’s Bourbon Street Steak
Applebee’s Chicken Fajita Rollup
Applebee’s Crispy Orange Chicken Bowl
Applebee’s Honey Grilled Salmon
Applebee s Mud Slide.
Applebees Onion Peels
Applebee’s Perfect Apple Margarita
Applebee’s Perfect Sunrise
Applebee’s Santa Fe Chicken Salad.
Applebee’s Tequila Lme Chicken
Applebee’s White Chocolate & Walnut Blondie
Benihana G nger Salad Dressing.
Benihana Japanese Ontor Soup
Benihana Mandann Orange Cheesecake
Bennigan’s The Monte Cristo.
Buffalo Wild Wings Buffalo Wings and Sauces.
California Pizza Kitchen California Club Pizza
California Pizza Kitchen California Cosmo.
California Pizza Kitchen Jama can Jerk Chicken Pizza
Cal fornia Pizza Kitchen Thai Crunch Salad
Carrabba’s Bread Dipping Blend
Carrabba’s Chicken Marsala
Carraboa’s House Sa’ad Dressing (Creamy Parmesan).
Cheesecake Factory, Barg-Bang Chicken & Shr mp
Cheesecake Factory Chicken Madeica
Cheesecake Factory, Mini Crabcakes
Cheesecake Factory Original Cheesecake
Cheesecake Factory, Sweet Corn Tama e Cakes
Cheesecake Factory. White Chocolate Raspberry Truffle
Cheesecake
Chevys Chile Con Queso
Chevys Flan.
Chevys Fresh Salsa
Chevys Garlic Masned Potatoes
Chevys Mango Salsa
Chevys Sweet Corn Tomalito
Chili’s Boneless Buffalo Wings.
Chris Boneless Shanghai Wings.
Chili’s Chicken Crispers
Chili’s Chicken Erch lada Soup
Chili’s Chili Queso
Chili’s Chocolate Chip Paradise P.e.
Chil’s Grilled Baby Back Ros
Chili’s Honey Mustard Dressing
Chili’s Lettuce Wraps.
Chli’s Molter Chocolate Cake
Chili s Salsa
Chili’s Southwestern Eggiolls
Chili’s Southwestern Vegetable Soup
Claim Jumper Cheese Potatocakes.
Claim Jumper Fire-Roasted Artichoke
Claim Jumper Garlic Cheese Bread.
Claim Jumper Meatloaf
Claim Jumper Spicy Thai Slaw
Denny’s BBQ Chicken Sandwich
Denny’s Club Sandwich
Denny’s Fabulous French Toast
Hard Rock Cafe Bar-B-Que Beans
Hard Rock Cafe Coleslaw
Hard Rock Cafe Homemade Chicken Noodle Soup
Hard Rock Cafe Pig Sandwich
Houston’s Chicago-Style Spinach Dip
Houston’s Coleslaw
Houston’s Honey Lime Viraigrette
IHOP Cmn-A-Stacks
IHOP Country Griddle Cakes
IHOP Country Omelette
IHOP Harvest Gram’N Nut Pancakes.
IHOP Pumpkin Pancakes
stands China Coast Sa’ad Dress ng
Islands Island Fries
Islands Tortilla Soup
Islands Yaki Soft Tacos
Joe’s Crab Shack Blue Crab Dip
Joe’s Crab Shack Garlic King Crab Legs
Lone Star Steakhouse Baked Sweet Potato
Lone Star Steakhouse Lettuce Wedge Salad
Lone Star Steakhouse Lone Star Chili
Margantaville Crab, Shrimp and Mushroom Dip
Margantaville Jamaica Mista ca Wings
Margaritaville Key Lime Pie
Mane Carlender’s Lemon Cream Cheese Pie
Marie Callender’s Pumpk n Pie
Mimi’s Cafe Corn Chowder
M mi’s Cafe Carrot Raisin Bread
Mimi’s Cafe French Market Onion Soup
Olive Garden Bruschetta
Olive Garden Chicken Scampi
Olive Garden Chocolate Lasagna
Olive Garden Frozen Tiramisu
Olive Garden Lemon Cream Cake
Olive Garden Limoncello Lemonade
Olive Garden Minestrone Soup
Olive Garden Pasta e Fagioli
Olive Garden Sicilian Scampi
Olive Garden Stuffed Mushrooms.
Olive Garden Tiramisu
Olive Garden Toasted Ravioli
Original Pancake House Apple Pancake
Original Pancake House German Pancake
Outback Steakhouse Bleu Cheese Dressing
Outback Steakhouse Caesar Salad Dressing
Outback Steakhouse Cinnamon Apple Oblivion
Outback Steakhouse Grilled Shnmp on the Barbie
Outback Steakhouse Honey Mustard Dressing
Outback Steakhouse Honey Wheat Bushman Bread
Outback Steakhouse Kookaburra Wings.
Outback Steakhouse Ranch Salad Dressing
Outback Steakhouse Sydney’s Sinful Sundae
Outback Steakhouse Tangy Tomato Dressing
P F Chang’s Chang’s Spare Ribs
P F Chang’s Chang’s Spicy Chicken
P F Chang’s Chicken in Soothing Lettuce Wraps.
P F Chang’s Chocolate Torte
P F. Chang’s Dan-Dan Noodles
P F. Chang’s Garlic Snap Peas
P F. Chang’s Lemon PepperShrimp
P F. Chang’s Mai Tai
P F Chang’s Mongolian Beef.
P F. Chang’s Oolong Marinated Sea Bass
P F. Chang’s Orange Peel Chicken
P F Chang’s Shrimp Dumplings.
Red Lobster Bacon-Wrapped Stuffed Shrimp
Red Lobster Cheddar Bay Biscuits
Red Lobster Cheddar Bay Crab Bake
Red Lobster New England Chowder
Red I obster Parrot Bay Coconut Shrimp
Red Lobster Tartar Sauce
Red Lobster Teriyaki Glazed Fresh Fisn
Red Robin 5 Alarm Burger
Red Robin Banzai Burger
Red Robin Seasoning
Red Robin Teriyaki Chicken Burger
Roadhouse Grill Baby Back Ribs
Roadhouse Grill Roadhouse Cheese Wraps.
Roadhouse Grill Roadhouse Rita
Romano’s Macaroni Grill Chicken Portobello
Romano’s Macaroni Grill Chicken Scaloppine
Romano’s Macaroni Grill Penne Rustica
Ruby Tuesday Creamy Mashed Cauliflower
TG.I. Friday’s Black Bean Soup
TG.I. Friday’s Broccoli Cheese Soup.
TG.I. Friday’s Pecan-Crusted Chicken Salad
TG.I. Friday’s Sizzling Shrimp
Tony Roma’s Baked Potato Soup
Tony Roma’s Blue Ridge Smokies Sauce
Tony Roma’s Carolina Honeys BBQ Salmon
Tony Roma’s Maple Sweet Potatoes
Waffle House Waffles
Table of Contents
Title Page
Copyright Page
Dedication
Acknowledgements
Introduction
APPLEBEE’S MUD SLIDE
APPLEBEE’S PERFECT APPLE MARGARITA
APPLEBEE’S PERFECT SUNRISE
APPLEBEE’S ONION PEELS
APPLEBEE’S BAKED FRENCH ONION SOUP
APPLEBEE’S SANTA FE CHICKEN SALAD
APPLEBEE’S ALMOND RICE PILAF
APPLEBEE’S BOURBON STREET STEAK
APPLEBEE’S CHICKEN FAJITA ROLLUP
APPLEBEE’S CRISPY ORANGE CHICKEN BOWL
APPLEBEE’S HONEY GRILLED SALMON
APPLEBEE’S TEQUILA LIME CHICKEN
APPLEBEE’S WHITE CHOCOLATE & WALNUT
BLONDIE
BENIHANA GINGER SALAD DRESSING
BENIHANA JAPANESE ONION SOUP
BENIHANA MANDARIN ORANGE CHEESECAKE
BENNIGAN’S THE MONTE CRISTO
BUFFALO WILD WINGS BUFFALO WINGS AND
SAUCES
CALIFORNIA PIZZA KITCHEN CALIFORNIA COSMO
CALIFORNIA PIZZA KITCHEN THAI CRUNCH SALAD
CALIFORNIA PIZZA KITCHEN CALIFORNIA CLUB PIZZA
CALIFORNIA PIZZA KITCHEN JAMAICAN JERK
CHICKEN PIZZA
CARRABBA’S BREAD DIPPING BLEND
CARRABBA’S HOUSE SALAD DRESSING (CREAMY
PARMESAN)
CARRABBA’S CHICKEN MARSALA
THE CHEESECAKE FACTORY MINI CRABCAKES
THE CHEESECAKE FACTORY SWEET CORN TAMALE
CAKES
THE CHEESECAKE FACTORY CHICKEN MADEIRA
THE CHEESECAKE FACTORY BANG-BANG CHICKEN
& SHRIMP
THE
CHEESECAKE
FACTORY
ORIGINAL
CHEESECAKE
THE CHEESECAKE FACTORY WHITE CHOCOLATE
RASPBERRY TRUFFLE CHEESECAKE
CHEVYS FRESH SALSA
CHEVY’S MANGO SALSA
CHEVYS CHILE CON QUESO
CHEVYS GARLIC MASHED POTATOES
CHEVYS SWEET CORN TOMALITO
CHEVYS FLAN
CHILI’S SALSA
CHILI’S BONELESS BUFFALO WINGS
CHILI’S BONELESS SHANGHAI WINGS
CHILI’S CHICKEN CRISPERS
CHILI’S CHILI QUESO
CHILI’S LETTUCE WRAPS
CHILI’S SOUTHWESTERN EGGROLLS
CHILI’S CHICKEN ENCHILADA SOUP
CHILI’S SOUTHWESTERN VEGETABLE SOUP
CHILI’S HONEY MUSTARD DRESSING
CHILI’S GRILLED BABY BACK RIBS
CHILI’S CHOCOLATE CHIP PARADISE PIE
CHILI’S MOLTEN CHOCOLATE CAKE
CLAIM JUMPER GARLIC CHEESE BREAD
CLAIM JUMPER FIRE-ROASTED ARTICHOKE
CLAIM JUMPER CHEESE POTATOCAKES
CLAIM JUMPER SPICY THAI SLAW
CLAIM JUMPER MEATLOAF
DENNY’S FABULOUS FRENCH TOAST
DENNY’S BBQ CHICKEN SANDWICH
DENNY’S CLUB SANDWICH
HARD ROCK CAFE HOMEMADE CHICKEN NOODLE
SOUP
HARD ROCK CAFE BAR-B-QUE BEANS
HARD ROCK CAFE COLESLAW
HARD ROCK CAFE PIG SANDWICH
HOUSTON’S CHICAGO-STYLE SPINACH DIP
HOUSTON’S HONEY-LIME VINAIGRETTE
HOUSTON’S COLESLAW
IHOP CINN-A-STACKS
IHOP COUNTRY GRIDDLE CAKES
IHOP COUNTRY OMELETTE
IHOP HARVEST GRAIN ’N NUT PANCAKES
IHOP PUMPKIN PANCAKES
ISLANDS CHINA COAST SALAD DRESSING
ISLANDS ISLAND FRIES
ISLANDS TORTILLA SOUP
ISLANDS YAKI SOFT TACOS
JOE’S CRAB SHACK BLUE CRAB DIP
JOE’S CRAB SHACK GARLIC KING CRAB LEGS
LONE STAR STEAKHOUSE LETTUCE WEDGE SALAD
LONE STAR STEAKHOUSE BAKED SWEET POTATO
LONE STAR STEAKHOUSE LONE STAR CHILI
MARGARITAVILLE CRAB, SHRIMP AND MUSHROOM
DIP
MARGARITAVILLE JAMAICA MISTAICA WINGS
MARGARITAVILLE KEY LIME PIE
MARIE CALLENDER’S LEMON CREAM CHEESE PIE
MARIE CALLENDER’S PUMPKIN PIE
MIMI’S CAFE CARROT RAISIN BREAD
MIMI’S CAFE CORN CHOWDER
MIMI’S CAFE FRENCH MARKET ONION SOUP
OLIVE GARDEN LIMONCELLO LEMONADE
OLIVE GARDEN BRUSCHETTA
OLIVE GARDEN SICILIAN SCAMPI
OLIVE GARDEN STUFFED MUSHROOMS
OLIVE GARDEN TOASTED RAVIOLI
OLIVE GARDEN PASTA E FAGIOLI
OLIVE GARDEN MINESTRONE SOUP
OLIVE GARDEN CHICKEN SCAMPI
OLIVE GARDEN CHOCOLATE LASAGNA
OLIVE GARDEN FROZEN TIRAMISU
OLIVE GARDEN LEMON CREAM CAKE
OLIVE GARDEN TIRAMISU
ORIGINAL PANCAKE HOUSE APPLE PANCAKE
ORIGINAL PANCAKE HOUSE GERMAN PANCAKE
OUTBACK STEAKHOUSE HONEY WHEAT BUSHMAN
BREAD
OUTBACK STEAKHOUSE GRILLED SHRIMP ON THE
BARBIE
OUTBACK STEAKHOUSE KOOKABURRA WINGS
OUTBACK STEAKHOUSE BLEU CHEESE DRESSING
OUTBACK STEAKHOUSE CAESAR SALAD DRESSING
OUTBACK STEAKHOUSE HONEY MUSTARD SALAD
DRESSING
OUTBACK STEAKHOUSE RANCH SALAD DRESSING
OUTBACK STEAKHOUSE TANGY TOMATO DRESSING
OUTBACK
STEAKHOUSE
CINNAMON APPLE
OBLIVION
OUTBACK STEAKHOUSE SYDNEY’S SINFUL SUNDAE
P. F. CHANG’S MAI TAI
P. F. CHANG’S CHANG’S SPARE RIBS
P. F. CHANG’S CHICKEN IN SOOTHING LETTUCE
WRAPS
P. F. CHANG’S SHRIMP DUMPLINGS
P. F. CHANG’S GARLIC SNAP PEAS
P. F. CHANG’S CHANG’S SPICY CHICKEN
P. F. CHANG’S DAN-DAN NOODLES
P. F. CHANG’S LEMON PEPPER SHRIMP
P. F. CHANG’S MONGOLIAN BEEF
P. F. CHANG’S OOLONG MARINATED SEA BASS
P. F. CHANG’S ORANGE PEEL CHICKEN
P. F. CHANG’S CHOCOLATE TORTE
RED LOBSTER TARTAR SAUCE
RED LOBSTER CHEDDAR BAY BISCUITS
RED LOBSTER BACON-WRAPPED STUFFED SHRIMP
RED LOBSTER CHEDDAR BAY CRAB BAKE
RED LOBSTER PARROT BAY COCONUT SHRIMP
RED LOBSTER NEW ENGLAND CLAM CHOWDER
RED LOBSTER TERIYAKI GLAZED FRESH FISH
RED ROBIN SEASONING
RED ROBIN 5 ALARM BURGER
RED ROBIN BANZAI BURGER
RED ROBIN TERIYAKI CHICKEN BURGER
ROADHOUSE GRILL ROADHOUSE RITA
ROADHOUSE GRILL ROADHOUSE CHEESE WRAPS
ROADHOUSE GRILL BABY BACK RIBS
ROMANO’S MACARONI GRILL CHICKEN PORTOBELLO
ROMANO’S MACARONI GRILL CHICKEN SCALOPPINE
ROMANO’S MACARONI GRILL PENNE RUSTICA
RUBY TUESDAY CREAMY MASHED CAULIFLOWER
TGI FRIDAY’S BLACK BEAN SOUP
T.G.I. FRIDAY’S BROCCOLI CHEESE SOUP
T.G.I. FRIDAY’S PECAN-CRUSTED CHICKEN SALAD
T.G.I. FRIDAY’S SIZZLING SHRIMP
TONY ROMA’S BLUE RIDGE SMOKIES SAUCE
TONY ROMA’S BAKED POTATO SOUP
TONY ROMA’S MAPLE SWEET POTATOES
TONY ROMA’S CAROLINA HONEYS BBQ SALMON
WAFFLE HOUSE WAFFLES
TRADEMARKS
INDEX


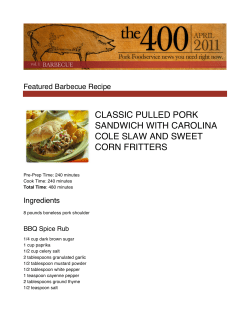


© Copyright 2026