
IInterlockin Pro ng Sta oduci abilis ing sed S oil B Blocks
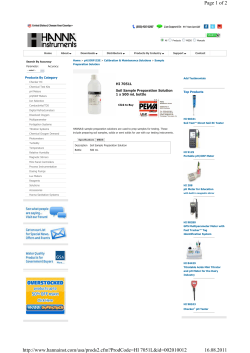
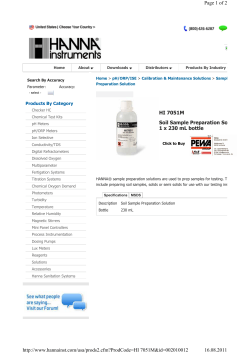
Pro oduciing IInterlockinng Staabilissed Soil Blocks B s A Flexiblee Learnin ng Courrse Prodducing ISSBss Ackknowlledgem ments Course Team m This course on Prod ducing Interlocking Stabilised Soil Blo ocks was draffted at a orkshop in Nairobi, Kenyaa in Octoberr 2013. The participants p w worked with COL wo Professsor Fred Lockkwood to tesst the rapid course c development mod del. Subseq quent work was w done on the materials by the team leader. Writerss: Bwamb bok K.Isaack (Rift Valley Technical T Traaining Institu ute) Josephat M.Njonjo (Rift Valley Technical T Traaining Institu ute) Foustin n M Ngwai (M Mombasa Teechnical Train ning Institutee) Mitti C.L. Koome (M Masai Techniical Institute) Team Leader: L Haji Mw wachirimira (Coast Institute of Techn nology) Instrucctional Desiggn Editor: Joan Mutero M Layout & Graphics:: Anthon ny Okuku Commo onwealth of Learning L © 2015 5 Commonwe ealth of Learrning Produccing Interlockking Stabiliseed Soil Blockss is made avaailable under a Creative Commo ons Attributiion-ShareAlikke 4.0 Licencce (internatio onal): http://creativecom mmons.org/liccenses/by-saa/4.0/ o doubt, by applying this license, thee Commonw wealth of For thee avoidance of Learnin ng does not waive w any prrivileges or im mmunities frrom claims th hat they may bee entitled to assert, nor does d the Com mmonwealth h of Learning submit itself to o the jurisdicction, courts,, legal processses or laws of any jurisd diction. Page 2 Producing ISSBs Table of Contents Acknowledgements ................................................................................... 2 Course Team .............................................................................................. 2 Table of Contents ...................................................................................... 3 Production of Interlocking Stabilised Soil Blocks ...................................... 4 Introduction ............................................................................................... 4 Module Outcomes ..................................................................................... 4 Module Content ........................................................................................ 5 Topic 1 ....................................................................................................... 5 Introduction to Interlocking Stabilised Soil Blocks ............................................ 5 Advantages of ISSB .................................................................................... 6 Limitations of ISSBs.................................................................................... 7 Topic 2......................................................................................................... 8 Tools and Equipment used in ISSB Production ......................................... 8 Equipment used in SSB Production ....................................................... 8 Topic 3....................................................................................................... 12 What is Soil? ............................................................................................ 12 Types of Soil ......................................................................................... 13 Topic 4....................................................................................................... 15 Soil Testing........................................................................................... 15 The Bottle or Sedimentation Test ....................................................... 15 The Shrinkage Test .............................................................................. 16 Topic 5....................................................................................................... 18 Production of ISSB ............................................................................... 18 Common Problems Encountered During Block Making ...................... 25 Topic 6....................................................................................................... 26 Basic Building Guidelines ..................................................................... 26 Foundations ......................................................................................... 26 Cement/Sand mortars ......................................................................... 26 Corners and Openings ......................................................................... 26 Roof Overhangs ................................................................................... 27 What have we learnt? ......................................................................... 28 Answers to Activities ............................................................................... 30 Glossary ................................................................................................... 32 References ............................................................................................... 32 Page 3 Producing ISSBs Producing Interlocking Stabilised Soil Blocks Introduction Welcome to this course on brick making. In this module you will learn how to produce interlocking stabilised soil blocks (ISSB). As you well know, soil is one of the main materials used for the construction of traditional low-cost houses in rural areas. This is because it is cheap and locally available. Some houses are constructed entirely or partially with soil, depending on the local traditions, climate, available skills and cost. One disadvantage of traditional soil-based construction is that they require regular maintenance and protection. This has led to the development of new methods or technologies that improve the quality and durability of soil construction methods. One such method is brick making. There are two basic types of bricks used for construction, namely: • • fired bricks which are compressed and baked in a type of oven known as a kiln; unfired bricks which are compressed and laid out in the sun to cure. There are many types of unfired bricks. However, in this course we shall discuss the type known as interlocking stabilised soil blocks. These are stabilised soil blocks made of moistened soil mixed with a little cement. The blocks are then compressed either manually or mechanically and cured. You will learn about the tools and equipment used to make the soil blocks and how to select and test the soil used for making them. In addition, we shall examine how to produce blocks and use them for construction. Let us start by reviewing the module outcomes. Module Outcomes On completion of this module you should be able to: • discuss the advantages and limitations of using ISSB; • list the tools and equipment used in the production of ISSB; • select suitable soil for the production of ISSB; • conduct soil tests to establish whether it is suitable for block making • describe the steps used in the production of ISSB; • describe the areas that require special attention when building with ISSB. Page 4 Prodducing ISSBss Mod dule Con ntent This mo odule is divid ded into the following four topics: Topic 1: 1 Introductio on to interloccking stabilissed soil blockks; Topic 2: 2 Tools and equipment used u in ISSB production Topic 3: 3 Soil selection Topic 4: 4 Soil testingg Topic 5: 5 Production n of ISSB Topic 6: 6 Basic build ding guidelin nes Toppic 1 Intrroductiion to Interlo ockingg Stabilised Figure 1: Various Va types of o interlocking g blocks. (Sourrce: aliimg.com m) Soil Bloccks Interloccking stabilissed soil blockks (ISSBs) aree compressed blocks whiich are made of o a mixture of soil, cemeent and wateer. They are then t compreessed using manual or mechanically operated machiness. The techno ology is desiggned to nism or the ability a to join n together producce blocks with an interloccking mechan without using any cement c for bonding. b The e interlocks increase the strength of e the amoun nt of cement needed as mortar. m Almo ost any soil the wall and reduce can be used to makke ISSBs exceept black cottton soil, see Figure 1 forr examples Page 5 Prodducing ISSBss Advvantagess of ISSB B What are a the advantages of ISSSB? Think about a this qu uestion for a minute and then compleete the follow wing activityy. Activiity 1 Advantages of ISSB (Time: 4 minuttes) List at leaast 3 advantages of ISSBss in the spacce provided below. b 1. ________________ _______________________________________ 2. ________________ ________________________________________ 3. _________________________________________________________ Now co ompare yourr answers witth the follow wing advantaages of ISSBs. The following are th he main advantages of ISSSBs: • Low cost an nd affordable to producee. Soil is easily accessiblee in most parts of thee world. Also o due to its interlocking mechanismss, little cement is needed n betw ween the blocck joints. • Can be produced near the t site of co onstruction thus t reducing transport costs. • Can be used to build all types of ho ouses. • They are an n alternativee to fired briccks which cau use environm mental degradation due to affo orestation. • They have excellent firee resistant properties. • Reduce con nstruction tim me due to th he blocks havving a male aand female interlockingg system. d to maintain n. • The ISSB machine is eassy to use and Those are a the advantages of ISSSBs. Let us now n look at the t limitation ns of these ISS bloccks. Page 6 Prodducing ISSBss Limitations of ISSB Bs Can you think of an ny limitationss? Take 2 minutes to think about it and a then wing activity. compleete the follow Activvity 2 Limitattions of ISSB Bs (Time: 3 miinutes) Write down d at leasst 2 limitations of ISSBs in n the space provided p bellow 1. _______________________________________________ ________________ ________________ 2. _______________________________________________ Well, we w believe yo our list includ ded the follo owing limitations of ISSBss: • Low accepttability amon ng certain so ocial groups ount of training to determ mine the corrrect type of • Requires a certain amo ortions and produce p uniform-sized bllocks. soils, correct mix propo t greatest care in assem mbling the walls, w the join nts are not • Even with the entirely ressistant to win nd and rain penetration. p Therefore, it is necessary to t plaster thee interior waall surfaces. • They requirre the use off cement which can be exxpensive. That brrings us to th he end of ourr introductio on to ISSBs. We W hope you u now understand what th hey are and ttheir advantages and lim mitation. Let us proceed n topic on n the tools and equipment used in ISSB productio on. to the next Page 7 Prodducing ISSBss Toppic 2 Toolls and Equipme E ent used d in ISSB B Produ uction In this section, s you will learn ab bout the toolls and equipment used in n making stabilised soil blockks (SSBs). Lett’s start with h the equipm ment. Equiipment used in SS SB Produ uction There are a two typees of machinees used to make m stabilise ed soil blockss. These are: a • The manuaally operated d machines • The motoriised machinees Let us look at each in further deetail startingg with the maanually operaated block ne. machin Manu ual Interlo ocking Blo ock Machin ne (Action n Pack) The maanual interlocking block machine m is manually m opeerated. It is cheap, long lasting and easy to operate. Th he machine uses u a mixturre of soil and d cement to s blo ocks at a ratio o of between n 5 and 10% cement to soil, s make stabilised depend ding on the soil s type avaiilable. Figure 2: 2 Manually operated o inteerlocking blo ock machine.. Page 8 Prodducing ISSBss The interlocking blo ocks produceed by this maachine do no ot need morttar for b showss a picture off manual inteerlocking staabilised soil bonding. Figure 2 below making mach hine (action pack) p block m Moto orised Stab bilised Soil Block Making M Maachines Motorised block making machin nes are eitheer operated by a diesel engine e or mple is the hyydraform machine. They can be electriccal motor. A good exam divided d into two main groups: • those that are simple and sturdy with a fixed taable and singgle mould me; capable of making one block at a tim m moree than one • those with 2 or more siingle mouldss capable of making t These tend t to be more m expensivve. block at a time. Figure 3 below show ws a picture of a single mould m motorrized soil com mpacting ne. machin Figure 3:: Single modee motorised soil compactting machinee. Next leet us look at the t hand too ols that you will w need to produce ISSB Bs. Page 9 Prodducing ISSBss Hand Tools The following are th he main tools that you will w need for producing in nterlocking blocks: 1. 2. 3. 4. 5. 6. 7. 8. 9. 10.. Bucket – fo or carrying water w and battching Oil can – fo or lubricatingg the internal surfaces off the mould Watering can – for the sprinkling off water durin ng the mixingg stage. 6mm sieve – for grading the size off the aggregaates or mixing of the materials Shovels – fo Trowels – for f feeding th he mortar in to the blockk mould Hoe – used d during the excavation e a mixing sttages and Pan – for lo oading the mixture m into the t machine Rammer – for crushing soil crumbs Broom – fo or cleaning Figure 4 below show ws the various tools thatt you requiree to make intterlocking blocks. Oil can Shovel Watering can c Bucket Trrowel Pan Broom Hoe Rammer Sieve Figure 4: Too ols used for making m interrlocking stab bilised soil blo ocks. We hop pe you now know the eq quipment and d tools used in the produ uction of stabilised soil blockks. Before yo ou continue to t the next topic, t compleete the o evaluate yo our progresss so far. following activity to Page 10 0 Prodducing ISSBss Activvity 3 Tools and a Equipme ent Used forr ISSB Production 1. Wh hat is the diffference betw ween a manually operateed and a mo otorised intterlocking staabilised soil block makingg machine. 2. Lisst the tools th hat are used for making interlocking stabilized so oil blocks Compaare your answ wers with th hose given att the end of this t module. You havve come to the t end of th his topic on equipment e and tools used in producction of SSBs. In the nextt section we shall discusss how to seleect the right soil for the producttion of stabilised soil bloccks. Page 11 1 Prodducing ISSBss Toppic 3 Soil Selectioon As you may have no oticed from our discussio on so far, soiil is one of th he main ocks. It is the erefore very important to ingredients of stabiilised soil blo m SSBs. It is also understand the chaaracteristics of soil before you start making o an area beefore you pro oduce soil important to assesss the climaticc condition of blocks. This is becaause a dry cliimate requires different soil blocks frrom those n wet climatees. In this section we shaall identify th he different ttypes of soil used in and its composition n. Whaat is Soill? Let’s sttart with you ur thoughts on o this. How w would you define d soil? Think T about it for 1 minute and then compleete the follow wing activityy. Activvity 4 Meaning of Soil Write down d your definition d of soil s in the sp pace provide below. ______________________________________ ________________________ ______________________________________ ________________________ ______________________________________ ________________________ ______________________________________ ________________________ Well, we w believe yo our answer mentioned m th hat soil is sim mply the upper layer of earth on o which plan nts grow. It is made up of o decayed remains of plant and animal origin, broke en rocks and d minerals. If you dig d a hole in the t ground, you will find d that there are a several laayers of soil as show wn in Figure 4 below. Theese are: 1. Top p soil: the so oil that contaains organic matter. m This is not suitab ble for ISSB pro oduction or any a other building purpo oses. It is best for agriculttural purrposes. 2. Sub b soil: the layyer of soil fo ound immediiately below the top soil. This soil is natturally stablee and in man ny cases the one o most suitable for pro oduction of ISSB. Page 12 2 Prodducing ISSBss 3. Bed d Rock: the layer l immediately below w the sub-soil. It may be broken b into fineer particles which w can bee stabilised. It is generallyy not suitable for ISSB pro oduction. Silty Saand Fine Cllay Clay Mixed M with Saand Gravvel W Weathered Rockk F Figure 5: Thee different layyers of soil. Typees of Soil Soil typ pes are gradeed accordingg to the size of o the soil paarticle. Theree are four types of o soils: • • • • Graavel: this hass soil particlees bigger thaan 2mm San nd: this has soil s particles smaller than n 2mm and bigger b than 0 0.06mm Siltt: this has soil particles sm maller than 0.06mm 0 but bigger than 0.002mm Claay: this has so oil particles smaller s than n 0.002mm. c further be b classified as coarse, The firsst three, thatt is gravel, saand and silt can medium m and fine. Page 13 3 Prodducing ISSBss Activvity 5 Types of soils suitaable for makking of ISSBs Which soil types arre good for making m stabilised soil blo ocks? Write them t in the space provided below. ________________________ ______________________________________ ______________________________________ ________________________ ______________________________________ ________________________ ______________________________________ ________________________ If you wrote w sand, silt, s clay and gravel, then n you are rigght! The production of good quality, durab ble compresssed stabilised d soil blocks requires thee use of soil ning fine gravvel and sand d for the body of the blocck, together with w silt and contain clay to bind the san nd particles ttogether. It should s have a ratio of 40% clay and d 60-70% san ndy soil. The soil used sho ould also approxximately 30-4 have paarticles not exceeding e 6m mm big. In addition a to so oil, one mustt use a good stabiliser. The main n stabilisers used u for ISSB Bs are cemen nt, lime and chemicals. c t cement is the mosst common stabiliser s useed in many parts p of this Of the three, countryy. One bag of o cement caan produce between b 90 and a 110 bloccks. Gravel,, sand and silt though maade from diffferent soil paarticle sizes have h similar charactteristics in th he sense thatt they retain the same size and shapee when wet and dryy. Silt is a litttle different because b it teends to swelll more and hold h togetheer when wett. Clay on the other hand d is sticky wh hen wet and hard when dry. It swells s a lot when w wet and shrinks wh hen dry, resu ulting in crackking. Clay is very im mportant beccause of its ability to provvide cohesion within a so oil. By cohesio on we mean the action of o soil particle es sticking to ogether. We hop pe you now know the beest types of soil s to use for the producction of stabilised soil blockks. Next we shall s look at how to analyse soil in orrder to s that it iss suitable forr block makin ng. make sure Page 14 4 Producing ISSBs Topic 4 Soil Testing Before any block making commences, you need to analyse the properties of the soil to determine its suitability and the amount of stabilizer that needs to added. There are two basic field tests which must be carried out on every soil. These are: • The bottle or sedimentation test • The shrinkage test The Bottle or Sedimentation Test The aim of this test is to help determine the approximate amount of clay, silt, sand and gravel in a soil sample. With many soils, it is very difficult to differentiate between silt and clay, however it is easier to determine the percentage of sand or clay. Testing Procedure: 1. 2. 3. 4. 5. 6. 7. 8. 9. Start by sieving the soil to be tested with a 6mm sieve Find a clear bottle with a flat bottom and reasonably straight sides Fill it quarter full with soil Add clean water until you completely cover the soil Add a pinch of salt to the bottle contents. The salt helps to accelerate the settling and segregation of particles. Firmly close the lid of the bottle and shake until the soil and water are well mixed - about 1 minute. Allow the bottle to stand on a flat surface for about 30 minutes so that the contents can settle. The heaviest particles, that is gravel, will settle at the bottom followed by sand, silt and clay. To work out the percentage of clay in the soil, you should use the following procedure: - Measure the total height of soil from the bottom of the bottle to the top of the soil and record it as X mm. - By looking closely at the soil layers, you will be able to determine where the clay content starts. Measure the height of the clay and record as Y mm. - To work out the percentage of clay in the soil, use the formula described below: Xmm Ymm x 100 = % of clay in the soil. Page 15 Prodducing ISSBss The Shrinkag S ge Test This tesst will help you y to calculaate the amou unt of cemen nt you need to add to the soil. The test procedure is as a follows: 1. Make or bu uy a wooden box that is 60cm 6 long, 4cm 4 wide and d 4cm deep and grease the inside surfaces of th he box. 2. Fill the boxx with sieved moist soil. Make sure th he soil is com mpressed in all corners of the box using a small wooden spaatula that can n also be s used to smoothen the surface. 3. Leave the wooden w box to dry for a week in a sh haded area. After the so oil has dried,, note the sh hrinkage and record. Thee shrinkage can be dete ermined by subtracting s t length off the dry soil sample the from the leength of the w wooden boxx. This shrinkage is usually expressed as a percen ntage of the original lenggth of the wo ooden box. See S Figure 5 below whicch shows boxxes in differeent stages off the shrinkagge test. Figure 6: The Shrinkag ge test (Sourrce: UN Habiitat, 2009) Page 16 6 Prodducing ISSBss Activvity 6 Soil Te ests What is i the differeence between the bottle test and the e shrinkage teest? Write your answer in thee space proviide below. ______________________________________ ________________________ ______________________________________ ________________________ ______________________________________ ________________________ ______________________________________ ________________________ wers with th hose given att the end of this t module. Compaare your answ Once you conduct soil s tests and d establish how much cement you will need, then yo ou are ready to start makking the soil blocks. We shall consideer that in the nexxt topic. Page 17 7 Producing ISSBs Topic 5 Production of ISSB As we have mentioned before, the basic materials required for production of ISSB are soil, stabiliser (cement) and water. The following are the steps to follow in production of interlocking stabilised soil blocks. 1. Dig or excavate the soil: • • Tools: You will need to have a hoe and a spade. Method: With the use of a hoe excavate or dig out the identified soil and crush the big lumps by hitting them with the back of the spade. 2. Sieve the soil: • • Tools: 6mm sieve and a spade Method: The simplest sieving device is a screen made from 6mm wire mesh, and nailed to a supporting wooden frame and inclined at 45 degrees to the ground. See Figure 5 below. Using a spade, you should throw the soil against the screen. The fine material will pass through while the course oversized material will ran down the front. Once you conduct a soil test and estimate the amount of cement you will need, the next step is to start making the stabilised soil blocks. Let us learn how that is done in the next topic. Figure 7: Sieving the soil with a wire mesh screen. Page 18 Producing ISSBs Note that the particles which are retained on the sieve can be further crushed and sieved again. 3. Batching and Mixing • • Tools: Shovels; Bucket; Watering can Method: Once you establish the right proportions, identify a measuring device, such as bucket, for your materials. o Using the bucket, measure or batch out the soil and cement required for a particular production. o Using the shovels, mix the dry cement and soil three times until the mixture has one uniform colour. o With the use of the watering can, add water gradually to the mixture of soil and cement until it is moist but not too wet. When you squeeze a handful of the soil mixture in your hand, no water should ran between your fingers. 4. Loading the Press • Tools: You will require the following equipment and tools; Soil press machine; Shovels; Brush. • Method: Open the press cover of the brick making machine. o Check the piston cover to ensure that it is sitting on the adjusting knob. o Using a brush, apply oil inside the mould. This is only done at the start when the blocks tend to stick. o Fill the mould box flush on top with the soil/cement mix as shown in figure 7 below. o Drop the mould cover gently to cover the mould box. In so doing, the soil inside is pre-compacted. Figure 8: Filling the mould with soil/cement mixture. Page 19 Producing ISSBs 5. Compacting the Block At least two people are required for this operation. • Method: Open the lever latch as the person on the other side takes over the handle to compact the block. Figure 9: Block compacting machine. • • The handle is brought down by the person compacting the block until the lever arms touches the compaction stop. This indicates that maximum compaction has been achieved. Figure 10: Worker bringing down the handle of a compacting machine. Page 20 Producing ISSBs 6. Ejecting the Block Once the block has been compressed, the next step is to eject the block. • Method: o Pass the handle to the person on the opposite side of the press to start the ejection stroke. o Ensure that the lever latch is locked in position, while the handle is moved from the vertical position so that the cover can be opened. o Bring the handle all the way down as the block is being ejected. o Remove the block gently by holding it along the sides and take it to a well-sheltered area for curing as illustrated in Figure 10 below. Figure 11: Removing the block from the machine. o To make more blocks, repeat the same process again. 6. Curing The last process in block making is curing. This starts the following day after production when the blocks are approximately 24 hours old. Curing is the process of controlling the setting or hardening of the soil block, so that it can gain maximum strength. This is a common requirement for materials with cement. If a product with cement dries very fast in the sun, it loses all the strength and start disintegrating. To acquire maximum strength, any cement product with cement must be laid out to dry slowly in wet or humid conditions for a few days. This is what is referred to as curing. If curing is not done properly, the surface material will lose its moisture and the clay particles will shrink. This will cause surface cracks on the block faces. The final blocks will be of poor quality and all the time and money spent in producing the blocks will have been wasted. Page 21 Prodducing ISSBss a two meth hods of curin ng stabilised soil blocks: There are Method 1: Coverin ng blocks witth grass or le eaves. Cover th he blocks witth grass, leavves or any otther suitablee material to protect them from direct d sunlight. See Figure 11 which illustrates c with h grass duringg the curing stage. blocks covered Figure 12: 1 Curing bllocks covered d with grass The blocks are then watered eveery morning and eveningg for a minimum of 7 days.. Method 2: Coverin ng blocks witth polythene e paper Water the t blocks aftter 24 hourss. Then coveer the blocks immediately after watering w with h a transpare ent polythen ne paper olythene she eet is well staacked to stop p any ensuring that the po b moisturre from escaping. Figure 12 shows a picture of blocks covered d with a polyythene sheet. Figure 13:: Blocks coveered with pollythene sheets. Page 22 2 Prodducing ISSBss 8. Staacking the e Blocks When the t blocks arre three dayss old, they sh hould be staccked togetheer to create space for f more bloccks. Stack th he blocks as shown in thee Figure 13 below. b Figure 14: Stacking g the blocks 9. Testing The Blocks As you know, stabillised blocks are a used for building and d therefore itt is dures to ensu ure that theyy have important to submit them to teesting proced mum perform mance requirrements. Thee tests are caarried out achieveed the minim after th he blocks aree a minimum m of 28 days old o How w do you picck blocks forr testing? Pickk any two blo ocks random mly from every day’s prod duction and label them ‘forr testing’. No o special treaatment should be given to t the blockss you have pickked. Theere are two tests t that you can conduct on the blo ocks. These are: Tesst 1: The dropping test • • • • Lift the blocck up to a heeight of one meter from a hard groun nd. Drop the bllock from yo our waist heigght and allow w it to hit thee ground. If the blockk falls and rem mains as onee piece, onlyy breaking the edges, then the block has passsed the test. wn into pieces, then someething went wrong with If the blockk breaks dow the production. Page 23 3 Prodducing ISSBss Tesst 2: The Three Point Ben nding Test • Place a blocck between ttwo other bllocks (bridgeed) as shown in figure 14. Figure 15: The T three poiint bending test. t • • Hold two blocks and steep in the cen ntre of the block or get so omebody with a miniimum weightt of 90 Kgs to o stand on th he block. If the blockk holds the weight w withou ut breaking then t it has passed the test. Activvity 7 Processs of Block Production Arrangge the follow wing steps of block production in the right order. Stacking the Blo ocks Sievve the soil Dig or excavate the soil M Battching and Mixing Curring Loaading the Preess Tessting The Blocks Com mpacting thee Block Ejeccting the Blo ock Compaare your answ wers with th hose given att the end of this t module. Page 24 4 Producing ISSBs Next let us discuss the common problems one is bound to encounter during block making and their solutions. Common Problems Encountered During Block Making While producing bocks, you might encounter some minor problems, which you might not know of their immediate cause. The Table 1 below summarizes some of the possible problems with the machine and the solutions. NO PROBLEM SOLUTION • 1 Compaction of blocks is too hard • • 2 Compaction of blocks is too easy 3 The blocks have broken edges when ejected 4 Block disintegrates while testing. • • • • • • Check if you are loading too much soil in the press. Adjust the volume of your moulding box using the adjusting knob The other possible cause for this problem is if the mixture is too dry. Check your water content You are probably not putting enough soil in the moulding box. Adjust the volume of your mould box. Your mixture might have excessive water. Check your water content Oil the mould box. Check whether your mixture is too wet Check whether your soil might be containing too much clay. Check whether the curing procedures was strictly followed. Check whether the soil is sieved before production That brings you to the end of this topic on block production. We hope that you are now well informed about how blocks are made. In the next section we shall look at basic building guidelines when using ISSBs. Page 25 Producing ISSBs Topic 6 Basic Building Guidelines When building a house with ISSBs, you should take special care in the following areas: • The foundation • Cement/sand mortar to be used • Corners and around openings • Roof overhangs This is because the foundations, corners and openings are the areas which are most vulnerable to water damage and erosion. Let us look at the guidelines for each starting with the foundations. Foundations When building the foundation walls, you should use quarry stones or concrete blocks. If you must use ISSB’s then it is recommended that you use special blocks which are made with twice the amount cement used on the basic blocks used for the super structures. Cement/Sand mortars When laying the blocks, you should not use cement or sand mortar that is stronger than the blocks themselves. This can cause the mortar to crack thus exposing the block to rain. The mortar strength should be slightly weaker or equal strength to the blocks. Mud mortars can also be used and later on raked externally to make the joints waterproof. Generally, the bed and vertical joints should not be bigger than 12mm. Corners and Openings Since the corners and openings are more vulnerable to erosion, it is recommended that all corners and the areas around openings should be plastered, see Figure 15. This applies also to the base of the building which must be plastered at least 300mm above the ground level. Again, you should make sure that the cement/sand is not stronger than the blocks themselves. Otherwise the plaster may crack. Page 26 Prodducing ISSBss F Figure 16: Prrotection around the basee and cornerrs with plasteering. Rooff Overhan ngs Buildings constructted with ISSB Bs should be provided with big roof o overhangs alll d them in ord der to give th he walls adeq quate protecction. The minimum around roof ovverhang reco ommended iss 600mm all around the building. Figgure 16 below shows s a hou use with a bigg roof overhaang. Figure 17: Roof overhang o You havve now com me to the end d of this topic on buildingg guidelines for constru uction with ISSSBs. Beforee you move on, o complete e the followiing activity to remind yourself of what you have learnt. Page 27 7 Prodducing ISSBss Activvity 8 Buildin ng guideliness with ISSBs (Time: 5 minnutes) List thee four areas that require special attention when building with h ISSBs in Column A and writte the reason ns why care is i needed in Column B. Colum mn A 1. C Column B 2 3. 4. That brrings us to th he end of thiss course. Let us now revview what yo ou have learnt in i this course e. Whaat have we w learnt?? In this course c we haave learnt th hat: • • • • • • ISSBs are made m of soil, water and sttabilizer (cem ment) and th hen compressed using a maanual or mottorized blockk-making macchine. Compared to other technologies off brick making it is affordable, a otherr advantagess. However, environmentally and usser friendly among b taken to ensure e qualitty. care must be The producction of ISSBss requires a block makingg machine an nd tools such as a sh hovel, buckeet, sieve, oil can, c among others o The best so oil for producction of ISSBs comes from m the sub-so oil layer and that the pro oduction of good g stabilissed soil blockks requires th he use of soil contain ning fine gravvel, sand, siltt and clay. Before you start block production p you y should teest the soil to o assess its a also to help h you calculate the am mount of cem ment you suitability and need to add d. The producction processs of SSBs hass many stepss that start with w digging, sieving of the soil, batching and mixxing, compaccting of the block, b out common n problems curing, staccking and tessting. You also learnt abo that may be e encountered during this process an nd possible solutions. s When consstructing with h ISSBs you should s take care c when building the foundation and when using u cementt or mortar. You should also protect d openings with w plaster and a build roo of overhangss to protect corners and the walls frrom erosion. Page 28 8 Producing ISSBs Congratulations! You have now come to the end of this course. We hope you have found it interesting and informative and that you now have the necessary knowledge to make interlocking stabilised soil blocks. To check if you have mastered the content of this course, go back to the outcomes at the beginning of this course and check if you have achieved them. If you have, take time to practice what you have learnt because practice makes perfect! Good luck! Page 29 Producing ISSBs Answers to Activities Answer to Activity 3 (1) What is the difference between a manually operated and a motorised interlocking stabilised soil block making machine The motorised machine uses diesel or electricity to run while the manual ones does not. The manual machine produces one block at a time while some motorised machines can produce 2 or more blocks at a time. (2) List the tools that are used for making interlocking stabilised soil blocks. 1. Bucket; 2. Oil can; 3. Watering can; 4. Sieve; 5. Shovels; 6. Trowels; 7.Hoe; 8. Pan; 9. Rammer; 10. Broom. Answer to Activity 6: Soil Tests What is the difference between the bottle test and the shrinkage test? The bottle test assesses the quality of the soil in terms of the proportions of each particle. While the shrinkage test is performed to help you calculate the amount of cement that should be added to the soil. Activity 7: Process of Block Production Arrange the following steps of block making in the right order: 1. 2. 3. 4. 5. 6. 7. 8. 9. Dig or excavate the soil: Sieve the soil: Batching and Mixing Loading the Press Compacting the Block Ejecting the Block Curing Stacking the Blocks Testing The Blocks Page 30 Producing ISSBs Activity 8: Building guidelines for ISSBs List the four areas that require special attention when building with ISSBs in Column A and write the reasons why care is needed in Column B. Column A Column B 1. Foundation Foundations are vulnerable to water damage and so require quarry stones or concrete blocks or ISSBs with twice the amount of cement used in ordinary blocks 2. Use of cement/sand mortars 3. Corners and openings 4.Roof overhangs Cement or sand mortar should not be stronger than the block to avoid cracking Should be plastered to protect from erosion To provide protection to the walls Page 31 Producing ISSBs Glossary Compress To squeeze the soil mixture with a machine Stabiliser Material added to soil to make it stronger and water proof, such as cement or lime. Interlock To fit or join two blocks closely together Mortar A paste made up of cement and sand used to bind blocks together Compacting To exert force on a soil mixture in order to compress it Mould A container used to give shape to something Lubricating To oil something Decayed To rot or decompose Batching The process of measuring and combining ingredients for block making. Curing Keeping blocks moist so that they can achieve maximum strength. References 1. UN Habitat (2009). Interlocking Stabilised Soil Blocks: Appropriate Earth Technologies in Uganda. UN Habitat/Adrian Perez. 2. UNESCO (2001). Compressed Stabilised Earth Block Manufacture in Sudan. UNESCO, Paris. 3. Weinhuber, K. (1995) Building with interlocking blocks. German Appropriate Technology Exchange, GTZ (GATE), Eschborn. 4. Teach a Man to Fish, Income Generating Activity Information Sheet, Stabilised Soil Brick (SSB) Brick Making Page 32


© Copyright 2026