7.5 Superlink E board (SC-ADNA-E)
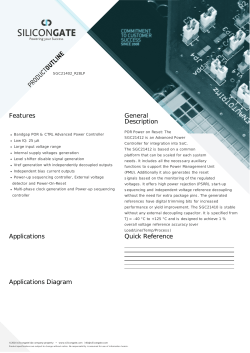
'11 • SCM-DB-109 7.5 Superlink E board (SC-ADNA-E) F PJZ012D029F ●Read and understand the instructions completely before starting installation. ●Refer to the instructions for both indoor and outdoor units. Safety precautions ●Carefully read “Safety precautions” first. Follow the instructions for installation. ●Precautions are grouped into “Warning ” and “Caution ”. The “Warning ” group includes items that may lead to serious injury or death if not observed. The items included in the “Caution ” group also may lead to serious results under certain conditions. Both groups are crucial for safety installation. Read and understand them carefully. ●After installation, conduct the test operation of the device to check for any abnormalities. Describe how to operate the device to the customer following the installation instruction manual, Instruct the customer to keep this installation instruction for future reference. Warning Caution ● Provide ground connection. The ground line should never be connected to the gas supply piping, the water supply piping, the lightning conductor rod, nor the telephone ground. If the grounding is improper, it may result in electric shock. ● Do not install the device in the following locations. 1.Where there is mist/spray of oil or steam such as kitchens. 2.Where there is corrosive gases such as sulfurous acid gas. 3.Where there is a device generating electromagnetic waves. These may interfere with the control system resulting in the device becoming uncontrollable. 4.Where flammable volatile materials such as paint thinner and gasoline may exist or where they are handled. This may cause a fire. ● This device should be installed by the dealer where you purchase the device or a licensed professional shop. If the device is incorrectly installed by the customer, it may result in electric shock or fire. ● Install the device carefully following the installation instruction. If the device is incorrectly installed, it may result in electric shock or fire. ● Use the accessory parts and specified parts for installation. If any parts that do not match the specifications are used, it may result in electric shock or fire. ● A person with the electrical service certification should conduct the service based on the “Technical standards for electrical facilities”, “Electrical Wiring Code”, and the installation instruction. If the work is done incorrectly, it may result in electric shock or fire. ● Wiring should be securely connected using the specified types of wire. No external force on the wire should be applied to any terminals. If a secure connection is not achieved, it may result in electric shock or fire. 1 5 Application Indoor-to-outdoor three core communication specification type 3 (since October 2007) 2 Note for setting the address Set the address between 00 and 47 for the previous Super Link connection and between 000 and 127 for the new Super Link connection. (*1) Do not set the address overlapping with those of the other devices in the network. (The default is 000) Accessories SL E board Metal box Metal cover Connection Outline Screw for Ground M4×8L 2 pieces Pan head screws φ4×8L 2 pieces Locking supports Binding band Grommet To secure the print board and the metal box Made of nylon 4 pieces (*1) Whether the actual link is either the new Super Link or the previous Super Link depends on the models of the connected outdoor and indoor units. Consult the agent or the dealer. 3 Function Allowing the center console SL1N-E, SL2NA-E, and SL3N-AE/BE to control and monitor the commercial air conditioning unit. 4 Signal line specification Control switching Communication method Settings can be changed by the switch SW3 on the SL E board as in the following. Switch 1 2 SW3 3 4 Remarks Switch Symbol ON Master OFF (default) Slave ON Fixed previous protocol OFF (default) Automatic adjustment of Super Link protocol ON Indicates the forced operation stop when abnormality has occurred. OFF (default) Indicates the status of running/stop as it is, when abnormality has occurred. ON The hundredth address activated “1” OFF (default) The hundredth address activated “0” Previous Super Link New Super Link Line type MVVS MVVS Line diameter 0.75 - 1.25mm2 0.75/1.25mm2 Signal line (total length) up to 1000m Signal line (maximum length) up to 1000m up to 1500/1000m (*2) up to 1000m (*2) Up to 1500 m for 0.75 mm2, and up to 1000 m for 1.25 mm2. Do not use 2.0 mm2. It may cause an error. (*3) Connect grounding on both ends of the shielding wire. For the grounding method, refer to the section “ 6 Installation”. - 236 - '11 • SCM-DB-109 (1) Set the Super Link network address with SW1 (tens place), SW2 (ones place), and SW3 (hundreds place). (2) Set the SL E board SW3-1 to be ON (Master) when using this without any remote controller (no wired remote controller nor wireless remote controller). (3) Set up the plural master/slave device using the dip switches on the indoor unit board. (4) Set up the remote controller master/slave device using the slide switch on the remote controller board. (5) Set up “0” to “F” using the address rotary switch on the indoor unit board when controlling the indoor unit with the multiple remote controller. Connect grounding. Connect grounding for the power line to Ground ①, and grounding for the signal line to Ground ② or to the Ground on the indoor unit control box. 2. When connecting to the indoor unit control box (ceiling-concealed type and FDT type only): (1) Mount the SL E board in the control box using the locking supports. (2) Remove 6 bands from the box and put the wiring through the bands to be secured. Electrical shock hazard! Make sure to turn the power off for servicing. Be cautious so that no abnormal force should be applied to the wiring. Do not let the SL E board hung by the wiring. Do not damage the board with a screw driver. The board is sensitive to static electricity. Release the static electricity of your body before servicing. (you can do this by touching the control board which is grounded). Location of installation 6 Install the device at the location where there are no electromagnetic waves nor where there is water and dust. The specified temperature range of the device is 0 to 40℃. Install the device at the location where the ambient temperature stays within the range. If it exceeds the specification, make sure to provide solution such as installing a cooling fan. When used outside of the range, it may cause abnormal operation. Installation 1. When using the metal box (mounted on the indoor unit / mounted on the back of the remote controller): (1) Mount the SL E board in the metal box using the locking supports. (2) Wiring should go through the provided grommet since then through the wiring to the hole on the Metal box. Secure the grommet after inserting the grommet into the Metal box as shown in below figure, then tie the wiring at the outlet of the unit using a binding band. - 7 Indicator display Check the LED 3 (green) and LED 2 (red) on the SL E board for flashing. SL E board LEDs Red Green Off Flashing Inspection mode Normal communication Off Off ・Disconnection in the remote controller communication line (X or Y) ・Short-circuit in the remote controller communication line (between X and Y) ・Faulty indoor unit remote controller power ・Faulty remote controller communication circuit ・Faulty CPU on SL E board One flash Flashing ・Disconnection in the Super Link signal line (A or B) ・Short-circuit in the Super Link signal line (between A and B) ・Faulty Super Link signal circuit Two flashes Flashing ・Faulty address setting for the SL E board (Set up the address for previous SL E board : more than 48 new SL E board : more than 128) Three flashes Flashing Four flashes Flashing Off Flashing 237 - Display on the integrated network control device ・SL E board parent not set up when used without a remote controller ・Faulty remote controller communication circuit ・Address overlapping for the SL E board and the Super Link network connected indoor unit ・Number of connected devices exceeds the specification for the multiple indoor unit control No corresponding unit number E1 E2 E10
© Copyright 2026


