
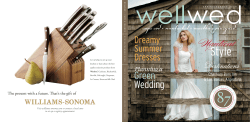
Making things for your wedding is such a fantastic way
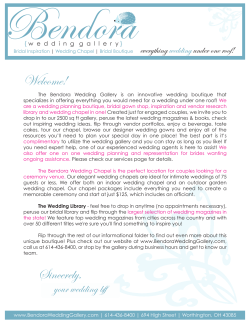
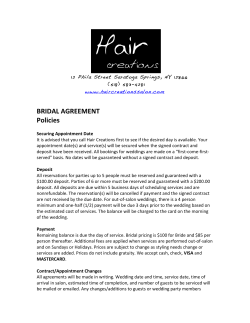
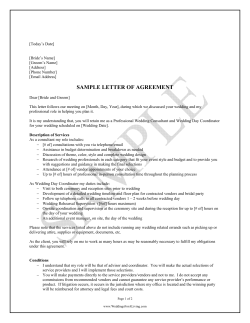
© 2011 www.silverlandjewelry.com
Making things for your wedding is such a fantastic way
to add style and character to your special day while also
reining in costs. There are countless DIY projects which you
can create for your wedding, from invitations to centerpieces
to ceremony decorations. Best of all, when your guests are
admiring your lovely paper flowers, favors, or other
decorations, you will be able to say, "I made that!".
Page 1
© 2011 www.silverlandjewelry.com
Table of Contents:
Chapter 1: Creative Handcrafted Fall Centerpieces..........................3
Chapter 2: DIY Bridal Shower Favors...............................................5
Chapter 3: DIY Flower Dying for Weddings.....................................7
Chapter 4: DIY Summer Wedding Centerpiece Ideas.......................9
Chapter 5: DIY Wedding Idea: Stencils...........................................11
Chapter 6: Easy Winter Wedding Centerpiece Ideas.......................13
Chapter 7: Elegant Wedding Bouquet Wraps You Can
Do Yourself....................................................................15
Chapter 8: Make Your Own Save the Date Cards............................17
Chapter 9: Wedding Paper Crafts....................................................19
Page 2
© 2011 www.silverlandjewelry.com
Creative Handcrafted Fall Centerpieces
Still trying to decide on the perfect centerpieces for your autumn wedding? There are many beautiful
designs for festive fall centerpieces, some of which are easy enough to do yourself. These are some
ideas for creative handcrafted fall centerpieces.
The autumn colors, leaves, fall flowers, and seasonal
elements like pumpkins and gourds can all play a role in
the best fall centerpieces. There is a style to suit every
type of reception, so you are sure to be able to find one
that you love. The key is to identify the general style or
theme that you would like for your reception decor, and
design your centerpieces around that.
Rustic is always big for the fall. This is the time of year
when couples are most likely to have a wedding that is
what I like to call "barn chic", where the bride wears a
simple gown with handmade wedding jewelry, and the
whole reception takes place in an authentic barn.
Interesting vessels will always add interest to the table
displays, and for this type of wedding, they will be easy
to come by. Take a group of orange and white pumpkins
and hollow them out to serve as vases. A super easy idea
Mums in pumpkins are perfect for
is to buy potted mums in the rich reds, yellows, and
fall wedding centerpieces.
oranges of autumn, and just transplant them from their
pots into the pumpkin vases. This is the ultimate in a diy centerpiece for a casual fall wedding. It is
very easy, and extremely affordable.
White pumpkins
and gold painted
gourds make easy
but elegant diy
fall centerpieces.
Page 3
© 2011 www.silverlandjewelry.com
If you want to stay away from pumpkins, another fun and unique vessel to use would be hollowed out
gourds or eggplants. The deep aubergine purple color is a more elegant option, and would be lovely for
a wedding where the bride is wearing a slightly more dressy bridal gown and set of wedding jewelry
than in the "barn chic" scenario. Fill the eggplants with flowers in rich shades of purple, red, burgundy,
and brown.
Of course, there is no rule that says centerpieces have to be
about flowers. For those who love Halloween, a fantastic
centerpiece would be handcarved jack o' lanterns for each
table. Do them with a wedding twist, though; instead of
scary faces, carve elegant motifs such as an elaborate
monogram or even a pretty scene. To elevate the pumpkins
beyond the typical jack o' lanterns that kids carve, be sure
that the person who cuts them does so with precision and
artistry. These would be real conversation starters for your
wedding guests.
Another non-floral idea for an autumn wedding would be to
create your centerpieces from cornucopias. These woven
"horns of plenty" represent the bounty of the earth and the
abundance of the fall harvest. Cornucopias are an age-old
symbol of fall, and would be very unique table decorations.
Carved pumpkins are fun to
The traditional horn of plenty has a large number of fruits
personalize for a fall wedding.
and vegetables spilling forth from it onto the table. Choose
really pretty cornucopias made from a rich brown wicker and you
will have a marvelous looking centerpiece for an outdoor autumn wedding.
Fall is a fantastic time for a wedding, and it is wonderful if you can make the season itself a part of
your wedding theme. These ideas for creative centerpieces with an autumnal flair are perfect for
capturing the essence of fall. Best of all, they make a fun and easy project that any bride can do herself.
The traditional autumn
cornucopia is a quick and
colorful fall wedding
centerpiece idea.
Page 4
© 2011 www.silverlandjewelry.com
Do-It-Yourself Bridal Shower Favors
If you are hosting a bridal shower, you know how important it is to pick just the right favors. The
favors for a bridal shower do not have to be extravagant, but they should be charming and special.
Make the parting gifts even more delightful by trying out one of these DIY ideas for bridal shower
favors.
Even if you are not the crafty type, there is something that you can make. There are tons of kits and
books available to help lead you through the process step by step. Even if they are not quite as perfect
as what you could buy in a store, a handmade shower favor has a sweet charm that could never be
matched by something that was mass produced. Just be sure to give yourself plenty of time to make
sample batches if you are trying something new.
Candles always make lovely favors. One idea is to make
the candles themselves. Any craft store will have kits to
help you customize candles just for your party. You can
choose from different shapes, colors, and even
fragrances. Classic feminine motifs like flowers are
always pretty, or select a design that matches the theme
of the bridal shower or an interest of the bride's.
Handrolled beeswax candles can also be lovely.
A variation on this idea is to focus on an interesting
candle holder. Did you know that it is very easy to frost Handmade glitter candles are an easy DIY
your own glass? You simply put a sticker on the area
craft.
that you would like to remain clear, and then paint on a
special etching solution that frosts any glass that is not covered. It creates a beautiful effect, and you
can choose any design that you like, such as stars, flowers, or even the first initial of each guest. For
more drama, select a colored glass votive holder. Simply fill each one with a tea light, and you will
have beautiful one-of-a-kind favors.
Treat bridal shower guests to
scented handmade soaps.
Page 5
Soap is something else that is a great DIY favor project.
Start by choosing a clear or cream soap base. Then pick a
favorite color or two, and layer in a scent. The liquid soap is
then poured into special molds to harden. Think about using
a mold that ties in with the shower. For instance, if you were
going with a tropical theme, you could use seashell shaped
molds and coconut scent. A springtime shower would be a
great excuse to create lilac scented soaps. You can also layer
other colors and forms into clear glycerin soaps to make
your design really unique and personal. Soap favors work
best when you stack two or three bars for each gift or make a
small bag with five or more tiny guest soaps.
© 2011 www.silverlandjewelry.com
You can't go wrong with edible favors, which can also be simple enough for a novice. Craft stores have
easy to use candy molds and meltable chocolate for creating tasty and pretty candy favors. Handmade
chocolate truffles or chocolate dipped strawberries are other great favor ideas for the novice. If you are
an experienced canner, by all means treat your guests to a jar of your signature jam or relish.
Homemade jams and candies are popular DIY bridal
shower favors.
Don't forget about the packaging for your favors, as it is what will truly make them special. Wrap a set
of soap in a handmade piece of paper, tie it up with a beautiful ribbon, and finish it off with a wax seal.
For candy, glassine bags with custom labels featuring the bride's name are adorable. And brides, don't
neglect thanking your hardworking friend for throwing you the perfect bridal shower! Special thank
you gifts for a bridesmaid who hosted a bridal shower would include a small piece of jewelry, a
handmade photo album, or a silver frame with a picture of the two of you in it. (Of course this would
be in addition to the bridesmaid jewelry you give her for being in your wedding.)
Making bridal shower favors can be easier
than you think. There are so many kits out
there that make it a snap to create your own
unique gifts. Let your creative juices flow, and
having fun with a great diy favor project that
will help to make the bridal shower special
and memorable.
Special packaging will make
your DIY bridal shower favors
especially delightful.
Page 6
© 2011 www.silverlandjewelry.com
DIY Flower Dying for Weddings
Many a bride has decided upon a stunning color palette for her wedding, only to discover that she
cannot find blossoms in exactly the right shade. What's a creative bride to do? Create her own custom
colored flowers, of course! This is what you need to know about diy flower dying for your wedding.
Some of the best
flowers to dye are
carnations, daisies,
Queen Anne's lace,
tulips, and allium.
Have you ever seen bright green or blue carnations in a florist's shop and wondered where on earth
such vivid flowers grow? The answer is that they are basic white blossoms which have been dyed to
achieve the desired color effect. This is actually a very easy project – you may even have done it when
you were a child. With just a little basic know-how, any crafty bride can create her very own couture
colored blossoms for a totally unique look.
When selecting flowers to dye for
your wedding, it is generally best to
start with white flowers, as they are
the easiest to manipulate. Flowers
with open stems will absorb dye
more quickly and reliably than those
with woody stems. Some excellent
varieties to dye include carnations,
Queen Anne's lace, daisies, allium,
and tulips. Gather your flowers,
some standard food dye, and the
vases, and you will be ready to get
to work.
Want custom colored wedding flowers? Dye them
yourself!
Page 7
© 2011 www.silverlandjewelry.com
If you are planning to dye your flowers to a custom hue
for your wedding, you will definitely want to do some
experiments in the months before your event. Take notes
about your samples, so that when you create the perfect
shade of apricot to match the bridesmaid jewelry or the
most vivid turquoise blue for your summer celebration,
you will be able to duplicate the result later. Be aware that
the food dye can also dye the leaves of the flowers, so
keep a careful eye on how long it takes for the flowers to
become the right color, without leaving them in the dye
so long that the leaves take on the same hue as the petals.
When prepping flowers to dye, the first step is to cut the
stems at a sharp angle under running water. Then place
Dying flowers can allow for custom
them in the vases with the colored water. The food dye
hues like these blue roses.
will not harm the blossoms or cause them to wilt. The
more food coloring you use, the more vivid the end result will be. So if you want to create navy blue
flowers for a wedding with a “true blue” theme, right down to the bridesmaid jewelry and cake, you
will need to use a high concentration of dye. Yearning to decorate your ceremony with ballet pink
Queen Anne's lace? Just a few drops of red coloring will do the trick. Allow about 24 hours for the
flowers to take on the color of the water.
Tip: The adventurous crafter can experiment with different
colors and flowers to create unique blossoms with multiple
colors on each flower.
For the adventurous diy bride, have fun experimenting
with custom color effects. Instead of white flowers,
play around mixing pastel blossoms with dye to create
unique shades. You can also create a two-tone effect by
dying flowers in a pastel shade, and then re-dying the
same blossoms using a deeper colored water. The color
spreads from the center of the blossom to the outside
(since the color is absorbed through the stem), so if you
watch the progression carefully, you can remove the
blossoms at the point when the petals are only partially
dyed with the second color. Just think about how much
fun you can have creating a one-of-a-kind flower color
for your wedding.
Page 8
© 2011 www.silverlandjewelry.com
DIY Summer Wedding Centerpiece Ideas
If you are looking to add style to your wedding reception without paying a lot for a florist, think about
making your own centerpieces. There are lots of beautiful designs which are easy enough to make
yourself, and with all the money you save, you can splurge on something with long lasting value, like
your wedding jewelry. These great ideas for diy summer wedding centerpieces will provide all the
inspiration you need to get started.
Pretty DIY summer wedding centerpieces don't require more than
your favorite blossoms and some Mason jars.
When you begin planning your reception centerpieces, think about the ways in which you can tie the
arrangements in with both your wedding style and the season. If you are having a beach theme
wedding, right down to the food and jewelry, incorporate that motif into your centerpieces. Or perhaps
you are having a 4th of July wedding; diy decorations with an Americana flavor would be ideal.
Summer weddings tend to be brighter and more relaxed than winter events, so keep your design light
and laid-back.
A gorgeous diy centerpiece for a garden wedding would be a butterfly “bouquet”. Take a cute enamel
watering can in your favorite color to use as the vessel. Then use a collection of butterflies on long
stems to wire together into a unique and colorful centerpiece. Of course, you won't use real butterflies,
but rather ones created from beautiful paper, fabric, or feathers. They make a colorful and charming
alternative to a floral table arrangement and are easy to assemble yourself. One of the best part about
using non-floral elements for diy centerpieces is that you can put them together a long time before the
wedding.
Page 9
© 2011 www.silverlandjewelry.com
Fresh fruit can make a striking wedding
centerpiece. One of the simplest diy table
decorations you can create is to fill a tall clear
vessel with sliced lemons and limes. Pack them
tightly around the sides so that the round slices are
pressed against the edges of the vessel for a great
graphic design. The citrus fruit adds color and a
summery feeling to the wedding. For a more
modern effect, use a clear tall cylinder or choose a
footed urn if your wedding style is more romantic.
A lemon or lime flavored signature drink would be
the perfect accompaniment to these centerpieces.
Fresh fruit is a delightful addition to a
DIY centerpiece.
Beach theme centerpieces always fit in with
summer weddings and are very easy for the diy
bride. Fill tall clear vases with a variety of seashells
and surround them with low votive candles. Or go
for a modern beach style by placing red faux coral
into clear Lucite boxes and stacking them up. They
will make very striking centerpieces for your
reception, yet are a breeze to assemble.
Of course flowers are always popular for wedding decorations, and there are plenty of designs which
do not require any experience to create. If you want to try your hand at diy centerpieces but are not
confident in your flower arranging abilities, gather a collection of pretty potted plants. For an
Americana wedding, bright red geraniums would look fantastic in white wicker baskets.
Best of all, after your wedding, the cheerful flowers can be planted outside your new home.
Page 10
© 2011 www.silverlandjewelry.com
DIY Wedding Idea: Stencils
When you are planning a wedding, it is really fun to engage your creative side with some DIY projects.
This is a great way to add personality and style to your wedding while keeping costs low. These are
some beautiful wedding projects that can be created with stencils.
Wedding invitations are one of the easiest DIY wedding projects to undertake. With nice paper and a
decent printer, you can get very professional looking results. A wonderful way to add a personal touch
to your invitations is to stencil a design onto them. You can buy a stencil of a pretty floral or a modern
geometric design, or create your own from a piece of plastic. If you decide to make your own stencil, a
monogram would be ideal.
For the invitations, there are a few
ways to use a stencil. For a small
motif, print the invitations first, and
then add your stencil as an accent on
the top. Another beautiful effect is to
stencil a larger image, such as a
flowering branch, in a pale color, and
then use a dark ink to overprint the
lettering. Just be sure to allow plenty
of drying time between steps.
Wedding stencils can be used to
create larger items as well. Keep in
Stencils are an easy way to decorate almost anything
mind that you do not have to limit
for your wedding.
yourself to stenciling on paper. It can
also be done on fabric or walls. A very unique and beautiful decoration for a ceremony would be a
fabric hanging stenciled with a large monogram or other design. The fabric can be suspended behind
the altar for a one-of-a-kind backdrop. If your wedding is in your own home, you can even think about
stenciling a monogram or a large floral pattern right onto the wall. You can always plan to paint over it
after the wedding, and the dramatic effect will be well worth the effort.
Use stencils to create DIY
wedding invitations, table
numbers, favors, and
more.
Page 11
© 2011 www.silverlandjewelry.com
Stencils are often seen on beautiful old country furniture, and this is a technique that would be
wonderful for a wedding. Pick up some old vintage furniture at a flea market, and put your own stamp
on it by stenciling on a wreath or floral pattern. Imagine how special a painted low bureau would look
holding the escort cards or favors at a shabby chic style reception. Even if you are using mostly rented
pieces, you could pick up a neat old pair of chairs to decorate in this manner for the bride and groom's
seats.
It would be delightful to stencil the
bride and groom's initials onto a bureau
to display the escort cards or guest book.
The wedding favors are a great place to try your hand
at stenciling. Choose any type of favor that you like,
and place it in a small paper bag or cardboard box.
You can use your stencil to add character to the
packaging and give your favors that really customized
look. This same idea can be used for your bridesmaid
gifts. Select pretty bridesmaid gifts, such as dainty
pearl earrings, and then make them even more special
by presenting them in hand-stenciled boxes. The
personal touch will make your gifts even more
heartfelt and thoughtful.
Personalize tote bags with a
stenciled message for your
bridesmaids or wedding guests.
There is no end to the different things that you can create for
your wedding using a stencil. The key is to choose one
special motif that you can carry throughout the wedding.
The attention to detail will make your ceremony and
reception feel very unique and personal.
Page 12
© 2011 www.silverlandjewelry.com
Easy Winter Wedding Centerpiece Ideas
There are so many things to do when planning a wedding! Designing the centerpieces is one of the
most important things, because they will really set the style for the wedding reception. Pretty
centerpieces do not have to be elaborate, however. These are some great ideas for easy winter wedding
centerpieces.
Christmas ornaments are a great design resource for
holiday wedding centerpieces. A very simple idea is to
gather a collection of beautiful round Christmas balls and
place them in clear glass elegant footed vases. Make the
look more wedding than holiday by choosing ornaments
which are not in the very traditional red and green
combination. Frosted metallic lime green with purple and
silver balls would be gorgeous filling a clear footed vase
or hurricane. Coordinate the napkins and stemware on the
table to the colors in the ornaments to create a beautiful
reception table design.
Christmas ornaments make easy
and elegant winter wedding
centerpieces.
Silver branches and large crystals are
perfect for a winter wedding DIY
centerpiece.
Sparkle is very popular for winter weddings, from
beaded gowns to crystal bridal jewelry to the bride's
bouquet. To bring some sparkle to your reception, try a
crystal branch centerpiece. Tall white or silver painted
branches can be artfully arranged in cylinders, vases, or
painted ceramic pots. Using clear fishing line, suspend
large crystals from the branches. Crystals with an “ab”
finish will really capture the light and look dazzling.
Hang small lanterns with candles from some of the other
branches to help illuminate the crystals. It is a fabulous
centerpiece for the bride who loves sparkly things like
crystal bridal jewelry.
Page 13
© 2011 www.silverlandjewelry.com
A very charming idea for a winter wedding centerpiece is gingerbread houses. The bride and her mom
could make the houses themselves from kits or simply purchase them already made. The gingerbread
houses can be decorated in the wedding colors, or could even be created to look like little gingerbread
chapels, complete with gingerbread brides and grooms! This centerpiece makes a nice tie-in to the
wedding favors. Gingerbread cookies in glassine bags with pretty bows would be perfect. Attach a
small card with your favorite gingerbread recipe to the favor bags.
Certainly flowers are beautiful for centerpieces at any
time of the year. An ultra easy idea for a winter
wedding centerpiece is to buy pots of white
poinsettias to use as table decorations. Remove the
foil wrapping they come in and place the plants in
white glazed ceramic pots. Surround the white
poinsettias with crystal votive candle holders to add
sparkle and light to the tables. The effect will be
simply gorgeous for a winter white wedding, and as a
bonus, the potted poinsettias will be far more cost
effective than arrangements of cut flowers.
Gingerbread houses would be great
DIY centerpieces for brides who love
to bake.
For a winter wedding with cozy homespun charm,
create centerpiece vessels by neatly wrapping red
yarn around cylinders to cover them. Fill with
decorations such as branches of red berries, white
flowers, and even whimsical touches such as little red
cardinals made of feathers. Short fat pillar candles
would be a nice accompaniment. These centerpieces
would be truly charming for an informal winter
wedding celebration.
White poinsettias are a
terrific element for DIY
winter centerpieces. Simply
add some candles for a
romantic winter white
tablescape.
Page 14
© 2011 www.silverlandjewelry.com
Elegant Wedding Bouquet Wraps You Can Do Yourself
The flowers are one of the key decorations at any wedding. The bouquets carried by the bride and her
bridesmaids will add a beautiful detail to their wedding attire as they process down the aisle, and
deserve to be as perfect as possible. A fantastic way to take a bouquet from pretty to marvelous is to
decorate it with a special handle wrap. These are some elegant wedding bouquet wraps which you can
even do yourself.
It may sound intimidating to do your own bouquet wraps and
handle decorations, but it is not as tricky as it looks. I recently
saw a Martha Stewart wedding special, and she showed step
by step how to totally transform the flower stems of a bouquet
with just some ribbon and a few pins. As I watched, I realized
that many bouquet wraps can be very beautiful without being
particularly hard to create. This is a perfect task for the DIY
bride. With a little advance practice, covering your own
wedding bouquet handles can be a fun and easy undertaking.
A great tip when doing wedding bouquet wraps is that the trim
should complement both the style of the flowers and the other
accessories, such as the bridesmaid jewelry. If your bridesmaids
were wearing pearl bridesmaid jewelry, for instance, a gorgeous
bouquet wrap would be a piece of pearl beaded taffeta. This is a
lovely fabric which comes pre-beaded, so that all you have to do
is attach it to the stems of the flowers. Cut a small piece and use
pins to secure the edge to the stems. Then tightly wrap the fabric
around the stems until they are covered and fold the cut edge of
the fabric under for neatness. A row of pearl tipped pins can be
pushed through the folded edge of the material to complete the
wrap, and as an extra decorative touch – perfect!
Pre-beaded fabrics and trims
are an easy way to create
elegant DIY bouquet wraps.
Pearl tipped pins, crystal
buttons, vintage brooches,
and costume jewelry are
special additions that will
give your DIY bouquet wrap
a couture look.
Page 15
© 2011 www.silverlandjewelry.com
Ribbon is one of the most popular bouquet wraps, and it can be used in a variety of styles. If you are
looking for a way to finish off your wedding flowers which is both luxurious and ridiculously easy, get
a length of a very wide double faced satin ribbon; 3 or 4 inches wide is usually about right, depending
how long you are planning to leave the stems of the blossoms. First, wrap floral tape around the stems
to secure them in place. Then take your luxe ribbon and wrap it around the middle of the stems. It can
either be pinned in place to create a tailored cuff using decorative pins, or tied into a bow with long
cascading tails. Once the whole thing is assembled, be sure to give the ends of the stems a fresh cut
with a sharp knife. Some people prefer the look of a diagonal cut, while others like the simplicity of a
straight cut.
Almost anything that strikes your fancy can
be used for a unique bouquet wrap, from a
sentimental lace handkerchief to rustic
burlap.
Another adorable idea for a bouquet wrap which you can do yourself is to take a piece of lightweight
lace and neatly wrap it around the stems of the flowers. If you have an heirloom, such as your
grandmother's vintage lace hankie, it can also be a great idea for the bride's something old. Once the
lace is secured with pearl tipped pins, feel free to leave it as is or to add another accent. A small sparkly
crystal brooch looks fabulous pinned to the bouquet wrap. Tiny fabric blossoms are very sweet stitched
to a lace or ribbon bouquet wrap.
Many other materials can be used for DIY wedding bouquet wraps. Raffia looks great for a rustic
wedding, or choose a velvet ribbon for a winter ceremony. If you are unsure about where to begin, take
a look at the bridal flowers in wedding magazines for inspiration. In many cases, the wraps themselves
are surprisingly straightforward; it is the luxurious quality of the ribbons and accents which makes
them look so impressive. Making your own bouquet wraps can be one of the most fun diy projects of
your entire wedding.
Page 16
© 2011 www.silverlandjewelry.com
Make Your Own Save the Date Cards
Save the date cards are a wonderful way to give your guests advance notice of your upcoming wedding.
They are also a great chance to give your family and friends a hint about what your wedding will be
like. Since they need not be very formal, many couples like the fun of designing and possibly even
making their own save the dates. Use these ideas to get the creative juices flowing.
The save the date cards are the first glimpse that
your guests will have of your wedding style, so
why not take the opportunity to make a great first
impression? Let's say that you are planning to have
very formal wedding, and will be using lots of
sparkly elements, such as crystal wedding jewelry.
A cute idea for your wedding notices would be to
embellish a heavy card with a silver chandelier
motif to give the hint of the elegance that is to
come. Or make your save the dates sparkle just like
your crystal wedding jewelry by dipping the edges
in glitter. Use a pretty script for the lettering, in
keeping with the fancy motif.
Calendar save the date cards can be really cute, and
there are any number of design possibilities. A
simple one is to have your cards printed with the
month in which you will be married and then circle
your wedding date in red. Underneath the calendar,
all that is needed is the names of the bride and
Calendar save the date cards are fun
groom with the message “save the date”. A
and effective.
variation on this is to have the calendar printed on a
magnet. With your wedding date staring them in the face every time they go to the fridge, you can be
sure that no one will forget about your special day!
Personalize your DIY save
the date cards with
photographs of the bride and
groom for a sweet detail.
Page 17
© 2011 www.silverlandjewelry.com
Customized photos can be a fantastic basis for save the date notices. One couple I knew made two
snowmen and stretched a banner between them which proclaimed, “We're engaged!”. Their names and
wedding date were printed under the picture. Not only were the cards cute and original, but they were
able to use them as their holiday greeting cards as well, thereby taking care of two things at once
(always helpful when you are busy planning a wedding!). A photo of the engaged couple could be used
in a similar fashion, and creating the cards yourself on the computer would be a piece of cake.
If you are planning a theme wedding, why not
have your notices reflect that? The message in
a bottle is a popular save the date idea for
destination weddings to tropical locations (as
long as you don't mind paying for all that
postage); a fun variation on that would be to
have labels printed with your wedding date
adhered to small bottles of wine for a
vineyard wedding. For a garden wedding,
send your notices on handmade paper which
has dried petals embedded in it, or use heart
shaped stationery for a Valentine's Day
wedding.
Vintage postcards are terrific for save the date
cards for a destination wedding!
The save the date cards are one of the areas of a wedding which allows the bride and groom total
creative freedom. Even if your wedding is formal, you can design wedding notices with a touch of
whimsy to them. Always keep in mind that one of the main jobs of the save the date card is not only to
notify guests of your upcoming nuptials, but to make them eagerly anticipate the celebration itself, and
you will do just fine.
Page 18
© 2011 www.silverlandjewelry.com
Wedding Paper Crafts
The two biggest trends in weddings right now are to spend less and to personalize more. A fantastic
way to achieve both of these goals simultaneously is to take on some diy projects. These are some ideas
for wonderful crafts that you can create for your wedding with paper.
Whimsical paper pom poms are an absolute
delight.
Colorful origami paper can
be used to create a wide
range of wedding paper
crafts, including origami
cranes and paper flower
centerpieces.
Page 19
The floral budget is one place where
substituting paper flowers for real
blossoms can really make a
difference. Handmade paper flowers
can be beautiful and whimsical and
have none of the negative
connotations of fake fabric flowers. In
addition, paper flowers are very sweet
and can be made in any color. Slightly
translucent tissue and crepe papers
work wonderfully for creating your
own flowers, and they can be used for
everything from the bouquets to the
boutonierres to accents for small
tables such as the guest book table.
Just be careful not to take on crafting
more paper flowers than you can
complete before your wedding!
© 2011 www.silverlandjewelry.com
A very cool and unique idea for decorations that you can make with paper is origami. One of the most
popular shapes to create with folded paper is a crane, and for very good reason. In Japan, the crane
symbolizes loyalty and honor, as it is a bird that mates for life. This makes it a perfect symbol to
include in a wedding! The best way to display origami cranes is in abundance. They look particularly
grand when hung in long strings from a ceiling or a wedding canopy. If you are having an Asian
inspired wedding, make your cranes from origami papers in shades of red. Otherwise, feel free to make
them in any color or pattern that strikes your fancy.
1000 handmade paper cranes is a beautiful Japanese wedding custom.
Another great thing that you can handmake with paper is boxes or vessels. Special paper can be applied
to the outside of a generic favor box to dress it up, or you can use a heavy paper to make your own
boxes (perhaps topped with a handmade paper flower?). Fancy little boxes are also a terrific
presentation for bridesmaid gifts. If you have selected dainty gifts such as bridesmaid jewelry, you
could easily craft tiny little paper boxes to make them even more special. The traditional shape of a
Christmas cracker (long tubes of paper, twisted at each end and filled with gifts) can be adapted to hold
your favors or bridesmaid gifts as well.
Of course, one of the most obvious diy projects involving paper is the wedding stationery. Your
invitations, thank you cards, and the rest of the wedding suite are one of the easier tasks for even a
novice crafter to undertake. When you make your own invitations, you will have complete control over
the design, and not be limited to what is available in stores. As a bonus, you will save big bucks.
Making things for your wedding is such a fantastic way to add style and character to your special day
while also reining in costs. Paper is versatile material that lends itself to countless diy projects. Best of
all, when your guests are admiring your lovely paper flowers, favors, or other decorations, you will be
able to say, "I made that!".
Page 20
© 2011 www.silverlandjewelry.com
DIY Wedding Ideas
By Bridget Mora
Published by Silverland Jewelry & Gifts'
© 2011
Page 21


© Copyright 2026