
Caring For Your Andersen 100 Series
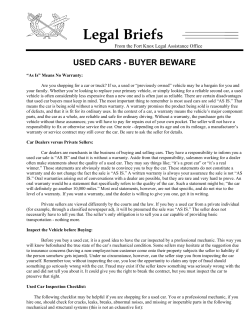
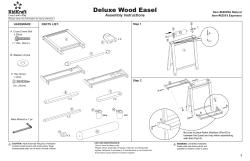
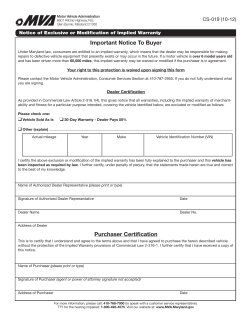
Caring For
Your Andersen
100 Series
Windows
and Doors
®
“Andersen” is a registered trademark of Andersen Corporation.
All other marks where denoted are marks of Andersen Corporation.
© 2009 Andersen Corporation. All rights reserved. 10/09
Introduction
We’re confident your new Andersen® 100 Series windows and
patio doors will help make your home more comfortable and energy
efficient year-round. Your new windows and doors have been built
and installed to your exact measurements and specifications with the
same attention to detail and quality that have made Andersen® products
the choice of homeowners, builders, and architects for years.
This booklet shows you how to keep your windows and doors
looking and working like new for years* of continued enjoyment.
Should you run into situations not covered in the following pages,
please contact your nearest Andersen dealer. You may also call
our Warranty Service Line at 1-888-888-7020, visit our website at
www.andersenwindows.com, or write to:
Andersen Windows
100 Fourth Avenue North
Bayport, MN 55003-1096
The Consumer Product Safety Commission, in its pamphlet “Protect Your
Child,” advises: “Keep children away from open windows to prevent falls.
Don’t depend on screens to keep the child from falling out of the window.
They are designed to keep insects out, not children in. Avoid placing furniture
near windows to keep children from climbing to a window seat or sill.” For
more information on child safety, call an Andersen dealer and ask for our
free booklet, “LookOut For Kids®.”
* See the limited warranty for details.
2
Table Of Contents
Maintaining your windows and patio doors ...................................4
Routine maintenance ..................................................................4
3
Proper care and maintenance of your Andersen® 100 Series windows
and patio doors will help provide continued operation and lasting* beauty.
Product modifications . ................................................................4
Glass replacement ......................................................................4
Hardware ...................................................................................5
Corrosion-resistant hardware .......................................................5
Use extreme care when working around a window opening. Never
leave a window unattended, especially when children are present.
Falling from a window may result in serious injury or death.
Understanding condensation .......................................................5
Painting guidelines for Fibrex® material windows and doors . ..........6
General window information . .......................................................8
Casement windows .....................................................................8
Awning windows . ........................................................................9
Single-hung windows ..................................................................10
Gliding windows .........................................................................11
Picture windows .........................................................................12
General patio door information . ..................................................13
Painting guidelines for patio doors ..............................................13
Removing insect screen .............................................................13
Panel adjustments .....................................................................14
Limited warranty.........................................................................15
* See the limited warranty for details.
“Andersen,” the AW logo and all other marks where denoted are trademarks
of Andersen Corporation. © 2009 Andersen Corporation. All rights reserved.
• Any harsh chemicals and cleaners that come into contact with
the hardware or glass should be rinsed off immediately.
• Acid solutions used to wash masonry will damage glass, fasteners,
hardware, and metal flashing. Follow the acid solution manufacturer’s
instructions carefully. Protect Andersen® products when cleaning
masonry to prevent acid contact. If acid does come in contact
with the window, immediately wash all surfaces with clean water.
• Do not use solvents, abrasive solutions, or razor blades to clean
the glass area. Scratches or other damage may occur.
• To minimize glass cleaner residue from depositing on the glass,
do not clean in direct sunlight.
• Do not use newspaper to dry the glass surface as the ink
may discolor the surrounding Fibrex® material.
Use caution when working at elevated heights and around unit
openings. Follow manufacturers’ instructions for ladders and/or
scaffolding. Failure to do so may result in injury or death.
Maintaining Your Windows
and
Patio Doors
Routine maintenance
• Clean out dirt and debris from sills and tracks to keep your windows
and doors opening and closing easily.
• Clean the frame and sash by using a mild solution of soap and
water and a soft rag or brush. See each window section for detailed
washing instructions.
• To clean the glass, first wipe loose dirt and grime from the glass with a
soft clean dry cloth. Apply a cleaning solution such as mild soapy water,
vinegar and water, or a liquid window cleaner to the glass and wipe in
a circular motion. Remove the cleaning solution with a squeegee or
clean, lint-free cloth. Rinse with clear water if soap has been used.
• Rinse insect screens periodically with a garden hose. If needed, wash
with a mild solution of soap and water and a soft fiber brush. Hose
off with clear water.
• On gliding windows, casement or awning windows, and patio doors,
lubricate all moving parts, such as locks, hinges, operators, and rollers
with dry lubricant to maintain ease of operation. DO NOT use wet
lubricants or harsh abrasive cleaners that will collect dirt or other
corrosive particles.
Product modifications
You may notice that your 100 Series windows and doors look and feel
different from any other windows and doors. That’s because the window
framing and sash are made of Fibrex® material, a unique structural
composite of wood fibers and thermoplastic polymer. Fibrex material
has an attractive low-luster finish and is virtually maintenance-free.
4
Please consult with an Andersen dealer before applying screws into
window or sash frame. If you choose to modify your windows, make
sure screws are never used where they could interfere with operation,
weatherstrip systems, or glazing. Damage to window from misplaced
screws or product modification is the responsibility of the homeowner
and does not imply a product or material failure.
Never nail through Fibrex® material. Irreparable product damage
could result.
Modifying window or door products after installation voids your
manufacturer’s warranty. This includes driving nails or screws
through the window and door sash and frame.
Glass Replacement
Wear gloves, safety glasses, goggles, or eye shields when handling
glass. Tape broken glass with duct or filament tape before removal
to reduce glass fragmentations.
If the glass is broken on an operating window sash, the sash must
be replaced. If the glass in a fixed sash or a picture window is
broken, the glass must be replaced. To order and schedule a new
sash installation, call Andersen Customer Service and give them the
product identification number printed on your window. See the
appropriate window style section for location of this number.
Maintaining Your Windows
(continued)
and
Patio Doors
5
Hardware
Understanding Condensation
Climate, location, and exposure to corrosive environments and elements
such as industrial areas, pesticides, herbicides, or salts are challenges
to your ability to maintain the hardware’s beauty and characteristics.
Simple routine maintenance will help extend the life of your window
and door hardware.
The moisture that suddenly appears on the interior or exterior of
window and patio door glass in cold weather can block the view, drip
on the floor, or freeze on the glass. It can be an annoying problem.
DO NOT use or apply harsh chemicals, abrasives and/or cleaners.
Product damage could occur.
Wash hardware using a mild detergent and water solution with a soft
cloth. Avoid abrasive cleaners, cloths, or brushes.
Corrosion-resistant Hardware
Andersen offers hardware for 100 Series casement and awning
windows that is specially designed to resist corrosion* in environments
such as seacoasts and heavy-industrial areas. If you are interested in
this option, contact your Andersen dealer for information.
While it may seem natural to blame the windows or doors, interior
condensation is really an indication of excess humidity in the home.
Exterior condensation, on the other hand, is a form of dew – the glass
simply provides a surface on which the moisture can condense.
What are some ways to control window condensation? Reduce
the indoor relative humidity in living areas, attics, and crawl spaces.
The following are a few general suggestions:
• Reduce the amount of moisture you put into the air. This can be
accomplished by recognizing the many sources of moisture in the
air – from cooking to heating to plants and other items.
• Vent clothes dryers, all gas appliances, and exhaust fans to the
outside. In most climates you should also ventilate your attic and
crawl space to the outside. If you have a crawl space, it is very
important to completely cover the earth with an effective vapor
barrier. If you run a humidifier, you may need to turn it down or off.
• Drapes and other window coverings can contribute to a condensation
problem by restricting the flow of warm room air over the glass
surface. Therefore, indoor condensation is more apt to occur when
the drapes are closed or the shades are pulled down.
* See the limited warranty for details.
Maintaining Your Windows
(continued)
and
Patio Doors
• Make sure you run the exhaust fans in the kitchen when cooking
and in the bathroom when bathing or showering. Run the exhaust
fan until the mirror in the bathroom is clear or the temperature near
your stove is back to normal. Be careful not to run the exhaust fan
too long and overheat the motor.
• Avoid storing firewood in your house or basement.
• For products with an interior insect screen, removing the insect screen
in the winter months when the window is not typically being operated
may reduce condensation behind the insect screen by increasing air flow.
• If you have a forced air furnace, make sure your home is properly
ventilated by installing a fresh air intake. Or if your home is extremely
“tight” and you have excessive moisture, it may be helpful to install
an air-to-air heat exchanger.
For more information on the causes of and cures for window
condensation, call your Andersen dealer and ask for our free
booklet, “A Guide to Understanding Condensation”, or contact
the following resources:
National Fenestration Ratings Council (NFRC)
6305 Ivy Lane, Suite 140
Greenbelt, MD 20770
(301) 589-1776
www.nfrc.org
Energy and Environmental Building Association (EEBA)
6520 Edenvale Boulevard, Suite 112
Eden Prairie, MN 55346
(952) 881-1098
www.eeba.org
6
Painting guidelines for
Fibrex® material frames
Use caution when working at elevated heights and around unit
openings. Follow manufacturers’ instructions for ladders and/or
scaffolding. Failure to do so may result in injury or death.
Sanding, staining, painting, varnishing and other finishing
procedures should always be done in well-ventilated areas.
Follow all manufacturer’s warnings, cautions, and instructions.
Failure to do so may result in injury or illness.
Metal razor blades can damage glass surface
Your new windows are manufactured with Fibrex® material frames
with a low-luster Perma-Shield® cladding. There is no need to paint the
window frame or sash; however, should a change in color be desired,
please follow these instructions in order to retain warranty coverage.
Maintaining Your Windows
(continued)
and
Patio Doors
• Do not paint the weatherstripping, gaskets, factory-applied exterior
silicone bead, jamb liners, or any surface that has sliding contact with
another surface. Also, refer to the section on your particular window
style for information on what NOT to paint on that window.
• Do not allow painted surfaces to come in contact with other surfaces
until thoroughly dry.
• READ AND FOLLOW all finishing product instructions and warnings on
finishing material.
• Use of stains on Fibrex® material surfaces is not recommended.
Stains will cause permanent damage.
• Improper painting can impair proper window operation. Certain
solvent-based paints, stains, or finishes can also cause permanent
damage. If in doubt, contact your Andersen representative.
• Do not use ketones (MEK, MIBK) or xylene as a surface conditioner
for cleaning the Fibrex® material surface.
7
Painting steps
1 Select a high-quality, fast-dry alkyd primer (such as KILZ® brand)
and an oil or water-based trim paint. Choose an exterior paint for
exterior applications and an interior paint for interior applications.
2 Prior to painting, lightly sand the surfaces to be painted with fine
sandpaper or steel wool. Remove dust particles with a soft, dry
cloth. Surface abrasion helps promote a strong bond between the
surface and the paint.
Do not allow sandpaper or steel wool to contact the glass surface.
Scratches or other damage may occur. If using steel wool, remove
all resulting steel fragments immediately to avoid rust stains.
3 Clean the surface of dust and fingerprints with a surface conditioner or mild solvent to promote paint adhesion. Wipe all surfaces
with a cloth dampened in surface conditioner or mild solvent, such
as acetone, isopropyl (rubbing) alcohol, or denatured alcohol, and
allow to dry thoroughly according to manufacturer’s instructions.
4 Paint the surface first with a quality, fast-drying alkyd primer in a neutral
color. Paint the unit with sash open and allow to dry completely before
closing (follow the manufacturer’s recommendations for dry time).
5 After the primer is thoroughly dry, apply a high-quality oil or waterbased trim paint. Paint exterior surfaces with exterior house paint
and interior surfaces with interior paint. Paint the unit with the
sash open and allow to dry thoroughly before closing.
“Kilz” is a registered trademark of Masterchem Industries LLC.
General Window Information
Casement windows
Do not leave casement windows open in high winds. Sash blow
out may occur in extreme conditions resulting in injury and/or
product damage.
Do not permanently remove handles. They must be in place
and tightened to allow egress in case of an emergency.
8
Washing the window
The hardware design of the casement window lets you wash the
exterior surface of the sash from inside.
Notice: Windows with egress hinges and very wide
windows (30-40 inches) may exceed your reach
and may need to be washed from the exterior.
To clean the exterior, open the window fully and
reach between the frame and sash.
Repair or replacement
Use extreme caution when working around window and door openings.
Never leave an open window unattended, especially when children are
present. Falling from window may result in serious injury or death.
Removing the insect screen
Your Perma-Clean® insect screen features a
strong aluminum frame with a glass fiber or
TruScene® insect screen. To remove, unlock
the sliding fasteners on both sides and lift insect
screen from the opening. To reinstall the insect
screen, reverse the procedure. Be sure to
latch it completely.
For product repair or replacement, simply call your local
Andersen dealer and give them the product identification
number printed on the window’s identification label. The
label on a casement is located on the head jamb; open
the sash to view the label.
Notice: Do not remove the identification label. It is essential for
identifying your specific window if replacement or repair parts are
ever needed. If you are unable to contact an Andersen dealer,
call our national service number located on the window’s
identification label or visit www.andersenwindows.com.
General Window Information
(continued)
Simple adjustments
If the operator handle should slip off or become
loose, make sure it is seated properly and
tighten the set screw. Make sure the handle is
slightly above the cover to avoid interference
during operation. Do not leave handles and set
screws loose as this may cause stripping of the
handle and shaft connections.
Painting
Before painting your casement window, thoroughly read and follow
all general painting instructions and recommendations (see pages
6 and 7). Failure to do so may result in poor appearance or damage
to your windows.
DO NOT paint weatherstripping, keeper, sash lock, lock rod, exterior
glazing, hinges, operator handle, insect screens, or any surface that
has sliding contact with other parts.
9
Awning Windows
Removing the insect screen
Your Perma-Clean® insect screen features a strong
aluminum frame with a glass fiber or TruScene®
insect screen. To remove, unlock the latches
at the sides and lift the insect screen from the
opening. You may need to apply slight pressure so
the insect screen flexes to pass by the window’s
lock levers. To reinstall, reverse the procedure
and latch it completely.
Washing the window
The exterior on the awning window must be washed from the outside.
Painting
Before painting your awning window, thoroughly read and follow
all general painting instructions for cautions and recommendations
(see pages 6 and 7). Failure to do so may result in poor appearance
or damage to your windows.
DO NOT paint weatherstripping, keeper, sash lock, lock rod,
exterior glazing, hinges, operator handle, insect screens, or
any surface that has sliding contact with other parts.
General Window Information
(continued)
10
Repair or replacement
Washing the window
For product repair or replacement, simply call your
local Andersen dealer and give them the serial number
printed on the window’s identification label. The label
on an awning window is visible on the top of the
frame when the sash is in an open position.
The exterior on 100 Series single-hung windows must be washed
from the outside.
If you are unable to contact a local Andersen dealer, call our national
service number located on the window’s identification label or visit
www.andersenwindows.com.
Notice: Do not remove the identification label. It is essential for
identifying your specific window if replacement or repair parts are
ever needed.
Single–hung windows
Removing the insect screen
Your Perma-Clean® insect screen features a strong aluminum
frame with a glass fiber, or TruScene® insect screen.
To remove insect screen, fully open the bottom sash. Pull up on the
loops located at the lower corners of the insect screen, push the
insect screen out to clear the sill, and remove from the channel in
the upper sash. Grip the insect screen tightly to avoid dropping it
to the ground outside. Turn it slightly and bring inside. To reinstall,
reverse the procedure. Make sure the insect screen is positioned
within the screen channel in the lower sash of the window.
Repair or replacement
For product repair or replacement, simply call your local
Andersen dealer and give them the product identification
number printed on the window’s identification label. The
label on a single-hung window is located on the head
jamb at the top of the window.
If you are unable to contact an Andersen dealer, call our national
service number located on the window’s identification label or visit
www.andersenwindows.com.
Notice: Do not remove the identification label. It is essential
for identifying your specific window if replacement or repair parts
are ever needed.
Painting
Before painting your single-hung window, thoroughly read and follow
all general painting instructions for cautions and recommendations
(see pages 6 and 7). Failure to do so may result in poor appearance
or damage to your windows.
DO NOT paint jamb liner, weatherstripping, keeper, sash lock, insect
screens, or any surface that has sliding contact with other parts.
General Window Information
(continued)
Gliding windows
Removing the insect screen
Your Perma-Clean® insect screen features a strong aluminum
frame with a glass fiber, or TruScene® insect screen.
To remove the insect screen, grasp the loops located on the upper
and lower corners of the insect screen nearest the side jamb,
and pull toward the meeting stile. Push the insect screen
outward to clear the side jamb and remove from the channel
in the meeting stile. Grip the insect screen tightly to avoid
dropping it to the ground outside. Turn it slightly and bring inside.
To reinstall, reverse the procedure.
Washing the window
Windows and doors can be heavy. Use safe lifting techniques and a
reasonable number of people with enough strength to lift, carry and
install window and door products to avoid injury and/or product damage.
Use extreme caution when working around window and door
openings. Never leave an open window unattended, especially
when children are present. Falling from window may result in
serious injury or death.
11
The operating sash on the gliding window can be
removed and brought inside for easy cleaning of
the exterior. Simply move the operating sash to
the center of the opening and proceed with the
following steps.
Lift the operating sash up into the head jamb
and pull the bottom of the sash toward you.
After cleaning the window, reverse the steps to replace the sash.
The exterior of the fixed sash can be cleaned as shown above.
For large gliding windows or for gliding/picture window combinations,
we recommend cleaning from the outside.
Painting
Before painting your gliding window, thoroughly read and follow all
general painting instructions and recommendations (see pages 6 and 7).
Failure to do so may result in poor appearance or damage to your
windows.
DO NOT paint weatherstripping, lock keeper, sash lock, tracks,
insect screens, or any surface that has sliding contact with other parts.
General Window Information
(continued)
12
Repair or replacement
Painting
For product repair or replacement, simply call your
local Andersen dealer and give them the product
identification number printed on the window’s
identification label. The label on a gliding window
is located on the head jamb.
Before painting your picture window, thoroughly read and follow all
general painting instructions and recommendations (see pages 6 and 7).
Failure to do so may result in poor appearance or damage to your
windows.
If you are unable to contact a local Andersen dealer, call our national
service number located on the window’s identification label or visit
www.andersenwindows.com.
Notice: Do not remove the identification label. It is essential
for identifying your specific window if replacement or repair parts
are ever needed.
Picture windows
Washing the window
The exterior of the picture window must be washed from the outside.
All Fibrex® material surfaces on your picture (fixed) window may
be painted.
Repair or replacement
For product repair or replacement, simply call your local
Andersen dealer and give them the product identification
number printed on the window’s identification label. The
label on a picture window is located on the head jamb.
Please call your local Andersen dealer for assistance. If you are
unable to contact a local Andersen dealer, call our national service
number or visit www.andersenwindows.com.
Notice: Do not remove the identification label. It is essential
for identifying your specific window if replacement or repair parts
are ever needed.
General Patio Door Information
Painting guidelines for patio doors
• Do not paint the weatherstripping, gaskets, factory-applied exterior
silicone bead or any surface that has sliding contact with another surface.
13
Painting
• Do not allow painted surfaces to come in contact with other surfaces
until thoroughly dry.
Before painting your Andersen® 100 Series patio door, thoroughly
read and follow all general painting instructions for cautions and
recommendations (see pages 6 and 7). Failure to do so may result
in poor appearance or damage to your door.
• READ AND FOLLOW all finishing product instructions and warnings on
finishing material.
The side jambs, head jamb, and panels of your 100 Series patio
door may be painted. We recommend that the sill not be painted.
Removing the insect screen
Improper painting can impair proper door operation. Certain
solvent-based paints, stains, or finishes can also cause permanent
product damage. If in doubt, contact your Andersen representative
for approved brands.
Use a clean cloth or clean plastic scraper to remove paint or staining
materials from the glass surface.
Notice: Andersen assumes no responsibility for any damage to the
door caused by painting or staining.
Your Perma-Clean® insect screen features adjustable rollers on top and rollers on the bottom.
The insect screen locking mechanism is
located on the side jamb of the patio door.
To remove the insect screen, Screen
lower the
insect screw
adjustment
Remove or install screen
screen by turning the adjustment screw located
on the bottom corners of each
side of the insect screen. Lift
the insect screen and pull out
at the bottom. To reinstall,
reverse the procedure.
General Patio Door Information
(continued)
Screen adjustment screw
If the insect screen operates stiffly, make sure
that the rollers are properly seated on the guide.
If the bottom appears to be dragging, insert a
screwdriver into the adjusting holes on the inside
bottom rail and turn to raise or lower the insect
screen. Close the insect screen to within one
inch of the side jamb and check for uniform
opening from top to bottom.
Panel adjustments
Adjustment hole caps are small parts and, if swallowed, could pose a
choking hazard to young children. Remove and dispose of any loose
Panel adjustment screw
or easily removed adjustment hole caps.
If the panel operates stiffly, it may be dragging
slightly because the patio door is out of adjustment. To adjust it, remove the adjustment hole
caps located on the ends of the bottom rail of
the door, insert a flat-head screwdriver, and turn
to raise or lower the rollers. Move one notch at
a time, checking door operation as you go. Close
panel to within one inch of the side jamb and
check for uniform opening from top to bottom. Replace the
adjustment hole caps when the adjustment is complete.
14
Check and adjust lock alignment on 2-panel patio doors
Close operating panel and move the latch lever to lock position. The
latch should engage latch receiver smoothly and pull the panel into
the receiver jamb for a snug fit.
If the latch fails to engage, follow these steps:
1 Close the operating panel to check alignment of the lock button to
the receiver pin.
2 Adjust the door and frame fit using a small flat-head screwdriver to
turn the adjustment screw on latch receiver, if necessary.
3 If the panel does not fit snug against the weatherstripping, turn
adjustment screw on latch receiver counterclockwise toward “–”
position for a tighter fit.
4 If the latch lever operates stiffly when locking or unlocking door,
turn adjustment screw on the latch receiver clockwise toward “+”
position for a looser fit.
Limited Warranty
LIMITED WARRANTY FOR 100 SERIES PRODUCTS
Your 100 Series products are warranted under a fully transferable
limited warranty covering parts, labor, and original installation
services as follows:
About our limited warranty
Our limited warranty is not prorated. It gives you the same coverage
day after day, year after year, for as long as the warranty is in force.
It’s fully transferable, so it can add real value when you decide to sell
your home or building.
What this means to you
If, due to conditions outlined within the following limited warranty,
your Andersen window or door does not meet manufacturing, materials,
or workmanship specifications during the warranty period, we will
bring it up to our quality standards.
Your responsibility
Even though Andersen products are of superior quality, this limited
warranty applies only if the Andersen product has been properly
installed, used, and maintained.
15
Andersen® 100 Series window and door units are warranted to be
free from defects in manufacturing, materials, and workmanship for
ten (10) years from the date of purchase from the retailer/dealer. The
glass is also warranted not to develop, under normal conditions, any
material obstruction of vision resulting from manufacturing defects or
as a result of premature failure of the glass or organic seal for ten
(10) years from the date of purchase from the retailer/dealer.
In the event a component fails as a result of a defect in manufacturing, materials, or workmanship within the limited warranty
period, Andersen, at its option, will: (1) provide replacement parts
to the Andersen retailer/dealer you specify—installation labor is not
included; or (2) provide a factory-authorized repair to the existing
component at no cost to you; or (3) refund the original purchase price
or retailer’s/dealer’s price at the time of the original purchase, whichever is less. Such replacement parts or repairs are warranted for the
remainder of the original limited warranty period.
General conditions and exclusions
The limited warranty set forth in this document is the only express
warranty (whether written or oral) applicable to Andersen 100 Series
windows and doors, and no one is authorized to modify or expand this
limited warranty. All warranty claims must be made during the applicable warranty period.
Limited Warranty
(continued)
ALL IMPLIED WARRANTIES INCLUDING MERCHANTABILITY
AND FITNESS FOR A PARTICULAR PURPOSE WILL EXPIRE
WITH THE TERM OF THE 10 YEAR LIMITED WARRANTY.
ANDERSEN EXCLUDES AND WILL NOT PAY FOR INCIDENTAL
OR CONSEQUENTIAL DAMAGES AND ITS LIABILITY WILL IN ALL
INSTANCES BE LIMITED TO REPAIR OR REPLACEMENT OR REFUND
OF THE ACTUAL PURCHASE PRICE OF THE DEFECTIVE PRODUCT.
Some states do not allow the exclusion or limitation of incidental
or consequential damages or limitation of the duration of an implied
warranty, so the above limitations or exclusions may not apply to you.
This limited warranty is only applicable in the U.S.A. (i.e. the 50
states and the District of Columbia). This limited warranty gives you
specific legal rights, and you may also have other rights which may
vary from state to state.
What is not covered by this limited warranty
Product failure or damage due to improper installation
or modification including:
• Adjustments or corrections due to improper installation
• Failures due to product modifications or glass shading devices
(e.g., glass tinting, security systems, improper painting or staining,
insulated coverings, etc.)
• Units improperly assembled or improperly mulled by others
• Failure due to the application of non-Andersen hardware
(e.g., locksets, trim sets, hinges, panic hardware, closers, etc.)
• Failure to properly install Andersen hardware
Damage caused by the following:
• Improper maintenance or use, including use of a non-commercial door
as a main entrance or exit door for a building other than a single-family
residential unit
16
• Exposure to conditions beyond published performance specifications
• Water infiltration other than as a result of a defect in manufacturing,
materials, or workmanship
• Condensation
• Using brickwash, razor blades, or sealants
• Sanding or improper washing
• Chemicals or airborne pollutants, such as salt or acid rain
• Delivery by others
• Accidents
• Acts of God
• Normal wear and tear
Additional items excluded from this limited warranty:
• Labor to replace sash or door panels, glass, or other components
• Labor and other costs related to the removal and disposal of defective product
• Labor and materials to paint or stain any repaired or replaced product,
component, trim, or other carpentry work that may be required
• Products not manufactured by Andersen
• Slight glass curvature, minor scratches, or other imperfections in the glass
that do not impair structural integrity or significantly obscure normal vision
• Tarnish or corrosion to hardware finishes
• Service trips to provide instruction on product use
• Applicable taxes and freight
• Removal and re-installation of a previously installed Andersen product
into a different structure
• Replacement parts for products outside the applicable warranty period
• Glass that is not factory-applied by Andersen
• All other Andersen window and door products, Andersen storm doors,
and Renewal® by Andersen products have their own limited warranties
and are not covered by this limited warranty.
For information on warranty coverage for Andersen® products other than
100 Series windows and doors, please refer to the specific limited warranties
for those products. They are available from your Andersen dealer or at
www.andersenwindows.com/warranty
Limited Warranty
(continued)
How to register your limited warranty
Andersen offers quick, easy warranty registration on our website.
Just go to www.andersenwindows.com/warranty and submit your
warranty information online. By registering, you will expedite any
warranty service you may have in the future. In addition, you can
receive product information updates, safety notices and special
offers regarding new products, as well as information regarding
enhancements for the windows and doors you’ve registered.
All warranty information is treated as highly confidential and will
never be sold or traded to any person or organization outside of
Andersen Corporation and the Andersen Dealer Network.
How to get help
For further information or to make a claim within this limited warranty
period, please contact the Andersen retailer/dealer who supplied
you with your Andersen® product. If unavailable or unknown to you,
you may contact us at:
17
You can help us serve you faster by collecting
and including the following important information:
• Description of the product such as the exterior color,
unit size or inside visible glass measurements
• Product ID label information
• Description of product concerns
• Documentation of the purchase date, if available
• Your name, address (with zip code) where the
product is installed and telephone numbers
If the limited warranty period has expired or for repairs not covered by
warranty, many replacement parts are available for purchase. When
warranty coverage is unclear, Andersen may charge an inspection fee
for any on-site product inspection. If the inspector determines the
Andersen® product has a defect covered by this limited warranty, the
inspection fee will be waived.
For specific warranty information outside the United States,
please contact your local distributor or write to:
Andersen Windows, Inc.
Andersen Service Center
100 Fourth Avenue North
Bayport, MN 55003-1096
Andersen Corporation
International Division
100 Fourth Avenue North
Bayport, MN 55003-1096 USA
You may also contact us using the Customer Care section of our
website at www.andersenwindows.com or reach us by phone at
1-888-888-7020.
“Andersen” and all other marks where denoted are trademarks of Andersen Corporation.
© 2009 Andersen Corporation. All rights reserved. Effective as of April 2009.


© Copyright 2026