
Caring For Your Baby • 59 •
Caring For
Your Baby
• 59 •
C a r i n g F o r Yo u r B a b y
G e t t i n g t o K n o w Yo u r B a b y
Long before your baby’s birth, you probably thought about how your baby would look and what his personality would
be. Often parents form pictures in their minds based upon babies they see on TV, in magazines, and in public. Now is
the time to get to know your baby. No other baby is exactly like yours, yet every baby has some common
characteristics and needs. The information outlined will help to make caring for your baby easier.
But, remember what your baby needs most is not a “perfect” parent; your baby needs LOVE. Falling in love with your
new baby takes time. Some parents love their new baby right away; others have to get to know the baby better. Both
are normal. You and your new baby need time to get to know each other. Talk and sing to your baby. Gently massage
your baby’s belly and tiny toes. You’ll learn his first likes and dislikes. Before too long, your baby will know you, and he
will respond to your touch and the sound of your voice.
Newborn Appearance
If your baby doesn’t have much hair, has short arms and legs, and a head that looks too big, your baby looks pretty
normal! Your baby might not look like what you expected, though. Maybe you didn’t get the boy or girl you wanted, or
maybe the baby just doesn’t fit the picture of the baby you dreamed about - the “Gerber Baby” you saw in magazines
and television. Keep in mind that the baby has lived in a bag of water for 9 months, has been through labor, and a
trip through the birth canal. Babies come in all sizes and shapes, but some normal newborn characteristics are:
Head
The baby’s head is still too heavy to
be fully supported by the neck
muscles so it is important to support
the head and neck when holding your
baby. The head may look lopsided,
elongated, or bruised - a temporary
condition caused by squeezing in the
birth canal. The head will begin to
take on the correct shape within a
week or so. There are two “soft spots”
called fontanels. The skull bones
move to allow the head to fit through
the birth canal and to allow for
growth of the brain. The triangular
fontanel is near the back of the head,
which closes by 6 - 8 weeks and the
diamond-shaped one is above the
forehead, which closes between 12 - 24
months. These areas are well protected by a tough membrane and are not harmed by shampooing, massaging,
combing, or brushing the head. Some babies have a firm knot on the top of their head called a cephalhematoma. It is
a large bruise which forms when the baby pushes against the mother’s bones during the birth process. It may take 1 2 months to disappear, but it is not harmful.
• 61 •
Section 3 ~ Caring For Your Baby
Hair
Some babies are born with thick hair and others are nearly bald. Neither the color nor the quantity of hair at birth
predicts final appearance. Hair color may change from dark at birth to blond in a couple of months. Some babies lose
their hair and then start a new growth. Permanent hair grows in by the 4th or 5th month.
Face
A newborn usually has puffy and bulging cheeks, a small and receding chin, and a broad, flat nose. These temporary
characteristics serve a useful purpose: to provide the infant with an obstruction free profile for breastfeeding. Initially,
the baby’s face may be swollen, or bruised, and the nose may be flattened to one side. This improves within a few
days.
Eyes and Vision
Caucasian baby’s eyes are usually gray-blue at birth, while darker skinned babies have gray-brown eyes. Eye color may
change anytime up to a year and sometimes even later. A newborn’s eyelids may be puffy from the pressure of the
birth process. Puffiness disappears within a few days. Some babies have reddened areas on the white of the eye. The
squeezing of the head during labor and birth causes the breaking of small blood vessels in the eye. This will disappear
in 1-2 weeks. Tear ducts are usually plugged for the first 1-3 months so your baby’s crying may be tearless at first. If
the baby seems to have a lot of eye drainage, gently massage the inner corner of each eye, down each side of the
nose. Do this 3-4 times a day, making sure your hands are clean. Many newborns look cross-eyed at first. Often their
nervous system and eye muscles are just immature and need time to develop. They will focus and become
coordinated within a few weeks.
Babies can see light, dark, and color and are sensitive to brightness differences. They prefer black and white patterns
and bright colors and are drawn to the human face. They see best at 8 to 12 inches, the distance from you when you
are cuddling them.
Ears and Hearing
The earlobes contain springy cartilage which may be bent in different directions from pressure during birth. Normal
shape returns quickly.
Babies can hear immediately at birth. Your baby has been able to hear since about 26 weeks into your pregnancy.
This is why the baby turns its head toward your familiar voice. Babies prefer human voices, soft sounds, and music.
When your baby hears a sudden, loud noise, he should make a quick, jerky movement and may cry.
Approximately 1 of every 1000 children is born deaf. Early identification and management of hearing loss significantly
improves a hearing impaired child’s ability to develop normal speech, academic, social, and emotional skills. If you
have questions about your baby’s hearing, talk to your baby’s doctor. (See “Hearing Screening.”)
Lips and Mouth
Your baby will suck on anything that touches his lips. Babies may have “sucking blisters”, especially on the top lip.
Babies have a well-developed sense of taste at birth. They can distinguish sweet, bitter, and sour, and prefer sweet.
Skin
A baby’s skin color is usually pinkish, although the hands and feet may be pale or slightly blue. The color ranges from
pale pink to reddish. When the baby cries hard, the whole body becomes very red. If the parents are dark-skinned, the
• 62 •
Section 3 ~ Caring For Your Baby
baby may have highly-pigmented areas on the lower back, called “mongolian spots”. They are bluish in color, but they
are not bruises. These spots are seen over the body, arms, and legs, but most frequently on the lower back. They will
disappear within the first 4 years. Dry, peeling skin normally is present, especially the hands and feet. Some
newborn’s skin is covered with a white, cheesy substance, called vernix, that protects the baby’s skin before birth. This
coating dries and flakes off in a few days. Baby skin is very sensitive and you may notice various conditions:
•
•
•
Fair-skinned babies may have pink or red marks on the eyelids, forehead, and at the hairline at the back of
the neck. These are commonly called “salmon patches” or “stork bites” and will disappear within the first
year.
Tiny yellowish white dots on the nose and brow are plugged oil glands, called milia. These dots clear
themselves, so do not squeeze them.
A blotchy red rash, resembling a small insect bite, on the baby’s chest, buttocks, or face for the first few days
is normal. The rash moves about the body and is called newborn rash. The rash will disappear in 7 to 10
days.
Any rash that looks like blisters, filled with clear fluid or pus, a rash that gets worse or does not go away, or a rash on
a baby who has a fever or cough or eats poorly should be reported to the baby’s doctor.
Hands and Arms
Awake or asleep, a newborn flexes its arms and usually clenches its hands in a tight fist. The thin, but fully formed
fingernails may cause facial scratches. To keep your baby from scratching his face, you can cover his hands using the
end of the t-shirt sleeves (mitts). See Fingernail Cutting.
Chest and Breathing
Babies’ breasts (both boys and girls) may be enlarged for a short time after birth. They may even secrete a small
amount of clear to milky white fluid. This is caused by the mother’s hormones passed through the placenta and will
disappear without treatment several days after birth.
Babies breathe with their chest and abdominal muscles. Their breathing is rapid and shallow and is often irregular and
uneven. Sometimes you may notice a small bulge in the middle of the chest when the baby takes a breath. This is
normal and caused by the soft cartilage at the bottom of the breast bone.
Abdomen
The baby’s abdomen is usually large and rounded and will rise and fall as the baby breathes.
Legs and Feet
The newborn usually holds its legs flexed against the abdomen. The legs may appear bowed or the feet may appear to
turn in. These conditions are frequently due to the infant’s cramped living space while in the uterus. Most of these
conditions are resolved without need for medical treatment. The feet may look flat because of protective fat on the
soles.
Genitalia
A baby boy’s scrotum (testicles) may be large and swollen. This is usually normal and the swelling will go away. A
baby girl’s labia may appear swollen. She may have some whitish or even bloody discharge from the vagina. This is all
normal. The discharge is caused by the transfer of the mother’s hormones to the placenta and will disappear on its
own.
• 63 •
Section 3 ~ Caring For Your Baby
Heart
The infant’s heart rate is normally rapid. Occasionally, a newborn has a mild heart murmur, which usually disappears
within a few hours or days. The doctor will evaluate the heart murmur on follow-up visits.
Weight
Most infants lose a few ounces in their first couple of days. The weight loss may equal 7-10% of their birth weight. This
is fluid loss and is normal. Babies, then gradually gain weight at 1/2 to 1 ounce daily. By the end of 2 to 3 weeks,
most babies regain their birth weight.
Newborn Activity
For a few hours immediately after birth, most infants are very active and eager to feed. Then the baby enters a period
where he is sleepy for 12-24 hours and are not interested in feeding. Your baby may sleep for a total of 16-20 hours a
day. Babies sleep to meet their needs, which may be unpredictable. The baby may wake you when you would rather
be sleeping. However, they gradually develop a schedule that is more predictable by 6 weeks of age. In the meantime,
sleep when they sleep.
Your baby has different levels of sleeping and waking, called
“states”. Babies behave in different ways during each state.
Babies have 6 different Sleep/Awake States:
•
Quiet Sleep State
•
Active Sleep State
•
Drowsy State
•
Quiet Alert State
•
Active Alert State
•
Crying State
If you can tell the state your baby is in, you can get to know your
baby better. For instance, being able to tell when your baby is
fully awake will help you know the best time for feeding or
playing. When you know about sleep states, you can judge the
times to let your baby sleep.
• 64 •
Section 3 ~ Caring For Your Baby
Sleep States
Quiet Sleep
Your baby’s eyes are firmly closed and motionless, and little or no body activity (except for occasional sucking
movements) occurs. The baby breathes deeply and regularly and noises do not disturb him. Your baby will be very
hard to wake up during this state. This is not a good time to feed. However, this may be a very good time to trim your
baby’s finger and toe nails.
Active Sleep
During active sleep, your baby breathes more irregular and faster. There is some body activity such as sudden jerking
or twitching, and movement of the eyes beneath the closed lids. Your baby may suck or smile, or may make brief fussy
or crying sounds. These sounds may not mean your baby is ready to eat. The newborn baby spends about half of their
sleeping time in active sleep (the older baby only 20-25% of the time).
Drowsy
This state comes before waking. You will notice smooth body movements and your baby will startle easily. Your baby’s
eyes may open and close and, when open, look very glazed. It may be difficult to tell if your baby is awake or asleep
in this state. If you leave the baby alone, he may go back to sleep. However, your baby will be easier to awaken in this
state if he needs to eat. To wake up your baby, give him something to see, hear, or suck.
Each baby has its own sleep pattern. Learning and adjusting to your baby’s sleep-wake states will make life easier for
everyone during the hectic early days. As the weeks go by and your baby becomes more responsive to the family
environment, the baby’s sleeping patterns will conform to your own.
You may want the baby in your room at first. Within a few months, you may prefer the baby sleep in its own room,
where you can hear the cries without being disturbed by every movement. Keep the baby’s room temperature fairly
normal (68-72 degrees F). Don’t try to keep the house quiet; let the baby adjust to the normal household noise.
Sleeping Position
DO NOT PUT YOUR BABY ON HIS TUMMY OR SIDE TO SLEEP. A healthy infant should be placed on his BACK to sleep.
Do this whenever your baby is being put down for a nap or to bed for the night. Research has shown this may reduce
the risk of Sudden Infant Death Syndrome (SIDS). Some parents worry that babies sleeping on their back may choke
or spit-up during sleep. Millions of babies around the world sleep on their backs and doctors have not seen an
increase in choking or other problems. In the U.S., the rate of SIDS has dropped dramatically since parents have been
instructed to place infants on their backs.
Some babies, at first, don’t like sleeping on their backs, however, they will adjust to it. Sometimes wrapping your baby
in his blanket will make him feel more secure. The use of restrictive devices to hold the infant’s head in place when
sleeping is not advised.
• 65 •
Section 3 ~ Caring For Your Baby
Tummy Time
Some parents have complained their babies have flattened heads from sleeping in this position. Placing infants on
their backs refers to sleeping infants. A certain amount of “tummy time” while the baby is awake and being watched is
beneficial for normal growth and development.
Sleep Time
The average newborn sleeps about 16-20 hours a day, divided about equally between night and day. The baby’s
longest sleep period will generally be 4 or 5 hours, but some infants sleep only 2 hours at a time. The sleep time
gradually shifts toward night:
•
At 3 months - babies average 5 hours of sleep during the day and 10 hours at night, usually with an
interruption or two.
•
At 6 months - they will nap twice (2-3 hours)
during the day and sleep 11 hours at night.
By the end of the first year, the total sleep time
decreases to about 13 hours, 10 to 11 hours plus
two naps (1 to 2 hours each).
Napping
Most babies will nap both mornings and afternoons
for periods anywhere from 20 minutes to 4 hours. If
your baby sleeps a lot during the day, he may stay
awake more at night. You may want to start the
baby’s nap earlier in the afternoon and wake him
after an hour or two.
Night Waking
Babies generally begin sleeping through the night between 4 and 6 months of age, but at first it may consist of a
stretch only from 12 midnight to 5 a.m. And, occasionally, babies who have been sleeping through the night may go
through spells of night waking. Try not playing with your baby during night feedings. Night time feedings, focused on
the task of feeding, may help your baby sleep better at night.
Sleep Problems
Early on it is a good idea to settle your baby into a bedtime routine. They eventually learn to fall asleep by themselves
and a good-night ritual is a reassuring send-off. A bedtime story, even for an infant, can be a nice way to end the day.
Some babies form an attachment to a blanket or a particular toy animal. These security objects can substitute for a
parent’s presence and helps the child feel independent. These bedtime rituals help children develop a bedtime
pattern. However, if your baby is waking up 5-6 times a night after 6 months of age, there may be a problem and you
should contact the baby’s doctor.
• 66 •
Section 3 ~ Caring For Your Baby
A w a ke S t a t e s
These three wake states fill up about 4-6 hours of the newborn’s day:
Quiet Alert State
Your baby will be awake and alert only intermittently, during daily cyclical periods called “Quiet Alert” states. The
“Quiet Alert” state takes up only about 10% of your baby’s day; the rest of the time your baby is protected from
overstimulation by a slowing of responses. During the quiet alert state, your newborn is receptive and tuned into the
surroundings, looking around with eyes wide open. During this intense concentration, the baby keeps its body and face
relatively inactive. Your baby will focus on your face, voice, or moving objects; your baby is ready to be with you. Try
talking quietly to your baby. Giving your baby something to see, hear, or suck will keep the baby in an alert state. The
key is to go slowly, and allow for your baby’s need to rest and look away.
Active Alert State
The “Active Alert” state usually follows each quiet alert state. The baby is more active during this state, moving its
extremities along with mild, but continuous, vocalization. Typically, this fussy stage is a signal that your baby is
beginning to feel hungry, tired or uncomfortable, or wants to be held. Your baby is telling you he needs a change of
pace. Try feeding him. If you have already fed him, he may be signaling you that you need to slow down or stop what
you are doing with him.
Crying State
As the discomfort grows, the sounds increase to outright crying and rapid movement of the extremities. Crying tells you
your baby has had enough. You need to stop whatever you are doing. You may need to help soothe your baby. The
“crying state” usually comes to an end when the infant’s hunger or discomfort is resolved.
Cr ying
All babies cry at times; it is a normal way of communicating their needs. How
much a baby cries varies with each baby.
Babies cry for many reasons and, at first, the cries all sound alike. But by the
end of the second month, a mother or father can usually recognize the
distinctive crying patterns that are caused by the different sources of distress:
Hunger
This is the most common cause of crying in the early weeks. Parents usually
recognize this cry as a rhythmic howl with a series of cries broken by brief
pauses. If the cries are left unanswered, they usually turn to a steady howl. It
is usually best to feed them without delay. Babies are not too patient, as a
rule.
• 67 •
Section 3 ~ Caring For Your Baby
Pain
When your baby is hurting, he will cry in an unmistakable way. The cry begins as a shrill scream, followed by a silent
period and a series of short gasps; then the cycle is repeated. Air bubbles swallowed while eating or crying are often
quite painful. To relieve this gas discomfort, try holding your baby across your lap, tummy down, gently pressing the
baby’s stomach against your knees. You should be alert, too, for signs of some illness that may be causing the baby’s
physical distress. If fever, diarrhea, or other symptoms of illness are present, or if the baby continues crying in
apparent pain, call the baby’s doctor.
Discomfort
A moderately loud, intermittent cry might mean your baby is simply uncomfortable. It may be caused by a wet diaper;
some babies are bothered by this and others are not. Maybe your baby is too warm or too cold. Feel the baby’s back
to see if he is cold or hot. Adjust his clothing to make him comfortable; dress the baby like yourself or one layer
warmer. Some babies cry because they are undressed. Put a blanket over the baby’s tummy until you redress him.
Overstimulation
Overstimulated/overtired babies usually cry with a whine. They may also sneeze and hiccup a lot. They can be soothed
by rhythmic sounds - of soft music, talking, singing, or humming. Some mothers and fathers use recordings of a
human heartbeat to quiet the baby. Even a steady drone of a fan or vacuum cleaner can be soothing. Repetitive
motions, such as rocking and patting, are also effective for these babies. Sucking on a thumb, fingers, or pacifier is
another repetitive motion that calms many children.
Loneliness
If your baby stops fussing when you pick him up, he may simply want to be held. Remember, the baby was in a snugly
womb, hearing a heart beat for 9 months, so his need for closeness is very real. Babies need physical contact just as
much as food and warmth. When you put the baby down and he starts crying again, this is his way of telling you that
he misses the secure feeling of being held in your arms. You might try taking the baby for a walk in a backpack or
chest carrier, where he will be snug against your body and can listen to your heartbeat.
A newborn baby CANNOT be spoiled by attending to his needs or by cuddling him when he is fussy. Picking him
up and soothing him reassures the infant that his needs will be met and allows him to gain trust and confidence
in his parents. This leads to the development of a greater sense of security. The ability to comfort their crying
infant is a great confidence-builder for new parents, as well. Cuddling is good for the whole family.
As you begin to recognize other behaviors with your baby’s cries, sorting out the meaning of his different cries will
become easier. For example, if he appears to be “rooting” searching for food, he may be hungry. If he has just eaten,
the problem may be a need to burp, a need for a diaper change, the need to suck more, or simply, the need to
release tension before sleep.
Keep in mind, after the first 6 months, babies cry less frequently. Now, babies not only cry to communicate needs,
they also cry to convey emotions, as well. As babies try out new motor skills, they often cry when they are unable to
go where they want or do what they want. The unfamiliar can also be frightening to older babies; they may become
afraid when confronted with new people, places, or experiences.
• 68 •
Section 3 ~ Caring For Your Baby
Comforting
Comforting a crying baby is important to a child’s well-being. The bond between you and your child is strengthened
each time he cries and you respond. Even if the crying doesn’t stop, your baby will be aware of the warmth and soft
voice of the loving parent who is trying to make them feel better. Crying is your baby’s way of telling you that he needs
you.
Suggestions for Comforting Your Baby
•
Allow time for your baby to calm down himself before you try to help.
Your baby can be very good at calming down without any help.
•
Unwrap your baby’s hands so they can be sucked on.
•
Show your baby your face.
•
Cuddle and talk softly to baby.
•
Gently hold both of your baby’s arms close to his body.
•
Place a hand on the baby’s abdomen.
•
Stroke one area of your baby’s body such as the head, foot, or back.
•
Wrap him snugly in a blanket to make him feel more secure.
•
Use a front pack carrier to provide closeness while doing chores.
•
Bathe him. Try changing the bath time to evening to tire him.
•
Try setting the baby in an infant seat in the bathroom while you are
showering. The sound of the water and the moisture in the room may settle him.
•
Change his position or environment.
•
Rock, swing, push in stroller or create some other form of motion.
•
Sing to him, play soft music, or run a mixer, fan, dishwasher, hair dryer, or other humming sound.
•
Massage or pat his back, buttocks, abdomen, or extremities.
•
Tape record your baby’s own cry and play it back to him.
•
Play intrauterine sounds available on tape, records, or in some stuffed animals.
•
Cuddle him to your shoulder and maybe rock or sway.
•
Lay the baby across your knees; rub or pat his back.
•
Walk with the baby tucked under your arm, with your hand under his tummy. Or, hold baby so he can look
around to see things.
•
Go for a ride in the car; put the baby in the car seat.
•
Talk to the baby’s doctor to see if he or she has other ideas.
Keep in mind that what helps one baby may not help another, and what works one time may not work the next. Some
babies have a fussy period which recurs daily at the same time. If all efforts fail, try to stay calm. Your baby will sense
your frustration and become more upset. If you know your baby is clean, dry, and fed, place him safely in his crib and
distract yourself briefly. Check after 10 minutes to see that he is safe and reassure him of your presence. If he is still
crying, pick him up and console him.
• 69 •
Section 3 ~ Caring For Your Baby
Colic
Some babies (about 1 in 5) have a condition called colic. Nobody knows exactly what causes colic. It is a period of
extreme and unexplained fussiness where the baby is difficult to soothe. These babies require extra attention and care.
Parents can help by keeping a regular schedule and protecting the baby from abrupt changes in his environment
whenever possible. Sometimes it helps to talk to other parents who have been through a similar situation, because
they are likely to have some helpful hints on how to cope with colic.
When you have done your best to comfort your baby, and he is still crying, remember it is not your fault or the baby’s
fault and you will both survive the experience. Maintaining a sense of humor can do wonders at these times. Seek
advice from your baby’s doctor if crying persists.
These three symptoms have to be in place to diagnose this fussy time as “colic.”
•
Start about 3-4 weeks after birth
•
Cries for at least 3 hours a day
•
Lasts until baby is 3 months old
Other Activities
Sneezing
Sneezes, snorts, and coughs are frequent
activities of newborns and are not signs of illness
unless accompanied by difficult breathing.
Babies sneeze to clear their nasal passages
because they are unable to blow their nose yet.
Hiccups
Hiccups are also common and are not harmful. They are probably more troublesome to parents. Young babies hiccup
often and intensely; their stomach contracts and their chest heaves. Hiccups usually occur after a feeding; sometimes
they help bring up air bubbles. Nothing really needs to be done about them, although offering a few more swallows
from the breast or bottle may help hiccups to stop.
Newborn Care
The basic physical care of a newborn often seems like a mountain of work. Initially you may feel “all thumbs” when
handling your infant. In the early weeks, life seems like a merry-go-round of repetitive activities - feeding the baby,
changing diapers, bathing the baby, comforting the baby, and attending to his every need. Sometimes, by the end of
the day, new mothers are exhausted, wondering where the time has gone. Take comfort, however, in those seemingly
insignificant tasks in your baby’s day. At no other time in your baby’s life are you physically closer to him as when you
are doing all those mundane tasks associated with normal newborn care. These are all special moments of getting to
really know your baby. By the end of the first year, you will find that you and your baby know each other very well and
love each other very much, which makes these moments of newborn care the most quality time anyone could ask for.
• 70 •
Section 3 ~ Caring For Your Baby
Baby Bath
There is, perhaps, no other infant care activity that worries new parents
more than giving their new baby a bath. Babies are so slippery and
tiny! The baby bath is not as difficult as you think. There is no one
right way of giving your baby a bath; you will develop techniques that
work best for you. Here are some helpful hints that may make you
more comfortable. Until the umbilical cord falls off and the
circumcision is healed, you should give your baby a sponge bath. This
means bathing your baby out of the water, using a washcloth to
sponge him off and a towel to pat him dry. During a sponge bath,
keep your baby clothed, except for the part of the body you are
washing. This will protect him against getting chilled during the bath.
Sponge baths are also good for quick clean-ups for older babies.
Supplies needed:
•
A basin, sink, or the tub basin provided by the hospital may be used at first. Eventually, a baby bathtub works
the best.
•
Washcloths and towels - you can use the regular household or baby towels.
•
Soap - ask your baby’s doctor about what soap they recommend. Generally, a mild soap without perfumes or
deodorant is acceptable. Some suggested types are Johnson and Johnson Baby Wash, Dove (unscented),
Neutrogena, and Alpha Keri. Ivory soap is too drying for infant skin. Your baby’s doctor may want you to use
plain water, at first, because newborn’s skin is very sensitive.
•
Shampoo - a tear-free baby shampoo is recommended. You may also use the same soap that you use to
wash the baby’s body.
•
Comb or Brush
•
Clean Diaper and Clothing
Steps of the Sponge Bath
•
Gather all equipment ahead of time.
•
Arrange a towel-covered surface within reach of the sink or tub of water.
•
Be sure the room temperature is warm and free of drafts.
•
Never leave your baby unattended, even for a minute! Take the phone off the hook during bath time or ignore
the calls. If you must respond to an interruption, take the baby with you.
•
Fill sink or basin with warm water. The bath water should be comfortably warm for you to touch with your wrist
or elbow.
•
Remember to start with the cleanest part of the body (the eyes) and end with the dirtiest part of the body
(the diaper area).
•
Eyes - Wrap the baby in a blanket, lay him on the towel-covered surface, and clean the baby’s closed eyes
with a washcloth and plain water. Wipe from the inside (nose side) to the outside (ear side) of the eyes,
using a clean corner of the washcloth for each eye.
• 71 •
Section 3 ~ Caring For Your Baby
•
Face - With the baby still lying on the towel-covered surface, gently wash his face and under his chin with
plain water.
•
Ears - Use another corner of the washcloth to clean his ears. DO NOT wash inside any farther than you can
reach with your finger; DO NOT use cotton-tipped swabs in the ear canal. Ear wax will naturally work its way
out of the ear. Remember to clean behind his ears, also.
•
Shampooing Head - Hold your baby’s head over the basin, supporting his head and neck with your hand and
arm, in the “football hold”. Wet his hair, shampoo his scalp with a gentle circular motion, and rinse
thoroughly. Massage and comb or brush the baby’s scalp (even if he’s bald) to increase circulation. (Daily
scalp massage will help prevent “cradle cap”, a condition which appears as yellow, scaly, oily skin on baby’s
scalp. Cradle cap is caused by overactive oil glands. You may apply oil to soften the scaly areas and then
comb through and shampoo. Dry the hair by gentle rubbing with a towel. Cover the baby’s head during the
rest of the bath to prevent heat loss.
•
Upper Body - Remove the baby’s shirt and use either soapy washcloth or soapy hands to wash his neck,
chest and arms. Be sure to wash between the fingers. Roll him to his side to wash his back area. Rinse and
dry his chest and back. Put a clean shirt on or use a blanket to cover this area while you finish the rest of the
bath.
•
Lower Body - Use either soapy washcloth or soapy hands to wash his legs and feet. Be sure to wash in
between the toes. Rinse and dry his legs and feet.
•
Diaper area - Remove the baby’s diaper. Using a soapy washcloth, wash the diaper area from front to back.
Boys - Squeeze water from the washcloth over the penis. Gently wipe, making sure to clean under the
scrotum. Rinse and dry well.
Girls - Carefully separate the labia (folds of skin) around the vagina. Using the washcloth, wipe from front
to back, first down each side, then the center. Remember to use a different area of the washcloth for
each area. Stool should be removed from the folds, but vernix may be left. Don’t try to rub it off; this may
irritate the baby’s sensitive skin. A mucusy, white or pink discharge may be present. Gently wipe it away
but don’t worry about it if you can’t remove it all at one time. This discharge will decrease over a few
weeks and is normal.
•
Skin Care - We do not recommend the use of any perfumed lotions or powders. These products are not
necessary and may irritate your baby’s delicate skin. You may apply Vaseline or diaper rash ointment to the
diaper area. Frequent diaper changes especially after stooling are a critical part of skin care. (See
“Diapering/Care of Bottom.”)
In addition to the bath, thoroughly clean the diaper area with each diaper change. This is important to keep the area
clean and prevent skin breakdown. Dry your baby well before putting a clean diaper on. Fold the top of the diaper
below the umbilical cord to promote drying of the cord.
Umbilical Cord Care
The cord does not need any special treatment. Keep it clean and dry. You may wash it with soap and water if it
becomes soiled.
The cord will dry and turn black; it usually falls off within 1 to 2 weeks. Do not be alarmed if you notice a little pink or
bloody drainage at the time of separation. This separation is a little like losing a scab. If at any time you notice a
yellowish-green, foul smelling discharge, redness, or swelling at the cord’s base, contact the baby’s doctor. These are
signs of infection and additional treatment may be necessary.
• 72 •
Section 3 ~ Caring For Your Baby
Tub Bath
Wait 2-3 days after the cord area has healed before tub bathing. Tub bathing means placing the baby inside a tub of
water to bathe him. Tubs come in a range of styles. Most parents buy special plastic baby bathtubs that are designed
to hold the baby at a convenient angle. Plastic dishpans or the kitchen sink will also work. After about 6 months, you
will probably need to use the regular bathtub. You may want to take your baby in the bathtub with you. The steps of
the bath do not change much from a sponge bath.
Steps of the Tub Bath
• Gather all equipment ahead of time.
•
Be sure the room temperature is warm and free of drafts.
•
Never leave your infant unattended, even for a minute! Even after the child can sit up steadily by himself, you
must never leave him alone. The possibility of the baby slipping and drowning in just a few inches of water is
far too great to take a chance.
•
Fill the tub only a few inches deep and always test the water before putting the baby in it.
•
Lifting the Baby - To move the baby in and out of the tub, support his head and shoulders with your forearm
and grasp him under one arm. Hold his thighs with your other hand, cradling his legs and bottom.
•
Hold in Tub - Support the baby in a partially upright position, using one hand and forearm. Use your other
hand to wash and rinse the baby. (Even after the baby can sit up unassisted, keep a hand on his arm, or at
least close enough so that you can move quickly to assist him if he loses his balance.)
•
Eyes, Face, and Ears - Continue to wash with only plain water. Use method described for sponge bath.
•
Shampooing - Use same method described for sponge bath.
•
Remainder of Body and Diaper Area - Continue in same fashion as described for sponge bath. (You will not
be able to keep areas of baby clothed during tub bath; however, the tub bath usually proceeds quicker than
sponge baths).
•
Once you have removed your baby from the tub, dry him quickly, but thoroughly, before diapering and
dressing into clean clothes.
A complete daily bath is not necessary for a newborn baby, as it may dry your baby’s skin. Until your baby is able to
crawl on the floor, he does not have much chance to get dirty. Therefore, it is recommended to only bathe your
newborn baby 2-3 times a week. When your baby starts to crawl or starts to feed himself, a daily bath will probably
become a necessity.
The bath can be given at any time of the day; try to work it around the baby’s sleep schedule. Some mothers find that
their babies are more receptive before the midmorning feeding; other parents find early evenings best because both
parents may be home and you have an extra pair of hands. Bathing your baby just before a late night feeding may
make him relaxed for bed and help him to sleep a little longer at night. If you bathe him right after a feeding, he’s
more likely to spit-up.
Bath time can be a stimulating playtime for your baby. Some babies need to be convinced of this and may take some
time before they are thrilled with the experience. As your baby gets older, he will probably enjoy the bath. The majority
of babies find it a real delight and show their enjoyment with nonstop swishing and splashing. As he is touched and
rubbed with the washcloth, he experiences tactile stimulation. The bath is one of the few places your baby can stretch
and move all of his body parts, providing good exercise. As the baby gets older, he becomes more mobile in the bath
tub, squirming around. Bath toys will help focus the baby’s attention on fun in the water and may cut down on
attempts to squirm and stand up.
• 73 •
Section 3 ~ Caring For Your Baby
Bulb Syringe
During the first 24-48 hours after birth, mucus may accumulate in your baby’s nose and mouth. This is normal and
can be easily removed by using a bulb syringe furnished by the hospital. Sometimes the amount of mucus can be
excessive and may interfere with your baby’s breathing. If your baby begins to gag or his skin color begins to have a
bluish tint, take the following steps:
•
Immediately turn your baby on his side with his head down.
•
Begin using the bulb syringe to remove the mucus.
•
Call for help if further assistance is needed.
To use the bulb syringe, squeeze out the air in the bulb and place the tip between the cheek and gum. Then release
the bulb gradually to create suction. Remove the syringe from the baby’s mouth and squeeze the bulb to remove the
contents into a cloth. Follow the same procedure for suctioning the nose. The only change is that you place the tip
into each nostril. Avoid continuous suction to one area
of the nostril. If you are not sure how to use the bulb
syringe, your nurse will demonstrate its use. Make sure
you clean out the bulb syringe by squeezing warm
soapy water and rinse after each use.
Diapering/Care of Bottom
Changing diapers is nobody’s favorite task, but it is not difficult and becomes second nature after a short time.
Cleaning the diaper of a newborn infant is not nearly as distasteful as many parents expect. Parents often find
diapering a good time to have face to face chats or play games with their babies. Prolonging the time the diaper area
is exposed allows the baby’s bottom to have a chance to air. If your baby is a boy, you may want to have a cloth or
extra diaper handy to cover the penis because exposing his bottom often encourages him to urinate. When your baby
gets older and squirmier, you may need distracting songs, games, or toys to keep him still for any length of time.
You will need to change your baby’s diaper frequently, whenever it is wet or soiled. At first babies use 8-10 diapers
daily. As your baby grows, he will need fewer diapers each day. It is necessary to clean and dry the diaper area
thoroughly each diaper change. When the baby has a bowel movement, it is important to wash the area with warm
water. Baby wipes are handy, but be aware that they may irritate the skin of some infants.
Diaper-changing Technique
•
Lay baby on his back on a flat surface.
•
Open the diaper and use the front of the old diaper to wipe away most of the stool.
•
Finish wiping the stool with tissues, toilet paper, moistened paper towel, or baby wipes.
•
Lay a towel under the baby’s bottom and gently wash the soiled area with a paper towel and warm water.
(Clean thoroughly from front to back, taking care to clean under the scrotum and in the folds).
•
When you remove a particularly messy diaper, you may find it easier to simply wash the baby’s bottom in the
bathroom sink, after an initial wipe off.
•
Dry the baby’s bottom thoroughly.
•
Put a clean diaper on.
•
Never leave your baby unattended on the changing table.
• 74 •
Section 3 ~ Caring For Your Baby
Cloth diaper
•
Fold the longer edges toward the center at one end to form a wedge.
•
Slide the diaper under the baby, with the narrow end of the wedge in front and the back edge even with his
waist.
•
Fold up the front, then bring the back corners around on top of it.
•
Keeping your fingers between the cloth and the baby, pin the corners, with the pointed end of the pin facing
towards the baby’s back.
•
Use sharp pins; sticking the points in a bar of soap will make it easier to push through the cloth. (Some of
the newer cloth diapers come with velcro tabs and may not require diaper pins.)
Disposable Diapers
•
The tapes on a disposable diaper are on the back side, the decorations are on the front.
•
Slide the back side under the baby’s bottom with the top edge roughly at the child’s waist.
•
Fold the front up against the baby’s stomach and pull the tapes around to attach in front, being careful to
pull it snugly, but not to bind the baby too tightly.
•
If a tape tears or fails to stick, fasten the diaper with tape.
Diaper Decisions
You will need to decide whether to use cloth diapers or disposables. Or, like many parents, you may end up using
both. Whether you choose to use disposable or cloth diapers, the best insurance against diaper rash is to change
them frequently.
Cleaning/Disposing of Diapers
Cloth Diapers - Cleaning cloth diapers is a multi-step process:
• Shake or scrape off bowel movement. Using a diaper liner can help eliminate this step.
• Rinse, either in the toilet or sink, and then soaked in a disinfectant solution in a diaper pail. (Wet diapers
also need to be rinsed and soaked).
• Soak the dirty diapers for about 6 hours.
• Wash them with a low-sudsing detergent and the hottest water possible.
• Be sure to rinse out all the chemicals after the wash. This usually requires two, possibly three, hot rinses. You
may add one cup of white vinegar to the last rinse to break down the soap residue.
• Do not use fabric softeners in the washer or dryer if either appears to irritate baby’s skin. Fabric softeners
added to the washer are usually the least irritating. They also may decrease the absorbancy of a cloth diaper.
• Fold the diapers to ready them for use (Using pre-folded styles eliminates this step).
Disposable Diapers - Some manufacturers claim their disposable diapers can be safely flushed down the toilet.
However, it is not recommended; this practice invites plumbing problems.
• Wrap the diaper into a tight bundle, with the soiled surface inside, and fasten it together with the sticky tabs.
• Discard with household trash.
• Always wash your hands after handling any kind of soiled diaper.
• 75 •
Section 3 ~ Caring For Your Baby
Urination/Stools
Your baby should urinate within the first 24 hours. If you are breastfeeding, your baby may not have many wet diapers
at first. You can expect this to increase each day. It is normal for a breastfed baby to only have 1 wet diaper at 1 day
of age, 2 wet diapers at 2 days of age, and so on, until the baby reaches 6-8 days of age. At this point, your baby
should be having a minimum of 6-8 wet diapers each day. This is the best way to determine that your baby is getting
enough breastmilk.
The baby’s urine should be clear or very pale yellow. During the first week, some babies pass uric acid crystals which
leave a reddish-orange stain on the diaper. This usually means the baby’s urine is a little concentrated. As soon as he
gets a little more fluids, the uric acid crystals will disappear.
The first stool your baby has after birth will be dark black and sticky, like tar. It is called meconium. Most infants pass
their first meconium stool within the first 24 hours after birth. This type of stool may last for the first few days. As your
infant eats more, the stools will change in color. By the second or third day, the stools change to “transitional” or
looser, greenish brown. Eventually, the stools become yellowish, seedy, or curdy. Formula fed babies tend to pass a
more formed stool. Breastfed infants have a looser, softer yellow stool.
The number of stools an infant will have varies with each baby. They may have a stool after each feeding, or once
every few days, or once a week. Constipation refers to stools that are hard and difficult to pass, not to the length of
time between stools. Many babies strain, grunt, and turn red when having a bowel movement. This does not mean
they are constipated.
Diaper Rash
Diaper rash is uncomfortable for babies and very disturbing for parents. It usually starts out as a red area of irritation
caused by a strong bowel movement or a wet diaper left on too long. Diaper rash can also be caused by perfumes or
chemicals in baby products, or by infection. Sometimes, a baby’s super sensitive skin breaks down even with the most
meticulous care. If your baby develops a diaper rash, do the following:
• Clean your baby’s bottom at each diaper change with warm water and a mild baby soap.
• Leave the diaper off and air dry the baby’s bottom for 20 minutes twice each day.
• Apply a protective ointment to the rash area as recommended by your baby’s doctor (Vaseline, A&D, Desitin, and
Zinc Oxide are commonly used).
• Try using a cloth diaper. Do not use plastic pants.
• Call your baby’s doctor if the rash lasts more than 2-3 days.
Circumcision
Circumcision is a surgical procedure in which the sleeve of skin (the foreskin) that covers the head (glans) of the penis
is removed. It is the most commonly performed surgical procedure in the United States. Routine circumcision is a
controversial topic. After much research and discussion with experts, there appears to be no medical indication for or
against the procedure. Therefore, circumcision has become a matter of personal parental choice. Parents have the
exclusive legal right and responsibility to make that decision. Regardless of the reason for circumcision, it is important
that you make your decision only after you have the available facts and sufficient time to review the options. If you
have specific questions about your choice, we recommend that you discuss it with the baby’s doctor.
• 76 •
Section 3 ~ Caring For Your Baby
Care of the Circumcised Penis
Care of the circumcision is designed to control bleeding and prevent infection. The penis should be washed gently with
water to remove urine or stool and a clean vaseline gauze should be applied to the penis with each diaper change for
24 hours. After that, put a small amount of Vaseline on the diaper or directly on the head of the penis for 4 to 5 days
after discharge. This will help prevent the penis from sticking to it. Avoid prepackaged wipes because they contain
alcohol. The diaper should be changed at least every four hours.
The head of the penis, normally dark red in appearance during healing, becomes covered with a yellowish, wet scab in
24 hours. This is part of the normal healing process and is not a sign of infection. No attempt should be made to
remove the scab, which persists for 2-3 days. In some instances, the physician uses a Plastibell (a plastic ring that
remains on the penis) to perform the circumcision.
In this case, no special dressing or vaseline is required, and the baby can be bathed and diapered just as if he had
not been circumcised. The plastic ring usually drops off 5-8 days after circumcision. A dark brown or black rim
encircling the plastic ring is normal and will disappear when the ring falls off.
Caring for the Uncircumcised Penis
The foreskin of the newborn requires no attention. Most newborn males have erections, thus retracting the foreskin
naturally. It normally takes 3 to 4 years before the foreskin can be easily retracted. Therefore, parents SHOULD NOT
force the foreskin back. This may be painful and can cause scarring and adhesions which may make circumcision
necessary. If you have any other questions about care of your uncircumcised baby, please contact your baby’s
physician.
Swaddling
Newborn babies are usually more content when they are swaddled snugly in a blanket. This reminds them of being
“snuggled” tightly inside of their moms. Use a square blanket with one corner folded down. Lay the baby with the neck
on the fold. Wrap one arm in and tuck the blanket around and underneath the body. Bring the bottom of the blanket
up and tuck it under the baby. Bring the other side around the baby. This swaddling will often calm a fussy newborn
and help him sleep better; it provides a sense of security to the baby.
Fingernail Cutting
We do not cut the baby’s fingernails in the hospital. You may cut your baby’s nails as needed.
•
Use a baby scissors with blunt ends or a baby clipper. Use an emery board and file the nails, instead of
cutting.
•
Find a quiet time to cut the nails. Cutting fingernails may be easiest when the baby is sleeping or right after a
feeding, with the baby in an infant seat. Nails are soft and easy to clip after the bath.
•
Trim only the nail that is unattached to the skin. (Be very careful because the skin is usually attached very
near to the end of the nail).
•
Hold the skin down away from the nail and cut straight across.
• 77 •
Section 3 ~ Caring For Your Baby
Temperature Taking
In the hospital, your baby’s temperature will be taken frequently. This is because, initially, newborns have some
difficulty maintaining their temperature. It is necessary to keep them dressed warmly. To determine if your baby is
dressed warm enough, feel his back or tummy. It should feel comfortable, not hot or perspiring or cool to the touch.
(Baby’s hands and feet are normally cool, so they are not a good indication of his temperature).
After you take your baby home, you will only need to check the baby’s temperature when you think the baby might be
sick. A fever may be the only noticeable sign of illness in a young infant. Your baby’s doctor will want you to call if the
temperature is higher than 100˙F or lower than 97˙F (axillary). Be sure you check the temperature before calling the
doctor.
A digital infant thermometer will be sent home from the hospital for your use. Other tools such as tympanic (ear),
pacifier, or forehead strip thermometers are not accurate for newborns and very young infants.
Axillary Method (under the armpit)
The axillary method is an appropriate method to use.
•
A normal axillary temperature is 97˙F to 100˙F. (See above for what to do if out of this range.)
•
Hold the tip of the thermometer securely in your baby’s armpit with his arm close to his body.
•
Make sure no clothing is in the area where the thermometer rests.
•
Read thermometer when it beeps.
•
Clean the thermometer with soap and water.
Rectal Method
Only use this method if your health care provider requests this of you.
•
Position your infant (under 6 months of age) on his back and grasp his ankles with your hands.
•
Make sure to place a diaper under your baby because inserting the thermometer often stimulates a bowel
movement.
•
Lift his legs to part the buttocks; the rectal opening will be clearly visible.
•
Insert the lubricated (vaseline or K-Y jelly) thermometer tip approximately 1/4 inch into the rectum.
•
Hold your child firmly and be prepared to remove the thermometer if he moves suddenly.
•
Read thermometer when it beeps.
•
Clean the thermometer with rubbing alcohol.
•
After 6 months, when the child becomes more active, position him on his abdomen across your lap. Place
one hand firmly on the child’s back and, with your other hand, insert the thermometer and hold it securely in
place.
NOTE: If you choose to use a mercury and glass thermometer instead, be sure to “shake” the thermometer down before
taking the temperature. Do this by grasping the thermometer at the top of the stem and, with a snapping motion of the
wrist, shake it hard until the mercury column falls below 95 degrees F. You will need to hold the thermometer in place 23 minutes for rectal temperatures and 3-4 minutes for axillary temperatures for an accurate reading.
• 78 •
Section 3 ~ Caring For Your Baby
Infant Clothing
Dressing Infant - Dress your baby appropriately for the weather. Babies cannot easily control their temperature, so it is
better to overdress them than to underdress them. You can always remove extra clothes. In cool weather, always put
on a hat and socks because babies lose the most heat through their head and feet. When you go out, always bring
extra clothes.
Laundering Infant Clothes - It is important to wash all new clothing with a mild detergent before your baby wears
them. If your baby’s skin becomes irritated or red, rinse the clothes twice.
We l l B a b y C a r e
Your baby’s doctor will not only treat your baby for illnesses, but will also provide well-baby care.
Follow-up Appointments
The baby’s doctor usually examines the newborn in the hospital within 24 hours of birth and continues to see the
baby in the office periodically throughout the first year. During these follow-up visits, the doctor will do a physical
exam, offer guidelines for nutrition and daily care, monitor the baby’s growth, look for advances in mental, emotional,
and social development, and suggest ways to stimulate development.
The first follow-up visit is usually scheduled within a few days to 2 weeks after birth. Your baby’s doctor will inform you
of this time frame prior to leaving the hospital. The follow-up visits are a good time to ask questions you may have
about your baby. You can prepare for the next visit by keeping notes on your baby’s feeding and sleeping schedule and
general behavior. (See Breastfeeding Diary.)
Vaccinations
An important part of well-baby care includes vaccinations. Vaccinations can be given to your baby at the doctor’s
office or at the Public Health Vaccination Clinic. These clinics are held monthly throughout the county. The natural
immunity your baby received from you wears off very soon after birth. To maintain protection from many harmful
diseases, immunizations are required. A vaccine is a tiny dose of the virus that causes a disease. Giving it through a
shot, or sometimes by mouth, lets the immune system learn to fight it off. Vaccines do not cure the diseases, they
PREVENT them. A person who receives vaccines benefits from the protection they provide. But when many people are
vaccinated, EVERYONE benefits because the chance for spread of disease is reduced. To protect the health of children,
Wisconsin law requires students in kindergarten through grade 12, and children in licensed day care centers, to be
immunized according to schedule. Proof of immunization will be required when your child enters school. Waivers are
available for medical, religious, or personal conviction reasons.
During the first two years after birth, babies need immunization against eleven serious diseases. These diseases are:
•
Hepatitis b
•
Mumps
•
Polio
•
Rubella (German measles)
•
Diphtheria
•
Haemophilus Influenza b
•
Tetanus (lockjaw)
•
Varicella (chicken pox)
•
Pertussis (whooping cough)
•
Streptococcus pneumoniae
•
Measles
• 79 •
Section 3 ~ Caring For Your Baby
Hepatitis B Vaccine (Hep B)
The American Academy of Pediatrics and the Center for Disease Control (CDC) recommend that all babies receive the
Hepatitis B vaccine shortly after birth. The vaccine (a series of three shots) will protect your child against a highly
contagious and sometimes fatal disease of the liver. You will receive information about this vaccine with your
admission to the Birthing Center. The baby must receive all three vaccinations in order to be protected. The first dose
is usually given within the first 12 hours after birth, the second dose at 1 month of age, and the third dose at 6
months of age. If you have questions about the vaccine, please talk to the baby’s doctor. We need your consent to
begin the series in the hospital.
Polio (IPV)
This disease used to severely cripple many children. The only reason this disease is now rare is because we have a
vaccine for it. Your child can only be protected by receiving the vaccine. The polio vaccine is given by injection or by
mouth.
Diphtheria (DTaP)
Diphtheria is an infectious disease of the throat that may progress to the windpipe and lungs, making breathing
difficult. Life-threatening complications, such as heart failure and muscular paralysis, may develop in other parts of
the body. The period of greatest risk of exposure to this disease is in early childhood. The diphtheria vaccine is given in
a shot form, combined with the tetanus and pertussis vaccines.
Tetanus (Td)
This is a disease that can result from contaminated puncture wounds, burns, and surgical wounds. It causes a wide
variety of symptoms ranging from “lockjaw”, or stiffening of the jaw, to seizures, paralysis, and sometimes death. The
tetanus vaccine is given with the diphtheria and pertussis vaccines.
Pertussis (DTaP)
Pertussis is often called “whooping cough” because it usually occurs as periods of harsh, continuous coughing, ending
in a “whoop” as the child gasps for breath. The coughing may interfere with breathing and often causes vomiting.
Complications such as pneumonia, convulsions, or even death, may occur. Pertussis vaccine is given with diphtheria
and tetanus vaccines.
Measles (MMR)
Measles is a serious disease that is easily passed from one person to another. It causes a high fever, cough, and a
rash and usually lasts for 1-2 weeks. Complications such as an ear infection and pneumonia, or even death, may
occur. Measles can also cause an infection of the brain that could lead to convulsions, hearing loss, and mental
retardation. Babies who catch measles are often much sicker and are more likely to suffer longer or die than school
age children and teenagers. The measles vaccine is combined with the mumps and rubella vaccines.
Mumps (MMR)
Mumps causes fever, headache, and swollen, painful glands under the jaw. It lasts for several days and it is easily
passed from person to person. Complications of mumps are a mild or severe inflammation of the coverings of the
brain and spinal cord (meningitis) and hearing loss. In males, a very painful inflammation of the testicles may also
occur. The mumps vaccine is given with the measles and rubella vaccines.
• 80 •
Section 3 ~ Caring For Your Baby
Rubella (MMR)
Rubella is also called “German measles”. It is usually a mild disease that lasts for a short time. If a pregnant woman
catches the disease however, it is very dangerous to her unborn baby. It may cause miscarriage, heart disease,
blindness, and deafness of the newborn. People who catch rubella usually have a mild fever, swollen glands in the
neck, and a rash that lasts up to 3 days. Rubella may cause soreness and swelling in the joints. The rubella vaccine is
given with the measles and mumps vaccine.
Streptococcus Pneumoniae (PCV)
Streptococcus Pneumoniae is a bacteria that is the most common cause of meningitis, pneumonia, sinus infections,
and ear infections in children. Children younger than 5 years of age have 2 - 3 times higher risk of getting this bacteria
if they are in “out-of-home” care settings. The PCV vaccine will help protect children from this bacteria.
Haemophilus influenza b (Hib)
H. influenza b is a type of bacteria that is responsible for a number of serious diseases in young children. It used to be
the most cause of meningitis, a life-threatening disease involving the membranes that cover the brain and spinal cord.
Meningitis causes death in 5% of infected children and 38% suffer permanent brain damage. The second most
common condition caused by H. influenza b is epiglottitis, an inflammation of the flap of cartilage that prevents food
from entering the windpipe. Epiglottitis can result in suffocation if not treated quickly. Other conditions caused by H.
influenza b are pneumonia, blood infections, and arthritis.
Varicella (Var)
Varicella virus causes chicken pox. Children susceptible to chicken pox may receive varicella vaccine anytime after
their first birthday.
Following this immunization schedule is important to the future of your children.
• 81 •
Section 3 ~ Caring For Your Baby
Keep a Record
Keep an up-to-date record of your child’s immunizations at home. Record all of the immunizations by month, day, and
year. If you do not have an immunization record, ask the doctor or nearest public health department for a form to
record immunizations.
Risks of the Vaccines
Most people who get vaccinations will not have a problem. Others will have minor problems, such as a sore or red
spot at the site of the shot that lasts for 1-2 days. Some babies will run a low-grade fever. Rarely, a person may have
a serious problem. If problems occur, they almost always happen after the first shot. Experts agree that the benefits of
the vaccines are far greater than the possible risks. These diseases make some people very sick.
What You Can Do After the Shot •
Talk with the doctor or nurse about medicines or other ways you can treat fever from the vaccine.
•
Notify the baby’s doctor promptly, if your child has a serious problem after receiving a vaccine.
•
Be sure to tell the baby’s doctor before receiving a second shot of the vaccine, if your child
had a problem after receiving a vaccine.
When the Vaccines should be Delayed or NOT Given - If your baby does not get the vaccine because
of one of the reasons below, check with the baby’s doctor about getting the vaccines at a later
time. Discuss these situations with the baby’s doctor:
•
Your child is sick with something more serious than a minor illness such as a common
cold. Delay the vaccination until the baby is better.
•
Your child has had an allergy problem after eating eggs that was serious enough
to require the attention of the doctor.
•
Your child has had an allergy problem to an antibiotic called neomycin so
serious that it required treatment by a doctor.
•
Your child was born with or develops any disease that makes it hard for
the body to fight infection, such as cancer, leukemia, lymphoma, or
HIV.
•
Your child is taking special cancer treatments such as x-rays or
drugs, or is taking other drugs such as prednisone or steroids that
make it hard for the body to fight infection.
•
Your child has received gamma globulin during the past 3 months.
The future health of your child depends on the decisions you make now. Although these diseases may not seem to be
an immediate health risk, children who are not vaccinated are at an increased risk of catching these diseases. If
insurance coverage or finances are a problem for you, consult your local health department for its schedule of reduced
cost immunization clinics. DO NOT skip these immunizations - the cost of treating the disease will far outweigh the cost
of the immunizations.
• 82 •
Section 3 ~ Caring For Your Baby
Infant Illness
No matter how healthy your baby is at birth or how meticulous you are
about his physical care, inevitably he will have an illness. Your baby is still
susceptible to colds and other infections. A year will rarely pass during
which your child will not experience some sort of illness. The most frequent
ailments are usually not very serious, and they are easily handled in
consultation with your baby’s doctor.
When to Call the Doctor
Parents often wonder if their baby is “sick enough” to call the doctor. Some
basic advice: WHENEVER you are concerned about the health of your child,
CALL. In addition, the following signs of illness should alert you to call the
baby’s doctor:
• Fever of more than 100˙F. (axillary) or less than 97˙F (axillary).
• Drastic behavior change (irritability or listlessness).
• Repeated, forceful vomiting.
• Repeated refusal to eat.
• Less than 6 wet diapers in a 24 hour period, after one week of age.
• Frequent, green, watery foul-smelling stools.
• Constipation. (Totally breastfed babies do not get constipated.)
• Unusual rashes.
• Persistent cough, nasal congestion, or any sign of difficult breathing.
• Unexplained bleeding.
• Persistent crying with apparent abdominal pain.
• Loss of consciousness or seizures (twitching of arms and legs - not related to the active sleepstate - see
“Sleep Patterns.”)
• Redness, swelling, or discharge from the eyes or ears.
• Skin color changes to pale white or blue.
• Pronounced yellow color of skin and whites of eyes (jaundice).
• Blood-tinged stool or urine.
• Redness, drainage, or foul smelling odor from umbilical cord or circumcision.
• Unusual cry or cough (hoarse, husky or “barking” cough).
• Increased fussiness and pulling at the ears.
• Serious accident or injury.
• Sudden worsening of a condition or symptom.
Remember that you know your baby best. Sometimes you will just sense things are “not right”. Be observant. Make
note of the things which seem unusual. Also, be prepared to give routine information when you call the doctor.
• 83 •
Section 3 ~ Caring For Your Baby
The doctor will want to know:
• Infant’s age
•
Baby’s temperature and by what route (axillary or rectal).
•
Reason for calling (symptoms). Be ready to give an overall picture of how your baby is acting.
•
How long your baby has been ill.
•
What you have done to help.
Try to make non-emergency calls in the day time hours.
In Case of an Emergency
In case of any serious emergency, and your baby’s physician is not immediately available, DO NOT waste time - take
your child to the nearest Emergency Department, or call your local emergency medical service (EMS), if you feel it
necessary to do so.
Common Medical Conditions
There are several temporary conditions that commonly develop during the first month. Ask your doctor about anything
that worries you or any condition that persists.
Jaundice
Jaundice refers to a yellowish tint to the baby’s skin and is fairly common among newborns. The yellowish coloration
is caused by an excess amount of bilirubin in your baby’s blood. Bilirubin is released into the bloodstream when red
blood cells are broken down. The bilirubin is processed in the liver and eventually excreted from the body. It is a
natural process for your baby’s body to rapidly break down red blood cells. Also, your baby’s liver is immature (not
functioning to total ability yet) and cannot process the bilirubin as quickly as he will be able to in a few days. Thus,
there is some delay in excreting the bilirubin, causing the yellow skin color. This is called physiologic jaundice and is
usually seen around the second or third day after birth. It usually starts fading about the fourth or fifth day of age.
Most jaundice in newborns is a normal event and is not serious. In most cases, it will disappear without any special
treatment. If your baby looks jaundice in the first few days after birth, your doctor or nurse may use a skin test or
blood test to check your baby’s bilirubin level. In some situations, the bilirubin gets to high and your baby’s doctor
may decide to treat the jaundice with a Bilirubin Reduction Light. The bililight helps the baby to get rid of bilirubin
found just below the surface of the skin. If treated in the hospital, the bililight is placed over the baby. The baby is
unclothed to provide maximum skin exposure. The baby may be under the bililight for a few days. Laboratory tests
and physical appearance guide the doctor in the evaluation of the baby’s progress. (See Section I - Home
Phototherapy)
Kernicterus
Infants with excessively high bilirubin levels can develop Kernicterus. Kernicterus is caused when the bilirubin
moves out of the blood and into the brain tissue. Some signs that tell you to seek immediate treatment for your
infant are:
• Decreased tone (floppy)
•
Arching the back and spine
• Difficulty arousing/waking infant
•
Fever
• High-pitched cry
•
Breastfeeding or formula feeding is decreased
• 84 •
Section 3 ~ Caring For Your Baby
Thrush
In the first few weeks after birth, some infants develop a mouth infection called thrush. It is caused by a fungus
(yeast) that may be transmitted by unwashed hands or bottles or from mothers who had a yeast infection during
delivery. Thrush looks like a white coating of cottage cheese inside the mouth and covering the tongue. It is usually
not painful and may clear up on its own, in time. Sometimes you may also notice a rash on the baby’s bottom that
does not clear up with air drying and skin care. The infection can be treated with antifungal medication to speed
recovery and to prevent thrush from spreading to the mother’s breasts during breastfeeding.
Sucking Blisters
Vigorous sucking on fingers in utero, bottles, and pacifiers may cause sucking blisters to develop on the upper lip
of some newborns. They are not serious and will disappear on their own.
Epstein’s Pearls
Harmless white cysts may also appear on the roof of the baby’s mouth or gums. These are normal and
noninfectious and will disappear on their own.
Protruding Navel
A weakness in the newborn’s abdominal muscle wall may result in an umbilical hernia, a painless swelling near the
naval. Although these hernias cause some parents some concern, they should not be compressed in any manner.
Most heal within a year without treatment.
Natal Teeth
Occasionally a baby is born with a tooth already in place, usually on the lower gum. If the tooth is loose and has
weak roots, removal may be recommended to prevent swallowing it during a feeding.
Blocked Tear Duct
Tears usually drain from the eye into the nasal passage through a duct at the inside corner of each eye. If the duct
is not fully open or is blocked by mucus, tears overflow and dry to a yellowish white crust that may cake the
eyelids together. In some cases, the duct becomes infected, causing redness and a pussy discharge. The baby’s
doctor may recommend a massage technique to open the tear duct.
Heat Rash
Heat rash occurs when pores are unable to bring sweat to the skin’s surface. A bright rash of tiny red pimples
appears, usually in skin folds or on the cheeks, neck, chest, or diaper area. This condition may appear during hot,
humid weather or when your baby has a fever or is dressed too warmly. Give your child a lukewarm bath and dress
him in loose-fitting clothes. If the rash does not go away in a few days, or if blisters appear, call the baby’s doctor.
Screening Tests
The first 24 hours of age are critical in determining how well your baby will adjust to life outside of you. There are
several screening tests routinely performed to minimize the possibility of any serious problems.
Apgar Score - an assessment to measure 5 newborn vital signs (heart rate, breathing, muscle tone, reflexes, and skin
color). This score is given exactly at 1 minute and 5 minutes of age. The scores range from 0 - 10. A low initial score is
not necessarily cause for alarm. A healthy infant usually has a score of 7 - 10 at 5 minutes of age.
• 85 •
Section 3 ~ Caring For Your Baby
Coombs Test - a blood test performed on newborns of mothers whose blood type is O positive or Rh negative. The
sample of blood is taken from the umbilical cord and is tested for a blood incompatibility between mother and baby.
Blood Sugar Level - a blood test conducted on all babies after birth. Children of diabetic mothers or infants with
symptoms of low blood sugar (irritability, jitteriness, poor feeding) will be tested again to make sure their levels are
high enough. Low blood sugar can be easily treated with frequent feedings.
Neonatal Screen - a blood test drawn by gentle pinprick from infant’s heel. The test screens for six different metabolic
disorders by state law. The blood sample is sent to Madison to the state lab. The baby’s doctor receives the screen
results within a few weeks. The screening test is not a diagnostic test. It only screens for those patients who have the
likelihood of developing the disease. Further testing is required. In some cases, a doctor’s decision based on these
test results can prevent complications that, if left untreated, could result in irreversible defects.
Hearing Screen - The ability to hear is vital for infants. Precious learning time can be lost if a child cannot hear well. To
provide your baby the best start the Birthing Center, through the support of our hospital volunteers, offers a hearing
screening to all newborns before discharge. Some babies, due to vernix in the ear canals, do not “pass” the screening
the first time. If this happens to your baby, you will be asked to bring your baby back to the Birthing Center in about
two weeks for a recheck. Babies that do not “pass” the recheck will be referred to an audiologist for follow-up. You will
not be charged for the hearing screenings completed on the Birthing Center.
Infant Safety
Your baby is completely dependent on you for protection.
Infant CPR
Infant safety/CPR classes are available through the Perinatal Education program of the Birthing Center. Basic Life
Support certified instructors teach ”hands-on” care of a choking baby or child and one who needs CPR. This class can
be taken after the baby is born, so contact the Birthing Center for more information.
Car Seats
An approved car seat will probably be the most important piece of safety equipment you own, and certainly will be the
first one you need. You will need to put your baby in an approved infant car seat for the ride home from the hospital
and every ride in the car thereafter, both short and long trips. No trip is too short for a car seat. Wisconsin Law
requires children under 4 years of age to be secured in an approved car safety seat whenever traveling by car.
Children 4 through 7 years old must be buckled in a child safety seat or seat belt. Car accidents are a leading
cause of death and injury for children. Therefore, consistent use of a car seat is mandatory. A child should not be
given the choice of whether or not to ride in a car seat; Safety is NOT negotiable. Parents should wear their own
seatbelts if they expect their children to comply also.
•
Put your child’s identification information (name, address, parents’ names, & phone number) on a piece of
paper taped to the back of the car seat. This would ensure rapid identification and treatment of your child
should an accident occur, especially if your child were riding with someone other than you. The Wisconsin
Department of Transportation has some ready-made adhesive stickers for that purpose. You can contact them
at 1-800-261-WINS.
• 86 •
Section 3 ~ Caring For Your Baby
A car seat can only protect your baby if you use it on every ride. You may be a very safe and careful driver, but you
can’t be sure of the other drivers on the road. Many car accidents occur within 2 miles of home at speeds less than
30 miles per hour.
Car Seat Safety Inspections
Child safety seats are 71% effective in reducing deaths for infants in passenger cars, and 54% effective in children
ages 1-4. The Wausau Area SAFE KIDS Coalition provides free car seat inspections and installations for anyone in the
community to make sure your child’s safety seat is properly installed. Along with the Aspirus Women’s Health Birthing
Center’s Baby Fair (1st Wednesday of every month) SAFE KIDS is available to inspect, install and educate you on the
proper use of your child’s car seat. Car Seats are available to purchase at that time, and the Wausau Area SAFE KIDS
Coalitions works with varying income levels to provide you with the correct choice for a car seat.
Child Passenger Safety
Proper Child Safety Seat Use Chart
Buckle Everyone. Children Age 12 and Under in Back!
WEIGHT
TYPE of SEAT
INFANTS
TODDLER
Birth to 1 year
at least 20-22 lbs.
Over 1 year and
Over 20 lbs.-40 lbs.
Over 40 lbs.
Ages 4-8, unless 4'9''
Infant only or rear-facing
convertible
Convertible / Forwardfacing
Belt positioning booster seat
Forward-facing
Forward-facing
Children to one year and at
least 20 lbs. in rear-facing
seats
Harness straps should be
at or above shoulders
Belt positioning booster seats must
be used with both lap and shoulder
belt.
Harness straps at or below
shoulder level
Most seats require top slot Make sure the lap belt fits low and
for forward-facing
tight across the lap/upper thigh
area and the shoulder belt fits snug
crossing the chest and shoulder to
avoid abdominal injuries
All children age 12 and
under should ride in the
back seat
All children age 12 and
under should ride in the
back seat
SEAT POSITION Rear-facing only
ALWAYS
MAKE SURE
WARNING
• 87 •
YOUNG CHILDREN
All children age 12 and under
should ride in the back seat
Section 3 ~ Caring For Your Baby
Types of Child Safety Seats
Always read the child safety seat instruction manual. Each manufacturer provides specific instructions regarding proper
use and installation of his/her safety seats.
All children age 12 and under should ride properly restrained in the back seat. Infants MUST NEVER ride rear
facing in front seats where a passenger air bag is present!!!!
Rear-Facing Infant Seats With and Without Removable Bases MUST:
Face rearward only, recline at a 45˙ angle, harness slots at or below
baby’s shoulders; harness chest clip at armpit level.
• Infant seat base installation (A)
• For infants from birth to about 27 inches who weigh up to 20
pounds.
• May require the use of a tightly rolled towel to allow for proper
recline. (B)
• An infant’s head should stay at least 2” below the top of the child seat. If the infant is tall, not yet 20 pounds,
and less than 1 year, move the infant into a convertible seat, which is used rear facing.
• If the infant is not yet 1 year, but weighs over 20 pounds, move the infant into a convertible seat which is
recommended for a child up to 25-35 pounds rear facing. This seat is also placed rear facing.
Convertible Seats (from birth to 40 pounds). Rear and Forward Facing:
When Used Rear Facing:
• All are recommended for use by infants less than 1 year and up to
about 20 pounds.
• Some are recommended for rear facing use, for heavier infants
(30-35 pounds), and less than 1 year.
• Harness straps should be at or below infant’s shoulders when used
rear facing.
• Harness chest clip should be at infant’s armpit level.
• 88 •
Section 3 ~ Caring For Your Baby
Convertible Seats
When Used Forward Facing:
• All are rated for children up to 40 pounds.
• Used forward facing by children who are between 20 and 40
pounds, and over 1 year.
• Harness straps should be at or above child’s shoulders. Use top
harness slots of safety seat.
• Harness chest clip should be at child’s armpit level.
Forward Facing Only Seats:
• Rated for use by children who are between 20 and 40 pounds.
• Some new models allow for use by children up to 60 pounds.
• Harness straps should be at or above child’s shoulders.
• Harness chest clip should be at armpit level.
The Lower Anchors and Tethers for Children (LATCH) System is
designed to make installation of child safety seats easier by requiring
child safety seats to be installed without using the vehicle’s seat belt
system. As of September, 1999, all new forward facing child safety
seats (not including booster seats) have to meet stricter head
protection requirements, which calls for a top tether strap. This
adjustable strap is attached to the back of a child safety seat. It has
a hook for securing the seat to a tether anchor found either on the
rear shelf area of the vehicle or, in the case of mini-vans and station
wagons, on the rear floor or the on the back of the rear seat of the
vehicle. As of September, 2000, all new cars, minivans, and light
trucks will have this tether anchor.
By September 1, 2002, two rear seating positions of all
cars, minivans and light trucks will come equipped with
lower child safety seat anchorage points located between a
vehicle’s seat cushion and seat back. Also by September 1,
2002, all child safety seats will have two attachments
which will connect to the vehicle’s lower anchorage
attachment points.
Together, the lower anchors and upper tethers make up the
LATCH system.
• 89 •
Section 3 ~ Caring For Your Baby
High-Back Booster With 5-Point Harness
Used Forward Facing Only
• Recommended for use by children approximately 20 to 40 pounds, when used with harness.
• Harness straps should be at or above child’s shoulders.
• Harness chest clip should be at child’s armpit level.
• Remove harness when child reaches 40 pounds and use the vehicle's adult lap and shoulder belt across child
(belt-positioning booster).
Belt Positioning Booster Seats
Boosts child up providing a higher sitting height, which allows the
adult lap and shoulder belt to fit properly
Used Forward Facing Only
• All children who have outgrown child safety seats should
be properly restrained in booster seats until they are at
least 8 years old, unless they are 4'9" tall.
• Can only be used with the adult lap and shoulder belt.
Never with a lap belt only.
• Provides the child a higher sitting height, which allows the
adult lap and shoulder belt to fit properly.
• The shoulder belt should cross the chest, resting snugly on
the shoulder, and the lap belt should rest low across the
upper thighs. Never up high across the stomach.
• Styles include highback, no back, and
base only. A highback booster
provides head
support not provided by vehicle seats with low backs or no head
restraints.
• The mid-point of the back of the child’s head (ear level) should not be
above the vehicle seat back cushion or the back of the high back
booster.
*A belt-positioning booster seat should be used until the child can sit with
his/her back against the vehicle seat back cushion with knees bent over
the seat cushion edge, and feet on the floor, approximately 4'9".
Graphics/Photos courtesy of: Transportation Safety Training Center, Virginia Commonwealth University
and Occupant Protection Division-National Highway Traffic Safety Administration
• 90 •
Section 3 ~ Caring For Your Baby
Child Restraint Re-use After Minor Crashes
NHTSA Position
• NHTSA recommends that child safety seats be replaced following a moderate or severe crash in order to ensure a
continued high level of crash protection for child passengers.
• NHTSA recommends that child safety seats do not automatically need to be replaced following a minor crash.
• Minor crashes are those that meet ALL of the following criteria:
• The vehicle was able to be driven away from the crash site;
• The vehicle door nearest the safety seat was undamaged;
• There were no injuries to any of the vehicle occupants;
• The air bags (if present) did not deploy; AND
• There is no visible damage to the safety seat
• Clarifying the need for child seat replacement will reduce the number of children unnecessarily riding without a
child safety seat while a replacement seat is being acquired, and the number of children who will have to ride
without a child seat if a seat were discarded and not replaced. The clarification will also reduce the financial
burden of unnecessary replacement.
Background
• Recent studies demonstrate that child safety seats can withstand minor crash impacts without any documented
degradation in subsequent performance.
• The Insurance Corporation of British Columbia ( ICBC ) subjected nine new and used child seats restraining 3-yearold dummies to a series of 50 consecutive 15 km/h sled tests into a 40% offset barrier. Three seats were
inspected visually; no damage was apparent as a result of the impacts. Three seats underwent x-ray inspection; no
damage was detected. Three seats were tested in accordance with Canadian federal standards (CMVSS 213) and
were found to be in compliance with all standards.
• ICBC performed four vehicle crash tests at 48 and 64 km/h, with two child seats restraining 3-year-old dummies in
each vehicle. Each seat was subjected to multiple impacts and visually inspected. Defects were noted and the
seats were re-tested. Seats always performed as well in subsequent tests as they did in the first test.
• The Insurance Institute for Highway Safety (IIHS) performed 30 mph vehicle crash tests with dummies from six
months to three years in a variety of child restraint systems (CRSs). Most seats sustained minor damage (e.g.,
frayed webbing, small cracks in the hard plastic shell, strain-whitening on the plastic shell or chest clip) but all
dummies remained well secured by the restraints. Four of the damaged seats were subjected to three additional
30 mph crash tests. Although additional minor damage was observed in subsequent tests, the seats met all
federal standards.
• The agency searched for, but was unable to find any cases in which a child safety seats were damaged in a minor
crash (as defined in NHTSA Position).
Note: The agency is committed to maintaining policies that are science-based and data-driven. Stakeholders with
data that address post crash re-use of child safety seats are encouraged to provide this information to the agency.
• 91 •
Section 3 ~ Caring For Your Baby
Why have children died in vehicles with airbags?
In almost all cases In which an infant died, the baby was riding in a rear-facing
safety seat in the front passenger seat. The back of the safety seat was so close to
the dashboard that the air bag hit the safety seat with tremendous force. The force
broke the back of the safety seat and caused a fatal brain injury. Child safety seats
are not designed to protect against this extreme impact.
In almost all cases In which a child over age 1 has died from impact by the air bag,
he or she was out of position - either unbuckled, or not wearing the shoulder portion
of the safety belt. The child slid or flexed forward during pre-crash braking, so the
head and neck were close to the dashboard at the time the airbag bag was
triggered. Severe head or neck injuries occurred.
If a child is sitting against the seat bach, fully restrained by a forward-facing child
safety seat or a lap/shoulder belt and the seat is pushed all the way back, the
danger from the airbag bag is reduced.
How do you know if your
vehicle has a passenger
airbag?
What about sports cars and pickup trucks?
If there is no rear seat and no air bag shut-off switch, a child is at high risk from a
passenger air bag.
Here are some signs:
Some pickup trucks made since model year 1996 have switches to shut off the
passenger airbag bag. Other vehicles may have them in future years. Turning off the
switch is the best way to protect an infant riding in a rear-facing safety seat or an
older child using a safety seat, booster, or safety belt.
•
•
•
Compartment cover in
dashboard panel with
embossed letters: SRS,
SIR, or SRS/Air bag.
Beware: NOT all vehicles
have these marks. NOT all
vehicles have a cover that
shows in the dashboard.
Warning label on sun visor
(often on the back of the
visor) and/or on the front
of the right door frame.
Description in the owner’s
manual.
Prepared in cooperation with the Air Bag
Safety Campaign. Funded by National
Highway Traffic Safety Administration.
What if you have no alternative except putting a child in front?
If there is no room in bach, a child over age one may have to ride in the front seat.
Here is how to reduce the risk:
•
Make sure the child is correctly buckled up with the vehicle seat moved as far
back as possible. A toddler/preschooler should use a forward-facing child
safety seat; an older child should use a belt-positioning booster or lap/shoulder
belt.
•
Fasten the harness or lap/shoulder belt securely.
•
Make sure an older child does not slip out of the shoulder belt or lean toward
the dashboard.
Vehicle owners and lessees can obtain an on-off switch for one or both of their
airbag bags only if they can certify that they are, or a user of their vehicle is, in one
of the four risk groups: infants in rear-facing infant seats, drivers or passengers with
unusual medical or physical conditions, children ages 1 to 12, or drivers who cannot
get back 10 Inches from the air bag cover. To be considered eligible for an on-off
switch, a NHTSA request form must be filled out and returned to NHTSA. Forms are
available from state motor vehicle offices and may be available from automobile
dealerships and repair facilities. Forms can also be requested by contacting
NHTSA's Auto Safety hotline at 1-888-DASH-2-DOT or visiting the NHTSA Web site at
http://www.nhtsa.dot.gov.
• 92 •
Section 3 ~ Caring For Your Baby
C h i l d p r o o f i n g Yo u r H o m e
Each year more children die from accidents in the home than from all childhood diseases combined. Most accidents
in the home are really not the fault of small children, who are merely following their natural curiosity, but of an
environment that is arranged with only adults in mind. Your home contains dozens of danger zones, but you can
“childproof” your home to make it a safe environment for your baby.
Baby Furniture Safety
Cribs
• Use a crib with slats no more than 2 3/8 inches apart, so baby cannot wiggle through or become trapped and
choke.
• Make sure your crib’s overall construction is sturdy, with no missing hardware, missing or broken slats, no sharp
metal edges or splinters.
• Strip and repaint the crib, if the paint contains lead. (Cribs
manufactured after 1977 are not painted with lead paint).
• Keep crib sides high enough so baby can’t fall or roll out, even
when the sides are down.
• Look for loose parts that could come free and choke an infant.
• Purchase a mattress that fits tightly against all four sides of the
crib. If you can fit 2 or more fingers between the mattress and the
sides, get a better fitting mattress.
• Always double check that the sides are securely locked in place.
Never leave your baby unattended in his crib with the rail down.
• The American Academy of Pediatrics recommends that families remove
pillows, quilts, comforters, sheepskins, stuffed toys, and other soft products from the crib. This includes bumper
pads.
• Lower the mattress and remove bumper pads and large toys when a child can reach a standing position. Such
objects can serve as steps for climbing out of the crib.
• Never tie or harness a child to a crib.
• Don’t buy a used crib with plastic latches holding up the mattress. If a latch breaks, one corner can slip down and
the baby can get his head caught under the side.
• Make sure that crib mobiles are hung out of the baby’s reach.
• Don’t buy a used crib with decorative headboard cutouts. Remove corner posts that stick up more than half an
inch above the crib’s sides. These could trap a child or clothing and lead to strangulation.
• Keep cribs away from windows, plants, drapes, curtains, blinds, or electric cords to prevent children from reaching
to them.
• Make sure your crib has a double lock on the drop side.
• Do not leave any plastic on the mattress, even if under the sheet.
• Remove bibs at bedtime.
• Keep the manufacturer’s name and the crib’s model or code number permanently attached to the crib in the
event of a recall.
• 93 •
Section 3 ~ Caring For Your Baby
Playpens
• Use playpen in the upright position.
• Use a playpen with a fine mesh netting to prevent clothing, buttons, or hooks from
getting caught.
• Regularly check the playpen, and either repair or discard a damaged product.
• Check for loose parts.
• Check for tears in vinyl rails or mattress pads. Small pieces, if bitten off by the
child, could cause choking or suffocation.
• Do not leave large toys in a playpen that can be used as “steps” to escape.
• Make sure that your child is well clear of moving parts and hinges when erecting the playpen or
raising or lowering its sides.
• Avoid scarves, necklaces, or long pacifier cords that might catch or entrap your child.
• Never leave a child in playpen if sides aren’t securely fixed and in the fully raised position.
• Check on your child frequently while he is in the playpen.
• Do not use a playpen once a child can climb out. The playpen no longer serves its purpose and may become a
safety hazard.
High Chairs
• Don’t use a high chair until your baby sits well.
• Choose a chair with a wide, stable base.
• Ensure there is a seat belt with the chair and that it is always used.
• Never leave your child unsupervised in the chair.
• Make sure your child’s fingers, hands, or head cannot become entrapped somewhere in the chair.
• Never assume your child cannot undo the seat belt or tray.
• Keep high chair away from counter tops, appliances, and hot surfaces.
• Keep older children from climbing on the chair, even if it’s empty.
Changing Tables
• Never leave your baby alone on a changing table, bed, or other elevated
surface; they could roll off.
• Pick up your baby and take him with you if you’re interrupted by the door bell,
telephone, or for any other reason.
Strollers
• Use the restraining straps that prevent the child from falling forward and tipping
over.
• Never leave a child unattended in a stroller.
• Don’t load the stroller with heavy packages that could upset its balance.
• Give your stroller a regular safety inspection. Look for sharp edges and tears in the upholstery. Check
to see that the brakes are working properly and make sure the wheels are fastened securely.
• 94 •
Section 3 ~ Caring For Your Baby
Walkers
• Make a wise decision about whether to use a walker. A walker increases the mobility of children and brings them
face to face with dangers they are still too young to recognize.
• Never leave your baby unattended in a walker.
• Look for one with a wide base.
• Select a sturdy model that won’t collapse when you put your baby in it.
• Read the manufacturer’s instructions to see that the walker is suitable for your baby’s weight.
• Block staircases to prevent walkers from falling down stairs.
• Beware that an infant rolling in a walker on vinyl flooring will likely tip over if he suddenly encounters a carpeted
floor.
• Exer-saucer is a safer alternative.
Toy Safety
• Choose a toy suited to the child’s age. Toys intended for older children might be dangerous for an infant. (Keep
older sibling’s toys out of an infant’s reach).
• Look for sturdy toys. Make sure they are durable.
• Avoid toys with small parts, including stuffed animals with eyes
or noses that could be pulled off and swallowed. (If a toy or toy
part could fit through the center of a roll of toilet tissue, your
baby could choke on it!)
• Make sure you hang mobiles well out of the reach of young
children and securely fastened. The rods and strings could
easily endanger a child. They should be removed when your
baby is 5 months old or when he can push up on hands and
knees.
• Select toys that are not too heavy if they fell on him.
• Avoid toys with glass, brittle plastic, or sharp edges, or parts that
could entrap little fingers.
• Do not use balloons as toys. A small piece can get caught in a baby’s
throat and he won’t be able to breathe.
• Do not use a squeeze toy with a squeaker, if the squeaker can be
removed.
• Avoid attaching or hanging crib toys, rattles, pacifiers, to crib,
stroller, or playpen with elastic, string, or ribbon. They may
entangle the baby.
• Check all toys periodically for damage.
• Keep all toys in good repair. If they have sharp points or edges that can’t be
repaired, throw them away.
• Use a toy box without a lid or one with supports that hold the lid up in any position.
• 95 •
Section 3 ~ Caring For Your Baby
Pacifier Safety
• Choose a pacifier that is designed with sufficient strength and
durability to withstand reasonable force, even after repeated
boiling. It should not break down into easily swallowed
pieces.
• Make sure it has a large enough guard or shield to prevent
children from inserting the nipple too far into their mouths.
• Only use a cord attached to the pacifier that is short enough
to prevent the pacifier from wrapping around the neck.
• Check that all materials used in the pacifier are nontoxic.
• Ensure that any ring or handle is hinged, collapsible, or flexible so
that the pacifier cannot be forced into the mouth of the baby if the
baby should fall or roll on his face.
• Never substitute a bottle nipple for a pacifier; hard sucking may pull a bottle
nipple from its cap, presenting a danger of choking.
• Inspect pacifiers frequently for signs of wear or deterioration; discard if the bulb has become sticky, swollen, or
cracked (the normal lifespan for a pacifier is about 2-3 months).
• Sucking for comfort is a natural instinct until about 3 months of age. After that is may turn into a habit and you
may wish to limit the use to encourage verbal development.
Kitchen Safety
• Make sure the drawers cannot pull out all the way. Use child safety locks, so that your child cannot reach up and
pull open drawers.
• Make sure low drawers and cabinets do not contain sharp or small objects. Use child safety locks to prevent them
from opening.
• Keep your child from playing under you while you are cooking.
• Never leave an extension cord plugged into the wall when disconnected from the appliance. Unplug appliances
from the wall when not in use. Do not let cords hang over the edges of the counters.
• Keep stoves free from grease and other flammable substances
• Turn all handles of the cooking pots to face the back of the stove to prevent children from pulling them down. Use
the back burners whenever possible.
• Do not allow children to play in the kitchen when you are not there, or when you are busy preparing a meal.
• Keep doors of appliances (stoves, refrigerator, dishwasher, dryer) closed at all times.
• Use placemats instead of a tablecloth that hangs over the edge and could be pulled down.
• Vacuum an area thoroughly after a glass or dish shatters on the floor to be sure all slivers are removed.
• Dispose of all empty cans promptly.
• Keep food storage bags out of reach; plastic bags are very dangerous.
• Do not keep medications with foods.
• 96 •
Section 3 ~ Caring For Your Baby
Bathroom Safety
• Do not allow children to play in the bathroom unattended.
• Never leave a child unattended in the tub, even for a second!
• Do not allow your child to touch the faucets. Turn off the hot water first, then the cold water, so if he should
happen to get to the faucets, he will not get hot water immediately.
• Do not use a radio, heater, or electrical appliance near the sink. Keep your hands dry while operating any
electrical appliance.
• Always get medicines with child-proof caps and lock up all medications.
• Do not leave mouthwashes and perfumes around; they have a high alcohol content.
• Keep cosmetics, nail polish, soaps, and razors out of reach.
• Keep the toilet seat cover down.
• Turn down your water heater to less than 130 degrees. Babies can be scalded within seconds when the water
heater is greater than 120-130 degrees.
• Keep the bathroom door shut so your child is not tempted to go in without you.
Entire House
• Put safety gates at top and bottom of stairs when your baby starts moving.
• Clean floors of all small objects that could be put in the mouth.
• Cover unused electrical outlets with safety covers.
• Prevent falls by keeping floors clear and obstacle-free, especially when your toddler starts to take his first steps.
Scatter rugs and waxed floors are extremely dangerous.
• Check knobs on the stereo, TV, and radio to make sure there are no removable parts.
• Teach your child how to get off furniture and go down stairs backwards.
• Remove “breakables” from low tables.
• Keep your thermostat set at 72º or below during the winter. Do not overheat your house.
• Secure lamp cords by wrapping the cord around the leg of the end table so it can’t be pulled off the table by a
toddler.
• Make sure the smoke detectors in your home work properly.
• Have your household carbon dioxide and radon levels checked.
• Put bulbs in empty light sockets.
• Pad the sharp corners of tables that are the baby’s height.
• Empty wastebaskets frequently; toddlers can get into them and find many hazardous objects.
• Lock doors leading to “off limit” places - basement, garage, attic, outside.
• 97 •
Section 3 ~ Caring For Your Baby
Chemicals/ Medications
• Store all chemical products (paints, solvents, insecticides, fertilizers, laundry soap) out of the reach of children.
• Never give medicine in the dark. Turn on the light and read the label every time.
• Never encourage your child to take medicine by calling it candy. He may think it’s a treat and try taking more.
• Do not give medicine, vitamin, or aspirin bottles to children to be used as toys, even if they have safety caps on
them.
• Periodically check for outdated drugs and discard them. Dispose of them by flushing down the toilet, not by
putting them in the trash can.
• Only give the amount of medicine prescribed.
• Give medicine only to the child for whom it is prescribed.
• Do not give adult medications to children.
• Keep Syrup of Ipecac on hand in case of poisoning. Don’t give it to your child until you contact Poison Control
and get instructions for its use.
Plant Safety
• Some plants are poisonous. Call the Poison Control Center, if you suspect your child has eaten any plant part, dirt
in which it is potted, or water from a vase.
Fire Safety/Burns
• Place guards in front of open fires.
• Build safety barriers around wood stoves and electric heaters.
• Keep children away from the stove when in use.
• Place matches and lighters out of reach.
• Choose children’s clothing with special care. Avoid loose-fitting, flowing garments. Buy flame-resistant clothing
that meets the U.S. Product Safety Commission Flammability Standard.
• Do not smoke while caring for your child; don’t leave cigarette ashes around.
• Do not leave your baby in the sun. Infants should be kept shielded from direct sunlight.
• Do not carry hot food or drink while holding your baby.
• Avoid passing hot food over the baby’s head at the dinner table.
Pet Safety
• Allow your pet to have contact with a blanket in which your baby has been wrapped. If you do this before the
baby goes home, your pet will start to get used to the baby’s smell.
• If you feel “uneasy” about your pet with the baby, make sure your pet stays away from the baby. They can get
acquainted with each other later on.
• Give the pet some extra attention, as you would an older child.
• Don’t leave the baby and pet alone together in a room, no matter how friendly the animal appears to be.
• Store pet food and litter box out of a child’s reach.
• Be sure your pet’s medical care and vaccinations are up to date.
• Wash your hands thoroughly after caring for your pet.
• 98 •
Section 3 ~ Caring For Your Baby
Babysitters
Some pointers for you and your babysitter:
• Choose a responsible sitter who has had experience
caring for infants and with whom you feel
comfortable leaving your child.
• Have the new sitter come a little early to get
acquainted with your child.
• Take a tour of your home with the sitter. Indicate
where the telephone, light switches, and diapers are
and how doors lock, etc.
• Show the sitter where emergency supplies are kept (first aid supplies, fire extinguisher, flashlight, portable radio).
• Tell your sitter about your baby’s routines and characteristics. Demonstrate the procedures for feeding your baby
and leave written instructions, as well. (Prepare bottles in advance).
• Leave a list of rules covering your sitter’s use of household equipment (TV, stereo, etc.).
• Make it clear to the sitter that you do not allow visitors and that you expect the telephone line to be kept open for
your check-in calls.
• Tell your sitter what time you expect to be home and leave a phone number where you can be reached.
• Leave your home address, phone number and location of your house in case she needs to call for help in an
emergency.
• Leave phone numbers of emergency resources - neighbors, police, fire.
• Leave your sitter with a note pad to record messages.
• Have snacks available for the sitter.
• Babysitting classes and Safety Videos are available in our community. Consider encouraging your babysitter to
take advantage of these resources.
• 99 •
Section 3 ~ Caring For Your Baby
Parenting
Love
What your baby needs most from you is LOVE. Babies that receive a lot of
love are healthier, happier babies. Very soon your baby will show his love for
you by turning toward your familiar voice, following you with his eyes, and
kicking excitedly when he sees you.
Love is not just keeping the baby fed and warm; love is also touching,
holding, and talking to your baby. Physical contact is one of the best ways to
communicate love to your baby.
Importance of Touch
Touching is very important to babies. Research shows that it is vital to the
baby’s healthy growth and development. Through touch, there is emotional
communication between the parent and child. When you play with him or
tenderly hold him, he gets a much-needed feeling of well-being, comfort, and
security.
Each day you care for your baby, you have many opportunities to show him the touch of love. Gently hug and rock him
while he eats. Take a few extra minutes to softly stroke his back or tummy before laying him down on his back or side
for a nap or bedtime. Try some special loving touches, like a baby massage. Gently rub or stroke his arms, legs, back,
and tummy. Your hands are very soothing. The extra time these massages take helps to make your baby feel
comfortable and loved.
Conversations with your Baby
Talking to your baby is also very important. Your baby cannot actually understand your words, but he is sensitive to the
tones and rhythms of your voice and the expression on your face. Often when you talk to your baby, he will make
gestures with his arms and legs in response. He may even open and close his mouth. You can help your baby’s growth
and development by talking to him frequently each day. Although he can’t talk back, he’ll enjoy every word you say.
Reading and singing to your baby also stimulates brain growth and development.
Prevention of Child Abuse
There will be times when you will feel overwhelmed with your parenting responsibilities. No matter what you do, you
cannot calm your baby. Lack of sleep may get the best of you. You will need a lot of patience as a parent.
When you get angry as a parent, it doesn’t mean that you are a bad parent or that you have a bad child. Babies don’t
cry to get even or just to be bad. They are too little to know how to do that and too little to be able to tell you what’s
wrong.
Some parents direct their anger toward their children. Angry words and actions can be very hurtful to your child. When
pressures build up, don’t take it out on your child. Try any or all of these alternatives:
•
Stop and take several deep breaths.
•
Count to 10.
•
Put your child in a “time-out” chair (1 minute time-out for each year of age).
• 100 •
Section 3 ~ Caring For Your Baby
•
Take a “time-out” for yourself - take a walk or hot bath.
•
Think about why you are angry. Is it because of your child or is your child a convenient target.
•
Phone a friend.
•
Hug a pillow.
•
Turn on some music, maybe even sing along.
•
Discuss your situation with someone else.
Talk to someone you trust - good friend, religious leader, doctor.
•
Take a parenting or discipline class.
•
Improve your own life. Seek help for your own problems.
Children need lots of loving, hugging, and cuddling. They need this tender-loving care to grow healthy and strong. Make
sure your child feels SAFE, LOVED, and WORTHWHILE.
•
Spend time with your child.
•
Spend time talking and playing with your child.
•
NEVER SHAKE a baby. Babies can die from being shaken.
•
Praise your child. Choose words that help (“You can do it.”, “Great job!”, “I’m proud of you.”, “I love you.”).
•
Don’t use hurtful words (“You’re stupid.”, “What a slob.”, “I wish you were never born”), or criticize his looks
(“You have big ears.”).
•
Teach your child how to cope with failure.
•
Help your child think about and solve his own problems.
•
Respect your child’s feelings and thoughts.
If you are having a hard time giving this care to your child, please reach out for help. Parenting classes and
information are available at the Family Resource Center. (715-845-6747).
Shaken Baby Syndrome
Babies or small children who suffer injury or
death from severe shaking or jerking are
victims of what is called “shaken baby
syndrome.” Sometimes a young child’s crying
or need for attention can be more than tired
parents or caregivers can handle. In
frustration, without knowing the dangers, they
may shake a small baby or child to get his
attention or to make him stop crying.
Children under 2 can easily be injured from
shaking, because their weak neck muscles are
not yet strong enough to fully control their
head movements. When a child is shaken, the
• 101 •
Section 3 ~ Caring For Your Baby
head whips back and forth slamming the fragile brain tissue against the hard skull causing bruising, bleeding, and
swelling inside the brain. When the shaking is combined with throwing the child against a crib mattress or pillow, even
more force is applied to the brain and more damage can occur. Half of the children who have shaken baby syndrome
die from their injures. Other results vary depending on the age of the child and the severity of the shaking. They
include learning disabilities, delays in development, speech problems, impaired use of arms and legs, brain damage
and seizures, hearing loss, partial or total blindness, spinal injury, paralysis, and mental retardation.
Shaken baby syndrome can be prevented. Follow these important steps and remember:
NEVER SHAKE A BABY!
Even a brief moment of vigorous shaking can cause serious and permanent damage.
•
Make sure that everyone who cares for your child knows about the dangers of shaking. This includes friends,
relatives, babysitters, child care providers, brothers and sisters, and especially anyone who has little or no
experience caring for babies or young children.
•
Support your baby’s head and neck when holding or transporting him. Be sure to tell others who care for your
infant to do the same.
•
Always play gently with your baby. Never throw or toss your baby in the air, swing your baby by the ankles, or
jog with a young infant on your back.
•
Most importantly, know what to do when your baby cries.
Remember: It is normal to feel upset and angry. Taking care of a baby can be tiring and sometimes frustrating. But
there are ways to comfort him and yourself, and there are people nearby to help.
1-800-4-a child (National Abuse Hotline)
Free 24 hour help
• 102 •
Section 3 ~ Caring For Your Baby
Which Parent Will I Be?
“I got two A’s,” the small boy cried,
His voice was filled with glee.
His father very bluntly asked,
“Why didn’t you get three?”
“Mom, I’ve got the dishes done,”
The girl called from the door.
Her mother very calmly said,
“Did you sweep the floor?”
“I’ve mowed the grass,” the tall boy said,
“And put the mower away.”
His father asked him, with a shrug,
“Did you clean off the clay?”
The children in the house next door
Seemed happy and content.
The same thing happened over there,
And this is how it went.
“I got two A’s,” the small boy cried,
His voice was filled with glee.
His father proudly said, “That’s great;
I’m glad you belong to me.”
“Mom, I’ve got the dishes done,”
The girl called from the door.
Her mother smiled and softly said,
“Each day I love you more.”
“I’ve moved the grass,” the tall boy said,
“And put the mower away.”
His father answered with much joy,
“You’ve made my happy day.”
Children deserve a little praise
For tasks they’re asked to do,
If they’re to lead a happy life,
So much depends on you.
Author Unknown
• 103 •
Section 3 ~ Caring For Your Baby
Growth and Development
The first 12 months after birth are a time of remarkable physical growth and behavioral change. In one short year your
baby’s birth weight and develops from a person who is asleep most of the time into one who spends most hours
awake. Most significant of all, your baby is developing a mind and personality all his own during these 12 months. A
baby’s personality and temperament have an effect on when and how he passes through stages of development. No
two babies develop at the same rate, but the milestone developments tend to occur at fairly predictable times, give or
take a few weeks. These are just guidelines of what to expect from your baby; don’t think of them as rigid timetables.
Remember, each child develops at a different pace. Allow your child to set the pace.
1 Month
• Watches people and objects briefly.
• Startles with sudden, loud noises.
• Discovers calming comfort in sucking on fists.
• Likes to be held and rocked.
• Makes “noise in throat” sounds.
• Raises head slightly when lying on stomach.
• Turns head from side to side while lying on stomach.
2 Months
• Bats at objects with hands.
• Holds head erect, but bobbing when supported in sitting position.
• Smiles, coos, and sighs.
• Kicks legs.
• Searches for source of sounds.
3 Months
• Grasps objects when placed in hands.
Grasps objects between fingers and palms.
• Cries when uncomfortable or annoyed.
• Lifts head and chest when lying on stomach.
• Follows a moving object or person with eyes.
• Makes vowel sounds when talked or sung to.
4 Months
• Recognizes breast, bottle, and familiar faces.
• Has good head control.
• Holds rattle for extended period of time.
• Laughs out loud.
• Attempts to bring hands to mouth.
• Vocalizes when talked to.
• 104 •
Section 3 ~ Caring For Your Baby
6 Months
• Begins to enjoy simple games - “peek-a-boo” and “patty cake”.
• Responds to smile or speech with gurgle, coo, and smile.
• Sits with minimal support. (Many infants are not doing this at 6 months, yet are normal.)
• Rolls from front to back. A few weeks later he will roll from back to front.
• Reaches for, grasps objects, and brings to mouth.
• Props self firmly with one arm while stretching with the other toward the goal.
9 Months
• Transfers objects from hand to hand.
• Crawls on hands and knees.
• Briefly searches for an object that falls or disappears.
• Sits without support.
• Smiles, reaches out, or turns toward speaker when his name is called.
• Repeats sounds made by others.
• Waves “bye-bye”.
• May simultaneously grasp an object in
each hand; grasps objects between
thumb and fingers.
• Attaches to parents, leery of strangers.
10-12 Months
• Grasps bits of food and small objects
with thumb and first two fingers.
• Begins to speak - says “Ma-Ma”or
“DaDa”.
• Pulls to standing position.
• Walks with assistance.
• Drinks from a cup when it is held.
• Lifts spoon to mouth; may insert
sideways.
• 105 •
Section 3 ~ Caring For Your Baby
Healthy Development
As a parent, you provide key ingredients for your infant’s healthy development:
• verbal and social stimulation
• interesting environment
• consistent encouragement and love
Although each child develops at their own pace, if you are concerned about your child being delayed in development,
contact your baby’s doctor. Under state law, children from birth to age 3 are entitled to early intervention services if
there are significant developmental delays.
Talking to Your Baby
One of the most important things you can do to stimulate your child’s
development is to talk to your baby from the very beginning. Your voice is
familiar to your baby—it calms your baby when he is tired and puts him at
ease when he is uncomfortable. Your baby can distinguish your voice
from all others within days of his birth. Even though he does not
understand what you are saying, the mere sound of words is a powerful
force that will shape his learning. Your voice sings and soothes, plays and
entertains, and tells your baby he is loved. Your voice is security and
reassurance.
Reading to Your Baby
Reading to your baby is a great way to use your voice as a learning tool.
Even the tiniest of babies enjoys being read to. Research has shown that
children who were regularly read to as babies do better once they enter
school. The library has specially designed “board books” for babies. They
are bright in color, small in size, and sturdy in construction. These picture
books will delight you as well as your child. Enjoy the wonderful pictures
and stories as you share time together.
By six to nine months of age, your baby’s eyesight is developed enough and he may try making sounds. This may be a
good time to try a simple board book with bright pictures. Again, it is the sound of your voice, along with the pictures
that will make your baby react with giggles and grabs. He will enjoy the finger games. Peek-a-boo will be a favorite
game you can play together. Talk to him as you feed him, change him and dress him. He will be your best listener. And
keep reading to him. You can give your baby a love of reading and learning. Start now. Read to your baby every day.
Creating an Interesting Environment
It is also important to make your child’s environment interesting to all his senses. Give him a variety of things to touch
and handle, things that visually hold his attention, and things that produce pleasant sounds and noises. Sing lullabies,
nursery rhymes, and poems to your baby. He’ll react by turning his head towards the sound of your voice, many times
stopping his crying to listen to you. He will not understand your words, but he will hear you and respond to the words
and rhythms of poetry and songs that you say or sing to him. He’ll listen intently, gurgle, coo, laugh and even seem to
imitate sounds. Playing games with rattles, balls, and toys are helpful also, but in the beginning, the best “toys” are
mom and dad. Give him lots of playful and affectionate attention.
• 106 •


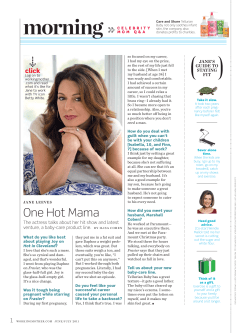
© Copyright 2026