
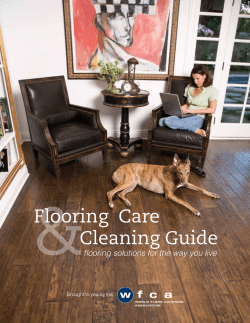
Care and Cleaning of Ceramic Tile Floors
Care and Cleaning of Ceramic Tile Floors
The beauty, elegance, and durability of ceramic tile has made it a favorite flooring choice
for centuries, but these are not the only reasons for its popularity. Tile is surprisingly easy to
maintain, and by using simple household products, you can keep your ceramic tile floors
looking like new for years.
As with all flooring, the best care is regular care. Sweep or vacuum your ceramic tile floors
at least once a week, more often if it gets regular use. Dust and lint can evolve into grime
it they are not promptly removed, especially in areas where there is moisture.
Since ceramic tile is often used in “wet” areas of the home, it is likely it will be subject to
different spills and spots. Simple washing or mopping with hot water and a mild household
detergent should wipe away anything that finds its way to your ceramic floors. The hot water
helps loosen any dirt that collects in the spill, and the detergent lifts any oily substance
on the floor. If a “once-over” is not enough to remove all of the spill, try a second pass over
the floor with a sponge or mop. If the spills remains stubborn, you can use a soft brush or
synthetic scouring pad to loosen the spot, but do not use steel wool or a metal brush, as
these may scratch the surface of the tiles.
After washing the ceramic tile floor, be sure to thoroughly rinse the floor with clean water.
This will remove any detergent residue from setting and attracting more dirt to your floor.
Occasionlly, a tough stain will appear on a ceramic tile floor, especially floors with unglazed
tiles, but these stains can also be easily removed. Prepare a paste of scouring powder
and water, and firmly rub it onto the stain. Allow the paste to sit for at least 5 minutes, and
then scrub it away with a soft brush or synthetic scouring pad. Repeat the process until the
stain is completely gone, and then thoroughly wash and rinse the floor.
Even in the tidiest homes, mildew frequently finds its way, especially in bathrooms, spa
areas and pool decks. Should mildew appear on your ceramic tile, use a simple solution
of equal parts water and ammonia to remove it. Again, use a soft brush to clean away the
mildew so you do not damage the tile or grout, and rinse the area thoroughly with clean
water after the midlew is removed. Be sure the area is well ventilated when using the
ammonia solution.
If the grout itself becomes stained or discolored, it can be brightened by a good cleaning
with diluted bleach (3 parts bleach to 1 part water). Use the edge of a sponge or toothbrush
for this job, and be careful to keep the bleach solution away from other surfaces. Even rust
stains can be easily removed from ceramic tile. Commercial cleaners for rust stains that you
can find in your local home supply store may do the job, or you can use regular kerosene to
lift the offending rust. Be sure to wear rubber gloves when working with kerosene, and make
sure the space is well ventilated.
Best Methods for Deep Cleaning Carpets
You know its time. Even though you have been religious about vacuuming your carpets,
quickly attending to spots and spills, and varying traffic patterns to reduce soiling and wear,
your carpets are ready for a freshening, and you have decided to hire a professional to
give your carpets a deep cleaning. All carpets should be deep cleaned every twelve to
eighteen months; a thorough cleaning not only revitalizes the look of your carpeting, it also
reduces wear, extends its life and may be required in the terms of your warranty. But just how
should your carpet for cleaned? There are five accepted methods for cleaning carpets, and
one is right for you.
In most new carpets, your carpet manufacturer or retailer will recommend the best cleaning
procedure for deep cleaning your carpets. Always follow these recommendations. If you are
attempting the deep cleaning yourself, choose a carpet shampoo or cleaner and follow the
directions for application and dilution. Never use soap, laundry detergent, dishwasher
detergent or other household cleaners intended for use on other flooring surfaces. For the
best results, be certain to vacuum the carpet thoroughly before cleaning, and apply a
preconditioning solution before the deep cleaning process. These pre-cleaning solutions
are mild detergents that begin loosening soil before the actual cleaning begins.
There are several ways to find the best professional for your job. You may simply ask for
referrals from friends, family or even carpet stores or you may use the internet to do your
own search. No matter which means you use, be aware of the five basic methods professionals
use to clean carpets. Each has its own advantage and disadvantages; discuss with a professional
which is best for your carpets before you begin deep cleaning your carpets.
Dry extraction cleaning use an absorbent compound containing special detergents and solvents
that is infused in and around the carpet fibers with specially-designed machines and brushes.
The compound acts as a tiny magnet, attracting dirt, oils, and soil in the carpet fibers, and then
both the soil and the compound are removed by vacuuming. This method is recommended for
sturdy fibers, including most synthetics, and is especially appropriate for natural fibers like wool
and cotton that should not be exposed to excessive moisture.
The dry foam extraction method applies a special detergent solution that has been fluffed
into a foam, and then applied to the carpet. This foam, which is less dense and much
drier than a wet solution, is worked into the carpet by specially designed machines, and then
removed by wet vacuuming. Some dry foam machines have their own extraction capabilities,
while others need a thorough vacuuming after the carpet is dry.
The hot water extraction method, or “steam cleaning,” as it is sometimes called, is the most
common method for do-it-yourselfers and mobile professional cleaners. After preconditioning
carpet areas that have experienced heavy use, the carpet cleaner uses hot water extraction
equipment to infuse a pressurized cleaning solution into the carpet. Suspended soil and the
cleaning solution are immediately extracted. Use caution with the hot water extraction system so
that carpets do not become saturated, and accelearate drying in any way possible - using fans,
air conditioners, dehumidifiers or addional drying strokes - to avoid possible damage and
discoloration resulting from the moisture.
The rotary shampoo method is the classic home carpet cleaning technique. A machine with
rotary brushes injects a cleaning solution into the carpet, and then removes the loosened soil
and cleaning solution. And as with steam cleaning, be certain your carpet dries as quickly as
possible. Never use a machine intended for hard surface flooring to shampoo your carpets - pile
distortion and untwisting of fibers can occur, causing permanent damage to your carpet.
The absorbent pad method should be used by a trained cleaning professional. In the
absorbent pad method, a special machine similar to a floor buffer with an absorbent spin
pad is used to remove the soil. The pad absorbs soil on the carpet, and the soil is then
rinsed off of the pad. The pad must remain saturated with the cleaning solution or damage
to the carpet pile may occur. And regularly change the pad to prevent returning the soil
back to the carpet face.
When choosing a deep cleaning method for your carpets, always check the recommendations of
the carpet manufacturer, the equipment manufacturer, and your carpet cleaning professional.
The match between your carpet and the right deep cleaning method will give your carpets
added years of beauty and wear.
Carpet Stain Removal
Its inevitable, and everyone faces it sooner or later. A stain mysteriously (or not so
mysteriously) appears on your carpeting, and it seems as if the entire room is focused on
the spot. But with prompt action and some simple steps, most spots can be removed, and
your carpeting returned to its original beauty.
If a stain occurs, quick action is essential. No carpeting is completely stain proof, although
many are stain resistant. The stain resistant carpet allow more time for you to act, but the
sooner you address the stain problem, the better your results will be.
First, remove as much of the staining material (food, wine, oil, etc) as possible by very
gently scraping the spill with a teaspoon or a dull knife. Don’t rub hard; you may damage
the fibers, or force more of the stain into the carpet. If the spill is wet, absorb as much of it
as possible by blotting the wet spot with clean white paper or cloth towels. Avoid using
towels with synthetic fibers, as they are not as absorbent, and again may push the staining
substance deeper in the carpet.
When blotting, work from the outside of the edge in toward the center. This will prevent
the stain from spreading. And be careful not to rub, scour or scrape with the cloth; blotting
will collect more moisture than scrubbing, and the vigorous action of rubbing may result
in a fuzzy or worn looking surface.
When as much as possible of the stain has been lifted or blotted away, you can remove
the rest of the stain with simple household solutions. A mild solution of a liquid detergent
(no more than half tablespoon to one gallon of water) is recommended by most carpet
manufacturers. Always test any cleaning solution on a discreet section of the carpet before
treating the stain to make sure it will not discolor the fibers. Clear detergents are preferred
over creamy or oily appearing ones, as they leave less residue. Using a clean white cloth
again, dab the stain with the detergent solution, penetrating the stained carpet, and again
blot the wet area with a clean dry cloth. Repeat this process until all the stain is removed.
A solution of one tablespoon of ammonia in one cup of water can also be used on wool
or wool blend carpets. Do not use any other household cleaners on the stain, especially
ones containing bleach, since many contain chemicals that may permanently damage
your carpet.
After the stain is removed, clean the spot again with clear water. This will remove any of the
detergent residue that may remain on the carpet. If it is not removed, the residue may
become sticky and cause a new spot in the same place.
When all that is left of the stain is a wet spot, place several layers of white paper or cloth
towels over the spot, and weight the towels with something heavy that will not transfer color,
such as a plastic water jug. This will help absorb all the moisture left in the fibers. Wool
fibers will hold more moisture (and hold it longer) than synthetic fibers, so be patient with
the process to get all the moisture out.
If the stain does not respond to the mild detergent, you can use any number of commercial
spot removers for specific offenders, such as chewing gum remover, non-oily nail polish
remover, or spot removers designed specifically for grease, oil, or tar. These are available
in most hardware and home improvement stores; be sure to follow their specific directions
carefully. If the stain persists, give us a call so we can advise you on certain types of
professionally cleaners that might be able to rescue your carpet.
Caring for your Hardwood Floors
Few things match the beauty of hardwood flooring, and with simple proper maintenance,
your hardwoods can retain the sheen, warmth and durability that make them a classic flooring
choice. It is important to remember that in caring for your hardwood floors, you are actually
caring for two separate surfaces, the finish and the hardwood beneath.
The first thing to remember is to keep grit off the floor. Those fine particles of dirt and dust
can act like sandpaper on your hardwoods, and subtly scratch and dull your hardwood finish.
Vacuum hardwoods at least once a week, and dust mop or sweep the floors in between
vacuuming.
When spills on your hardwood floors happen, immediately clean them, and tracked on dirt,
with a clean, soft cloth. After wiping the spill away, dry the area with a dry cloth. Moisture
is the enemy of both the hardwoods and their finishes; never allow a wet area to stand.
Use protective mats, runners, and area rugs. Rugs at exterior doors reduce the amount of
dirt and grit that can enter your house, and mats and runners in high traffic areas will reduce
the wear on your hardwood surfaces. Mats, rugs, and runners can capture an amazing
amount of dirt, so be certain to shake them out often and clean them regularly.
Be careful about the movement of chairs and tables on hardwoods; this can cause excessive
wear to the floor’s finish. Use felt or fabric covered casters or glides on all furniture legs that
come in contact with the floor, and replace them regularly. When moving a piece of furniture,
lift it, don’t slide it. If it is too heavy to be lifted, place a towel or heavy sock under each leg
to avoid damaging the floor.
Be mindful of what kinds of footwear are best for hardwood floors. High heels or shoes with
deep treads that can hold grit or small stones can create permanent gouges or marks.
Keep the humidity in your home between 45 and 55%. Excessive humidity can cause wood
fibers to swell, causing cracks and buckles in the finish. Unusually dry conditions can cause
separations between the floor boards. Depending on which extreme you are encountering,
install a humidifier or dehumidifier.
Select the appropriate cleaner; the right cleaner will lmatch the specific needs of your
hardwood flooring’s finish. Never use any product on your hardwood floors until you have
carefully read the label. If it does not specifically say “suitable for hardwood floor,” don’t
use it! Also, never use self polishing waxes, vinyl or tile floor care products. Although they
may leave your floors looking glossy at application, the polishes will discolor over time, and
will create problems when future refinishing of your hardwood floors is required. Be careful
not to over-clean your hardwoods - too much cleaning with commercial products will
untimately dull the finish.
Also, never pour water or allow water to puddle on your hardwood floor. Water and wood are
not a good combination, especially if you have applied a wax finish to your floors. Remove
any wet spots from your hardwoods immediately, and dry the area thoroughly.
If your hardwood floors are sealed (that is, have a polyurethane finish), use clear vinegar
and hot water on a barely damp cloth to clean them. Commerical cleaning products can
damage the polyurethane surface, and make adhesive of a new coat of polyurethane in the
future a problem. And never use wax on sealed wood floors. It can create a dangerously
slippery surface, and also create difficulties should a future recoating of polyurethane be
necessary.
If your hardwood floors are waxed, decide between a buffable and non-buffable wax product,
and stay with it. Mixing the two can cause a dull and streaky finish. Buffable waxes are a
good choice for high traffic areas; non-buffable waxes (which contact acrylics) are
recommended for low traffic areas protected by rugs. And never use a cleaning product
that includes or requires water on a waxed floor. Carefully read the products label, and
be certain it is compatible with the kind of wax you are using. And never wax over dirt!
By following these few simple steps, your beautiful hardwood floors will be as satisfying
in years to come as they were the day they were installed.
Care for Laminate Flooring
The rocketing popularity of laminate flooirng choices is not just because of the products’
beauty, simplicity of installation, and reasonable price. Maintaining a laminate floor is
simple, easy, and requires no special equipment; with regular care, your laminate floors
will give you years of enjoyment.
The care regimen for laminate floors couldn’t be simplier. As with any floor, vacuum the
laminate flooring regularly using a soft brush attachment. When needed, a wipe down with
a damp cloth or soft mop will return the flooring’s original shine. The new, disposable dust
mop products seem to work especially well in removing dust and pet hair from laminate
floors.
Should you face an especially soiled area, such as a spill that has dried, or a heavy traffic
area that has been neglected, a wet sponge and a little elbow grease is all you need to
remove the soil. Avoid using soap based detergent when cleaning a spill, and never use
harsh chemical cleaners on your laminate floor; these cleaners may cloud or discolor the
floor’s finish. Also, never use steel wool, scouring pads or sandpaper on your laminate
floors. If a soiled area remains particularly stubborn, simply repeat the sponging process
until the spot is gone.
One of the great advantages of laminate flooring is that they require no special products or
equipment to maintain their beauty. Do not use polish or wax on these floors; these products
designed for other flooring surfaces will only diminish the beauty of your laminate, and leave
you with an extra job of removing the polishing product from your floor!
Laminate floors are especially durable. But as with any hard surface flooring, laminates can
be scratched or gouged, so you should always use felt pads or wide-base casters under all
furniture. Be careful to lift rather than slide when moving furniture or heavy objects in a room
with laminate flooring. Also, step-off mats at exterior doorways and junctures where flooring
surfaces change in your home can help prevent unintended scratches. If a dent, scratch, or
stain does appear on your laminate flooring, there are easy commercial touch up kits
available, with instructions, that can lead you step-by-step through the simple repair process.
If you are faced with an extraordinary cleaning situation with your laminate floor, you should
always refer to the manufacturer’s care and maintenance instructions and recommendations.
Keeping your Area Rugs at their best
Your area rugs are a special part of your room design, and as such, deserve special care.
With a little regular maintenance, and an understanding of the rug itself, your area rugs can
provide years of enjoyment.
The first consideration in caring for your area rug is understanding what specific kind of rug
it is, and what kind of care is appropriate for it. A delicate needlepoint rug under a living
room coffee table will receive much lighter use than a rugged dhurri in a playroom. Likewise,
the beautiful Oriental rug that defines a reading area in a master bedroom will call for slightly
different care than the durable knotted hall runner near children’s rooms. But regardless of the
type of area rug you own, certain steps are essential for the care of every style.
First and foremost is the area rug pad. Every area rug, even those going over carpet, should
have a good quality pad underneath it. The pad will keep the area rug in place, keep the floor
surface underneath the rug cleaner, and prevent any “bleed” of colors from the area rug to the
floor. Area rug pads are an important safety feature as well, especially for rugs placed in high
traffic areas and on hard surface floors such as wood or tile. The pad will hold the area rug in
place, and help prevent slips and slides. Use only quality vinyl rug underlay from your flooring
retailer as rubber, foam back, or plastic mats may discolor the floor.
A weekly vacuuming (or more often, if the rugs are in high traffic areas) will extend the life
of your area rugs. A thorough vacuuming prevents dirt and soil from becoming embedded
into the rug’s fibers, and helps keep the nap of the rug fresh-looking. The traditional practice
of shaking small area rugs is not recommended. The stress of flapping the rug by hand to
loosen dirt and dust will stress the fibers of the rug, and accelerate its wear. When
vacuuming those rugs that have fringed edges, avoid the frindge while doing the body of the
rug. Then set your vacuum on the rug and pull it towards you over the fringe. This should
avoid any tangles or damage to the fringed border, and keep those fibers dust free as well.
Should a stain or spill occur, warm water and a mild soap may be all that is needed for
the clean-up. Cleaning instructions should come with new, manufactured carpets, so be
certain to follow the maker’s cleaning recommendations. Older and hand-made rugs are a
bit trickier. If a stain occurs on one of these, test your cleaning solution (soap and water,
club soda, commercial spot remover, etc.) on a small, hidden part of the rug, or on the
reverse side, to make sure the dyes in the fibers will not run. Once you are certain that you
will not damage the rug by spot cleaning, proceed carefully as you would with any carpet.
If it seems that the solutions may damage your rug, it’s time to call a professional.
Even with good weekly vacuuming, rugs will collect some dust and dirt over time, so a
professional cleaning should be done at least every two years. In-home steam cleaning
companies may be able to take care of your area rugs, and reputable off-site rug cleaners (often
operated in conjunction with dry cleaners) can also give your rugs a fresh, renewed look.
To reduce uneven wear from traffic and fading from natural light, rotate your rugs 180
degrees every two or three months. By turning the rug, you will distribute the actual use of
the rug over its entire surface.
Following these guidelines will protect the appearance of your rugs and increase their
longevity by years.


© Copyright 2026