
Table of Contents….
Table of Contents….
Copy right statement
Dedication
Disclaimer
Venders
Parts list
Why change the engine anyway?
Concerns….YOU can do this!!!
Tools you will need:
Fuel pressure gauge
NOID light
Actron OBDII Diagnostic Tester. CP9035 or equal
VOM—Triplett 310, Simpson 260 or equivalent
Shop Manual
Stant coolant system pressure tester
Set of fuel system disconnect devices
Remote start switch
Stethoscope
Why did I choose the 3.8Liter V6 by GM?
Where and how to get one.
What to look for.
I Can’t Believe I just bought a CAR!!
Photos of Donor vehicle
Change the transmission or not?
The real work begins….
Radiator Mount “Hoop and Saddle”
Copper or Plastic…. pipes that is. Plumbing coolant from radiator to the
engine.
Mating the Engine and the Transmission
Engine Mount and installing the engine
Power steering pump and reservoir
Cut out the Cross Beam?
Exhaust System
Mount the PCM
Mount the Battery
Fuel System
Throttle System
Charging the Cooling System
Wiring HELL or Engineer’s Heaven?
SIMPLE version of wiring…..
MORE COMPLEX VERSION…
DC Distribution EC1, EC2, Instrument Fuse panel and BCM.
Troubleshooting the electric system and engine sensors before attempting to crank
engine. Applies to SIMPLE or MORE COMPLEX version.
Cranking and Cranking and cranking the engine.
Finally, it is Running, but is it Cooling?
First Drive!! .WOW!!
Cleaning up all the loose ends.
DTCs, Check engine light
Final Comments
Additions I am considering and my thoughts about each:
CPP Switch up grade
PCM re-program from automatic transmission to manual transmission program
Heat under the back seat
Air Conditioning??? REALLY!!!
Cruise control
Transmission upgrade…..COMPLETED August 2009….and WOW!!!!
Remainder of page left blank intentionally.
COPY RIGHT STATEMENT
This material is copy righted and is not to be reproduced in any format (electronic
or hardcopy) or shared with anyone other than the original purchaser without the written
consent of the author. Violations will be prosecuted to the fullest extent of the law.
Dedication
This book is dedicated to my loving wife, Jan who has tolerated my
fascination with VW’s for many years with great patience and fortitude. Without all
those years in the school of hard knocks, I would never have dreamed of attempting this
conversion or writing this book. Ironically, my love for her and our family is what has
driven me to excel to whatever degree I have in this hobby. Buying, re-building and
selling VWs paid a large portion of our children’s college education.
Disclaimer
The following is an accounting of the process of converting my 1978 VW
Westfalia Camper from its OEM 2 liter horizontally opposed 4-cylinder air-cooled engine
to a 3.8liter GM V6 water-cooled engine. It is not intended to instruct you on how to
perform this conversion, but merely stands as a record of what I did. I include a list of
manufactures that I got strategic parts from and the part numbers for you to use only as a
reference to help you decide what will work for your application. Any variation in the
components (3.8liter from 1998 FireBird, VW other than 1978 VW Campmobile, etc.)
could subsequently change the experience. It is my contention that too many otherwise
good VW vans (bay windows and vanagons) are left to die premature deaths because of
poor power, no heat, no HVAC and (in the aging years) poor reliability. I would rather
see vans happily serving their owners with a new “heart” than, parted out or crushed and
melted down. Once they are gone, they are gone forever. It is my hope that my
experience will in some way encourage you to resurrect that old Bus that has been sitting
in the back yard for years. After all, they ARE one of the coolest, most functional
vehicles ever to be created and have never been equaled by any other manufacturer… no
matter how hard they have tried. Perhaps having seen the details of how I did it, will
remove the mystery in the process and help quell the fear you may be feeling about the
unknown. I hope this record will give you the courage to complete your own conversion.
There are no warranties, expressed or implied.
Venders
Arrow Thermal Products
Harrisburg, NC 28075
Steve Wilson @ 980-621-0742 Steve has agreed to fabricate a full
radiator mount with an aluminum radiator , with a hole for the thermal switch AND
provide the fan and mount the fan for one price. This is basically all of the cooling
system except the mounting and the plumbing. He also can provide the aluminum
“unions” that you will need to join the various sections of the cooling system. If you
send him photos of the item you want and a copy of the radiator design drawing I have
provided, he can give you a quote. Steve has also agreed to modify your engine mount
bar to create the “new and improved” engine mounting bar for the V6 at a single cost. He
actually assembled mine, so again, he has done this before. You must provide the
drawing that I have included with this Ebook.
Auto Zone
http://www.autozone.com/
Check web for location nearest to you. This is a good source of
many Flex hoses and such for the cooling system. I actually purchased mine at Viking
Imports in Charlotte. Talk to John Roland or his son, Johnnie. These guys have been
around a long time and are great people to deal with. (704) 374-0222. If you are reading
this, you probably know someone like them in your home town.
NAPA …auto parts http://www.napaonline.com/ Much of what I used that
is locally available, I got from NAPA. This is an alternate source to Auto Zone.
BSR Products
4030 Concord Pkwy S.
Concord, NC
(704) 765-5032
http://bsrproducts.com
I got the cooling system overflow
tank, the 1 ½ “ elbows and the Plastic duct extension pieces that I used to line the coolant
line penetrations in the front wall of the Bus.
Griffin Radiator
100 Hurricane Creek Road
Piedmont, SC 29673
http://griffinrad.com/
Radiator core and SPAL axial motor fans
864-845-5000 or 1-800-RACERAD if you prefer. If I had it to do
over again, I would let Steve at Thermal Products build the complete radiator unit for me
and the engine mount.
HELM, Inc.
www.helminc.com
1-800-782-4356
14310 Hamilton Ave.
Highland Park, MI 48203
Dealer service manuals
SCOTT FANS—
1-800-272-3267 ( 800-272-FANS) Talk to
Gary Wilson and tell him I sent you. He’s very nice guy.
http://scottscoolingfans.com/
Scott’s is a source of the cooling system fan. It is top quality and
more expensive. Cheaper can be had, but at your own risk. I have seen
some at Auto Zone and other popular auto supply stores.
Here are some additional sources:
Alternate source: Electric Fan Engineering
http://www.electricfanengineering.com/
Partzfinder
http://www.partzfinder.com/SearchResults.asp?Cat=28&Click=790
KEP
Kennedy Engineered Products
http://www.kennedyeng.com
661-272-1147
Engine coupling conversion kit…plate; clutch disc and pressure plate. I talked to
Brendon. Each “kit” is custom configured. You will need to send them a flywheel as a
“core” so they can weld into it an insert that matches the crankshaft bolt pattern of your
chosen engine. They will then balance the assembly and return it.
Paul Pearce [email protected]
Fort Mill SC…Paul is the guy that did the transmission upgrade. He is an
excellent mechanic and has worked on many “import autos”. He is a VW guy so he gets
it. I know that he has done several VW to Subaru engine conversions in Vanagons.
BTW, he says he likes what I have done better than anything else he has driven…cannot
get a better recommendation THAT!!!
Parts list
2 each
Mod.AT150.90
Products
$25 each
90 degree aluminum elbow from BSR
1 each
BSR MOD.001 Radiator Surge Tank
Cooling system overflow tank from BSR Products or equal. You might be able to use any radiator cooling
over flow tank. Perhaps you could use one from a Vanagon if you have access to it while
obtaining the cooling pipes. Fit in to the radiator mount will need to be
considered….meaning will it fit into the mount. I used the BSR because it was easy to
fit….
6 each 4” x 1 ½ “
Coupling “unions” from Arrow Thermal Products.
These are used to join sections of hose to complete the plumbing….See text and photo
$5 each
4 each
Flexible cooling hose, pn. 12168 from Auto Zone. 1 ½ “ ID, 20.5
inches long $15 each
2 each
Flexible cooling hose pn. 12205 from Auto Zone
$12 each
1 each
FF218 from NAPA Auto Parts. 1 ½ ID , 15.5 inches long. $15
each
30 each
Large hose clamps for 1 ½ hoses from Auto Zone I count 28 off
the drawings, so I added two for good measure.
$20/box
1 each
system)
Hex nipple 3/8 PN A-783(PB122 from Lowe’s hardware (fuel
1 each
Flare to Female 3/8 to 3/8 PN A-176(PB46) from Lowe’s
hardware (fuel system) These two pieces screwed together make up a coupling from the
fuel hose on the Bus to the fuel hose attached to the fuel rail of the engine.
$5 both
1 each
Radiator frame and aluminum radiator with 1 ½ OD inlet and
outlet, with 3/8 NPT fitment for Scott Fan temperature switch approximately 3” below
maximum water line. Includes Spahl Fan mounted to the radiator and temperature
switch, wiring instructions for cooling fan, relay, temp switch and by-pass switch. Also
included is the reduction washer (1 ½ to 5/8) that is recommended by KEP. The washer
is welded into the inlet pipe to the radiator. I actually do not have this in mine and have
had no problems. I think the key to NOT having it is that the system is “charged
correctly and has NO air bubbles in it. See radiator frame drawing for specific
measurements. Your cost to have built is about $600. Steve @ Thermal Products can
build one for you… The only problem I know he will have is that he does not have the
machine to form the “hoops”. If you have those made and ship them to him, he can
assemble the rest..per the drawing I have included… I had my hoops formed at a local
machine shop. Many shops do not have the machine that it takes to do this, so call
around locally and ask. My hoops are 31” diameter, ¾ “steel pipe. The pipe was about
$35 and a local machine shop charged me $50 to form them into a hoop. The pipes need
to be a minimum of 96 inches long. An inch or two more would be nice. You could
probably save some weight if you had the whole thing made from aluminum, but it will
cost more and be more demanding to weld. Steve has already built mine, so he is
familiar with the process. If you do it yourself, you can probably do it for $300.
1 each
Engine mounting bar. This will be fabricated from your original
bar (or a different one acquired from the local junk yard)… Steve at Thermal Products
has agreed to provide the completed unit for a single price. You must provide the
“original bar”. Cost will be less than $200.
1 each
“HOOD” for the radiator frame. I do not have one of these on
mine yet, but a “continental kit “should work very well if you can find one. JC Whitney
used to carry these for about $70, but I think they have discontinued them. I plan to buy
an 8” wide piece of sheet metal and attach it to the radiator frame via rivets and screws.
Keep in mind that you will need to get to the radiator fill cap to check/fill radiator. I plan
to use a stainless steel piano hinge to create a “flap” that I can open to check the radiator
fluid. I will probably attach the end opposite the hinge with a quick release fastener of
some sort. Exact style is yet to be determined.
1 each conversion package from KEP(Kennedy Engineered Products :
http://kennedyenginc.com/default.aspx ) for the engine you are using. Brett is very
helpful. Use the Stage II clutch package. Install new throw out bearing that comes with
the kit.
$1000
1 each
High torque starter from KEP $235
1 each
Power distribution, relay, fuse block panel with BCM. Including
the cost of the BCM, you should be able to build this for less than $75. See chapter about
DC Distribution EC1, EC2, Instrument Fuse panel and BCM….”SIMPLE wiring”. And
the PDF in the drawings section of the book. Page 3 of the VW.pdf file.
3800 V6 with SFI (L36) from 1996-2006 Camaro or Firebird;
Produces 200 horsepower @ 5200 RPM and 225 lbs.-ft of torque@
4000RPM. See text below to learn the best way(s) to get the engine and other parts you
will need at the best price.
WHY Change the engine anyway?
So, why would a person want to put a V6 in VW Camper in the first place?
The fact is, I love my Camper. It is very functional as a camper. It sleeps four adults.
It has a two-burner stove, sink with 8 gallons of fresh water, cooler, hook ups for
water, electric and gray water, mosquito screens, “Florida” windows, gets reasonably
good (23 MPG) gas mileage and it is a lot of fun to drive. It’s neat, different and I
enjoy the attention I get when I drive it. I regularly have people wave the “peace
sign” at me. Often they wave and point. Some even comment to me in a parking lot,
“Nice van”. If there were anything I would change (other than the engine) it would be
the cooler (fridge). I have the early solid-state electric version. I really want one of
the newer propane/ac/dc versions. My friend Tom Smith has one in his Vanagon,
1987, “WEDGE” STYLE and I really like it. Come to think of it, that is the van that I
owned at one time, but sold it to him because I did not like the WATER COOLED
engine or FUEL INJECTION on it. NOW…here I am putting BOTH in my Bus.
I like the “loaf of bread” or “bay window” style of bus better than the Vanagon, so I’m
going to stay with that.
I DO NOT enjoy the fact that I have had to completely tear the engine down
FOUR times. The first time was when I got it and was because the previous owner had
let the oil get low and twisted a rod bearing. Low oil is probably THE most often cause of
engine failure in the “bay window versions” of the VW Bus. These have the engine that is
often referred to as the “pancake engine” or “flat” engine. In the earlier versions the
cooling fan sat upright at the rear. These are “attached’ to the crankshaft on the front
(rear, closest to you when you are standing at the back looking at the engine) of the
engine. Probably because of oil leaks around the push rod tubes and the valve cover
gaskets like the earlier versions. The last THREE times was because of dropped valve
seats. That is the second most often cause of engine failure in VW buses. Thus…
reliability was the thing that started me down the path of a conversion to a V6.
So, here are MY reasons for the conversion…in order of importance to me.
PEACE OF MIND-reliability. This is the main reason I decided to attempt this
conversion. When I bought the Bus, it had a twisted Rod bearing and I had to pull the
engine out and rebuild it. Over the next 14 years, I had to rebuild the engine 3 more
times. That is a total of FOUR times I’ve had to build this engine. Each event took about
4 years, but still it happened. The last three times were because the engine had “dropped
a valve seat”. The “flat” or “pancake” air-cooled VW engines are noted for this particular
failure. One solution is to have all the valve seats cut out over-sized ….heating the head,
to expand it, and cooling the valve seat, to shrink it, and then combining the two…..and
then “rolling” the metal over off the head onto the valve seat by hand. I did that and still
ended up dropping a valve seat. Taking the solution to the next level meant buying brand
new heads. At $500 each, I was reluctant to do that because even that was no guarantee
that I would not have to deal with a dropped valve seat again. I even came to the
conclusion that the engine did not have the proper valve train. Mine was the only 2liter
VW that I knew about which had “solid lifters” in it. I learned later that there were two
years which VW did send them from the factory with solid lifters. The last time I rebuilt
the engine, I replaced the whole valve train, including the cam with a “hydraulic lifter”
set up. This earned me a new problem. The lifters kept bleeding down between uses.
When I cranked the engine, they would clatter very loudly until they would finally “pump
up” and build up hydraulic pressure and quiet down. This is presumably because they
were worn. The only solution was to replace all of the lifters and that was going to be
expensive also. And when it was all said and done, I was still going to be in the slow lane
going up Saluda Mountain(near Asheville, NC). I decided that the ultimate solution was
to replace the engine with something that was not prone to these problems…. And had
more power….
MORE POWER-I’ve never known a VW Bus that can pull the grade (7% for 5
miles) at Saluda Mountain (I-26 just south of Asheville, NC) unless it was in 3rd gear and
screaming at 3600 RPM just to maintain 45 MPH. I’m tired of being relegated to the
slow lane with the 18-wheelers…. And worse yet, some of them were trying to pass me.
When I say more power, the response I get most often is, “Man, with that engine, you can
pull the front wheels off the ground.” THAT is not what I mean by power. Pulling the
hill a Saluda is what I’m after.
PS…after accomplishing the transmission up grade (“taller” 3rd and 4th gears) Paul
Pearce dubbed the “BumbleBus” with a new name…”The Torque Monster”.
Affectionately referring to the GOBS of torque now produced by this engine/transmission
combination. I now climbs the hill at Saluda in fourth gear at 65 MPH and I still can
push down the gas and accelerate up the hill. I LOVE IT!!!!!
HEAT-Something only water-cooled Vanagons have in quantity or quality among
the VW family. With the water cooled V6, real heat is only a matter of plumbing out the
water lines to the heater core. AAHHHH warm air… I LOVE It!!!!!
AIR CONDITIONING- A/C has never been really good on any VW van and
never without taxing the power of the engine. With this engine and the already attached
compressor, AC is actually a possibility without really taxing the
engine….AAHHHHH.,,,COOOL air….. I LOVE IT!!!! ☺
One other factor to consider is the COST. I realized pretty quickly that this is not
going to be a cheap project. Roughly figuring, I knew that the conversion package from
KEP would be $1,000 and the engine, PCM and accessories would add at least another
$1000. I knew I needed a radiator, radiator mount, fan, plumbing, engine mount, fuel
system and exhaust system. I was figuring somewhere around $3000 for the whole thing.
The ONLY reason I was able to do this cost effectively was the fact that I bought a
WHOLE car at auction and then sold enough parts off of it to make well above the
auction price and STILL had the engine, PCM and a lot of other parts I did not know I
would need at the time. So, I actually made money through the whole process. It is true
that I had to “float” the project a couple of times while I sold parts and pieces to make the
money back to pay for what I just bought. You just need to manage your cash flow.
Besides, if I went out and bought a new VW EuroVan Camper, it would cost me close to
$40,000. I figured this was MUCH cheaper AND I had my Bay Window Bus. And you
know what? Even a brand new EuroVan will not pull Saluda mountain like mine will.
☺☺☺
There are my reasons. Yours may be entirely different. The fact is, you
would not be reading this if you were not thinking strongly about it. So, stay with me and
I think you will discover that you CAN do it, too.
Concerns..
I can hear a number of you whining now about how you don’t like fuel
injection and all those new fangled computers they put on engines these days. I know
that because I said the same thing. A few years ago, I bought a 1983 water-cooled
Vanagon Camper that was in GREAT condition from a friend at the astonishing price of
$1000. Once I had possession of it, I immediately became intimidated by the water
cooled, fuel injected engine. Instead of taking the time to learn about them, I sold it to
Tom Smith for $1000. He bought a new motor ($2200) from VW and installed it himself.
We quickly became VW friends…Over the next few months; he slowly convinced me
that fuel injection was the only way to go. I borrowed his Bentley manual and read up on
it. As fate would have it, I happened across the bus I own now about the same time. It is
a 1978 Deluxe Camp mobile with all the extras. It had a twisted rod bearing and (gulp)
fuel injection. Being a 1978 meant that it would have to pass 1976 and newer emissions
rules (North Carolina). That was something it would not do, if I converted it to a carb.
So, I swallowed hard and bought it knowing that I would be “stuck” with fuel injection. I
re-built the engine and refitted the fuel injection. I’ve had trouble with it a couple of
times now and have been able to isolate the problem each time. To date, I have been very
satisfied with the fuel injection as far as economy and performance. Well, it performs
well except when you try to go up Saluda Mountain… ☺ As I’ve already stated, I just
have not been satisfied with the reliability of the motor. The morale of the story is,
“Don’t fear the unknown. Learn about it and your fear will go away.” The same holds
true with this conversion. Yes, there are a lot of wires and connections and (heaven
forbid) computers associated with these newer engines. So, learn everything you can
about them and you can conquer them. Along that line, I have learned that there are
ways to test these things. The engine part of it has not changed. It is still a reciprocating
engine that pumps air, mixes gas with the air and ignites it…at the right time. Then it
pumps it out through the exhaust system. Dad taught me fuel, air, compression and fire at
the right time…that’s all it takes. That has not changed, but the methods of controlling
these have changed. So tell me how… Amazingly, the basis for fuel injection systems of
today is the good old VW of the mid seventies. In its simplest form, all they did was
measure the volume of air entering the system and turn the fuel injectors on for a time
frame that is proportional to that volume. They had a few “circuits” that parallel those of
carbs. One was designed to allow a rich mixture until the engine warmed up. Another
was an idle circuit. The big “trick” to those things was that IF ANY air that got into the
engine that was not metered, it messed up the fuel ratio. Hence leaky hoses really “hose
up” the works. (I’m sorry, I couldn’t resist.) If you don’t believe me, get a Bently book
on the 1978 VW transporter and study it and then compare that to any modern day fuel
injected engine. You will be surprised by the similarity. This brings me to a very
important point about this process. Know everything you can about your vehicle the way
it is currently configured and know (or learn) as much as you can about the “donor
vehicle”…preferably before you acquire it, but certainly before you attempt any
conversion. See the next Chapter for more information that will encourage you and help
build your confidence in your ability to do this.
In the following narrative, I will attempt to describe how I did this little trick. As
you read, keep in mind that I had to do a lot of R&D. Trial and error if you will. You
should not have to do that. Once you have accumulated all the parts, you should be able
to accomplish the conversion in a weekend or two at most. The coolant lines are made
up of parts you can acquire from auto supply houses and junk yards (old Vanagon pipes
or aluminum/stainless steel tubing(I would prefer Stainless) and flex hoses). You could
use the Aero quip fittings and braided stainless hoses that NASCAR uses, but that will
cost you almost $1000. The way I assembled the cooling system plumbing cost around
$200.
While it took me months of trial and error, you could conceivably accomplish
this conversion in a couple of long weekends. Think about it: Mount the new radiator on
the Bus. Run the water lines under the Bus. Drop the old engine. Which by the way, you
can sell the old engine to help pay for the project. Remove the old Fuel Injection system.
Sell it also. Mate the engine and transmission with the KEP adaptor. Install the new
engine. Install exhaust system. (I had a shop do this using mostly parts from the Firebird
for $100). Hook up the fuel system. Charge the coolant lines. Install the Power
distribution, relay, fuse block panel with BCM. Bleed the coolant lines, crank it and
drive.
Tools you will need
I have learned that there is equipment available that will help you know what is
going on with your “new” engine and its computerized brain. First of all, you must have a
fuel pressure gauge. The time that the fuel injectors are open is controlled by the PCM
(primary control module = computer), but the fuel pressure (along with the size of the
hole in the injector) controls the rate that fuel enters the cylinders. JC Whitney sells a
great “universal” fuel pressure gauge.
Auto Zone has a thing called a “noid light”. All it does is plug into the cable
coming from the PCM to the fuel injector and light up when the PCM sends the “ON”
signal to the injector. It will tell you real fast if that part of the PCM is working or not.
We all know about the infamous and feared “check engine light”. Actually, that is
a bit of a misnomer. When it comes on, it could be telling you that the vehicle has a
problem ranging from the engine to the transmission to the cruise control and virtually
everything in between. My problem has always been that I do not have a clue how to
know WHAT that light is trying to tell me. Well, wonder no more. These days there is a
standard OBDII code system that all auto manufacturers are required to adhere to. If you
have a 1996 or newer vehicle, there is a plug/connector somewhere under the dash, near
the driver that you can plug into. If you get an OBDII ‘scanner”(Diagnostic Tester) and
plug it in that connector, it will give you a read out of one or more numbers (diagnostic
trouble codes, DTCs) that will tell you the condition that caused the “check engine light “
to come on in the first place. Understand that it will not always tell you exactly which
component is faulty, but at least it will get you in the ballpark. I got mine at Auto Zone.
It is a model CP9035 and it was $175. I realize that is not cheap, but without it, you will
pay someone $40 to tell you what caused the light each time you have a check engine
light come on. On a “normal” vehicle, that is painful, but can you imagine the grief most
shops would give you when you tell them your 1998 Firebird 3.8L V6 lives in a 1978
VW Bus? I, for one, do not want to go there. Go buy one. Consider it part of the cost of
gaining all that has driven you this far. Below you will find a few pictures of the device
and the connector.
Standard OBDII connector
Once the DTC tells you what system is failed, you can use your trusty VOM to
determine which sensor is actually defective. BTW, the “shop manuals” that I have not
mentioned yet have “troubleshooting flow charts” that make this much easier. Basically,
they say check here…you get this, then go here….but if you get this, then go there. OH,
I haven’t mentioned the VOM yet have I?? Well, a VOM is another tool that you will
need. What, you ask, is a VOM? It is a Volt Ohm Meter. See the photo below of a
Simpson 260. This is just one example of a VOM. There are many kinds. Almost any of
them will do what you need to do. Radio Shack used to have one in the $10 range that
will work just fine. An average VOM (even digital version) runs about $30. If you have
an OEM “shop manual” for your donor vehicle, it will tell you how to use a VOM to test
each and every one (well MOST of them, OK?) of the sensors on your vehicle.
And that brings me to the “shop manual”. Do not think that the Haynes manual
that you can buy at most auto supply stores is adequate. It is not!!! I have one of those
for the FireBird and for the VW Bus. Those are good general information and are worth
having, but they will not give you the details you need to complete this project. This is
the most important tool of all. Without it, none of the others are worth anything. You can
get one of these from various providers depending on the manufacturer of your particular
donor. I got mine (1998 FireBird) from Helm, inc. @ www.helminc.com or you can call
them @ 1-800-782-4356. Mind you these books are not cheap, but trust me; they are
worth every penny in the time that they will save. Mine was $129, but it is three volumes
and details every system and wire and mechanical piece on the car. There is no way I
would have been able to reconnect all the systems (PCM, BCM, cruise, HVAC, etc.) once
I transplanted them to my bus without this set of books. So, don’t even think about not
buying them….You will be glad you did. When you get them STUDY them. The more
you know and understand what is in these books, the better off you will be.
One more item that you do not HAVE to have, but will make your life easier
(and I highly recommend it) is a Stant Coolant System pressure tester. I got mine at a
pawnshop for $50. If you aren’t as lucky, you can get one at NAPA or your local auto
parts store for around $120. This thing will come in handy when you begin to fill your
coolant system. Think about it. You just got finished building a “one off” cooling system
with many clamps, mounts, hoses, pipes and a new radiator. That system has never been
tested or operated. You cannot be sure that it will hold water under pressure AND that
you have all the air pockets out of the system until that system is “up to pressure”. The
pressure tester will allow you to pressurize the system and check for leaks and vent any
air pockets before you even crank your engine. That’s important because if you don’t
have all the air pockets out of the system, the water pump could go into “cavitation”. If it
does that, it will not move any water through the system. If the water doesn’t move, the
cooling system will not work and you could damage that engine before you even get a
chance to drive it. That would not be a good thing. I will get more into how exactly to
“charge” the cooling system correctly, but for now, let’s just get the engine installed.
OK? See photo..
You will need to acquire a set of fuel system disconnect tools. The fuel system
on the FireBird has quick connect unions on the fuel lines where they connect to the fuel
loop and the fuel lines that run from the front to the rear on the vehicle. They are
inexpensive and it will be impossible to disconnect/reconnect the fuel system without
them. You can get them at Auto Zone or NAPA.
One other tool that is a “nice to have” is a ‘remote starter switch”. This is a
hand held switch that is used to “by-pass” the starter solenoid to activate the starter
motor. It makes it possible to “crank” the engine from the rear of the vehicle. From
there, you can see, hear and test what is going on while you are “cranking” the engine. If
you want the engine to actually CRANK, turn the ignition to “run”. If not, you will
simply turn the engine over…no fuel, no spark… You can get one at Auto Zone or
NAPA. Mine is from Sears.
One last item that came in very handy for me was a stethoscope. As I will
explain later in the book, I used it to listen to the fuel injectors to determine that they
were in fact opening. You can HEAR them working with the stethoscope. You can even
hear the fuel moving through the lines!!
Shown in this photo (left to right, top to bottom) are a stethoscope, two
different types of spark testers, the fuel disconnect tools (second row) a coolant
“Protection” level gauge (reads specific gravity of the coolant and gives a read out as to
what temperature it will freeze), NOID light for testing fuel injectors, jumper leads for
electric system testing and a test light (also for electric system testing). The lead clips to
ground and you probe for voltage. If you find it, the light comes on. It is much quicker
and easier than reading a VOM. I use it when I do not care about the level of voltage, but
only the presence or absence of voltage.
That wraps it up for test equipment.
Why did I choose the 3.8-liter V6 by
GM?
Originally, I had intended to use a 3.0 liter from a Nissan Maxima because
I had looked at KEP’s web site (http://www.kennedyeng.com ). They recommended the
engine because it is the “smoothest V6 available”. I have no doubt that it is true. Ride in
any Nissan Maxima and you will see that it is strong AND smooth. In addition to that,
the guys at KEP are very knowledgeable about such things, so who am I to question what
they said? As I began to investigate the motor and try to get information that I needed
about its dimensions, I began to discover that it was not going to fit like I wanted it to.
For one thing, the engine is mounted transversely in the Nissan. The exhaust was looking
like it was going to fit well. The exhaust came off the front manifold and swept under the
engine. The “front” of the engine would be on the right (passenger side) of the vehicle
when it was mounted to the VW transmission. That was not a problem because that put
the “merge” of the exhaust on the left (driver’s side) of the VW. That placed it on the
opposite side of where I wanted to place the coolant lines (on the right). The coolant
lines come off the front of the engine and it would be fairly easy to route the coolant lines
to mate with hard coolant lines coming from the front of the VW. All was looking pretty
good up to this point.
I turned my attention to the intake manifold…. Whoops. It protrudes about four
inches beyond the junction point of the engine and the transmission, toward the driver’s
side of the vehicle (Nissan). When you realize that the junction of the engine and
transmission of the VW is directly along the plane of the rear (front) firewall, you know
that the intake manifold will not fit. It will protrude into the area occupied by the gas tank
on the Bus. In an effort to work around that little problem, I looked at the same engine
in the Nissan Pathfinder because it is rear wheel drive and mounts straight to the
transmission just like the Bus. The exhaust in that vehicle drops off each side of the
engine and sweeps straight back. That solved the exhaust manifold problem and the
transmission union problem, but I soon discovered that the intake manifold on the
Pathfinder was too tall. Kennedy tells us that you only have19 inches from the center
shaft of the VW transmission to the underside of the engine compartment. It is 22 inches
from the center of the transmission to the top of the manifold of the V6 in the Pathfinder.
I did not want to have to cut a hole above the engine compartment for the engine to fit.
That would allow the engine to protrude into my BED. THAT was NOT going to
happen. Sorry!!!! So I started to look at other engines. It was while I was at a junkyard
looking at the engine dimensions of the Nissan that one of the guys told me about a local
guy that put a 3.8liter V6 from a GM product in a Vanagon. The more I talked to him, the
more interested I became in the 3.8liter V6 from GM. It turns out that the 3.8liter from a
Buick LaSabre has the same problems with the exhaust(wraps over the top) and the
intake manifold(too tall)that the Maxima has. Both are front wheel drive. The engine
itself appeared to be short enough to fit into the engine compartment. The guy at the
junkyard suggested a Camaro or FireBird. These are rear wheel drive just like the
PathFinder. The exhaust sweeps straight back just like the PathFinder. The intake
manifold points forward…I was getting excited. I borrowed a tape measure and asked
him to show me one of these engines. BINGO….It is only 18 inches from the center
of the crankshaft pulley to the top of the intake manifold….. I think I’ve found a good
fit. My concerns with this selection at this point were too much horsepower (200 hp) and
too much torque (235 ft/lbs.). I am not sure the VW transmission can take that much of
either. KEP recommends no more than 150hp with a stock VW transmission. That makes
sense because all the design criteria I am familiar with call for designing at “two times
over rating” and the VW engine is rated at about 75 horsepower. I’m thinking that it will
be OK as long as I don’t punch it hard or drop the clutch on a revved engine. Since
popping wheelies was not on my list of requirements, I was not too concerned. AND I
figured that the Germans, being consummate engineers, probably designed it a THREE
times over rating anyway. THAT will definitely cover it. And this engine certainly will
provide the power that I wanted to pull Saluda Mountain, heat and air conditioning…
One last factor that pushed me away from the Nissan toward the 3.8 liter V6 is
that the 3.8 liter has a chain connecting the crank and cam instead of a belt as in the
Nissan. My concern there is that if the belt breaks, the pistons will get out of sync with
the valves and will destroy the valve train!! The 3.8 liter also has a balancing cam to
smooth the vibrations of the engine. So, I decided that I am willing to risk it and move
forward with this engine. The next step is finding one.
Another consideration that pushed me toward the GMC V6 is that all the sensors
are very closely located to the engine itself. Most of the other engine potentials that I
looked at had things scattered all over the engine bay. Things like MAF sensor in
particular. Most of them were mounted “remote” to the engine. The GMC MAF is
actually mounted ON the intake manifold on the engine. I like the way that is done.
There is a large bundle of cables going from the PCM to the engine…these are
connected to sensors all over the engine for the proper operation of the engine. Only a
few wires actually NEED to go “up front” for the engine to work correctly. Most of those
go to the BCM. I have “others” in my Bus that are not needed, but I wanted them. To
help with the project for those that may not be as anal as I am about things working, I
have detailed a “simplified” wiring application …basically a “board” to mount in the
engine bay that will take care of much of the “up front” wiring. See this in the Chapter
labeled “wiring hell SIMPLE version”
There are (maybe) alternate engine
choices:
I decided to go for the engine that I did for the reasons I have already stated. I am
sure there are other choices that will also work. I am very satisfied with the choice that I
made because of the power/torque/size/fit/layout of the engine/sensors/wire and cable.
The placement and routing of the exhaust/intake manifold/fuel lines/cooling lines/throttle
cable/etc. all came into the decision. One big factor that dictated a lot of these was using
an engine in a rear wheel drive vehicle. These days, that limits the quantity of “donor
vehicles”. So, perhaps, accepting a “traverse mounted” engine should be an option. Two
things you will need to look out for more than the others are: the exhaust routing and the
intake manifold. The exhaust CAN be dealt with by finding an exhaust shop that has the
ability to fabricate exhaust manifolds. I would estimate that you should be able to get a
shop to make you a set of exhaust manifolds that drop off the engine and go straight back
…and perhaps come together in a “Y” pipe just behind the engine…for around $300.
The intake manifold may present more of a problem. Many of the traverse mounted
engines will place the intake manifold into the gas tank area when re-oriented in the VW.
Flipping or modifying the intake manifold can generate a whole new set of issues. So, if
you decide to consider a traverse mounted engine…watch out for these gotchas…
I have looked at Chevy (GM) products (Impala/Regal/Park
Avenue, Century…)…engines of various sizes…and all seem to have the same issues. I
did look at a Jeep Laredo 4x4 3.7 liter V6 is rear wheel drive. Actually 4 wheel drive, but
the engine sits right for our purposes. Water lines, fuel lines, vacuum lines, throttle and
exhaust all look good. The intake manifold looks like to will be an inch or two too tall.
The other thing is, it seems weak in the vehicle to me. It makes a lot “noise” but does not
seem to make the vehicle GO like it sounds like it should. That may be a gearing issue.
…a Nissan Pathfinder seems like it will fit as well, with the exception of the intake
manifold. I remember it being about 22 inches from the top of the manifold to the center
of the crankshaft. I never got around to looking at a lot of other manufactures because I
liked what I found in the 3.8 liter, but if I started over, I would look at more
manufactures… Honda, Hyundai, Subaru Mazda at least. I would certainly look at
pickup trucks. All of them that I am familiar with are rear wheel drive, so that may open
up the possible donors. Often they have larger engines because the builder is trying to get
more power…to pull things and haul heavy loads. I have never even considered a four
cylinder. WAY to small in my opinion( low HP and low Torque) . GMC trucks generally
have the 4.3 liter VORTEX V6, which MAY be too large also. I know of at least one
conversion that used it and it seemed to work out OK. Again, I have not looked at it
closely, so I cannot say for sure. It seems to me that V8s are too big, both physically and
power wise. I did take a brief look at a Chrysler Magnum. At least on a cursory look, it
looked like it would fit…physical size wise (length/width). It was surprisingly small for
the power it promised. That much power would certainly drive me to consider doing
something to beef up the transmission… another whole set of issues… ☺ … I was not
able to determine if the vertical height would work or not…but it looked like it would.
Another thing that I have thought about along that line is using an engine with HIGH
vertical clearance. You can always cut out the top of the engine compartment and build
an enclosure above it. This is something I elected NOT to do because I did not want to
disturb the lower bed in my Westfalia. If that is not an issue with you, I see no reason it
would be a problem. This will also come into play if you are considering up fitting a
Vanagon. The vertical height(drive shaft to under side of the engine bay) is much shorter
in them. In fact, I believe that even my 3.8 liter would be too tall in one of them. That is
why many of them lean toward the Subaru engines…they are flatter. Also, they are using
the radiator already in the vehicle. If I were doing that, I would consider replacing the
OEM radiator with an aluminum radiator. (More cooling capacity in a smaller space)…
but then that generates a whole new set of issues with mounting and plumbing. I might
be tempted to try it and see if the OEM is actually “big enough” to cool the 3.8 liter…
maybe…☺…maybe not…☺… And don’t forget to consider the Subaru engines. KEP
has a kit already set up for the Vanagons which I would assume is pretty good. It is a flat
engine and should fit well in a Bay Window style Westfalia. With the radiator set up that
I have, it should work out fine. So that is definitely an option. I think the Subaru’s are
about 135 horse power, so I am sure the tranny will handle that at least as well as it does
my V6 which is 200 horse power.
Another consideration that you do not want to overlook is at what RPM does the
engine you are considering develop its power? Remembering that the OEM VW engine
is rev-limited to 3600 RPM should be your first clue. The transmission is geared that
way also. If you use an engine that develops its power at 4500 rpm (or higher) you could
have some real problems. The engine would never get to the RPM that it needs to give
you the power that you are looking for. If you can…rent and drive a vehicle that engine
in it….preferably with a manual transmission. Plot the rpm at the various shift points that
the engine is comfortable with… You may be able to do this even if the vehicle you
rented is automatic. Defeat the over drive and/or use the “manual shift” feature of the
transmission. Pay attention to which gear the transmission is in as you drive over various
terrain. If you can, force it to stay in a gear while pulling a long hill and see where the
RPM is and what kind of power you are getting. If that doesn’t “feel” a lot like the RPMs
in each gear on your bus, you are probably looking at the wrong engine…. Turns out my
3.8 liter and upgraded transmission works out in this regard very well.
Where to get one…and how.
Once I decided which engine to use, I needed to determine what vehicle came with
that engine in it. I was looking for a GM, 3.8L V6 and it needed to be in a rear wheel
drive vehicle. It needed to be a fairly recent model in order to have low mileage..
Most late model sedans are front wheel drive. I narrowed my choices down to
Camaro, FireBird or a pickup as vehicles with rear wheel drive. I discovered pretty
quickly that many of the Camaros and FireBirds came with V8’s. Still, they were my
best option in years from 1996 to 2002. I don’t remember, but I think the trucks ran in
the same years. I really did not concentrate on the trucks, since I felt the cars were
probably more available.
Now that I had an idea of what I was looking for, I had to figure out HOW to get
one. The first idea that came to mind was going to a junkyard and buying one. I
considered this option, but not for very long. The thing that scared me away is that I had
no way of knowing that I was going to get EVERYTHING I needed to make the engine
run. Most of these junkyards are chop shops and are only interested in the major parts of
the vehicle that they can cut out easily and turn a profit on quickly. They don’t have time
to take the time to pull the engine, PCM and the harness intact. Even if I could find one
that would agree to do that, I still could not be sure that I would get everything I needed.
If for no other reason, because at the time, I did not know myself what all I would need.
That began to look like “not such a good choice”.
A second option, pull the engine and all I needed myself. OK, in order to do that,
I would need extended access to the vehicle and I needed to figure out just exactly what I
would need to take off of the donor vehicle for the conversion. If I bought the car, I
needed to figure out what I could remove and SELL. This turned out to be a major
revenue stream for funding the conversion project. I gleaned the following list from the
electrical drawing on page 12-29 of the Haynes manual on 1993 to 2000 Camero and
Firebirds. Not all of these items will positively be needed, but it would be best to secure
them while I have the opportunity. Many, like fuses and relays, will be grouped together
and secured as a bundle. Many of them are attached to the “engine assembly” itself.
•
•
•
•
•
•
•
•
•
•
•
•
•
•
•
•
•
•
Instrument panel fuse block
BCM( body control module)
Under-hood electrical center, EC1 and EC2
Fuel pump…Do not need if using VW pump. I used the existing VW fuel pump.
Fuel pump relay..p/o EC2. Do not need if using SIMPLE version of wiring.
Exhaust Gas Recirculation vacuum control signal solenoid valve(attached to the
engine)
Throttle position sensor(attached to the engine)
Engine coolant temp sensor(attached to the engine)
Idle air control valve (IAC) (attached to the engine)
Camshaft position sensor(attached to the engine)
Crankshaft position sensor(attached to the engine)
Electronic Ignition control module (attached to the engine)
Vehicle speed sensor. It is located in the transmission.
Intake air temperature sensor (IAT) (attached to the engine)
3 each heated oxygen sensors. Two “pre-catalytic converter” and one “post
catalytic converter. All attached to the exhaust system.
Manifold absolute pressure sensor (MAP) (attached to the engine)
Knock sensor # 1(attached to the engine)
Knock sensor # 2(attached to the engine)
•
•
A/C refrigerant pressure sensor in/on the coolant lines. Only needed if you plan
to add A/C to the system.
Powertrain Control Module (PCM) Mounted on the firewall.
I got the Helms shop manuals a few days later and came up with some additions
to this list. I realized pretty quickly that I was going to need some time to get all the stuff
that I needed off of any donor that I acquired.
Another option that I came up with to acquire the engine was to work out a deal with
a local junk yard where I would buy the car from them, take it back to my house and
remove all the items I need from it and then they would buy back from me what is left.
The problem with this is, I would pay a high price for the car and I did not know in
advance how much of that money I was going to be able to recover. Also, they were
only going to give me a week to do it. With the way I travel for my job, I was not sure
I could do that. This option also began to look less appealing.
It was looking more like I was going to have to buy the vehicle, remove
what I needed and sell what remained and do it AT MY PACE. One way of doing that
was to buy one from an individual. Since I travel so much, I figured I might “spot one”
from the road or maybe find one that had been left at a shop and had a mechanics lean on
it because of a bad transmission or something other than the engine. I tried this approach
for a few weeks and came close a couple of times, but couldn’t find an acceptable donor.
It was about that time that I became aware of another option. Buying from
a local auction company that specializes in vehicles damaged in crashes. Most of the
vehicles here are ones that the insurance companies “bought” from the owner when it was
wreaked and they are trying to sell them at auction to try and recover as much as possible
from the vehicle to offset the expense of the claim. I discovered several in my area that
have auctions weekly or bi-weekly. Here are some to look at. Perhaps these have
“equivalents” in your area.
http://www.adesaimpact.com/
Adesa Impact auto Salvage
I narrowed my source down to Rimer’s Auto Auctions in Concord, NC(now part
of Adesa Impact Auto Salvage) because I could look on their web site and see pictures of
the vehicles, what damage had been done and find out how many miles were on the
vehicle and engine size. Keep looking in your area until you find the right source and stay
with it until you find the right donor vehicle. You will need to know what to look for
before you will know if you have the right vehicle.
What to look for:
The first thing I looked for was a low mileage vehicle. I set my target at
around 50K miles. I figured that would be in an older vehicle (1993-2000) that I could
buy at a price I could afford and was still low enough mileage that I could get a lot of
good service out of it before I had to do anything to the engine. I felt that was especially
true with the engine I had chosen because it had a chain drive for the timing between the
cam and main and not a belt. The belts change interval is 60K miles and I did not want to
have to start this conversion by having to change a timing belt. I decided on a “lower
mileage” engine because I did not want to have to re-build the engine and then install an
untested engine in a prototype vehicle. There are too many variables in that scenario.
The second thing I was looking for was a vehicle that had been hit from the side
or rear or rolled over. It could be hit anywhere but the front. I discovered that there are a
lot of people that go to these auctions to buy vehicles that have been salvaged by the
insurance companies (and have salvage titles) and fix them and re-title them and sell
them to “the unsuspecting public”. I figured the more surface damage a car had, the more
it would cost them to repair it and the less likely they would be to buy it. So, I was
looking for a vehicle that had been hit and spun or rolled over. I discovered there is a
balance in this approach. If everything but the engine is damaged, you are basically
buying the engine and the stuff that you need for the conversion. If there is stuff still
intact on the car that you can sell, you may in fact get the engine for free by selling parts
off the car to pay for this part of the project. That was the case with me. I bought a 1998
FireBird for $2000 and got all the parts I needed for the conversion (at my pace, I might
add) and then sold parts off of the car amounting to over $4000. To top it off, I priced the
parts I sold at 50% discount to the best prices I could find for the parts on the Internet car
parts dealers. In other words, I could have made more. My objective was not to make
more, but get the engine for free.
Here’s an insert from my diary on the day that I bought the car and some
pictures of the car once I got it home and more of “the donor vehicle” after I had removed
the engine. If you have more “love” for a 1998 FireBird than you do for your Bus, you
might not want to look at the pictures. They are not for the faint of heart.
I can’t BELIEVE I just bought a car…
I went to Rimer auto auction for the first time on March 9, 2002. It was quite an
experience. I bought a donor car for the project. But let’s not get a head of our selves.
Ashlie and Brian (daughter and her husband) were moving to Morehead City that day
and I had been watching Rimer’s web site for about two months looking for a donor.
Most of the time, they had one or two Camaros ranging from 1993 to 1996. On this
particular day, they had six cars that I felt “might work”. Brian was driving the U-haul
truck, Ashlie was driving their pick up and friend of the family and I were going to help
unload and set up. We would ride together. Jan (wife) had decided that she did not want
to be part of this whole weekend because it upset her so much that they were moving in
the first place. I talked to Brian and Ashlie and they felt it would be OK for me to delay
long enough to go to the auction because they would be spending the evening just getting
their water bed in place and ready for them to sleep on that night. It turned out just that
way. We loaded the truck on Saturday and all was well. So, Allen and I went early and
got registered while Ashlie and Brian went on to Morehead City. When the registration
was complete, we went and looked at each of the cars I had identified as possible donors.
It turns out that most of them had a 3.4L V6 in them. That is not the motor that I wanted,
so I eliminated them. That left a 1998 FireBird and a 2000 Camaro. The FireBird was in
pretty good shape and had only 45, 000 miles on it. The Camaro was a basket case. It
had been ROLLED and there was not a spot as big as my hand that was not bent,
scratched or crushed. BUT, the engine and transmission looked to be in pretty good
shape. I was pretty apprehensive about this whole auction thing, so I was glad that there
were a LOT of cars in the order of the sale before they got to any of the cars I was
looking at. It turns out that the first Camaro was # 133. It took them one hour to get to it.
That’s about 30 seconds on each car or less. By the time they got to # 50 or so, I was
feeling better about it. I could at least keep up with the auctioneer. They sold # 133 for
$1200. Probably a good price because what parts were OK were probably worth that,
but no more. It was not long until they started up the row where the FireBird was sitting
in position #268. Allen and I had talked about the car and what we thought it would
bring. I was thinking $3000 or maybe $4000. We looked at the car trying to decide what
was on it that I could sell to make my money back. I came up with at least $2000. I
figured I was safe to bid that. The auction company had a young man (high school age)
that would place a short red flag on the car just before the auctioneer would begin sale of
that car. He placed the flag on the FireBird and the auctioneer was off and running at
$1000. Three bids later (10 seconds….maybe) I jumped in at $1200. It had gone down to
$500, back to $1000 to $1100 and then to me. My mind was whirling. I was thinking
about all that was happening in front of me and suddenly I realized the auctioneer was
talking to saying, “You!!! In the brown hat, are you in at $1400?” He was talking to
ME!! I raised my hand in acknowledgement. Another bidder and I batted it back and
forth until he went to $1900. $1900, who will give me $2000,,,,$2000??? I found myself
raising my hand. Five seconds later, I heard “SOLD to # 6190”. It was a few seconds
before I realized that was me!!! I was absolutely stunned. I looked back at Allen and he
was grinning from ear to ear. Yep, I did just buy that car. I made my way through the
crowd up to the step-van and someone handed me a piece of paper. I looked at the “key
man” at the back of the van he just shrugged. It was then that I realized I had no key to
this car. It was not important now, because the thing did not even have a battery in it. It
was the next day before I began to “come down”. Man what a kick in the pants!!! Poor
Allen, he had to listen to me ramble about it for hours. I simply could not believe I had
actually bought that car for $2000. It turns out that I was the right thing to do. The motor
runs great after I got a key and got around to adding some gas to the tank. I bought a
battery at the auction for $30 from a vender and made arrangements to have the car
delivered for $30. I figured it was a good deal since you can’t get a tow for less than $50.
It turned out; it was a bit of a problem. They had told me it would be the middle of the
week before they would deliver it. I figured I had Monday and Tuesday to get the garage
cleared out so I could put it right in there un-noticed. Well, Allen and I went about our
business helping Brian and Ashlie move. Sunday afternoon as we were preparing to
leave, Jan called all in a panic. “WHAT, do you want me to do with this CAR???” They
were delivering the car on Sunday morning at 10:30 AM. Every one of my neighbors
were peering through their windows wondering,” WHAT is he up to now??” You see,
I’m the nut case in the neighborhood that likes to “push the envelope” with regard to our
neighborhood covenants and rules. One neighbor in particular has a real problem with it
because she had so much trouble with that sort of thing at her previous residence. I
understand all that, because I had a problem with it too. And I do try to stay within the
rules, but how are you supposed to pull an engine when there is only 3 or 4 feet behind
the Bus when it is in the garage??? Anyway, the car had not hit the ground before she
was “greeting” my wife with, WHAT is this?” At this point in time, my wife was JUST
as upset as she was. I’m not sure, but I think they burned me in effigy. I’m glad I was 5
hours away. I heard all about it from Jan as soon as my neighbor left. As it turns out, by
the time I actually sat down with my neighbor and her husband, they were pretty calm.
Once I explained the whole situation and that I was in the process of installing a V6 in
my Bus SO THAT I would not have to work on it all the time, they were OK with it.
Sunday, it will be two weeks since it was delivered. It has sat right where the guy left it
because I had to get a key made ($45 bucks to get a copy of the right key with the right
“chip” in it). I checked things over and tried to crank the car several times. I got a
“noid” light and checked the feed to the fuel injectors from the PCM. It was OK. Got a
“scanner” tool for the OBD II ($179) and it showed no DTC’s. Which I expected since
the “service engine soon” light was not on. I just figured I might need one once I got the
motor in the bus, so I went ahead and bought it. When I checked the fuel pressure, I got
nothing. It made me think my gauge might have failed. It showed 40 psi when I hooked
it to the Ford Taurus. A short trip to the gas station, two gallons in the tank and she fired
right up!!! Another pumped up moment. A short while later I tried to drive the car. I
pulled the shift lever and I heard it go in gear, but the car would not move. I soon
discovered that someone had removed the driveshaft. I found out later that they are
VERY rare on the used market. No matter there is still plenty on the car that I know I can
sell. In fact, I pulled prices from “carparts.com” and once I added it all up, I could sell as
much as $8, 195. And I would still have the engine and accessories that I need for the
conversion.
Photos of Donor vehicle
Here are some pictures I took while it was in the driveway waiting on the garage
to get cleared out. Note the “organ recipient” (Bus) behind.
When you first look at these pictures, you think, “It’s not THAT bad.” But it is…
The frame was damaged on the passenger side, of course the door, all of the fenders
except one were damaged, the molded bumper parts on the front and rear plus all the
ground effects were damaged, LR tail light, and the rear deck lid trim. It was bad for
someone speculating to rebuild the vehicle, but fantastic if you were going to part it out.
Here’s a list of the parts that I can remember selling off the car. I’m sure I forgot some.
Hood, rear axle, front axle, rear molded piece, front seats, rear seats, both T tops, rubber
gaskets for T tops and attachment hardware (it seems if you have these, you can convert
your hardtop Camaro/FireBird to T tops), starter motor, wiper motor, RR tail light (rare,
desired), master cylinder, brake booster, brake calipers, brake discs, hood (undamaged),
transmission, passenger door, both head light assemblies (with motor), passenger side air
bag (expensive, be careful when removing. If you don’t have the Helms manuals, DO
NOT TRY THIS!!!!), driver’s air bag (same deal), anti-lock brake pump, four tires with
chrome rims (sold these to a guy in Puerto Rico for $500 (buy now) and shipped via
USPS for $ 140.00)… I have included a spreadsheet that details how much I got for each
of the parts I sold. The following is a list of the items I kept off of the vehicle: engine,
PCM, BCM (body control module), Radiator & fans, HVAC core, HVAC module from
cabin (has vacuum controls, fans and heater core and HVAC evap core), exhaust system,
radio (CD.AM, FM cassette and 5 of the 6 speakers, Windshield washer tank with pump,
instrument panel, etc. You get the idea that was worth the effort for me.
Now comes the ugly part. The faint of heart should not look at the pictures that
follow… ☺ Here are a few pictures of the FireBird during and after the “donation”.
Notice the PCM with the cables to the sensors still attached sitting on top of
the engine. The cables originate on the firewall of the FireBird. When installed in
the Bus the PCM ended up on the driver’s side firewall near the battery (also on the
driver’s side… I moved it). I never unplugged the cables from the PCM.
It got a little worse before I finally got everything off that I could sell and then
sold the carcass to the local junk yard for $100 just to get them to come and haul it away.
CHANGE THE TRANSMISSION OR
NOT?
I struggled with the idea of swapping the transmission or not. The tranny
in mine has seen almost 100K miles, so it will probably need to be overhauled soon. If I
consider the fact that the V6 would push a brand new tranny to its limit. I lean toward
changing it out. Or I could just install the new engine and then drive the tranny until it
fails, but then I’d be back under the Bus a lot sooner than I want to be. I have a friend in
town that runs a Porsche shop and he has a newly remanufactured five-speed tranny that
will fit. It is from a 1979 Porsche, which runs well over 200 hp, and the torque is up
around 250 ft/lbs., so I am sure that will do the job. My thoughts are to go ahead and
change the tranny while I have everything out. I’ll need to create a mount for it, but I am
already creating a mount for the engine. I might as well create a matched set while I’m
doing. The only thing that is holding me back is the cost. I think I can work that out by
selling the engine and transmission that are already in the Bus to get the money for the
Porsche transmission. I can get it for around $800.
I checked with Bret at KEP and he tells me that I can use the same “conversion
plate” for the Porsche tranny, but I will need to buy a different flywheel and have it
balanced as I did the first one. That will cost $230. I will also need Porsche throw out
bearing, Pressure Plate and clutch disc. Those cost around $600 new. So, it will be a
little expensive to do this. The tranny is going to be in the $800 to $1000 range and it
will be used, so I may end up having it rebuilt at a cost of $600. Then the rest adds up to
$1500… Another concern with this is that the Porsche engine power curve is similar to
the VW. Turns out I would have had to “re-gear” the Porsche transmission to get the
right RPM ranges I would need. This would cost a LOT more to do on the Porsche
transmission than the stock VW…on second thought, maybe I won’t do this right now.
…Maybe never.
In a recent conversation with a guy on Ebay, I found that a 901
transmission from a Porsche will work without a major problem. In fact, I can use the
same clutch disc, pressure plate and throw out bearing as the original. In fact, Jay says he
can build up the tranny with taller gears so that the cruise speed of the engine will be
more in the range it needs to be. He indicated that he could set it up so that I’ll have 2500
RPM @ 70 MPH. That is more like it should be for an over the road cruiser. He says
he will build one for me for $900. Once I get the Bus settled down and the finances
collected, I’d like to take him up on this deal. I will have to re-work the linkage, but I
think it will be worth that. For now, I am going to go with the stock transmission.
I also found a guy in California that says he can do the same thing to a
stock VW Bus transmission for about the same price. That might be a better option since
I would not have to re-work the linkage. The only thing I am not certain about with that
option is the ability of the transmission to take the additional power of the new engine. A
“taller” gear in 3rd and 4th will require more torque to pull the vehicle. At that point, it
becomes an issue of whether or not the transmission can handle that additional torque. If
interested in that, contact AATRANSAXLE at http://www.aatransaxle.com/
Note that I have also included in the package with the book a spreadsheet titled
“possible gear sets” in two versions. One will only run in a more current version of
Windows office… you’ll figure out which one… ☺…(file has XLSX file extension
instead of XLS.)
If you are in the North/South Carolina area we have a guy that lives in Fort Mill,
SC just south of Charlotte that does excellent work. The wife and I moved from
Harrisburg to Morehead City in 2007 and I lost my garage in the process. So any real
work from that point on was going to need to be done by someone else. Fortunately, I
found Paul Pearce. The Bus developed an oil leak in 2008 and I decided to have the
transmission overhauled and taller gears installed in 3rd and 4th gears. While trying to
figure out the best way to make that happen, I found Paul and now in August 2009, he is
getting it done for me. In fact, check out my update at the end of the book for a blog on
my recent 2009 repair and upgrade that Paul did for me. You can contact Paul via email
at [email protected] Tell him I sent you….
If you are interested in spending some major bucks and getting a transmission that
will let you jerk the front wheels off the ground without getting hurt, then you need to
check into Rancho Performance at http://www.ranchoperformancetrans.com/service.html
Contact them if you want a real high performance model. Plan to spend more than
$3500….
With any of these options, it would be nice for the engine to be turning
lower RPMs since that would likely result in better gas mileage. THAT would be nice,
but if I got 10% better gas mileage, that would result in maybe 3 MPG better gas mileage.
AS gas gets higher and higher, this looker more inviting.
THE REAL WORK BEGINS:
Radiator, Mount and “hoop and
saddle”…
Now that I have an engine, how do I go about building this conversion? In
my case, I have a running vehicle that I’d like to be able to use as much of as possible. I
decided to get the cooling system installed first. I figured I could install that without
disturbing anything else on the Bus. I had been looking at everything I could find about
conversions on the web and the guy that put a 4.3L Vortex V6 in a 1972 Bus intrigued
me. I liked the radiator idea he had most of all. He built it to look like a spare tire
mounted on the front of the Bus. Yep, hide it in plain sight. I could not tell what size the
hoop and “continental tire kit” is from looking at his web site. So, I did a search at JC
Whitney and came up with a whole page of different sizes. The largest of which was 96½ inches circumference. That figures out to about 31 inches diameter. I had determined
what size I had to fit everything inside of. The bad news is that JC Whitney no longer
sells this item.
I exchanged some Emails with the guy and told him what I was doing and he
offered as much support as he could. He used a custom aluminum radiator from Griffin
Thermal products. He even gave me the work order number, which he used to get his
custom radiator. He was a very helpful and knowledgeable guy. Griffin provides a lot of
the radiators used by auto racers all over the country. In talking to the sales guy at
Griffin, I discovered that they had a “stock” radiator that they produced that was a little
different than my internet friend and would provide cooling for a 400 hp engine AND it
was a lot cheaper. He is using a larger engine, so I’m sure he needed what he used to get
the cooling, but I’m pretty sure the stock version will handle the 3.8L V6 I’m using. If
you do the math, the original FireBird radiator (core size) was 17 x 22= 374 sq. inches.
Take 25% reduction of that to account for the improved efficiency of the aluminum and
you get that I should have a 280 sq. inches core size. If you figure it the other way, my
radiator is 17 x17=289 sq. inches (aluminum). Factor it up by 25% and you get 361 sq.
inches (copper). If you consider the design over kill that I know the factory added to
“CYA”, I had determined what type, what size and where to get my radiator.
I think I paid $285 plus shipping for the radiator. I did pay $25 more than the
stock radiator in order to get the 3/8 NPT hole put in the left side of the radiator as a
provision for the temperature sensor for the cooling fan. I talked to the sales guy at Scott
Fans (http://scottscoolingfans.com/ ) and he was very helpful about helping me choose
which fan I needed and what type (temperature setting, when does it kick in…and when
does it drop out) sensor to order. He also helped me decide where to place the sensor on
the radiator, i.e., on the intake side (hottest water and about 3 inches below the water line
so the water level could fluctuate a little and not cause me a problem. Best of all, it will
fit inside the 31 diameter “hoop that I made. You can call Scott at 1-800-272-FANS. I
used a 17” fan and 195 degree thermal switch. Just let them know what you are doing
and they will make sure you get the right stuff. At the time, mine cost $265. I will
mention that Pep Boys has some fans that are very close to what I got from Scott and they
only cost $85. Will that work? Maybe, but I chose not to use them because I wanted the
best quality I could get and afford. If money is a real problem, I’d look at it. The choice
PS….
At this point be sure that you read the follow up to this at the end
is up to you.
of this book. In short, I learned later that the PCM works with a temperature sensor to
control the fan(s) which were on the FireBird. Since I only have one fan, I only needed
the “first trigger”. You can actually use that method and you will not need the NPT and
sensor from Scott Fans. Right at this moment (July 2010), I do not even have a fan
activation sensor on my Bus. The system keeps things cool enough MOST of the time. I
only use the fan when I’ve been cruising on the interstate and come down on an exit. I
turn on the fan (with manual switch) for a few minutes and all is well. Very SOON, I will
hook up the PCM…I suggest you go ahead and do that. It seems that is the BEST way to
provide that function.
I learned from Griffin’s web site that an aluminum radiator can produce as much
as 25% better cooling in the same core size because the tubes can be made a larger
diameter than copper. Aluminum has greater strength and can stand the pressure better
than the copper. Check it out for yourself at http://griffinrad.com/ or call them for info at
800-722-3723.
So, at this point, the size of the continental kit has dictated the maximum
size of the “hoop” for the radiator. It will fit between the headlights and looks like a
spare tire. It is larger than a spare tire (about 26 inches in diameter). “VW people” will
notice the difference, but the average person will not. In fact, I have had people off the
street look at the Bus and not even notice the radiator. Others have asked me what THAT
is… a generator. Only “VW people” look at it and know right away that “something is
different”. I have found an aluminum radiator that will fit inside that boundary and I’ve
found a fan, which will fit on that radiator. The next thing to do is design a frame that
will hold the radiator and figure out the best way to mount them on the Bus. See the file
“Radiator frame” (PDF and Visio) on the CD for details on the frame I designed to
accomplish all of this. I have also attached a series of pictures showing various details of
the unit. And before any of you decide to write, I know the welding on this unit is not the
best, but the guy that did it gave me a great “price” and I knew that it would work OK.
So, I accepted it instead of “looking a gift horse in the mouth” if you know what I mean.
Cutting out the “bottom” parts of the saddle with a jig saw.
Notice the “notches” marked on the triangle. These are the slots
that the clamps will fit through to hold the hoops to the saddle
mount.
All the parts before assembly.
Several shots of it in primer….
And then after I had painted it black…
I found a local machine shop that has the capability to bend pipe in a circle. I
thought about making the frame out of aluminum, but soon discovered that is would
quadruple the cost of the materials and complicate any welding that I need to have done.
Yes, it is much lighter, but that was not as much a consideration as the cost. The shop
formed the two pieces of ¾ “steel pipe into two 31-inch diameter hoops…just like a hulahoop. I went to the local hardware store and bought 1 ¼ “ angle iron to form the “box”
which would contain the radiator and fan and later, the HVAC condenser core if/when I
decide to add AC. I then measured everything and cut out the angle iron and took it and
my drawing (Radiator Frame) to the welding shop. It took a little explaining to get Brett
to understand what I was trying accomplish and how the finished product should look.
Understand that he did not have the pictures that you just saw. He kept it a day or so
while I was out of town on business and just tack welded everything. He did not have it
quite right on that try, so we went round two. This time it was pretty good, so he welded
it all up and away I went.
It was about this time that I had a stroke of good luck. I was looking for
someone to do some repair work and welding on an aluminum rim I had bought for the
Bus. It was a spare for the Vanagon rims I have on the Bus. To make a long story short, I
found Steve at Arrow Thermal Products. Steve runs a local shop only about 6 miles from
my house that specializes in aluminum radiators and welding for the NASCAR racing
industry in Charlotte. Steve was a Godsend. I took my newly built frame and my
aluminum radiator to him and asked him to weld “ears” on the radiator so I could mount
it in the frame. He understood right away what I was trying to accomplish…a very sharp
guy. He kept my parts (frame, fan and radiator) and after another short out of town trip,
he had it done and I do mean done IT. WOW!!! Take a look at what I mean.
Once I had the “ears” on the radiator, I had to get the whole thing mounted in the
frame. Steve did not do that part of what you see in the above picture. I did. It’s hard to
visualize the mount that I had designed by looking at the drawing, so here are some
photos that will clear it up.
The neat thing about this design is that the radiator can be “adjusted” or
positioned at any point (front to back) within the frame by shifting the “double nut
“locking system on the threaded rods. This allowed me to get the back portion of the fan
pretty close to the front of the Bus once I had it mounted. I have the rear of the fan hub
adjusted to within about ¾ “of the front panel of the Bus. Also, adding the HVAC core in
front of the radiator should be very easy. Another good thing is that this is VERY strong.
OK, so now I have the frame, radiator and fan all in one piece. Now I need to get
them mounted to the Bus. It is obvious that my mount goes on the front of the Bus.
However, you should know that I considered putting the radiator in the long rectangular
rear hatch door. In that configuration, I was thinking I would have no obvious indicators
on the Bus that it was not a stock engine. It turns out that the opening was too small. I
could not get a radiator with enough surface area in the hole to assure me that the engine
would never over heat. Another consideration was that a radiator that would fit in that
hole would have to be custom made. Anytime you have something custom made, it
WILL cost more. I was trying to keep cost down, so I did not consider that an option.
One more thing that made me reject this idea is that the radiator would seriously block
access to the engine. As it turned out, the engine was way too long to even allow room
for a radiator in that position. One other possibility is over the rear of the Bus. I mean
above the pop up camper roof. Check out the Road Cow site to get a better idea of what I
mean. http://www.roadcow.com/ Obviously, that works, but I don’t think it will work
with my Bus. From 1974 on, the camper top pivots from the rear and a radiator over the
rear would not allow that to happen. So, I decided that I have to mount this “thing” on
the front. The bumper offered the most obvious mounting point. The top attach point
was a bit more “interesting”. Check out the pictures of the radiator and frame that I came
up with. Also, check out the Word DOC file “Toggle bolts”. This is an excerpt from
McMaster Kerr’s catalog. http://www.mcmaster.com/ I used the “female heavy duty
toggle bolts” for 3/8 inch threaded rod, see next to last entry.
After I had the saddle mount built and installed, I came up with the idea of using
water pipe and flanges to mount the radiator frame to the Bus. It would be a lot less
invasive and probably cost less to do. I have included a rough profile drawing of the
design it is labeled “alternate water pipe radiator mount”. I have included it in Visio and
GIF format so anyone can open the GIF file.
The bottom part of the frame is basically a “saddle” that one of the hoops sits in.
The radius of the saddle matches the 31” diameter of the hoops. You can see slots just
below the curved portion of the saddle and the hose clamps which hold the “rear” hoop of
the radiator frame down in the saddle. Originally, I did that as a temporary attachment so
that I could tilt the frame front and rear if I needed to in order to make it fit correctly.
Turns out, I did not need to adjust it. It also turns out that this makes a very strong
connection, so I left it. It would be a very simple matter to have the rear hoop welded in
place to the saddle.
The following pictures show what the whole thing looks like when it is attached
to the Bus. Notice also, the diamond mesh stone guard with the VW emblem in the first
picture.
Now I want to look at the top attach point that I mentioned earlier. Check out this
photo of one of the attach points. The other side is identical. See below…
As you can see, I had a short piece of pipe welded to the hoop that sits in the
“saddle”, i.e., the rear hoop. You can also see the nuts, washers and lock washers that
“capture” it on the threaded rod. This allows me to adjust the tilt of the whole frame in
reference to the “saddle” which is clamped to the bumper attachment. What is not
evident from this photo is the portion that attaches to the Bus. Look at the threaded rod…
Starting at a point just in front of the Bus, you have a nut. Going toward the Bus there is
a lock washer, a set of spherical washers, a large washer right against the outside wall of
the Bus AND in between the outer wall and the inner wall… a short section of pipe, and
then…Inside….another large washer right next to the INNER wall of the Bus and a “T’
or toggle bolt. DO NOT MISS THIS. There is a short section of pipe is in the area
between to two walls of the Bus. I mean the outside wall that you are looking at in the
photo above and the inside wall of the Bus. It was sized to allow the nuts to just begin to
compress the two walls together and then the pipe will pick up the load between the two
washers (one on the outside of the Bus and one on the inside of the Bus). From that
point, the nuts can be tightened and the rod is VERY firmly captured between the toggle
nut and the outer nut. The spherical washer allows the rod to be tilted up or down and
still maintain a “flat” (level) surface so that the large washer will be parallel to the pipe
and it will allow the rod to go straight through the pipe that is on the rear hoop. When
everything is locked down, this is a VERY strong attachment. You can move the whole
Bus by heaving on the radiator frame. I do not know how it will behave in a crash. I
suspect no worse than the spare tire mounts that people routinely place on the front of
their buses. By the way, I put some RTV in the area between the outer wall and the inner
wall to keep water from intruding into the Bus via that hole.
Copper or plastic…pipes, that is.
Now that I have the radiator firmly mounted on the Bus. I needed to get the
coolant from the radiator on the front of the Bus to the engine which will be in the rear.
The only way to go is UNDER the Bus. After all, that is the way VW did with the
Vanagons, right? I went through a couple of rounds of design with this part. My first
design involved copper pipe, LOTS of copper pipe. Copper is easy to get and fairly easy
to deal with. Sweating copper pipe is not a terribly difficult skill to learn. I figured there
are many plumbers around to turn to for help and instruction. My real concern with
copper is the danger of electrolysis. Check out this web site where two guys put Subaru
engines in Vanagons. There is a pretty extensive discussion about copper pipes and
electrolysis….. http://www.cycoactive.com/Urabus/ Well, it seems this link is now
DEAD,,,, so I went looking again and found this site: http://www.vanaru.com/faq1.htm
Unfortunately, it does not go into the copper electrolysis discussion. But it does give
some pretty cool info on cooling systems in general. It is a detailed and a little
intimidating at first. My impression is that these guys really understand these systems
and could be a good resourse, so I include them. I decided also to leave my earlier
discussion just because it is info you need to make the decision at hand. XXXXXXX The
concept is fairly simple. You have dissimilar metals (copper (pipe) and aluminum (the
engine block) in the presence of an electrolyte (the cooling fluid). That is a battery any
way you look at it. When you complete a path for electrons to flow in a battery, it tries to
equalize the chemical imbalance between the two metals. That’s cool, right? Yea, except
that in this case, it screws up the metal in the process. Electrons move from the engine
head to the copper and “eat” a big hole in it. Read that a BAD THING!!! ☺ ☺ The way
you stop that from happening is to NEVER allow the “circuit to become “completed”.
That means you have to isolate the copper from the frame of the vehicle. My first
thought was, “I can do that.” My second thought was, “NEVER allow the copper to
touch the frame? HUMMM, I’m not sure THAT is worth the risk.” I oscillated back and
forth on that for about two weeks. I even bought all the material. I had convinced myself
I could do it. Truth is, when it got down to it, I chickened out. I just could not bring
myself to risk that “new” engine on a NEVER allow…. So, I backed up and punted. I
looked at the Vanagon cooling system and thought, “That works, Why not do that?”
Those pipes are PLASTIC!! So, I did. I went to the local VW junkyard and acquired a
set of coolant pipes off of a Junker Vanagon. I also got the rear under the seat heater in
the bargain. I then began to work out the details of connecting sections of that “plastic
pipe” together with pieces of flexible radiator hoses and regular radiator hose. By the
time I finished I had six flex hoses, several sections of regular radiator hose, several short
sections of Vanagon pipe, two long sections of Vanagon pipe and LOTS of clamps.
Check out the profile drawings in the drawings folder.
By the way, that Vanagon pipe is NOT just “plastic pipe”. I do not know exactly
what it is, but I do know that it is pretty special stuff. When a radiator system is doing its
job, the coolant is 195 degrees Fahrenheit and at 16 lbs/ square inch of pressure. PVC
WILL NOT do that, so don’t think that will work. It can take the heat OK, but the
pressure will do it in. If you don’t believe me, try it. You will be sorry.
Oh, yes and one other note of interest. Do NOT use the radiator hose “repair kits”
that are available at your local auto supply house to join sections of the radiator hose. I
discovered the hard way that these are intended for TEMPORARY repairs only. The
package says as much, but I’ve been known to be a little stubborn about those things at
times. They work well for a short time…maybe 25 miles, but they collapse after the heat
gets to them. After the third one failed, I decided I needed to do something different. The
picture below shows the aluminum replacements. And you have been warned. They are
made of PCV….DUHHH?? ☺ I should have known, huh? Check out the aluminum
tube next to the FAILED plastic (PVC) one. The aluminum one was made by my friend
Steve at the Arrow Thermal Products (see providers list). He can make these in 1-¼” OD
and 1-½ “OD sizes. You should only need 1 ½ “. By the way these things are about 4”
long. I don’t think you can buy either size anywhere on the commercial market. Except
maybe at BSR (see provider’s list).
I actually had to acquire a second set of Vanagon pipes to get the right “curves”
and pieces I needed to complete the plumbing. The pipes have bends in them when they
are installed in a Vanagon. I tried to heat them and re-form them, but with no success.
So, my design used existing bends to weave its way from front to back. I used some
major straight sections to run between the two “jack points” on the passenger side of the
Bus. Check out the photos that I have included later in this chapter. Also, take a look at
the “Coolant System Profiles” in the drawing folder. There is a guy on Ebay that sells a
SS set of pipes that could be used to make the turn over the top of the wheel well… In
fact, he has a full set of SS pipes from front to rear or just the part that goes over the rear
wheel. So, you could buy either or both. In my system, this would take the place of the
plastic Vanagon lines I have used. You will need to co-ordinate what you are doing with
him to make sure they will work as expected. Since I did not do it this way, I will only be
able to speculate about the fit and if his products will work in the application. Here is a
link to his web site http://community.webtv.net/VanStuff/VanagonWestfalia.
He has all
sorts of good stuff for VW Vanagons that could work on Bay window buses as well.
In order to use the “plastic” pipes that I bought, I cut out the steel sleeve at the
ends of the pipes with at Dremel and then slotted them and re-inserted them into the pipe
after I cut it to length. These are there to absorb the clamping pressure of the hose
clamps. Yes, I do have some clamps on pipes in my Bus that do not have these sleeves in
place. It remains to be seen how well that works. Note: It worked fine for over 10,000
miles at this writing. At about 200 miles time, one of the flex hoses that go through the
front wall of the bus popped off of the Vanagon pipe that I had it clamped to. The other
end was clamped to another flex hose. I got everything cleaned up and re-tightened the
clamps and everything was fine. I figured out that it is a good idea to go back and tighten
all the clamps in the system after about 50 miles or so. It seems that the expansion and
contraction will cause them to become loose and possibly pop off a clamp. After I
corrected mine the first time, I have not had a re-occurrence. I do regularly check the
clamps in the system, but none of them have been discovered to be loose since that first
occurrence. This does not seem to be a problem in places where I cut down the steel
sleeve that was inside the Vanagon pipes and re-inserted them. Apparently, they give
enough resistance against the pipes “crushing” and prevent the problem from happening.
“Maybe” the Germans put them in there for a reason? ☺ PS..I have changed the water
pump on my Bus and while I had it down, I removed all the short sections of Vanagon
pipe and installed three pop rivets in each end of the pipe to give the hose and clamp a
place to grip. This should prevent the hose from “popping off”. This is what I
recommend on new installations as it is easy, cheap and it works…. ☺..
At first the pipes under the Bus were pretty much unprotected. The fact is that
the coolant pipes on Vanagons run unprotected under the vans and I have never heard of
one being broken or damaged. Recently, I put a covering of black “wire loom” product
over the pipes to give them a little more protection against small rocks and debris. I’m
thinking that may be all I need to do. BTW, it did make it look better as well.
Here’s one of the Vanagon pipes with the end cut off and the
steel “sleeve” cut out. Notice the “split” in the pipe. I did all the
cutting with a Dremel tool and high speed grinding wheel…In the
following four photos; you can see the “sleeves” after I re-inserted
them into the pipes.
CHECK OUT THIS SERIES OF PICTURES OF THE PLUMBING that runs
UNDER the Bus... They run from front to rear consecutively.
Shown here is a 1 ½ “90 degree turn joining two “flex”
hoses. I have lashed it to the radiator mount with large “tie-wraps”
and used the red insulation material to protect against rubbing or
abrasion. Use BLACK tie wraps because they are UV resistant.
And check them periodically.
The green wiring is for my fog lamps and for the temperature
sensor for the fan. The RETURN (cooled water returning to the
engine) line is on the left and the DELIVERY (hot water coming
from the engine) line is on the right. (ABOVE) Also, notice the 90
aluminum Elbow. I got that from BSR in Concord NC. I later
filled the holes with expansion insulation foam from Lowe’s
hardware to hold the pipes in place and prevent chaffing that could
rub a hole in them.
This is the inside of the Bus where the plumbing comes
through the front wall and turns to go down through the floor. The
hose on the right (return to engine line) is the NAPA 1 ¼ to 1 ½
reducer. It is 12” long. I needed the reducer hose because the lower
fitting on my radiator is 1 ¼ “. Yours should be 1 ½ “, you could
use a “straight hose”... (Not a reducer hose)... I had to add an
aluminum coupler and a short section of the 609 hose from NAPA
between the two flex hoses in the return line…on the right. You
should be able to use a single long hose for this section and
eliminate some clamps. The delivery line has only one long flex
hose (on the left above and right below).
From that point, they join the flex hoses shown in this photo.
Notice I had to cut away part of the “splash guard” under the Bus
to make room for the coolant lines to pass. Also, notice the white
10AWG power wires attached to the hoses. These emerge behind
the FireBird console panel in front of the passenger…see later
chapters.
These are the same flex hoses in the photo above looking
from the front to the rear. Note the transition to the hard pipes.
These pipes are one piece from just in front of the front axle to just
behind the rear axle. Notice the large tie wraps holding the pipes
to the front axle. Also, notice the red insulation material which I
used to provide an abrasion buffer for the pipes. Use BLACK tie
wraps because they are UV resistant. Also, Thomas and Betts
make a version of these that have very fine teeth and a metal
“TAB’ which seats in those teeth. They cost more, but are worth
it!!
Notice: I have installed the plastic wire “Loom” as protection
from small stones and sticks. PANDUIT made this product. It is
1½ “black loom for organizing equipment wiring. I bought it at
Graybar Electric.
Right here is where the connection is made between the two
pieces of Vanagon pipe that came from different salvaged Buses.
One (darker color) comes from the front of the Bus and extends all
the way to just ahead of the front axle. The lighter color pipes turn
UP and go over the top of the wheel well. They have flex hoses on
the far end of them (at the rear.)
This is from the rear of the Bus looking forward. The
“unions” shown are where the “second set” (dark) of Vanagon
pipes are joined to form the upward turn to get over the rear axle.
These “unions” are made from the “609” tubing that I got from
NAPA.
This is the same area looking up. The flex hoses just to the
top (rear) of the red abrasion shield lead to the rear of the Bus. The
flex pipes shown go right beside the old battery compartment.
Here’s the other end of the flex hoses where the “return line”
turns toward the center and the water pump inlet. Note that it is
forward (LEFT) of the steering pump fluid reservoir. The second
one”feed line” (output of thermostat, bound for TOP radiator) is
stacked on top of the lower one and continues toward the rear a
short way. It is hard to see it in this photo. Check out the next one
and it is easier to see.
Here’s a view of the flex pipes. Notice that the “return” line
is forward (behind from this view) of the power steering reservoir.
The “feed” line is in the foreground and goes back to the
thermostat housing outlet on the engine block (TO THE LEFT).
Note the power steering fluid reservoir right behind the white
Vanagon coolant pipe in the foreground.
Here’s that last section shown more clearly. Note the short
union on the inlet to the water pump. . Look below and slightly
behind (toward the front of the Bus). The hose says “609” on it.
This pipe is the “return” coolant from the radiator. Also notice the
“feed” line leaving the thermostat housing bound for the radiator.
(Top hose in the foreground) The Mass air flow sensor is on the
far left with the screen mesh in it.
If this system has a weakness it is that it has WAY TOO MANY CLAMPS. Each
clamp is a potential point of failure. I recognized this fact even before I installed the
system, but was not sure how else to handle it at the time. It was after I had this system
installed that I meet my friend Steve at the radiator shop. He informed me of a different
way to accomplish the plumbing. I considered a “revised” version of the cooling system.
It would be much simpler and much easier to install. Just like NASCAR!! It would have
two hoses, one delivery to radiator and one for the return. And to boot the hoses screw
into the radiator and have only two short coupling hoses on the engine end. There would
be one coupler for each hose. Also, theses hoses are very flexible and have about a fourinch minimum-bending radius. The NASCAR way is much more expensive (estimates
for all new parts are around $900 and used parts around $550). Using the Vanagon pipes
is much cheaper (around $225). I know that there are those that will opt for the
NASCAR way because they have the money. There are also those of us that are not
made of money and need to do this with as little of it as possible. So, with all things
considered, I have decided to leave well enough alone and NOT convert the plumbing to
the NASCAR way. What I have is working fine and I see no need to change it at this
time. If you would like to try the NASCAR way, knock yourself out. I can give you
some insight to the process if you Email me…. ☺☺
I am not able “charge” the cooling system at this time
because the engine had to be in place before the cooling system
could be ‘closed”.
So, the next order of business is to get the engine mounted in the Bus.
Mating the Engine and Transmission…
KEP comes through again
Before I could even think about installing the new engine, I had to do was get the
old VW engine out. I had done this many times before, so it provided to be a no brainer.
I actually sold the engine on Ebay in completely rebuilt condition for around $500. Not
much for all the work that I had in it, but I was glad to see it go. NOW, I had reached the
point of no return. I had to get this new engine in and running or I would be walking.
I had to get the engine and the transmission coupled to each other before I could
install it into the Bus. To do this, I used the conversion kit that I bought from Kennedy
Engineered Products (KEP). The folks at KEP were great to work with. They helped me
pick out the exact kit that I needed to couple the two together and the correct clutch plate
(stage II) and disc. The kit came with all the bolts needed, a throw-out bearing and a pilot
bearing. It turns out that I did not use the pilot bearing. I did not realize that I needed
the pilot bearing…..I talked to KEP about it several times and they said to leave it alone
and it would be fine. But if you ever separate the engine and transmission again, put it in.
I have driven the Bus over 20,000 miles at this point and have not had a problem. I also
got a high torque starter from KEP. Once I got to the point of trying to crank the engine, I
thought I’d just try the original starter. I found out real fast that I needed the high torque
version. The original starter produced little more than a grunt. Here are some pictures of
the mating process.
Notice the PCM still connected to all the engine sensors and
sitting on top of the engine.
KEP does nice work!!!
You can’t see it here, but the flywheel has been outfitted with
the same bolt pattern as the V6 by KEP. I used the standard
alignment pin to position the clutch disc and then torqued the
pressure plate bolts down to the correct torque setting.
Note the FireBird engine support bolted to the engine. I tried
to install it this way and soon realized it would not fit. I later
replaced it with a custom bar fabricated from the original VW
engine mount bar. See the photos in the next chapter and drawing
labeled “Engine mount” for details.
Notice the HVAC compressor on the lower left of the engine.
I removed the plumbing and bolted a plate with a rubber gasket
across the output “hole”. I also removed the connector and taped it
in a zip lock bag to insure that the clutch would not inadvertently
be engaged. So, the clutch pulley is just another point (pulley) on
which the accessory belt to runs. Much like the power steering
pump described in the next chapter.
Notice again that the PCM with all its associated wiring to
the engine sensors is all still connected to the engine. There are
very few wires that need to be managed between the engine bay
and the rest of the vehicle. That was one strong reason for picking
this engine.
SOOOO, this is going in there? YEP, SURE is!!!
Engine Mount and installing the engine.
FireBird or VW
Originally, I had planned to use the engine mount crosspiece from the FireBird. It
is attached to the engine in some of the previous pictures. It made perfect sense to re-use
it because it was strong enough to support the engine and all I had to do was make a
mounting “ear” on each side that I could bolt up to the Bus. Well, that did not work out
very well. It turns out that the mount was not symmetrical for one thing. I had the motor
under the Bus and started to raise it to get measurements, one side hit the frame and the
other was way too short and out of “line”. So, it was back to the drawing board. By the
way, getting the engine in place was no easy task. The bay window buses prior to 1973
(1968-1972) had a similar engine mount system except that the rear portion of the bus
(cross member) simply un-bolted and was removed when changing the engine out. It is
not so with the 1974 through 1979. Check out the picture of the rear of the Bus in the
previous set and notice the cross beam that makes up the bottom of the frame for the
engine bay door. In order to get the V6 under the Bus, I had to raise the back of the Bus
high enough to allow the V6 to pass under that. With the original engine, I had to raise
the back end to about 19 inches. The V6 is taller. I used two floor jacks and raised the
back of the Bus up and placed engine stands under it. It was pretty high and a little
precarious. I had some “auto ramps that I used to use to change the oil under it as well. I
was able to slide them under the wheels and let the Bus down on them. It was only then
that I felt comfortable crawling under the vehicle. With the FireBird engine mount
attached to the engine, I used two bottle jacks, one on each side of the engine and I began
to inch the whole assembly under the Bus. I had an engine hoist poked inside the back of
the Bus with a chain hooked to the engine. I had to raise the hoist and at the same time
raise the shift rod on the front end of the transmission so that it was on top of the cross
member and the transmission mount forks fit into the proper position. This was not an
easy task. I finally got it in position. Then I set the engine down and used the jacks to
lower the vehicle around it. It was then that I discovered that the mount was not correct.
So, now what do I do? I discussed this with my new found friend; Steve and he told me
that I could actually jack the engine up using the oil pan as a jack point. I just needed to
be sure to place a block of wood between it and the jack. PS…I learned later that this is
not such a good idea because the oil pan is made with much thinner metal than they used
to be and will distort and this may cause leaks…. So, I jacked the engine up and
removed the FireBird mount. That left the engine very unstable. The chain on my hoist
was the only thing that kept the engine from tipping over inside the engine bay. The
frame and wheels of the hoist were under the engine (the engine straddled the frame) and
the hoist arm was above it. I had two ropes on the engine mounts to keep the engine from
tipping, one on each side. I wish I had gotten a picture of that…WHAT a RIG… AND I
still had a horrible time getting the engine in the right place to attach the transmission to
the over-head mounts. In fact, I ended up having to REMOVE the engine from under the
Bus after ALL OF THAT because the mount would not fit correctly. I was not a happy
camper.
I went back to the drawing board and came up with the mount below. I
took the original VW engine mount and flipped it 180 degrees so that it would not hit the
oil pan. I then fabricated a couple of wooden “templates” to try and figure out the angle
they would need to be mounted. I did some marking and cutting on them and then took
the whole thing to Steve at Arrow Thermal Products. See the file “Engine Mount” for the
exact measurements. Also, check out the photos of the finished product. Any welding
shop should be able to make this mount with the drawings provided.
Here’s a view of whole engine mount. Note the “cross piece”
has been cut out. I used a “saws all” and a 12” blade….”ye
haw”!!!!
Driver’s side
Center section
Passenger side. Note that the bar is offset from front to back
about ½ inch. I did this so that the bar had more clearance at the
oil pan. Also, the angle of the plate on which the engine mount sits
can vary a little because the mount piece on the outer end of the
engine mount can “swivel” a little to match up to it.
Driver’s side, different angle
Driver’s side moving toward the passenger side from
previous photo.
Same spot, different angle.
Same spot. Yet another angle. Note the CV joint in the
background and the nodes that I had welded to it to “trigger” the
VSS sensor for the speedometer and cruise control.
Driver’s side mount. Note the gusset for extra strength.
Note the HVAC compressor protruding on the right side. That is
toward the rear of the vehicle.
Power Steering pump and reservoir
Since I have the engine mount in place now, I need to mention the power
steering pump and reservoir. The power steering pump is bolted to the engine and is part
of the “pulley” system for the accessory drive belt. This pump creates the high pressure
hydraulics that provides the “power assistance” for the power steering. The pump has a
reservoir that it “draws” off of and pumps the fluid into the high pressure side of the
steering gear. The fluid is then routed to the correct side of a piston and is used to push
(turn) the wheels in the desired direction. Since I do not HAVE the steering gear from
the FireBird, the fluid has no place to go. I thought about disabling the pump by breaking
the pump vanes inside the pump. I was not sure how removing that “back-pressure”
might affect the engine, so I opted not to do that. I could not remove the pump because
then it would remove part of the pulley system for the accessory belt and that would
change the length of the travel. Then I would have to determine a new belt size and it
might even change the routing of the belt. I figured there had to be an easier way. After
thinking about it a while, I decided to plumb the output of the pump (high pressure side)
right back into the reservoir and leave the low pressure side plumbed into the “intake” of
the pump. Essentially, just running the output of the pump right back into the reservoir
instead of into the steering gear. I was not sure just how “high” the high pressure was
from the pump OR what would happen if I did that, but I decided to give it a try since it
was the simplest thing to do and I nothing to lose. It worked!!! I have never lost any
fluid and the pump works fine and the fluid just goes around in little circles. ☺ ☺ Check
out the picture below. With the cross beam removed, you can see the power steering
reservoir just behind the white coolant pipe. Notice the “high” pressure pipe enters the
lower left and the low pressure pipe come out the lower right of the power steering
reservoir. Also note the new engine mount. All of this is visible in many of the previous
photos of the engine mount.
Cut out the cross beam?
When I got ready to place the engine back under the Bus, I decided that I was
NOT going to do it the same way again. I decided to CUT OUT THE CROSS-BEAM! I
reasoned that they had made these buses for several years and did not have that piece in
place, so why did I need it. Besides, I am going to fix it where I can bolt it back in place,
LATER. For now, I cut it out. I used a portable saws-all with a 12” course blade. It
came right out with no problems. In the photo below, you can see the engine in place
very clearly.
With that piece removed, I could use the engine hoist to roll the engine and the
transmission/engine into place. MUCH easier! I figured out that I was having trouble
getting the transmission mounts to bolt up because I was jacking up on the oil pan and
that would cause the whole thing to pivot(bow) around the transmission mount points and
the front end would drop down. I finally got a small bottle jack and pushed up directly
under the attach points and it slipped right in. So keep that in mind.
Once I got the transmission mounts bolted up and the mount at the front of the
transmission bolted up, the motor was hanging off of the transmission mount points. Not
exactly a desirable situation. It was then that I figured out how I was going to make the
engine mount and made all the measurements to have it fabricated. I did not have a
cross member to support the engine so I made a frame (saddle) out of 4 x 4 s. It was a
“U” shaped contraption that fit under the far ends of the mounts on the engine. It
supported the weight of the engine until I could get the mounting bar fabricated and
installed.
This little rig supported the weight that is now held by the engine mounting bar
and allowed me to leave the engine like that long enough to fabricate an engine mount.
The mount that I ended up with was made from the original VW engine mount. See the
previous section..
With the new mount in place, the 4 x 4 support is no longer needed. The engine is
truly “IN THERE!” At the beginning, I made much to do about the height of the engine
and the distance between the center shaft of the transmission and the top of the engine
compartment. The MAX was 19 inches. I ended up with 18 ½ inches. So, the top of the
alternator is about ½ to ¾ “from the underside of the engine compartment. It is very
close, but it fits.
Exhaust System….
The next item I worked on was the exhaust system. I had removed the complete
exhaust system from the FireBird. I mounted the “Y” pipe to the engine and then towed
the Bus to a local muffler shop that I knew would work with me to build this custom
exhaust system. The “Y” pipe when in the FireBird exited toward the rear of the vehicle
and ran down the right (passenger side). Since the engine is turned around 180 degrees,
the “Y” pipe points to the front of the vehicle and runs down the left (driver’s side) of the
vehicle. My first thought was to put in a “U” pipe and turn it back toward the rear of the
vehicle. I soon discovered that this action created a problem. Where would I put the
muffler? The only place I could think of was at the rear of the engine and the Bus. Just
like the original VW muffler. I just never could get comfortable with that. It just seemed
to me that it would be way too crowded or would be forced down too far causing really
low ground clearance. Then I thought I might extend it further to the front and then
install the “U” pipe and make the exhaust exit on the driver’s side of the vehicle as a
“lake pipe”. That seemed appealing, but it meant that I would have to scrap the original
FireBird exhaust. That would violate my “prime directive” and make it more expensive
than it needed to be. I decided to use the FireBird exhaust and make the two-exhaust
ports exit between the tires on the driver’s side. When I got the Bus to the muffler shop,
the owner agreed with my assessment and set about building the system as you see it in
the following pictures. A1 Exhaust and Radiator in Fort Mill, SC….803-547-1099… and
they only charged me $100 to assemble and mount the exhaust system you see in the
photos that follow. The great part about this is that it was really not expensive since all
that was required by the shop was labor. Note that all of the O2 sensors and the catalytic
converter are included in this system. If any were removed, the system would never go
into “closed loop” and fuel economy would suffer dramatically, not to mention the
quality of the emissions would be “nasty”…and we do want to be GREEN don’t we?
“Closed loop” is the state in which the fuel system is operating at its optimum point. It is
getting all of the feedback from the sensors that it needs for setting the fuel and oxygen to
the best balance to give the minimum pollutants. Anything less than that is not as
efficient and fuel economy will suffer as well as the pollutants will increase in the
exhaust. Here is a series of photos of the exhaust system beginning at the exhaust flange
of the engine and working toward the outlet pipes.
Exhaust system mated to the exhaust manifold.
Here is the collection point(Y) of the exhaust pipes.
Catalytic converter (nearest to you with the holes in the
cover) and Stock FireBird Exhaust muffler (with the two exhaust
pipes running to the left).
Exit of the catalytic converter welded to the inlet of the
muffler.
Catalytic converter mated to the Stock FireBird Exhaust
Stock FireBird Exhaust and hanger.
Stock FireBird Exhaust
Stock FireBird Exhaust
I get this a lot…”WHAT are those?”
think it is?”
OR “Is that what I
OR “What have you done to this thing?”
Catalytic converter
Stock FireBird muffler as viewed from left rear tire position.
MOUNT THE PCM
The mounting position of the PCM was “dictated” by the short length of
the wires attached to it. When I removed the engine from the FireBird, I kept as much of
that wiring intact as possible. I simply laid the PCM and all the wiring on top of the
engine. Once it was in the Bus, I had to figure out how to mount it. I retained the
“plastic” piece from the FireBird that it was mounted in and made a bracket to mount it in
the engine compartment and then mounted the plastic piece to that. Then I slipped the
PCM into it. Of course, I still needed to get all the wires connected. Since I did not
disconnect any of the wiring from the engine itself, all I needed to re-connect was any
wiring that “left the engine bay area” when it was in the FireBird. These were primarily
engine instrumentation, cruise control wiring and connections to the BCM. The only
connections you really need are the ones to the BCM and the fuel pump relay. All of the
instrumentation connections were there only because I utilized the FireBird
instrumentation console. It is very nice to have and if I had it to do over again, I would
definitely include it.
This photo shows the battery in its new position on
the driver’s side of the vehicle and the PCM mounted
nearby. Note also the ¾ “conduit to the right of the
PCM. That is my first try at the throttle linkage. It did
not work well and was replaced by a newer better
design.
MOUNT THE BATTERY
Talking about all this power reminds me that I needed to place the battery
and hook up the power distribution blocks.
I decided to mount the battery on the left (driver’s side) in the rear because
the right side of the engine bay is so crowded with plumbing. I figured the plumbing
would be hard to “move” so I could get the battery in and out or if I needed to jump-start
the vehicle. I retained the battery cables from the FireBird for this purpose. The positive
“side connection” to the battery breaks out into three leads. One goes to the alternator.
One goes to the starter and one goes to the feed to the DC distribution blocks, EC1 and
EC2. My Bus is a “deluxe” model and therefore had a place designated for an “extra”
battery, which was supposed to feed the DC powered cooler. That designated position is
on the left side in the engine bay and that is where I put my battery. From that position,
all of the leads that were attached to the FireBird reached perfectly. I simply connected
them.
Fuel System….
The next thing I worked on was the fuel supply system. It is amazing how similar
the two fuel injection systems are. Both have a fuel loop that feeds the fuel injectors and
a pressure regular that bleeds excess fuel back into the tank. That is, the fuel tank has an
outlet port and an inlet port. The fuel pump picks up the fuel and pumps it into a fuel rail.
The fuel injectors are fed by the fuel rail. The injectors are turned on by the PCM
(computer). The excess fuel is bled off to the return line into the fuel tank via pressure
regulator. If you are installing this engine in VW that is NOT fuel injected, you are going
to need to change the fuel tank because it will have only the outlet pipe. You must have a
fuel tank that has both the outlet pipe and the inlet pipe for this “fuel loop” concept to
operate properly. On the FireBird, the fuel pump is inside the gas tank. On the VW, it is
mounted to the frame on the left side (driver’s side)…assuming you have a fuel injected
VW. If not, you are going to need to get a fuel pump designed for fuel injection. A fuel
pump for carbs will only push about 3-4 pounds of pressure because all it has to do is
raise the fuel up to the “float bowl” on the carb(s). The pressure of the FireBird requires
48 to 50 pounds of pressure and the VW requires 38 pounds. I retained the VW fuel
pump and plumbed out the loop to the fuel loop of the V6. Since the fuel pump on the
driver’s side feed the VW loop and the return line to the tank is on the passenger’s side, I
had to extend to the feed line to the passenger side. I ran that fuel line in the “channel”
that is above the transmission. On my first fuel system, I used good cloth high pressure
7mm fuel line and wrapped it in plastic wire loom material (that I got off of the FireBird)
and electrical tape to protect it against chaffing. NOTE: I later discovered that the
7mm OEM VW fuel line is not really a good idea. It was probably OK with 36 pounds of
pressure, but it is not with 50 PSI. I was very lucky because I actually had TWO separate
events of leaks in the fuel line and did not burn the bus up. I guess I’m a bit of a slow
learner, but it took twice for me to get the message. I replaced the fuel line with an
extreme heavy duty fuel line that I got at NAPA which was designed for 80PSI…it was
also $6 a foot…ouch!! Still, that is a lot cheaper than replacing the Bus. Paul Pearce
who did the transmission upgrades recommends that you use Continental NBR VW TL
52255E, 7*3. Also, the feed (supply) side of the FireBird loop is 5/16 “and the supply
(and return) line of the VW is 7mm. I installed a reducer made of a couple of brass
fittings that I got at Lowe’s Hardware. Here are the descriptions and part number of the
two pieces. Hex nipple 3/8 PN A-783(PB122) and Flare to Female 3/8 to 3/8 PN A176(PB46). Notice in the photo that I used Teflon tape on the joint of the two brass
pieces
Notice the cloth fuel line on the left and the PVC tubing from
the fuel rail on the right. I then wrapped this in aluminum
reflectorized tape. PS…the cloth fuel line has been upgraded after
this photo. I did develop a fuel leak (TWICE) because that fuel
line failed. Use what Paul recommends Continental NBR VW TL
52255E, 7*3
See photo below.
On the FireBird, these nylon lines had quick disconnect fittings. One end
connected to the “fuel rail” and the other end connected to the steel fuel lines that ran
from the engine bay to the fuel tank. The original shape of the lines was a “drip loop”. I
used one end of the lines to route the lines out of the fuel rail (connected to the rail via the
quick disconnects) and toward the front of the vehicle and the open ends of the fuel lines
from the Bus. I coupled the other end of these to the braided fuel lines from the Bus via
steel in-line splices and the reducer assembly shown above and clamps. These are
wrapped in an aluminized reflective tape to reduce any heat affects of the manifold,
which is only 5-6 inches away. I was not too concerned with this as the lines were not any
further from the exhaust in the FireBird. A third nylon line that followed the route of the
fuel lines is the EVAP line to the gas tank. This line is used by the PCM (via a vacuum
relay and a pressure sensor) to draw a vacuum on the fuel tank and measure that vacuum
to see if there is a vacuum leak in the fuel tank. It is also used to route (suck) the vapors
from the gas tank into the crankcase to be burned. This system is what causes the “MIL”
light (via the PCM and DTCs) when the gas cap is not secured correctly. One of my
goals in this process is to end up with NO DTCs when the system is in normal operation.
Since I do not have this EVAP system and I have actually PLUGGED that EVAP line, I
had to “defeat” the system so that the PCM will not give DTCs associated with the EVAP
system. I did this by using a voltage divider and connecting the sensor leads on the PCM
to the right points of the voltage divider.
EVAP vacuum line runs from the center of this photo to the lower
right corner.
Fuel lines wrapped in “reflectorized” aluminum tape to
reflect heat. Note how I have the whole bundle “lifted and
supported” on several tie wraps. There is probably a better way to
do this, but it has been working for me for over 6 years.
That about covers the plumbing for the fuel system. There are a couple of things
that you will need to get the fuel moving through the lines. Obviously, one of these is the
fuel pump. The fuel pump should be running whenever the ignition switch is in the
“RUN” position. That was accomplished in the “old VW system” via the “double relay”.
Since you now have a PCM (program control module) and a BCM (body control module)
that used to be in the FireBird, it is not that simple. Simply wiring the fuel pump hot lead
through a control relay will not work. The BCM receives a resistive signal from the
ignition key. When the key is inserted in the ignition switch, the BCM “sees” the
resistive “pellet”(one of 15 different resistive values) in the key and IF it is correct
(according to the BCM programming) a signal (I’ve been told this is a proportional
square wave signal, NOT a DC control signal) is sent to the PCM. WHEN the PCM sees
that signal from the BCM, it sends a signal (DC voltage) to the fuel pump relay and turns
it on….AND it will then fire the fuel injectors. Without the square wave signal, the
injectors will not work and thus the engine will not run…even if the fuel pump is running
because if the signal is not received, the cranking system will not work and the PCM will
not activate the fuel injectors. This system prevents the engine from starting unless the
correct key is inserted in the ignition switch. In my Bus, I installed the BCM on the back
side of the console that sits in front of the passenger and then wired the ignition key to the
key switch which I removed from the FireBird. It is mounted on the front edge of the
console that I built between the front seats. See photos…. Most people are not going to
want to install the FireBird instrument panel as I have done. So, if you do not want the
FireBird instrument panel, refer to the WIRING section and the SIMPLE version of the
wiring.
For now, let’s move on to the throttle system.
Throttle System
The throttle system is an extension of the fuel system in that it does no
good to get the engine running if you can’t control the rate of the fuel supply. The
“drivability’ of the vehicle will depend a lot on the throttle system. If it is not smooth and
even, the vehicle will not be much fun to drive. I wanted to use as much of the existing
system as possible. So, the pedal and the cable IS in fact all original right up to the
firewall of the engine compartment. It seemed to me that it would be best to route the
linkage to the port side (left) and then connect it to the throttle. I pulled the original
throttle cable to the left side and secured it to the frame with a clamp. This left the cable
in the lower port (left) side of the engine bay. See fourth photo down and notice the VW
throttle cable clamped to the bottom of the Bus. I needed to transition the cable from this
lower position to the top of the engine bay and across the top of the engine at about a 45
degree angle to connect to the throttle valve (MAF…mass air flow sensor). Look at the
profile drawing of the system that I designed. See file “Throttle Assbly” . The new
system uses a 17 inch piece of 1 ¼ conduit and two pulleys. The throttle cable of the Bus
is spliced to one end of a cable and the cable is then routed over the pulleys (one at the
bottom and one at the top). The cable is then connected to the original FireBird throttle
cable via a screen door tensioning adjuster. Once it is set to length, I used “Loc-tight” to
keep it in that position. Please note that the cable changes orientation from top to bottom.
By that I mean if you orient a point on the conduit to straight ahead (0 degrees), the cable
enters the bottom of the conduit at about 345 degrees. The cable exits at the top in about
a 60 degree orientation. That places it in line with the FireBird throttle cable, which
crosses the top of the engine at a 120 degree angle. Check out the attached drawing and
it will become very clear. This system is very nice. It is simple and very smooth.
Smooth translates to very nice, smooth action on the gas pedal and makes it very
“drivable”. Compare the drawing to the pictures below.
The clamp shown above is a standard plumbing part
available at Lowe’s Hardware. I used a piece of copper
strapping on the side opposite the factory clamp. This stuff
comes in a roll and can be had at Lowe’s plumbing
department.
This shows the VW throttle cable secured to the frame of
the VW (left, driver’s side) (get your “bearings” from the fuel
pump…the orange wire). The VW cable is clamped to the new
throttle cable that goes up through the center of the “throttle
pipe”.
Here’s another view of that same connection and the new
throttle cable going over the pulley and up through the throttle
pipe.
Here’s the other end. Notice that the cable comes across
the pulley at a different angle than it entered. The cable at the
bottom was coming from the front, left side of the vehicle. Now
it emerges and is going toward the center of the vehicle. This
transition works great and the throttle action is very smooth.
Drive-ability is GREAT!!!
Here’s a little closer look at it. Notice the plumbing pipe
clamp and how it is screwed to the firewall. The other end of
the pipe also has one of these clamps and is secured to the
frame of the Bus on that end. Be aware of the vertical height
of the pipe and the cable so that they do not get in the way of
the engine bay lid when you put it back on.
This shows the “screen door tensioner” installed. You
know the piece on the old screen door is used to pull the far end
(away from the hinges) up so that the door will not drag. One
end is attached to the cable coming from the “gas pedal” (on
the left) and the other end it attached to the cable from the V6
MAF sensor and its throttle valve. (On the right) This lets me
adjust the angle that the Throttle pedal sits in the Bus.
This shows the other end that is attached to the V6
throttle cable and its throttle valve. It is very easy to take the
slack out of the throttle “line” by twisting the screen door
tensioner. Once I had it adjusted, I put a little “LocTight” on
both the screws to keep it where I set it. The system works
GREAT!!
Notice the loop of black heater hose. That is the line that
would be fed to the heater core. Right now, I have this loop in
place. It takes the coolant from the outlet to the inlet of the
heater loop. Later I will re-plumb these lines to feed the under
seat heater and the heater (old FireBird heater core) that will
be located under the center of the Bus. (Where the old
Espacher E-6 gasoline heater was located)
Charging the cooling System..
Up to this point, I have the radiator mounted with the fan in place and a
temperature controlled switch to activate the fan; plumbing from the radiator all the way
to the connections on the engine; The engine is mated to the transmission, with the new
flywheel, clutch plate and pressure plate are in place; The power steering pump system
has been dealt with; the exhaust system has been connected to the engine; the battery has
been mounted in its new position on the driver’s side of the vehicle; The PCM has been
mounted on the left rear near the battery; the BCM, fuse panel, instrument panel and the
DC distribution system is in place ( But none of that is hooked up yet; the fuel system has
been plumbed and lastly the throttle system has been installed and connected. The next
order of business is to close up and charge the cooling system. Before you do that, I
highly recommend that you have a working water temperature gauge in place. Mine is
part of the FireBird instrument panel and is already installed. If you elect to use the
simplified wiring system with the BCM/ignition/relay panel, you will not have one unless
you install it now. Without it, you will have no way of knowing if your “new” engine is
overheating or not. So, do it now and you will be much better off. In the process of
deciding on how to create a cooling system, I had been doing a lot of reading on the “net”
about conversions and cooling systems. Almost all of them mentioned caution about air
bubbles in the cooling system. The danger seemed to be air gathering up around the
thermostat housing and not allowing it to heat up and open allowing coolant to flow to
the radiator. If that were to happen, it could easily “fry” the new engine. The last thing I
wanted was to ruin the engine before I got a chance to see how it drives. So, I decided to
remove the thermostat temporarily for the first “running” of the engine. If it’s not in
there, blocking the coolant, there will be no problem, right? Yes, I know that I must put it
back in because the PCM (computer) will not like it if the engine does not get up to a
certain temperature. For now, I figured too cool was way better than too hot.
I looked at the “profile” of the cooling system and took a hint from the VW
maintenance manual and decided to jack up the front of the Bus before I added any
coolant. VW requires that you jack the front end up 19 inches higher than the rear. If
you look at the profile you will realize that this will cause the coolant to run to the lowest
point and then fill up. The profile drawing I have provided shows that the top of the
radiator was 42 inches off the ground and the thermostat was 32 inches off the ground
while I was filling the system. Yet I was still concerned that all of the air in the system
would not get past the “rise” just behind the rear wheel. I had already checked the pipes
before I installed them (taped up one end and filled it up with about ½ gal of fluid) and
each would hold ½ a gallon. So, I knew I had an extra gallon of coolant in the system.
That was useful in making sure I have the right ratio of water to coolant. At this point, I
connected the radiator hoses to the installed engine and added about two gallons coolant.
Once I had two gallons of coolant in, I added water until it was full. I left the cap off so I
could keep a close eye on the coolant. By the way, I am using the OEM recommended
DexCool (the orange stuff). One guy I talked to tried to convince me not to use it. I
declined because I figure that the manufacturer knew the right stuff to use. Besides, I did
not want to take the chance that some of it would be trapped in the engine and I’d end up
with a mixture of the green and the orange. I figure that would not be good. Anyway, at
this point, I used the Stant cooling system pump to pump the system up to 16 pounds.
This is the operating pressure of the cooling system. Using the Stant pump I can reach
the operating pressure without the need to get the engine hot to create the pressure. Once
it was pumped up, I opened the bleed valve on the neck of the thermostat housing and
bled out the air in the system. I had to pump up the system a couple of times to get all the
air out, but I knew I had it all out. This way, I was pretty sure there was no air trapped
behind the thermostat. And that is stress relieving. Of Course, you should always go
back through the bleeding process once the engine is running and hot because there could
be air trapped in the engine block until the water starts to circulate as the engine runs and
the water pump does its thing.
This should complete all the installation work with
the exception of the wiring. So I guess you could say we
saved the best for last. So, here goes….
Wiring HELL?? Or engineers
HEAVEN..
There are basically two ways you can go about getting the wiring done. One is
the simple way because it involves only the most essential elements to make the engine
run and the other is much more complex because it includes more “stuff” that you do not
absolutely need. I have included discussions about both below. If you just want the
engine to run, you need only be concerned with the “simple version of the wiring”. If
you want to include the FireBird instrument panel instead of using your own VDO
gauges, then you will need to go to the more complex version.
SIMPLE VERSION OF THE
WIRING
I recognize that not everyone will want a full FireBird instrument panel in front of
the passenger seat of their Bus. If you DO NOT…this section is for you. Everyone
will(should) want things like tachometer, volt meter, oil pressure and water temperature
instruments to keep tabs on how you new engine is doing. I have all the above and
personally, would recommend that you do as well. All of mine are in the FireBird
instrument panel, BUT, VDO makes some very nice dashboard displays that you can
mount their instruments in. I will not include any wiring drawings for their products here
as that is “outside the scope of this work”. However, I will answer any questions you
may have to best of my ability…no promises.. ☺
I actually have a center console box
in which I had several instruments mounted before I installed the V6. It will hold up to
SIX VDO instruments. I made it out of 3/8 inch birch plywood and as you can see from
the photo, it looks pretty good…if I do say so myself. It gives me a place to mount things
like cell phone, 2 meter hand held amateur radio, cup holder, VDO meters, wire and cable
connections to the BCM and cruise control stick, clutch pedal switch, switches and
control relays for fog light and an accessory horn.. All of which are up front in my Bus.
ALSO this gives me added “glove box” space. I have included a drawing with
dimensions on it if you are interested in building your own. It is page 4 of the PDF
labeled “VW” in the drawings section.
So, if you are not interested in the FireBird console, I would wager that you ARE
interested in what is the BARE MINIMUM wiring that I will have to do the make this
thing work. I have mentioned earlier that one reason I picked the GM 3800 V6 is that
almost all of the sensors (and therefore the wiring) remains ON the engine. That meant
when I pulled the engine…MOST of the wiring remained intact. The BCM (body control
module) and the PCM (primary control module) are mounted elsewhere on the body and I
think the O2 sensor and the antiknock sensor are mounted elsewhere. There are very few
wires that MUST be connected to them that did not stay with the engine. That being said,
the only WIRING you should have to do involves the BCM and the PCM and a few
“interfaces” with the BUS… like fuel pump, Ignition switch, etc. . Knowing all of this
got me to thinking, “WHAT is the SIMPLEST WAY to make the engine run…the very
least wiring. I came up with the idea of building a “control panel” which would be
the central connection point for things that need to connect to the BCM and the PCM that
do not already go there. I wanted to keep it as small as possible and planned to mount it
on the firewall in the engine compartment. I figured that would make the wires even
shorter. Refer to the PDF labeled “VW” for a wiring drawing of the SIMPLE version. It
is page 3 of that document.
On the wiring drawing, I have numbered every wire. I came up with a total of
45…That is really not that bad, so don’t wig out on me. Several wires actually have two
numbers in the drawing…. Relax…breath slowly and repeat after me… “I CAN do this.
I can DO this. I can do THIS… “ I am going to give you details for every single wire…
by number…. So you will KNOW where every single wire goes and what it does. Are
you ready? Here we go.
The first thing you need to do is acquire the parts. HERE is a list of what you will
need:
1 piece of ¾” plywood 11 by 11. You will mount all the parts on this.
3 relays…. TWO each…PN.275-226 is 30 amp relay and ONE each… PN. 2750001 is a 40 amp relay. These are from Radio Shack. One is for the Fuel pump. One is
for the ignition control and one for the Starter control (starter relay really needs to be the
40 amp relay.
Barrier strips. These can be had from Radio Shack or from Action Electronics. I
have included several PDFs in the drawings folder which I got from the Action
Electronics web site : http://www.action-electronics.com/terminalblocks.htm You can
choose which format you want to use. If you use the double sided strips, you will need
some compression connectors. I prefer the “ring” style because they will not come off
until you remove the screw all the way…..
1 each
In-line fuse holder with 30 amp fuse inside
A hand full of crimp connectors, some in-line splices (crimp type) and some wire.
Preferably, your wire will be several different colors. 18 AWG will work fine.
Some electric tape and/or some shrink tubing from Radio Shack.
1 BCM….You should have acquired this when you got the engine. The PCM
should still be “attached” to the engine…
1 ignition key…It should be “programmed to” the BCM. Not to fear, if it is not, I
will tell you how to do that. Also, the instructions are in the shop manuals you bought.
Remember those?
Now that you have all the parts, you need to build the board. You begin this
process by cutting out the board and placing the various parts on the board itself.
Looking at the drawing of the control panel, do that.
Mount the BCM, barrier strips and relays to the panel in the positions shown.
Exact placement is not critical, so do not worry about that. Mount the BCM module
where it goes. I used plumbers copper pipe strap to accomplish that. Mount the barrier
strip; starter relay, fuel relay and the ignition relay AND label them so that they are easy
to recognize.
NOW… Let’s walk through the wires one at a time. If I were doing this, I would
connect each of the wires as you go through this list. That way you know exactly what
you are connecting and WHY it needs to be there…
I have included simplified drawings for the fuel circuit and the start circuit. All
the ignition circuit does is provide a “switched _12 VDC” by using the “RUN” position
of the VW ignition switch to provide +12VDC to the coil of the ignition relay. That feeds
+12VDC to the PCM; ICM; MAF, O2 sensors, fuel injectors; and the control relay for the
cooling fan.
1) This wire is the power FEED to the cooling fan. It should be a 10 AWG
(American wire gauge) wire since it will be fused at 30 amps and will be
providing current to the cooling fan on the front of the Bus. The IN-LINE fuse
holder with 30 amp fuse inside will connect here. THIS BARRIER STRIP
SHOULD BE SIZED TO HOLD 10 AWG COMPRESSION LUGS. The first six
lugs probably should be this size and the leads 9-13 should as well.
2) This wire is the voltage SOURCE for the whole control panel. One end of it is
connected to the battery terminal (the main lug of the starter). It should be 10
AWG as well. If you are very “safety conscience” you could put another in-line
fuse on this since it is actually connected directly to the battery. If you look
closely, you will notice that I have drawn arrows indicating that this wire is a
SOURCE and is providing power to several other wires via the barrier strip
connections.
3) This wire provides the main power to the PCM. It connects to an ORANGE wire
that is connected to the PCM on connector #1 pin 20. (That is written 20-C1)…
SEE PAGE 6-1862 VOLUME 3….shows connectors on the PCM Page 6-743
Volume 3. PCM plug pin outs on Page 6-767 Volume 3
4) This lead is the “output voltage” of the START relay which feeds the solenoid on
the starter of the Bus. When the start relay gets “pulled” (closed) by the
activation of the ignition key of the vehicle (lead 5, below), this voltage in turn
activates the solenoid and causes the starter to crank the engine.
5) This lead is the voltage that comes from the ignition key circuit of the Bus
referred to above in item 4. It activates the starter relay when the key is turned to
START position….. (I actually have mine wired to a big RED button on the dash
which I use to start the Bus. The start position of the VW ignition switch is bad
about being intermittent, so I by-passed it)…..AND (and only when) the BCM
gives that relay a ground (C11-C3, lead # 25) because it has recognized the
presence of the ignition key resistor pellet. That pellet is in the FIREBIRD key
that you should have gotten when you acquired the FireBird and the BCM. They
must be “matched” by programming. A new BCM will automatically program
itself to the key that is in place when it is first powered up. This is a one-time
deal for the life of the unit. If you do not have a proper key, the GM dealership
has a tool that will present each of the 15 possible key resistances to the BCM and
tell you when you have the correct one. Also, the correct key can be discovered if
you know the VIN # of the vehicle that the BCM came out of. Obviously, it is
best if you acquire the BCM with a known matching key…
6) This lead is the FEED TO THE FUEL PUMP. It is supplied by the “FUEL” relay
when the fuel relay is activated. The fuel relay is activated by the PCM if and
only if it has received a signal (lead 8) from the BCM that the pellet key is in
place (leads 20 and 21). This signal originates FROM the BCM at lead 26 (D8C3) and is wired to the PCM via lead and goes to the PCM via lead 8. In response
to that signal, the PCM sends the “fuel pump control” back on lead 7….which
activates the fuel relay. Fuel is ENABLED and if cranking is happening…you are
on the way to ignition.
7) Lead 7 is the Fuel Pump control signal that comes from the PCM (3-C2) which
applies 12 VDC to the fuel relay and activates fuel pressure. Note that the engine
will still not start unless the PCM turns on the Fuel injectors in the right sequence
as determined by the ICM and the crankshaft position.
8) This lead is the lead going from the BCM to the PCM which tells it that the pellet
key is in place and it is OK to turn the fuel on…BCM D8-C3 (lead 26) to PCM
70-C1 (Dk-Blue wire) (lead 8)
9) Lead 9 is the first of several “switched B+” or “switched HOT leads”. These (9,
10, 11, 12) are used to turn on various things WHEN the Ignition key is the RUN
position. Lead 9 goes to the PCM 19-C1 (pink wire) which applies power to it.
10) Lead 10 is the switched voltage FEED to the ICM (ignition control module)
which powers up the ICM when the ignition key is turned to RUN. Signals from
the ICM control the firing of the plugs and signal the PCM WHEN to turn on
WHICH fuel injector; the fuel injectors (the fuel injectors must have 12VDC on
one side so that when the PCM puts a ground on an injector it will open and let
fuel flow into that cylinder. The length of time each injector is open is controlled
by the interaction of the ICM and the PCM. The ICM module feeds timing
information to the PCM which it uses in conjunction with air volume information
from the MAF (Mass air flow sensor) to determine how long to leave the injectors
open…so injectors are under a controlled pressure(meaning a certain amount of
fuel will be released in a certain time frame)the MAF sensor tells the PCM how
much air is coming into the engine and then it takes the signal from the ICM to
determine HOW LONG to turn each injector on and WHEN to turn it on based on
timing from the ICM…..this puts the fuel in the cylinder at the right volume and
the right time so that when the ICM fires the plug…BOOOM…and we have a
running engine. Engine sensors; MAF (mass airflow sensor) and the O2 sensors
all feed information to the PCM which it uses to “refine” the fuel/air mixture
based on current “happenings”.
11) Lead 11 is switched voltage feed TO the MAF sensor and the O2 sensors.
12) Lead 12 is switched voltage feed TO the cooling fans…See the Scott fan
connections which is the last page of the VW.pdf in the drawings section. This
wire connects to the yellow lead on the relay. ( +12 vdc switched TO the fan…
turns it on)
13) Lead 13 is switched B+(+12 VDC), but is not currently feeding anything.
14) Lead 14 is Ground to the PCM from the OBDII plug. It is there to make sure all
the ground potentials on the vehicle remain the same….and the PCM ground
reference is established here because external devices will plug in here.???
Blk/white wire goes to PCM C1-60.
15) Lead 15 purple wire goes to the PCM C1-59. This is Class 2 Data which comes
from the PCM to the OBDII connecter.
16) Lead 16 tan wire goes to the PCM C1-15…it carries serial data from the PCM to
the OBDII connector.
17) Lead 17 is +12 VDC coming from the ignition key of the VW and is fed to the
“high side” of the IGN relay. Ground is already tied down, so when this voltage
is applied the relay pulls and provides “switched B+”( -12 VDC) to several
places.
18) Lead 18 comes from the PCM C2-5 on Brown/white wire and feeds the “MIL”
light. See page 6-743 of shop manuals for details on how this works.
19) Lead 19 feeds the security light in the console. This lead comes on briefly when
12VDC is applied and then goes off. IF/WHEN BCM remote key functions are
activated, this will indicate when system is in secure park mode by flashing.
Equal to flashing light on the dash that says, “Don’t mess with me!!”
20) Lead 20 and 21 are both sides of the resistive pellet key. This feeds directly into
the BCM on leads 29 and 30. If the key is in place the BCM will give a ground to
the start relay via lead 25 and cause the starter solenoid to pull in and engage the
starter motor to the flywheel to “crank” the engine.
21) See lead 20.
22) Lead 22 provides a good chassis ground to the BCM via leads 31 and 32.
23) Lead 23 and 24 are connected to the 12VDC source and provide power to the
BCM at all times. #24 needs to be “interruptible” so that voltage can be removed
at appropriate times to allow programming the BCM to a new resistive pellet key
if that becomes necessary. I did this by using a pair of crimp style (Thomas &
Betts) connectors which plug into each other to allow you to pull them apart and
open the voltage circuit as needed.
24) See # 23.
25) Lead 25 provides a ground from the BCM to the start relay when the pellet key is
verified by the BCM. If the pellet key is not in place and verified, the start relay
will not pull and the engine will not even turn over.
26) Lead 26 is a signal from the BCM to the PCM that enables the PCM to “trigger”
the fuel injectors. If this signal is not present, the PCM will momentarily enable
the injectors and then stop. Even if the starter is “hot-wired” the engine will not
run for very long because the PCM will not enable the injectors to deliver fuel.
27) Lead 27 is a “switched voltage” input to the BCM. This is in addition to the “all
the time hot lead supplied at lead 23 and 24.
28) Lead 28 is the feed from the BCM to the security LED on the dash. If you are not
using this lead, do not worry about it. I actually hooked it up so that I could see
the BCM “thinks all is well”. Also, I may later activate the key fob and that LED
will play a role in that function.
29) Lead 29 and 30 are the resistive pellet key input to the BCM. See leads 21/22.
30) See lead 29.
31) Ground to BCM. Note that this should also be tied to the chassis of the vehicle.
32) Ground to BCM. Note that this should also be tied to the chassis of the vehicle.
In fact, anyplace you have a GROUND should also be tied to the chassis of the
vehicle. I have heard that is one of the “gotcha’s” associated with some of the Subaru
conversions that people have done. If all the ground points are not actually tied to the
frame, it makes the control system act really weird. That agrees with something one of
my mentors in the electronics field told me early on….” If a piece of equipment (circuit)
is acting REALLY WEIRD….look at either the power source or the ground!! “ Keeping
that little “jewel” in the back of my head has gotten me out of some really tough
situations. A word to the wise….:-)
DC distribution,EC1,EC2,Instrument
Instrument/Fuse panel and BCM
More complex version of wiring
The remainder of this chapter is only for those that wish to include the Firebird
instrument panel and the DC distribution panels of the FireBird. I included them because
I wanted a higher current distribution capability that the FireBird DC distribution ( EC1
and EC 2)offered me and the I also wanted the tach, voltage meter, water temp gauge,
check engine light, oil pressure gauge that the FireBird instrument panel offered me.
NONE of that is essential to make the engine run. Once I get the VSS (vehicle speed
sensor mounted and hooked up, I can activate the speedometer in the panel as well. Also
the VSS provides the signal needed to regulate the cruise control.
Yea, RIGHT!!! All you gotta do is…Obviously, this is complex wiring. BUT,
don’t let it intimidate you. My Dad taught me something early in life that has served me
well in many situations. “The only way to eat an elephant is one bite at a time.” That
applies in this case. You just need to isolate each wire one at a time, get it connected and
move on to the next one. Another thing that I did was take a picture of the fuse blocks
and then pull all of the fuses. The pictures would help me know at a glance which fuses
needed to be in place when I finished and where they go. Once all the wiring is
connected, you can insert the fuses one at a time starting with the large amperage fuses
and work your way down to the smaller ones. That way if you have an error/short, you
will blow a fuse as soon as you install it and you will know exactly where to look for the
cause. This worked well for me. I got all my fuses in and everything powered up just like
it was supposed to do. Take a look at the sketch I made of the DC fuses and what they
feed on page 4 of the VW pdf file. Don’t take everything on that drawing literal because
it was not really intended for publication and may not be totally accurate. The numbers
on the page like “8-314” at the top are page numbers in the FireBird shop manual. Those
pages have information that relates to the particular fuse or hook up. The indicated fuses
in EC1, EC2 and the instrument fuse panel are actually plugged in and hot in my Bus.
When I began, all of the fuses were pulled. When the wiring was “complete”, I
systematically plugged in each of the fuses. If it did not “blow”, I assumed the wiring
was not shorted or otherwise overloaded and all was good. In my case, I got them all
plugged in without a hitch.
This is the part that terrifies most people. Since I worked as an electronics
technician for a number of years, I was actually looking forward to the challenge. In fact,
I decided to include parts of the FireBird that are not needed to get the engine to operate
in the VW. The “console” described below serves two purposes. One was to raise the
“floor level” of the passenger floorboard up 4 inches so that my 5’ 2” wife could sit in the
seat and put her feet on the floor comfortably. The other purpose was to give me a place
to mount the FireBird console, the BCM, the OBDII connector and the relays and by-pass
switch for the cooling fan. Once I had the console mounted, I began connect the wiring
according to the “cut sheet” at the front and then at the rear. See the files “Cable 01 back
to front” and “Cable 02 back to center and then cable 03 center to front”. I’m afraid I’m
a gadget freak and I just could not pass up the possibility of having remote key access,
electric windows and locks, secure key cranking (using the secure pellet key from the
FireBird) and all the lights, Speedo and the tach from the FireBird. In addition to that, I
wanted to retain the DC distribution system (EC1 and EC2) from the FireBird. I decided
to do that because of the increase in the DC output of the new system. The fact is that the
VW alternator only had 55-amp capacity and the FireBird alternator has 105 amps
capacity. I just couldn’t stand the idea of not having access to that much POWER…
SOO, I have EC1, EC2 AND the Instrument Panel Fuse panel from the FireBird installed.
Many of the fuses in these panels are needed in the new vehicle, so this was not entirely
unnecessary. In fact, without these pieces, I would have had to create a DC distribution
and fusing system to meet the needs of the Bus. You can see from the pictures that I built
a platform that fits in the floorboard of the passenger side right in front of the front seat. I
then built a vertical panel that mounts to that new floor board. I mounted the instrument
panel in the vertical panel. I mounted the BCM and the OBDII connector and the
“instrument panel” fuse block from the Firebird to the back side of that vertical panel. I
figured that the fuse panel would give me a place to distribute/fuse some of the additional
power that I now have available. The only part of this that is actually required is the
BCM. In order for the ignition to work via the PCM, the pellet key and the BCM must be
hooked up correctly so that the BCM can send a signal to the PCM that tells it to turn on
the fuel pump via a relay. At one time, I thought I could by pass that and just put in a
relay, but I found out that the PCM has to see that signal before it will turn on the fuel
injectors. It is a pretty effective theft deterrent system, so I am actually glad that I have it.
The signal is NOT just a DC voltage. It is actually a square wave of a certain ratio, so
just feeding the PCM a DC voltage will not work.
I created what I call a cut sheet. Take a look at mine and you will see what I
mean. (See the files “Cable 01 back to front” and “Cable 02 back to center…. center to
front”.) I decided WHAT I wanted to work when I was finished. I then determined where
those wires appeared at the engine and the wire colors they appeared on. I had a couple
of “bundle cables” that used to be “control cables” for Motorola police radios. I bought
these at a local “ham fest” for $5 each. For those that do not know, a “ham fest” is a flea
market for amateur Radio operators. Companies and individuals sell all sorts of radio
and computer gear at these Ham fests that can be used by these “Hams” in the pursuit of
their hobby. These bundled cables have colored wires in them. The cut sheet “mapped”
how each of the desired functions would get from the engine bay up to the new console
that I built in front of the passenger seat of the Bus as well as the BCM, cruise control
switch and several other switches AND the color changes along the way.
New “floor board” and FireBird instrument panel installed.
In addition to this wiring, I added several (8) large conductor wires (10 AWG,
white) from front to rear to accommodate large current feeds from the rear of the Bus to
the front. One good application is the cooling fan. It requires 30 amps. I spliced into the
EC1 distribution panel and a 40 amp fuse to insure that I had ample power for the
function and that it is fused as it should be. See file “10 AWG Power assignments”
The drawing of the DC distribution system shows this connection as well
as the rest of the DC distribution and fusing system. (See GIF the file labeled DC
Distribution) Note that many of the fuses in EC1, EC2 and IP fuse panel are not used.
The un-used wires are folded back and isolated (taped up) and the fuses have been pulled.
These are available for future applications. It’s nice to know that I have fuse positions
and wiring outputs to put some of the 105 amps to use.
Below are a few photos of parts of the electrical system that I took from the
FireBird and installed in the Bus.
EC1
EC2
Instrument panel fuse block mounted on new
panel in front of passenger seat.
This is the beginning of the wiring process on the panel up
front...
This is the back side of FireBird instrument panel before I
started wiring it. Note the BCM on the lower left and the
“instrument fuse panel” on top. You are looking at the “backside
“of the panel. Notice that I have isolated wires that I KNOW I will
not need at this time, by taping them up and trying them together.
This is the backside of FireBird instrument panel during the
wiring process.
Note the “flex hoses” for the cooling system coming through
the front wall and down through the floorboard. The BCM is to
your right, the relays for the cooling fan to your left and the
instrument fuse panel from the FireBird is on the board between
the BCM and the fan relays.
Another photo of the back side of the vertical panel…scarily
huh?
Most people are much more comfortable looking at THIS
side of the panel… ☺
How do you like my cup holder??
The early stages of the wiring process at the back of the Bus.
EC1 and EC2 during the wiring process.
A little farther along in the wiring process.
EC1 and EC2 mounted on the right side of the engine bay. I
“tagged” the bracket in which they were held in the FireBird to a
vertical support in the Bus. The long dark hole behind it is where
the “computer” (CPU) for the VW fuel injection system was
mounted. The open area to the right is where the battery used to
sit. Note the reservoir for the power steering pump fluid. I
mounted it to the engine mount bar and routed the pump output
into the reservoir and the inlet to the pump comes right off the
bottom of the reservoir. Basically, the pump pumps fluid out of the
reservoir and right back into it. That was the simplest way I knew
to deal with the pump since I could not disable it or remove it. ☺
Also, note the pencil clamped into the end of the EVAP suction
line.
Troubleshooting the electric system and engine sensors
before attempting to crank the engine. What follows is tests
that you should make in the order you should make them to
trouble shoot the electric system. As you progressively verify
each, you will be one step closer to the engine having all it
needs to actually crank and run.
•
•
•
Verify that 12vdc is delivered from the ignition switch of
the bus to the feed of the relay which provides the
“switched voltage”. This will supply the following points.
You will need to verify that each of them gets this voltage
as expected. This will be provided via the “ignition relay”
on the control board which you have manufactured.( or
EC1 and EC2 if you are using the complex version)
•
engine sensors
•
PCM
•
BCM
•
ICM
•
O2 sensors (3 each)
•
Fuel injectors
•
Tach
•
H2O sensor
•
Oil Pressure (OP) sender
•
MAF sensor
Verify that the “pellet key” circuit is complete to the
BCM and that it (BCM) is providing the control signal to
the PCM which enables it to turn on the fuel injectors and
enable the start relay. You can test this by doing the next
step….
Quickly engage the “start” function using the ignition key
on the Bus BRIEFLY and verify that the vehicle does
indeed attempt to crank. This is done without the
FIREBIRD key connected to the BCM. If it does not
start, continue…
Insert the FIREBIRD key in the BCM circuit and attempt
to crank. If the starter turns over, the BCM is sending
signal to the PCM that it is OK to crank. The following
steps determine if the other requirements are also being
provided.
•
With the ignition key(on the BUS) in “run” position,
Verify that the fuel pump relay on auxiliary board is
providing 12vdc to the pump and it is running. If it is, the
BCM and PCM are doing what they need to do to enable
the fuel circuit.
•
Verify that fuel pressure is at 50 PSI as expected as a
result of the fuel pump now running.
•
Using a fuel injector tester (NOID light) (see list of
required tools), verify that the injectors are being
activated by the PCM. This will be indicated by the tool
“blinking” as the engine cranks.
•
Verify that the “tach” lead from the ICM is “toggling” as
cranking is taking place. I believe this lead is being
“grounded” by the ICM to give the tach its signal. This
means that the timing signals are being generated by the
ICM and that it is(should be) triggering the spark at the
correct time.
•
Verify that the ignition coils are “sparking” as the engine
is cranked using a spark gap tester.
At this point, you will have verified that the PCM and BCM
are working, you have fuel pressure, compression (because the
starter is turning the engine over) and spark…at the right
time…as triggered by the ICM. The engine should be running
by now…. Unless you have the same issues I had…read on….
•
CRANKING AND CRANKING AND
CRANKING THE ENGINE
I have a remote starter switch that I used to crank the engine. (See list of required
tools in first chapter) It connects from 12VDC to the solenoid. When you “close” the
switch, the solenoid kicks in and the starter turns the engine over. If the ignition key is in
the run position, the engine will crank and run. It allowed me to be right there with the
motor so that I could watch while I tried to get it going. It sounds like a small thing, but
it really is better than sitting in the driver’s seat listening while you switch the ignition
key from “run” to “start”. It is also harder to take voltage measurements in the engine
bay when you are sitting in the driver’s seat. Well worth the price.
OH, BY THE WAY. Here are a couple photos of the old starter and the
new starter that I got from KEP. The old starter barely even grunted when I tried to crank
the engine. So, I ended up with the new high torque version. MUCH better…
After I had checked everything over several times, I tried to start it. Ten
seconds…twenty seconds…it’s turning over, but not starting!!!! I just about went into
panic mode. All that wiring which I had done began to loom larger and larger. Is it all
right? What did I leave out? It did not take long before I was second-guessing
everything I had done. After the third time checking every single wire, I finally began to
feel confident that it WAS right. So, I began to look at other possible reasons why the
engine was not starting. I made some assumptions, but tried to make a “note” of each
one so that I could go back to it if I came to that point. My hope was that the
assumptions would hold up and I would not have to go there. Pretty much, they did. I
had test run the engine before I began to remove it from the FireBird and it ran fine and
had no DTCs. So, from that I “knew” that I had compression. I put a fuel pressure gauge
on the fuel rail and verified that I had 50 pounds of fuel pressure. At his point, I decided
to use the troubleshooting aids in the “manual” because I was now dealing with the
dreaded fuel injection system. Truth is, I did not know exactly how everything worked
and I was a little afraid of it. Between reading the manual and the trouble shooting
charts, which were labeled “cranks, but will not start”, I began to understand how the
system worked. After going round and round and reading the book a lot, I realized that
the chart was WRONG. WHAT a Bummer. Once I decided that, it did not take long to
determine that the ICM was not triggering the coils. I figured out that several signals
from sensors on the crankshaft and cam told the ICM when to trigger the coils. Anyway,
cleaned up versions of these signals then were fed to the PCM and it used them to
synchronize the firing of the injectors. How long the injectors are actually open is a
function of several factors. The main one is the volume of air passing through the mass
air sensor. Anyway, the coils were not being triggered. I knew the coils were not getting
triggered because I was not getting any spark from the coils. I had bought a tester that
you inserted in the spark plug line to ground and you can SEE the spark jump in a clear
tube. I finally convinced myself that the ICM (ignition control module) was bad.
Apparently, it had failed while the engine was sitting and waiting to be re-installed. I
found one on EBay and bought it. When I got it, I thought, OK, this is IT. I put it in and
the engine STILL did not start. WHAT in the world? I backed up again. DID I in fact
have spark now? OH YEA!!! I had the ICM connected and sitting on the engine while I
cranked it one time and WOW. DID I ever have spark! It jumped completely across the
1-¼ inch space between the terminals of the coils. OK, so now I have spark. WHY will
it not run? I finally decided to squirt starting fluid in the engine. I was really hesitant to
do so, because I have had some “exciting” moments with this stuff. One time an engine
backfired and blew a nice flame back at me. So, I was not thrilled about trying it again.
Once I got fluid into the manifold and cranked, it fired and ran for about three seconds. I
did this three times and decided that I was not getting fuel to the cylinders. I had already
checked the injector leads with a “noid” light and I knew I was getting trigger signals to
the injectors from the PCM. The only possible answer was that the injectors were not
opening. I pondered this possibility for a while and decided that I needed to buy a
mechanics stethoscope so that I could hear the injectors when they opened. I did just
that. When I listened to the injectors as I cranked….NOTHING…NOT A SOUND….I
could hear the fuel rushing through the fuel rail, but NO noise from the injectors. Just to
make sure I was on the right track, I cranked the company car “Ford Tarus” and listened
to the injectors. Sure enough, you could hear them clicking as the engine ran. I went
back to Ebay and won a set of injectors with a fuel rail. By the time they arrived, I had
determined that all I needed to do was apply 12 vdc to them and I should hear them click
as they opened and closed. I did that to all six of them and I could only hear ONE of
them click. I think it was the fourth one I tested. After the third one, I was getting a little
concerned. It turns out that I had to clean the “fuel varnish” out of them before they
would work. I poured lacquer thinner into the top end, let it sit for 20 minutes or so and
then flipped them over and did the same to the bottom end. I got all six of them working.
Then I pulled the fuel rail and the injectors off of the Bus and did the same thing to them.
I only got three of the six working, so the purchase of all six and a rail turned out to be a
good thing. Now that I have a set of six of the injectors “clicking” as they should, it was
time to crank it up…I turned the key to “RUN” long enough to let the fuel pressure build
up and then to start. It fired on the first turn and it ran like a sewing machine. Man what
a rush!! And guess what??? It sounds just like a FireBird. Imagine that??
Finally…it is running…but is it
cooling???
At the moment I got it running, my concern shifted to the cooling system. I cut
the engine off immediately. If you recall, I had charged the system with the thermostat
removed. The system was under pressure because I had pumped it up with the Stant
cooling pump. Now that the engine had run for a short while, I went back to the “bleeder
valve” at the thermostat and opened it. Air and coolant bubbled out. I left it open until I
go nothing but coolant….no more air. I removed the pressure tester and cranked the
engine again. With the thermostat removed, coolant began flowing through the radiator
right away. I let it run for 15 minutes or more to make sure I got all the bubbles out of
the lines. It sat in the driveway idling for 30 minutes before the temperature gauge in the
FireBird instrument panel, which, I mounted in the passenger console of the Bus, peaked
out and stabilized at 195 degrees. All this while I was running back and forth from the
radiator looking down in the fill hole and the back to the engine to feel the hoses… are
they getting hot? How hot? Too hot? What about the radiator, is it getting hot? Is
water in fact flowing? Yes, I see it. Is it getting hot? How hot? Too hot? Finally, the
engine started to warm up and hot water began to reach the radiator and also flow through
the short loop that is the heater feed. And yes the temperature gauge began to move and
slowly climbed up to 195 degrees and stabilized. I put the cap on the radiator now and
continued to run around the vehicle checking temperatures. But now, I was looking for
leaks in the system as the pressure began to build up… Slowly, I could feel the flexible
radiator hoses getting tight from the pressure. The temperature was staying steady…no
leaks were to be seen anywhere… At this point, the system is up to temperature and
under pressure. I tried the bleeder valve one more time and got nothing but coolant.
First DRIVE, WOW!!!!
It was time to DRIVE!!!! With the engine still idling, I got behind the wheel. I
pushed the clutch in and pushed her into reverse. As I eased the clutch out, I realized the
Bus had taken on a whole new personality. I could feel the power right away. I backed
out of the drive and got here squared up in the street and eased the clutch out. First gear
ran out quickly. Shifting was just as it had been, but man is this thing peppy!!! It drives
like a stick shift FireBird. You know what I mean, Right? You CAN drive the vehicle
gingerly and ease into the clutch… It will be a bit “jerky” if you do that. IF, however,
you drive it just a little aggressively, it drives a lot smoother. By aggressively, I mean get
off the clutch and ease into the gas quickly and smoothly…. I DO NOT mean rev up the
engine and drop the clutch. Anyway, I drove around for about 20 minutes very closely
watching the temperature gauge and getting used to the “feel” of the beast. Once I started
driving, the temperature dropped and it never got above 160 degrees on the gauge. I
drove back to the house and let things cool off. Then I put the thermostat back in.
Obviously, I lost a lot of coolant. I jacked the Bus back up and replaced the coolant.
Once again I was concerned that I had trapped air behind the thermostat. I put the Stant
pressure pump back on and opened the bleeder valve until I got no air bubbles. I cranked
the Bus and paced around it for half an hour checking the rear hoses, the gauge and the
radiator. The temperature climbed up to 195 degrees and stabilized right there. It has
been that way since. I have the temperature sensor/switch on the cooling fan set to 190
degrees and it has switched the fan on one time. It was a 90-degree day sitting in traffic.
(PS… I have since figured out that I do not even need the temperature switch in the
radiator. The V6 has one that is wired to the PCM. It is actually a two stage switch
which controlled TWO cooling fans. One would come on as needed …unless you turned
on the AC. In that case, it came on right away. The second fan came on in really hot
situations. As it is, I only have one fan so, I hooked up the first stage to the ground side
of my fan control relay and done.) I still need to do a “study” on the system in many
conditions to prove that the system will keep the engine cool in every situation. I have
every confidence that it will perform just fine. Griffin Thermal Products told me that my
radiator could handle a 400 HP engine in racing conditions. I felt like a 200 HP engine in
street conditions should be no problem.
Cleaning up all the LOOSE ENDS
DTC codes and “check engine light”
If you did what I did and used the instrument panel from the donor, you probably
wired up the “check engine light”. One problem with that is that if you don’t get all the
DTCs cleared from the PCM and KEEP them clear, the light will stay on all the time.
Being the engineer that I am, I wanted to KNOW when the PCM thought something was
wrong, so I wanted the light. Unless it only comes on when there IS a problem, it is
useless. SOOO, all the DTCs must be clear in “normal” state. SOME of these are going
to be hard to get rid of. In some cases the PCM looks for an output from the transmission
at certain times or after a certain set of circumstances. If it does not get that signal, the
PCM sets an error code and the light comes on. Another one is the EVAP system.
Periodically, the PCM closes one solenoid and looks for a vacuum indication on another
one. If it does not get it, it sets a DTC. In one case, if it does not see the presence of a
sensor, it sets a DTC…So, what to do? The transmission was fairly easy. All you have to
do is get your local dealer to reprogram the PCM to think you have a manual
transmission instead of an automatic…how? You get a VIN number from a vehicle that
has manual transmission and go see your local dealer. He will enter that into the PCM
(for a fee) and viola…no more codes. The EVAP was a little more troublesome. I have
figured out that I can replace the sensor (which did not exist any longer cause it went
with FireBird) with a voltage divider made up of two 50 ohm resisters (10 watt version
from Radio Shack). You solder the two resistors together, tie one end to 12VDC and the
opposite end of the other resistor to ground. It will draw current all the time that 12 VDC
is applied. The sensor lead is connected to the junction between the two resistors. The
nature of a “voltage divider” makes the voltage at that point 6 VDC and the current is
limited. The 350 ma of current that the PCM draws when it looks at that circuit makes it
happy. It never knows the difference, so it never sets the DTC and no light. I have not
actually done all this up to this point, but I am pretty sure it will work fine….. So
whatever code you have, more than likely, if you give the PCM 50 ohms to look at for the
sensor, it will be happy and stop the DTCs. Sounds simple…it’s not really that bad, just
a little scary if you don’t understand it…
Shake Down cruise results in a minor upgrade…
Thermostat switch for cooling fan
I took the Bus on another camping trip in the fall of 2004 and on the way
back, I found another little glitch. If you are driving in traffic and the fan comes on and
you get up to highway speed right away and stay there (Interstate 85??), the fan never
cuts off. I called Scott Fans about it and it turns out that I have the wrong temperature
switch at the radiator. Scott has the switches designed so that they cutoff 15 degrees
below where they turn on. My thermostat is set at 180 degrees and my fan switch is set at
190 degrees. So, it should cut off at 175 degrees. I noticed that the temperature had to
get below 180 degrees for the fan to cut off before and it is OK unless you go to highway
speed. At that point, the thermostat kicks in and the engine will never get below 180
degrees and the fan will not cut off. The solution for this is to install a 195 degree fan
switch. Is should cut off at 180 degrees and all should be well. They do have a 200
degree switch, but I don’t think I want to let the radiator water get that hot before I turn
on the fan. 5 degrees can make a big difference.
Round TWO with cooling fan switch
Late fall of 2009 I decided to get the transmission overhauled and upgraded.
While I was driving to Charlotte to take the Bus to Paul Pearce so that he could
accomplish that work, the thermostat switch failed. The fan would not cut off. So to be
safe, I drove it the rest of the way to Paul’s that way. Once I had it there and he was
working on it, I contacted Scott Fans and bought a replacement. They had changed a
little, but Scott’s shipped it as requested. I had Paul install it in the NPT fitting. When I
got the Bus back, I soon discovered that the fan would come on when the temp got to 195
in the radiator…exactly as expected. BUT, it would only cut off if it was not driven at all
for about ten minutes…in other words, just sit and idle. Obviously, that is not correct. I
called Scott’s Fans and discussed the symptoms… and we were having trouble figuring
out WHY it was acting that way. They said the switch had the same characteristics as
before, but it certainly did not act the same as before the one failed. I called Paul and had
him verify that the thermostat that he installed (at my request) was in fact 195 degrees
and that the one he removed was also 195 degrees. Yes on both counts… this is weird!!!
As I discussed above, I had thought that the thermostat was 180 degrees. I’m not sure
WHY I thought that because the temperature had been stabilizing at 195 degrees all
along. That made me wonder how/why the temperature switch had worked the way it did
before. I never did figure that one out… in any case, I had to deal with the current
situation, so I decided to disconnect the fan switch and see how the system reacted.
Amazingly, the temperature stabilized at 195 degrees and stayed there. The only time the
temp even tried to move from that was if I sat and idled for ten minutes. I am sure that
will vary depending on how hot the air temperature is, but I was still fascinated by that.
SO, I decided to go to the manual and figure this out…. I discovered that in the original
system the fans were turned on by the PCM. It uses a two stage switch in the cooling
system to turn on each of the fans in two steps. The first fan comes on when the
temperature at the sensor reaches 231 degrees. WHAT??? TWO HUNDRED AND
THIRTY ONE DEGREES….OH MY…That is hot!! The second fan comes on at 235
degrees OR when the air conditioning is turned on. This gives extra air flow for the
HVAC cooling coil when the air is running. I was VERY surprised that the fan does not
come on until 231 degrees. I was also a little surprised that the fans were turned on by
the PCM instead of directly from a sensor/switch in the cooling system. I SHOULD have
known that before…but overlooked it. What I had was working fine…and was pretty
normal for the autos that I had worked on prior to this, so I had no reason to suspect
otherwise. NOW that I know, I am a bit chagrinned. Live and learn. For now, I am
hooking up the first “trigger” from the PCM to the one fan that I have since I have only
one and no HVAC…. It seems reasonable. Also, I added some additional comments
about this in the section below where I discuss the transmission upgrade.
Final comments…
This has been one fun project. The results are everything I was hoping for. It is a
continuing project because there are several things I want to add or upgrade in the future.
I have listed these in the following section on “additions I am considering and my
thoughts about them”. The truth is it is very functional just like it is and if I don’t get
these additions done, it will be OK. I have taken the Bus on several camping trips and it
has performed well on each of the trips. I have taken it up the mountain at Saluda and it
pulls the hill in fourth gear at 65 MPH with no problem. THAT was one major goal
accomplished. Heat has been semi-accomplished. I get a pretty fair amount of heat by
simply opening the “Fresh air vent” on the front of the Bus. Since it is right behind the
radiator, warm air just flows in. So, It may end up being enough that I don’t need the
heater cores. I’m just not sure if it will perform the “defrost” function without the heater
cores and fans. I have a set of “ambulance fans” which I bought from a guy in Australia
on Ebay that I have not installed yet. They may help distribute air for heat and defrost
also. Until I can prove otherwise, I will still plan to install them. In addition, I plan to
add heater cores under the back seat and under the Bus in the FireBird heater casing. .
Additions I am considering and my
thoughts about them…
CPP Switch up grade and PCM reprogram
One problem that I need to work out is that if you are running along at
speed (50 in fourth gear maybe), and depress the clutch quickly, the engine will die. The
problem is that the engine and PCM came from a vehicle with an automatic transmission
in it and is programmed that way. I can correct this by getting the manual transmission
program into the PCM. There is also a set of contacts that were in the FireBird that are
not in the VW. One of these is a normally closed contact from 12 VDC to the PCM.
When the clutch is depressed, this voltage goes away and the PCM (with the manual
transmission program) knows the clutch has been depressed and lets the engine go to idle.
Without this signal, the PCM gets confused and does not know what to do. If left to
itself, the engine will die. I have learned that I can depress the clutch and tap the gas
pedal and the PCM will let the engine go to idle. That is OK in most situations, but there
are times when I am braking that I depress the clutch, but I don’t really have time to tap
the gas pedal. The solution is to wire in a NC contact that responds to the clutch. I plan
to use a magnetic reed switch. I have the wire assigned in my wiring bundle, so it is just
a matter of wiring it up and checking its operation. I have installed the magnetic reed
switches on a panel which is attached to the frame. I still need to install the magnetic part
of the switches on the clutch arm so that when the clutch is depressed, the magnetic will
do what it is supposed to and activate the switch, which in turn will cause the PCM to
react as it should. Once this is done, I can upgrade the PCM to a manual transmission
program and the problem should be resolved.
Heat under the back seat
Anyone that has been around VWs at all knows that with the exception of the
water cooled Vanagons, they have very poor heat. This was one of the original reasons I
decided to install the V6 to start with. So, when I acquired the Vanagon water pipes at
the junk yard, I also got the under seat heater out of the “donor”. I figured that I would
install it in my Bus since I will have hot water now. To this point, I have not actually
installed the unit, but I have acquired the plumbing parts to make it happen. As I
mentioned earlier, I now have a short “loop” of heater hose from the output to the heater
from the block TO the input from the heater. I plan to install a much longer “loop” that
will route down and across the engine to meet up with the water lines that run forward to
the radiator. Only these lines will have two “branches”. One branch will route water
through the heater core that will be located under the seat. The second branch will route
hot water through the heater core which will be located under the Bus where the old
Espatcher gasoline heater used to be. This heater core is part of the original FireBird
heater and HVAC (air conditioning) unit. I plan to fabricate some brackets to mount it
under the Bus and a duct to route the heated (or cooled ) air into the air ducts that used to
bring heated air (from the heat exchangers on the old air cooled engine) forward to the
air/defrost ducts in the dash and windshield. In this way, the under-seat heater will bring
heat to the rear seat area by discharging heated air at the floor under the Z bed and the
“under-Bus” heater will discharge heated/cooled air the same way the old heat system
used to do. I will need to run power to both places to power the fans. I will need tap into
“engine vacuum” and set up the vacuum switches that the FireBird used to have to
control the air flow through the “exchanger” to route it across the heater core or the air
conditioning core…depending on if you are demanding heated or cooled air. Right now,
I am thinking about using several switched vacuum “relays” to turn off or on the vacuum
and pull the flaps/vents as needed… There is a lot to be determined as far as the best,
easiest way to make that part work. The under-seat heater is much simpler… open/close
a water valve; turn on a fan...Heat or no heat….simple…
The point is…not only can I have HEAT, but I can have air conditioning
as well…
Air conditioning??? REALLY??
YEP!!! Air conditioning….in a VW Bus that actually works. Again, there is a lot
that needs to be done to make it happen, but the point is… I have the POWER.. ☺ It will
most likely happen after or perhaps in conjunction with the under-seat …under Bus
heaters. That being the case, the exchanger unit will already be mounted under the Bus
in the same under Bus unit as the heat exchanger. That will be the exchanger core. At
that point, I will need to mount a condenser core in the frame with the Radiator. I will
also need to mount a receiver/dryer unit near the compressor in the engine bay. That
should not be too hard. I know also that there is a sensor in the coolant line that needs to
be in play and some sensors in the exchanger unit that quite frankly, I do not know what
they do yet. I think they are some sort of air flow sensors that shut off the system if the
air gets too hot…but I am not sure right now. The compressor clutch needs to be hooked
up again. I unplugged it when I installed the engine originally. At that point, I will need
to “plumb” out the high pressure and the low pressure sides of the refrigerant system. I
know what “connectors” need to be used on both ends and I have already had some
conversation with Campbell Hassfield in Charlotte and they seem to think they can make
the required hoses for around $200. I will need to give them the lengths for each of the
hoses.. Then it should be a matter of hanging the hoses and hooking it up….and getting
someone to pull a vacuum and can charge the system… I am sure there are things that I
have not thought about or learned about yet and at some point, I may decide that it is not
worth it… One thing that comes to mind is the two different types of “Freon” that
systems use now as opposed to what they used years ago. Am I going to have an issue
with that? I do not have a clue…but I will learn. One other issue that comes to mind is I
wonder if the new found cool air will cause problems with condensation on the uninsulated air ducts of the Bus? Possible….how will I deal with that?
Cruise control
Cruise control is one of the things I would like to have on the Bus. I am
pretty sure I would like to have the system that was on the FireBird because it uses actual
feedback from the vehicle speed to control the throttle and keep the vehicle at that speed.
Some that I have looked at use feedback from the tachometer and I don’t think that is as
accurate. It’s a personal preference thing, so you may feel otherwise. It is your privilege.
I have also looked into using a cruise control from Viking Imports. It costs about $225
and seems to be very similar to the original. I am sure that I can use the control stick
from the FireBird that I already have. I do have some nodes welded onto the CV joint at
the left side of the transmission to use for mounting magnets which will supply the VSS
signals to the speedo and the cruise control. The things that have slowed me down are
1) mounting the control “stick” on the turn signal arm of the Bus. 2) Mounting the
magnetic reed switches on the clutch pedal lever of the Bus. I currently have the
switches mounted on a plate in proximity of the lever. I do NOT have the magnets
mounted on the lever itself. Once those are mounted, I can cable out and connect the
contacts to the cruise control module where they should go.. ACTUALLY, I HAVE
SINCE DETERMINED THAT ONE LEAD….ALL I NEED TO DO IS CONNECT A
WIRE FROM THE BRAKE LIGHTS TO THE CRUISE UNIT. When the brakes come
on, the cruise unit will see +12vdc and will release the throttle as it is supposed to. So,
THAT is why when you tap the brakes on most cars the cruise control releases. 3) I do
not have the VSS (vehicle speed sensor) mounted. This sensor was mounted in the
transmission of the FireBird. It senses and outputs a pulse to the PCM each time the shaft
of the transmission turns on revolution. It is BEFORE the gearing of the differential in
the rear end, so it does not match road speed. I need to mount it and also provide
magnetic pulses to trigger it properly. I have had a CV joint modified so that I can mount
5 magnets on it. This should give me the 4000 pulses per mile that the cruise unit
requires. 4) I do not have the cruise control module mounted or the throttle cable
connected to the Mass air flow sensor. The cruise control computer is looking for 4000
pulses per mile. I did a little math and figured that if I can get five pulses every time the
wheel turns over, it will be about right. SO, I had a local welder put five little metal
“lumps” on the CV joint that is at the transmission end of the shaft. I put it there because
I figured that end would be much more stable. And there are things close by on which to
mount the VSS . At this time, I have NOT mounted the VSS. I figure once I do get it
running, I can feed that signal to the PCM, cruise control and the speedo in the FireBird
instrument panel that I have mounted in front of the passenger in the Bus. In fact, I figure
that will be my first indication if the VSS is working correctly. If the speedo reads right
(or close) I am in pretty good shape.
One input that Cruise looks for is a brake light signal. +12 vdc should be fed to
the PCM (cruise control module??) when the brake lights come on. This signals the unit
to disengage the cruise control. There is also a couple of contacts that are fed to the PCM
that need to be wired out…I know one of them signals the PCM that the clutch has been
depressed so you need to disengage the cruise. These were all wired from switches on
steering column, the clutch and brake switches in the FireBird. The Bus does not have
provisions for these, so I had to make them. I used magnetic reed switches (you can get
these from Radio Shack). These are NC (normally closed) contacts. This means when
the magnet is in close proximity to the reed switch it is a closed contact. When the
magnet is removed, the contact goes open. I figured I could use these with the magnets
attached to the clutch pedal lever and when I depress the clutch, the magnets will move
away from the reed switches and they will go open. The +12 vdc can be activated by
tapping into the switched +12 vdc that activates the brake lights on the Bus. When I hit
the brake, +12vdc will be applied and disengage the cruise control. I made a plate and
attached it to the outside floor of the Bus and the clutch lever is positioned between the
reed switches. See the photo below…..
Now that I have the NC contacts working, I can cable them back to the cruise
control module as well as the contacts off of the cruise control “stick” that is mounted to
the turn control arm. Once all those connections are made, I will need power to the unit.
I think I am going to fuse it from the center console so that I can remove the fuse should
the unit fail in an unfavorable way… ☺ I think that power goes through the control
“stick” anyway, so just turning it OFF should disable the unit anyway…. Then it is a
matter of testing it… ☺
Transmission upgrade….August
2009
I have really enjoyed driving the Bus over the last few years. As you drive a
vehicle, you make note of things you would like to add or change. Several of those are
noted above. One that I really wanted to do is to up grade 3rd gear and 4th gear to taller,
stronger gears. I have been looking into that for the last few years and trying to find the
best way to make it happen. I found AATransaxle on the web and they had calculator on
their web site that would help you get a good idea of HOW each gear set would react as
you change them. I have attached a copy of that with the book. Once you have followed
the basic instructions and gotten your tire size right, you can modify from there. When I
plugged all that in as STOCK, the gear speed and RPM pretty much matched my stock
arrangement. That told me that I had a stock gear set in the tranny. Then I knew that I
could plug different gear ratios into the “tool” and it would show me what RPMs to
expect at what speeds. Stock VW gear set is 1.225 for 3rd gear and 0.85 for 4th
(1.225/0.85) I looked at every combination I could think of and finally decided on two
options…. 1.18 for 3rd gear and 0.77 for 4th gear and secondly 1.080 for 3rd and 0.77 for
4th. . I am still not totally committed to either, but Paul Pearce, who is a VW restoration
expert(and will be doing the work) recommended the first choice, so based on his years
of knowledge and experience, I am going to go with that. The objective here is to lower
the RPM at cruise speed on the highway. Stock tranny gives 3500 RPM at 65 MPH. I’d
really like to see that lowered. The engine is very comfortable at 3200 RPM, so maybe
something along the lines of 3200 RPM at 62 MPH…. That would give me 70 MPH at
3500 RPM. I have been driving the Bus at 65 MPH a lot at the 3500 RPM, so I know it
will do it for long periods of time. I just want to 1) get better gas mileage and 2) extend
the life of the engine. As it is the Bus gets about 20 MPG at that speed/RPM, so I figure
a 10% increase should be about 22 or maybe 23 MPG. That is what the Bus did with the
stock engine in it. Anything above that is as they say “gravy”. I do not want to extend
the RPM too much toward the low end because then you get into a low RPM at the low
end of the gear. Remember, when shifting from 2nd to 3rd, you need to make that fairly
smooth…if the RPM DROPS dramatically in the process, the vehicle will “lurch
forward”… so it should be pretty even at the shift point. It is better to rev up 2nd a little
more and catch 3rd with that RPM “loaded’. The other part of the equation is that you
want to be in the “power curve” of the engine. If you are not, the engine will LUG… So
this is a game of give and take. It can be governed somewhat by how you expect to drive
the vehicle. For my part, I want good easy cruise RPM, but I want to be in the power
curve so if I am pulling something (see the BIG tow hitch on the Bus)… I don’t want to
LUG the engine constantly. Paul and I both feel that the gear set we have chosen will do
that. What you use is up to you.
THE TORQUE MONSTER LIVES…..Paul had the BumbleBus about two and a half
weeks working on it. I got lots of stuff done to it, but the biggest thing was the
transmission. So, you can imagine that I was very apprehensive about the outcome.
Even though Paul has done Vanagon’s with Subaru engines with this gear set, he was not
sure how it was going to turn out with this engine. I was in Charlotte visiting family
when Paul called and said he was finished. I arranged to meet him right off of I-77 at
Tyvola Road. My Mother-in-Law had agreed to drop me off there. I figured I’d take
Paul back to Fort Mill and that would give me a chance to test drive the Bus. Paul was
grinning when he drove up in the Bus. It was not long before I figured out WHY. Just
looking at it, the Bus did not look any different. BUT IT IS!!!! Paul and I got right in
and headed back to Fort Mill. I could tell right away that 1st and 2nd gear were stronger
than before. Pulling out from McDonalds, I got a touch of 3rd gear. But when I started
down the ramp to merge onto I-77, it came ALIVE!!! I shifted into 3rd at about 30 MPH
and hit it a little….VERY quickly I was at the bottom of the ramp at 60 MPH and shifting
to 4th. 4th gear picked up right where 3rd had left off and just kept going…. I was doing
70MPH and shooting towards 80 MPH MUCH faster than ever before!!! It turns out that
it is EVERYTHING I had hoped it would be. 1st and 2nd are BOTH stronger than before.
And the engine speed vs RPM is EXACTLY where I wanted it. 3rd gear is running 65
MPH at 4000 RPM and getting from 2000 RPM to 4000 RPM is nothing but TORQUE!!!
It will pull that faster than you really want to. 4th gear can go from 2500 RPM at about
40 MPH to pegging the speedo …and I never wound it all the way to 5000 RPM…. OH
MY GOOD NESS!!! The engine has more torque and runs better now than it did before
the transmission up fit. I am not sure and at this point, but I think the change in the
thermostat made the difference, but I will come back to that shortly. Third gear is
UNBELIEVABLE!!!! You can actually start pulling in 3rd gear at 1000 RPM and take it
all the way to 5000 +….!!! Read that as a BIG SMILE and you had better be holding
on…!!!!!! Have you noticed that I can’t put enough exclamation points at the end of the
sentences? There is a reason for that. UUUHHHH,…. OK, John get a grip!!! It is
now that you need to remember that you did not build the Bus to race. You built it to
cruise the interstate and pull the hill at Saluda Mountain…. Well, at this point, I can say
without question that the cursing the interstate is defiantly a done deal. I had thought I
would be running 70 MPH at 3500 RPM. It turns out that it is more like 3250 RPM. The
engine is SOOO smooth and easy at that speed. There is no strain at all. The best part is
that I can just step down and be doing 80 MPH PLUS very quickly. This alone makes the
vehicle so much more usable and practical. Never again will I worry about getting into a
tight situation that I cannot get out of ONLY by slowing down. We all know that
sometimes speeding up is the right thing to do because it allows you to move away from
a bad situation…not get caught in it. I now have that option. From what I have seen so
far, Saluda Mountain is TOAST!!! With the torque this thing has at 2500 RPM, I have no
doubt that 65 MPH in 4th gear is a done deal. I was so pumped when we got to Paul’s
house that I just walked around the Bus muttering. That was the same reaction Paul said
he had when he drove it first. He said that normally he does about an hour of test driving
once he completes a vehicle. But this one… he said I drove around a little to get things
heated up, came back to the house and parked…..jumped out and crawled under it
looking for any leaks. When I saw none, I got back in and drove around for a couple of
hours. He said, “I just could not get enough of it!” Here is a clip of the first email he
sent when he finally did park it. “First impressions for me - WOW. Gobs of torque, 3rd
is great, 4th is all there. You forget how much power there is and just drive with a huge
grin on your face as you watch traffic disappear behind you!! I really hope you will like
it.´
As far as gas mileage, I have not had a chance to evaluate that yet. I’ll add a PS
to this test once I do. I fully expect it to be good news. …..
Here’s the “PS”… gas mileage is improved IF you can keep it at the same speed.
65 MPH is now lower RPM and so the engine turns slower and MPG is better. The
problem is that it is HARD to keep it at that speed..And you find yourself doing 70 and
75 MPH at the same RPM that you were before. Because the engine is now smoother, it
does not feel as “stressed” at the higher RPMs. So MPG is the same at the same RPM as
it was before…you are just going faster. One other issue is that it is HARD to keep your
foot out of it….so pulling harder, faster to get to the speed you are seeking equals lower
MPG…The long and short of it is that the MPG is still about 19 to 20 MPG …as long as
you keep your foot out of it…
One last thing that came out of all this, the engine is smoother and stronger than it
was. WHY? Well, I have an idea about that. During the up fit, I had to Paul change the
thermostat. Might as well while you are doing all this…it is cheap, right? Also, when I
was driving the Bus to Paul’s for the work to be done, the fan thermostatic switch failed
in the ON position. So the fan was on all the time. I called Scott fans and ordered a
replacement and had that shipped to Paul. He installed it. When I got the Bus back, the
whole fan on/off scheme had changed. BEFORE, I had a 195 degree fan switch and a
195 degree thermostat and the engine would heat up to 195, the fan would switch on and
cool things down. The fan would run until the coolant reached 180 degrees and then cut
off. Truth is, I thought the thermostat was a 180 degree stat. It acted like one, but was
marked 195. When Paul put the new 195 in, the fan would come on and stay on. It was
not able to drive the coolant below the 180 cutoff temp unless you were driving very
cosmopolitan streets. If you were on the interstate, it ran all the time. SO, WHY does
that do that? Do not know. I think the stat that I had was mislabeled and was keeping the
engine at 180 degrees. That, as it turns out, is too COLD for the engine. In fact, this
even got me to looking at and thinking about the whole system again. What I discovered
is that in the FireBird, the PCM is what controlled the cooling fans. It had TWO of them
and three relays. The first relay which turns on the first of two fans is set to come on
when the coolant in the engine block reaches…..are you ready for this?... 231 degrees!!!!
I was SCHOCKED. That is really HOT! And the second switch cuts the second fan
on…if the HVAC is on or the coolant temp reaches 235 degrees. SO, bottom line here is
that the engine has been running at least 15 degrees too cold. THAT is probably why it
now has more torque and runs much smoother…and why I am getting 70 MPH at 3250
RPM instead of 3500 RPM as I expected…. I am not decided yet how I am going to deal
with the temp situation. I will probably add a blog at the end of the book to relay the
results to those that are interested. SEE the section labeled “ROUND TWO WITH
COOLING FAN SWITCH” earlier in the book.
So, bottom line here is, “Would I recommend you upgrade the transmission to this
3rd/4th combination?” OH, YES I WOULD!!!! This upgrade has changed the whole
character of the vehicle. It has made it SO much more usable than it was before that
there is no question I would do the upgrade. My only regret is that I did not do it sooner.


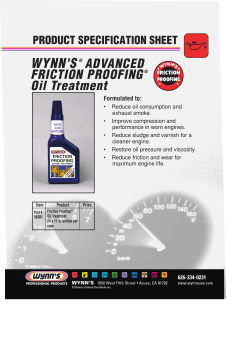


© Copyright 2026