
Chairside
Chairside ® A Publication of Glidewell Laboratories • Volume 7, Issue 4 Photo Essay Comprehensive Post and Core Tooth Repair Page 22 Digital Communication of Critical Cosmetic Restorative Guidelines Dr. Bill Strupp Page 34 How to Align Teeth in Six Months Six Month Smiles Founder Dr. Ryan Swain’s Patient-Friendly Approach to Orthodontics Page 59 One-on-One with Dr. John Harden Hospital Dentistry and Treating the Medically Compromised Patient Page 48 Dr. Michael DiTolla’s Clinical Tips Page 9 COVER PHOTO Suzeanne Harms, Video and Trade Show Coordinator Glidewell Laboratories, Newport Beach, Calif. Contents 9 Dr. DiTolla’s Clinical Tips Featured in this issue are two innovative products we recommend for effectively cleaning and cementing BruxZir® and other zirconium oxide-based crowns. Also showcased is a new buffering agent designed to eliminate the sting that can be caused by the acidity of local anesthetic, and a diamond polishing paste that will give your porcelain restorations a nice luster. 15 Basic Procedures: An Excerpt from REALITY Publishing’s “The Techniques, Vol. 1” This excerpt from REALITY Publishing’s invaluable reference manual details the numerous tasks in dentistry that are repeatedly performed and are common to many specific procedures. Dr. Michael Miller covers a variety of common tasks, skillfully compiling these basic procedures for easy application in everyday practice. 22 Photo Essay: Post-and-Core Technique for Endodontically Treated Teeth Addressing a question I am often asked by fellow dentists, this photo essay outlines my technique for placing a post and core in an endodontically treated tooth using the Rebilda® Post System from VOCO America. The Dental Advisor recently awarded the post build-up system its top five-star rating, and after testing out the kit at our lab, I was also impressed by its range and simple handling. 34 Digital Communication of Critical Cosmetic Restorative Guidelines According to Dr. Bill Strupp, an important element to consider in a cosmetic restorative case is the horizontal plane, or HPC. Using a series of case examples, he demonstrates how the restorative dentist can define and communicate these critical cosmetic guidelines to the laboratory and specialists involved in the case to ensure a successful final result. Can’t get enough Chairside? Check out our weekly Chairside Live Web series featuring dental news and Dr. DiTolla’s Case of the Week — available on YouTube, iTunes and at www.glidewelldental.com. Contents 1 Contents 48 One-on-One with Dr. Michael DiTolla: Interview of Dr. John Harden This issue’s featured interview is with Dr. John Harden, a practicing dentist in Atlanta, Ga., who specializes in hospital-based dentistry for medically compromised patients. For those interested in this area of the dental field, this experienced practitioner and dental speaker has hundreds of stories to share about the many challenges and rewarding experiences that can come from working in a hospital setting. 59 How to Align Teeth in Six Months: Six Month Smiles® System Provides Patient-Focused Approach to Orthodontics Short-term orthodontics can be an essential offering and practice builder for restorative dentists, enabling them to treat potential patients who aren’t interested in comprehensive orthodontic treatment. In this article, general dentist and founder of Six Months Smiles Inc. Dr. Ryan Swain discusses his company’s cosmetic braces system, a patient-focused approach to orthodontics specially designed for general dentists. 64 The Zirconia-Based Porcelain Veneer Glidewell Publications iPad App To experience Chairside magazine on the iPad, search “Glidewell” in the iTunes Store and download the free Glidewell Publications app. 2 www.chairsidemagazine.com In order to adapt to and satisfy patient desires, today’s practitioners must be versatile and maintain up-todate knowledge of procedures and materials, claims Dr. Elliot Mechanic. The porcelain-layered zirconia veneer featured in his case report is just one example of the type of innovations in dental materials that are providing us with increasing options for treating dental patients. Publisher Jim Glidewell, CDT Editor-in-Chief and Clinical Editor Michael C. DiTolla, DDS, FAGD Managing Editors Jim Shuck; Mike Cash, CDT Creative Director Rachel Pacillas Copy Editors Jennifer Holstein, David Frickman, Chris Newcomb, Megan Strong Statistical Editor Darryl Withrow Digital Marketing Manager Kevin Keithley Graphic Designers Emily Arata, Jamie Austin, Deb Evans, Joel Guerra, Audrey Kame, Phil Nguyen, Kelley Pelton Web Designers Jamie Austin, Melanie Solis, Ty Tran Photographer Sharon Dowd Illustrator Wolfgang Friebauer, MDT Coordinator and Ad Representative Teri Arthur ([email protected]) If you have questions, comments or complaints regarding this issue, we want to hear from you. Please e-mail us at [email protected]. Your comments may be featured in an upcoming issue or on our website: www.chairsidemagazine.com. © 2012 Glidewell Laboratories Neither Chairside magazine nor any employees involved in its publication (“publisher”), makes any warranty, express or implied, or assumes any Neither Magazine nor any employees involved or in its publicaliability or Chairside responsibility for the accuracy, completeness, usefulness any warranty, express or implied, or assumes of tion any(“publisher”), information,makes apparatus, product, or process disclosed, or any liability responsibility accuracy, completeness, or usefulrepresents thatorits use would for not the infringe proprietary rights. Reference ness to of any apparatus, product, process disclosed, or herein any information, specific commercial products,or process, or services that its use would manufacturer not infringe proprietary rights. Reference by represents trade name, trademark, or otherwise does not herein to constitute any specific products, process, or services by necessarily or commercial imply its endorsement, recommendation, or trade name, manufacturer otherwise not expressed necessarfavoring by the trademark, publisher. The views andoropinions of does authors ily constitute or imply its endorsement, recommendation, or favoring herein do not necessarily state or reflect those of the publisher and by not the be publisher. views and opinions endorsement of authors expressed shall used forThe advertising or product purposes. herein doWhen not necessarily state or reflect those of the publisher CAUTION: viewing the techniques, procedures, theories and and shall not beare used for advertising or make product endorsement purposes. materials that presented, you must your own decisions about CAUTION: When viewing the techniques, procedures, theories and maspecific treatment for patients and exercise personal professional terials that are presented, youfurther must make ownordecisions about judgment regarding the need for clinicalyour testing education and specific treatment for patients and exercise personal professional judgyour own clinical expertise before trying to implement new procedures. ment regarding the need for further clinical testing or education and your own clinical expertise before trying to implement new procedures. Chairside is a registered trademark of Glidewell Laboratories. Editor’s Letter One of the reasons why I love Dr. Bill Strupp is his attention to detail when it comes to dentistry. Some might even call it obsessive. If you have been to his courses or subscribe to his newsletter “Crown & Bridge UPDATE,” you will know what I am talking about. This attention to detail allows Bill to tackle large cases that might otherwise be less predictable. I prefer to help dentists focus on the basic stuff — 1 or 2 units of crown & bridge with a 4 percent remake rate and that fall into place the other 96 percent of the time. So when it comes to teaching the big cases, I leave that to Bill because that’s where his attention to detail can help avoid some huge snafus. In this issue of Chairside, he shares with us how he goes about communicating the horizontal plane of the case to the lab and the other specialists who may be involved. I used to do a lot of traditional orthodontics on kids and adolescents, with a few difficult adults thrown in the mix. And it was too bad, because the adults really did want to have straighter teeth, but many were not willing to go through two years of traditional ortho. I found clear plastic aligner trays to be frustrating because once you have moved a tooth with an archwire and a bracket, moving a tooth with an aligner seemed more like wrestling a greased pig. Dr. Ryan Swain has managed to merge moving teeth using traditional bonded brackets with an accelerated six-month time frame that is much more acceptable to most adults. His article may make you think twice before treating every arch with alignment issues strictly as a veneer case. Also in this issue, Dr. John Harden shares with us the unpredictability of doing dentistry in the OR. I think showing up to work and having no idea what procedure I will be doing might drive me crazy, but John thrives on it! Dr. Michael Miller has also once again generously let me delve into REALITY Publishing’s “The Techniques,” a book that I think should be given to all graduating dental students. Dr. Elliot Mechanic contributes an article on zirconia-based porcelain veneers that you will want to read as well. Finally, as we continue to improve the translucency and esthetics of BruxZir® restorations here at the lab, it is our hope that one day soon I will have a BruxZir veneer case to share with you. Keep an eye out for this in a future issue. Yours in quality dentistry, Dr. Michael C. DiTolla Editor-in-Chief, Clinical Editor [email protected] Chairside® Magazine is a registered trademark of Glidewell Laboratories. Editor’s Letter 3 Letters to the Editor just to be safe. It’s a simple step that seems well worth the effort. – Mike Dear Dr. DiTolla, We received several questions from our readers about the video “Updated BruxZir Cleaning, Cementing & Bonding Protocol,” available at www.glidewelldental.com: I saw your video on using Ivoclean™ to clean zirconia crowns. You didn’t mention a RelyX™ resin cement (3M ESPE; St. Paul, Minn.) as a good cement for BruxZir® crowns. 3M reports that this phosphoric acid/methacrylate cement is good for just about everything. Have you had problems with people using it? I always get nervous about trying new bonding agents/cements/ resins, but I have just started using it. 3M seems proud of it, and so far, I have not had any problems with it. Do you have any recommendations for that particular cement? – Colin Lentz, DDS Dacula, Ga. Dear Colin, I was watching your video on bonding zirconia crowns, and you mentioned sandblasting with 50-micron aluminum oxide to decontaminate them. As many of us have microetchers with 50-micron aluminum oxide, is this as good as using Ivoclean™ (Ivoclar Vivadent; Amherst, N.Y.) for bond strength, or should we still use the Ivoclean? The new RelyX Ultimate Adhesive Resin Cement from 3M ESPE, when used in combination with their Scotchbond™ Universal Adhesive (which contains the phosphate monomer MDP), should work just fine for cementing BruxZir crowns. The bigger point, however, is to make sure you use Ivoclean after trying zirconia-based crowns in the mouth, to eliminate the salivary phosphates and give the Scotchbond Universal Adhesive something to bond to. I haven’t personally used it because I am so happy with the handling characteristics of Ceramir® Crown & Bridge luting cement (Doxa Dental; Newport Beach, Calif.), but I would stick with the RelyX if you are having good results with it. Dear Gary, In the research I was referring to, sandblasting was still found to be inferior to using Ivoclean, even under the bestcase scenario with the sandblasting pressure set at 2.5 bar. That approach is still too iffy for me, so I continue to use Ivoclean after trying crowns in intraorally. At first I only used it on zirconia crowns being placed on short clinical preps, and then one day I started using it on all zirconia and IPS e.max® crowns (Ivoclar Vivadent) — 4 www.chairsidemagazine.com – Christopher Capehart, DDS Lewisville, Texas Dear Christopher, Dear Dr. DiTolla, – Gary L. France, DDS La Mesa, Calif. ever bond my BruxZir crowns; I almost exclusively cement them with 3M ESPE’s RelyX™ RMGI luting cement, just because of its ease of use and cleanup. With that being said, I always cement them like I do my PFMs, and I was under the impression that was OK. If your techniques in this video will help retention, then I will change my technique, especially if crowns are overtapered. Ivoclean™ (Ivoclar Vivadent; Amherst, N.Y.), Z-PRIME™ Plus (Bisco Inc.; Schaumburg, Ill.), then RelyX Luting Plus — would that help retention? Since RelyX has glass ionomers in it also, I didn’t know whether using a resin primer would help or hurt the situation. Please advise. I love the BruxZir crowns, and I just want to make sure I am cementing them the best that I can. – Mike Dear Dr. DiTolla, I just watched your technique video on cementing/bonding BruxZir® crowns. I hardly I have cemented nearly all of my BruxZir crowns with RelyX Luting Plus and have had only one come off — a very short crown on a lower second molar. You can still use RelyX to cement your BruxZir crowns and be fine. I have started supplementing it with the Ivoclean after we try the crown in the mouth, and I now use Ceramir® Crown & Bridge luting cement from Doxa Dental, since it bonds to the zirconia material itself. It seems like an easy enough step to implement, and I know it will increase the bond of my RMGI to the crown itself. I also hit the prep with some G5™ AllPurpose Desensitizer (CLINICIAN’S CHOICE; New Milford, Conn.) to try to kill most of the bacteria that ends up on the tooth during temp and tryin. So, my preferred method is now: Ivoclean and Ceramir in the crown, and G5 (or GLUMA® Desensitizer [Heraeus Kulzer; South Bend, Ind.]) on the prep. Honestly, if you continue to do what you are doing, you shouldn’t have any problems. You could go to my method just on shorter preps, or use Ivoclean/Z-PRIME Plus/RelyX Luting cement. Slow down! Be in the moment! You can’t take your money with you! Be a good human being and the money you need will come. – Mike – Carol Dudley, dental assistant for 25 years Greenville, N.C. Dr. Ellis Neiburger’s article, “Speed Dentistry: Fast Is Better — Up to a Point,” which was featured in the Summer 2012 issue of Chairside (Vol. 7, Issue 3), also elicited a flurry of reader responses: Response from Dr. Neiburger: Dear Dr. DiTolla, I enjoy Chairside, and I wanted to write you about the poor ethics I feel Dr. Neiburger has. I would not ever care to begin reading another article by him. I would be embarrassed to ever have a patient read this. I would not ever want him to treat me (or any of my patients). This article detracts from your lab, which I am enjoying. Sorry, I just needed to let you know my thoughts. So different a philosophy I admire, like Dr. Pankey’s, where you make money, enjoy and get to know your patients, and can be proud of what you do. Sincerely, – Ed Olsen, DDS Hardwick, Vt. Dear Dr. DiTolla, Just received the latest issue and must BARK about the speed dentistry article. I don’t know any patients that like to feel rushed in the chair. Most patients want some conversation and for the staff to “kiss them” first before sticking them and grinding on them. I think Dr. Speed is more interested in making tons of money as opposed to treating a real human being. How can you treat a patient you don’t know? Quit talking so much?! How impersonal. Get rid of difficult patients?! How do you advertise for “good patients” only? Rapid injections? OW! I feel dentistry is becoming way too impersonal — nobody has time or MAKES time to get to know anyone anymore. It’s a great pleasure to respond to Dr. Olsen and dental assistant Dudley and their misunderstandings about speed dentistry. Most of the negative comments I receive come from professionals who are troubled by new ideas or wish to keep the status quo, no matter what the economic or health improvements could be for the patients and staff. Speed dentistry is a way of looking at the delivery of dentistry to the patient. The faster you do invasive treatments, while maintaining quality, the better off the patient will be. Rather than dehumanize dental treatment, speed dentistry can reduce actual and psychological suffering. It reduces the trauma and abuse inherent in some dental treatments (e.g., extractions). It can also provide more time for the important socialization, treatment dis cussions and just plain visiting that is so necessary to maintain a close personal connection with each patient and ensure future visits, referrals and cariogenic, fattening snacks around the holidays. It fits all practices since the practitioner decides how it is implemented and to what degree. Because it requires a bit more planning and energy (working faster and more efficiently), speed dentistry is not for the lazy. Dr. Olsen and Ms. Dudley are focusing on the possibility of using speed dentistry to increase income at the expense of rushing patients through; but in reality, speed dentistry gives the practitioner and the patient more time since treatment time is shortened, leaving more relaxed time available to all. That is what one would call “being a good human being.” If you doubt this explanation, ask your patients what they would prefer: a five-minute or a 25-minute extraction? A 15-minute or a one-hour root canal? A sevenminute or a 30-minute prophy? It all can be done faster and better (and you don’t have to buy a kit or take the course). – E.J. Neiburger, DDS CONNECT WITH CHAIRSIDE FOLLOW US ON TWITTER Find us @GlidewellDental FIND US ON FACEBOOK Search for Glidewell to see what’s new. ITUNES WATCH AND LEARN Go to the iTunes store and search “Glidewell.” Plus, download the free Glidewell Publications app for iPad. SHARE YOUR THOUGHTS Visit www.chairsidemagazine.com and select “Contact Us.” Or write to: Glidewell Laboratories ATTN: Chairside magazine 4141 MacArthur Blvd. Newport Beach, CA 92660 ACCESS OUR RESOURCES Clinical videos, product information and patient resources are a click away at www.glidewelldental.com. ADVERTISE/SUBMIT AN ARTICLE Call 888-303-4221 Letters should include writer’s full name, address and daytime phone number. All correspondence may be published and edited for clarity and length. Contributors Michael C. DiTolla, DDS, FAGD Dr. Michael DiTolla is a graduate of the University of the Pacific Arthur A. Dugoni School of Dentistry. As Director of Clinical Education and Research at Glidewell Laboratories in Newport Beach, Calif., he performs clinical testing on new products in conjunction with the company’s R&D department. Glidewell dental technicians have the privilege of rotating through Dr. DiTolla’s operatory and experiencing his commitment to excellence through his prepping and placement of their restorations. He is a CR evaluator and lectures nationwide on both restorative and cosmetic dentistry. Dr. DiTolla has several clinical programs available on DVD through Glidewell Laboratories. For more information on Dr. DiTolla’s articles or to receive a free copy of his clinical presentations, call 888-303-4221 or e-mail [email protected]. John W. Harden Jr., DMD Dr. John Harden received his Doctor of Dental Medicine from the Medical College of Georgia School of Dentistry in 1978, and has been in private practice in Atlanta since that time. In 1985, Dr. Harden completed a residency training program in anesthesiology at the Illinois Masonic Medical Center in Chicago. He has been on the medical staff at Emory University Hospital Midtown since 1988, where he regularly receives referrals for the fearful and medically compromised patient. A member of the ADA, Georgia Dental Association and the Northern District Dental Society, he also serves on the board of directors and is past president of the Emile T. Fisher Foundation for Dental Education in Georgia. Contact him at [email protected] or visit www.jhdmd.com. Elliot Mechanic, BSc, DDS Dr. Elliot Mechanic has been practicing general and esthetic dentistry in Montreal, Quebec, since 1979. Dr. Mechanic serves as an Oral Health editorial board member for esthetics, and is a member of numerous professional organizations, including the International Academy for Dental-Facial Esthetics, Academy of Laser Dentistry and the AACD. Dr. Mechanic takes great pride in his work, which has afforded him the pleasure to work with executives, professionals, celebrities, international stars and everyone in between. He can be reached at [email protected]. 6 www.chairsidemagazine.com Michael B. Miller, DDS Dr. Michael Miller is the co-founder, president and editor-in-chief of REALITY, and he maintains a dental practice in Houston, Texas. He is a Fellow of the Academy of General Dentistry, as well as a founding and accredited member and Fellow of the American Academy of Cosmetic Dentistry, for which he created its acclaimed accreditation program. Dr. Miller has contributed to several texts and authors regular columns for General Dentistry, the peer-reviewed journal of the AGD. He is also a founding board member of the National Children’s Oral Health Foundation. He can be reached at [email protected]. William C. Strupp Jr., DDS, FAACD Dr. Bill Strupp is a practicing dentist best known for his vast knowledge of comprehensive cosmetic and restorative dentistry. He lectures nationally and internationally to thousands of dentists each year, and has been published in many prominent dental publications. Dr. Strupp also publishes the newsletter “Crown & Bridge UPDATE,” which is aimed at educating practitioners in better dentistry. An AACD Accredited Fellow, Dr. Strupp continually evaluates and applies clinically relevant research to the day-to-day practice of crown & bridge dentistry. His teachings center on his 43 years in private practice, from which he’s been regarded as “the dentist’s dentist.” Contact him at 800-235-2515, via e-mail at [email protected] or by visiting www.strupp.com. Ryan B. Swain, DMD A graduate of the University of Florida College of Dentistry, Dr. Ryan Swain is a general dentist and the CEO and founder of Six Month Smiles Inc. He trains dentists internationally in short-term orthodontics, and is constantly working to make orthodontics more accessible for general dentists. Dr. Swain practices in Scottsville, N.Y., where he focuses exclusively on short-term orthodontics with the Six Month Smiles System and other forms of conservative cosmetic dentistry. Contact him at [email protected] or www.sixmonthsmiles.com. Contributors 7 9 Number of consecutive years Glidewell Laboratories has won the Dentaltown Townie Choice Award in the “Veneer & High Esthetic” laboratory category 70% Percentage drop in precious metal-based restorations prescribed by dentists from Glidewell Laboratories in 2012 vs. 2007 47.2% Percentage of adults in the U.S. who have periodontal disease Source: The America Academy of Periodontology, www.perio.org 8 www.chairsidemagazine.com $31,000 Numbers by the Price paid by the highest bidder, a Canadian dentist, for the molar of Beatles icon John Lennon at a 2011 auction 201,523 Total number of implant restorations fabricated by Glidewell Laboratories through August 2012 1,612 Number of dental labs in the U.S. that use Glidewell Laboratories to fabricate their temporaries Dr. DiTolla’s CLINICAL TIPS PRODUCT........ Ceramir® Crown & Bridge SOURCE........... Doxa Dental Inc. (Newport Beach, Calif.) 855-369-2872, www.ceramirus.com With BruxZir® restorations steadily growing in popularity, I continue to look for better ways to work with this unique material. Ceramir Crown & Bridge luting cement from Doxa Dental is the only permanent cement that contains phosphates, making it the only cement that will bond to the internal aspect of a BruxZir crown without the use of a zirconia primer. Regardless of your chosen technique, we still recommend using Ivoclean® after intraoral try-in. (For more on this universal cleaning paste from Ivoclar Vivadent, see the Clinical Tip on page 10.) Ceramir is hydrophilic while placing the crown and moisture-tolerant while setting, so there is no need to dry the tooth bone-dry; in fact, it is preferable to leave the tooth moist. There is even no need to air-dry the prep, as any pooled moisture can simply be removed with a few cotton pellets. Once the crown is in place, any residual moisture will not affect the cement, even if saliva comes in contact with it while it is setting. Ceramir also has a nice rubbery stage during the set time to help avoid any interproximal “boulders” and to allow for any excess cement to be peeled off in one piece. Dr. DiTolla’s Clinical Tips 9 Dr. DiTolla’s CLINICAL TIPS PRODUCT........ Ivoclean® SOURCE........... Ivoclar Vivadent Inc. (Amherst, N.Y.) 800-533-6825, www.ivoclarvivadent.us When I started looking into the best way to cement or bond BruxZir® crowns, I stumbled across some research done by Ivoclar Vivadent that showed that zirconia oxide gets contaminated once it is tried in the mouth and comes in contact with saliva. It turns out that the phospholipids in saliva contain the same phosphate groups as zirconia primers. Furthermore, simply rinsing the saliva out of the crown does not remove the phosphate groups that are bonded to the zirconia oxide, and using phosphoric acid only worsens the problem because it is full of phosphates as well. To effectively remove these phosphate groups, a zirconia oxide solution needs to be used to clean the crown. Ivoclean is the only product like this available today. 10 www.chairsidemagazine.com Once the salivary phosphate has bonded to the zirconia oxide in the crown, Ivoclean works by flooding the inside of the crown with a greater concentration of zirconia oxide. Placing Ivoclean into the crown creates a concentration gradient, so that the phosphates that were bonded to the crown become bonded to the zirconia oxide in the Ivoclean. After 20 seconds, the Ivoclean is simply rinsed away, creating a fresh bonding surface on the inside of the crown for the zirconia primer. To watch an in-depth presentation on this topic, visit the Video Gallery section of the Glidewell Laboratories website (www.glidewelldental.com) and view the “Updated BruxZir Cleaning, Cementing & Bonding Protocol” video. Dr. DiTolla’s CLINICAL TIPS PRODUCT........ Onpharma® Anesthetic Buffering System SOURCE........... Onpharma Inc. (Los Gatos, Calif.) 877-336-6738, www.onpharma.com After spending countless hours experimenting with the best way to give a painless injection, I got decently good at it; however, no matter how much topical anesthetic I used to keep patients from feeling the needle, they always felt the sting of the acidic local anesthetic (pH 3.9) as it went into the tissue. I know you can give Citanest® Plain (DENTSPLY Pharmaceutical; York, Pa.) — which has a neutral pH of 7.4 — as an initial injection, and then follow it with some Cook-Waite Marcaine® (Carestream Health Inc.; Atlanta, Ga.) to avoid the sting, but that doesn’t seem practical for infiltrations, for example. I also believe in efficiency, so I love the STA device because I can anesthetize a single mandibular molar, set down the syringe and start prepping. When Dr. Mic Falkel from Onpharma called me to tell me about his anesthetic buffering system that he said would allow me to inject any anesthetic at a neutral pH to avoid the sting, I was ready to order it. But I was really sold when he mentioned that buffering the anesthetic created 2,500 times more of the active form of the anesthetic than when it was at its original pH of 3.9. Rather than having to wait the typical eight to 10 minutes for the body to convert the anesthetic to the active form on a lower block, injecting the buffered anesthetic will let you know if your block is working within a minute or two. Dr. DiTolla’s Clinical Tips 11 Dr. DiTolla’s CLINICAL TIPS PRODUCT........ Rapid-Glaze Diamond Polishing Paste SOURCE........... Yates-Motloid Inc. (Chicago, Ill.) 800-860-0473, www.yates-motloid.com Dentists often ask me about the best way to adjust and polish restorations. While protocols differ slightly for different materials, they all have a few things in common. Adjustments should be made with the finest grit diamond you have available. A coarse diamond will leave scratches that are almost impossible to remove, and even a medium grit bur can be challenging. Every polishing cup or wheel in the set should be used, and all visible scratches should be gone by the time you are finished using the last cup or wheel. That’s about all you need to do in the posterior. In the anterior, the high shine should be restored on any facial surfaces that were adjusted. In fact, I will often use 12 www.chairsidemagazine.com Rapid-Glaze on a bristle brush at a slow speed on the facial surfaces of crowns even when I haven’t adjusted them. This is usually because some cement has stuck to the facial of the crown or veneer, or because the surface just doesn’t look shiny enough after using the last polishing cup or wheel. Whatever your technique, a final pass with Rapid-Glaze will add a nice luster to your restorations. BasiC Procedures An Excerpt from REALITY Publishing’s “The Techniques, Vol. 1” T – ARTICLE by Michael B. Miller, DDS here are numerous tasks in dentistry that are repeatedly performed and are common to many specific procedures. We have detailed these tasks in this article. The tasks are listed in roughly the order in which you would encounter them as you progress through a procedure. Basic Procedures 15 Mark Occlusion Before Preparation (Figs. 1, 2) This should actually be done at the exam appointment to determine whether the occlusal contact areas of a tooth fall on enamel or on an existing or planned restoration. By knowing the location of these contacts, you will be better able to advise your patient on the best restoration. For example, if you are restoring a mandibular second molar, a tooth which presumably is most susceptible to wear, and the centric stop is squarely on the restorative material, you would want to inform the patient that a material with superior wear resistance would be a prudent choice. In addition, if the tooth has an abfraction lesion, removing eccentric contacts could prevent the lesion from enlarging and may relieve dislodging forces from a subsequently placed restoration. Figure 3: Defective restorations are present on the maxillary left central incisor, left lateral incisor and left canine. Figure 1: Occlusion is marked on mandibular second premolar, displaying a centric stop on enamel. Replacing the defective amalgam can be done confidently with composite because main occlusal contact is on enamel. Figure 4: Defective restorations have been removed and replaced prior to preparing teeth for crowns. The new restorations will be reliable foundations for the crowns. Figure 2: Occlusion is marked, showing no obvious deflective contacts on the maxillary second premolar. An abfraction lesion could be safely restored without worrying that occlusal forces could lead to its loss of retention. Figure 5: Definitive crowns have been cemented on preparations that were rebuilt with reliably bonded foundations. 16 www.chairsidemagazine.com Check Existing Restorations Before Preparation (Figs. 3–5) If there are existing restorations in teeth destined for full coverage, they should be carefully checked and replaced if there is any doubt at all as to their adequacy to serve as build-ups. A good rule of thumb is: If you did not recently (within two to three years) place the restorations yourself, they should be replaced now. This can be done prior to beginning the actual crown preparation or be delayed until the gross preparation is finished. Caution: The thinness of a Tofflemire-like band, which makes it easier to place through a tight contact, can actually be a disadvantage, since it is not difficult to cut through the band with a sharp carbide bur or diamond. Using a thin band may give you a false sense of confidence. If you repeatedly “nick” it during the preparation, you can still damage the adjacent tooth. You can also penetrate through a Tofflemire-like matrix with air abrasion. Therefore, if you can get a thicker protective device such as InterGuard through the contact, it would be a safer alternative. ! The shade of composite used to replace faulty restor ations is not critical, but should be in the same general shade range as the teeth, assuming the definitive restoration will be fabricated without metal support. This is especially true when the definitive restoration is fabricated from a relatively translucent ceramic or resin material. On the other hand, when a metal-based restoration is planned, using a build-up material that contrasts with tooth structure can be advantageous, since this contrast helps you see the transition from build-up to tooth and, therefore, ensures that the margin of the restoration will be prepared on tooth structure and not build-up material. Protect Adjacent Teeth During Preparation (Figs. 6, 7) Iatrogenic damage to adjacent teeth is widespread. A study, which we reviewed in REALITY NOW #106, found that 78 percent of 71 Class II cavities resulted in adjacent tooth surfaces being scarred as a result of the preparation. With small preparations, the risk of scarring the adjacent tooth increases. Figure 6: Tofflemire-like bands have been placed on mesial and distal to protect adjacent teeth from the high-speed diamond used to prepare onlay. As proximal contacts have not been opened, scarring the adjacent teeth would be difficult to prevent without the bands. The full bands were “sawed” through the very tight contacts and then the excess was cut off with scissors. While specific products such as InterGuard® (Ultradent Products Inc.; South Jordan, Utah) have been developed to prevent this type of damage, a simple (and inexpensive) Tofflemire-like band can also be used. And, because a Tofflemire-like band is relatively long and thin, it can also be “sawed” through a tight contact. To use a Tofflemire-like band, you would typically need to cut off the excess once it is in place, so it does not interfere with the procedure. However, cutting a band once it is already in place can leave sharp edges and corners. If you are using a rubber dam, this sharpness will probably not be a problem, although it can tear your gloves. But without the dam, it can lacerate a tongue and/or cheek. Therefore, be sure to round the cut corners. Figure 7: InterGuard has been inserted to protect the second premolar during the tunnel preparation through the mesial surface of the first molar. Basic Procedures 17 Figure 8: Caries-detecting dye is applied to the lesion as soon as it is uncovered. Figure 9: Caries-detecting dye remains in the lesion for no more than 10 seconds. Figure 10: Caries-detecting dye has been rinsed and slightly stains the carious lesion on the axial wall. Figure 11: Carious tooth structure as indicated by the dye has been removed and proximal surface has been opened. Figure 12: Caries-detecting dye is applied again to the lesion. Figure 13: Second application of cariesdetecting dye has been rinsed. No stains are visible. Apply Caries-Detecting Dye and Remove Carious Lesion (Figs. 8–14) Even though their efficacy has been seriously challenged, 68 percent of the REALITY Editorial Team still uses a product in this category at least some of the time. If you do use one of these products, apply for 10 seconds and rinse. Any stained tooth structure is then removed with the least destructive instruments, typically slow-speed burs and spoon excavators. Reapply the dye and repeat the removal of any stained tooth structure until the dye no longer stains the tooth. Discretion needs to be used, however. If you are getting close to the pulp and the dentin is still staining, you should stop removing any additional tooth structure. 18 www.chairsidemagazine.com Figure 14: Caries-detecting dye has been applied and rinsed, revealing stained carious tooth structure. Darker dyes are sometimes preferred to the original red color for more contrast, especially as the lesion approaches the pulp. Pulp Protection (Figs. 15, 16) With a properly sealed restoration, pulp protection is not necessary. However, you need to guard against mechanical trauma to the pulp. If there is no exposure, you can proceed with the rest of the procedure, being careful not to put pressure on thin dentin over the pulp. To protect against mechanical trauma, place a small amount of a flowable material (composite, compomer or resin ionomer) over the pulp. With mechanical exposures, achieving hemostasis is the most important aspect. Once hemostasis is accomplished, you can proceed with the rest of the adhesive procedures. Using a sterile cotton pellet that has been dipped in 5% sodium hypochlorite (Clorox, but check the concentration on the bottle) and then blotted to make it damp, apply pressure for 20–60 seconds, depending on the size of the exposure. Gentle rinsing with sterile saline and hemostasis should follow. Then proceed with adhesive procedures, again using a flowable material to prevent mechanical trauma to the pulp. Figure 15: Defective amalgam has been removed, exposing the pulp. Sodium hypochlorite was used for hemostasis. With a carious exposure, no suppuration should be present. If there is suppuration, endodontic treatment is inevitable. Otherwise, slight bleeding is probably advantageous because it may help remove some of the bacterial invasion of the pulp. In fact, if a carious exposure does not bleed, it may be advantageous to induce slight hemorrhaging to remove some of the bacterial invasion. Then proceed with the same procedure as described for mechanical exposures. In a recent REALITY Editorial Team survey, 88 percent of the members stated that they have bonded over exposed pulps. It was also estimated by these editorial team members that this treatment failed in about 18 percent of the teeth. Therefore, we strongly advise that you inform your patients that, while this treatment has an estimated success rate of about 82 percent, they still may require endodontics. Figure 16: After etching and adhesive application, flowable composite (ÆLITEFLO™ [Bisco Inc.; Schaumburg, Ill.]) has been placed to protect the pulp from mechanical trauma. As an alternative, a resin ionomer can be placed over the exposure after achieving hemostasis, but before applying the etchant and adhesive or self-etching adhesive. The advantage of placing resin ionomer before other procedures is to preserve the hemostasis you have achieved. After the resin ionomer is placed and light-cured, you can proceed as if there never was an exposure. With mechanical exposures, achieving hemostasis is the most important aspect. Once hemostasis is accomplished, you can proceed with the rest of the adhesive procedures. Basic Procedures 19 Figure 17: DO preparation has been completed on mandibular second premolar, giving direct access to the mesial of the first molar. Even though the first molar will no doubt require a restoration in the near future due to the fracture lines and internal discoloration (suggesting carious involvement), it is prudent to note whether the mesial surface has obvious signs of decay. Without visible carious involvement, the subsequently placed new restoration for the first molar can be planned to leave the mesial surface intact. Figure 18: Carious lesion found on mesial surface of maxillary first molar during the preparation of the second premolar. Figure 19: Adjacent tooth surface is cleaned with an interproximal scaler that will remove external stains and deposits, but will not remove tooth structure. Contact remains intact. By cleaning the adjacent tooth surface, you can validate that it is noncarious and the new restoration can contact clean tooth structure. Figure 20: Amalgam on mesial of mandibular first molar protrudes into DO preparation in second premolar. Figure 21: Coarse finishing disc (Sof-Lex™ XT [3M ESPE; St. Paul, Minn.]) is used to recontour amalgam. This is followed by finer grits of the same disc system for polishing. Figure 22: Contouring is completed. The restored distal surface of the premolar can now be properly contoured, without the limitations of trying to conform to the poor contour of the amalgam restoration. Check Adjacent Teeth After Preparation However, when the contact is not broken, you may not have access to completely smooth an adjacent restoration. In this instance, a finishing strip (aluminum oxide or diamond) would be used instead of a bur or disc. A perforated strip (interproximal scaler) may also be used to clean proximal surfaces of hard adherents prior to placing the restoration. CM (Figs. 17–22) Be sure to check the adjacent tooth surface for possible caries or to smooth existing restorations. If proximal caries exists in the adjacent tooth, this is the optimal time to restore it. At this point, you have direct access to the carious lesion, allowing the most conservative preparation possible. If the adjacent tooth has a rough, overcontoured or overhung restoration, it should be smoothed and/or recontoured with finishing discs or finishing burs, if access permits. 20 www.chairsidemagazine.com Dr. Michael Miller is the co-founder, president and editor-in-chief of REALITY. He maintains a dental practice in Houston, Texas. Contact him at mm@realityesthetics. com. Reprinted by permission of REALITY Publishing Company. © 2003 REALITY Publishing Co. Vol. 1, The Techniques, pp. 11–14. 22 www.chairsidemagazine.com Photo Essay Post-and-Core Technique for Endodontically Treated Teeth – ARTICLE by Michael C. DiTolla, DDS, FAGD lacing post and cores is not an everyday procedure for most den tists, yet I get a surprising number of e-mails from dentists asking which post-and-core system I prefer. Rather than limit myself to one system, I like to try out the various systems in the lab’s operatory. For the case that follows, I used the Rebilda® Post System (VOCO America Inc.; Briarcliff Manor, N.Y.) to restore an endodontically treated tooth #10 with severe decay. In addition to radiopaque, translucent fiberglass posts and corresponding burs, the system includes a dual-purpose cement/ core build-up material and dualcured, self-etch bonding agent. I was pleasantly surprised by the system’s completeness and ease of use. Post-and-Core Technique for Endodontically Treated Teeth 23 Figure 1: After reviewing the radiograph to assess the condition of the endodontic treatment and the condition of the canal, we can begin removal of the gutta percha. My goal is to extend the post two-thirds of the way into the root, while leaving a minimum of 4 mm of gutta percha in the apical third of the tooth. Although the gutta percha in this tooth is short of the radiographic apex, there is no apparent pathology and the patient is asymptomatic, so I am comfortable placing a post. Figure 2: We begin the process of removing the gutta percha using the 0.7 mm reamer. The safe-end tip on the reamer and the use of minimal vertical pressure helps to prevent ditching or perforating the walls of the canal. Tilting your head can help to visualize the faciolingual orientation of the reamer. Figure 3: Take a look from the facial as well to ensure that the angulation of the reamer is along the long axis in a mesiodistal orientation. Glance again at the radiograph to help you picture where the reamer should be going. Seeing pieces of gutta percha jumping out of the coronal portion of the root is a good sign. Position the reamer into the gutta percha along the path of least resistance. Figure 4: As the reamer progresses into the canal, place an endo stopper on the reamer if you haven’t already. When the reamer begins to bottom out, hitting tooth structure and the gutta percha in the apical third of the root, it is time to stop and take a radiograph to verify your position. 24 www.chairsidemagazine.com Figure 5: This is one of those times when digital radiography really comes in handy, making you more efficient than if you were to run a film through a developer. I can see on the radiograph that the reamer has indeed begun to engage the tooth structure and is right at my desired depth of two-thirds the length of the canal. I take the reamer out of the canal and measure the length. The goal is to have two-thirds of the post in the root and one-third of the post in the build-up. Figure 7: Next, we move up to the 1.5 mm Rebilda Post drill, the middle size of the three post burs supplied in the kit. It seems to fit many maxillary lateral incisors and is fluted to remove a significant amount of gutta percha. Progressing apically, I feel it stop 1.5 mm short as it bottoms out in the tooth. Resist the urge to shove it down the last bit of the way to match the length of the reamer — that’s how roots get fractured! Figure 6: It is now time to replace the reamer with the first Rebilda Post drill. The goal here is to remove more of the coronal gutta percha to create the post space without removing too much structure internally in the apical third of the root. All of the root fractures I have seen in the past 20 years have originated in the apical third of the root at the base of the post. I have always attributed these fractures to over-preparation. I am using the 1.2 mm Rebilda Post drill, which goes to the same depth as the reamer. All of the root fractures I have seen in the past 20 years have originated in the apical third of the root at the base of the post. I have always attributed these fractures to over-preparation. Post-and-Core Technique for Endodontically Treated Teeth 25 Figure 8: A glance into the coronal portion of the root reveals that the coronal gutta percha has been removed completely. Residual gutta percha in the coronal portion of the root can make it difficult to seat the post correctly. If you have difficulty removing it, you can move up to the largest drill, the 2.0 mm Rebilda Post drill, but take care to advance it slowly until it just begins to bind in the canal and no further. All of the drilling you are seeing here was done at 2,000 rpm with my KaVo ELECTROtorque plus handpiece (KaVo Dental; Charlotte, N.C.). Figure 9: The fiber posts in the Rebilda Post System kit are color coded to match the drills, so I use a 1.5 mm post to match the size of the last drill we took to length. Mark the post at that length to verify that it is seating completely when you try it in the tooth. It’s OK if there is some side-to-side movement of the post; in fact, I prefer a passive fit to ensure we are not setting up stress in the brittle, endodontically treated root. Figure 10: Using a permanent marker, I make a length mark on the post slightly longer than I think I will need. I like to have the top part of the post be close to the surface of the build-up material I am going to add, so that when I am light curing from the incisal I can be sure that the light is going down the fiber post and into the canal and the surrounding cement. The literature shows that a fiber post that flexes when the tooth does causes fewer problems than an inflexible post. Figure 11: I prefer to cut the post to size outside the patient’s mouth to avoid having the cut portion drop into the back of the mouth. Also, I prefer to do the cutting now, instead of while the post is in the tooth and the cement is setting, so that the vibration from the handpiece doesn’t break the cement bonds to the tooth structure and the post. As I am intentionally going with a passive fit of the post, I am counting on my cement bond to hold the post and core in place. 26 www.chairsidemagazine.com Figure 12: Holding the Rebilda Post with an articulating paper holder, I coat the post with alcohol to remove any contamination that might be present from inserting it into the canal. All posts are shipped in non-sterile packaging, so some dentists will coat them with alcohol prior to trying them in for the first time. There is certainly nothing wrong with doing that. Figure 13: Next, I evaporate the alcohol using my A-dec Warm Air Tooth Dryer (A-dec Inc.; Newberg, Ore.). This might be the most obscure instrument in dentistry, and it’s certainly one of the tougher ones to find (most of your supply reps have probably never even heard of it). Without the dryer, which uses a venturi to remove any moisture from the air, I would have a lot less confidence in my bonding procedures. I use it on a hose that has never had a handpiece on it and is therefore free of oil, since the presence of oil can cause even more bonding issues than moisture contamination. Figure 14: Here I am using a microbrush to coat the fiber post with the enclosed Ceramic Bond. Because there is some glass in this fiber-reinforced composite post, this silane does a great job of bonding the resin cement to the post. After coating the post and waiting 60 seconds, I will use the A-dec Warm Air Tooth Dryer to thin and evaporate the Ceramic Bond on the post prior to placement. At this point, you can flush the canal with sodium hypochlorite to make sure all gutta percha and dentinal debris have been removed. Figure 15: Futurabond DC, a dual-cured, self-etching bonding agent reinforced with nano particles, is the bonding agent included with this system. VOCO’s clever unidose dispensing system ensures that you always have fresh material because the two components aren’t mixed until you push down on one side of the blister pack, causing the self-etching bonding agent to mix with the dual-cure activator. Here you can see me squeezing the pack to mix the liquids. Post-and-Core Technique for Endodontically Treated Teeth 27 Figure 16: After activating the Futurabond DC, simply punch through the foil pack with the enclosed microbrush, which is specially designed for placing bonding agents inside the canal. The long, tapered brush extends nearly all of the way into the prepared post space. I find it easier to puncture the foil surface with the handle side of the microbrush and then insert the elongated tip into the foil reservoir as shown. This helps prevent the microbrush from bending. Figure 17: Once the tapered post brush is coated with Futurabond DC, I pump it up and down in the canal space for about 20 seconds. I have my operatory light turned off because we definitely do not want to cure the bonding agent in the canal at this point. If we were to do that or if it were to pool in the apical third of the canal, it would be impossible to get the post to seat properly. Figure 18: Again I use the A-dec Warm Air Tooth Dryer to evaporate the solvents from the Futurabond DC in the canal. You can see why introducing moisture or oil from a regular three-way syringe at this point in the bonding process could be especially problematic. A simple test is to take your air-water syringe and blow it for 20 seconds on the face of your wristwatch to make sure it is free of oil and moisture. Figure 19: I have found that the best way to remove excess bonding agent from the apical third of the post space is not with air, but with a typical endodontic paper point. Place the paper point as far as it will go into the post space and then give it a few seconds to absorb any excess bonding agent. Observe the tip of the paper point when removed to see if it appears wet and then continue inserting points until one appears dry after removal. 28 www.chairsidemagazine.com Figure 20: You can now start the core build-up. The Rebilda DC dualcure core build-up material is an automixing system dispensed directly into the post space using the enclosed microtip, as shown here. These tips are the thinnest I have seen for an automix system. In fact, at first glance it’s hard to believe the build-up material is going to be able to pass through the opening, but, of course, it does. Figure 21: When filling up the post space, take care not to fill it completely. If you fill the post space completely and then try to jam the post down into place, the shape of the canal and a fundamental rule of hydraulics won’t allow this to happen. If you just were to fill up the apical half of the post space you would be fine, since by the time the post is inserted you would have excess build-up material flowing out the coronal aspect. In the rare instance when you might not use enough material, it is very easy to fill a void by placing additional material with the enclosed microtip. Figure 22: If you happen to correctly estimate the amount of build-up material to place in the canal, you should see something like this. The tip of the post should be at the same length you measured it, indicating that it is properly seated. You shouldn’t see a mass of extra build-up material on the exterior of the tooth, although cleanup with the microtip is easy if needed. Figure 23: I prefer to cure the post, Futurabond DC and Rebilda DC simultaneously before placing the coronal build-up. Otherwise, I would be curing through a huge ball of composite and, in my mind, the success of this post and core comes down to how well everything cures inside the canal. Curing it as you see here gives me the best opportunity to get light down the post and deep into the canal. I cure for 40 seconds. Post-and-Core Technique for Endodontically Treated Teeth 29 Figure 24: In the past I have done free-form composite build-ups, which I call the softserve ice cream technique because you swirl on material, swirl on more material and then cure. However, I always find myself coming back to shaping aids, both in the interest of speed and because I have a harder time getting an ideal prep shape with the soft-serve method than if I slightly overbuild it with a shaping aid and cut it back. Here I am using the Rebilda Form. I always find myself coming back to shaping aids, both in the interest of speed and because I have a harder time getting an ideal prep shape with the soft-serve method than if I slightly overbuild it with a shaping aid and cut it back. 30 www.chairsidemagazine.com Figure 25: I cut the Rebilda Form to an acceptable height and shape the gingival aspect to allow room for the papilla. I then stabilize the Rebilda Form with my index finger, while I fill the form with a fresh mix of Rebilda DC. I am using the endo tip again, but any tip would work here. You may notice that I am using the same material I used to bond the post for the build-up, ensuring compatibility at the interface and reducing inventory. Figure 26: I set the curing light on top of the Rebilda Form and cure away, aiming for a 40-second cure. Sometimes I cure for 40 seconds and then hand the light to my assistant so she can cure it for an additional 40 seconds. Maybe it’s because I graduated from dental school in the late 1980s, but I really don’t trust most manufacturer-suggested curing times. Until a study comes out proving that overcuring is bad, I plan to stick to this technique. Figure 27: After my marathon cure, I stick an explorer into the Rebilda Form, slide it up to the occlusal and remove the shaping aid. Oops! Look at the void I created in the build-up. I may have been pressing a little too hard with my index finger because the vertical void looks a lot like the tip of the explorer. Apparently, I neglected to continue to inject as I removed the tip from the Rebilda Form. This falls squarely under the heading of operator error. Figure 28: Fortunately, the oxygen-inhibited layer is still present on the Rebilda DC, so all I need to do to fix these voids is to put a new tip on the build-up syringe and add material as I am doing here. This will also give me a chance to light cure again, especially from the gingival, where I wasn’t able to cure when the Rebilda Form was in place. Figure 29: With the voids filled, I now have my preferred build-up shape, which is roughly the outline of an overbuilt lateral incisor. As I mentioned earlier, I find it much simpler to achieve an ideal lateral incisor prep through a subtractive process than through an additive process using the soft-serve technique. Figure 30: I do not have the full contour of a lateral incisor in this case, so I can’t do my typical Reverse Preparation Technique on this tooth. Because I can’t use the round bur I usually start with, I begin with this super coarse 856-025 bur (Axis Dental; Coppell, Texas). I will start doing my axial reduction with this bur, but first I need to make sure I get rid of any flash at the gingival margin. I like to get my #00 cord (Ultrapak® Cord [Ultradent Products Inc.; South Jordan, Utah]) in the sulcus as soon as possible, but the flash first needs to be eliminated if we are going to have any chance of getting the cord smoothly into place. Post-and-Core Technique for Endodontically Treated Teeth 31 Figure 31: The #00 cord is placed into the sulcus with the two ends flush. This will retract the gingival margin about 0.5 mm, which will allow us to drop the margin to this new gingival level. When the #00 cord is removed, the net effect will be a 0.5 mm subgingival margin without having to take a bur subgingival or cause bleeding. Figure 32: Usually there is a fair amount of time between when I place the bottom #00 cord and the top #2E cord (Ultradent Products Inc.), but in this case the prep is almost finished after using only the 856-025 bur. This top #2E cord will provide the lateral retraction of the tissue and make room for the impression material, while the bottom cord provides the vertical retraction that allows us to prep our virtual subgingival margin. Figure 33: One of the benefits of using an electric handpiece is the ability to turn it down to 2,000 rpm with the water off to see precisely what you are doing, preferably through loupes. Trace a line along the gingival margin to make sure it is crisp and clear. Remember, the handpiece is only spinning at 2,000 rpm, so there is not enough heat generated to damage the pulp. Figure 34: With the top cord in place, the subgingival margin is just barely visible above the gingival margin. This top cord stays in place for 8 to 10 minutes. When it is removed, there typically will be no bleeding since the bottom #00 cord is still in contact with the inflamed base of the sulcus. Once the top cord is removed, an impression of the finished post-and-core preparation can be taken. CM 32 www.chairsidemagazine.com 34 www.chairsidemagazine.com digital Communication of Critical Cosmetic Restorative Guidelines O ne of the most important elements of a cosmetic restorative case is the horizontal plane of the case (HPC). The HPC is defined as the plane that the incisal edges of the anterior restorations should follow relative to specific landmarks of the face. Ninety percent of the time, the plane can follow the pupillary line plane. The gingival plane of the anterior teeth should parallel the HPC when the gingival line is visible in the smile. Facial asymmetry and biological limitations based on anatomy dictate the reality of what is possible when matching the gingival plane to the chosen HPC. Leaving the HPC up to chance or ignoring it often compromises the cosmetic outcome of the case. As such, it is important for the restorative dentist to define and then communicate the HPC to the laboratory and to the specialists involved in the interdisciplinary treatment of the case. When biological limitations do not exist, it is important for the laboratory and the specialists to follow the designated plane. Analyzing and deciding on the appropriate HPC is easily done using a lip-retracted, full-face digital photograph imported into presentation software such as Apple Keynote® (Apple Inc.; Cupertino, Calif.) or Microsoft PowerPoint® (Microsoft Corporation; Redmond, Wash.). In this author’s opinion, Keynote is by far the easiest program to use. – ARTICLE by William C. Strupp Jr., DDS 1 Figure 1: The retracted view full-face photograph is made with the patient standing against a wall marked with “correct” horizontal and vertical lines. The patient must not lean against the wall and should stand erect without tilting the head. The photographer should attempt to eliminate any camera tilt and to take care not to shoot the photograph at an angle from the left, right, above or below. The patient must be “square” to the camera and vice versa. The photograph is captured and then imported into Apple Keynote. 2 STEPS in the digital communication process 1. Take the photographs. 2. Analyze the photographs to determine the HPC. 3. C ommunicate the HPC to the laboratory and the specialists involved in the interdisciplinary management of the case. Figure 2: The first step in analysis is to draw a 0-degree line on the photograph that extends beyond the spectral highlights — the white dots in the pupils caused by reflection of the camera flash. Other 0-degree lines can be drawn over the teeth and the gingiva to assess the horizontal plane and to determine the HPC. Analysis of these lines reveals the patient’s tilt and facial asymmetry in the photograph. Digital Communication of Critical Cosmetic Restorative Guidelines 35 3 4 Figure 3: The photo is then “corrected” by tilting it in Keynote so the 0-degree line crosses both spectral highlights at the same point. It is now possible to draw other 0-degree lines to decide if the patient or camera was tilted, or if the patient is tilted anatomically. From these lines the ideal HPC can be determined. In this case, because the patient’s ear lobe plane anatomically matches his pupillary line, the selected HPC is the pupillary line. Figure 4: If the case is to be restored, communication of the HPC is necessary. This is accomplished by adding the patient’s name, date of the photograph and selected HPC to the slide. The restorative dentist selects the HPC for this case as the gingival plane of tooth #6 & #10. This slide is then printed and sent to the laboratory, as well as to the specialists if surgical correction is necessary. Further analysis of the incisal and gingival planes reveal asymmetry. If the gingival plane does not show in the full smile, that asymmetry does not require correction. If the incisal plane can be corrected without creating undue envelope of function issues, and if there is sufficient biological support available to allow a change, then it is possible in the final restorative case to change the incisal plane to match the HPC. A complete understanding of occlusion is necessary to make these determinations. This maxillary case was previously restored without paying attention to the foregoing discussion, and the cosmetic result mirrors the lack of attention to these details. When a modification of the gingival plane is necessary to match the HPC, the periodontist decides if there is adequate biological support to create the desired changes, communicates this to the restorative dentist, and then matches the gingival plane to the HPC using the appropriate surgical approach and biological respect. 5a When the case is mounted for diagnosis and treatment planning or for treatment, the laboratory trims the base of the maxillary cast to be parallel to the HPC (the gingival plane of tooth #6 & #10) and mounts the models with the base of the maxillary cast parallel to the horizontal plane of the articulator. In addition, the midline of the face should be the midline of the articulator. All diagnostic waxing, case planning and finishing of the restorative case is done on models mounted by the laboratory in this orientation. 5b Figures 5a, 5b: Many clinicians suggest using a straw bite to record the correct HPC. Unfortunately, 99 percent of these bites are incorrect and lead the laboratory to mount cases incorrectly. Diagnostic waxing, case planning and finishing using an incorrect HPC is a sure way to compromise the cosmetic outcome of the case. 36 www.chairsidemagazine.com 6a 6b Figures 6a, 6b: Postoperative computer analysis of case photographs reveals both successes and failures, thereby helping the clinician improve communication and cosmetic results for future cases. These are preoperative photos of a missing lower central case planned for phased restorative treatment of all of the teeth over time. No periodontal surgery was done in this case because the gingival plane was not a cosmetic compromise. The chosen HPC was the gingival plane of tooth #6 & #11. 7a 7b Figures 7a, 7b: The “after” photograph reveals the success and failure of the case. The incisal plane is perfectly parallel to the HPC, but the maxillary right central is 0.3 mm too long. The restorations were made of single-tooth IPS e.max® Press (Ivoclar Vivadent; Amherst, N.Y.) restorations on supragingival margins. A custom zirconia abutment was used for the missing mandibular central. 8 Figure 8: The short lip exposes the gingival line, and were it not within normal cosmetic limits, surgery would have been required to alter it so it would be parallel to the HPC. 9 Figure 9: Keynote also allows the clinician to use innovative concepts in studying cases and communicating with the laboratory and specialists. Here, an image of a ruler was cropped and properly sized. The maxillary left central incisor was exactly 9 mm wide, so this dimension was used to size the ruler image. (Note: A known dimension must exist in the photo to properly size the ruler image.) The opacity was reduced to 20 percent, the image was duplicated and rotated 90 degrees, and then both images were placed over the maxillary left central to study length and width proportions. Digital Communication of Critical Cosmetic Restorative Guidelines 37 10 11 Figure 10: If a probe is placed in the same plane as the teeth and photographed in the full-face retracted view, imported overlay images (in that plane) can be properly sized to analyze length and width proportions. Knowing the exact width and length of a central incisor is the easiest way to correctly size imported images. 12a Figure 11: Calculations can be made to decide length and width proportions and to determine if those proportions are possible. It is impossible to make a tooth that is 9.0 mm wide as it emerges from the tissue be less than 9.0 mm wide. The gingival diameter of the root mesiodistally cannot be altered without drastic surgical procedures. The three dimensions depicted on this photograph can be assessed for practical application for making the final case. In this case, 75 percent is ideal, but probably not possible. 12b Figures 12a, 12b: Another interesting thing that can be done for communication with specialists is to draw circles at the height of the existing gingival line and then overlay an image of teeth obtained from the Internet, properly sized and reduced in opacity, to evaluate where the gingival levels are and where they should be placed relative to the circles under the image. It is obvious from the circles in this image that the gingival line is not very esthetic. It is also obvious from the line drawn along the gingival line of the Internet photo that the gingival line of this image is asymmetrical. The tissue on the right cuspid is receded and the tissue on the laterals is not receded enough. When the teeth are overlaid matching the incisal edges, which were ideal in length, the gingival aspect of where the tissue is and where it needs to be can be evaluated and communicated to the specialists. 13 38 Figure 13: The circles can be moved apically into an acceptable position relative to the HPC using a 0-degree line over the central gingival line as a reference point. The height of tissue on the cuspids and centrals should fall on this line, with the laterals 1.0–1.5 mm short of the line. Once the imported image is overlaid, an analysis of what might be better cosmetically can be visualized, taking into account the gingival line issues of the imported photograph. This information can be photographically transmitted to the periodontist for proper tissue positioning, provided it is permitted biologically. Likewise, the incisal plane can be visualized and communicated to the laboratory for proper design in both the diagnostic and final phases of treatment. www.chairsidemagazine.com 14a 14b 14c 14d Figures 14a–14d: Instead of using imported images of teeth, outline drawings of teeth that are properly sized and proportioned can be used to evaluate the gingival and incisal planes. The outline drawing in this photo is exactly 8.5 mm x 11.0 mm, which is believed to be the most realistic size for this case. Once the outline drawing is properly sized, it is moved over the gingival line of the teeth in the correct HPC and duplicated in Keynote. It is then flipped in Keynote and the mirror image is properly positioned in the correct HPC to match the other side. Analysis of these line drawings can be helpful to the referral doctors and to the laboratory technician in managing the case. The question surgeons must answer is: “Are the desired cosmetic changes possible given the biological support that exists?” The question laboratory technicians must answer is: “Can the case be properly mounted so the quest for a HPC can be achieved?” The question for the restorative dentist is: “Will I spend the time to do all this stuff?” If the restorative dentist will not take the time to learn how to do all of these “high-tech” procedures, all is not lost. Most of the communication needed can be transmitted with the use of a Straight Smile Guide™ (Crown & Bridge UPDATE, 800-235-2515). Created for technophobe dentists, it is a quick way to analyze and communicate critical cosmetic parameters to the team. 15 Figure 15: The Straight Smile Guide is a stiff plastic sheet with grid lines running vertically and horizontally. This guide comes in two sizes. The large size is used to evaluate the HPC by placing it over a full-face, retracted view, 8.5-by-11-inch photograph of the patient. The small size is for the lab technician to aid in mounting the case in the correct HPC and then to verify that the mounting is correct. Digital Communication of Critical Cosmetic Restorative Guidelines 39 16 17 Figure 16: Using the Straight Smile Guide, decide on the correct HPC. Do this at the diagnosis and treatment planning stage, before beginning treatment. Move the guide around on the photograph to decide on the correct horizontal plane of the case. Record the anatomical points to be used for the HPC. 18 Figure 17: Provide the lab with the full-face retracted photo and the Straight Smile Guide (large one is used over the photo, small one is used for the articulator to assist in mounting and to verify accuracy). Information on the anatomical points that should be used for the correct HPC is also given to the laboratory for proper mounting. In this case, it is the gingival plane of tooth #6 & #10. 19 Figure 18: The lab uses the properly trimmed maxillary cast to properly mount the case. If the midline of the face is also marked on the model, the mark can be used to position the cast in the articulator just like the teeth are positioned in the mouth. Using the small Straight Smile Guide aids in proper mounting and verifies that the mounting is correct to the HPC. Figure 19: The lines across the top model show the base trimmed improperly — it is not parallel to the gingival plane of tooth #6 & #10, which is the chosen HPC. The lines across the bottom model show the base trimmed properly — it is parallel to the gingival plane of tooth #6 & #10, which is the chosen HPC. Mounting the base of the maxillary cast in the same horizontal plane of the articulator gives the technician making the case the correct HPC relationships (cast to articulator to patient). This minimizes the issue of uphill and downhill smiles. Most of the communication needed can be transmitted with the use of a Straight Smile Guide. Created for technophobe dentists, it is a quick way to analyze and communicate critical cosmetic parameters to the team. 40 www.chairsidemagazine.com 20a 20b 20c 20d Figures 20a–20d: These four images were printed from Keynote and sent to the periodontist with an e-mail describing the cosmetic concerns with the HPC. This was a post-orthodontic case where the roots were 50 percent burned off on the maxillary central and lateral incisors. In addition, there was an anterior open bite from second bicuspid to second bicuspid. Occlusion on the molars was flat due to no anterior guidance and excessive wear patterns. The case was planned to restore all of the upper and lower teeth with partial-coverage porcelain to establish appropriate occlusion on the teeth capable of carrying the load. The patient’s chief complaint was her gummy smile and lack of occlusal contact. The horizontal lines are all at 0 degrees. The lines drawn on the central represent an ideal proportion if the incisal edges were and were not lengthened. Altered passive eruption (APE) meant no supporting bone would need to be removed to treat the APE. 21 Figure 21: This photo reveals the issue with the HPC. The angulation of 1 degree should be corrected surgically before restorative care is provided. The APE on the right side requires correction, while on the left it does not. The lip asymmetry on the right displays more gingiva. In addition, the incisal plane of the cuspids parallels the gingival asymmetry; it is off by 1 degree. The simple correction for this case is to remove tissue from the right side and lengthen the incisal edges on the left to create a restorative case that is parallel to the HPC. Note that the red lines are at 0 degrees and the white lines are at 1 degree. The final gingival and incisal planes should parallel the red lines. Soft tissue and bone would need to be removed over the right bicuspids to avoid an excessive step from anterior to posterior. Digital Communication of Critical Cosmetic Restorative Guidelines 41 22a 22b Figures 22a, 22b: A technique that can be used to “standardize” the size of photographs is to draw a line between the spectral highlights, duplicate the line and then cut and paste it onto another photo. Resizing the second photograph until the line fits exactly in the same spots on the spectral highlights makes both photographs the same size, provided camera angle does not play a role. This enables the user to measure the length of the teeth before and after surgery to see the treatment results. 23 24 Figure 23: In order to have a harmonious HPC, the tissue will need to be decreased on the right and the incisal length will need to be increased on the left. Note that the 0-degree line is in red and the 1-degree line is in white. 25 26 Figure 25: Periodontal surgery was done to “correct” the APE on the six anterior teeth and bone was removed to create a parabolic architecture. Nothing was done to parallel the gingival plane with the HPC. The right bicuspids were not touched. The gingival asymmetry was preserved rather than matching the gingival plane to the HPC. The periodontist ignored the photographs that showed exactly what was necessary to make this case a cosmetic success. 42 Figure 24: Camera angles alter length perception, but not plane perception. This photograph was shot from too high above the teeth. www.chairsidemagazine.com Figure 26: Photo at six weeks post-op. A second surgery was done at this time to remove tissue from teeth #6–#9. 27 Figure 27: Even after the second surgery, the gingival plane is still 0.7 degrees off the HPC. The line drawn on tooth #8 represents the original length of the central before the two surgeries. 28 Figure 28: Cosmetic issues. Cuspid gingival plane is off 0.7 degrees. Gingival levels of the incisors are uneven or gull-winged in shape. Gingival length of #10 is longer than #7. There is a significant step between #5 & #6, and #10 & #11 should not have been lengthened. The #10 space was left too wide by the orthodontist, and the midline was not properly managed. 29a 29b 29c 29d Figures 29a–29d: Outline of the teeth at 75 percent length and width proportion shows the ideal angle of the case relative to the HPC. Unfortunately, the gingival plane must be followed, which leaves one of two options: 1) angle the incisal edges to follow the gingival plane, thus creating a “downhill smile” that will not have the incisal edges parallel to the HPC or 2) shorten the incisal length of the teeth on the right to make the case incisally parallel to the HPC, thus creating contralateral teeth of different lengths. Both of these options are a cosmetic compromise that could have been avoided if the periodontist had followed the restorative dentist’s request to level the gingiva with the HPC. Digital Communication of Critical Cosmetic Restorative Guidelines 43 30 Diagnostic waxing, case planning and finishing using an incorrect HPC is a sure way to compromise Figure 30: Another case by the same periodontist who ignored the HPC when treating the gingival plane. It is advised to use computer analysis of digital photographs to communicate important cosmetic elements to the patient, staff, specialists (periodontist, orthodontist, implantologist) and the laboratory. Use your staff to do most of the work required for the protocol. the cosmetic outcome of the case. 31a 31b 31c 31d Figures 31a–31d: This case shows a violent discrepancy between the surgical gingival line and the HPC. Fortunately, the difference in the incisal length of contralateral teeth did not compromise the case too much. The patient was thrilled. This case will be presented in its entirety in the seminar titled “Simplifying Complex Cosmetic and Restorative Dentistry,” which will be presented in Clearwater, Fla., and San Francisco, Calif., in early 2013. CM Dr. Bill Strupp practices in Clearwater, Fla., and lectures internationally on the subject of comprehensive cosmetic and restorative dentistry. He also publishes “Crown & Bridge UPDATE,” aimed at educating dentists in better dentistry. Contact him at 800-235-2515, [email protected] or by visiting www.strupp.com. 44 www.chairsidemagazine.com Interview with Dr. John Harden – INTERVIEW of John W. Harden Jr., DMD by Michael C. DiTolla, DDS, FAGD Dr. John Harden is a Glidewell Laboratories customer and fellow speaker, who will be presenting at the 2013 CDA meeting in Anaheim, Calif. After learning that his program will be on hospital dentistry, it dawned on me that I had never interviewed a dentist in Chairside who specializes in this area. John has hundreds of stories about the type of unpredictable cases that can be thrown at you when working in the hospital setting, and he recently took the time to sit down and share a few. Enjoy! Interview with Dr. John Harden 49 Dr. Michael DiTolla: In Chairside magazine, we haven’t had the opportunity to talk to someone who does a lot of hospital or sedation dentistry. Tell me a little bit about your background, especially what you did after dental school that led you to where you are today. Dr. John Harden: I graduated from the Medical College of Georgia School of Dentistry in 1978, and then I practiced for about five-and-a-half years in downtown Atlanta. I met my present wife, who is in anesthesia, and I got very interested in anesthesia. So I went to Chicago to the Illinois Masonic Medical Center, which is a University of Illinois teaching hospital, and I did a residency program in anesthesiology. The program accepted one dentist with the physicians, and I went through with 17 physicians. After I finished that program, I came back to Atlanta and started going around giving anesthesia for other dentists. I also worked in a large clinic and, in about 1987, started up another practice. And I continued going around giving anesthesia for other dentists in their offices. But as business built up, I just didn’t have time to do that. I had to spend more and more time in the office, and of course we gave anesthesia for our own patients. This was mainly deep IV sedation; we didn’t give any general anesthetics at all. I got involved with hospital dentistry at Emory University Hospital, which is where I am right now. As the years went by, we started doing more and more hospital dentistry, and that’s our prime focus right now. MD: When you were doing anesthesia for other dentists, what type of procedures were you mainly going to their offices for? JH: Extraction of third molars and periodontal surgery, and sometimes other miscellaneous general dental procedures. But those are the main things we did. We had a lot of general dentists taking out third molars. I would carry all of my equipment with me, including my own oxygen supply. I didn’t want to take a chance on anything. We mainly did sedation with Versed (midazolam) and fentanyl. MD: What was your experience in terms of safety over those years? Since you were doing more deep IV sedation as opposed to general anesthesia, it sounds like it was probably a pretty safe procedure. JH: It was a very safe procedure, and we never had any problems at all. I basically did it the way I was trained as a resident in Chicago. We never had any adverse reactions. Every now and then we had a few patients where once I got on site I realized we couldn’t do the case. There was one case where I showed up to give anesthesia on a guy who’d had a heart attack a couple of months before. I realized that we weren’t going to be able to do anything on the patient, and that we needed to wait at least six months and get clearance from a cardiologist. But, overall, we had a great safety record. 50 www.chairsidemagazine.com MD: So were these mainly GPs or surgeons taking out these wisdom teeth? JH: These were mainly GPs that I gave anesthesia for. They were doing third molars and other miscellaneous procedures. I’ve had periodontists and prosthodontists come to my office and have me sedate their patients. Over the years, we’ve gravitated mainly to hospital dentistry and sedation. MD: I know a lot of general dentists who don’t enjoy taking out four third molars, especially if they’re partially impacted. I always thought that their discomfort came from the surgery itself, but I wonder, if those dentists were able to have a patient be in deep IV sedation, would they not feel a little more confident taking on those cases? I think part of their discomfort comes from the patient being awake. JH: They do much better with IV sedation — absolutely. MD: Don’t you get the feeling that more dentists would probably attempt that procedure if they had someone doing IV sedation in their practice? JH: Absolutely they would, because many times you get too involved with the procedure and you can’t adequately monitor the patient. Sometimes it’s difficult to do both. Most general dental procedures are rather long as opposed to oral surgeries, where the surgeon goes in and gets out four third molars in 30 to 45 minutes at the most. MD: And I’d assume that even those oral surgeons would take a lot longer than 30 or 45 minutes if the patient was awake. JH: Oh absolutely. There is no question about that. Third molar surgery is a very difficult surgery when you have bony impactions. There’s a lot of post-op pain associated with it, too. MD: So how did you get introduced to hospital dentistry? Like most of our readers probably, I have been involved in very few hospital dentistry cases over the years. JH: When I was in Chicago doing anesthesia, they had a big general practice residency program there that did a lot of dentistry for the handicapped. I used to put a lot of those patients to sleep with full-blown general anesthetics. So I watched the general practice residents and got to know them well and decided to do that when I came back to Atlanta. I applied to be on the medical staff and started doing hospital cases in 1988. And we’ve done many hospital cases over the years — the sickest of the sick. And in as much as Emory University Hospital is a teaching hospital for a major university, they will treat anybody. It doesn’t matter how sick they are. They can handle anyone. On my website is a list of many of the different types of cases that I’ve done. One particular type that we have 52 www.chairsidemagazine.com enjoyed doing is renal transplant cases, where you have to clean the patient up prior to the transplant and write a letter certifying to the transplant surgeon that there are no sources of dental infection. But the problem with these patients is that they often have out-of-control hypertension, in that top 5 percent, where it’s called malignant hypertension. You really have to treat them in an operating room; there is no way you can manage it in the office, because medication has to be given to keep their pressure down. Many times these patients have to go to the ICU for blood pressure control. The last case I did was a female patient with end-stage renal disease, hyperparathyroidism and out-of-control hypertension. We had to give medication in the recovery room because she was over 200 systolic and 120 diastolic. If you typically do patients like this in the office you can get into real trouble. Many times you have to have a nephrologist, a kidney specialist, on standby to manage the hypertension after the OR case. So those are some of the types of patients, but I actually got into that by watching the general practice residents in Chicago when I was an anesthesia resident. So now we do it routinely. I get referrals from very difficult patients, such as those with Down syndrome, cerebral palsy, developmental delay and severe cardiac disease. MD: Are you providing the anesthesia and doing the dentistry on those cases? JH: Oh no. The Emory University School of Medicine runs the anesthesia there and they have attending anesthesiologists. But most of the anesthesia is given by physician assistants (PAs) in anesthesia and Certified Registered Nurse Anesthetists (CRNAs). The PAs in anesthesia have a fouryear college degree and have completed a two-year PA training program. The CRNAs have a B.S. in nursing and two to three years of anesthesia training. They are both very, very good. So they give the anesthesia and I just do the dentistry. I have an assistant who is credentialed in the hospital system who goes with me and assists me in doing these cases. They can last anywhere from two or three hours to seven or eight hours, when we have a lot to do. Many times when we go down there we really don’t know what we’re going to have to do, because we can’t examine the patient and they’re unmanageable in the office. So we do the exam — I have digital radiography in the operating room and we take all the X-rays there and formulate the treatment plan — and then proceed to do everything. MD: So you walk into these anesthetized cases, where you’re trying to cram in three or four appointments, and you have no idea what you’re going to be doing? JH: Yeah, we carry all the operative stuff. We carry endo gear with us. I carry an Aseptico® endodontic handpiece (Aseptico Inc.; Woodinville, Wash.) and the SybronEndo Twisted Files™ (SybronEndo Corporation; Orange, Calif.), and I do the endo from start to finish, whether it’s anterior, bicuspid or a molar. MD: Are you also doing extractions? JH: If there are extractions, I’ll have an oral surgeon come in and take out the teeth at the beginning of the case. They’ll suture them up and leave, and then I’ll do their operative. I do take teeth out though, but the problem is, as in a general practice, I’m too busy doing restorative. As another example, a young lady I’ve been treating for some time, who truly is dental-phobic, said, “John, I want veneers and ceramic crowns on the upper front six teeth.” I said: “Sure, no problem. Can you handle the office?” She said, “I cannot, we must go to the operating room.” So we went down there and did the preps and impressions. The crowns were all done by Glidewell, by the way. Glidewell does great work! MD: Thank you! JH: I’m not a “Michael DiTolla” from the restorative standpoint, but we do enjoy doing it. I did two ceramic crowns and four veneers on her and they came out great. Only had to take one impression, which is not unusual, but (laughs) we were lucky on that one. Let me tell you about a case we did late last year. The patient was 35, but when she was two or three months old she had an astrocytoma resection, a brain tumor. She survived, but obviously she had a lot of neurologic deficits. So we took her to the OR and did two ceramic crown preps on tooth #8 and #9, and we had to carry her back to put them in because when I touched her in the examination appointment she started screaming. So you see, the point is we get a lot of patients like that who are totally unmanageable. We’ve done a lot of restorative, and we’ve restored some implants. Now, periodontists would typically sedate them in the office and put the implants in. We just do the restoratives; I do not place implants at all. MD: For the patients where I’ve had a dental anesthesiologist come in and do deep IV sedation, I’ve noticed that crown & bridge can be a lot harder to do on someone who is sedated. Do you find that to be true? JH: Well, here’s the thing: If they have a full-blown general anesthetic, it is more difficult because you can’t take any triple trays on a lot of these patients because the tongue gets in the way. So, for instance, if I’m doing six, seven or eight units on the upper, I’ll take a full-arch polysiloxane impression on the bottom using heavy body and put it aside, then take a separate impression up on the top. Assuming all the teeth are present for the most part, usually you can hand articulate those pretty well without a record. It is more difficult though. I find myself saying “open up,” and the patients are asleep. But finally you realize that won’t work. It is more difficult when they’re totally asleep because you’re working in the airway. Now if they’re intubated with the nasal tube, like all of mine are in the operating room, Interview with Dr. John Harden 53 there is nothing in the mouth to get in the way. Usually they’ll put a nasal tube in and put them to sleep, and I’ll drape the patient and put mouth props in and crank them open and just go to town. When I have endo to do, the rotary endo as you know is extremely fast, and with the Sybron TF files — there are only three of them — I can go in there and repair a bicuspid in about 15 minutes. And have it filled in 30 minutes with two canals. I share space with an endodontist, who has been boarded for years. We share space, but we have separate practices, and he’s taught me a lot of endo. That is where I’ve picked up a lot of my endo skills. MD: What about seating crowns on sedated people? It makes it pretty difficult to check occlusion, doesn’t it? JH: Absolutely, you’re 100 percent correct on that. MD: So what do you do? JH: I use articulating paper. Usually these patients are paralyzed with muscle relaxants. You can take the chin, click them together and check the occlusion without any problem because the nondepolarizing muscle relaxants like NORCURON® (Organon Pharmaceuticals USA; Roseland, N.J.) make the jaw flaccid. You can click it up and down. But that is a good point. Just like it can be very difficult to check occlusion on someone with anesthesia, it is not easier because they are asleep. I agree, I think it is more difficult. MD: I’ve noticed on the couple sedation cases that I’ve done, the tongue seems to swell. Is that something that actually happens? JH: I think it does a little bit to be honest with you. A lot of times in the office we’ll take full-arch triple trays or quarterarch triple trays, just for one unit maybe. In the mouth, I’ve had problems with the tongue getting in the way, so we’ve gone almost exclusively to full-arch trays — which ideally is the best way for anything, really; you get all the excursive movements right. MD: I would assume that on these cases where you go in and do everything, and you don’t know what you’re going to be doing before you walk in, that financial arrangements are a little difficult to do ahead of time. JH: Here’s how we do that. When we go down there we charge — and my fees are not exorbitant when you hear the numbers — we charge a thousand dollars to go to the OR, and we collect in full a week before the case. Otherwise, you may not get paid. And you know how overhead is. We haven’t had any problems in most cases doing that. Now, if it’s somebody who has tons of stuff or a special patient, say a Down syndrome or cerebral palsy patient, we’ll go in there and do a complete oral exam, periodontal exam, fullmouth X-rays, whatever X-rays we think we need, formulate a treatment plan, do the restorative and maybe do an endo 54 www.chairsidemagazine.com or two. But if they require crown & bridge, we’re probably going to have to come back and do the crown & bridge at a separate appointment. MD: But their parents or their guardians know that you could go in and they might just need a debridement, or they might need two root canals or four extractions. It’s pretty open-ended, right? JH: Exactly. For instance, I did a patient with tetralogy of Fallot, which had been repaired. You know, one of the common congenital heart defects. She probably had a mental age of 5. She had a failing pulmonary valve. We took her to the OR, they put her to sleep, and I took full-mouth X-rays on her, then did a full-mouth scaling. I found the supernumerary tooth in the area of #3. So I had an oral surgeon then take her to the operating room and take out the third molars and the supernumerary tooth. That was really all she needed. It was a very simple case. Most of them aren’t that simple. But every now and then you’ll find a patient who may need five surfaces of resin and that’s it. Usually you can’t examine these patients in the office because they’re too combative. MD: So it sounds like you end up doing perio too. Is most of it debridement? JH: Actually, full-mouth scaling and root planing is what we mainly do. I have done perio surgery, but usually if they need perio I’ll send them to a periodontist who sedates patients. MD: Compared to when you were in private practice, is there more of a premium to work quickly and efficiently with what you do in the hospital? JH: Absolutely. OR time is very expensive. Let me give an example. There was a guy in Atlanta, just a normal, successful businessman who is an international marble consultant. He had been to one dentist and she tried to work on him, but he had too much of a gag reflex. I’m not sure if she tried to give him some benzodiazepine by mouth or not. But later he was referred to another gal who had taken the DOCS Education course, and she was not able to do anything. So my name came up, and he showed up to the office one day. I said: “You’re a very busy man. Time is a premium for you; time is money. We can go to the OR and do this crown and one two-surface resin and be done with it.” He said, “Do it.” So we did, and then he came back and we put the crown in, in the office. MD: He was OK with that? JH: He was fine. The hospital bill for that morning was $15,000. MD: Hold on, the hospital bill? JH: That’s the anesthesia and the OR cost. See, the OR is so much for the first hour and then so much for each additional hour, and then there’s the anesthesia charge. MD: How much did this patient pay between the operating room fee and your fee? How much for the crown? JH: Well, my fee for the crown was around a grand. Then for the resin, a couple hundred bucks. What we charge is $1,000 to go, plus what we do, with a minimum of $2,000. MD: So this crown might have cost him $17,000? JH: His medical insurance I’m sure paid the hospital surgery charge — the operating room charge plus the anesthesia charge that the anesthesiologist bills. JH: We’ve seen some people who are off the charts! There was one guy I treated 20 years ago, he was about 42, who had severe aortic regurgitation. He was going to have to have a valve pretty soon, plus he was a terrible dental phobic. I couldn’t even examine him in the office. He was sent to me by an oral surgery colleague, who had put him out in the office and taken some teeth out. The patient was missing a number of posterior teeth. I took him to the OR and we got into a pre-op hold area, and he would not let the anesthesia provider start the IV. I came up and I said: “I’m going to give you one chance, my friend. You let this professional put that IV in or we are done.” And he shut up and let the guy put it in. Sometimes you have to take that approach. JH: Oh God, I would feel bad bragging about that! I would never go out and flash up a pan and say, “I did this in one morning to make 10 G’s.” Here’s another thing. You can also give them Ketamine, which you’ve probably heard of, in the thigh. It’s a dissociative anesthetic, and what you do is put 50–100 mg in the big muscle of the thigh and they’ll go out immediately. Then you can start the IV. We did that with the brain tumor patient. We had to take her to a special room off the pre-op hold area, where we had two anesthesiologists, myself and a couple of nurses; the parents were in there, too. We gave her a shot in the thigh and out she went. MD: I know, I know (laughs). I just think it’s a great story that it cost him $17,000. I guess that goes to show how strong dental phobias can be, huh? MD: So with the guy who was refusing the IV in the arm, are you saying that to give it in the thigh is easier because you just slam it in there rather than having to finesse with the IV? MD: I want you to be proud about this and let people know that you charged $17,000 for a crown! You don’t have to mention that the hospital got $15,000. 56 www.chairsidemagazine.com JH: It would have been easier if they had given him ketamine. That is probably what I would have recommended if he wouldn’t let them start the IV right off. They do that with many kids for surgery because ketamine will put them out. MD: But not orally? JH: No, not orally; it’s given intramuscularly. It can be given in an IV. I used it when I was a resident for trauma anesthesia many years ago in Chicago. Typically, say you have a 70 kg patient, an adult. You can give them 50–100 mg in the thigh and that will put them out enough to allow you to breathe them down by mask with the inhalant anesthetic — the anesthesiologist is doing this, of course — or start the IV and give them something like propofol. MD: So $17,000 crowns notwithstanding, when you go in and do these cases, can you have a fairly productive day? JH: Oh yeah. You can have a good day — absolutely. MD: Do you find yourself more productive in this type of setting than when you were in private practice? JH: Actually, it depends on what you do. There was one case we did on a child who had developmental delay. I’ve treated her a number of times in the OR, and one morning I think we produced $8,000 in the OR. That’s a big day though. You normally don’t produce that much. If you do three or four crowns, you’re looking at $4,000 plus $1,000 to go down there, so that’s $5,000. But you don’t do that every day. Typically, these patients have not had incremental care for a while, so there will be endo for obvious reasons, some restorative, some crowns. We like to see if we can get X-rays from another source or even our own office before we go down there, so we know what we’re going to be doing. So it depends on what you’re doing exactly. If you’re doing a couple of endos, two or three crowns and a bunch of restorative, you can have a multi-thousand-dollar morning without any problem. Of course, you can do that in the office, too. MD: Well, it sounds like the average case in the OR might be bigger than the average case in general dentistry. JH: Probably so. I’ve been told by oral surgeons that I need to charge more, but as you well know, that’s all relative. I have a pedodontist friend who has a big practice here in Atlanta and he grosses between $1.5 and $2 million. Half of that is ortho. He had a three-year program in Connecticut where he had a year of ortho. He is the exception to the rule. He does a lot of hospital dentistry on very sick kids. He sedates in the office also. I think his minimum is $2,500 now to go to the OR. He goes only on Fridays. Friday is his OR day. Now, obviously, that kind of production is not typical. MD: Right. If there is somebody reading this who says: “You know what? That sounds like fun. I’d like to be able to help out developmentally disabled people. I like the idea of being in a hospital or doing some of these cases.” Or maybe they’re drawn to the excitement of not knowing what they’re going to be getting into. How can somebody get involved? JH: It is enjoyable, it really is. Emory University Hospital requires a residency of some type to be on staff. Typically, dentists who do hospital dentistry have had a GPR. A smaller community hospital might allow you to come in and watch and get on staff without a residency of some type. But at Emory, and probably at USC, UCLA and all the other centers out there, they usually require a residency of some type — whether perio, GPR or pedo. Obviously all the oral surgeons go to the OR. The reason for that is that they do not want to teach you how to work in a hospital. They want you to know already how to work in a hospital environment. There is a lot of paperwork involved. MD: Not only that, but it sounds like if you are not used to working in a hospital, you’re probably not going to bring as much stuff with you to the hospital as you need. I could see it being a real mess. JH: We’ve got a two-page list for the basic setup. We’ve got a list for endo. Then we’ve got a list for crown & bridge. So my assistant takes that list and packs the chest and the bag. I usually get there at 5:30 in the morning for a 7:30 case. I get everything set up and laid out and ready to go. We have an A-dec® dental unit (A-dec Inc.; Newberg, Ore.) and an Air Techniques PA machine that the hospital bought for me. I get that hooked up and get the sterile water in the water canister, get the waste canister screwed on and check all the lines. I have every nut and bolt ready to go. They like me when I come because I’m never late, and they never have to go get anything. All we do is work. MD: Do they have people scheduled after you in that OR? JH: Probably so. There are probably 30 ORs in the main OR. It’s a big, new 20-story hospital. I always get my cases scheduled first thing, and I tell them I’m going to be going until 1 or 2 p.m. maybe, so I need the OR blocked off. But there may be a case after me, maybe a general surgery. You never know what room you’re going to get stuck in either. I usually go the night before to the OR, before I leave work, to make sure that the X-ray machine is there, that it’s not off somewhere else in the hospital, and that the dental unit is ready and working. MD: I would assume that it is pretty bad etiquette and that it would make them pretty unhappy if you ran three hours late, right? JH: Oh good lord. Some of these general surgeons will come in there 30 minutes late. But general surgeons have a Interview with Dr. John Harden 57 general surgery pack. All they do is waltz in and they open up the general surgery pack and start whacking. But for dentistry, you’ve got to have your dental unit set up. You’ve got to have it plugged into the medical nitrogen, and you’ve got to have your X-ray stuff all laid out. I carry a Hewlett-Packard laptop with a Gendex® digital intraoral sensor (Gendex Dental Systems; Hatfield, Pa.), and I use VixWin™ PRO software (Gendex Dental Systems). It works great. MD: We’re both lecturing at the next CDA meeting. Is this the type of thing that you’re going to talk about in your program? JH: I am. The title of it is “29 Years of Dental Anesthesiology in Hospital Dentistry.” It’s going to be about special patient care, whether in the office or in the operating room. I’ll be giving a little blip on my training — I’ve got slides that go back 30 years. We’re going to have some information on where I trained and what the training program was like. Then we’ll move into anesthesia in the dental office and then into hospital dentistry. I’ve got a bunch of cases, which seems to be what people like to see, the final product. I could talk all day, but it’s going be crammed into an hour and a half. It’s 278 Microsoft PowerPoint® slides. 58 www.chairsidemagazine.com MD: Wow, that sounds like an action-packed one! I can tell just by talking to you for this short time that you’ve got thousands of stories — and all of them entertaining. JH: We’ve had a lot of fun, we really have. The people at the hospital are very good to me. When I go down there I treat every nurse and every tech with the utmost respect. I don’t throw stuff at them. I don’t holler at them. You’d really be surprised how much they’re willing to work for you when you treat them like that. I’ve got a lot of them from the OR as patients. MD: Of course. But you treat them in your office, right? JH: Absolutely, a lot of them. MD: They probably don’t want to be seen in the OR. JH: Exactly! (laughs) CM Dr. John Harden practices in Atlanta, Ga., and is on the medical staff at Emory University Hospital Midtown. Contact him at [email protected] or visit www.jhdmd.com. How to ALIGN TEETH – ARTICLE by Ryan B. Swain, DMD Six Month Smiles system provides patient-focused approach to orthodontics ® F in Six Months or all patients with malpositioned teeth, comprehensive orthodontics are the first recommendation to conservatively correct and enhance the appearance of their smile. Unfortunately, the large majority of adults aren’t willing to undergo the lengthy treatment that’s usually involved. For patients who refuse comprehensive orthodontic treatment, general dentists are finding clear aligners to be a solution that isn’t always as predictable or as cost effective as they had hoped. For older teens and adults, the Six Month Smiles® short-term orthodontic system (Six Month Smiles Inc.; Scottsville, N.Y.) may be an option. The Six Month Smiles system is a practical, turnkey cosmetic braces system specifically designed for general dentists. As a practice builder, the system enables practices to treat a large pool of potential patients who aren’t interested in comprehensive orthodontic treatment, but who want the cosmetic and quality of life enhancements that a straight smile can offer. The system enables general dentists to provide this treatment in a very short time, and the return on investment is immediate. For example, dentists who attend Six Month Smiles training seminars can return to their practices the following week, treat patients previously unaware of this option and gen erate revenue from that care. General dentists don’t require orthodontic experience to begin implementing the system, which validates its ease of use. Dentists can attend How to Align Teeth in Six Months 59 Figure 1: Consult with patient to determine specific cosmetic concerns. Figure 2: Etch the teeth prior to seating the bonding trays. Figure 3: Apply the adhesive bonding agent provided in the kit. Figure 4: Bonding agent is placed on the brackets in the bonding trays. a two-day hands-on training seminar, quickly learn the process, avail themselves of mentors and support specialists, and treat appropriate, life-changing cases when they return to their practices. One of the most valuable features of the PTK is that the bonding trays are custom-fabricated based on models of the patient’s teeth. The brackets are uniquely positioned in the bonding trays by bracket technicians, and the trays enable dentists to easily and precisely place brackets on the patient’s teeth. Tooth-by-tooth chairside bracket application is eliminated, saving dentists and their patients significant chairtime. Once the brackets are secure, shape-memory wires (also included in the PTK) are attached. The shapememory wires work with the prepositioned brackets to easily move the teeth to the desired positions. About the System The Six Month Smiles short-term orthodontic system incorporates a patient-focused approach to treatment planning and case selection, and a practical system for simplified bracket and wire placement. It combines the reliability of braces with the ease of use and general practitioner-friendly nature of clear aligners. Key components of the system are the hands-on training seminars, the specific brackets, the Six Month Smiles case processing facility and the Six Month Smiles Patient Tray Kit™ (PTK), which includes case-specific bonding trays. 60 www.chairsidemagazine.com A wide range of tooth movement can be predictably achieved using the system, including extrusions, rotations, intrusions and various types of tipping. However, careful case selection and successful treatment is predicated on a good understanding of patient expectations, what they want Figure 5: OrthoFlow® cement (Six Month Smiles Inc.) is placed on the brackets in the bonding trays. Figure 6: The upper-arch bonding tray with brackets in place while the lower arch is etched. Figure 7: The bonding trays with brackets are cured into place. Figure 8: The bonding trays are removed. to achieve with braces and what is possible with the system. The treatment approach involves correcting the patient’s chief cosmetic complaints and not making significant changes to the posterior occlusal scheme. The short treatment times are due to cosmetically focused treatment goals and materials that are designed to efficiently achieve these results. Take impressions of the patient’s teeth. Support is available through the Six Month Smiles online forum to help ensure that accurate and detailed impression-taking techniques are followed. The online forum includes mentors and instructors who are experts in providing guidance when treating patients with specific cosmetic concerns. Send impressions or models to the Six Month Smiles case processing facility. Practical Protocol Examine the patient and discuss what he specifically dislikes about his smile and what he wants to change (Fig. 1). If the patient’s concerns are primarily cosmetic and don’t involve changes that are outside the realm of short-term orthodontics (i.e., changes to angle class, significant buccolingual root movement, significant midline changes), continue with an examination to confirm that Six Month Smiles is a viable option. A Six Month Smiles bracket specialist/technician sets up the case by positioning the brackets on the models, after which the bonding trays used for precise intraoral bracket placement are fabricated. The trays are placed in the PTK with the other necessary materials and returned to the dentist. Etch the teeth (Fig. 2), then apply the adhesive included in the PTK (Figs. 3–4) and seat the bonding trays (Figs. 5–8). Attach the appropriate wires included in the PTK to How to Align Teeth in Six Months 61 Figure 9: The bonding trays are removed by peeling them away. Figure 10: Attach the shape-memory wires to the brackets. Figure 11: A typical case before treatment Figure 12: A typical case six months after treatment the brackets and adjust accordingly (Figs. 9, 10). Dismiss the patient. See the patient every four weeks for adjustments. A threewire sequence is typically followed throughout treatment. The appropriate wires are included in the PTK. Treatment ranges from four to nine months, depending on the case. and a simplified, general dentist-friendly means to treat adult patients who previously were stuck with malpositioned teeth (Figs. 11, 12). General dentists don’t require orthodontic experience to incorporate the system into their practices. Mentors and support specialists are available to answer questions and supplement the thorough training provided during the initial seminar. When treatment is complete, the teeth are straight and an acceptable occlusal scheme has been achieved. Remove the wires and brackets. Because a robust retention protocol is important for long-term orthodontic success of any kind, determine and provide appropriate retention. For patients with crooked teeth who aren’t willing to undergo comprehensive orthodontics, the system is a practical, cosmetic braces option for general dentists to provide the quality of life enhancements for their patients that a straight smile can offer. CM Closing Thoughts Dr. Ryan Swain is the CEO and founder of Six Month Smiles Inc. in Scottsville, N.Y. Contact him at [email protected] or visit www.sixmonthsmiles.com. The Six Month Smiles short-term orthodontic system is a patient-focused, lifestyle-friendly approach to orthodontics 62 www.chairsidemagazine.com The Zirconia-Based Porcelain 64 www.chairsidemagazine.com Veneer – ARTICLE by Elliot Mechanic, BSc, DDS D entistry is both an art and a science requiring today’s practitioner to be versatile and ready to adapt. Not every patient fits into the same treatment box, calling for an identical approach. A comprehensive examination is needed to discover and establish a list of each patient’s requirements. Generally, most patients’ dental treatments call for conventional and time-tested pro cedures. However, at times we are faced with challenges that require us to be able to think and operate “outside the box,” relying on our ingenuity and creativity. As practitioners gain experience, they gather their own personal “bag of tricks” to turn to. New procedures and innovations in dental materials provide us with increas ing options. The Zirconia-Based Porcelain Veneer 65 CASE REPORT Diagnosis and Treatment Planning Our patient presented with a discolored upper left central incisor (Fig. 1). His dental history noted that trauma occurred to the tooth in his youth. His tooth tested vital and had never been restored. Although the dark tooth bothered the patient, he had always been reluctant to compromise its integrity. Full-coverage crowns, pressed-ceramic veneers and bonded-composite res torations had been previously proposed as possible esthetic solutions. However, these restorations called for significant tooth reduction in order to mask the dark underlying dentin. Since his tooth was healthy and asymptomatic, he had been seeking a more conservative option. Figure 1: A discolored, vital, unrestored left central incisor Presented with the desires of the patient, we studied his restorative choices and considered the currently available dental materials. An ultra-thin zirconia core veneered with porcelain was acceptable to him. Zirconia has recently become a popular dental material because it has high strength, is resistant to fracture and, being opaque, has the ability to mask discolored underlying tooth structure.1 Its flexural strength of 900 to 1,100 MPa and fracture toughness of 8 to 10 MPa make it a suitable material to create both con servative esthetic restorations and pontic spans for bridge work. It can be milled to a 0.2 mm thickness and then layered with a compatible porcelain to yield a restoration of less than 0.6 mm in total thickness. A restoration of this nature would be minimally invasive, with the ability to alter the color of the dark tooth to approximate that of the other central incisor. However, in order to achieve a restoration of this description, we require the necessary chemistry to create adhesion between the zirconia and the tooth. Figure 2: Shade selection (VITA Classical Shade Guide [Vident; Brea, Calif.]) To understand the challenges of the required chemistry, we must realize that enamel and dentin are living tissue requiring primers and adhesives that infiltrate into created microretention on the surface. Zirconia is a nonliving, oxide-based substrate requiring a primer with phosphate comonomers to covalently bond to the oxide. In order to fuse the zirconia to the tooth, we require a cement interface that cohesively re-creates the dentoenamel junction among the living enamel, dentin and the inert zirconia oxide-based substrate. The resin cement chosen should be hydrophobic and dual-curing (light- and self-curing), as zirconia is opaque and may not allow light to totally pass through it to fully cure the resin.2–4 Until recently, the zirconia-to-tooth bonded interface was not possible, as hydrophobic cements do not adhere to oxides. New products, however, such as Z-PRIME™ (Bisco Inc.; Schaumburg, Ill.), have been developed. These are primers that utilize a com bined phosphate and carboxylic monomer to create a cohesive interface, allowing the hydrophobic resin cement to create a 66 www.chairsidemagazine.com Figure 3: Matrix impression was taken using a clear silicone impression material (AFFINITY Crystal [CLINICIAN’S CHOICE]) in a clear plastic tray; this was made for later fabrication of the bis-acryl provisional. Dentin = Opaque linked, cohesive hydrophilic seal between the tooth and the indirect zirconia restoration. New universal primers (such as Monobond® Plus [Ivoclar Vivadent; Amherst, N.Y.]) have also been developed to accomplish this task with zirconium oxide, metals, porcelain glass and lithium disilicate. Clinical Treatment An initial reference shade was taken and photographed before any preparation to the tooth occurred. The other incisors matched a VITA A1 shade (Fig. 2). Enamel = Translucent Figure 4: Creative tooth preparation, allowing room for the ceramist to build in (layer) opacity and transparency An impression of the unprepared tooth was then taken using a clear plastic tray in order to have a matrix ready for subsequent bis-acryl temporary fabrication. This clear silicone impression material, Affinity™ Crystal (CLINICIAN’S CHOICE; New Milford, Conn.), allows the dentist to visualize the underlying teeth as a reference, making it easy to reposition in the patient’s mouth when filled with the provisional material (Fig. 3). After labial reduction of 0.6 mm, we had removed the outer layers of translucent enamel, thus exposing the darker underlying hue of the dentin that creates the tooth’s color. Zirconia oxide is typically a very opaque material that does not provide for natural translucency and light reflection. It should be noted that several translucent zirconia-based materials have been recently introduced into the marketplace to address certain esthetic concerns (such as inCoris™ TZI [Sirona Dental Systems; Charlotte, N.C.], Zenotec CAD/CAM [Wieland Dental Systems; Danbury, Conn.] and BruxZir® Solid Zirconia [Glidewell Laboratories; Newport Beach, Calif.]). Figure 5: Stump shade selection was done after preparation. Understanding the properties of our restorative materials and their limitations allows us to work creatively within the parameters that we are given. Understanding the properties of our restorative materials and their limitations allows us to work creatively within the parameters that we are given. Incisal reduction of 1.0 mm was created so that the incisal edge of the veneer could be fab ricated in pure feldspathic porcelain. This design would allow our ceramist to create transparencies and internal coloration similar to that of the adjacent natural tooth. In addition, deeper preparation on the mesial and distal line angles would enable the ceramist to develop a translucent effect in these areas (Fig. 4). The areas of discolored dentin would be masked out with the opaque zirconia. Next, the shade of the underlying prepared tooth was selected and photographed (Fig. 5). This was done in order for the ceramist to create a corresponding die as a color reference. Before taking the final impression of the prepared tooth, our procedure protocol is to fabricate a preliminary provisional restoration using a bis-acryl provisional material (such as Luxatemp® Ultra [DMG America; Eaglewood, N.J.], Protemp™ Plus [3M ESPE; St. Paul, Minn.] or Integrity® [DENTSPLY Caulk; Milford, Del.]). This initial provisional serves both as a preparation The Zirconia-Based Porcelain Veneer 67 check, allowing the clinician to assess if enough tooth structure was removed to accommodate the desired restoration, and to also verify that the correct shade of bis-acryl provisional material was chosen. Our office protocol calls for the dental assistants to use an operatory timer that is set to reflect the setting time as noted in the manufacturer’s instructions for the material being used. The timer was set for two minutes (as required for the Luxatemp Ultra used in this case) (Fig. 6a), and then the bisacryl material was injected into the previously obtained clear silicone matrix impression (Fig. 6b) and positioned over the prepared tooth. The provisional material was allowed to set on the tooth, so that we could check to see if we had achieved an adequate and uniform preparation to accommodate the re quired thickness of the restorative material selected for this case (Fig. 7). Any modification needed can be done to the preparation by directly cutting through the bis-acryl, which serves as our reference. In this case, we needed to reduce the tooth a bit more on the labial surface (Fig. 8).5 After the preparation was completed, a final provisional restoration was fabricated and set aside to harden. It is important to emphasize that, by using the bis-acryl provisional as a preview, we eliminated the need for our dental laboratory team to inform us of underpreparation/insufficient room; this also obviated the need for the patient to return to our office to modify the tooth and to take a new impression. Having to reanesthetize, retemporize, reprepare and reimpress (the author refers to this as “redo-a-dontics”) is not fun for either the patient or the dentist! The patient’s bite was taken using a rigid bis-acryl bite registration material (LuxaBite® Ultra [DMG America]) placed in the anterior region from canine to canine (Figs. 9a, 9b). This is a thixotropic material that offers minimal resistance to closure; and once set, it has a D-69 Shore scale hardness that prevents any flexure/distortion, allowing the accurate transfer of the patient’s bite to the articulator. Unlike many silicone bite registration materials, it is a bis-acryl material designed to yield precise mounting and orientation of the plaster models.6 Again, the assistant set the operatory timer to a setting time of two minutes, according to the manufacturer’s instructions. There was no reason to extend the registration beyond the canines because the posterior bite was extremely stable; in this way, it was easily visually verified that the patient was biting in maximum intercuspation. The final upper impression was taken using an extremely firm vinyl polysiloxane (VPS) impression material (Honigum® Putty [DMG America]). The Honigum Putty, which was dispensed from an automatic mixer (Mixstar® eMotion [DMG America]), has a setting time of five minutes. It easily displaced the very viscous Kopy Single Crown Light Body (Dental Savings Club) into the subgingival sulcus, yielding a sharp and accurate impression. The author has found that this impression material 68 www.chairsidemagazine.com a b Figures 6a, 6b: Fabricating the bis-acryl provisional (Luxatemp Ultra [DMG America]) Figure 7: Using the provisional to assess the preparation Figure 8: Modifying the preparation through the provisional (further labial reduction was needed, as noted in the preceding prep assessment) is pleasant tasting and is easily removed from the mouth. The opposing lower model was taken with a VPS alginate substitute (Status Blue® [DMG America]). Totally rigid and inflexible metal impression trays (Rim-Lock® Metal Trays [DENTSPLY Caulk]) were used for both impressions, thus minimizing distortions and inaccuracies. Next, the patient’s tooth was cleaned and treated with a desensitizing agent (Gluma® [Heraeus Kulzer; South Bend, Ind.]). The provisional restoration was then cemented with a translucent, dual-cured, eugenol-free resin temporary cement (TempBond® Clear [Kerr Corp.; Orange, Calif.]). a Brief Synopsis of the Dental Laboratory Protocol At the dental lab, a sintered zirconia core (keyed to the desired A1 shade) was milled using the Zenotec T1 7-axis CAD/CAM milling system to a thickness of 0.2 mm (Fig. 10). A feldspathic porcelain (Cerabien™ ZR [Kuraray America; New York, N.Y.]) was used to create a 0.4 mm porcelain buildup (laminate) over the zirconia substructure, yielding a total restoration thickness of 0.6 mm. The Noritake feldspathic porcelain has a coefficient of thermal expansion carefully matched to the zirconia, permitting the ceramist to create lifelike esthetics that display internal detailing and transparencies. The finished zirconia veneer offers precise marginal fit, excellent esthetics and high strength. b Figures 9a, 9b: Rigid bis-acryl anterior bite registration (LuxaBite Ultra [DMG America]) Delivery of the Final Restoration Upon receiving the restoration from the laboratory, its fit was verified on the laboratory work model to ascertain that it met our expectations. We then telephoned the patient to schedule an appointment. (In our office protocol, delivery appointments are not prescheduled according to the lab return dates, as we always want to have the flexibility of being able to return the case to the dental laboratory team if obvious corrections are needed.) In this case, the restoration was acceptable as received from the laboratory, so the internal surfaces were treated with a zirconia primer (Z-PRIME) (Fig. 11). The phosphate monomer in this special primer interacts with the oxide surface of the zirconia to form a covalent bond, thus optimizing the bond strength between the resin cement and the zirconia surface. Figure 10: The milled zirconia core (Zenotec T1 7-axis CAD/CAM milling system [Wieland Dental Systems Inc.]) With the patient in the chair, and before removing the provisional, we first assessed the esthetics of the restoration next to the natural teeth to see if they looked the same (Fig. 12). If they had not, we would have returned the case to the dental ceramist with photos and a description of the changes required. Once approved, the provisional was removed by first placing a slit in the labial surface using a flame-shaped diamond (KUT 3205 C [Dental Savings Club]). It was then separated and removed using an EB134 instrument (Brasseler USA; Savannah, 70 www.chairsidemagazine.com Figure 11: Application of the zirconia primer (Z-PRIME [BISCO Inc.]) to the internal surface of the restoration Ga.) (Figs. 13a–13c). The underlying prepared tooth was cleaned with pumice, and then treated with a 32% phosphoric acid gel (UNI-ETCH® [Bisco Inc.]) containing benzalkonium chloride, an antimicrobial agent (Fig. 14). A universal adhesive (ALL-BOND UNIVERSAL™ [Bisco Inc.]) with low film thickness was then brushed on the tooth structure (Fig. 15). Figure 12: Verifying the restoration for form and color, with the provisional still in place Next, a resin cement (DUO-LINK™ SE Kit [Bisco Inc.]) was applied to the internal surface of the veneer (Fig. 16), and then it was placed on the tooth and light-cured (VALO® LED Curing Light (Ultradent Products Inc.; South Jordan, Utah) (Fig. 17). The VALO LED light produces a high degree of polymerization.7,8 Furthermore, its curing tip can be easily placed at a 90-degree angle to the labial surface of the tooth, allowing optimum light penetration. Designing the tooth preparation specifically to accommodate the application of the ceramic materials chosen in this case was very important. This thoughtful protocol resulted in areas of translucency, transparency and internal detailing, providing a definitive restoration with lifelike esthetics that satisfied our patient’s esthetic goals (Fig. 18). a Figure 14: Etching the tooth with a 32% phosphoric acid gel (UNI-ETCH [Bisco Inc.]) containing benzalkonium chloride, an antimicrobial agent b c Figures 13a–3c: Removing the bis-acryl provisional Figure 15: Placing a universal adhesive (ALL-BOND UNIVERSAL [Bisco Inc.]) The Zirconia-Based Porcelain Veneer 71 CLOSING COMMENTS No single restorative material can satisfy every esthetic need. By having current knowledge of procedures and materials available, the practitioner is better able to adapt and satisfy the patient’s desires. Porcelain-layered zirconia veneers can be a useful addition to our dental “bag of tricks.” CM Dr. Elliot Mechanic practices esthetic dentistry in Montreal, Canada. He is the esthetic editor of Canada’s Oral Health dental journal and is on the editorial board of Dentistry Today. Contact him via e-mail at [email protected]. Acknowledgement The author would like to thank Adrian Jurim, CDT, MDT, for inspiration and the exquisite technical fabrication of this zirconia-based layered veneer (Zeneer™ [Jurim Dental Studio Inc.; Great Neck, N.Y.]). Figure 16: Placing the resin cement (DUO-LINK SE Kit [Bisco Inc.]) References 1. Denry I, Kelly JR. State of the art of zirconia for dental applications. Dent Mater. 2008 Mar;24(3):299-307. 2. Tanaka R, Fujishima A, Shibata Y, Manabe A, Miyazaki T. Cooperation of phosphate monomer and silica modification on zirconia. J Dent Res. 2008 Jul;87(7):666-70. 3. Yoshida K, Tsuo Y, Atsuta M. Bonding of dual-cured resin cement to zirconia ceramic using phosphate acid ester monomer and zirconate coupler. J Biomed Mater Res B Appl Biomater. 2006 Apr;77(1):28-33. 4. Dérand P, Dérand T. Bond strength of luting cements to zirconium oxide ceramics. Int J Prosthodont. 2000 Mar-Apr;13(2):131-5. 5. Gürel G. Predictable, precise, and repeatable tooth preparation for porcelain laminate veneers. Pract Proced Aesthet Dent. 2003 Jan-Feb;15(1):17-24. 6. Chan CA. Bite-management considerations for the restorative dentist. Dent Today. 2008 Jan;27(1):108, 110-3. 7. Price RB, Felix CA, Andreou P. Third-generation vs a second-generation LED curing light: effect on Knoop microhardness. Compend Contin Educ Dent. 2006 Sep;27(9): 490-6. 8. Boksman L, Santos GC Jr. Principles of light-curing. Inside Dentistry. 2012 Mar;8(3):94-7. Figure 17: The completed restoration Disclosure: Dr. Mechanic reports no disclosures. Reprinted by permission of Dentistry Today, © 2012 Dentistry Today. Dentin = Opaque Enamel = Translucent Figure 18: The zirconia-based porcelain layered veneer demonstrating natural, lifelike details 72 www.chairsidemagazine.com
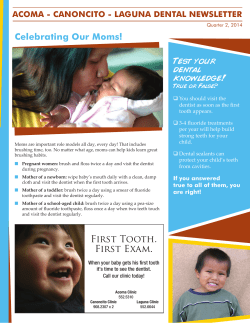


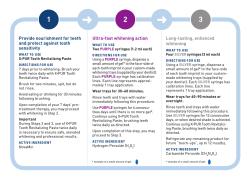
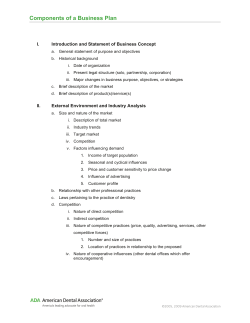
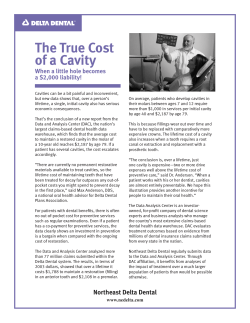


© Copyright 2026