
FULL ONE YEAR WARRANTY
FULL ONE YEAR WARRANTY
on Sherline’s 3.5" Metal Lathe, Vertical Milling Machine and Accessories
If within one year from the date of purchase a new* Sherline power tool or accessory fails due to a defect in
material or workmanship, Sherline will repair it free of charge. In addition, it has always been our policy to
replace at no cost all parts, regardless of age, which are determined to have been incorrectly manufactured
or assembled and have failed due to this cause rather than because of improper use or excessive wear
caused by continuous use in a production environment. In cases such as this, Sherline will inspect the machine
or part and will be the sole judge of the merit of the claim. Freight charges for returning a machine are not
covered. Merchandise which has been abused or misused is not subject to warranty protection.
Warranty service is available by simply returning the machine, defective assembly or part to:
Sherline Products, Inc., 3235 Executive Ridge, Vista, CA 92083-8527
Please write, fax, call or e-mail to let us know that you are retuning a part and to receive a return
authroization number. This will speed up the warranty process. (E-mail is [email protected])
This warranty gives you specific legal rights, and you may also have other rights which vary from state to state.
*NOTE: Only new machines purchased directly from Sherline or from an Authorized Sherline dealer are covered under this warranty.
Machines purchased from a non-authorized source are considered "used" and are not subject to warranty even if they appear to be new. If
you are in doubt about the status of a dealer or are suspicious about an offer, you should confirm the dealer's status by checking our dealer
listing at www.sherline.com/dealers.htm or by calling (800) 541-0735 for confirmation. Proof of date of purchase and dealer name may be
required for service under this warranty.
SHERLINE SERVICE POLICY
Sherline’s policy regarding customer service is simple: CUSTOMER SATISFACTION!
Because products manufactured by Sherline are completely produced in our Vista, California plant, we offer
fast and reasonably priced service. All we ask when you pack the items for shipping is to use common sense,
individually protecting items from one another during shipping. Ship by UPS whenever possible. If you have
attempted a repair and then decide to return the item it is not necessary to reassemble the machine. If you
have lost a part, don’t worry, we’ll still get it looking great for you and return it via UPS*. Equipment will be
returned C.O.D. if it is not warranty work.
Cleaning the returned items thoroughly before you ship them will save time and money.
*If merchandise is received damaged by UPS, keep the original shipping carton and contact your local UPS office.
HOW TO ORDER REPLACEMENT PARTS
The model number of your machine will be found on the nameplate attached to the top or side of the
headstock. The serial number is located on the back of the headstock. Always mention the model number
when requesting service or repair parts for your machine or accessories.
Replacement parts may be ordered from the factory or from any Sherline dealer. The most expeditious way
to order parts is directly from the factory by phone. Sherline’s office hours are 8 A.M. to 4 P.M. (PST or
PDT) Monday through Friday. Orders received before 12 noon (Pacific Standard or Daylight Time) will be
shipped the same day. We accept payment by Visa, MasterCard, Discover or American Express.
Parts orders:
Toll free order line: (USA)1-800-541-0735
International or Technical Assistance: 1-760-727-5857 • Fax: 760-727-7857
SHERLINE IS ON THE INTERNET
list as well as a “Resources” page with hot links to
many other items of interest to miniature machinists.
There is even a “factory tour” in photos. You have a
wealth of free information at your fingertips. Our
address is: www.sherline.com. You may now place
your order by e-mail at [email protected] or order
on-line 24 hours a day at www.sherlinedirect.com.
To take a look at the newest offerings from Sherline
Products, look in on our Internet site. You will find a
complete list of all our accessories as well as the fully
illustrated instructions for each one. Learn how a part
is used before deciding to buy, or print out the directions
for your later use. There is also a U.S. and worldwide
dealer listing, replacement parts listing, current price
-1-
TABLE OF CONTENTS
Inserted tip carbide tools . . . . . . . . . . . . . . . . . . . . . 24
Turning speeds and feed rates, general rules . . . . . . 24
Accessories for the lathe
3-Jaw, 4-jaw and drill chucks . . . . . . . . . . . . . . . . . . 25
Thread-cutting attachment . . . . . . . . . . . . . . . . . . . . 25
Steady rest . . . . . . . . . . . . . . . . . . . . . . . . . . . . . . . 26
Additional lathe accessories . . . . . . . . . . . . . . . . . 26
3-JAW CHUCK OPERATION. . . . . . . . . . . . . . . . . 28
VERTICAL MILLING MACHINE OPERATION
General description . . . . . . . . . . . . . . . . . . . . . . . . . 29
Helpful tips for machining . . . . . . . . . . . . . . . . . . . . 29
Mill terminology . . . . . . . . . . . . . . . . . . . . . . . . . . . 30
Securing the workpiece . . . . . . . . . . . . . . . . . . . . . . 30
Before you cut . . . . . . . . . . . . . . . . . . . . . . . . . . . . 31
Purchasing raw materials . . . . . . . . . . . . . . . . . . . . 31
Types of work . . . . . . . . . . . . . . . . . . . . . . . . . . . . 32
Types of milling cutters . . . . . . . . . . . . . . . . . . . . . 32
Standard milling vs. “climb” milling . . . . . . . . . . . . . 32
Working to a scribed layout line . . . . . . . . . . . . . . . 33
Use of a dial indicator . . . . . . . . . . . . . . . . . . . . . . . 33
Accurately locating the edge of a part . . . . . . . . . . . 34
Determining the depth of cut . . . . . . . . . . . . . . . . . . 35
Suggested cutting speeds, end mills and drills . . . . . 35
End mills . . . . . . . . . . . . . . . . . . . . . . . . . . . . . . . . 35
Locking the column saddle . . . . . . . . . . . . . . . . . . . 36
Accessories for the milling machine
Sensitive drilling attachment . . . . . . . . . . . . . . . . ..36
3/8" end mill holder . . . . . . . . . . . . . . . . . . . . . . . . . 36
Mill collet set . . . . . . . . . . . . . . . . . . . . . . . . . . . . . 36
Boring head . . . . . . . . . . . . . . . . . . . . . . . . . . . . . . 37
Fly cutter . . . . . . . . . . . . . . . . . . . . . . . . . . . . . . . 37
Drills and drill chuck, center drills . . . . . . . . . . . . . 37
Milling vise . . . . . . . . . . . . . . . . . . . . . . . . . . . . . . . 38
Step block hold-down set . . . . . . . . . . . . . . . . . . . 38
Tilting angle table . . . . . . . . . . . . . . . . . . . . . . . . . . 38
4" rotary table. . . . . . . . . . . . . . . . . . . . . . . . . . . . . 38
CNC rotary indexer . . . . . . . . . . . . . . . . . . . . . . . . 39
Horizontal milling conversion . . . . . . . . . . . . . . . . . 39
Multi-direction column upgrade . . . . . . . . . . . . . . . . 39
Additional mill accessories . . . . . . . . . . . . . . . . . . . 40
Books and videos for machinists . . . . . . . . . . . . . . . . . 41
Speed control electrical wiring layout and color codes . . 41
Exploded view, typical CNC stepper motor mount . . . . . 41
Exploded view, 4000/4400-series lathes . . . . . . . . . . . . . 42
Exploded view, 5000/5400-series mills . . . . . . . . . . . . . . 43
Exploded view, 2000 series 8-direction mill . . . . . . . . . 44
Part numbers and descriptions . . . . . . . . . . . . . . . . . . . 45
Tips on using the handwheels . . . . . . . . . . . . . . . . . . . 46
Technical specifications, lathes and mills . . . . . . . . . . . 46
Sherline warranty and service policy . . . . . . . . . . . . . . . 1
Ordering replacement parts . . . . . . . . . . . . . . . . . . . . . 1
Safety rules for power tools . . . . . . . . . . . . . . . . . . . . . 3
An introduction to the world of miniature machining . . . 4
General precautions . . . . . . . . . . . . . . . . . . . . . . . . . . 4
Customer’s responsibilities . . . . . . . . . . . . . . . . . . . . . . 5
Learning more about machining . . . . . . . . . . . . . . . . . . 5
Lubrication . . . . . . . . . . . . . . . . . . . . . . . . . . . . . . . . . 5
Initial assembly of a new machine . . . . . . . . . . . . . . . . 5
Mounting the lathe crosslide . . . . . . . . . . . . . . . . . . . . . 6
Installing the mill X-axis handwheel . . . . . . . . . . . . . . . . 6
Installing the mill X-axis digital readout handwheel . . . . . 6
5000/5400-series millls, installing the column . . . . . . . . . 7
2000-series mills, installing the multi-direction column . . . 7
Mounting the motor and speed control assembly . . . . . . . 7
What to do if the motor shuts down . . . . . . . . . . . . . . . .8
Operation of the motor and speed control . . . . . . . . . . . 9
Industrial applications for Sherline components . . . . . . . 9
Mounting the headstock to the lathe or mill . . . . . . . . . 9
Mounting lathe and mill to a base board . . . . . . . . . . . . . 10
Converting machines from inch to metric . . . . . . . . . . 10
ADJUSTMENTS
2-speed pulley . . . . . . . . . . . . . . . . . . . . . . . . . . . . 10
Preload . . . . . . . . . . . . . . . . . . . . . . . . . . . . . . . . . 11
Gibs . . . . . . . . . . . . . . . . . . . . . . . . . . . . . . . . . . . . 11
Leadscrew backlash . . . . . . . . . . . . . . . . . . . . . . . 11
Handwheels . . . . . . . . . . . . . . . . . . . . . . . . . . . . . . .11
Saddle nut . . . . . . . . . . . . . . . . . . . . . . . . . . . . . .12
Tailstock gib adjustment . . . . . . . . . . . . . . . . . . . . .12
Aligning the lathe headstock and tailstock . . . . . . . . 12
Aligning your mill . . . . . . . . . . . . . . . . . . . . . . . . . 13
Use of cutting oils . . . . . . . . . . . . . . . . . . . . . . . . . . . . 17
General machining terms . . . . . . . . . . . . . . . . . . . . . . . 17
Rules for feed rates and cutting speeds . . . . . . . . . . . . . 17
LATHE OPERATION
Leveling the tool . . . . . . . . . . . . . . . . . . . . . . . . . . . 18
Initial test cutting . . . . . . . . . . . . . . . . . . . . . . . . . . 18
Lathe terminology . . . . . . . . . . . . . . . . . . . . . . . . . . 19
Controlling “chatter” . . . . . . . . . . . . . . . . . . . . . . . . 19
Holding the workpiece . . . . . . . . . . . . . . . . . . . . . . 19
Turning between centers . . . . . . . . . . . . . . . . . . . . . 19
Removing tools from Morse tapers . . . . . . . . . . . . . 20
Center drilling . . . . . . . . . . . . . . . . . . . . . . . . . . . . . 20
Tailstock drilling . . . . . . . . . . . . . . . . . . . . . . . . . . . 20
Headstock drilling . . . . . . . . . . . . . . . . . . . . . . . . . . 21
Reaming . . . . . . . . . . . . . . . . . . . . . . . . . . . . . . . . 21
Faceplate turning . . . . . . . . . . . . . . . . . . . . . . . . . . 21
Taper turning . . . . . . . . . . . . . . . . . . . . . . . . . . . . . 21
Tool shapes and cutting angles, use of tools . . . . . . 21
“A man who works with his hands is a laborer.
A man who works with his hands and his brain is a craftsman.
A man who works with his hands, his brain and his heart is an artist.”
—Louis Nizer
-2-
SAFETY RULES FOR POWER TOOLS
1. KNOW YOUR POWER TOOL—Read the owner’s manual
carefully. Learn its application and limitations as well as
the specific potential hazards peculiar to this tool.
2. GROUND ALL TOOLS—If a tool is equipped with a threeprong plug, it should be plugged into a three-hole
receptacle. If an adapter is used to accommodate a twoprong receptacle, the adapter wire must be attached to a
KNOWN GROUND. Never remove the third prong. (See
Figure 1 in right-hand column.)
3. KEEP GUARDS IN PLACE—and in working order.
4. REMOVE ADJUSTING KEYS AND WRENCHES—Form a habit
of checking to see that keys and adjusting wrenches are
removed from the tool before turning on any machine.
5. KEEP WORK AREA CLEAN—Cluttered areas and benches
invite accidents.
6. AVOID A DANGEROUS WORK ENVIRONMENT—Do not use
power tools in damp or wet locations. Keep your work
area well illuminated.
7. KEEP CHILDREN AWAY—All visitors should be kept a safe
distance from the work area.
8. MAKE YOUR WORKSHOP KID-PROOF—with padlocks,
master switches or by removing starter keys.
9. DO NOT FORCE A TOOL—Do not force a tool or attachment
to do a job for which it was not designed. Use the proper
tool for the job.
10. WEAR PROPER APPAREL—Avoid loose clothing, neckties,
gloves or jewelry that could become caught in moving
parts. Wear protective headgear to keep long hair styles
away from moving parts.
11. USE SAFETY GLASSES—Also use a face or dust mask if a
cutting operation is dusty.
12. SECURE YOUR WORK—Use clamps or a vise to hold work
when practicable. It is safer than using your hand and
frees both hands to operate the tool.
13. DO NOT OVERREACH—Keep your proper footing and
balance at all times.
14. MAINTAIN TOOLS IN TOP CONDITION—Keep tools sharp
and clean for best and safest performance. Follow
instructions for lubrication and changing accessories.
15. DISCONNECT TOOLS—Unplug tools before servicing and
when changing accessories such as blades, bits or cutters.
16. AVOID ACCIDENTAL STARTING—Make sure the switch is
“OFF” before plugging in a power cord.
17. USE RECOMMENDED ACCESSORIES—Consult the owner’s
manual. Use of improper accessories may be hazardous.
18. TURN THE SPINDLE BY HAND BEFORE SWITCHING ON THE
MOTOR—This ensures that the workpiece or chuck jaws
will not hit the lathe bed, saddle or crosslide, and also
ensures that they clear the cutting tool.
19. CHECK THAT ALL HOLDING, LOCKING AND DRIVING DEVICES
ARE TIGHTENED—At the same time, be careful not to
overtighten these adjustments. They should be just tight
enough to do the job. Overtightening may damage threads
or warp parts, thereby reducing accuracy and
effectiveness.
20. DON’T USE YOUR LATHE FOR GRINDING—The fine dust
that results from the grinding operation is extremely hard
on bearings and other moving parts of your tool. For the
same reason, if the lathe or any other precision tool is
kept near an operating grinder, it should be kept covered
when not in use.
21. DON’T LET LONG, THIN STOCK PROTRUDE FROM THE BACK OF
THE SPINDLE—Long, thin stock that is unsupported and
turned at high RPM can suddenly bend and whip around.
22. WEAR YOUR SAFETY GLASSES—Foresight is better than
NO SIGHT! The operation of any power tool can result
in foreign objects being thrown into the eyes, which can
result in severe eye damage. Always wear safety glasses
or eye shields before commencing power tool operation.
We recommend a Wide Vision Safety Mask for use over
spectacles or standard safety glasses.
GROUNDING TYPE 3-PRONG PLUG
PROPERLY
GROUNDED
TYPE OUTLET
GROUND PRONG
NOTE: Power cords are
now available with UK
and European plugs.
UK—P/N 40630
Europe—P/N 40640
USE PROPERLY
GROUNDED
RECEPTACLE AS
SHOWN
PLUG ADAPTER
GROUND WIRE
FIGURE 1—Proper grounding for electrical
connections.
ELECTRICAL CONNECTIONS
The power cord supplied is equipped with a 3-prong
grounding plug that should be connected only to a
properly grounded receptacle for your safety. Should an
electrical failure occur in the motor, the grounded plug
and receptacle will protect the user from electrical shock.
If a properly grounded receptacle is not available, use a
grounding adapter to adapt the 3-prong plug to a properly
grounded receptacle by attaching the grounding lead from
the adapter to the receptacle cover screw.
NOTE: The electrical circuit designed into the speed
control of your lathe or mill reads incoming current from
100 to 240 volts AC and 50 or 60 Hz and automatically
adapts to supply the correct 90 volts DC to the motor.
As long as you have a properly wired, grounded
connector cord for your source, the machine will operate
anywhere in the world without a transformer. This has
been true for all Sherline machines built since 1994. Prior
to that, we used an AC/DC motor. Use that motor ONLY
with the power source for which it was intended. It will
not automatically adapt to any other current and using it
with an improper power source will burn out the motor
or speed control. Also, the first few DC units built did
not include the circuits to adapt to other currents. If you
think you may have an early DC model, remove the plastic
speed control housing and look for a label on the aluminum
speed control frame. If it has a small metallic label on
top of the frame that lists input voltage as 120VAC, DO
NOT ATTEMPT TO CONVERT TO OTHER
CURRENTS. Models that can be used with any current
have a paper label on the end of the speed control frame
which lists the model number as KBLC-240DS.
-3-
AN INTRODUCTION TO THE WORLD OF MINIATURE MACHINING
Getting answers to your questions about machining
Over the years we have found that the majority of our
customers are both highly intelligent and skilled craftsmen.
Often they are also new to machining. The instructions we
have included in this book, while far more extensive than
anything included with other machine tools, even ones
costing thousands of dollars, still only scratch the surface
when it comes to machining. We have tried to anticipate
the most common problems and questions asked by a new
machinist. What we have provided in this book and with
each accessory, when combined with a liberal amount of
common sense, is more than enough to get you started. If
you apply what you learn here, you will be well on your
way to making good parts. No doubt you will also have
many questions specific to your project that simply can’t
be addressed in a booklet of this type.
Answers to questions beyond the scope of this booklet will
have to come from your own research. Bookstores and
libraries are full of excellent books on machining, and the
Internet is forming some great user groups that can put
you in direct contact with others who share your specific
interests. Our own Worldwide Web site is a great source
of information as well. We have published there all the
instructions for all our tools and accessories for you to
read and print out for free. There are also links to many
other fascinating sites. For the past thirty-five years I have
found Machinery’s Handbook to be the source I turn to
for answers to my own questions.
I recently wrote a book called Tabletop Machining that is
specifically directed to the owners of Sherline tools and to
anyone who wants to learn to make small, metal parts.
The instructions you are reading that come with your
machine are quite complete; however, if you want to get
into more detail or want to see color photos of setups and
projects made by some of the best craftsmen around, I am
sure you will find more than your money’s worth in
Tabletop Machining. May your journey toward becoming
a skilled machinist be an enjoyable one.
What new machinists like most and least
If you are new to machining, you may find it to be either
one of the most rewarding skills one can learn or the most
frustrating thing you have ever attempted. What makes
machining fun for some is the complexity and challenge.
The same thing will drive others up the wall. One customer
may be overjoyed because he can now make parts that
were not available for purchase. Another may wonder why
he just spent all day making a part that is similar to one he
could have purchased for two dollars. The difference is
that it is not the same as the two-dollar part—it is exactly
the part needed.
There are no shortcuts
Machining is a slow process because parts are made one
at a time. The interesting thing is, a skilled machinist may
take almost as long to make the same part as a novice.
Shortcuts usually end in failure. Unlike some other trades,
mistakes cannot be covered up. There are no erasers, whiteout or “putting-on tools” for machinists; you simply start
over. To expand a little on an old rule: “Think three times,
measure twice and cut once!”
The craftsman’s strength–anticipating a tool’s limitations
The skill in machining isn’t just “moving the dials.” It is a
combination of engineering and craftsmanship. A file is
just as useful a tool to a good machinist as a multi-thousanddollar machine tool. Tools “deflect” or bend under load,
and anticipating this bend is what it is all about. Sharp
tools deflect less than dull tools, but with each pass the
tool gets a little duller and the deflection becomes greater.
If you try to machine a long shaft with a small diameter,
the center will always have a larger diameter than the ends,
because the part deflects away from the tool where it has
less support. You can go crazy trying to machine it straight,
or you can simply pick up a good, flat mill file and file it
straight in a few moments. Machine tools will never replace
the “craftsman’s touch,” and machining is a combination
of both good tools and good technique.
You don’t become a machinist by buying a machine
You should strive from the beginning to make better and
more accurate parts than you think you need. Work to closer
tolerances than the job demands. Be on the lookout for
ways to make a job easier or better. Having a selection of
appropriate materials on hand and a good cutoff saw to
get them to rough size is a good start. Take some time and
read through this instruction book before you try machining
anything. We want you to enjoy the process of creating
accurate parts from raw metal. Buying a machine didn’t
make you a machinist, but using it along with the skill and
knowledge you acquire along the way eventually will. With
the purchase of Sherline equipment, you have taken your
first step toward many years of machining satisfaction.
We thank you for letting us be a part of that.
—Joe Martin, President and owner
Sherline Products Inc.
GENERAL PRECAUTIONS
• DO NOT attempt to operate the lathe or mill without
first mounting them to a secure base. (See page 10.)
• DO NOT turn on the motor with a 3-jaw chuck mounted
if the jaws are not tightened on themselves or on a part.
The acceleration of the spindle can cause the scroll to open
the chuck jaws if not tightened.
• DO NOT lift or carry the machine by the motor. The
motor mount was not designed to support the entire weight
of the machine. Carry the machine by lifting under the
base or by the mounting board. It is also advisable to
remove the headstock/motor/speed control unit when
transporting the machine. The inertia of a sudden shock
can also overstress the motor mount.
-4-
THE CUSTOMER’S RESPONSIBILITIES
Always use care when operating the lathe and mill. Follow
the safety rules for power tools on page 3. Turn off the
motor before attempting adjustments or maintenance. (Do
not simply turn the speed control down to zero RPM but
leave the motor switch on.) Be sure the work piece is firmly
supported on the lathe or mill. Accessories should be
mounted and operated following instructions carefully.
Keep your machine clean, lubricated and adjusted as
instructed. Do not leave cleaning rags, tools or other
materials on the lathe bed or around moving parts of the
machine.
LEARNING MORE ABOUT MACHINING
Many fine books have been written on machining techniques
and are available at your local library or bookstore. Although
these books often refer to machines many times larger than
Sherline’s tools, the principle remains the same. Sherline
offers several good books related specifically to miniature
machining. See page 41 and the back cover for more.
Visit the Sherline Web Site for the Latest Updates
A world of up-to-date information on Sherline tools and
accessories and their use is available at:
• A chip guard (P/N 4360) is now available that offers
additional protection from flying chips when working near
the spindle. It is not a substitute for wearing proper eye
protection, but it does offer additional protection. It will
also contain cutting oil to help keep your work area cleaner.
AVOID OVERTIGHTNING!
One of the problems with designing and manufacturing
metal cutting equipment of this size is that the operator
can physically be stronger than the machine, which is not
normally the case with larger tools. For example, a 10pound force applied a couple of inches out on a hex key
becomes a 650-pound force at the tip of the screw. If you
tighten both screws on the tool post this tight, it becomes
approximately 1300 pounds of force on relatively small
parts! Tools and/or parts can become distorted and accuracy
will be lost. Overtightening hold-down screws and Tnuts in their slots can distort the crosslide or mill table.
It is not necessary to overtighten parts and tools, because
loads are smaller on equipment of this size. Save your
equipment and increase accuracy by not overtightening
and by taking light cuts.
DON’T OVERSTRESS THE MOTOR!
It is also important to realize that you can overload the
motor supplied with this lathe or mill.* The many variables
involved in machining, such as materials being machined,
size of cutter, shape of cutter, diameter of stock, etc., can
leave but one rule to follow...COMMON SENSE!
*The motor is thermally protected, so if it is overloaded, it
will simply shut down until it cools. See note on thermal
protection in the motor/speed control section on page 8.
CAUTION!
Read all operating instructions and safety rules carefully
before attempting any machining operations.
Here are a few key addresses (www.sherline.com/...):
Accessory instruction links: accessor.htm
Links to interesting and informative sites: resource.htm
Projects by Sherline machinists: workshop.htm
Replacement parts price list: prices3.htm
Reference dimensions of Sherline tools: dimen.htm
Sources for raw materials: online.htm
Tips from Sherline machinists: tips.htm
Sherline photo factory tour: factour.htm
Special instructions and help sheets: hlpsheet.htm
LUBRICATION
MACHINE SLIDES—Use a light oil such as sewing machine oil
or grease on all points where there is sliding contact. This
should be done immediately after each cleanup. (We grease
the slides at the factory to ensure the lubrication stays in
place during shipping, but light oil will work fine once you
begin using the machine.)
LEADSCREW, TAILSTOCK SCREW, CROSSLIDE SCREW—Sewing
machine oil should be placed along all threads regularly.
At the same time, check that the threads are free from any
metal chips. Use an air hose or inexpensive paint brush to
keep them clean.
TAILSTOCK SPINDLE—Wind out the spindle as far as it will
go and lightly oil it with sewing machine oil.
HANDWHEELS—A few drops of light oil or a little grease
behind the handwheel will reduce friction between the
surfaces and make operation easier and smoother.
HEADSTOCK BEARINGS—These bearings are lubricated at the
factory for the lifetime of the machine and should not need
further lubrication. DO NOT break the seals.
MOTOR—Sealed ball bearings require no maintenance.
When NOT to lubricate certain surfaces
The mating surfaces of the arm, the column and the column
cap on the Model 2000 mill are to be kept free from
lubrication. Tightening the column bolt causes friction
between these surfaces to resist movement of the arm
during the forces and vibration of machining. If these smooth
surfaces are lubricated, the arm or the column could move
during machining even if the bolt is securely tightened. Clean
these surfaces periodically with mild detergent or bathroom
spray cleaner to keep a good "bite" between surfaces. The
same goes for the surfaces between the "knuckle" and the
ends of the swing arm. These surfaces are smooth enough
that adjustment is easily accomplished with the nut loosened
even without lubrication. They should be free of dirt and
chips, but please resist your natural inclination to lubricate
them, as they do their intended job better when dry.
A Note on Synthetic Greases
We have recently begun using a Teflon-based synthetic
grease to lubricate not only the Sherline tools we sell, but
www.sherline.com
-5-
FIGURE 3—Installing
the crosslide table
onto the saddle
also the factory machines that we use to produce them.
Several manufacturers now offer it in small grease gun
canisters that are available at hardware and auto part stores.
It offers smoother action than conventional grease when
used on sliding parts, and we highly recommend it.
INITIAL ASSEMBLY OF A NEW MACHINE
Your new lathe or mill will come packed in a box with
some items disassembled for shipping purposes. This has
been done to minimize the chance of damage during
shipping. On the lathe, you will install the crosslide table
onto the saddle. On the mill you will install the Z-axis column
onto the base. On some mills you will reinstall the X-axis
handwheel. On both machines you will need to install the
motor and speed control. The machines are completely
assembled and tested for fit at the factory prior to shipping.
They are then disassembled and packaged, so everything
should go together easily when you reassemble it. The
motors are “run in” for approximately one hour to assure
proper function and seating of the brushes.
Before you call us and say a part is missing, please look
carefully through the packaging. Some parts are in bags
taped to the bottom of cardboard flaps or spacers, and you
may not notice them when you open the box and remove
the major components.
LATHE—MOUNTING THE CROSSLIDE
Installation of the crosslide requires no tools. First, make
sure the bottom of the crosslide has a light coat of grease
on all the sliding surfaces. This will have been applied at
the factory, just make sure it has not been wiped off and
that it is evenly distributed.
FIGURE 4—Aligning the slide screw with the
brass slide screw insert
engage the threads. Continue to crank the handwheel
clockwise until the crosslide is in the desired position on the
saddle.
MILL—X-AXIS HANDWHEEL INSTALLATION
Mills with adjustable “zero” handwheels come with the Xaxis handwheel removed to prevent damage to the
leadscrew during shipping. Reinstalling the handwheel is a
simple process:
1. Loosen the X-axis table lock (the barrel-shaped lock on
the saddle that is tightened against the side of the mill table
with a socket head cap screw). From the end of the mill
table where the X-axis leadscrew protrudes, push on the
end of the mill table to make sure it seats tightly against the
leadscrew.
2. Examine the red collar on the handwheel to see that the
small hole is aligned with the head of the set screw. If it is
not, loosen the black locking nut on the handwheel and
rotate the collar until you can see the head of the set screw.
3. The handwheel was installed at the factory and then
removed for shipping. You should be able to see a mark on
the leadscrew where the set screw was previously tightened.
When reinstalling the handwheel, try to have the set screw
pick up this same position on the leadscrew.
4. Slide the handwheel onto the end of the leadscrew shaft
and push until the handwheel is fully seated and the thrust
collar is clamped tightly between the handwheel and the
leadscrew collar. A 3/32" hex wrench is included with your
machine to tighten the handwheel set screw.
DIGITAL READOUT HANDWHEELS
If you ordered your mill equipped with a digital readout, the
X-axis handwheel will again be removed to prevent damage
during shipping. The proper thrust collar has been factory
installed. If a 1/4" shim washer is required, it will be included
in this package. Place it on the leadscrew shaft before
installing the handwheel. Follow the installation instructions
GIB
GIB LOCK
SADDLE
SLIDE SCREW INSERT
FIGURE 2— Lathe bed, saddle and gib
Next, see that the gib is in the proper position on the saddle.
(See Figure 2.) It is taped into position for shipping.
Remove the tape holding it in place. If the gib has come
off, reposition it on the gib lock as shown.
Set the dovetail of the crosslide over the gib and matching
dovetail on the saddle. Slide it onto the saddle about 1/4"
(6-7 mm) until it stops. (See Figure 3.)
Look underneath and align the slide screw with the threads
on the brass slide screw insert on the side of the saddle.
(See Figure 4.) Turn the crosslide handwheel clockwise to
-6-
CHECK THE TIGHTNESS OF ALL BOLTS
Vibration in shipping can cause some bolts or screws to loosen
up. Before using your new machine, check the tightness of all
fasteners. It is also a good idea to check tightness periodically
when using the machine, as vibration from operation may
cause some fasteners to loosen up.
included with the P/N 8100 digital readout to install the
encoder housing and handwheel unit.
5000-SERIES MILLS—MOUNTING THE COLUMN
The mill is shipped attached to a piece of plywood to keep
it from moving in the box. Before you begin, remove the
screws holding the mill base to the plywood. It was installed
strictly for packing purposes and will need to be removed
so that the column can be installed.
The Z-axis column is mounted to the base
with two 1-3/4" long, 1/4-20 socket head
screws. These screws and the hex key tool
you will need to tighten them are packaged
in the bag with the motor mounting
bracket and drive belt. It is much easier
to mount the column to the base before
you mount the motor and speed control
to the saddle.
Set the column on the base aligned with
the mounting holes and hold it in
position while you insert the first
screw up from the bottom of
the base. Hand-turn the first
screw part way in, and then
start the second screw. This
can be done with the machine
FIGURE 5—Mounting upright by letting the base hang
the 5000-series mill Z- over the edge of your table or
axis column
bench just far enough to expose
the first hole. Using the large 3/16" hex key provided, snug
up both screws lightly first, and then tighten evenly.
2000-SERIES MILLS—ASSEMBLING AND MOUNTING THE
MULTI-DIRECTION COLUMN
To assemble the multi-direction column, make reference to
the exploded view on page 44 of these instructions and
complete the steps that follow:
1. Attach the round column base (P/N 5666) to the mill
base with the two 1/4-20 x 1-1/2" socket head cap screws.
2. Screw the arm hold-down bolt (P/N 5613) into the top
of the round column base and tighten with an adjustable
wrench using the two flat indentations on the shaft.
3. Slip the round column top (P/N 5655) over the pin and
rotate it until the flat sides are parallel to the mill base with
the engraved indicator line on the same side as the X-axis
handwheel.
4. Using an 11/16" or a 17 mm wrench, loosen the flange
nut holding the bed and swing arm together. Rotate the bed
away from the swing arm until they are at approximately a
90° angle to each other. Retighten the flange nut firmly to
hold the column in this position. Discard the protective spacer
that was installed between the bed and arm during shipping.
5. Set the swing arm over the column and align it
approximately square with the mill base and in about the
center of its travel. Make sure the swing arm registers on
the flats of the column top and is properly seated. While
still holding the swing arm unit in place, set the hold-down
washer (P/N 5620) over the end of the bolt. Put a flange
nut on the end of the bolt and tighten it against the holddown washer firmly to lock the swing arm in place. NOTE:
There should be NO lubrication on the mating surfaces
between the arm and the column base. Friction between
these surfaces keeps the arm from moving during cuts.
6. Place the column adjustment block (P/N 5635) on top
of the swing arm and attach it with two 10-32 x 5/8" socket
head cap screws at both ends. Adjust the 1" long center
bolt so that it is just touching the flat in the bottom of the
relieved section in the top of the pivot knuckle when the
column is in the 90° position.
NOTE: If you remove the column adjustment block to
accommodate a backward tilt movement of the column,
make sure you replace it when returning the column to an
upright position. It not only serves as a reference point
when returning the column to the 90° position, it also keeps
it from accidentally swinging down and damaging the table
if the flange nut is loosened.
7. Slip the alignment key into its keyway in the mill saddle.
Place the headstock/motor/speed control unit over the pin
on the mill saddle and over the alignment key. Tighten the
set screw in the side of the headstock to hold the entire unit
in place. Recheck to be sure you have tightened the flange
nut on the shouldered bolt pivot pin securely so that all the
weight of the column is not resting on the column adjustment
block bolt.
MOUNTING THE MOTOR AND SPEED CONTROL
UNIT TO THE HEADSTOCK
(Refer to Figure 6 and the exploded views and number list
on pages 42, 43, 44 and 45 for part number references.)
1. Remove the motor pulley from the motor shaft. Mount
the inner belt guard to the motor using the two standoffs
(P/N 4310). Next, install the motor pulley (P/N 4336) to
the motor shaft and tighten the set screw. The end of the
pulley should be just about even with the end of the motor
shaft, with the smaller pulley toward the end of the shaft.
2. Place the drive belt over the motor pulley.
3. Place the round post (A) on the speed control hinge
plate in the hole on the inner belt buard (B).
4. Set the outer belt guard in place, locating the other post
of the hinge plate (C) in its pivot hole (D). The motor
standoff ends will register in holes in the outer belt guard.
Make sure the drive belt is routed properly, then secure
the cover with the two 1-3/8" pan head screws that go into
nuts pressed into the back of the inner belt guard.
5. Attach the motor mounting bracket to the rear of the
headstock with two 10-32 x 3/8" socket head screws. (These
screws are shipped threaded into the headstock rather than
in the parts bag.) There is enough “play” in the mounting
holes to allow you to ensure the motor is visually mounted
parallel with the spindle axis. (Note: If a chip guard is to be
mounted, its attachment screw replaces one of these
mounting screws. It can be mounted at this time or after
the headstock is in place. (See chip guard instructions.)
-7-
A
in the speed control housing and into the nut in the mounting
plate. Tighten enough to hold it in place. Do not overtighten.
NOTE: If you machine a lot of wood or brass, you may
want to purchase and install a switch cover (P/N 3015) to
keep the fine dust out of the power switch. The wood dust
can gum up the switch causing intermittent operation. Brass
dust can short out the switch or cause a risk of electric
shock to the operator.
THE ADVANTAGES OF SHERLINE’S DC MOTOR
AND ELECTRONIC SPEED CONTROL
Sherline’s 90-volt DC motor is very smooth and powerful,
particularly at low RPM. The specially designed electronics
package also provides some unique advantages in addition
to smooth speed control with a usable speed range of 70 to
2800 RPM. A special circuit compensates for load, helping
to keep RPM constant. The machines can also be used on
any current worldwide from 100 VAC to 240 VAC, 50 or
60 Hz without any further adjustment other than seeing
that the proper wall plug is used. The control reads the
incoming current and automatically adjusts to the proper
settings.
CAUTION—MOTOR IS THERMALLY PROTECTED
Thermal protection means there is a built-in circuit breaker
that will shut down the motor if it gets too hot. This keeps
the motor from burning out. The breaker will automatically
reset as soon as the motor cools and you can go back to
cutting, but you should be aware of how it works and what
to do if the machine suddenly shuts itself down. If your
motor is shutting down from overheating on a regular basis,
it means you are taking cuts that are too heavy or operating
at too high an RPM for long periods. Slow your speed down,
reduce your cut or feed rate, and you should have no further
problems.
Due to the nature of miniature machining, overloading the
machine is a common problem. It is often tempting to try to
speed up the process by working faster. Keep in mind this
is a small machine, and work with patience and precision—
don’t be in a hurry. Your parts will come out better, and
your machine will last much longer if it is not overstressed.
WHAT TO DO IF THE MOTOR SUDDENLY SHUTS DOWN
If your thermal protection circuit shuts down the motor
while work is in progress, immediately shut off the power
switch and then back the tool out of the work. It should
only take 10 seconds or less for the circuit breaker to reset,
then you can turn the motor on and start the cut again, this
time putting a little less stress on the motor. If you leave the
tool engaged in the part and the power on, when the circuit
breaker kicks back on, the motor must start under load.
This can be very hard on your motor.
Remember that the circuit breaker turns the speed control
off, which turns off the motor. If power were to be applied
to the speed control with the motor disconnected, it could
damage the speed control.
Thermal protection is built into your motor to insure it is not
damaged by overloading. Use good common sense when
operating the motor for years of trouble-free operation.
C
B
D
FIGURE 6—DC motor and speed control assembly
6. Place the drive belt over the spindle pulley and insert
two 10-32 x 3/4" socket head screws (with 2 washers on
each) through the motor mount slot and into holes in the
ends of the motor standoffs. (These standoff ends should
be exposed through locating holes in the outer belt guard.)
NOTE: The normal operating position for the drive belt is
on the large diameter groove on the motor pulley and the
small diameter groove on the spindle pulley. Use of the
other (low RPM) position is discussed in the instructions
on page 10.
7. Tighten the motor mount screws, tilt the speed control
unit out of the way and check the alignment of the drive
belt. It should be perpendicular to the drive pulleys. If it is
not, loosen the set screw on the motor pulley and adjust it
in or out on its shaft until the drive belt is square with the
motor.
8. Pull the desired tension into the drive belt by sliding the
motor unit outward in the bracket slot. Tighten the mounting
screws to hold the motor and control unit in place.
NOTE: Do not over-tension the drive belt. Just make sure
it has enough tension to drive the spindle pulley without
slipping under normal load. By not overtightening the belt
you will not only extend its life, but will also provide a margin
of safety for belt slippage should a tool jam in a part or an
accident occur. The belt must be a little tighter when used
in the low speed range because small diameter pulleys are
not as efficient.
9. Set the mounting plate into the top of the belt guard
housing so it rests on the rails molded onto the inside
surfaces of the housing. (The pressed-in nut goes down
and to the outside.) Slide the plate toward the outside (toward
the spindle pulley) until it stops. NOTE: The mounting plate
was designed to be easily removable so it is out of the way
when changing the drive belt position.
10. Rotate the speed control unit down into place and insert
the single 10-32 x 3/8" socket head screw through the hole
-8-
HIGH SPEED SPINDLE OPERATION
A special pulley set is available that turns the spindle at up
to its maximum rated capacity of 10,000 RPM. See P/N 4335.
OPERATION OF THE MOTOR AND
ELECTRONIC SPEED CONTROL
The lathe is supplied with an electronic speed control that
produces a comprehensive range of speeds suitable for all
operations. Special circuitry designed into the DC motor
speed control automatically compensates for speed changes
due to increased load. If the spindle RPM drops noticeably
when cutting, you are taking too heavy a cut. The speed
range of the spindle using the speed control is from 70 to
2800 RPM. This is achieved without the inconvenience of
changing belt positions or gear ratios as is often the case
with other designs. A second belt position is offered as an
additional feature to provide extra torque at low RPM for
larger diameter parts should your job require it.
To operate the motor, turn the speed control knob
counterclockwise as far as it will go. Then turn the toggle
switch to “ON” and select the speed by turning the speed
control knob clockwise.
Motors are Pre-tested at the Factory
Your new motor should run smoothly the first time you use
it, as it has been “run in” for about an hour before being
shipped to you. Despite our secure packaging, there have
been cases where extremely rough handling by a shipper
has damaged the magnets in the motor. If the motor does
not run when plugged in, turn the motor by hand. If it does
not turn smoothly, it may have been damaged in shipment.
Call Sherline for instructions on making a damage claim
with the shipper. Do not attempt to repair the motor
yourself.
MOUNTING THE HEADSTOCK TO THE LATHE OR MILL
You may notice that the post onto which the headstock
mounts is a loose fit where it projects from the lathe bed
or column saddle. This is normal, and the diagram in Figure
8 will help you understand how it works.
The screw in the front center of the headstock has a cone
point. The pivot pin has a tapered slot with a corresponding
angle. When the screw is tightened, its angled face engages
the groove, and, because the pivot pin can not come up, it
draws the headstock down into position, clamping it into
place. If the pin were rigid, it could keep the headstock
from pulling down squarely.
The headstock is aligned with the lathe bed or column
saddle by means of a precision ground key that fits into
keyways in both parts. It is not square in cross section so it
will fit in only one direction. Push the headstock firmly
against it as you tighten the hold-down screw. The mill
column saddle has two keyways milled into it so the
headstock can be mounted in conventional fashion or at a
90° angle for horizontal milling.
HEADSTOCK CASE
HEADSTOCK PIVOT PIN
HEADSTOCK LOCKING SCREW
ALIGNMENT KEY
LATHE BED
LATHE BASE
FIGURE 8—A cross-section of the headstock showing
the pointed locking screw
FIGURE 7—A typical
Sherline industrial slide based
on components from the tool line.
INDUSTRIAL APPLICATIONS FOR SHERLINE COMPONENTS
For many years, Sherline spindles, slides and motor units
have been especially popular with designers of custom tooling
for small industrial applications because of the low cost
and the large number of Sherline accessories that fit the
spindle. In fact, we use them in our own production facility
for a number of operations. Sherline is now offering a
complete line of components made specifically for the
production tooling designer. As you would expect, the size
range is best suited for smaller operations, but if your needs
fit within the specifications of Sherline components, excellent
design results can be achieved. For more information on
products from Sherline’s Industrial Products Division, see
our web site at www.sherlineIPD.com.
HEADSTOCK ASSEMBLY
FIGURE 9—
Headstock and
alignment key
in position over
lathe
HEADSTOCK LOCKING SCREW
ALIGNMENT KEY
PIVOT PIN
CAUTION! Always make sure the key, slot and mating
surfaces are free from dirt and chips before locking down
the headstock.
-9-
NOTE: Alignment keys are fitted to each machine. If you
have more than one machine or component that uses an
alignment key, try not to mix them up.
Removing the headstock alignment key permits the
headstock to be mounted in positions other than square.
This allows you to mill parts at an angle or turn tapers on
the lathe. When using the lathe or mill without the alignment
key, keep cutting loads light.
MOUNTING THE LATHE AND MILL TO A BOARD
Mounting the lathe to a board is necessary because of the
narrow base. This keeps the machine from tipping. We
recommend mounting the lathe on a piece of pre-finished
shelf material, which is readily available at most hardware
stores. (See Figure 11 for sizes.) The machine can be
secured to the board using four 10-32 screws with washers
and nuts. Lengths should be 1-1/2" for short bed lathes and
1-7/8" for long bed lathes. Rubber feet should be attached
at each corner on the bottom of the mounting boards. They
are also readily available in hardware stores.
This arrangement gives the machines a stable platform for
operation yet still allows for easy storage. The rubber feet
help minimize the noise and vibration from the motor.
Mounting the tool directly to the workbench can cause
vibration of the bench itself, which acts as a “speaker” and
actually amplifies the motor noise. Bench mounting also
eliminates one of the best features of Sherline
machines...the ability to be easily put away for storage.
7.19"
5.0"
4000/4100
LATHE
10" x 24"
2.25"
2.25"
The overall sizes are based on standard
laminated shelf material. You may adjust
them to fit the material available to you.
The mill mounting boards will have to be
cut to length as shelf material is not
normally available in lengths that short.
3.5"
17.0"
4400/4410
LATHE
10" x 36"
2.25"
2.25"
(12" Base)
10.5"
8.5"
(10" Base)
2000-SERIES MILLS
12" x 18"
FRONT
1.5" (5000)
.75" (5400)
2.38"
2.38"
5000-SERIES
MILLS
2.38"
2.38"
10" x 12"
12.5"
1.75"
FIGURE 11—Plans for mounting board hole patterns.
Confirm actual dimensions from your lathe or mill
before drilling.
mill from one measurement system to the other is possible,
but it takes more than changing the handwheels. The
leadscrews, nuts and inserts must also be changed. A
look at the exploded views of the machines on pages 42
through 44 will show which parts need to be purchased.
(Look for parts that have both a metric and inch version
in the parts listing.) Conversion kits with all the necessary
parts are available. If you are a good mechanic, you can
do the conversion yourself, or you can return your machine
to the factory for conversion.
FIGURE 10—Machines mounted to a
base board for stability.
ADJUSTMENTS
TWO-SPEED PULLEY
HIGH TORQUE, LOW RPM POSITION
NORMAL BELT POSITION
RUBBER FEET
The mill may be mounted in a similar manner on a 10" x 12"
to 12" x 24" pre-finished shelf board with rubber feet using
10-32 x 1" screws to attach the mill to the board.
REMEMBER: DO NOT LIFT YOUR MACHINE BY THE
MOTOR! Carry the machine by lifting under the base or
by the mounting board.
To keep your Sherline tools clean, soft plastic dust covers
are available. The lathe cover is P/N 4150 for the Model
4000/4100 and 4500/4530 short bed lathes and P/N 4151
for the Model 4400/4410 long bed lathe. A mill dust cover
is available as P/N 5150 for 5000-series mills and P/N 5151
for 2000-series 8-direction mills.
CONVERTING MACHINES FROM INCH
TO METRIC OR VICE VERSA
All Sherline tools and accessories are manufactured in your
choice of inch or metric calibrations. Converting a lathe or
A
B
FIGURE 12—The two pulley positions. Position A is the
conventional setting, position B offers more torque at
low RPM when turning large diameter parts.
The normal pulley position, which is placing the belt on the
larger motor pulley and smaller headstock pulley, will suffice
for most of your machining work. Moving the belt to the
other position (smaller motor pulley, larger headstock pulley)
will provide additional torque at lower RPM. It is particularly
useful when turning larger diameter parts with the optional
riser block in place. To change the pulley position, remove
the speed control hold-down screw and pivot the speed
control housing up out of the way. Remove the mounting
plate from its position on the rails of the two halves of the
-10-
SADDLE
BED
belt guard housing. Loosen the two nuts that hold the motor
to the motor mounting bracket and take the tension off the
belt. With your finger, push the belt off the larger diameter
groove of the pulley and into the smaller one. (Depending
on which way you are changing it, this could be either the
motor or spindle pulley.) Then move the belt to the larger
diameter groove on the other pulley, and rotate the headstock
by hand to get it to seat. Push the motor outward on the
motor mounting bracket to put the proper tension on the
belt, and retighten the two motor mounting screws. Now
you can replace the mounting plate, pivot the speed control
back down, and refasten it. Moving the belt back to the
other position is simply a reverse of the above procedure.
SPINDLE PRELOAD ADJUSTMENT
If any end play develops in the main spindle, it can be easily
eliminated by readjusting the preload nut. (See part number
40160 in the exploded view.) When the headstocks are
assembled at the factory, the preload nut is adjusted to .0002"
(.005 mm) of end play. This is controlled by the outer races
of the bearing being held apart by the headstock case and
the inner races being pulled together by the preload nut.
This setting was determined through experience, and, like
everything in engineering, it is a compromise. If the machine
is only to be run at high-speed, this setting may be too
“tight.” The headstock will run fairly warm to the touch
normally, but extended periods of high speed operation may
bring about excessive temperature. The headstock should
not be too hot to touch. If this is your case, the preload
tension may be reduced slightly.
To change the adjustment, remove the spindle pulley, loosen
the set screw in the preload nut and back the preload nut
off 4° of rotation (counterclockwise). The bearings are lightly
pressed into the case, so the inner race will not move
without a sharp tap with a plastic mallet to the end of the
spindle where the pulley is attached.
If you find your bearings are set too loose, you may want
to take up on the end play. You can check them with an
indicator or by spinning the spindle without the motor belt
engaged. If the spindle spins freely with a chuck or faceplate
on it, it is too loose for normal work. Adjust the preload nut
until it turns only about one and a half revolutions when
spun by hand.
GIB ADJUSTMENT (Lathe and Mill)
Tapered gibs are fitted to the mill headstock, saddle and
table and to the lathe saddle and crosslide. Correct
adjustment of the gibs will ensure smooth and steady
operation of the slides. The gib is effectively a taper with
an angle corresponding to the one machined into the saddle.
It is held in place by an “L” wire gib lock that is secured
with a locking screw. It is adjusted by loosening the gib
locking screw and pushing the gib inward until “play” is
removed. After adjusting, retighten the locking screw.
Milling operations require a tighter adjustment of the gibs
than lathe operations.
FIGURE 13—
Adjusting the gibs
GIB
BACKLASH
ADJUSTMENT
(Lathe and Mill)
GIB LOCK
Backlash is the
amount the handwheel can be
turned before the
slide starts to move when changing directions. This is a
fact of life on any machine tool, and on machines of this
type it should be about .003" to .005" (.08 mm to .12 mm).
Backlash must be allowed for by feeding in one direction
only. Example: You are turning a bar to .600" diameter.
The bar now measures .622" which requires a cut of .011"
to bring it to a finished diameter of .600". If the user
inadvertently turns the handwheel .012" instead of .011",
he couldn’t reverse the handwheel just .001" to correct the
error. The handwheel would have to be reversed for an
amount greater than the backlash in the feed screws before
resetting the handwheel to its proper position.
Backlash on the X- and Y-axes of the mill may be reduced
to a minimum by adjustment on the anti-backlash nuts.
These nuts are located on the handwheel ends of the mill
saddle. The nuts are secured by button head screws that
hold a star gear that interlocks with teeth on the nut.
To adjust backlash, simply loosen the button head screw
that locks the star gear. Rotate the anti-backlash nut
clockwise on the X-axis and counterclockwise on the Yaxis until snug. Retighten the button head screw while
pushing the gear toward the nut. With the anti-backlash
nuts properly adjusted, the leadscrews should turn smoothly
and have no more than the proper .003" to .005" of backlash.
LEADSCREW
SET SCREW
ANTIBACKLASH
NUT
NUT
SADDLE
FIGURE 14—Mill Backlash Adjustment
(NOTE: Older mills use a “pointer” type lock instead
of the star gear.)
HANDWHEEL ADJUSTMENT (Lathe and MIll)
The handwheels are secured to their corresponding
leadscrew shafts by a small set screw in the side of the
handwheel base. Check them periodically to make sure
they have not been loosened by vibration. On the adjustable
“zero” handwheels, you must first release the rotating collar
by loosening the locking wheel. Then rotate the collar until
you can see the set screw through the small hole in the
side of the collar and adjust the screw as necessary.
-11-
Want to see some projects built by other Sherline
machinists? Visit www.sherline.com/workshop.htm.
If a handwheel has been removed, when reinstalling it, make
sure it is pushed up tightly against its thrust collar before
tightening the set screw. Push the appropriate table or saddle
toward the handwheel to remove any excess play before
tightening. For the mill Z-axis, lift up on the headstock to
remove play.
If excessive backlash develops at the handwheel and thrust
collar junctions, adjust by first loosening the handwheel
set screw. Index (rotate) the handwheel so the set screw
tightens on a different part of the shaft. (If you don’t, it
may tend to keep picking up the previous tightening
indentation and returning to the same spot.) Push the
handwheel in tightly while holding the saddle and retighten
the handwheel set screw.
SADDLE NUT ADJUSTMENT (Lathe and Mill)
Both the lathe saddle and mill column saddle are connected
to their respective leadscrews using a similar brass saddle
nut (P/N 40170/41170 or 40177/41177). The saddle should
first be positioned at the end of its travel as close to the
handwheel as possible. A socket head cap screw attaches
the saddle nut to the saddle, while two set screws align the
nut to the leadscrew. Loosen the cap screw, bring each set
screw into light contact with the saddle nut and retighten
the cap screw. If binding occurs, readjust the set screws.
NOTE: The mill column saddle nut differs from the lathe
leadscrew saddle nut in that it includes a spring-loaded ball
that engages a detent in the saddle locking lever. See page
36 for details on use of the saddle locking lever.
Only someone new to machining would talk about “perfect”
alignment. Machinists speak instead in terms of
“tolerances,” because no method of measurement is totally
without error. We believe the tolerances of your machine
are close enough for the work for which it was intended;
however, for those searching for maximum accuracy, here
are some tips for maximizing the accuracy of your machine.
Loosen the headstock, push it back evenly against the
alignment key and retighten. This will maximize the accuracy
of the factory setting. To achieve greater accuracy, you
will have to be willing to sacrifice one of the better features
of your lathe or mill; that is, its ability to turn tapers and mill
angles in such a simple manner.
HEADSTOCK—If you choose total accuracy over versatility
or need it for a particular job, proceed as follows. Remove
the headstock and clean any oil from the alignment key
and slot and from the area of contact between bed and
headstock. Replace the headstock, pushing squarely against
the key and retighten. Take a light test cut on a piece of
1/2" to 3/4" diameter by 3" long aluminum stock held in a 3jaw chuck. Use a sharp-pointed tool to keep cutting loads
low so as not to cause any deflection of the part. Measure
the diameter of both machined ends. If there is a difference,
the headstock is not perfectly square. Now, without removing
the key, tap the headstock on the left front side (pulley end)
if the part is larger at the outer end. Tap on the right front
side (chuck end) if the part is larger at the inner end.) You
are trying to rotate the headstock ever so slightly when
viewed from the top until the machine cuts as straight as
you can measure. There should be enough movement
available without removing the key, as its factory placement
is quite accurate.
Take another test cut and remeasure. Repeat this procedure
until you have achieved the level of perfection you seek.
Then stand the lathe on end with the alignment key pointing
upward and put a few drops of LocTite™ on the joint
between key and headstock. Capillary action will draw the
sealant in, and when it hardens, the key will be locked in
place. We prefer this method to “pinning” the head with
1/8" dowel pins, because it offers you the option to change
your mind. The headstock can be removed by prying with
a screwdriver blade in the slot between the bottom of the
headstock and the lathe bed to break the LocTite™ loose
should you wish to be able to rotate the headstock again.
TAILSTOCK—To maximize the machine’s tailstock alignment,
first make sure that there are no chips caught in the dovetail
of the bed and no chips or dents in the taper of your tailstock
center. Now put a 6" long piece between centers and take
a long, light test cut. Measurements at either end will tell
you if you need to use an adjustable tailstock tool holder in
the tailstock to achieve better tailstock alignment. We
manufacture adjustable tailstock tool holders (P/N 1202,
1203, 1206) and an adjustable live center (P/N 1201) that
can help you attain near perfect alignment at the tailstock
should your job require it. Instructions for their use are
included with each item.
ADJUSTMENT AND USE OF THE TWO-PIECE TAILSTOCK
The brass tailstock gib should be adjusted so that it is equally
tight at both ends and slides easily on the bed dovetail when
the adjustment screw is loosened. As the brass gib wears,
any play that develops can be adjusted out by loosening the
two set screws, readjusting the two button head screws
and then relocking the set screws. To lock the tailstock in
place on the bed,
tighten the center
TAILSTOCK CASE
socket head cap
LOCKING SCREW
screw. Do not
ADJUSTMENT LOCKING
overtighten.
SET SCREWS
BRASS GIB
ADJUSTMENT SCREWS
FIGURE
15—
Components of the
tailstock case and
adjustable gib
ALIGNING THE LATHE HEADSTOCK AND TAILSTOCK
The versatile feature of Sherline machines that allows the
headstock to be removed or rotated for taper turning and
angle milling keeps us from being able to lock the headstock
in perfect alignment. Precision ground alignment keys and
accurate adjustment at the factory, however, make the
machines highly accurate. In standard form, alignment should
be within .003" (.08 mm). This should be more than
acceptable for most jobs you will attempt.
-12-
Questions? See our “Frequently asked questions”
section on the web site: www.sherline.com/faq.htm.
would dramatically increase the price. We try to give a
customer what we consider "the most bang for the buck."
Why aren't there alignment pins to square up the machine?
If you are a novice to machining, you probably believe a
machine should be designed so that a couple of pins could
be dropped into holes, squaring up the machine and
eliminating this whole process. After all, that is the way
they do it with woodworking machinery. The truth is the
tolerances that work well for wood cutting tools simply
aren't accurate enough for most metalworking tools. You
just can't hold the tolerances required with "pins." When
they fit tight enough to lock the head square to the table
you can't remove them to do work that isn't square. They
become more of a problem than the problem they were
installed to eliminate. For example, an alignment or assembly
error of .010" in a wooden kitchen table will never be
noticed. Usually the floor it sits on is not even flat. It would
be a waste of time and effort to make it more accurate
than it has to be. On the other hand, a cylinder that has
been bored out of square with the crankshaft in an
automobile engine could wear the entire engine at an
alarming rate. The piston goes up and down a million times
in a normal day's use. The additional cost in fuel and
shortened life demands accuracy. Your Sherline mill should
be adjusted and aligned to the degree of accuracy demanded
by the particular job you are attempting to do.
Start by getting the column
close to square with the table
ALL SHERLINE MILLS...The first place to start is to get
the column approximately square with the table using the
pointers and laser engraved scales on the machine. The
first time you set it up you will have to use a machinist's
square on the side-to-side column rotary adjustment as the
pointer will not have been “zeroed in” yet. None of these
adjustments must be extremely precise at this point because
a finger type dial indicator will be used to make the final
adjustments later. Remove the headstock/motor/speed
control unit from the saddle. Place a machinist's square on
the table and line up the front of the saddle to get the column
approximately square front to back. Then line up on the
right side of the saddle to get the column approximately
square side to side. Reinstall the headstock assembly.
Check for any built-in error in your machine
ALL SHERLINE MILLS...(See Figure 17.) To check the
built-in error of the machine use a dial indicator mounted in
the spindle. Move the table under spindle with the Y-axis
handwheel and note the error. This error will usually be
around .001" to .002" (.05 mm) in 3" (76 mm). (Remember
the components are not precision ground, they are precision
milled.) When squaring the head later on this error should
be accounted for. Remember you are squaring the head
and spindle to the base of the machine where the saddle
travels, not the surface of the table itself. The head doesn't
have to be square for this operation as long as you don't
rotate the spindle since you are only checking for square in
one direction.
Remember that unless you drill very small holes (less than
1/64") or turn a lot of long shafts, you are giving up a very
useful feature to solve a problem which can usually be
handled with a few passes of a good mill file. The inaccuracy
inherent in any drill chuck is such that perfect machine
alignment is meaningless unless you use adjustable tailstock
tool holders.
SQUARING UP YOUR MILL
The following tips are taken from the Model 2000 mill
instructions. Though the 8-direction mill is shown in the
examples, the same procedures would be used for aligning
the 5000-series mills, or any mill for that matter.
FIGURE 16—The axes of movement of a Sherline 8direction mill. Table left/right movement is referred to
as the X axis. Table in/out movement is the Y axis.
Headstock up/down
Z
movement is referred
to as the Z axis. The
headstock can also
6
be rotated on its
saddle on Sherline
5
mills. The four
4 additional movements available on
8
the model 2000 mill
are also shown
7
above.
X
Y
Determining the level of accuracy you really need
Squaring up a multi-direction mill can be a chore if you
want “perfection.” It is best to determine how accurate
the setup must be before you start. The larger a close
tolerance part is the better the setup required. An error of
.001" (.025 mm) per inch (25.4 mm) would be a very small
error on a part .4" (10 mm) long. However, a part that is 5"
long would have an error of .005". The type of machining
that is going to be performed also has a bearing on the
quality of the setup. As an example, a drilled hole doesn't
usually require the quality of setup that would be used for a
bored hole, (assuming the hole is being bored for accuracy
rather than for lack of a drill of the proper size). The amount
of work that will be done with the setup should be
considered too. If your setup is just to do one particular job
you only have to set it up close enough to do that job. If the
setup will accommodate future operations as well, it should
be adjusted to the tolerances of the most critical job. For
example, squaring up a mill and vise to work on a number
of precise parts is worth more of your attention than setting
up to drill one clearance hole in a non-critical part.
Limitations of the production process
Before starting you should realize that these mills are
relatively inexpensive machine tools. They have accurately
milled slides but the surfaces are not ground. To increase
the accuracy of a Sherline tool only a percentage point
-13-
WHEN SQUARE,
SCRIBE ZERO
REFERENCE
MARK HERE
FIGURE 18—Squaring up the ram parallel to the Yaxis on the 2000-series mill. The indicator can be held
with a chuck on the table or a mill vise as shown here.
When square, tighten the nut on top of the column. 5000/
5400-series mills can be adjusted slightly by loosening
the two bolts that hold the column base in place, twisting
the column slightly and retightening the bolts.
FIGURE 17—Checking for built in error in the table
travel along the Y-axis
Squaring up the column
MODEL 2000 MILLS...(See Figure 18.) The next decision
to make is where the spindle is to be located. With all the
adjustments that can be made with the 8-direction mill you'll
probably start with the spindle located near the middle of
the X/Y table movements. Something that isn't too obvious
should be considered now. If the ram (the two-bar slide
that allows you to move the head in or out and left or right)
isn't square with the X-axis, the rotating column calibrations
will have an error. To square up the ram, mount a dial
indicator to the worktable and move the X-axis back and
forth while reading the left and right surfaces of the column
bed near the bottom. This only has to be done if you will be
rotating the column and want to be able to rely on the angle
graduation readings. Once set, lock the ram in place with
the flange nut. Now you can scribe a line on the column
base opposite the “zero” mark for future reference as shown
in Figure 18.
MODEL 5000-SERIES MILLS...Though the column ram
does not rotate on the 5000-series mills, its squareness can
still be checked in the same manner if desired. The factory
alignment of the holes is quite accurate, but a small amount
of adjustment is available by loosening the two screws that
hold the column base to the bed and pressing the base to
one side or the other while retightening.
Squaring the column with the X-axis
MODEL 2000 MILL OR 5000-SERIES MILLS WITH
OPTIONAL ROTARY COLUMN ATTACHMENT...
(See Figure 19.) The column should next be squared with
the X-axis. This is accomplished with an indicator mounted
in the spindle. Have the four socket head cap screws used
to clamp the column rotation tight enough to keep the column
from rotating, but not so tight that you can't move it with a
light tap from a plastic mallet to the column bed. Because
the axis that allows you to tilt the column in and out hasn't
been squared yet you should only read the indicator at the
same Y-axis location on the worktable that you used before.
Offset the indicator at an angle in the spindle so that when
the spindle is rotated it describes about a 2" to 3" circle on
the table. Take readings at the extreme left and right
positions. Adjust the column with light taps until there is
little difference in the readings at either extreme. I wouldn't
try to get it perfect yet, just close enough so there isn't a
gross error.
Hint: To keep the tip of the indicator from falling into
the T-slots, some machinists keep a large ball bearing
on hand. The two surfaces of a precision bearing are
generally parallel. The bearing is placed on the mill
table centered on the spindle and the indicator is run
around the surface of the bearing race, which provides
a round, flat, parallel surface for the tip of the indicator
to run against.
MODEL 5000-SERIES MILLS...This axis is not adjustable
on the 5000-series mills, but it can be checked in the same
manner. Again, factory alignment should be quite good, but
a slight amount of adjustment can be obtained by loosening
the four screws that hold the column to the base and pressing
the column to one side or the other while retightening.
Squaring the column with the Y-axis
MODEL 2000 MILLS...(See Figure 20.) Loosen the flange
nut on the horizontal pivot pin just enough so that the column
-14-
ADJUST FORE/AFT MOVEMENT
WITH CENTER ADJUSTMENT SCREW
ON ALIGNMENT BLOCK
LOCK ADJUSTMENT
IN PLACE WITH
11/16" FLANGE NUT
FIGURE 20—Squaring the fore and aft pivot movement
of the column with the Y-axis. (See the hint in the section
on squaring the X-axis above for a way to keep the tip
of the indicator from dropping into the T-slots.)
would not remain at “0” but would now be a negative
reading. This is caused because the pivot point is located
far enough behind the spindle so that both front and rear
measuring points are still in front of it. Swinging the column
back actually raises both points. The front point raises more
than the back point, but both do go up. You will have to
keep tilting the column back and measuring until you get
the same reading front and back. This may require more
movement than you first thought based on the difference
between the initial measurements.
Fine tuning the headstock alignment
ALL SHERLINE MILLS...It is time to make the final
adjustments to the rotating column, but first I'll add a little
more confusion to your life. Remember when I said that
alignment pins are somewhat useless to line up a machine?
Well, as much as I hate to admit it, in a sense we already
have one. It is the alignment key that holds the headstock
assembly square to the column saddle, which is mounted
on the column bed. Removal of this key is what allows you
to pivot the headstock on the Sherline lathes and mills. It is
one of the features that make our machines easy to use,
versatile and very adaptable. It is also another thing you
have to consider when searching for “perfect” alignment.
If you have more than one key, try not to mix them up
because they are matched during assembly to fit as closely
as possible. I have found the best way to deal with this
potential problem is to push the head square against the
key before tightening the cone point screw that locks the
headstock in place. If you ever want to check alignment of
the key to the column bed, mount a dial indicator in the
spindle. Raise and lower the head while reading the vertical
edge of a precision square. (See Figure 21.) Adjust the
rotating column until there is no error as the indicator moves
up and down the square. Now read the table with the
indicator. If the slot and key are perfect there shouldn't be
FIGURE 19—Squaring the left to right rotation of the
column with the X-axis
can be moved using the adjustment screw in the alignment
block but there is no slop in the assembly. The tilt is harder
to set because the spindle doesn't rotate at the pivot point,
but once you understand this, the task becomes simpler.
This is explained in the example that follows. The alignment
block adjustment screw helps make fine adjustments in this
direction easy. With the block in place and the flange nut
loose, the entire assembly is kept from falling forward by
the adjusting screw. This block can be left in place unless
the ram is completely retracted or the column is tilted back
at an angle that interferes with the block. With the indicator
still held in the spindle, take readings parallel with the Yaxis near the front and rear edges of the table. Raise or
lower the column with the alignment block adjusting screw
until the readings are the same front and rear. Remember
the location of the pivot point as you take these
measurements and allow for it. (See example below.)
MODEL 5000-SERIES MILLS...This axis is not adjustable
on the 5000-series mills, but it can be checked in the same
manner. Again, factory alignment should be quite good, but
a slight amount of adjustment can be obtained by loosening
the two screws that hold the column to the base and
shimming the column at the front or back with thin metal
shim stock* as needed. Recheck your X-axis alignment
after shimming.
*Hint: Shim stock can be purchased from most tooling
supply catalogs. If you don't have metal shim stock available,
cigarette paper or business card stock can be used as a
temporary substitute depending on thickness needed.
Example:
If the indicator reading is larger at the front of the table
than the back, then that means the column must be tilted
back. Say your reading is “0” at the back and .010" (.25
mm) at the front. If you tipped the column back until the
indicator read zero at the front, the reading at the back
-15-
HEADSTOCK PIVOTS ON
SADDLE PIN. EVEN WITH
ALIGNMENT KEY IN PLACE,
SLIGHT ADJUSTMENT CAN
BE MADE TO GET
HEADSTOCK PERFECTLY
SQUARE..
FIGURE 21—Fine tuning the headstock rotation
alignment with a machinist's square and dial indicator.
The headstock pivots on the saddle pin. Even with the
alignment key in place, slight adjustment can be made
to get the headstock perfectly square.
any error, but in most cases there will be a small amount.
This can usually be eliminated by taking advantage of what
play does exist in the alignment key and slot. With the cone
point set screw loosened slightly, tap the headstock with a
plastic mallet to take out play in the direction you want to
go. Then retighten the set screw.
Making final adjustments
The rotating column and tilting adjustments can be finalized
so the indicator reads “0” as the spindle is rotated, however
the error we measured when checking the table flatness
could be accounted for now if need be. If the pointer on
the back of the rotary column disk doesn't line up with the
zero mark, loosen the screw holding it in place and reset it
to indicate zero for future reference. (Model 2000 mills
and 5000-series mills with rotary column attachment only.)
Your machine is now “indicated in” and ready to use. As
you get a feel for your machine and go through this
adjustment procedure a few times, the time it takes to get
good results will decrease. Being able to accurately indicate
in a mill is one of the skills that must be developed by any
machinist who plans on making accurate parts. Though the
adjustments on larger machines may be made in slightly
different ways, the skills and procedures you learn here
can be applied to other machines as well.
Using the column spacer block
MODEL 2000 MILLS (Standard)...In normal use the
column spacer block will not be required. However, if you
are working on a larger part or your setup requires more
clearance under the swing arm, the spacer block can be
installed to raise the column an additional two inches.
(Installation will be made easier if you first remove the
headstock/motor unit to reduce the weight of the column.)
To install the spacer block, remove the flange nut on top of
the column hold-down bolt, and lift off the hold-down washer
so that the entire column top and swing arm assembly can
be lifted off of the hold-down bolt. Screw the extension
bolt onto the end of the column bolt and tighten with an
adjustable wrench. Slide the column spacer over the bolt
and reinstall the column top and swing arm assembly.
Reinstall the headstock/motor unit.
NOTE: The column spacer block is included as standard
with the Model 2000 mill. It is optional at extra cost on all
mill column upgrades and 8-direction vertical milling columns
and upgrades.
MODEL 5000 AND 54OO MILLS (Optional)...There is
now an optional column spacer block available for use with
the standard mill column. It is P/N 1300 and includes longer
bolts needed to attach the column to the base through the
spacer block. The spacer block will add 2" of additional
distance between the spindle and the table. If you simply
need more travel, there is also an optional 15" column bed
(P/N 45260) and matching leadscrew (P/N 45270/45280),
allowing your column to be converted from the standard
11" height to add four more inches of Z-axis travel.
Working with setups that require extremely low
or high column travel
MODEL 2000 MILLS ONLY...An upgrade to the Model
2000 mill was introduced in March, 1999. It adds 1.6" of
travel to the lower end of the Z-axis movement so that end
mills can be brought down below the surface of the table
for working on the edge of parts. This travel extension is
now standard on all Model 2000 mills. The headstock may
be lowered even more by placing the column top (P/N
56550) above the swing arm instead of below it. Remove
the flange nut, hold-down washer and swing arm. Place
the swing arm over the hold-down bolt directly on top of
the column base (P/N 56660). Place the column top back
onto the hold-down bolt upside down and replace the holddown washer and flange nut. Although you cannot use the
alignment lines to help square up the head, this makes for a
very strong and stable setup. In most cases the new travel
extension will make this procedure unnecessary.
Should you wish to work on extremely tall setups that
combine several holding devices (i.e., a chuck on top of a
rotary table on top of a tilting angle table) you can extend
Z-axis travel on the top end by either adding an additional
spacer block to the column or by removing the saddle travel
extension and attaching the saddle directly to the saddle
nut as is done on standard Sherline mills.
Using the saddle locking lever
ALL SHERLINE MILLS...Along with the travel extension,
a new saddle locking lever was installed to replace the old
saddle friction lock used prior to 2/99. This new locking
-16-
FEED
lever is standard on all non-CNC-ready mills and vertical
milling columns as of that date. This lever is located on the
Z-axis leadscrew behind the saddle. When turned to the
full clockwise position the saddle will move freely. A springloaded ball locates in a detent in the bottom of the lever to
hold it in this position. To lock the saddle in position, move
the lever to the full counterclockwise position. This locks
the lever against the saddle nut which prevents the
leadscrew from turning. The exploded view on page 43
shows the location of the components.
Engineering compromises
I'm always at odds with myself when I write instructions
on complicated procedures like describing the alignment
procedure for this mill. By giving you this much information
I know that I am making life easier for some customers by
answering their questions. At the same time I am probably
confusing another customer who would never have asked
the question because of the type of work that the mill or
lathe is being used for. I don't want to create a customer
who spends all his time trying to achieve perfect alignment
for work that doesn't require it and ends up never using the
machine. Engineering is always a compromise. I deal with
this fact with each new product that I design. While our
machines aren't accurate enough for some customers, they
are still too expensive for others. I hope you are pleased
with the new capabilities this multi-direction mill can bring
to your shop. I think you will find the combination of features
offers a very good machining value.
USE OF CUTTING OILS AND LUBRICANTS
Much can be written about the use of lubricants, but they
may usually be dispensed with where production rates are
not very important. A small amount of any kind of oil applied
with a small brush will be sufficient. Aluminum and its alloys
may require the use of cutting oil to prevent the chips from
welding to the tool’s point. Do not use oils with a low flash
point or a bad smell. If desired, a mixture of one part soluble
oil to six parts water may be used on steel to assist in
producing a smoother finish and reduce tool chatter when
parting off. Brass and cast iron are always turned dry.
Cutting lubricants should be cleaned off the tools after use.
Cutting oils can be purchased at an industrial supply store.
In the past it was sold only in “industrial” quantities that
were too large for home shop use; however, several industrial
suppliers now sell it in quantities small enough to be practical
for the home machinist. Do not use high sulfur pipe thread
cutting oil. It is good for hard-to-machine materials, but is
so dirty to work with we do not recommend it. We also find
some of the cutting fluids used for tapping are too smelly
and unpleasant to use for general machining.
The main purpose of using lubricants is to keep the chips
from sticking to the cutting tool. When used properly, modern
high-speed tool bits are not likely to be affected by heat on
the type of work usually done on miniature machine tools.
GENERAL MACHINING TERMS
Two terms frequently used in machining are “feed” and
“cut.” Reference to the diagrams that follow will show
A
CUT
FEED
B
CUT
FIGURE 22—Directions of Feed and Cut showing (A)
Turning work between centers and (B) Facing off a
work piece
what is meant by these terms. Normal turning on a lathe,
when used to reduce the diameter of a work piece, involves
advancing the cutting tool perpendicular to the lathe bed by
an appropriate amount (depth of cut) and feeding the tool
along parallel to the lathe bed to remove material over the
desired length. (See Figure 22.)
In normal lathe turning, the depth of cut is set by the crosslide
handwheel, and the feed is provided by the handwheel on
the end of the bed. When facing off the end of a work
piece held in a chuck or faceplate, the depth of cut is set by
the handwheel on the end of the bed, and the feed is provided
by the crosslide handwheel. (See Figure 24.)
CUT (Z-AXIS)
FEED (X-AXIS)
FEED (Y-AXIS)
FIGURE 23—Directions
of Feed and Cut when
working with a milling
machine
When using a mill, cut is
determined by the amount
of depth the cutter is set to
by the Z-axis handwheel.
Feed is supplied by either
or both the X- or Y-axis
handwheels depending on
the desired direction of the
cut. (See Figure 23.)
GENERAL RULES FOR FEED RATES AND CUTTING SPEEDS
Before attempting to machine any metal, please try to
remember this simple rule about machining:
“If the tool chatters,
decrease speed and increase feed.”
Understanding this simple rule can save you many hours of
grief. When the tool “chatters,” it is not cutting in a
continuous fashion. Metal likes to be machined in a way
that allows the material to come off in a continuous strip
while the tool is in contact with the metal. If the tool is not
fed at a rate that is fast enough, the tool skips along the
surface, occasionally digging in. The surface of the tool
that is doing the most cutting will find a frequency of
vibration that is a product of all the variables involved. This
can cause anything from a high pitched whine on light, high
speed cuts to a resonating racket that can rip the work out
of the chuck on heavy cuts. If you maintain the same feed
rate and reduce the RPM, the feed will increase because
chip will be thicker. (If that sounds wrong at first, think of it
this way: At the same feed rate, if you cut the RPM in half,
twice as much metal must be removed with each rotation
-17-
to get to the end of the cut in the same amount of time. The
chip is twice as thick, so the feed is GREATER at lower
RPM if the feed RATE stays constant.)
When a tool chatters, it gets dull faster, because it must
keep cutting through the previously machined surface that
has been “work hardened” by machining. As you can
imagine, there are limits to how much you can increase
feed rate, so the answer lies in adjusting both speed and
feed to achieve the proper cut.
Proper cutting speed is the rate a particular material can
be machined without damaging the cutting edge of the tool
that is machining it. It is based on the surface speed of the
material in relation to the cutter. This speed is a function of
both the RPM of the spindle as well as the diameter of the
part or size of the cutter, because, as the part diameter or
cutter size increases, the surface moves a greater distance
in a single rotation. If you exceed this ideal speed, you can
damage the cutting tool. In the lathe and mill instructions,
we give some examples of suggested cutting speeds, but
what I wanted to get across here is that the damage isn’t a
slow process. A tool can be destroyed in just a few seconds.
It isn’t a case of getting only one hour of use instead of
two. The cutting edge actually melts. If you machine tough
materials like stainless steel, you will ruin more tools than
you care to buy if you don’t pay a lot of attention to cutting
speeds. Charts showing suggested cutting speeds for
various materials are included in both the lathe and mill
sections that follow.
LATHE OPERATING INSTRUCTIONS
*NOTE: Thin metal shim stock is available for this purpose.
If you don’t have any metal thin enough, a single thickness
of paper business card stock will usually do the job. Do not
use more than one thickness as it will compress too much.
Our optional rocker tool post (P/N 3057) allows this
adjustment to be made without shims. It comes standard
with the Model 4400/4410 long bed lathe.
INITIAL TEST CUTTING
If you have never operated a lathe before, we suggest that
you make a trial cut on a scrap of material to learn the
operation of the machine. In a 3- or 4-jaw chuck, secure a
piece of round aluminum stock approximately 3/4" (19 mm)
diameter and 1-1/2" (38 mm) long. Secure the presharpened
1/4" square cutting tool supplied with the lathe in the tool
post, making sure that it is properly positioned. First, turn
the speed control all the way counterclockwise, then turn
the motor on. Bring the speed up to approximately 1000
RPM (about 1/3 speed). To establish tool position in
relation to the work, bring the tool in slowly until it just
starts to scribe a line on the work. Crank the tool towards
the tailstock until it clears the end of the work. Advance
the tool .010" (.25 mm) using the crosslide handwheel (10
divisions on the inch handwheel scale). Using the bed
handwheel, move the tool slowly across the work toward
the headstock.
Cutting tools used on lathes are designed to remove metal
much as paper is removed from a roll. It takes a positive
feed rate to accomplish this. If the feed rate isn’t fast
enough, it would be similar to tearing an individual sheet
of paper off the roll. The results when cutting metal would
be shorter tool life, a poor finish and tool “chatter.” Chatter
is a function of rigidity, but it is controlled by speed (RPM)
and feed rate.
Since you already have a piece of aluminum chucked up,
experiment with speed and feed rate. You just took a cut of
.010" (.25 mm) and probably noticed that the machine didn’t
even slow down in the slightest. Now take a 1/2 inch long
cut .050" or 1 mm deep, which is one complete revolution
of the handwheel. If you used the sharpened cutting tool
CAUTION!
READ ALL OPERATING INSTRUCTIONS CAREFULLY BEFORE
ATTEMPTING ANY MACHINING OPERATIONS.
LEVELING THE CUTTING TOOL
Each type of turning work requires the correct tool for the
job. It is important that the cutting tool be sharp and
correctly set up in the tool post. The cutting edge of the
tool should be exactly level with the center height of the
lathe. Check this by bringing the tool tip up to the point of
either the headstock center or tailstock center. (See Figure
24A.) We also manufacture a simple tool height adjustment
gage that allows you to check tool height at any time by
measuring from the table surface. (See Figure 24B.)
NOTE: Upper position is for tools
B
HEIGHT GAGE
P/N 3009
held in extended tool post used
with riser blocks.
A
CENTER
TOOL POST
CROSSLIDE
FIGURE 24—Leveling the tool using (A) the tip of a
head- or tailstock center or (B) Sherline’s tool height
gage P/N 3009.
The standard Sherline tool post is designed to hold common
1/4" square tool bits which have had a few thousandths of
an inch (.1 mm) ground off the top edge for sharpening.
Loosen the hold-down bolt and slide the tool post as close
to the center as possible. The tip of the tool bit may be
raised or lowered by sliding a shim* underneath it. The
cutting edge must be on center or just below center (0.004"
or .01 mm maximum). Ensure that the tool is fixed securely
in position by firmly tightening the socket head screws. Try
not to have the tool cutting edge protruding more than 3/8"
(10 mm) from the tool post.
-18-
SPEED CONTROL
ASSEMBLY
SPEED CONTROL KNOB
ON/OFF SWITCH
TAILSTOCK DRILL CHUCK
HEADSTOCK
DC MOTOR
TAILSTOCK SPINDLE
TOOL POST
3-JAW
CHUCK
TAILSTOCK SPINDLE LOCK
CROSSLIDE
TAILSTOCK
SADDLE
TAILSTOCK FEED
HANDWHEEL
HEADSTOCK
SPINDLE
“V” BELT
TAILSTOCK
LOCKING
SCREW
BED
2-SPEED
STEPPED PULLEY
HEADSTOCK
LOCKING SCREW
LEAD SCREW
HANDWHEEL
TAILSTOCK GIB
GIB
TAILSTOCK
LATHE DOG
FACEPLATE
NO. 1
DRAWBOLT
MORSE
AND WASHER
ARBOR
HEADSTOCK
TAILSTOCK
CENTER
CENTER CROSSLIDE FEED
HANDWHEEL
SPINDLE BARS
SADDLE NUT
ADJUSTMENT
SCREWS
LATHE BASE
CHUCK KEY
HEX KEYS
FIGURE 25—Lathe part terminology
that came with your machine, it should have made the cut
easily. If the tool “squealed,” reduce the RPM a little and
take another .050" cut while feeding the tool faster. You
will probably be surprised at how easily your machine takes
cuts this heavy.
INDUCING CHATTER AND LEARNING
HOW TO OVERCOME IT
To better understand what is going on, we will now purposely
try to make the machine “chatter.” Make sure the stock
you are cutting is sticking out of the chuck no more than 1
inch (25 mm). Crank the handwheel two turns further in
from the last setting which will give you a .100" (100
thousandths of an inch) or 2 mm cut. Set the spindle speed
to about 1000 RPM (1/3 speed) and feed the tool slowly
into the material. Vary speed and feed until you get a
substantial chatter. Without changing the depth of the cut,
drop the speed to about 200 RPM and feed the tool into the
work with more force. The chatter should disappear. Once
you have learned to control chatter by adjusting speed and
feed, you will be well on your way to becoming a machinist.
HOLDING THE WORKPIECE
Work can be held between centers, in 3-jaw or 4-jaw chucks,
on the faceplate or with a collet. Sometimes it is necessary
to use a chuck and center, and, if the work is spinning fast,
a live center should be used. (See Figures 26, 27 and 28.)
TURNING BETWEEN CENTERS
This is done by fitting the dog to the work which is to be
turned and placing the work and dog between the centers
in the headstock and tailstock. The maximum diameter that
FIGURE 26—Holding a round work piece in a 3-jaw
chuck
can be held with the dog is 5/8" (15 mm). (See Figure 28.)
The dog is driven by fitting it into one of the faceplate holes.
This method of turning is ideal for bar work or turning of
steps on a bar. The tailstock center must be greased to
prevent overheating. (An optional live center—such as
P/N 1191—turning on ball bearings is the solution preferred
by most machinists.) The headstock spindle has a #1 Morse
taper in the spindle nose. The tailstock spindle has a #0
Morse taper.
-19-
FIGURE 27—Holding a square work piece in a 4-jaw
chuck
FIGURE 29—Tailstock center drilling. The work turns
while the drill is held stationary in the tailstock
REMOVING TOOLS FROM THE MORSE TAPERED SPINDLES
Accessories held in the headstock spindle use a Morse #1
taper and can be removed with the use of a knockout rod
(not supplied) approximately 3/8" in diameter and 6" long.
The bar is inserted through the back of the spindle, and
accessories, such as centers, can be removed with a few
tend to wander on the surface of the rotating work, whereas
a center drill is designed to seek the center and begin drilling.
The 60° point of the center drill makes a properly shaped
index hole for the tip of a live or dead center. It also provides
an accurate starting point for a standard drill. Cutting oil is
recommended for all drilling operations. A center drill should
be withdrawn, cleared of chips and oiled several times during
the drilling of a hole to keep the tip from breaking off.
For more information, see the chart of commonly available
center drill sizes on page 38.
TAILSTOCK DRILLING
Hold the work in a 3- or 4-jaw chuck. If the work is longer
than approximately 3" (76 mm), support the free end with a
steady rest. Seat the drill chuck’s #0 Morse arbor into the
tailstock spindle and secure a center drill in the chuck. Adjust
the tailstock to bring the center drill close to the work and
lock it in position. Turn the tailstock handwheel to bring the
center drill forward. After the hole is started with the center
drill, switch to a standard drill bit of the desired size to drill
the hole. (See page 37 for more on drilling holes.)
The easiest way to center drill the end of a round shaft that
has a diameter too large to be put through the spindle is to
support it with a steady rest (P/N 1074) while the end is
being drilled. If this isn’t possible, find the center with a
centering square, prick punch a mark and center drill by
hand. (See Figure 43, page 26 for a steady rest in use.)
HEADSTOCK DRILLING
The drill chuck comes fitted with a #0 Morse arbor that fits
in the tailstock spindle. To use it in the headstock, you will
need to first change to the #1 Morse arbor that is included
with your chuck. To change arbors, put the drill chuck key
in its hole to give you better purchase to grip the chuck
while using a wrench to remove the #0 arbor. Replace it
with the larger #1 arbor. Put the drill chuck in the headstock.
Then put the drawbolt with its washer through the spindle
hole from the other end of the headstock and tighten the
drawbolt. DO NOT OVERTIGHTEN! (See Figure 30,
next page.)
FACEPLATE
DOG
GREASE TAILSTOCK CENTER
TO PREVENT OVERHEATING
OR USE A “LIVE CENTER”
FIGURE 28—Turning between centers with a faceplate
and drive dog
taps. Accessories like the drill chuck that are drawn into
the spindle taper with a drawbolt are removed by loosening
the drawbolt a few turns and then giving the head of the
bolt a sharp tap to break the taper loose. The tailstock
spindle does not have a through hole and a drawbolt is not
used. It is equipped with a Morse #0 taper, and accessories
such as drill chucks and centers can be removed by turning
the handwheel counterclockwise until the accessory is
ejected.
CENTER DRILLING
Because the work turns and the drill does not on a lathe, it
is necessary to use a center drill before a standard drill can
be used. Due to the flexibility of a standard drill bit, it will
-20-
FIGURE 30—Headstock drilling. The drill turns in the
headstock spindle while the work is held stationary.
REAMING
Twist drills will generally not drill perfectly accurate sizes,
and very small boring tools are not satisfactory in deep
holes because of their flexibility. Therefore, reaming is used
for holes requiring accuracy within .0005" (.013 mm).
Reamers are available in any standard size, but they are
rather expensive and are generally not purchased to do
one-of-a-kind type work. Use them only when a boring
tool cannot be used because of the depth or size of the
hole. Because of their length, they cannot always be used
on a small lathe.
Reamers are used only to “clean up” a hole. To make an
accurate hole, the work is drilled approximately .010" (.25
mm) smaller than the reamer size. The work should be
slowly rotated and the reamer slowly fed into the hole while
applying plenty of cutting oil. The reamer should be
frequently removed and cleared of chips. Never rotate a
reamer backwards in the work as this can dull the cutting
edges.
FACEPLATE TURNING
The faceplate has three slots that allow work to be bolted
to its surface. Flat work can be screwed directly to the
faceplate. Extra holes can be drilled to suit odd shaped
work unsuitable for a chuck. If the work is mounted offcenter, be sure to counterbalance the faceplate and use very
low RPM. Don’t hesitate to drill holes in or modify the
faceplate as needed to do a particular job. That’s what
they are for. They are inexpensive and you can have several
on hand modified for special jobs.
TAPER TURNING
On some lathes, a taper is cut by offsetting the tailstock.
On the Sherline lathe, taper turning is done by removing
the headstock key and turning the headstock to any angle
away from dead center. To rotate the headstock, the
alignment key must first be removed. Loosen the set screw
in the front of the headstock, and lift the headstock and
motor unit off the locating pin. Tap the alignment key out
of its slot on the bottom of the headstock, and replace the
headstock unit on the pin. While pressing down on the
headstock, rotate it to the angle you desire by referring to
the angle scale on the bed. The base is calibrated in 5°
increments up to 45° on either side of center. When set to
FIGURE 31—Turning a taper with the headstock
slightly rotated.
the proper angle, retighten the set screw against the pin to
lock the headstock into position. Tapers can also be cut
without turning the headstock by using a compound slide
(P/N 1270). See page 26 for a description.
Short work can be inserted in a 3- or 4-jaw chuck and
turned as shown in Figure 26. If the headstock is angled
towards the lathe front, the taper will be cut smaller at the
right. Tapered holes can also be bored in work held in the
3- or 4- jaw chuck. To machine a taper on longer stock,
center drill both ends of the bar, set the headstock angle
and mount the part between centers. (See Figure 32.)
TOOL SHAPES AND GRINDING YOUR OWN
CUTTING TOOLS
The shaping of cutting tools to suitable angles for the type
of material and nature of work being performed can be
very important to satisfactory work. When tools become
dull, gently re-grind and preserve the original angles and
shapes. Do not grind the top face of the tools, but confine
sharpening to the end and/or sides except form tools which
are ground on the top surface.
FIGURE 32—Long, shallow tapers can be cut in a
continuous pass by pivoting the headstock to the proper
offset while supporting the other end with the tailstock.
The work is driven by using a drive dog in the faceplate.
The dog acts like a “universal joint” as the drive pin
slides in the faceplate slot.
-21-
Remember that heavy cuts and rapid feed will cause greater
strain on the chuck and lathe. This may induce “spring” or
binding of work and tools that can produce a poor finish.
NOTE: Because of the importance of a sharp and properly
ground tool to the cutting process, Sherline has prepared a
special instruction sheet on Grinding Your Own Lathe
Tools. There are a few tips that can make the process a
simple one. The instructions are included with each lathe
and with cutting tool sets when you order them from us, or
you may call us and request a copy. (Cost is $5.00 postage
paid.) They are also available from our Worldwide Web
site at no cost. Unfortunately, space does not permit us to
reprint them as part of this booklet.
NORMAL TURNING TOOLS (SIDE TOOLS)*
LEFT-HAND
THREADING TOOL**
FIGURE 34—A lathe boring tool in use
Boring Tool—A boring tool is used in the tool post on a lathe
or in an offsettable boring head on a mill to enlarge holes in
a work piece. (See Figures 35 [lathe] and 52 [mill].)
Form Tool—A custom contour can be ground into a tool to
produce a special shape like a radius in a part. The width
of the cutting edge must be less than 2-1/2 times the smallest
diameter. Cutting speed must be slow to prevent chatter.
FIGURE 35—Form tool and part
The clearances ground behind the
PART
cutting edges indicate the type of
material for which the tool may be used
and the direction in which it is fed along
the work. When grinding tool bits,
TOOL
correct clearances are essential or
“rubbing” can occur.
The shape shown here would be
difficult to grind on a home bench grinder; however, the
same form could be achieved by grinding two separate
tools with half the needed arc on the outside corner of
each tool–a “left” and a “right.” By using a number of
simple shaped tools in sequence, complicated forms can be
generated.
Turning Tools (left and right hand)—Reference to Figure 36
will illustrate the lateral positioning of this tool. Note the
clearance behind the point between the end of the tool and
the work. Insufficient clearance will cause the tool to “rub,”
and excessive clearance will produce a ridged or wavy
BORING TOOL*
RIGHT-HAND
INSIDE
THREADING TOOL
(P/N 1200)
PARTING TOOL***
*These shapes are available in high speed steel tool set, P/N 3007.
**The 60° threading tool is included as part of the carbide tool set, P/N
3006 and also comes with the thread cutting attachment (P/N 3100.)
***The parting tool comes with the cutoff tool holder, P/N 3002. Other
shapes are custom ground to accomplish special purposes as needed.
FIGURE 33—Cutting tool shapes
Cutting tools are ground to various shapes according to
their usage. Tools are usually ground to shape as needed
by the operator. Some standard tools are described below:
Normal Turning Tool—or RIGHT-hand tool feeds from right
to left, is used to reduce work to the desired diameter and
is the most frequently used of all tools.
Side Tools—These are used to face off the ends of shoulders
and may also be used as normal turning tools. Note that a
tool that is fed from left to right and has its cutting edge on
the right is called a LEFT-hand side tool because the chip
comes off to the left. Cutting tools are named based on
which direction the chip comes off, not which side has the
cutting face.
Parting Tool—The conventional parting tool or cutoff tool is
shaped like a dovetail when viewed from above and is used
to cut off work pieces by feeding the end of the tool across
the lathe bed and through the work piece. The Sherline
parting tool instead uses a thin .040" (1 mm) blade that has
a slightly thicker ridge at the top to accomplish the same
job of providing clearance for the tool while cutting. Parting
tools thicker than .040" (1 mm) will be too thick for use on
your Sherline lathe.
NORMAL TOOL
SIDE TOOLS
SLIGHTLY
ROUNDED
CORNER
CLEARANCE
LEFT-HAND RIGHT-HAND
TOOL
TOOL
CLEARANCE
FIGURE 36—Arrows show direction of tool feed in all
diagrams.
-22-
finish due to the small length of tool edge in contact with
the work. This ridging becomes more pronounced with rapid
feed. To provide a smooth finish, the sharp cutting point
may be slightly rounded with an oilstone, taking care to
preserve the side clearance underneath this corner.
This type of tool should not be advanced directly endwise
into the work. The depth of cut is set while the tool is clear
of the end of the work. The starting procedure is to advance
the tool until the point just touches the work. Note the reading
on the crosslide handwheel, withdraw the tool slightly and
move along until clear of the end of the work. Now advance
the crosslide to the above reading, add desired depth of cut
and then feed the tool along the work piece the desired
distance. Withdraw the tool clear of the work, having noted
the reading on the crosslide handwheel. Mentally note the
reading on the leadscrew handwheel, return the tool to
starting position and advance to the previous reading plus
the desired cut.
NOTE: Sherline offers optional adjustable “zero”
handwheels that allow you to reset the handwheel to zero
at any time...a handy feature normally found only on larger,
more expensive machine tools. New tools may be ordered
with them already installed, and existing tools can be
retrofitted with them on any axis.
The second feed is now commenced, stopping at the same
reading on the leadscrew handwheel as before. This
procedure enables turning to accurate length.
Repeat the procedure until the work has been reduced to
within about .010" (0.25 mm) of desired diameter, noting
that each .015" (0.4 mm) increase in depth of cut will reduce
the work diameter by twice this amount; that is, .030" (0.8
mm). For the finishing pass, advance the tool by the required
amount and feed along the work just far enough to gage
the finished diameter. Adjust depth of cut if necessary and
complete the final pass using a SLOW feed to obtain a
smooth finish and exact size.
USING THE CUTOFF OR PARTING TOOL
(See Figure 37.) After completing a part in the lathe, it is
frequently necessary to separate the part from the excess
material used for chucking. This operation is best
accomplished with the use of a cutoff tool or “parting tool”
as it is sometimes called. The Sherline cutoff tool and holder
utilizes a very slender, high-speed tool steel cutting blade
mounted in a special tool holder. The thinness of the blade
(.040") enables it to feed into the part quite easily and at
the same time minimizes the amount of waste material. A
word of caution: Never use a parting tool on a part
mounted between centers. The part may bind on the
cutter, resulting in a scrapped part or a broken cutting tool.
Always try to lay work out so the cutoff tool is used as
close to the spindle as possible. Set blade height by sliding
the blade back and forth in the slightly angled slot in the
tool holder. It should be set so the tip is aligned with the
centerline of the part being cut. An unusual diameter may
require a shim under the front or rear of the holder to
FIGURE 37—A parting tool used to separate a part
from it’s bar stock.
accomplish this. The tool can also be mounted on the back
side of the table by using the rear mounting block, P/N 3016.
IMPORTANT!
Always use cutting oil when using the cutoff tool. The
cut will be made much smoother, easier and cooler.
The turning speed for parting should be about one-half the
normal turning speed, and feed rate should be a little heavy
so the chip will not break up in the slot. If speed and feed
are correct, there will not be any chatter, and the chip will
come out as if it were being unrolled. Cutting oil plays a
major roll in this occurring properly.
If the tool chatters, first check to see if the work is being
held properly. Then decrease speed (RPM) or increase
feed rate or both. Once the blade has chattered, it leaves a
serrated finish that causes more chatter. Sometimes a
serrated finish can be eliminated by stopping the spindle,
adding a liberal amount of cutting oil, bringing the blade up
so there is a slight pressure on it without the spindle turning,
and then turning the spindle by hand or as slowly as possible
with the speed control.
Very small work may be completely cut off when held in a
chuck and allowed to fall onto the crosslide. It is too small
and light to cause any damage. Hollow articles, such as
rings, may be caught on a piece of wire whose end is held
in a suitable position.
SIDE TOOLS
While these may be, and often are, used as general purpose
turning tools, their specific use is for facing the sides of
collars and shoulders; that is, finishing these to correct
dimension and with a smooth, flat surface. They are also
for facing work held on a faceplate or in a chuck. The
facing of work in this manner is very useful for the
production of truly flat surfaces and for producing articles
to an exact thickness. The uses of side tools are illustrated
in Figures 33 and 36. The sharp corner at the cutting point
should not be slightly rounded, as may be done with the
normal turning tool, as knife tools may be required to produce
sharp corners.
-23-
P/N 7600 TOOL POST
FOR 3/8” INSERT
HOLDERS AND 3/8”
ROUND BORING
TOOLS
BORING TOOLS
The use of this tool requires the existence of a drilled or
cored hole, or it may be used to enlarge the bore of a tube.
The work must be mounted in a chuck or on a faceplate
and the boring tool set as shown in Figure 34. Note the
clearance behind the cutting point as shown in Figure 38
below.
FIGURE 38—Boring
tool clearance
CLEARANCE
A slow rate of feed should
be used, as the turnings
are not able to escape
freely from the hole and
can jam the tool. Frequent
withdrawal of the tool to
allow turnings to escape may be necessary. Care should
be taken not to feed the tool beyond the depth required or
to feed so deeply as to damage the chuck or faceplate.
Where a hole must be bored right through the work, it should
be shimmed out from the faceplate to provide clearance
for the tool to feed through. The leadscrew handwheel
graduations can be used to indicate the correct depth at
which to stop the feed. Notice that, with boring, the depth
of cut is increased by moving the tool and crosslide towards
the operator and not away as with normal turning.
The boring of holes often necessitates greater than normal
overhang of the tool from the tool post, so the depth of cut
and rate of feed should be reduced from normal.
INSERTED TIP CARBIDE CUTTING TOOLS
Sherline brings the home shop machinist into the space age
with cutting tools that add a new dimension to small lathes.
When working with tough metals, high-speed steel tools
need constant sharpening and have a relatively short life.
Brazed carbide tools cut great but chip easily. Inserted
carbide cutting tools are the answer and have replaced
those other tools in the modern machine shop. Carbide
inserts have the ability to consistently give good finishes
and long tool life at a much higher cutting speed. This is
especially important with small lathes, because they do not
have excessive power at low RPM. With inserted carbide
tools you can cut stainless steel at the same RPM you
were formerly using to cut aluminum with high-speed steel
tools without any sacrifice in quality in surface finish.
A SPECIAL TORX DRIVER
FOR TIGHTENING THE
INSERT HOLD-DOWN
SCREW IS INCLUDED
WHEN CARBIDE TIPS
ARE PURCHASED
CARBIDE INSERT
P/N 2256 TOOL HOLDER
FIGURE 39—Carbide insert tool and tool post. The
tool post holds both 3/8" square and round tools.
P/N 2258. Tools are also available to hold 80° inserts, which
are slightly less versatile but offer longer tool life because
of their stronger, more square shape. These tools should
not be used to cut hardened steels or piano wire. Materials
such as those should be ground to shape, not cut. Abrasive
materials such as glass-reinforced plastics can be easily
cut with these tools.
Another tool available to
Sherline machinists that holds
carbide inserts is the 3/8" IC
55° negative rake insert tool
holder (P/N 7610). The
indexable carbide insert sits on
the tool holder at a 5° negative
angle. This gives the sides of
the cutter clearance even FIGURE 40—Negative
though the insert has square rake insert tool holder
(P/N 7610)
sides. By having square sides,
both top and bottom of the insert can be used as cutting
edges, giving a total of four cutting edges on each insert.
Because of its design, it cuts like a positive rake cutter,
which requires less rigidity than a negative rake cutter. It
gives you the best of both worlds—the four cutting edges
of a negative rake tool along with the lower stress loading
of a positive rake cutter, which is appropriate for a lathe of
this type.
When searching for a mirrorlike finish on copper or
aluminum, a four-sided diamond insert (P/N 7609) and a
tool holder (P/N 7619) are also available. Though expensive,
the four cutting edges of the diamond insert mean you are
really getting four tools in one, making it a better deal than
it may first appear.
NOTE: Never attempt to cut steel with a diamond
cutter.
While inserted tip carbide and diamond cutting tools will
improve the performance of the Sherline lathe, they will
not correct poor machining technique. Rigid setups are a
must for tools such as these.
TURNING SPEEDS
The following chart in Figure 41 provides a guide to speeds
at which work of differing materials should be rotated. Note
that the turning speed is inversely proportional to the
diameter of the work; that is, the larger the diameter, the
slower the turning speed. Material often differs in hardness,
so these figures may have to be adjusted. The harder the
material, the slower the turning speed should be.
These tools are more expensive than high-speed steel;
however, they are worth every penny if you have problems
grinding your own steel tools or are cutting exotic materials
like stainless steel. Sherline offers a tool post (P/N 7600)
that holds the larger 3/8" square tool shanks used to hold
carbide or diamond inserted tips. It also has a 3/8" round
hole for boring tools.
A good starting point for an inserted tip tool is the P/N 2256
right-hand holder with a 35° offset. This holder uses the
P/N 7605 carbide insert, which is a 55° insert good for
turning, facing and profiling. A left-hand tool is also available
as P/N 2257, or a set of both left- and right-hand tools is
-24-
GUIDE TO APPROXIMATE TURNING SPEEDS
Material
Cut Speed 1/4" (6mm)1/2" (13mm)1" (25mm)
S.F.M.
Diameter Diameter Diameter
Stainless, 303
67
1000 RPM 500 RPM 250 RPM
Stainless, 304
50
800
400
200
Stainless, 316
47
700
350
175
Steel, 12L14
174
2600
1300
650
Steel, 1018
87
1300
650
300
Steel, 4130
82
1250
650
300
Gray Cast Iron
57
900
450
220
Aluminum, 7075 400
2800
2800
1400
Aluminum, 6061 375
2800
2800
1400
Aluminum, 2024 268
2800
2000
1000
Brass
400
2800
2800
1400
P/N 1040 3.1" 3-jaw chuck—This is a larger version of the
P/N 1041 chuck. It holds parts up to 1-1/2" (38 mm) in
diameter in normal position and up to 2-3/4" (70 mm) with
the jaws reversed. Same through hole and spindle thread.
P/N 1075 2.5" 4-jaw self-centering chuck—
This chuck holds round or square stock
from 3/32" (2 mm) up to 1-3/16" (30 mm).
With the jaws reversed, it will grip stock
up to 2-1/4" (56 mm). The jaws scroll in
unison as on the 3-jaw chuck. (NOTE: stock held in this
chuck must be perfectly round or square to be gripped by
all four jaws.)
P/N 1044 2.5" 4-jaw (independent) chuck—
Each jaw is adjusted independently,
allowing precise adjustment for perfect
centering or for holding odd-shaped
parts. Four-jaw chucks take a little more
time to use, but offer much greater
accuracy and versatility than a 3-jaw chuck. Holding range
is the same as the P/N 1041 3-jaw chuck.
P/N 1030 3.1" 4-jaw (independent) chuck—A larger version
of the chuck above for holding larger work. Holding range
is the same as the P/N 1040 3-jaw chuck.
P/N 1072 1/4" Jacobs drill chuck—A
conventional Jacobs drill chuck fitted
with a #0 Morse arbor so it can be used
in the tailstock for center drilling parts.
It also comes with a #1 Morse arbor
and drawbolt so it can be used in the headstock on the
lathe or mill. Adjustment key included. Holds drills from
1/4" down to about 1/64", although for drills smaller than
1/32" we recommend our 5/32" chucks (See P/N 1010/
1015 below).
P/N 1069 3/8" drill chuck—A larger size Jacobs chuck with
arbors for use in either the headstock or tailstock. It is
recommended for the long bed lathe, where the greater
center-to-center distance allows the use of larger drills and
reamers. Adjustment key, arbors and drawbolt included.
P/N 1010/1015 5/32" drill chuck—A small Jacobs chuck that
holds drills from 5/32" down to #80. The arbors are pressed
into a #0 Jacobs taper, so separate chucks are needed for
the headstock and tailstock. P/N 1010 has a #1 Morse
taper for the headstock, P/N 1015 has a #0 Morse taper
for the tailstock. The chuck’s small size can also make it
the proper choice for some setups where space is limited.
Adjustment key included. Drawbolt included with P/N 1010.
THREAD-CUTTING ATTACHMENT, P/N 3100
Common threads are most easily cut using taps and dies,
but it would be impossibly expensive to own a tap and die
for every conceivable thread size. Cutting threads on a
lathe is the traditional alternative. A lathe cuts threads by
gearing the leadscrew directly to the spindle. This is called
FIGURE 41—Turning speeds for high-speed steel
cutting tools
Keep in mind that, apart from possible production of
excessive heat and the fact that excessive speed may
damage the cutting edge or cause it to “rub” instead of
cutting, turning speeds are not too critical. Slower than
normal speeds cause no harm, except by increasing the
time involved. Aluminum, however, usually gives a better
finish turned at high speed and with the use of lubrication
(coolant).
ACCESSORIES FOR THE LATHE
Your lathe can be made more versatile with the addition of
suitable attachments and accessories. These include various
chucks and collets, a thread-cutting attachment, vertical
milling column, knurling tool, a live center and many others.
Remember that accessories and attachments must be cared
for in the same way as the lathe. Always make sure that
threads are free from metal chips and dirt. Chucks should
be lightly oiled frequently so that they continue to function
smoothly and accurately. Gears in the thread-cutting
attachment should be lightly greased when in operation.
Some attachments have moving slides, and these should be
lubricated in the same way as the slides in your lathe. Each
accessory comes with complete instructions for its use when
it is purchased.
Following are shown some of the more popular lathe
accessories along with a brief description of their purpose.
When parts are available in both inch and metric
configurations, the inch part number is given first followed
by the metric part number in parenthesis.
3-JAW, 4-JAW AND DRILL CHUCKS
Chucks are used to hold work in the lathe. They can also
be used to function like a vise to hold a part for milling.
Drill chucks can be used in the lathe headstock or tailstock
or in the mill for drilling. Here are some of the chucks
available for your Sherline tools:
P/N 1041 2.5" 3-jaw chuck—Three jaws
scroll in unison to grip round or hex stock
from 3/32" (2 mm) up to 1-3/16" (30 mm)
in diameter. Jaws are reversible for
holding larger stock up to 2-1/4" (56 mm)
in diameter. The chuck has a .687" (17 mm) through hole
and 3/4-16 spindle thread.
Not yet on line? Many public libraries offer Internet
access. Call your local branch for information.
-25-
“single pointing” a thread. When the spindle turns, the
saddle moves. If they were geared one-to-one, the cutting
tool would cut a pitch that would be the same as the
leadscrew. On Sherline’s inch machines, this would be 20
threads per inch. If the leadscrew turns 180° while the
spindle turns 360° (by using a 20-tooth to a 40-tooth gear
reduction) we would cut 40 TPI. Note that threads can be
applied to any diameter stock.
HANDWHEEL DRIVES
SPINDLE SHAFT
(HANDWHEEL REMOVED
FOR CLARITY.)
HANDWHEEL
LEADSCREW SHAFT
FIGURE 42—Sherline’s thread-cutting attachment.
(Handwheel is removed for clarity.)
Sherline’s thread-cutting attachment provides all the
necessary gears and support arms to cut any thread from
80 TPI down to 5 TPI. Both left-hand or right-hand threads
can be cut. With the use of a 127-tooth change gear, metric
threads from .25 to 2.0 pitch can be cut on an inch machine
and inch threads can be cut on a metric machine. A large
handwheel replaces the motor and speed control to drive
the spindle, so that you have total control over the threadcutting process. Though this might sound like a step
backwards, it actually is a very practical system for cutting
small threads, allowing you to cut right up to a shoulder if
need be. A carbide 60° thread-cutting tool is included, and
an inside threading tool (P/N 1200) is also available as an
option. Complete instructions include a chart of the gear
combinations to achieve the threads mentioned above.
With this attachment and your lathe, you will never be
stuck without a way to come up with the right thread.
Even if a tap or die is available, you can set up and cut a
thread faster than you could get to the store and back to
buy it and save yourself some money as well!
STEADY REST, P/N 1074
The steady rest supports longer work with three
adjustable brass pads. It keeps long parts from
deflecting away
FIGURE 43—
from the tool or
Steady rest in
wobbling while turning and
use.
steadies the end of long
parts for center drilling.
Along with a live center, this
is one of the first
accessories most lathe
owners add to their tool box.
ADDITIONAL LATHE ACCESSORIES
1090 Follower rest—Moves with lathe saddle.
Two brass pads provide support right behind the
cutting tool to keep long, thin stock from
deflecting during a cut.
1160 (1178), 2100, -01, -02, 1162 (1179) WW Collet sets—
Holding work in individually sized collets
is a more accurate method than holding
in a chuck. A number of sets of standard
collets, collet pot chucks and deluxe collet sets are available.
1182 Bullnose live center—For supporting the
end of tubing or parts with a large end hole up
to 1-5/8". Two preloaded ball bearings, #0
Morse tapered shaft.
1185 (1184) Vertical milling table—Mounts to the
lathe table to provide a vertical Z-axis movement
of 2.25" (57 mm). Although the vertical milling
column (P/N 3050/3053) is the preferred method,
this is a traditional method of doing small milling
jobs on the lathe. It is also useful for special setups on the
vertical mill.
1191 Live center—Replaces tailstock dead center
for holding work. Ball bearing reduces friction
while turning between centers.
1201 Adjustable live center—Ball bearing live
center with adjustable backing plate allows
precise alignment of headstock and tailstock.
Adjustable tailstock accessories like P/N 1201,
1202 and 1203 are for the craftsman seeking the ultimate
in precision.
1202 Adjustable tailstock chuck holder—Allows
perfect centering adjustment for tailstock chuck.
1203 Adjustable tailstock custom tool holder—
Adaptable to hold any tool you wish on perfect
center in the tailstock.
1206 Adjustable tailstock 1" die holder—Holds
1" dies for threading shafts. Includes a 13/16"
bushing for holding smaller size dies.
1270 Compound slide—Mounts to the “back”
side of the lathe table. Allows cutting of angles
that can’t be achieved by “swinging the
headstock” or turning between centers. Laser
engraved base has angle scale for reference.
1290 Steady rest riser block—Raises steady rest
to proper height for use with headstock and
tailstock riser blocks.
1291 Headstock riser block—Raises headstock
1.25" (31.7mm) for more clearance to turn
larger stock (up to 6" in diameter). Also
includes riser rocker tool post.
To view or print complete instructions for all Sherline
accessories, see www.sherline.com/accessor.htm.
-26-
1292 Tailstock riser block—Raises tailstock 1.25"
(31.7 mm) to align it with headstock when using
the P/N 1291 riser block.
2049 Spindle handwheel— Steel handwheel
mounts on the end of the spindle shaft and
allows the operator to quickly and safely stop a
rotating spindle with his hand. It also makes it
easy to hand index the spindle when working on a part.
2085 (WW) and 2086 (8mm) collet adapters—Held
in P/N 1203 adjustable tool holder above (not
included), collet adapters allow you to use WW
or 8.0 mm collets in the tailstock to hold small drills
accurately on center.
2200 Radius cutting attachment—Mounts
to lathe table. The body pivots on
centers to allow the tool to cut a
concave or convex radius or ball end
on the end of a part.
2250 Quick-change tool post—
Steel tool post has a dovetail slide
that accepts various holders to
allow rapid tool changes. Holders
include a 1/4" standard cutting tool holder, 3/8" boring tool
holder and cutoff tool holder. An optional inserted tip carbide
holder (not shown) is also available (P/N 2295).
2258 35° RH and LH insert tool holders—
3/8" square shaft tool holders accept 55°
carbide inserts. Available individually as
right-hand (P/N 2256) and left-hand
(P/N 2257) holders or as a pair (P/N 2258). Carbide insert
included with each.
3001 Power feed—A constant speed, singledirection motor with on/off switch drives the
leadscrew at .9" per minute. A lever below
the headstock engages and disengages the
drive. Saves a lot of hand cranking on long parts and provides
smooth finishes.
3003 Two-position tool post—Save time by
mounting two 1/4" cutting tools at once so you
can switch quickly from one to the other by
rotating the tool post. (P/N 3008 looks similar
but holds a 5/16" and a 3/8" tool.)
3004 Knurling tool—Mounts to the lathe crosslide.
Knurls are produced by embossing, not by cutting,
and this creates high tool loads. Using two knurls
opposing each other equalizes these loads,
allowing successful knurling on a small machine.
A number of patterns can be achieved by changing the
knurls. A 25 thread per inch, medium diamond pattern set
comes with the tool. A number of additional straight and
spiral knurls can be ordered.
3015 Toggle switch dust cover—Protects on/off
switch on speed control from fine dust generated
by cutting brass or wood.
3016 Cutoff tool rear mounting block—Allows the
parting tool holder (P/N 3002) to be used on the
back side of the table. The cutoff tool blade is
turned upside down in the holder and this 13/16"
high spacer block keeps the tool’s cutting point at the lathe’s
centerline. A cutoff tool can remain mounted out of the
way on back side of table and be brought into use quickly
for cutoff operations.
3035 Spur Driver—A simple way to drive wood
from the headstock in place of a 3-jaw chuck.
3038, 3047 Wood Tool Rests—Allows wood turning
on the lathe using hand-held wood cutting tools.
Includes base with 3" and 5" long rests.
3050 (3053) Vertical Milling Column—Mounts in
seconds to provide three axes of movement to
turn your lathe into a milling machine. Your lathe’s
headstock and motor/speed control mount to a
saddle on the column. Z-axis column provides
the same 6.25" (159 mm) vertical travel available
on the Sherline milling machine.
3057 Rocker Tool Post—Allows exact control of tool
tip height in relation to part centerline. Tips of older,
resharpened cutting tools can be adjusted up to
proper cutting height without having to use shims.
4150 (15") and 4151 (24") Vinyl Dust Covers—Clear 6-mil fitted
cover protects your lathe from grit and dust when not in
use. Adds a professional touch to your miniature machine
shop. Includes a red Sherline logo.
4360 Chip Guard—A clear, tough
polycarbonate shield mounts to the
headstock to contain chips and cutting
fluids near the chuck. Swings out of the
way for changing setups.
8200/8260 Digital Readout—Add a twoaxis digital readout to any new or existing
lathe. Also includes continuous RPM
readout. Reads to .0005". Reset display
to zero with the push of a button. Special
handwheels replace standard handwheels. Available with
third axis readout for use with a vertical milling column.
CNC-Ready Lathes—Existing Sherline lathes can be converted
to CNC use, or new lathes can be ordered CNC ready.
Included are stepper motor mounts with preloaded bearings
and couplers. (Does not include stepper motor or CNC
hardware or software.)
8800 Programmable Power
Fig. 44
Feed—Drive your lathe
leadscrew and/or crosslide with
a stepper motor. Two units can
be “daisy-chained” for coordinated sequential movements. Retrofit kits available
with or without stepper motor
mount. Includes stepper motor, cables, control box and
power supply.
-27-
3-JAW CHUCK OPERATION AND MAINTENANCE
jaws are removed, they can be easily identified by the
location of the teeth in relation to the end of the jaws (See
Figures 45 and 46). To maintain chuck accuracy, the 2nd
jaw must always be inserted in the same slot even when
the jaws are reversed. This slot is identified by the laser
engraved letter “B” next to the slot. Always insert the jaws
in the order and location shown on the drawings. Turn the
scroll counterclockwise when viewed from the face of the
chuck until the outside start of the scroll thread is just ready
to pass the slot for the first jaw. Slide the first jaw as far as
possible into the slot. Turn the scroll until the first jaw is
engaged.
Due to the close tolerances between the slot and jaw, the
most difficult part in replacing the jaws is engaging the
scroll thread and first jaw tooth without binding. Therefore,
never use force when replacing the jaws, and, if binding
occurs, back up the scroll slightly and wiggle the jaw until
it is free to move in the slot. Advance the scroll and repeat
for the second and third jaws. The scroll thread must engage
the first tooth in the first, second and third jaws in order.
REMOVING A CHUCK FROM THE SPINDLE
Use one tommy bar in the hole in the spindle and another
tommy bar in a hole in the chuck body to achieve enough
leverage to unscrew the chuck (counterclockwise) from the
spindle thread. If the chuck becomes stuck on the spindle
thread, put a tommy bar in the hole in the chuck body. Place
a block of wood against the tommy bar where it enters the
chuck. With a small mallet, give the block of wood a sharp
tap, turning the chuck in a counterclockwise direction. It
should not be necessary to hold the spindle, as its inertia
should be sufficient. (Don't hit the tommy bar anywhere
other than right where it enters the chuck or you could bend
it.) This small but sharp force at the outer edge of the chuck
should break the thread loose and the chuck can then be
unscrewed using the tommy bars.
The 3-jaw self-centering chuck is the most popular of all
the accessories available for the Sherline lathe. It is
available in both 2-1/2" diameter (P/N 1041) and 3-1/8"
diameter (P/N 1040). These chucks will grip round or
hexagonal work quickly, since the jaws move
simultaneously to automatically center the work being held.
The jaws on the chuck are designed so that the same chuck
can be used for both internal and external gripping. Jaws
are reversible for holding larger diameter work. Due to
the nature of the design of a 3-jaw chuck, it cannot be
expected to run perfectly true. Even 3-jaw chucks costing
five times more than the one made for this lathe will have
.002" to .003" runout. If perfect accuracy is desired in a
particular operation, the use of a 4-jaw chuck is
recommended. Each jaw is adjusted independently so parts
can be centered with total precision. Both a 2-1/2" and
3-1/8" 4-jaw chuck are available for the Sherline lathe as
P/N 1044 and P/N 1030 respectively.
NOTE: DO NOT TURN THE LATHE SPINDLE
ON WITHOUT HAVING THE CHUCK
TIGHTENED. The acceleration of the spindle can
cause the scroll to open the chuck jaws if not tightened!
The 2-1/2" 3-jaw chuck (P/N 1041) is designed to take up
to 1-3/16" (30 mm) diameter stock with the jaws in the
normal position. The 3-1/8" 3-jaw chuck (P/N 1040) is
designed to take up to 1-1/2" (38 mm) diameter stock. For
larger diameter work, reverse the jaws (See Fig. 46). To
prevent permanent damage, finished, turned or drawn stock
should only be held with this chuck. For rough castings,
etc., use a 4-jaw chuck.
DO NOT OVERTIGHTEN THE CHUCK.
Use only moderate pressure with the spindle bars
(P/N 40580) supplied.
To reverse the chuck jaws, rotate the knurled scroll until
the jaws can be removed from the chuck body. After the
JAW LOCATION
JAW LOCATION
1ST
1ST
3RD
3RD
C
C
A
A
REVERSED JAW
IDENTIFICATION
STANDARD JAW
IDENTIFICATION
B
B
2ND
2ND
1ST
1ST
2ND
2ND
3RD
FIGURE 46—Reversing the chuck jaws.
NOTE: Always start with position “A.”
3RD
FIGURE 45—Jaw locations and identification
-28-
VERTICAL MILLING MACHINE OPERATION
CAUTION!
READ ALL OPERATING INSTRUCTIONS CAREFULLY BEFORE
ATTEMPTING ANY MACHINING OPERATIONS.
NOTE: See pages 4 through 18 for setup, lubrication and
general machining instructions. Read Safety Rules for
Power Tools on page 3 before operating machine.
GENERAL DESCRIPTION
At first glance, a vertical mill looks similar to a drill press,
but there are some important design differences; for
example, the mill has a spindle that can take side loads as
well as end loads and an accurate method of moving work
in relation to the spindle on all three axes. It is wise to
memorize these “X,” “Y” and “Z” axes, because, since
the advent of complex electronically controlled milling
machines, these terms have become common “shop talk,”
even outside engineering departments. Feed screws with
calibrated handwheels control movements on these three
axes. The handwheel calibrations are quite accurate and
should be used whenever possible.
Angles can be machined by removing the headstock
alignment key and rotating the milling head to the appropriate
angle to the work or by holding the work at an angle to the
spindle. (Note: Lighter than normal cuts should be taken
when the alignment key is not in place.) The latter method
must be used for drilling on 5000/5400-series mills to keep
the drill movement parallel with the machine slide. Angle
drilling can also be accomplished without removing the
alignment key by using the optional rotary column
attachment (P/N 3500). (The Model 2000 mill is also capable
of angle drilling due to its multi-axis design.) All machine
slides have an adjustable gib to compensate for any “play”
that may develop. (See “adjusting gibs” on page 11.)
It is assumed that anyone purchasing a vertical milling
machine has had some experience working with metal
cutting tools; therefore, these instructions are somewhat
limited for a beginner. There is enough information,
however, to enable a good craftsman to get started. Using
a vertical mill correctly takes more skill and experience
than is required for lathe operation because of the additional
axis (vertical) and the more varied type of work that can
be performed.
The machine must be well maintained, for it is subject to
higher stresses than a lathe. This particular mill is one of
the smallest being manufactured and is an extremely useful
tool. However, it would be unreasonable to clamp a 3-pound
piece of stainless steel to the work table and expect to
make a 1-pound part from it. The key point is to work
within the capabilities of the machine, and those limitations
can only be determined by the operator.
HELPFUL TIPS FOR MILLING
• This is a small, light-duty mill and should not be used to
remove large amounts of stock that could be easily removed
with a hacksaw. For efficiency, select a piece of stock as
close to finished size as possible.
• Stresses on a mill are quite high when cutting most
materials; therefore, gib and backlash adjustments must
be properly maintained. (See “Adjustments” section
beginning on page 10.)
• End mills must run true and be sharp. Holding end mills
in a drill chuck is a poor practice. Use collets or an end
mill holder instead. The 3/8" end mill holder (P/N 3079)
3 (Z-axis)
5
Z
4
8
X
7
6
Y
FIGURE 47—The axes of movement for milling on a
standard 3-axis vertical milling machine.
1 (X-axis)
2 (Y-axis)
FIGURE 48—Eight directions of movement of the model
2000 series milling machines
-29-
HEADSTOCK ALIGNMENT KEY
VERTICAL FEED
HANDWHEEL (Z-AXIS)
DC MOTOR
2-SPEED STEPPED PULLEY
SPEED CONTROL
ASSEMBLY
“V” DRIVE BELT
VARIABLE SPEED
CONTROL KNOB
COLUMN SADDLE LOCK
(BEHIND SADDLE ON LEADSCREW)
ON/OFF SWITCH
HEADSTOCK SPACER BLOCK
HEADSTOCK
HEADSTOCK LOCKING SET SCREW
Z-AXIS GIB
SPINDLE
DRILL CHUCK
TABLE FEED HANDWHEEL
(X-AXIS)
TABLE
Z-AXIS COLUMN BED
COLUMN BASE
SADDLE
TABLE LOCK ASSEMBLY
Y-AXIS ANTI-BACKLASH
NUT AND LOCK
TABLE FEED HANDWHEEL
(Y-AXIS)
“T” SLOTS (2)
X-AXIS STOP SCREW
SADDLE FRICTION ADJUSTMENT SCREW
Y-AXIS GIB
MILL BASE
ADJUSTABLE ZERO HANDWHEEL
COLLAR LOCKING NUT
FIGURE 49—Milling machine part terminology
allows you to use a large range of readily available 3/8"
end mills with your machine. (Several other size inch and
metric end mill holders are also available.)
• Fly cutting is an excellent way of removing stock from
flat surfaces.
• Normal machine alignment is adequate for most work,
but if the work is exceptionally large or requires extreme
accuracy, shims may be employed to improve machine
alignment.
• For accurate setups you should have and know how to
use a dial indicator.
• Often, more time will be spent making fixtures to hold
work than doing the actual machining.
• To help save time on many simple setups, a good mill vise
is a must. A drill press vise is not designed for the forces
involved in milling.
• Plan ahead. Always try to have one point from which to
measure. Do not machine this point off part way through
the job. This would leave you with no way of measuring
the next operation.
• Remember the basic machining rule that says: “If the
tool chatters, reduce speed and increase feed.”
• It takes a long time to accumulate the knowledge, tools
and fixtures required for many different types of milling
operations. Do not become discouraged by starting with a
job that is too complex or by using materials that are
extremely difficult to machine.
SECURING THE WORKPIECE
The first problem encountered will be holding the work and
aligning it to the machine. It is important for reasons of
safety and accuracy that the workpiece be solidly secured.
This may be the most difficult task, since once the work is
clamped in position, the method of doing the entire job has
been established. Usually, a rectangular block can be easily
held in a mill vise. Note that round stock may also be held
in a “V” shaped vise slot. Mill vises are specially designed
to pull the movable jaw downward as they tighten on it.
(See Mill Vise P/N 3551 shown in figure 71 and in the
Sherline Tools and Accessories Catalog.)
Certain objects can be secured with a 4-jaw lathe chuck,
which is, in turn, clamped to the machine. Some irregular
shapes, such as castings, may present greater difficulties.
Often they may be clamped directly to the table. Very small
or irregular shapes can be secured by epoxying them to a
second, more easily held piece of material. They are broken
-30-
loose after machining. A mill tooling plate (P/N 3560) is a
very useful fixture for holding parts. It has a number of
holes predrilled for holding clamps, and additional holes
can be drilled and tapped as needed. It also provides
additional stiffness and protection for your mill table.
THINGS TO CONSIDER BEFORE YOU START CUTTING
The following steps should be considered before
commencing any part:
• Is the material about to be machined best suited for the
job, and is it machinable with available cutting tools and
equipment? Work with aluminum, brass, plastic or cast
iron whenever possible. Too often a hobbyist will pick up
the first correctly-sized piece of material he finds at his
local salvage dealer thinking that, if it is rusty, it’s steel,
and that all steels are pretty much the same. Not so! Anyone
who has ever tried to machine an old automobile axle can
attest to this. If the part must be steel, grade 12L14,
commonly called “lead-loy,” is about the best material for
machining. It was developed for screw-machine use and
is available in round stock only. However, it works so well
that many times it may be advisable to machine rectangular
parts from it. It can also be case hardened. Your local screwmachine shop will usually have scrap pieces available and
may be a good source for obtaining it.
• Avoid exotic materials, such as stainless steel, unless
absolutely necessary because of machining difficulty and
poor milling cutter life. (If each new mechanical engineer
were given a block of stainless steel to mill, drill and tap
P/N 3012 HOLD-DOWN
SET SHOWN. P/N 3013
STEP BLOCK HOLD-DOWN
SET ALSO AVAILABLE
FIGURE 50—Center drilling a part clamped to the
table with the hold-down set
FIGURE 51—A complex setup shows a part held in a
3-jaw chuck, which is mounted to the rotary table, which
is mounted to the tilting angle table, which is in turn
mounted to the mill table. A mill arbor holds a geartooth
cutter which is cutting teeth in a bevel gear. The
horizontal milling conversion is used to mount the
headstock in the horizontal position. With Sherline tools
and accessories, the parts you machine are limited only
by size, not by complexity.
upon his graduation, stainless steel sales would probably
drop considerably!)
• Before beginning, carefully study the part to be machined.
Select the best surface from which to work (usually the
flattest).
• Decide if work should be “rough cut” to size. Some
materials will warp while being machined. Close tolerance
parts can be destroyed by attempting heavy machining at
the end of the job rather than at the beginning.
• The method of holding the work is also determined by
the type of machining to be performed. For instance, work
that involves only small drilling jobs does not have to be
held as securely as work to be milled.
• Lay the job out so that it can be machined with the
minimum number of setups.
• Be sure to have all needed cutting tools available before
beginning a job.
• Do not start off with a job so complex that the odds of
success are limited. Making complex machined parts
requires a great deal of intelligence, planning and skill.
Skill is acquired only through experience.
In summary, you should become aware of the fact that
milling is difficult, but not impossible. There are many
more considerations than just moving the handwheels, and
you should not start your first step until your last step has
been determined.
PURCHASING MATERIALS IN SMALL QUANTITIES
Commercial metal suppliers are not set up to serve the
home shop machinist. They usually have large minimum
-31-
CAUTION! Because the tool spins on a mill, hot chips can be
thrown much farther than when using a lathe. Safety glasses and
proper clothing are a must for all milling operations.
order quantities and high “cutting charge” fees that make it
impractical to purchase small amounts from them. However,
there are now a number of suppliers that cater to the hobby
market. They have complete catalogs of the materials most
commonly used by hobbyists, and you can order as much
or as little as you need. The price per inch is somewhat
higher than industrial rates, but the convenience and overall
savings make it well worth it. There are several suppliers
listed in Sherline’s web site. Your local scrap yard can also
be a good source for raw materials at good prices. Bring
your own hacksaw, and be aware that the some yards are
better than others at identifying and organizing the materials.
If you are not sure exactly what kind of metal you are
getting, you could be letting yourself in for a lot of trouble
when you start cutting. See www.sherline.com/
online.htm for a list of sources for obtaining raw material
in small quantities.
THREE TYPES OF WORK
There are three basic types of work that can be performed
with a vertical milling machine: milling, drilling and
boring. It would be extremely difficult to determine
whether a vertical mill or a lathe would be the most valuable
machine in a shop. Theoretically, most vertical mills are
capable of reproducing themselves with standard milling
accessories such as a rotary table and centers. This would
be impossible on a lathe without exotic modifications and
attachments. These instructions briefly describe standard
vertical mill work. Many comprehensive books are
available on this subject, and, although the machines they
describe are much larger, the principles remain the same.
A good starting point is a book we offer called Tabletop
Machining. It is printed in full color and is available
through Sherline as P/N 5301. Sherline tools are used
throughout in all the setups and examples. Also available is
a black and white book, The Home Shop Machinist’s
Handbook (P/N 5300) by Doug Briney which features
Sherline tools as well. (See more on books and videos for
machinists on page 41.)
FIGURE 52— Boring the inside of a hole to exact size
with a boring tool held in a boring head.
Another type of milling is performed with an adjustable fly
cutter, which may be used for surfacing. For maximum
safety and rigidity, the cutting bit should project from the
holder no further than necessary. A 1-1/2" diameter circle
of cut is quite efficient, and multiple passes over a surface
should overlap about 1/3 of the circle size. For machining
aluminum, use a speed of 2000 RPM and remove about
.010" (0.25 mm) per pass. (See Figure 68 on page 37.)
STANDARD MILLING VERSES CLIMB MILLING
It is important to understand that the cutting action of a
milling cutter varies depending upon the direction of feed.
Study the relationship of cutting edges to the material being
cut as shown in Figure 53. Note that in one case the tool
will tend to climb onto the work, whereas in the other case
the tool will tend to move away from the cut. The result is
that climb milling should normally be avoided except for
very light finishing cuts.
TYPES OF MILLING CUTTERS
Milling on a vertical mill is usually accomplished with end
mills. These cutters are designed to cut with both their side
and end. (See Figure 60, Page 35.) Drilling is accomplished
by raising and lowering the entire milling head with the Zaxis feed screw. Center drills must be used before drilling
to achieve any degree of accuracy. (See Figures 50 and
69.) Note that subsequent holes may be accurately “dialed
in” from the first hole by using the calibrated handwheels.
Each revolution of the wheel will yield .050" of travel or
1mm for the metric machines. There is no need to start
with the handwheel at “zero,” although this can be easily
accomplished with the optional resettable “zero”
handwheels to make calculations easier.
Boring is a method of making accurate holes by rotating a
tool with a single cutting edge, usually in an adjustable holder
called a “boring head.” It is used to open up drilled holes or
tubing to a desired diameter. (See Figure 52.)
TOP VIEW
STANDARD
MILLING
FIGURE 53—
Standard vs. climb
milling. For clarity,
imagine the cutter is
moving rather than
the part.
-32
CLIMB
MILLING
CLIMB MILLING ADVANTAGES AND DRAWBACKS
Though you will almost always use conventional milling,
climb milling can create a better finish in two ways. First,
the lightest part of the cut is at the end of the cut. Second,
the chips are tossed from the cutting area and do not affect
the finish.
The major problem with machining in this direction is that
the cutter may actually do just that—climb up on the part
and break. Also, when a climb cut is first started, the work
has to be pushed into the cutter. Then the cutting action
pulls the backlash out of the table leadscrew, and a heavier
cut is taken than planned. If you understand and
compensate for these drawbacks, climb milling can be used.
However, for those new to milling, it is best to try and plan
your cuts so that the end mill is cutting in the conventional
manner.
WORKING TO SCRIBED LAYOUT LINES
A common practice when working with a mill is to lay out
the hole centers and other key locations using a height gage
and a surface plate. A coloring (usually deep blue) called
layout fluid or “Dykem” is brushed or sprayed on a clean
surface of the part. A thin layer is best because it dries
quicker and won’t chip when a line is scribed. The purpose
of this fluid is to highlight the scribed line and make it
easier to see.
Don’t prick-punch the scribed, crossed lines representing
a hole center. Using a center drill in the mill spindle and a
magnifying glass, bring the headstock down until the center
drill just barely touches the scribed cross. Examine the
mark left with a magnifying glass and make any corrections
needed to get it perfectly on center. You should be able to
locate the spindle within .002" (.05 mm) of the center using
this method.
Once the first hole is located in this manner, the additional
holes can be located using the handwheels. (This is where
the optional resettable “zero” handwheels are useful.) Now
the scribe marks are used as a double check and the
handwheels take care of the accuracy. Don’t forget the
rules of backlash—always turn the handwheels in the same
direction as you go from one point to the next.
FIGURE 54—Indicating in the jaws of a vise. Shown is
a Starrett “Last Word” Indicator. Starrett gages are
available in numerous sizes and types. They are
manufactured in Athol, Massachusetts and can be
purchased from most industrial dealers.
indicator stationary and moving the slide with which you
wish to align the part. When “indicating in” a vise, always
take the reading on the fixed jaw. To start with, use
approximately .005" indicator deflection from neutral.
Remember that excessive pressure can cause inaccurate
readings. Also, try to keep the indicator finger at a
USING A DIAL INDICATOR
(NOTE: For more on use of a dial indicator to square up
your mill, see pages 13-16.)
The basis of most accurate machining involves the use of a
“universal dial test indicator”; a small, inexpensive indicator
which is calibrated in .001" or .01 mm divisions. An indicator
with a large face or one that reads in finer divisions is not
necessary for use with this mill. Three major tasks that can
be accomplished with an indicator are:
1. Checking the squareness of a setup.
2. Finding the center of a hole.
3. Aligning the work with the machine.
A vise can be mounted or a part can be clamped down
exactly parallel with the machine slides by holding the test
FIGURE 55—Indicating in the center of a hole
-33-
placement of the bed by running an indicator on the square
as the headstock is raised and lowered. (See Figure 21,
page 16.) The same method can be used to check alignment
of the column bed to ensure it is square with the Y-axis. To
correct any error (which should be small), place a shim
between the column block and the mill base.
LOCATING THE EDGE OF A PART
IN RELATION TO THE SPINDLE
There are two quick methods of “picking up an edge” of a
part on a mill. The first is to put a shaft of known diameter
in the spindle and see that it runs perfectly true. Using a
depth micrometer against the edge of the part, measure
the distance to the outside diameter of the shaft. To that
dimension add half the known shaft diameter. You now
have the distance from the edge of the part to the centerline
of the spindle. Rotate the handwheel on the axis being set
exactly this distance and you will have the centerline of the
spindle lined up with the edge of the part from which you
measured.
SPINDLE
The second method is much easier.
It involves the use of a clever tool
called an “edge finder.” These
devices have been around for
years and have two lapped
surfaces held together by a spring.
3/8" SHAFT
One surface is on the end of a shaft
that fits in a 3/8" end mill holder
PART
and is held in the spindle. The other
is a .200" diameter shaft held to
the larger shaft with a spring so it
is free to slide around. With the
spindle running at approximately
.200" DIA. SHAFT
2000 RPM, the shorter shaft will
be running way off center. As this FIGURE 57—Using
shaft is brought into contact with an “edge finder” to
the edge you are trying to locate in accurately locate
relation to the spindle, the .200" the edge of a part
shaft will be tapped to the center
as the spindle rotates. This keeps making the .200" shaft
run continually truer. When the shaft runs perfectly true it
makes contact with the part 100% of the time. This creates
a drag on the surface of the shaft that will “kick” it off
center. (See Figure 57.) At this point you know the part is
exactly .100" (half the diameter) from the centerline of the
spindle. Advancing the handwheel on a Sherline mill two
revolutions (.050" per revolution) will bring the edge of the
part into alignment with the spindle.
It is important to use a high quality edge finder such as the
Starrett 827A shown in the drawing. It must have a 3/8"
shaft to fit the end mill holder on the Sherline mill. Metric
sized edge finders are also available which work in the
same manner.
For those who like to own the newest gadgets, electronic
edge finders are now available. Import models start at
around $100.00.
FIGURE 56—Indicating in a head tilt using a mill vise
and draftsman’s triangle
reasonable angle to the indicated part or surface. When
the part is properly aligned, there will not be any deflection
on the indicator. If you wish to locate the spindle over an
existing hole, place the indicator in the spindle and read the
inside surface. Move the X- and Y-axes until there is no
deflection when the spindle is rotated. At this point, the
spindle is in perfect alignment with the hole’s center.
When aligning the spindle to used bearing holes, remember
that the hole may be worn out-of-round, and it may be
impossible to attain zero indicator deflection reading.
Boring out a worn bearing hole to a larger diameter and
sleeving it with a simple bushing made on a lathe is a fairly
common machining operation. With the new bushing
pressed in, the bearing will be like new.
The squareness of your machine may also be checked with
an indicator. For instance, alignment of the head can be
checked by offsetting the indicator in the spindle so the tip
will move on about a 5-inch diameter circle. The amount of
reading relative to the table is the amount of error. Don’t
be discouraged to find a few thousandths of an inch error
in your machine. This machine has been designed to have
the most accuracy commensurate with reasonable cost. In
machine tool manufacturing, accuracy and cost run handin-hand. To increase accuracy only a few percentage points
could double the selling price, because entirely different
manufacturing processes would be required. However, you
can personally improve the accuracy of your machine with
a few shims, if needed, by employing your dial indicator.
The column bed is aligned with the column block at the
factory. If you remove it, it will have to be realigned by
mounting a known “square” on the mill table and adjusting
34-
CUTTING SPEEDS FOR MILLING
SPEED ADJUSTMENT CHART
SPINDLE RPM = 3.82 x S.F.M.
D
S.F.M. =
The rated Surface Feet per Minute for milling. For drilling,
use 60% of the rated surface feet.
RPM =
The rated spindle speed in Revolutions Per Minute
D=
The Diameter of work in inches
FIGURE 59—Formula for adjusting spindle speed for
cutting a given diameter.
NOTE: To estimate RPM, remember that the speed range
of your vertical mill is from 0 to 2800 RPM. (The lowest
usable speed is about 70 RPM, so we use that in our
specifications. To obtain much more torque at the lower
speed ranges, the drive belt can be switched to the smaller
diameter positions on the spindle and drive pulleys.)
Therefore, in the normal belt position, half speed is
approximately 1450 RPM and so on. You can estimate
these speeds by a combination of the setting on the speed
control knob and the sound of the motor itself. When using
the optional digital readout (P/N 8100), the exact RPM is
displayed constantly on the LCD screen.
FIGURE 58—A digital readout makes life easier for
the machinist. The electronic display reads out to .0005"
and any axis can be reset to “zero” with the push of a
button. It also helps eliminate mistakes due to losing
track of the number of handwheel revolutions on longer
dimensions. As a bonus, the spindle RPM is displayed
at all times. The digital readout or “DRO” is available
for both the lathe and mill.
END MILLS
End mills are the standard cutting tools used on a vertical
mill. We recommend 3/8" shank end mills held in the 3/8"
end mill holder (P/N 3079). One of the benefits of 3/8"
end mills is that they are available in a large range of sizes.
The end mill is held with a set screw on its flat surface,
and it can be easily changed. They are also lower in price
than miniature cutters because of their popularity.
You can also use miniature series end mills having 3/16" or
1/4" shank sizes which should be held in collets or end mill
holders sized for those tools. End mills held in collets must
be single-ended, while end mill holders are capable of
holding double-ended end mills. We recommend using 2flute, high-speed steel (HSS) end mills for aluminum because
the flutes are less prone to clog with chips. Use 4-flute
cutters for cutting steels with lower RPM. The solid carbide
tools are not suggested since they are very expensive and
the cutting edges will chip unless used with heavy-duty
production equipment.
DETERMINING DEPTH OF CUT
There are no firm rules other than common sense for
determining depth of cut. A .030" cut depth with a 3/16"
end mill in aluminum could be considered light, but .003"
cut depth in steel with a 1/32" diameter end mill would
break the cutter. Start with very light cuts and gradually
increase the depth until satisfactory results are achieved.
Try to develop the skill of knowing how much of a cut is
satisfactory without breaking the cutter or damaging the
work.
Note that regular end mills should not be used for drilling;
however, they may be employed to enlarge an existing hole.
The cutting edges deserve more respect than those of drills
even though similar in appearance; they are designed to
cut with their sides. Handle and store them with care.
WORK ACCURATELY
It should be remembered that a good machinist is capable
of making a part to much closer tolerances than those of
the machine with which he is working. The accuracy of
the parts you make is limited only by your skill as a
craftsman and the quality of your measurement equipment.
Accuracy should be the ultimate goal of every machinist!
FIGURE 60—A typical 2-flute end mill.
As a convenience to our customers, Sherline keeps in
inventory many of the popular sizes of end mills that are
appropriate for use on our machines. See the “Cutting Tools
Price List” for selection. End mills may also be purchased
from your local industrial machine shop supply outlet (see
the yellow pages under “Machine Shop Supplies”) or from
mail order industrial suppliers.
Because small diameter cutters (less than 1/8") are quite
fragile, the largest diameter cutter possible for the job
MACHINING TIP
Use of a tooling plate (P/N 3560) is an inexpensive
way to protect the surface of your mill table while
providing a flat, versatile clamping surface.
-35-
END MILLS (Slot and side milling)
MATERIAL
FIGURE 62—Mill
column saddle lock
CUT SPEED (S.F.M.)1/8” DIA. 1/4” DIA. 3/8” DIA.
Stainless Steel, 303
Stainless Steel, 304
Stainless Steel, 316
Steel, 12L14
Steel, 1018
Steel, 4130
Gray Cast Iron
Aluminum, 7075
Aluminum, 6061
Aluminum, 2024
Aluminum, Cast
Brass
40
36
30
67
34
27
34
300
280
200
134
400
1200 RPM 600 RPM 400 RPM
1100
500
350
900
450
300
2000
1000
650
1000
500
350
800
400
250
1000
500
350
2800
2500
2000
2800
2500
2000
2800
2500
2000
2800
2000
1300
2800
2800
2800
MILL SADDLE
LOCKING LEVER—
TURN LEVER
COUNTERCLOCKWISE
TO LOCK, CLOCKWISE
TO RELEASE
SADDLE NUT
COLUMN LEADSCREW
DRILLS
MATERIAL
Carbon Steel
Cast Iron, Soft
Stainless Steel
Copper
Aluminum, Bar
Aluminum, Cast
CUT SPEED (S.F.M.)
1/16” DIA.
1/4” DIA.
36
30
24
72
240
120
2000 RPM
1800
1400
2000
2000
2000
550 RPM
450
360
1100
2000
2000
SADDLE NUT
ADJSUTMENT
SET SCREWS
ACCESSORIES FOR MILLING
The addition of accessories can greatly enhance the utility
of your mill. A few of the more popular accessories are
described below.
SENSITIVE DRILLING ATTACHMENT (P/N 1012)
The sensitive drilling attachment provides both
faster drilling of multiple holes and better “feel”
for the cut when using drills smaller than 1/16".
A Jacobs 5/32" drill chuck is fitted to a spring
loaded shaft that inserts into the spindle. A red
knurled collar with a ball bearing at the center,
allows the user to hand feed the chuck. A spring
inside the brass tube helps return the chuck to
the up position when done. The chuck holds
drills from 5/32" (4 mm) down to #80 or smaller.
The attachment is easily installed by screwing
it onto the external thread of the spindle.
Fig.63
3/8" END MILL HOLDER (P/N 3079)
The 3/8" end mill holder makes it easy to use the popular
(and less expensive) 3/8" end mills. Using double-ended
end mills is economical and easy with this holder, as tools
are changed by simply loosening a
set screw and changing the tool.
Sherline now offers holders to hold
other size cutting tools in the same
manner. The following additional
sizes are available: 3/16" (P/N
6080), 1/4" (P/N 6079), 5/16" (P/N
FIGURE 64—3/8" 3075), 6.0mm (P/N 3076), 8.0mm
(P/N 3077) and 10mm (P/N 3078).
End mill holder
FIGURE 61—Drill and mill speed adjustment chart.
requirements should be employed. Be certain that the RPM
is appropriate before attempting to remove any metal. An
end mill can be instantly damaged if a cut is attempted at
excessive RPM. Like all cutting tools, end mills will have a
short life span when used for machining steel or other exotic
materials. Save new cutters for finish work. Because of
excessive cutter deflection (bending), do not use small
diameter end mills with long flutes unless absolutely
necessary.
RESHARPENING END MILLS
End mills can be resharpened by your local tool and cutter
grinding shop. End mills lose their cutting edge clearance
after a couple of sharpenings and should no longer be
reused.
USING THE MILL COLUMN SADDLE LOCK
The saddle locking lever is located on the back side of the
mill column just above the saddle nut. This lever tightens
against the saddle nut on the column leadscrew to keep it
from moving during milling operations.
With the lever released, adjust the Z-axis handwheel to the
desired setting. Rotate the lever counterclockwise to lock
the saddle. This will eliminate any backlash in the leadscrew.
Friction on the gib can still cause a little backlash to be
present between the handwheel and the leadscrew thrust.
To eliminate this, push down on the saddle to make sure
the handwheel is fully seated against the thrust. Double
check your height adjustment. Now, when milling, the saddle
cannot move any further down.
To release the saddle, rotate the lever clockwise. A springloaded ball in the saddle fits in a detent on the lever to keep
it from locking accidentally when the Z-axis is adjusted.
(See Figure 62.)
MILL COLLET SET (P/N 3060)
(See Figure 65 on next page.) The main purpose of the mill
collet set is to hold end mills. The spindle nose has an internal
Morse #1 taper that closes the collet as the drawbolt is
tightened. Morse tapers are approximately 5/8" per foot
and are self-locking. Therefore, to loosen a collet, the
drawbolt must be loosened a few turns and given a few
light taps with a hammer.
-36-
P/N 7620 FLY CUTTER
WITH CARBIDE INSERT
P/N 3052 FLY CUTTER
USES A 1/4" SQUARE HSS
OR BRAZED CARBBIDE
CUTTING TOOL
FIGURE 65—Mill collet set
BORING HEAD (P/N 3054/3049) AND BORING TOOLS
The main purpose of the boring head is to eliminate the
need for a large inventory of drills and reamers. A small
milling machine would not have the power or rigidity to
turn a one-inch diameter drill even if one could be obtained
that would fit. However, holes of even larger diameters
can be accurately bored to size with a little patience and
care.
FIGURE
66—Boring
Head and Boring Tool.
Boring tool P/N 3061 is for
1/4" (6.4 mm) minimum
diameter by .60" (15.2
mm) maximum depth hole.
P/N 3063 is for 5/16" (7.0
mm) minimum diameter by
1.0" (25 mm) maximum
depth hole. Both have a
3/8" diameter shaft. P/N 3064 is similar in size to P/N
3063 but longer and will work to a maximum depth of
1.5" (38.1 mm).
Boring heads for the mill work on the same cutting principle
as lathe boring, except that the cutting tool turns while the
work remains stationary. (In the case of a lathe, the work
turns and the cutter remains stationary.) The boring head
is designed to employ round cutting tools with a 3/8" shank.
Sherline offers three boring tools with sizes and lengths
appropriate for the Sherline mill. It is sometimes advisable
to remove excessive tool shank length from standard (nonSherline) 3/8" boring tools in order to improve rigidity.
(See Figure 52, page 32 for a boring tool in use.)
Tool sizes are listed indicating the smallest diameter hole
that can be bored and the maximum depth that can be cut.
For best results, use the largest diameter possible with the
shortest lengths. A .010" cut represents a good starting
point.
If boring a hole where a flat bottom is required, it is
advisable to stop the down-feed at about .002" above the
desired depth, turn off the motor and cut the remaining
distance by hand-turning the spindle to eliminate any
possibility of chatter.
FLY CUTTERS (P/N 3052 AND P/N 7620)
For machining flat surfaces, the fly cutter shown in the
Sherline Tool & Accessory Catalog is recommended. It is
imperative that the tool be used with utmost care. EYE
PROTECTION IS A MUST, and the work as well as the
cutting tool must be properly held. The big advantage of a
fly cutter is its ability to take light cuts up to 2" wide and
to give an excellent surface finish. It is ideal for squaring
FIGURE 67—Fly cutters and drawbolts
up work. Also, the machining stresses are lower than one
might imagine, because, unlike an end mill, very little
crushing action takes place at the cutting edge. Fly cutting
tools look like left-hand lathe tools, and, although the fly
cutter (P/N 3052) comes with a brazed carbide tool, highspeed tools work quite well and can be sharpened on any
grinder. (See Figures 67 and 68)
FIGURE 68—Typical setup for fly cutting
DRILL CHUCK (P/N 3072) AND CENTER DRILLS
The 1/4" drill chuck available for this vertical mill is supplied
complete with a #1 Morse arbor and a drawbolt to hold it
securely in place. Drilling can be accomplished by raising
and lowering the entire head with the vertical feed
handwheel. This allows for very accurate control of feed
rate and hole depth. For accurately located holes we again
stress the importance of using center drills.
Drills should be kept in excellent condition, either by
replacement or proper resharpening. Good quality highspeed steel drills should be employed. A dull or improperly
sharpened drill can cut oversize by as much as 10%. When
you start to drill, the initial penetration should be no more
than twice the diameter of the hole before you retract the
drill, clear the chips and add coolant with the tip of a small
brush. From then on, do not try to drill deeper than the
-37-
diameter of the drill without clearing the chips and adding
coolant. For example:
To drill a 1/8" diameter hole 1" deep:
1st Pass: 2 times diameter or 1/4"
2nd Pass: 1 times diameter or 1/8"
3rd Pass: 1 times diameter or 1/8"
Etc.
mill vise is a rotating base (P/N 3570) that greatly adds to
the versatility of this basic machining accessory.
STEP BLOCK HOLD-DOWN
SET (P/N 3013)
When a part can’t be held in
a mill vise due to its size or
shape, the step block set is the
next most popular way
machinist’s have traditionally
clamped work to the mill
FIGURE 72—Step table. Its versatile design
makes setups quick and easy.
block hold-down set
The set includes two step
blocks and two step clamps plus an extra unanodized step
block that can be cut and milled to make smaller blocks to
suit your special needs. Also included are six pairs of
threaded studs from 1" to 3.5", T-nuts and special convex
nuts and concave washers that tighen flat on clamps even
if they are slightly tilted.
TILTING ANGLE TABLE
(P/N 3750)
This accessory opens up a great
variety of setup options. The
table can be tilted to any angle
from 0° to 90°. A hole pattern in
the table is designed to easily
FIGURE 73—Tilting mount the mill vise or rotary table
for holding parts. A chuck adapter
angle table
is included that allows the 3-jaw
or 4-jaw chuck to be screwed directly to the table as well.
Parts mounted to the table can be machined or drilled at
precise angles without tilting the column or headstock. In
the 90° position, the rotary table is held at the same height
as it would be on the P/N 3701 right angle plate, eliminating
the need for that accessory.
Total Depth
1/4"
3/8"
1/2"
(You may encounter recommendations exceeding this, but
they are meant for automatic equipment with pressurized
coolant systems.)
It is difficult to maintain tolerances of better than +.003"
–.000" with a drill. If tolerances closer than these are
required, a reamer must be employed. Try to use fractional
size reamers whenever possible rather than decimal sizes,
because the cost difference can amount to 2 or 3 times
higher for decimal sizes. (The length of reamers may
prevent their use for some operations on machines of this
size.)
FIGURE 69—Typical Center Drill
To accurately start holes, center drills must be used. They
have a small tip that accurately starts the hole, and then the
shaft widens with a 60° cutting face to the final diameter.
Care must be taken to employ cutting oil and to clear chips
from the drill frequently. If this is not done, the fragile tip
may load up and twist off, even in soft materials. Center
drills are available in a variety of sizes, but for general work
we recommend size No.1.
SIZE
000
00
0
1
2
3
BODY
DIA.
1/8"
1/8
1/8
3/16
3/16
1/4
DRILL
DIA.
.020"
.025
.031
.046
.078
.109
DRILL
LENGTH
3/64"
1/16
1/16
3/64
5/64
7/64
LENGTH
OVERALL
1-1/4"
1-1/4
1-1/4
1-1/4
1-7/8
2
4" ROTARY TABLE (P/N 3700)
The rotary table mounts to the
mill table and provides a rotary
axis for milling. Each increment
on the handwheel represents
1/10° of rotation, so a circle can
be divided into 3600 segments
without interpolation. SeventyFIGURE 74—Rotary two handwheel revolutions
rotate the table one time. It can
table
be used to mill a radius on a part,
cut a circular slot or drill precision circular hole patterns.
Used with the right angle attachment (P/N 3701) and right
angle tailstock (P/N 3702), it can also be used to cut gear
teeth. A rotary table used with a mill allows a machinist to
produce virtually any part he can design. On a Sherline
mill, the only limits are size, not complexity. The compact
size of this high quality rotary table also makes it a good
choice for use on larger machines as well, where its size
would offer an advantage in working with small parts. (See
Figure 51 for a photo of the rotary table in use.)
FIGURE 70—Table of commonly available center drill
sizes
MILL VISE SET (P/N 3551)
The vise shown here and in use
in Figures 54 and 56 is furnished
with special clamps that allow it
to be clamped in any position on
the mill table. The vise capacity
is 2 inches. It has a movable jaw
FIGURE 71—Mill vise that is pulled down while
clamping, eliminating any
chance for the jaw to lift. Perpendicular grooves in the
fixed jaw help secure round stock. It is the most convenient
way to hold small parts for milling. Now available for the
-38-
the work. (Note: The greater versatility and capacity of
the 2000-series 8-direction mill eliminate the need for this
accessory on those mills.)
The black anodized mounting plate is predrilled to mount
the base and column in several possible locations.
Alignment bars and a selection of appropriate bolts are
included to make it easy to accurately relocate the column.
Rubber feet insulate the table for quiet, vibration-free
operation. (Note: The column base should be shortened
by 2" for best operation. Instructions are provided with
the accessory, or we can shorten your column for you. The
modification is listed as P/N 6101 on the price list. New
mills purchased along with the horizontal milling
conversion can be ordered with the column already split.)
FIGURE 75—This simple programmable indexer brings
computer control to operations like cutting gears.
CNC ROTARY INDEXER (P/N 8700)
Based on the 4" rotary table, this completely self-contained,
computer operated unit is perfect for repetitive radial
operations like gear cutting or drilling multiple hole
patterns. Using the keypad, enter the parameters such as
the number of divisions required . When the command is
given, the indexer will move precisely to the next
programmed position. The computer keeps track of the
divisions to many decimal places, so error is virtually
eliminated. The unit includes a computer/keypad unit,
rotary table, motor mount, stepper motor, power supply
and all connecting cables. It can also be “daisy chained”
with other units to produce sequenced operations.
HORIZONTAL MILLING CONVERSION (P/N 6100)
FOR 5000/5400-SERIES MILLS
A number of milling operations require the application of
the cutting tool from the side rather than from the top. A
3/4" thick aluminum base 10.5" x 12.5" allows the 5000series mill column to be mounted separately from the base
for a variety of milling configurations. The headstock is
rotated 90° and work is machined from the side, allowing
larger surfaces to be worked on without having to reclamp
CNC-READY SHERLINE LATHES AND MILLS
FIGURE 77—Any Sherline lathe or mill can be ordered
“CNC-ready,” and existing machines can be easily
converted to have stepper motors drive the leadscrews.
Shown here is a cutaway of a stepper motor mount with
two preloaded ball bearings and coupler.
Sherline now offers the stepper motor mounts and
couplings needed to turn any Sherline lathe or mill into a
computer-controlled machine. Several aftermarket
companies offer complete CNC machines based on
Sherline tools, but if you can come up with the software
portion of the system, you can now build up your own
stepper motor-equipped machine from Sherline
components. An exploded view of a typical stepper motor
mount and coupling is shown on page 41. A list of dealers
selling Sherline CNC packages is available on Sherline’s
web site at www.sherline.com/cncdlrs.htm or by calling
Sherline and requesting a CNC dealer list.
UPGRADING 5000/5400-SERIES MILL COLUMNS
TO 8-DIRECTION CAPABILITY
Any existing Sherline mill can be upgraded to 8-direction
capacity with the addition of a 2000-series column
conversion. The rectangular column base is replaced by
the round column, ram and rotating collar of the 2000series 8-direction mill. A base adapter offsets the column
to the rear to make up for the additional mechanism so
that no Y-axis travel is lost. (See Figure 78, next page.)
FIGURE 76—One of the configurations possible with
the horizontal milling conversion, P/N 6100.
-39-
FIGURE 78—The
P/N 5650 (inch) or
P/N 5660 (metric)
upgrade includes
everything you
need to bring your
existing Sherline
mill up to the 8direction capacity
of the Model
2000 mill.
Other sizes are available individually, see the “Cutting tools
price list.”
3200 Indexing Attachment—Cut gears of any
number of teeth or drill precise hole patterns.
The indexing head and tailstock are mounted
on a 12" dovetailed bed. Includes a gear cutter
holder and cutting tool blank. The head detents every 5°
of rotation or a special rack gear allows division of a circle
into any number of increments by measuring rack length.
3230-3236 Mill Cutter Arbors—Available in
7/8" or 1" I.D. sizes and long or short lengths,
these arbors are designed to hold round
milling cutters.
3500 Rotary Column Attachment—Allows the
mill column to be rotated up to 90° either
way side-to-side so that angled drilling or
milling can be accomplished.
3559 90° Angle Plate—This useful workholding fixture can be used to hold parts on
either surface, and parts can also be held from
two directions at once. It is 3-5/8" x 3-5/8" x
10" and has T-slots on both surfaces.
3560 Mill Tooling Plate—Cast aluminum plate
milled to 1/2" thick provides a versatile method
of clamping parts to the table. Use existing
threaded 10-32 holes or drill and tap your own as needed.
Protects the table surface and also adds stiffness to the
mill table. Includes mounting bolts and T-nuts.
TRAVEL
EXTENSION
MULTI-DIRECTION COLUMN
EXTENSION/COLUMN BASE
YOUR EXISTING MILL BASE,
COLUMN AND MOTOR/
SPEED CONTROL UNIT
ADDITIONAL MILL ACCESSORIES
Following is a list of popular Sherline accessories for the
mill and a brief description of their purpose. Part numbers
for inch sizes are listed first with metric part numbers (when
different) in parenthesis.
1187 Chuck-to-T-Slot Adapter—Slips in either
T-slot on mill table and a 3- or 4-jaw chuck
can be screwed down to hold parts for milling.
(Shown upside down.)
1297 Mill Headstock Spacer Block—Extends
headstock 1.25" (31.8mm) further out to
reach areas that otherwise could not be
machined without changing your setup. Laser engraved
scale for angle milling. Includes additional precision
alignment key.
2045 Index block set—A hex block and an
octagonal block make quick work of simple
indexing operations involving 2, 3, 4, 6 or 8
increments. Internal Morse #1 taper and external threads
accept all Sherline chucks and collets for holding parts.
3012 Hold-down Set—Two strap clamps plus
T-Nuts and a selection of bolts to provide a
versatile method of clamping work to the mill
table. See also the newer P/N 3013 step block hold-down
set shown in Figure 72, page 38.
3570 Rotating Vise Base—When mounting the
mill vise to the table, this base will allow the
vise to be rotated to any angle. The red
anodized base is laser engraved with angle
measurements in 1° increments all the way around.
XY Bases—Mill base and table only. If you
already have a lathe and vertical milling
column, this is all you need to make up a
complete mill at less cost. Available in
standard 10" base (P/N 5200/5210), 10" base with adjustable
handwheels (P/N 5220/5225) or deluxe 12" base with laser
engraved scales and adjustable handwheels (P/N 5401/
5411). The 2000-series 14" base is also available (P/N 5600/
5610) so that an 8-way column can be added to make it a
complete 2000-series mill. Uses lathe motor and speed
control.
3055 Morse #1 Blank—Made from freemachining steel. Make your own custom tool
holders. Drill, tap or slot this blank to fit your
custom needs.
3058 4-Jaw Hold-down Set—Two T-nuts, bolts
and clamps to mount a Sherline 4-jaw chuck
in just about any location on the mill table for holding parts.
(Included with mill vise and rotary table.)
3065 Slitting Saw Holder—Holds jeweler’s
circular slitting saw blades for machining thin
slots.
3080 End Mill Set—Three 3-flute end mills,
sizes 1/8", 3/16" and 1/4". All have 1/4" shank.
XYZ Bases—A complete 3-axis mill less the
headstock, motor and speed control. Available
in standard 10" base (P/N 5201/5211), 10"
base with adjustable handwheels (P/N 5230/
5235) or deluxe 12" base with laser engraved
scales and adjustable handwheels (P/N 5420/
5430). The 8-way 2000-series mill base and
column is available as well (P/N 5625/5630).
5150 and 5151 Vinyl Dust Covers—Fitted 6-mil vinyl cover
keeps mill clean and dust free when not in use. P/N 5150
-40-
5329—Shop Secrets Video–Measuring Tools, by Mike
Rehmus. A great introduction to the proper use of
measuring tools for machining. 2 hours, VHS
fits 5000-series mills, while P/N 5151 is sized for 2000series mills.
8100 (8160) Mill Digital Readout—3-axis digital readout can
be added to any existing mill or ordered factory installed
on any new mill. Reads to .0005" or .01 mm. Resets to
zero with the push of a button. Also reads out spindle RPM
at all times. See photo on page 35.
BOOKS AND VIDEOS
Sherline Shop Guide—This collection of instructions from all
Sherline’s major accessories is a great source of machining
information and a good way to learn about an accessory
before you decide to buy. 8-1/2 x 11", 202 pages, P/N 5327
Steam Engine Video—Rudy Kouhoupt shows production of
a scratch built steam engine from start to finish. Includes
dimensioned plans and materials list. Watch an expert as
you learn machining skills, build confidence and end up with
a beautiful, working steam engine for your den or coffee
table. 2 tapes, 3-1/2 hours, VHS, P/N 5328
Home Machinist’s Handbook—Doug Briney’s book features
Sherline equipment throughout. It is a complete guide for
the amateur machinist and covers all aspects of lathe and
mill use as well as information on reading plans, measuring,
using hand tools, selection of materials, heat treating and
so on. It also includes practice projects such as punches,
A+
TURN
COUNTERCLOCKWISE
UNTIL MOTOR
RUNS
SMOOTHLY
L1
ELECTRICAL
WIRE COLORS
AND MOTOR
CONNECTIONS
L2
SPEED CONTROL PLATE
ACCEL.
ball peen hammers, gages, a cannon and more. Softbound,
black and white, 7-3/4" x 9-1/4", 275 pages, P/N 5300
Tabletop Machining—
Sherline’s owner, Joe Martin
has written the most complete
and up-to-date book ever on
machining small metal parts. Its
high-quality format makes it
equally at home on the coffee table
or workbench. Naturally, Sherline
tools are featured. Softbound or
hardbound, full color, 8-1/2" x 11",
344 pages, over 400 color photos and
over 200 illustrations, P/N 5301
PARTS FOR SHERLINE CNC-READY LATHES AND MILLS
Sherline CNC-ready lathes and mills use the same
components as are used on standard Sherline machines
with the exception of the parts shown here. Handwheels
that would normally come with the machines are included
for use on the end of the stepper motors. Where different,
inch part number is shown first followed by the metric
part number.
CNC STEPPER MOTOR MOUNT EXPLODED VIEW
A
67102
67120
A-
67111
P2
MAX. SPEED
P3 P1
MIN. SPEED
GREEN (Green/Yellow)
(MOTOR)
GREEN (Green/Yellow)
67120
WHITE (White)
(MOTOR, Thermal Lead)
BLACK (Brown)
67111
WHITE (Blue)
5K POT.
RED
(MOTOR)
ORANGE
(MOTOR,
Thermal Lead)
SWITCH
P1
P2 P3
A+
A-
40520
FIGURE 80—Exploded view of typical Sherline stepper
motor mount components
BLACK
(MOTOR)
L1
67115
67105
MOTOR
POWER
L2
USA colors listed first, European
colors in parenthesis when different.
REF.
PART NO.
PART DESCRIPTION
USE
A
A
67106/67108
67107/67109
RH preload nut
LH preload nut
Lathe crosslide screw, Mill X-axis
Lathe leadscrew, Mill Y- and Z-axes
Other Parts used only on CNC-Ready machines
PART NO.
FIGURE 79—Electrical wiring color codes for motor
and speed control
50171/51171
54161/54171
67028/67029
67030/67031
67024/67025
67026/67027
44211/44222
67040/67041
SHERLINE FACTORY TOURS
Visit Sherline’s factory in North San Diego County and
see miniature machine tools being produced. If you can’t
come by, see the photo factory tour on our web site at
www.sherline.com/factour.htm.
-41-
DESCRIPTION
All Mills, X-axis CNC leadscrew
All Mills, Y-axis CNC leadscrew
5000/5400 Mills, Z-axis CNC leadscrew
2000 Mill, Z-axis CNC leadscrew
4000 Lathe, 15” CNC leadscrew
4400 Lathe, 24” CNC leadscrew
All lathes, 6.5” CNC slide screw
CNC Lathe bed hold-down
SHERLINE LATHE EXPLODED VIEW AND PART NUMBER LISTING
NOTE: Where different, Inch part number is given first, followed by Metric part number.
41130
30220
40510
90080
90060
2-PART LEADSCREW END DETAIL
40660
30230
43200 (Label)
43110
43170
43460
40520
43150
43160
43140
*LEADSCREW BODY PART NUMBERS
Tailstock Feed Screw Body—40221 (41221)
Crosslide Slide Screw Body—44211 (44221)
43170
40620
40630 (UK)
40640 (Eur.)
43120
43190
43100
32100
43360
40440
43130
34260/34270
40520
34210
40090
41080
43180 32100
40340
40320
40440
45450
34250
40660
40510
40380
40690
40330
40520
40390
40820 40520
40820
40270/41270
40112
40600 40501
40890/41890 44880
40540
40040
40420
40160
40900
40520
40520
40111
40440
40980
40910
40020
40080/41040
40070
40860
40870
40230
40420
40100
34220
40340
40660
40330
40590
SEE LEADSCREW END DETAIL
40220/41220
40330
40180
40250
40520
40330
40590
40990
44210/44220
43230
40670
40170/41170
40120
40900
31080
SEE LEADSCREW END DETAIL
40080/41040
40520
40660 40300
40510
00
412
00/
2
0
4
40260
40520
40050/41050
34250
34230/34240
40280
40530
34210
40370/41370
34220
40240
40520 40520
40010
40400
40561
40510
40570
34220
34410
34260/34270
34250
40340
40550
40580
44120
40660
40690
11980
44200/44230
44010
11990
11950
NOTE: Rocker tool post is included with
4400-series lathes. (Standard tool post
included with 4000-series lathes.)
40250
FIGURE 81
-42-
SHERLINE VERTICAL MILLING MACHINES
EXPLODED VIEW AND PART NUMBER LISTING
NOTE: Where different, Inch part number is given first, followed by Metric part number.
1297
45013
34220
41080
34410
40620 (US)
40630 (UK)
40640 (Euro.)
43180
43230
40520
43190
40040
34250
45014
34260/34270
43120
31080
45450
40600
40670
40175/41175
45012
34000/34100
50240
40177/41177
41080
40160
43140
43150
40520
32100
40420
90060
43200 (Label)
90080
45040
40510
40520
34060
40590
43130
40440
40020
40260
40540
40520
45200
41130
40990
43360
43100
40820 40100
40520
40660
40510
30220
43460 43110
43170 30230
45010/45160
40660
40900
40420
45030
40320
40440
40690
43160
40080/41040
43170
40520
40530
50050
40340
40230
40520
54180/54190
40280
50180
34220
34210
50010
40510
50211
LEADSCREW END DETAIL
34250
34260/34270
50150
50280
40520
50170/51170
SEE LEADSCREW DETAIL
50200/51200
40510
50910
40530
40520
50220
50130/51130
50190
40690
50140/51140
50160/51160
SEE LEADSCREW DETAIL
40980
40820
40890/41890
40760
45070
40050/41050
40520
50150
40520
50211
40520
40980
40510
40820
54160/54170
54020/54120
*LEADSCREW BODY PART NUMBERS
X-AXIS (ALL)—50171 (51171)
Y-AXIS, 5000 SERIES–50161 (51161)
Y-AXIS, 5400 SERIES–54161 (54170)
Y-AXIS, 2000 SERIES–56161 (56151)
40560
40550
40570
40580
FIGURE 82
-43-
SEE LEADSCREW DETAIL
34250
34230/34240
34210
40520
34220
SHERLINE MODEL 2000 MILL COLUMN
EXPLODED VIEW AND
PART NUMBER LISTING
SADDLE NUT ASSEMBLY
40177 (Inch), 41177 (Metric)
1/8" BALL, P/N 40178
SPRING, P/N 22630
40690
40176
SADDLE NUT BODY
P/N 40179 (Inch)
P/N 41179 (Metric)
56230
56200
40175 (Inch)
41175 (Metric)
50220
40330
40670
40340
56400
56350
45011 (Inch)
45161 (Metric)
56230
56220
35160
56550
56330 (Inch)
56331
(Metric)
56450
50211
40690
56440
56110
40670
35170
56770
56130
56700
56210
56470
NOTE
For part numbers of table, column bed
and headstock/motor/speed control
portions of mill, see Figure 82 on
previous page.
56160 (Inch)
56150 (Metric)
56010 (Inch)
56020 (Metric)
56240
NEW SHERLINE ACCESSORIES
Sherline introduces new accessories every year. See
our web site for new product introductions.
www.sherline.com
-44-
FIGURE 83
PART NUMBERS AND DESCRIPTIONS, SHERLINE LATHES AND MILLS
KEY TO MATERIALS: A=Aluminum, B=Brass, C=Composite, DC=Die Cast, P=Plastic, U=Urethane, S=Steel
PART NO. DESCRIPTION
1195
11980
11990
1297
22630
30220
30230
31080
32100
34000
34060
34100
34200
34210
34220
34230
34240
34250
34260
34270
34300
34400
34410
34500
35160
35170
40010
40020
40040
40050
40070
40080
40090
40100
40111
40112
40120
40160
40170
40175
40176
41176
40177
40178
40179
40180
40200
40220
40230
40240
40250
40260
40270
40280
40300
40320
40330
40340
40370
40380
40390
40400
40420
40440
40500
40501
40510
40520
40530
40540
40550
MATERIAL
1/4” HSS Right hand cutting tool
S
Rocker tool post body
A
Rocker tool post rocker
S
Headstock Spacer Block (Deluxe Mill)
A/S
Spring (in Z-Axis Saddle Nut)
S
Toggle Switch Retaining Ring
S
Toggle Switch
-10-32 x 3/8” Flat Point Set Screw
S
10-32 Hex Nut
S
Oversize Handwheel (Inch)
A
Thrust Bearing Washer Set
Ball
Oversize Handwheel (Metric)
A
2” Zero Adjustable Hndwhl. Asby., (Inch)
A/S
2” Handwheel Body
A
Handwheel Locking Nut
S
Y Axis/Crosslide Collar (Inch)
A
Y Axis/Crosslide Collar (Metric)
A
6-32 x 7/8” Pan Head Screw
S
X, Z-axis and Leadscrew Collar (Inch)
A
X, Z-axis and Leadscrew Collar (Metric)
A
2” Zero Adjustable Hndwhl. Asby., (Met.)
A/S
2-1/2” Zero Adjust. Hndwhl. Asby., (Inch)
A/S
2-1/2” Handwheel Body
A
2-1/2” Zero Adjust. Hndwhl. Asby., (Met.) A/S
Graduated Clamping Ring
A
Moveable Clamping Ring
S
15” Lathe Bed
DC
Motor Bracket
DC
Drive Belt
U
1-5/8” Handwheel, Y Axis/Crosslide (Inch)
A
Faceplate
DC
1-5/8” Handwheel, X Axis/Leadscrew (Inch) A
Drive Dog
DC
Headstock Casing
A
Tailstock Casing (Gib style)
A
Tailstock Gib
B
Lathe Bed
S
Preload Nut
S
Saddle Nut (Inch)
B
Column Saddle Travel Extension
S
Column Locking Lever (Inch)
B
Column Locking Lever (Metric)
B
Saddle Nut Assembly w/ Ball, Z-Axis (Inch) B
1/8” Ball
S
Saddle Nut, Z-Axis, w/o Ball or Spring (Metric) B
Tool Post
A
15” Leadscrew (LH) (Inch)
S
Feed Screw (Tailstock spindle, LH) (Inch)
S
Headstock Spindle
S
Headstock Pivot Pin, Lathe
S
Tool Post Tee Nut
S
Head Key
S
Tailstock Spindle (Inch)
S
Thrust Collar
S
Leadscrew Thrust
S
Bearing Washer
S
10-32 x 5/8” Socket Head Cap Screw
S
10-32 x 1” Socket Head Cap Screw
S
Leadscrew Support (Metric 41370)
S
#1 Morse Center
S
#0 Morse Center
S
Plug Button
P
Headstock Bearing
Ball
Self Tapping Screw
S
10-24 x 7/8” Socket Head Cap Screw
S
10-32 x 1/2” Button Head Socket Screw
S
10-32 x 3/8” Socket Head Cap Screw
S
10-32 x 3/16” Cup Point Set Screw
S
5-40 x 3/8” Socket Head Cap Screw
S
5/16-18 X 3/4” Cone Point Set Screw
S
5/32” Hex Key
S
PART NO. DESCRIPTION
40560
40570
40580
40590
40600
40620
40630
40640
40660
40670
40690
40760
40820
40860
40870
40890
40900
40910
40980
40990
41040
41050
41080
41110
41130
41170
41177
41179
41200
41220
41270
41890
43100
43110
43120
43130
43140
43150
43160
43170
43180
43190
43200
43230
43360
43450
43460
44010
44120
44200
44210
44220
44221
44222
44230
44880
45010
45030
45040
45070
45160
45170
45180
45190
45200
50010
50050
50130
50140
50150
50160
MATERIAL
3/16” Hex Key
S
3/32” Hex Key
S
Spindle Bar
S
1/4” I.D. Washer
S
10-32 x 1/4” Flat Point Set Screw
S
Power Cord, USA
-Power Cord, UK
-Power Cord, Europe
-3/16” I.D. Washer
S
10-32 x 1/2” Socket Head Cap Screw
S
10-32 x 3/4” Socket Head Cap Screw
S
10-32 x 5/8” Thumbscrew
S
Gib Lock
S
Tailstock Locking Screw Grommet
P
Tailstock Spindle Locking Screw
S
Slide Screw Insert (Inch)
B
10-32 x 3/8” Flat Head Socket Screw
S
Saddle
A
Gib, lathe crosslide, mill X- and Y-axes
C
Gib, lathe saddle, mill Z-axis
C
1-5/8” Handwheel, X-axis/Leadscrew (Metric) A
1-5/8” Handwheel, Y-axis/Crosslide (Metric) A
6-32 Hex Nut
S
Tailstock Casing
A
DC Speed Control Knob and Set Screw
P/S
Saddle Nut
B
Saddle Nut Assembly w/ Ball, Z-axis (Metric) B
Saddle Nut, Z-axis, w/o Ball or Spring (Metric) B
15” Leadscrew (LH) (Metric)
S
Feed Screw (Tailstock, LH) (Metric)
S
Tailstock Spindle (Metric)
S
Slide Screw Insert (Metric)
B
DC Motor Standoff
A
DC Speed Control Case
P
DC Speed Control Hinge Plate
P
DC Speed Control Cover Mounting Plate
P
DC Speed Control Tab, Small
P
DC Speed Control Tab, Large
P
Belt Guard, Outer
P
6-32 x 1-3/8” Pan Head Screw
S
Belt Guard, Inner
P
#2 x 1/4” Flat Head Sheet Metal Screw
S
DC Speed Control Label
Foil
Stepped Main Spindle Pulley
A
Stepped Motor Pulley
A
DC Motor
-DC Speed Control Electronics
-24” Lathe Base
DC
24” Lathe Bed
S
24” Leadscrew (LH) (Inch)
S
Slide Screw (Inch)
S
Slide Screw (Metric)
S
CNC Slide Screw (Inch)
S
CNC Slide Screw (Metric)
S
24” Leadscrew (LH) (Metric)
S
Crosslide
A
Leadscrew, Z-axis (LH) (Inch)
S
Column Bed
S
Saddle, Z Axis
A
Lock, Teflon
P
Leadscrew, Z-axis (LH) (Metric)
S
Column Saddle Lock
P
3/16” Ball Bearing
S
#10 Type B Washer
S
Leadscrew Thrust, Bored
S
10” Mill Base
A
Column Base
A
Backlash Nut, X-axis (Inch)
B
Backlash Nut, Y-axis (Inch)
B
Anti-backlash Lock
B
Leadscrew, Y-axis (Inch)
S
-45-
PART NO. DESCRIPTION
50170
50171
50180
50190
50200
50210
50211
50220
50240
50280
50910
51130
51140
51160
51170
51171
51200
54020
54120
54160
54161
54170
54171
54180
54190
56010
56020
56110
56130
56150
56160
56200
56210
56220
56230
56240
56330
56350
56400
56440
56450
56460
56470
56550
56660
56770
67021
67024
67025
67026
67027
67028
67029
67040
67050
67051
67052
67102
67105
67106
67107
67108
67109
67111
67115
67120
67150
67151
67152
90060
90080
MATERIAL
Leadscrew, X-axis (Inch)
S
CNC Leadscrew, X-axis (Inch)
S
Mill Table
A
X-axis Lock
S
Nut, Y-axis (Inch)
B
8-32 x 1/4” Pan head Screw
S
8-32 x 1/4" Button Head Screw
S
1/4-20 x 1-3/4” Socket Head Cap Screw
S
Headstock Pivot Pin, Mill
S
Thrust Collar, Mill
S
Saddle
A
Backlash Nut, X-axis (Metric)
B
Backlash Nut, Y-axis (Metric)
S
Leadscrew, Y-axis (Metric)
S
Leadscrew, X-axis (Metric)
S
CNC Leadscrew, X-axis (Metric)
S
Nut, Y-axis (Metric)
B
12” Mill Base, Deluxe Engraved (Inch)
A
12” Mill Base, Deluxe Engraved (Metric)
A
Leadscrew, Deluxe Mill, Y-axis (Inch)
S
CNC Leadscrew, Deluxe Mill, Y-axis (Inch)
S
Leadscrew, Deluxe Mill, Y-axis (Metric)
S
CNC Leadscrew, Y-axis Deluxe Mill (Metric) S
Mill Table, Deluxe Engraved (Inch)
A
Mill Table, Deluxe Engraved (Metric)
A
#2000 Mill Base (Inch)
A
#2000 Mill Base (Metric)
A
Extension Bolt
S
#2000 Arm Hold-down Bolt
S
#2000 Y-axis Leadscrew (Metric)
S
#2000 Y-axis Leadscrew (Inch)
S
#2000 Arm Hold-down Washer
A
3/8-16 x 2” Shouldered Bolt
S
#2000 Swing Arm Side
A
Flange Nut
S
1/4-20 x 1-1/2” SHCS
S
#2000 Swing Arm Side (Engraved)
A
Column Adjustment Block
A
#2000 Arm Spacer Block
A
#2000 Arm Mount
S
Index Tab
S
8-32 x 1/4” Button Head Screw
S
3/32” x 1/2” Dowel Pin
S
#2000 Column Top
A
#2000 Column Base
A
Column Spacer
A
CNC Mill Column Bed
S
CNC 15” Leadscrew (LH) (Inch)
S
CNC 15” Leadscrew (LH) (Metric)
S
CNC 24” Leadscrew (LH) (Inch)
S
CNC 24” Leadscrew (LH) (Metric)
S
CNC Z-axis Leadscrew (LH) (Inch)
S
CNC Z-axis Leadscrew (LH) (Metric)
S
CNC Leadscrew Thrust (Lathe)
S
CNC Mill Table (No engraving)
A
CNC Mill Table (Engraved Scales, Inch)
A
CNC Mill Table (Engraved Scales, Metric)
A
Stepper Motor Mount (all axes)
A
CNC Coupling
S
CNC Preload Nut, RH (Inch)
S
CNC Preload Nut, LH (Inch)
S
CNC Preload Nut, RH (Metric)
S
CNC Preload Nut, LH (Metric)
S
8-32 x 3/4” SHCS
S
5-40 x 7/8” SHCS
S
CNC Preload Bearing
Ball
CNC 10” Mill Base
A
CNC 12” Deluxe MIll Base (Inch)
A
CNC 12” Deluxe MIll Base (Metric)
A
DC Speed Control 5K Potentiometer
-3/8-32 Hex Nut
S
MACHINING BASICS—USING THE HANDWHEELS
P
keep a smooth, continuous feed going. On small machines, the
handwheel is turned by its outer knurled surface using the thumb
and a finger of one hand. Then, as that hand is released, the
thumb and finger of the other hand pick up the rotation. Using
the handle on the handwheel can introduce pushing and pulling
motions that can adversely affect the finish. (See Figure 83.)
recision leadscrews and the handwheels that drive
them make it possible to produce highly accurate parts on a
mill or lathe. Here are some tips that should help first-time
machinists get off to a good start.
HANDWHEEL INCREMENTS
The handwheels on Sherline machines are marked in increments
of one one-thousandth of an inch (.001") for inch models or one
one-hundredth of a millimeter (.01 mm) for metric models. One
turn of the handwheel causes the leadscrew to advance the tool
or part .050" (inch models) and 1 mm (metric models). The
leadscrews are precision rolled and are quite accurate. Therefore,
moving the handwheel three rotations, for example, moves that
axis exactly .150" (or .03mm on metric machines). This precise
method of moving the tool or part is what makes it possible to
make accurate parts on a metalworking lathe or mill.
When advancing the CROSSLIDE handwheel to take a cut on
the lathe, keep in mind that the amount of metal removed is
actually TWICE the amount you dial in. You are removing a given
amount of material from the RADIUS of the part, which means
you are actually removing twice that amount from the
DIAMETER of the part. (Some lathes are set up with the crosslide
feed reading the amount the diameter is reduced; however, since
it is possible for Sherline lathes to also be used in a milling
configuration where the crosslide feed becomes the X-axis feed
for milling, this system was not used.)
TURNING THE HANDWHEELS
Each handwheel has a small handle. This is mainly used to
advance the leadscrew quickly over long distances. When
actually making a cut, or at least when making the final cut on a
part, most machinists will turn the handwheel itself, using the
outer surface and alternating back and forth between hands to
FIGURE 83—A
two-handed technique for turning
the handwheels
yields a better final
finish on your part.
Shown in use here
is an adjustable
“zero” handwheel.
ADJUSTABLE “ZERO” HANDWHEELS
Adjustable handwheels are optional on all Sherline machines
and are standard on the deluxe models. The increments are marked
on a collar which can be disengaged from the handwheel and
reset to “zero” or any other desired setting. To release the collar,
turn the black, knurled release knob on the outer face of the
handwheel counterclockwise. The collar can then be adjusted
without moving the handwheel itself. When reset to zero, carefully
retighten the black locking knob to reengage the collar and then
advance the handwheel. The advantage of this system is that it
can eliminate errors when “dialing in” a dimension, as you are
starting from zero each time, rather than adding one number to
another to come up with the next stopping point.
TECHNICAL SPECIFICATIONS
LATHES
Swing over bed
Swing over carriage
Distance between centers
Hole through spindle
Spindle nose ext. thread
Spindle nose int. taper
Travel of crosslide
Tailstock spindle taper
Protractor graduations
Handwheel graduations
Electronically controlled
spindle speed range
Length overall*
Width overall*
Height overall*
Shipping weight
4000 (4100)
4400 (4410)
VERTICAL MILLS
3.50" (90 mm)
1.88" (48 mm)
8.00" (200 mm)
.405" (10 mm)
3/4-16 T.P.I.
#1 Morse
4.25" (110 mm)
#0 Morse
0° to 45° by 5°
.001" (.01 mm)
3.50" (90 mm)
1.88" (48 mm)
17.00" (430 mm)
.405" (10 mm)
3/4-16 T.P.I.
#1 Morse
4.25" (110 mm)
#0 Morse
0° to 45° by 5°
.001" (.01 mm)
70 to 2800 RPM
23" (584 mm)
10.25" (260 mm)
8" (203 mm)
24 lb. (10.9 kg)
70 to 2800 RPM
32.5" (826 mm)
10.55" (267 mm)
8.5" (216 mm)
30 lb. (13.6 kg)
Max. clearance,
table to spindle
Throat (no spacer)
(w/ headstock spacer)
Travel, X-axis
Travel, Y-axis
Travel, Z-axis
Hole through spindle
Spindle nose ext. thread
Spindle nose int. taper
Handwheel graduations
Electronically controlled
Spindle speed range
Width overall*
Depth overall*
Height overall (Max.)*
Table size
MOTOR SPECIFICATIONS
Input voltage—100 to 240 VAC, 50 to 60 Hz
Output to motor—90 VDC
Current draw—.5 to 15 amps depending on load
No-load output shaft speed—6000 RPM (no pulley)
NOTE: Motor and speed control are available separately.
Part numbers are as follows:
P/N 33050—DC Motor and Speed Control
P/N 33060— Headstock, DC Motor, Speed Control
Hold-down provision
Shipping weight
Movements in addition
to X-, Y- and Z-axes
5000 (5100)
5400 (5410)
2000 (2010)
8.00" (203 mm)
2.25" (50 mm)
(optional)
9.00" (228 mm)
3.00" (76 mm)
6.25" (159 mm)
.405" (10 mm)
3/4-16 T.P.I.
#1 Morse
.001" (.01 mm)
8.00" (203 mm)
2.25" (50 mm)
3.50" (90mm)
9.00" (228 mm)
5.00" (127 mm)
6.25" (159 mm)
.405" (10 mm)
3/4-16 T.P.I.
#1 Morse
.001" (.01 mm)
9.00" (229 mm)
(Adjustable)
(Adjustable)
9.00" (228 mm)
7.00" (178 mm)
5.38" (137 mm)
.405" (10 mm)
3/4-16 T.P.I.
#1 Morse
.001" (.01 mm)
70 to 2800 RPM
14.75" (375 mm)
11.75" (298 mm)
20.75" (527 mm)
2.75" x 13.00"
(70 mm x 330 mm)
2 T-slots
33 lb (15.0 kg)
Headstock rotation
(90° L/R)
70 to 2800 RPM
15.00" (381 mm)
14.00" (356 mm)
20.75" (527 mm)
2.75" x 13.00"
(70 mm x 330 mm)
2 T-slots
36 lb (16.3 kg)
Headstock rotation
(90° L/R)
*All overall dimensions include motor and speed control.
-46-
70 to 2800 RPM
15.00" (381 mm)
22.25" (565 mm)
23.38" (568 mm)
2.75" x 13.00"
(70 mm x 330 mm)
2 T-slots
38 lb (17.2 kg)
Headstock rotation
(90° L/R),
Column rotation (90° L/R),
Column pivot (90° Fwd/Bk),
Column swing (90°L/R),
Col. travel (In/Out) 5.5" (140 mm)
Sherline’s owner, Joe Martin, has put together the ultimate book for the Sherline machinist...
This book gives you not just the “hows,”
but also the “whys” of machining
The perfect “next step” beyond this instruction book
Right now you are holding one of the most complete
instruction booklets ever given away with any machine
tool, regardless of size or price. However, as complete as it
is, most new machinists will have
more questions than can be
answered in a basic instruction
guide. The book, Tabletop
Machining, gave Sherline’s
owner, Joe Martin, the chance to
stretch out and expand these basic
instructions to include much more
detail on the machines and
processes related to working with
metal. Naturally, the book can not
provide step-by-step instructions
for your particular project, but
rather it concentrates on the
basics of metalworking. Armed
with the right facts, tips and
techniques, the machinist can then
apply what is learned to his
particular needs. Information is
given on selecting materials; using
a lathe and a mill; using
measurement tools; coolants;
sharpening cutting tools; using
accessories for threading,
indexing and gearcutting; setting up a home shop and much
more. Plans and instructions for several simple projects
are provided for beginning machinists.
Creative inspiration as well as instruction
A gallery of photos of superb miniature projects will show
you what others have been able to produce using miniature
Enjoy the work of some of the world’s
best craftsmen at
www.CraftsmanshipMuseum.com
machine tools. Seeing these fine projects will set your mind
to work in all sorts of new directions. A history of Sherline
tools is also included. It is written from the point of view
of giving you some guidance if you’ve ever thought of
starting your own business or
taking a product of your own to
market.
Printing quality you’d expect
in a book that chronicles the
quest for perfection
This book will be equally at home
on your living room coffee table
or your shop workbench. Printed
on 344 pages of high quality,
glossy paper, this large 8.5" x 11"
soft-bound book is packed with
over 400 detail-rich color photos
and hundreds of informative line
drawings by longtime Sherline art
director and technical illustrator,
Craig Libuse. The “lay-flat”
binding makes it easy to read and
use as a reference in your shop.
The 12-point cover is laminated
with a plastic coating to protect
it. Both the quality of the printing
and the information within have
resulted in excellent reviews from customers and magazine
editors alike. If you like tools and working on small, intricate
projects, you should plan on adding this book to your library.
P/N 5301 (Softbound)–$40.00
P/N 5302 (Hardbound, author signed)–$60.00*
*NOTE: $10.00 of purchase price is donated to the Joe Martin Foundation for Exceptional Craftsmanship.
SHERLINE
PRODUCTS
INCORPORATED 1974
3235 Executive Ridge, Vista, CA 92083-8527
Phone Toll Free: 1-800-541-0735 • Local/International/Technical Assistance: 1-760-727-5857
Fax: (760) 727-7857 • Internet: www.sherline.com • E-mail: [email protected]
Order 24 hours a day on line at
www.SherlineDirect.com
PRINTED IN USA
P/N 5326
SHERLINE
PRODUCTS
INCORPORATED 1974
MINIATURE MACHINE TOOLS
ASSEMBLY AND
INSTRUCTION GUIDE
FIFTH EDITION
©2003, Sherline Products Inc.


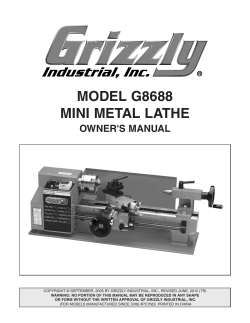


© Copyright 2026