
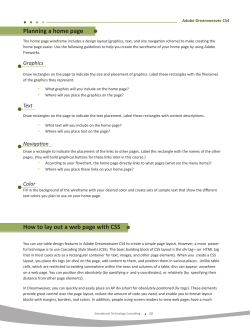
How to lay out a web page with CSS
Adobe Dreamweaver CS5
Activity 2.6 guide
How to lay out a web page with CSS
You can use table design features in Adobe Dreamweaver CS5 to create a simple page layout. However, a more
powerful technique is to use Cascading Style Sheets (CSS). The basic building block of CSS layout is the div tag—an
HTML tag that in most cases acts as a rectangular container for text, images, and other page elements. When you
create a CSS layout, you place div tags (or divs) on the page, add content to them, and position them in various
places. Unlike table cells, which are restricted to existing somewhere within the rows and columns of a table, divs can
appear anywhere on a web page. You can position divs absolutely (by specifying x- and y-coordinates), or relatively
(by specifying their distance from other page elements).
In Dreamweaver, you can quickly and easily place an AP div (short for absolutely positioned div tags). These
elements provide great control over the page layout, reduce the amount of code you need, and enable you to format
layout blocks with margins, borders, and colors. In addition, people using screen readers to view web pages have a
much easier time browsing pages built with CSS because the code is simpler and shorter. The limitation of an AP div,
however, is that since it is absolutely positioned, its position never adjusts on the page to accommodate to the size of
the browser window.
You will learn more about CSS in later units.
© 2010 Adobe Systems Incorporated
How to lay out a web page with CSS
1
Activity 2.6 guide
Adobe Dreamweaver CS5
Creating a new page
In the following steps, you will create a new HTML page to which you will later add divs.
To create a new page:
1. Start Dreamweaver.
2. Make sure the Files panel is visible (Figure 1).
It is docked at the right side of the screen. If the Files
panel is not open, select Window > Files.
3. Make sure your portfolio site is selected. If it is not, click
the Site pop-up menu and select your portfolio site.
4. Select File > New.
The New Document dialog box opens (Figure 2).
5. With the Blank Page category selected, click HTML
under Page Type and <none> under Layout.
6. Click Create.
Figure 1 Files panel
A new untitled HTML document opens.
7. To save the untitled document as your home page, select
File > Save As.
The Save As dialog box opens to the root folder of your
portfolio site.
8. Name the new page index.html and click Save.
The new file, index.html, is added to the root folder in the
Files panel (Figure 3).
Figure 2 New Document dialog box
Figure 3 To save the untitled document as your
home page, select File > Save As.
2
How to lay out a web page with CSS
© 2010 Adobe Systems Incorporated
Adobe Dreamweaver CS5
Activity 2.6 guide
Inserting a div tag
To insert a div tag:
1. Select the Layout category in the Insert panel.
Draw AP Div button
Make sure the Standard mode button is selected
(Figure 4).
2. Click the Draw AP Div button (Figure 4).
The mouse pointer chnages to a cross when you move it
over the page.
3. Select one of the page areas on your storyboard. To create
the div that will define this area on your page, drag a
rectangle in the Dreamweaver document. When the
rectangle matches the page area’s size on your
storyboard, release the mouse button.
Figure 4 Insert panel, Layout category
4. Click the border of the div to select it.
Handles appear along the border (Figure 5) and the div
properties appear in the Property inspector.
5. Make sure the Property inspector is open (Figure 6).
It is docked at the bottom of the screen. If the Property
inspector is not open, select Window > Properties.
6. Click in the CCS-P Element ID box (Figure 6) and enter
a name for the div.
Choose a unique name that will help you remember the
div’s contents, such as header or navigation.
Note: “CSS-P” is a commonly accepted abbreviation for
“CSS Positioning”.
Figure 5 Div inserted and selected
CSS-P Element ID box
7. Click the Bg Color box and select a color in the color
picker.
The div changes to the selected color.
8. Open the AP Elements panel (Window > AP Elements).
Figure 6 Property inspector
You’ll see that Dreamweaver has added the new div to
the list of AP Elements.
9. Click once outside the new div to deselect it.
A thin black line appears around the div. This line does
not appear in a browser. If you do not see the line, select
View > Visual Aids > CSS Layout Outlines.
10. Continue adding divs for all the sections on your
storyboard. You can place divs directly alongside one
another (Figure 7).
AP
Elements
panel
11. Save your page.
Figure 7 Multiple divs on page
© 2010 Adobe Systems Incorporated
How to lay out a web page with CSS
3
Activity 2.6 guide
Adobe Dreamweaver CS5
Resizing divs
You can resize an individual div or simultaneously resize multiple divs to make them the same width and height.
Note: If the Prevent Overlaps option is selected in the AP Elements panel, you will not be able to resize a div so it
overlaps with another div.
To resize a div:
1. Select a div by clicking its border or by clicking the div’s
name in the AP Elements panel.
2. Do one of the following to resize the div:
•
To resize by dragging, drag any of the div’s resize
handles (Figure 8).
•
To resize one pixel at a time, hold down Control
(Windows) or Option (Mac OS) while pressing an
arrow key.
Note: The arrow keys move the right and bottom
borders of the div; you can’t resize the top and left
borders with this technique.
•
In the Property inspector, type values for width (W)
and height (H).
Div resize handle
Figure 8 Resize by dragging
Moving divs
You can move divs in Design view in much the same way you move objects in most basic graphics applications.
Note: If the Prevent Overlaps option is selected in the AP Elements panel, you will not be able to move a div so that
it overlaps another div.
To move a div:
1. Select one or more divs.
2. Do one of the following:
•
•
To move by dragging, drag the div’s selection handle
(Figure 9).
Selection handle
To move one pixel at a time, use the arrow keys.
Figure 9 Moving a div
4
How to lay out a web page with CSS
© 2010 Adobe Systems Incorporated
Adobe Dreamweaver CS5
Activity 2.6 guide
Adding content to divs
You can add images, text, and other content (such as Flash movies) to your divs just as you would elsewhere in a web
page.
To add content to a div:
1. To insert an image in a div, click in the div and select
Insert > Image on the menu bar.
Note: Make sure the div is sized large enough to hold the
image or other content. If the div is sized smaller than the
image, the div may not display correctly in all browsers.
2. In the Select Image Source dialog box, locate and select
an image to insert (such as your page banner). Then click
OK (Windows) or Choose (Mac OS).
The image appears on the div (Figure 10).
3. To format the image in the div, select the image and
select formatting elements in the Property inspector.
4. To add text to a div, click in the div and type text or paste
text copied from another document.
Figure 10 Div with image added
© 2010 Adobe Systems Incorporated
How to lay out a web page with CSS
5
Activity 2.6 guide
Adobe Dreamweaver CS5
Viewing div tags by using Live view
You can use a feature called Inspect mode in Live view to view the code generated by adding the div tags.
To view div tags using by using Inspect mode in Live view:
1. Click the Inspect button (Figure 11).
A message appears below the Inspect button asking if
you want to switch workspace settings.
2. Click Yes (Windows) or Switch Now (Mac OS).
When you do, the following settings are applied:
Inspect button
•
CSS styles panel is open to Current mode. When you
move the mouse pointer over a page element created
with CSS, details about the rule appear in the CSS
styles panel.
•
Split Code/Live view is enabled. This lets you see
the code alongside the design display. Live view
displays the page as it will appear in a web browser,
without your needing to launch a browser.
•
Live Code is enabled. This means that the page
appears as it will in a web browser.
Figure 11 Inspect button
3. Move the mouse pointer over a div in the right pane.
Observe that the div tag is highlighted in the left pane
(Figure 12).
Highlighted tag
Div
Figure 12 Inspect mode
Previewing divs in a browser
To preview the page in a browser:
•
Select File > Preview In Browser and then select a
browser from the submenu (or press F12).
The page opens in the selected browser (Figure 13).
Note: It is important to preview in a browser to make
sure your design fits in a standard browser window. Try
resizing the browser window to see the effect on your
page.
Figure 13 Web page in a browser window
6
How to lay out a web page with CSS
© 2010 Adobe Systems Incorporated


© Copyright 2026