ABC
docz
Explore
Log in
Create new account
Download
Report
art and entertainment
visual art and design
design
How to sharpen a hoof knife How to sharpen a hoof knife Tristan Jubb Livestock Health Systems Australia
Basic assembly instructions: What you will need: 1 ..Trace.knife.tang.onto.handles . Knife.blade .
Document 106240
Architectural Abstract Baroque WET-FELTED ACOUSTICAL CEILING TILES & PANELS
DIAMOND SHARPENING STONE
www.redheart.com
R.D.T.
Document 126842
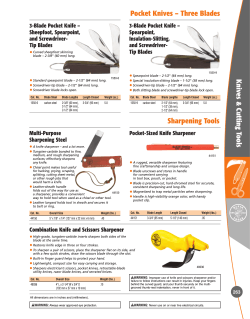
Pocket Knives – Three Blades
Intarsia-Backed High Chair •
Northwest Women’s Show It’s not just recipes, It’s understanding!
© Copyright 2026
About abcdocz
DMCA / GDPR
Report