
How to publish your data using the “Atarrabi” software
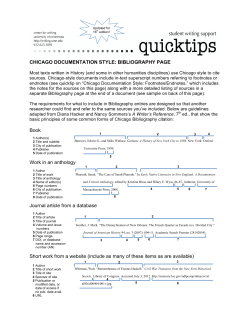
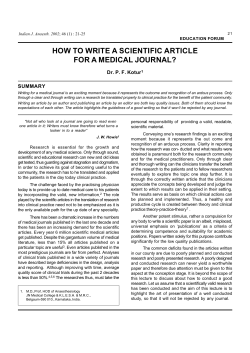
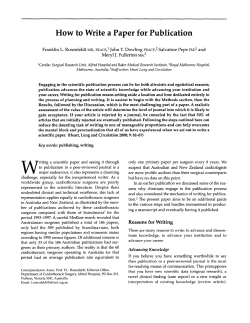
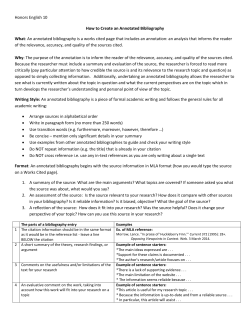
How to publish your data using the “Atarrabi” software
at World Data Center for Climate
Contact: [email protected]
Software version: 2.0
1 Introduction
The World Data Center for Climate1 (WDCC) encourages scientists to publish their data after they have
been archived in the WDCC computing center. In the course of the publication process the data will be
assigned a Digital Object Identifier (DOI) and a Uniform Resource Name (URN) which reference to the
data for the long-term. Once the data is successfully published the data can easily be cited by using the
DOI or URN (see box ’DOI Example’). In case the data is moved to another storage site both identifiers
can be updated to point to the new location.
DOI Example
Denhard, Michael (2009); dphase mpeps: MicroPEPS LAF-Ensemble run by DWD for the MAP D-PHASE
project. World Data Center for Climate.
doi:10.1594/WDCC/dphase mpeps
http://dx.doi.org/10.1594/WDCC/dphase_mpeps
2 Involved Parties and Software Support
The publication process involves three parties:
The scientist: an authorized author or another person familiar with the primary data and the metadata,
who enters and checks the required metadata and provides additional documentation (e. g. plots,
additional information, notes about the performed quality assurance measures).
A publication agent: a WDCC representative who supervises the publication process. Each data publication process is assigned to a publication agent, who helps and supports the scientist and doublechecks the entered data.
The registration agency: an organisation able to register entries in the DOI database. WDCC registers
new DOIs via Technische Informationsbibliothek2 (TIB) Hannover. Since TIB is now a member of
the DataCite3 consortium the technical interfaces of DataCite are used to register new DOIs.
1
http://www.wdc-climate.de
http://www.tib-hannover.de/
3
http://www.datacite.org
2
1
After registration the data will be resolved by the DOI handle system and listed in different catalogs and
portals, e. g. the GetInfo4 portal of TIB.
The Atarrabi software is a web-based workflow system which is used by the WDCC to guide the
scientist through all necessary publication steps. This quick tour provides a step by step tutorial how to
use the Atarrabi software.
3 Requirements for Publication
Please assure the following requirements are met:
• The data comes from an observational experiment or is the result of a CMIP5 simulation.
• The data was successfully archived at WDCC as experiment or data set group and is listed in the
CERA5 catalog of WDCC.
• The WDCC informed you that the data is ready for publication and denominated the CERA
account name which has been granted to publish the data.
• It was specified by the authors and investigators
– which persons are to be enumerated as authors (order is relevant),
– which institutions are to be listed as contributing institutions, and
– which person is to be set as DOI contact (for enquiries regarding the data).
• Depending on the data type (observational data, CMIP5 model data) the system will ask for
additional metadata which has to be entered, such as
– relations to other data or publications,
– temporal and spatial coverage of the data
– used platforms and instruments, and
– quality assurance measures and result protocols.
4
5
https://getinfo.de/
Remark: For CMIP5 data publications the metadata out of the data headers and out of the CIM questionnaire are ingested
into the database of the DOI publication agency WDCC. A copy of the data is then long-term archived at WDCC.
2
4 Getting Started with Atarrabi
1. Open your browser and navigate to the Atarrabi site at http://cera-www.dkrz.de/atarrabi.
The page will look like in figure 1.
Figure 1: The Atarrabi home page.
2. If you are not logged-in, Atarrabi will only provide general information about data publication. To
get access to its publishing functions use your WDCC CERA account to login. If you do not have
a CERA account, use the link “Register new CERA user” to be presented with a registration form.
You will receive your CERA account credentials by email within three workdays.
3. Once you have been successfully authenticated you will be redirected to the “My publications” page
(see figure 2). Consider this page your personal workspace. The following functions are available:
• start a new publication (blue button at the very top of the page)
• a list of publication instances you have to do a task for (table “My work items”)
• a list of all publication instances to track instances you have submitted (table “My process
instances”)
• a list of finished publications (table “Archived processes”).
You can get back to this page anytime by using the link “My Publications” in the menu on the left.
3
Figure 2: The scientist home page.
4. Start a new publication by clicking the “Start new publication” button.
5. Atarrabi will list the experiments and data set groups which have been granted for publication and
are not subject of an already started publication process (see figure 3).
Figure 3: The entry selection view.
6. Select the entry you want to publish and press the button “Start publication”. Atarrabi will now
import all existing metadata from the CERA2 database. This could take a while, so please be
patient. In the following we will exemplarily publish CMIP5 model data.
7. Next you are presented with the first page of the Atarrabi publication wizard, the page “General”
(see figure 4). On the left hand side find the box “Process Overview” which shows all the pages you
will have to traverse. The currently visible page is printed in bold letters and marked with a small
triangle. You can navigate through the wizard by using the buttons at the bottom of the page.
Each wizard page is composed in a similar manner. You will find an introductory text right at
the top of the page. Sometimes a “more...” link option is available, which provides additional
instructions or information. All metadata fields provide a help text which becomes visible when
4
you move the mouse cursor over the icon. The metadata fields marked with a red asterisk (*) are
required to be filled to continue the publication process in the wizard.
If you have questions or comments aimed at the publication agent you can use the “Message to the
publication agent” text area which appears when clicking on the according expandable panel at the
very bottom of the page. This message will be sent to the publication agent during submission in
the last wizard step.
You can leave the wizard at any time by clicking the button “Save and exit”. Your data will be
saved and you will be redirected to the “My Publications” page. The unfinished publication process
will be listed in the “My work items” section (figure 2) where you can reenter the wizard to continue
the publication process.
Move on to the next page by pressing the “Continue” button.
Figure 4: The general view – the first page of the scientist wizard.
8. The second page of the wizard, the “Authors” view, will be rendered. Depending on the metadata already stored in the CERA database authors will be listed in the section “Selected authors
(ranked)”. In our example there are no authors predefined. To add a person to the author list you
will firstly search the CERA2 pool of existing persons. To do this start typing an author’s name.
The system will search as you type and present a result list below the search field. Once you have
found your desired person you can click the link “Select Author” to move this person to the author
list. If the person is not existing in the CERA database you can create a new person entry by
5
pressing the “Add new person” button below the search results. After you have selected or created
a new author the view will look like in figure 5.
Notice the order buttons on the right hand side of the author list. The order of the authors will be
the order of the authors in the data citation for the “cite by persons” option (see again “General”
page in figure 4). The action links in the column “Action” provide functionality like removing the
person from the author list and editing the contact data of the author or the address data of the
assigned institute. The latter two open a form panel to change or enter the data.
Figure 5: The author selection view (selected authors).
After you selected and edited all authors press “Continue” to get to the next page. Fill out the
forms on the following pages “DOI contact” and “Contributors” (in case you chose the “cite by
institutes” rule on the general page (figure 4), the order of the contributors will be the order of the
authors in the data citation string) in the same manner as the “Authors” view.
9. After the “Contributors” page you will be presented with the “Relations” view (see figure 6). This
page allows for editing and creating relations to other (data) publications. You will find a definition
of the available relation types by opening the text behind the “more...” link.
Figure 6: The relations view.
6
10. The next wizard page deals with the spatial and temporal coverage of the entry (see figure 7). Since
these metadata are extracted from the CMIP5 data header no changes are allowed. If the selected
location “World (global)” did not span the whole world, the map would show a rectangle of the
selected location. For comments or questions use, again, the “Message to publication agent” text
field. Click “Continue” to get to the next page.
Figure 7: The coverage view.
7
11. The next page of the wizard is named “Quality” (see figure 8). This page is about documenting the
data quality assurance procedures performed on the primary data and their results. Please describe
the quality checks in field “4. Description of your Quality Checks”. Moreover you can upload files
which will then be attached to the publication entry. Files can be images, text documents, XML
files etc. You can find a list of the accepted file formats below the file upload box. Click “Continue”
to get to the next page.
Figure 8: The quality view.
8
12. Now we have reached the last page of the publication wizard. This page will give you an overview
of all entered metadata. Please check the metadata carefully and go back in the wizard to change
or add data. In the authors and contributors sections you can get more details by clicking the name
of the person or institute. It is possible to download this summary as PDF or XML file for your
records. If you want being kept updated in case of status changes of the publication process, please
enter an email address.
After the review click “Submit”.
Figure 9: The summary view (fragment).
9
13. Atarrabi will present you with a confirmation page (figure 10). The process has now been handed
over to the publication agent who will double-check your submitted data. Depending on this check
the publication agent can accept or reject the publication.
Click “Back to start” to get back to your “My publications” page. Since you submitted the entry
to the publication agent the entry will not be listed in the “My work items” section anymore, but
you can track the status of the publication process in the “My process instances” section.
In case the publication agent rejects the publication you will be informed by email (if an email
address was provided) and there will be again an entry in the “My work items” section.
If the publication agent has accepted the publication and successfully registered the data at DataCite, your publication will show up in the section “Archived processes”.
Figure 10: The confirmation view.
Congratulations, you successfully prepared your data for publication!
10


© Copyright 2026