
I.1 What is MATLAB? I.1.1 Introduction
I.1
What is MATLAB?
I.1.1 Introduction
MATLAB stands for matrix (MAT) laboratory (LAB). It is a high performance language for
scientific computing. MATLAB integrates numerical computation, visualization, and
programming in an easy-to-use environment where problems and solutions are expressed in
familiar mathematical notations. With its interactive capabilities, you can solve many numerical
problems in a fraction of the time it would take to write a program in a language such as BASIC,
FORTRAN, or C. With MATLAB, you can develop new applications without writing a single
line of low-level computer code.
I.1.2 Starting and Ending a MATLAB Session
To start MATLAB on a PC or Macintosh (Mac), double-click on the MATLAB icon. To start
MATLAB on a UNIX system, type “matlab” at the operating system prompt.
To quit MATLAB at any time, type “quit” at the MATLAB prompt. On both the PC and the
Mac, you have the option to exit or quit from the file menu.
Remember
MATLAB reacts to your command only after the return or enter key is pressed.
I.1.3 MATLAB Windows
The Command Window
When you start MATLAB, the Command Window opens by default. The name “MATLAB
Command Window” appears at the top section of the MATLAB Window. In this window, you
communicate with the MATLAB interpreter. The MATLAB interpreter displays a prompt ( >> )
indicating that it is ready to accept commands from you.
For example, to enter a 1 ✖ 5 vector, you can enter the following command:
>>x = [1 2 3 4 5]
MATLAB responds:
>> x =
1
1 2 3 4 5
>>
To find the dimension of x, you can use the size command. . .
>> size(x)
MATLAB responds:
ans =
1
5
>>
indicating that x is a vector with 1 row and 5 columns.
Remember
MATLAB is case sensitive. “X” and “x” are distinctly different variables.
The icons at the top of the Command Window can be used for managing files, workspace,
editing, and getting online help.
Figure Windows
A figure window is used by MATLAB to display graphs. The number of figure windows
allowed in MATLAB depends on the amount of available memory in your system. Whenever
you ask MATLAB to plot a function for you, it automatically opens a figure window and plots
the desired function in that window. If you are interested in opening several figure windows, you
can do so by typing:
>>figure (x)
where x is the number assigned to the figure window. This number will appear in the title bar of
the figure window.
For example, if you are interested in seeing two plots in two different windows, you can type
>> figure (1)
2
which opens Figure No. 1 and
>>figure (2)
which opens Figure No. 2. The size and location of these windows can be easily
modified. You can move a window by clicking on the title bar and dragging it to a desired
location. You resize a figure window by moving the mouse pointer to the edge/corner of the
window until the pointer becomes a “resize handle.” Then you drag in the desired direction and
the window size adjusts accordingly.
We will discuss more windows in Chapters 4, 5, and 6.
I.1.4 What can MATLAB do for You ?
MATLAB provides the user with a set of high-level numerical and graphical routines.
The routines are written in C code and are optimized for high performance. Typical use of these
routines include:
Mathematics and computations
Algorithm development
Modeling, simulation, and prototyping
Data analysis
Simulation
Visualization
Scientific and engineering graphics
Application development
The basic data element in MATLAB is an array that does not require dimensioning.
This feature of MATLAB allows you to solve problems that can be formulated with a matrix or a
vector in a much faster time than it would take to write a program in C, FORTRAN, or BASIC.
For example, you can solve for the roots of the following polynomial:
f ( x ) = x 5 + 2 x 4 + 5x 3 + 12 x 2 + 5x − 15
in two simple steps. Step 1 is to tell MATLAB which polynomial you want to solve. This is done
by typing the following statement at the prompt in the command window:
>> p = [1 2 5 12 5 -15]
With this expression, you have given MATLAB sufficient information about the polynomial that
you want to solve. In step 2, you tell MATLAB to solve for the roots of the polynomial. This is
done by issuing the following command:
>>r = root(p).
3
With this command, MATLAB solves for the roots, displays them, and stores the roots in a
vector r. Here is the complete program used in MATLAB to solve for the roots of f(x).
» p = [1 2 5 12 5 -12]
p=
1
2
5 12
5 -12
» r = roots(p)
r=
0.2704+ 2.3713i
0.2704- 2.3713i
-1.6243+ 0.5818i
-1.6243- 0.5818i
0.7077
»
Plotting in MATLAB
MATLAB provides you with powerful 2-D and 3-D plot routines. For example, you can plot the
function defined below in two easy steps.
f ( x ) = sin( x ) + sin(3x )
In step 1 you define three parameters: the starting point of the graph, the distance between two
consecutive points on the graph, and the end of the graph. An example is given in the following
expression:
>>x = 0:0.01:6
Starting point of the graph
x = 0:0.01:6
End point of the graph
Distance between two consecutive points on the graph
4
In step 2, you plot the function f(x) by typing:
>>plot( (sin(x) + sin(3 * x))
After this command, MATLAB opens another window (Figure No.1 Window) and plots the
function as shown below.
2
1.5
1
0.5
0
-0.5
-1
-1.5
-2
0
100
200
300
400
500
600
700
There are many commands that allow you to control different aspects of a plot. We will discuss
these in Chapters I.5 and I.6.
I.1.5 MATLAB Functions
MATLAB provides you with many functions that can be used to solve different problems.
These functions fall in different categories. In the following table, we list some of the most
widely used operators and functions used in MATLAB.
In addition to the standard MATLAB functions, you can easily develop a customized function
using an M-file. In Chapter 3 we will show you how you can build your own
M-files to perform specific tasks.
General Purpose Commands
Managing Commands and Functions
Command
demo
help
info
lookfor
Description
Run demos
Online documentation
Information about MATLAB and MATHWorks
Keyword search through the help entries
5
path
type
what
which
Control MATLAB’s search path
List M-file
Directory listing of M, MAT, and MEX-files
Locate functions and files
Managing Variables and the Workspace
Command
clear
disp
length
load
pack
save
size
who
whos
Description
Clear variables and functions from memory
Display matrix or text
Length of vector
Retrieve variables from disk
Consolidate workspace memory
Save workspace variable to disk
Size of matrix
List current variables
List current variables, long form
Working with Files and the Operating System
Command
cd
delete
diary
dir
getenv
unix
!
Description
Change current working directory
Delete file
Save text of MATLAB session
Directory listing
Get environment values
Execute operating systems command; return result.
Execute operating system command.
Controlling the Command Window
Command
clc
echo
format
home
more
Description
Clear Command Window
Echo commands inside script files
Set output format
Send cursor home
Control paged output on Command Window
6
Starting and Quitting MATLAB
Command
matlabrc
quit
Startup
Description
Master startup M-file
Terminate MATLAB
M-file executed when MATLAB is invoked
Language Construct and Debugging
MATLAB as a Programming Language
Command
eval
feval
function
global
nargchk
Description
Execute string with MATLAB expression
Execute function specified by string
Add new function
Define global variable
Validate number of input arguments
Control Flow
Command
break
else
elseif
end
error
for
if
return
while
Description
Terminate execution of loop
Used with if
Used with if
Terminate the scope of for, while, and if statement
Display message and abort function
Repeat statement for a specific number of times
Conditionally execute statement
Return to invoking function
Repeat statements until a condition is met
Interactive Input
Command
input
keyboard
menu
pause
Description
Prompt for user input
Invoke keyboard as if it were a script-file
Generate menu of choice for user input
Wait for user response
7
Debugging
Command
dbclear
dbcont
dbdown
dbquit
dbstack
dbstatus
dbstep
dbstop
dbtype
dbup
Description
Remove breakpoint
Resume execution
Change local workspace context
Quit debugging mode
List who called whom
List all breakpoints
Execute one or more line
Set breakpoint
List M-file with line numbers
Change local workspace context
Elementary Matrices and Matrix Manipulation
Elementary Matrices
Command
eye
linspace
logspace
meshgrid
ones
rand
randn
zeros
:
Description
Identity matrix
Linearly spaced vector
Logarithmically spaced vectors
X and Y arrays for 3-D plots
Ones matrix
Uniformly distributed random numbers
Normally distributed random numbers
Zeros matrix
Regularly spaced vector
Matrix Manipulation
Command
diag
fliprl
flipud
reshape
rot90
tril
triu
Description
Create or extract diagonals
Flip matrix in the left/right direction
Flip matrix in the up/down direction
Change size
Rotate matrix 90 degrees
Extract lower triangular part
Extract upper triangular part
8
Specialized Matrices
Command
Description
compan
Companion matrix
hadamard
Hadamard matrix
hankel
Hankel matrix
hilb
Hilbert transform
invhilb
Inverse Hilbert matrix
magic
Magic square
pascal
Pascal matrix
rosser
Classic symmetric eigenvalue test problem
toeplitzToeplitz matrix
vander
Vandermonde matrix
wilkinson
Wilkinson’e eigenvalue test matrix
Elementary Matrix Functions
Command
cond
det
norm
null
orth
rcond
rank
rref
trace
Description
Matrix condition number
Determinant
Matrix or vector norm
Null space
Orthogonalization
LINPAK reciprocal condition estimator
Number of linearly independent rows or columns
Reduced row echlon form
Sum of diagonal elements
Linear Equations
Command
chol
inv
iscov
lu
nnls
pinv
qr
\ and /
Description
Cholesky factorization
Matrix inverse
Least square in the presence of known covariance
Factors from Gaussian elimination
Non-negative least-squares
Pseudoinverse
Orthogonal-triangular decomposition
Linear equation solution
9
Matrix Eigenvalues and Singular Values
Command
balance
cdf2rdf
eig
hess
poly
qz
rsf2csf
schur
svd
Description
Diagonal scaling to improve eigenvalue accuracy
Complex diagonal form to real block diagonal form
Eigenvalues and eigen vectors
Hessenberg form
Characteristic polynomial
Generalized eigenvalues
Real block diagonal form to complex diagonal form
Schur decomposition
Singular value decomposition
Advanced Matrix Functions
Command
expm
exmp1
exmp2
exmp3
funm
logm
sqrtm
Description
Matrix exponential
M-file implementation of exmp
Matrix exponential via Taylor series
Matrix exponential via eigenvalues and eigenvectors
Evaluate general matrix function
Matrix logarithm
Matrix square root
Data Interpolation
Command
griddata
interp1
interp2
interpft
Description
Data gridding
1-D interpolation
2-D interpolation
1-D interpolation using FFT method
Data Analysis
Command
cumprod
cumsum
max
mean
median
Description
Cumulative product of elements
Cumulative sum of elements
Largest component
Average or mean value
Median value
10
min
prod
sort
std
sum
trapz
Smallest component
Product of elements
Sort of ascending order
Standard deviation
Sum of elements
Numerical integration using trapezoidal method
Special Variables and Constants
Command
ans
computer
eps
flops
i, j
inf
NaN
nargin
nargout
pi
realmax
realmin
Description
Most recent answer
Computer type
Floating point relative accuracy
Count the floating point operations
Imaginary units
Infinity
Not-a-Number
Number of function input arguments
Number of function output arguments
3.1415926535897…
Largest floating point number
Smallest floating point number
Time and Date
Command
clock
cputime
date
etime
tic, toc
Description
Wall clock
Elapsed CPU time
Calendar
Elapsed time function
Stopwatch timer functions
Operators and Special Characters
Command
+
−
*
.*
^
.^
kron
Description
Plus
Minus
Matrix multiplication
Array multiplication
Matrix power
Array power
Kronecker tensor product
11
\
/
./
:
()
[]
.
..
...
,
;
%
!
‘
.’
=
==
<>
&
|
~
xor
Left division
Right division
Array division
Colon
Parentheses
Brackets
Decimal point
Parent directory
Continuation
Comma
Semicolon
Comment
Exclamation point
Transpose and quote
Nonconjugated transpose
Assignment
Equality
Relational operator
Logical AND
Logical OR
Logical NOT
Logical exclusive OR
Elementary Mathematical Functions
Command
abs
acos
acosh
angle
asin
asinh
atan
atan2
atanh
ceil
conj
cos
cosh
exp
fix
floor
imag
log
log10
Description
Absolute value
Inverse cosine
Inverse hyperbolic cosine
Phase angle
Inverse sine
Inverse hyperbolic sine
Inverse tangent
Four quadrant inverse tangent
Inverse hyperbolic tangent
Round towards plus infinity
Complex conjugate
Cosine
Hyperbolic cosine
Exponential
Round towards zero
Round towards minus infinity
Complex imaginary part
Natural logarithm
Base 10 (common ) logarithm
12
real
rem
round
sign
sin
sinh
sqrt
tan
tanh
Complex real part
Remainder after division
Round towards nearest integer
Signum function
Sine
Hyperbolic sine
Square root
Tangent
Hyperbolic tangent
Finite Difference
Command
del2
diff
gradient
Description
Five-point discrete Laplacian
Difference function and approximate derivative
Approximate gradient
Correlation
Command
corrcoef
cov
Description
Correlation coefficients
Covariance matrix
Filtering and Convolution
Command
conv
conv2
deconv
filter
filter2
Description
convolution and polynomial multiplication
Two-dimensional convolution
Deconvolution and polynomial division
One-dimensional digital filter
Two-dimensional digital filter
Fourier Transform
Command
cplxpair
fft
fft2
fftshift
Description
Sort numbers into complex conjugate pairs
Discrete Fourier transform
Two-dimensional discrete Fourier transform
Move zeroth lag to center of spectrum
13
ifft
Inverse discrete Fourier transform
ifft2
Inverse two-dimensional discrete Fourier transform
nextpow2
Next higher power of 2
unwrapRemove phase angle jumps across 360o boundaries
Polynomial and Interpolation Functions
Command
poly
polyder
polyfit
polyval
polyvalm
residue
roots
Description
Construct polynomial with specified roots
Differentiate polynomial
Fit polynomial to data
Evaluate polynomial
Evaluate polynomial with matrix argument
Partial-fraction expansion
Find polynomial roots
Function Functions
Command
fmin
fmins
fplot
fzero
ode23
ode45
quad
quad8
Description
Minimize function of one variable
Minimize function of several variables
Plot function
Find zero of function of one variable
Solve differential equations, low order method
Solve differential equations, high order method
Numerically evaluate integral, low order method
Numerically evaluate integral, high order method
Sparse Matrix Functions
Command
spdiags
speye
sprands
sprandsym
Description
Sparse matrix formed from diagonals
Sparse identity matrix
Sparse random matrix
Sparse symmetric random matrix
14
Full to Sparse Conversion
Command
find
full
sparse
spconvert
Description
Find indices of nonzero entries
Convert sparse matrix to full matrix
Create sparse matrix from nonzero and indices
Convert from sparse matrix external format
Working with Nonzero Entries of Sparse Matrices
Command
issparse
nnz
nonzeros
nzmax
spalloc
spones
Description
True if matrix is sparse
Number of nonzero entries
Nonzero entries
Amount of storage allocated for nonzero entries
Allocate memory for nonzero entries
Replace nonzero entries with ones
Visualizing Sparse Matrices
Command
gplot
spy
Description
Plot graph
Visualize sparsity structure
Reordering Algorithms
Command
colmmd
colperm
dmperm
randpers
symmmd
symrcm
Description
Column minimum degree
Order columns based on nozero count
Dulmage-Mendelsohn decomposition
Random permutation vector
Symmetric minimum degree
Reverse Cuthill-Mckee ordering
Norm, Condition Number, and Rank
Command
condest
normest
sprank
Description
Estimated 1-norm condition
Estimate 2-norm
Structural rank
15
Miscellaneous
Command
spaugment
spparms
symbfact
Description
Form least squares augmented system
Set parameters for sparse matrix routines
Symbolic factorization analysis
Two Dimensional Graphics
Elementary X-Y Graphics
Command
fill
loglog
plot
semilogx
semilogy
Description
Draw filled 2-D polygons
Log-log scale plot
Linear plot
Semi-log scale plot
Semi-log scale plot
Specialized X-Y Graph
Command
bar
compass
errorbar
feather
fplot
hist
polar
rose
stairs
Description
Bar graph
Compass plot
Error bar plot
Feather plot
Plot function
Histogram plot
Polar coordinate plot
Angle histogram plot
Stairstep plot
Graph Annotation
Command
grid
gtest
text
title
xlabel
yaxis
Description
Grid lines
Mouse placement of text
Text annotation
Graph title
X-axis label
Y-axis label
16
3-Dimensional Graphs
Command
fill3
plot3
clabel
contour
contour3
contourc
image
pcolor
quiver
Description
Draw filled 3-D polygons in 3-D space
Plot lines and points in 3-D space
Contour plot elevation labels
Contour plots
3-D contour plots
Contour plot computation
Display image
Pseudocolor plot
Quiver plot
Surface and Mesh Plots
Command
mesh
meshc
meshz
slice
surf
surfc
surf1
waterfall
Description
3-D mesh surface
Combination mesh/contour plot
3-D Mesh with zero plane
Volumetric visualization plot
3-D shaded surface
Combination surface/contour plot
3-D shaded surface with lighting
Waterfall plot
Graph Appearance
Command
axis
caxis
colormap
hidden
shading
view
viewmtx
zlabel
Description
Axis scaling and appearance
Pseudocolor axis scaling
Color lookup table
Mesh hidden line removal mode
Color shading mode
3-D graph viewpoint specification
View transformation matrices
Z-label for 3-D graph
3-D Objects
Command
cylinder
sphere
Description
Generate cylinder
Generate sphere
17
General Purpose Graphics Functions
Command
clf
close
figure
gcf
Description
Clear current figure
Close figure
Create figure
Get handle to current figure
Axis Creation and Control
Command
spaugment
axes
axis
cazis
cla
gca
hold
subplot
Description
Create axes in arbitrary position
Control axis scaling and appearance
Control pseudocolor axis scaling
clear current axes
Get handle to current axes
Hold current graph
Create axes in tiled position
Handling Graphics Objects
Command
line
patch
surface
uicontrol
uimenu
Description
Create line
Create patch
Create surface
Create user interface control
Create user interface menu
Handling Graphics Operations
Command
delete
drawnow
get
reset
set
Description
Delete object
Flash pending graphics event
Get object properties
Reset object properties
Set object properties
18
Hardcopy and Storage
Command
orient
print
printopt
Description
Set paper orientation
Print graph or save graph to file
Configure local printer default
Movies and Animation
Command
getframe
movie
moviein
Description
Get movie frame
Play recorded movie frame
Initialize movie frame memory
Miscellaneous
Command
ginput
ishold
Description
Graphical input from mouse
Return hold state
Color Maps
Command
bone
cool
copper
flag
gray
hsv
hot
pink
Description
Gray-scale with a tingle of blue color map
Shaded of cyan and magenta color map
Linear copper-tone color map
Alternating red, white, blue, and black color
Linear gray-scale color map
Hue-saturation-value color map
Black-red-yellow-white color map
Pastel shaded of pink color map
Color Map Related Functions
Command
brighten
hsv2rgb
rgb2hsv
rgbplot
spinmap
Description
Brighten or darken color map
Hue-saturation-value to red-green-blue conversion
Red-green-blue to hue-saturation-value conversion
Plot color map
Spin color map
19
Lighting Models
Command
diffuse
specular
surf1
surfnorm
Description
Diffuse reflectance
Specular reflectance
3-D shaded surface with lighting
Surface normals
Sound Processing Functions
Command
saxis
sound
Description
Sound axis scaling
Convert vector into sound
Character String Functions
Command
Description
abs
Convert string to numerical values
eval
Execute string with MATLAB expression
isstr
True for string
setstr
Convert numeric values to string
str2matForm text matrix from individual string
string
About character string in MATLAB
String Comparison
Command
lower
strcmp
upper
Description
Convert string to lowercase
Compare string
Convert string to uppercase
String-to-Number Conversion
Command
int2str
num2str
sprintf
sscanf
str2num
Description
Convert integer to string
Convert number to string
Convert number to spring under format control
Convert string to number under format control
Convert string to number
20
Hexadecimal-to-Number Conversion
Command
dec2hex
hex2dec
hex2num
Description
Convert decimal integers to hex string
Convert hex string to decimal integer
Convert hex string to IEEE floating point number
Low-level File I/O Functions
Command
fclose
fopen
Description
Close file
Open file
Unformatted I/O
Command
fread
fwrite
Description
Read binary data from file
Write binary data to file
Formatted I/O
Command
fgetl
fgets
fprintf
fscanf
Description
Read line from file, discard new line character
Read line from file, keep new line character
Write formatted data to file
Read formatted data from file
File Positioning
Command
ferror
frewind
fseek
ftell
Description
Inquire file I/O error status
Rewind file
Set file position indicator
Get file position indicator
String Conversion
Command
sprintf
sscanf
Description
Write formatted data to string
Read string under format control
21
I.2
Communicating with MATLAB
I.2.1
Expressions and Variables
MATLAB provides mathematical expressions which involve entire matrices.
blocks of mathematical expressions in MATLAB are:
•
•
•
•
The building
Variables
Numbers
Operators
Functions
Variable
Variables in MATLAB do not require any type of declarations or dimension statements.
Variable names are not limited in a number of characters. A MATLAB variable name consists of
a letter, followed by any number of letters, digits, or underscore. MATLAB uses only the first 31
characters of a variable name and ignores the rest. MATLAB is case sensitive, it distinguishes
between lowercase and uppercase letters. X and x, for example, are not the same and represent
two separate MATLAB variables.
Numbers
MATLAB uses conventional decimal notation. Scientific notation uses the letter e to specify a
power-of-ten scale factor. Imaginary numbers use either i or j as a suffix. For example x=2+3i
or x=2+3j represent the same imaginary numbers.
Operators
Expressions in MATLAB use familiar arithmetic operators:
+
Plus
Minus
−
*
Multiplication
^
Power
/
Division
‘
Complex conjugate or transpose of matrix
()
Specify evaluation order
[]
Specify vector and matrices
Functions
MATLAB provides a large number of standard elementary mathematical functions. The most
commonly used function are:
abs
Absolute value
22
acos
acosh
angle
asin
asinh
atan
atan2
atanh
ceil
conj
cos
cosh
exp
fix
floor
imag
log
log10
real
rem
round
sign
sin
sinh
sqrt
tan
tanh
Inverse cosine
Inverse hyperbolic cosine
Phase angle
Inverse sine
Inverse hyperbolic sine
Inverse tangent
Four quadrant inverse tangent
Inverse hyperbolic tangent
Round towards plus infinity
Complex conjugate
Cosine
Hyperbolic cosine
Exponential
Round towards zero
Round towards minus infinity
Complex imaginary part
Natural logarithm
Base 10 (common ) logarithm
Complex real part
Remainder after division
Round towards nearest integer
Signum function
Sine
Hyperbolic sine
Square root
Tangent
Hyperbolic tangent
In addition, several special functions provide values of useful constants. The default values for
the following variables are:
pi
i
j
eps
realmin
realmax
inf
nan
3.14159265358979
Imaginary unit i2=-1
The same as i
A small number equal to 2-52
Smallest floating-point number, 2-1022
Largets floating-point number, 21023
Infinity
Not-a-number
The variable names for the above functions are not reserved by MATLAB. It is possible to
overwrite any of them with a new variable, such as
pi=3.1416
and then use that value in subsequent calculations. The default value can be restored with clear
pi.
23
I.2.2
Data Format
MATLAB stores all numbers using long format specified by the IEEE floating-point standard.
Floating-point numbers have a finite precision of roughly significant digits and a finite range of
roughly 10-308 to 10308 .
The format command in MATLAB controls only the numeric format of the data being displayed
on the screen.
The format command does not affect the way MATLAB stores and manipulates the data. The
following examples illustrate the effect of different formats on displaying the output.
Example I.2.1.1
First we assign the value
4
to a variable x, then we display x using different formats.
3
» x=4/3
x=
1.3333
»
format short displays data using 5-digit scaled fixed point.
» format short
»x
x=
1.3333
»
format long displays data using 15-digit scaled fixed point.
» format long
»x
x=
1.33333333333333
»
24
format short e: displays data using 5-digit floating point.
» format short e
»x
x=
1.3333e+000
»
format long e: displays data using 16-digit floating point.
» format long e
»x
x=
1.333333333333333e+000
»
format hex : displays data using hexadecimal.
» format hex
»x
x=
3ff5555555555555
»
format bank: displays data using dollars and cents format.
» format bank
»x
x=
1.33
»
format rat: displays data using a ratio of small integers.
25
» format rat
»x
x=
4/3
»
format + : displays data using + for positive and - for negative numbers.
» format +
»x
x=
+
»
format by itself with no other entries will return to default (short) format.
» format
»x
x=
1.3333
»
Summary of formats
short
long
short e
long e
hex
bank
rat
+
5-digit scaled fixed points.
15-digit scaled fixed points.
5-digit floating point.
16-digit floating point.
Hexadecimal.
Fixed dollars and cents.
Ratio of small integers.
Positive/negative designation.
26
I.2.3
Input / Output Data
You can enter data into MATLAB in two different ways: directly from keyboard or reading from
a data file.
Entering Data from Keyboard
The prompt “>>”in the Command Window indicates that MATLAB is ready to accept input data
or a command from the keyboard.
You can enter data from the keyboard in one simple step. For example,
» A=3.25
A=
3.2500
»
At this stage MATLAB has assigned value 3.25 to the variable A.
This value remains in a memory location reserved for A as long as you do not overwrite it or
clear it, or by ending the current MATLAB session through termination of the
Command Window.
You can change the value of A by simply entering a new value for A. For example,
» A=2
A=
2
»
To clear the variable A, at the prompt type clear A.
» clear A
»
Note that if you typed clear instead of clear A, MATLAB would have cleared all variables
without giving you a notice. So be very careful. This can be very painful when you have entered
many variables and suddenly you have accidentally cleared them all!
27
Practice I.2.3.1
Assign values 2, 3, and 4 to variables A, B, and C, respectively.
There are different ways of entering these data from the keyboard. We mention two of them
here.
Method 1. All in one line.
At the prompt, type A=2,B=3,C=4 and press Return or Enter. MATLAB responds
» A=2,B=3,C=4
A=
2
B=
3
C=
4
»
Method 2. Entering one at a time.
» A=2
A=
2
» B=2
B=
2
» C=3
C=
28
3
»
I.2.4
Suppressing Output
A semicolon at the end of a MATLAB statement
stops
the MATLAB from displaying the output
Anytime you press the return or enter key, MATLAB takes two actions: first it automatically
displays the input data, then it performs the necessary computation ( if needed ) and displays the
output.
However, if we end the input statement with a semicolon (;), MATLAB does not display the
input data but it performs the computation and displays the output. This is particularly useful
when you generate a large array vector.
For example
» a=0:0.001:1000;
»
In this example, you generated a vector containing 1000001 numbers. Imagine that if you had
not ended the statement with a semicolon. Without the semicolon, MATLAB displays all
numbers on your computer screen.
I.2.5
Long Command Lines
MATLAB allows 4096 characters per line. However, it is impossible to display all of these on
one line. If your statement is long and does not fit on one line, use three periods, . . . , followed
by a return or enter to indicate that the statement continues on the next line. For example,
» x=2 + 1 - 5 +6 + 7 + 8 + 9 + 11 + ...
13+14+15-12 - 13 - 14
x=
42
»
29
I.2.6
Entering and Manipulating Arrays and Matrices
You can enter arrays and matrices into MATLAB in several different ways.
•
•
•
•
Enter an explicit list of elements.
Load from an external data file
Generate arrays or matrices using built-in functions
Create arrays or matrices with your own functions in M-files. (M-files are explained in
Chapter III.)
Entering arrays
Arrays are entered into MATLAB using the following format:
v= initial value : difference between two consecutive elements : final value
The default value for the difference between two consecutive elements is 1.
For example:
» v=1:10
v=
1
2
3
4
5
6
7
8
9
10
»
You generated a row vector of length 10 consisting of the integers 1 through 10
» v=10:0.1:11
v=
Columns 1 through 7
10.0000 10.1000 10.2000 10.3000 10.4000 10.5000 10.6000
Columns 8 through 11
10.7000 10.8000 10.9000 11.0000
».
30
In the above example, you generated a vector containing numbers from 10 through 11 with an
increment of 0.1.
You can access an individual or a range of elements from a vector using the following format:
v(from index : to index)
Example: I.2.6.1
Enter a vector v containing elements 1 through 10; do not display the elements. Add elements 1
through 5 to elements 6 through 10 of this vector v.
The elements 1 through 5 are: 1, 2, 3, 4, 5 and the elements 6 through 10 are: 6, 7, 8, 9, 10. We
would like to add 1 to 6, 2 to 7, … etc.
» v=1:10;
» v(1:5)+v(6:10)
ans =
7
9
11
13
15
»
Matrices are entered into MATLAB using the following two format:
M= [ first row; second row;…; last row] or
M= [first row
2nd row
.
.
.
last row ]
For example to enter a 3x3 matrix you can enter either
» M=[1 2 3;4 5 6;7 8 9]
M=
1
4
2
5
3
6
31
7
8
9
»
or
» M=[ 1 2 3
456
7 8 9]
M=
1
4
7
2
5
8
3
6
9
»
To access different blocks of matrices you can use the following format:
M1 = M (from row: to row , from column: to column )
where M is the original matrix and M1 is the desired sub-matrix.
Example: I.2.6.2
a) Enter a 3x3 matrix M with the first row being 1, 2, and 3, the second row being 4, 5, and 6,
and the third row being 7, 8, and 9, respectively. Do not display the matrix.
b) Assign the elements from row 1 through 2 and columns 2 through 3 to a matrix M1.
c) Assign the elements from row 2 through 3 and columns 1 through 2 to a matrix M2.
d) Obtain a matrix MSUM containing the sum of the corresponding elements in M1 and M2.
a)
The matrix M is:
1 2 3
M = 4 5 6
7 8 9
b) M1 is:
2 3
M1 =
5 6
32
c) M2 is
d) MSUM is
4 5
M2 =
7 8
6 8
MSUM =
12 14
You can do this in MATLAB as shown below.
» M=[1 2 3;4 5 6;7 8 9];
» M1=M(1:2,2:3)
M1 =
2
5
3
6
» M2=M(2:3,1:2)
M2 =
4
7
5
8
» MSUM=M1+M2
MSUM =
6
12
8
14
»
I.2.7
Generating a Matrix from Arrays
You can combine vectors to generate a matrix. If vectors v1, v2, v3, and v4 are row vectors of
dimension 1x4, then the matrix M can be formed using these vectors.
M=[v1;v2;v3;v4]
33
Example: I.2.7.1
a) Generate row vectors v1, v2, v3, and v4 containing element, 1,2,3,4, and 5,6,7,8, and 9, 10,
11, 12, and 13, 14, 15, 16, respectively.
b) Generate matrix M containing v1, v2, v3, and v4 as its 1st, 2nd, 3rd, and 4th rows.
» v1=1:4
v1 =
1
2
3
4
7
8
11
12
15
16
» v2=5:8
v2 =
5
6
» v3=9:12
v3 =
9
10
» v4=13:16
v4 =
13
14
» M=[v1;v2;v3;v4]
M=
1 2 3 4
5 6 7 8
9 10 11 12
13 14 15 16
»
I.2.8
Special Matrices
Identity Matrix
34
An nxn identity matrix is a matrix whose diagonal elements are ones and all other elements are
zeros.
» eye(4)
ans =
1
0
0
0
0
1
0
0
0
0
1
0
0
0
0
1
»
Note that you can generate an m x n matrix whose diagonal elements are ones and zeros
elsewhere using the eye function.
» eye(3,4)
ans =
1
0
0
0
1
0
0
0
1
0
0
0
»
Companion matrix
An nth order polynomial is represented by
p( x ) = a1 x n + a 2 x n −1 +...+ a n x + a n +1 .
You can represent this polynomial in MATLAB as a vector with entries being the coefficients
a1 , a 2 ,..., a n , a n +1 . Once you entered this polynomial as a vector in MATLAB, you then can solve
for its roots. For example, you can solve for the polynomial
p( x ) = x 2 − 5x + 6
as
» p=[1 -5 6];
» r=roots(p)
r=
3
35
2
»
The vector r holds the roots of the polynomial p(x).
The companion matrix of p is a matrix whose eigenvalues are the roots of the polynomial p. For
example, the companion matrix corresponding to the polynomial
p( x ) = x 2 − 5x + 6
is:
» p=[1 -5 6];
» A=compan(p)
A=
5 -6
1 0
»
In other words, if we compute the eigenvalues of A, they will be identical to the roots of the
polynomial p.
» eig(A)
ans =
3
2
»
Hadamard matrices
The Hadamard transform has many applications in signal and image processing. The 1-D and 2-D
Hadamard transformations are given in the following equations:
1-D Hadamard transform
2-D Hadamard transform
36
The elements of the Hadamard matrix H are either +1 or -1. You can generate an nxn Hadamard
matrix by
H = hadamard (n)
The 4x4 Hadamard matrix is:
» A=hadamard(4)
A=
1 1 1 1
1 -1 1 -1
1 1 -1 -1
1 -1 -1 1
»
Note that the rows and columns of the Hadamard matrices are orthogonal, that is if we sum the
product of any two rows or any two columns of a Hadamard matrix the result is zero. Also, if we
multiply the transpose of a Hadamard matrix by a Hadamard matrix itself, the product is equal to
n times an identity matrix. Which states that the inverse of a Hadamard matrix is equal to its
transpose divided by n. Lets try this on a 4x4 Hadamard matrix.
» A=hadamard(4);
» trans_a=A';
» trans_a*A
ans =
4
0
0
0
0
4
0
0
0
0
4
0
0
0
0
4
» trans_a*A/4
ans =
1
0
0
0
0
1
0
0
0
0
1
0
0
0
0
1
»
37
In addition to the above matrices, MATLAB can generate many more special matrices. Examples
are:
Function
Purpose
hilb
Hilbert matrix
Inverse
Hilbert transform invhilb
magic
Magic square
pascal
Pascal matrix
rosser
Classic symmetric eigenvalue test problem
toeplitzToeplitz matrix
vander
Vandermonde matrix
wilkinson
Wilkinson's eigenvalue test matrix
38
I.3
FILES IN MATLAB
I.3.1
Why do we need M-Files ?
When you start MATLAB it defaults to the Command Window. To solve a specific
problem, you can enter a series of commands at the prompt in the Command Window. For
example: if you are interested in converting Fahrenheit to Celsius, you can simply enter an
expression for this conversion using the formula C=(F-32)*5/9 and obtain your answer. So to
convert 10 degrees Fahrenheit to Celsius you would type the following :
» C=(10-32)*5/9
C=
-12.2222
»
The resulting temperature is -12.2222 degree Celsius. This is easy and fast. Now if you
want to convert F=-30 degree Fahrenheit to C, you need to enter this expression again. Is there
another way to go through this conversion without entering the Fahrenheit to Celsius conversion
each time? Of course there is! You can create an M-file for converting Fahrenheit to Celsius.
I.3.2
What is an M-File ?
Instead of typing your commands one by one in the Command Window, you can type them only
once in an M-file using a text editor of your choice. When you tell MATLAB to run your M-file,
it will open the file and evaluate commands in the sequence appearing in the file.
Remember
M-File filename must end with the extension ‘.m’
These files are called script files, or simply M-files. The term “script” emphasizes the fact that
MATLAB simply reads from the “script” found in the file. The term “M-file” recognizes the
fact that script filenames must end with the extension “.m” , e.g., f_to_c.m.
Remember
An M-file consists of a sequence of MATLAB command statements
All M-files are either in script or function form. Scripts are suitable when you need to
perform a long sequence of commands. Function files, on the other hand, are more flexibility as
they allow the user to pass and return values as would with other MATLAB functions.
39
Remember
There are two types of MATLAB M-files : script and function files
I.3.3
How to Create and Edit an M-file
Remember
Steps involved in working with MATLAB M-files are:
CREATE Æ EDIT Æ RUN
M-Files are ASCII files that can be created using a text editor or word processor . To
create a new M-file, choose New from the File menu and then select M-file.
This procedure will open a default text editor where you can begin entering your MATLAB
commands. If you would like to add comments to your code, you may do so by starting the
comment line with a “%” character. Once you have finished entering your commands, you must
save your file. To save your file, choose Save As from the File menu of the text editor.
Remember
you must save your MATLAB M-files with .m extensions
Once you have created your M-file, you can execute it by either typing the name of the
M-file at the command prompt in the Command Window or by choosing Run M-File (Script
File) from the File menu in the Command Window.
If you choose Open from the File Menu in the Command Window, you will probably
find several files with ‘.m’ extensions. For example, if you want to rotate a matrix by 90 degrees
there is an M-file that will do that called rot90.m. Go to the File Menu and select Open M-file,
then change your directory to matlab/toolbox/matlab/elmat. The rot90.m file is located there.
40
This brings up the question of locating both user written M-files and built-in MATLAB
functions. Suppose you wanted to do a matrix rotation with the function rot90.m, but you do not
know where it is located. The function which {M-file} will search through the MATLAB path
and give you the location of the desired M-file. For example, to find the location of the function
rot90.m, you can enter:
» which rot90
c:\matlab\toolbox\matlab\elmat\rot90.m
Occasionally, one forgets the name of an M-file to do a certain task. Or one may want to
search for a selection of similar MATLAB capabilities. You can use the lookfor {keyword}
command, which will give you a list of M-files that relate to a given keyword. For example, if
you wanted a list of all the M-files that have anything to do with the word "rotate," you would
enter:
» lookfor rotate
ROT90
ROTATE
XPR
IMROTATE
I.3.4
Rotate matrix 90 degrees.
Rotate an object by angle alpha about a specified direction.
Radial coordinate of t-point of xy-curve rotated through angle u.
Rotate image.
Working with M-files
To better understand how to write and operate an M-file, let’s work through a couple of
examples. We’ll start by writing a script file.
1.
Choose New from the File Menu and select New M-file.
41
2.
When the editor is opened, type in the following:
% This script M-file will convert Fahrenheit to Celsius.
% Tc is the temperature in Celsius and Tf is the temperature in Fahrenheit.
Tf = 78.;
Tc = (Tf -32.0)*(5/9)
% display Celsius Temperature to screen
3. Save the file as f_to_c.m and run it by either typing ‘f_to_c’ at the command prompt
or going to the Run M-file option of the file menu.
» degree
Tc =
25.5556
Remember
A % at the beginning of a statement denotes
a comment in MATLAB M-files
Now try typing help degree. You should see the following :
» help degree
This script M-file will convert Fahrenheit to Celsius.
Tc is the temperature in Celsius and Tf is the temperature in Fahrenheit.
»
The first two lines of the M-file which explain the code should appear on the screen. The
‘%’ sign in an M-file indicates a comment and allows you to create your own on-line help.
Notice that help will display only those comments before the beginning of the actual code. Any
comments in the code are not included in help.
This program, however, has several limitations. First, the temperature in Fahrenheit can
only be changed by editing the M-file and running it again. So in order to make this M-file more
useful let’s make some modifications. Make the following changes to the f_to_c.m file so that it
looks like the following:
42
% This script M-file will convert Fahrenheit to Celsius.
% Tc is the temperature in Celsius and Tf is the temperature in Fahrenheit.
echo on
% Tf is the temperature in Fahrenheit
Tf = input(‘Input the temperature in Fahrenheit: ’);
% Tc is the temperature in Celsius
Tc = (Tf -32.0)*(5/9)
% display Celsius Temperature to screen
After saving the M-file try running it again. As before, either run it from the command
prompt or go to the file menu. This is what should happen when you run it with a temperature of
45 degrees Fahrenheit.
» degree
% This script M-file will convert Fahrenheit to Celsius.
% Tc is the temperature in Celsius and Tf is the temperature in Fahrenheit.
echo on
% Tf is the temperature in Fahrenheit
Tf = input('Input the temperature in Fahrenheit: ');
Input the temperature in Fahrenheit: 45.
% Tc is the temperature in Celsius
Tc = (Tf -32.0)*(5/9)
Tc =
7.2222
% display Celsius Temperature to screen
There are two things to note in this M-file. First, after the initial set of comments there is
a statement ‘echo on’. This command allows the M-files to be viewed while running. So if there
is an error in the code, the user can see which command and at what line caused the problem.
This could be useful in debugging the M-file; once you have worked out all the bugs, you can
remove the echo on command.
In addition to the echo command there are other commands used for debugging M-files.
The command ‘pause’ in an M-file will halt program execution temporarily. The program will
resume execution when the user presses any key on the keyboard. Similarly, ‘pause(n)’ will
cause the program to stop for n seconds. There is another command called keyboard which is
used in M-file debugging and modification. When used in an M-file, it invokes the keyboard as
if it were a script M-file. During execution of an M-file, the keyboard command halts
execution, allowing the user to modify or observe the contents of MATLAB variables. Upon
43
execution of the keyboard command, MATLAB is placed in the Keyboard mode, which is noted
by a ‘K>>’ prompt appearing in the Command Window. The Keyboard mode can only be exited
by typing ‘return’ and then pressing the Enter key to resume execution.
A second point of note in the above M-file is that the MATLAB variable Tf is now an
input from the user. When the M-file was run, the user was prompted for the temperature. After
entering the desired value and then pressing return, the program finished executing and displayed
the result. Script files are just one example of M-files. As mentioned previously, M-files can
also be in the form of functions. Function M-files can easily be differentiated from script files
since the word function always appears first in a function M-file. Function files also allow values
to be passed into the M-files. To explain the implementation of function M-files we will work
through another example.
This next example will be similar to the previous M-file in that it again converts from
Fahrenheit to Celsius. However, this M-file will be a function M-file that will allow the user to
pass in the value for degrees Fahrenheit. The M-file f_to_c.m should be changed to the
following:
function yc = degree(xf)
% This function M-file will convert Fahrenheit to Celsius.
echo on
% xf is the temperature in Fahrenheit
% yc is the temperature in Celsius
yc = (xf -32.0)*(5/9);
fprintf(‘The Temperature in Celsius is %4.2f degrees.\n’,yc)
Now try running the new function M-file. Type in the name of the M-file and the
corresponding temperature in parentheses. The output will be a print statement of the
temperature in Celsius.
» degree(45);
The Temperature in Celsius is 7.22 degrees.
»
Function files are no more difficult to create than script files. Just remember, when
defining the function, use the same name as the M-file. For instance, in our previous example the
first statement was the following:
function yc = degree(xf).
Note that function name, degree, is the also the name of the corresponding M-file, degree.m.
Also you are not limited to passing only numbers. Vectors and matrices can be passed to
functions just as easily. Another point of note is that the variables xf and yc are local to the
44
degree function and are not in the workspace. So if you type “whos” you will not see those
variables. Finally, you are not limited to a single output. In other words our previous example
could also have returned the temperature in Kelvin. The M-file could have looked like this..
function [yc,yk] = degree(xf)
% This script M-file will convert Fahrenheit to Celsius and Kelvin.
echo on
% xf is the temperature in Fahrenheit
% yc is the temperature in Celsius
% yk is the temperature in Kelvin
yc = (xf -32.0)*(5/9);
yk = yc + 273;
fprintf('The Temperature in Celsius %4.2f degrees.\n', yc)
fprintf('The Temperature in Kelvin %4.2f degrees.\n', yk)
Again, after running the M-file you should see the following results.
» degree(45);
The Temperature in Celsius 7.22 degrees.
The Temperature in Kelvin 280.22 degrees.
»
Some Final Words on M-files…
When you first write an M-function file it is interpreted and placed into memory. It is
then available for the user throughout the working session without any further compilation.
Functions defined using M-files can also be called in other M-files just like any other function.
In other words, the function degree could have been called by another M-file.
In the examples mentioned previously it was not mentioned where the M-files were
saved. When the name of an M-file is invoked by the user, MATLAB has to determine what that
name means. This is done by following a certain sequential process. The MATLAB interpreter
will look for the name first as a variable, then as a built-in function, then in the current directory,
and finally in directories available through the MATLAB search path.
There is also one more hint that should be mentioned. If you are using Windows 95 you
could run into a problem with the naming of your M-files. On most Windows 95 machines,
Notepad is probably the default editor used to write an M-file. Usually you would go to the top of
the MATLAB Command Window and select File. Then you would choose to open a new M-file.
You would then proceed to type in all your commands and then save the file. Suppose you
choose to save the M-file as simple.m. You then proceed to try to run it. You type ‘simple’ at the
command prompt and then get a message such as the following:
>> simple
‘ ??? Undefined function or variable simple.’
45
Don’t worry if this happens; you didn’t do anything wrong. In the MATLAB Command Window,
open a DOS shell by typing ‘!command &’ and then go to the directory where you saved the Mfile. For you DOS novices you can change directories by using ‘cd directory name’. Then list the
files in that directory using the command ‘dir’. You should see your M-file listed as
‘simple.m.txt’. Since MATLAB only looks for .m extensions, it wasn’t able to find your M-file.
Simply rename the file using ‘rename simple.m.txt simple.m’ and hopefully your problem will be
solved.
Another problem that you may encounter relates to the search path that MATLAB scans
to find your M-file. If you save your file in a directory that is not in the MATLAB search path,
then MATLAB will give you an ‘ ??? Undefined function or variable simple’ error message. To
remedy this situation, you have 3 choices. You can move the MATLAB workspace to the
directory of the M-file by entering the command cd followed by the name of the directory where
the M-file is found. Another option is to move the M-file to a directory that is in the MATLAB
path. Finally, you can modify the MATLAB path to include the directory of your M-file.
I.3.5
Saving Workspaces
As you gain more experience in MATLAB, your computations will likely become more
complex. As you become more familiar with MATLAB, you will likely start writing M-files to
make your work easier. As your computations become more complex, the amount of data that
you generate will increase. This can be a big problem especially if you are on a slower machine.
Every time you decide to end your MATLAB session, you lose all the data you have generated.
So the next time you resume your work, you have to spend precious time re-creating the previous
information. Fortunately, all is not lost!! You can save your variables and data generated in a
workspace for future use. The following example illustrates how to save variables and the
workspace.
» Y = [1 2;3 4]
Y=
1
3
2
4
» X = [5 6;7 8]
X=
5
7
6
8
» U = rot90(Y)
U=
2
1
4
3
46
» V = rot90(X)
V=
6
5
8
7
»
Two matrices, X and Y, were created. Then, two rotated versions of X and Y were
created and saved as variables, U and V. The matrices are small and should not take too much
time for MATLAB to generate. Next, type ‘whos’. As you might remember from previous
exercises, this command will list all the variables used in the current work session and how much
memory is being used. You should see the variables, Y and X, as full 2 x 2 matrices. You may
also have several other variables in your workspace. Now suppose that you want to save the
variable Y. This is done by typing the following at the command prompt:
» save variable Y
This command will save the variable Y in a file called variable.mat. You could have also
typed either of the following two commands :
» save
or
» save variable
If you had used just ‘save’ all the variables in the workspace would have been saved to a
file called matlab.mat. If the command ‘save variable’ had been used, all the variables would
have been saved to a file called variable.mat.
Now exit MATLAB. Then reopen it and type the following :
» load variable
This command will then load the variable Y and the data in the matrix that was saved
previously.
You can save multiple variables also. In other words, if you wanted to save only a few
variables out of several, you could either delete them from memory using the ‘clear’ command or
you could specify the exact variable that you wanted to save. In our previous example it would
have been the following :
» save test X Y
Therefore using just a few commands you can save your work to use in the future. The
load and save commands also have a different use. They can be used to import and export ASCII
data. Their use and other topics are discussed in the next section.
47
Remember
use the load or save command to save variables in your workspace
I.3.6
Importing and Exporting Data
In the preceding section we learned how to use the save and load commands to retain
data from a previous MATLAB session. You can use these commands, along with several
others, to read and write out ASCI data files. These ASCI files can either be used as a data file
for other M-files, or they could be used as an input file for a Fortran or C program. Again, most
of the concepts will be explained through examples.
» Y = [1 2;3 4];
» save temp.dat Y -ascii
» save a:\temp.dat Y -ascii
This will create the Y matrix and then save the data in ASCII format to your hard drive
and also to the floppy disk drive. The file can then be opened in another application. This could
be useful if, for example, you are generating some statistics on population growth to include in a
report. The data could then be saved in this manner and then used in a spreadsheet or plotting
package to include in reports.
As mentioned previously, the data files could also be used as input files to Fortran or C
files. For example, suppose that a Fortran or C program requires the Matrix Y as an input. The
matrix Y can be saved and the C or Fortran program can be executed all within MATLAB by
using a few simple commands :
» Y = [1 2;3 4];
» save temp.dat Y -ascii
» !prog_execute
» load output.dat
The matrix Y will be saved in the text file temp.dat. The external program prog_execute
will be called using the shell escape command ’!’. The prog_execute program will then read in
the data file temp.dat, execute the program, and then create the output file, output.dat. This
output file is then loaded into the MATLAB workspace. This is a convenient way to run your
external programs without interrupting your work in MATLAB. These commands could also
have been included in an M-file.
Data can also be read or written out with other I/O functions such as fopen, fread, fcanf,
fprintf, and fwrite. When trying to read or write to a file you always want to open the file first
(using the fopen command), and then close it (using the fclose command) once you are finished
with the file. A typical fopen and fclose command may be the following :
48
fid = fopen(‘filename’,’permission’)
fclose(fid)
where permission could be the following :
r
for read only
r+
read and write
w
write over existing contents
w+
read and write over existing contents
If the file is opened successfully, then the value of fid is an integer greater than 2. Binary
files can also be read or written by adding a ‘b’ at the end of the previous permissions. So r+
would become rb+.
The fscanf and fprintf commands are used when reading and writing ASCII data while the
fread and fwrite are used for reading and writing binary data. The syntax of these commands will
first be explained and then some examples to show their use will follow.
The command fprintf is used to write formatted data to a file. The syntax used for this
command is :
count = fprintf(fid,’format’,A,...) or fprintf(‘format’,A,...)
Recall that the file, fid, was first defined using the fopen command. Count returns the
number of bytes that was written out. The format statement allows you to determine the
precision and spacing of your output data. There are two types of specific format syntax. They
are escape characters and conversion characters. The escape characters are preceded by a
backslash ‘\’ and are as follows :
\n
\t
\b
\r
\f
\\
\’
start a new line
horizontal tab
backspace
carriage return
form feed
backlash
single quote
The conversion characters are preceded by a percent sign ‘%’ and are as follows :
%e
%f
%g
exponential notation
fixed point notation
chooses the shorter of %e or %g
(does not include significant zeros)
All of this may seem confusing. Hopefully, the next couple of examples will clear this
confusion. Type in the following commands :
49
» fid = fopen(‘test.dat’, ‘w’);
» x = 1:100;
» y = [x; sqrt(x)];
» fprintf(fid, ‘ %6.2f %6.2\n ‘, y);
» fclose(fid)
Looking at the previous commands, let's concentrate on the fprintf statement. The fprintf
command prints the variable y to a file named test.dat. The syntax ‘6.2f’ means the minimum
field width is 6 spaces long and the 2 specifies the precision of the data. In other words, the
printed data will be accurate to within 2 decimal places. The ‘\n’ is important here, without it all
the data would be printed on the same line. The output file test.dat should look like the
following:
1.00
2.00
3.00
4.00
5.00
6.00
7.00
8.00
.
.
1.00
1.41
1.73
2.00
2.24
2.45
2.65
2.83
.
.
The fscanf command works in a similar fashion. The generic format is as follows :
[A,count] = fscanf(fid, ‘format’, size)
[A,count] = fscanf(id, ‘format’)
The fscanf statement will read the data into a matrix A. The size of the file can be the
following :
n
reads n elements into a column vector
inf
reads to the end of a file
[m,n] reads until m x n matrix is full
From the previous example we could read test.dat back in as follows :
» fid = fopen(‘test.dat’);
» U = fscanf(fid, ’%g %g’, [2 inf ])
» fclose(fid)
Test data will be read into MATLAB again with the y data in a two row matrix called U.
The next set of commands fwrite and fread deal with binary data files. The commands are
very similar to fscanf and fprintf. The generic form for fread and fwrite are:
50
A = fread(fid)
or
[a,count] = fread(fid, size, ‘precision’)
count = fwrite(fid,A,’precision’) or fwrite(fid,A,’precision’)
You open the file and read it or write to it as needed. However since we are now dealing
with binary data, there is also a precision option. Use of the precision option requires that the
user knows the number of bits in each value being read or written. If noting is used, precision is
automatically set to ‘unchar’ which means unsigned 8-bit character. The following is a list of
what could be used for precision when reading and writing binary files. The information is given
for both MATLAB and C or FORTRAN.
MATLAB
C or FORTRAN
char
schar
uchar
short
ushort
int
uint
long
float
ulong
float 32
double
float64
intN
uintN
char or char*2
signed char
unsigned char
short
unsigned short
int
unsigned int
long
float
unsigned long
real*4
double
real*8
Interpretation
character 8 bits signed or unsigned
signed 8 bit character
unsigned 8 bit character
16 bit integer
unsigned 16 bit integer
16 or 32 bits integer
unsigned 16 or 32 bit integer
32 bit integer
32 bit floating point value
32 bit unsigned integer
32 bit floating point value
64 bit long floating point
64 bit floating point value
signed integer, N bits wide
unsigned integer N bits wide
Therefore, using freadf you could read in binary data from C or Fortran. Likewise, you
could write binary data that would be compatible with your external program.
I.3.7
Using the MATLAB Debugger
Often times when writing an M-file you will save it and run it only to find that MATLAB
either says you have an error or you get values that you weren’t expecting. There are several
options at this point. You can start by removing the semicolons so that the data is displayed as it
is calculated. If this does not help, the echo and keyboard commands could also be used to
examine the workspace state at any point during execution. Finally if you are running the
MATLAB version of 4.0 or greater you could use the MATLAB debugger. A list of all the
debugging commands are listed in Chapter 1.
Remember
the debugger only works on MATLAB function files
51
To better understand the debugger commands we will work through some examples.
Create the following function M-file shown below:
function [y1,y2] = temp(x)
% For each Matrix entered find the determinant and rotate the matrix
y2 = rot90(x)
y1 = det(x)
After running the M-file with a matrix you should get results similar to the following :
» x = [3 4 5;1 5 6;7 8 9]
x=
3
1
7
4
5
8
5
6
9
» temp(x);
y2 =
5
4
3
6
5
1
9
8
7
y1 =
-12
»
To start using the debugger, first use the dbtype command. This command will list the
M-file with line numbers. The syntax of this command is dbtype followed by the function name.
In the following example, the dbtype command will be used for both the temp M-file and the
rot90 M-file. After using dbtype you should see the following :
» dbtype temp
1
2
3
4
function [y1,y2] = temp_example(x)
% For each Matrix entered find the determinant and rotate the matrix
y2 = rot90(x)
y1 = det(x)
» dbtype rot90
1 function B = rot90(A,k)
2 %ROT90 Rotate matrix 90 degrees.
52
3 % rot90(A) is the 90 degree rotation of m x n matrix A.
4 % rot90(A,k) is the k*90 degree rotation of A, k = +-1,+-2,...
5 % For example,
6 %
7 %
A = [1 2 3 B = rot90(A) = [ 3 6
8 %
456]
25
9 %
14]
10 %
11 % mesh(B) then shows a 90 degree counter-clockwise rotation
12 % of mesh(A).
13 %
14 % See also VIEW, FLIPUD, FLIPLR.
15
16 % From John de Pillis 19 June 1985
17 % Modified 12-19-91, LS.
18 % Copyright (c) 1984-93 by The MathWorks, Inc.
19
20
21 [m,n] = size(A);
22 if nargin == 1
23 k = 1;
24 else
25 k = rem(k,4);
26 if k < 0
27
k = k + 4;
28 end
29 end
30 if k == 1
31 A = A.';
32 B = A(n:-1:1,:);
33 elseif k == 2
34 B = A(m:-1:1,n:-1:1);
35 elseif k == 3
36 B = A(m:-1:1,:);
37 B = B.';
38 else
39 B = A;
40 end
»
Now we will set a stop in the temp M-file and the rot90 M-file using the following
command :
» dbstop at 2 in temp
» dbstop at 21 in rot90
53
These statements will cause MATLAB execution to stop at line 2 in the temp M-file and
at line 21 in the rot90 M-file. Now run the M-file again using a different value of x. You should
see something like this.
» x = [2 6 7;3 8 4; 1 6 3];
» temp(x);
y2 = rot90(x)
K»
Execution stopped at line 2 in the temp M-file and is now in the keyboard command
mode. At this time, use the dbstack command to display all the function calls. The command
dbstack should return the function and its appropriate path. This is an example of what you may
see. Since you may have saved your M-file somewhere else your path may be different than this.
K» dbstack
In c:\matlab\bin\temp.m at line 3
K»
At this point you can enter whos to see what variables are being used and what their
values are. We will continue execution and move to the next break point using the dbcont
command. After typing dbcont you should see something like this.
K» dbcont
21 [m,n] = size(A);
K»
The dbcont statement allowed the M-file to continue until the next breakpoint. If we
wanted to move line by line through our code, we could use the dbstep command. Using the
dbstep command in the program we could view the values as the program is being run. The use
of the dbstep command is shown below:
K» dbstep
22 if nargin == 1
K» nargin
nargin =
1
K» dbstep
23 k = 1;
K» dbstep
24 else
K» k
k=
1
54
K»
At this point we could use dbcont to allow the program to run to completion or we could
step through the entire rot90 M-file line by line. If there are more breakpoints that you do not
need anymore, the dbclear command can be used.
K» dbclear at 21 in rot90
The above statement will clear the breakpoint in rot90. If you are satisfied with the
results of your M-file and wish to quit the debugger, dbquit will take the user out of the
debugging mode.
K» dbquit
»
Now try running the program temp again; the following should happen.
» temp(x)
3 y2 = rot90(x)
K» dbcont
y2 =
7
6
2
4
8
3
3
6
1
y1 =
40
Since all the breakpoints were not cleared, MATLAB again stopped in the temp M-file
and reverted to the debugging mode. You have to clear all stops before quitting the debugger, or
you can use the clear command in the workspace. Do bee careful, though, as the clear
command will clear ALL variables.
There were several important topics discussed in this chapter. We learned how to create,
run and debug M-files to make your work easier. We also learned how to read and write data to
files. The information provided should cover most of your needs. And of course, practice makes
perfect so work through those examples. Remember, you can always use the help provided with
MATLAB for more information and examples.
55
I.4
MATLAB OPERATORS
I.4.1
Operators
Operators are the basis for building expressions. Operations include basic functions such
as scalar addition and subtraction to more complex functions such as matrix multiplication and
division. A comprehensive list of operators is provided in the first chapter.
Remember
In MATLAB there are three different groups of operators
arithmetic, relational, and logical
Remember
In MATLAB the order of precedence for the operators are
arithmetic->relational-> logical
The first group of operators is the arithmetic operators. They include the basic math
functions to perform addition, subtraction, etc. The syntax used in MATLAB for the basic
arithmetic operators is as follows :
+
*
/
\
^
addition
subtraction
multiplication
right division
left division
power
The user should be familiar with the addition, subtraction, and multiplication operations.
The right and left division, however, does need some explaining. The basic concept behind left
and right division is as follows :
Right Division
A/B = B\A
Left Division
In right division, the first number is the numerator and the second number is the denominator.
56
Left division works opposite to right division; the first number is the denominator and the second
number is the numerator.
Example I.4.1
Divide 2 by 4 using right and left division.
» 2/4
ans =
0.5000
» 4\2
ans =
0.5000
Before finishing this section, let’s do one more example with arithmetic operators..
Example I.4.1.2
In one command statement using the arithmetic operators, subtract 8 from 16 squared.
» 16^2 - 8
ans =
248
»
This example demonstrates that the power operator takes precedence over subtraction.
Precedence of the power operator over subtraction means that the power operation is performed
before the subtraction, regardless of the order of the two operations. Rules for precedence of
arithmetic operators are as follows.
Multiplication, right and left division and the power
operator all have equal precedence. Combinations of these four operators in one statement are
performed in the order that they appear from left to right. These four operators all have
precedence over addition and subtraction. You can use parentheses to assert your own
precedence in an arithmetic expression. We will see more examples of precedence when we
discuss Relational and Logical operators.
I.4.2 Arithmetic Array and Matrix Operators
The arithmetic operators mentioned in the previous section are not limited to scalar
operations only; they can be used for arrays and matrices.
Remember
In MATLAB array arithmetic operations are carried out element by element
A list of the operators, their function, and their syntax is given below:
A + B
addition of arrays A and B
57
A
A
A
A
A
A
.*
./
.\
.^
.‘
B
B
B
B
B
subtraction of arrays A and B
element by element multiplication
right division of arrays A and B
left division of arrays A and B
Array A raised to the power of B
Transpose of array A
Remember
In using array operations, A and B either have to be of the same dimension or one
of them has to be a scalar
The array operations are similar to the arithmetic operations mentioned in the previous
section. The ‘.’ indicates the element by element operation. The next couple of examples show
the use of some of these operators..
Example I.4.2.1
Define two arrays x = [5 6 7] and y = [7 8 9]
» x = [5 6 7]
x=
5
6
7
» y = [7 8 9]
y=
7
»
8
9
Example I.4.2.2
Transpose x and y
» x.'
ans =
5
6
7
» y.'
ans =
7
58
8
9
»
Example I.4.2.3
Multiply x and y. Then multiply x by the transpose of y
» x.*y
ans =
35 48
63
» x.*y'
??? Error using ==> .*
Matrix dimensions must agree.
»
Again remember the dimensions must agree!! In the previous example, the error was
shown because we tried to multiply a 1 by 3 array with a 3 by 1 array.
Example I.4.2.4
Divide x and y using left and right division.
» x./y
ans =
0.7143
0.7500
0.7778
0.7500
0.7778
» y.\x
ans =
0.7143
»
Example I.4.2.5
Raise x to the power of 2. Then raise x to the power of y.
» x.^2
ans =
25 36
49
» x.^y
59
ans =
78125
»
1679616
40353607
In example I.4.2.5 above, we raise x to the power of y in an element-by-element fashion
by using the ‘.*’ operator. The array x contains the elements 5, 6, and 7 and the array y contains
the elements 7, 8, 9. So the element-by-element power operation raises 5 to the power of 7, 6 is
to the power of 8, and 7 to the power of 9.
As you can see, the use of array operators is not that difficult. The information learned
here will be built upon in the next section when we talk about matrix operators.
I.4.3 Arithmetic Matrix Operators
Matrix arithmetic operations are defined by the rules of linear algebra. The list of
operators are similar to the operators used for array operations. A list of the operators and their
functions are listed below:
A + B
A - B
A* B
A/ B
A\ B
A^ p
A’
Adds A and B
Subtracts A and B
Algebraic Multiplication of A and B
Matrix right division
Matrix left division
Matrix power where p is a scalar or integer
Matrix transpose (for complex matrices performs
complex conjugate transpose)
Matrix operators are very useful and are used frequently for such functions as solving
linear equations. Some examples are again shown here to familiarize the reader with Matrix
operators.
Remember
The order of operations is important when using Matrix operations
Example I.4.3.1
Create matrices P and Q. Let P be equal to [1 4;4 5] and Q be equal to [6 5;4 5].
Multiply P and Q, then Q and P, and array multiply P and Q, then Q and P.
» P = [1 4;4 5]
P=
1
4
60
4
5
» Q = [6 5;4 5]
Q=
6
4
5
5
»P*Q
ans =
22
44
25
45
»Q*P
ans =
26
24
49
41
» P .* Q
ans =
6 20
16 25
» Q .* P
ans =
6 20
16 25
»
As mentioned previously, the order of matrix operations is important. P * Q does not
equal Q * P. Note that this restriction is not necessary for array multiplication. P .* Q is just an
element-by-element multiplication of the matrices, therefore P .* Q equals Q.* P.
Example I.4.3.2
Perform matrix right and left division on matrices P and Q.
» P/Q
ans =
-1.1000 1.9000
0 1.0000
61
» Q\P
ans =
-1.5000 -0.5000
2.0000 1.4000
»
Again, the order of the operations is important. It is interesting to note that right division of
matrices is equivalent to multiplication of a the first matrix times the inverse of the second
matrix. That is, A/B is equivalent to A*inv(B). Similarly, for left division, A\B is equivalent to
inv(A)*B.
Example I.4.3.3
Raise P to the second power. Again use matrix and array operators to see the difference.
» P^2
ans =
17
24
24
41
» P .^2
ans =
1 16
16 25
»
Note that P^2 is equivalent to matrix multiplication of P times P.
At this point you may be asking yourself, “How do I know when to use array and matrix
operators?”. If you want to perform element-by-element operations, use array operators.
Suppose, for example, you are solving for X in the equation AX = B where A and B are both
matrices. Since this is a matrix equation, the solution will involve matrix operations. The
solution for X is of the form X = inv(A)*B. The abbreviated solution for this expression is X=
A\B. The preceding is an instance where matrix operations are appropriate. The following is an
example where element-by-element operations are appropriate.
62
Example I.4.3.4
Suppose you would like to calculate power dissipation in a diode given the following
measurements of diode voltage and current:
Diode Voltage
0.5 volts
0.6 volts
0.65 volts
0.7 volts
0.75 volts
0.8 volts
Diode Current
10 µA
1mA
4 mA
10 mA
40 mA
100 mA
We all know that power is voltage times current. In MATLAB, we can define a voltage array, v,
and a current array, i, and use element-by-element multiplication to calculate the power.
» v= [0.5 0.6 0.65 0.7 0.75 0.8] % voltage array
v=
0.5000
0.6000
0.6500
0.7000
0.7500
0.8000
» i = [10e-6 1e-3 4e-3 10e-3 40e-3 100e-3]
% diode current in amps
i=
0.0000
» p=v.*i
0.0010
0.0040
0.0100
0.0400
0.1000
0.0300
0.0800
% diode power in watts
p=
0.0000
0.0006
0.0026
0.0070
» format short e
»p
p=
5.0000e-006 6.0000e-004 2.6000e-003 7.0000e-003 3.0000e-002 8.0000e-002
»
It takes some practice to remember what the syntax for a given operation should be, but once you
have used these operations for a while, the appropriate usage should become second nature.
63
I.4.4 Relational Operators
Relational operators perform element-by-element comparisons between two matrices or
scalars.
Remember
MATLAB will return a 1 if the relation is true and a 0 if the relation is false
The Relational operators, their syntax, and their functions are listed below :
A
A
A
A
A
A
< B checks if A is less than B (works only on real part)
> B checks if A is greater than B(works only on real part)
<= B checks if A is less than or equal to B(works only on real part)
>= B checks if A is greater than or equal B(works only on real part)
= = B checks if A is equal to B(works on real and imaginary part of operands)
~= B checks if A is not equal to B(works on real and imaginary part)
All the relational operators are relatively self-explanatory.
operators and their uses, some more examples are presented.
To understand relational
Example I.4.4.1
Create variables a and b. Set a to 6 and b to 8. Then use some of the relational operators to
compare a and b and observe the results.
»a=6
a=
6
»b=8
b=
8
»a>b
ans =
0
»a<b
ans =
1
64
» a == b
ans =
0
»
Note that relational operations return a "1" if the relationship is true, and a "0" if it is false.
Example I.4.4.2
Create matrices c and d. Let c be a 2x2 matrix equal to [1 5;7 3] and d be a 2x2 matrix
equal to [9 5;2 7]. Again use some of the relational operators to compare c and d and see what
type of results you get.
» c = [1 5;7 3]
c=
1
7
5
3
» d = [9 5;2 7]
d=
9
2
5
7
» c >d
ans =
0
1
0
0
» c >=d
ans =
0
1
1
0
» c == d
ans =
0
0
1
0
» c <d
ans =
65
1
0
0
1
» c <=d
ans =
1
0
1
1
»
Example I.4.4.3
Now create two complex variables e and f. Let e be equal to 3 + 5i and f be equal to 2 +
7i. Again use some of the relational operators to compare e and f and see what type of results you
get.
» e = 3 + 5i
e=
3.0000 + 5.0000i
» f = 3 + 7i
f=
3.0000 + 7.0000i
» e ~=f
ans =
1
» e == f
ans =
0
» e >f
ans =
0
» e >=f
ans =
1
66
»
As can be seen by the previous example, all the relational operators, excluding the (= =) and (~=)
operators, test only the real part of the operands. Relational operators are very useful for
comparing variables and for decision making, as required in for and if loops.
I.4.5
Logical Operators
The final set of operators are Logical operators. They perform the AND, OR, and NOT
operations. The syntax used is as follows :
A&B
A|B
~A
xor(A,B)
A AND B
A OR B
NOT A
EXCLUSIVE OR of A and B
As is the case with Relational operations, if a Logical operation is TRUE then a 1 is
returned and if it is FALSE a 0 is returned.
Remember
When Logical operators are used in calculations, they
have the lowest precedence
Some examples are presented here to better understand Logical operators.
Example I.4.5.1
In MATLAB write a command statement to test if 2+4 is less than 9 and 11.
» 2+4 < 9 & 11
ans =
1
»
There are some important things that should be noted in the previous example. First when
looking at the command statement above, it should read: “Is the value of 2+4 less than 9 and
11.” The answer is obviously true; however, it is important to remember that MATLAB used the
order of precedence when performing the comparison. The addition of 2+4 was performed first
67
since it has higher precedence than the AND operator. The sum was checked to see if it was less
than both 9 and 11.
Example I.4.5.2
In MATLAB, write a command statement to test if 2+4 is less than 3 or 11.
» 2+4 < 3 | 11
ans =
1
»
The command statement above should be read: “Is the value of 2+4 less than 3 or 11.” Six is
less than 11, so the operation is true and the result is 1. As with Relational operators, Logical
operators are useful in performing comparisons and for decision making in programming loops.
I.4.6
Special Characters
In this section some special characters and their uses are explained. These special
characters are helpful to know when constructing arrays, making comments in M-files, etc. The
list of Special Characters and their functions are listed below.
[]
()
=
‘
.
,
;
%
!
Brackets are used to form vectors and Matrices
Parentheses are used to indicate precedence in arithmetic expressions
Used in assignment statements, ==is a Relational operator
Matrix Transpose
Decimal point
Used to separate matrix subscripts and function arguments
Used after expression to suppress printing
Denotes comment
Indicates the rest of the input line is a command to the operating system
You should have been exposed to most of these characters in the previous sections.
However, since we have been stressing operators and the importance of precedence in arithmetic
expressions, let's look at one more example.
Example I.4.6.1
In MATLAB write a command statement to test if 9 + 2*2 > 20. Then add parentheses
around 9 + 2 to see the difference.
» 9 + 2*2 > 20
68
ans =
0
» (9 + 2)*2 > 20
ans =
1
»
As can be seen in the previous example, the parentheses changed the values on the left
hand side of the expression.
In this section we covered several important topics from the use of operators to the use of
special characters. By going through the examples, the user should become more comfortable
with MATLAB and more confident in writing M-files.
69
I.5
Two- Dimensional Graphics
I.5.1
Linear X-Y Graphs
The common command for plotting two-dimensional data is the plot command. This command
plots sets of data arrays on appropriate X-Y (horizontal and vertical ) axes, and connects the
points using straight lines. Here is an example of how to use the plot command:
Example I.5.1.1
»x = 0:0.01:2 * pi;
»y = sin(x);
»plot(x, y)
»
1
0.8
0.6
0.4
0.2
0
-0.2
-0.4
-0.6
-0.8
-1
0
1
2
3
4
5
6
7
This example creates 629 data points over the range 0≤x ≤2π to form the horizontal axis of the
plot. It also creates another array, y, containing the corresponding sine of the data in array x.
Once the plot command is entered, MATLAB will open a graphics window (Figure Window)
and graph the data by using straight lines to connect the points. It also adds numerical scales and
70
tick marks to the axes automatically. If a Figure Window already contains a graph, the plot
command clears the current Figure Window and plots a new graph.
The Plot Command
plot(horizontal axis, vertical axis)
An array holding the horizontal variable.
An array holding the function to be plotted.
Rotate 90o
plot(vertical axis, horizontal axis)
An array holding the function to be plotted.
I.5.2
An array holding the horizontal variable.
Multiple Plots on the Same Axes
There are different ways of plotting more than one set of data on the same set of axes:
1) using the hold command, or
2) using the plot command with a multiple pair of arguments
The Hold Command
The hold command holds the current plot and all axes properties so that the subsequent graphing
commands add to the existing command.
Example I.5.2.1:
» x = 0:0.01:2 * pi;
» y = sin(x);
» z = cos(x);
» zz = sin(x + pi / 4);
» plot(x, y)
» hold
Current plot held
71
» plot(x, z);
» plot(x, zz);
»
Once the hold command is entered, MATLAB continues plotting new graphs on the same axes.
1
0.8
0.6
0.4
0.2
0
-0.2
-0.4
-0.6
-0.8
-1
0
1
2
3
4
5
6
7
You can stop holding the current graphs by either entering another hold command or using the
hold off command.
To stop MATLAB from holding the current plots, enter
hold off
or
hold (if a hold command has been entered before)
Another way of plotting multiple functions on the same set of axes is by giving the plot
command more than one pair of arguments.
Example I.5.2.2:
» hold off
» x = 0:0.01:2 * pi;
» y = sin(x);
» z = cos(x);
» plot(x, y, x, z)
»
72
1
0.8
0.6
0.4
0.2
0
-0.2
-0.4
-0.6
-0.8
-1
0
1
2
3
4
5
6
7
Remember
Many functions may be plotted at one time if you supply additional pairs of arguments to the plot
command.
If one of the arguments in the plot command is a matrix and the other is a vector, then
MATLAB graphs each row of the matrix versus the vector.
Example I.5.2.3:
» x = 0:0.01:2 * pi;
» y = sin(x);
» z = cos(x);
» zz = sin(x + pi / 4);
» mat_y_z_zz = [y; z; zz];
» plot(x, mat_y_z_zz)
»
In this example, you created a matrix , mat_y_z_zz, whose rows are sin(x), cos(x) , and sin(x + pi
/ 4). The plot command graphs the rows of this matrix versus the variable x at the same time on
the same set of axes.
73
I.5.3
Interpretation of Plot Command with a Single Argument
When the plot command is used with a single argument, plot(y), it acts based on the data
contained in y. If y is a complex-valued function, then plot(y) is interpreted as plot (Real(y),
Imag(y)). In all other instances, the imaginary component of y is ignored.
Example I.5.3.1:
» x = 0:0.01:2 * pi;
» y = sin(x) + cos(x) * i;
» plot(y)
»
1
0.8
0.6
0.4
0.2
0
-0.2
-0.4
-0.6
-0.8
-1
-1
-0.8
-0.6
-0.4
-0.2
0
0.2
0.4
0.6
0.8
1
In this example, you created a complex array y with Real(y) = sin(x) and Imag(y) = cos(x). The
plot command, plot(y) , graphs cos(x) versus sin(x).
When y is a real-valued function, then plot(y) is interpreted as plot(x,y). If there is no array
involved in the calculation of y, then plot(y) is interpreted as plot(1:length(y),y). That is, y is
plotted versus an index of its values. For example, when the single argument is a matrix, then
these interpretations are applied to the columns of the matrix.
Example I.5.3.2:
» x = 0:0.01:2 * pi;
» mat_y_z = [sin(x); cos(x)];
» mat_y_z = mat_y_z';
» plot(mat_y_z)»
74
1
0.8
0.6
0.4
0.2
0
-0.2
-0.4
-0.6
-0.8
-1
0
100
200
300
400
500
600
700
In this example, you created a matrix mat_y_z with its first and second column being sin(x) and
cos(x), respectively. Note that MATLAB interpreted the plot as plotting sin(x) and cos(x) versus
its index ( number of rows) not the values of x.
Teaser I.5.3.1:
In the previous plots, you have seen different scales for the x-axis.
One divided the x-axis between 0 and 7, the other between 0 and 700. Can you explain why ?
If you couldn’t explain this, see our explanation at the end of this chapter.
I.5.4 Line Styles, Markers, and Colors
Various line types, plot symbols and colors may be obtained with plot(x,y,s), where s is a
character string made of one or more elements from the following columns labeled “Symbol.”
75
Symbol
Color
y
yellow
m
magenta
c
cyan
x
r
red
g
green
b
blue
w white
d
k
black
Symbol
Marker
Symbol
Line Style
.
o
point
circle
:
solid
dotted
x-mark
+
*
s
-.
plus
star
square
diamond
v
triangle (down)
^
triangle (up)
<
triangle (left)
>
triangle (right)
p
pentagram
h
hexagram
dashdot
--
dashed
Example I.5.4.1:
» x = 0:0.1:2 * pi;
» y = sin(x);
» z = cos(x);
» plot(x, y, 'kp-', x, z, 'gd--')
»
76
1
0.8
0.6
0.4
0.2
0
-0.2
-0.4
-0.6
-0.8
-1
0
1
2
3
4
5
6
7
In this example, y is plotted with black color (k), pentagram marker ( p), and solid lines. The
function z is plotted with green color (g), diamond marker (d), and dashed lines (--).
Remember
Line style, marker, and color must follow each pair of the arguments in the plot command.
These parameters must be enclosed in single quotation marks , ‘ ’.
plot(x, y, ‘bd*’)
x = horizontal axis
y = vertical axis
b= blue color
d = diamond marker
* = start line style
I.5.5
Plot Appearance
MATLAB allows flexibility as to how you want your plot to appear on the screen. You can add
grids, label the axes, insert a title, create a legend, and eliminate the box that surrounds your
graph.
Adding Grids
77
Example I.5.5.1:
» x = 0:0.01:2 * pi;
» plot(y)
» grid on
»
1
0.8
0.6
0.4
0.2
0
-0.2
-0.4
-0.6
-0.8
-1
0
100
200
300
400
500
600
700
To remove the grid, simply enter
» grid off
»
Labeling Axes
xlabel
Labeling axes is simple!
xlabel(‘whatever you want for x-axis’)
ylabel(‘whatever you want for y-axis’)
» xlabel('This is where the x-label goes.')
» ylabel('This is where the y-label goes.')
78
1
0.8
This is where the y-label goes.
0.6
0.4
0.2
0
-0.2
-0.4
-0.6
-0.8
-1
0
100
200
300
400
500
This is where the x-label goes.
600
700
Titling Your Plot
The title command adds a line of text at the top of the plot.
title(‘This is where the title goes’)
» title('This is where the title goes.')
»
79
This is where the title goes.
1
0.8
This is where the y-label goes.
0.6
0.4
0.2
0
-0.2
-0.4
-0.6
-0.8
-1
0
100
200
300
400
500
This is where the x-label goes.
600
700
Remember
You can add a label (or any other text string) to any specific location on your plot with the text
command.
text ( x,y, ‘text string’)
The point (x,y) represents the coordinates of the center left edge of the text string in units taken
from the plot axes.
For example, you can add y = sin(x) at the location (300,0.4) as:
» text(300,0.4,'y = sin(x)')
»
80
1
0.8
0.6
0.4
y=sin(x)
0.2
0
-0.2
-0.4
-0.6
-0.8
-1
0
100
200
300
400
500
600
700
Legends
Rather than using an individual text string to identify each graph, you may use a legend. The
legend command creates a legend box in the upper right corner of the plot and adds any text that
you supply to each line in your plot. If you wish to move the legend to a different location,
simply click and drag it to the desired location.
Example I.5.5.2:
» x = 0:0.01:2 * pi;
» y = sin(x);
» z = cos(x);
» plot(x, y, '-', x, z, '--')
» legend('- sin(x)', '-- cos(x)')
»
81
1
- sin(x)
-- cos(x)
0.8
0.6
0.4
0.2
0
-0.2
-0.4
-0.6
-0.8
-1
0
1
2
3
4
5
6
7
Remember
You can click and drag the legend box to any location that you desire.
To remove the legend, simply enter:
legend off
Remember
To remove the title, x-label, and y-label, enter:
xlabel(‘ ‘)
ylabel(‘ ‘)
title(‘ ‘)
The Axes Box
When you plot a function, the box is “ON.”
To remove the box, simply enter:
box off
82
To add the box, simply enter:
box on
This is where the title goes.
1
0.8
This is where the y-label goes.
0.6
0.4
0.2
0
-0.2
-0.4
-0.6
-0.8
-1
0
100
200
300
400
500
This is where the x-label goes.
600
700
Scaling Axes
MATLAB automatically scales the axes to fit your data set. To manually scale the axes, you can
use the axis command. This gives you complete control over the scaling and appearance of the
horizontal and vertical axes of your plot.
Scaling Axes
You can control the scales of the x and y axes by
axis([xmin, xmax, ymin, ymax])
which sets the minimum and maximum values for the horizontal and vertical axes.
Auto Scaling
83
The default scaling is automatic. However, if you have scaled the axes manually, you can always
go back to auto scaling by entering
axis auto
Axes “Off” and Axes “On”
You can turn the axes on or off. The default is on. To turn the axes off, enter
axis off
The axis command is a powerful way of controlling the appearance of your plot. In addition to
the above features, you can do much more. To get a complete list of what you can do with the
axis command, type “help axis” at the prompt in the Command Window.
I.5.6
Manipulating Plots
At this time, you should know how to plot more than one set of data on the same set of axes by
using the hold command. However, there are times when you would like to plot more than one
set of data on different sets of axes in the same window. This can be done by using the subplot
command. The subplot command divides the Figure Window into different areas defined by the
argument of the subplot. For example:
subplot(m,n,p)
divides the Figure Window into m ✖ n rectangular panes (m rows and n columns) and creates a
set of axes in the pth pane where the data will be plotted.
Example I.5.6.1:
» clear
» x = 0:0.01:2 * pi;
» y = sin(x);
» z = cos(x);
» zz = sin(x + pi / 4);
» subplot(2, 3, 1)
» plot(y)
» subplot(2, 3, 3)
» plot(z)
84
» subplot(2, 3, 5)
» plot(zz)
»
Plots of y, z, and zz will be in panes 1, 3, and 5, respectively.
1
1
0.5
0.5
0
0
-0.5
-0.5
-1
0
500
-1
1000
0
500
1000
1
0.5
0
-0.5
-1
0
500
1000
I am stuck in subplot, get me out !
Okay, just close the Figure Window by clicking the left mouse button on the top right
corner (X). After the Figure Window has closed, open it by entering the command figure(1) in
the Command Window. MATLAB will open a Figure Window that contains no plots. I hope
you learned your lesson and learned how to get out of trouble!
Zooming on Plots
The zoom command,
zoom on
is used to activate the interactive “zoom in” function of the MATLAB. Once this
command is entered, clicking the left mouse button on the plot will “zoom in” and clicking the
right mouse will “zoom out” the plot.
>>
85
1
Filling the Area
0
-1
0
2
4
6
You can fill in the area under the curve by using the area command.
» x=0:0.1:2*pi;
» y=sin(x);
» area(x,y)
»
Plotting on log-log and semi-log Scales
The loglog command is the same as the plot command except that the logarithmic scales are used
for both axes.
» x=1:2:1000;
» y=x.*x+2*x+300;
» loglog(x,y)
»
86
6
10
5
10
4
10
3
10
2
10
0
10
1
2
10
10
3
10
The semilogx command is the same as the plot command except that the horizontal axis is a
logarithmic scale.
semilogx(x,y)
This command is the same as plot(x,y)
except that
the x-axis will be on a semi-log and the y-axis on a linear scale.
The semilogy command is the same as the plot command except that the vertical axis is a
logarithmic scale.
semilogy(x,y)
This command is the same as plot(x,y)
except that
the x-axis will be on a linear scale and the y-axis on a semi-log.
87
Pie Chart
pie(x)
Plots a pie chart of vector x.
pie(x,b)
b is a logical vector describing a slice or slices to be pulled out of the pie chart.
» x = [1 2 2 3 2];
» pie(x)
» subplot(2, 2, 1)
» pie(x)
» subplot(2, 2, 2)
» pie(x, x==min(x))
Bar Graphs
10%
10%
20%
20%
20%
20%
30%
20%
30%
20%
88
bar(x,y)
This command is the same as plot(x,y)
except that
it plots a bar graph.
Printing Your Results
There are different ways of printing plots. The two most common ways are:
a) Click on the Figure Window, choose print from the File menu, or
b) Click on the Figure Window, then type print at the prompt on the Command Window.
In the latter, you can control the print orientation and size by using the following commands:
» orient landscape
This command tells the printer to change the printout orientation from portrait to landscape.
»orient tall
This command tells the printer to stretch the plot to fill the vertical page.
Teasers’ Answer
Teaser I.5.3.1
The argument of the plot command dictates how the x-axis is scaled. If a single argument is
used for the argument of the plot command, i.e., plot(y), then MATLAB uses the minimum and
the maximum values of x to scale the x-axis. If a pair of variables is used for the argument of the
plot command, i.e., plot(x,y), then MATLAB uses the number of points in the x vector to scale
the x-axis.
89
I.6
Three - Dimensional Graphics
I.6.1
Introduction
Three-dimensional (3D) data can be displayed in many different styles. Line, surface, and wire
mesh are examples of displaying 3D plots.
I.6.2
Line Plots
The plot3 command in MATLAB is used to display data using connected lines. A simplified
format for this command is:
The 3-D Line Plot Command
plot3(x, y, z, s)
The argument of plot3 is a fourtuple ( having four vectors), where x, y, and z are three vectors of
the same size. For each x, y, and z, there is a unique location in 3D space. The plot3 command
uses lines to connect these points with the style defined by s. If s is eliminated, then MATLAB
uses the default setting.
Example I.6.2.1:
» x = -10:0.01:10;
» y = sin(x);
» z = sin(x + pi / 3);
» plot3(y, z, x)
»title(‘Coil’), xlabel(‘sin(x)’), ylabel(‘(sin(x + pi / 3)’), zlabel(‘x’)
90
Coil
10
x
5
0
−5
−10
1
1
0.5
0.5
0
0
−0.5
(sin(x + pi / 3)
−0.5
−1
−1
sin(x)
You can plot more than one set of 3D data on the same set of axes. This can be done by adding
more fourtuples to the argument of the plot3 command. For example:
plot3(x1,y1,z1,s1,x2,y2,z2,s2)
displays two sets of three dimensional data, x1,y1,z1 and x2,y2,z2 using styles s1 an s2,
respectively. The line types, line colors, and marker symbols are specified by s in the argument
of plot3. A set of line styles, colors, and markers is given in the following table:
Table I.6.2.1
Symbol
Color
Symbol
Marker
Symbol
y
m
c
r
g
b
w
k
yellow
magenta
cyan
red
green
blue
white
black
.
o
x
+
*
s
d
v
^
<
>
p
h
point
circle
:
x-mark
-.
plus
-star
square
diamond
triangle (down)
triangle (up)
triangle (left)
triangle (right)
pentagram
hexagram
Line Style
solid
dotted
dashdot
dashed
91
Example I.6.2.2:
» x = -10:0.1:10;
» y1 = sin(x);
» z1 = sin(x + pi / 3);
» y2 = sin(x + pi / 4);
» z2 = sin(x + pi / 6);
» plot3(y1, z1, x, '-', y1, y2, x, '+')
» title('Tangled Coils')
» xlabel('y1')
» ylabel(‘z1, y2')
»
Tangled Coils
10
5
0
−5
−10
1
1
0.5
0.5
0
0
−0.5
z1, y2
−0.5
−1
−1
y1
I.6.3 Mesh Plots
Mesh plots are useful for plotting functions of two variables such as z =f (x,y).The mesh surface
is defined by the z-coordinates of points above a rectangular grid in the x-y plane. The mesh
command forms a plot by joining adjacent points with straight lines. There are four steps
involved in generating mesh plots:
Step 1. Define a desired range for two variables, say x and y.
Step 2. Use the meshgrid command to generate a mesh related to x and y:
[x, y] = meshgrid(x, y).
Step 3. Evaluate the function f(x, y), say z = sqrt(x * x + y * y).
92
Step 4. Use the mesh command to plot the mesh corresponding to z: mesh(x, y, z).
Example I.6.3.1
Plot a mesh graph for
z=
x 2 + y 2 over the range -10≤
≤ x ≤ 10 and -10 ≤ y ≤10.
» x = -10:1:10;
» y = x;
» [x, y] = meshgrid(x, y);
» z = sqrt(x.^2 + y.^2);
» mesh(x, y, z)
»
15
10
5
0
10
10
5
5
0
0
−5
−5
−10
−10
I.6.4 Surface Plots
A surface plot is the same as a mesh plot except that the patches (the space between the lines) are
filled with a specified (or default) color. All of the steps involved in plotting a surface graph are
the same as the ones for mesh plots except for step 4, where mesh is replaced by surf.
Step 1. Define a desired range for two variables, say x and y.
Step 2. Use the meshgrid command to generate a mesh related to x and y:
[x, y] = meshgrid(x, y).
93
Step 3. Evaluate the function f(x, y), say z = sqrt(x * x + y * y).
Step 4. Use the surf command to plot the surface corresponding to z: surf(x, y, z).
Example I.6.4.1:
Plot a surface graph for
z=
x 2 + y 2 over the range -10≤
≤ x ≤ 10 and -10 ≤ y ≤10.
» x = -10:1:10;
» y = x;
» [x, y] = meshgrid(x, y);
» z = sqrt(x.^2 + y.^2);
» surf(x, y, z)
»
15
10
5
0
10
10
5
5
0
0
−5
−5
−10
−10
94
I.6.5 Contour Plots
The contour command draws a contour plot of a function of two variables such as z=f(x,y). The
number of contour lines and their values are chosen automatically by the contour command.
The Contour Command
contour(x, y, z, n)
where z is a function of x and y. The parameter n defines the number of contours to be plotted by
the contour command. However, if n is deleted, then the contour command automatically
chooses the number of contours. The steps involved in drawing a contour plot of a function of
two variables are the same steps used for mesh plots except in step 4., where the mesh command
is replaced by the contour command.
Step 1. Define a desired range for two variables, say x and y.
Step 2. Use the meshgrid command to generate a mesh related to x and y:
[x, y] = meshgrid(x, y).
Step 3. Evaluate the function f(x, y), say z = sqrt(x * x + y * y).
Step 4. Use the contour command to plot the contours corresponding to z:
contour(x, y, z).
Example I.6.5.1
Plot a contour graph for
z=
x 2 + y 2 over the range -10≤
≤ x ≤ 10 and -10 ≤ y ≤10.
» x = -10:1:10;
» y = x;
» [x, y] = meshgrid(x, y);
» z = sqrt(x.^2 + y.^2);
» contour(x, y, z)
»
95
10
8
6
4
2
0
−2
−4
−6
−8
−10
−10
−8
−6
−4
−2
0
2
4
6
8
10
If you want to apply a larger number of contours, simply specify the desired number in the last
argument of the contour command. For example, to plot 20 contours, type
contour(x, y, z, 20) instead of contour(x, y, z).
I.6.6 Three-Dimensional Contour Plots
To produce a 3-D contour of a 3D function, you can use the contour3 command. The argument
of the contour3 command is the same as the argument of the contour command. The steps
involved in generating a 3-D contour plot are the same as those of the mesh command except that
in step 4, the mesh command is replaced by the contour3 command.
Step 1. Define a desired range for two variables, say x and y.
Step 2. Use the meshgrid command to generate a mesh related to x and y:
[x, y] = meshgrid(x, y).
Step 3. Evaluate the function f(x, y), say z = sqrt(x * x + y * y).
Step 4. Use the contour3 command to plot the 3-D contours corresponding to z:
contour3(x, y, z).
96
Example I.6.6.1
Plot a 3-D contour plot for
z=
x 2 + y 2 over the range -10≤
≤ x ≤ 10 and -10 ≤ y ≤10.
» x = -10:1:10;
» y = x;
» [x, y] = meshgrid(x, y);
» z = sqrt(x.^2 + y.^2);
» contour3(x, y, z)
»
14
12
10
8
6
4
2
10
10
5
5
0
0
−5
−5
−10
−10
97


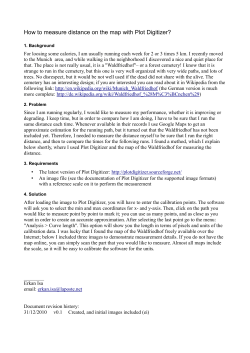


© Copyright 2026