
Your Simple Guide to the Sample Research Paper:
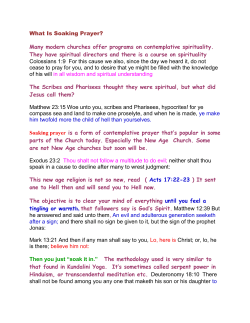
Your Simple Guide to the Sample
Research Paper:
An LRS Primer to Writing Turabian Style
James M. Kinnebrew, Ph.D.
Copyright 2003
INTRODUCTION
Your Simple Guide to the Sample Research Paper is offered as a companion
document to be used with the paper “Hell: The Necessity and Nature of Divine
Retribution.” A student of Luther Rice Seminary wrote the latter paper some
years ago as a class assignment. With that student’s permission, the paper was
slightly revised and has been used for several years to help other students see
how to format a research paper according to the guidelines published in Kate L.
Turabian’s A Manual for Writers of Term Papers, Theses, and Dissertations, 6th
ed., rev. John Grossman and Alice Bennett (Chicago: University of Chicago Press,
1996).
Mrs. Sandra Kinnebrew has always had a heart for struggling ministerial
students, and there is probably no task that causes as much consternation for a
new student as that of mastering the rules of academic writing. Seeing this, Mrs.
Kinnebrew began conducting a two-hour tutorial on the LRS campus to teach
local students how to write a Turabian-style paper. As the tutorial students look
at what has come to be known simply as “that hell paper,” Sandy explains pointby-point the various form and style issues reflected there.
Students participating in the tutorial have always been very vocal in their
enthusiastic appreciation of the instruction afforded them. Many, even on the
doctoral level, have testified that it was the most important two hours of their
student career! Though there is no substitute for the personal attention offered
at the tutorial, the present document follows the broad outlines of Mrs.
Kinnebrew’s instruction and is offered to those who cannot attend in person.
With “that hell paper” in one hand and the PC mouse in the other, the student
will walk through the sample paper noticing important aspects of seven different
items as they are pointed out in the Guidebook. It would be a good idea to take
notes right on the “hell paper.” (There will be a test!) The instructional tour
begins on the first page with the course cover sheet and ends with the final page,
the Selected Bibliography. Though it’s not a difficult trip, there is a good bit of
ground to cover; so let’s take a walk!
1
ITEM ONE: THE COURSE COVER SHEET
The first page on the sample paper is called the “Course Cover Sheet.” It should
be the first thing the professor sees when he picks up an assignment. On this
page are enumerated the following items:
1. The number and name of the course for which the work was done
2. The nature of the submission—is it a partial submission (there are
other assignments that must be done before the final grade is assigned), a
final submission (this assignment will be added to work previously
submitted to compute the final grade), or a complete submission
(consisting of the entire course work in one package)?
3. The author(s) and title(s) of the course’s required textbook(s)
4. Submittal information (including the degree being pursued)
5. The student’s name and complete mailing address
6. The student’s ID number and a daytime phone number (including
the area code)
7. The date the work was completed
8. The student’s academic advisor (this is usually AAO—the Academic
Advising Office)
9. The professor who teaches or grades the course
10. The number of hours (including that very course) that the student has
completed toward the degree
11. The number of hours that remain to be completed before the degree is
awarded (not including that course)
Each of these items is important for a proper recording of the
submission. Care must be taken not to omit any of them.
As for spacing, the information should be centered within the “writing
workspace.” This is the area on the page that remains after the margins have
been formatted. Margins for the Course Cover Sheet are as follows:
•
•
•
•
1 ½ inches on the left side
1 inch on the right side
2
1 inch on the top
1 inch at the bottom
The above margin specifications remain the same on every page except, as will be
seen later, pages that begin a major section. Those pages have a 2 inch top
margin.
The lines that separate the middle portion of the page from the top and bottom
portions are created by hitting the “underline” key 20 times. The entire page (as,
indeed, the entire paper) is written in Courier New, 12 pt. font, with
black ink.
Show your
creativity
in the content, not the
fonts or colors.
Other than the items noted above (margins, 20 space dividing lines, and font
size), no universally standard spacing is possible within the writing workspace.
This is because some courses will have a few textbooks, and others will have
many; some addresses take three lines to write out, and others take five; etc.
The key is to make the spacing uniform and visually pleasing and to keep all of
the writing centered in the workspace.
ITEM TWO: THE TITLE PAGE
The second page of the research paper is its title page. Spacing, again, depends
on the amount of information (length of title, etc.) that must be included. The
key to this page, like the previous one, is threefold.
1. Include every component:
•
•
•
•
The title of the paper (all capital letters)
The professor to whom the work is being sent (using the correct
title: Dr., Mr., Mrs., etc., but not degrees: Ph.D., M.A., etc.)
The course for which the paper was written
The student’s name and ID number
2. Work only within the “writing workspace”
3. Make the spacing between elements as balanced and visually appealing as
possible
1
ITEM THREE: THE OUTLINE
A well-conceived outline gives the author a “playing field.” It marks the
specific bases that he must touch before he “scores,” and it draws base lines
that keep him from running all over creation on his way from one point to the
next. It may be the most basic key to a well-written paper.
Because of this, one must spend significant thought and time on the outline
prior to beginning the paper. Unless the student already possesses a
good grasp of the topic, some research will be necessary before an outline can
be created. A perusal of encyclopedia articles and introductory textbooks will
give one a general knowledge of the paper’s topic and an idea of the issues
that merit investigation. With that knowledge in hand, one can decide what
points should be covered in the paper, put those points into a logical outline,
and use that outline to guide and limit the rest of his research.
The third page in the research paper gives the author’s outline, allowing the
reader to preview the ground that is about to be covered. Note the following
factors:
•
The top margin of this (and any other page that begins a main section
of the paper) is 2”. Other margins remain the same (1 ½” on the left, 1”
on the right, and 1” on the bottom).
•
This preliminary page is numbered ii (since the title page is
considered the first preliminary page of the paper [i], though not
numbered, and the course cover sheet is not technically a part of the
research paper at all).
•
The page number (here and everywhere) is at the bottom center of the
page and must not encroach into the 1” bottom margin. Setting the
footer at 1” will ensure that no print violates that margin.
•
The section heading, “OUTLINE,” is in all capital letters, as are the
main sections of the outline (anything with a Roman numeral next to it
is considered a main section).
2
•
Lesser-level subheadings (those not specified by Roman numerals) are
written in upper and lower case letters. In these, the first and last
words always begin with capital letters, as do all other words except
conjunctions, articles, and prepositions. Note the mnemonic: “Do
not CAP conjunctions, articles, or prepositions.”
•
The Roman numerals are arranged so that the dots line up vertically
with each other. To do this, one must hit the space bar twice before
typing I. and once before typing II. The space bar, then, is not hit at all
before typing III., and it is hit once before typing IV.
•
There are two spaces after the dot that follows each numeral or letter in
the outline.
•
A paper of this length (8-15 pp.) will usually have a brief and
uncomplicated outline, consisting of the INTRODUCTION, the TITLE
TOPIC (broken into however many facets of that topic are to be
covered), the CONCLUSION, and a SELECTED BIBLIOGRAPHY
•
In longer papers, the outline may have more levels of subheadings. If
so, the sequence is Roman numeral, capital letter, Arabic numeral,
small letter, Arabic numeral in parentheses, and small letter in
parentheses. Such intricate dissection is rarely needed and will
probably not be used in most classes, but a partial example might be
helpful:
I. THE PICTURES OF HELL
A. Hell As Fire
1. Hell Fire in the Old Testament
a In the Pentateuch
1) Genesis
2) Exodus
b In the Prophets
2. Hell Fire in the New Testament
a. In the Teaching of Jesus
1) His proclamation
2) His parables
a) The rich man and Lazarus
b) The sheep and the goats
b. In the Teaching of the Apostles
B. Hell As Fury
II. THE PUNISHMENT OF HELL
3
NOTE: Every level of heading or subheading must have at
least two sections.
(In other words, if there is an “I,” there must be an “II”; if
there is an “A,” there must be a “B”; if there is a “1,” there
must be a “2”; and so forth).
HOWEVER, it is not important that every level be divided to
the same extent (for example, there are more divisions in
the section on Jesus’ teaching than there are on the
prophets’ teaching in the above outline—no one in all the
Bible said so much about Hell as Jesus did).
Note, also, that the descending levels are all indented 2
blank spaces beyond the level that precedes them.
And, finally, note that the capitalization varies according to
levels: The main points are written entirely in capital
letters; the subpoints, at levels 1-3, are written in “headline
style” (see the first “bullet” on p. 6 above); and levels 4-5
are capitalized “sentence style” (only the first word and
proper nouns begin with capital letters).
4
ITEM FOUR: THE INTRODUCTION
Although it appears first, the Introduction is the last part of the paper to be
written. This is so for the simple reason that one cannot introduce to someone a
thing that does not yet exist (I would like to introduce my grandson to you, but he
has yet to be conceived)! Only after the body of the paper is written is the author
able to give a concise and accurate Introduction.
A striking question, an interesting illustration, a startling statistic, or some other
way of engaging the reader’s attention will serve as a good start to the
Introduction. The point, however, is not to entertain or even to inform; that is
the job of the main body of the paper. The Introduction is simply to engage the
reader and let him know what the body of the paper is going to discuss. It is a
tried and true method: “Tell them what you are going to tell them; tell
them; then tell them what you told them.” The first of those three
“tellings” is the job of the Introduction. Notice in the sample paper that the
author spends no time in the Introduction arguing for the existence of Hell or
telling what its nature is. In the Introduction, he simply says that those two
topics are about to be discussed.
As for format, note the following:
•
Because this begins a major section of the paper (i.e., it rates a Roman
numeral in the outline), the top margin is 2”. Other margins remain the
same.
•
The section heading, “INTRODUCTION,” is in all capital letters.
•
This is the first page of the paper proper, so it is numbered “1.” (Without
the quotation marks and the period of course!)
•
Every section of the paper, i.e., every item that merits mention in the
outline, should have at least two paragraphs, as seen in the sample paper’s
Introduction.
5
ITEM FIVE: THE BODY
The body of the paper contains the results of the author’s research on his topic.
This is the “tell them” part of the paper. Note the following format and writing
style factors:
From Page Two
•
Since this begins a major section of the paper, it starts on a fresh page
(even though the Introduction did not use all of page 1).
•
Since it begins a major section, the top margin is 2” deep. Other margins
remain the same.
•
The major heading is the same as the title of the paper and is written in all
capitals.
•
The first-level subheading (any element marked with a capital letter in the
outline) is centered, italicized, and written with both upper and lower case
letters. NOTE: The definite article “The” is capitalized because it is the
first word in the subheading; “of” is not capitalized, because it is a
preposition. (A dictionary will help when one is uncertain what part of
speech a particular word is.)
•
All headings and subheadings appear in the text exactly as they appeared
in the outline (minus the numerals or letters). In other words, if the
outline says “The Necessity of Hell,” the subheading on page 2 cannot say
“Why Hell Is Necessary.”
•
There is a triple space (two blank lines) between the main heading (HELL:
THE NECESSITY AND NATURE OF DIVINE RETRIBUTION) and the
first-level subheading (The Necessity of Hell). Some typists prefer to
double space the entire paper and then go back to places where a triple
6
space is needed and insert a manual carriage return to add the extra
blank line.
•
There is a double space (one blank line) between the subheading and the
following text.
•
Paragraphs are indented 5 spaces (this is the default setting for most word
processors).
•
Sentences are separated by 2 spaces. That is, there are two blank spaces
after the period (or other end punctuation).
•
When an end quotation mark and a punctuation mark are juxtaposed (as
in the next to last sentence of the first paragraph), the order is as follows:
1. Periods and commas always precede the quotation mark
2. Semicolons and colons always follow the quotation mark
3. Question marks and exclamation points precede the quotation
mark if they are a part of the quoted material, but they follow the
quotation mark if they are not
•
The line that separates text from footnotes is formed by hitting the
underline key 20 times.
•
Footnotes are numbered with a superscript numeral. In the text, that
number comes after the quotation mark (see fn. 1). Each footnote is
single-spaced, with a double space between the notes.
•
Footnotes are numbered consecutively throughout the paper (in other
words, one does not renumber from 1 just because he is on a new page).
•
The preference at LRS is that the word “Bible” and its synonyms
(Scripture, Gospel, Canon, Word, etc.) be capitalized, as in the second
sentence on p. 2. On the other hand, the related adjectives (biblical,
scriptural, canonical, etc.) are not to be capitalized.
•
When the author mentions another person for the first time, the full name
should be given (e.g., A. E. Hanson, not Hanson). After the first mention,
a person may be referred to by last name alone. Note also that there is a
space between initials in a name.
•
Book titles are italicized (not underlined) in Upper and Lower Case
letters. (Students using typewriters instead of computers may underline
items that would ordinarily be italicized.)
7
•
Scripture references given after a quote are noted parenthetically in the
text, not in footnotes.
•
A Scripture reference that is an integral part of a sentence (as is Matt 25.46
in the last sentence on p. 2) is not put in parentheses. Only things that
could be omitted without changing the meaning of the sentence should be
put in parentheses.
•
There is no period after the abbreviation of a Bible book, but there is a
period (not a colon) between the chapter and verse of a reference.
•
The first time a Scripture is quoted (not cited), the version used should be
stated in a footnote (see fn. 2 in the sample paper).
•
Names in footnotes are written in normal order (first name first).
•
Dictionary articles are named in quotation marks after the abbreviation
s.v. (sub verbo, Latin, “under the word”). If the article is signed, its
author’s name is given in the footnote. Note the order of information.
•
If a source is going to be used repeatedly, the author may wish to designate
an abbreviation for that source in the first citation and use the
abbreviation thereafter (e.g., DCT in footnote 1, cf., fn. 7).
FROM PAGE THREE
•
When Scripture is quoted, as seen on line 4 of page 3, the order after the
quote is:
1. End quotation marks
2. Parenthetical reference
3. Period (or other end punctuation)
•
When a quote is four or more lines of text, it should be “blocked.” A block
quote is single-spaced and indented 4 blank spaces on the left. It is not
indented on the right at all. It is separated from the rest of the text by a
blank line before and after.
•
There are no quotation marks used in a block quote (unless they appear in
the original source). The blocking of the text serves the purpose of
notifying the reader that someone else is being quoted.
•
Quoted material should be reproduced exactly as it is in the original source
(note that the Scripture references in the block quote are not in the style
8
preferred by LRS, but they are rightly reproduced as they appeared in the
original).
•
Note the order of footnote data: Author’s name (natural order), book title
(in italics), city, publisher, and date (all in parentheses), and page
numbers (numbers only, no “p.”). Note, too, the punctuation: Author,
COMMA; title BEGIN PARENTHESES; city, COLON; publisher, COMMA;
date, END PARENTHESES & COMMA; page number, PERIOD.
•
If the publisher’s city is well known (e.g., Nashville), it is not necessary to
note the state. If the city is not so well known (e.g., Valley Forge), the twoletter state abbreviation used by the United States Postal Service is given.
FROM PAGE FOUR
•
There is a triple space (two blank lines) between the last line of text and
the following subheading (as seen above).
•
There is a double space (one blank line) between the subheading and the
following text (like above).
•
The text (other than block quotes) is double spaced.
•
Foreign language words are italicized (unless they have become a
commonly recognized part of the English language, e.g., the French word
“eureka”).
•
Once a source has been footnoted, subsequent uses of that source may be
noted with an abbreviated reference (author’s last name, title, and page
number).
FROM PAGE FIVE
•
Reprint editions are footnoted as in fn. 6. The abbreviation “n.d.” signifies
that there is “no date” given for the original publication.
•
“Ibid.” signifies that the footnoted quote is from the same source cited in
the previous note. “Ibid.” without a page number means “same source,
same page.”
•
“Ibid.” should not be used as the first (or only) footnote on a page, since
such a use would require the reader to search other pages for the referent
note.
9
ITEM SIX: THE CONCLUSION
The Conclusion wraps things up. This is where, having “told” his readers all
he wanted to tell them, the writer “tells them what he told them.” New
information is not appropriate here. An illustration, application, or short
quote might be relevant, but the purpose of the Conclusion is to reiterate the
points that were made in the body of the paper. Note these form and style
points in the sample paper (p. 7):
•
This being the first page of another major section of the paper, the top
margin is 2” deep. All other margins remain the same.
•
The section heading, “CONCLUSION,” is written in all capital letters.
•
There are two blank lines (triple spacing) between the heading and the
following text.
•
In this instance the first line of the block quote is indented 8 blank
spaces, because in the original source (the Holman Bible Dictionary)
this material began a new paragraph. In such cases, the block quote is
indented 4 spaces (to “block” it), and the first word is indented 4 more
spaces (to show that, in its original context, it was the beginning of a
new paragraph).
•
This entire paper has been written in the third person (no “I,” “you,”
“we,” etc.). This is the proper style for an academic paper. When the
writer does refer to himself at the end, he uses the phrase “this writer.”
This is acceptable, but there is actually no reason for a self-reference
10
here. The sentence would read smoother and convey the same
meaning if it were written: “Finally, Hell can be described as a place of
demons, distress, deprivation, debts coming due, and duration.” The
reader knows whose paper he is reading, so there is no reason to say,
“This is what this writer thinks.” Avoiding self-reference is a discipline
with which many students struggle, but once mastered it improves
their writing immensely.
•
One other point should be made regarding writing in the third person.
By that rule, phrases such as “our Lord Jesus Christ,” “in our day and
age,” etc. are prohibited. The author of the sample paper avoided that
mistake on p. 7, calling the Savior “the Lord Jesus.”
11
ITEM SEVEN:
THE SELECTED BIBLIOGRAPHY
The final section of the research paper is the “SELECTED BIBLIOGRAPHY.”
It lists every work that is mentioned in the paper, whether actually quoted or
not. It may also contain other works that the writer found helpful in
researching the topic, even though those works were not quoted, or even
mentioned in the paper. Titles that were never consulted should not be
included in this list.
•
The top margin is 2” because this is the beginning of a new section of
the paper.
•
The correct heading is “SELECTED BIBLIOGRAPHY,” not simply
“BIBLIOGRAPHY.”
•
There is a triple space (2 blank lines) between the heading and the first
entry.
•
The entries are single-spaced with a double space (1 blank line)
between each entry.
•
The entries contain all of the information that the footnotes contained
(except page numbers), but the arrangement and punctuation are
different.
•
The first line of each bibliographical entry is flush with the left margin,
but all subsequent lines are indented 5 empty spaces.
•
Entries are arranged alphabetically by the author’s last name or, if no
author is given, the title. Note: if the title begins with an article, as The
Holy Bible, it is alphabetized by the second word in the title.
12
•
The general arrangement of an entry is as follows: The author’s last
name, a COMMA, the first name and (if applicable) middle name or
initial, a PERIOD, the book title (in italics), another PERIOD, the city,
a COLON, the publisher, a COMMA, the date, and a final PERIOD.
•
Dictionary and encyclopedia articles vary slightly from the above (see
the sample).
•
Journal and periodical articles have another arrangement, as do works
with more than one author (see the samples).
•
In bibliographical entries, and only there, a period is followed by
only one blank space.
•
In longer Bibliographies, it is helpful to separate the various kinds of
resources (books, periodicals, lexicons, encyclopedias, etc.) with
centered, italicized subheadings.
13
SUPPLEMENTAL INFORMATION
The preceding “walking tour” has stopped at all the major points of interest in
the sample research paper. It has likely pointed out more than most students
ever knew was there. Still, there are a few important details that could not be
seen from the vantage points visited in this brief “walk through.” The sample
paper, for example, only had two levels of heading/subheading. What is the
proper placement for headings beyond those two levels? The sample paper
cited enough Scripture to clue one in to the fact that the preferred method of
abbreviation might not be the method that the student has been accustomed
to using, but it did not give the accepted abbreviations for all the Bible books.
These considerations and others follow.
HEADINGS & SUBHEADINGS
Turabian’s Manual gives the following instructions for the placement of
different subheadings (1.37-38):
1. Main Headings (those items denoted by a Roman numeral in the
outline) are written in all capital letters and centered at the top of a
new page (with a 2” top margin):
HELL: THE NECESSITY AND NATURE
OF DIVINE RETRIBUTION
2. First Level Subheadings (capital letters in the outline) are centered,
italicized, and written in headline style (upper & lower case letters)
with a triple space (two blank lines) after the preceding text:
The Necessity of Hell
14
3. Second Level Subheadings (Arabic numbers in the outline) are
centered, written in normal text (not italics), and capitalized in
headline style:
The Doctrine of Hell in the New Testament
4. Third Level Subheadings (small letters in the outline) are flush to
the left margin, italicized, and capitalized in headline style:
Hell in the Teaching of Jesus
5. Fourth Level Subheadings (parenthetical numbers in the outline)
are flush to the left margin, written in normal text, and capitalized
sentence style:
Hell and Jesus’ parables
6. Fifth Level Subheadings (parenthetical letters in the outline) are
written as “run-in” headings at the beginning of a paragraph. They are
italicized and capitalized in sentence style with a period at the end:
The rich man and the beggar. When Jesus told the story of the rich
man and Lazarus, the concept of a place of eternal torment was widely
accepted among the rank and file of Israel. What His audience found
surprising was not that there was a Hell, but that the rich might go there.
BIBLE BOOK ABBREVIATIONS
OT: Gen Exod Lev Num Deut Josh Judg Ruth 1-2 Sam 1-2 Kgs 1-2 Chr Ezra Neh
Esth Job Ps (Pss-plural) Prov Eccl (or Qoh) Cant Isa Jer Lam Ezek Dan Hos Joel
Amos Obad Jonah Mic Nah Hab Zeph Hag Zech Mal
NT: Matt Mark Luke John Acts Rom 1-2 Cor Gal Eph Phil Col 1-2 Thes 1-2 Tim
Tit Phlm Heb Jas 1-2 Pet 1-2-3 John Jude Rev
Apocrypha: Add Esth Bar Bel 1-2 Esdr 4 Ezra Jdt EpHer 1-2-3-4 Mac PrAzar
PrMan Sir Sus Tob Wis
15
FINAL REMARKS
You may have noticed that the sample paper bears traces of a sermonic style.
While alliteration, illustration, and other elements common to the pulpit may be
acceptable if used with restraint, such elements are certainly not required; and
they must never be allowed to get in the way of objective, clear, and scholarly
expression.
The preceding pages have covered most of the things you need to know for
writing papers at Luther Rice Seminary. Inevitably, though, questions will arise
that were not addressed in this brief survey. The two sources that will prove to be
most helpful in such cases are:
•
Turabian, Kate L. A Manual for Writers of Term Papers, Theses, and
Dissertations. 6th ed. Revised by John Grossman and Alice Bennett.
Chicago: University of Chicago Press, 1996.
•
Vyhmeister, Nancy Jean. Quality Research Papers. Grand Rapids:
Zondervan, 2001.
Now, if you are reading this Guide as part of
Lesson 1 in the Introduction to Theological
Research & Writing class, close this window and
go back to the contents of lesson one for the
post-test. Don’t worry, because . . .
The One who calls you is faithful, and He will do it!
(1 Thess 5.24)
16


© Copyright 2026