
Graham Training Letter Some tips for Hot Weather Painting
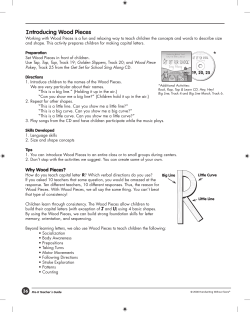
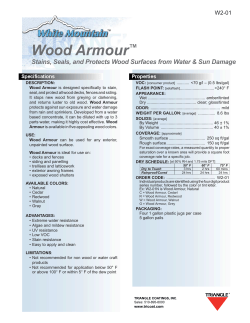
Newsletter 7/17/07
Volume 1, Issue 2
Graham Training Letter
Graham Paint/ 773-585-9110
Some tips for Hot Weather Painting
Good surface preparation is always the
single most important task for almost any
painting project. More exterior paint job
failures occur from inadequate substrate
preparation than any other single reason.
Do-it-yourselfers sometimes want to jump
right in with brush and roller to get the job
done rather than spend the time to prepare
properly. Most pros know that good
preparation is vital to a good job but even
the pros sometimes miss a thing or two.
A few minutes at the counter explaining
good preparation will prevent customers
returning with complaints.
What does good surface preparation mean?
The surface must be clean and free from
oil, grease, dirt, mold, mildew, and chalk. If
the surface has been painted before, the
existing paint must be firmly attached to
the substrate. Any peeling paint must be
scraped away and the edges feather-sanded.
If there are bare spots down to the wood,
the wood should be sanded to remove any
fuzzy wood fibers. When bare wood is
exposed to the sun and air, the top cells of
the wood degrade and the cells form fuzzy,
fibrous material that are loosely attached to
the wood. When paint is applied, the paint
adheres very well to these fibers but the
fibers don’t adhere well to the solid wood.
The fibers pull away from the wood taking
the paint with it.
Pressure washing cautions
Pressure washing has become the norm
for cleaning surfaces prior to painting.
Pressure washers do a good job of
knocking off dirt. However, they aren’t
perfect (just like us humans).
Used on wood, the power washes removes
dirt, and also roughens up the top layer of
wood cells forming a fibrous material just
like mother nature does but the power
washer does it in a few minutes. If these
fuzzy materials are not sanded off, any
full-bodied paint will very likely peel
off. Natural and Semi-transparent oil
based stains will penetrate the wood and
not be affected by the fuzzy fibers.
When power-washing vertical siding, the
nozzle should be held slightly downward
so the spray goes down rather than up.
The reason for this is to prevent water
from being forced up under the siding.
Getting the inside side of the siding wet
may cause adhesion problems for the
paint as well as reduce the efficiency of
the insulation. Also, having dirty water
run down from behind the siding to the
board below across the freshly painted
surface is not a pretty sight.
Power washing will wash off mildew so
you can’t see the black any more, but it
doesn’t necessarily destroy the spores.
Mildew must be killed with a good
mildewicide or a mix of one-cup
household bleach to 3 cups water. Allow
remaining on the surface for 15 minutes
and flushing thoroughly with water.
Should I let new wood age before painting?
No. The National Forest Products
Laboratory in Madison, WI. has run
extensive tests and determined that one
should paint wood outside just as soon
as possible after it is installed. As
explained above, the sun’s UV rays
attack the wood cells and turn them into
little fibers that cause paint adhesion
problems. The tests the Laboratory has
run indicate they can tell the difference
in paint longevity beginning two weeks
after the raw wood is exposed to the sun
before painting. If the wood is installed
outside and painted immediately, and
another lot of wood is allowed to
weather outside for w2 weeks before
Graham has you covered
both ways
painting, the difference in the life of the
paint can be seen, a difference of several
months. The longer the wood is left
unprotected, the longer the difference in
longevity of the paint film.
One caveat is the wood should be
reasonably dry. If the wood is too wet,
paint adhesion problems will occur.
Since treated lumber is often wet, it
should be allowed to dry before being
painted. If the treated lumber is dry, it
should be painted as soon as possible.
This applies to all wood even those that
resist insects and mold such as cedar and
redwood. They are resistant to bugs but
not to the UV rays of the sun.
Should I use Oil or Latex?
Should you use oil-based or
latex exterior paint? Should you use an
oil-based primer or a latex primer?
These are questions that often are
asked. Unfortunately, the answers
sometimes given can be confusing. In
general, a good acrylic latex finish
coat will always out-perform an oilbased finish coat in terms of
longevity and color retention. In
general, a good acrylic primer will
provide a better base for finish coats
than an oil primer.
Latex coatings form a film on
the top of the surface. There is little
penetration into the wood fibers
because the latex molecules are too
large and they don't go down into the
wood fibers even if the paint is
reduced way down in viscosity.
However, latex does adhere very
tightly to firm wood surfaces. Oilbased finishes do penetrate into the
wood fibers to some degree. The
molecules are smaller and some work
their way into the wood.
For exterior exposure
applications, paints containing 100%
“In general, a good acrylic
will always outlast an oil
based finish outside.”
acrylic resins are recommended. They
have better performance than paints
formulated with only vinyl acrylic resin
For new unpainted
wood, the best choice is almost
always acrylic latex primer and acrylic
finish coat. The only times oil-based
products would be used is if the wood
has weathered and the top layer of the
wood has become soft and punky.
You can tell if this is the case if you
carefully scrap your fingernail across
the surface of the wood and there are
Page 2 of 4
several wood fibers caught under your
fingernail. CAUTION! At one time
wood splinters were shoved under
prisoner's fingernails as a form of
torture. If you get a splinter under
your fingernail you will quickly learn
why this method of torture was so
effective. If this caution disturbs you,
you can also tell if the wood has
started to degrade by firmly applying a
piece of transparent Scotch tape to the
wood surface and pulling it off. If
there are several wood fibers on the
tape, the sun's UV rays have already
Oil or latex?
the tape, the sun's UV rays have
already done their dirty work.
If these tests indicate the wood
is sound, use acrylic latex primer and
acrylic latex finish coat. If the tests
indicate the wood has degraded, the
preferred method is to remove the
dead punky fibers by scraping or
sanding. Test again to see if any fibers
come loose. If there are no fibers
coming off, use an acrylic primer and
acrylic topcoat. If you don't remove
the loose fibers, use an oil-based
primer followed by an acrylic finish
coat.
Oil-based finish stains do
allow more of the wood texture to
show through than does latex stains,
so if you want to maximize the
appearance of the wood texture, use
an oil-based stain.
For previously
painted wood, a primer is not
necessary to be used other than spot
priming of repaired areas. The usual
preparation work, i.e. scrapping loose
paint, filling nail holes, sanding,
d
“New wood outside should
be painted as soon as
possible.”
caulking, spot-priming, etc. is required
for both acrylic latex and oil-based
finish coats. If the old paint is in
sound condition and the wood is
sound acrylic latex paint should be
used. If the wood is in very poor
condition, pitted, cracked and soft, oilbased primer followed by oil-based
finish coat is the best choice. In this
case, it is hoped that the deeper
penetration of the oil-based products
will help to hold things together. As a
rule of thumb, if more than 5 coats
of paint is already in place, use an
oil based finish.
For vinyl, aluminum and
steel siding, acrylic finish coat
should be used. No primer is
necessary. It is important that chalk be
removed before painting. There is no
reason to ever use oil-based paint on these
substrates.
For unpainted
galvanized metal, use a 100%
acrylic latex primer followed by an
acrylic topcoat. Do not use an oil-based
primer on bare galvanized metal. The zinc
in the galvanized metal reacts with the
oil resin causing paint failure.
For masonry surfaces
Use acrylic finish coats and acrylic primers
if required. Most acrylic finish coats
designed for masonry do not require
primers. Oil-based finishes should not be used
on masonry because a chemical reaction
occurs between the masonry and the alkyd
resins found in oil-based paints. This
reaction degrades the oil-based primers.
Page 3 of 4
Graham Paint
4100 W 76th Street
Unit G
Chicago, IL 60652
USA
Phone:
773-585-9110
Fax:
773-284-0989
E-Mail:
[email protected]
“Absolutely the best
paint you can buy”
We’re on the Web!
See us at:
www.grahampaint.com
Graham Paint has a great new product
called ELEMENT. This new paint is
a one-coat heavy build self-priming
paint that can be applied down to 35º
Incidentally, all Aqua Borne
Ceramic® exterior products can be
applied down to 35º.
Painters tell us it is much easier to
apply than Sherwin Williams Duration
and PPG’s Timeless.


© Copyright 2026