ABC
docz
Explore
Log in
Create new account
Download
Report
business and industrial
energy
oil
Model year 2014 USER MANUAL
Model year 2014 USER MANUAL
Model year 2014 USER MANUAL
Model year 2014 USER MANUAL
Two Step Stool Assembly Instructions Item #15501B White Item #15511B Natural
Round Metal Table & Chair Set Assembly Instructions
Legal Briefs USED CARS - BUYER BEWARE
Document 61718
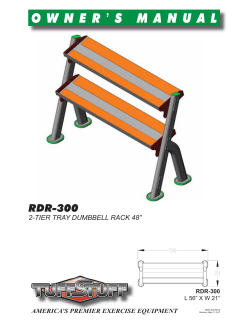
O W N E R RDR-300 2-TIER TRAY DUMBBELL RACK 48”
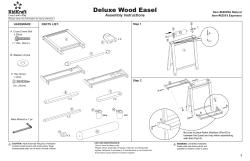
Deluxe Wood Easel Assembly Instructions Item #62005A Natural Item #62019 Espresso
HARDROCK
FG 43 Owner’s Manual Öhlins Front Fork Road & Track
October 2014 Lewis & Clark Journal: Local News & Events
© Copyright 2026
About abcdocz
DMCA / GDPR
Report