
vCloud Director Installation and Upgrade Guide vCloud Director 5.6
vCloud Director Installation and
Upgrade Guide
vCloud Director 5.6
This document supports the version of each product listed and
supports all subsequent versions until the document is
replaced by a new edition. To check for more recent editions
of this document, see http://www.vmware.com/support/pubs.
EN-001288-00
vCloud Director Installation and Upgrade Guide
You can find the most up-to-date technical documentation on the VMware Web site at:
http://www.vmware.com/support/
The VMware Web site also provides the latest product updates.
If you have comments about this documentation, submit your feedback to:
[email protected]
Copyright © 2010–2014 VMware, Inc. All rights reserved. Copyright and trademark information.
VMware, Inc.
3401 Hillview Ave.
Palo Alto, CA 94304
www.vmware.com
2
VMware, Inc.
Contents
VMware vCloud Director Installation and Upgrade Guide 5
1 Overview of vCloud Director Installation, Configuration, and Upgrade 7
vCloud Director Architecture 7
Configuration Planning 8
vCloud Director Hardware and Software Requirements 9
2 Creating a vCloud Director Server Group 27
Install and Configure vCloud Director Software on the First Member of a Server Group
Configure Network and Database Connections 30
Install vCloud Director Software on Additional Members of a Server Group 34
Install Microsoft Sysprep Files on the Servers 35
Start or Stop vCloud Director Services 36
Uninstall vCloud Director Software 37
28
3 Upgrading vCloud Director 39
Use the Cell Management Tool to Quiesce and Shut Down a Server 41
Upgrade vCloud Director Software on Any Member of a Server Group 43
Upgrade the vCloud Director Database 45
Upgrade the Existing vShield Manager or NSX Manager That Is Associated with an Attached
vCenter Server System 47
Upgrade vCenter Server Systems, Hosts, and vShield Edge Appliances 48
4 vCloud Director Setup 51
Review the License Agreement 52
Enter the License Key 52
Create the System Administrator Account 52
Specify System Settings 52
Ready to Log In to vCloud Director 53
5 Cell Management Tool Reference 55
Managing a Cell 56
Exporting Database Tables 57
Detecting and Repairing Corrupted Scheduler Data 60
Replacing SSL Certificates 60
Generating Self-Signed SSL Certificates 61
Managing the List of Allowed SSL Ciphers 62
Configuring the Metrics Database Connection 64
Recovering the System Administrator Password 65
Force Running Tasks to Complete 65
VMware, Inc.
3
vCloud Director Installation and Upgrade Guide
6 Install and Configure Optional Database Software to Store and Retrieve
Historic Virtual Machine Performance Metrics 67
Index
4
69
VMware, Inc.
VMware vCloud Director Installation and
Upgrade Guide
The VMware vCloud Director Installation and Upgrade Guide provides information about installing or
®
®
upgrading VMware vCloud Director software and configuring it to work with VMware vCenter™ to
®
provide VMware-ready VMware vCloud services.
Intended Audience
The VMware vCloud Director Installation and Upgrade Guide is intended for anyone who wants to install or
upgrade VMware vCloud Director software. The information in this book is written for experienced system
®
administrators who are familiar with Linux, Windows, IP networks, and VMware vSphere .
VMware, Inc.
5
vCloud Director Installation and Upgrade Guide
6
VMware, Inc.
Overview of vCloud Director
Installation, Configuration, and
Upgrade
1
®
A VMware vCloud combines a vCloud Director server group with the vSphere platform. You create a
vCloud Director server group by installing vCloud Director software on one or more servers, connecting the
servers to a shared database, and integrating the vCloud Director server group with vSphere.
The initial configuration of vCloud Director, including database and network connection details, is
established during installation. When you upgrade an existing installation to a new version of
vCloud Director, you update the vCloud Director software and database schema, leaving the existing
relationships between servers, the database, and vSphere in place.
This chapter includes the following topics:
n
“vCloud Director Architecture,” on page 7
n
“Configuration Planning,” on page 8
n
“vCloud Director Hardware and Software Requirements,” on page 9
vCloud Director Architecture
A vCloud Director server group consists of one or more vCloud Director servers. These servers share a
common database, and are linked to an arbitrary number of vCenter Server systems and ESXi hosts.
Network services are provided to the vCenter Server systems and vCloud Director by the VMware vShield
®
Manager™ component from VMware vCloud Networking and Security™ or by the VMware NSX
®
Manager™ component from VMware NSX™ for vSphere .
A typical installation creates a vCloud Director server group comprising several servers. Each server in the
group runs a collection of services called a vCloud Director cell. All members of the group share a single
database. Each cell in the group connects to multiple vCenter Server systems, the hosts that they manage,
and each vShield Manager or NSX Manager that is configured to support each connected vCenter Server
system.
VMware, Inc.
7
vCloud Director Installation and Upgrade Guide
Figure 1‑1. vCloud Director Architecture Diagram for an Installation That Uses vShield Manager
vCloud Director Installation
vCloud Director
Database
vCloud Director
Server
Cell
VMware vCloud Director
VMware vSphere
ESX/ESXi
ESX/ESXi
vCenter
vShield
Manager
vCenter
Database
The vCloud Director installation and configuration process creates the cells, connects them to the shared
database, and establishes the first connections to a vCenter Server system, that vCenter Server system's
associated vShield Manager or NSX Manager, and its hosts. A system administrator can then use the
vCloud Director Web Console to add vCenter Server systems, the vShield Manager or NSX Manager
associated with the added vCenter Server system, and the added vCenter Server system's hosts to the
vCloud Director server group at any time.
Configuration Planning
vSphere provides storage, compute, and networking capacity to vCloud Director. Before you begin
installation, consider how much vSphere and vCloud Director capacity you need, and plan a configuration
that can support it.
Configuration requirements depend on many factors, including the number of organizations in the cloud,
the number of users in each organization, and the activity level of those users. The following guidelines can
serve as a starting point for most configurations:
8
n
Allocate one vCloud Director server (cell) for each vCenter Server system that you want to make
accessible in your cloud.
n
Be sure that all vCloud Director servers meet at least the minimum requirements for memory and
storage detailed in “vCloud Director Hardware and Software Requirements,” on page 9.
n
Configure the vCloud Director database as described in “Installing and Configuring a vCloud Director
Database,” on page 15.
VMware, Inc.
Chapter 1 Overview of vCloud Director Installation, Configuration, and Upgrade
vCloud Director Hardware and Software Requirements
Each server in a vCloud Director server group must meet certain hardware and software requirements. In
addition, a supported database must be accessible to all members of the group. Each server group requires
access to a vCenter server, a vShield Manager or NSX Manager, and one or more ESXi hosts.
Supported Platforms
Current information about the VMware platforms supported by this release of vCloud Director is available
from the VMware Product Interoperability Matrixes located in VMware Partner Central. Log in to VMware
Partner Central using your VMware Partner account information.
vSphere Configuration Requirements
Servers and hosts intended for use with vCloud Director must meet specific configuration requirements.
n
vCenter networks intended for use as vCloud Director external networks or network pools must be
available to all hosts in any cluster intended for vCloud Director to use. Making these networks
available to all hosts in a datacenter simplifies the task of adding new vCenter servers to
vCloud Director.
n
vSphere Distributed Switches must be used for cross-host fencing and network pool allocation.
n
vCenter clusters used with vCloud Director must configure storage DRS with an automation level of
Fully Automated. This configuration requires shared storage attached to all ESXi hosts in a DRS cluster.
vCloud Director can take full advantage of Storage DRS, including support for fast provisioning, with
vCenter 5.1 or later.
n
vCenter servers must trust their hosts. All hosts in all clusters managed by vCloud Director must be
configured to require verified host certificates. In particular, you must determine, compare, and select
matching thumbprints for all hosts. See Configure SSL Settings in the vCenter Server and Host
Management documentation.
vSphere Licensing Requirements
vCloud Director requires the following vSphere licenses:
n
VMware DRS, licensed by vSphere Enterprise and Enterprise Plus.
n
VMware Distributed Switch and dvFilter, licensed by vSphere Enterprise Plus. This license enables
creation and use of vCloud Director isolated networks.
VMware, Inc.
9
vCloud Director Installation and Upgrade Guide
Supported vCloud Director Server Operating Systems
Table 1‑1. Supported vCloud Director Server Operating Systems
Operating System (64-bit only)
Updates
CentOS 6
4
Red Hat Enterprise Linux 5
4-9
Red Hat Enterprise Linux 6
1-4
Disk Space
Requirements
Each vCloud Director server requires approximately 1350MB of free space
for the installation and log files.
Memory Requirements
Each vCloud Director server must be provisioned with at least 4GB of
memory.
Linux Software
Packages
Each vCloud Director server must include installations of several common
Linux software packages. These packages are typically installed by default
with the operating system software. If any are missing, the installer fails with
a diagnostic message.
Table 1‑2. Required Software Packages
Package Name
Package Name
Package Name
alsa-lib
libICE
module-init-tools
bash
libSM
net-tools
chkconfig
libstdc
pciutils
coreutils
libX11
procps
findutils
libXau
redhat-lsb
glibc
libXdmcp
sed
grep
libXext
tar
initscripts
libXi
which
krb5-libs
libXt
libgcc
libXtst
NOTE Several procedures for configuring network connections and creating SSL certificates require the use
of the Linux nslookup command, which is available in the Linux bind-utils package.
Supported vCloud Director Databases
vCloud Director supports Oracle and Microsoft SQL Server databases. The most current information about
supported databases for this release of vCloud Director is available from the VMware Product Interoperability
Matrixes located in VMware Partner Central. Log in to VMware Partner Central using your VMware Partner
account information.
For recommended database server configurations, see “Installing and Configuring a vCloud Director
Database,” on page 15.
10
VMware, Inc.
Chapter 1 Overview of vCloud Director Installation, Configuration, and Upgrade
Supported LDAP Servers
Table 1‑3. Supported LDAP Servers
Platform
LDAP Server
Authentication Methods
Windows Server 2003
Active Directory
Simple, Simple SSL, Kerberos, Kerberos SSL
Windows Server 2008
Active Directory
Simple
Windows 7 (2008 R2)
Active Directory
Simple, Simple SSL, Kerberos, Kerberos SSL
Linux
OpenLDAP
Simple, Simple SSL
Guest OS Support
See the vCloud Director User's Guide for a list of supported guest operating systems.
Supported Databases for Storing Historic Metric Data
You can configure your vCloud Director installation to store metrics that vCloud Director collects about
virtual machine performance and resource consumption. Data for historic metrics is stored in a KairosDB
database backed by Cassandra. See Chapter 6, “Install and Configure Optional Database Software to Store
and Retrieve Historic Virtual Machine Performance Metrics,” on page 67 for more information.
vCloud Director supports the following KairosDB and Cassandra versions.
n
KairosDB 0.9.1
n
Cassandra 1.2 and 2.0
Browsers That vCloud Director Supports
The vCloud Director Web Console is compatible with recent versions of Google Chrome, Mozilla Firefox,
and Microsoft Internet Explorer.
NOTE The vCloud Director Web Console is compatible only with 32-bit browsers. When a browser is listed
as supported on a 64-bit platform, use of a 32-bit browser on the 64-bit platform is implied.
Browser Support on Linux Platforms
On these Linux platforms, the vCloud Director Web Console is compatible with the most recent version of
Mozilla Firefox and Google Chrome, and with their immediate predecessor versions.
Table 1‑4. Browser Support and Operating System Compatibility on Linux Platforms
Platform
Google Chrome
Mozilla Firefox
CentOS 6.x
YES
YES
Red Hat Enterprise Linux 6.x
YES
YES
Ubuntu 12.x
YES
YES
Browser Support on Windows Platforms
On Windows platforms, the vCloud Director Web Console is compatible with at least one version of
Microsoft Internet Explorer. Some Windows platforms are also compatible with the most recent version of
Mozilla Firefox and Google Chrome, and with their immediate predecessor versions.
VMware, Inc.
11
vCloud Director Installation and Upgrade Guide
Table 1‑5. Browser Support and Operating System Compatibility on Microsoft Windows Platforms
Internet Explorer 8.x
Internet
Explorer 9.x
Internet
Explorer
10.x
YES
YES
No
No
YES
YES
YES
No
No
Windows Server 2008
YES
YES
YES
YES
YES
Windows Server 2008 R2
YES
YES
YES
YES
YES
Windows Vista
YES
No
YES
YES
YES
Windows 7
YES
YES
YES
YES
YES
Windows 8
YES
YES
No
No
YES
Platform
Google
Chrome
Mozilla
Firefox
Windows XP Pro
YES
Windows Server 2003
Enterprise Edition
Browser Support on Macintosh Platforms
On Macintosh platforms, the vCloud Director Web Console is compatible with the most recent version of
Mozilla Firefox and Google Chrome, and with their immediate predecessor versions.
Supported Versions of Adobe Flash Player
The vCloud Director Web Console requires Adobe Flash Player 11.2 or later. Only the 32-bit version is
supported.
Supported Versions of Java
vCloud Director clients must have JRE 1.6.0 update 10 or later installed and enabled. Only the 32-bit version
is supported.
Supported TLS and SSL Protocol Versions and Cipher Suites
vCloud Director requires clients to use SSL. The following SSL server protocols are supported:
n
TLS versions 1.0, 1.1, and 1.2
n
SSL version 3
Supported cipher suites include those with RSA, DSS, or Elliptic Curve signatures and DES3, AES-128, or
AES-256 ciphers.
12
VMware, Inc.
Chapter 1 Overview of vCloud Director Installation, Configuration, and Upgrade
Summary of Network Configuration Requirements for vCloud Director
Secure, reliable operation of vCloud Director depends on a secure, reliable network that supports forward
and reverse lookup of hostnames, a network time service, and other services. Your network must meet these
requirements before you begin installing vCloud Director.
The network that connects vCloud Director servers, the database server, vCenter servers, and the associated
vCloud Networking and Security or NSX for vSphere components, must meet several requirements:
IP addresses
Each vCloud Director server requires two IP addresses, so that it can support
two different SSL connections. One connection is for the HTTP service. The
other is for the console proxy service. You can use IP aliases or multiple
network interfaces to create these addresses. You cannot use the Linux ip
addr add command to create the second address.
Console Proxy Address
The IP address configured as the console proxy address must not be located
behind an SSL-terminating load balancer or reverse proxy. All console proxy
requests must be relayed directly to the console proxy IP address.
Network Time Service
You must use a network time service such as NTP to synchronize the clocks
of all vCloud Director servers, including the database server. The maximum
allowable drift between the clocks of synchronized servers is 2 seconds.
Server Time Zones
All vCloud Director servers, including the database server, must be
configured to be in the same time zone.
Hostname Resolution
All host names that you specify during installation and configuration must
be resolvable by DNS using forward and reverse lookup of the fully qualified
domain name or the unqualified hostname. For example, for a host named
vcloud.example.com, both of the following commands must succeed on a
vCloud Director host:
nslookup vcloud
nslookup vcloud.example.com
In addition, if the host vcloud.example.com has the IP address 192.168.1.1, the
following command must return vcloud.example.com:
nslookup 192.168.1.1
Transfer Server Storage
VMware, Inc.
To provide temporary storage for uploads, downloads, and catalog items
that are published or subscribed externally, you must make an NFS or other
shared storage volume accessible to all servers in a vCloud Director server
group. This shared volume must have write permission for root. Each
member of the server group must mount this volume at the same
mountpoint, typically /opt/vmware/vcloud-director/data/transfer. Space
on this volume is consumed in two ways:
n
Transfers (uploads and downloads) occupy this storage for as long as
the transfer is in progress, and are removed when the transfer is
complete. Transfers that make no progress for 60 minutes are marked as
expired and cleaned up by the system. Because transferred images can
be large, it is a good practice to allocate at least several hundred
gigabytes for this use.
n
Catalog items in catalogs that are published externally and enable
caching of published content occupy this storage for as long as they
exist. (Items from catalogs that are published externally but do not
enable caching do not occupy this storage.) If you enable organizations
13
vCloud Director Installation and Upgrade Guide
in your cloud to create catalogs that are published externally, it is safe to
assume that hundreds or even thousands of catalog items will need
space on this volume, and that each catalog item will be the size of a
virtual machine in compressed OVF form.
NOTE If possible, the volume you use for transfer server storage should be
one whose capacity can be easily expanded.
Network Security Recommendations
Secure operation of vCloud Director requires a secure network environment. Configure and test this
network environment before you begin installing vCloud Director
Connect all vCloud Director servers to a network that is secured and monitored. vCloud Director network
connections have several additional requirements:
n
Do not connect vCloud Director directly to the public Internet. Always protect vCloud Director
network connections with a firewall. Only port 443 (HTTPS) must be open to incoming connections.
Ports 22 (SSH) and 80 (HTTP) can also be opened for incoming connections if needed. All other
incoming traffic from a public network must be rejected by the firewall.
Table 1‑6. Ports That Must Allow Incoming Packets From vCloud Director Hosts
n
Port
Protocol
Comments
111
TCP, UDP
NFS portmapper used by transfer service
920
TCP, UDP
NFS rpc.statd used by transfer service
61611
TCP
ActiveMQ
61616
TCP
ActiveMQ
Do not connect the ports used for outgoing connections to the public network.
Table 1‑7. Ports That Must Allow Outgoing Packets From vCloud Director Hosts
14
Port
Protocol
Comments
25
TCP, UDP
SMTP
53
TCP, UDP
DNS
111
TCP, UDP
NFS portmapper used by transfer service
123
TCP, UDP
NTP
389
TCP, UDP
LDAP
443
TCP
vCenter, vShield Manager, NSX Manager,
and ESX connections
514
UDP
Optional. Enables syslog use.
902
TCP
vCenter and ESX connections.
903
TCP
vCenter and ESX connections.
920
TCP, UDP
NFS rpc.statd used by transfer service.
1433
TCP
Default Microsoft SQL Server database port.
1521
TCP
Default Oracle database port.
5672
TCP, UDP
Optional. AMQP messages for task
extensions.
VMware, Inc.
Chapter 1 Overview of vCloud Director Installation, Configuration, and Upgrade
Table 1‑7. Ports That Must Allow Outgoing Packets From vCloud Director Hosts (Continued)
Port
Protocol
Comments
61611
TCP
ActiveMQ
61616
TCP
ActiveMQ
n
Route traffic between vCloud Director servers and the vCloud Director database server over a
dedicated private network if possible.
n
Virtual switches and distributed virtual switches that support provider networks must be isolated from
each other. They cannot share the same level 2 physical network segment.
Installing and Configuring a vCloud Director Database
vCloud Director cells use a database to store shared information. This database must exist before you can
complete installation and configuration of vCloud Director software.
NOTE Regardless of the database software you choose, you must create a separate, dedicated database
schema for vCloud Director to use. vCloud Director cannot share a database schema with any other
VMware product.
Configure an Oracle Database
Oracle databases have specific configuration requirements when you use them with vCloud Director. Install
and configure a database instance and create the vCloud Director database user account before you install
vCloud Director.
Procedure
1
Configure the database server.
A database server configured with 16GB of memory, 100GB storage, and 4 CPUs should be adequate
for most vCloud Director clusters.
2
Create the database instance.
Use a command of the following form to create a single CLOUD_DATA tablespace:
Create Tablespace CLOUD_DATA datafile '$ORACLE_HOME/oradata/cloud_data01.dbf' size 1500M
autoextend on;
3
Create the vCloud Director database user account.
The following command creates database user name vcloud with password vcloudpass.
Create user $vcloud identified by $vcloudpass default tablespace CLOUD_DATA;
NOTE When you create the vCloud Director database user account, you must specify CLOUD_DATA
as the default tablespace.
4
Configure database connection, process, and transaction parameters.
The database must be configured to allow at least 75 connections per vCloud Director cell plus about 50
for Oracle's own use. You can obtain values for other configuration parameters based on the number of
connections, where C represents the number of cells in your vCloud Director cluster.
VMware, Inc.
Oracle Configuration Parameter
Value for C Cells
CONNECTIONS
75*C+50
PROCESSES
= CONNECTIONS
SESSIONS
= PROCESSES*1.1+5
15
vCloud Director Installation and Upgrade Guide
5
Oracle Configuration Parameter
Value for C Cells
TRANSACTIONS
= SESSIONS*1.1
OPEN_CURSORS
= SESSIONS
Create the vCloud Director database user account.
Do not use the Oracle system account as the vCloud Director database user account. You must create a
dedicated user account for this purpose. Grant the following system privileges to the account:
6
n
CONNECT
n
RESOURCE
n
CREATE TRIGGER
n
CREATE TYPE
n
CREATE VIEW
n
CREATE MATERIALIZED VIEW
n
CREATE PROCEDURE
n
CREATE SEQUENCE
Note the database service name so you can use it when you configure network and database
connections.
To find the database service name, open the file $ORACLE_HOME/network/admin/tnsnames.ora on the
database server and look for an entry of the following form:
(SERVICE_NAME = orcl.example.com)
Configure a Microsoft SQL Server Database
SQL Server databases have specific configuration requirements when you use them with vCloud Director.
Install and configure a database instance, and create the vCloud Director database user account before you
install vCloud Director.
vCloud Director database performance is an important factor in overall vCloud Director performance and
scalability. vCloud Director uses the SQL Server tmpdb file when storing large result sets, sorting data, and
managing data that is being concurrently read and modified. This file can grow significantly when
vCloud Director is experiencing heavy concurrent load. It is a good practice to create the tmpdb file on a
dedicated volume that has fast read and write performance. For more information about the tmpdb file and
SQL Server performance, see http://msdn.microsoft.com/en-us/library/ms175527.aspx.
Prerequisites
n
You must be familiar with Microsoft SQL Server commands, scripting, and operation.
n
To configure Microsoft SQL Server, log on to the SQL Server host computer using administrator
credentials. You can configure SQL server to run with the LOCAL_SYSTEM identity, or any identity
with the privilege to run a Windows service.
Procedure
1
Configure the database server.
A database server configured with 16GB of memory, 100GB storage, and 4 CPUs should be adequate
for most vCloud Director clusters.
2
Specify Mixed Mode authentication during SQL Server setup.
Windows Authentication is not supported when using SQL Server with vCloud Director.
16
VMware, Inc.
Chapter 1 Overview of vCloud Director Installation, Configuration, and Upgrade
3
Create the database instance.
The following script creates the database and log files, specifying the proper collation sequence.
USE [master]
GO
CREATE DATABASE [vcloud] ON PRIMARY
(NAME = N'vcloud', FILENAME = N'C:\vcloud.mdf', SIZE = 100MB, FILEGROWTH = 10% )
LOG ON
(NAME = N'vcdb_log', FILENAME = N'C:\vcloud.ldf', SIZE = 1MB, FILEGROWTH = 10%)
COLLATE Latin1_General_CS_AS
GO
The values shown for SIZE are suggestions. You might need to use larger values.
4
Set the transaction isolation level.
The following script sets the database isolation level to READ_COMMITTED_SNAPSHOT.
USE [vcloud]
GO
ALTER DATABASE
ALTER DATABASE
ALTER DATABASE
ALTER DATABASE
GO
[vcloud]
[vcloud]
[vcloud]
[vcloud]
SET
SET
SET
SET
SINGLE_USER WITH ROLLBACK IMMEDIATE;
ALLOW_SNAPSHOT_ISOLATION ON;
READ_COMMITTED_SNAPSHOT ON WITH NO_WAIT;
MULTI_USER;
For more about transaction isolation, see http://msdn.microsoft.com/en-us/library/ms173763.aspx.
5
Create the vCloud Director database user account.
The following script creates database user name vcloud with password vcloudpass.
USE [vcloud]
GO
CREATE LOGIN [vcloud] WITH PASSWORD = 'vcloudpass', DEFAULT_DATABASE =[vcloud],
DEFAULT_LANGUAGE =[us_english], CHECK_POLICY=OFF
GO
CREATE USER [vcloud] for LOGIN [vcloud]
GO
6
Assign permissions to the vCloud Director database user account.
The following script assigns the db_owner role to the database user created in Step 5.
USE [vcloud]
GO
sp_addrolemember [db_owner], [vcloud]
GO
Create SSL Certificates
vCloud Director uses SSL to secure communications between clients and servers. Before you install and
configure a vCloud Director server group, you must create two certificates for each member of the group
and import the certificates into host keystores.
Each vCloud Director server requires two IP addresses, so that it can support two different SSL endpoints.
Each endpoint requires its own SSL certificate. Certificates for both endpoints must include both an X.500
distinguished name and X.509 Subject Alternative Name extension.
VMware, Inc.
17
vCloud Director Installation and Upgrade Guide
Procedure
1
List the IP addresses for this server.
Use a command like ifconfig to discover this server's IP addresses.
2
For each IP address, run the following command to retrieve the fully qualified domain name to which
the IP address is bound.
nslookup ip-address
3
Make a note of each IP address, the fully qualified domain name associated with it, and whether
vCloud Director should use the address for the HTTP service or the console proxy service.
You need the fully qualified domain names when you create the certificates, and the IP addresses when
you configure network and database connections. If the IP address can be reached by other DNS names,
make a note of those too, since you will need to supply them when specifying a Subject Alternative
Name.
4
Create the certificates.
You can use certificates signed by a trusted certification authority, or self-signed certificates.
NOTE Signed certificates provide the highest level of trust.
Create and Import a Signed SSL Certificate
Signed certificates provide the highest level of trust for SSL communications.
Each vCloud Director server requires two SSL certificates, one for the HTTP service and one for the console
proxy service, in a Java keystore file. You can use certificates signed by a trusted certification authority, or
self-signed certificates. Signed certificates provide the highest level of trust.
IMPORTANT These examples specify a 2,048-bit key size, but you should evaluate your installation's security
requirements before choosing an appropriate key size. Key sizes less than 1,024 bits are no longer supported
per NIST Special Publication 800-131A.
To create and import self-signed certificates, see “Create a Self-Signed SSL Certificate,” on page 21.
Prerequisites
18
n
Generate a list of fully-qualified domain names and their associated IP addresses on this server.
n
Choose an address to use for the HTTP service and an address to use for the console proxy service. See
“Create SSL Certificates,” on page 17.
n
Verify that you have access to a computer that has a Java version 7 runtime environment, so that you
can use the keytool command to create the certificate. The vCloud Director installer places a copy of
keytool in /opt/vmware/vcloud-director/jre/bin/keytool, but you can perform this procedure on any
computer that has a Java version 7 runtime environment installed. Certificates created with a keytool
from any other source are not supported for use with vCloud Director. Creating and importing the
certificates before you install and configure vCloud Director software simplifies the installation and
configuration process. These command-line examples assume that keytool is in the user's path. The
keystore password is represented in these examples as passwd.
n
Certificates for both endpoints must include both an X.500 distinguished name and X.509 Subject
Alternative Name extension. Familiarize yourself with the keytool command, especially its -dname and
-ext options.
VMware, Inc.
Chapter 1 Overview of vCloud Director Installation, Configuration, and Upgrade
n
Gather the information required for the argument to the keytool -dname option.
Table 1‑8. Information required by keytool -dname option
X.500 Distinguished
Name Subpart
keytool keyword
Description
Example
commonName
CN
The fully qualified domain name
associated with the IP address of
this endpoint.
CN=vcd1.example.com
organizationalUnit
OU
The name of an organizational
unit, such as a department or
division, within the organization
with which this certificate is
associated
OU=Engineering
organizationName
O
The name of the organization
with which this certificate is
associated
O=Example Corporation
localityName
L
The name of the city or town in
which the organization is located.
L=Palo Alto
stateName
S
The name of the state or province
in which the organization is
located.
S=California
country
C
The name of the country in which
the organization is located.
C=US
Procedure
1
Create an untrusted certificate for the HTTP service.
This example command creates an untrusted certificate in a keystore file named certificates.ks. The
keytool options have been placed on separate lines for clarity. The X.500 distinguished name
information supplied in the argument to the -dname option uses the values shown in the Prerequisites.
The DNS and IP values shown in the argument to the -ext option are typical. Be sure to include all the
DNS names at which this endpoint can be reached, including the one you specified for the commonName
(CN) value in the -dname option argument . You can also include IP addresses, as shown here.
keytool
-keystore certificates.ks
-alias http
-storepass passwd
-keypass passwd
-storetype JCEKS
-genkeypair
-keyalg RSA
-keysize 2048
-validity 365
-dname "CN=vcd1.example.com, OU=Engineering, O=Example Corp, L=Palo Alto S=California
C=US"
-ext "san=dns:vcd1.example.com,dns:vcd1,ip:10.100.101.9"
IMPORTANT The keystore file and the directory in which it is stored must be readable by the user
vcloud.vcloud. The vCloud Director installer creates this user and group.
VMware, Inc.
19
vCloud Director Installation and Upgrade Guide
2
Create an untrusted certificate for the console proxy service.
This command adds an untrusted certificate to the keystore file created in Step 1. The keytool options
have been placed on separate lines for clarity. The X.500 distinguished name information supplied in
the argument to the -dname option uses the values shown in the Prerequisites. The DNS and IP values
shown in the argument to the -ext option are typical. Be sure to include all the DNS names at which
this endpoint can be reached, including the one you specified for the commonName (CN) value in the dname option argument . You can also include IP addresses, as shown here.
keytool
-keystore certificates.ks
-alias consoleproxy
-storepass passwd
-keypass passwd
-storetype JCEKS
-genkeypair
-keyalg RSA
-keysize 2048
-validity 365
-dname "CN=vcd2.example.com, OU=Engineering, O=Example Corp, L=Palo Alto S=California
C=US"
-ext "san=dns:vcd2.example.com,dns:vcd2,ip:10.100.101.10"
3
Create a certificate signing request for the HTTP service.
This command creates a certificate signing request in the file http.csr.
keytool -keystore certificates.ks -storetype JCEKS -storepass passwd -certreq -alias http file http.csr
4
Create a certificate signing request for the console proxy service.
This command creates a certificate signing request in the file consoleproxy.csr.
keytool -keystore certificates.ks -storetype JCEKS -storepass passwd -certreq -alias
consoleproxy -file consoleproxy.csr
5
Send the certificate signing requests to your Certification Authority.
If your certification authority requires you to specify a Web server type, use Jakarta Tomcat.
6
When you receive the signed certificates, import them into the keystore file.
a
Import the Certification Authority's root certificate into the keystore file.
This command imports the root certificate from the root.cer file to the certificates.ks keystore
file.
keytool -storetype JCEKS -storepass passwd -keystore certificates.ks -import -alias root
-file root.cer
b
(Optional) If you received intermediate certificates, import them into the keystore file.
This command imports intermediate certificates from the intermediate.cer file to the
certificates.ks keystore file.
keytool -storetype JCEKS -storepass passwd -keystore certificates.ks -import -alias
intermediate -file intermediate.cer
20
VMware, Inc.
Chapter 1 Overview of vCloud Director Installation, Configuration, and Upgrade
c
Import the certificate for the HTTP service.
This command imports the certificate from the http.cer file to the certificates.ks keystore file.
keytool -storetype JCEKS -storepass passwd -keystore certificates.ks -import -alias http
-file http.cer
d
Import the certificate for the console proxy service.
This command imports the certificate from the consoleproxy.cer file to the certificates.ks
keystore file.
keytool -storetype JCEKS -storepass passwd -keystore certificates.ks -import -alias
consoleproxy -file consoleproxy.cer
7
To verify that all the certificates are imported, list the contents of the keystore file.
keytool -storetype JCEKS -storepass passwd -keystore certificates.ks -list
8
Repeat this procedure on all vCloud Director servers in the server group.
What to do next
If you created the certificates.ks keystore file on a computer other than the server on which you
generated the list of fully qualified domain names and their associated IP addresses, copy the keystore file to
that server now. You will need the keystore path name when you run the configuration script. See
“Configure Network and Database Connections,” on page 30.
Create a Self-Signed SSL Certificate
Self-signed certificates can provide a convenient way to configure SSL for vCloud Director in environments
where trust concerns are minimal.
Each vCloud Director server requires two SSL certificates, one for the HTTP service and one for the console
proxy service, in a Java keystore file. You can use certificates signed by a trusted certification authority, or
self-signed certificates. Signed certificates provide the highest level of trust.
IMPORTANT These examples specify a 2,048-bit key size, but you should evaluate your installation's security
requirements before choosing an appropriate key size. Key sizes less than 1,024 bits are no longer supported
per NIST Special Publication 800-131A.
To create and import signed certificates, see “Create and Import a Signed SSL Certificate,” on page 18.
Prerequisites
n
Generate a list of fully-qualified domain names and their associated IP addresses on this server.
n
Choose an address to use for the HTTP service and an address to use for the console proxy service. See
“Create SSL Certificates,” on page 17.
n
Verify that you have access to a computer that has a Java version 7 runtime environment, so that you
can use the keytool command to create the certificate. The vCloud Director installer places a copy of
keytool in /opt/vmware/vcloud-director/jre/bin/keytool, but you can perform this procedure on any
computer that has a Java version 7 runtime environment installed. Certificates created with a keytool
from any other source are not supported for use with vCloud Director. Creating and importing the
certificates before you install and configure vCloud Director software simplifies the installation and
configuration process. These command-line examples assume that keytool is in the user's path. The
keystore password is represented in these examples as passwd.
n
Certificates for both endpoints must include both an X.500 distinguished name and X.509 Subject
Alternative Name extension. Familiarize yourself with the keytool command, especially its -dname and
-ext options.
VMware, Inc.
21
vCloud Director Installation and Upgrade Guide
n
Gather the information required for the argument to the keytool -dname option.
Table 1‑9. Information required by keytool -dname option
X.500 Distinguished
Name Subpart
keytool keyword
Description
Example
commonName
CN
The fully qualified domain name
associated with the IP address of
this endpoint.
CN=vcd1.example.com
organizationalUnit
OU
The name of an organizational
unit, such as a department or
division, within the organization
with which this certificate is
associated
OU=Engineering
organizationName
O
The name of the organization
with which this certificate is
associated
O=Example Corporation
localityName
L
The name of the city or town in
which the organization is located.
L=Palo Alto
stateName
S
The name of the state or province
in which the organization is
located.
S=California
country
C
The name of the country in which
the organization is located.
C=US
Procedure
1
Create an untrusted certificate for the HTTP service.
This example command creates an untrusted certificate in a keystore file named certificates.ks. The
keytool options have been placed on separate lines for clarity. The X.500 distinguished name
information supplied in the argument to the -dname option uses the values shown in the Prerequisites.
The DNS and IP values shown in the argument to the -ext option are typical. Be sure to include all the
DNS names at which this endpoint can be reached, including the one you specified for the commonName
(CN) value in the -dname option argument . You can also include IP addresses, as shown here.
keytool
-keystore certificates.ks
-alias http
-storepass passwd
-keypass passwd
-storetype JCEKS
-genkeypair
-keyalg RSA
-keysize 2048
-validity 365
-dname "CN=vcd1.example.com, OU=Engineering, O=Example Corp, L=Palo Alto S=California
C=US"
-ext "san=dns:vcd1.example.com,dns:vcd1,ip:10.100.101.9"
IMPORTANT The keystore file and the directory in which it is stored must be readable by the user
vcloud.vcloud. The vCloud Director installer creates this user and group.
22
VMware, Inc.
Chapter 1 Overview of vCloud Director Installation, Configuration, and Upgrade
2
Create an untrusted certificate for the console proxy service.
This command adds an untrusted certificate to the keystore file created in Step 1. The keytool options
have been placed on separate lines for clarity. The X.500 distinguished name information supplied in
the argument to the -dname option uses the values shown in the Prerequisites. The DNS and IP values
shown in the argument to the -ext option are typical. Be sure to include all the DNS names at which
this endpoint can be reached, including the one you specified for the commonName (CN) value in the dname option argument . You can also include IP addresses, as shown here.
keytool
-keystore certificates.ks
-alias consoleproxy
-storepass passwd
-keypass passwd
-storetype JCEKS
-genkeypair
-keyalg RSA
-keysize 2048
-validity 365
-dname "CN=vcd2.example.com, OU=Engineering, O=Example Corp, L=Palo Alto S=California
C=US"
-ext "san=dns:vcd2.example.com,dns:vcd2,ip:10.100.101.10"
3
To verify that all the certificates are imported, list the contents of the keystore file.
keytool -storetype JCEKS -storepass passwd -keystore certificates.ks -list
4
Repeat this procedure on all vCloud Director servers in the server group.
What to do next
If you created the certificates.ks keystore file on a computer other than the server on which you
generated the list of fully qualified domain names and their associated IP addresses, copy the keystore file to
that server now. You will need the keystore path name when you run the configuration script. See
“Configure Network and Database Connections,” on page 30.
Install and Configure vShield Manager for a New vCloud Director Installation
vCloud Director depends on having either vShield Manager or NSX Manager to provide network services to
the cloud. Before you perform a new installation of vCloud Director, you must install and configure either
vShield Manager or NSX Manager and associate a unique instance of vShield Manager or NSX Manager
with each vCenter Server that you plan to include in your vCloud Director installation.
vShield Manager is included in the VMware vCloud Networking and Security download. Current
information about supported versions of vShield Manager that are compatible with vCloud Director is
available from the VMware Product Interoperability Matrixes located in VMware Partner Central. Log in to
VMware Partner Central using your VMware Partner account information. For information about the
network requirements, see “vCloud Director Hardware and Software Requirements,” on page 9.
IMPORTANT This procedure applies only when you are performing a new installation of vCloud Director. If
you are upgrading an existing installation of vCloud Director, see Chapter 3, “Upgrading vCloud Director,”
on page 39.
Prerequisites
n
Verify that each of your vCenter Server systems meets the prerequisites for installing vShield Manager.
n
Perform the installation task for the vShield Manager virtual appliance described in the vShield
Installation and Upgrade Guide.
VMware, Inc.
23
vCloud Director Installation and Upgrade Guide
Procedure
1
Log in to the vShield Manager virtual appliance that you installed and confirm the settings that you
specified during installation.
2
Associate the vShield Manager virtual appliance that you installed with the vCenter Server system that
you plan to add to vCloud Director in your planned vCloud Director installation.
What to do next
Configure VXLAN support in the associated vShield Manager. vCloud Director creates VXLAN network
pools to provide network resources to Provider VDCs. If VXLAN support is not configured in the associated
vShield Manager, Provider VDCs show a network pool error, and you must create a different type of
network pool and associate it with the Provider VDC. For details about how to configure VXLAN support,
see the vShield Administration Guide.
Install and Configure NSX Manager for a New vCloud Director Installation
vCloud Director depends on having either vShield Manager or NSX Manager to provide network services to
the cloud. Before you perform a new installation of vCloud Director, you must install and configure either
vShield Manager or NSX Manager and associate a unique instance of vShield Manager or NSX Manager
with each vCenter Server that you plan to include in your vCloud Director installation.
NSX is included in the VMware NSX for vSphere download. Current information about supported versions
of NSX Manager that are compatible with vCloud Director is available from the VMware Product
Interoperability Matrixes located in VMware Partner Central. Log in to VMware Partner Central using your
VMware Partner account information. For information about the network requirements, see “vCloud
Director Hardware and Software Requirements,” on page 9.
IMPORTANT This procedure applies only when you are performing a new installation of vCloud Director. If
you are upgrading an existing installation of vCloud Director, see Chapter 3, “Upgrading vCloud Director,”
on page 39.
Prerequisites
n
Verify that each of your vCenter Server systems meets the prerequisites for installing NSX Manager.
n
Perform the installation task for the NSX Manager virtual appliance described in the NSX Installation
and Upgrade Guide.
Procedure
1
Log in to the NSX Manager virtual appliance that you installed and confirm the settings that you
specified during installation.
2
Associate the NSX Manager virtual appliance that you installed with the vCenter Server system that
you plan to add to vCloud Director in your planned vCloud Director installation.
What to do next
Configure VXLAN support in the associated NSX Manager. vCloud Director creates VXLAN network pools
to provide network resources to Provider VDCs. If VXLAN support is not configured in the associated NSX
Manager, Provider VDCs show a network pool error, and you must create a different type of network pool
and associate it with the Provider VDC. For details about configuring VXLAN support, see the NSX
Administration Guide.
24
VMware, Inc.
Chapter 1 Overview of vCloud Director Installation, Configuration, and Upgrade
Installing and Configuring an AMQP Broker
AMQP, the Advanced Message Queuing Protocol, is an open standard for message queuing that supports
flexible messaging for enterprise systems. vCloud Director includes an AMQP service that you can
configure to work with an AMQP broker, such as RabbitMQ, to provide cloud operators with a stream of
notifications about events in the cloud. If you want to use this service, you must install and configure an
AMQP broker.
While use of an AMQP broker with vCloud Director is optional, a number of integrations use AMQP to
communicate with vCloud Director. Consult the installation and configuration documents for any
integrations you plan to use.
Procedure
1
Download the RabbitMQ Server from http://info.vmware.com/content/12834_rabbitmq.
2
Follow the RabbitMQ installation instructions to install RabbitMQ on any convenient host.
The RabbitMQ server host must be reachable on the network by each vCloud Director cell.
3
During the RabbitMQ installation, make a note of the values that you will need to supply when
configuring vCloud Director to work with this RabbitMQ installation.
n
The fully-qualified domain name of the RabbitMQ server host, for example amqp.example.com.
n
A username and password that are valid for authenticating with RabbitMQ.
n
The port at which the broker listens for messages. The default is 5672.
n
The RabbitMQ virtual host. The default is "/".
What to do next
By default, the vCloud Director AMQP service sends unencrypted messages. If you configure it to encrypt
these messages using SSL, it verifies the broker's certificate by using the default JCEKS trust store of the Java
runtime environment on the vCloud Director server. The Java runtime environment is typically located in
the $JRE_HOME/lib/security/cacerts directory.
To use SSL with the vCloud Director AMQP service, select Use SSL on the AMQP Broker Settings section of
the Extensibility page of the vCloud Director Web console, and provide either of the following:
n
an SSL certificate pathname
n
a JCEKS trust store pathname and password
If you do not need to validate the AMQP broker's certificate, you can select Accept all certificates.
Download and Install the VMware Public Key
The installation file is digitally signed. To verify the signature, you must download and install the VMware
public key.
You can use the Linux rpm tool and the VMware public key to verify the digital signature of the
vCloud Director installation file, or any other signed downloaded file from vmware.com. If you install the
public key on the computer where you plan to install vCloud Director, the verification happens as part of
the installation or upgrade. You can also manually verify the signature before you begin the installation or
upgrade procedure, then use the verified file for all installations or upgrades.
NOTE The download site also publishes a checksum value for the download. The checksum is published in
two common forms. Verifying the checksum verifies that the file contents that you downloaded are the
same as the contents that were posted. It does not verify the digital signature.
VMware, Inc.
25
vCloud Director Installation and Upgrade Guide
Procedure
1
Create a directory to store the VMware Packaging Public Keys.
2
Use a Web browser to download all of the VMware Public Packaging Public Keys from the
http://packages.vmware.com/tools/keys directory.
3
Save the key files to the directory that you created.
4
For each key that you download, run the following command to import the key.
# rpm --import /key_path/key_name
key_path is the directory in which you saved the keys.
key_name is the filename of a key.
26
VMware, Inc.
Creating a vCloud Director Server
Group
2
A vCloud Director server group consists of one or more vCloud Director servers that share a common
database and other configuration details. To create a server group, you install and configure
vCloud Director software on the first member of the group. Installation and configuration of the first group
member creates a response file that you use to configure additional members of the group.
Prerequisites for Creating a vCloud Director Server Group
IMPORTANT This procedure is for new installations only. If you are upgrading an existing vCloud Director
installation, see Chapter 3, “Upgrading vCloud Director,” on page 39
Before you begin installing and configuring vCloud Director, complete all of the following tasks.
1
Verify that a supported vCenter Server system is running and properly configured for use with
vCloud Director. For supported versions and configuration requirements, see “Supported Platforms,”
on page 9.
2
Verify that a supported vShield Manager or NSX Manager is running, associated with the vCenter
Server system, and properly configured for use with vCloud Director. For supported versions, see
“Supported Platforms,” on page 9. For installation and configuration details, see “Install and Configure
vShield Manager for a New vCloud Director Installation,” on page 23 and “Install and Configure NSX
Manager for a New vCloud Director Installation,” on page 24.
3
Verify that you have at least one server platform that is supported for running the vCloud Director
software and that server platform is configured with an appropriate amount of memory and storage.
For supported platforms and configuration requirements, see “Supported vCloud Director Server
Operating Systems,” on page 10.
Each member of a server group requires two IP addresses: one to support an SSL connection for the
n
HTTP service and another for the console proxy service.
VMware, Inc.
n
Each server must have an SSL certificate for each IP address. All directories in the pathname to the
SSL certificates must be readable by any user. See “Create SSL Certificates,” on page 17.
n
For the transfer service, each server must mount an NFS or other shared storage volume
at /opt/vmware/vcloud-director/data/transfer. This volume must have write permission for root.
See “Summary of Network Configuration Requirements for vCloud Director,” on page 13.
n
Each server should have access to a Microsoft Sysprep deployment package. See “Install Microsoft
Sysprep Files on the Servers,” on page 35.
27
vCloud Director Installation and Upgrade Guide
4
Verify that you have created a vCloud Director database and that it is accessible to all servers in the
group. For a list of supported database software, see “Supported vCloud Director Databases,” on
page 10.
n
Verify that you have created a database account for the vCloud Director database user and that the
account has all required database privileges. See “Installing and Configuring a vCloud Director
Database,” on page 15.
n
Verify that the database service starts when the database server is rebooted.
5
Verify that all vCloud Director servers, the database server, all vCenter Server systems, and those
vCenter Server systems' associated vShield Manager or NSX Manager components can resolve each
other's names as described in “Summary of Network Configuration Requirements for vCloud
Director,” on page 13.
6
Verify that all vCloud Director servers and the database server are synchronized to a network time
server with the tolerances noted in “Summary of Network Configuration Requirements for vCloud
Director,” on page 13.
7
If you plan to import users or groups from an LDAP service, verify that the service is accessible to each
vCloud Director server.
8
Open firewall ports as shown in “Network Security Recommendations,” on page 14. Port 443 must be
open between vCloud Director and vCenter Server systems.
This chapter includes the following topics:
n
“Install and Configure vCloud Director Software on the First Member of a Server Group,” on
page 28
n
“Configure Network and Database Connections,” on page 30
n
“Install vCloud Director Software on Additional Members of a Server Group,” on page 34
n
“Install Microsoft Sysprep Files on the Servers,” on page 35
n
“Start or Stop vCloud Director Services,” on page 36
n
“Uninstall vCloud Director Software,” on page 37
Install and Configure vCloud Director Software on the First Member of
a Server Group
All members of a vCloud Director share database connection and other configuration details that you
specify when installing and configuring the first member of the group. These details are captured in a
response file that you must use when adding members to the group.
vCloud Director software is distributed as a digitally signed Linux executable file named vmware-vclouddirector-5.6.0-nnnnnn.bin, where nnnnnn represents a build number.
The vCloud Director installer verifies that the target server meets all platform prerequisites and installs
vCloud Director software on it. After the software is installed on the target server, you must run a script that
configures the server's network and database connections. This script creates a response file that you must
use when configuring addiitonal members of this server group.
Prerequisites
n
Verify that the target server and the network it connects to meet the requirements specified in
“Summary of Network Configuration Requirements for vCloud Director,” on page 13.
n
Verify that you have superuser credentials for the target server.
n
Verify that the target server mounts the shared transfer service storage volume at /opt/vmware/vcloud-
director/data/transfer.
28
VMware, Inc.
Chapter 2 Creating a vCloud Director Server Group
n
To have the installer verify the digital signature of the installation file, download and install the
VMware public key on the target server. If you already verified the digital signature of the installation
file, you do not need to verify it again during installation. See “Download and Install the VMware
Public Key,” on page 25.
Procedure
1
Log in to the target server as root.
2
Download the installation file to the target server.
If you purchased the software on a CD or other media, copy the installation file to a location that is
accessible to all target servers.
3
Verify that the checksum of the download matches the one posted on the download page.
Values for MD5 and SHA1 checksums are posted on the download page. Use the appropriate tool to
verify that the checksum of the downloaded installation file matches the one shown on the download
page. A Linux command of the following form displays the checksum for installation-file.
[root@cell1 /tmp]# md5sum installation-file
checksum-value installation-file
Compare the checksum-value produced by this command with the MD5 checksum copied from the
download page.
4
Ensure that the installation file is executable.
The installation file requires execute permission. To be sure that it has this permission, open a console,
shell, or terminal window and run the following Linux command, where installation-file is the full
pathname to the vCloud Director installation file.
[root@cell1 /tmp]# chmod u+x installation-file
5
In a console, shell, or terminal window, run the installation file.
To run the installation file, type its full pathname, for example:
[root@cell1 /tmp]# ./installation-file
The file includes an installation script and an embedded RPM package.
NOTE You cannot run the installation file from a directory whose pathname includes any embedded
space characters.
The installer prints a warning of the following form if you have not installed the VMware public key on
the target server.
warning:installation-file.rpm: Header V3 RSA/SHA1 signature: NOKEY, key ID 66fd4949
When the installer runs, it takes these actions.
a
Verifies that the host meets all requirements
b
Verifies the digital signature on the installation file
c
Creates the vcloud user and group
d
Unpacks the vCloud Director RPM package
e
Installs the software
After the software is installed, the installer prompts you to run the configuration script, which
configures the server's network and database connections.
VMware, Inc.
29
vCloud Director Installation and Upgrade Guide
What to do next
Decide whether to run the configuration script.
n
If you have completed the prerequisites listed in “Prerequisites for Creating a vCloud Director Server
Group,” on page 27, you can run the configuration script now. Type y and press Enter.
n
If you are not ready to run the configuration script now, type n and press Enter to exit to the shell.
For more information about running the configuration script, see “Configure Network and Database
Connections,” on page 30.
Configure Network and Database Connections
After vCloud Director software is installed on the server, the installer prompts you to run a script that
configures the server's network and database connections.
You must install vCloud Director software on the server before you can run the configuration script. The
installer prompts you to run the script after installation is complete, but you can choose to run it later.
To run the script after the vCloud Director software is installed, log in as root, open a console, shell, or
terminal window, and type:
/opt/vmware/vcloud-director/bin/configure
The configuration script creates network and database connections for a single vCloud Director server. The
script also creates a response file that preserves database connection information for use in subsequent
server installations.
NOTE After you run the configuration script to configure the first member of the server group, you must
use the -r option and specify the response file pathname when configuring additional members of the
group. See “Protecting and Reusing the Response File,” on page 33.
Prerequisites
30
n
Verify that a database of a supported type is accessible from the vCloud Director server. See “Installing
and Configuring a vCloud Director Database,” on page 15 and “vCloud Director Hardware and
Software Requirements,” on page 9.
n
Have the following information available:
n
Location and password of the keystore file that includes the SSL certificates for this server. See
“Create and Import a Signed SSL Certificate,” on page 18. The configuration script does not run
with a privileged identity, so the keystore file and the directory in which it is stored must be
readable by any user.
n
Password for each SSL certificate.
n
Hostname or IP address of the database server.
n
Database name and connection port.
n
Database user credentials (user name and password). This user must have specific database
privileges. See “Installing and Configuring a vCloud Director Database,” on page 15.
VMware, Inc.
Chapter 2 Creating a vCloud Director Server Group
Procedure
1
Specify the IP addresses to use for the HTTP and console proxy services running on this host.
Each member of a server group requires two IP addresses, so that it can support two different SSL
connections: one for the HTTP service and another for the console proxy service. To begin the
configuration process, choose which of the IP addresses discovered by the script should be used for
each service.
Please indicate which IP address available on this machine should be used
for the HTTP service and which IP address should be used for the remote console proxy.
The HTTP service IP address is used for accessing the user interface and the REST API.
The remote console proxy IP address is used for all remote console (VMRC) connections
and traffic.
Please enter your choice for the HTTP service IP address:
1: 10.17.118.158
2: 10.17.118.159
Choice [default=1]:2
Please enter your choice for the remote console proxy IP address
1: 10.17.118.158
Choice [default=1]:
2
Specify the full path to the Java keystore file.
Please enter the path to the Java keystore containing your SSL certificates and
private keys:/opt/keystore/certificates.ks
3
Type the keystore and certificate passwords.
Please enter the password for the keystore:
Please enter the private key password for the 'http' SSL certificate:
Please enter the private key password for the 'consoleproxy' SSL certificate:
4
Configure audit message handling options.
Services in each vCloud Director cell log audit messages to the vCloud Director database, where they
are preserved for 90 days. To preserve audit messages longer, you can configure vCloud Director
services to send audit messages to the syslog utility in addition to the vCloud Director database.
Option
Action
To log audit messages to both
syslog and the vCloud Director
database.
Type the syslog hostname or IP address.
To log audit messages only to the
vCloud Director database
Press Enter.
If you would like to enable remote audit logging to a syslog
host please enter the hostname or IP address of the syslog server. Audit logs are stored by
vCloud Director for 90 days. Exporting logs via syslog will enable you to
preserve them for as long as necessary.
Syslog host name or IP address [press Enter to skip]:10.150.10.10
5
Specify the port on which the syslog process monitors the specified server.
The default is port 514.
What UDP port is the remote syslog server listening on? The
standard syslog port is 514. [default=514]:
Using default value "514" for syslog port.
VMware, Inc.
31
vCloud Director Installation and Upgrade Guide
6
Specify the database type, or press Enter to accept the default value.
The following database types are supported:
1. Oracle
2. Microsoft SQL Server
Enter the database type [default=1]:
Using default value "1" for database type.
7
Specify database connection information.
The information that the script requires depends on your choice of database type. This example shows
the prompts that follow specification of an Oracle database. Prompts for other database types are
similar.
a
Type the hostname or IP address of the database server.
Enter the host (or IP address) for the database:10.150.10.78
b
Type the database port, or press Enter to accept the default value.
Enter the database port [default=1521]:
Using default value "1521" for port.
c
Type the database service name.
Enter the database service name [default=oracle]:orcl.example.com
If you press Enter, the configuration script uses a default value, which might not be correct for
some installations. For information about how to find the database service name for an Oracle
database, see “Configure an Oracle Database,” on page 15.
d
Type the database user name and password.
Enter the database username:vcloud
Enter the database password:
The script validates the information you supplied, then continues with three more steps.
1
It initializes the database and connects this server to it.
2
It offers to start vCloud Director services on this host.
3
It displays a URL at which you can connect to the Setup wizard after vCloud Director service starts.
This fragment shows a typical completion of the script.
Connecting to the database: jdbc:oracle:thin:vcloud/[email protected]:1521/vcloud
...........
Database configuration complete.
Once the vCloud Director server has been started you will be able to
access the first-time setup wizard at this URL:
http://vcloud.example.com
Would you like to start the vCloud Director service now? If you choose not
to start it now, you can manually start it at any time using this command:
service vmware-vcd start
Start it now? [y/n]:y
Starting the vCloud Director service (this may take a moment).
The service was started; it may be several minutes before it is ready for use.
Please check the logs for complete details.
vCloud Director configuration is now complete. Exiting...
32
VMware, Inc.
Chapter 2 Creating a vCloud Director Server Group
What to do next
NOTE Database connection information and other reusable responses you supplied during configuration
are preserved in a file located at /opt/vmware/vcloud-director/etc/responses.properties on this server.
This file contains sensitive information that you must reuse when you add more servers to a server group.
Preserve the file in a secure location, and make it available only when needed.
To add more servers to this group, see “Install vCloud Director Software on Additional Members of a Server
Group,” on page 34.
After vCloud Director services are running on all servers, you can open the Setup wizard at the URL
displayed when the script completes. See Chapter 4, “vCloud Director Setup,” on page 51.
Protecting and Reusing the Response File
Network and database connection details that you supply when you configure the first vCloud Director
server are saved in a response file. This file contains sensitive information that you must reuse when you
add more servers to a server group. Preserve the file in a secure location, and make it available only when
needed.
The response file is created at /opt/vmware/vcloud-director/etc/responses.properties on the first server
for which you configure network and database connections. When you add more servers to the group, you
must use a copy of the response file to supply configuration parameters that all servers share.
Procedure
1
Protect the response file.
Save a copy of the file in a secure location. Restrict access to it, and make sure it is backed up to a secure
location. When you back up the file, avoid sending cleartext across a public network.
2
Reuse the response file.
a
Copy the file to a location accessible to the server you are ready to configure.
NOTE You must install vCloud Director software on a server before you can reuse the response file
to configure it. All directories in the pathname to the response file must be readable by the user
vcloud.vcloud, as shown in this example.
[root@cell1 /tmp]# ls -l responses.properties
-rw------- 1 vcloud vcloud 418 Jun 8 13:42 responses.properties
The installer creates this user and group.
b
Run the configuration script, using the -r option and specifying the response file pathname.
Log in as root, open a console, shell, or terminal window, and type:
[root@cell1 /tmp]# /opt/vmware/vcloud-director/bin/configure -r /path-to-response-file
What to do next
After you configure the additional servers, delete the copy of the response file you used to configure them.
VMware, Inc.
33
vCloud Director Installation and Upgrade Guide
Install vCloud Director Software on Additional Members of a Server
Group
You can add servers to a vCloud Director server group at any time. Because all servers in a server group
must be configured with the same database connection details, you must use the response file created when
you configured the first member of the group to supply this information when you configure additional
members.
Prerequisites
n
Verify that you can access the response file that was created when you installed and configured the first
member of this server group. See “Protecting and Reusing the Response File,” on page 33.
n
Verify that the vCloud Director database is accessible from this server.
n
Verify that the SSL certificates that you created for this server are installed in a location that the installer
can access. See “Create and Import a Signed SSL Certificate,” on page 18. The configuration script does
not run with a privileged identity, so the keystore file and the path in which it is stored must be
readable by any user. Using the same keystore path (for example, /tmp/certificates.ks) on all
members of a server group simplifies the installation process.
n
Have the following information available:
n
The password of the keystore file that includes the SSL certificates for this server.
n
Password for each SSL certificate.
Procedure
1
Log in to the target server as root.
2
Download the installation file to the target server.
If you purchased the software on a CD or other media, copy the installation file to a location that is
accessible to all target servers.
3
Ensure that the installation file is executable.
The installation file requires execute permission. To be sure that it has this permission, open a console,
shell, or terminal window and run the following Linux command, where installation-file is the full
pathname to the vCloud Director installation file.
[root@cell1 /tmp]# chmod u+x installation-file
4
Copy the response file to a location accessible to this server.
All directories in the pathname to the response file must be readable by root.
5
In a console, shell, or terminal window, run the installation file using the -r option and specifying the
response file pathname.
To run the installation file, type its full pathname, for example:
[root@cell1 /tmp]# ./installation-file -r /path-to-response-file
The file includes an installation script and an embedded RPM package.
NOTE You cannot run the installation file from a directory whose pathname includes any embedded
space characters.
The installer prints a warning of the following form if you have not installed the VMware public key on
the target server.
warning:installation-file.rpm: Header V3 RSA/SHA1 signature: NOKEY, key ID 66fd4949
34
VMware, Inc.
Chapter 2 Creating a vCloud Director Server Group
When the installer runs with the -r option, it takes these actions.
a
Verifies that the host meets all requirements
b
Verifies the digital signature on the installation file
c
Creates the vcloud user and group
d
Unpacks the vCloud Director RPM package
e
Installs the software
f
Copies the response file to a location readable by vcloud.vcloud
g
Runs the configuration script using the response file as input
When the configuration script runs, it looks for the certificates in the path saved in the response file (for
example, /tmp/certificates.ks) , then prompts you to supply the keystore and certificate passwords. If
the configuration script does not find valid certificates in the pathname saved in the response file, it
prompts you for a pathname to the certificates.
6
(Optional) Repeat this procedure to add more servers to this server group.
What to do next
If your cloud needs to support guest customization for certain older Microsoft operating systems, install
Sysprep files on all members of the server group. See “Install Microsoft Sysprep Files on the Servers,” on
page 35.
After the configuration script finishes and vCloud Director services are running on all servers, you can open
the Setup wizard at the URL that appears when the script completes. See Chapter 4, “vCloud Director
Setup,” on page 51.
Install Microsoft Sysprep Files on the Servers
Before vCloud Director can perform guest customization on virtual machines with certain older Windows
guest operating systems, you must install the appropriate Microsoft Sysprep files on each member of the
server group.
Sysprep files are required only for some older Microsoft operating systems. If your cloud does not need to
support guest customization for those operating systems, you do not need to install Sysprep files.
To install the Sysprep binary files, you copy them to a specific location on the server. You must copy the
files to each member of the server group.
Prerequisites
Verify that you have access to the 32- and 64-bit Sysprep binary files for Windows 2003 and Windows XP.
Procedure
1
Log in to the target server as root.
2
Change directory to $VCLOUD_HOME/guestcustomization/default/windows.
[root@cell1 /]# cd /opt/vmware/vcloud-director/guestcustomization/default/windows
3
Create a directory named sysprep.
[root@cell1 /opt/vmware/vcloud-director/guestcustomization/default/windows]# mkdir sysprep
4
For each guest operating system that requires Sysprep binary files, create a subdirectory of
$VCLOUD_HOME/guestcustomization/default/windows/sysprep.
Subdirectory names are specific to a guest operating system.
VMware, Inc.
35
vCloud Director Installation and Upgrade Guide
Table 2‑1. Subdirectory Assignments for Sysprep Files
Guest OS
Subdirectory to Create Under
$VCLOUD_HOME/guestcustomization/default/windows/sysprep
Windows 2003 (32-bit)
svr2003
Windows 2003 (64-bit)
svr2003-64
Windows XP (32-bit)
xp
Windows XP (64-bit)
xp-64
For example, to create a subdirectory to hold Sysprep binary files for Windows XP, use the following
Linux command.
[root@cell1 /opt/vmware/vcloud-director/guestcustomization/default/windows]# mkdir sysprep/xp
5
Copy the Sysprep binary files to the appropriate location on each vCloud Director server in the server
group.
6
Ensure that the Sysprep files are readable by the user vcloud.vcloud.
Use the Linux chown command to do this.
[root@cell1 /]# chown -R vcloud:vcloud $VCLOUD_HOME/guestcustomization
When the Sysprep files are copied to all members of the server group, you can perform guest customization
on virtual machines in your cloud. You do not need to restart vCloud Director after the Sysprep files are
copied.
Start or Stop vCloud Director Services
After you complete installation and database connection setup on a server, you can start vCloud Director
services on it. You can also stop these services if they are running.
The configuration script prompts you to start vCloud Director services. You can let the script start these
services for you, or you can start the services yourself later. These services must be running before you can
complete and initialize the installation.
vCloud Director services start whenever you reboot a server.
IMPORTANT If you are stopping vCloud Director services as part of a vCloud Director software upgrade, you
must use the cell management tool, which allows you to quiesce the cell before stopping services. See “Use
the Cell Management Tool to Quiesce and Shut Down a Server,” on page 41.
Procedure
36
1
Log in to the target server as root.
2
Start or stop services.
Option
Action
Start services
Open a console, shell, or terminal window and run the following
command.
service vmware-vcd start
Stop services when the cell is in
use
Use the cell management tool.
Stop services when the cell is not in
use
Open a console, shell, or terminal window and run the following
command.
service vmware-vcd stop
VMware, Inc.
Chapter 2 Creating a vCloud Director Server Group
Uninstall vCloud Director Software
Use the Linux rpm command to uninstall vCloud Director software from an individual server.
Procedure
1
Log in to the target server as root.
2
Unmount the transfer service storage, typically mounted at /opt/vmware/vclouddirector/data/transfer.
3
Open a console, shell, or terminal window and run the rpm command.
rpm -e vmware-vcloud-director
VMware, Inc.
37
vCloud Director Installation and Upgrade Guide
38
VMware, Inc.
Upgrading vCloud Director
3
To upgrade vCloud Director to a new version, install the new version on each server in the vCloud Director
server group, upgrade the vCloud Director database, and restart vCloud Director services. You must also
upgrade the vSphere components that support vCloud Director, including each vShield Manager or NSX
Manager that is associated with each vCenter Server system included in the vCloud Director server group.
After you upgrade a vCloud Director server, you must also upgrade its vCloud Director database. The
database stores information about the runtime state of the server, including the state of all vCloud Director
tasks it is running. To ensure that no invalid task information remains in the database after an upgrade, you
must ensure that no tasks are active on the server before you begin the upgrade.
IMPORTANT The upgrade process requires you to upgrade vCloud Director, each associated vCenter Server
system and its associated vShield Manager or NSX Manager, and all hosts. You must prevent users from
accessing vCloud Director until the upgrade of the associated vShield Manager or NSX Manager is
complete.
The upgrade preserves the following artifacts:
n
Local and global properties files are copied to the new installation.
n
Microsoft sysprep files used for guest customization are copied to the new installation.
If you use a load balancer to distribute client requests across members of your vCloud Director server
group, you can upgrade a subset of the server group while keeping existing services available on the others.
If you do not have a load balancer, the upgrade requires sufficient vCloud Director downtime to upgrade
the database and at least one server. You might also have to upgrade registered vCenter Server systems if
they are not running a compatible version of vCenter software. Upgrading vCenter Server systems and ESXi
hosts can incur additional vCloud Director downtime, because virtual machines are inaccessible while their
hosts or vCenter Server systems are being upgraded.
SSL Certificates Must Include an X.509 Subject Alternative Name
Extension
Beginning with this release, SSL certificates used by vCloud Director must include both an X.500
distinguished name and an X.509 Subject Alternative Name extension. Previous releases did not verify the
Subject Alternative Name during the SSL handshake. Unless your existing certificates include the X.509
Subject Alternative Name extension, the SSL handshake will fail in this release, and clients will not be able
to connect with vCloud Director.
SSL certificates that include an X.509 Subject Alternative Name extension are compatible with all previous
releases of vCloud Director. It is a good practice to create and install the new certificates on your existing
vCloud Director release before proceeding with he upgrade. Doing so allows you verify that SSL connection
can be completed using the new certificates before you begin the upgrade process.
VMware, Inc.
39
vCloud Director Installation and Upgrade Guide
“Create SSL Certificates,” on page 17 provides detailed information about creating and importing signed
and self-signed certificates. “Generating Self-Signed SSL Certificates,” on page 61 and “Replacing SSL
Certificates,” on page 60 explain how to use the cell-management-tool to create new certificates and
replace existing ones.
Upgrading a vCloud Director Server Group
1
Disable user access to vCloud Director. You can also display a maintenance message while the upgrade
is underway. See “Displaying the Maintenance Message During an Upgrade,” on page 41.
2
Use the cell management tool to quiesce all cells in the server group and shut down vCloud Director
services on each server. See “Use the Cell Management Tool to Quiesce and Shut Down a Server,” on
page 41.
3
Upgrade vCloud Director software on all members of the server group. See “Upgrade vCloud Director
Software on Any Member of a Server Group,” on page 43. You can upgrade the servers individually
or in parallel, but you must not restart vCloud Director services on any upgraded member of the group
before you upgrade the vCloud Director database.
4
Upgrade the vCloud Director database. See “Upgrade the vCloud Director Database,” on page 45.
5
Restart vCloud Director on the upgraded servers. See “Start or Stop vCloud Director Services,” on
page 36.
6
Upgrade each associated vShield Manager or NSX Manager. All vShield Manager or NSX Manager
installations registered to this server group must be upgraded to a version of vShield Manager or NSX
Manager software that is compatible with the version of vCloud Director installed by the upgrade. If
the upgrade program detects an incompatible version of vShield Manager or NSX Manager, upgrading
is not allowed. You must upgrade to the latest version of vShield Manager or NSX Manager as
described in “Supported Platforms,” on page 9 to use networking features introduced in this release of
vCloud Director. See “Upgrade the Existing vShield Manager or NSX Manager That Is Associated with
an Attached vCenter Server System,” on page 47.
7
Enable user access to vCloud Director.
8
Upgrade each associated vCenter Server system and hosts. See “Upgrade vCenter Server Systems,
Hosts, and vShield Edge Appliances,” on page 48. All vCenter Server systems registered to this server
group must be upgraded to a version of vCenter Server software that is compatible with the version of
vCloud Director installed by the upgrade. Incompatible vCenter Server systems become inaccessible
from vCloud Director after the upgrade is complete. See “Supported Platforms,” on page 9.
Using a Load Balancer to Reduce Service Downtime
If you are using a load balancer or other tool that can force requests to go to specific servers, you can
upgrade a subset of the server group while keeping existing services available on the remaining subset. This
approach reduces vCloud Director service downtime to the length of time required to upgrade the
vCloud Director database. Users might experience some degradation of performance during the upgrade,
but in-progress tasks continue to run as long as any subset of the server group is operational. Console
sessions might be interrupted, but you can restart them.
1
Use the load balancer to redirect vCloud Director requests to a subset of the servers in the group.
Follow the procedures recommended by your load balancer.
2
Use the cell management tool to quiesce the cells that are no longer handling requests and shut down
vCloud Director services on those servers.
NOTE Console sessions routed through a server's console proxy are interrupted when the server shuts
down. Clients can refresh the console window to recover.
See “Use the Cell Management Tool to Quiesce and Shut Down a Server,” on page 41.
40
VMware, Inc.
Chapter 3 Upgrading vCloud Director
3
Upgrade vCloud Director software on the members of the server group on which you have stopped
vCloud Director, but do not restart those services. See “Upgrade vCloud Director Software on Any
Member of a Server Group,” on page 43.
4
Use the cell management tool to quiesce the cells that you have not yet upgraded and shut down
vCloud Director services on those servers.
5
Upgrade the vCloud Director database. See “Upgrade the vCloud Director Database,” on page 45.
6
Restart vCloud Director on the upgraded servers. See “Start or Stop vCloud Director Services,” on
page 36.
7
Upgrade each associated vShield Manager or NSX Manager. See “Upgrade the Existing vShield
Manager or NSX Manager That Is Associated with an Attached vCenter Server System,” on page 47.
8
Upgrade each associated vCenter Server system and hosts. See “Upgrade vCenter Server Systems,
Hosts, and vShield Edge Appliances,” on page 48.
9
Use the load balancer to redirect vCloud Director requests to the upgraded servers.
10
Upgrade vCloud Director software on the remaining servers in the group, and restart vCloud Director
on those servers as the upgrades complete. See “Upgrade vCloud Director Software on Any Member of
a Server Group,” on page 43.
Displaying the Maintenance Message During an Upgrade
If you anticipate a lengthy upgrade process and want to have the system display a maintenance message
while the upgrade is underway, verify that at least one cell remains accessible while the others are being
upgraded. Run the /opt/vmware/vcloud-director/bin/vmware-vcd-cell command on that cell to turn on the
cell maintenance message.
[root@cell1 /opt/vmware/vcloud-director/bin]# ./vmware-vcd-cell maintenance
When you are ready to return an upgraded cell to service, run the following command on the cell to turn off
the maintenance message.
[root@cell1 /opt/vmware/vcloud-director/bin]# service vmware-vcd restart
This chapter includes the following topics:
n
“Use the Cell Management Tool to Quiesce and Shut Down a Server,” on page 41
n
“Upgrade vCloud Director Software on Any Member of a Server Group,” on page 43
n
“Upgrade the vCloud Director Database,” on page 45
n
“Upgrade the Existing vShield Manager or NSX Manager That Is Associated with an Attached vCenter
Server System,” on page 47
n
“Upgrade vCenter Server Systems, Hosts, and vShield Edge Appliances,” on page 48
Use the Cell Management Tool to Quiesce and Shut Down a Server
Before you upgrade a vCloud Director server, use the cell management tool to quiesce and shut down
vCloud Director services on the server's cell.
vCloud Director creates a task object to track and manage each asynchronous operation that a user requests.
Information about all running and recently completed tasks is stored in the vCloud Director database.
Because a database upgrade invalidates this task information, you must be sure that no tasks are running
when you begin the upgrade process.
VMware, Inc.
41
vCloud Director Installation and Upgrade Guide
With the cell management tool, you can suspend the task scheduler so that new tasks cannot be started, then
check the status of all active tasks. You can wait for running tasks to finish or log in to vCloud Director as a
system administrator and cancel them. See Chapter 5, “Cell Management Tool Reference,” on page 55.
When no tasks are running, you can use the cell management tool to stop vCloud Director services.
Prerequisites
n
Verify that you have superuser credentials for the target server.
n
Verify that you have vCloud Director system administrator credentials.
n
If this cell will be accessible to vCloud Director clients while it is being upgraded, use
the /opt/vmware/vcloud-director/bin/vmware-vcd-cell command to turn on the cell maintenance
message.
[root@cell1 /opt/vmware/vcloud-director/bin]# ./vmware-vcd-cell maintenance
This command causes the cell to respond to all requests with a maintenance message. If you use a load
balancer or similar tool to make the cell inaccessible during the upgrade, you do not need to to turn on
the cell maintenance message.
Procedure
1
Log in to the target server as root.
2
Use the cell management tool to gracefully shut down the cell.
a
Retrieve the current job status.
The following cell-management-tool command supplies system administrator credentials and
returns the count of running jobs.
[root@cell1 /opt/vmware/vclouddirector/bin]# ./cell-management-tool -u administrator cell --status
Job count = 3
Is Active = true
b
Stop the task scheduler to quiesce the cell.
Use a cell-management-tool command of the following form.
[root@cell1 /opt/vmware/vclouddirector/bin]# ./cell-management-tool -u administrator cell --quiesce true
This command prevents new jobs from being started. Existing jobs continue to run until they finish
or are cancelled. To cancel a job, use the vCloud Director Web Console or the REST API.
c
When the Job count value is 0 and the Is Active value is false, it is safe to shut down the cell.
Use a cell-management-tool command of the following form.
[root@cell1 /opt/vmware/vclouddirector/bin]# ./cell-management-tool -u administrator cell --shutdown
NOTE You can supply the vCloud Director system administrator password on the cellmanagement-tool command line, but it is more secure to omit the password. This causes the cellmanagement-tool to prompt for the password, which it does not display on the screen as you type.
Console sessions routed through a server's console proxy are interrupted when the server shuts
down. If other members of the server group are still active, clients can refresh the console window
to recover.
42
VMware, Inc.
Chapter 3 Upgrading vCloud Director
What to do next
After the cell management tool stops vCloud Director services on this server, you can upgrade the server's
vCloud Director software or complete other maintenance that the server requires.
Upgrade vCloud Director Software on Any Member of a Server Group
The vCloud Director installer verifies that the target server meets all upgrade prerequisites and upgrades
the vCloud Director software on the server.
vCloud Director software is distributed as a Linux executable file named vmware-vcloud-director-5.6.0nnnnnn.bin, where nnnnnn represents a build number. After the upgrade is installed on a member of a
server group, you must run a tool that upgrades the vCloud Director database that the group uses before
you can restart vCloud Director services on the upgraded server.
Prerequisites
n
Verify that you have superuser credentials for the target server.
n
To have the installer verify the digital signature of the installation file, download and install the
VMware public key on the target server. If you already verified the digital signature of the installation
file, you do not need to verify it again during installation. See “Download and Install the VMware
Public Key,” on page 25.
n
Create new SSL certificates for the target server. See “SSL Certificates Must Include an X.509 Subject
Alternative Name Extension,” on page 39.
n
Use the cell management tool to quiesce and shut down vCloud Director services on the server's cell.
n
Verify that you have a valid license key to use the version of the vCloud Director software to which you
are upgrading.
Procedure
1
Log in to the target server as root.
2
Download the installation file to the target server.
If you purchased the software on a CD or other media, copy the installation file to a location that is
accessible to all target servers.
3
Verify that the checksum of the download matches the one posted on the download page.
Values for MD5 and SHA1 checksums are posted on the download page. Use the appropriate tool to
verify that the checksum of the downloaded installation file matches the one shown on the download
page. A Linux command of the following form displays the checksum for installation-file.
[root@cell1 /tmp]# md5sum installation-file
checksum-value installation-file
Compare the checksum-value produced by this command with the MD5 checksum copied from the
download page.
4
Ensure that the installation file is executable.
The installation file requires execute permission. To be sure that it has this permission, open a console,
shell, or terminal window and run the following Linux command, where installation-file is the full
pathname to the vCloud Director installation file.
[root@cell1 /tmp]# chmod u+x installation-file
5
Use the cell management tool to quiesce the cell and shut down vCloud Director services on the server.
See “Use the Cell Management Tool to Quiesce and Shut Down a Server,” on page 41.
VMware, Inc.
43
vCloud Director Installation and Upgrade Guide
6
In a console, shell, or terminal window, run the installation file.
To run the installation file, type its full pathname, for example ./installation-file. The file includes
an installation script and an embedded RPM package.
NOTE You cannot run the installation file from a directory whose pathname includes any embedded
space characters.
If the installer detects a version of vCloud Director installed on this server that is equal to or later than
the version in the installation file, it displays an error message and exits. Otherwise, it prompts you to
confirm that you are ready to proceed to upgrade this server.
Checking
Checking
Checking
Checking
An older
7
architecture...done
for a supported Linux distribution...done
for necessary RPM prerequisites...done
free disk space...done
version of VMware vCloud Director has been detected
Respond to the upgrade prompt.
Option
Action
Continue the upgrade.
Type y.
Exit to the shell without making any
changes in the current installation.
Type n.
After you confirm that you are ready to upgrade the server, the installer verifies that the host meets all
requirements, unpacks the vCloud Director RPM package, stops vCloud Director services on the server,
and upgrades the installed vCloud Director software.
Do you wish to proceed with the upgrade? (y/n)? y
Extracting vmware-vcloud-director ......done
Upgrading VMware vCloud Director...
Installing the VMware vCloud Director
Preparing...
##################################################
vmware-vcloud-director
##################################################
Migrating settings and files from previous release...done
Migrating in-progress file transfers to /opt/vmware/vcloud-director/data/transfer...done
Uninstalling previous release...done
The installer displays a warning of the following form if you did not install the VMware public key on
the target server.
warning:installation-file.rpm: Header V3 RSA/SHA1 signature: NOKEY, key ID 66fd4949
The installer displays a warning of the following form when it makes changes to the existing
global.properties file on the target server.
warning: /opt/vmware/vcloud-director/etc/global.properties created as /opt/vmware/vclouddirector/etc/global.properties.rpmnew
Most upgrades require this sort of change, and display this warning. If you have made any changes to
the existing global.properties file, you can retrieve them from global.properties.rpmnew.
44
VMware, Inc.
Chapter 3 Upgrading vCloud Director
8
(Optional) Update logging properties.
After an upgrade, new logging properties are written to the file /opt/vmware/vclouddirector/etc/log4j.properties.rpmnew.
Option
Action
If you did not change existing
logging properties
Copy this file to /opt/vmware/vclouddirector/etc/log4j.properties.
If you changed logging properties
Merge /opt/vmware/vclouddirector/etc/log4j.properties.rpmnew file with the
existing /opt/vmware/vcloud-director/etc/log4j.properties.
Merging these files preserves your changes.
When the vCloud Director software upgrade is complete, the installer displays a message indicating where
the old configuration files are stored, then reminds you to run the database upgrade tool.
What to do next
n
If you have not already done so, upgrade the vCloud Director database that this server uses.
n
If you already upgraded the vCloud Director database that this server group uses, you can restart the
upgraded server. See “Start or Stop vCloud Director Services,” on page 36.
Upgrade the vCloud Director Database
After you upgrade a server in your vCloud Director server group, you must upgrade the group's
vCloud Director database before you restart vCloud Director services on the server.
All servers in a vCloud Director server group share the same database, so regardless of how many servers
you are upgrading, you need to upgrade the database only once. After the database is upgraded,
vCloud Director servers cannot connect to it until they, too, are upgraded.
Prerequisites
IMPORTANT Back up your existing database before you upgrade it. Use the procedures that your database
software vendor recommends.
Verify that all vCloud Director cells are inactive. See “Use the Cell Management Tool to Quiesce and Shut
Down a Server,” on page 41
Procedure
1
Open a console, shell, or terminal window, and type the following command to run the database
upgrade script.
/opt/vmware/vcloud-director/bin/upgrade
IMPORTANT If the database upgrade script detects that an incompatible version of vShield Manager or
NSX Manager is registered to this installation of vCloud Director, it displays a warning message and
cancels the upgrade.
One or more vShield Manager servers registered to this vCloud
Director installation are not supported by the version of vCloud Director
you are upgrading to. Upgrade canceled, please follow the procedures in
the vShield Manager Upgrade Guide to upgrade those unsupported vShield
Manager servers.
VMware, Inc.
45
vCloud Director Installation and Upgrade Guide
2
Respond to the database upgrade prompts.
a
Confirm that you want to continue with the database upgrade.
Welcome to the vCloud Director upgrade utility
This product is intended for use only by service providers under the
terms and conditions of the VMware Service Provider Partner (VSPP)
Program. If you are a member of the VSPP Program, please locate your
license key before proceeding. If you are not a member of this program,
do not proceed with this upgrade. Upgrading without a proper key will
invalidate your support contract.
This utility will apply several updates to the database. Please
ensure you have created a backup of your database prior to continuing.
Do you wish to upgrade the product now? [Y/N]:
Take one of the following actions:
b
Option
Action
Continue the upgrade.
Type y.
Exit to the shell without making
any changes in the current
vCloud Director database.
Type n.
(Optional) Wait for cells to become inactive, if necessary.
If the database upgrade tool detects that any cells are still active, it prompts you to continue with
the upgrade or exit.
Found active cell. Name: "cell-01", IP Address: 10.150.151.190, Identifier: a2eb...
Do you wish to upgrade the database while cells are still active? [Y/N]
If you see this prompt, type n to exit to the shell, then wait five minutes and restart the database
upgrade tool. If the database upgrade tool continues to warn you about cells that are still active,
return to the procedure in “Use the Cell Management Tool to Quiesce and Shut Down a Server,” on
page 41 and ensure that all cells have become inactive.
After you have responded to all prompts, the database upgrade tool runs and displays progress
messages.
Executing upgrade task: Start UpdateStatementManager
...[3]
Successfully ran upgrade task
Executing upgrade task: ...
.......... Successfully ran upgrade task
...
Executing upgrade task: Stop UpdateStatementManager
...[3]
...
Successfully ran upgrade task
46
VMware, Inc.
Chapter 3 Upgrading vCloud Director
3
(Optional) Rebuild the database indexes and update the database statistics.
These procedures can lead to better database performance after the upgrade.
Do you wish to rebuild the database indexes? This may take several minutes. [Y/N] y
Rebuilding database indexes
...
Do you wish to update the database statistics? This may take several minutes. [Y/N] y
Updating database statistics
...
After the database is upgraded, the upgrade script offers to start vCloud Director services on this host.
Would you like to start the vCloud Director service now? If you choose not
to start it now, you can manually start it at any time using this command:
service vmware-vcd start
Start it now? [y/n]:y
Starting the vCloud Director service (this may take a moment).
Upgrade the Existing vShield Manager or NSX Manager That Is
Associated with an Attached vCenter Server System
Before you upgrade a vCenter Server system and hosts attached to vCloud Director, you must upgrade the
vShield Manager or NSX Manager that is associated with that vCenter Server system.
Upgrading vShield Manager or NSX Manager interrupts access to the administrative functions of vShield
Manager or NSX Manager, but does not interrupt network services.
Prerequisites
n
Verify that at least one upgraded cell in your vCloud Director installation is running before you begin
the upgrade. The cell writes data about the upgraded vShield Manager or NSX Manager to the
vCloud Director database.
n
Verify that you have the items that are required for upgrading vShield Manager or NSX Manager,
depending on which one you are upgrading.
VMware, Inc.
vShield Manager
NSX Manager
See the upgrade information available from the VMware
vCloud Networking and Security Documentation Center at
https://www.vmware.com/support/pubs/vshield_pubs.html.
See the upgrade information available from the NSX for
vSphere Documentation Center at
https://www.vmware.com/support/pubs/nsx_pubs.html.
47
vCloud Director Installation and Upgrade Guide
Procedure
1
Upgrade the associated vShield Manager or NSX Manager installation by following the upgrade
procedure that is appropriate for the product and version to which you are upgrading.
CAUTION When you upgrade to a version of NSX Manager, do not upgrade the existing associated
vShield Edge appliances to NSX Edge appliances. vCloud Director does not support NSX Edge
appliances. When you use NSX Manager with vCloud Director, vCloud Director uses NSX Manager to
create vShield Edge appliances.
2
Option
Action
Upgrade an associated vShield
Manager to a later version of
vShield Manager.
See the Upgrade vShield Manager information in the vShield Installation
and Upgrade Guide at
https://www.vmware.com/support/pubs/vshield_pubs.html. Upgrade only
vShield Manager, and no other vShield components. Do not upgrade the
existing associated vShield Edge appliances.
Upgrade an associated vShield
Manager to NSX Manager, or
upgrade an associated NSX
Manager to a later version of NSX
Manager.
See the Upgrade to NSX Manager information in the NSX Installation and
Upgrade Guide at https://www.vmware.com/support/pubs/nsx_pubs.html.
Upgrade only vShield Manager or NSX Manager, and no other vShield or
NSX for vSphere components. Do not upgrade the existing associated
vShield Edge appliances.
Repeat Step 1 for each vShield Manager or NSX Manager associated with the other vCenter Server
systems registered to your cloud.
After the upgrade finishes, the now upgraded vShield Manager or NSX Manager notifies vCloud Director
that the software is at a new version. It can take several minutes before the notification is sent and
vCloud Director processes it.
What to do next
After you upgrade each associated vShield Manager or NSX Manager, you must upgrade all of the
registered vCenter Server systems and hosts before you use vCloud Director to upgrade the associated
vShield Edge appliances. See “Upgrade vCenter Server Systems, Hosts, and vShield Edge Appliances,” on
page 48.
Upgrade vCenter Server Systems, Hosts, and vShield Edge
Appliances
After you have upgraded vCloud Director and vShield Manager or NSX Manager, you must upgrade the
vCenter Server systems and hosts attached to your cloud. After all of the attached vCenter Server systems
and hosts are upgraded, then you must use vCloud Director to upgrade the associated vShield Edge
appliances by redeploying edge gateways or resetting the vApp networks.
Prerequisites
Verify that you have already upgraded each vShield Manager or NSX Manager that is associated with the
vCenter Server systems that are attached to your cloud. See “Upgrade the Existing vShield Manager or NSX
Manager That Is Associated with an Attached vCenter Server System,” on page 47.
Procedure
1
Upgrade the attached vCenter Server system.
See the vSphere Installation and Setup Guide.
2
Verify all vCloud Director public URLs and certificate chains.
On the Administration tab of the vCloud Director Web console, click Public Addresses in the left pane.
Enter values for all fields
48
VMware, Inc.
Chapter 3 Upgrading vCloud Director
3
(Optional) If you have configured vCloud Director to use vCenter Single Sign On, you must unregister
and re-register vCloud Director with the vCenter Lookup Service.
a
Log in to vCloud Director as a system administrator using a local or LDAP account. Do not use
vCenter Single Sign On for this log in.
b
Unregister vCloud Director with the vCenter Lookup Service.
On the Administration tab of the vCloud Director Web console, click Federation in the left pane,
and click Unregister. You must provide the appropriate vCenter administrator credentials to
complete this action.
c
Register vCloud Director with the vCenter Lookup Service.
See "Configure vCloud Director to use vCenter Single Sign On" in thevCloud Director
Administrator's Guide
4
5
Refresh the vCenter Server system's registration with vCloud Director.
a
In the vCloud Director Web console, click the Manage & Monitor tab and click vCenters in the left
pane.
b
Right-click the vCenter Server name and select Refresh.
c
Click Yes.
Upgrade each host that the upgraded vCenter Server system supports.
See the vSphere Installation and Setup Guide. For each host, the upgrade requires the following steps:
a
In the vCloud Director Web console, disable the host.
On the Manage and Monitor page, click Hosts, then right-click the host and select Disable Host.
b
Use the vCenter Server system to put the host into maintenance mode and allow all the virtual
machines on that host to migrate to another host.
c
Upgrade the host.
To ensure that you have enough upgraded host capacity to support the virtual machines in your
cloud, upgrade hosts in small batches. When you do this, host agent upgrades can complete in time
to allow virtual machines to migrate back to the upgraded host.
d
Use the vCenter Server system to reconnect the host.
e
Upgrade the vCloud Director host agent on the host.
See "Upgrade an ESX/ESXi Host Agent" in the vCloud Director Administrator's Guide.
f
In the vCloud Director Web console, enable the host.
On the Manage and Monitor page, click Hosts, then right-click the host and select Enable Host.
g
6
Use the vCenter Server system to take the host out of maintenance mode.
Use your upgraded vCloud Director to upgrade all vShield Edge appliances managed by the upgraded
vShield Manager or NSX Manager associated with the upgraded vCenter Server system.
CAUTION If the upgraded vCenter Server system is associated with NSX Manager instead of vShield
Manager, only use the methods described in this step to automatically upgrade the vShield Edge
appliances using vCloud Director. Do not use any other methods to upgrade the associated vShield
Edge appliances to NSX Edge appliances. vCloud Director does not support NSX Edge appliances.
When you use NSX Manager with vCloud Director, vCloud Director uses NSX Manager to create
vShield Edge appliances.
VMware, Inc.
49
vCloud Director Installation and Upgrade Guide
An appropriate upgrade of a vShield Edge appliance occurs automatically when you use either the
vCloud Director Web console or REST API to reset a network that vShield Edge protects.
n
For an edge gateway, redeploying the edge gateway upgrades the vShield Edge appliance
associated with that edge gateway.
n
For vApp networks that the virtual machines connect to, such as routed vApp networks, isolated
vApp networks, or fenced organization virtual datacenter networks, resetting the vApp network
from within the context of the vApp upgrades the vShield Edge appliance associated with that
network. To use vCloud Director Web console to reset a vApp network from within the context of a
vApp, navigate to the Networking tab for the vApp, display its networking details, right-click the
vApp network, and select Reset Network.
For more information on how to redeploy edge gateways and reset vApp networks, see the
vCloud Director Web console online help or the vCloud API Programming Guide, depending on which
method you want to use.
What to do next
Repeat this procedure for the other vCenter Server systems registered to your cloud.
50
VMware, Inc.
vCloud Director Setup
4
After you configure all servers in the vCloud Director server group and connect them to the database, you
can initialize the server group's database with a license key, system administrator account, and related
information. When this process is complete, you can use the vCloud Director Web Console to complete the
initial provisioning of your cloud.
Before you can run the vCloud Director Web Console, you must run the Setup wizard, which gathers the
information that the Web Console requires before it can start. After the wizard is finished, the Web Console
starts and displays the login screen. The vCloud Director Web Console provides a set of tools for
provisioning and managing a cloud. It includes a Quickstart feature that guides you through steps like
attaching vCloud Director to vCenter and creating an organization.
Prerequisites
n
Complete the installation of all vCloud Director servers, and verify that vCloud Director services have
started on all servers.
n
Verify that you have the URL that the configuration script displays when it completes.
NOTE To discover the URL of the Setup wizard after the script exits, look up the fully qualified domain
name associated with the IP address you specified for the HTTP service during installation of the first
server and use it to construct a URL of the form https://fully-qualified-domain-name, for example,
https://mycloud.example.com. You can connect to the wizard at that URL.
Complete the installation of all vCloud Director servers, and verify that vCloud Director services have
started on all servers.
Procedure
1
Open a Web browser and connect to the URL that the configuration script displays when it completes.
2
Follow the prompts to complete the setup.
This chapter includes the following topics:
n
“Review the License Agreement,” on page 52
n
“Enter the License Key,” on page 52
n
“Create the System Administrator Account,” on page 52
n
“Specify System Settings,” on page 52
n
“Ready to Log In to vCloud Director,” on page 53
VMware, Inc.
51
vCloud Director Installation and Upgrade Guide
Review the License Agreement
Before you can configure a vCloud Director server group, you must review and accept the end user license
agreement.
Procedure
1
Review the license agreement.
2
Accept or reject the agreement.
Option
Action
To accept the license agreement.
Click Yes, I accept the terms in the license agreement.
To reject the license agreement
No, I do not accept the terms in the license agreement.
If you reject the license agreement, you cannot proceed with vCloud Director configuration.
Enter the License Key
Each vCloud Director cluster requires a license to run. The license is specified as a product serial number.
The product serial number is stored in the vCloud Director database.
The vCloud Director product serial number is not the same as the vCenter server license key. To operate a
vCloud, you must have a vCloud Director product serial number and a vCenter server license key. You can
obtain both types of license keys from the VMware License Portal.
Procedure
1
Obtain a vCloud Director product serial number from the VMware License Portal.
2
Type the product serial number in the Product serial number text box.
Create the System Administrator Account
Specify the user name, password, and contact information for the vCloud Director system administrator.
The vCloud Director system administrator has superuser privileges throughout the cloud. You create the
initial system administrator account during vCloud Director setup. After installation and configuration is
complete, this system administrator can create additional system administrator accounts as needed.
Procedure
1
Type the system administrator's user name.
2
Type the system administrator's password and confirm it.
3
Type the system administrator's full name.
4
Type the system administrator's email address.
Specify System Settings
You can specify the system settings that control how vCloud Director interacts with vSphere and vShield
Manager or NSX Manager.
The configuration process creates a folder in the attached vCenter Server system for vCloud Director to use
and specifies an installation ID to use when you create MAC addresses for virtual NICs.
Procedure
1
52
Type a name for the vCloud Director vCenter Server folder in the System name field.
VMware, Inc.
Chapter 4 vCloud Director Setup
2
Use the Installation ID field to specify the installation ID for this installation of vCloud Director.
If a datacenter includes multiple installations of vCloud Director, each installation must specify a
unique installation ID.
Ready to Log In to vCloud Director
After you provide all of the information that the Setup Wizard requires, you can confirm your settings and
complete the wizard. After the wizard finishes, the login screen of the vCloud Director Web Console
appears.
The Ready to Log In page lists all the settings you have provided to the wizard. Review the settings
carefully.
Prerequisites
Verify that you have access to the vCenter Server system that you want to use with your cloud, and to that
vCenter Server system's associated vShield Manager or NSX Manager. The vCloud Director Web Console
requires access to the installations of vCenter Server and vShield Manager or NSX Manager that you want to
configure as part of this vCloud Director installation. These installations must be running and configured to
work with each other before you finish this task. For more information about the configuration
requirements, see “vCloud Director Hardware and Software Requirements,” on page 9.
Procedure
n
To change a setting, click Back until you get to the page where the setting originated.
n
To confirm all settings and complete the configuration process, click Finish.
When you click Finish, the wizard applies the settings you specified, then starts the vCloud Director Web
Console and displays its login screen.
What to do next
Use the displayed login screen to log in to the vCloud Director Web Console using the user name and
password you provided for the system administrator account. After you have logged in, the console
displays a set of Quickstart steps that you must complete before you can use this cloud. When the steps are
complete, the Guided Tasks are enabled, and your cloud is ready for use.
VMware, Inc.
53
vCloud Director Installation and Upgrade Guide
54
VMware, Inc.
Cell Management Tool Reference
5
The cell management tool is a command-line utility that you can use to manage a cell and its SSL certificates,
and to export tables from the vCloud Director database. Superuser or system administrator credentials are
required for some operations.
The cell management tool is installed in /opt/vmware/vcloud-director/bin/cell-management-tool.
Listing Available Commands
To list the available cell management tool commands, use the following command line.
cell-management-tool -h
Example: Cell Management Tool Usage Help
[root@cell1 /opt/vmware/vcloud-director/bin]# ./cell-management-tool -h
usage: cell-management-tool
-h,--help
print this message
Available commands:
cell - Manipulates the Cell and core components
certificates - Reconfigures the SSL certificates for the cell
ciphers - Reconfigure the list of disallowed SSL ciphers for the cell
configure-metrics - Collects and stores properties necessary for collecting and querying metrics
data
dbextract - Exports the data from the given set of tables
fix-scheduler-data - Scan database for corrupt scheduler data. Fix scheduler job data if
corrupt.
generate-certs - Generates self-signed SSL certificates for use with vCD cell.
recover-password - Change a forgotten System Administrator password. Database credentials are
required.
fail-tasks - Fail all tasks running on this cell and set a custom failure message.
For command specific help:
cell-management-tool <commandName> -h
n
Managing a Cell on page 56
Use the cell command of the cell management tool to suspend the task scheduler so that new tasks
cannot be started, to check the status of active tasks, to control cell maintenance mode, and to shut
down the cell gracefully.
VMware, Inc.
55
vCloud Director Installation and Upgrade Guide
n
Exporting Database Tables on page 57
Use the dbextract command of the cell management tool to export data from the vCloud Director
database.
n
Detecting and Repairing Corrupted Scheduler Data on page 60
If you know the vCloud Director database username and password, you can use the
fix-scheduler-data command of the cell management tool to scan the database for corrupt
scheduler data and repair that data as needed.
n
Replacing SSL Certificates on page 60
Use the certificates command of the cell management tool to replace the cell's SSL certificates.
n
Generating Self-Signed SSL Certificates on page 61
Use the generate-certs command of the cell management tool to generate new self-signed SSL
certificates for the cell.
n
Managing the List of Allowed SSL Ciphers on page 62
Use the ciphers command of the cell management tool to configure the set of cipher suites that the
cell offers to use during the SSL handshake process.
n
Configuring the Metrics Database Connection on page 64
Use the configure-metrics command of the cell management tool to connect the cell to the optional
metrics database.
n
Recovering the System Administrator Password on page 65
If you know the vCloud Director database username and password, you can use the
recover-password command of the cell management tool to recover the vCloud Director system
administrator password.
n
Force Running Tasks to Complete on page 65
Use the fail-tasks command of the cell management tool to generate a list of tasks running on a
quiesced cell that you can force to complete immediately with a status of failure.
Managing a Cell
Use the cell command of the cell management tool to suspend the task scheduler so that new tasks cannot
be started, to check the status of active tasks, to control cell maintenance mode, and to shut down the cell
gracefully.
To manage a cell, use a command line with the following form:
cell-management-tool -u sysadmin-username -p sysadmin-password cell command
sysadmin-username
Username of a vCloud Director system administrator.
sysadmin-password
Password of the vCloud Director system administrator.
NOTE You can supply the vCloud Director system administrator password
on the cell-management-tool command line, but it is more secure to omit the
password. This causes the cell-management-tool to prompt for the
password, which it does not display on the screen as you type.
command
56
cell subcommand.
VMware, Inc.
Chapter 5 Cell Management Tool Reference
Table 5‑1. Cell Management Tool Options and Arguments, cell Subcommand
Command
Argument
Description
--help (-h)
None
Provides a summary of available
commands in this category.
--maintenance (-m)
true or false
Controls cell maintenance mode.
The argument true puts the cell
into maintenance mode. (You must
quiesce the cell first.) The
argument false releases the cell
from maintenance mode.
--quiesce (-q)
true or false
Quiesces activity on the cell. The
argument true suspends the
scheduler. The argument false
restarts the scheduler.
--shutdown (-s)
None
Shuts down vCloud Director
services on the server.
--status (-t)
None
Displays information about the
number of tasks running on the
cell and the status of the cell.
--status-verbose (-tt)
None
Displays verbose information
about the tasks running on the cell
and the status of the cell.
Example: Getting Task Status
The following cell-management-tool command line supplies system administrator credentials and returns
the count of running tasks. When the Job count value is 0 and the Is Active value is false, you can safely
shut down the cell.
[root@cell1 /opt/vmware/vclouddirector/bin]# ./cell-management-tool -u administrator cell --status
Job count = 3
Is Active = true
Exporting Database Tables
Use the dbextract command of the cell management tool to export data from the vCloud Director
database.
To export database tables, use a command line with the following form:
cell-management-tool dbextract options
Table 5‑2. Cell Management Tool Options and Arguments, dbextract Subcommand
Option
Argument
Description
--help (-h)
None
Provides a summary of available
commands in this category.
-categories
A comma-separated list of table categories
to export.
Optional. NETWORKING is the only
supported category
-dataFile
An absolute path to a file describing the
data to export.
Optional. If not supplied, the
command uses
$VCLOUD_HOME/etc/data_to_exp
ort.properties. See “Specifying
Tables and Columns to Export,” on
page 58.
VMware, Inc.
57
vCloud Director Installation and Upgrade Guide
Table 5‑2. Cell Management Tool Options and Arguments, dbextract Subcommand (Continued)
Option
Argument
Description
-dumpFolder
An absolute path to the folder in which to
create the dump. The folder must exist and
be writable by vcloud.vcloud.
All data will be exported to a file in
this folder.
-exportSettingsFile
An absolute path to a data export settings
properties file.
Optional. If not supplied, the
command uses
$VCLOUD_HOME/etc/data_export
_settings.ini. See “Limiting
and Ordering Exported Rows,” on
page 59.
-properties
An absolute path to a database connection
properties file.
Optional. If not supplied, the
command uses the database
connection properties in
$VCLOUD_HOME/etc/global.prop
erties. See “Specifying a
Properties File,” on page 58.
-tables
A comma-separated list of tables.
Optional. Export all tables to see
individual table names.
Specifying a Properties File
By default, the dbextract command extracts data from the vCloud Director database using the database
connection information in the current cell's $VCLOUD_HOME/etc/global.properties file. To extract data from a
different vCloud Director database, specify the database connection properties in a file and use the
-properties option to provide the pathname to that file on the command line. The properties file is a
UTF-8 file that has the following format.
username=username
password=password
servicename=db_service_name
port=db_connection_port
database-ip=db_server_ip_address
db-type=db_type
username
The vCloud Director database user name.
password
The vCloud Director database password.
db_service_name
The database service name. For example, orcl.example.com .
db_connection_port
The database port.
db_server_ip_address
The IP address of the database server.
db_type
The database type. Must be Oracle or MS_SQL.
Specifying Tables and Columns to Export
To restrict the set of data exported, use the -exportSettingsFile option and create a
data_to_export.properties file that specifies individual tables and, optionally, columns to export. This file
is a UTF-8 file that contains zero or more lines of the form TABLE_NAME:COLUMN_NAME.
58
TABLE_NAME
The name of a table in the database. To see a list of table names, export all
tables.
COLUMN_NAME
The name of a column in the specified TABLE_NAME.
VMware, Inc.
Chapter 5 Cell Management Tool Reference
This example data_to_export.properties file exports columns from the ACL and ADDRESS_TRANSLATION
tables.
ACL:ORG_MEMBER_ID
ACL:SHARABLE_ID
ACL:SHARABLE_TYPE
ACL:SHARING_ROLE_ID
ADDRESS_TRANSLATION:EXTERNAL_ADDRESS
ADDRESS_TRANSLATION:EXTERNAL_PORTS
ADDRESS_TRANSLATION:ID
ADDRESS_TRANSLATION:INTERNAL_PORTS
ADDRESS_TRANSLATION:NIC_ID
The command expects to find this file in $VCLOUD_HOME/etc/data_to_export.properties, but you can specify
another path.
Limiting and Ordering Exported Rows
For any table, you can specify how many rows to export and how to order the exported rows. Use the exportSettingsFile option and create a data_export_settings.ini file that specifies individual tables. This
file is a UTF-8 file that contains zero or more entries of the following form:
[TABLE_NAME]
rowlimit=int
orderby=COLUMN_NAME
TABLE_NAME
The name of a table in the database. To see a list of table names, export all
tables.
COLUMN_NAME
The name of a column in the specified TABLE_NAME.
This example data_export_settings.ini restricts data exported from the AUDIT_EVENT table to the first 10000
rows and orders the rows by the value in the event_time column
[AUDIT_EVENT]
rowlimit=100000
orderby=event_time
The command expects to find this file in $VCLOUD_HOME/etc/data_export_settings.ini, but you can specify
another path.
Example: Exporting All Tables From the Current vCloud Director Database.
This example exports all tables of the current vCloud Director database to the file /tmp/dbdump .
[root@cell1 /opt/vmware/vclouddirector/bin]# ./cell-management-tool dbextract -dumpFolder /tmp/dbdump
This utility outputs data from your vCloud Director system
that may contain sensitive data.
Do you want to continue and output the data (y/n)?
y
Exporting data now. Please wait for the process to finish
Exported 144 of 145 tables.
VMware, Inc.
59
vCloud Director Installation and Upgrade Guide
Detecting and Repairing Corrupted Scheduler Data
If you know the vCloud Director database username and password, you can use the fix-scheduler-data
command of the cell management tool to scan the database for corrupt scheduler data and repair that data
as needed.
To scan database for corrupt scheduler data, use a command line with the following form:
cell-management-tool fix-scheduler-data options
Table 5‑3. Cell Management Tool Options and Arguments, fix-scheduler-data Subcommand
Option
Argument
Description
--help (-h)
None
Provides a summary of available
commands in this category.
--dbuser
The user name of the
vCloud Director database
user.
Must be supplied on the command
line.
--dbpassword
The password of the
vCloud Director database
user.
Prompted for if not supplied.
Replacing SSL Certificates
Use the certificates command of the cell management tool to replace the cell's SSL certificates.
The certificates command of the cell management tool automates the process of replacing a cell's
existing certificates with new ones stored in a JCEKS keystore. The certificates command helps you
replace self-signed certificates with signed ones. To create a JCEKS keystore containing signed certificates,
see “Create and Import a Signed SSL Certificate,” on page 18 .
To replace the cell's SSL certificates, use a command with the following form:
cell-management-tool certificates options
Table 5‑4. Cell Management Tool Options and Arguments, certificates Subcommand
60
Option
Argument
Description
--help (-h)
None
Provides a summary of available
commands in this category.
--config (-c)
full pathname to the cell's
global.properties file
Defaults to
$VCLOUD_HOME/etc/global.prop
erties.
--httpks (-j)
None
Generate a keystore file named
certificates for use by the http
endpoint.
--consoleproxyks (-p)
None
Generate a keystore file named
proxycertificates for use by
the console proxy endpoint.
--responses (-r)
full pathname to the cell's
responses.properties file
Defaults to
$VCLOUD_HOME/etc/responses.p
roperties.
VMware, Inc.
Chapter 5 Cell Management Tool Reference
Table 5‑4. Cell Management Tool Options and Arguments, certificates Subcommand (Continued)
Option
Argument
Description
--keystore (-s)
keystore-pathname
Full pathname to a JCEKS keystore
containing the signed certificates.
--keystore-pwd (-w)
keystore-password
Password for the JCEKS keystore
referenced by the --keystore
option.
Example: Replacing Certificates
You can omit the --config and --responses options unless those files were moved from their default
locations. In this example, a keystore at /tmp/my-new-certs.ks has the password kspw. This example replaces
the cell's existing http endpoint certificate with the one found in /tmp/my-new-certs.ks
[root@cell1 /opt/vmware/vcloud–
director/bin]# ./cell-management-tool certificates -j -s /tmp/my-new-certs.ks -w kspw
Certificate replaced by user specified keystore at /tmp/new.ks.
You will need to restart the cell for changes to take effect.
NOTE You must restart the cell after you replace the certificates.
Generating Self-Signed SSL Certificates
Use the generate-certs command of the cell management tool to generate new self-signed SSL certificates
for the cell.
The generate-certs command of the cell management tool automates the procedure shown in “Create a
Self-Signed SSL Certificate,” on page 21.
To generate new self-signed SSL certificates and add them to a new or existing keystore, use a command
line with the following form:
cell-management-tool generate-certs options
Table 5‑5. Cell Management Tool Options and Arguments, generate-certs Subcommand
Option
Argument
Description
--help (-h)
None
Provides a summary of available
commands in this category.
--expiration (-x)
days-until-expiration
Number of days until the
certificates expire. Defaults to 365
--issuer (-i)
name=value [,
name=value, ...]
X.509 distinguished name of the
certificate issuer. Defaults to
CN=FQDN. where FQDN is the fullyqualified domain name of the cell
or its IP address if no fullyqualified domain name is
available. If you specify multiple
attribute and value pairs, separate
them with commas and enclose the
entire argument in quotation
marks.
--httpcert (-j)
None
Generate a certificate for the http
endpoint.
VMware, Inc.
61
vCloud Director Installation and Upgrade Guide
Table 5‑5. Cell Management Tool Options and Arguments, generate-certs Subcommand (Continued)
Option
Argument
Description
--key-size (-s)
key-size
Size of key pair expressed as an
integer number of bits. Defaults to
2048. Note that key sizes smaller
than 1024 are no longer supported
per NIST Special Publication
800-131A.
--keystore-pwd (-w)
keystore-password
Password for the keystore on this
host.
--out (-o)
keystore-pathname
Full pathname to the keystore on
this host.
--consoleproxycert (-p)
None
Generate a certificate for the
console proxy endpoint.
NOTE To maintain compatibility with previous releases of this subcommand, omitting both -j and -p has
the same result as supplying both -j and -p.
Example: Creating Self-Signed Certificates
Both of these examples assume a keystore at /tmp/cell.ks that has the password kspw. This keystore is
created if it does not already exist.
This example creates the new certificates using the defaults. The issuer name is set to CN=Unknown. The
certificate uses the default 2048-bit key length and expires one year after creation.
[root@cell1 /opt/vmware/vclouddirector/bin]# ./cell-management-tool generate-certs -j -p -o /tmp/cell.ks -w kspw
New keystore created and written to /tmp/cell.ks.
This example creates a new certificate for the http endpoint only. It also specifies custom values for key size
and issuer name. The issuer name is set to CN=Test, L=London, C=GB. The new certificate for the http
connection has a 4096 bit key and expires 90 days after creation. The existing certificate for the console proxy
endpoint is unaffected.
[root@cell1 /opt/vmware/vclouddirector/bin]# ./cell-management-tool generate-certs -j -o /tmp/cell.ks -w kspw
-i "CN=Test, L=London, C=GB" -s 4096 -x 90
New keystore created and written to /tmp/cell.ks.
Managing the List of Allowed SSL Ciphers
Use the ciphers command of the cell management tool to configure the set of cipher suites that the cell
offers to use during the SSL handshake process.
When a client makes an SSL connection to a vCloud Director cell, the cell offers to use only those ciphers
that are configured on its default list of allowed ciphers. Several ciphers are not on this list, either because
they are not strong enough to secure the connection, or because they are known to contribute to SSL
connection failures. When you install or upgrade vCloud Director, the installation or upgrade script
examines the cell's certificates. If any of the certificates are encrypted using a cipher that is not on the list of
allowed ciphers, the script modifies the cell's configuration to allow use of that cipher and displays a
warning. You can continue using the existing certificates despite their dependence on these ciphers, or you
can take the following steps to replace the certificates and reconfigure the list of allowed ciphers:
1
Create new certificates that do not use any of the disallowed ciphers. You can use cell-managementtool ciphers -a as shown in “Example: List All Allowed Ciphers,” on page 63 to list all the ciphers
that are allowed in the default configuration.
62
VMware, Inc.
Chapter 5 Cell Management Tool Reference
2
Use the cell-management-tool certificates command to replace the cell's existing certificates with the
new ones.
3
Use the cell-management-tool ciphers command to reconfigure the list of allowed ciphers to exclude
any ciphers not used by the new certificates. Excluding these ciphers can make it faster to establish an
SSL connection to the cell, since the number of ciphers offered during the handshake is reduced to the
practical minimum.
IMPORTANT Because the VMRC console requires the use of the AES256-SHA and AES128-SHA ciphers,
you cannot disallow them if your vCloud Director clients use the VMRC console.
To manage the list of allowed SSL ciphers, use a command line with the following form:
cell-management-tool ciphers options
Table 5‑6. Cell Management Tool Options and Arguments, ciphers Subcommand
Option
Argument
Description
--help (-h)
None
Provides a summary of available
commands in this category.
--all-allowed (-a)
None
List all allowed ciphers.
--compatible-reset (-c)
None
Reset to default list of allowed
ciphers, and also allow ciphers
used by this cell's certificates.
--disallow (-d)
Comma-separated
list of cipher names,
as published at
http://www.openssl.o
rg/docs/apps/ciphers.
html
Disallow the ciphers in specified
comma-separated list.
--list (-l)
None
List currently configured ciphers.
--reset (-r)
None
Reset to default list of allowed
ciphers. If this cell's certificates use
disallowed ciphers, you will not be
able to make an SSL connection to
the cell until you install new
certificates that use an allowed
cipher.
Example: List All Allowed Ciphers
Use the --all-allowed (-a) option to list all the ciphers that the cell is currently allowed to offer during an
SSL handshake.
[root@cell1 /opt/vmware/vcloud-director/bin]# ./cell-management-tool ciphers –a
*
*
*
*
*
*
*
*
*
*
*
VMware, Inc.
TLS_DHE_DSS_WITH_AES_256_CBC_SHA
TLS_DHE_DSS_WITH_AES_128_CBC_SHA
TLS_DHE_DSS_WITH_3DES_EDE_CBC_SHA
TLS_DHE_RSA_WITH_AES_256_CBC_SHA
TLS_DHE_RSA_WITH_AES_128_CBC_SHA
TLS_DHE_RSA_WITH_3DES_EDE_CBC_SHA
TLS_RSA_WITH_AES_256_CBC_SHA
TLS_RSA_WITH_AES_128_CBC_SHA
TLS_RSA_WITH_3DES_EDE_CBC_SHA
TLS_ECDHE_ECDSA_WITH_AES_256_CBC_SHA
TLS_ECDHE_ECDSA_WITH_AES_128_CBC_SHA
63
vCloud Director Installation and Upgrade Guide
*
*
*
*
*
*
*
*
*
*
*
*
TLS_ECDHE_ECDSA_WITH_3DES_EDE_CBC_SHA
TLS_ECDHE_RSA_WITH_AES_256_CBC_SHA
TLS_ECDHE_RSA_WITH_AES_128_CBC_SHA
TLS_ECDHE_RSA_WITH_3DES_EDE_CBC_SHA
TLS_ECDH_ECDSA_WITH_AES_256_CBC_SHA
TLS_ECDH_ECDSA_WITH_AES_128_CBC_SHA
TLS_ECDH_ECDSA_WITH_3DES_EDE_CBC_SHA
TLS_ECDH_RSA_WITH_AES_256_CBC_SHA
TLS_ECDH_RSA_WITH_AES_128_CBC_SHA
TLS_ECDH_RSA_WITH_3DES_EDE_CBC_SHA
SSL_RSA_WITH_3DES_EDE_CBC_SHA
SSL_DHE_DSS_WITH_3DES_EDE_CBC_SHA
Example: Disallow Two Ciphers
Use the --disallow (-d) option to remove one or more ciphers from the list of allowed ciphers. This option
requires at least one cipher name. You can supply multiple cipher names in a comma-separated list. You can
obtain names for this list from the output of ciphers –a. This example removes two ciphers listed in the
previous example.
[root@cell1 /opt/vmware/vclouddirector/bin]#
./cell-management-tool ciphers –d
SSL_DHE_RSA_WITH_3DES_EDE_CBC_SHA,SSL_DHE_DSS_WITH_3DES_EDE_CBC_SHA
Configuring the Metrics Database Connection
Use the configure-metrics command of the cell management tool to connect the cell to the optional
metrics database.
vCloud Director can collect metrics that provide current and historic information about virtual machine
performance and resource consumption. Data for historic metrics is stored in a KairosDB database backed
by Cassandra. See Chapter 6, “Install and Configure Optional Database Software to Store and Retrieve
Historic Virtual Machine Performance Metrics,” on page 67.
To create a connection from KairosDB to a vCloud Director, use a command line with the following form:
cell-management-tool configure-metrics options
Table 5‑7. Cell Management Tool Options and Arguments, configure-metrics Subcommand
64
Command
Argument
Description
--help (-h)
None
Provides a summary of available
commands in this category.
--repository-host
Host name or IP address of
KairosDB host
If you have multiple installations
of KairosDB, you must supply the
load-balancer address here.
--repository-port
KairosDB port to use.
By default, KairosDB listens on
port 8080.
VMware, Inc.
Chapter 5 Cell Management Tool Reference
Example: Configuring a Metrics Database Connection
This example configures system to use a KairosDB instance hosted at IP address 10.0.0.1 at the default port.
The address can be either the address of a single machine running a single instance of KairosDB, or the
address of a load balancer that distributes requests to multiple installations of KairosDB.
[root@cell1 /opt/vmware/vclouddirector/bin]#
./cell-management-tool configure-metrics --repository-host 10.0.0.1 --repository-port 8080
Recovering the System Administrator Password
If you know the vCloud Director database username and password, you can use the recover-password
command of the cell management tool to recover the vCloud Director system administrator password.
With the recover-password command of the cell management tool, a user who knows the vCloud Director
database username and password can recover the vCloud Director system administrator password.
To recover the system administrator password, use a command line with the following form:
cell-management-tool recover-password options
Table 5‑8. Cell Management Tool Options and Arguments, recover-password Subcommand
Option
Argument
Description
--help (-h)
None
Provides a summary of available
commands in this category.
--dbuser
The user name of the
vCloud Director database
user.
Must be supplied on the command
line.
--dbpassword
The password of the
vCloud Director database
user.
Prompted for if not supplied.
Force Running Tasks to Complete
Use the fail-tasks command of the cell management tool to generate a list of tasks running on a quiesced
cell that you can force to complete immediately with a status of failure.
When you quiesce a cell using the cell-management-tool -q command, running tasks should terminate
gracefully within a few minutes. If tasks continue to run on a cell that has been quiesced, the superuser can
force those tasks to exit with failure so that system maintenance can begin.
To generate a list of running tasks that can be forced to fail, use a command line with the following form:
cell-management-tool fail-tasks -m "message"
Table 5‑9. Cell Management Tool Options and Arguments, fail-tasks Subcommand
Command
Argument
Description
--help (-h)
None
Provides a summary of available
commands in this category.
--message (-m)
Message text.
Message text to place in task
completion status.
VMware, Inc.
65
vCloud Director Installation and Upgrade Guide
Example: Fail Tasks Running on the Cell
This example generates a list of tasks running on this cell that are candidates for forced failure and requests
confirmation that the tasks should be forced to fail.
[root@cell1 /opt/vmware/vclouddirector/bin]# ./cell-management-tool fail-tasks -m "administrative shutdown"
Operation: IMPORT_SINGLETON_VAPP, Start time: 12/16/13 6:41 PM, Username: system, Organization:
org1
Would you like to fail the tasks listed above?
Type y to fail the task with a failure status of administrative shutdown. Type n to allow the task to continue
running.
NOTE If multiple tasks are returned in the response, you must decide to fail all of them or take no action.
You cannot choose a subset of tasks to fail.
66
VMware, Inc.
Install and Configure Optional
Database Software to Store and
Retrieve Historic Virtual Machine
Performance Metrics
6
vCloud Director can collect metrics that provide current and historic information about virtual machine
performance and resource consumption for the virtual machines that are in your cloud. Data for historic
metrics is stored in a KairosDB database backed by a Cassandra cluster.
Cassandra and KairosDB are open source databases that, when deployed together, provide a scalable, highperformance solution for collecting time series data like virtual machine metrics. If you want your cloud to
support retrieval of historic metrics from virtual machines, you must install and configure Cassandra and
KairosDB, then use the cell-management-tool utility to connect vCloud Director to KairosDB. Retrieval of
current metrics does not require optional database software.
To support retrieval of historic metrics, vCloud Director requires a Cassandra cluster. A Cassandra cluster
consists of one or more machines on which you have installed Cassandra and are running the Cassandra
service. For a typical vCloud Director installation, you should have at least three machines in the Cassandra
cluster. Because the vCloud Director metrics monitoring feature uses a replication factor of two, having
three machines, the nodes, in the Cassandra cluster ensures that a node is always available to handle a
transaction. You can use a single Cassandra cluster for your vCloud Director installation.
You also need at least one instance of KairosDB configured to work with your Cassandra cluster. If your
cloud collects historic metrics from many virtual machines, additional instances of KairosDB might be
needed. You can either install and configure KairosDB on one of the Cassandra nodes and point the cell
management tool to that endpoint, or install and configure KairosDB on each Cassandra node, add a load
balancer in front of the configuration, and point the cell management tool at the load balancer endpoint.
Because vCloud Director expects to communicate with KairosDB at a single IP address, installations that
include multiple instances of KairosDB must use a load balancer to provide that address and distribute
vCloud Director requests to the KairosDB instances.
Prerequisites
n
Verify that vCloud Director is installed and running before you configure the optional database
software.
n
If you are not already familiar with Cassandra and KairosDB, review the material available at
http://cassandra.apache.org/ and https://code.google.com/p/kairosdb/.
n
Obtain either Cassandra 1.2.x or Cassandra 2.0.x from http://cassandra.apache.org/download/.
n
Obtain KairosDB 0.9.1 from https://code.google.com/p/kairosdb/.
n
Complete the installation and configuration of the Cassandra cluster that you plan to use with your
vCloud Director installation, according to this configuration:
VMware, Inc.
n
Cassandra 1.2.x or Cassandra 2.0.x is installed on at least three machines that are connected to the
same network that your vCloud Director cells use.
n
The machines are configured to have their own physical storage, and not shared storage.
67
vCloud Director Installation and Upgrade Guide
n
The machines are configured as a Cassandra cluster.
n
Java Native Access (JNA) version 3.2.7 or later is enabled for the Cassandra cluster, to improve
performance of memory usage and disk access.
n
Complete the installation and configuration of at least one instance of KairosDB 0.9.1 on one of the
Cassandra nodes, to use your Cassandra cluster as its database. You can also install and configure
KairosDB on each Cassandra node if you add a load balancer in front of that configuration.
n
Verify that KairosDB and Cassandra are configured correctly. Use a Web browser to browse to
http://KairosDB-IP:8080/api/v1/metricnames. If the page opens without an error, KairosDB and
Cassandra are configured correctly.
n
Verify that you can run the service command of the cell-management-tool utility. For details about the
service command, see “Start or Stop vCloud Director Services,” on page 36.
Procedure
1
Use the cell-management-tool utility to configure a connection between vCloud Director and KairosDB.
Use a command like this, where KairosDB-IP is the IP address of the machine on which you installed
KairosDB, or the IP address of the load balancer you are using to distribute requests to multiple
instances of KairosDB.
[root@cell1 /opt/vmware/vcloud-director/bin]# ./cell-management-tool configure-metrics
--repository-host KairosDB-IP --repository-port 8080
2
68
Restart each vCloud Director cell using the service command of the cell-management-tool utility.
VMware, Inc.
Index
A
AMQP broker, to install and configure 25
architecture diagram 7
B
browsers, supported 11
C
cell management tool
cell command 56
certificates command 60
ciphers command 62
configure-metrics command 64
dbextract command 57
fail-tasks command 65
generate-certs command 61
options 55
certificate
self-signed 21
signed 18
configuration, confirm settings and complete 53
D
database
about 15
connection details 30
corrupted scheduler data 60
Oracle 15
SQL Server 16
supported platforms 9
to upgrade 45
databases, optional 67
F
firewall, ports and protocols 14
G
guest customization, preparing 35
H
host, to upgrade 48
I
creating a server group 27
of first server 28
of more servers 34
overview of 7
to configure 51
uninstalling 37
Installation ID, to specify 52
J
Java, required JRE version 11
K
keystore 17
L
license agreement 52
M
Microsoft Sysprep 35
N
network
configuration requirements 13
security of 14
NSX Manager
installing and configuring 24
supported releases 9
to upgrade 47
P
product serial number
to enter 52
to obtain 52
R
RPM file, to verify digital signature 25
S
services, to start 36
System Administrator account
to create 52
to recover password 65
System Name, to specify 52
installation
about 5
and capacity planning 8
architecture diagram 7
VMware, Inc.
69
vCloud Director Installation and Upgrade Guide
U
upgrade
database 45
of first server 43
upgrading, workflows for 39
V
vCenter, supported releases 9
vCenter Server, to upgrade 48
vShield Manager
installing and configuring 23
supported releases 9
to upgrade 47
70
VMware, Inc.


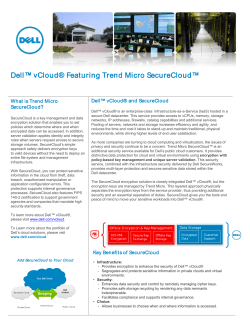


© Copyright 2026