
VisTrails Documentation Release 2.1.4 NYU Poly October 21, 2014
VisTrails Documentation
Release 2.1.4
NYU Poly
October 21, 2014
CONTENTS
I
User’s Guide
1
1
Preliminary Pages
1.1 Preface . . . . . . . . . . . . . . . . . . . . . . . . . . . . . . . . . . . . . . . . . . . . . . . . . .
3
3
2
An Introduction to VisTrails
2.1 What Is VisTrails? . . . . . . . . . . . . . . . . . . . . . . . . . . . . . . . . . . . . . . . . . . . .
2.2 Getting Started . . . . . . . . . . . . . . . . . . . . . . . . . . . . . . . . . . . . . . . . . . . . . .
5
5
6
3
Learning VisTrails By Example
3.1 Creating and Modifying Workflows . .
3.2 Groups and Subworkflows . . . . . . .
3.3 Interacting with the Version Tree . . .
3.4 Merging Two Version Trees . . . . . .
3.5 Querying the Version Tree . . . . . . .
3.6 Spreadsheet . . . . . . . . . . . . . . .
3.7 Tabular data package . . . . . . . . . .
3.8 Using Analogies to Update Workflows
3.9 Parameter Exploration . . . . . . . . .
3.10 Provenance Browser . . . . . . . . . .
3.11 Mashups . . . . . . . . . . . . . . . .
3.12 Module Descriptions and Examples . .
4
II
5
.
.
.
.
.
.
.
.
.
.
.
.
.
.
.
.
.
.
.
.
.
.
.
.
.
.
.
.
.
.
.
.
.
.
.
.
.
.
.
.
.
.
.
.
.
.
.
.
.
.
.
.
.
.
.
.
.
.
.
.
.
.
.
.
.
.
.
.
.
.
.
.
.
.
.
.
.
.
.
.
.
.
.
.
.
.
.
.
.
.
.
.
.
.
.
.
.
.
.
.
.
.
.
.
.
.
.
.
.
.
.
.
.
.
.
.
.
.
.
.
.
.
.
.
.
.
.
.
.
.
.
.
.
.
.
.
.
.
.
.
.
.
.
.
.
.
.
.
.
.
.
.
.
.
.
.
.
.
.
.
.
.
.
.
.
.
.
.
.
.
.
.
.
.
.
.
.
.
.
.
.
.
.
.
.
.
.
.
.
.
.
.
.
.
.
.
.
.
.
.
.
.
.
.
.
.
.
.
.
.
.
.
.
.
.
.
.
.
.
.
.
.
.
.
.
.
.
.
.
.
.
.
.
.
.
.
.
.
.
.
.
.
.
.
.
.
.
.
.
.
.
.
.
.
.
.
.
.
.
.
.
.
.
.
.
.
.
.
.
.
.
.
.
.
.
.
.
.
.
.
.
.
.
.
.
.
.
.
.
.
.
.
.
.
.
.
.
.
.
.
.
.
.
.
.
.
.
.
.
.
.
.
.
.
.
.
.
.
.
.
.
.
.
.
.
.
.
.
.
.
.
.
.
.
.
.
.
.
.
.
.
.
.
.
.
.
.
.
.
.
.
.
.
.
.
.
.
.
.
.
.
.
.
.
.
.
.
.
.
.
.
.
.
.
.
.
.
.
.
.
.
.
.
.
15
15
24
28
33
33
39
45
45
53
60
62
64
Intermediate Concepts and VisTrails Packages
4.1 Parameter Widgets . . . . . . . . . . . . .
4.2 Control Flow in VisTrails . . . . . . . . .
4.3 The Control Flow Assistant . . . . . . . .
4.4 List Handling in VisTrails . . . . . . . . .
4.5 Streaming in VisTrails . . . . . . . . . . .
4.6 Parallel Flow in VisTrails . . . . . . . . .
4.7 Connecting to a Database . . . . . . . . .
4.8 Example: Web Services . . . . . . . . . .
4.9 Persistence in VisTrails . . . . . . . . . .
4.10 VisTrails Server Setup . . . . . . . . . . .
4.11 Embedding VisTrails Files Via Latex . . .
.
.
.
.
.
.
.
.
.
.
.
.
.
.
.
.
.
.
.
.
.
.
.
.
.
.
.
.
.
.
.
.
.
.
.
.
.
.
.
.
.
.
.
.
.
.
.
.
.
.
.
.
.
.
.
.
.
.
.
.
.
.
.
.
.
.
.
.
.
.
.
.
.
.
.
.
.
.
.
.
.
.
.
.
.
.
.
.
.
.
.
.
.
.
.
.
.
.
.
.
.
.
.
.
.
.
.
.
.
.
.
.
.
.
.
.
.
.
.
.
.
.
.
.
.
.
.
.
.
.
.
.
.
.
.
.
.
.
.
.
.
.
.
.
.
.
.
.
.
.
.
.
.
.
.
.
.
.
.
.
.
.
.
.
.
.
.
.
.
.
.
.
.
.
.
.
.
.
.
.
.
.
.
.
.
.
.
.
.
.
.
.
.
.
.
.
.
.
.
.
.
.
.
.
.
.
.
.
.
.
.
.
.
.
.
.
.
.
.
.
.
.
.
.
.
.
.
.
.
.
.
.
.
.
.
.
.
.
.
.
.
.
.
.
.
.
.
.
.
.
.
.
.
.
.
.
.
.
.
.
.
.
.
.
.
.
.
.
.
.
.
.
.
.
.
.
.
.
.
.
.
.
.
.
.
.
.
.
.
.
.
.
.
.
.
.
.
.
.
.
.
.
.
.
.
.
.
.
.
.
.
.
.
.
.
.
.
.
.
.
.
.
.
.
.
.
.
.
.
.
.
.
.
.
.
.
.
.
.
.
.
75
75
77
91
95
99
100
101
103
107
111
116
Developer’s Guide
Writing VisTrails Packages
.
.
.
.
.
.
.
.
.
.
.
.
121
123
i
5.1
5.2
5.3
5.4
5.5
5.6
5.7
5.8
5.9
5.10
6
Introduction . . . . . . . . . . .
Who Should Read This Chapter?
An Example Module . . . . . . .
An Example Package . . . . . . .
Package Specification . . . . . .
Module Specification . . . . . . .
Port Specification . . . . . . . . .
Generating Modules Dynamically
Wrapping Command-line tools .
For System Administrators . . . .
.
.
.
.
.
.
.
.
.
.
.
.
.
.
.
.
.
.
.
.
.
.
.
.
.
.
.
.
.
.
.
.
.
.
.
.
.
.
.
.
.
.
.
.
.
.
.
.
.
.
.
.
.
.
.
.
.
.
.
.
.
.
.
.
.
.
.
.
.
.
.
.
.
.
.
.
.
.
.
.
.
.
.
.
.
.
.
.
.
.
.
.
.
.
.
.
.
.
.
.
.
.
.
.
.
.
.
.
.
.
.
.
.
.
.
.
.
.
.
.
.
.
.
.
.
.
.
.
.
.
.
.
.
.
.
.
.
.
.
.
.
.
.
.
.
.
.
.
.
.
.
.
.
.
.
.
.
.
.
.
.
.
.
.
.
.
.
.
.
.
.
.
.
.
.
.
.
.
.
.
.
.
.
.
.
.
.
.
.
.
.
.
.
.
.
.
.
.
.
.
.
.
.
.
.
.
.
.
.
.
.
.
.
.
.
.
.
.
.
.
.
.
.
.
.
.
.
.
.
.
.
.
.
.
.
.
.
.
.
.
.
.
.
.
.
.
.
.
.
.
.
.
.
.
.
.
.
.
.
.
.
.
.
.
.
.
.
.
.
.
.
.
.
.
.
.
.
.
.
.
.
.
.
.
.
.
.
.
.
.
.
.
.
.
.
.
.
.
.
.
.
.
.
.
.
.
.
.
.
.
.
.
.
.
.
.
.
.
.
.
.
.
.
.
.
.
.
.
.
.
.
.
.
.
.
.
.
.
.
.
.
.
.
.
.
.
.
.
.
.
.
.
.
.
.
.
.
.
.
.
123
123
123
124
128
134
139
141
143
146
Command-line Arguments
6.1 Starting VisTrails via the Command Line . . . . . . . . . .
6.2 Specifying a User Configuration Directory . . . . . . . . .
6.3 Passing Database Parameters on the Command Line . . . .
6.4 Running VisTrails in Batch Mode . . . . . . . . . . . . . .
6.5 Executing Workflows in Parallel . . . . . . . . . . . . . . .
6.6 Executing Parameter Explorations from the Command Line
6.7 Finding Methods Via the Command Line . . . . . . . . . .
.
.
.
.
.
.
.
.
.
.
.
.
.
.
.
.
.
.
.
.
.
.
.
.
.
.
.
.
.
.
.
.
.
.
.
.
.
.
.
.
.
.
.
.
.
.
.
.
.
.
.
.
.
.
.
.
.
.
.
.
.
.
.
.
.
.
.
.
.
.
.
.
.
.
.
.
.
.
.
.
.
.
.
.
.
.
.
.
.
.
.
.
.
.
.
.
.
.
.
.
.
.
.
.
.
.
.
.
.
.
.
.
.
.
.
.
.
.
.
.
.
.
.
.
.
.
.
.
.
.
.
.
.
.
.
.
.
.
.
.
.
.
.
.
.
.
.
.
.
.
.
.
.
.
147
147
152
152
153
156
156
157
7
Accessing the Execution Log
159
8
Example: ITK
161
8.1 Introduction to ITK . . . . . . . . . . . . . . . . . . . . . . . . . . . . . . . . . . . . . . . . . . . . 161
8.2 Preparing ITK . . . . . . . . . . . . . . . . . . . . . . . . . . . . . . . . . . . . . . . . . . . . . . 161
8.3 ITK and VisTrails . . . . . . . . . . . . . . . . . . . . . . . . . . . . . . . . . . . . . . . . . . . . 163
9
Creating a Control Flow Loop Module
167
9.1 Building your own loop structure . . . . . . . . . . . . . . . . . . . . . . . . . . . . . . . . . . . . 167
10 Using parallelization in VisTrails modules
171
10.1 Threading . . . . . . . . . . . . . . . . . . . . . . . . . . . . . . . . . . . . . . . . . . . . . . . . . 171
10.2 Multiprocessing . . . . . . . . . . . . . . . . . . . . . . . . . . . . . . . . . . . . . . . . . . . . . 171
10.3 IPython . . . . . . . . . . . . . . . . . . . . . . . . . . . . . . . . . . . . . . . . . . . . . . . . . . 171
11 Wrapping command line tools using package CLTools
173
11.1 Package CLTools . . . . . . . . . . . . . . . . . . . . . . . . . . . . . . . . . . . . . . . . . . . . . 173
12 VisTrails API Documentation
181
12.1 Module Definition . . . . . . . . . . . . . . . . . . . . . . . . . . . . . . . . . . . . . . . . . . . . 181
12.2 Port Specification . . . . . . . . . . . . . . . . . . . . . . . . . . . . . . . . . . . . . . . . . . . . . 185
12.3 Parameter Widget Configuration . . . . . . . . . . . . . . . . . . . . . . . . . . . . . . . . . . . . . 189
III
Indices and tables
191
Bibliography
195
Python Module Index
197
Index
199
ii
Part I
User’s Guide
1
CHAPTER
ONE
PRELIMINARY PAGES
1.1 Preface
Welcome to the VisTrails User’s Guide. This book has been updated for version 2.1 of the VisTrails software.
VisTrails is a new scientific workflow management system developed at the University of Utah that provides support for
data exploration and visualization. For an engineer or scientist, generating and evaluating hypotheses is an interactive
process. With each change, a different, albeit related, workflow is created. VisTrails was designed to manage these
rapidly-evolving workflows. By automatically managing the data, metadata, and the data exploration process, VisTrails
allows you to focus on the task at hand and relieves you from tedious and time-consuming tasks involved in organizing
vast volumes of data. VisTrails provides infrastructure that can be combined with and enhance existing visualization
and workflow systems.
VisTrails is an open-source software system. You can contribute to VisTrails by sharing bug reports, bug fixes, and
suggestions with the VisTrails community. The easiest way to get started is to sign up for the VisTrails Users mailing
list. Instructions for doing this can be found on the VisTrails web site: www.vistrails.org.
This book is divided into four parts. The first part, Getting started, provides instructions on how to download and install
the VisTrails software, and introduces you to its user interface. The second and longest part, “Learning VisTrails by
Example,” consists of a number of tutorial chapters that guide you, step by step, through the features of VisTrails. We
encourage you to try out these examples for yourself as you read this book. The third part provides information on
additional features and packages. The forth and final part is the “Developer’s Guide” and is intended for programmers
who wish to add new features, packages, and modules to VisTrails.
We hope that you will find VisTrails to be a useful tool towards automating and streamlining your workflows, leading
to faster discoveries and deeper insight.
For your convenience, the html version of this manual is also available at http://www.vistrails.org/usersguide.
About the figures: VisTrails works across multiple platforms, and the screenshots shown in this manual reflect this.
Hence, some of the images in this book may vary slightly from what you see on your system, depending on the look
and feel of your platform.
1.1.1 Acknowledgements
VisTrails research and development has been funded the Department of Energy SciDAC (VACET and SDM centers),
the National Science Foundation (grants IIS-0746500, CNS-0751152, IIS-0713637, OCE-0424602, IIS-0534628,
CNS-0514485, IIS-0513692, CNS-0524096, CCF-0401498, OISE-0405402, CCF-0528201, CNS-0551724), and IBM
Faculty Awards (2005, 2006, 2007, and 2008).
3
VisTrails Documentation, Release 2.1.4
4
Chapter 1. Preliminary Pages
CHAPTER
TWO
AN INTRODUCTION TO VISTRAILS
2.1 What Is VisTrails?
VisTrails is a new system that provides data and process management support for exploratory computational tasks. It
combines features of both workflow and visualization systems. Similar to workflow systems, it allows the combination
of loosely-coupled resources, specialized libraries, and grid and Web services. Similar to some visualization systems,
it provides a mechanism for parameter exploration and comparison of different results. But unlike these other systems,
VisTrails was designed to manage exploratory processes in which computational tasks evolve over time as a user
iteratively formulates and tests hypotheses. A key distinguishing feature of VisTrails is its comprehensive provenance
infrastructure that maintains detailed history information about the steps followed in the course of an exploratory task.
VisTrails leverages this information to provide novel operations and user interfaces that streamline this process.
2.1.1 Important Features
One of our main uses for VisTrails has been exploratory visualization, but the system is much more general and
provides many other features, such as:
• Flexible Provenance Architecture. VisTrails transparently tracks changes made to workflows, including all the
steps followed in the exploration. The system can optionally track run-time information about the execution
of workflows (e.g., who executed a module, on which machine, elapsed time etc.). VisTrails also provides a
flexible annotation framework whereby you can specify application-specific provenance information.
• Querying and Re-using History. The provenance information is stored in a structured way. You have a choice of
using a relational database (such as MySQL or IBM DB2) or XML files in the file system. The system provides
flexible and intuitive query interfaces through which you can explore and reuse provenance information. You
can formulate simple keyword-based and selection queries (e.g., find a visualization created by a given user) as
well as structured queries (e.g., find visualizations that apply simplification before an isosurface computation
for irregular grid data sets).
• Support for collaborative exploration. The system can be configured with a database backend that can be
used as a shared repository. It also provides a synchronization facility that allows multiple users to collaborate
asynchronously and in a disconnected fashion—you can check in and check out changes, akin to a version
control system (e.g., SVN: http://subversion.tigris.org).
• Extensibility. VisTrails provides a very simple plugin functionality that can be used to dynamically add packages
and libraries. Neither changes to the user interface nor re-compilation of the system are necessary. Because
VisTrails is written in Python, the integration of Python-wrapped libraries is straightforward. For example, a
single line in the VisTrails start-up file is needed to import all of VTK’s classes.
• Scalable Derivation of Data Products and Parameter Exploration. VisTrails supports a series of operations for
the simultaneous generation of multiple data products, including an interface that allows you to specify sets of
5
VisTrails Documentation, Release 2.1.4
values for different parameters in a workflow. The results of a parameter exploration can be displayed side by
side in the VisTrails Spreadsheet for easy comparison.
• Task Creation by Analogy. Analogies are supported as first-class operations to guide semi-automated changes
to multiple workflows, without requiring you to directly manipulate or edit the workflow specifications.
2.1.2 Obtaining the software
Visit http://www.vistrails.org to access the VisTrails community website. Here you will find information including
instructions for obtaining the software, online documentation, video tutorials, and pointers to papers and presentations.
VisTrails is available as open source; it is released under the GPL 2.0 license. The pre-compiled versions for Windows
and Mac OS X come with an installer and include a number of packages, including VTK, matplotlib, and Image
Magick. Additional packages, including packages written by users, are also available (e.g., ITK, Matlab, Metro).
Developers can easily add new packages using the VisTrails plugin infrastructure.
2.2 Getting Started
The VisTrails system is distributed both as source code and pre-built binaries, and instructions for obtaining either can
be found at our website: http://www.vistrails.org. Because the system is written in Python using a Qt interface, it can
be run on most architectures that support these two components, even if a pre-built binary is not available for your
system. Section Installation provides instructions to guide you through installation procedures, and Section Quick
Start gives a quick orientation and serves as a springboard for exploring the different features of VisTrails.
2.2.1 Installation
There are two types of VisTrails installations. The first is a binary installation that lets you use VisTrails by running the
precompiled executable. The second is a full source code installation that requires you to install and compile VisTrails
and all of its dependencies. Of the two types of installations, the binary version is much easier, and we encourage firsttime users to use this option whenever possible. Precompiled binaries are currently available for Microsoft Windows
(XP and Vista) and Mac OS X (10.5.x or higher). To obtain either a binary or source copy of VisTrails, please see our
website: http://www.vistrails.org.
Installing VisTrails on Windows XP/Vista
To install VisTrails on Windows, download the installation bundle for Windows from the VisTrails website:
http://www.vistrails.org. Unzip the file using the decompression program of your choice, then double-click the executable to begin installation (Figure Installation wizard for Microsoft Windows XP/Vista). Follow the prompts in the
installation wizard to complete the installation process.
Installing VisTrails on Mac OS X
To install VisTrails on Mac OS X, download the installation bundle for Mac from the VisTrails website:
http://www.vistrails.org. The precompiled binary currently only supports Mac OS X 10.5.x or higher. The disk image
should be mounted automatically (Figure Installing VisTrails on Mac OS X). Once the disk image is mounted, drag
the VisTrails folder to the Applications folder to install the software.
6
Chapter 2. An Introduction to VisTrails
VisTrails Documentation, Release 2.1.4
Figure 2.1: Installation wizard for Microsoft Windows XP/Vista.
Figure 2.2: Installing VisTrails on Mac OS X.
2.2. Getting Started
7
VisTrails Documentation, Release 2.1.4
Installing VisTrails on Ubuntu Linux
Although not a binary installation per se, installing VisTrails on Ubuntu Linux is nonetheless quite straightforward.
VisTrails now interfaces with “apt” directly via a Python API. This allows dynamic installation of necessary packages.
As a result, you do not need to manually install any of the dependent packages. Just download the VisTrails source
code and execute it with:
python vistrails/run.py
and VisTrails should detect all necessary software and, if necessary, ask for your permission to install it.
Installing VisTrails from source
Installing VisTrails from source code is a non-trivial task. Rather than listing full compilation instructions in this
manual, we instead provide a list of software packages upon which VisTrails is dependent, and refer you to the
VisTrails website for additional details.
• Python 2.6 or higher
• Qt 4.4 or higher
• PyQt4
• SciPy
• VTK (needed to run the examples in this book)
There may also be additional dependencies, depending on which optional features of VisTrails you plan to use.
Please refer to http://www.vistrails.org/index.php/Mac_Intel_Instructions for more details.
2.2.2 Quick Start
On Windows and Mac OS X, you can launch VisTrails by double-clicking on the VisTrails application icon. In general,
however, it is possible to start VisTrails on any system by navigating to the directory where the file run.py is located
(usually the root directory of your installation) and executing the command:
python run.py
Depending on a number of factors, it can take a few seconds for the system to start up. As VisTrails loads, you may
see some messages that detail the packages being loaded and initialized. This is normal operation, but if the system
fails to load, these messages will provide information that may help you understand why.
2.2.3 Installing additional packages
VisTrails releases come with a number of packages already installed. In addition to these, you can write your own
packages or install packages from third-party developers. To do that, just drop the Python module (single file) or
package (i.e. directory) in $HOME/.vistrails/userpackages/ (VisTrails should automatically create this
folder on the first run).
You can then enable and disable standard or user packages from the preferences dialog, under the module packages
tab.
8
Chapter 2. An Introduction to VisTrails
VisTrails Documentation, Release 2.1.4
2.2.4 The Vistrails Builder Window
After everything has loaded, you will see the VisTrails Builder window as shown in Figure VisTrails Builder Window.
If you have enabled the VisTrails Spreadsheet (Packages → VisTrails Spreadsheet → Show Spreadsheet), you will
also see a second window like that in Figure VisTrails Spreadsheet Window. Note that if the spreadsheet window is
not visible, it will open upon execution of a workflow that uses it.
Figure 2.3: VisTrails Builder Window
The VisTrails Toolbar
The VisTrails toolbar both allows you to execute the current workflow or function, and switch between various modes.
A brief description of each member of the toolbar follows:
Pipeline This view shows the current workflow. See Chapter Creating and Modifying Workflows for information about
creating a workflow.
History This view shows different versions of the workflow(s) as it has progressed over time. See Chapter Interacting
with the Version Tree.
Search Use this mode to search for modules or subpipeline within the current version, the current vistrail, or all
vistrails. See Chapter Querying the Version Tree.
Explore This option allows you to select one or more parameter(s) for which a set of values is created. The workflow
is then executed once for each value in the set and displayed in the spreadsheet for comparison purposes. See Chapter
Parameter Exploration.
Provenance The Provenance mode shows the user a given vistrail’s execution history. When a particular execution
is selected, its pipeline view with modules colored according to its associated execution result is shown. See Chapter
Provenance Browser.
Mashup The Mashup mode allows you to create a small application that allows you to explore different values for a
selected set of parameters. See Chapter Mashups for more information.
2.2. Getting Started
9
VisTrails Documentation, Release 2.1.4
Figure 2.4: VisTrails Spreadsheet Window
Figure 2.5: VisTrails Toolbar
10
Chapter 2. An Introduction to VisTrails
VisTrails Documentation, Release 2.1.4
Execute Execute will either execute the current pipeline when the Pipeline, History, or Provenance views
are selected, or perform the search or exploration when in Search or Exploration mode. This button is disabled
for Mashup mode, or when there is not a current workflow to execute.
The New, Open, and Save buttons will create, open, and save a vistrail, as expected.
Palettes and Associated Views
Palettes
As you can see, the builder window has a center widget with a palette on each side. There are a number of views
(listed in the 4th group of the views menu) that when made visible, will be opened in these palettes. In this section,
we will discuss how the views are arranged.
Notice that when VisTrails first launches the builder window, both palettes contain two views. The left palette is split
so both views are visible, whereas the right palette uses tabs to display one view at a time. By default, additional views
will be shown in the right, and lower left panels when they are made visible. To make a view visible, either switch
to a mode that requires it, or select it from the views menu. For example, the Mashup mode will add the Mashup
Pipeline and Mashups Inspector views to the panels. When the mode is changed from Mashup, these two
views will be removed (hidden).
Buttons
Notice that there is a button with a pin icon in the upper right corner of each view (see Figure Buttons - Close, Detach,
and Pin). If you don’t want a view to disappear when you change modes, make sure it is pinned. When the pin points
up, it is unpinned and the view is likely to disappear when you change modes.
The other two buttons, the one with the ‘X’ and the one with the rectangular outlines (see Figure Buttons - Close,
Detach, and Pin), will either close the view, or undock the view, depending on which one you push. Alternatively, you
may undock a view by clicking on the view’s title bar and pulling it out of the palette. The view can then either remain
in its own window, or can be docked by placing it in either palette.
Figure 2.6: Buttons - Close, Detach, and Pin
View Locations
The following table gives the view that is visible in each palette for each of the main views/modes:
Pipeline
History
Explore
Provenance
Mashup
Lower Left Palette
Modules
Modules
Explore Properties
Modules
Mashups Inspector
Right Palette
Module Information
Properties
Set Methods
Log Details
Mashup Pipeline
Notice that the Workspace, Diff Properties, and Vistrail Variables views are not in the table. That
is because, the Workspace view is always visible, the Diff Properties view opens in the right palette when
a visual diff is performed in the History view, and the Vistrail Variables view is opened from the Views
menu. Note: with the Vistrail Variables view especially, if you don’t want it to disappear, you should make
sure it is pinned.
2.2. Getting Started
11
VisTrails Documentation, Release 2.1.4
The Center Widget
The center widget is somewhat larger than the side panels as it is intended to be the main workspace. It displays the following views: Pipeline, History, Search- query and results, Visual Diff results, Explore,
Provenance, and Mashup. By default, one view is shown. To open an additional view, type CTRL-t to create a
new tab. The new tab starts out in the Pipeline view, but you are free to change it to any of the other views. Note
that the tabs from only one vistrail are displayed at a time. When you switch to a different vistrail, the other vistrail’s
set of open tabs are displayed.
If you would like to see views from more than one vistrail at a time, you may do this by right-clicking on the vistrail
(listed in Current Vistrails of the Workspace view), and selecting the option to open in a new window.
The side palettes will stay with the original window, but can be moved to the current window by selecting Dock
Palettes from the Views menu.
If you would like to see multiple views from the same vistrail, double-click the title of the view to detach it. It is not
possible to reattach the view, so once you are finished with the detached view, you may close it. If you would like the
view to be reattached, you should close it and open it again in a new tab.
2.2.5 Manipulating VisTrails Files
To open a VisTrails file, or vistrail, you can either click the Open button in the toolbar or select Open from the File
menu. This brings up a standard file dialog where you can select a vistrail to open. Vistrails are identified by the .vt
file extension. Alternatively, if the vistrail is listed under My Vistrails in the Workspace Panel, double clicking its
name will open it. When a vistrail is opened, it is listed in the Workspace (upper left panel) under Current Vistrails.
Since only one open vistrail is displayed at a time, the Workspace allows you to select which one to display. Vistrails
can also be stored in a database, enabling a central repository for workflows. See Chapter Connecting to a Database
for more details about this feature.
To close a vistrail, you can either choose the Close option from the File menu or type Ctrl-w. If the vistrail has not
been saved, you will be asked if you wish to save your work. To save a vistrail, there is both a button and a menu item
in the File menu. If you would like to save the vistrail with a different name or in a different location, you can use
the Save As option.
2.2.6 VisTrails Basics
In general, a workflow is a way to structure a complex computational process that may involve a variety of different
resources and services. Instead of trying to keep track of multiple programs, scripts, and their dependencies, workflows abstract the details of computations and dependencies into a graph consisting of computational modules and
connections between these modules.
The Pipeline button on the VisTrails toolbar accesses VisTrails’ interface for building workflows. Similar to many
existing workflow systems, it allows you to interactively create workflows using an extensible library of modules and
a connection protocol that helps you determine how to connect modules. To add a module to a workflow, simply
drag the module’s name from the list of available modules to the workflow canvas. Each module has a set of input
and output ports, and outputs from one module can be connected to inputs of another module, provided that the types
match. For more information on building workflows in VisTrails, see Chapter Creating and Modifying Workflows.
In addition to VisTrail’s Pipeline interface for manipulating individual workflows, the History interface (accessed
through the History button on the toolbar) contains a number of features that function on a collection of workflows.
A vistrail is a collection of related workflows. As you explore different computational approaches or visualization
techniques, a workflow may evolve in a lot of directions. VisTrails captures all of these changes automatically and
transparently. Thus, you can revisit a previous version of a workflow and modify it without worrying about saving
intermediate versions. This history is displayed by the VisTrails Version Tree, and different ways of interacting with
this tree are discussed in Chapter Interacting with the Version Tree.
12
Chapter 2. An Introduction to VisTrails
VisTrails Documentation, Release 2.1.4
With a collection of workflows, one of the necessary tasks is to search for specific workflows. VisTrail’s search
functionality is accessed by clicking the Query button on the toolbar. The criteria for these searches may vary from
finding workflows modified within a specific time frame to finding workflows that contain a specific module. Because
of the version history that VisTrails captures, these tasks are natural to implement and query. VisTrails has two methods
for querying workflows, a simple text-based query language and a query-by-example canvas that lets you build exactly
the workflow structure you are looking for. Both of these techniques are described in Chapter Querying the Version
Tree.
The Exploration button allows you to explore workflows by running the same workflow with different parameters.
Parameter Exploration provides an intuitive interface for computing workflows with parameters that vary in multiple
dimensions. When coupled with the VisTrails Spreadsheet, parameter exploration allows you to quickly compare
results and discover optimal parameter settings. See Chapter Parameter Exploration for specific information on using
Parameter Exploration.
2.2.7 VisTrails Interaction
Workflow Execution
The Execute button on the toolbar serves as the “play” button for each of the modes described above. In both
the Builder and Version Tree modes, it executes the current workflow. In Query mode, it executes the query, and in
Parameter Exploration mode, it executes the workflow for each of the possible parameter settings.
When a workflow is executed, the module color is determined as follows:
• lilac: module was not executed
• yellow: module is currently being executed
• green: module was successfully executed
• orange: module was cached
• red: module execution failed
A popup is shown when executing workflows from the pipeline or history view. The popup shows overall progress,
the type of module being executed, and a cancel button. Pressing cancel will show a dialog where you can choose to
abort or continue the execution. Note that the cancel button may appear frozen while a module is being executed. This
is due to limitations in python.
Note
VisTrails caches by default, so after a workflow is executed, if none of its parameters change, it won’t be executed
again.
If a workflow reads a file using the basic module File, VisTrails does check whether the file was modified since
the last run. It does so by keeping a signature that is based on the modification time of the file. And if the file
was modified, the File module and all downstream modules (the ones which depend on File) will be executed.
If you do not want VisTrails to cache executions, you can turn off caching: go to Menu Edit → Preferences and
in the General Configuration tab, change Cache execution results to Never.
If you would like your input and output data to be versioned, you can use the Persistence package.
Additional Interactions
From the Edit menu, Undo and Redo function in the standard way, but note that these actions are implicitly switching between different versions of a workflow. Thus, you will notice that as you undo or redo a change to a workflow,
the selected version in the version tree changes.
2.2. Getting Started
13
VisTrails Documentation, Release 2.1.4
For all modes except Parameter Exploration, the center pane of VisTrails is a canvas where you can manipulate the
current workflow, version tree, or query. The buttons on the right side of the toolbar allow you to change the default
behavior of the primary mouse button (the left button for most multiple button mice) within this canvas. You can
choose the behavior to select items in the scene, pan around the scene, or zoom in and out of the scene by selecting
the given button. In addition, if you are using a 3-button mouse, the right button will zoom, and the middle button will
pan. To use the zoom functionality, click and drag up to zoom out and drag down to zoom in.
Note
Pressing Ctrl-R will recenter the window.
14
Chapter 2. An Introduction to VisTrails
CHAPTER
THREE
LEARNING VISTRAILS BY EXAMPLE
3.1 Creating and Modifying Workflows
3.1.1 Working with Modules
In VisTrails, modules are represented by a rectangle in the Pipeline view of the Builder. The name of the module
is shown in bold letters in the middle of the rectangle. The input and output ports for the module are denoted by small
squares on the top and bottom of the module, respectively. Modules are connected together to define the dataflow
using curved black lines that go from output to input ports between modules. Each module may also have adjustable
parameters that can be viewed when a module is selected. Modules can be connected, disconnected, added, and deleted
from a workflow.
As a running example in this chapter, we will make some changes to the “vtk_book_3rd_p189.vt” vistrail, included in
the “examples” folder of the VisTrails installation.
Try it now!
Open the “vtk_book_3rd_p189.vt” vistrail, either by selecting File → Open from the menu, or by clicking
the Open button on the toolbar. After opening this vistrail, select the version labeled final, then click on the
Pipeline toolbar button to enter workflow editing mode.
3.1.2 Adding and Deleting Modules
A list of available modules is displayed hierarchically in the Modules container on the left side of the VisTrails
Builder (Figure The main VisTrails Pipeline...). A core set of basic modules is always distributed with the VisTrails
system. Other packages, such as VTK, are also distributed, but are not necessary for VisTrails and thus can be disabled
on startup (see Chapter Writing VisTrails Packages). Note, however, that the VTK module is required for most of the
examples in this book. Depending on the number of packages imported on startup, the number of modules to select
from can be difficult to navigate. Thus, a simple search box is provided at the top of the container to narrow the
displayed results. To add a module to the workflow, simply drag the text from the Module container to the workflow
canvas.
Modules and connections may be selected in multiple ways and are denoted by a yellow highlight. Besides directly
left clicking on the object, a box selection is available by left clicking and dragging over the modules and connections
in the canvas. Multiple selection can be performed with the box selection as well as by right clicking on multiple
objects with the ‘Shift’ key pressed.
There are several ways to manipulate selected modules in the workflow canvas. Moving them is performed by dragging
a selected module using the left mouse button. Deleting selected modules is performed by pressing the ‘Delete’ key.
15
VisTrails Documentation, Release 2.1.4
Figure 3.1: The main VisTrails Pipeline user interface. The major components are labeled.
The modules and connections can also be copied and pasted using the Edit menu, or with ‘Ctrl-C’ and ‘Ctrl-V’,
respectively.
Try it now!
Let’s replace the vtkQuadric module in our example with a vtkCylinder module instead. To do this, first
type “vtkCylinder” into the search box of the Module container. As the letters are typed, the list filters the
available modules to match the query. Select this module and drag the text onto an empty space in the canvas
(see Figure The vtkCylinder module is added to the canvas). Then, select the vtkQuadric module in the
canvas and press the ‘Delete’ key. This removes the module along with any connections it has (see Figure The
vtkQuadric module is deleted).
Figure 3.2: The vtkCylinder module is added to the canvas.
Figure 3.3: The vtkQuadric module is deleted.
16
Chapter 3. Learning VisTrails By Example
VisTrails Documentation, Release 2.1.4
3.1.3 Connecting Modules
Modules are connected in VisTrails through the input and output ports at the top and bottom of the module, respectively.
By hovering the mouse over the box that defines a port, the name and data type are shown in a small tooltip. To
connect two ports from different modules, start by left clicking inside one port, then dragging the mouse to the other.
The connection line will automatically snap to the ports in a module that have a matching datatype. Since multiple
ports may match, hovering the mouse over the port to confirm the desired match may be necessary. Once a suitable
match is found, releasing the left mouse button will create the connection. Note, a connection will only be made if the
input and output port’s data types match. To disconnect a connection between modules, the line between the modules
can be selected and deleted with the ‘Delete’ key.
Try it now!
To connect the vtkCylinder module to the vtkSampleFunction module, place the cursor over the only
output port on the vtkCylinder module, located on the bottom right. A tooltip should appear that reads
“Output port self (vtkCylinder).” Left click on the port and drag the mouse over the vtkSampleFunction
module. The connection should snap to the fourth input port from the left. Hovering the mouse over this port
shows a tooltip that reads “Input port SetImplicitFunction (vtkImplicitFunction).” Release the mouse button to
complete the connection between these two modules (see Figure The connection replaced). To check for a valid
dataflow, execute the workflow by pressing the Execute button on the toolbar, and see if the results appear in
the spreadsheet.
Figure 3.4: The connection replaced.
If the ports are not directly compatible, VisTrails may automatically insert a conversion module between the two ports.
If such a module is about to be used, VisTrails will display the connection you are drawing with a dotted line (see
Figure Automatic conversion).
Figure 3.5: Insertion of a conversion module
3.1.4 Changing Module Parameters
The parameters for a module can be accessed in the Module Information tab located on the right side of the
Builder window. When a module on the canvas is selected, the corresponding module information is displayed. The
3.1. Creating and Modifying Workflows
17
VisTrails Documentation, Release 2.1.4
Inputs, Outputs, and Annotations tabs can be selected to set parameters within the respective categories. To
set a parameter, simply click on its name to reveal its input box and enter the desired value. Notice that a - and +
button appears to the left of the input box. The - button removes the corresponding input box and the + button adds
one. This allows you to experiment with different values, but only the values in the last box are used in the final result.
Try it now!
To perform a parameter change, select the vtkCylinder module in the canvas. Select SetRadius, enter
0.25 into the text box and press the ‘Enter’ key. By executing the workflow, the modified visualization appears in
the spreadsheet. Figures The module methods... and The results... show the interface and results of the parameter
explorations.
Figure 3.6: The module methods interface is shown with a change of the SetRadius parameter to 1.0.
Figure 3.7: The results of the changes are displayed on execution.
3.1.5 Using Global Variables
VisTrails supports the use of global variables, which allows the user to create a variable which can be used anywhere
within the vistrail. So, if you create a variable of type String, you can assign that variable to any port of type
String. This is done by opening the Vistrail Variables view, creating a variable, and then dragging it to the
desired port.
18
Chapter 3. Learning VisTrails By Example
VisTrails Documentation, Release 2.1.4
Figure 3.8: The module methods interface is shown with a change of the SetRadius parameter to 0.25.
Figure 3.9: The results of the changes are displayed on execution.
3.1. Creating and Modifying Workflows
19
VisTrails Documentation, Release 2.1.4
Try it now!
Open vtk_http.vt and go to the Pipeline view of the Fran Cut Smoothed version. Select Views →
Vistrail Variables. Select the String module from Basic Modules, drag it over to the Vistrail
Variables tab, and drop it (see Figure Create a Variable...). Name it ‘Filename1’ and assign it the following value: ‘http://www.sci.utah.edu/~cscheid/stuff/vtkdata-5.0.2.zip‘. Click on String, which is just below
Filename1 in the Vistrail Variables tab. Drag it over and drop it in the port of the DownloadFile
(as shown in Figure Assign a Variable...). The variable should be assigned and the port should be filled in with
yellow. (Open result)
To delete a global variable, simply click on the ‘X’ button that appears to the right of its name. This will remove the
variable, but if any ports are assigned to it, they need to be disconnected. You can do this by right-clicking on the port
and selecting Disconnect Vistrail Variables (see Figure Disconnect a Variable...).
Figure 3.10: Create a Variable - Drag the String module and drop it in the Vistrail Variables tab to create
a global variable.
Figure 3.11: Assign a Variable - Drag the type from just below the Global Variables name on the Vistrail
Variables tab. Drop it on a port to set the variable.
Figure 3.12: Disconnect a Variable - To disconnect a global variable, right click on the assigned port and select
Disconnect Vistrail Variables.
20
Chapter 3. Learning VisTrails By Example
VisTrails Documentation, Release 2.1.4
3.1.6 Configuring Module Labels
To give the module a custom name, enter it in the Module Information tab’s Name box. The modules name will
be displayed with the original module name(type) displayed in parenthesis below it.
3.1.7 Configuring Module Ports
For convenience, all the inputs and outputs of a module are not always shown in the canvas as ports. The ports that are
shown by default are defined with the method signatures of a package. A full list of ports is available on the Module
Information panel, which is displayed on the right by default. There, module ports can be enabled/disabled by
clicking in the left margin next to the port name in the Inputs or Outputs tabs (see Figure Enabling the GetRadius
port from the Module Information tab). When enabled, an eye icon will appear to the left of the port name.
Try it now!
As an example of configuring a module port, select the vtkCylinder module in the canvas, select Outputs
from the Module Information tab, and click in the left margin next to GetRadius (see Figure Enabling the
GetRadius port from the Module Information tab). A new circle port should appear on the module. Next, add a
new StandardOutput module from the basic modules and connect the output port for GetRadius to the
input port of StandardOutput. Upon execution, the value 0.25 is now output to the console. Figure The
vtkCylinder module... shows the new workflow.
Figure 3.13: Enabling the GetRadius port from the Module Information tab.
Figure 3.14: The vtkCylinder module is configured to show an additional GetRadius port, which is then connected to a StandardOutput module.
3.1.8 Basic Modules
In addition to the modules provided by external libraries, VisTrails provides a few basic modules for convenience and
to facilitate the coupling of multiple packages in one workflow. These modules mostly consist of basic data types in
3.1. Creating and Modifying Workflows
21
VisTrails Documentation, Release 2.1.4
Python and some manipulators for them. In addition, file manipulation modules are provided to read files from disk
and write files to disk.
PythonSource
Because not every Python operation can be represented as a module, the PythonSource module is provided to allow
you to write Python statements to be executed as part of a workflow. By pressing ‘Ctrl-E’ when a PythonSource
module is selected in the canvas, a configuration window is opened. This window allows you to specify custom input
and output ports as well as directly enter Python source to be executed in the workflow.
Note
Sometimes is it useful to view the source code that is contained in the PythonSource module when working
with other modules. Since the PythonSource configuration window will disappear when you select a new module, a Show read-only window button can be used to open a read-only window of the PythonSource’s
configuration, which will remain open until it is closed.
Try it now!
To demonstrate a PythonSource module, we will output the center of the cylinder using Python instead
of the StandardOutput module. First, add a PythonSource module to the canvas and remove the
StandardOutput module. Select the PythonSource module and press ‘Ctrl-E’ to edit the configuration. In the newly opened configuration window, create a new input port named “radius” of type Float. Next,
in the source window enter:
print radius
then select OK to close the window. Finally, connect the GetRadius output of the vtkCylinder module to
the new input port of PythonSource. Upon execution, the radius of the cylinder is printed to the console as
before. Figure A PythonSource module can be used to directly insert scripts into the workflow shows the new
workflow together with the PythonSource configuration window.
Figure 3.15: A PythonSource module can be used to directly insert scripts into the workflow.
Accessing vtkObjects in PythonSource When using a PythonSource module, users will often rely on their knowledge of VTK to interact with VTK modules. It is important to realize that a VTK module is really a wrapping of a
vtkObject. The real vtkObject is called vtkInstance, meaning the vtkObject of a module called ‘dataset’ is called
‘dataset.vtkInstance’ (see figure Accessing vtkObjects...).
22
Chapter 3. Learning VisTrails By Example
VisTrails Documentation, Release 2.1.4
Figure 3.16: The configuration window for PythonSource allows multiple input and output ports to be specified
along with the Python code that is to be executed.
Figure 3.17: Accessing vtkObjects - The vtkObject of a VTK module, ‘dataset’, is accessed with ‘dataset.vtkInstance’.
3.1. Creating and Modifying Workflows
23
VisTrails Documentation, Release 2.1.4
3.2 Groups and Subworkflows
3.2.1 Grouping Modules
As the number of modules in a pipeline increases, the pipeline can grow quite large and cumbersome. This also
makes the pipeline more difficult to understand and maintain. With any large system, it can be helpful to cluster
related pieces together and represent them as a single unit. This idea, called encapsulation, is commonly used in
computer programming as a way of controlling complexity. VisTrails likewise supports the grouping of multiple
modules together so that they can be treated as a single module. This “group” module can be thought of as a monolithic
entity that performs all the same functions as its individual parts, but shields its inner details from everyone else. As
such, a group module inherits all the input and output ports of the modules inside it, but only displays those ports that
have connections to another module outside of the group. To borrow another term from programming languages, these
visible ports might be considered the public interface of the group module.
Multiple modules are grouped together by first selecting them, and then choosing the Group option from the Edit
menu. Alternatively, you can use the keyboard shortcut ‘Ctrl-G’.
An example may clarify how this works.
Try it now!
Open vtk_book_3rd_p189.vt. Select the vtkOutlineFilter, vtkPolyDataMapper, vtkProperty,
and vtkActor modules on the left side of the pipeline, as shown in Figure Box selection of four modules. Type
‘Ctrl-G’ to group these modules. Notice how the pipeline changes, as shown in Figure The modules represented
as a single group module. Since the label “Group” isn’t very descriptive, you can change this by selecting the
Group module, and entering a name in the Name box of the Module Information panel. Type a more
descriptive name, such as “BoundingBox,” into the text field and click OK. The new label is reflected in the
pipeline (Figure Renaming the group).
Figure 3.18: Box selection of four modules.
Just as any number of modules may be clustered into a group, any number of groups may be combined with other
groups or modules to form still larger groups. This is done in the same way as described above.
Further, the contents of the groups or combinations of groups are revealed through the Show Pipeline option.
First select the group module in the pipeline and then select Show Pipeline from the Workflow menu. The
24
Chapter 3. Learning VisTrails By Example
VisTrails Documentation, Release 2.1.4
Figure 3.19: The modules represented as a single group module.
Figure 3.20: Renaming the group.
3.2. Groups and Subworkflows
25
VisTrails Documentation, Release 2.1.4
group’s contents will be shown in a new tab. If there is a group within a group, selecting the interior group module
and then selecting Show Pipeline will show the interior group’s pipeline in an additional tab.
In addition to viewing the group’s contents, any group may be also un-grouped; that is, restored to its individual
modules. This is done by selecting the group module in the pipeline, and then choosing the Edit → Ungroup menu
option or by pressing ‘Ctrl-Shift-G’. A group’s pipeline may not be used to ungroup interior groups, however. The
tabs opened by the Show Pipeline command are read only.
3.2.2 Subworkflows and Group Modules
A subworkflow is similar to a group, but has some differences. Here, we will explain the differences to make it easier
to understand which one to use when:
• A subworklow is a VisTrail, and a history of changes to a subworkflow is kept, whereas a group is part of a
vistrail. So, if you copy and paste a group, the pasted group won’t necessarily be linked to the group’s history.
• When a subworkflow is created, it is listed in the My Subworkflows portion of the Modules panel. It is
saved and will be accessible from any vistrail. A group, on the other hand can be named and copied and pasted
within a file, or even across files. However, it will not be placed in the modules panel.
• Subworkflows can be edited and saved without needing to ungroup and regroup the modules. To edit anything
within a group, it first needs to be ungrouped, and then regrouped.
3.2.3 Subworkflows
To create a subworkflow, select the modules to include and select Create Subworkflow from the Workflow
menu. See Figure Creating a subworkflow. You will be prompted to name the subworkflow. The subworkflow will
appear in the modules list under My Subworkflows. Groups can be converted to subworkflows by selecting the
Convert to Subworkflow option.
To edit a subworkflow, select a module of the corresponding subworkflow and select Edit Subworkflow from the
Workflow menu. This will open the subworkflow’s file. If you make changes to the subworkflow and save them,
the modules that correspond to the old subworkflow will be marked with a ‘!’, meaning that it is not the latest version.
To upgrade to the latest version, either select the triangle in the module’s upper right corner and choose Upgrade
Module, or delete the old module and replace it with a new one. See Figure Upgrading a subworkflow module that
had been edited.
Importing and Exporting Subworkflows
Since subworkflows are saved locally, the Import Subworkflow and Export Subworkflow options can be
used for sharing. For example, to add a subworkflow from an open VisTrail to your local list of My Subworkflows
modules, you would select the subworkflow and select Import Subworkflow from the Workflows menu. Alternatively, you can save any number of subworkflows to a package by dragging the subworkflow modules to the
canvas, selecting them, selecting Export Subworkflow, and following the prompts to name/create the appropriate folders/files. The subworkflows will be exported to a folder which can be added to the userpackages directory.
The package should contain a __init__.py, and an init.py file. The importing of the individual subworkflows will be
handled in the init.py file. See the Writing Vistrails Packages chapter of the Developer’s Guide for more information
on packages.
26
Chapter 3. Learning VisTrails By Example
VisTrails Documentation, Release 2.1.4
Figure 3.21: Creating a subworkflow.
Figure 3.22: Upgrading a subworkflow module that has been edited.
3.2. Groups and Subworkflows
27
VisTrails Documentation, Release 2.1.4
3.3 Interacting with the Version Tree
3.3.1 Version Tree View
The History button on the VisTrails toolbar lets users interact with a workflow history. It consists of a tree view in
the center and the Properties tool container on the right for querying and managing version properties (see Figure
In History mode, you can examine...). Versions are displayed as ellipses in the tree view where the root of the tree is
displayed at the top of the view. The nodes of the tree correspond to a version of a workflow while an edge between
two nodes indicates that one was derived from the other.
Figure 3.23: In History mode, you can examine and annotate different versions of a workflow.
The nodes are displayed as colored ellipses, and are either blue or orange. A blue color denotes that the corresponding
version was created by the current user while orange nodes were created by other users. The brightness of each node
indicates how recently a version was created; brighter nodes were created more recently than dimmer ones. Each node
may also have a tag that describes the version, and this tag is displayed as a text label in the center of the ellipse of the
corresponding version.
The nodes are connected by a solid line if the child node is a direct descendent of the parent node; that is, if you have
made only a single change from the older version to the newer version. By default, only nodes that: are leaves, have
more than one child node, are specially tagged (see Section Adding and Deleting Tags), or are current version will be
displayed. To save space, other nodes will be “collapsed,” or hidden from view. Collapsed nodes are marked by the
appearance of a small expansion button along an edge connecting two nodes. Clicking this button expands the version
tree to reveal the hidden versions (Figure To conserve space...). The tree expansion is smoothly animated to help you
maintain context from one view to the next. Clicking the button a second time collapses the nodes once again. Because
most non-trivial changes to a workflow take more than one action, most edges in a the version tree will be shown with
these expansion buttons.
28
Chapter 3. Learning VisTrails By Example
VisTrails Documentation, Release 2.1.4
Figure 3.24: To conserve space, linear sequences of non-tagged nodes may be hidden from view. They can be restored
by clicking on the expansion button, which resembles a plus sign (+) inside a small box.
3.3. Interacting with the Version Tree
29
VisTrails Documentation, Release 2.1.4
Try it now!
To see an example of a version tree, load the example vistrail vtk_book_3rd_p189.vt. All versions will be shown
in orange unless your username happens to be “emanuele.” Recall that this tree displays the structure of changes
to a workflow, so let’s make some changes to see their effect on the version history. In the History view,
select the node tagged Almost there, and then click on the Pipeline button to switch to a view of the
workflow. Select a connection and delete it. Now, switch back to the History view, and notice that there is
a new child node connected to Almost there. In addition, the line connecting the new node to its parent is
solid, indicating that only a single change has been made. If we delete more connections, an expansion button
would appear (Figures All versions created..., Deleting a connection..., and More interations...).
Figure 3.25: All versions created by other users are shown in orange.
Figure 3.26: Deleting a connection results in a blue version connected by a solid line.
30
Chapter 3. Learning VisTrails By Example
VisTrails Documentation, Release 2.1.4
Figure 3.27: More interactions on this version cause additional versions to be created. To save space, these intermediate
nodes are hidden, and an expansion button appears on the edge between the current node and the last tagged node.
3.3.2 Adding and Deleting Tags
As noted above, only certain nodes, including specially tagged ones, are shown by default in the version tree. To tag a
version, simply click inside a selected node and type some meaningful text. The tag is created when you either click
outside the node or press ‘Enter’. If you would like to change the tag’s text, click inside the node again and modify the
text as before. (Alternately, you can also create and modify tags using the Tag text field in the Properties panel.)
Note that deleting all of the text in the tag field effectively deletes the tag. A second way to delete a tag is to click the
‘X’ button to the right of the text box. Removing a tag from a node may cause it to not be displayed in the default
version tree view if it doesn’t satisfy any of the other criteria for display.
3.3.3 Upgrading Versions
As module packages are continuously updated, with new versions being released periodically, VisTrails is set up to
automatically incorporate module upgrades into existing workflows before they are executed. In other words, VisTrails
upgrades the current vistrail’s current version after the execute button is pressed, but prior to execution. When this
happens, a new version is created in the version tree and tagged ‘Upgrade’. You are then free to rename this version if
desired.
After an upgrade, you will not be able to select the original version because the focus is passed to the upgraded version.
However, if you right-click on the original version and select ‘Display raw pipeline’, this version will keep the focus,
which allows you to see its pipeline by pressing the Pipeline button on the toolbar. See figure Original Pipeline....
Finally, although VisTrails tags the new version with ‘Upgrade’ by default, some users prefer the original version’s
name to be transferred to the upgraded version. VisTrails will do this if you: select Preferences from the
VisTrails menu, select the Expert Configuration tab, and change the migrateTags value to ‘True’.
3.3.4 Adding Version Annotations
In addition to the tag field, the Properties panel displays information about the user who created the selected
version and when that version was created. Also, the Notes field which allows users to store notes or annotations
related to a version. As with tags, adding notes to a version is as easy as selecting the desired version and modifying
3.3. Interacting with the Version Tree
31
VisTrails Documentation, Release 2.1.4
Figure 3.28: Original Pipeline - This figure shows how to view the original pipeline after an upgrade has occurred.
the text field. Notes are automatically saved when you save the vistrail file. Finally, a thumbnail is displayed in the
preview portion of the panel if the version has been successfully executed.
3.3.5 Navigating Versions
Clicking on nodes in the version tree is not the only way to navigate different versions of a workflow; you can also
use Undo (Ctrl-z) and Redo (Ctrl-Shift-z). Because the version tree captures all changes to a workflow, undo and
redo not only revert or reinstate changes to a workflow, but also change the currently selected version in the version
tree. More precisely, undoing a change in a workflow is exactly the same as selecting the parent of the current node in
the version tree. Note that because the current version is always shown in the version tree, undo and redo provide an
effective way to navigate between two nodes whose intermediate versions might be currently hidden from view.
3.3.6 Comparing Versions
While selecting versions in the History view and using the Pipeline view to examine each version is extremely
useful, this approach can be cumbersome when trying to compare two different versions. To help with such a comparison, VisTrails provides a Version Difference mechanism for quickly comparing two versions. This is done by
dragging one version and dropping it onto another, after which a Visual Diff tab will open (see Figure A Visual
Diff showing the difference...).
In the new tab, the difference is displayed in a manner that is very similar to the pipeline view, but modules and
connections are colored based on similarity. Dark gray indicates those modules and connections that are shared
between the two versions; orange and blue show modules and connections that exist in one workflow and not the
other; and light gray modules are those where parameters between the two versions differ. The Legend, which is
displayed in the Diff Properties panel on the right, will remind you of these color correspondences. If the
Diff Properties panel is not visible on the right, you may enable it by selecting Diff Properties under
the View menu. This panel also shows the differences in parameters for light gray colored modules that are selected.
Try it now!
To try out this feature, open the lung.vt example vistrail, and click the History button. Within the version tree, click and drag the z-space version to the textureMapper version. After the diff appears, select View → Diff Properties (if the Diff Properties panel is not visible), and then click on the
vtkRenderer module to see the parameter differences. We can see that one of the changes from z-space
to textureMapper was to add a black background. Figure A Visual Diff showing the difference... shows the
result of this comparison.
32
Chapter 3. Learning VisTrails By Example
VisTrails Documentation, Release 2.1.4
Figure 3.29: A Visual Diff showing the difference between version z-space and version textureMapper.
3.4 Merging Two Version Trees
One of the benefits of having a version tree is that branching allows users to work on multiple workflows within the
same file. This is especially useful when workflows are similar or when one workflow provides output for another.
However, if a user creates two different workflows in two different files and decides he/she wants them to be part of
the same file/history, VisTrails allows file merging.
To merge two files:
• Open both files
• Select one of the files you would like to be merged.
• Place you mouse over the Merge With arrow from the Edit menu. A list of open files should appear.
• Select the file that you would like to join with the current (previously selected) file.
The history trees of both files should now be joined and placed in a new file.
3.4.1 Example
3.5 Querying the Version Tree
VisTrails is designed for manipulating collections of workflows, and an integral part of this design is the ability to
quickly search through these collections. VisTrails provides two methods for querying vistrails and workflows. The
first is a Query by Example interface which allows you to build query workflows and search for those with similar
structures and parameters. The second is a textual interface with a straightforward syntax. For each interface, the
results are visual: each matching version is highlighted in the History view, and if the query involves specific
workflow characteristics, any matching entities are also highlighted in the Pipeline view for the current version.
3.4. Merging Two Version Trees
33
VisTrails Documentation, Release 2.1.4
Figure 3.30: Merging two vistrails.
Figure 3.31: The resultant history tree.
34
Chapter 3. Learning VisTrails By Example
VisTrails Documentation, Release 2.1.4
3.5.1 Query By Example
One of the problems faced when trying to query a collection of workflows is the fact that structure is important.
Suppose that you want to find only workflows where two modules are used in sequence. Instead of trying to translate
this into a text-based syntax, it is easier to construct this relationship visually. VisTrails provides such an interface
which mirrors the Pipeline view, allowing you to construct a (partial) workflow to serve as the search criteria.
To use the Query by Example interface, click on the Search button on the toolbar. This view is extremely similar to
the Pipeline view and pipelines can be built in a similar manner. Just like the Pipeline view, modules are added
by dragging them from the list on the left side of the window, connections are added by clicking and dragging from a
port on one module to a corresponding port on another module. Setting module parameters in this view will narrow
the search to matching modules whose parameters fall within the specified range of values. Figure Example pipeline
in Search mode shows an example pipeline that has been built in the query builder.
Figure 3.32: Example pipeline in Search mode.
The next step is to decide whether to search the Current Vistrail, Current Workflow, or all Open
Vistrails. The results of the first option are displayed on a version tree as well as in the Workspace panel.
Non-matching versions in the version tree will be grayed out while matching versions will be displayed in the tree as
normal. In contrast, the Workspace panel will display matching results and omit versions with no matches. Doubleclicking a version from the Workspace’s results will bring up the associated pipeline with matching modules
highlighted. See Figures Workspace... and Pipeline....
The remaining two options are Current Workflow and Open Vistrails. The Current Workflow option
is the simplest and will display the pipeline with matching modules highlighted. The Open Vistrails option
will put all of its results in the Workspace panel, listing open vistrails with their matching versions. From here,
double-clicking on a vistrail will bring up a version tree which emphasizes matching versions, or double-clicking on a
version will bring up the associated pipeline with matching modules highlighted.
After constructing a pipeline and selecting the appropriate search option, click the Execute button to begin the query.
This button will be available as long as the query window is not empty. However, you may need to press the Back
to Search button to return to the query window to re-execute.
3.5. Querying the Version Tree
35
VisTrails Documentation, Release 2.1.4
Note
You may leave the Query either through use of the toolbar or by pressing the Edit button. However, the search
results will persist until the search is cleared (press Clear Search), returning the workspace to its normal
form.
Try it now!
Let’s practice making a simple query. Open the offscreen.vt example vistrail. Click on the Search button
to enter Search mode. Create a query like the one shown in Figure Example pipeline in Search mode by
dragging the modules SheetReference, CellLocation, and RichTextCell onto the Search canvas.
(These modules can be found under the “VisTrails Spreadsheet” header in the Modules panel.) Connect the
input and output ports of the modules as shown, then click the Execute button to perform the query. VisTrails
will automatically switch to the History view, with all matching versions highlighted (Figure History...).
Notice that the query results are also displayed in the Workspace tab. Double-click on the html version in the
workspace to open the results in the pipeline view.
Figure 3.33: Workspace - The query results displayed in the workspace.
Figure 3.34: History - Search results in the History view.
Note that Query by Example provides the capability to iteratively refine searches by adding more criteria. For example,
36
Chapter 3. Learning VisTrails By Example
VisTrails Documentation, Release 2.1.4
Figure 3.35: Pipeline - The results in the Pipeline view.
if you were interested in workflows that contain a certain module, you may find that such a query returns too many
results. You could then refine the query to find only those workflows where the given module has a parameter setting
that falls within a given range. This is done by specifying parameter values in the Methods panel on the right side of
the window. One major difference between the Pipeline view and the Search view is that you can use comparison
operations, such as ‘<’ and ‘>’, in parameter values. The following example illustrates this.
Try it now!
Open the terminator.vt example file, and enter Search mode. Drag the vtkActor module from the Modules
panel onto the Search canvas. Execute the query, and see which versions of the workflow contain a vtkActor
module. Select Back to Search to return to the Search view, select the vtkActor module, then select
RotateZ method from the Module Information tab. In the RotateZ text field, select ’>’ and then
enter ‘90’. When you Execute the query this time, you will notice that the results are different. This is
because we are searching for versions that not only contain a vtkActor module, but that also use a value
greater than 90 in this module’s RotateZ method. Your results should resemble those in Figure Query result
showing all workflows....
Figure 3.36: Query result showing all workflows in the “terminator.vt” example that contain the module vtkActor.
3.5. Querying the Version Tree
37
VisTrails Documentation, Release 2.1.4
Figure 3.37: The same query refined to show only those workflows whose RotateZ value is greater than 90.
3.5.2 Textual Queries
There are many ways to search for versions in the version tree using textual queries, but they all rely on
a simple text box for input. Begin a search by selecting Search on the toolbar. The search box is
at the top of the center panel and has a magnifying glass icon next to it. If you enter query text, VisTrails will attempt to match logical categories, but if your query is more specific, VisTrails has special
syntax to markup the query. To execute a query, simply press the ‘Enter’ key after typing your query.
Table 3.1: Syntax for querying specific information
using textual queries.
Search Type
User name
Annotation
Tag
Date
Syntax
user: user name
notes: phrase
name: version tag
before: date | relative time
after: date | relative time
Note
Since we allow regular expressions in our search box, question marks are treated as meta-characters. Thus,
searching for ”?” returns everything and “abc?” will return everything containing “abc”. You need to use “\?”
instead to search for ”?”. So the search for ”??” would be “\?\?”.
Table Syntax for querying specific information using textual queries. lists the different ways to markup a query. Note
that you can search by user name to see which changes a particular user has made, and also by date to see which
changes were made in a specific time frame. When searching by date, you can search for all changes before or after
a given date or an amount of time relative to the present. If searching for changes before or after a specific date,
the date can be entered in a variety of formats. The simplest is ‘day month year,’ but if the year is omitted, the
current year is used. The month may be specified by either its full name or an abbreviation. For example, ’before:
18 November 2004’ and ’after: 20 Dec’ are both valid queries. If searching by relative time, you can
prepend the amount of time relative to the present including the units to ‘ago’. An example of this type of query is
’after: 30 minutes ago’. The available units are seconds, minutes, hours, days, months, or years.
You can concatenate simple search statements to create a compound query to search across different criteria or for
a specific range. For example, to search for workflows whose tag includes ’brain’ and were created by the user
’johnsmith’, the query would be ’name: brain user: johnsmith’. To search for all workflows created between April 1 and June 1, the query would be ’after: April 1 before: June 1’.
38
Chapter 3. Learning VisTrails By Example
VisTrails Documentation, Release 2.1.4
Try it now!
Open the terminator.vt example file, and enter Search mode. Let’s look for all workflows that were created
after November 24, 2010. In the search box in the Search panel, type ’after: 24 nov 2010’ and press
‘Enter’. The expected result is shown in Figure Results of a query to find any changes make after November 24,
2010.
Figure 3.38: Results of a query to find any changes made after November 24, 2010.
In addition, VisTrails keeps track of the most recent textual queries, and repeating or clearing these queries can be
accomplished by selecting the recent query from the dropdown menu attached to the search box. Finally, the ‘X’
button next to the search box will reset the query.
Refining the Results
While in the Search view, you can select two different ways of viewing search results. The magnifying glass icon
to the left of the textual search box contains a dropdown menu with two options: “Search” and “Refine” (Figure
Clicking the button to the left...). The first displays results by simply highlighting the matching nodes while the second
condenses the tree to show only the versions that match. For large vistrails, this second method can help you determine
relationships between the matching versions more easily.
Figure 3.39: Clicking the button to the left of the query text box accesses a dropdown menu.
3.6 Spreadsheet
As described in Section Comparing Versions, VisTrails has a powerful built-in mechanism to compare workflows.
However, this comparison shows changes in the design of the workflows, and we are often also interested in differences
3.6. Spreadsheet
39
VisTrails Documentation, Release 2.1.4
Figure 3.40: The VisTrails Spreadsheet.
in the results of workflows. The VisTrails Spreadsheet provides a simple, flexible, and extensible interface to display
and compare results from workflows. Coupled with the version differences, users can explore the evolution of their
workflows.
The Spreadsheet package is installed with VisTrails by default, and it can display a variety of data ranging from VTK
renderings to webpages without additional configuration. To view the spreadsheet if it is hidden, select Packages
→ Spreadsheet → Show Spreadsheet.
3.6.1 The Spreadsheet Layout
As should be expected, the VisTrails Spreadsheet consists of one or more sheets, each with a customizable number of
rows and columns.
Custom Layout Options
To modify the layout for the active sheet, you can change both the number of rows and columns and resize individual
cells. The number of rows is controlled by the left spinner in the toolbar and the number of columns by the right
spinner. To resize a given row or column, click and drag on one edge of the row or column header. In addition, you
can resize an individual cell by moving the mouse to lower-right corner of the cell until the cursor changes and clicking
and dragging to the desired size (see Figure Different states of a spreadsheet cell (d)). Note that this will affect the
entire layout, compressing or expanding rows and columns to generate or fill space for the resized cell.
To adjust the default number of rows and columns in the spreadsheet: select preferences from the VisTrails
menu, select spreadsheet from the Enabled Packages portion of the Module Packages tab, press the
Configure button, and adjust the values as for rowCount and colCount as desired.
40
Chapter 3. Learning VisTrails By Example
VisTrails Documentation, Release 2.1.4
Multiple Spreadsheets
VisTrails supports the use of multiple spreadsheets which can be added, docked, ordered and deleted. Sheets are added
either by clicking the New Sheet button in the Spreadsheet toolbar or choosing the menu item with the same
name from the Main menu. Each of these sheets can optionally be displayed as a dock widget separated from the main
spreadsheet window by dragging its tab name out of the tab bar at the bottom of the spreadsheet, allowing multiple
spreadsheets to be visible at the same time. To dock a sheet back to the main window, drag it back to the tab bar
or double-click on its title bar. Similarly, sheets are ordered by dragging sheet names to desired locations within the
tab bar. Finally, a sheet can be deleted by clicking the ‘X’ button in the lower-right corner or choosing the Delete
Sheet menu item.
3.6.2 Sending Output to the Spreadsheet
Users may send results to the spreadsheet by using a spreadsheet cell. Upon inspecting the VisTrails Spreadsheet
package (in the list of packages, to the left of the pipeline builder), one can see there are built-in cells for different
kinds of data, e.g., RichTextCell to display HTML and plain text.
By default, an unoccupied cell on the active sheet will be chosen to display the result. However, you can specify in
the pipeline exactly where a spreadsheet cell will be placed by using CellLocation and SheetReference. CellLocation
specifies the location (row and column) of a cell when connecting to a spreadsheet cell (VTKCell, ImageViewerCell,
...). Similarly, a SheetReference module (when connecting to a CellLocation) will specify which sheet the cell will be
put on given its name, minimum row size and minimum column size. There is an example of this in examples/vtk.vt
(select the Cell Location version).
Advanced Cell Options
The user can define new cell types to display application-specific data. For example, we have developed VtkCell,
MplFigureCell, and OpenGLCell. It is possible to display pretty much anything on the Spreadsheet!
Examples of writing cell modules can be found in: RichTextCell: packages/spreadsheet/widgets/richtext/richtext.py
VTK: packages/vtk/vtkcell.py
Here is the summary of some requirements on a cell widget:
1. It must be a Qt widget. It should inherit from spreadsheet_cell.QCellWidget in the spreadsheet package. Although any Qt Widget would work, certain features such as animation will not be available (without rewriting
it).
2. It must re-implement the updateContents() function to take a set of inputs (usually coming from input ports of a
wrapper Module) and display on the cells. VisTrails uses this function to update/reuse cells on the spreadsheet
when new data comes in.
3. It needs a wrapper VisTrails Module (inherited from basic_widgets.SpreadsheetCell of the spreadsheet package).
Inside the compute() method of this module, it may call self.display(CellWidgetType, (inputs)) to trigger the
display event on the spreadsheet.
3.6.3 Interacting with the Spreadsheet
Currently, there are two operating modes in the Spreadsheet: Interactive Mode and Editing Mode. Interactive Mode
allows users to view and interact with the spreadsheet cells, while Editing Mode provides operations for manipulating
cells. The modes can be toggled via the View menu or their corresponding keyboard shortcuts (‘Ctrl-Shift-I’) and
(‘Ctrl-Shift-E’).
3.6. Spreadsheet
41
VisTrails Documentation, Release 2.1.4
Interactive Mode
In Interactive Mode, users can interact directly with the viewer for an individual cell, interact with multiple cells at
once, or change the layout of the sheet. Because cells can differ in their contents, interacting with a cell changes based
on the type of data displayed. For example, in a cell displaying VTK data (a VTKCell), a user can rotate, pan, and
zoom in or out using the mouse.
In a sheet, a cell can be both active and selected. There can only be one active cell, and that cell is highlighted by a
yellow or grey border. Clicking on any cell will make it active. This active cell will respond to keyboard shortcuts
as well as mouse input. In constrast to the active cell, one or more cells can be selected, and the active cell need
not be selected. To select multiple cells, either click on a row or column heading to toggle selection or ‘Ctrl’-click
to add or remove a cell from the group of selected cells. The backgrounds of selected cells are highlighted using a
platform-dependent selection color. See Figure Different states of a spreadsheet cell... for examples of the different
cell states.
Depending on the cell type, additional controls may appear in the toolbar when a cell is activated. These controls
affect only the active cell, and change for different cell types. As shown by Figure Different states of a spreadsheet
cell (d), a cell optimized for rendering 2D images (a ImageViewerCell) adds controls for resizing, flipping, and
rotating the image in the active cell.
Figure 3.41: Different states of a spreadsheet cell. (a) inactive and unselected, (b) active and unselected, (c) active and
selected, (d) an active cell with its toolbar and resizer.
The Camera
Spreadsheet cells that display VTK data typically are associated with a vtkRenderer, which is associated with a vtkCamera. If the camera is not assigned in the workflow, a default one is created. If the rendered geometry is not visible
in the window, pressing ‘r’ will invoke the renderer’s ResetCamera() command, which centers the geometry. Also,
pressing ‘i’ will initiate interactions with interactive vtk objects.
Arranging Cells
As described in Section Custom Layout Options, cells can be resized by either resizing rows, columns, or an individual
cell. In addition to resizing, a row or column can be moved by clicking on its header and dragging it along the header
bar to the desired position. See Section Editing Mode for instructions on moving a specific cell to a different location.
Synchronizing Cells
Often, when a group of cells all display results from similar workflows, it is useful to interact with all of these cells at
the same time. For example, for a group of VTKCells, it is instructive to rotate or zoom in on multiple cells at once
42
Chapter 3. Learning VisTrails By Example
VisTrails Documentation, Release 2.1.4
and compare the results. For this reason, if a group of cells is selected, mouse and keyboard events for a single cell of
the selection are propogated to each of the other selected cells. Currently, this feature only works for VTKCells, but
we plan to add this to other cell types as well. An example of this functionality is shown in Figure When selecting all
cells....
Figure 3.42: When selecting all cells, interacting with one VTK cell (A1) causes the other two VTK cells (B1 and B2)
to change their camera to the same position.
Editing Mode
Recall that Editing Mode can be entered either by accessing the View menu or by keying ‘Ctrl-Shift-E’. Editing
Mode provides more operations to layout and organize spreadsheet cells. In this mode, the view for each cell is frozen
and overlaid with additional information and controls (see Figure The spreadsheet in editing mode...). The top of the
overlay displays information about which vistrail, version, and type of execution were used to generate the cell. The
bottom piece of the overlay contains a variety of controls to manipulate the cell depending on the its state.
Cells can be moved or copied to different locations on the spreadsheet by clicking and dragging the appropriate icons
(Move or Copy) for a given cell to its desired location. To move a cell to a location on a different sheet, drag the icon
over the target sheet tab to bring that sheet into focus first and then drop it at the desired location. If you move a cell to
an already-occupied cell, the contents of the two cells will be swapped. See Figure The spreadsheet in editing mode...
for an example of swapping two cells.
Clicking the Locate Version icon will highlight the node in the version tree (in the History view) from which
the visualization in that cell was generated. The next two icons, Create Analogy and Apply Analogy, help
with creating visualizations by analogy. Please refer to Chapter Using Analogies to Update Workflows for information
about this feature.
If a cell was generated via parameter exploration (see Chapter Parameter Exploration), the Create Version button
will be available to save the workflow that generated the result back to the vistrail. Clicking this button modifies the
vistrail from which the cell was generated by adding a new version with the designated parameter settings. Thus, if
you go back to the History mode of the VisTrails Builder for that vistrail, you will find that a new version has been
added to the version tree.
3.6. Spreadsheet
43
VisTrails Documentation, Release 2.1.4
Figure 3.43: The spreadsheet in Editing Mode. (a) All cell widgets are replaced with an information widget (b) Two
cells are swapped after drag and drop the ‘Move’ icon from A1 to B1.
3.6.4 Launching a Web Browser
It is sometimes difficult to view web pages within a spreadsheet cell due to limited space. It may therefore be desirable
to launch a web browser from within the spreadsheet cell. While this functionality is not provided by VisTrails, here
are some possible solutions:
1. You can use parameter exploration to generate multiple sheets so you might have an exploration that opens each
page in a new sheet. Use the third column/dimension in the exploration interface to have a parameter span
sheets.
2. The spreadsheet is extensible so you can write a custom spreadsheet cell widget that has a button or label with
the desired link (a QLabel with openExternalLinks set to True, for example).
3. You can tweak the existing RichTextCell by adding the line “self.browser.setOpenExternalLinks(True)” at line
63 of the source file “vistrails/packages/spreadsheet/widgets/richtext/richtext.py”. Then, if your workflow creates a file with html markup text like “<a href=”http://www.vistrails.org“>VisTrails</a>” connected to a RichTextCell, clicking on the rendered link in the cell will open it in a web browser. You need to add the aforementioned line to the source to let Qt know that you want the link opened externally; by default, it will just issue an
event that isn’t processed.
3.6.5 Saving a Spreadsheet
Warning: This is currently an experimental feature and as such is not robust. If you rename or move the vistrails
used by the saved spreadsheet, the spreadsheet will not load correctly.
Because spreadsheets can include several workflow executions or parameter explorations, it is helpful to be able to
save the layout of the current spreadsheet. To save a spreadsheet, simply choose the Save menu item from the Main
44
Chapter 3. Learning VisTrails By Example
VisTrails Documentation, Release 2.1.4
menu, and complete the dialog. After saving a spreadsheet, you can reopen it using the Open menu item. A whole
sheet can also be saved by selecting Export (either from the menu or from the toolbar).
Saving a Spreadsheet Image
To save an image from the spreadsheet, click on the image’s cell to make it active. Then select the camera on the
toolbar to take a snapshot. The system will prompt you for the location and file name where it should be saved. The
other icons can be used for saving multiple images that can be used for generating an animation on demand.
3.7 Tabular data package
The tabledata package provides facilities to load and manipulate data in table formats.
It provides modules to read tables from CSV files and numpy arrays (including plain binary files) and extract or convert
columns.
Try it Now!
This example shows how to use tabledata together with matplotlib to visualize trip data from NYC Citibike’s
open data.
Note that you can find the completed example here: bikes.vt.
Start by dragging the following modules to the canvas:
• DownloadFile (from the URL package)
• CSVFile (under read/csv)
• TableCell
• Two ExtractColumn modules
• StringToDates (under convert/dates)
• MplLinePlot from the matplotlib package
• MplFigure from the matplotlib package
• MplFigureCell from the matplotlib package
Connect the modules as shown in Figure The pipeline for the Bikes example.
Next Step!
Set the ‘url’ input of DownloadFile to http://www.vistrails.org/download/download.php?type=DATA&id=citib
Make sure ‘header_present’ is checked on CSVFile.
Set the ‘column_name’ parameters on both ExtractColumn modules to Date (for the one on the left) and Miles
traveled today (midnight to 11:59 pm) (for the one on the right). Alternatively, you can set
column_index to 0 and 3.
The workflow is now ready. On execution, you will see a graphical view of the CSV file as a table, and a line
plot showing the variations of the total distance traveled daily.
3.8 Using Analogies to Update Workflows
In Chapter Interacting with the Version Tree, we saw how the provenance data maintained by VisTrails allows you
to compare different versions of a workflow. In Chapter Querying the Version Tree, you learned how this same
provenance information forms the basis of an elegant Query by Example mechanism, letting you find all versions of a
workflow that match a given arrangement of modules. In this chapter, we will see yet another benefit of the VisTrails
3.7. Tabular data package
45
VisTrails Documentation, Release 2.1.4
Figure 3.44: The pipeline for the Bikes example
46
Chapter 3. Learning VisTrails By Example
VisTrails Documentation, Release 2.1.4
Figure 3.45: The result in the VisTrails Spreadsheet
3.8. Using Analogies to Update Workflows
47
VisTrails Documentation, Release 2.1.4
provenance architecture. Through a process we call visualization by analogy, you can reuse pipeline information to
create new visualizations semi-automatically without directly editing the workflow.
3.8.1 Visualization by Analogy
The main idea behind visualization by analogy is as follows. Given two versions of a workflow (called the “source”
and “target” versions, respectively), VisTrails can automatically find the differences between them and apply those
differences to another (potentially unrelated) workflow. This powerful feature lets you create a new visualization
without having to add or remove modules to/from the pipeline. VisTrails takes care of these details for you behind the
scenes.
There are two distinct user interfaces for constructing visualizations by analogy. In the first, you set up the analogy
in the Visual Diff window. In the second, you interact with the Spreadsheet. Both ways are logically equivalent,
and which method you use will be largely a matter of personal preference.
Before explaining either approach, however, let’s first set up the vistrail that we’ll be using as a running example in
this chapter.
Try it now!
Open the vtk_http.vt vistrail, located in the examples directory of the VisTrails distribution. If the tetra mesh
contour version is not selected, go to the History view and select it. This will be our “source” workflow.
Execute this workflow, and take a look at the resultant visualization in the Spreadsheet.
We will now create our “target” workflow. Switch to the Pipeline view and add a new module,
vtkSmoothPolyDataFilter between the vtkContourFilter and vtkDataSetMapper modules.
Your modified pipeline should resemble the one shown in Figure Modified pipeline for use in our example.
Next, let’s adjust some of the parameters for the new module. Select the vtkSmoothPolyDataFilter
module. In the Module Information panel, select SetNumberOfIterations and type 20 in the input
box. Then, select SetRelaxationFactor enter 0.5. Now, execute this workflow, and compare the two
results in the Spreadsheet.
Return to the History view, and give your new version a meaningful tag such as smoothed (Figure Corresponding version tree). Finally, select the Fran Cut version and execute it too. Your spreadsheet should now
resemble the one shown in Figure Analogy example....
Figure 3.46: Modified pipeline for use in our example.
48
Chapter 3. Learning VisTrails By Example
VisTrails Documentation, Release 2.1.4
Figure 3.47: Corresponding version tree.
Figure 3.48: Analogy example - (top left) Original tetrahedral mesh model. (top right) Smoothed tetrahedral mesh.
(bottom left) “Fran Cut” model.
3.8. Using Analogies to Update Workflows
49
VisTrails Documentation, Release 2.1.4
3.8.2 Using the Visual Diff Window
By creating an analogy, you’re telling VisTrails to analyze and store the differences between the “source” and “target”
versions of a workflow. Then when you apply that analogy to another (perhaps completely different) version of the
workflow, VisTrails attempts to make similar types of changes to this other workflow.
One way to create an analogy is to run a Visual Diff between the “source” and “target” workflows. Recall from
Chapter Interacting with the Version Tree that to perform a Visual Diff between two versions of a workflow, you
need to drag the icon for one version atop the icon for the other. However, in the case of analogies, the sequence is
important. In order for the analogy to work correctly, the icon for the source version of the workflow must be dragged
atop the icon for the target version (not vice versa).
In the toolbar of the Diff Properties window, there is a button whose tooltip is labeled Create Analogy
(Figure Click the Create Analogy button...). Clicking the Create Analogy will open up a dialog that lets you give
this analogy a descriptive name. Once the analogy has a name, you can then apply it to any version of the workflow.
This is done by returning to the History view, and selecting then right-clicking the version you want to apply the
analogy to. A menu will appear, showing you a list of available analogies. Choose the one you want, and VisTrails
will attempt to apply the selected analogy to this version of the workflow.
Figure 3.49: Click the Create Analogy button in the Diff Properties window to create a named analogy.
50
Chapter 3. Learning VisTrails By Example
VisTrails Documentation, Release 2.1.4
Try it now!
In the History view, drag the tetra mesh contour icon (the “source” version) atop the smoothed
icon (the “target” version). A Visual Diff window will open. Click the Create Analogy button in
the toolbar and then choose a name for this analogy, for example “SmoothFilter.” Close the Visual Diff
window. Select the Fran Cut icon in the History view so that it is highlighted, then right-click to access
the Perform analogy menu. Choose the name of the analogy you just made (Figure Access the Perform
analogy menu by right-clicking...). A new version icon will appear as a child of the current icon. Select the new
icon, and click Execute to run this new version of the workflow. The resulting visualization will appear in the
Spreadsheet (Figure Result of applying a smoothing analogy to a different workflow).
Figure 3.50: Access the Perform analogy menu by right-clicking on a selected icon in the version tree.
Figure 3.51: Result of applying a smoothing analogy to a different workflow.
3.8.3 Using the Spreadsheet
You can also create and apply analogies directly in the Spreadsheet, without the use of the Visual Diff window.
The Spreadsheet uses a simple “drag and drop” interface to manipulate analogies, and many users find it simpler to
3.8. Using Analogies to Update Workflows
51
VisTrails Documentation, Release 2.1.4
work with than the method described above. The drawback is that the Spreadsheet does not allow you to name your
analogies like the Visual Diff window does.
The Spreadsheet must be in Editing Mode in order to use analogies. Please refer to Chapter Spreadsheet for more
information about the Spreadsheet’s modes. Identify the two cells representing the “source” and “target” visualizations
for which you wish to create an analogy. Drag the Create Analogy icon from the “source” to the “target.” This
creates an analogy that you can use to apply changes to other workflows. To apply an analogy to another version, drag
the Apply Analogy icon from the cell containing a visualization to which you want to apply the analogy, to an
empty cell. A new version of the workflow will be created, and rendered in the designated cell.
The following example illustrates how to use analogies within the Spreadsheet. If you completed the previous “Try it
now!” exercise, first clear the cell containing the smoothed version of the Fran Cut model, so that it won’t interfere
with the present example. The Spreadsheet should again resemble Figure Analogy example....
Try it now!
Switch to the Spreadsheet’s Editing Mode by hitting ‘Ctrl-Shift-E.’ Create the analogy by dragging the Create
Analogy icon from the top-left cell over to the top-right cell (Figure Drag the Create Analogy icon from the
source cell...). Next, apply this analogy to the Fran Cut model by dragging the Apply Analogy icon from
the bottom-left cell over to the bottom-right cell (Figure Drag the Apply Analogy icon from the cell you wish to
modify...). Hit ‘Ctrl-Shift-I’ to return to Interactive Mode, and see the result of your analogy. It should resemble
the output of the first example, as shown in Figure Result of applying a smoothing analogy....
Figure 3.52: Drag the Create Analogy icon from the “source” cell to the “target” cell to create an analogy.
Regardless of whether you use the Visual Diff interface or the Spreadsheet interface to create your analogy, the
end result is the same. To verify this, you can inspect the Pipeline view for the newly created version of the
workflow. All the module(s) necessary to implement the analogy’s behavior are automatically inserted by VisTrails at
the correct locations in the pipeline.
3.8.4 Notes
Creating visualizations by analogy is a relatively new feature of VisTrails, and as such is not yet fully mature. Although
it works well for the examples presented herein, our algorithm may fail to create intuitive visualizations on other
pipelines. Furthermore, it is not yet possible to save an analogy, nor apply an analogy to a vistrail other than the one
in which it was created. Please contact the VisTrails development team with any bug reports and/or suggestions.
52
Chapter 3. Learning VisTrails By Example
VisTrails Documentation, Release 2.1.4
Figure 3.53: Drag the Apply Analogy icon from the cell you wish to modify to an empty cell.
3.9 Parameter Exploration
While exploring workflows, one critical task is tweaking parameter values to improve simulations or visualizations.
VisTrails contains an integrated parameter exploration interface that lets you thoroughly explore the parameter space
and quickly identify the desired settings. By binding parameters to a range of values, you can generate a collection of
results without having to tediously edit the workflow.
VisTrails Parameter Exploration is Spreadsheet-aware, so you can map the intermediate results from explorations into
cells of the Spreadsheet. Because the Spreadsheet provides a multi-view interface that makes efficient use of screen
space, you can quickly compare the results of different parameter settings. The changes in parameters can be displayed
across rows, columns, and sheets. In addition, parameters can be explored across timesteps, and then displayed in the
Spreadsheet as animations. This could be used, for example, to show how pathological tissues and tumors are affected
by radiation treatment in a series of scans.
3.9.1 Creating a Parameter Exploration
To access VisTrails Parameter Exploration for the currently-active workflow, click on the Exploration button in
the VisTrails toolbar.
The Parameter Exploration view starts out with a blank central canvas wherein exploration parameters can be
set up. On the right side of the window, there are a variety of panels that control aspects of the exploration.
The Set Methods panel contains the list of parameters that can be explored, the Annotated Pipeline panel
displays the workflow to be explored and helps resolve ambiguities for parameter settings, and the Spreadsheet
Virtual Cell aids users in laying out exploration results in the spreadsheet.
To add parameters to an exploration, simply drag the corresponding method from the Set Methods panel to the
center canvas. To reduce clutter, this panel only shows the methods for which parameters were assigned values in the
Pipeline view. See Chapter Creating and Modifying Workflows for instructions on adding methods and parameters
to a module.
After dragging a method to the exploration canvas, you can, for each parameter, set the collection of values to be explored and the direction in which to explore (Figure Setting values for parameter exploration). By default, intermediate
parameter values are set via linear interpolation. We will discuss other options later.
The five column headings in the upper-right corner of the main canvas control how the results of the parameter exploration will be displayed in the Spreadsheet. From left to right, the five controls determine:
3.9. Parameter Exploration
53
VisTrails Documentation, Release 2.1.4
Figure 3.54: Setting values for parameter exploration.
exploration in the ‘x’ direction
exploration in the ‘y’ direction
exploration in the ‘z’ direction
exploration in time
none; do not vary this parameter
The spinner beneath each of these icons lets you control the number of parameter values to be explored in that direction.
For each parameter, you must select one of the radio buttons corresponding to a direction of exploration (‘x’, ‘y’, ‘z’,
time, or none). Note that choosing the final column disables exploration for that parameter.
To run a parameter exploration, click the Execute button in the VisTrails toolbar or select Execute from the
Workflow menu.
We now reinforce the above discussion with three examples, motivated by the problem of finding isosurfaces for
medical imaging. In the examples that follow, we’ll look at determining the interfaces between different types of
tissue captured by CT scans.
Try it now!
To begin, load the terminator.vt vistrail, select the “Isosurface” node in the version tree, and switch to parameter exploration. From the Pipeline Methods panel, click and drag the SetValue method of the
vtkContourFilter module to the center canvas.
We’d like to compare different values for the isosurfaces so change the start and end values of the “Float”
parameter to “30” and “75”. Since side-by-side visualization will look better on most monitors, select the radio
button below the ‘x’ dimension control, and increase the value of the control to 2 (see Figure Setting values for
parameter exploration). Execute the exploration and switch to the Spreadsheet to view the results. They should
match Figure Parameter Exploration of two isovalues.... (Open result)
54
Chapter 3. Learning VisTrails By Example
VisTrails Documentation, Release 2.1.4
Figure 3.55: Parameter Exploration of two isovalues as displayed in the Spreadsheet.
Next Step!
While these two isovalues show interesting features, we may wish to examine other intermediate isosurfaces.
To do so, switch back to the main VisTrails window and increase the number of results to generate in the ‘x’
direction to four. VisTrails will calculate the intermediate values via linear interpolation, and your execution of
this new exploration should match Figure Parameter Exploration of four isovalues.... (Open result)
Figure 3.56: Parameter Exploration of four isovalues as displayed in the Spreadsheet.
In our next example, we demonstrate how multiple parameter values can be explored simultaneously. We will use both
X and Y exploration directions to change the values of two parameters at the same time in the same spreadsheet.
3.9. Parameter Exploration
55
VisTrails Documentation, Release 2.1.4
Try it now!
In the terminator.vt example vistrail, make sure you’re working with the “Isosurface” version of the workflow,
then go to the Pipeline view. Add the module vtkImageResample to the pipeline, and insert it between vtkStructuredPointsReader and vtkContourFilter, connecting the output of the reader
to input of the resampler and the output of the resampler to the input of the contour filter as shown in Figure Inserting a vtkImageResample module.... Finally, select the vtkImageResample module and set the
SetAxisMagnificationFactor to 0 and 0.2. See Chapter Creating and Modifying Workflows for reminders on how to accomplish these tasks. After modifying the workflow, switch back to the Exploration
view. Inside the Set Methods panel, select the SetValue method from the vtkContourFilter module, and drag it to the center canvas. Also select the SetAxisMagnificationFactor method from the
vtkImageResample module and drag it to the canvas. Set the values as in the previous example, and set
the range of the “Float” parameter of “SetAxisMagnificationFactor” to start at 0.2 and end at 1.0. Also, set the
magnification factor to vary over the ‘y’ direction. Finally, set the exploration to generate 16 results, four in the
‘x’ direction, and four in the ‘y’ direction. Your exploration setup should match Figure Setting up parameter
exploration, and after executing, you should see a result that resembles Figure Resulting spreadsheet. Notice
that the isosurface changes from left to right while the images have less artifacts as the magnification factor
approaches 1.0 from top to bottom. (Open result)
Figure 3.57: Inserting a vtkImageResample module into the “terminator.vt” example pipeline.
Figure 3.58: Setting up parameter exploration.
Our third example shows how to create an animation by exploring parameter values in time, rather than in ‘X’ or ‘Y’.
56
Chapter 3. Learning VisTrails By Example
VisTrails Documentation, Release 2.1.4
Figure 3.59: Resulting spreadsheet.
Using parameter exploration with two parameters.
Try it now!
To create an animation, we’ll use the same terminator example (make sure that you have the “Isosurface” version selected). Follow the same steps as in the first example, but this time, use the range from 30 to 80 and
select “time” as the dimension to explore, setting the number of results to generate to 7. See Figure Setting up
parameter exploration to check your settings. After executing, the Spreadsheet will show a single cell, but if
you select that cell, you will be able to click the Play button in the toolbar. You should see an animation where
each frame is the result of choosing a different isovalue. A sample frame is displayed in Figure One frame from
the resulting animation. (Open result)
Figure 3.60: Setting up parameter exploration.
3.9.2 Alternatives to Linear Interpolation
In each of the examples above, we used linear interpolation to vary the parameter values in ‘X’ and ‘Y’ and time.
However, linear interpolation is only one of three methods for exploring a range of parameter values. The other two
are to iterate through a simple list of values, or use a user-defined function. You can choose the desired method from
the drop-down menu on the right side of the parameter input field (Figure Choose from linear interpolation, list, or
user-defined function). For linear interpolation, the starting and ending values must be specified; for a list, the entire
comma-separated list must be specified, and for a user-defined function, a Python function must be specified. For the
list and user-defined functions, you can access an editor via the ‘...’ button. (See Figure Editors for lists of values for
3.9. Parameter Exploration
57
VisTrails Documentation, Release 2.1.4
Figure 3.61: One frame from the resulting animation.
examples of the list editor and Python editor widgets.) As an alternative to the list editor, you can manually enter a
list using Python notation; for example, [30, 36, 45, 75]. As before, to set the direction in which to explore a
given parameter, simply select the radio button in the column for the specified direction.
Figure 3.62: Choose from linear interpolation, list, or user-defined function.
In both the Set Methods and Annotated Pipeline panels, you may see numbered red circles. See Figure
The panels of the Parameter Exploration window... for an example of what this looks like. These circles appear when
there is more than one module of a given type in a workflow. For each type satisfying this criteria, the instances are
numbered and displayed so that you can identify which part of the pipeline a module in the Set Methods panel
corresponds to.
3.9.3 Saving Parameter Explorations
New parameter explorations are saved automatically when they are executed. The inspector (below) has buttons for
moving back and forward through the history of parameter explorations. Explorations can be tagged with a name,
which will make them visible in the workspace view.
58
Chapter 3. Learning VisTrails By Example
VisTrails Documentation, Release 2.1.4
Figure 3.63: Editors for lists of values.
Figure 3.64: Editors for user-defined functions.
3.9. Parameter Exploration
59
VisTrails Documentation, Release 2.1.4
Figure 3.65: The panels of the Parameter Exploration window. Set Methods (Top) will appear in the right panel
and the others will be on the left. The numbered red circles in the Annotated Pipeline (Middle) distinguish
duplicate modules, and the cells in the Spreadsheet Virtual Cell (Bottom) determine the layout for spreadsheet results.
Figure 3.66: The parameter exploration inspector
3.9.4 “Virtual Cell” Layout
As stated earlier, the Spreadsheet provides integrated support for parameter explorations. Each of the directions of
exploration corresponds to a visual dimension in the spreadsheet: the ‘x’ direction corresponds to columns; the ‘y’
direction to rows; the ‘z’ direction to sheets; and time to animations. However, when a workflow already outputs to
more than one cell, you can layout the group of cells as it will be replicated during the exploration. For example,
given a workflow with two output cells and an exploration for three parameter values in the ‘x’ direction, the resulting
spreadsheet could be 1 × 6 or 2 × 3. The Spreadsheet Virtual Cell panel controls the layout of the pattern.
Drag and drop cells to position them. See Figures The panels of the Parameter Exploration window (Bottom) and
Results of the Virtual Cell arrangement for an example.
3.10 Provenance Browser
The Provenance Browser allows you to browse through all executions performed on a vistrail. When the
Provenance mode is selected, executions are displayed in the Log Details panel on the right (see figure Provenance Browser). Selecting an execution from the Log Details panel will display the pipeline with modules colored
according to their execution results. Alternatively, this pipeline is displayed by double-clicking on the execution in the
Workspace panel. Executions in the Workspace panel are displayed under the version to which they belong and
are made visible or invisible by toggling the panel’s executions button. Notice that only executions that belong to
tagged versions are displayed in the Workspace, but all executions are displayed in the Log Details.
60
Chapter 3. Learning VisTrails By Example
VisTrails Documentation, Release 2.1.4
Figure 3.67: Results of the Virtual Cell arrangement.
Figure 3.68: Provenance Browser - Left: The Workspace has a button to enable/disable executions. When enabled,
executions of each tagged version in the vistrail will appear when each respective version is expanded. Right: The
Provenance Browser keeps track of all executions whether they belong to tagged versions or not. When selected,
the color coded execution pipeline will appear in the center panel.
3.10. Provenance Browser
61
VisTrails Documentation, Release 2.1.4
3.11 Mashups
3.11.1 Creating Parameter Aliases
If you would like to be able to explore different values for a specific parameter, you will need to create an alias by
double-clicking the parameter in the Parameter Aliases section. After naming the alias, you can select the
alias in the Mashup tab (center panel), and configure the alias by selecting the Display Widget type and setting
Default values.
Notice that a pipeline can have multiple modules of the same type or name, making it difficult to differentiate between them. These modules are each assigned a number, with the numbers in the Annotated Pipeline section
corresponding to the numbers in the Parameter Aliases section, making it possible set an alias for the desired
module without much confusion. See figure Numbered Modules....
Finally, not all modules in the Annotated Pipeline will show up in the Parameter Aliases section. Only
modules whose parameters have been set in the pipeline will appear.
3.11.2 Configuring Parameter Aliases
As mentioned in section Creating Parameter Aliases, aliases are configured in the center panel (the Mashup tab).
This is pretty simple, so here are the steps:
1. Select the alias you wish to configure from the top box in the Aliases tab. The name and position of the
selected alias should be displayed below. Both of these can be changed by editing the Name and/or Order
values.
2. Next select the type of widget to display. The choices are combobox, slider, and numeric stepper. The combobox
will allow you to enter specific values, whereas the numeric stepper and slider will allow you to scroll through
a range of values.
3. Set the Min Val, Max Val, and Step Size (for slider and numeric stepper only).
4. Set the Default Value. The default value should already be set based on the value it was given in the pipeline,
but you are allowed to change it here if desired.
5. Enter suggested values. If you have a set of values to suggest to the user through the Mashups interface, you
should add them to the values list. You can do this by either clicking the ... button and adding the appropriate
values, or by entering the values in the Values List box in list format.
6. Finally, you may delete an alias with the Delete Alias button.
After configuring the necessary aliases, press Preview to interact with your mashup and to ensure its proper functionality.
3.11.3 Saving a Mashup
Mashups are added the the VisTrail when you press the keep button. However, this changes the VisTrail, but does not
save it. To fully save your mashup, you should both press the Keep button and save the VisTrail.
3.11.4 Managing Multiple Mashups
The Mashups Inspector allows you to both rename a mashup, and easily switch between existing mashups.
62
Chapter 3. Learning VisTrails By Example
VisTrails Documentation, Release 2.1.4
Figure 3.69: Numbered Modules - The DownloadFile modules 1 and 2 appear in the annotated pipeline and in the
parameter aliases. The annotated pipeline also, numbers the vtkDataSetReader modules (which appear below the
respective HTTPFile modules in the pipeline). Their parameters have not been exposed to the mashup, so they do not
appear in the Parameter Aliases section.
3.11. Mashups
63
VisTrails Documentation, Release 2.1.4
3.11.5 A Simple Example
Try it now!
•
•
•
•
•
•
•
•
•
•
•
•
•
•
•
•
Open brain_vistrail.vt
Choose Save As and rename the file if you do not want to overwrite the original.
Select the “contour 3” version
Press execute to ensure any necessary upgrades are made
Select Mashup from the toolbar.
In the Mashup Pipeline tab, look under vtkProperty → SetOpacity and double-click on Float.
Enter “Opacity” in the Set Parameter box that pops up, then click OK. See figure Creating the Opacity
Alias.
Under vtkRenderer → SetBackgroundWidget, double-click on Color and enter “Background”
as the alias. See figure Creating the Background Alias.
In the center panel, select the Opacity alias.
Change the display widget to numericstepper.
Set the Min Val, Max Val, and Step Size to 0, 1, and 0.1 respectively.
Set the Values List to [0.3, 0.5]. See figure Configuring the Opacity Alias.
Select the Background alias and make sure the display widget is a combobox.
Select Preview. See figure The resulting mashup.
Select Tag, No, and then enter “one” as the new tag name.
Save the file. (Open result)
Figure 3.70: Creating the Opacity Alias.
3.12 Module Descriptions and Examples
3.12.1 VisTrails VTK modules
Although most VTK modules in VisTrails would be familiar to vtk users, or at least in the vtk documentation, there
are a few modules that VisTrails introduces. They are used as follows:
• PythonSource - Although a PythonSource is in the Basic Modules list rather than VTK, it is mentioned here
for convenience. This module allows you write python statements to be executed as part of the workflow. See
Section PythonSource for more information.
• VTKCell - VTKCell is a VisTrails module that can display a vtkRenderWindow inside a cell. Simply pass it a
vtkRenderer and any additional optional inputs, and it will display the results in the spreadsheet.
64
Chapter 3. Learning VisTrails By Example
VisTrails Documentation, Release 2.1.4
Figure 3.71: Creating the Background Alias.
Figure 3.72: Configuring the Opacity alias.
3.12. Module Descriptions and Examples
65
VisTrails Documentation, Release 2.1.4
Figure 3.73: The resulting mashup.
66
Chapter 3. Learning VisTrails By Example
VisTrails Documentation, Release 2.1.4
• VTKRenderOffscreen - Takes the output of a vtkRenderer and produces a PNG image of size width X height.
Default values of width and height are 512. The output can then be written to a file using a FileSink.
• VTKViewCell - This is similar to the VTKCell except that you pass it a vtkRenderView.
• vtkInspectors: vtkDataArrayInspector, vtkDataSetAttributesInspector, vtkDataSetInspector, vtkPolyDataInspector - These inspectors were created to allow easy access to information that is not otherwise exposed
by module ports, but would be accessible through vtk objects. This information includes: normals, scalars, tensors, and vectors as well as statistical information such as bounds, center, length, max, min. Looking at the
output ports of these inspectors gives an idea of the information available.
• vtkInteractionHandler - The vtkInteractionHandler is used when a callback function is needed. To setup this
handler:
– Connect the Observer input port to the output port of the object that needs the callback function.
– Connect the SharedData input port to the modules that would be passed as parameters to the
callback function. Multiple modules can be connected (see terminator.vt - Images Slices SW).
– Connect the output port to the VTKCell.
– Select configure to write the callback function.
* Name the function after the event that initiates it, but replace ‘Event’ with ‘Handler’. If
the function should be called when a StartInteractionEvent occurs, the function
should be named startInteractionHandler.
* The function should take the parameters observer, and shareddata.
* Add the contents of the function.
There are a number of examples that use the vtkInteractionHandler. If there is any confusion, comparing the callback/interaction handler portions of the .py and .vt files in the vtk_examples/GUI
directory is helpful.
Accessing vtkObjects in vtkInteractionHandler VtkObjects passed to the vtkInteractionHandler
are VisTrails modules. The vtkObject within that module is called a vtkInstance and is accessed by
calling myModule.vtkInstance. See Section PythonSource for more information.
• vtkScaledTransferFunction - Allows you to add a transfer function through the use of an interactive widget.
See head.vt - volume rendering or terminator.vt for example usage.
3.12.2 Modules and Corresponding Examples
Here we provide a list of the .vt files in the examples directory that use the following modules:
• AreaFilter: triangle_area.vt
• CellLocation: offscreen.vt, terminator.vt, vtk.vt
• ConcatenateString: KEGG_SearchEntities_webservice.vt
• Cross: triangle_area.vt
• fetchData: structure_or_id_webservice.vt, protein_visualization.vt
• FileSink: offscreen.vt - offscreen
• Filter: triangle_area.vt
• If: structure_or_id_webservice.vt, protein_visualization.vt
• ImageViewerCell: r_stats.vt
• List: triangle_area.vt
3.12. Module Descriptions and Examples
67
VisTrails Documentation, Release 2.1.4
• Map: triangle_area.vt
• MplFigure: plot.vt, terminator.vt - Histrogram, triangle_area.vt, vtk.vt - Three Cells
• MplFigureCell: plot.vt, terminator.vt - Histrogram, triangle_area.vt, vtk.vt - Three Cells
• MplPlot: plot.vt, terminator.vt - Histrogram, triangle_area.vt, vtk.vt - Three Cells
• PythonCalc: ProbeWithPointWidget.vt, officeTube.vt
• PythonSource: infovis.vt,
noaa_webservices.vt,
offscreen.vt,
KEGG_SearchEntities_webservice.vt,
chebi_webservice.vt, EMBOSS_webservices.vt, structure_or_id_webservice.vt, vtk_http.vt, protein_visualization.vt, terminator.vt, triangle_area.vt
• RichTextCell: noaa_webservices.vt, offscreen.vt, KEGG_SearchEntities_webservice.vt, chebi_webservice.vt,
EMBOSS_webservices.vt, protein_visualization.vt
• RPNGFigure: r_stats.vt
• RReadCSV: r_stats.vt
• Rsource: r_stats.vt
• SheetReference: offscreen.vt, vtk.vt
• StandardOutput: r_stats.vt, triangle_area.vt
• Tuple: marching.vt, ProbingWithPlaneWidget.vt, TransformWithBoxWidget.vt, BandContourTerrain.vt,
probeComb.vt, ImplicitPlaneWidget.vt, BuildUGrid.vt, ProbeWithPointWidget.vt, VolumeRenderWithBoxWidget.vt, PerlinTerrain.vt
• Untuple: probeComb.vt, BandContourTerrain.vt
• vtk3DSImporter: flamingo.vt
• vtkAppendPolyData: vtk.vt - Implicit Plane Clipper, xyPlot.vt, TransformWithBoxWidget.vt, probeComb.vt,
ImplicitPlaneWidget.vt, warpComb.vt
• vtkAssembly: assembly.vt
• vtkAxes: textOrigin.vt
• vtkBandedPolyDataContourFilter: BandContourTerrain.vt
• vtkBMPReader: Tplane.vt, imageWarp.vt, GenerateTextureCoords.vt
• vtkBoxWidget: TransformWithBoxWidget.vt, VolumeRenderWithBoxWidget.vt, cone.vt - 6
• vtkBYUReader: cubeAxes.vt, ClipCow.vt
• vtkCastToConcrete: ExtractUGrid.vt
• vtkCellArray: constrainedDelaunay.vt, Arrays.vt, CreateStrip.vt
• vtkClipPolyData: terminator.vt, vtk.vt - Implicit Plane Clipper, ImplicitPlaneWidget.vt, ClipCow.vt
• vtkColorTransferFunction: lung.vt, SimpleRayCast.vt, mummy.xml - volume rendering, SimpleTextureMap2D.vt, VolumeRenderWithBoxWidget.vt
• vtkCone: iceCream.vt
• vtkConeSource: vtk_book_3rd_p193.vt, vtk.vt - Implicit Plane Clipper, TransformWithBoxWidget.vt,
Cone.vt, ImplicitPlaneWidget.vt, ProbeWithPointWidget.vt, assembly.vt
• vtkConnectivityFilter: ExtractUGrid.vt, pointToCellData.vt
68
Chapter 3. Learning VisTrails By Example
VisTrails Documentation, Release 2.1.4
• vtkContourFilter: brain_vistrail.vt, spx.vt, vtk_http.vt, marching.vt, head.vt - alias, mummy.xml - Isosurface,
terminator.vt, pointToCellData.vt, triangle_area.vt - CalculateArea, Medical1.vt, hello.vt, VisQuad.vt,
probeComb.vt, vtk_book_3rd_p189.vt, Medical2.vt, iceCream.vt, Contours2D.vt, Medical3.vt, PerlinTerrain.vt, ColorIsosurface.vt, PseudoVolumeRendering.vt
• vtkCubeAxesActor2D: cubeAxes.vt
• vtkCubeSource: assembly.vt, marching.vt
• vtkCutter: ClipCow.vt, CutCombustor.vt, PseudoVolumeRendering.vt
• vtkCylinderSource: assembly.vt, cylinder.vt
• vtkDataArrayInspector: CutCombuster.vt, officeTube.vt
• vtkDataSetAttributesInspector: officeTube.vt, CutCombustor.vt
• vtkDataSetInspector: ProbingWithPlaneWidget.vt, StreamlinesWithLineWidget.vt, CutCombustor.vt, officeTube.vt, TextureThreshold.vt, BandContourTerrain.vt, probeComb.vt, ProbeWithPointWidget.vt, rainbow.vt, streamSurface.vt, warpComb.vt
• vtkDataSetMapper: offscreen.vt, spx.vt, structure_or_id_webservice.vt, vtk_http.vt, SubsampleGrid.vt, TextureThreshold.vt, imageWarp.vt, protein_visualization.vt, head.vt - alias, mummy.xml - Isosurface, terminator.vt - Histogram, pointToCellData.vt, ExtractUGrid.vt, ExtractGeometry.vt, vtk.vt, BuildUGrid.vt,
GenerateTextureCoords.vt
• vtkDataSetReader: brain_vistrail.vt, vtk_http.vt, triangle_area.vt, ExtractUGrid.vt, vtk.vt
• vtkDecimatePro: smoothFran.vt
• vtkDelaunay2D: constrainedDelaunay.vt, faultLines.vt
• vtkDelaunay3D: GenerateTextureCoords.vt
• vtkDEMReader: BandContourTerrain.vt
• vtkDoubleArray: Arrays.vt
• vtkExtractEdges: constrainedDelaunay.vt, marching.vt
• vtkExtractGeometry: ExtractGeometry.vt
• vtkExtractGrid: SubsampleGrid.vt, PseudoVolumeRendering.vt - vtkPlane
• vtkExtractUnstructuredGrid: ExtractUGrid.vt
• vtkExtractVOI: Contours2D.vt
• vtkFloatArray: Arrays.vt, BuildUGrid.vt, marching.vt
• vtkFollower: textOrigin.vt
• vtkGeometryFilter: ExtractUGrid.vt, pointToCellData.vt
• vtkGlyph3D: vtk_book_3rd_p193.vt, marching.vt, vtk.vt - Implicit Plane Clipper, TransformWithBoxWidget.vt, ImplicitPlaneWidget.vt, ProbeWithPointWidget.vt, spikeF.vt
• vtkGraphLayoutView: infovis.vt
• vtkHexahedron: BuildUGrid.vt
• vtkIcicleView: infovis.vt
• vtkIdList: BuildUGrid.vt, marching.vt
• vtkImageActor: Medical3.vt
• vtkImageDataGeometryFilter: BandContourTerrain.vt, imageWarp.vt
3.12. Module Descriptions and Examples
69
VisTrails Documentation, Release 2.1.4
• vtkImageLuminance: imageWarp.vt
• vtkImageMapToColors: brain_vistrail.vt, Medical3.vt
• vtkImageReslice: terminator.vt
• vtkImageShiftScale: lung.vt - raycasted
• vtkImageShrink3D: BandContourTerrain.vt
• vtkImplicitBoolean: iceCream.vt, ExtractGeometry.vt
• vtkImplicitModeller: hello.vt
• vtkImplicitPlaneWidget: terminator.vt, vtk.vt, ImplicitPlaneWidget.vt
• vtkImplicitSum: PerlinTerrain.vt
• vtkIntArray: Arrays.vt
• vtkInteractionHandler: ProbingWithPlaneWidget.vt, StreamlinesWithLineWidget.vt, terminator.vt, vtk.vt Implicit Plane Clipper, TransformWithBoxWidget.vt, Cone.vt - 6 , ImplicitPlaneWidget.vt, ProbeWithPointWidget.vt, VolumeRenderWithBoxWidget.vt
• vtkInteractorStyleImage: terminator.vt
• vtkInteractorStyleTrackballCamera: Cone.vt - 5
• vtkLight: cubeAxes.vt, faultLines.vt
• vtkLine: BuildUGrid.vt
• vtkLineSource: streamSurface.vt, xyPlot.vt
• vtkLineWidget: StreamlinesWithLineWidget.vt
• vtkLODActor: TestText.vt, stl.vt, CADPart.vt, vtk.vt - Implicit Plane Clipper, TransformWithBoxWidget.vt,
BandContourTerrain.vt, cubeAxes.vt, ImplicitPlaneWidget.vt, FilterCADPart.vt, ColorIsosurface.vt
• vtkLookupTable: brain_vistrail.vt, vtk_book_3rd_p193.vt, pointToCellData.vt, BandContourTerrain.vt, ExtractUGrid.vt, Medical3.vt, rainbow.vt, PseudoVolumeRendering.vt
• vtkMaskPoints: vtk_book_3rd_p193.vt, spikeF.vt
• vtkMassProperties: triangle_area.vt - CalculateArea
• vtkMergeFilter: imageWarp.vt
• vtkOpenGLVolumeTextureMapper3D: lung.vt - TextureWithShading
• vtkOutlineFilter: VisQuad.vt, probeComb.vt, ExtractGeometry.vt, vtk_book_3rd_p189.vt, cubeAxes.vt, VolumeRenderWithBoxWidget.vt, Contours2D.vt, Medical1.vt, Medical2.vt, Medical3.vt
• vtkPDBReader: protein_visualization.vt, structure_or_id_webservice.vt
• vtkPerlinNoise: PerlinTerrain.vt
• vtkPiecewiseFunction: lung.vt, SimpleRayCast.vt,
tureMap2D.vt, VolumeRenderWithBoxWidget.vt
mummy.xml
-
volume
rendering,
SimpleTex-
• vtkPixel: BuildUGrid.vt
• vtkPlane: lung.vt - TS and plane, CutCombustor.vt, terminator.vt, vtk.vt - Implicit Plane Clipper, ImplicitPlaneWidget.vt, iceCream.vt, PerlinTerrain.vt, ClipCow.vt
• vtkPlanes: VolumeRenderWithBoxWidget.vt
• vtkPlaneSource: Tplane.vt, terminator.vt, probeComb.vt
70
Chapter 3. Learning VisTrails By Example
VisTrails Documentation, Release 2.1.4
• vtkPlaneWidget: ProbingWithPlaneWidget.vt
• vtkPLOT3DReader: ProbingWithPlaneWidget.vt, StreamlinesWithLineWidget.vt, CutCombustor.vt, SubsampleGrid.vt, TextureThreshold.vt, xyPlot.vt, probeComb.vt, ProbeWithPointWidget.vt, rainbow.vt, ColorIsosurface.vt, streamSurface.vt, warpComb.vt, PseudoVolumeRendering.vt
• vtkPointData: marching.vt, Arrays.vt, BuildUGrid.vt
• vtkPointDataToCellData: pointToCellData.vt
• vtkPoints: CreateStrip.vt, marching.vt, constrainedDelaunay.vt, Arrays.vt, BuildUGrid.vt
• vtkPointSource: GenerateTextureCoords.vt, officeTube.vt
• vtkPointWidget: ProbeWithPointWidget.vt
• vtkPolyData: CreateStrip.vt, ProbingWithPlaneWidget.vt, constrainedDelaunay.vt, StreamlinesWithLineWidget.vt, Arrays.vt, ProbeWithPointWidget.vt, ClipCow.vt
• vtkPolyDataInspector: ClipCow.vt
• vtkPolyDataNormals: brain_vistrail.vt, pointToCellData.vt, Medical1.vt , faultLines.vt, ExtractUGrid.vt,
smoothFran.vt, cubeAxes.vt, Medical2.vt, Medical3.vt, ClipCow.vt, ColorIsosurface.vt, warpComb.vt,
PerlinTerrain.vt, spikeF.vt, PseudoVolumeRendering.vt, BandContourTerrain.vt
• vtkPolyDataReader: hello.vt, faultLines.vt, smoothFran.vt, spikeF.vt
• vtkPolygon: BuildUGrid.vt
• vtkPolyLine: BuildUGrid.vt
• vtkPolyVertex: BuildUGrid.vt
• vtkProbeFilter: brain_vistrail.vt, ProbingWithPlaneWidget.vt, xyPlot.vt, probeComb.vt, ProbeWithPointWidget.vt
• vtkProperty2D: xyPlot.vt
• vtkPyramid: BuildUGrid.vt
• vtkQuad: BuildUGrid.vt
• vtkQuadraticDecimation: spx.vt - Decimate
• vtkQuadric: VisQuad.vt, ExtractGeometry.vt, vtk_book_3rd_p189.vt, Contours2D.vt
• vtkRandomGraphSource: infovis.vt - hello_world
• VTKRenderOffscreen: offscreen.vt
• vtkRibbonFilter: StreamlinesWithLineWidget.vt
• vtkRuledSurfaceFilter: streamSurface.vt
• vtkRungeKutta4: StreamlinesWithLineWidget.vt, officeTube.vt, streamSurface.vt
• vtkSampleFunction: VisQuad.vt, ExtractGeometry.vt, vtk_book_3rd_p189.vt, iceCream.vt, Contours2D.vt,
PerlinTerrain.vt
• vtkScaledTransferFunction: head.vt - volume rendering, terminator.vt
• vtkShrinkFilter: ExtractGeometry.vt
• vtkShrinkPolyData: marching.vt, filterCADPart.vt
• vtkSmoothPolyDataFilter: xyPlot.vt
• vtkSphere: iceCream.vt, ExtractGeometry.vt
3.12. Module Descriptions and Examples
71
VisTrails Documentation, Release 2.1.4
• vtkSphereSource: TestText.vt, marching.vt, assembly.vt, vtk.vt - Implicit Plane Clipper, TransformWithBoxWidget.vt, ImplicitPlaneWidget.vt
• vtkSTLReader: stl.vt, CADPart.vt, FilterCADPart.vt
• vtkStreamLine: StreamlinesWithLineWidget.vt, officeTube.vt, streamSurface.vt
• vtkStripper: brain_vistrail.vt, Medical2.vt, Medical3.vt, ClipCow.vt
• vtkStructuredGridGeometryFilter: CutCombuster.vt, officeTube.vt, TextureThreshold.vt, rainbow.vt, warpComb.vt
• vtkStructuredGridOutlineFilter: StreamlinesWithLineWidget.vt, officeTube.vt, SubsampleGrid.vt, TextureThreshold.vt, xyPlot.vt, probeComb.vt, ProbeWithPointWidget.vt, rainbow.vt, ColorIsosurface.vt,
streamSurface.vt, warpComb.vt, PseudoVolumeRendering.vt, ProbingWithPlaneWidget.vt, CutCombustor.vt
• vtkStructuredGridReader: officeTube.vt
• vtkStructuredPointsReader: lung.vt, vtk_book_3rd_p193.vt, SimpleRayCast.vt, TextureThreshold.vt,
head.vt - volume rendering, mummy.xml - volume rendering, head.vt - alias, mummy.xml - Isosurface,
terminator.vt, SimpleTextureMap2D.vt
• vtkTetra: BuildUGrid.vt
• vtkTextActor: TestText.vt
• vtkTextProperty: TestText.vt, xyPlot.vt, cubeAxes.vt
• vtkTexture: Tplane.vt, TextureThreshold.vt, terminator.vt, GenerateTextureCoords.vt
• vtkTextureMapToCylinder: GenerateTextureCoords.vt
• vtkThreshold: pointToCellData.vt
• vtkThresholdPoints: vtk_book_3rd_p193.vt, marching.vt
• vtkThresholdTextureCoords: TextureThreshold.vt
• vtkTransform: marching.vt, terminator.vt, xyPlot.vt, TransformWithBoxWidget.vt, Cone.vt - 6, probeComb.vt, ExtractGeometry.vt, spikeF.vt
• vtkTransformPolyDataFilter: marching.vt, xyPlot.vt, probeComb.vt, spikeF.vt
• vtkTransformTextureCoords: GenerateTextureCoords.vt
• vtkTreeMapView: infovis.vt
• vtkTreeRingView: infovis.vt
• vtkTriangle: BuildUGrid.vt
• vtkTriangleFilter: triangle_area.vt - CalculateArea, ClipCow.vt
• vtkTriangleStrip: BuildUGrid.vt
• vtkTubeFilter: marching.vt, constrainedDelaunay.vt, officeTube.vt, officeTubes.vt, xyPlot.vt, faultLines.vt,
PseudoVolumeRendering.vt
• vtkUnstructuredGrid: BuildUGrid.vt, marching.vt
• vtkUnstructuredGridReader: offscreen.vt, spx.vt, pointToCellData.vt
• vtkVectorText: textOrigin.vt, marching.vt
• vtkVertex: BuildUGrid.vt
• VTKViewCell: infovis.vt
72
Chapter 3. Learning VisTrails By Example
VisTrails Documentation, Release 2.1.4
• vtkViewTheme: infovis.vt - cone_layout
• vtkVolume: lung.vt, SimpleRayCast.vt, head.vt - volume rendering, mummy.xml - volume rendering, terminator.vt, SimpleTextureMap2D.vt, VolumeRenderWithBoxWidget.vt
• vtkVolume16Reader: VolumeRenderWithBoxWidget.vt, Medical1.vt, Medical2.vt, Medical3.vt
• vtkVolumeProperty: lung.vt, SimpleRayCast.vt, head.vt - volume rendering, mummy.xml - volume rendering,
terminator.vt, SimpleTextureMap2D.vt, VolumeRenderWithBoxWidget.vt
• vtkVolumeRayCastCompositeFunction: lung.vt - raycasted, SimpleRayCast.vt, mummy.xml - volume rendering, terminator.vt - SW, VolumeRenderWithBoxWidget.vt
• vtkVolumeRayCastMapper: lung.vt - raycasted, SimpleRayCast.vt, mummy.xml - volume rendering, terminator.vt - SW, VolumeRenderWithBoxWidget.vt
• vtkVolumeTextureMapper2D: SimpleTextureMap2D.vt
• vtkVolumeTextureMapper3D: head.vt - volume rendering, terminator.vt - HW
• vtkVoxel: BuildUGrid.vt
• vtkWarpScalar: imageWarp.vt, BandContourTerrain.vt, warpComb.vt
• vtkWarpVector: pointToCellData.vt, ExtractUGrid.vt
• vtkWedge: BuildUGrid.vt
• vtkWindowLevelLookupTable: terminator.vt
• vtkXMLTreeReader: infovis.vt
• vtkXYPlotActor: xyPlot.vt
3.12. Module Descriptions and Examples
73
VisTrails Documentation, Release 2.1.4
74
Chapter 3. Learning VisTrails By Example
CHAPTER
FOUR
INTERMEDIATE CONCEPTS AND
VISTRAILS PACKAGES
4.1 Parameter Widgets
4.1.1 Introduction to Parameter Widgets
Parameter widgets are editable parameters inside modules in the pipeline view. They can be used to give an overview
of the parameters in a workflow, or to quickly edit parameters without the usual clicking on a module and selecting
the parameter in the ‘Module Info’ panel. Figure 1 shows a complete workflow using parameter widgets. (open in
vistrails)
Enabling Parameter Widgets
Parameter widgets are hidden by default, but can be enabled by toggling the pencil icon in the ‘Module Info’ panel
(See Figure 2). This will show all existing parameter widgets as well as the pencil icons in ‘Module Info’ for adding
new ones.
Adding a parameter widget to a module
A parameter widget can be enabled or disabled in the ‘Module Info’ panel by toggling the pencil icon (See Figure 3).
Only parameters of constant type that have widgets for editing can be added.
Constant modules such as String and Integer show a parameter widget for ‘value’ by default, but it can be removed
using the ‘Module Info’ panel if needed.
Limitations
On some platforms (Such as Mac) some parameter widgets may look unsharp or pixelated. This is because no widget
for that type has been created for use in the pipeline view, and the default one from the ‘Module Info’ pane has been
used instead.
Only one parameter widget per port can be visible right now. In the ‘Module Info’ pane it is possible to specify several
function parameters for each port.
Zooming out will hide all the edit widgets for performance reasons, it would also be difficult to edit anything in that
size.
75
VisTrails Documentation, Release 2.1.4
Figure 4.1: Figure 1 - Complex Workflow with Parameter Widgets.
Figure 4.2: Figure 2 - How to enable/disable the Parameter Widgets mode.
Figure 4.3: Figure 3 - How to add/remove Parameter Widgets from modules.
76
Chapter 4. Intermediate Concepts and VisTrails Packages
VisTrails Documentation, Release 2.1.4
4.2 Control Flow in VisTrails
Scientific workflows usually follow a dataflow model, but, in some cases, control structures, including loops and
conditionals, are necessary to accomplish certain tasks. VisTrails provides the Control Flow package to support
these and other structures. To create your own Control Flow modules, please refer to the Developer’s Guide
(Creating a Control Flow Loop Module). Or, if you would like to use the Control Flow Assistant, to simplify the
process described in this chapter, please refer to The Control Flow Assistant.
This package also provides some related modules that operate on lists.
4.2.1 The Map operator
In functional programming, map is a high-order function that applies a given function to a list (each element of the
list is processed using this function) and returns a sequence of results. The Map module provides this functionality
for workflows in VisTrails. Note that this module provides simple looping as it can be used to iterate through a list of
inputs.
The Map module has four input ports:
• “FunctionPort”: this port receives the module (via the “self” output port) that represents the function to be
applied for each element of the input list; if the function uses more than one module, you must use a Group
(see Chapter Groups and Subworkflows) or a SubWorkflow and connect that composite module to this port;
• “InputPort”: this port receives a list of the names of the input ports that represent the individual arguments of
the function;
• “OutputPort”: this port receives the name of the output port that represents the individual result of the function;
• “InputList”: this port receives the input list for the loop; it must be a list of tuples if more than one function
input port was chosen.
The output port “Result” produces a list of results, one for each element in the input list.
Try it Now!
To better show how to use the Map module, let’s use a workflow as an example. Inside the “examples” directory
of the VisTrails distribution, open the “triangle_area.vt” vistrail. Now, select the “Surface Area” version. This
version basically calculates the area of a given isosurface. We are going to modify this version, in order to
calculate the areas of the isosurface given by contour values in a list. Then, we will create a 2D plot to show all
the areas.
Begin by deleting the StandardOutput modules, and the connection between the vtkDataSetReader
and the vtkContourFilter modules. Then, drag the following modules to the canvas:
• Map
• CartesianProduct
• List (under “Basic Modules”)
• MplSource (under “matplotlib”)
• MplFigure (under “matplotlib”)
• MplFigureCell (under “matplotlib”)
• InputPort (under “Basic Modules”) - you will need two of them
• OutputPort (under “Basic Modules”)
• PythonSource (under “Basic Modules”)
Notice that when you drag Map to the pipeline canvas it will be drawn in a different shape from the other modules.
This is a visual cue to help distinguish control modules from other modules. All control modules have the same shape.
4.2. Control Flow in VisTrails
77
VisTrails Documentation, Release 2.1.4
Next Step!
Select the vtkContourFilter module and delete its method “SetValue” in the Module Information
tab. Then, make this port visible by clicking on the first column left of its name in the “inputs” tab to toggle the
eye icon..
Connect the modules as shown in Figure Connecting a subset of the modules to be grouped as a SubWorkflow.
Figure 4.4: Connecting a subset of the modules to be grouped as a SubWorkflow
These modules represent the function we wish to map: each element of the input list will be processed using them. Because we have more than one module, we need to create a Group or a SubWorkflow to identify the entire function.
The InputPort and the OutputPort modules are necessary to expose these ports in the Group/SubWorkflow
structure.
Next Step!
In this example, we will use a SubWorkflow structure. Select all the modules shown in Figure Connecting a
subset of the modules to be grouped as a SubWorkflow, go to the Workflow menu, and then click on Create
SubWorkflow. You can name it CalculateArea. Enable the self output port in the ‘outputs’ panel: you
will need it to connect to the “Map” module
Note
When using Map, the module (or subworkflow) used as function port in the map module MUST be a function,
i.e., it can only define 1 output port.
Next Step!
Now, select the MplSource module and open its configuration dialog. Inside it, add two input ports of type
List: “InputList” and “X_Values”. Also, copy the code listed below, in order to create the necessary information for the 2D plot, into the source text area and save your changes.
78
Chapter 4. Intermediate Concepts and VisTrails Packages
VisTrails Documentation, Release 2.1.4
subplot(212)
dashes = [1, 3]
xaxis = []
for i in xrange(len(InputList)):
xaxis.append(X_Values[i][1])
l, = plot(xaxis, InputList, marker="o", markerfacecolor="red",
markersize=7, label="IsoSurface Areas", linewidth=1.5)
l.set_dashes(dashes)
Next Step!
Next, edit the PythonSource module by adding an output port “result” of type List, copying the following
code to the source text area, and saving these changes. The code will create a range of contour values that we
will use as our input list.
result = []
for i in xrange(4, 256, 4):
result.append(i)
Next Step!
It may be helpful to identify this PythonSource module by labeling it as RangeList. Connect all the
modules as shown in Figure All the modules connected in the canvas.
Next Step!
You will set some parameters now:
• DownloadFile: set the parameter “url” to http://www.sci.utah.edu/~cscheid/stuff/head.120.vtk
• List: set the parameter “value” to [0]
• Map: set the parameter “InputPort” to [”SetValue”] and the parameter “OutputPort” to GetSurfaceArea
The workflow is now ready to be executed. When you execute the workflow, you will see the SubWorkflow
CalculateArea executing several times (one time for each value of the input list). It’s important to notice that,
although only the module connected to Map (in this example, the SubWorkflow Calculate Area) will be in the
loop, the modules above it will be also used in each loop iteration; the difference is that they are going to be executed
only for the first iteration; in all other iterations, the results will be taken from the cache.
When the workflow finishes its execution, the VisTrails Spreadsheet will contain a 2D plot (Figure The result in the
VisTrails Spreadsheet).
This example can be found in the version “Surface Area with Map”, inside the triangle_area.vt vistrail.
4.2.2 Filtering results
When computing large lists of results, it can be useful to selectively reduce the list during execution to avoid unnecessary computation.
4.2. Control Flow in VisTrails
79
VisTrails Documentation, Release 2.1.4
Figure 4.5: All the modules connected in the canvas
Figure 4.6: The result in the VisTrails Spreadsheet
80
Chapter 4. Intermediate Concepts and VisTrails Packages
VisTrails Documentation, Release 2.1.4
The Filter module was developed to address this issue. It receives an input list and, based on a specified boolean
condition, returns only elements of the list that satisfy the condition. Its ports are the same as those in the Map module.
The difference between these modules is related to the function module: in Filter, the output of that module is not
the value to keep, but a boolean indicating whether to keep (True) or discard (False) the value from the original
list.
Try it Now!
To better understand how Filter works, let’s modify our earlier example to filter out areas less than 200,000.
With the previous vistrail open (you can use the “Surface Area with Map” version), add the following modules
to the canvas:
• Filter
• PythonSource (under “Basic Modules”)
Edit the configuration of PythonSource by adding an input port of type Float named “Area”, and an output
port of type Boolean named “Condition”, and writing the following code inside the source text area:
if Area > 200000.00:
Condition = True
else:
Condition = False
Next Step!
Press the OK button. You can label this PythonSource as FilterCondition. Now, reorganize the modules in the canvas as shown in Figure The new organization of the modules in the canvas.
Figure 4.7: The new organization of the modules in the canvas
4.2. Control Flow in VisTrails
81
VisTrails Documentation, Release 2.1.4
Next Step!
Select the Filter module and set the values of its parameters to the following:
• “InputPort”: [”Area”]
• “OutputPort”: Condition
When you execute this workflow, it will generate another plot that is similar to the one from the Map example, but
only areas above 200,000 are considered (Figure The result in the VisTrails spreadsheet).
Figure 4.8: The result in the VisTrails spreadsheet
This example is already inside the triangle_area.vt vistrail, in the “Surface Area with Map and Filter” version.
Later in this chapter, you will see how to combine Map and Filter in one single module, by creating your own
control structure.
4.2.3 Conditional module
Conditional statements are a very important control flow structure frequently used in programming languages, and the
if structure is probably the most common of these structures. In scientific workflows, for example, an if structure
can be used to select the part of the pipeline to be executed based on a boolean condition.
For this reason, the Control Flow package also includes an If module. Its input ports are:
• “Condition”: this port receives a boolean value that will specify the direction of computation;
• “TruePort”: this port receives the part of the workflow that will be executed if the condition value is True; you
don’t need to group or make a SubWorkflow in this case: just connect the output port “self” of the last module
in this port;
82
Chapter 4. Intermediate Concepts and VisTrails Packages
VisTrails Documentation, Release 2.1.4
• “FalsePort”: this port receives the part of the workflow that will be executed if the condition value is False; as
with the
• “TruePort” port, you don’t need to group or make a SubWorkflow;
• “TrueOutputPorts”: this port receives a list that contains the names of the output ports of the module connected
to “TruePort” that you want the result of; this port is optional;
• “FalseOutputPorts”: this port receives a list that contains the names of the output ports of the module connected
to “FalsePort” that you want the result of; this port is optional.
The If module has an output port named “Result” that returns a list with the results of the specified output ports of
“TrueOutputPorts” or “FalseOutputPorts”, depending on the condition value. If only one output port is chosen, the
result of this port will not be returned in a list. If “TrueOutputPorts” or “FalseOutputPorts” are not enabled, “Result”
returns None.
Let’s do a simple example to show how this module works.
Try it Now!
Our example will contain 2 different text strings. The string that is used by the workflow will depend on the
condition of the If module. The final text will be rendered in a spreadsheet cell. You can change the final text
by changing the condition on the If module. Create a new workflow and add the following modules:
• Boolean (under “Basic Modules”)
• String (under “Basic Modules”) - you will need two of them
• If (under “Control Flow”)
• WriteFile (under “Basic Modules”)
• RichTextCell (under “VisTrails Spreadsheet”)
Name the Boolean module “Condition”, the first String module “True Branch”, and the second String
module “False Branch”. Connect the modules as shown in Figure Simple If example. The Condition should
be connected to the “Condition” port on the If module and will determine which of the branches that will
be executed. True Branch should be connected to the “TruePort” on the If module and will be executed
when the If module evaluates to True. False Branch should be connected to the “FalsePort” on the If
module and will be executed when the If module evaluates to False. On the If module, set parameters
“TrueOutputPorts” and “FalseOutputPorts” to “[’value’]”. This will tell the If module to output the “value”
port on the String modules. Finally, set the “value” port on the Condition module to either True or
False. Execute the workflow and see that the branch specified by the If condition has been executed.
Figure 4.9: Simple If example
4.2. Control Flow in VisTrails
83
VisTrails Documentation, Release 2.1.4
Lets do a more advanced example from the bioinformatics domain. This workflow will take a string as the input. If this
string is a structure identifier, a web service from the European Bioinformatics Institute - EBI (http://www.ebi.ac.uk/)
is used to put the structure into PDB format (a standard representation for macromolecular structure) and the VTK
package is used to show the protein in the VisTrails Spreadsheet. Otherwise, the input is assumed to be invalid and a
message is generated in the Spreadsheet.
Try it Now!
First, the EBI’s web service must be enabled. For this, you need to add the following url to the wsdlList
configuration:
http://www.ebi.ac.uk/Tools/webservices/wsdl/WSDbfetch.wsdl
Don’t forget to ensure that the SudsWebServices package is enabled in the Preferences dialog. For
more information about web services in VisTrails, see Chapter Example: Web Services.
Now, you’re going to drag the following modules to the canvas:
• If
• fetchData (under “Methods” for the current web service)
• WriteFile (under “Basic Modules”)
• vtkPDBReader (under “VTK”)
• vtkDataSetMapper (under “VTK”)
• vtkActor (under “VTK”)
• vtkRenderer (under “VTK”)
• VTKCell (under “VTK”)
• PythonSource (under “Basic Modules”) - you will need two of them
• String (under “Basic Modules”)
• RichTextCell (under “VisTrails Spreadsheet”)
Set some paremeters of fetchData:
• “format”: pdb
• “style”: raw
Next, connect some modules as shown in Figure Some modules of the workflow connected.
Figure 4.10: Some modules of the workflow connected
The aim of this group of modules is to get the PDB format of the structure ID, through the web service, and then make
the visualization with the VTK package. This is the part of the workflow that will be executed if the input is a structure
identifier.
84
Chapter 4. Intermediate Concepts and VisTrails Packages
VisTrails Documentation, Release 2.1.4
Next Step!
Next, select one of the PythonSource modules and open its configuration dialog. One input port named
“Structure”, of type String, and one output port named “Is_ID”, of type Boolean, must be added, as well as
the code below:
1
2
3
4
5
6
if "\n" in Structure:
lineLen = Structure.index("\n")
else:
lineLen = -1
if lineLen < 1:
lineLen = len(Structure)
7
8
9
10
11
if ":" in Structure:
index = Structure.index(":")
else:
index = -1
12
13
14
15
16
if Structure[0] != "ID " and index > 0 and index < lineLen:
Is_ID = True
else:
Is_ID = False
Next Step!
Name this module as Is_ID. This module will be the condition for the If structure.
Now, select the last PythonSource module, and, inside its configuration, add one input port of type String,
named “Input”, and one output port of type File, named “html”. Then, copy the code below:
1
2
3
4
5
6
7
8
9
10
output = self.interpreter.filePool.create_file()
f = open(str(output.name), ’w’)
text = ’<HTML><TITLE>Protein Visualization</TITLE><BODY BGCOLOR="#FFFFFF">’
f.write(text)
text = ’<H2>Protein Visualization Workflow</H2>’
f.write(text)
text = ’<H3>The following input is not an ID from a protein:</H3>’
text += ’<H4>’ + Input + ’</H4>’
text += ’<H3>The visualization cannot be done.</H3>’
f.write(text)
11
12
13
text = ’</BODY></HTML>’
f.write(text)
14
15
self.set_output(’html’, f)
16
17
f.close()
4.2. Control Flow in VisTrails
85
VisTrails Documentation, Release 2.1.4
Next Step!
Name this PythonSource as Not_ID. This module will print a message in the VisTrails Spreadsheet when
the input is not a structure identifier.
Finally, the String module can be named as Workflow_Input, to make it clear that it takes the input of the
workflow. Also, open the configuration dialog of RichTextCell to enable the output port “self”, so it can be
connected to the If module. Then, connect all the modules as shown in Figure All the modules connected.
Figure 4.11: All the modules connected
Next Step!
In order to better organize the disposal of the modules, group all the modules shown in Figure Some modules
of the workflow connected by selecting them, going to the Edit menu and clicking on Group. Name it as
Generate_Visualization. Your workflow must correspond to the one shown in Figure The final workflow, using the Group structure.
Note that this implementation follows exactly the initial specification of the workflow. If the input is a structure identifier (Is_ID returns True), Generate_Visualization will be executed; otherwise (Is_ID returns False),
Not_ID and RichTextCell will create an error message in the VisTrails Spreadsheet.
86
Chapter 4. Intermediate Concepts and VisTrails Packages
VisTrails Documentation, Release 2.1.4
Figure 4.12: The final workflow, using the Group structure
Next Step!
For the workflow execution, set the parameter “value” of the Workflow_Input module to PDB:3BG0. This
entry is an ID from a protein; so, the condition will be True, and the Generate_Visualization group
will be executed, generating the visualization shown in Figure The visualization of the protein in the VisTrails
Spreadsheet.
If you change the value from the input port “value” to protein, for example, the condition will be False, and the
message shown in Figure The message in the Spreadsheet, generated when the input is not a structure ID will be
generated in the Spreadsheet.
This example can be found inside the “examples” directory, in the protein_visualization.vt vistrail. It was partially
based on the workflow “Structure_or_ID”, which can be found at http://www.myexperiment.org/workflows/225.
4.2.4 While loop
The while loop is a common construct of programming languages, allowing the repetition of an operation until some
condition becomes true.
It runs a single module (possibly a Group or Subworkflow) whose self output port is connected to the
FunctionPort input of the While module (just like the Map module). It gets the value of the ports whose name
are set on the ConditionPort, OutputPort and StateOutputPorts. As long as the port designated by ConditionPort does
not return true, the module is run again, with on its StateInputPorts the values that were output on the StateOutputPorts
in the previous run.
4.2. Control Flow in VisTrails
87
VisTrails Documentation, Release 2.1.4
Figure 4.13: The visualization of the protein in the VisTrails Spreadsheet
Figure 4.14: The message in the Spreadsheet, generated when the input is not a structure ID
88
Chapter 4. Intermediate Concepts and VisTrails Packages
VisTrails Documentation, Release 2.1.4
Try it Now!
In this example, we are going to compute the GCD of two integers using Euclid’s algorithm. Keep in mind that
VisTrails is meant for data-oriented workflows and that we are twisting it’s execution model a little, but this will
demonstrate the functionality should you actually need it.
Note that you can find the completed example here: gcd.vt.
The modules we are going to need are:
• And
• InputPort (under “Basic Modules”)
• List (under “Basic Modules”)
• PythonSource (under “Basic Modules”)
• 3 OutputPort (under “Basic Modules”)
• 2 Tuple and one Untuple (under “Basic Modules”)
• 2 PythonCalc (under “PythonCalc”)
• 2 If
The structure is a little complicated and comports 4 parts (see Figure The grouped pipeline for Euclid’s algorithm):
• (I) compares a and b, and outputs the biggest one as ‘result’
• (II) makes the (a, b-a) Tuple (if a < b)
• (III) is like (II) but makes (a-b, b) (if a >= b)
• (IV) sets the ‘continue’ port, if both a and b are not null.
The Integer modules marked ‘a’ and ‘b’ are only here to make the workflow clearer, they simply repeat the
values from Untuple.
Next Step!
The PythonCalc are substractions (operation ‘-‘).
The PythonSource has two Integer inputs a and b, and a Boolean o output; the code should be o = a < b
The Tuple and Untuple modules have two Integer ports each.
You will need to use the List module’s configuration widget to add one additional port, so you can connect a
and b to the head and item0 ports.
The If modules each have [’value’] for both FalseOutputPorts and TrueOutputPorts.
Next Step!
Set names on the InputPort and OutputPort modules. For example, you can use nbs for the InputPort
and (from left to right) state, result and continue for the OutputPort.
Once this is done, you can simply select everything and Workflow/Group. Then, add a While module,
fill in the port names, and set the nbs port of the Group to 15 and 6 (or any couple of integers). Also add a
StandardOutput module to display the result.
4.2.5 For loop
The For module is very similar to Map, except that it uses input values from a range. It can be used to make a module
or group run several times with successive integer input, or just to repeatedly execute a task (optionally waiting between
each iteration).
4.2. Control Flow in VisTrails
89
VisTrails Documentation, Release 2.1.4
Figure 4.15: The grouped pipeline for Euclid’s algorithm
Figure 4.16: The final pipeline
90
Chapter 4. Intermediate Concepts and VisTrails Packages
VisTrails Documentation, Release 2.1.4
4.2.6 Boolean operations
The And and Or modules are simple boolean operations. They take a list of booleans and output a single boolean.
They are useful when building workflows with structures that need booleans, such as the Filter, While and If
modules.
Figure 4.17: Example usage of And and Or modules; outputs (True, False, True, False)
4.2.7 Vector operations
This packages also provides some general modules for lists, or vectors of numbers.
The Sum module computes the sum of the elements in a list of numbers. Example: Sum([1, 2, 3]) = 6
The Cross module takes two 3-element lists and computes the cross product of these vectors. It returns a 3-element
list as well. Example: Cross([1, 2, -1], [0, 2, 5]) = [12, -5, 2]
The Dot module performs the dot product of two lists, i.e. returns the sum of the pairwise products of the two lists’
elements. It is the same thing as connecting an ElementwiseProduct to a Sum module. Example: Dot([2, 0,
-1], [4, 2, 3]) = 5
If NumericalProduct is true (the default), the ElementwiseProduct module outputs a list where each element is the product of the elements of both input lists. Example: ElementwiseProduct([1, 2, 3], [2,
0, -1]) = [2, 0, -3]
Else, the elements are concatenated instead of multiplied. Example: ElementwiseProduct([1, 2, 3], [2,
0, -1]) = [(1, 2), (2, 0), (3, -1)]
4.3 The Control Flow Assistant
4.3.1 Using the Control Flow Assistant (CFA)
In order to simplify the process of creating a control flow loop that uses the Map module, VisTrails has a Control Flow
Assistant (CFA). To use the CFA, you must:
1. Enable all ports (in the Module Information panel) that you wish to use as inputs or outputs.
2. Select the modules in the workflow that will form the basis of your mapped input-output loop.
3. Go to ‘Edit->Control Flow Assistant’ to launch the CFA using the selected modules.
4. Select the input ports that you wish to loop over using List modules as input.
4.3. The Control Flow Assistant
91
VisTrails Documentation, Release 2.1.4
5. Select the output port that you wish to use for the values in the output List.
6. Click OK, and the CFA will generate the control flow structure as a Group module.
7. Connect a List input to each of the inputs on the control flow Group.
8. Connect the Group’s output List (output port ‘Result’) to a suitable module/port, or create a PythonSource
module to handle the List output.
Note: All existing connections to input and output ports selected in steps 4 and 5 will be removed.
List Input
By default, the List inputs will be used sequentially, one from each List, which requires that all List inputs be the
same length. As another option, the Group created by the CFA has a boolean ‘UseCartesianProduct’ parameter. If this
parameter is set to ‘true’ then the cartesian product of all of the input Lists will be used as the input for the Map. Use
caution when using this parameter, as the number of inputs can grow very rapidly with just a few List inputs.
List Output
There are several ways to handle the output List. One option would be to send the output List to a StandardOutput
module to display its contents. Another option is to simply ignore the output List, in the case where you just want part
of the workflow to execute multiple times using different inputs. For example, if the mapped portion of the workflow
contains a VTKCell, and you just want to generate a new VTKCell for each input, you should select the ‘self’ port of
the VTKCell module when choosing the output port in the CFA, and then ignore the output List. For more specialized
handling of the output List, you may wish to create a PythonSource module.
Custom List
For advanced users, the default behavior, or cartesian product behavior may not be sufficient for your needs. If this
is the case, the ‘UserDefinedInputList’ parameter allows you to manually specify the input list. If this parameter is
defined, it will override any input lists already defined or connected. The format for this user-provided input list must
be a list of lists of tuples. Each inner list represents a single loop execution, and contains tuples (or single values
for functions taking only one argument) representing the arguments for each input function to be used in that loop
execution. The order of the argument tuples in the inner lists should match the order in which the functions appear on
the module generated by the CFA.
For example, if the loop has two input functions defined, in order, as SetXY(x, y) and SetZ(z), and we want two
executions of the loop, the input list would be: [[(x1, y1), z1], [(x2, y2), z2]]
Parameter Exploration
One useful purpose for the CFA is to provide a version-based approach to parameter exploration. To create a parameter
exploration for a workflow, you could simply select all modules in the workflow, making sure the ports for the desired
parameters are enabled, then launch the CFA and select the ports of the parameters you wish to explore. By providing
a list for each parameter, you can create a parameter exploration that directly uses the version tree.
92
Chapter 4. Intermediate Concepts and VisTrails Packages
VisTrails Documentation, Release 2.1.4
Try it Now!
Processing a List of values with PythonCalc:
1. Go to ‘Edit->Preferences’, select the ‘Module Packages’ tab, and enable the ‘pythonCalc’ package if it is
not already enabled.
2. Click on File->New to start a new VisTrail.
3. Add the following modules from the module registry to the VisTrail: a) One ‘PythonCalc’ module from the
‘pythonCalc’ package b) One ‘List’ module from the ‘Basic Modules’ package c) One ‘StandardOutput’
module from the ‘Basic Modules’ package
4. Set the List ‘value’ parameter to: [1.0, 2.0, 3.0, 4.0, 5.0]
5. Set the PythonCalc ‘op’ parameter to: ‘*’
6. Set the PythonCalc ‘value2’ parameter to: 2.0
7. With the PythonCalc module selected, go to ‘Edit->Control Flow Assistant’ (see Figure Example 1.1):
(a) Click on the input port ‘value1’ and ensure it is highlighted
(b) Click on the output port ‘value’ and ensure it is highlighted
(c) Click ‘OK’ to close the window and build the loop structure as a Group module (see Figure Example
1.2)
8. Connect the ‘List’ module’s output port ‘value’ to the ‘Group’ module’s input port ‘value1’.
9. Connect the ‘Group’ module’s output port ‘Result’ to the ‘StandardOutput’ module’s input port ‘value’
(see Figure Example 1.3)
10. Execute the current workflow.
11. In your Standard Output console, you should see a List containing the computation for each element in
the input list: [2.0, 4.0, 6.0, 8.0, 10.0] (Open result)
Figure 4.18: Example 1.1 - Running the Control Flow Assistant
4.3. The Control Flow Assistant
93
VisTrails Documentation, Release 2.1.4
Figure 4.19: Example 1.2 - Selecting relevant ports.
Figure 4.20: Example 1.3 - The connected pipeline.
94
Chapter 4. Intermediate Concepts and VisTrails Packages
VisTrails Documentation, Release 2.1.4
Try it Now!
Performing a Parameter Exploration:
1. Go to ‘File->Open’, explore to the VisTrails examples folder, and open spx.vt.
2. Open the History view and select the version tagged as ‘decimate’.
3. Open the Pipeline view.
4. Select the ‘vtkContourFilter’ module and enable the ‘SetValue’ input port by clicking to the left of ‘SetValue’ in the Module Information panel (see Figure Example 2.1).
5. Click on ‘Edit->Select All’.
6. With all modules selected, go to ‘Edit->Control Flow Assistant’:
(a) Click on the ‘vtkContourFilter’ module’s input port ‘SetValue’ and ensure it is highlighted
(b) Click on the ‘VTKCell’ module’s output port ‘self’ and ensure it is highlighted (see Figure Example
2.2)
(c) Click ‘OK’ to close the window and build the loop structure as a Group module
7. Select the newly created ‘Group’ module, and set the ‘SetValue’ parameter to: [(0, 0.5), (0, 0.75), (0, 1.0)]
8. Execute the current workflow.
9. In your VisTrails Spreadsheet, you should see three visualizations, one for each set of input parameters to
the ‘SetValue’ port of ‘vtkContourFilter’ (see Figure Example 2.3). (Open result)
Figure 4.21: Example 2.1 - Enabling a port for use with the control flow assistant.
4.4 List Handling in VisTrails
In VisTrails you can pass typed and untyped lists between modules. Ports on modules have a depth parameter specifying the list depth it supports. 0 means no list, 1 is a list, 2 is a list of lists etc. Port depth can be specified either by
module developers or by using a PythonSource or similar module.
It is important to know how connections of mismatching list depths are handled:
• List wrapping - If the destination port has a larger list depth, the source will be wrapped in lists until the list
depth is matched.
• Iterating over lists - If the source port has a larger list depth, the destination module will be executed once for
each element in the list.
4.4.1 The List type
The List type represents an untyped list and can contain a list of any type. The vistrails Variant type matches any
type and a List is equal to a Variant of list depth 1. List depth specified on List types does not include the List
itself: A List type with list depth 1 are considered a Variant with list depth 2.
There is one important exception: Variant connects directly to List. This is because Variant ports are allowed
to contain lists.
4.4. List Handling in VisTrails
95
VisTrails Documentation, Release 2.1.4
Figure 4.22: Example 2.2 - Selecting relevant ports.
Figure 4.23: Example 2.3 - The spreadsheet results using the list: [(0, 0.5), (0, 0.75), (0, 1.0)] as input to the contour
filter via the control flow assistant.
96
Chapter 4. Intermediate Concepts and VisTrails Packages
VisTrails Documentation, Release 2.1.4
4.4.2 Iterating over lists
Passing a list to a module that does not support lists will cause that module to be executed once for each element in
the list. When passing lists on multiple input ports, the inputs will be combined. The default combination is cartesian
product, where each element in a list is combined with each element in another list. This combination can be changed
by selecting “Looping Options” in the module menu. The options are Cartesian, Pairwise (where the elements
are combined pairwise), and Custom. Custom gives you complete control over how inputs are combined and allows
you to use both pairwise/cartesian combiners as well as reordering them. The output of an iterated module will be
an ordered list with the individual results of the module execution. This will cause modules downstream to also be
iterated over, unless they accept a list as input. Iterated modules will have duplicated connections to show that they
are being iterated over. A list of lists will have the connection triplicated etc.
Try it Now!
Lets create a simple example showing how to combine strings. First we will create a module that generates lists
of strings. Create a new workflow and add a PythonSource module. Give it three output ports named s1,
s2, s3 of type String and set their list depth to 1. Enter this code:
s1 = [’A’, ’B’, ’C’]
s2 = [’+’, ’-’, ’*’]
s3 = [’1’, ’2’, ’3’]
Next Step!
Add a ConcatenateString module, connect s1->str1, s2->str2, s3->str3. Notice how the connections going into ConcatenateString are duplicated. This indicates that ConcatenateString will
iterate over the list inputs. Add a StandardOutput module and connect ConcatenateString.value
to StandardOutput.value. This connection will be duplicated in both ends, indicating they will both be
iterated over. Your workflow should now look like Figure The complete workflow.
Figure 4.24: The complete workflow
4.4. List Handling in VisTrails
97
VisTrails Documentation, Release 2.1.4
Next Step!
By default ConcatenateString will combine the inputs using cartesian product ["A+1", "A+2",
"A+3", "A-1", ...]. Lets change this. Go to Module Menu->Looping Options and click custom.
Right click in the port list and add a pairwise product. Rearrange the ports so that it looks like Figure A custom
list combiner.
Figure 4.25: A custom list combiner
Finally:
str2 and str3 will now be combined pairwise and then combined with str1 using cartesian product. Open
the vistrails console and execute the workflow. You should see this output: (Open result)
A+1
A-2
A*3
B+1
B-2
B*3
C+1
C-2
C*3
98
Chapter 4. Intermediate Concepts and VisTrails Packages
VisTrails Documentation, Release 2.1.4
4.5 Streaming in VisTrails
Streaming data may be useful for a number of reasons, such as to incrementally update a visualization, or to process
more data than fit into memory. VisTrails supports streaming data through the workflow. By implementing modules
that supports streaming, data items will be passed through the whole workflow one at a time.
4.5.1 Using Streaming
Streaming is similar to list handling (see Chapter List Handling in VisTrails). Modules that create streams should
output a port with list depth 1. Downstream modules that do not accept lists will be executed once for each item in the
stream. Modules with multiple input streams will combine them pairwise. For this reason the input streams should
contain the same number of items (or ben unlimited).
Modules accepting a type with list depth 1, but does not support streaming, will convert input streams to lists and
execute after the streaming have ended.
Try it Now!
Lets use PythonSources to create a simple example that incrementally sums up a sequence of numbers. First
we will create a module that streams the natural numbers up to some value. Create a new workflow and add a
PythonSource module. Give it an input port named inputs of type Integer, which will specify the maxim
number to stream, and an output port named out of type Integer with list depth 1, which will be the output
stream. An output stream can be created by using self.set_streaming_output, which takes the port
name, an iterator object, and an optional length of the input items. To create an integer iterator we can use
xrange. Add this to the PythonSource:
self.set_streaming_output(’out’,
xrange(inputs).__iter__(),
inputs)
Next Step!
Now lets create a module that captures the item in the string. Add a second PythonSource module below the
first one. Give it an input port named integerStream of type Integer and list depth 1 that will be our input
stream. An input stream can be captured by adding the magic string #STREAMING to the PYthonSource code
and calling self.set_streaming with a generator method as argument. The generator method should take
the module as an input. It should first initialize its value, in our case set intsum=0. Then it should receive the
inputs in a loop ending with yield. In each iteration the module will be updated to contain a new input in the
stream. Similar to a normal module, the loop should:
1. get inputs
2. compute outputs
3. set outputs
4. call yield
Below is the complete example. Add it to the PythonSource.
#STREAMING - This tag is magic, do not change.
def generator(module):
intsum = 0
while 1:
i = module.get_input(’integerStream’)
intsum += i
4.5. Streaming in VisTrails
99
VisTrails Documentation, Release 2.1.4
print "Sum so far:", intsum
yield
self.set_streaming(generator)
Finally:
Connect the two PythonSource’s, set inputs to 100 in the first PythonSource, open the vistrails console and
execute. See how the output is printed to the console while the stream runs and how the progress of the modules
increase. The output should look like this: (open in vistrails)
Sum
Sum
Sum
...
Sum
Sum
so far: 0
so far: 1
so far: 3
so far: 4851
so far: 4950
4.6 Parallel Flow in VisTrails
When dealing with large datasets, the ability to leverage multiple cores or machines allows to speed up workflow
execution time. VisTrails provides support for parallelization of tasks using IPython.
4.6.1 Setting up an IPython cluster
This package uses the standard IPython.parallel machinery to execute jobs. You will need to create and configure the
IPython profile that you want VisTrails to use.
VisTrails is capable of running the ipcontroller and ipengine commands for you to start a controller or a set
of engines locally, but for more complex setups, you can run ipcluster yourself from a terminal with the necessary
options.
4.6.2 Interacting with the cluster
In the Packages/Parallel Flow menu, you will find the following options:
Start new engine processes Use ipengine to start multiple new workers on the machine, using the current IPython
profile. These processes will be shutdown on exit, unless detached using Cleanup
Show information on the cluster Indicates whether we are connected to an IPython controller, the number of engines
in the cluster, and which processes were started locally. Lists some basic information on each engine.
Change profile Selects a different IPython profile. Performs cleanup first if a cluster was connected.
Cleanup started processes Disconnects from the cluster and “forgets” the processes that were started from VisTrails.
It is either possible to terminate them, or to leave them running in the background (for example, to be reuse by
the next VisTrails session).
Request cluster shutdown Sends the shutdown signal to the controller, regardless of whether it was started locally
or not. If accepted, the controller will ask every connected engine to terminate and exit.
Note that when VisTrails is exited, it will shutdown the engines that it started. If it started the controller, it will also
be shutdown, along with every engine that might have connected to it from other machines. To prevent that, use the
100
Chapter 4. Intermediate Concepts and VisTrails Packages
VisTrails Documentation, Release 2.1.4
‘cleanup’ button and choose not to stop them; they will detach from VisTrails and won’t be killed automatically. You
will still be able to use the ‘cluster shutdown’ button explicitely.
4.6.3 The Map module
Map allows you to execute a single module or a Group in parallel using input values taken from a list. It works in
exactly the same way as the regular Map module from the Control Flow package.
Contrary to the standard Map module, the elements of the list will be submitted to the IPython controller which will
execute them in a load-balanced manner on the engines currently connected.
4.7 Connecting to a Database
As an environment for collaborative scientific exploration, VisTrails supports both stand-alone, file-based storage and
relational storage of vistrails. With a relational database supporting VisTrails, multiple users can easily collaborate on
projects without copying files back and forth. At the same time, if you choose to work without being connected to a
database, you can save your work locally to files. Finally, VisTrails can import and export to both types of storage so
you can import a vistrail from the database, save it locally as a file on your computer, make and save changes, and
export those changes back to the database. Remember that because the complete workflow evolution is always saved,
other users will not overwrite your changes, and vice versa. This prevents users from “stepping on each other’s feet.”
By default, VisTrails works with local files stored in the ”.vt” format (essentially compressed XML). You can save a
vistrail as uncompressed XML by saving the file with a ”.xml” extension. When saving a vistrail, the system displays
a standard save dialog. These files have a version associated with them so when the schema for these files may change,
VisTrails will be able to import older versions. The current version of the XML schema can be found in the distribution
at:
vistrails/db/versions/v1_0_2/schemas/xml/vistrail.xsd
where v1_0_2 is the current version.
4.7.1 Setup
As described earlier, VisTrails supports relational database storage as well as file-based storage. Currently, VisTrails
has been tested with MySQL, but in the future, we plan to support most standard relational database systems.
Setting up the database
Before using VisTrails with a relational database, you must have a database installed and have access to create, access,
and modify that database. If you are planning to deploy for institution-wide access, you should consult your system
administrator to determine the correct configuration. The database schema for VisTrails can be found in the distribution
at:
vistrails/db/versions/v1_0_2/schemas/sql/vistrails.sql
where v1_0_2 is the current version. This schema contains a sequence of SQL commands that define the tables
needed for storing vistrails.
After you or someone else has created the database for the vistrails, you will need the following information:
1. hostname: the name or IP address of the machine that stores the database (localhost if it is your own
machine)
2. port: the port number that you connect to the database on
4.7. Connecting to a Database
101
VisTrails Documentation, Release 2.1.4
3. user: the username that should be used to access and modify the vistrails database
4. password: the password for the account corresponding to the given user
5. database name: the name of the database where the vistrails are to be stored.
Setting up VisTrails
If you are planning to use the database for most of your work, you can configure VisTrails to open vistrails from
the database by default. To do so, select the Preferences option from the Edit menu. (On Mac OS X, the
Preferences option is found under the VisTrails menu.) When the Preferences window opens, select the
appropriate option from the “Read/Write to database by default” box in the General Configuration tab.
4.7.2 Opening from a database
To open a vistrail from a relational database, choose the Import option from the File menu. You should see a
dialog like the one pictured in Figure Opening a vistrail from the database. (Alternatively, if you have set VisTrails to
use a relational database by default (see Section Setting up VisTrails), then you should select File → Open from the
menu or the Open button on the toolbar.)
If you have previously connected to databases using VisTrails, you should see a list of these databases in the left
column of the dialog. If not, you will need to add one. To do so, click the + icon in the lower-left corner. This will
bring up a dialog like that shown in Figure Creating a new database connection. To set up a connection, you will need
the database connection information outlined in Section Setting up the database. After filling in that information, you
can test the connection by clicking the Test button. If the test succeeds, click the Create button to add the database
to the available sources for vistrails.
The database you wish to use should now be listed in the left column. Clicking on that row will query the database
for a list of vistrails available from the database and display them in the right column. To open a vistrail, select the
desired vistrail and click the Open button or simply double-click the vistrail. When the vistrail has loaded, you will
be able to interact with it in exactly the same way as a vistrail loaded from a file.
Figure 4.26: Opening a vistrail from the database
4.7.3 Saving to a database
If you opened a vistrail from the database, the default save action will be to save that vistrail back to the database.
There will be no dialogs displayed—the database the vistrail was loaded from will be automatically updated.
If you opened the vistrail from a file, you will need to select either Save As or Export from the File menu,
depending on whether VisTrails uses the database by default (see Section Setting up VisTrails). You will be shown a
102
Chapter 4. Intermediate Concepts and VisTrails Packages
VisTrails Documentation, Release 2.1.4
Figure 4.27: Creating a new database connection
dialog similar to the one in Figure Saving a vistrail to the database. As discussed in Section Opening from a database,
you can create a new connection to the database or use an existing one. Note that the name of the vistrail must differ
from those already stored on the database, and clicking the Save button will persist the changes to the database.
Figure 4.28: Saving a vistrail to the database
4.7.4 Known Issues
Currently, saving a vistrail to the database will overwrite the vistrail currently stored on the database. However, we
plan to add synchronization soon so that all explorations are captured. Thus, be aware that if two users have the same
vistrail loaded from the database at the same time, and both users save their changes, only the second user’s changes
will be captured.
4.8 Example: Web Services
A web service grants you programmatic access to an online data source via a straightforward API. In this chapter, you
will learn how to invoke web services from within VisTrails workflows. We will build a simple workflow that invokes
a web service and generates an HTML table with the results. Our current example is intentionally simple; for more
in-depth examples, please refer to the VisTrails website.
Where we’re going in this chapter: The European Bioinformatics Institute maintains ChEBI, 1 a database of over
15,000 chemical compounds. Each entity is referenced by a unique ID number, called its chebiID. To see an example
of the kind of queries we will build in this example, go to http://www.ebi.ac.uk/chebi/webServices.do and scroll down
until you find the web form labeled “getCompleteEntity.” (Figure (a) Web browser interface for the ChEBI database).
1
ChEBI is an acronym for Chemical Entities of Biological Interest.
4.8. Example: Web Services
103
VisTrails Documentation, Release 2.1.4
If you type 15357 into the text field, it will return a long string of data in XML format about this chemical. We learn,
among other things, that this chemical’s name is acetylenedicarboxylate(-2).
To try another query, scroll down to the area labeled “getOntologyChildren” and type 15357 into the text field. This
returns an XML representation of this chemical’s ontology children. In this case, the result is a single chemical,
acetylenedicarboxylate(-1), whose chebiID is 30782 (Figure (b) Results from a “getOntologyChildren” query).
Figure 4.29: (a) Web browser interface for the ChEBI database
Figure 4.30: (b) Results from a “getOntologyChildren” query
In this example, we will build a workflow that accesses a web service to perform the second of these two queries.
Because we’re using a web service, we don’t need a browser — we will perform this query programmatically within
VisTrails.
104
Chapter 4. Intermediate Concepts and VisTrails Packages
VisTrails Documentation, Release 2.1.4
4.8.1 Enabling the SUDSWebServices Package
In order to use web services in VisTrails, you need to ensure that the SUDSWebServices package is enabled in
the Preferences dialog. (Please refer to Chapter Writing VisTrails Packages for more information on enabling
packages.)
4.8.2 Adding Web Service Packages
Within the Module Packages tab of the Preferences dialog, click the Configure button to open the configuration dialog for this package (SUDSWebServices). Select the wsdlList and click on the Value field. This
is where you will enter the URL(s) of the web service(s) you wish to access. If there is more than one URL, place a
semicolon (;) between each URL, but not after the final URL. In other words, the URLs must be semicolon-delimited,
but not semicolon-terminated.
For our example, we need the following URL:
http://www.ebi.ac.uk/webservices/chebi/2.0/webservice?wsdl
After closing the dialog, you need to reload the SUDSWebServices package in order to load the changes. Then,
close the Preferences dialog. A new package will be created for each URL provided.
Alternatively, you may add a web service package by clicking the secondary mouse button on the “SUDS Web Services” package in the module palette and entering the corresponding URL. You may remove a web service by clicking
the secondary mouse button on the corresponding package in the module palette and selecting Remove this Web
Service.
Figure 4.31: The available modules in the webServices module are shown in the Modules panel.
4.8.3 Creating a new vistrail
After configuring the SUDSWebServices package properly, there will be a SUDSWebServices entry in your
Modules panel. The SUDSWebServices package will generate a module for each published method in a web
service.
Start with a new empty workflow in the Pipeline view, and drag the following modules to the canvas.
4.8. Example: Web Services
105
VisTrails Documentation, Release 2.1.4
• String (under “Basic Modules”)
• getOntologyChildren (under “Methods” for the current web service)
• getOntologyChildrenResponse (under “Types” for the current web service)
• OntologyDataItemList (under “Types” for the current web service)
• PythonSource (under “Basic Modules”)
• RichTextCell (under “Spreadsheet”)
As discussed in Chapter Creating and Modifying Workflows, PythonSource has no input and output ports by
default; we need to create some. Open the configuration dialog for PythonSource by selecting this module in
the pipeline canvas and typing ‘Ctrl-E’. Add a new input port named “ontologyDataItemList” of type List, and a
new output port named “outfile” of type File. (Please refer to Chapter Creating and Modifying Workflows for more
information about configuring and using the PythonSource module.)
We will now add some Python code to this module. This code generates a simple HTML table based on the information
retrieved from the web service query. Type or paste the following source code into the PythonSource configuration
dialog:
dataitemlist = self.get_input("ontologyDataItemList")
output1 = self.interpreter.filePool.create_file()
f1 = open(str(output1.name), "w")
text = "<HTML><TITLE>Chebi WebService</TITLE><BODY BGCOLOR=#FFFFFF>"
f1.write(text)
text = "<H2>getOntologyChildren Query</H2><BR>"
f1.write(text)
text = "<CENTER><table border = 1><tr><TH>ChebiId</TH> <TH>ChebiName</TH>"
text += "<TH>Comments</TH> <TH>Type</TH> <TH>Status</TH>"
text += "<TH>CyclicRelationship</TH></tr>"
f1.write(text)
for element in dataitemlist:
if not hasattr(element,’Comments’) or str(element.Comments) == ’[]’:
comment = ""
else:
comment = str(element.Comments)
line = "<tr><td>" + str(element.chebiId) + "</td><td>" + str(element.chebiName)
line += "</td><td>" + comment + "</td><td>" + str(element.type) + "</td><td>"
line += str(element.status) + "</td><td>" + str(element.cyclicRelationship)
line += "</td></tr>"
f1.write(line)
text = "</table></CENTER></BODY></HTML>"
f1.write(text)
self.set_output("outfile",output1)
f1.close()
Close the dialog. One of the ports we need to use is an optional port. Select the OntologyDataItemList
module and select the Outputs tab from the Module Information panel. Click in the left column next to
ListElement so the eye icon appears. Now connect the modules together as shown in Figure Our example pipeline.
Our workflow is now complete except for one crucial element: the starting point. We need to pass a chebiID string to
the workflow in order to look up information about a chemical. We do this by assigning a chebiID string to the String
module at the top of the pipeline. Highlight the String module in the canvas, then in the Module Information
panel on the right, make sure the Inputs tab is selected and click on value and type CHEBI:15357 into the
String input box that comes up.
106
Chapter 4. Intermediate Concepts and VisTrails Packages
VisTrails Documentation, Release 2.1.4
Figure 4.32: Our example pipeline
4.8.4 Executing the workflow
The workflow is now ready to be visualized. Click the Execute button to send the current pipeline with the current
parameters to a RichTextCell within the VisTrails Spreadsheet. Your result should resemble Figure The HTML
table generated by our workflow. As you can see, the “ontology children” query returns the same information as
before, but without the use of a web browser. In addition, we used a small Python program (via the PythonSource
module) to transform the raw XML into a readable HTML table.
4.9 Persistence in VisTrails
The Persistence package in Vistrails helps improve reproducibility by associating versions of data files with their
provenance, and minimize the need to rerun lengthy executions by keeping intermediate persistent files. Although, we
will focus primarily on the use of persistent files, persistent directories are used in the same manner. The difference is
that a persistent directory deals with multiple files within a directory rather than a single file.
4.9.1 Getting Started With Persistence
A persistent file is simply a file that is kept in a repository and identified by an id and version string and annotated with
a signature and content hash. To begin, notice that there are three persistent file/directory types: input, intermediate,
and output. It is helpful to understand the differences among these files as well as their distinguishing characteristics
and configuration options.
4.9. Persistence in VisTrails
107
VisTrails Documentation, Release 2.1.4
Figure 4.33: The HTML table generated by our workflow
Input Files
To use a persistent input file, after dragging it onto the canvas, it is necessary to edit the configuration (Ctrl+E). For
an input file, one can either create a new reference to an existing local file, or use a file that exists in the database. To
create a new reference, select Create New Reference and either enter the path to the file, or select the folder
icon on the right to browse local directories for a file. Then, give the file a name and any appropriate tags to help
identify the file. Select OK. The file will be added to the repository. If the file is already in the repository, select Use
Existing Reference and select the appropriate file. You may use the search box to search for particular files by
name, tag, ID, or content hash.
Note
A new version of a persistent file is created each time its contents change. A persistent input file will always use
the most recent version of a file if it is assigned to the root of the file tree.
The PersitentInputFile module can also be used to read or write data directly from or to a local file. To use
this feature, you will need to set localPath to point to a local file. This can be done in the Set Methods Panel,
the Configuration Dialog, or by connecting a file to the localPath input port. Then, the local file will be read when
readLocal is set to true and written when writeLocal is set to true. To do this using the Configuration Dialog, select
Keep Local Version, enter the file location or click on the folder icon to select a file, then select Read From
Local Path.
Output Files
To use a persistent output file, after dragging it onto the canvas, it is necessary to edit the configuration (Ctrl+E). Notice
that the Configuration Dialog for the output file is the same as that of the input file except that an option to Always
Create New Reference exists. Selecting this new option will cause a new file to be created and added to the
persistent store each time the workflow is executed. The new file does not get a name or tag, so it can be difficult to
identify the newly created file.
If you prefer to have a new version of the file created each time the workflow is changed rather than executed, you
should choose either of the other options (Create New Reference, or Use Existing Reference). The
other two options and the option to read from or write to a local path are used in the same manner as with the input
file. However, when the input file is read from a local path, it is not also read from the persistent store. In contrast,
108
Chapter 4. Intermediate Concepts and VisTrails Packages
VisTrails Documentation, Release 2.1.4
when an output file is written to a local path, it is also written to the selected entry in the persistent store.
Intermediate Files
An intermediate file is the same as the output file except that its contents can be used in further calculations. Thus,
lengthy computations upstream of the intermediate file will only be recalculated when the upstream workflow changes,
but will not need to be rerun when only the downstream workflow changes. Intermediate files by default are set to
always create a new reference. Since these files do not need to be manually annotated or named, configuration is
optional, but is the same as the output file configuration.
4.9.2 Using the Output of One Workflow as Input for Another
You need to configure the persistence modules using the module’s configuration dialog. After adding a PersistentOutputFile to the workflow, click on the triangle in the upper-right corner of the PersistentOutputFile, and select “Edit
Configuration” from the menu that appears. In this dialog, select “Create New Reference” and give the reference a
name (and any space-delimited tags). Upon running that workflow, the data will be written to the persistent store. In
the second workflow where you wish to use that file, add a PersistentInputFile and go to its configuration dialog in the
same manner as with the output file. In that dialog, select “Use Existing Reference” and select the data that you just
added in the first workflow from the list of files below. Now, when you run that workflow, it will grab the data from
the persistent store.
4.9.3 Managing Files in the Store
You may manage the files in the store by selecting Packages -> Persistence -> Manage Store. You
are then free to save files from the store to local files, or delete files from the store. However, please be aware that
files deleted from the store are not recoverable. Also, for versioned files, a specific version of a file can not be deleted
without deleting all versions of that file. To delete all versions of the file, select the root version and press Delete.
4.9.4 Examples
4.9. Persistence in VisTrails
109
VisTrails Documentation, Release 2.1.4
Try it Now!
Base Workflow
1. Drag the following modules to the canvas and connect them in the order in which they are
named: DownloadFile, vtkUnstructuredGridReader, vtkDataSetMapper, vtkActor,
vtkRenderer, VTKRenderOffscreen. Refer to Figure Example 1.1 to ensure connections are correct.
2. Select the DownloadFile module and set the url to:
http://www.vistrails.org/download/download.php?type=DATA&id=spx.vtk
3. (Optional) Select the vtkRenderer module and select SetBackgroungWidget from the Module
Information’s Inputs tab. Select the background color of your choice.
Persistent Output
4. Switch to the History view and tag the current version as “Base Workflow”. Then, switch back to the
pipeline view.
5. Enable the persistence package.
6. Drag the PersistentOutputFile module to the canvas and connect the output from
VTKRenderOffscreen to its value port. See Figure Example 1.2.
7. With the PersistentOutputFile module selected, press Ctrl-E to edit the module configuration.
8. Select Create New Reference, name it “persistence1_1”, and give it a “Persistent Output” tag.
Select Save.
9. Execute the workflow.
Persistent Input
10. Switch to the History view again and tag the current version as “Persistent Output”. Then, select the root
of the version tree and go back to the pipeline view.
11. Drag the PersistentInputFile and ImageViewerCell modules to the canvas and connect them.
See Figure Example 1.3.
12. Edit the configuration of the PersitentInputFile. Select “Use Existing Reference” and select the
file named “persistence1_1” with the “Persistent Output” tag. Select Save. See Figure Example 1.4.
13. Execute the workflow. An image should be displayed in the VisTrails spreadsheet.
Persistent Intermediate
14. Switch to the History view and tag the version with “Persistent Input”, then select the “Base Workflow”
version and switch to the pipeline view again.
15. Drag the PersistentIntermediateFile and ImageViewerCell modules to the canvas and
connect them as shown in Figure Example 1.5.
16. Execute the workflow.
17. In the History view, tag the version with “Persistent Intermediate”. See Figure Example 1.6.
Experimentation
You can now change the background color in the “Persistent Output” version and execute the pipeline. The
changes should show up when you execute the pipeline of the “Persistent Input” version. You can also change
the background color in the “Persistent Intermediate” version, but this example merely demonstrates how to use
the module. Performance increase will not be seen here due to the lack of lengthy computations.
110
Chapter 4. Intermediate Concepts and VisTrails Packages
VisTrails Documentation, Release 2.1.4
Example 1.1 - Base Workflow - An example pipeline
without persistence.
Example 1.2 - Persistent Output File
Figure 4.34: Example 1.3 - Persistent Input File
4.10 VisTrails Server Setup
• lets assume that everything is going to be put in the /server dir:
4.10. VisTrails Server Setup
111
VisTrails Documentation, Release 2.1.4
Figure 4.35: Example 1.4 - Selecting an existing reference
112
Chapter 4. Intermediate Concepts and VisTrails Packages
VisTrails Documentation, Release 2.1.4
Figure 4.36: Example 1.5 - Persistent Intermediate File
Figure 4.37: Example 1.6 - The History Tree
4.10. VisTrails Server Setup
113
VisTrails Documentation, Release 2.1.4
$ cd /server
$ mkdir vistrails
• put VisTrails Source in vistrails/ folder:
$ cd vistrails
$ git clone git://vistrails.org:vistrails.git git # or just download the latest release or night
• make a logs dir for the server:
$ mkdir logs
• if you are running the server without crowdLabs or as a remote server, you need to create a media directory with
the following structure:
/path/to/media_dir/
wf_execution/
graphs/
workflows/
vistrails/
medleys/
images/
You
can
run
python scripts/create_server_media_dir_structure.py
/path/to/media_dir to create the directory structure automatically.
• Determine how you will start the vistrails server. You have a choice of using Xvfb or not. If you use it,
/server/vistrails/git/scripts/start_vistrails_xvfb.sh is what you will use, otherwise, use start_vistrails.sh
Using Xvfb is slower and not recommended if your workflows will make use of volume rendering or other graphicscard intensive techniques.
4.10.1 Using Xvfb
• edit /server/vistrails/git/scripts/start_vistrails_xvfb.sh file and make sure it is consistent with your system setup:
LOG_DIR=/server/vistrails/logs
Xvfb_CMD=/usr/bin/Xvfb
VIRTUAL_DISPLAY=":6"
VISTRAILS_DIR=/server/vistrails/git/vistrails
ADDRESS="<your_server.com>"
PORT="8081" #the port where the server will listen for requests
CONF_FILE="server.cfg"
NUMBER_OF_OTHER_VISTRAILS_INSTANCES="1"
MULTI_OPTION="-M" #execute the main instance multithreaded
• The setup above will execute 2 instances of the server. You can add more instances by changing the variable
NUMBER_OF_OTHER_VISTRAILS_INSTANCES. When using multiple instances, the ports and virtual displays will be used incrementally, so if the main instance is using port 8081 and virtual display :6, the next
instance will use port 8082 and virtual display :7, and so on.
4.10.2 Connecting to X server directly
• If you decide no to use Xvfb, edit /server/vistrails/git/scripts/start_vistrails.sh file and make sure it is consistent
with your system setup:
114
Chapter 4. Intermediate Concepts and VisTrails Packages
VisTrails Documentation, Release 2.1.4
LOG_DIR=/server/vistrails/logs
VISTRAILS_DIR=/server/vistrails/git/vistrails
ADDRESS="<your_server.com>"
PORT="8081" #the port where the server will listen for requests
CONF_FILE="server.cfg"
NUMBER_OF_OTHER_VISTRAILS_INSTANCES="2"
MULTI_OPTION="-M" #execute the main instance multithreaded
• The setup above will execute 3 instances of the server. You can add or remove more instances by changing the
variable NUMBER_OF_OTHER_VISTRAILS_INSTANCES. When using multiple instances, the ports will be
used incrementally, so if the main instance is using port 8081, the next instance will use port 8082, and so on.
4.10.3 Basic Configuration
• If the vistrails server will receive requests from the outside world and if you are using a firewall, make sure the
ports used by the vistrails server are open and accessible.
• create a file called server.cfg in /server/vistrails/git/vistrails/ as follows:
[access]
permitted_addresses = localhost, 127.0.0.1, <crowdlabs-server-address>
[media]
media_dir=/server/crowdlabs/site_media/media
[database]
host = <vistrail database address>
read_user = <read user>
read_password = <read password>
write_user = <write user>
write_password = <write user password>
[script]
script_file=/server/vistrails/git/scripts/start_vistrails.sh
virtual_display=<virtual display number>
• change permitted_addresses variable in to include the address of the machine running of the crowdLabs server
(or other machines you want to be able to connect to the server):
[access]
permitted_addresses = localhost, 127.0.0.1, <crowdlabs-server-address>
• Add the password for the full permission mysql user:
write_user = <write user>
write_password = <write user password>
• Configure the full path to the script file and if you are using Xvfb, also specify the virtual display of the main
instance:
[script]
script_file=/server/vistrails/git/scripts/start_vistrails.sh
virtual_display=0 #not using any display
• run vistrails in server mode:
$ cd /server/vistrails/git/scripts
# If you are running Xvfb:
4.10. VisTrails Server Setup
115
VisTrails Documentation, Release 2.1.4
$ ./start_vistrails_xvfb.sh
# Or if you are connecting to X server directly:
$ ./start_vistrails.sh
4.11 Embedding VisTrails Files Via Latex
The VisTrails Latex extension allows you to embed the result from a VisTrails file into a Latex document. Images
to be included in the Latex document will be generated through VisTrails and can be linked to the VisTrails file and
version from which it was generated. In other words, Latex calls VisTrails to generate an image for a resulting PDF
document. The resulting image can be set up so, when clicked, the generated VisTrails file will be opened in VisTrails.
4.11.1 Latex Setup and Commands
This section contains instructions for setting up Latex files to use VisTrails. For a complete example of this setup, you
may also refer to example.tex in VisTrails’ extensions/latex directory.
To use the Latex extension, copy vistrails.sty and includevistrail.py from the extensions/latex directory to the same
directory as your .tex files. Then, add the following line to the beginning of the latex file:
\usepackage{vistrails}
By default, VisTrails will be executed at www.vistrails.org and the images downloaded to your hard drive. This allows
any user that downlods your paper to execute the workflows on the server.
Local Setup
If you want to run a local copy of VisTrails instead, add the following path to your python file or executable:
\renewcommand{\vistrailspath}{/path/to/vistrails/run.py}
Depending on how you are running VisTrails and on which OS you are running, the vistrailspath should be configured appropriately. Please check head.tex in VisTrails’ extensions/latex directory for detailed instructions on the
configuration for the different platforms.
By default, images are set up to link to their corresponding vistrail. This means that on a local setup, clicking on an
image will open the local .vt file or will try to connect to the database if you loaded the vistrail from a database. This
may not work when other users click on the images on different machines. However, if you are using your own web
server, additional setup is required (see Setup For Use With Files on MediaWiki or a Web Server). Otherwise, to setup
the images without links (not clickable), add:
\renewcommand{\vistrailsdownload}{}
Finally, if you are running VisTrails from source and don’t have python on your path, use this to set the python
interpreter:
\renewcommand{\vistrailspythonpath}{/path/to/python/executable}
Note: If you set the vistrailspythonpath to an invalid path VisTrails will use cached files if they exist.
Setup For Use With Files on MediaWiki or a Web Server
Many VisTrails files and/or data are stored in a database that readers of a pdf document might not have access to. If the
files are also accessible through the web, the following instructions explain setup that will allow readers to download
the VisTrail or workflow through MediaWiki or a web server.
116
Chapter 4. Intermediate Concepts and VisTrails Packages
VisTrails Documentation, Release 2.1.4
MediaWiki
To setup your MediaWiki for use with VisTrails:
• In your wiki/extensions folder, create a config.php file based on the config.php.sample file located in VisTrails’
extensions/http folder.
• Copy download.php, functions.php, and vistrailsExtension.php from the extensions/mediawiki folder to your
wiki/extentions folder and update these files according to your needs.
• Configure your .tex files with:
\renewcommand{\vistrailsdownload}{http://yourwebserver.somethingelse/download.php}
Web Server
To configure VisTrails to run on your web server:
• Create a config.php file based on the config.php.sample file located in VisTrails’ extensions/http folder.
• Copy functions.php and downloads.php from the extensions/mediawiki folder and update them according to
your needs.
• Depending on the functionality you want to make available, copy any or all of the following files:
– run_vistrails.php - will execute workflows and return images and pdf files
– get_db_vistrail_list.php - will return a list of VisTrails available in the database
– get_vt_xml.php - will return a VisTrail in xml format
– get_wf_pdf.php - will return a workflow graph in pdf format
– get_wf_xml.php - will return a workflow in xml format
• Configure your .tex files with:
\renewcommand{\vistrailspath}{http://yourwebserver.somethingelse/run_vistrails.php}
\renewcommand{\vistrailsdownload}{http://yourwebserver.somethingelse/download.php}
4.11.2 Including VisTrails Results in Latex
There are two ways of including VisTrails’ objects in a Latex file. Usually you start with a workflow in a vistrail (the
vistrail can be loaded from a file or from a database):
• In History view, select the version node representing the workflow.
• In Pipeline view, ensure that the workflow is being displayed.
Now you can select Publish → To Paper... to launch a dialog with embedding options (see Figure Embedding
Options).
Then perform the following steps:
• Select the type of object that you would like to display. The choices are: Workflow Results, Workflow Graph,
and History Tree Graph.
• Make sure that Latex is displayed in the In: combobox.
• You should then choose from a number of “Embed” and “Download” options which will be explained in the
tables below.
• Press the “Copy to Clipboard” button
• Paste clipboard contents into you Latex document
4.11. Embedding VisTrails Files Via Latex
117
VisTrails Documentation, Release 2.1.4
Figure 4.38: Embedding Options
118
Chapter 4. Intermediate Concepts and VisTrails Packages
VisTrails Documentation, Release 2.1.4
• Run pdflatex with the -shell-escape option: pdflatex -shell-escape example.tex.
Note on using local VisTrails files: Relative or absolute filenames can be used in the .tex file, but absolute filenames
are used in the pdf. Thus, if the absolute location of the file has changed, the pdf will need to be regenerated even if
the relative location of the file has not changed. Also, the VisTrails Embed function assumes the .vt file is in the same
directory as the .tex file. You will need to change this to an absolute filename if it is not.
Table 4.1: Configuration Options
Option
Workflow Results
Latex Flag
version=<...>
Description
Show the results of the specified version.
Workflow Graph
version=<...>
showworkflow
Show the workflow instead of the results.
History Tree Graph
showtree
Show the version tree instead of the results.
Table 4.2: Embed Options
Option
As PDF
Latex Flag
pdf
Description
Download images as pdf files. If this is not checked,
a png image is used.
Smart Tag
tag=<...>
Allows you to include a version’s tag. If a tag is provided, version can be omitted and buildalways is implicit.
Cache Images
buildalways (do not
include for caching)
When caching desired, the buildalways flag should
not be included. If it is included, VisTrails will be
called regardless of whether or not it has been called
for the same host, db, version, port and vt_id.
Include .vtl
getvtl
Causes the .vtl file to be downloaded when compiling
the pdf file. This is useful when you want to package
the workflows together with your paper for archiving.
Table 4.3: Download Options
Option
Include Workflow
Latex Flag
embedworkflow
Description
When clicking on the image in the pdf, download the
workflow only.
Execute Workflow
execute
Will cause the workflow to be executed when it is
opened.
Include Full Tree
includefulltree
When clicking on the image, download the complete
VisTrail.
Show Spreadsheet
Only
showspreadsheetonly
When opening the workflow it will initially only show
the spreadsheet. The execute option is implicit.
Example
The following is an example command for including the execution results the workflow aliases from examples/head.vt in a pdf and caching the images. When clicking on the images, the user will start VisTrails showing
only the spreadsheet:
4.11. Embedding VisTrails Files Via Latex
119
VisTrails Documentation, Release 2.1.4
\vistrails[filename=head.vt,
version=15,
pdf,
execute,
showspreadsheetonly,
]{width=0.45\linewidth} %Options you would give to the \includegraphics{}
command.
See head.tex in the extensions/latex directory for a complete example of usage.
Additional Notes
After running at least once, VisTrails will cache the images and latex instructions. The latex code will be in the
“cached” folder and the images in vistrails_images.
Vistrails will create in the current directory a directory called vistrails_images/filename_version_options with the
png/pdf files generated by the spreadsheet.
4.11.3 Including crowdlabs.org workflow results in Latex
It is also possible to embed results of workflows that are in www.crowdlabs.org.
To use the crowdLabs extension, copy crowdlabs.sty and includecrowdlabs.py from the extensions/latex directory to
the same directory as your .tex files. Then, add the following line to the beginning of the latex file:
\usepackage{crowdlabs}
The vistrail you would like to use must be already in crowdLabs. Visit the page of the workflow, for example, go to:
http://www.crowdlabs.org/vistrails/workflows/details/1046/
And click on the Embed this Workflow tab located below the image. Copy the snippet in the In LaTex box:
\vistrail[wfid=1046,
buildalways=false]{width=4cm}
And paste it in the latex file.
Currently crowdLabs supports only embedding workflow results in the png format. Do not use this extension together
with the vistrails extension above.
120
Chapter 4. Intermediate Concepts and VisTrails Packages
Part II
Developer’s Guide
121
CHAPTER
FIVE
WRITING VISTRAILS PACKAGES
5.1 Introduction
VisTrails provides a plugin infrastructure to integrate user-defined functions and libraries. Specifically, users can
incorporate their own visualization and simulation code into pipelines by defining custom modules (or wrappers).
These modules are bundled in what we call packages. A VisTrails package is simply a collection of Python classes
stored in one or more files, respecting some conventions that will be described shortly. Each of these classes will
represent a new module. In this chapter, we will build progressively more complicated modules. Note that even
though each section introduces a specific large feature of the VisTrails package mechanism, new small features are
highlighted and explained as we go along. Because of this, we recommend at least skimming through the entire chapter
at least once.
5.2 Who Should Read This Chapter?
This chapter is written for developers who wish to extend VisTrails with customized modules, tailored for their specific
needs. It is assumed that you have experience writing code in the Python programming language. Teaching the syntax
of Python is beyond the scope of this manual; for experienced programmers who would like a compact introduction to
Python, we recommend the book Python in a Nutshell by Alex Martelli (published by O’Reilly).
However, if you do not yet know Python but are familiar with another object-oriented language such as Java or C#, you
should be able to get the gist of these examples from looking at the code and by reading our line-by-line commentaries.
5.3 An Example Module
Here is the definition of a very simple module:
1
2
3
4
5
6
7
8
9
10
class Divide(Module):
_input_ports = [IPort(name=’arg1’,\
signature=’basic:Float’,\
label="dividend"),
IPort(name=’arg2’,\
signature=’basic:Float’,\
label=’divisor’)]
_output_ports = [OPort(name=’result’,\
signature=’basic:Float’,\
label=’quotient’)]
11
12
def compute(self):
123
VisTrails Documentation, Release 2.1.4
arg1 = self.get_input("arg1")
arg2 = self.get_input("arg2")
if arg2 == 0.0:
raise ModuleError(self, "Division by zero")
self.set_output("result", arg1 / arg2)
13
14
15
16
17
New VisTrails modules must subclass from Module, the base class that defines basic functionality. The only required
override is the compute() method, which performs the actual module computation. Input and output is specified
through ports, which must be explicitly registered with VisTrails using the _input_ports and _output_ports
lists. Simple ports are specified using InputPort (IPort) and OutputPort (OPort) objects.
5.4 An Example Package
The previous section only shows the definition of a single module. To create a full package that loads and runs in
VisTrails, a few more items are required. In this example, we define a basic calculator package named PythonCalc.
Note that this package includes two files, __init__.py and init.py that live in a directory named pythonCalc;
each file is an important piece of a VisTrails package.
__init__.py
1
2
3
"""This package implements a very simple VisTrails module called
PythonCalc. This is intended as a simple example that can be referred
to by users to create their own packages and modules later.
4
5
6
7
8
If you’re interested in developing new modules for VisTrails, you
should also consult the documentation in the User’s Guide and in
core/modules/vistrails_module.py.
"""
9
10
11
12
identifier = ’org.vistrails.vistrails.pythoncalc’
name = ’PythonCalc’
version = ’0.9.2’
init.py
1
2
3
4
5
6
7
8
9
10
11
###############################################################################
# PythonCalc
#
# A VisTrails package is simply a Python class that subclasses from
# Module. For this class to be executable, it must define a method
# compute(self) that will perform the appropriate computations and set
# the results.
#
# Extra helper methods can be defined, as usual. In this case, we’re
# using a helper method op(self, v1, v2) that performs the right
# operations.
12
13
14
from vistrails.core.modules.vistrails_module import Module, ModuleError
from vistrails.core.modules.config import IPort, OPort
15
16
17
18
class PythonCalc(Module):
"""PythonCalc is a module that performs simple arithmetic operations
on its inputs."""
19
# You need to report the ports the module wants to make
# available. This is done by creating _input_ports and
# _output_ports lists composed of InputPort (IPort) and OutputPort
20
21
22
124
Chapter 5. Writing VisTrails Packages
VisTrails Documentation, Release 2.1.4
23
24
25
26
27
28
29
30
31
32
33
34
35
36
37
# (OPort) objects. These are simple ports that take only one
# value. We’ll see in later tutorials how to create compound ports
# which can take a tuple of values. Each port must specify its
# name and signature. The signature specifies the package
# (e.g. "basic" which is shorthand for
# "org.vistrails.vistrails.basic") and module (e.g. "Float").
# Note that the third input port (op) has two other arguments.
# The "enum" entry_type specifies that there are a set of options
# the user should choose from, and the values then specifies those
# options.
_input_ports = [IPort(name="value1", signature="basic:Float"),
IPort(name="value2", signature="basic:Float"),
IPort(name="op", signature="basic:String",
entry_type="enum", values=["+", "-", "*", "/"])]
_output_ports = [OPort(name="value", signature="basic:Float")]
38
39
40
41
42
43
44
# This constructor is strictly unnecessary. However, some modules
# might want to initialize per-object data. When implementing your
# own constructor, remember that it must not take any extra
# parameters.
def __init__(self):
Module.__init__(self)
45
46
47
48
49
50
51
52
53
54
# This is the method you should implement in every module that
# will be executed directly. VisTrails does not use the return
# value of this method.
def compute(self):
# get_input is a method defined in Module that returns
# the value stored at an input port. If there’s no value
# stored on the port, the method will return None.
v1 = self.get_input("value1")
v2 = self.get_input("value2")
55
56
57
58
59
60
61
62
# You should call set_output to store the appropriate results
# on the ports. In this case, we are only storing a
# floating-point result, so we can use the number types
# directly. For more complicated data, you should
# return an instance of a VisTrails Module. This will be made
# clear in further examples that use these more complicated data.
self.set_output("value", self.op(v1, v2))
63
64
65
66
67
68
69
70
71
72
73
74
75
76
77
78
def op(self, v1, v2):
op = self.get_input("op")
if op == ’+’:
return v1 + v2
elif op == ’-’:
return v1 - v2
elif op == ’*’:
return v1 * v2
elif op == ’/’:
return v1 / v2
# If a module wants to report an error to VisTrails, it should raise
# ModuleError with a descriptive error. This allows the interpreter
# to capture the error and report it to the caller of the evaluation
# function.
raise ModuleError(self, "unrecognized operation: ’%s’" % op)
79
80
# VisTrails will only load the modules specified in the _modules list.
5.4. An Example Package
125
VisTrails Documentation, Release 2.1.4
81
82
# This list contains all of the modules a package defines.
_modules = [PythonCalc,]
To create and install this package in VisTrails, first create a new directory named pythonCalc in the
.vistrails/userpackages subdirectory of your home directory. Then, save the two code blocks above to
the corresponding __init__.py and init.py files in the newly created pythonCalc directory. Now, click on
the Edit menu (or the VisTrails menu on Mac OS X), select the Preferences option and select the Module
Packages tab. A dialog similar to what is shown in Figure All available packages... should appear. Select the
pythonCalc package, then click on Enable. This should move the package to the Enabled packages list.
Close the dialog. The package and module should now be visible in the VisTrails builder.
Figure 5.1: All available packages can be enabled and disabled with the VisTrails preferences dialog.
Now create a workflow similar to what is shown in Figure A simple workflow that uses PythonCalc.... When executed,
this workflow will print the following on your terminal:
7.0
Let’s now examine how this works. The __init__.py file provides metadata about the package. Version is simply information about the package version. This might be tied to the underlying library or not. The only recommended
guideline is that compatibility is not broken across minor releases, but this is not enforced in any way. Name is a
human-readable name for the package.
The most important piece of metadata, however, is the package identifier, stored in the variable called identifier.
This is a string that must be globally unique across all packages, not only in your system, but in any possible system.
We recommend using an identifier similar to Java’s package identifiers. These look essentially like regular DNS names,
but the word order is reversed. This makes sorting on the strings a lot more meaningful. You should generally go for
126
Chapter 5. Writing VisTrails Packages
VisTrails Documentation, Release 2.1.4
Figure 5.2: A simple workflow that uses PythonCalc, a user-defined module.
institution.project.packagename for a package related to a certain project from some institution, and
institution.creatorname for a personally developed package. If you are wrapping third-party functionality,
do not use their institution’s DNS, use your own. The rationale for this is that the third party itself might decide to
create their own VisTrails package, and you do not want to introduce conflicts.
The init.py file contains the actual definitions of the modules.
Every VisTrails module corresponds to a Python class that ultimately derives from the Module class, which is defined in
vistrails.core.modules.vistrails_module. Each module must define input ports and output ports
as well as implement a compute() method that takes no extra parameters.
We need to tell VisTrails about the input and output ports we want to expose in a module. Input ports are set in the
_input_ports list and output ports in the _output_ports list. Each object in these lists is defined from a
type from vistrails.core.modules.config. The most basic port types are InputPort (aka IPort) and
OutputPort (aka OPort). Each requires two arguments, the name of the port and the signature of the port. A name
may be any string, but must be unique across all inputs or outputs. The same name may be used both for an input
and an output. The signature defines the type of the port; VisTrails allows any module to also be a type. A signature
is a string composed of the module’s package identifier followed by a colon and the module’s name. Many basic
module types including String, Float, and Integer are defined by VisTrails in the Basic Modules package.
Thus, the Float module’s signature is org.vistrails.vistrails.basic:Float. Any core package that
is distributed with VisTrails has an identifier that begins org.vistrails.vistrails and thus you may omit
that prefix for brevity; basic:Float defines the same signature. There are a number of other options for ports, but
we will cover these later.
The compute method on Line 49 defines the actual computation that happens in a module. This computation typically
involves getting the necessary input and generating the output. Lines 53-54 shows how to extract input from a port.
Specifically, we’re getting the values passed to input ports value1 and value2. We then perform some operation
with these values, and need to report the output on an output port, so that it is available for downstream modules. This
is done on Line 62, where the result is set to port value.
Let us now look more carefully at the remainder of the class definition. Notice that developers are allowed to define
extra helper methods, for example the op method on Line 64. These helper methods can naturally use the ports API.
5.4. An Example Package
127
VisTrails Documentation, Release 2.1.4
The other important feature of the op method is error checking. PythonCalc requires a string that represents the
operation to be performed with the two numbers. If the string is invalid, it signals an error by simply raising a Python
exception, ModuleError, that is provided in vistrails.core.modules.vistrails_module. This exception expects two parameters: the module that generated the exception (typically self) and a string describing the
error. In the Pipeline view, this error message is displayed in the tooltip that appears when the user moves the cursor
over the PythonCalc module icon.
The final step is to specify the list of modules your package defines. This is done via the _modules list which is
simply a list of all the modules the package wishes to define. Leaving a class out of that list will mean it will not appear
as an available module for use in VisTrails. That is it — you have successfully created a new package and module.
From now on, we will look at more complicated examples, and more advanced features of the package mechanism.
Note
Older versions of VisTrails used explicit calls to the ModuleRegistry in an initialize() method.
These calls like ModuleRegistry.add_module(), ModuleRegistry.add_input_port(), and
ModuleRegistry.add_output_port() are still supported though their use is discouraged as the new
syntax places all attributes and configuration options in the module definition, making code more readable and
localized. The arguments available in the registry functions are mirrored in the new configuration objects used
for _settings, _input_ports, and _output_ports.
5.5 Package Specification
5.5.1 Structure
A package should contain the following files inside a directory named for the package:
• __init__.py – identifiers and configuration
• init.py – modules, other imports
Optionally, it might also contain:
• identifiers.py – the identifers might be specified here and imported in __init__.py
• widgets.py – any GUI widgets the package’s modules use
• any other files and/or python submodules that the package depends on in
The reason for the separation between __init__.py and init.py is that VisTrails inspects packages for identification, configurations, and information to populate the list of available packages, and for large packages with
dependent libraries, including everything (including the subpackage imports) in __init__.py would take significant time. Thus, we encourage package developers to define modules and include sub-imports only from init.py to
speed up loading times. The optional identifiers.py allows developers to import configuration information, like
the identifier and version, into both __init__.py and init.py. Then, __init__.py may consist of the line
from identifiers import *. widgets.py is a suggested separation between GUI configuration widgets
and the module definitions because VisTrails can run in batch mode or as a python package without Qt/PyQt, and if the
widgets are imported into or defined from init.py, VisTrails will unnecessarily try to import the Qt/PyQt libraries.
Instead, modules can define their configuration widgets as path strings (see Configuration Widgets ), and the widgets
will only be imported when the GUI is running.
Most third-party packages should be installed into a user’s ∼/.vistrails/userpackages directory. The package’s codepath is the name of the directory in that userpackages directory. A few third-party packages install
into the packages directory of the VisTrails codebase due to specific dependencies or to install for all users of the
application. If you are interested in such installation features, please contact us.
128
Chapter 5. Writing VisTrails Packages
VisTrails Documentation, Release 2.1.4
The identifier, name, version, configuration, and package_dependencies fields/methods should be specified or imported
into __init__.py. An example of __init__.py from VisTrails‘ matplotlib package follows.
1
2
3
4
identifier = ’org.vistrails.vistrails.matplotlib’
name = ’matplotlib’
version = ’1.0.1’
old_identifiers = [’edu.utah.sci.vistrails.matplotlib’]
5
6
7
8
9
10
11
12
def package_dependencies():
import vistrails.core.packagemanager
manager = vistrails.core.packagemanager.get_package_manager()
if manager.has_package(’org.vistrals.vistrails.spreadsheet’):
return [’org.vistrails.vistrails.spreadsheet’]
else:
return []
13
14
15
16
17
18
19
def package_requirements():
import vistrails.core.requirements
if not vistrails.core.requirements.python_module_exists(’matplotlib’):
raise vistrails.core.requirements.MissingRequirement(’matplotlib’)
if not vistrails.core.requirements.python_module_exists(’pylab’):
raise vistrails.core.requirements.MissingRequirement(’pylab’)
The old_identifiers field is used to identify packages whose identifiers have changed. This allows VisTrails
to migrate old vistrails to the new packages. Other imports (excluding vistrails.core.configuration), other class definitions, and the initialize method should be in the init.py file.
5.5.2 Configuration
In addition to “pure-python” packages, VisTrails packages can also be designed to wrap existing libraries and
command-line tools (see Wrapping Command-line tools for more information). For command-line tools, there are
often some configuration options that may change from machine to machine. In addition, there may also be flags
(e.g. for debugging) that a user may wish to toggle on or off depending on the situation. VisTrails provides the
configuration package attribute for such situations; the ConfigurationObject stored here is accessible
both during module computations and from the GUI in the Preferences dialog.
In the following example, we have some code from a package designed to control runs of afront, a command-line
program for generating 3D triangle meshes. 1 It uses a general run() method to run each command, and we use the
configuration object to determine where the executable lives and whether we should print debugging information.
1
import os
2
3
4
5
from vistrails.core.configuration import ConfigurationObject
from vistrails.core.modules.vistrails_module import Module, ModuleError
from vistrails.core.system import list2cmdline
6
7
8
configuration = ConfigurationObject(path=(None, str),
debug=False)
9
10
class AfrontRun(object):
11
12
13
14
15
def run(self, args):
if configuration.check(’path’): # there’s a set directory
afront_cmd = os.path.join(configuration.path, ’afront’)
else: # Assume afront is on path
1 This package is not included in binary distributions of VisTrails, but is available in the source code distribution. The stand-alone Afront
utility is available at http://afront.sourceforge.net.
5.5. Package Specification
129
VisTrails Documentation, Release 2.1.4
afront_cmd = ’afront’
cmd = [afront_cmd, ’-nogui’] + args
cmdline = list2cmdline(cmd)
if configuration.debug:
print cmdline
...
16
17
18
19
20
21
22
...
Let us first look at how to specify configuration options. Named arguments passed to the ConfigurationObject
constructor (Lines 6 and 7) become attributes in the object. If the attribute has a default value, simply pass it to the
constructor. If the attribute should be unset by default, pass the constructor a pair whose first element is None and
second element is the type of the expected parameter. Currently, the valid types are bool, int, float and str.
To use the configuration object in your code, you can simply access the attributes (as on line 18). This is fine when
there is a default value set for the attribute. In the case of path, however, the absence of a value is encoded by a
tuple (None, str), so using it directly is inconvenient. That is where the check() method comes in (line 12). It
returns False if there is no set value, and returns the value otherwise.
Perhaps the biggest advantage of using a configuration object is that the values can be changed through a GUI, and
they are persistent across VisTrails sessions. To configure a package, open the Preferences menu (VisTrails→
Preferences on Mac OS X, or Edit → Preferences on other platforms). Then, select the package you want
to configure by clicking on it (a package must be enabled to be configurable). If the Configure button is disabled,
it means the package does not have a configuration object. When you do click Configure, a dialog like the one in
Figure Configuration window for a package... will appear.
Figure 5.3: Configuration window for a package that provides a configuration object.
To edit the value for a particular field, double-click on it, and change the value. The values set in this dialog are
persistent across VisTrails sessions, being saved on a per-user basis.
5.5.3 Menu Items
As we saw in Section Configuration, using the ConfigurationObject class is one way to “hook” your custom
package into the VisTrails GUI. However, this is not the only way to integrate your package with the user interface.
VisTrails also supports a mechanism whereby your package can add new options underneath the Packages menu
(Figure Packages can integrate their own commands...).
This is done by adding a function named menu_items to your main package file. This function takes no parameters,
and should return a tuple of pairs for each new menu item to be added. The first element of each pair is the label of
the menu item as it should appear in the GUI. The second element of the pair is the name of the callback function to
be invoked when the user selects that menu item.
130
Chapter 5. Writing VisTrails Packages
VisTrails Documentation, Release 2.1.4
Figure 5.4: Packages can integrate their own commands into the main VisTrails menu.
As an example, we include below the implementation of menu_items from the VisTrails Spreadsheet package:
1
2
3
4
5
def menu_items():
"""menu_items() -> tuple of (str,function)
It returns a list of pairs containing text for the menu and a
callback function that will be executed when that menu item is selected.
"""
6
7
8
9
10
11
def show_spreadsheet():
spreadsheetWindow.show()
lst = []
lst.append(("Show Spreadsheet", show_spreadsheet))
return tuple(lst)
Writing your own menu_items function is straightforward; simply use the provided example as a basis, and substitute labels and callback functions as appropriate for your specific module. Although the Spreadsheet package currently
only implements one new menu option, you are free to add as many as you see fit; just append additional pairs to the
list (see Line 10 of the example code) before the function returns.
The Packages menu is organized hierarchically, as illustrated in Figure Packages can integrate their own commands.... Each package that contributes a menu_items function will receive an entry in the Packages menu. The
actual menu items for each package will appear in a submenu.
5.5.4 Dependencies
When creating more sophisticated VisTrails packages, you might want to create a new module that requires a module
from another package. For example, using modules from different packages as input ports, or even subclassing modules from other packages, require management of interpackage dependencies. VisTrails needs to know about these so
that packages can be initialized in the correct order. To specify these dependencies, you should add a function named
package_dependencies to your package. This function should return a list containing the identifier strings of
the required packages.
As an example of this function’s usage, let’s take a look at a (simplified) code segment from the VTK package, which
is included in the standard VisTrails distribution:
1
2
def package_dependencies():
return [’org.vistrails.vistrails.spreadsheet’]
As you can see, the package_dependencies function is quite straightforward; it simply returns a list of the
identifiers for the packages required by the VTK package. In this case, the list contains just a single string, as the
VisTrails Spreadsheet is the only package dependency for the VTK package.
The simple approach taken by the above code works well for the majority of cases, but in practice you may want to
add some error-checking to your package_dependencies function. This allows VisTrails to recover gracefully
in the unlikely event that the Spreadsheet package is missing. Below is the complete package_dependencies
function for the VTK package:
5.5. Package Specification
131
VisTrails Documentation, Release 2.1.4
1
2
3
4
5
6
7
def package_dependencies():
import vistrails.core.packagemanager
manager = vistrails.core.packagemanager.get_package_manager()
if manager.has_package(’org.vistrails.vistrails.spreadsheet’):
return [’org.vistrails.vistrails.spreadsheet’]
else:
return []
The above code segment also demonstrates the VisTrails API function has_package which simply verifies that a
given package exists in the system.
5.5.5 Requirements
In Section Dependencies, we saw how packages can depend on other packages. However, some packages may also
depend on the presence of external libraries (in the form of Python modules) or executable files in order to run correctly.
Python Modules
To check for the presence of a required Python module, you should add a function named
package_requirements to your package. This function need not return any value; however it may raise exceptions or output error messages as necessary. Here is an example of the syntax of the package_requirements
function, taken from the VisTrails VTK package:
1
2
3
4
5
6
7
8
def package_requirements():
import vistrails.core.requirements
if not vistrails.core.requirements.python_module_exists(’vtk’):
raise vistrails.core.requirements.MissingRequirement(’vtk’)
if not vistrails.core.requirements.python_module_exists(’PyQt4’):
print ’PyQt4 is not available. There will be no interaction’,
print ’between VTK and the spreadsheet.’
import vtk
A key element of package_requirements is the use of the function python_module_exists (see Lines 3
and 5), which checks whether a given module has been installed in your local Python system.
Automatically Installation
A more advanced method is to attempt to install a python module automatically using a system package manager. This
method currently works for apt- and rpm-based systems. By using core.bundles.py_import, you can attempt
to automatically install a system dependency, all you need to specify is the python module name and the name of
the package that contains it. The following example can be put in your init.py file, with the desired module and
package names changed:
1
2
3
4
5
6
7
8
from vistrails.core.bundles import py_import
from vistrails.core import debug
try:
pkg_dict = {’linux-ubuntu’: ’your-apt-package’,
’linux-fedora’: ’your-deb-package’}
your-py-module = py_import(’your-py-module’, pkg_dict)
except Exception, e:
debug.critical("Exception: %s" % e)
Note that, if you use this method, you should not specify it in the package_requirements, because that would
block the install attempt.
132
Chapter 5. Writing VisTrails Packages
VisTrails Documentation, Release 2.1.4
Executables
As explained in Section Wrapping Command-line tools, a common motivation for writing new VisTrails modules is to wrap existing command-line tools. To this end, the VisTrails API provides a function called
executable_file_exists which checks for the presence of specific executables on the path.
Here is an example of its usage, taken from the initialize function of the ImageMagick package. This package
is included in the standard VisTrails distribution. The following code snippet checks to see if convert, a commandline program associated with the ImageMagick suite of graphics utilities, is on the path.
1
import vistrails.core.requirements
2
3
...
4
5
6
if (not vistrails.core.requirements.executable_file_exists(’convert’)):
raise vistrails.core.requirements.MissingRequirement("ImageMagick suite")
Note that this function is not strictly required in order to wrap third party executables into a module. Using a
Configuration object (see Section Configuration) that lets the user specify the path to an executable may be
a cleaner solution.
For additional information or examples of any of the functions described above, please refer to the VisTrails source
code or contact the VisTrails development team.
5.5.6 Upgrades
When revising a package, it is important that workflows containing old modules can be translated to their corresponding new versions. If no upgrade is explicitly specified, VisTrails attempts to automatically upgrade the old module
to the new version. However, if a module’s interface has changed (e.g. a port was added or removed or the name
was changed), the automated upgrade will fail. For such cases, VisTrails provides hooks for developers to specify the
upgrade paths. The recommended method is to use the _upgrades attribute in the package to specify a dictionary
where each key is a module name and the corresponding value is a list of potential upgrade paths for those modules.
The upgrade path is specified by an UpgradeModuleRemap instance which specifies the versions for which the
upgrade is valid, the output version, the new module, and a set of remaps for module entities. For example,
1
2
3
4
5
6
7
_upgrades = {"TestUpgradeA":
[UpgradeModuleRemap(’0.8’, ’0.9’, ’0.9’, None,
function_remap={’a’: ’aa’},
src_port_remap={’z’: ’zz’}),
UpgradeModuleRemap(’0.9’, ’1.0’, ’1.0’, None,
function_remap={’aa’: ’aaa’},
src_port_remap={’zz’: ’zzz’})]}
Here, we have two upgrade paths for the module TestUpgradeA. The first works for version 0.8 through–but not
including–0.9, and the second for 0.9 to 1.0. The output versions are 0.9 and 1.0, respectively, and both specify
None as the new module type which means that the new module has the same name as the old one. The new module
type could also be a string representing a different module name. There are four remap types: function_remap,
src_port_remap, dst_port_remap, and annotation_remap. Each one is a dictionary where the name
of affected function, port, or annotation is the key and the value specifies either the output name (if this is just a
name change) or a function to be used to perform the remap. For example, one might write a method that transforms
the value of a temperature parameter from Fahrenheit to Celsius. Such a method should return a list of actions that
accomplish this change. Note that because the dst_port_remap and function_remap both affect input ports,
any remaps for dst_port_remap are also used for functions unless explicitly overridden.
If
you
require
more
control
over
the
upgrade
process,
handle_module_upgrade_request method in the VisTrails package.
5.5. Package Specification
you
may
also
define
a
It will be passed the controller,
133
VisTrails Documentation, Release 2.1.4
id of the module needing an upgrade, and the current pipeline as inputs, and should return a set of actions that will
upgrade that single module to the latest version.
5.6 Module Specification
In this section, we will explore different options for specifying modules and associated attributes, including those
which affect their appearance and organization in the GUI. Details about all of the options available for modules can
be found in the VisTrails API Documentation. VisTrails provides the ModuleSettings class to offer a number of
configuration options for modules. A module should define the _settings attribute in the class to use these settings.
5.6.1 Caching
VisTrails provides a caching mechanism, in which portions of pipelines that are common across different executions
are automatically shared. However, some modules should not be shared. Caching control is therefore up to the package
developer. By default, caching is enabled. So a developer that doesn’t want caching to apply must make small changes
to the module. For example, look at the StandardOutput module:
from vistrails.core.modules.vistrails_module import Module, newModule, NotCacheable, ModuleError
from vistrails.core.modules.config import IPort
...
class StandardOutput(NotCacheable, Module):
"""StandardOutput is a VisTrails Module that simply prints the
value connected on its port to standard output. It is intended
mostly as a debugging device."""
_input_ports = [IPort(name="value", signature="basic:Module")]
def compute(self):
v = self.get_input("value")
print v
By subclassing from NotCacheable and Module (or one of its subclasses), we are telling VisTrails not to cache
this module, or anything downstream from it.
VisTrails also allows a more sophisticated decision on whether or not to use caching. To do that, a user simply
overrides the method is_cacheable to return the appropriate value (the default implementation returns True).
For example, in the teem <http://teem.sourceforge.net/> package, there’s a module that generates a scalar field with
random numbers. This is non-deterministic, so shouldn’t be cached. However, this module only generates nondeterministic values in special occasions, depending on its input port values. To keep efficiency when caching is
possible, while still maintaining correctness, that module implements the following override:
class Unu1op(Unu):
(...)
def is_cacheable(self):
return not self.get_input(’op’) in [’rand’, ’nrand’]
(...)
Notice that the module explicitly uses inputs to decide whether it should be cached. This allows reasonably finegrained control over the process.
134
Chapter 5. Writing VisTrails Packages
VisTrails Documentation, Release 2.1.4
5.6.2 Namespaces
ModuleSettings.namespace can be used to define a hierarchy for modules in a package that is used to organize
the module palette. Hierarchies can be nested through the use of the ‘|’ character. For example,
1
2
3
class MyModule1(Module):
_settings = ModuleSettings(namespace="MyNamespace")
...
4
5
6
7
8
class MyModule2(Module):
_settings = ModuleSettings(namespace="ParentNamespace|\
ChildNamespace")
...
5.6.3 Documentation
The docstring you set on your Module subclass will be displayed to the user when he clicks on the ‘Documentation’
button in the ‘Module Information’ panel. Be sure to put a readable description and your usage information there.
If you want to customize that documentation, you can provide a staticmethod or classmethod ‘get_documentation’ on
your Module. The string it returns will be used as the documentation.
1
2
3
class TestMod(Module):
"""This very simple module doesn’t do anything sensible.
"""
4
5
6
7
@classmethod
def get_documentation(cls, docstring, module=None):
return docstring.upper()
The function receives two arguments: the string that was about to be used (the module’s docstring or an empty string),
and the module object from the pipeline if the documentation was requested for a specific instance of that module
(else, None is passed).
5.6. Module Specification
135
VisTrails Documentation, Release 2.1.4
5.6.4 Visibility
ModuleSettings.abstract and ModuleSettings.hide_descriptor can be used to prevent modules
from appearing in the module palette. abstract is for use with modules that should never be instantiated in the
workflow and will not add the item to the module palette. On the other hand, hide_descriptor will add the item
to the palette, but hides it. This will prevent users from adding the module to a pipeline, but allow code to add it
programmatically. To use either of these options, abstract or hide_descriptor, set it to True:
1
2
3
class AbstractModule(Module):
_settings = ModuleSettings(abstract=True)
...
4
5
6
7
class InvisibleModule(Module):
_settings = ModuleSettings(hide_descriptor=True)
...
5.6.5 Shape and Color
VisTrails allows users to assign custom colors and shapes to modules by using the ModuleSettings.color and
ModuleSettings.fringe options. For example,
class FancyModule(Module):
_settings = ModuleSettings(color=(1.0, 0.0, 0.0),
fringe=[(0.0, 0.0),
(0.2, 0.0),
(0.2, 0.4),
(0.0, 0.4),
(0.0, 1.0)])
produces
and
class FancyModule2(Module):
_settings = ModuleSettings(color=(0.4,0.6,0.8),
fringe=[(0.0, 0.0),
(0.2, 0.0),
(0.0, 0.2),
(0.2, 0.4),
(0.0, 0.6),
(0.2, 0.8),
(0.0, 1.0)])
produces
136
Chapter 5. Writing VisTrails Packages
VisTrails Documentation, Release 2.1.4
The ModuleSettings.color parameter must be a tuple of three floats between 0 and 1 that specify RGB colors
for the module background, while ModuleSettings.fringe is a list of pairs of floats that specify points as they
go around a side of the module (the same one is used to go from the top-right corner to bottom-right corner, and from
the bottom-left corner to the top-left one. If this is not enough, let the developers know!)
Alternatively, you may use different fringes for the left and right borders:
class FancyModule3(Module):
_settings = ModuleSettings(color=(1.0,0.8,0.6),
left_fringe=[(0.0, 0.0),
(-0.2, 0.0),
(0.0, 1.0)],
right_fringe=[(0.0, 0.0),
(0.2, 1.0),
(0.0, 1.0)])
5.6.6 Configuration Widgets
There are two types of widgets that are associated with modules. The first, the module configuration widget, is available to all modules regardless of inheritance. This type of widget allows users to configure modules in ways other than with the ports list in the Module Information panel. For example, the
PythonSource module uses a special widget that allows users to add ports as well as write code in a editor with line numbers and highlighting features. Developers wishing to create similar widgets should subclass
from vistrails.gui.modules.module_configure.StandardModuleConfigurationWidget and
implement the saveTriggered and resetTriggered methods. Note that both the module and controller are
passed into the constructor and are available as self.module and self.controller.
The second type of widget is the constant configuration widget which can only be defined for constant modules, that is
those which subclass from vistrails.core.modules.basic_modules.Constant. When such a module
is used as the type of an input port, the user is allowed to edit the value in the ports list of the Module Information
panel. The constant configuration widget is used to display and allow the user to edit the value of a parameter. The
default widget is a simple line edit widget, but certain basic types in VisTrails like Color and File have specialized
widgets that make specification easier.
Creation
Developers may build new constant configuration widgets using the vistrails.gui.modules.constant_configuration.C
or vistrails.gui.modules.constant_configuration.ConstantEnumWidgetBase base classes.
Note that these base classes should be the second base class listed; the first should be a QWidget subclass.
ConstantWidgetBase is intended for use with “normal” while ConstantEnumWidgetBase is intended for
use with ports where the possible values are enumerated. For ConstantWidgetBase subclasses, developers
should implement the setContents and contents methods and optionally the setDefault method. For
ConstantEnumWidgetBase subclasses, developers should implement the setValues method and optionally
the setFree and setNonEmpty methods.
As an example, consider the following widget:
1
2
from PyQt4 import QtCore, QtGui
from vistrails.gui.modules.constant_configuration import ConstantEnumWidgetBase
5.6. Module Specification
137
VisTrails Documentation, Release 2.1.4
3
4
5
6
7
8
9
10
11
12
class NumericSliderWidget(QtGui.QSlider, ConstantEnumWidgetBase):
def __init__(self, param, parent=None):
QtGui.QSlider.__init__(self, parent)
self.setOrientation(QtCore.Qt.Horizontal)
self.setTracking(False)
self.setTickPosition(QtGui.QSlider.TicksBelow)
ConstantEnumWidgetBase.__init__(self, param)
self.connect(self, QtCore.SIGNAL("valueChanged(int)"),
self.update_parent)
13
def setValues(self, values):
self.setMinimum(int(values[0]))
self.setMaximum(int(values[1]))
14
15
16
17
def contents(self):
return unicode(self.value())
18
19
20
def setContents(self, contents, silent=True):
if contents:
self.setValue(int(contents))
if not silent:
self.update_parent()
21
22
23
24
25
Registration
To make VisTrails aware of these new widgets, developers should specifying them in the ModuleSettings options.
For example,
1
2
3
class TestWidgets(Constant):
_settings = ModuleSettings(configure_widget="widgets:MyWidget",
constant_widget="widgets:ConstWgt")
Note that the PathString is best specified relative to the base path of the package. Important: If
MyWidget is defined in the widgets module of the test_widgets package in userpackages, its full
path might be userpackages.test_widgets.widgets:MyWidget, but we only include the inner path
(widgets:MyWidget). (The full path is used for internal packages, but this should be avoided for third-party
packages.)
For constant widgets, VisTrails allows users to associate different widgets with different uses. A widget used for query may differ from the default display & edit widget, and developers may specify different widgets for these uses. Current uses include “query” and “paramexp” (parameter exploration). In addition, individual ports may specify different constant widgets using the InputPort.entry_type setting.
These specifications are tied to the widget’s type. To specify these associations, developers should use the
ConstantWidgetConfig settings. Also, QueryWidgetConfig and ParamExpWidgetConfig provide
shortcuts for configurations for query and parameter exploration uses, respectively. Multiple widgets can be specified via the ModuleSettings.constant_widgets setting. For example,
1
2
3
4
5
class TestWidgets(Constant):
_settings = ModuleSettings(constant_widgets=[
ConstantWidgetConfig(widget="widgets:MyEnumWidget",
widget_type="enum"),
QueryWidgetConfig(widget="widgets:MyQueryWidget")])
Note that if a query or parameter exploration widget is not specified, VisTrails will generically adapt the default widget
for those uses so you do not need to create a widget for each use.
138
Chapter 5. Writing VisTrails Packages
VisTrails Documentation, Release 2.1.4
5.7 Port Specification
5.7.1 Defaults and Labels
In versions 2.0 and greater, package developers can add labels and default values for parameters. To add this functionality, you need to use the default(s) and label(s) keyword arguments. For example,
1
2
3
4
5
6
class TestDefaults(Module):
_input_ports = [IPort(’word’, ’basic:String’,
default="Hello",
label="greeting"),
CIPort(’center’, ’basic:Float, basic:Float’,
defaults=[10.0, 10.0], labels=["x", "y"])]
Note that simple ports use the singular InputPort.default and InputPort.label kwargs while compound
input ports use plural forms, CompoundInputPort.defaults and CompoundInputPort.labels.
5.7.2 Optional Ports
An optional port is one that will not be visible by default in the module shape. For modules with many ports, developers
might less-used ports optional to reduce clutter. To make a port optional, set the optional flag to true:
1
2
3
class ModuleWithManyPorts(Module):
_input_ports = [IPort(’Port14’, ’basic:String’,
optional=True)]
5.7.3 Cardinality
By default, ports will accept any number of connections or parameters. However, the Module.get_input()
method will only access one of the inputs, and which one is not well-defined. To access all of the inputs, developers
should use the Module.get_input_list() method. The spreadsheet package uses this feature, so look there
for usage examples (vistrails/packages/spreadsheet/basic_widgets.py)
In addition, VisTrails 2.1 introduced new port configuration arguments min_conns and max_conns that allow
developers to enforce specific cardinalities on their ports. For example, a port that required at least two inputs could
set min_conns=2, and a port that does not accept more than a single input could set max_conns=1. Currently,
the values for min_conns and max_conns default to 0 and -1, respectively, which means that no connections are
required and any number of connections are allowed. These will eventually be enforced by the GUI to help users
building workflows.
5.7.4 Shape
As with modules, port shape can also be customized. There are three basic types besides the default square, “triangle”,
“circle”, and “diamond”. Such types are specified as string values to the shape setting. In addition, the triangle
may be rotated by appending the degree of rotation (90, 180, or 270 only!) in the string. Finally, custom shapes are
supported in a similar fashion to the module fringe. The shape should be defined in the [0,1] x [0,1] domain with 0
representing the top/left) and 1 being the bottom/right.
1
2
3
4
5
class FancyPorts(Module):
_input_ports = [IPort("normal", "basic:Float"),
IPort("triangle", "basic:Float",
shape="triangle"),
IPort("triangle90", "basic:Float",
5.7. Port Specification
139
VisTrails Documentation, Release 2.1.4
shape="triangle90"),
IPort("circle", "basic:Float",
shape="circle"),
IPort("diamond", "basic:Float",
shape="diamond"),
IPort("pentagon", "basic:Float",
shape=[(0.0, 0.0), (0.0, 0.66),
(0.5, 1.0), (1.0, 0.66),
(1.0, 0.0)])]
6
7
8
9
10
11
12
13
14
This produces a module with ports that look like the following figure:
5.7.5 Signatures
We recommend using strings to define ports, but we still allow the actual classes to be used instead for backward
compatibility. For example,
1
from vistrails.core.modules.basic_modules import String
2
3
4
class MyModule(Module):
_input_ports = [IPort("a", String)]
This is not recommended for non-basic types due to the required import of the dependent package modules. If
a package develoepr wants to use a module from another package, they must determine where in that package the
module is defined, import that specific module, and then hope that future versions of that package do not change the
location of that module. String-based signatures do not face the same issues as code reorganization is independent of
the package definition. The grammar for a simple port signature is
1
2
<module_string> := <package_identifier>:[<namespace>|]<module_name>
<port_signature> := "<module_string>"
and for a compound port:
1
2
<compound_string> := ,<module_string>
<port_signature> := "<module_string><compound_string>*"
For example,
class MyModule(Module):
_input_ports = ("myInputPort", "org.suborg.pkg_name:Namespace|ModuleB")
5.7.6 Variable Output
There may be cases where a port may output values of different types. There are a few ways to tackle this–each
has its own benefits and pitfalls. Because VisTrails modules obey inheritance principles, a port of a given type may
produce/accept subclasses of itself. For example, an output port of type Constant may output String, Float,
or Integer values since all are subclasses of Constant. For input ports, Module (the base class for all modules)
is the most general input type and will accept any input. For example, the StandardOutput module’s input port
140
Chapter 5. Writing VisTrails Packages
VisTrails Documentation, Release 2.1.4
value is of type Module and it prints the string representation of the input value to stdout. However, for output
ports, note that having an output of type Module is less useful because there may be cases where a user wishes to
use a general output as an input to a port that accepts a specific type. For example, consider a GetItem module that
takes a List module and a Integer parameter and outputs the element at the specified index. Its output port must
be the most general type (e.g. Module), but that means that a user who knows the list only contains floats cannot
pass the output to a calculator that only takes floats as inputs. To address this issue, VisTrails provides the Variant
type which allows connections to any input port. VisTrails attempts to do run-time type-checking to ensure that the
type passed in to the module is as advertised but allows general computations to remain general. For example, the
GetItem module might be constructed as:
1
2
3
4
class GetItem(Module):
_input_ports = [IPort("list", "basic:List"),
IPort("index", "basic:Integer")]
_output_ports = [OPort("value", "basic:Variant")]
5.7.7 Connectivity
In some cases, it may be desirable to know which outputs are used before running a computation. The outputPorts
dictionary of the module stores connection information. Thus, you should be able to check
("myPortName" in self.outputPorts)
on the parent module to check if there are any downstream connections from the port “myPortName”. Note, however,
that the caching algorithm assumes that all outputs are computed so adding a new connection to a previously unconnected output port will not work as desired if that module is cached. For this reason, we would currently recommend
making such a module not cacheable. Another possibility is overriding the update() method to check the output
ports and set the upToDate flag if they are not equal. Here is an example:
1
2
3
4
5
6
class TestModule(Module):
_output_ports = [(’a1’, ’basic:String’),
(’a2’, ’basic:String’)]
def __init__(self):
Module.__init__(self)
self._cached_output_ports = set()
7
8
9
10
11
def update(self):
if len(set(self.outputPorts) - self._cached_output_ports) > 0:
self.upToDate = False
Module.update(self)
12
13
14
15
16
17
18
def compute(self):
if "a1" in self.outputPorts:
self.set_output("a1", "test")
if "a2" in self.outputPorts:
self.set_output("a2", "test2")
self._cached_output_ports = set(self.outputPorts)
5.8 Generating Modules Dynamically
When wrapping existing libraries or trying to generate modules in a more procedural manner, it is useful to dynamically
generate modules. In our work, we have created some shortcuts to make this easier. In addition, the list of modules
can also be based on the package configuration. Here is some example code:
__init__.py
5.8. Generating Modules Dynamically
141
VisTrails Documentation, Release 2.1.4
1
from vistrails.core.configuration import ConfigurationObject
2
3
4
5
identifier = "org.vistrails.examples.auto_example"
version = "0.0.1"
name = "AutoExample"
6
7
configuration = ConfigurationObject(use_b=True)
init.py
The expand_ports and build_modules methods are functions to help the construction of the modules easier. The key
parts are the new_module call and setting the _modules variable.
1
from vistrails.core.modules.vistrails_module import new_module, Module
2
3
identifier = "org.vistrails.examples.auto_example"
4
5
6
7
8
9
10
11
12
13
14
15
16
17
18
19
20
21
22
23
24
25
26
27
28
29
30
31
32
33
34
35
36
37
38
39
40
41
42
43
44
45
def expand_ports(port_list):
new_port_list = []
for port in port_list:
port_spec = port[1]
if type(port_spec) == str: # or unicode...
if port_spec.startswith(’(’):
port_spec = port_spec[1:]
if port_spec.endswith(’)’):
port_spec = port_spec[:-1]
new_spec_list = []
for spec in port_spec.split(’,’):
spec = spec.strip()
parts = spec.split(’:’, 1)
print ’parts:’, parts
namespace = None
if len(parts) > 1:
mod_parts = parts[1].rsplit(’|’, 1)
if len(mod_parts) > 1:
namespace, module_name = mod_parts
else:
module_name = parts[1]
if len(parts[0].split(’.’)) == 1:
id_str = ’org.vistrails.vistrails.’ + parts[0]
else:
id_str = parts[0]
else:
mod_parts = spec.rsplit(’|’, 1)
if len(mod_parts) > 1:
namespace, module_name = mod_parts
else:
module_name = spec
id_str = identifier
if namespace:
new_spec_list.append(id_str + ’:’ + module_name + \
’:’ + namespace)
else:
new_spec_list.append(id_str + ’:’ + module_name)
port_spec = ’(’ + ’,’.join(new_spec_list) + ’)’
new_port_list.append((port[0], port_spec) + port[2:])
print new_port_list
return new_port_list
46
142
Chapter 5. Writing VisTrails Packages
VisTrails Documentation, Release 2.1.4
47
48
49
50
51
52
53
54
55
56
57
58
59
60
61
62
63
64
65
66
67
def build_modules(module_descs):
new_classes = {}
for m_name, m_dict in module_descs:
m_doc = m_dict.get("_doc", None)
m_inputs = m_dict.get("_inputs", [])
m_outputs = m_dict.get("_outputs", [])
if "_inputs" in m_dict:
del m_dict["_inputs"]
if "_outputs" in m_dict:
del m_dict["_outputs"]
if "_doc" in m_dict:
del m_dict["_doc"]
klass_dict = {}
if "_compute" in m_dict:
klass_dict["compute"] = m_dict["_compute"]
del m_dict["_compute"]
m_class = new_module(Module, m_name, klass_dict, m_doc)
m_class._input_ports = expand_ports(m_inputs)
m_class._output_ports = expand_ports(m_outputs)
new_classes[m_name] = (m_class, m_dict)
return new_classes.values()
68
69
70
71
72
73
74
75
76
77
78
def initialize():
global _modules
def a_compute(self):
a = self.get_input("a")
i = 0
if self.has_input("i"):
i = self.get_input("i")
if a == "abc":
i += 100
self.set_output("b", i)
79
80
81
82
83
84
85
86
87
88
module_descs = [("ModuleA", {"_inputs": [("a", "basic:String")],
"_outputs": [("b", "basic:Integer")],
"_doc": "ModuleA documentation",
"_compute": a_compute,
"namespace": "Test"}),
("ModuleB", {"_inputs": [("a", "Test|ModuleA")],
"_outputs": [("b", "Test|ModuleA")],
"_doc": "ModuleB documentation"})
]
89
90
91
92
93
if configuration.use_b:
_modules = build_modules(module_descs)
else:
_modules = build_modules(module_descs[:1])
94
95
_modules = []
5.9 Wrapping Command-line tools
Many existing programs are readily available through a command-line interface. Also, many existing workflows are
first implemented through scripts, which work primarily with command-line tools. This section describes how to
wrap command-line applications so they can be used with VisTrails. We will use as a running example the afront
package, which wraps afront, a command-line program for generating 3D triangle meshes. We will wrap the basic
5.9. Wrapping Command-line tools
143
VisTrails Documentation, Release 2.1.4
functionality in three different modules: Afront, AfrontIso, and MeshQualityHistogram.
Each of these modules will be implemented by a Python class, and they will all invoke the afront binary. Afront
is the base execution module, and AfrontIso requires extra parameters on top of the original ones. Because of this,
we will implement AfrontIso as a subclass of Afront. MeshQualityHistogram, however, requires entirely
different parameters, and so will not be a subclass of Afront. A first attempt at writing this package might look
something like this:
__init__.py
1
2
3
name = "Afront"
version = "0.1.0"
identifier = "edu.utah.sci.vistrails.afront"
init.py
1
2
from vistrails.core.modules.vistrails_module import Module
... # other import statements
3
4
5
6
class Afront(Module):
def compute(self):
... # invokes afront
7
8
9
10
class AfrontIso(Afront):
def compute(self):
... # invokes afront with additional parameters
11
12
13
14
class MeshQualityHistogram(Module):
def compute(self):
... # invokes afront with completely different parameters
15
16
_modules = [Afront, AfrontIso, MeshQualityHistogram, ...]
5.9.1 Class Mixins
While this approach is a good start, it does require significant duplication of effort. Each module must contain code
to invoke the afront binary and pass it some parameters. Since this functionality is required by all three modules,
we would like to put this code in a separate class called, say, AfrontRun, and let each of our modules inherit from
it. AfrontRun itself is not a module, and thus does not extend the Module class. So our three modules will inherit
from both AfrontRun and Module. Helper classes such as this are often referred to as mixin classes. 2 hi hello
1
2
3
from vistrails.core.modules.vistrails_module import Module, ModuleError
from vistrails.core.system import list2cmdline
import os
4
5
6
7
8
9
10
11
12
13
class AfrontRun(object):
_debug = False
def run(self, args):
cmd = [’afront’, ’-nogui’] + args
cmdline = list2cmdline(cmd)
if self._debug:
print cmdline
result = os.system(cmdline)
if result != 0:
2 Programmers who are more comfortable with single-inheritance languages like Java and C# may be unfamiliar with mixins. A mixin class
is similar to an interface in Java or C#, except that a mixin provides an implementation as well. Python’s support for multiple inheritance allows
subclasses to “import” functionality as needed from a mixin class, without artificially cluttering the base class’s interface.
144
Chapter 5. Writing VisTrails Packages
VisTrails Documentation, Release 2.1.4
raise ModuleError(self, "Execution failed")
14
15
16
17
class Afront(Module, AfrontRun):
...
18
19
20
class MeshQualityHistogram(Module, AfrontRun):
...
Now every module in the afront package has access to run(). The other new feature in this snippet is
list2cmdline, which turns a list of strings into a command line. It does this in a careful way (protecting arguments with spaces, for example). Notice that we use a call to a shell (os.system()) to invoke afront. This is
frequently the easiest way to get third-party functionality into VisTrails.
5.9.2 Temporary File Management
Command-line programs typically generate files as outputs. On complicated pipelines, many files get created and
passed to other modules. To facilitate the use of files as communication objects, VisTrails provides basic infrastructure
for temporary file management. This way, package developers do not have to worry about file ownership and lifetimes.
To use this infrastructure, it must be possible to tell the program being called which filename to use as output. VisTrails can accommodate some filename requirements (in particular, specific filename extensions might be important
in Windows environments, and these can be set), but it must be possible to direct the output to a certain filename.
We will use Afront’s compute() method to illustrate the feature.
1
2
...
class Afront(Module, AfrontRun):
3
def compute(self):
o = self.interpreter.filePool.create_file(suffix=’.m’)
args = []
if not self.has_input("file"):
raise ModuleError(self, "Needs input file")
args.append(self.get_input("file").name)
if self.has_input("rho"):
args.append("-rho")
args.append(str(self.get_input("rho")))
if self.has_input("eta"):
args.append("-reduction")
args.append(str(self.get_input("eta")))
args.append("-outname")
args.append(o.name)
args.append("-tri")
self.run(args)
self.set_output("output", o)
4
5
6
7
8
9
10
11
12
13
14
15
16
17
18
19
20
21
...
Line 5 shows how to create a temporary file during the execution of a pipeline. There are a few new things happening,
so let us look at them one at a time. Every module holds a reference to the current interpreter, the object responsible
for orchestrating the execution of a pipeline. This object has a filePool, which is what we will use to create a
pipeline, through the create_file method. This method takes optionally a named parameter suffix, which
forces the temporary file that will be created to have the right extension.
The file pool returns an instance of basic_modules.File, a module that is provided by the basic VisTrails
packages. There are two important things you should know about File. First, it has a name attribute that stores the
name of the file it represents. In this case, it is the name of the recently-created temporary file. This allows you to
safely use this file when calling a shell, as seen on Line 17. The other important feature is that it can be passed directly
to an output port, so that this file can be used by subsequent modules. This is shown on Line 20.
5.9. Wrapping Command-line tools
145
VisTrails Documentation, Release 2.1.4
The above code also introduces the boolean function has_input (see Lines 7, 10, and 13). This is a simple errorchecking function that verifies that the port has incoming data before the program attempts to read from it. It is
considered good practice to call this function before invoking get_input for any input port.
Accommodating badly-designed programs Even though it is considered bad design for a command-line program
not to allow the specification of an output filename, there do exist programs that lack this functionality. In this case, a
possible workaround is to execute the command-line tool, and move the generated file to the name given by VisTrails.
5.10 For System Administrators
Most users will want to put their custom packages in their
∼/.vistrails/userpackages
directory, as described in Section An Example Package. This makes the package available to the current user only.
However, if you are a power user or a system administrator, you may wish to make certain packages available to all
users of a VisTrails installation. To do this, copy the appropriate package files and/or directories to the
vistrails/packages
directory of the VisTrails distribution. The packages will be made visible to users the next time they launch VisTrails.
146
Chapter 5. Writing VisTrails Packages
CHAPTER
SIX
COMMAND-LINE ARGUMENTS
6.1 Starting VisTrails via the Command Line
VisTrails supports a number of command-line arguments that let you modify certain attributes and behaviors of the
program. When invoking VisTrails from the command line, the arguments are placed after the “run.py” filename. For
example,
python vistrails/run.py -b
starts VisTrails in batch mode. Table table-batch-cli contains a complete list of the command line switches supported
by vistrails. Each command line switch has both a short form and a long form. The two forms are logically equivalent,
and which one you use is a matter of personal preference. The short form consists of a single minus sign “-” followed
by a single letter. The longer form uses two minus signs “–” followed by a descriptive word. For example, the above
command for batch mode could have been written as:
python vistrails/run.py --batch
In addition to the explicit switches listed in Table table-batch-cli, the VisTrails command line also lets you indicate
the filename of the vistrail you wish to open. For example, assuming your “examples” directory is one level above
your current working directory, this is how you would tell VisTrails to load the “lung.vt” example at startup:
python vistrails/run.py examples/lung.vt
Moreover, if you want VisTrails to start on a specific version of the pipeline within the vistrail, you can indicate that
version’s tag name on the command line. The filename and version tag should be separated by a colon. For example,
to start VisTrails with the colormap version of the “lung.vt” vistrail, use:
python vistrails/run.py examples/lung.vt:colormap
In the event that the version you want to open contains a space in its tag name, simply surround the entire “filename:tag”
pair in double quotes. For example:
python vistrails/run.py "examples/lung.vt:Axial View"
You can also open up multiple vistrails at once by listing more than one vistrail file on the command line. This causes
the vistrails to be opened in separate tabs, just as if you had opened them via the GUI. For example:
python vistrails/run.py examples/lung.vt examples/head.vt
You can specify version tags in conjunction with multiple filenames. Here is an example of an elaborate command-line
invocation that opens two vistrails and sets each one to a specific version:
python vistrails/run.py "examples/lung.vt:Axial View"
examples/head.vt:bone
147
VisTrails Documentation, Release 2.1.4
usage: run.py [-h] [--version] [-S DIR] [--subworkflows-dir DIR]
[--data-dir DIR] [--package-dir DIR] [--user-package-dir DIR]
[--file-dir DIR] [--log-dir DIR] [--temporary-dir DIR]
[--thumbs-auto-save | --no-thumbs-auto-save]
[--thumbs-mouse-hover | --no-thumbs-mouse-hover]
[--thumbs-tags-only | --no-thumbs-tags-only]
[--thumbs-cache-dir DIR] [--thumbs-cache-size THUMBS.CACHESIZE]
[--host URL] [--port PORT] [--db DB] [--user USER]
[--rpc-server RPCSERVER] [--rpc-port RPCPORT]
[--rpc-log-file DIR] [--rpc-instances RPCINSTANCES]
[--multithread] [--rpc-config DIR] [--web-repository-url URL]
[--web-repository-user WEBREPOSITORYUSER]
[--job-check-interval JOBCHECKINTERVAL]
[--job-autorun JOBAUTORUN] [--job-list] [--job-info] [-e] [-b]
[-o DIR] [-p OUTPUTSETTINGS] [--parameters PARAMETERS]
[--parameter-exploration] [--show-window] [--with-version-tree]
[--with-workflow] [--graphs-as-pdf]
[--maximize-windows | --no-maximize-windows]
[--multi-heads | --no-multi-heads]
[--show-splash | --hide-splash] [--auto-save | --no-auto-save]
[--db-default | --no-db-default] [--cache | --no-cache]
[--stop-on-error | --no-stop-on-error]
[--execution-log | --no-execution-log]
[--error-log | --no-error-log]
[--default-file-type DEFAULTFILETYPE] [-v DEBUGLEVEL]
[--upgrades | --no-upgrades]
[--migrate-tags | --no-migrate-tags]
[--upgrade-delay | --no-upgrade-delay]
[--upgrade-module-fail-prompt | --no-upgrade-module-fail-prompt]
[--auto-connect | --no-auto-connect]
[--detach-history-view | --no-detach-history-view]
[--show-connection-errors | --hide-connection-errors]
[--show-variant-errors | --hide-variant-errors]
[--show-debug-popups | --hide-debug-popups]
[--show-scrollbars | --hide-scrollbars]
[--show-inline-parameter-widgets | --hide-inline-parameter-widgets]
[--shell-font-face SHELL.FONTFACE]
[--shell-font-size SHELL.FONTSIZE]
[--max-recent-vistrails MAXRECENTVISTRAILS]
[--view-on-load VIEWONLOAD]
[--enable-custom-version-colors | --no-enable-custom-version-colors]
[--fixed-custom-version-color-saturation | --no-fixed-custom-version-color-saturation]
[--enable-packages-silently | --no-enable-packages-silently]
[--install-bundles | --no-install-bundles]
[--install-bundles-with-pip | --no-install-bundles-with-pip]
[--repository-local-path DIR] [--repository-httpurl URL]
[--single-instance | --no-single-instance]
[--static-registry DIR]
[vistrail [vistrail ...]]
Positional arguments:
vistrails
Vistrail to open
--version
show program’s version and exit
-S, --dot-vistrails
The location to look for VisTrails user configurations and storage. Defaults
to ~/.vistrails.
Options:
148
Chapter 6. Command-line Arguments
VisTrails Documentation, Release 2.1.4
--subworkflows-dir The location where a user’s local subworkflows are stored.
--data-dir
The location that VisTrails uses as a default directory for data.
--package-dir
The directory to look for VisTrails core packages (use userPackageDir for
user-defined packages).
--user-package-dir
The location for
trails/userpackages).
--file-dir
The location that VisTrails uses as a default directory for specifying files.
--log-dir
The path that indicates where log files should be stored.
--temporary-dir
The directory to use for temporary files generated by VisTrails.
user-installed
packages
(defaults
to
~/.vis-
--thumbs-auto-save Whether to save thumbnails of results when executing VisTrails.
--no-thumbs-auto-save Inverse of –thumbs-auto-save
--thumbs-mouse-hover Whether to show thumbnails when hovering over a version in the version tree.
--no-thumbs-mouse-hover Inverse of –thumbs-mouse-hover
--thumbs-tags-only If True, only stores thumbnails for tagged versions. Otherwise, stores
thumbnails for all versions.
--no-thumbs-tags-only Inverse of –thumbs-tags-only
--thumbs-cache-dir The directory to be used to cache thumbnails.
--thumbs-cache-size The size (in MB) of the thumbnail cache.
--host
The hostname for the database to load the vistrail from.
--port
The port for the database to load the vistrail from.
--db
The name for the database to load the vistrail from.
--user
The username for the database to load the vistrail from.
--rpc-server
Hostname or ip address where this xml rpc server will work.
--rpc-port
Port where this xml rpc server will work.
--rpc-log-file
Log file for XML RPC server.
--rpc-instances
Number of other instances that vistrails should start.
--multithread
Server will start a thread for each request.
--rpc-config
Config file for server connection options.
--web-repository-url The URL of the web repository that should be attached to VisTrails (e.g.
www.crowdlabs.org).
--web-repository-user The default username for logging into a VisTrails web repository like
crowdLabs.
--job-check-interval How often to check for jobs (in seconds, default=600).
--job-autorun
Run jobs automatically when they finish.
--job-list
List running workflows.
--job-info
List jobs in running workflow
-e, --execute
Execute any specified workflows.
6.1. Starting VisTrails via the Command Line
149
VisTrails Documentation, Release 2.1.4
-b, --batch
Run vistrails in batch mode instead of interactive mode.
-o, --output-directory Undocumented
-p, --output-settings One or more comma-separated key=value parameters.
--parameters
List of parameters to use when running workflow.
--parameter-exploration Open and execute parameter exploration specified by the version argument after the .vt file.
--show-window
Show the main VisTrails window.
--with-version-tree
Output the version tree as an image.
--with-workflow
Output the workflow graph as an image.
--graphs-as-pdf
Undocumented
--maximize-windows Whether the VisTrails windows should take up the entire screen space.
--no-maximize-windows Inverse of –maximize-windows
150
--multi-heads
Whether or not to use multiple screens for VisTrails windows.
--no-multi-heads
Inverse of –multi-heads
--show-splash
Whether the VisTrails splash screen should be shown on startup.
--hide-splash
Inverse of –show-splash
--auto-save
Automatically save vistrails to allow recovery from crashes, etc.
--no-auto-save
Inverse of –auto-save
--db-default
Use a database as the default storage location for vistrails entities.
--no-db-default
Inverse of –db-default
--cache
Cache previous results so they may be used in future computations.
--no-cache
Inverse of –cache
--stop-on-error
Whether or not VisTrails stops executing the rest of the workflow if it encounters an error in one module.
--no-stop-on-error
Inverse of –stop-on-error
--execution-log
Track execution provenance when running workflows.
--no-execution-log
Inverse of –execution-log
--error-log
Write errors to a log file.
--no-error-log
Inverse of –error-log
--default-file-type
Defaults to .vt but could be .xml.
-v, --debug-level
How much information VisTrails should alert the user about (0: Critical
errors only, 1: Critical errors and warnings, 2: Critical errors, warnings,
and log messages).
--upgrades
Whether to upgrade old workflows so they work with newer packages.
--no-upgrades
Inverse of –upgrades
--migrate-tags
Whether or not the tag on a workflow that was upgraded should be moved
to point to the upgraded version.
--no-migrate-tags
Inverse of –migrate-tags
Chapter 6. Command-line Arguments
VisTrails Documentation, Release 2.1.4
--upgrade-delay
Persist upgrade only after other changes.
--no-upgrade-delay Inverse of –upgrade-delay
--upgrade-module-fail-prompt Whether to alert the user when an upgrade may fail when upgrading a subworkflow.
--no-upgrade-module-fail-prompt Inverse of –upgrade-module-fail-prompt
--auto-connect
Try to automatically connect a newly dragged in module to the rest of the
workflow.
--no-auto-connect
Inverse of –auto-connect
--detach-history-view Show the version tree in a separate window.
--no-detach-history-view Inverse of –detach-history-view
--show-connection-errors Alert the user if the value along a connection doesn’t match connection types.
--hide-connection-errors Inverse of –show-connection-errors
--show-variant-errors Alert the user if the value along a connection coming from a Variant
output doesn’t match the input port.
--hide-variant-errors Inverse of –show-variant-errors
--show-debug-popups Always show the debug popups or only if there is a modal widget.
--hide-debug-popups Inverse of –show-debug-popups
--show-scrollbars
Whether VisTrails should show scrollbars on the version tree and workflow
canvases.
--hide-scrollbars
Inverse of –show-scrollbars
--show-inline-parameter-widgets Show editable parameters inside modules
--hide-inline-parameter-widgets Inverse of –show-inline-parameter-widgets
--shell-font-face
The font to be used for the VisTrails console.
--shell-font-size
The font size used for the VisTrails console.
--max-recent-vistrails How many recently opened vistrails should be stored for “Open Recent”
access.
--view-on-load
Whether to show pipeline or history view when opening vistrail Can be
either appropriate/pipeline/history
--enable-custom-version-colors Undocumented
--no-enable-custom-version-colors Inverse of –enable-custom-version-colors
--fixed-custom-version-color-saturation Undocumented
--no-fixed-custom-version-color-saturation Inverse of –fixed-custom-version-color-saturation
--enable-packages-silently Do not prompt the user to enable packages, just do so automatically.
--no-enable-packages-silently Inverse of –enable-packages-silently
--install-bundles
Automatically try to install missing Python dependencies.
--no-install-bundles Inverse of –install-bundles
--install-bundles-with-pip Whether to try to use pip to install Python dependencies or use distribution support.
6.1. Starting VisTrails via the Command Line
151
VisTrails Documentation, Release 2.1.4
--no-install-bundles-with-pip Inverse of –install-bundles-with-pip
--repository-local-path Path used to locate packages available to be installed.
--repository-httpurl URL used to locate packages available to be installed.
--single-instance
Whether or not VisTrails should only allow one instance to be running.
--no-single-instance Inverse of –single-instance
--static-registry
If specified, VisTrails uses an XML file defining the VisTrails module registry to load modules instead of from the packages directly.
6.2 Specifying a User Configuration Directory
In addition to the default .vistrails directory, VisTrails allows you to create and use additional configuration directories. First, you will need to create a new directory. This is done by running: python vistrails/run.py -S
/path_to_new_directory/new_directory_name.
This will both create a new directory containing default configuration files and directories, and launch VisTrails,
which will use the newly created files for configuration. The user is then free to add desired configurations to
the new directory. Once a configuration directory exists, subsequent calls using the directory name (python
vistrails/run.py -S /path_to_directory/existing_directory) will launch VisTrails using the
‘existing_directory’ for configuration and a new directory will not be created.
Note:
If you would like to copy configuration directories, you must change the references in
copy_of_directory/startup.xml to point to the new directory instead of the original.
6.3 Passing Database Parameters on the Command Line
As discussed in Chapter Connecting to a Database, VisTrails can read and write vistrails stored in a relational database
as well as in a filesystem. VisTrails allows you to specify the name of the database server, the database name, the
port number, and the username on the command line. This potentially saves you the trouble of filling out the same
information on the database connection dialog. Note that, for security reasons, VisTrails does not allow you to include
a database password on the command line; you must still type your password into the database connection dialog when
VisTrails opens.
The last four rows of Table table-batch-cli show the command-line switches that pertain to database connectivity. Be
advised that these switches were designed primarily for use by VTL files (see Section Using “Vistrail Link” Files) and
as such, are not necessarily user-friendly. In particular, these switches are ignored unless you also specify the vistrail
ID and version name on the command line. For example, to open the contour version of the the “spx” vistrail (whose
ID is 5) from the database “vistrails” residing on the host “vistrails.sci.utah.edu” with a username of “vistrails”:
python vistrails/run.py --host=vistrails.sci.utah.edu --db=vistrails
--user=vistrails 5:contour
Once VisTrails opens, you will be prompted to enter the password. Upon successful authentication, the vistrail is
loaded from the database and opened to the pipeline corresponding to the specified version.
6.3.1 Using “Vistrail Link” Files
As discussed in Chapter Connecting to a Database, one of the advantages of storing your vistrails on a database is that
you can collaborate with others without having to pass around a .vt file or force all users to use a shared filesystem.
A disadvantage is that you need to remember the parameters with which to connect to the database. Using a “Vistrail
152
Chapter 6. Command-line Arguments
VisTrails Documentation, Release 2.1.4
Link” (VTL) file reduces this inconvenience, and also eliminates the need to include the associated command-line
switches to connect to the database.
A VTL is a very small text (XML) file that contains the parameters required to load a vistrail from a database. VTL
files are intended for use with a VisTrails-enabled wiki. You can open a VTL either by saving the file and passing its
filename to the command line, or by configuring your web browser to do this for you. Here is the syntax for using a
VTL file on the command line:
python vistrails/run.py sample.vtl
Internally, VisTrails parses the VTL file and loads the vistrail from the database exactly as if you had included its full
parameter list on the command line.
Note:
VTL is a relatively new feature of VisTrails, and as such is neither fully developed nor completedly documented.
Please contact the VisTrails development team with any bug reports and/or suggestions.
6.4 Running VisTrails in Batch Mode
Although VisTrails is primarily intended to be run as an interactive, graphical client application, it also supports noninteractive use. VisTrails can thus be invoked programmatically, eg as part of a shell script. You can tell VisTrails to
start in non-interactive mode by using the “-b” or “–batch” command line switch when launching vistrails. 1
Running VisTrails in non-interactive mode has little effect, however, without an additional command line argument
indicating which vistrail to load. Since we are running VisTrails as part of a batch process, it only makes sense to
execute vistrails whose output is something tangible, such as a file. A vistrail whose only output is an interactive
rendering in a VTKCell, for instance, would not be well-suited for running in batch mode.
Consider the following example. The “offscreen.vt” vistrail (included in the “examples” directory) has a variety of
output options, depending on which version you select in the History view (Figure The different versions of the
offscreen.vt vistrail...). The version tagged only vtk displays its output as an interactive VTK rendering. The
version tagged html creates a simple web page in the Spreadsheet. The offscreen version, however, outputs an
image file named “image.png”. Since its output (a file) can be easily accessed outside of VisTrails, this version is an
ideal candidate for running in batch mode. To try it, invoke VisTrails as shown, specifying both the name of the vistrail
file and the desired version:
python vistrails/run.py -b examples/offscreen.vt:offscreen
As you would expect, this command runs to completion without opening any windows. Instead, it silently loads the
requested pipeline, executes it, and closes. Assuming it ran correctly, this pipeline should have created a file named
“image.png” in the current directory. When you view this file, it should resemble the picture in Figure Running the
offscreen version of offscreeen.vt in batch mode....
6.4.1 Running a Specific Workflow in Batch Mode
To run a specific workflow in batch mode, call VisTrails with the following options:
python vistrails/run.py -b path_to_vistrails_file:pipeline
where pipeline can be a version tag name or version id.
1
The parameter “-b” stands for “batch.” In this chapter, we use the terms “batch mode” and “non-interactive mode” synonymously.
6.4. Running VisTrails in Batch Mode
153
VisTrails Documentation, Release 2.1.4
Figure 6.1: The different versions of the “offscreen.vt” vistrail offer various forms of output.
Figure 6.2: Running the offscreen version of “offscreen.vt” in batch mode produces an image named “image.png”.
154
Chapter 6. Command-line Arguments
VisTrails Documentation, Release 2.1.4
Note
If you downloaded the MacOS X bundle, you can run VisTrails from the command line via the following commands in the terminal. Change the current directory to wherever VisTrails was installed (often /Applications),
and then type: Vistrails.app/Contents/MacOS/vistrails [<cmd_line_options>]
6.4.2 Running a Workflow with Specific Parameters
An alias is a name assigned to a parameter that allows you to reference that parameter in batch mode. An alias is
created by clicking on the type of an existing parameter in VisTrails, then entering a name for it.
Figure 6.3: Example of creating an alias
Users can change workflow parameters that have an alias through the command line.
For example, offscreen pipeline in offscreen.vt always creates the file called image.png. If you want generate it with a
different filename:
python vistrails/run.py -b examples/offscreen.vt:offscreen
--parameters="filename=other.png"
filename in the example above is the alias name assigned to the parameter in the value method inside the String module.
When running a pipeline from the command line, VisTrails will try to start the spreadsheet automatically if the pipeline
requires it. For example, this other execution will also start the spreadsheet (attention to how $ characters are escaped
when running on bash):
python vistrails/run.py -b examples/head.vt:aliases --parameters="isovalue=30\$&\$diffuse_c
0.4, 0.2"
You can also execute more than one pipeline on the command line:
python vistrails/run.py -b examples/head.vt:aliases ../examples/spx.vt:spx \
--parameters="isovalue=30"
Use –parameters only once regardless the number of pipelines.
6.4.3 Accessing a Database in Batch Mode
As discussed in Section Passing Database Parameters on the Command Line, you can specify most of the parameters
of your database connection on the command line, but the password must be entered through the GUI. This poses a
problem for running VisTrails in non-interactive mode, since no database connection dialog will be opened. If your
batch process needs to access vistrails stored on a database, the current workaround is to create a special account on the
database (probably one with read-only access) that does not require a password, and use this account for connecting
to the database in batch mode.
6.4. Running VisTrails in Batch Mode
155
VisTrails Documentation, Release 2.1.4
6.4.4 Using VisTrails as a Server
Using the VisTrails server mode, it is possible to execute workflows and control VisTrails through another application.
For example, the CrowdLabs Web portal (http://www.crowdlabs.org) accesses a VisTrails sever to execute workflows,
retrieve and display vistrail trees and workflows.
The way you access the server is by doing XML-RPC calls. In the current VisTrails release, we include a set of PHP
scripts that can talk to a VisTrails server instance. They are in “extensions/http” folder. The files are reasonably well
documented. Also, it should be not difficult to create python scripts to access the server (just use xmlrpclib module).
Note that the VisTrails server requires the provenance and workflows to be in a database. More detailed instructions
on how to setup the server and the database are available in VisTrails Server Setup and in Setting up the database.
If what you want is just to execute a series of workflows in batch mode, a simpler solution would be to use the VisTrails
client in batch mode (see Section Running VisTrails in Batch Mode).
6.5 Executing Workflows in Parallel
The VisTrails server can only execute pipelines in parallel if there’s more than one instance of VisTrails running. The
command
self.rpcserver=ThreadedXMLRPCServer((self.temp_xml_rpc_options.server,
self.temp_xml_rpc_options.port))
starts a multithreaded version of the XML-RPC server, so it will create a thread for each request received by the server.
The problem is that Qt/PyQT doesn’t allow these multiple threads to create GUI objects. Only the main thread can.
To overcome this limitation, the multithreaded version can instantiate other single threaded versions of VisTrails and
put them in a queue, so workflow executions and other GUI-related requests, such as generating workflow graphs and
history trees can be forwarded to this queue, and each instance takes turns in answering the request. If the results are
in the cache, the multithreaded version answers the requests directly.
Note that this infrastructure works on Linux only. To make this work on Windows, you have to create a script similar to
start_vistrails_xvfb.sh (located in the scripts folder) where you can send the number of other instances via commandline options to VisTrails. The command line options are:
python vistrails_server.py --host=<ADDRESS> --port=<PORT>
-O<NUMBER_OF_OTHER_VISTRAILS_INSTANCES> [-M]&
If you want the main vistrails instance to be multithreaded, use the -M at the end.
After creating this script, update function start_other_instances in vistrails/gui/application_server.py lines 1007-1023
and set the script variable to point to your script. You may also have to change the arguments sent to your
script (line 1016: for example, you don’t need to set a virtual display). You will need to change the path to the
stop_vistrails_server.py script (on line 1026) according to your installation path.
6.6 Executing Parameter Explorations from the Command Line
Named parameter explorations can be executed from the command line in different ways using the -P flag. The
parameter after the vistrail will then indicate the parameter exploration name in place of the workflow version. To
open vistrails and execute a parameter exploration named “final” in terminator.vt run:
python vistrails/run.py -P terminator.vt:final
To only show the spreadsheet run:
python vistrails/run.py -P -i terminator.vt:final
156
Chapter 6. Command-line Arguments
VisTrails Documentation, Release 2.1.4
To execute the spreadsheet in batch mode, and to output the spreadsheet as images to a directory, use the -b flag and
specify a directory with the -e flag:
python vistrails/run.py -P -b -e ./final_images terminator.vt:final
This will create an image for each cell and also create a composite image for each sheet in the spreadsheet.
6.7 Finding Methods Via the Command Line
We have tried to make some methods more accessible in the console via an api. You can import the api via import api
in the console and see the available methods with dir(api). To open a vistrail:
import api
api.open_vistrail_from_file(’/Applications/VisTrails/examples/terminator.vt’)
To execute a version of a workflow, you currently have to go through the controller:
api.select_version(’Histogram’)
api.get_current_controller().execute_current_workflow()
Currently, only a subset of VisTrails functionality is directly available from the api. However, since VisTrails is written
in python, you can dig down starting with the VistrailsApplication or controller object to expose most of our internal
methods. If you have suggestions for calls to be added to the api, please let us know.
One other feature that we’re working on, but is still in progress is the ability to construct workflows via the console.
For example:
vtk = load_package(’org.vistrails.vistrails.vtk’)
vtk.vtkDataSetReader() # adds a vtkDataSetReader module to the pipeline
# click on the new module
a = selected_modules()[0] # get the one currently selected module
a.SetFile(’/vistrails/examples/data/head120.vtk’) # sets the SetFile\
parameter for the data set reader
b = vtk.vtkContourFilter() # adds a vtkContourFilter module to the\
pipeline and saves to var b
b.SetInputConnection0(a.GetOutputPort0()) # connects a’s GetOutputPort0\
port to b’s SetInputConnection0
6.7. Finding Methods Via the Command Line
157
VisTrails Documentation, Release 2.1.4
158
Chapter 6. Command-line Arguments
CHAPTER
SEVEN
ACCESSING THE EXECUTION LOG
The code responsible for storing execution information is located in the “core/log” directories, and the code that
generates much of that information is in “core/interpreter/cached.py”. Modules can add execution-specific annotations
to provenance via annotate() calls during execution, but much of the data (like timing and errors) is captured by the
LogController and CachedInterpreter (the execution engine) objects. To analyze the log from a vistrail (.vt) file, you
might have something like the following:
import core.log.log
import db.services.io
def run(fname):
# open the .vt bundle specified by the filename "fname"
bundle = db.services.io.open_vistrail_bundle_from_zip_xml(fname)[0]
# get the log filename
log_fname = bundle.vistrail.db_log_filename
if log_fname is not None:
# open the log
log = db.services.io.open_log_from_xml(log_fname, True)
# convert the log from a db object
core.log.log.Log.convert(log)
for workflow_exec in log.workflow_execs:
print ’workflow version:’, workflow_exec.parent_version
print ’time started:’, workflow_exec.ts_start
print ’time ended:’, workflow_exec.ts_end
print ’modules executed:’, [i.module_id
for i in workflow_exec.item_execs]
if __name__ == ’__main__’:
run("some_vistrail.vt")
You should be able to see what information is available by looking at the “core/log” classes.
159
VisTrails Documentation, Release 2.1.4
160
Chapter 7. Accessing the Execution Log
CHAPTER
EIGHT
EXAMPLE: ITK
8.1 Introduction to ITK
The Insight Toolkit, 1 or ITK, is an open-source software system initially designed to support the Visible Human
Project [C1]. ITK is under continual development, being updated to employ cutting-edge segmentation and registration
algorithms for multiple dimensions. For more information about ITK, please refer to [C2] and [C3].
In order to facilitate the implementation of processing mechanisms specific to the medical imaging community, ITK
provides a robust set of general purpose image processing tools. These image processing tools are available to users
through the standard ITK Filter interface. Although ITK is implemented in C++, through the use of CMake 2 and
CableSwig 3 , the functionality of ITK is made available to languages such as TCL, Java, and Python. In addition,
much of the functionality of ITK is also available in a VisTrails package. The ITK package is not currently included
in the binary distribution of VisTrails, but it may be downloaded separately from the VisTrails website.
Note: The WrapITK library, upon which the VisTrails ITK package depends, is well-tested on Linux and Mac OS X
platforms. It is, however, known to have issues under Windows.
8.2 Preparing ITK
At the time of this writing, the latest stable release of ITK is 3.6.0. In order to incorporate the functionality of ITK
into the VisTrails system, it first must be built and installed. In the following sections, we will describe in detail the
process of downloading, building, and installing ITK and all the required components needed to use it.
8.2.1 Downloading ITK
ITK can be downloaded in either source tarballs or via public CVS access to the ITK source repository. The following instructions take advantage of the CVS source repository; however, source tarballs can be downloaded from:
http://www.itk.org/
These instructions can be found, in part, at the ITK website. To use CVS, you must have a CVS client installed on
your system. To download the ITK library, issue the following commands:
cvs -d :pserver:[email protected]:/cvsroot/Insight login
password: insight
cvs -d :pserver:[email protected]:/cvsroot/Insight co Insight
1
2
3
The Insight Toolkit is sometimes referred to by the longer name Insight Segmentation and Registration Toolkit.
CMake cross-platform make system. http://www.cmake.org
CableSwig Interface generator. http://www.itk.org/HTML/CableSwig.html
161
VisTrails Documentation, Release 2.1.4
Change directory into the newly created Insight/Utilities directory and issue the following command:
cvs -d :pserver:[email protected]:/cvsroot/CableSwig co CableSwig
This checkout includes CableSwig in the ITK system, allowing it to be built automatically during compilation of ITK
itself.
8.2.2 Building the ITK Libraries
ITK requires CMake to be installed and available on your system. As of ITK version 3.2.0, CMake version 2.4.6 or
greater must be used to prevent compilation errors. In order to simplify updating ITK to later versions of the software,
we perform an out-of-source build. To do this, we first create a directory outside the Insight directory created for us
during the CVS checkout process.
mkdir itk
cd itk
We now run CMake, or the GUI-based version ccmake, in this directory. If you’re using Windows, you may wish to
run the Windows-specific cmake-gui.exe instead.
ccmake ../Insight
Note: The above command assumes that the Insight directory exists at the same level as the itk directory that we just
created.
The following advanced CMake variables must be set to the appropriate values:
CMake Variable
BUILD_SHARED_LIBS
INSTALL_WRAP_ITK_COMPATIBILITY
ITK_CSWIG_PYTHON
ITK_USE_REVIEW
USE_WRAP_ITK
WRAP_ITK_PYTHON
WRAP_ITK_JAVA
Value
ON
ON
OFF
ON
ON
ON
OFF
Note: Some CMake variables are only available based on the state of others. If a variable is missing from the list, set
what is visible and re-configure, this will often allow you to see and set additional parameters.
After generating the appropriate files and exiting ccmake, the standard build process can be completed. To compile
(on Linux or Mac OS X), run:
make
sudo make install
On Windows, the build process is governed by the type of project or Makefile generated by CMake.
Note:
It is possible to use ITK without installing it. To do this, the environment variables LD_LIBRARY_PATH and
PYTHONPATH must be set to the appropriate build directories:
LD_LIBRARY_PATH=/Path_To_itk/bin
PYTHONPATH=/Path_To_itk/Wrapping/WrapITK/Python
At this point, ITK is build and installed. To validate this, open a Python shell and issue the following commands:
162
Chapter 8. Example: ITK
VisTrails Documentation, Release 2.1.4
>>> import itk
>>> itk.Image[itk.US,2]
The above commands should both complete without error, and should produce the output:
<class ’itkImage.itkImageUS2’>
The WrapITK implementation used to wrap ITK for use in Python lazily instantiates required classes. This means that
even if the import succeeds, the instantiation of the above itk.Image class may fail. This is particularly common if
the environment variable LD_LIBRARY_PATH is incorrectly set.
8.3 ITK and VisTrails
When built and installed with the appropriate Python bindings included, ITK can be used from VisTrails through the
ITK package. As mentioned previously, ITK is a third-party package and is not included in the general VisTrails
distribution. However, like many third-party packages, it is available from the VisTrails website. 4
The VisTrails ITK package is under continual development with the latest versions being announced on the VisTrails
website. After downloading the package and extracting it into the .vistrails/userpackages directory, you
can enable it through the Module Packages tab in the Preferences dialog. Please refer to Chapter Writing
VisTrails Packages for instructions on how to do this.
Upon starting VisTrails, the ITK package modules will be made available to the Builder Window.
8.3.1 ITK Package Organization
The ITK VisTrails package loosely mimics the ITK functionality hierarchy. The package’s top level consists of base
classes, containers, and file readers as shown in Figure (a) The VisTrails ITK Package Structure Overview. Also
available at the top level is the PixelType module and the specific types used to create and execute ITK-based
pipelines.
Currently, the ITK Image Filters are organized into functional groups. The five filter types, as show in Figure (c) The
ITK Package Filter Structure, are:
• Feature Extraction Filters
• Image Intensity Filters
• Segmentation Filters
• Image Selection Filters
• Image Smoothing Filters
All filter types currently have at least one representative ITK filter wrapped and usable from within the VisTrails
environment.
8.3.2 Reading DICOM Volumes
DICOM is a standard format for exchanging medical images. ITK includes DICOM support through the GDCM
libraries. 5 It is worthwhile to note that at this time these libraries are currently not a complete implementation of the
DICOM standard.
4 Please Note: At the time of this writing, the VisTrails ITK package is not a complete wrapping of all ITK functionality. If you would like to
contact the author regarding the wrapped functionality, please do so through the e-mail address on the VisTrails website.
5 Grass roots DiCoM Project. http://www.creatis.insa-lyon.fr/Public/Gdcm/
8.3. ITK and VisTrails
163
VisTrails Documentation, Release 2.1.4
Figure 8.1: (a) The VisTrails ITK Package Structure Overview
Figure 8.2: (b) The ITK Package Supported PixelTypes
Figure 8.3: (c) The ITK Package Filter Structure
164
Chapter 8. Example: ITK
VisTrails Documentation, Release 2.1.4
DICOM volumes can be integrated into VisTrails through the use of either the GDCMReader or DICOMReader
modules in the ITK package. For the rest of this example, we will use the GDCMReader module as its performace is
slightly higher than the DICOMReader implementation.
Figure VisTrails workflow utilizing ITK to extract a single slice... shows the use of the GDCMReader module. In order
to properly read a DICOM volume, the GDCMReader must be supplied with the dimension of the volume to be read
and the directory containing the series to read. By default, WrapITK supports two- and three-dimensional volumes. In
order to include support for higher dimensions, the appropriate WrapITK variable must be set within CMake, before
compiling ITK.
8.3.3 Volume Processing With ITK and VisTrails
Typically, DICOM volumes are written with no 16-bit unsigned shorts. Unfortunately, most systems allow the display
of only 8-bit values. Because of the higher precision inherent in DICOM data, it is often preferable to perform any
computation, segmentation, or processing on the data prior to rescaling in order to utilize as much information as
possible.
Figure 8.4: VisTrails workflow utilizing ITK to extract a single slice from a DICOM volume. The slice is chosen by
first forming a Region to extract. The result is viewed through the use of standard VisTrails Spreadsheet modules.
8.3.4 Volume Processing With ITK and VisTrails
ITK image filters are typically templated based on the dimensionality of the data being processed, as well as the data
type being processed. In VisTrails, these parameters are handled through the use of PixelType modules. Although
any ITK Filter wrapped in vistrails can accept any of these PixelTypes, the underlying implementation may not be
compatible with the input PixelType. Using PixelTypes incompatible with the underlying filter implementations
is the most frequent cause of error when executing otherwise functional pipelines in VisTrails.
8.3. ITK and VisTrails
165
VisTrails Documentation, Release 2.1.4
When processing volumes, it is often necessary to extract a single slice from the volume at different stages of the
processing pipeline. This is possible in VisTrails through the use of the ExtractImageFilter. Given a volume,
a Region, and Dimensionality information, the ExtractImageFilter can extract a single slice from the data
volume that can be used in further processing, previewing the results, or writing to disk. An example workflow that
extracts a slice from a DICOM volume can be seen in Figure VisTrails workflow utilizing ITK to extract a single slice....
8.3.5 Visualizing the results
Although ITK’s processing filters and the DICOM standard both support 16-bit processing and storage, many image
viewers are capable of displaying in only 8-bit resolution using the unsigned char PixelType. Since the output of an
ITK processing workflow is an image, it makes sense to view it as such. This means that we are required to both remap
the data values in the image to 8 bits as well as perform a casting operation to change the data type from unsigned shorts
to unsigned chars. These operations are performed through the use of the RescaleIntensityImageFilter and
the CastImageFilter. Figure VisTrails workflow utilizing ITK to extract a single slice... demonstrates the use of
the RescaleIntensityImageFilter and the CastImageFilter in conjunction with the ImageToFile
and ImageViewerCell modules to view the resulting slice in the VisTrails Spreadsheet.
Citations
166
Chapter 8. Example: ITK
CHAPTER
NINE
CREATING A CONTROL FLOW LOOP
MODULE
This chapter explains how to extend the Control Flow package by creating additional loop modules. For more
information on Control Flow or the Control Flow Assistant, please refer to Control Flow in VisTrails or
The Control Flow Assistant in the User’s Guide.
9.1 Building your own loop structure
In functional programming, fold is a high-order function used to encapsulate a pattern of recursion for processing
lists. A simple example of a fold is summing the elements inside a list. If you fold the list [1, 2, 3, 4] with the sum
operator, the result will be (((1+2)+3)+4) = 10. It’s common to start with an initial value too. In the sum example, the
initial value would be 0, and the result would be ((((0+1)+2)+3)+4) = 10.
With this function, a programmer can do any type of recursion. In fact, the map and filter functions, shown
previously, can be implemented with fold. The Control Flow package provides a Fold module to enable this
functionality, and the Map and the Filter modules inherit from the Fold class.
In fact, any control module that has this kind of recursion uses the Fold class. To use this functionality for your own
control modules, instead of defining the compute() method, you need to define two other methods:
• setInitialValue(): in this method, you will set the initial value of the fold operator through the
self.initialValue attribute;
• operation(): in this method, you must implement the function to be applied recursively to the elements of
the input list (e.g., the sum function). More specifically, you need to define the relationship between the previous
iteration’s result (self.partialResult attribute) and the current element of the list (self.element
attribute); this method must be defined after the setInitialValue() one.
It’s important to notice that all modules inheriting from Fold will have the same ports, as Map and Filter, but you
can add any other ports that will be necessary for your control structure. Also, you do not need to use the input ports
“FunctionPort”, “InputPort” and “OutputPort”. You will only use them when you create an operator like Map and
Filter, which need a function to be applied for each element of the input list.
As an example, we will create a simple Sum module to better understand the idea. Create a new package, and the code
inside it would be as follows:
1
from controlflow import Fold, registerControl
2
3
4
5
version = "0.1"
name = "My Control Modules"
identifier = "org.vistrails.my_control_modules"
167
VisTrails Documentation, Release 2.1.4
6
7
8
def package_dependencies():
return ["org.vistrails.vistrails.control_flow"]
9
10
11
12
class Sum(Fold):
def setInitialValue(self):
self.initialValue = 0
13
def operation(self):
self.partialResult += self.element
14
15
16
17
18
def initialize(*args,**keywords):
registerControl(Sum)
We begin by importing the Fold class and the registerControl function from the Control Flow package
(Line 1). The registerControl function is used to register the control modules, so the shape of them can be set
automatically.
Also, define the variables version, name and identifier, as it’s done for all packages. The interpackage dependency (include reference of the package chapter) is used too, as My Control Modules requires a module
and a function from Control Flow (Lines 7 and 8); in this way, VisTrails can initialize the packages in the correct order. Then, create the class Sum, which inherits from Fold. Inside it, set the initial value to 0 inside the
setInitialValue() method (Lines 11 and 12), and define the sum operator inside operation(), as shown
clearly by the relation between self.partialResult and self.element (Lines 14 and 15).
The last thing we must do is define the initialize() method, so the package can be loaded in VisTrails. However,
instead of calling the registry, if you do not need any other ports, you just have to call the registerControl()
function (Line 18).
Save this package and enable it inside VisTrails. Create a similar workflow as shown in Figure A workflow using the
Sum module.
Figure 9.1: A workflow using the Sum module
Upon executing this workflow, the sum ((((0+1)+2)+3)+4), should be printed on your terminal as follows:
168
Chapter 9. Creating a Control Flow Loop Module
VisTrails Documentation, Release 2.1.4
10
Note that the input ports “FunctionPort”, “InputPort” and “OutputPort” were not necessary for this module. Now,
let’s see another example that does use them. Open the workflow we used to calculate the area of isosurfaces
(in “triangle_area.vt”, “Surface Area with Map and Filter” version), and delete the Map, the Filter, and the
FilterCondition (PythonSource) modules.
Now, create a single module that maps the list and filters the results, named as AreaFilter. Inside your package,
add the following class:
1
2
3
class AreaFilter(Fold):
def setInitialValue(self):
self.initialValue = []
4
5
6
def operation(self):
area = self.elementResult
7
8
9
if area>200000:
self.partialResult.append(area)
The initial value is an empty list, so the result of each element can be appended to it (Line 3). In the operation()
method, the self.elementResult attribute is used (Line 6); it represents the result of the port chosen in “OutputPort”; so, it means that “FunctionPort”, “InputPort” and “OutputPort” will have connections. In this workflow,
self.elementResult is the area for each contour value inside the input list, and, if the area is above 200,000, it
will be appended to the final result (Lines 8 and 9). We can easily see that this module does exactly the same as Map
and Filter combined.
Don’t forget to register this module in the initialize() function. After doing this, save the package and load it
again inside VisTrails. Then, just connect AreaFilter as in Figure The same workflow, but now with AreaFilter.
Figure 9.2: The same workflow, but now with AreaFilter
Now, you must set some values in the following parameters of AreaFilter:
9.1. Building your own loop structure
169
VisTrails Documentation, Release 2.1.4
• “InputPort”: [”SetValue”]
• “OutputPort”: GetSurfaceArea
When you execute this workflow, the result in the VisTrails Spreadsheet will be the same as shown previously (Figure
The result in the VisTrails spreadsheet). It shows the flexibility of doing a recursion function by inheriting from Fold.
170
Chapter 9. Creating a Control Flow Loop Module
CHAPTER
TEN
USING PARALLELIZATION IN
VISTRAILS MODULES
This chapters presents different techniques for using parallelization inside the code of your VisTrails modules.
10.1 Threading
VisTrails is single-threaded: the modules are executed one after the other, and while you are free to use threads in your
module’s compute() method, you should not interact with VisTrails from other threads.
Note that because of the restrictions of the CPython interpreter, you might not improve performance by using this
type of parallelization: the interpreter has a lock, preventing two threads from executing Python code at the same
time. If you are not already, consider using packages such as NumPy which provides efficient numerical functions
implemented in C (and parallelizable).
10.2 Multiprocessing
Use of the multiprocessing package introduced with Python 2.6 is possible in VisTrails. This is generally the
preferred way of performing multiple computational tasks in parallel in Python, and will effectively leverage multiple
cores; please refer to the official documentation for more details.
10.3 IPython
You can access IPython clusters through the Parallel Flow package, via the provided API. Simply declare it in your
package’s dependencies, and import vistrails.packages.parallelflow.api. This module provides the
following:
get_client(ask=True) -> IPython.parallel.Client or None Low-level function giving you a
Client connected to the cluster, or None. If not connected to a cluster or if no engines are available, the ask
parameter controllers whether to offer the user to take automatic action.
direct_view(ask=True) -> IPython.parallel.DirectView or None Gives you a view on the
engines of the cluster, which you can use to submit tasks. This is currently equivalent to calling
get_client()[:].
You should probably use load_balanced_view() instead.
171
VisTrails Documentation, Release 2.1.4
load_balanced_view(ask=True) -> IPython.parallel.LoadBalancedView or None
Gives you a load-balanced view on the engines of the cluster, which you can * use to submit tasks.
It is the preferred way of submitting tasks.
This is currently equivalent to calling
get_client().load_balanced_view().
172
Chapter 10. Using parallelization in VisTrails modules
CHAPTER
ELEVEN
WRAPPING COMMAND LINE TOOLS
USING PACKAGE CLTOOLS
11.1 Package CLTools
The package CLTools provide a way to wrap command line tools so that they can be used as modules in VisTrails.
It includes a wizard that simplifies the creation of wrappers. To use the package, enable CLTools in the package
configuration window. The package will be empty until you add a wrapper for a command line tool. When you have
added a wrapper you need to reload the wrappers by either pressing the reload button in the wizard, reloading the
CLTools package, or selecting Packages->CLTools->Reload All Scripts on the menu.
11.1.1 Using the CLTools Wizard
You can run the Wizard from within VisTrails. First, make sure the CLTools package is enabled. Then, on the menu,
select Packages->CLTools->Open Wizard.
Or, to launch the wizard from the command line run: python vistrails/package/CLTools/wizard.py
The wizard allows you to create and edit wrappers for command line tools. Input/output ports can be created as
arguments to the command or using pipes (stdin, stdout, or stderr). Figure 1.1 shows the main interface. Command
line arguments can be added, removed and rearranged. Pipes can be added and configured. There is a preview line
where you can see how your command will look when executed. You can also push the preview button to see which
ports will be available for the vistrails module, as shown in the bottom right. This example shows some of the most
common ways to specify arguments. In order: The standard output is used as a string output port, an integer attribute
using the -i flag, a boolean flag -A that can be turned on or off, an input file using a prefix, an output file using the -o
flag, and finally a simple string input. Note the way arguments correspond to ports in the bottom right.
Arguments can represent either input ports, output ports, both, or constant strings. Ports can handle different types
such as boolean flags, strings, integers, floats, or files. Lists of strings and files are also possible. Each argument can
have a flag before it such as -f or a prefix such as --file=.
A file ending can be specified for files that are used as outputs using file suffix.
You can view and import flags from man and help pages (See Figure 1.2).
Files should be saved as {modulename}.clt in the directory .vistrails/CLTools/
Supported flags:
-c
Import a command with arguments automatically
For example, to create a wrapper for ls with two flags -l and -A run:
python wizard.py -c ls -l -A
173
VisTrails Documentation, Release 2.1.4
Figure 11.1: Figure 1.1 - CLTools Wizard main window
174
Chapter 11. Wrapping command line tools using package CLTools
VisTrails Documentation, Release 2.1.4
Figure 11.2: Figure 1.2 - Import Arguments Window
11.1. Package CLTools
175
VisTrails Documentation, Release 2.1.4
Try it Now!
Create a wrapper that takes a file as input and generate a file as output using -o. The ports should always be
visible. The command looks like:
filter infile -o outfile
Your wrapper should look like in figure Figure 1.3. Note that the order of the arguments is always preserved:
Figure 11.3: Figure 1.3 - An infile outfile wrapper
11.1.2 Port visibility
Figure 1.4 shows how the visible setting affects ports in VisTrails. Visible ports are meant to be connected to other
modules, and are shown as square input or output ports on the module, while non-visible ports are meant to be
optional, or added as parameters on the input port list to the right. Non-visible ports can be made visible on the
module by clicking on the left side of the ports pane, so that a eye icon is displayed. The example below has 2 visible
input ports and one visible output port. The input list to the right shows available inputs, bot visible and non-visible.
The first input in the input list to the right is visible by default, which is shown by a greyed-out eye. The second port
is non-visible by default but has been made visible as shown by the eye icon. The second input is non-visible but can
be made visible on the module by clicking so that the eye icon becomes visible.
11.1.3 Environment Variables
There are three ways to set environment variables in CLTools. If your environment variables is platform-dependent,
you should set the env configuration variable for the CLTools package. In VisTrails, go to the Preferences->Module
Packages dialog, select CLTools, make sure it is enabled, and select Configure.... Set the env variable to the preferred
environment. Separate name and value using = and variables using ;, like this:
PATH=/my/custom/path;DEBUG=;MYVAR=32
176
Chapter 11. Wrapping command line tools using package CLTools
VisTrails Documentation, Release 2.1.4
Figure 11.4: Figure 1.4 - Port visibility in VisTrails
If you want to specify the variables in your workflow, you can enable the env input port on your module by checking the
env option in the top toolbar in the CLTools wizard. Then you can specify environment variables either as parameters
to your module or by connecting the env input port to other modules. Multiple parameters can be specified as a single
string or by adding multiple env parameters. These variables overrides variables specified using the other two methods.
For modules that always need the same environment variables, they can be added to the module by editing the .clt file
directly and adding an env entry in the options section as shown below. These variables overrides the ones specified
in the CLTools configuration:
{
"command": "ls",
"options": {
"env": "MYVAR=/my/custom/path;MYVAR2=64"
}
}
Note that if you replace e.g. the PATH variable, you should include the existing path, which can be found by running
e.g. echo $PATH on the command line.
11.1.4 Setting working directory
The Directory field to the right of the command field can be used to specify the working directory where the command
will be executed. It does not specify the directory where the command is found. Use the PATH enviroment variable
for that.
11.1.5 InputOutput files
The InputOutput port should be used for commands that modifies a file in-place, so that it is used both as and input
and an output. An example of using the InputOutput module is shown in Figure 1.5. When executed, the input file will
be copied to a temporary file before it is passed to the command and used as an output. This is because you should not
(if you can avoid it) modify the inputs to your modules, because they may be used by other modules, or re-executed
by the same module. It may be useful to set the file suffix attribute to make sure the copied file is of the same type as
the original. There is currently no way of passing the original file to the command, since it is discouraged. But if this
is necessary in a particular case, CLTools can be easily modified to do this.
11.1. Package CLTools
177
VisTrails Documentation, Release 2.1.4
Figure 11.5: Figure 1.5 - Example of an InputOutput port
11.1.6 Creating a standalone package
When you have a working set of wrappers and want to distribute them, you should put them in a separate module
package. This allows you to name and version your package, and makes sure there are no conflicts with modules using
the same name as yours. One warning: workflows using the old modules will need to be recreated to use the modules
in this new package instead, so it is better to start building workflows after a separate package has been created. Below
are the steps to follow in order to set up a new package.
1. Create a new directory in $HOME/.vistrails/userpackages/
2. Copy __init__.py and init.py from vistrails/packages/CLTools to this new directory
3. Update name, identifier, and version in __init__.py to the desired values
4. Move all desired tools (*.clt files) to this new directory
5. Enable and test your new package!
11.1.7 File Format
The wrapper is stored as a JSON file and can be edited using a text editor if needed. It uses the following schema:
ROOT is a dict with the following possible keys:
• command (required) - value is the command to execute like “cat” or “/home/tommy/cat”
• stdin - handle stdin - value is a 3-list [”port name”, CLASS, OPTIONDICT]
• stdout - handle stdout - value is a 3-list [”port name”, CLASS, OPTIONDICT]
• stderr - handle stdout - value is a 3-list [”port name”, CLASS, OPTIONDICT]
• args - list of ordered arguments that can either be constants, inputs, or outputs. See ARG.
• dir - value is the working directory to execute the command from
• options - a dict of module options - see OPTIONDICT
OPTIONDICT is a dict with module specific options, recognized options are:
• std_using_files - connect files to pipes so that they need not be stored in memory. This is useful for large files
but may be unsafe since it does not use subprocess.communicate
178
Chapter 11. Wrapping command line tools using package CLTools
VisTrails Documentation, Release 2.1.4
• env - A list of environment variables to set when executing the command, with entries separated by ; and
key/value pairs separated by =. This overrides all other environment variables set, except for the env_port, and
should only be used when they are not expected to change. It can only be set by editing the .clt files directly
with a text editor.
• env_port - Set to add an input port env for specifying the environment variables to use, this overrides all other
environment variables set
ARG is a 4-list containing [TYPE, “name”, KLASS, ARGOPTIONDICT] TYPE is one of:
• input - create input port for this arg
• output - create output port for this arg
• inputoutput - create both input and output port for this arg. The type must be File and a copy of the original
file will be processed and used as output.
• constant - use “port name” directly as a constant string
CLASS indicates the port type and can be one of the following. String is used by default.
• File - A vistrails File type. The filename will be used as the argument
• String - A vistrails String type. The string will be used as the argument
• Integer - A vistrails Integer type. Its string value will be used as the argument
• Float - A vistrails Float type. Its string value will be used as the argument
• Flag - A vistrails Bool type. A boolean flag that when set to true will add the value of the argument to the
command.
• List - A list of values of the type specified by the type option. All values in the list will be added as arguments.
ARGOPTIONDICT is a dict containing argument options. recognized options are:
• type: CLASS - used by List-types to specify subtype.
• flag: name - Append name as a short-style flag before the specified argument. If type is List it is appended
before each item
• prefix: name - Append name as a long-style prefix to the final argument. If it is also a list it is appended to each
item.
• required: None - Makes the port always visible in VisTrails.
• suffix: name - Specifies the file ending for created files
11.1. Package CLTools
179
VisTrails Documentation, Release 2.1.4
Try it Now!
Wrap the command “cat” that takes 2 files as input named “first” and “second”. Also take a list of files as input
named “rest”. Catch stdout as file, name it “combined”. Catch stderr as string, name it “stderr”. Show “first”
and “combined” by default.
Your wrapper should now look like this:
{"command": "cat",
"args": [["input", "first", "File", {"required":""}],
["input", "second", "File", {}],
["input", "rest", "List", {"type":"File"}]],
"stdout": ["combined", "File", {"required":""}],
"stderr": ["stderr", "String", {}]
}
Save as {yourhomedirectory}/.vistrails/CLTools/cat.clt Reload CLTools package in VisTrails. Test the new module.
180
Chapter 11. Wrapping command line tools using package CLTools
CHAPTER
TWELVE
VISTRAILS API DOCUMENTATION
12.1 Module Definition
12.1.1 Module
class vistrails.core.modules.vistrails_module.Module
Module is the base module from which all module functionality is derived from in VisTrails. It defines a set
of basic interfaces to deal with data input/output (through ports, as will be explained later), as well as a basic
mechanism for dataflow based updates.
Execution Model
VisTrails assumes fundamentally that a pipeline is a dataflow. This means that pipeline cycles are disallowed,
and that modules are supposed to be free of side-effects. This is obviously not possible in general, particularly
for modules whose sole purpose is to interact with operating system resources. In these cases, designing a
module is harder – the side effects should ideally not be exposed to the module interface. VisTrails provides
some support for making this easier, as will be discussed later.
VisTrails caches intermediate results to increase efficiency in exploration. It does so by reusing pieces of
pipelines in later executions.
Terminology
Module Interface: The module interface is the set of input and output ports a module exposes.
Designing New Modules
Designing new modules is essentially a matter of subclassing this module class and overriding the compute()
method. There is a fully-documented example of this on the default package ‘pythonCalc’, available on the
‘packages/pythonCalc’ directory.
Caching
Caching affects the design of a new module. Most importantly, users have to account for compute() being called
more than once. Even though compute() is only called once per individual execution, new connections might
mean that previously uncomputed output must be made available.
Also, operating system side-effects must be carefully accounted for. Some operations are fundamentally sideeffectful (creating OS output like uploading a file on the WWW or writing a file to a local hard drive). These
modules should probably not be cached at all. VisTrails provides an easy way for modules to report that they
should not be cached: simply subclass from the NotCacheable mixin provided in this python module. (NB: In
order for the mixin to work appropriately, NotCacheable must appear BEFORE any other subclass in the class
hierarchy declarations). These modules (and anything that depends on their results) will then never be reused.
Intermediate Files
181
VisTrails Documentation, Release 2.1.4
Many modules communicate through intermediate files. VisTrails provides automatic filename and handle management to alleviate the burden of determining tricky things (e.g. longevity) of these files. Modules can request
temporary file names through the file pool, currently accessible through self.interpreter.filePool.
The FilePool class is available in core/modules/module_utils.py - consult its documentation for usage. Notably,
using the file pool will make temporary files work correctly with caching, and will make sure the temporaries
are correctly removed.
_input_ports
Class attribute that stores the list of input ports for the module. May include instances of InputPort and
CompoundInputPort.
_output_ports
Class attribute that defines the list of output ports for the module. May include instances of OutputPort
and CompoundOutputPort.
_settings
Class attribute that stores a ModuleSettings object that controls appearance, configuration widgets,
and other module settings.
compute()
This method should be overridden in order to perform the module’s computation.
get_input(port_name, allow_default=True)
Returns the value coming in on the input port named port_name.
Parameters
• port_name (String) – the name of the input port being queried
• allow_default (Boolean) – whether to return the default value if it exists
Returns the value being passed in on the input port
Raises ModuleError if there is no value on the port (and no default value if allow_default is
True)
get_input_list(port_name)
Returns the value(s) coming in on the input port named port_name. When a port can accept more than
one input, this method obtains all the values being passed in.
Parameters port_name (String) – the name of the input port being queried
Returns a list of all the values being passed in on the input port
Raises ModuleError if there is no value on the port
set_output(port_name, value)
This method is used to set a value on an output port.
Parameters
• port_name (String) – the name of the output port to be set
• value – the value to be assigned to the port
check_input(port_name) → None.
Raises an exception if the input port named port_name is not set.
Parameters port_name (String) – the name of the input port being checked
Raises ModuleError if there is no value on the port
has_input(port_name)
Returns a boolean indicating whether there is a value coming in on the input port named port_name.
182
Chapter 12. VisTrails API Documentation
VisTrails Documentation, Release 2.1.4
Parameters port_name (String) – the name of the input port being queried
Return type Boolean
force_get_input(port_name, default_value=None)
Like get_input() except that if no value exists, it returns a user-specified default_value or None.
Parameters
• port_name (String) – the name of the input port being queried
• default_value – the default value to be used if there is no value on the input port
Returns the value being passed in on the input port or the default
force_get_input_list(port_name)
Like get_input_list() except that if no values exist, it returns an empty list
Parameters port_name (String) – the name of the input port being queried
Returns a list of all the values being passed in on the input port
annotate(d)
Manually add provenance information to the module’s execution trace. For example, a module that generates random numbers might add the seed that was used to initialize the generator.
Parameters d (Dictionary) – a dictionary where both the keys and values are strings
12.1.2 ModuleError
class vistrails.core.modules.vistrails_module.ModuleError(module,
errormsg,
abort=False)
ModuleError should be passed the module instance that signaled the error and the error message as a string.
12.1.3 ModuleSettings
class vistrails.core.modules.config.ModuleSettings(name=None,
configure_widget=None,
constant_widget=None,
constant_widgets=None,
signature=None,
constant_signature=None, color=None,
fringe=None,
left_fringe=None,
right_fringe=None,
abstract=False,
package=None,
namespace=None,
version=None,
package_version=None,
hide_namespace=False,
hide_descriptor=False,
is_root=False, ghost_package=None,
ghost_package_version=None,
ghost_namespace=None)
name(String)
An optional string that will identify the module (defaults to the module class’s __name__).
configure_widget(QWidget | PathString)
An optional module configuration widget that is provided so that users can configure the module (e.g.
PythonSource uses a widget to display a code editor more suited for writing code).
12.1. Module Definition
183
VisTrails Documentation, Release 2.1.4
constant_widget(ConstantWidgetConfig | QWidget | PathString)
If not None, the registry will use the specified widget(s) or import path string(s) of the form “<module>:<class>” to import the widget. A tuple allows a user to specify the widget_type (e.g. “default”,
“enum”, etc.) as the second item and the widget_use (e.g. “default”, “query”, “paramexp”). If the plural
form is used, we expect a list, the singular form is used for a single item.
constant_widgets(List(constant_widget))
See ModuleSettings.constant_widget
signature(Callable)
If not None, then the cache uses this callable as the function to generate the signature for the module in
the cache. The function should take three parameters: the pipeline (of type vistrails.core.vistrail.Pipeline),
the module (of type vistrails.core.vistrail.Module), and a dict that stores parameter hashers. This dict is
supposed to be passed to vistrails/core/cache/hasher.py:Hasher, in case that needs to be called.
constant_signature(Callable)
If not None, the cache uses this callable as the function used to generate the signature for parameters of the associated module’s type. This function should take a single argument (of type vistrials.core.vistrail.module_param.ModuleParam) and returns a SHA hash.
color((Float, Float, Float))
In the GUI, the module will be colored according to the specified RGB tuple where each value is a float in
[0,1.0].
fringe(List((Float, Float)))
If not None, generates custom lateral fringes for the module boxes. module_fringe must be a list of
pairs of floats. The first point must be (0.0, 0.0), and the last must be (0.0, 1.0). This will be used
to generate custom lateral fringes for module boxes. All x values must be positive, and all y values
must be between 0.0 and 1.0. Alternatively, the user can set ModuleSettings.left_fringe and
ModuleSettings.right_fringe to set two different fringes.
left_fringe(List((Float, Float)))
See ModuleSettings.fringe.
right_fringe(List((Float, Float)))
See ModuleSettings.fringe.
abstract(Boolean)
If True, means the module only serves as a base class for other modules. It will not appear in the module
palette but may be used as a input or output port type.
package(String)
If not None, then we use this package instead of the current one. This is only intended to be used with
local per-module module registries (in other words: if you don’t know what a local per-module registry is,
you can ignore this option).
namespace(String)
If not None, then we associate a namespace with the module. A namespace is essentially appended to the
package identifier so that multiple modules inside the same package can share the same name. Namespaces
may be nested using the “|” separator. For example, “Tools|Mathematical” specified the Mathematical
namespace inside of the Tools namespace.
version(String)
The module version. This is usually used with subworkflows where the underlying module may have
different versions. Not recommended for general use at this time.
package_version(String)
The current package version for the module. As with ModuleSettings.package, you shuold not
use this unless you know what you are doing as VisTrails will automatically fill in this information for any
normal package.
184
Chapter 12. VisTrails API Documentation
VisTrails Documentation, Release 2.1.4
hide_namespace(Boolean)
If True, the module palette will not display the namespace for the module. Used for subworkflows, otherwise it may be confusing for users.
hide_descriptor(Boolean)
If True, the module palette will not display that module in its list (similar to abstract, but can be used when
the module is not truly abstract).
is_root(Boolean)
Internal use only. This is used to designate the base Module class and should not be used by any other
module.
ghost_package(String)
If not None, then the ‘ghost_identifier’ is set on the descriptor, which will cause the module to be displayed
under that package in the module palette, rather than the package specified by the package argument (or
current package).
ghost_package_version(String)
If not None, then the attribute ‘ghost_package_version’ is set on the descriptor. Currently this value is
unused, but eventually if multiple packages with the same identifier but different package versions are
loaded simultaneously, this will allow overriding the package_version to clean up the module palette.
ghost_namespace(String)
If not None, the descriptor will be displayed under the specified namespace instead of the ‘namespace’
attribute of the descriptor.
12.2 Port Specification
12.2.1 InputPort (IPort)
class vistrails.core.modules.config.InputPort(name=None,
signature=None,
optional=False, sort_key=-1, docstring=None,
shape=None, min_conns=0, max_conns=1, depth=0, label=None, default=None,
values=None, entry_type=None)
name(String)
The name of the of the port
signature(String)
The signature of the of the port (e.g. “basic:Float”)
optional(Boolean)
Whether the port should be visible by default (defaults to True)
sort_key(Integer)
An integer value that indicates where, relative to other ports, this port should appear visually
docstring(String)
Documentation for the port
shape( “triangle” | “diamond” | “circle” | [(Float,Float)])
The shape of the port. If triangle, appending an angle (in degrees) rotates the triangle. If a list of (x,y)
tuples, specifies points of a polygon in the [0,1] x [0,1] region
min_conns(Integer)
The minimum number of values required for the port
12.2. Port Specification
185
VisTrails Documentation, Release 2.1.4
max_conns(Integer)
The maximum number of values allowed for the port
depth(Integer)
The list depth of the port. Default is 0 (no list)
label(String)
A label to be shown with a port
default
The default value for a constant-typed port
values(List)
A list of enumerated values that a ConstantWidgetConfig uses to configure the widget. For example,
the “enum” widget uses the entries to present an exclusive list of choices.
entry_type(String)
The type of the configuration widget that should be used with this port.
Developers may use custom widgets on a port-by-port basis by adding widgets with different
ConstantWidgetConfig.widget_type values and defining the port’s entry_type to match.
class vistrails.core.modules.config.IPort
Synonym for InputPort
12.2.2 OutputPort (OPort)
class vistrails.core.modules.config.OutputPort(name=None,
signature=None,
optional=False,
sort_key=-1,
docstring=None, shape=None, min_conns=0,
max_conns=-1, depth=0)
name(String)
The name of the of the port
signature(String)
The signature of the of the port (e.g. “basic:Float”)
optional(Boolean)
Whether the port should be visible by default (defaults to True)
sort_key(Integer)
An integer value that indicates where, relative to other ports, this port should appear visually
docstring(String)
Documentation for the port
shape( “triangle” | “diamond” | “circle” | [(Float,Float)])
The shape of the port. If triangle, appending an angle (in degrees) rotates the triangle. If a list of (x,y)
tuples, specifies points of a polygon in the [0,1] x [0,1] region
min_conns(Integer)
The minimum number of values required for the port
max_conns(Integer)
The maximum number of values allowed for the port
depth(Integer)
The list depth of the port. Default is 0 (no list)
class vistrails.core.modules.config.OPort
Synonym for OutputPort
186
Chapter 12. VisTrails API Documentation
VisTrails Documentation, Release 2.1.4
12.2.3 CompoundInputPort (CIPort)
class vistrails.core.modules.config.CompoundInputPort(name=None, signature=None,
optional=False,
sort_key=-1,
docstring=None, shape=None,
min_conns=0, max_conns=-1,
depth=0,
items=None,
labels=None, defaults=None, values=None, entry_types=None)
name(String)
The name of the of the port
signature(String)
The signature of the port (e.g. “basic:Integer, basic:Float”). Note that for compound ports, this may be
instead included on a per-component basis in InputPortItem.signature.
optional(Boolean)
Whether the port should be visible by default (defaults to True)
sort_key(Integer)
An integer value that indicates where, relative to other ports, this port should appear visually
docstring(String)
Documentation for the port
shape( “triangle” | “diamond” | “circle” | [(Float,Float)])
The shape of the port. If triangle, appending an angle (in degrees) rotates the triangle. If a list of (x,y)
tuples, specifies points of a polygon in the [0,1] x [0,1] region
min_conns(Integer)
The minimum number of values required for the port
max_conns(Integer)
The maximum number of values allowed for the port
depth(Integer)
The list depth of the port. Default is 0 (no list)
items(List(InputPortItem))
Either use this field and break individual labels/defaults/values/entry_types into InputPortItem components or use the other four fields.
labels(List(String))
A list of InputPort.label
defaults(List)
A list of InputPort.default
values(List(List))
A list of InputPort.values
entry_types(List(String))
A list of InputPort.entry_type
class vistrails.core.modules.config.CIPort
Synonym for CompoundInputPort
12.2. Port Specification
187
VisTrails Documentation, Release 2.1.4
12.2.4 CompoundOutputPort (COPort)
class vistrails.core.modules.config.CompoundOutputPort(name=None, signature=None,
optional=False, sort_key=-1,
docstring=None, shape=None,
min_conns=0, max_conns=-1,
depth=0, items=None)
name(String)
The name of the of the port
signature(String)
The signature of the port (e.g. “basic:Integer, basic:Float”). Note that for compound ports, this may be
instead included on a per-component basis in OutputPortItem.signature.
optional(Boolean)
Whether the port should be visible by default (defaults to True)
sort_key(Integer)
An integer value that indicates where, relative to other ports, this port should appear visually
docstring(String)
Documentation for the port
shape( “triangle” | “diamond” | “circle” | [(Float,Float)])
The shape of the port. If triangle, appending an angle (in degrees) rotates the triangle. If a list of (x,y)
tuples, specifies points of a polygon in the [0,1] x [0,1] region
min_conns(Integer)
The minimum number of values required for the port
max_conns(Integer)
The maximum number of values allowed for the port
depth(Integer)
The list depth of the port. Default is 0 (no list)
items(List(OutputPortItem))
Either use this field and break individual signatures into OutputPortItem components or use the signature field.
class vistrails.core.modules.config.COPort
Synonym for CompundOutputPort
12.2.5 InputPortItem (IPItem)
class vistrails.core.modules.config.InputPortItem(signature=None, label=None,
fault=None,
values=None,
try_type=None)
deen-
signature(String)
See InputPort.signature
label(String)
See InputPort.label
default
See InputPort.default
188
Chapter 12. VisTrails API Documentation
VisTrails Documentation, Release 2.1.4
values(List)
See InputPort.values
entry_type(String)
See InputPort.entry_type
class vistrails.core.modules.config.IPItem
Synonym for InputPortItem
12.2.6 OutputPortItem (OPItem)
class vistrails.core.modules.config.OutputPortItem(signature=None)
signature(String)
See InputPort.signature
class vistrails.core.modules.config.OPItem
Synonym for OutputPortItem
12.3 Parameter Widget Configuration
12.3.1 ConstantWidgetConfig
class vistrails.core.modules.config.ConstantWidgetConfig(widget, widget_type=None,
widget_use=None)
widget(QWidget | String)
The widget to be used either as the class itself or a string of the form <py_module>:<class> (e.g.
“vistrails.gui.modules.constant_configuration:BooleanWidget”)
widget_type(String)
A developer-available type that links a widget to a port entry_type
widget_use(String)
Intended to differentiate widgets for different purposes in VisTrails. Currently uses the values None,
“query”, and “paramexp” to define widget uses in parameter, query, and parameter exploration configurations, repsectively.
12.3.2 QueryWidgetConfig
class vistrails.core.modules.config.QueryWidgetConfig(widget=None,
get_type=None,
get_use=’query’)
widwid-
widget(QWidget | String)
The widget to be used either as the class itself or a string of the form <py_module>:<class> (e.g.
“vistrails.gui.modules.constant_configuration:BooleanWidget”)
widget_type(String)
A developer-available type that links a widget to a port entry_type
widget_use(String)
Like ConstantWidgetConfig.widget_use, just defaulted to “query”
12.3. Parameter Widget Configuration
189
VisTrails Documentation, Release 2.1.4
12.3.3 ParamExpWidgetConfig
class vistrails.core.modules.config.ParamExpWidgetConfig(widget=None,
widget_type=None,
widget_use=’paramexp’)
widget(QWidget | String)
The widget to be used either as the class itself or a string of the form <py_module>:<class> (e.g.
“vistrails.gui.modules.constant_configuration:BooleanWidget”)
widget_type(String)
A developer-available type that links a widget to a port entry_type
widget_use(String)
Like ConstantWidgetConfig.widget_use, just defaulted to “paramexp”
190
Chapter 12. VisTrails API Documentation
Part III
Indices and tables
191
VisTrails Documentation, Release 2.1.4
• genindex
• search
193
VisTrails Documentation, Release 2.1.4
194
BIBLIOGRAPHY
[C1] 18. (a) Banvard, “The visible human project image data set from inception to completion and beyond,” Proceedings of CODATA, 2002.
[C2] 12. Ibanez, W. Schroeder, L. Ng, and J. Cates, The ITK Software Guide, 2nd ed., Kitware, Inc. ISBN 1930934-15-7, http://www.itk.org/ItkSoftwareGuide.pdf, 2005.
[C3] 20. (a) Yoo, M. J. Ackerman, W. E. Lorensen, W. Schroeder, V. Chalana, S. Aylward, D. Metaxes, and R.
Whitaker, “Engineering and algorithm design for an image processing API: A technical report on ITK The Insight Toolkit,” Proceedings of Medicine Meets Virtual Reality, pp. 586-592, 2002.
195
VisTrails Documentation, Release 2.1.4
196
Bibliography
PYTHON MODULE INDEX
v
vistrails.core.modules.config, 183
vistrails.core.modules.vistrails_module,
181
197
VisTrails Documentation, Release 2.1.4
198
Python Module Index
INDEX
Symbols
mashups, 62
analogy,
45
_input_ports (vistrails.core.modules.vistrails_module.Module
visual
diff, 50
attribute), 182
animation,
53,
56
_output_ports (vistrails.core.modules.vistrails_module.Module
annotate()
(vistrails.core.modules.vistrails_module.Module
attribute), 182
method), 183
_settings (vistrails.core.modules.vistrails_module.Module
annotations
attribute), 182
versions, 31
‘‘ConfigurationObject‘‘, 130
‘‘ModuleError‘‘
modules, 124, 127
‘‘_input_ports‘‘
modules, 124, 127
‘‘_modules‘‘
packages, 124
‘‘_output_ports‘‘
modules, 124, 127
‘‘compute‘‘
modules, 127
‘‘filePool‘‘
packages, 145
‘‘identifier‘‘
packages, 124
‘‘name‘‘
packages, 124
‘‘version‘‘
packages, 124
B
basic
modules, 21
batch mode, 153
builder, 15, 22
by example
queries, 35
C
caching
modules, 134
cardinality
ports, 139
cells
creating, spreadsheet, 41
positioning, spreadsheet, 41
spreadsheet, 40, 42
web browser, spreadsheet, 44
center, 14
A
changing
abstract
parameters, 17
modules, 135
check_input()
(vistrails.core.modules.vistrails_module.Module
abstract (vistrails.core.modules.config.ModuleSettings
method),
182
attribute), 184
close
adding
vistrail, 12
connections, 17
color
modules, 15, 105
modules, 136
ports, 21
color
(vistrails.core.modules.config.ModuleSettings atspreadsheet sheets, 41
tribute), 184
tags, 31
columns
adding parameters
spreadsheet, 40
parameter exploration, 53
command
line arguments, 147
aliases
comparing
199
VisTrails Documentation, Release 2.1.4
versions, 32
defaults (vistrails.core.modules.config.CompoundInputPort
CompoundInputPort
(class
in
visattribute), 187
trails.core.modules.config), 187
definition
CompoundOutputPort
(class
in
visconnections, 12
trails.core.modules.config), 188
modules, 12
compute() (vistrails.core.modules.vistrails_module.Module
vistrail, 12
method), 182
deleting
configuration
modules, 15
modules, 137
ports, 21
packages, 129
spreadsheet sheets, 41
configuration directory, 152
tags, 31
configure_widget (vistrails.core.modules.config.ModuleSettings
dependencies
attribute), 183
packages, 131
configuring aliases
depth (vistrails.core.modules.config.CompoundInputPort
mashups, 62
attribute), 187
connecting
depth (vistrails.core.modules.config.CompoundOutputPort
modules, 17
attribute), 188
connections
depth (vistrails.core.modules.config.InputPort attribute),
adding, 17
186
definition, 12
depth
(vistrails.core.modules.config.OutputPort
atselecting, 15
tribute), 186
connectivity
diff
ports, 141
see versions, comparing, 32
constant_signature
(vis- differences
trails.core.modules.config.ModuleSettings
parameters, 32
attribute), 184
directions
constant_widget (vistrails.core.modules.config.ModuleSettings parameter exploration, 53
attribute), 184
docking
constant_widgets (vistrails.core.modules.config.ModuleSettings spreadsheet sheets, 41
attribute), 184
docstring (vistrails.core.modules.config.CompoundInputPort
ConstantWidgetConfig
(class
in
visattribute), 187
trails.core.modules.config), 189
docstring (vistrails.core.modules.config.CompoundOutputPort
control flow
attribute), 188
parameter exploration, 92
docstring (vistrails.core.modules.config.InputPort atcontrol flow assistant, 91
tribute), 185
creating
docstring (vistrails.core.modules.config.OutputPort atspreadsheet cells, 41
tribute), 186
customization
dynamic
modules, 134
modules, 141
D
E
database, 101, 103
issues, 103
opening from, 102
saving to, 102
setup, 101
default (vistrails.core.modules.config.InputPort attribute),
186
default (vistrails.core.modules.config.InputPortItem attribute), 188
default values
ports, 139
spreadsheet, 40
editing
spreadsheet modes, 43
entry_type (vistrails.core.modules.config.InputPort attribute), 186
entry_type (vistrails.core.modules.config.InputPortItem
attribute), 189
entry_types (vistrails.core.modules.config.CompoundInputPort
attribute), 187
execute, 13
exploring
parameters, 53, 92
200
Index
VisTrails Documentation, Release 2.1.4
F
items (vistrails.core.modules.config.CompoundInputPort
force_get_input() (vistrails.core.modules.vistrails_module.Module attribute), 187
items (vistrails.core.modules.config.CompoundOutputPort
method), 183
attribute), 188
force_get_input_list()
(vistrails.core.modules.vistrails_module.Module
L
method), 183
fringe (vistrails.core.modules.config.ModuleSettings at- label (vistrails.core.modules.config.InputPort attribute),
186
tribute), 184
label
(vistrails.core.modules.config.InputPortItem
atfrom a database
tribute),
188
open, 12
labels
modules, 21
G
ports, 139
get_input() (vistrails.core.modules.vistrails_module.Module
labels
(vistrails.core.modules.config.CompoundInputPort
method), 182
attribute), 187
get_input_list() (vistrails.core.modules.vistrails_module.Module
layout
method), 182
ghost_namespace (vistrails.core.modules.config.ModuleSettings spreadsheet, 40
left_fringe (vistrails.core.modules.config.ModuleSettings
attribute), 185
attribute), 184
ghost_package (vistrails.core.modules.config.ModuleSettings
legend,
32
attribute), 185
ghost_package_version
(vis- list of examples
modules, 67
trails.core.modules.config.ModuleSettings
location
attribute), 185
view, 11
grouping, 24
log,
159
modules, 24
groups
subworkflows, 26
M
mashups
aliases, 62
configuring aliases, 62
has_input() (vistrails.core.modules.vistrails_module.Module
naming, 62
method), 182
hide_descriptor (vistrails.core.modules.config.ModuleSettings saving, 62
setting parameters, 62
attribute), 185
max_conns (vistrails.core.modules.config.CompoundInputPort
hide_namespace (vistrails.core.modules.config.ModuleSettings
attribute), 187
attribute), 184
max_conns (vistrails.core.modules.config.CompoundOutputPort
history, 28
attribute), 188
max_conns (vistrails.core.modules.config.InputPort atI
tribute), 185
image
max_conns
(vistrails.core.modules.config.OutputPort atspreadsheet saving, 45
tribute),
186
input
merging,
33
persistent files, 108
methods, 17
InputPort (class in vistrails.core.modules.config), 185
InputPortItem (class in vistrails.core.modules.config), min_conns (vistrails.core.modules.config.CompoundInputPort
attribute), 187
188
min_conns
(vistrails.core.modules.config.CompoundOutputPort
interactive
attribute),
188
spreadsheet modes, 42
min_conns
(vistrails.core.modules.config.InputPort
atintermediate
tribute),
185
persistent files, 109
is_root (vistrails.core.modules.config.ModuleSettings at- min_conns (vistrails.core.modules.config.OutputPort attribute), 186
tribute), 185
modes
issues
editing, spreadsheet, 43
database, 103
interactive, spreadsheet, 42
H
Index
201
VisTrails Documentation, Release 2.1.4
spreadsheet, 41
Module
(class
in
vistrails.core.modules.vistrails_module), 181
ModuleError
(class
in
vistrails.core.modules.vistrails_module), 183
modules, 15
‘‘ModuleError‘‘, 124, 127
‘‘_input_ports‘‘, 124, 127
‘‘_output_ports‘‘, 124, 127
‘‘compute‘‘, 127
abstract, 135
adding, 15, 105
basic, 21
caching, 134
color, 136
configuration, 137
connecting, 17
customization, 134
definition, 12
deleting, 15
dynamic, 141
grouping, 24
labels, 21
list of examples, 67
namespaces, 135
parameters, 17
ports, 21
selecting, 15
shape, 136
subworkflows, 26
ungrouping, 24
visibility, 135
widgets, 137
writing new, 123
ModuleSettings (class in vistrails.core.modules.config),
183
N
name (vistrails.core.modules.config.CompoundInputPort
attribute), 187
name (vistrails.core.modules.config.CompoundOutputPort
attribute), 188
name (vistrails.core.modules.config.InputPort attribute),
185
name (vistrails.core.modules.config.ModuleSettings attribute), 183
name
(vistrails.core.modules.config.OutputPort
attribute), 186
namespace (vistrails.core.modules.config.ModuleSettings
attribute), 184
namespaces
modules, 135
naming
mashups, 62
202
navigating
versions, 32
non-interactive mode, 153
notes, 31
O
open
from a database, 12
vistrail, 12
opening from
database, 102
optional
ports, 139
optional (vistrails.core.modules.config.CompoundInputPort
attribute), 187
optional (vistrails.core.modules.config.CompoundOutputPort
attribute), 188
optional (vistrails.core.modules.config.InputPort attribute), 185
optional
(vistrails.core.modules.config.OutputPort
attribute), 186
ordering
spreadsheet sheets, 41
output
persistent files, 108
OutputPort (class in vistrails.core.modules.config), 186
OutputPortItem (class in vistrails.core.modules.config),
189
P
package
upgrades, 133
package (vistrails.core.modules.config.ModuleSettings
attribute), 184
package_version (vistrails.core.modules.config.ModuleSettings
attribute), 184
packages, 123
‘‘_modules‘‘, 124
‘‘filePool‘‘, 145
‘‘identifier‘‘, 124
‘‘name‘‘, 124
‘‘version‘‘, 124
configuration, 129
dependencies, 131
ports, 139
temporary files, 145
wrapping command-line tools, 143
palette
views, 11
pan, 13
parameter exploration, 53, 60
adding parameters, 53
control flow, 92
directions, 53
Index
VisTrails Documentation, Release 2.1.4
running, 53
setting values, 53
spreadsheet, 53, 58, 60
parameter widgets, 75
parameters
changing, 17
differences, 32
exploring, 53, 92
modules, 17
ParamExpWidgetConfig
(class
trails.core.modules.config), 190
persistent files
input, 108
intermediate, 109
output, 108
ports, 17, 127
adding, 21
cardinality, 139
connectivity, 141
default values, 139
deleting, 21
labels, 139
modules, 21
optional, 139
packages, 139
shape, 139
signatures, 140
variant, 140
positioning
spreadsheet cells, 41
PythonSource, 22
vistrail, 12
saving
image, spreadsheet, 45
mashups, 62
spreadsheet, 44
saving parameter exploration
spreadsheet, 58
saving to
database, 102
in
vis- search
refine, 39
select, 13
selecting
connections, 15
modules, 15
server, 111, 156
set_output() (vistrails.core.modules.vistrails_module.Module
method), 182
setting parameters
mashups, 62
setting values
parameter exploration, 53
setup
database, 101
shape
modules, 136
ports, 139
shape (vistrails.core.modules.config.CompoundInputPort
attribute), 187
shape (vistrails.core.modules.config.CompoundOutputPort
attribute), 188
shape (vistrails.core.modules.config.InputPort attribute),
Q
185
shape
(vistrails.core.modules.config.OutputPort
atqueries, 33, 39
tribute), 186
by example, 35
sheets
textual, 38
adding, spreadsheet, 41
viewing results, 35
deleting, spreadsheet, 41
QueryWidgetConfig
(class
in
visdocking, spreadsheet, 41
trails.core.modules.config), 189
ordering, spreadsheet, 41
signature (vistrails.core.modules.config.CompoundInputPort
R
attribute), 187
redo, 13, 32
signature
(vistrails.core.modules.config.CompoundOutputPort
RichTextCell
attribute), 188
spreadsheet, 107
signature
(vistrails.core.modules.config.InputPort atright_fringe (vistrails.core.modules.config.ModuleSettings
tribute),
185
attribute), 184
signature
(vistrails.core.modules.config.InputPortItem
atrows
tribute),
188
spreadsheet, 40
signature (vistrails.core.modules.config.ModuleSettings
running
attribute), 184
parameter exploration, 53
signature (vistrails.core.modules.config.OutputPort attribute), 186
S
signature (vistrails.core.modules.config.OutputPortItem
save
attribute), 189
Index
203
VisTrails Documentation, Release 2.1.4
signatures
upgrading
ports, 140
tags, 31
sort_key (vistrails.core.modules.config.CompoundInputPort
V
attribute), 187
sort_key (vistrails.core.modules.config.CompoundOutputPort
values (vistrails.core.modules.config.CompoundInputPort
attribute), 188
attribute), 187
sort_key (vistrails.core.modules.config.InputPort at- values (vistrails.core.modules.config.InputPort attribute),
tribute), 185
186
sort_key
(vistrails.core.modules.config.OutputPort values (vistrails.core.modules.config.InputPortItem atattribute), 186
tribute), 188
spreadsheet, 39, 45
variant
cells, 40, 42
ports, 140
cells creating, 41
version (vistrails.core.modules.config.ModuleSettings atcells positioning, 41
tribute), 184
cells web browser, 44
versions, 28, 32
columns, 40
annotations, 31
default values, 40
comparing, 32
layout, 40
navigating, 32
modes, 41
viewing, 28
modes editing, 43
view
modes interactive, 42
location, 11
parameter exploration, 53, 58, 60
viewing
RichTextCell, 107
versions, 28
rows, 40
viewing results
saving, 44
queries, 35
saving image, 45
views
saving parameter exploration, 58
palette, 11
sheets adding, 41
virtual cell
sheets deleting, 41
spreadsheet, 60
sheets docking, 41
visibility
sheets ordering, 41
modules, 135
virtual cell, 60
vistrail
subworkflows, 26
close, 12
groups, 26
definition, 12
modules, 26
open, 12
save, 12
T
VisTrails VTK modules, 64
tab, 12
vistrails.core.modules.config (module), 183
tags, 28
vistrails.core.modules.config.CIPort (class in visadding, 31
trails.core.modules.config), 187
deleting, 31
vistrails.core.modules.config.COPort (class in visupgrading, 31
trails.core.modules.config), 188
temporary files
vistrails.core.modules.config.IPItem (class in vispackages, 145
trails.core.modules.config), 189
textual
vistrails.core.modules.config.IPort
(class
in
visqueries, 38
trails.core.modules.config), 186
toolbar, 9
vistrails.core.modules.config.OPItem (class in vistrails.core.modules.config), 189
U
vistrails.core.modules.config.OPort (class in visundo, 13, 32
trails.core.modules.config), 186
ungrouping
vistrails.core.modules.vistrails_module (module), 181
modules, 24
visual diff
upgrades, 133
analogy, 50
package, 133
see versions, comparing, 32
204
Index
VisTrails Documentation, Release 2.1.4
vtkInteractionHandler, 67
W
web browser
spreadsheet cells, 44
widget (vistrails.core.modules.config.ConstantWidgetConfig
attribute), 189
widget (vistrails.core.modules.config.ParamExpWidgetConfig
attribute), 190
widget (vistrails.core.modules.config.QueryWidgetConfig
attribute), 189
widget_type (vistrails.core.modules.config.ConstantWidgetConfig
attribute), 189
widget_type (vistrails.core.modules.config.ParamExpWidgetConfig
attribute), 190
widget_type (vistrails.core.modules.config.QueryWidgetConfig
attribute), 189
widget_use (vistrails.core.modules.config.ConstantWidgetConfig
attribute), 189
widget_use (vistrails.core.modules.config.ParamExpWidgetConfig
attribute), 190
widget_use (vistrails.core.modules.config.QueryWidgetConfig
attribute), 189
widgets
modules, 137
workflow, 12
wrapping command line tools using package CLTools,
173
wrapping command-line tools
packages, 143
writing new
modules, 123
Z
zoom, 13
Index
205
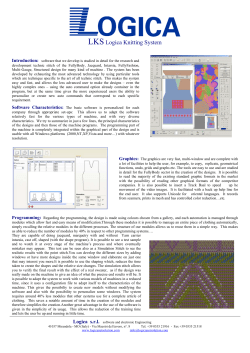


© Copyright 2026