
Developing IBM UrbanCode Deploy Plug-ins
Developing IBM UrbanCode
Deploy Plug-ins
Introductions
Your organization
Your role
Your background and
experience
Software development
IBM UrbanCode products
IBM Rational products
Course expectations
IBM Corporation ©2013
Intended Audience
This course focuses on the process and tools used in
creating UrbanCode Deploy plug-ins. The course
assumes a basic knowledge of UrbanCode Deploy and
does not teach those concepts.
Basic knowledge of Eclipse
is assumed.
Questions are welcomed.
Questions that require
technical answers may be
deferred to insure all class
materials are covered.
IBM Corporation ©2013
Course Goals
At the end of this course, you should be able to:
Understand the IBM plug-in support model
Utilize the IBM UrbanCode Plug-in DevKit to build and
deploy new plug-ins
Understand the anatomy of a plug-in
Build deploy plug-ins that wrap existing scripts, makes CLI
calls, and make REST calls
Build source config plug-ins
Incorporate resources and properties in your plug-ins
Understand how to upgrade a plug-in
Know when and how to use post-processing scripts
IBM Corporation ©2013
Agenda
Introduction to IBM UrbanCode Deploy Plug-ins
The UrbanCode Deploy Plug-in DevKit
Lab 1 – Hello World plug-in
A closer look at info.xml and plugin.xml
Lab 2 – Create a new plug-in that encapsulates a script
Upgrading a plug-in – upgrade.xml
Lab 3 – Upgrade a plug-in
Helper Groovy Scripts and calling REST API methods
Lab 4 – Create a new plug-in that makes a REST call
Plug-ins and Properties
Source Config Plug-ins
Lab 5 – Source Config plug-in
Miscellaneous Topics - Post-processing scripts, logging, auto-discovery
IBM Corporation ©2013
INTRODUCTION TO IBM
URBANCODE DEPLOY
PLUG-INS
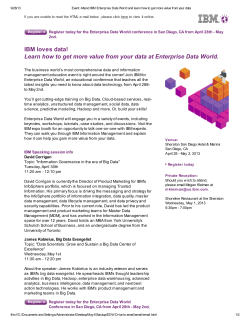
What is a Plug-in?
A plug-in provides a customizable integration point
between UrbanCode Deploy and 3rd party solutions
involved in artifact storage, application deployment,
or SDLC processes.
IBM UrbanCode
Deploy
IBM Corporation ©2013
UrbanCode Deploy Integration Strategies
Type of Interaction
Integration Target Systems
Examples of Integration Targets
Accept inputs of application and
component assets.
Prepare and provision
environments to deploy
applications and components to.
Private Cloud
Public Cloud
PureApp, SCO, VMWare,
Amazon EC2
Deploy applications and
components to heterogeneous
middleware platforms.
Application Servers
Load Balancers
Portals
BPM Servers and ESBs
Messaging Infrastructure
Commerce Servers
Packaged Applications
Appliances
WAS, WebLogic, JBoss, IIS/.NET
Citrix NetScaler, F5
WebSphere Portal, WebLogic Portal
IBM BPM, WMB, Microsoft BizTalk
WebSphere MQ
WebSphere Commerce
SAP, Oracle Applications
IBM DataPower
Integrate with a host of other
systems and services for a range of
SDLC tasks.
Work Item / Issues Tracking
Installers
Quality Management / Testing
Scripting
System Utilities
Rally, JIRA, RTC
MSI, RPM
RQM, GH, HP QC, Selenium
Groovy, Shell, PowerShell
Windows & Linux System Tools, 7zip
IBM Corporation ©2013
Build / CI Servers
SCM Systems
Repositories
Build Tooling
Build Forge, Jenkins, Hudson
RTC, CC, AccuRev, CVS, PVCS
Maven, RAM, Subversion
Make, MSBuild, Ant, NAnt
Plug-in Types
Tier 1 plug-ins
Tier 2 plug-ins
Provided with the UrbanCode Deploy product
Some are installed automatically and others can be added
based on need
Fully supported
Provided by partners. Must engage partner to obtain
plug-in and receive support
Tier 3 plug-ins
Openly developed plug-ins by anyone
(IBM DevOps Services/GitHub)
Forum support only
IBM Corporation ©2013
Plug-ins Website
All info and updates available here:
https://developer.ibm.com/urbancode/plugins/
IBM Corporation ©2013
Why Plug-ins?
Encapsulate best practices
Provide re-usable steps that can be included in
many different processes
New customers have a desire to simply call their existing
scripts. While this may provide a quick win, it is seldom a
scalable solution.
Plug-in steps are the building blocks that can then be
used to create numerous process templates
Upgrading a plug-in upgrades all process steps
currently in use
IBM Corporation ©2013
Plug-in Details
Plug-ins are packaged as simple zip files
Metadata files capture plug-in data
Scripts that provide the plug-in step implementation
Any supporting libraries or utility code
UrbanCode Deploy refers to its plug-in architecture
as the “Air” plug-in architecture
Two types of plug-ins:
Automation – manipulate component versions typically
by deploying them or integrate with other SDLC
tools/processes
Source – integrate with external systems to import
artifacts and create component versions.
IBM Corporation ©2013
Plug-ins at Runtime
Each process step is executed by an UrbanCode
Deploy agent. The plug-in that provides the step is
downloaded to and cached by the agent.
The first time an agent executes a step from a plug-in,
you may notice additional execution time. This is due to
the downloading of the plug-in.
Plug-in versions are checked each time a step is executed
by an agent. If a new version of the plug-in step is being
used, the agent will pull the new version of the plug-in.
IBM Corporation ©2013
The Anatomy of an Air Plug-in
Metadata
info.xml – basic information about the plug-in (author,
release notes, version number)
plugin.xml – detailed information about each plug-in step
(properties and run command), plug-in name and unique
identifier, plug-in type
upgrade.xml – provide information about a new plug-in
version to allow the upgrade process to be successful
Payload – the code that will
“do the work” of each
plug-in step including
any helper libraries
IBM Corporation ©2013
Groovy recommended …
Steps can run any script you write. Why does UrbanCode
Deploy usually use Groovy?
- Groovy is on every agent
- Groovy is cross platform
- Groovy is very good at XML
- Groovy is fun to learn, concise and effective
Other good choices:
- Perl, Ruby, VBScript, Python
- Etc, etc, etc
- Must insure runtime is available
or include it in the plug-in
- Use existing plug-ins for examples
and best practices
IBM Corporation ©2013
THE URBANCODE DEPLOY
PLUG-IN DEVELOPMENT KIT
The Plug-in Development Kit
The plug-in development kit provides a set of Eclipse
extensions to aid your development of UrbanCode Deploy
plug-ins.
New Project wizard with project templates for typical plug-in
strategies
Custom editors for each of the plug-in metadata files
Consistent project structure
Build.xml file to use Ant to produce your plug-in zip file
Alternative export wizard to create zip file
Export wizard to automatically deploy your plug-in to your
UrbanCode Deploy server
Upgrade action to update your plug-in metadata to the next release
version
Help Content
IBM Corporation ©2013
New Project Wizard
Creates a new Groovy-based plug-in project
IBM Corporation ©2013
New Project Wizard
Provides templates for common plug-in strategies
IBM Corporation ©2013
Custom Editors – info.xml
info.xml editor
IBM Corporation ©2013
Custom Editors – plugin.xml
plugin.xml editor
IBM Corporation ©2013
Custom Editors – upgrade.xml
upgrade.xml editor
IBM Corporation ©2013
Project Structure
Each project is created with the same structure
Doc folder for any plug-in documentation
Imports folder for include component
templates and processes in your plug-in
Lib folder for any needed libraries
License folder to capturing licensing text
Plugin folder for the metadata xml files
Releases folder holds the build output
IBM Corporation ©2013
Src folder for developing Groovy helper
scripts
Scripts folder for the Groovy
implementation scripts for each plug-in step
Build.xml file for Ant builds
Export Wizards
Export UCD Plug-in – standard zip extractor
Export UCD Plug-in to UCD Server – automatically
deploy your zip file
IBM Corporation ©2013
Automatically Export to UCD Server
Right-mouse-click on zip file. File Export…
Provide administrative user credentials
IBM Corporation ©2013
Automatically Export to UCD Server
Automatically create Application, Components, and
Environments to test plug-in
IBM Corporation ©2013
Upgrade Plug-in Action
Right-mouse-click on upgrade.xml
Action updates all 3 metadata files to new version
number
Adds new migrate-command entry to upgrade.xml
for each plug-in step
Adds new
release-notes
entry to
info.xml
Manual effort
to finish
IBM Corporation ©2013
Help Content
IBM Corporation ©2013
Lab 1 – Hello World Plug-in
Lab 1 in Workbook – 20 minutes
In this lab you will create your first plug-in project
and explore the UrbanCode Deploy Development
Kit.
Create a new example plug-in project
Edit each of the metadata files
Modify the groovy script to output “hello world”
Build the plug-in
Deploy the plug-in
Run the plug-in
IBM Corporation ©2013
A CLOSER LOOK AT
INFO.XML AND PLUGIN.XML
3 metadata files
info.xml – basic background information about the
plug-in
plugin.xml – details of each plug-in step
upgrade.xml – used by the UrbanCode Deploy
server plug-in upgrade process
Version number in each of these files. The version
number needs to be consistent across all 3 files
IBM Corporation ©2013
info.xml
Author name is required, other author info is
optional
Author name filled in from new project wizard
IBM Corporation ©2013
info.xml
Integration type is required
IBM Corporation ©2013
info.xml
Tool-description section is required
IBM Corporation ©2013
info.xml
Release-version and release-note sections are
required
IBM Corporation ©2013
info.xml
Source, licenses, related-info, and meta-html
sections are not required but are there for you to
add additional background data.
Except for the release-version and release-note
sections, this file stays fairly static throughout the
lifetime of the plug-in.
IBM Corporation ©2013
plugin.xml
Defines all of the properties and their user interface
widgets that are used to capture the property values
for each plug-in step.
Defines the
command string
that will be used
to execute the
step
Defines the default
post-processing
script
IBM Corporation ©2013
plugin.xml
Header
The identifier is the unique identifier for the plug-in. No two loaded
plug-ins can have the same identifier
The name of the plug-in is what is displayed in the GUI
The displayed version number
The description is what is shown in the GUI
The tag defines where in the step tree hierarchy the steps in the
plug-in can be found.
IBM Corporation ©2013
plugin.xml
The plugin.xml editor from the DevKit can help
create new step properties.
IBM Corporation ©2013
plugin.xml
Results in this step properties dialog
IBM Corporation ©2013
plugin.xml
Property types
textBox
textAreaBox
secureBox
checkBox
selectBox
IBM Corporation ©2013
plugin.xml
Select boxes have an additional set of values that
define the choices
IBM Corporation ©2013
Lab 2 – Encapsulate a Script
Lab 2 in Workbook – 20 minutes
In this lab you will create another plug-in project.
This one will encapsulate a script.
Create a simple script to encapsulate
Create a new plug-in project using a template
Build the plug-in
Deploy the plug-in
Run the plug-in
IBM Corporation ©2013
UPGRADING A PLUG-IN
PLUGIN.XML
The plug-in upgrade process
The upgrade.xml file gives instructions to the server
plug-in upgrade process as to how to upgrade a step
When a new version of a plug-in is loaded into the
UrbanCode Deploy server, the following happens:
A <migrate to-version=“?”> element is required for each
version beyond version 1. It encapsulates a series of
<migrate-command> elements for each step that is to be
migrated
Every step of every existing process is examined
If the step is one of the plug-in steps being upgraded, the
upgrade.xml file tells the upgrade process what to do.
For large installations you may want to upgrade
plug-ins during off hours
IBM Corporation ©2013
upgrade.xml
The following conditions require the following
elements to be created in the upgrade.xml file
Update a script
IBM Corporation ©2013
if there are no changes to the plugin.xml file (no metadata
changes) but you simply want to update one of the scripts
that are run that implement the logic of a step, no change
is required to any of the plug-in configuration files. You
can simply reload the plug-in zip file and the scripts will be
replaced.
NOTE: It is recommended that you still create a new
version of plug-in in this case to insure you have a record
of the change
upgrade.xml
Propagating a step to the next version
Delete a step
any time you upgrade a plug-in, you must include a
<migrate-command> element for every step that you want
to include in the new version.
if you want to delete a step, then simply don't include a
<migrate-command> element for that step. The step will
be marked as deleted in a process. The process must be
fixed before it will run successfully.
Adding a step
IBM Corporation ©2013
If your new plug-in version adds a step, you don't need to
do anything in the upgrade.xml file. There are no
processes that are using this step so there is nothing to
upgrade.
upgrade.xml
Rename a step
the <migrate-command> element provides a way to
rename a step by including an "old" attribute.
Adding a step property
IBM Corporation ©2013
if you are adding a new property that does not have a
default value, then obviously your script will have to take
that into account. In this situation, you don't need to do
anything special to the upgrade.xml file as long as you have
a <migrate-command> element for the property's step. All
existing process steps will get the new property but since
there is no default value there is no need to migrate any
existing properties. If the new property is required, you
will be asked to enter a value when the process is run.
upgrade.xml
If you are adding a new property that does have a default
value, required or not, then you should add a <migrateproperties> element as follows. This will insure that the
properties of any existing use of the step will get migrated
and the default value of the property will get assigned to
the new property. If you don't include the <migrateproperties> element, the default value will not be applied
to the property as no property migration will occur. This
will be a problem if your script assumes a default value.
Deleting a step property
IBM Corporation ©2013
nothing needs to be done in the upgrade.xml The process
of upgrading the step will remove the property as long as
you have a <migrate-command> element to migrate the
step.
upgrade.xml
Renaming a step property
Changing a step property's default value
a capability similar to renaming a step exists to rename a
step property using the <migrate-properties> element.
the <migrate-property> element is also used to change its
default value.
You can combine the previous two concepts to both
rename a property and provide a new default value
IBM Corporation ©2013
Upgrading a plug-in
Upgrading a plug-in should be planned. Knowing
that the plug-in upgrade process could potentially
alter all occurrences of the plug-in steps in all
processes, you should only upgrade plug-ins in your
production instance(s) of UrbanCode Deploy after
they have thoroughly been tested and proven in a
non-production setting.
IBM Corporation ©2013
Lab 3 – Upgrade a Plug-in
Lab 3 in Workbook – 20 minutes
In this lab you will create another plug-in project.
This one will upgrade the plug-in created in the
previous lab.
Update the script to accept a parameter
Add a text box property to the plug-in step
Add a parameter to the plug-in step command to pass the
property value
Upgrade the plug-in metadata
Build the plug-in
Run the plug-in
IBM Corporation ©2013
HELPER GROOVY SCRIPTS
AND CALLING REST API
METHODS
Groovy Helpers
The example plug-in (created in Lab 1) includes a
series of Groovy helper scripts that can be included
in any plug-in.
Each file has some detailed comments on how to
use the class
IBM Corporation ©2013
Advanced Plug-ins
Many plug-ins require some extensive programming
that involve utilizing 3rd part APIs or libraries. These
can be done in Groovy, but you may want a higher
level programming language that provide
supporting libraries (i.e. Java).
You may need to include an extensive list of jar files
to provide the necessary functionality you need
You are responsible for adhering to the license
agreements for the various libraries or APIs you may
download from the internet and use.
IBM Corporation ©2013
Calling Rest APIs
Calling REST APIs is a good example of an advanced
implementation
Most likely have to deal with authentication and
potentially SSL certificates
Most likely have to deal with JSON payloads both
outgoing and incoming
Would take advantage of the various httpclient Apache
libraries
Would take advantage of many of the JSON serializer
libraries out there
Might have to utilize some API functionality from another
software product/application
IBM Corporation ©2013
Acquire any API capabilities from the vendor
Lab 4 – Call a REST API
Lab 4 in Workbook – 20 minutes
In this lab you will create another plug-in project.
This one will call a REST API.
Create a new plug-in project
Build the plug-in
Run the plug-in
IBM Corporation ©2013
PLUG-INS AND PROPERTIES
Properties and Plug-ins
As you construct your plug-in steps and determine
the information that needs to be gathered from the
user via step properties, think ahead to how that
data should be provide
Properties that are unique, change frequently, and don’t
follow a pattern can be entered by the user
Set a default value if at all possible
Properties that are closely tied to an environment, a
component, a resource, an agent, etc. should be
abstracted away to be an UrbanCode Deploy property
IBM Corporation ©2013
Your default value then should be a suggested property
name and scope (i.e. ${p:resource/propName})
Properties and Plug-ins
IBM Corporation ©2013
Properties and Plug-ins
In your scripts, access current step properties via:
${p:property}
Creating new properties for use in later steps
You can create a new property for use in a later step.
For example, within a step include the following Groovy
code that gets the current date in a specified format
import java.text.SimpleDateFormat
def today = new Date()
def formattedDate = new SimpleDateFormat("ddMMyyyy, Ka").format(today)
outProps.put("date",formattedDate)
Access the date property in a subsequent step via:
${p:<step-name>/date}
IBM Corporation ©2013
Properties and Plug-ins
Security sensitive properties
Username/passwords should be captured in a secureBox
property type
If there is no default value, then the user must enter
them in for each instance of the step
If you provide a default value, then you should provide a
suggested property that would store the value
${p:resource/Dbpassword}
IBM Corporation ©2013
Make the property secure if you don’t want the value to be
displayed
Properties and Plug-ins
Also you can make the step property hidden
Another option is to execute some type of script to access
username/passwords
IBM Corporation ©2013
Take advantage of setting properties in this case if
username/passwords is needed in subsequent steps
SOURCE CONFIG PLUG-INS
Source Config Plug-ins
Source-type plug-ins are defined the same way that
automation-type plug-ins are defined except for
some modifications to the plugin.xml file
The <server:plugin-type>Source</server:plugin-type> tag
identifies the type of plug-in as 'Source’
A source plug-in has one and only one step, which must
be named “Import Version”
Source plug-ins have two property groups. Component
type properties & Import type properties.
IBM Corporation ©2013
Component-type properties are filled in when the user
specifies the “Create New Component” action
Import-type properties are filled in when the user specifies
the “Import Component” action.
Source Config Plug-ins
Plugin.xml
Plugin-type is Source
Only one step-type – Import Version
IBM Corporation ©2013
Source Config Plug-ins
Property groups
IBM Corporation ©2013
Source Config Plug-ins
Are run by an agent (keep this in mind)
Based on input properties (label, stream, branch,
change set, etc.) use the source config API to fetch
the artifacts
Use the UrbanCode Deploy CLI or REST API to create
a component version and add files to it
gitClient.checkoutRevisionOrTag(gitVersionOrTag, repoDir);
System.out.println("Uploading artifact files.");
versionClient.addVersionFiles(componentName, versionId, repoDir, "",
includes, excludes, executePermissions, true, charset, extensions);
IBM Corporation ©2013
Source Config Plug-ins
CLI is a command-line interface that provides access
to the IBM® UrbanCode Deploy server REST APIs. It
can be used to find or set properties, and run
numerous functions
You can download the CLI 'udclient.zip' from the IBM
UrbanCode Deploy server by clicking Help > Tools and
then clicking IBM UrbanCode Deploy Client
UDRestClient.jar – utilized in all of the UrbanCode
plug-ins to access many of the UrbanCode Deploy
REST API methods.
Feel free to use in your source plug-ins as well
IBM Corporation ©2013
Lab 5 – Create a Source Config Plug-in
Lab 5 in Workbook – 20 minutes
In this lab you will create another plug-in project.
This one will implement a source config integration.
Create a new plug-in project
Examine the plugin.xml file
IBM Corporation ©2013
POST-PROCESSING SCRIPTS
AND LOGGING
Post-Processing Scripts
When a plug-in step's <command> element finishes
processing, the step's mandatory <postprocessing> element runs.
The plugin.xml file specifies the default postprocessing script. However, this may be overridden
by an individual step instance
Must be implemented in JavaScript!
Post-processing scripts have access to
a java.util.Properties variable called properties.
IBM Corporation ©2013
Post-Processing Scripts
The properties variable has several special
properties: exitCode contains the process exit code,
and Status contains the step's status. A Status value
of Success means that the step completed
successfully.
Post-processing scripts must set the Status property
to specify the status of the script.
properties.put("Status","Success");
IBM Corporation ©2013
Post-Processing Scripts
Another available variable, scanner, can scan the
step's output log (scanning occurs on the agent) and
run commands based on the results. scanner has
several public methods:
register(String regex, function call) registers a function to
be called when the regular expression is matched.
addLOI(Integer lineNumber) adds a line to the lines of
interest list, which are highlighted in the Log Viewer;
implicitly called whenever scanner matches a line.
getLinesOfInterest() returns a java.util.List of lines of
interest; can be used to remove lines.
scan() scans the log. Use after all regular expressions are
registered.
IBM Corporation ©2013
Post-Processing Scripts
Users can store post-processing scripts on the server
to reuse them in component processes and in
generic processes to override the default.
Click Settings > Post Processing Scripts and then
click Create New Script.
IBM Corporation ©2013
Post-Processing Scripts
Sample
Scanner
properties.put("Status", "Success");
//
// Evaluate the built-in exitCode property, which indicates the exit code
// of the script called by the plug-in step. Typically, if the value of
// the exitCode property is non-zero, the plug-in step failed.
//
if (properties.get("exitCode") != 0) {
properties.put("Status", "Failure");
}
//
// Register a scanner to search for the text "error at line" in the log. The first
// argument is a regular expression. The second argument, an inline function, is
/ invoked once for every line in the log output that matches the pattern. The
// "lineNumber" variable contains the line number where the match occurred, and the
// "line" variable is the full text of the line.
//
scanner.register("(?i)ERROR at line", function(lineNumber, line) {
//
// In this case, we build up an "Error" property which
// contains the text of all errors that are found. We find every
// line starting with "error at line" and add it to this list.
//
var errors = properties.get("Error");
if (errors == null) {
errors = new java.util.ArrayList();
}
errors.add(line);
//
// If a line starting with "error at line" is found, the step has
// failed, so we set the special "Status" property to "Failure",
// indicating to the UrbanCode Deploy server that the step should
// be marked as a failure.
//
properties.put("Status", "Failure");
});
IBM Corporation ©2013
Post-Processing Scripts
Scanner
//
// Multiple searches can be registered with the scanner. We add a
// second search to look for some interesting text to set as an output
// property.
//
// For example, if there is a line "The value is BLUE", then we end up
// with an output property, "Value", with a value of "BLUE".
//
scanner.register("The value is", function(lineNumber, line) {
var value = line.replace("The value is ", "");
properties.put("Value", value);
});
scanner.scan();
//
// Convert the collected list of error strings into a single string and
// set that as an output property.
//
var errors = properties.get("Error");
if (errors == null) {
errors = new java.util.ArrayList();
}
properties.put("Error", errors.toString()); }
IBM Corporation ©2013
Logging
Process logs show the output log for each plug-in
step
The more information you output to sysout, the
more information you have to debug your plug-in
IBM Corporation ©2013
New Plug-in Capabilities
New way to reference properties (6.0.1)
Assume propName is a property that has no value
Now you can specify a property as ${p?:<prop>}.
Again, assume propName has no value
${p:propName} will resolve to ${p:propName}
${p?:propName} will resolve to “” (empty string)
If a property has a value, ${p?:propName} and
${p:propName} will both resolve to the property’s value
In many cases, servers may have resources already
defined (i.e. app server instances, apps, cells, nodes,
etc.) It is up to the user to build the necessary
resource tree and create properties and values
specific to the server.
IBM Corporation ©2013
Auto-Discovery and Auto-Configure
Auto-discovery and auto-configure plug-in step
types have been create to help capture this
information automatically (6.0)
Three basic capabilities:
An automatic discovery step is transparently run whenever an Agent
Resource is added to the resource tree. The discovery process is
generally used to discover information about the agent machine and
either update its properties or automatically generate and configure
sub-resources.
An automatic configuration step is an end user initiated step that
runs a configuration process against a resource to configure it for
deployments.
A resource role is basically a property sheet. Typically they are
attached to discovered resources listing information that is relevant
or useful at deployment time. The contents of the resource role may
be populated by Discovery, Configuration or manually.
IBM Corporation ©2013
Auto-Discovery and Auto-Configure
The first use of these capabilities is in the Application Deployment for
WebSphere plug-in. See this plug-in for a good example.
Auto-discovery steps are initiated when an agent resource is added to
the resource tree. Every auto-discovery step from every plug-in is run by
the agent at this time.
Discovery steps are intended to make initial discoveries of technologies
installed on the agent machine. Configure steps typically require
additional information (usernames/passwords) and may be run
numerous times based on changing environments.
Typical discovery uses:
Application server discovery (Tomcat, WAS, etc.)
Check for the existence of a testing tool and tag agent as able to run tests
Determine server hostname and query CMDB for configuration info
Discovery and configure can be done in a single discovery step, but
resource intensive processes or those processing requiring admin
knowledge or any processes you would want to run numerous times
should be done in configuration steps.
IBM Corporation ©2013
Auto-Discovery
Typical auto-discovery steps
Search for the existence of some technology (Tomcat, WAS, IIS, etc.)
based on typical or default installation paths.
Update properties of the Agent Resource and/or create a subresource that identifies the discovered technology
Assign a role to the sub-resource with corresponding properties that
capture discovered information and others that need to be filled in
for configuration
IBM Corporation ©2013
Auto-Configure
Typical auto-configure steps
Utilizing the discovered property values as well as
property values supplied by the user, interrogate the
server for additional technology information (i.e. WAS
nodes and servers)
Create additional sub-resources and configure them with
roles and property sets to capture the acquired
information.
IBM Corporation ©2013
Auto-Discovery and Auto-Configure
When debugging your auto-discovery and autoconfiguration steps, the agent sends back log
information to the server. You can find the stdout
from the step at this location:
<server install dir>/logs/autoDiscovery/
<server install dir>/logs/autoConfigure/
IBM Corporation ©2013
Plugin.xml
Additional elements are provided in the step-type
definition to indicate auto-discover or autoconfigure:
Auto-discover
<server:type>AUTO_DISCOVERY</server:type>
Auto-configure (the role indicates the type of resource
that you can initiate auto-configure from)
<server:role>WebSphereCell</server:role>
<server:type>AUTO_CONFIGURE</server:type>
IBM Corporation ©2013
Resource Groups in Plugin.xml
Resource groups are used to define the property
sets for each resource role.
Type attribute indicates the purpose of the property-group
Special-type indicates that it may be used for auto-discovery
IBM Corporation ©2013
Plug-in Imports
You can provide UrbanCode Deploy objects as part of your plug-in
(applications, components, component templates, and generic
processes).
An imports directory in your plug-in zip file will hold the json files that
represent the element(s).
imports/applications/
imports/components/
imports/componenttemplates/
imports/processes/
If a process in any of your imports uses steps in the plug-in you are
developing, you must load a version of the plug-in to an UrbanCode
Deploy server first, create the process using the plug-in steps, and
then export the element as a json file. Then include the json in your
plug-in.
The WebSphere plug-in utilizes this capability.
IBM Corporation ©2013
www.ibm.com/software/rational
IBM Corporation ©2013


© Copyright 2026