
View - Adtran
NetVanta Unified Communications
NetVanta Unified Communications Server
Administrator Guide
Version 5.5
619500001-1E
November 2014
Trademarks
UCS Administrator Guide
Trademarks
Any brand names and product names included in this manual are trademarks, registered trademarks, or
trade names of their respective holders.
To the Holder of the Manual
The contents of this manual are current as of the date of publication. ADTRAN reserves the right to change
the contents without prior notice.
In no event will ADTRAN be liable for any special, incidental, or consequential damages or for
commercial losses even if ADTRAN has been advised thereof as a result of issue of this publication.
Software Licensing Agreement
Access to the features of the NetVanta Unified Communications software are restricted by license keys
based on your licensed configuration. Pursuant to the Licensing Agreement, you may: (a) use the server
software on one device only and (b) use the client software on an unlimited number of computers for use
by configured users of the software product. In addition, certain ADTRAN systems may contain additional
conditions for obtaining software upgrades.
Toll Fraud Liability
Be advised that certain security risks are inherent in the use of any telecommunications or networking
equipment, including but not limited to, toll fraud, Denial of Service (DoS) attacks, loss or theft of data,
and the unauthorized or illegal use of said equipment. ADTRAN OFFERS NO WARRANTIES, EITHER
EXPRESSED OR IMPLIED, REGARDING THE PREVENTION, DETECTION, OR DETERRENCE
OF TOLL FRAUD, NETWORKING ATTACKS, OR UNAUTHORIZED, ILLEGAL, OR IMPROPER
USE OF ADTRAN EQUIPMENT OR SOFTWARE. THEREFORE, ADTRAN IS NOT LIABLE FOR
ANY LOSSES OR DAMAGES RESULTING FROM SUCH FRAUD, ATTACK, OR IMPROPER USE,
INCLUDING, BUT NOT LIMITED TO, HUMAN AND DATA PRIVACY, INTELLECTUAL
PROPERTY, MATERIAL ASSETS, FINANCIAL RESOURCES, LABOR AND LEGAL COSTS.
Ultimately, the responsibility for securing your telecommunication and networking equipment rests with
you, and you are encouraged to review documentation regarding available security measures, their
configuration and implementation, and to test such features as is necessary for your network.
Service and Warranty
For information on the service and warranty of ADTRAN products, visit the Support section of the
ADTRAN website at http://www.adtran.com
901 Explorer Boulevard
P.O. Box 140000
Huntsville, AL 35814-4000
Phone: (256) 963-8000
Copyright © 2014 ADTRAN, Inc.
All Rights Reserved.
2
Copyright © 2014 ADTRAN, Inc.
619500001-1E
UCS Administrator Guide
Service and Warranty
Conventions
Notes provide additional useful information.
Cautions signify information that could prevent service interruption or damage to
equipment.
Warnings provide information that could prevent injury or endangerment to human
life.
Below is a list of naming conventions used in this document. The first example shows the naming
convention used for the first occurrence; the second example shows the naming convention used for
subsequent occurrences.
Type
Convention Example
Operating System*
Microsoft ® Windows Server ® 2008 operating system version R2 or later
or Windows Server 2008 R2 or later
Server Software
NetVanta Unified Communications Server software or NetVanta UC Server software
NetVanta Unified Communications Live Attendant Server or Live Attendant Server
Client Software
NetVanta Unified Communications Client software or NetVanta UC Client software
NetVanta ucCompanion Desktop Presence client software or ucCompanion
NetVanta ucCompanion Live Attendant or Live Attendant
NetVanta ucCompanion Soft Phone or Soft Phone
Hardware
Server computer - the computer on which the server software is installed.
Client computer - the computer on which the client software is installed.
NetVanta Unified
Communication Products
NetVanta Unified Communications Server or NetVanta UC Server
NetVanta Business Communications System or NetVanta BCS
NetVanta Enterprise Communications Server or NetVanta ECS
NetVanta Business Application Server or NetVanta BAS
NetVanta UC Live Attendant Server or Live Attendant Server
* Other operating systems may be mentioned in this document. They will follow a format similar to the one provided.
619500001-1E
Copyright © 2014 ADTRAN, Inc.
3
Service and Warranty
4
UCS Administrator Guide
Copyright © 2014 ADTRAN, Inc.
619500001-1E
UCS Administrator Guide
Table of Contents
Table of Contents
1 Introducing the Administrator Application . . . . . . . . . . . . . . . . . . . . . . . . . . . . . . . . . . . . . . . . . . 9
Conventions . . . . . . . . . . . . . . . . . . . . . . . . . . . . . . . . . . . . . . . . . . . . . . . . . . . . . . . . . . . . . . 9
Product Features. . . . . . . . . . . . . . . . . . . . . . . . . . . . . . . . . . . . . . . . . . . . . . . . . . . . . . . . . . 10
About the NetVanta UC Server . . . . . . . . . . . . . . . . . . . . . . . . . . . . . . . . . . . . . . . . . . . . . . . 11
Starting the Administrator Application . . . . . . . . . . . . . . . . . . . . . . . . . . . . . . . . . . . . . . . . . . 14
Changing the Password . . . . . . . . . . . . . . . . . . . . . . . . . . . . . . . . . . . . . . . . . . . . . . . . . . . . 14
Navigating the NetVanta UC Server . . . . . . . . . . . . . . . . . . . . . . . . . . . . . . . . . . . . . . . . . . . 15
Customizing the NetVanta UC Server. . . . . . . . . . . . . . . . . . . . . . . . . . . . . . . . . . . . . . . . . . 16
Installing the NetVanta UC Client . . . . . . . . . . . . . . . . . . . . . . . . . . . . . . . . . . . . . . . . . . . . . 18
2 Setting System-Wide Options . . . . . . . . . . . . . . . . . . . . . . . . . . . . . . . . . . . . . . . . . . . . . . . . . . 21
Setting User Options . . . . . . . . . . . . . . . . . . . . . . . . . . . . . . . . . . . . . . . . . . . . . . . . . . . . . . . 22
Setting Auto Attendant and System Announcement Options . . . . . . . . . . . . . . . . . . . . . . . . 33
Setting Outbound Calls and Dialing Options. . . . . . . . . . . . . . . . . . . . . . . . . . . . . . . . . . . . . 38
Setting Administrative, Maintenance, and Diagnostic Options . . . . . . . . . . . . . . . . . . . . . . . 42
3 Integrating with Active Directory . . . . . . . . . . . . . . . . . . . . . . . . . . . . . . . . . . . . . . . . . . . . . . . . 49
Overview . . . . . . . . . . . . . . . . . . . . . . . . . . . . . . . . . . . . . . . . . . . . . . . . . . . . . . . . . . . . . . . . 49
Understanding Active Directory. . . . . . . . . . . . . . . . . . . . . . . . . . . . . . . . . . . . . . . . . . . . . . . 50
Using the Active Directory Users and Computers Console. . . . . . . . . . . . . . . . . . . . . . . . . . 51
4 Managing User Profiles . . . . . . . . . . . . . . . . . . . . . . . . . . . . . . . . . . . . . . . . . . . . . . . . . . . . . . . 63
Overview . . . . . . . . . . . . . . . . . . . . . . . . . . . . . . . . . . . . . . . . . . . . . . . . . . . . . . . . . . . . . . . . 63
Creating User Profiles . . . . . . . . . . . . . . . . . . . . . . . . . . . . . . . . . . . . . . . . . . . . . . . . . . . . . . 65
Changing Users to Local or Windows Users. . . . . . . . . . . . . . . . . . . . . . . . . . . . . . . . . . . . . 65
Using the New User Wizard . . . . . . . . . . . . . . . . . . . . . . . . . . . . . . . . . . . . . . . . . . . . . . . . . 67
Configuring User Profiles . . . . . . . . . . . . . . . . . . . . . . . . . . . . . . . . . . . . . . . . . . . . . . . . . . . 76
Enabling Access to User Profiles using Authentications. . . . . . . . . . . . . . . . . . . . . . . . . . . . 89
Managing User Profiles from EBS . . . . . . . . . . . . . . . . . . . . . . . . . . . . . . . . . . . . . . . . . . . . 91
5 Managing User Extensions and Identities . . . . . . . . . . . . . . . . . . . . . . . . . . . . . . . . . . . . . . . . . 93
Overview . . . . . . . . . . . . . . . . . . . . . . . . . . . . . . . . . . . . . . . . . . . . . . . . . . . . . . . . . . . . . . . . 93
User Identities . . . . . . . . . . . . . . . . . . . . . . . . . . . . . . . . . . . . . . . . . . . . . . . . . . . . . . . . . . . . 96
Auto Attendant Identities . . . . . . . . . . . . . . . . . . . . . . . . . . . . . . . . . . . . . . . . . . . . . . . . . . . . 99
Ring and Hunt Group Identities. . . . . . . . . . . . . . . . . . . . . . . . . . . . . . . . . . . . . . . . . . . . . . 102
Configuring Identities Using the Identities Pane . . . . . . . . . . . . . . . . . . . . . . . . . . . . . . . . . 105
Configuring the Global Phone Directory . . . . . . . . . . . . . . . . . . . . . . . . . . . . . . . . . . . . . . . 106
6 Configuring the NetVanta UC Server . . . . . . . . . . . . . . . . . . . . . . . . . . . . . . . . . . . . . . . . . . . 109
Configuring Gateways. . . . . . . . . . . . . . . . . . . . . . . . . . . . . . . . . . . . . . . . . . . . . . . . . . . . . 109
Configuring Ports . . . . . . . . . . . . . . . . . . . . . . . . . . . . . . . . . . . . . . . . . . . . . . . . . . . . . . . . 110
Configuring Servers . . . . . . . . . . . . . . . . . . . . . . . . . . . . . . . . . . . . . . . . . . . . . . . . . . . . . . 113
Configuring Communication Systems . . . . . . . . . . . . . . . . . . . . . . . . . . . . . . . . . . . . . . . . . 129
Configuring Licenses. . . . . . . . . . . . . . . . . . . . . . . . . . . . . . . . . . . . . . . . . . . . . . . . . . . . . . 134
7 Configuring Classes of Service . . . . . . . . . . . . . . . . . . . . . . . . . . . . . . . . . . . . . . . . . . . . . . . . 137
Configuring a User CoS . . . . . . . . . . . . . . . . . . . . . . . . . . . . . . . . . . . . . . . . . . . . . . . . . . . 137
Configuring a Phone CoS . . . . . . . . . . . . . . . . . . . . . . . . . . . . . . . . . . . . . . . . . . . . . . . . . . 145
8 Faxing . . . . . . . . . . . . . . . . . . . . . . . . . . . . . . . . . . . . . . . . . . . . . . . . . . . . . . . . . . . . . . . . . . . 151
Overview . . . . . . . . . . . . . . . . . . . . . . . . . . . . . . . . . . . . . . . . . . . . . . . . . . . . . . . . . . . . . . . 151
Sending Faxes . . . . . . . . . . . . . . . . . . . . . . . . . . . . . . . . . . . . . . . . . . . . . . . . . . . . . . . . . . 152
Receiving Faxes . . . . . . . . . . . . . . . . . . . . . . . . . . . . . . . . . . . . . . . . . . . . . . . . . . . . . . . . . 176
619500001-1E
Copyright © 2014 ADTRAN, Inc.
5
Table of Contents
UCS Administrator Guide
9 Creating Distribution Lists . . . . . . . . . . . . . . . . . . . . . . . . . . . . . . . . . . . . . . . . . . . . . . . . . . . . 179
Overview . . . . . . . . . . . . . . . . . . . . . . . . . . . . . . . . . . . . . . . . . . . . . . . . . . . . . . . . . . . . . . . 179
Using System Distribution Lists. . . . . . . . . . . . . . . . . . . . . . . . . . . . . . . . . . . . . . . . . . . . . . 179
Using Personal Distribution Lists . . . . . . . . . . . . . . . . . . . . . . . . . . . . . . . . . . . . . . . . . . . . 179
10 Using Advanced Features . . . . . . . . . . . . . . . . . . . . . . . . . . . . . . . . . . . . . . . . . . . . . . . . . . . 181
Using the Outbound Dialer . . . . . . . . . . . . . . . . . . . . . . . . . . . . . . . . . . . . . . . . . . . . . . . . . 181
Customizing System Announcements on the Server . . . . . . . . . . . . . . . . . . . . . . . . . . . . . 196
11 Creating Custom Call Answering Services . . . . . . . . . . . . . . . . . . . . . . . . . . . . . . . . . . . . . . 199
Overview . . . . . . . . . . . . . . . . . . . . . . . . . . . . . . . . . . . . . . . . . . . . . . . . . . . . . . . . . . . . . . . 199
Managing Services . . . . . . . . . . . . . . . . . . . . . . . . . . . . . . . . . . . . . . . . . . . . . . . . . . . . . . . 200
Using the Service Editor . . . . . . . . . . . . . . . . . . . . . . . . . . . . . . . . . . . . . . . . . . . . . . . . . . . 203
Working with Elements to Build a Service. . . . . . . . . . . . . . . . . . . . . . . . . . . . . . . . . . . . . . 205
Customizing Services using Parameters . . . . . . . . . . . . . . . . . . . . . . . . . . . . . . . . . . . . . . 208
Validating Services . . . . . . . . . . . . . . . . . . . . . . . . . . . . . . . . . . . . . . . . . . . . . . . . . . . . . . . 209
Troubleshooting Services . . . . . . . . . . . . . . . . . . . . . . . . . . . . . . . . . . . . . . . . . . . . . . . . . . 209
12 Using Elements to Create Call Answering Services . . . . . . . . . . . . . . . . . . . . . . . . . . . . . . . 211
Service Element Settings and Features . . . . . . . . . . . . . . . . . . . . . . . . . . . . . . . . . . . . . . . 211
Using Standard Elements . . . . . . . . . . . . . . . . . . . . . . . . . . . . . . . . . . . . . . . . . . . . . . . . . . 214
Using Advanced Elements . . . . . . . . . . . . . . . . . . . . . . . . . . . . . . . . . . . . . . . . . . . . . . . . . 234
13 Using Announcements in Call Answering Services. . . . . . . . . . . . . . . . . . . . . . . . . . . . . . . . 259
Using Prerecorded Announcements . . . . . . . . . . . . . . . . . . . . . . . . . . . . . . . . . . . . . . . . . . 259
Recording Announcements. . . . . . . . . . . . . . . . . . . . . . . . . . . . . . . . . . . . . . . . . . . . . . . . . 263
Managing Announcements . . . . . . . . . . . . . . . . . . . . . . . . . . . . . . . . . . . . . . . . . . . . . . . . . 271
14 Using Databases in Call Answering Services . . . . . . . . . . . . . . . . . . . . . . . . . . . . . . . . . . . . 273
Overview . . . . . . . . . . . . . . . . . . . . . . . . . . . . . . . . . . . . . . . . . . . . . . . . . . . . . . . . . . . . . . . 273
Managing Data Sources . . . . . . . . . . . . . . . . . . . . . . . . . . . . . . . . . . . . . . . . . . . . . . . . . . . 273
Accessing Data using Database Service Elements . . . . . . . . . . . . . . . . . . . . . . . . . . . . . . 285
Using Database Elements. . . . . . . . . . . . . . . . . . . . . . . . . . . . . . . . . . . . . . . . . . . . . . . . . . 289
15 Importing and Exporting . . . . . . . . . . . . . . . . . . . . . . . . . . . . . . . . . . . . . . . . . . . . . . . . . . . . 299
Overview . . . . . . . . . . . . . . . . . . . . . . . . . . . . . . . . . . . . . . . . . . . . . . . . . . . . . . . . . . . . . . . 299
Starting the Import/Export Wizard . . . . . . . . . . . . . . . . . . . . . . . . . . . . . . . . . . . . . . . . . . . . 299
Importing and Exporting Items . . . . . . . . . . . . . . . . . . . . . . . . . . . . . . . . . . . . . . . . . . . . . . 299
16 Maintaining the NetVanta UC Server . . . . . . . . . . . . . . . . . . . . . . . . . . . . . . . . . . . . . . . . . . 301
Backing up the NetVanta UC Server. . . . . . . . . . . . . . . . . . . . . . . . . . . . . . . . . . . . . . . . . . 301
17 Troubleshooting. . . . . . . . . . . . . . . . . . . . . . . . . . . . . . . . . . . . . . . . . . . . . . . . . . . . . . . . . . . 303
Overview . . . . . . . . . . . . . . . . . . . . . . . . . . . . . . . . . . . . . . . . . . . . . . . . . . . . . . . . . . . . . . . 303
Troubleshooting Playback and Recording . . . . . . . . . . . . . . . . . . . . . . . . . . . . . . . . . . . . . 303
Troubleshooting Voicemail . . . . . . . . . . . . . . . . . . . . . . . . . . . . . . . . . . . . . . . . . . . . . . . . . 304
Troubleshooting Message Waiting Indicators . . . . . . . . . . . . . . . . . . . . . . . . . . . . . . . . . . . 305
Troubleshooting the NetVanta UC Server. . . . . . . . . . . . . . . . . . . . . . . . . . . . . . . . . . . . . . 306
Troubleshooting Performance Issues with Exchange Server . . . . . . . . . . . . . . . . . . . . . . . 307
Using the NetVanta UC Server Logs . . . . . . . . . . . . . . . . . . . . . . . . . . . . . . . . . . . . . . . . . 308
Enabling Diagnostic Information . . . . . . . . . . . . . . . . . . . . . . . . . . . . . . . . . . . . . . . . . . . . . 314
Accessing Documentation and Training . . . . . . . . . . . . . . . . . . . . . . . . . . . . . . . . . . . . . . . 315
Accessing Technical Support . . . . . . . . . . . . . . . . . . . . . . . . . . . . . . . . . . . . . . . . . . . . . . . 315
Restoring NetVanta UC Server Files and Settings . . . . . . . . . . . . . . . . . . . . . . . . . . . . . . . 315
6
Copyright © 2014 ADTRAN, Inc.
619500001-1E
UCS Administrator Guide
Table of Contents
18 Appendix A - Installing and Uninstalling Software . . . . . . . . . . . . . . . . . . . . . . . . . . . . . . . . . 317
Overview . . . . . . . . . . . . . . . . . . . . . . . . . . . . . . . . . . . . . . . . . . . . . . . . . . . . . . . . . . . . . . . 317
Installing Active Directory Users and Computers Console . . . . . . . . . . . . . . . . . . . . . . . . . 317
Uninstalling Server Software. . . . . . . . . . . . . . . . . . . . . . . . . . . . . . . . . . . . . . . . . . . . . . . . 318
19 Appendix B - Troubleshooting Logs . . . . . . . . . . . . . . . . . . . . . . . . . . . . . . . . . . . . . . . . . . . 319
Overview . . . . . . . . . . . . . . . . . . . . . . . . . . . . . . . . . . . . . . . . . . . . . . . . . . . . . . . . . . . . . . . 319
Troubleshooting System Error Logs . . . . . . . . . . . . . . . . . . . . . . . . . . . . . . . . . . . . . . . . . . 319
Troubleshooting Warning Logs . . . . . . . . . . . . . . . . . . . . . . . . . . . . . . . . . . . . . . . . . . . . . . 321
619500001-1E
Copyright © 2014 ADTRAN, Inc.
7
Table of Contents
8
UCS Administrator Guide
Copyright © 2014 ADTRAN, Inc.
619500001-1E
UCS Administrator Guide
Introducing the Administrator Application
1. Introducing the Administrator Application
Installing the NetVanta UC Server on a Windows operating system allows you to manage the business
communications system within a Microsoft IT environment. Integration with Active Directory allows IT
administrators to manage the communications system using the same user accounts and security policies
that are used in the Windows environment. The automatic integration requires no extra programming or
special integration.
For more information about the NetVanta UC Server, refer to the ADTRAN Support
Community at https://supportforums.adtran.com. Here you will find training,
documentation, and technical notes.
This chapter introduces the NetVanta Unified Communications (UC) Server Administrator application and
presents some basic operations. This chapter covers the following topics:
•
•
•
•
•
•
Conventions on page 9
Product Features on page 10
Starting the Administrator Application on page 14
Changing the Password on page 14
Navigating the NetVanta UC Server on page 15
Installing the NetVanta UC Client on page 18
Conventions
Bold font is used to indicate important input data and keywords.
Steps for procedures generally instruct readers to use shortcut menus, although commands can also be
made using menus and toolbar buttons.
To obtain a shortcut menu, right-click the icon or folder you want to access then select the command you
want.
Computer audio card device
Telephone handset device
Record button
Stop button
619500001-1E
Copyright © 2014 ADTRAN, Inc.
9
Product Features
UCS Administrator Guide
Play button
You can select the icon of the audio device when you play or record. The application
saves the setting and automatically uses the last device that you selected.
Product Features
The following are some of the many NetVanta UC Server features:
• Support for Outlook 2010 32-bit and 64-bit voice form, fax form, contact system, and click-to-dial
integration
• Support for Polycom Corporate Directory (refer to Configuring the Global Phone Directory on page 106
and Using the Global Phone Directory on page 194)
• Support for Windows Server 2008
• Support for Microsoft Exchange Server 2007 is available automatically through the Netvanta UC
NetVanta UC Server Configuration Wizard
• Client software supports Microsoft Windows Vista and Microsoft Office 2007
• Support for connecting existing PBXs to the NetVanta UC Server through a SIP gateway (refer to To
configure PBX options for a PBX connected through a gateway on page 132)
• Ability to use a customized application and the OutDial executable to make outgoing calls and run
services on connected calls (refer to Using the Outbound Dialer on page 181)
• When importing users from text files you can specify the call answering mode, either Personal Assistant
(PA), or Personal Business Assistant (PBA)
• Automatically populates the Active Directory field with the primary identity address (for example, an
extension number)
• Interactive Voice Response (IVR) elements including Move Current Row element on page 296 for
selecting information from multi-record results from database searches, and Prompt for Current Row
element on page 297 to allow callers to select a result from a set through automated prompts
• Ability to sort database data from elements in a service (refer to Fetch Data element on page 290)
• The service code and service expiry date are available from the About NetVanta UC menu box (refer
to Accessing Technical Support on page 315)
Starting the Administrator Application
To start the Administrator application
1. Select Windows Start > Programs.
2. Select NetVanta UC Client. A menu box will appear
10
Copyright © 2014 ADTRAN, Inc.
619500001-1E
UCS Administrator Guide
Changing the Password
3. In the Server name or IP address field, enter the name or IP address of the server to which you want
to connect.
If the server and the application are on the same computer, you can type localhost
instead of the full name.
4. Enable the Save as default check box.
5. Select OK.
Changing the Password
If your user profile menu has access to multiple profiles, you can view those profiles as tabs across the top
of the window. Make sure you have selected the correct profile for which you want to change the
password.
The default administrator login name is admin.
To change the password
1. Select the tab of the profile for which you want to change the password.
2. Select Tools > Change User Password.
3. In the Change Password menu box, do all of the following:
• In the Old password field, enter the old password.
• In the New password field, enter the new password.
• In the Confirm new password field, reenter the new password.
The new password takes effect when you restart the application.
Navigating the NetVanta UC Server
In the Administration application, the Admin tab is available when you start the application. From the
Administration navigation pane you can manage the following:
•
•
•
•
•
Users (user profiles)
Ports
Authentications
Identities (typically extensions)
Data Sources (if you are licensed for database integration, then data sources can be used in custom call
answering services)
619500001-1E
Copyright © 2014 ADTRAN, Inc.
11
Installing the NetVanta UC Client
UCS Administrator Guide
• Servers
• Communication Systems
The administrator application is divided into the following four quadrants: the navigation pane, the
summary pane, the identities pane, and the information pane. Selecting an item in the navigation pane, for
example Users, opens the information in the summary pane, for example a list of users. Selecting an item
in the summary pane, for example a particular user, displays more information about the selection in the
information pane.
The identities pane displays information about the identities associated with the administrator application.
From here, you can change the default number of rings before a call is directed to voicemail, locate and
edit information about services, and retrieve user login and password information for SIP authentication.
When you select the Admin tab, the following menu appears:
Tabs
Summary
Pane
Topics
Navigation
Pane
Detail
Pane
Navigation
Bars
Identitites
Pane
Installing the NetVanta UC Client
Installing the NetVanta UC Server client application on a user’s computer, provides the following
capabilities:
•
•
•
•
•
•
12
Fax printer driver enables sending faxes from a user’s desk
Greeting management
One time messages
Assistant options (for example, transferring callers and notification services)
Personal settings for message delivery, mailbox options, client time zone settings, and so forth
For the Personal Business Assistant (PBA), the ability to manage services and announcements
Copyright © 2014 ADTRAN, Inc.
619500001-1E
UCS Administrator Guide
Installing the NetVanta UC Client
To install the application
1. Navigate to the folder that contains the NetVanta UC Server software that you downloaded and
double-click CAAutoRun.exe.
2. In the ADTRAN NetVanta Unified Communications CD Menu, select Install UC Client. The
ADTRAN NetVanta Unified Communications Client Setup Welcome menu appears.
3. In the Welcome menu, select Next. The End-User License Agreement (EULA) will appear.
4. Select the I accept the terms in the License Agreement check box and select Next. The Custom
Setup menu will appear.
619500001-1E
Copyright © 2014 ADTRAN, Inc.
13
Installing the NetVanta UC Client
UCS Administrator Guide
5. If the user requires the French spell checker function in the ucCompanion instant messaging feature,
select the plus symbol next to Clients to expand the components of the Clients feature.
Select the down arrow next to the red X next to .net Framework French Language Pack, and select
Will be installed on local hard drive from the drop-down menu. Then select Next. The Ready to
install NetVanta Unified Communications Client menu will appear.
6. In the Ready to install NetVanta Unified Communications Client menu, select Install to begin the
installation of NetVanta UC Client.
7. If you selected to install the .net Framework French Language Pack, once NetVanta UC Client has
finished installing, the .net Framework French Language Pack installation wizard will start. Follow
the directions in this wizard to install the language pack.
8. Once the language pack has been installed, select Finish in the ADTRAN NetVanta Unified
Communications Client Setup Wizard.
14
Copyright © 2014 ADTRAN, Inc.
619500001-1E
UCS Administrator Guide
Setting System-Wide Options
2. Setting System-Wide Options
This chapter explains how the NetVanta UC Server administrator options can be used to configure the
behavior of the system by setting system-wide options. System-wide options fall under the following
categories:
•
•
•
•
Setting User Options on page 22
Setting Auto Attendant and System Announcement Options on page 33
Setting Outbound Calls and Dialing Options on page 38
Setting Administrative, Maintenance, and Diagnostic Options on page 42
To access the NetVanta UC Client administrator options
1. Log into NetVanta UC Client as a user with administrator privileges.
2. Select the Admin tab.
3. In the menu bar of the Administrator application, select Tools > Options.
4. Select from the tabs available to change system-wide options.
619500001-1E
Copyright © 2014 ADTRAN, Inc.
21
Setting User Options
UCS Administrator Guide
Setting User Options
There are a number of system-wide user options that can be set to define the default user behavior.
•
•
•
•
•
•
•
•
Setting Message Delivery Options on page 22
Configuring Message Waiting Indicator Options on page 24
Setting the Message Playback Order on page 26
Setting Voicemail Options on page 27
Setting Assisted Transfer Options on page 29
Setting Fax Message Delivery Options on page 29
Setting Fax-on-demand Options on page 30
Message Archiving Options on page 32
Setting Message Delivery Options
Message delivery options apply to the Active Message Delivery and Pager Notification features that are
available to Personal Assistant (PA) users.
When Active Message Delivery is in use, you can specify the maximum number of concurrent calls, and
the number of seconds to wait after connecting before prompting the caller. The default value for the
maximum number of concurrent calls is 1. Increasing this value increases the number of simultaneous calls
that can made. However, setting the value too high reduces the number of ports available for other
activities such as auto attendants, calls forwarded to voicemail, outgoing Active Message Delivery, and on
some PBX integrations, message waiting indicators. You must also consider the number of circuits or
trunks when setting this value, to ensure that you have enough PSTN gateways/trunks that can be used at
any one time.
For the Pager Notification feature, you can specify the number of attempts to deliver messages. You can
also specify the interval between successive delivery attempts.
For the Sending Email field, you can select the email service that is used to send notifications by email.
You can set the Message Sensitivity mode for the message that you want to deliver. This mode lets you
mark a message as one of the following:
•
•
•
•
Normal—this is the default mode
Private—for personal or business-related messages that you do not want others to see
Personal—for personal but not business-related messages
Confidential—for business-related messages that you want to be treated according to the confidentiality
policy of your company
You can set this mode for both voice and fax messages.
22
Copyright © 2014 ADTRAN, Inc.
619500001-1E
UCS Administrator Guide
Setting User Options
To specify the maximum number of concurrent calls
1. In the menu bar of the Administrator application, select Tools > Options.
2. Select the Message Delivery tab.
3. Select the maximum number of concurrent calls.
4. Select OK.
To specify the number of seconds to wait after connecting before prompting a caller
1. In the menu bar of the Administrator application, select Tools > Options.
2. Select the Message Delivery tab.
3. In the second(s) after connecting before prompting callee field, select the number of seconds to
wait after connecting before prompting the callee for a password.
4. Select OK.
To specify the number of delivery attempts using the pager notification feature
1. In the menu bar of the Administrator application, select Tools > Options.
2. Select the Message Delivery tab.
3. In the maximum attempts to deliver to the pager system field, select the number of attempts for
delivery to the pager system.
4. In the Delay drop-down menu, select the number of minutes to wait between notification delivery
attempts.
5. Select OK.
To specify the email service that is used to send email
1. In the menu bar of the Administrator application, select Tools > Options.
2. Select the Message Delivery tab.
3. From the Send Email using drop-down menu, select the email service that you want to use for the
Send email feature. The Send email using drop-down menu consists of servers that have already been
configured on the system.
4. Select OK.
To specify the message sensitivity mode
1. In the menu bar of the Administrator application, select Tools > Options.
2. Select the Message Delivery tab.
619500001-1E
Copyright © 2014 ADTRAN, Inc.
23
Setting User Options
UCS Administrator Guide
3. In the Message Sensitivity section, do one of the following:
• From the Voice Messages drop-down menu, choose the sensitivity level that you want for a voice
message.
• From the Fax Messages drop-down menu, choose the sensitivity level that you want for a fax
message.
4. Select OK.
Messages that have different sensitivity levels are managed by individual message stores.
You can check the email server’s documentation for the specific capabilities that are
available when using this mode.
Configuring Message Waiting Indicator Options
You can specify how the message waiting indicator operates after a user receives a message. The
instructions below describe how to set the message waiting indicator behavior system wide, however you
can also set it individually for specific users. Users can also set their own message waiting indicator
behavior. If a user selects Use system defaults, then the message waiting indicator behavior defaults to the
message waiting indicator behavior set system wide.
Because message waiting indicator behavior can be set by both the administrator and the user, and the
administrator can set it both system wide and individually, sometimes these settings may differ. The
message waiting indicator behavior in effect corresponds to the last mode set. Thus, the administrator can
set the system wide message waiting indicator behavior when a new system is installed or upgraded. The
user can then set their own message waiting indicator behavior, which may differ from the system setting.
However, if the administrator then changes the system wide setting, this setting overrides the user's setting,
and they will have to reset it if they want a different setting.
Disable the mode if you do not want to manage the message waiting activity. If you enable the mode, the
message waiting indicator turns on when:
• A caller leaves a message in the user’s mailbox.
• The user receives a message sent using the manage mailbox feature.
• A forwarded voice or fax message arrives in the user’s mailbox.
A voice or fax message that is forwarded by email does not turn on the recipient’s
message waiting indicator.
You can specify the message waiting indicator to turn off when the user listens to the first new message, or
the last new message in the mailbox.
If the system is busy and is using voicemail ports to manage the message waiting indicator activity, you
can increase the number of simultaneous operations. Doing so can reduce the time it takes to deliver
changes to message waiting indicators. Set the number at about 1/8 the total number of ports in the system.
There is no advantage to setting the number higher than the number of ports.
24
Copyright © 2014 ADTRAN, Inc.
619500001-1E
UCS Administrator Guide
Setting User Options
When configuring message waiting indicators there are some options that should rarely be changed. The
simultaneous event monitor’s value controls the number of threads used to process mailbox events for the
purpose of updating message waiting indicators. The default value is 1, and this mode rarely requires
changing.
Only change the value of the simultaneous event monitors under the direction of the
ADTRAN Technical Support team.
For message waiting indicators to update when messages are accessed in Microsoft
Outlook Web Access or on a mobile device, you can configure Microsoft Exchange
Server to monitor for changes in users’ mailboxes, and for the NetVanta UC Server to
adjust the waiting light accordingly. For more information, refer to Configuring
Microsoft Exchange Server on page 114.
For troubleshooting information, refer to Troubleshooting Message Waiting Indicators
on page 305.
To disable the message waiting indicator mode
1. In the menu bar of the Administrator application, select Tools > Options.
2. Select the Message Waiting Light tab.
3. Enable the Never turn on or off button.
4. Select OK.
To specify message waiting indicator options
1. In the menu bar of the Administrator application, select Tools > Options.
2. Select the message waiting indicator tab.
3. Enable the Turn on when new message arrives button.
4. Enable either of the following:
• Turn off when first message is accessed in mailbox—the light turns off when the user accesses
the first new message, regardless of whether the user disconnects before listening to the message
• Turn off when no more new messages in mailbox—the light turns off when the user accesses the
last new message
5. Select OK.
The changes that you make to the message waiting indicator options come into effect for
new messages only.
619500001-1E
Copyright © 2014 ADTRAN, Inc.
25
Setting User Options
UCS Administrator Guide
For information on setting the message waiting indicator options for individual users,
refer to Configuring a user’s message waiting indicator on page 83.
To set the number of simultaneous message waiting indicator operations
1. In the menu bar of the Administrator application, select Tools > Options.
2. Select the message waiting indicator tab.
3. In the Operational section, enter a number in the Maximum number of simultaneous field.
You can set the number anywhere between 1 and 16 inclusively. The default is 1.
4. Select OK.
To set the number of simultaneous event monitors
1. In the menu bar of the Administrator application, select Tools > Options.
2. Select the message waiting indicator tab.
3. Under Operational parameters, Maximum number of simultaneous monitors, select a number.
You can set the number anywhere between 1 and 16 inclusively. The default is 1.
4. Select OK.
Setting the Message Playback Order
You can configure system wide the order in which new (unheard) and old (previously heard) messages are
played over the telephone user interface (TUI).
• If Enable sorting is checked, then the default values are for new messages to be played in chronological
order (oldest messages first), while old messages are played in reverse chronological order (newest
messages first). Enable sorting is the default value.
• If Enable sorting is unchecked, then messages will be played in an order that is dependent on the server.
That is, the user cannot rely on any specific order for message playback. If a specific order of message
playback is required, then Enable sorting should be checked.e
Users do not have the same options for setting message playback sort order, and instead have the following
options available to them:
• Listen to voice and fax messages only.
26
Copyright © 2014 ADTRAN, Inc.
619500001-1E
UCS Administrator Guide
Setting User Options
• Listen to voice and fax messages first then email messages.
• Listen to all messages in the order they were received.
If Enable sorting is checked, and a user has selected Listen to voice and fax messages
only, or Listen to voice and fax messages first then email messages, then all voice, fax,
and email messages (if selected), are sorted together.
To set message playback order for new and old messages
1. In the menu bar of the Administrator application, select Tools > Options.
2. Select the Mailbox Management TUI tab.
3. Check the Enable sorting checkbox. Play new (unheard) messages defaults to playing in
chronological order, while old (heard) messages defaults to playing in reverse chronological order.
4. Select the radio buttons to play new (unheard) messages and old (heard) messages in either
chronological or reverse chronological order, and select OK.
Setting Voicemail Options
These options define how voicemail elements work when you include them in a service that you activate
on a trunk or when a user with Personal Business Assistant mode inserts the voicemail element in a
service. The options also apply system-wide to Personal Business Assistant mode.
You can allow callers to transfer out of a user’s voicemail when they press a specified key. This is useful if,
for example, a caller wants to talk to any salesperson. While the caller listens to a salesperson’s voicemail,
the caller can press a key to transfer to another salesperson. Alternatively, callers can leave a message for
one salesperson, and transfer to another after they finish recording their message, without having to hang
up and call back into the system.
For information on voicemail elements, refer to Voicemail element on page 222.
To specify the NetVanta UC Server access key
1. In the menu bar of the Administrator application, select Tools > Options.
2. Select the Voice Mail tab.
3. From the Enter mailbox management drop-down menu, select a key to be used to start mailbox
management.This key is the NetVanta UC Server access key.
The NetVanta UC Server access key cannot be the same as the operator access key (refer
to To specify the dial by name mode on page 36).
619500001-1E
Copyright © 2014 ADTRAN, Inc.
27
Setting User Options
UCS Administrator Guide
To enable a beep to signal the start of recording
1. In the menu bar of the Administrator application, select Tools > Options.
2. Select the Voice Mail tab.
3. Enable the Beep before recording check box.
4. Select OK.
To set the maximum length of a recording
1. In the menu bar of the Administrator application, select Tools > Options.
2. Select the Voice Mail tab.
3. In the Record for field, enter in seconds the maximum length of a recording. The length can range
from 5 to 900 seconds. The default maximum length of a recording is 240 seconds.
4. Select OK.
To enable silence detection
1. In the menu bar of the Administrator application, select Tools > Options.
2. Select the Voice Mail tab.
3. Enable the Stop recording after check box.
4. Specify in seconds the period of silence to elapse before the call is terminated. Recording stops after
the number of seconds that you specify. The default period is 8 seconds.
5. Select OK.
To enable the termination of a recording when a caller presses a key
1. In the menu bar of the Administrator application, select Tools > Options.
2. Select the Voice Mail tab.
3. Enable the Stop recording when key pressed check box.
The recording stops when a caller presses a key.
4. Select OK.
To allow transfer from voicemail when a caller presses a key
1. In the menu bar of the Administrator application, select Tools > Options.
2. Select the Voice Mail tab.
3. Select a key from the Enter skip-out of voicemail when drop-down menu.
4. Enable the Allow transfer from greeting check box if you want callers to be able to transfer out of a
user’s greeting before leaving a message.
28
Copyright © 2014 ADTRAN, Inc.
619500001-1E
UCS Administrator Guide
Setting User Options
5. Enable the Allow transfer after record check box if you want callers to be able to access another
user’s voicemail after they record a message.
6. Select OK.
Setting Assisted Transfer Options
The Assisted Transfer element is used in call answering services. You can specify the maximum number of
seconds that the NetVanta UC Server waits for an answer before recalling an assisted transfer attempt. The
default is 20 seconds.
For information on the Assisted Transfer element , refer to Assisted Transfer element on
page 225.
To change the assisted transfer timer mode
1. In the menu bar of the Administrator application, select Tools > Options.
2. From the General tab, enter or select the number of seconds to wait before recalling an assisted
transfer attempt.
Setting Fax Message Delivery Options
Fax specifications relate to outgoing fax transmissions from your workplace and to Fax-on-demand
elements that you add to services.
You can specify the number of times that the NetVanta UC Server attempts to transmit a fax. You can also
specify the interval between successive attempts.
Fax transmission options allow you to specify what is included with a fax transmission report. Fax
transmission reports go to a user’s Sent Items folder when a fax is sent successfully. If the fax is
unsuccessful, an email stating the failure appears in the user’s inbox.
For more information on faxing, refer to Faxing on page 151.
To set the number of transmission attempts for outgoing faxes
1. In the menu bar of the Administrator application, select Tools > Options.
2. Select the Fax Messages tab.
3. In the Try drop-down menu, select the number of transmission attempts for outgoing faxes.
4. Select OK.
619500001-1E
Copyright © 2014 ADTRAN, Inc.
29
Setting User Options
UCS Administrator Guide
To set the delay between transmission attempts for outgoing faxes
1. In the menu bar of the Administrator application, select Tools > Options.
2. Select the Fax Messages tab.
3. In the Delay drop-down menu, select the number of minutes between transmission attempts.
4. Select OK.
To set the number of simultaneous outgoing faxes
1. In the menu bar of the Administrator application, select Tools > Options.
2. Select the Fax Messages tab.
3. From the Send up to drop-down menu, select the number of simultaneous faxes that you want to
send.
4. Select OK.
To specify fax transmission options
1. In the menu bar of the Administrator application, select Tools > Options.
2. Select the Fax Messages tab.
3. In the Fax transmission report options section, select one of the following from the drop-down
menu:
• Entire fax only—delivers the entire fax to the user’s Sent Items folder, without including the fax
transmission report.
• Entire fax with fax transmission report—delivers the entire fax including the fax transmission
report to the user’s Sent Items folder.
• Fax transmission report only—delivers only the fax transmission report to the user’s Sent Items
folder. If you select this mode, the following warning appears: “Selecting “Fax Transmission
Report only” will not include the original fax contents when delivering to individual mailboxes or
the system defined mailbox for Message Archiving. Ensure that delivering “Fax Transmission
Report only” complies with your internal document retention policy and adherence to your
industry legislative guidelines.”
Changes to the fax transmission options take effect immediately.
4. Select OK.
Setting Fax-on-demand Options
For a Fax-on-demand element activated on a service, you can specify the minimum and maximum number
of digits that a fax number must have to initiate transmission. You can also enable or disable the service for
long distance callers. Advanced Fax-on-demand options involve specifying the keys that callers press to
30
Copyright © 2014 ADTRAN, Inc.
619500001-1E
UCS Administrator Guide
Setting User Options
indicate that they have finished entering their fax number or to cancel the operation.
You can specify the number of times callers are allowed to attempt to enter their fax number, as well as the
interval between attempts. You can also specify the number of simultaneous faxes that the user can send.
For more information on faxing, refer to Faxing on page 151.
To set the minimum and maximum number of digits for local fax-on-demand services
1. In the menu bar of the Administrator application, select Tools > Options.
2. Select the Fax-on-demand tab.
3. In the Local phone number boxes, select the minimum and maximum digits for fax-on-demand
services.
4. Select OK.
To make fax-on-demand services available to long distance callers
1. In the menu bar of the Administrator application, select Tools > Options.
2. Select the Fax-on-demand tab.
3. Check the Enable long distance phone numbers check box.
4. Select the minimum and maximum number of digits for Fax-on-demand services for long distance
phone numbers.
5. Select OK.
To specify keys to signal the end of caller input and to cancel a fax-on-demand request
1. In the menu bar of the Administrator application, select Tools > Options.
2. Select the Fax-on-demand tab.
3. Select Advanced... to open the Advanced Fax-on-demand Options menu box.
4. From the End of input drop-down menu, select the key that callers can press to signal that they have
finished entering their fax number.
5. From the Cancel drop-down menu, select the key that callers can press to cancel their fax-on-demand
request.
6. Select OK.
619500001-1E
Copyright © 2014 ADTRAN, Inc.
31
Setting User Options
UCS Administrator Guide
To set the maximum number of times a caller can attempt to enter a fax number and the
timeout period
1. In the menu bar of the Administrator application, select Tools > Options.
2. Select the Fax-on-demand tab.
3. Select Advanced... to open the Advanced Fax-on-demand Options menu box.
4. In the Maximum attempts to enter a fax field, enter the maximum number of times callers can
attempt to enter their fax number. When callers reach the maximum number of attempts, the operation
terminates.
5. In the Timeout after second(s) if caller does not respond field, enter the number of seconds to wait
for callers to enter a fax number before the operation terminates.
6. Select OK.
7. Select OK.
Message Archiving Options
You can configure message archiving options for each user on the system.
To specify the message archiving mode
1. In the menu bar of the Administrator application, select Tools > Options.
2. Select the Message Archiving tab.
3. Enable any of the following check boxes:
• Incoming fax messages
• Outgoing fax messages
• Incoming voice messages
4. From the Select the user’s mailbox that all duplicate messages will be recorded to drop-down
menu, select the mailbox of the user that you want to apply message archiving to.
5. Select OK.
To specify the user’s mailbox for duplicate messages
1. In the menu bar of the Administrator application, select Tools > Options.
2. Select the Message Archiving tab.
3. Select a user’s mailbox from the Select the user’s mailbox that all duplicate messages will be
recorded to drop-down menu.
4. Select OK.
32
Copyright © 2014 ADTRAN, Inc.
619500001-1E
UCS Administrator Guide
Setting Auto Attendant and System Announcement Options
Setting Auto Attendant and System Announcement
Options
You can set the following auto attendant and system announcement options:
•
•
•
•
Setting Operator Options on page 33
Configuring Voices for System Announcements on page 34
Selecting the Order for Dial by Name Dialing on page 36
Configuring Non-user Extensions and Identities on page 37
For more information about auto attendants, refer to Auto Attendant Identities on
page 99.
Setting Operator Options
You can set system-wide options for the operator, typically the company receptionist.
To set operator options
1. In the menu bar of the Administrator application, select Tools > Options.
2. Select the Operator Definition tab.
3. Check the Enable operator key check box if you want to allow callers to enter the operator access
key and be transferred to the operator extension.
4. From the Operator access key drop-down menu, select a key for operator access.This is the number
that callers will press to be transferred to a company receptionist. Typically the number 0 is used.
The operator access key cannot be the same as the NetVanta UC Server access
key (defined in the next section, Setting Voicemail Options on page 27).
5. In the Operator Identity field, enter the operator extension to which callers are transferred when they
press the operator access key (as defined in step 4, above).
6. From the Default mailbox drop-down menu, select an Exchange mailbox. This is the mailbox where
voice and fax messages are left for the operator. This includes incoming faxes that are sent directly to
an attendant service using the Play Announcement element, or where a service element does not
route them to a user extension. The configured mailbox can then redistribute the fax to the appropriate
person.
7. Select OK.
619500001-1E
Copyright © 2014 ADTRAN, Inc.
33
Setting Auto Attendant and System Announcement Options
UCS Administrator Guide
Configuring Voices for System Announcements
The NetVanta UC Server administrator can configure the voices that are used for prerecorded
announcements, voice mailbox management, and voicemail behavior for the Voice Mail element and
Personal Assistant mode. The properties of a voice combine features of language, gender, and text to
speech (TTS). For example, the English (U.S.) Female voice provides audio prompts and TTS spoken in
American English by a female speaker.
Enabling and Disabling Voices
The NetVanta UC Server administrator can enable or disable voices from the Voices tab in the
Administrator Options. Enabling a voice adds it to the list of voices a user or administrator can select for
the user's voice and to the list of voices the administrator can select for prerecorded announcements.
Disabling a voice removes it from the list of voices a user or administrator can select for the user's voice
and from the list of voices the administrator can select for prerecorded announcements. Enabling or
disabling a voice also affects the Change Voice element used in services, service elements using the
System Voice value (such as the Compare Data element), and database fields with a Voice data type.
To enable a system voice
1. In the menu bar of the Administrator application, select Tools > Options.
2. Select the Voices tab.
3. In the list of available voices, select the voice you would like to enable. The voice will become
highlighted.
4. Select the Enable button. The Enabled column in the list of available voices will change from No to
Yes.
5. Select OK.
If the number of enabled voices exceeds the license limit, then the attempt to commit
the changes will be unsuccessful and the following error message is displayed: The
number of enabled voices exceeds the license limit.
To disable a system voice
1. In the menu bar of the Administrator application, select Tools > Options.
2. Select the Voices tab.
3. In the list of available voices, select the voice you would like to disable. The voice will become
highlighted.
4. Select the Disable button. The Enabled column in the list of available voices will change from Yes to
No.
The Disable button is inactive if the voice you selected is the default voice.
34
Copyright © 2014 ADTRAN, Inc.
619500001-1E
UCS Administrator Guide
Setting Auto Attendant and System Announcement Options
5. Select OK.
If a voice being disabled is currently in use by a user, you will be warned that A voice
being disabled is in use by one or more users and prompted to confirm or cancel the
changes. If the changes are confirmed, then the attempt to commit the changes
continues; otherwise, the commit attempt is cancelled. If the commit attempt is
successful, all users who use a disabled voice will automatically be changed to use the
system default voice.
Setting the Default Voice
The default voice is the voice used by default for system announcements. Users who have not selected a
voice for system announcements (or have not been assigned a voice by an administrator) will automatically
receive system announcements in the default voice. The default voice can be changed from English (U.S.)
Male to another available voice. When a new default voice is configured, it is automatically enabled.
To set the Default voice
1. In the menu bar of the Administrator application, select Tools > Options.
2. Select the Voices tab.
3. In the list of available voices, select the voice you would like to make the default voice. The voice will
become highlighted.
4. Select the Default button above the list of available voices. [Default] will appear in the Default
column of the selected voice, signifying that the selected voice is now the default voice.
5. Select OK.
To revert the voice settings back to the system defaults, select the Defaults button
below the list of available voices.
619500001-1E
Copyright © 2014 ADTRAN, Inc.
35
Setting Auto Attendant and System Announcement Options
UCS Administrator Guide
Configuring the Text to Speech Voice Properties
The default TTS voice properties can be changed for available voices using the Edit Voice menu. This
menu allows administrators to configure the voice to use for TTS, as well as the TTS volume and the
sample rate. The available TTS voices are dependent upon the TTS vendor that was licensed.
Only one TTS vendor, either Nuance Communications or Speech Technology Group (STG),
can be licensed.
The table below shows the TTS voices available from each vendor and the voices with which they are
associated by default.
Voice
Default TTS Voice Name
Nuance Licensed
STG Licensed
English (U.S.) Male
Speechify Solo Tom (quality 01708)
VW Paul
English (U.S.) Female
Speechify Solo Mara (quality 01708)
VW Julie
French (Canada) Female
VW Chloe
To configure the TTS voice properties
1. In the menu bar of the Administrator application, select Tools > Options.
2. Select the Voices tab.
3. In the list of available voices, select the voice for which you would like to configure the TTS
properties. The voice will become highlighted.
4. Select the Open button. The Edit Voice menu will appear.
5. In the Edit Voice menu, use the Voice Name drop-down menu to select the desired TTS voice.
6. Enter the desired volume for the TTS voice in the Volume field. This value is a percentage of the
maximum playback volume for the TTS voice. The default value is 80 percent.
7. Use the Sample Rate drop-down menu to select the sample rate in samples per second (Hz). Higher
values correspond to higher TTS voice quality. The default value is 16000.
8. Select OK.
Selecting the Order for Dial by Name Dialing
Using the dial by name mode, you can specify the order in which callers can enter a name (either the first
or last name) using their telephone keypad, and then be connected to a corresponding extension.
To specify the dial by name mode
1. In the menu bar of the Administrator application, select Tools > Options.
2. Select the General tab.
36
Copyright © 2014 ADTRAN, Inc.
619500001-1E
UCS Administrator Guide
Setting Outbound Calls and Dialing Options
3. Select one of the following:
• First name, last name
• Last name, first name
4. Select OK.
For information on the Dial by Name element, refer to Dial by Name Element on
page 221.
Configuring Non-user Extensions and Identities
Identities typically refer to extensions. The NetVanta UC Server validates a transfer destination identity.
You can transfer to identities that do not have a user associated with the extension number, such as
conference rooms, lobby phones, etc.
For more information about identities, refer to Managing User Extensions and Identities
on page 93.
The identities that you enter allow the Dial by Extension and Select Extension elements, used in custom
call answering services, to transfer callers to these identities.
For more information about services, refer to Creating Custom Call Answering Services
on page 199. For more information about the Dial by Extension and Select Extension
elements, refer to Dial by Extension Element on page 220 and Select Extension Element
on page 235.
To define a list of accessible identities
1. In the Administrator application, select Tools > Options.
2. Select the Identity tab.
3. Select the Insert identity icon.
4. Enter the identity.
5. Select OK.
Setting Outbound Calls and Dialing Options
Dialing rules allow you to restrict outgoing calls, specify dialing properties, and specify the keys that users
must press to access an outside line for local and long distance calls. Dialing options are used to set
restrictions, properties, and rules related to outgoing calls, and are used for services and many NetVanta
UC Server features including:
619500001-1E
Copyright © 2014 ADTRAN, Inc.
37
Setting Outbound Calls and Dialing Options
•
•
•
•
•
UCS Administrator Guide
Active Message Delivery
Pager Notification
Transfer Call
Fax-on-demand element
Fax sending capabilities
Active Message Delivery, Pager Notification, and Transfer Call are options available to Personal Assistant
(PA) users. The Fax-on-demand element is available for use in custom call answering services, which are
available to Personal Business Assistant (PBA) users.
The dialing options are not global dialing rules that apply to regular outgoing calls from
phones. These dialing options work in conjunction with the dialing restrictions set on the
communication system. The dialing restrictions set on the communication system
override those set from the Tools > Options > Dialing tab.
For more information on faxing, refer to Faxing on page 151.
You can set restrictions for outgoing calls, for example to prevent users from transferring calls to long
distance numbers. You can also set exceptions to the restrictions. For example, you might restrict long
distance calls in general, but allow long distance calls to a specific area code where another office or a
customer is located. In addition, you can define when dialing restrictions are applied for PA, PBA, and
Attendant services. For example, a restriction set to prevent long distance calls denies calls starting with 1.
However, this restriction also prevents calls to extensions starting with 1. If internal extensions were a
maximum of four digits, then enabling Enforce only for numbers longer than 4 digits, prevents long
distance calls while allowing calls to extensions starting with 1.
Rules relate to the number that users must enter on their telephone keypad to access an outside line for
local or long distance telephone calls.
To restrict outgoing calls
1. In the menu bar of the Administrator application, select Tools > Options.
2. Select the Dialing tab.
3. In the Exclude prefixes field, enter the restrictions that you want to apply to outgoing calls. Use a
semi-colon (;) to separate each restriction.
4. In the But allow field, type any exceptions that are not restricted.
5. In the Enforce only for numbers longer than x digits, enable the check box and select the number of
digits to apply the restrictions only to numbers above the specified number of digits.
6. Select OK.
To set dialing properties
1. In the menu bar of the Administrator application, select Tools > Options.
2. Select the Dialing tab.
38
Copyright © 2014 ADTRAN, Inc.
619500001-1E
UCS Administrator Guide
Setting Outbound Calls and Dialing Options
3. From the Country/region field, select the country or region that you want to dial from.
4. Enter the area code in the Area code field.
5. Select OK.
To define the keys that are used to obtain an outside line for local and long distance calls
1. In the menu bar of the Administrator application, select Tools > Options.
2. Select the Dialing tab.
3. Enter a number in the To access an outside line for local calls, dial field.
4. Enter a number in the To access an outside line for long distance calls, dial field.
The number in each field represents the key that users press to access an outside
line for local and long distance calls. That key depends on the configuration of
the PBX. The default key on most PBXs is 9 for both types of access.
5. Select OK.
Advanced Dialing Rules
Advanced dialing rules allow you to specify the conditions under which you can dial telephone numbers
from your office. You can apply dialing rules to a specific area code or office code of outgoing telephone
numbers. The office code consists of the first three digits of a regular seven-digit telephone number. You
can also specify local 10-digit dialing.
You can change the prefix that is applied to specified outgoing telephone numbers.
To specify advanced dialing rules for outgoing calls
1. In the menu bar of the Administrator application, select Tools > Options.
2. Select the Dialing tab.
3. Select the Advanced button.
4. Select New to specify a set of advanced dialing rules.
5. Type an area code in the Area Code field.
6. Choose one of the following:
• All office codes—the advanced dialing rules apply to all office codes
• Specific office codes—the advanced dialing rules apply to the office codes that you specify
7. If you enable the Specific office codes button, enter the office code in the office code field, and then
select OK.
8. Select Add to enter an additional specific office code.
9. Select OK.
619500001-1E
Copyright © 2014 ADTRAN, Inc.
39
Setting Outbound Calls and Dialing Options
UCS Administrator Guide
To specify the prefix
1. In the menu bar of the Administrator application, select Tools > Options.
2. Select the Dialing tab.
3. Select the Advanced button to open the Advanced Dialing Properties field.
4. In the Before the number, dial section, choose one of the following:
• Local prefix
• Long distance prefix
• Custom
5. If you choose Custom, in the Custom field enter the prefix that you want.
6. If you want to dial the area code, enable the Include the area code check box.
Check the Preview the dialed number field to preview the telephone number
elements to dial. These elements are based on the advanced dialing properties that
you specify.
7. Select OK.
Setting Account Codes
You can set a default account code that applies to any service, or you can specify the account code dialing
rules so the user can use any account code that follows the rules that you specify. An account code is a
specified set of digits that the caller must enter after completing the dialing pattern. Account codes
represent an accounting category, for example, expenditures, revenues, or salaries. They are also used to
ensure security because a caller who does not have an account code cannot access specified information.
The account code dialing rules let you specify the following:
• Account code dialing position—determines the position where the account code is inserted in the
dialing string. You can insert the account code before the PBX external dialing prefix, between the PBX
external dialing prefix and the telephone number, or after the telephone number.
• Account code dialing information—specifies special digits or pauses that must be inserted before or
after the account code. A single comma (,) represents a half-second pause. You can specify special PBX
dialing sequences or feature access codes.
You can also specify multiple commas using the following syntax: \xx, where xx is the
number of commas. e.g.: 9\05,5551234 -> 9,,,,,5551234
• Account code dialing format—specifies the minimum and maximum length of account codes that a
user can enter when dialing out. If users enter an account code that is too long or too short, an error
message states that they must enter an account that is within the specified range.
You can use account codes to allow long distance dialing, in which the telephone company applies the long
distance charges to your account code.
40
Copyright © 2014 ADTRAN, Inc.
619500001-1E
UCS Administrator Guide
Setting Outbound Calls and Dialing Options
To set the default account code
1. In the menu bar of the Administrator application, select Tools > Options.
2. Select the Dialing tab.
3. In the Account code section, enable the Enable account codes check box.
4. Enter the account code in the Account code field.
5. Select OK.
To set the account code dialing position
1. In the menu bar of the Administrator application, select Tools > Options.
2. Select the Dialing tab.
3. In the Account Code section, enable the Enable account codes check box.
4. Select the Details button to open the Account Code Dialing Rule field.
5. In the Account code dialing position section, specify where you want to insert the account code in the
dialing string.
6. Select OK.
To set the account code dialing format
1. In the menu bar of the Administrator application, select Tools > Options.
2. Select the Dialing tab.
3. In the Account Code section, enable the Enable account codes check box.
4. Select the Details button to open the Account Code Dialing Rule field.
5. In the first Account code dialing format section, specify pauses (,) or dual-tone multi-frequency
(DTMF) characters that you want to be inserted before or after the account code.
A comma inserts a half-second pause before or after the account code.
You can also specify multiple commas using the following syntax: \xx, where xx is
the number of commas. e.g.: 9\05,5551234 -> 9,,,,,5551234
6. Select OK.
619500001-1E
Copyright © 2014 ADTRAN, Inc.
41
Setting Administrative, Maintenance, and Diagnostic Options
UCS Administrator Guide
To set the account code dialing format length
1. In the menu bar of the Administrator application, select Tools > Options.
2. Select the Dialing tab.
3. In the Account Code section, enable the Enable account codes check box.
4. Select the Details button to open the Account Code Dialing Rule field.
5. In the second Account code dialing format section, specify the minimum and maximum length of
account codes that a user can define.
6. Select OK.
Setting Administrative, Maintenance, and Diagnostic
Options
The following administrative, maintenance, and diagnostic options can be set system-wide.
•
•
•
•
Configuring diagnostic system options
Setting mail server message buffering
Specifying active domains
Configuring system call options
Automatically Archive Logs
You can enable automatic log archiving, in order for the NetVanta UC Server to periodically create log
archives based on a set of criteria that you configure, allowing you to manage log information more
effectively.
You can set the maximum size of an individual log file. Once the size of a log file exceeds that threshold, it
is automatically archived.
The NetVanta UC Server ensures that the log files do not fill the hard drive of the NetVanta UC Server. The
log system does not store logs to the NetVanta UC Server hard drive if the hard drive is lower than the limit
configured for the disk threshold limit.
For more information on logs and log archives, refer to Managing logs on page 312.
To automatically archive logs
1. In the menu bar Administrator application, select Tools > Options.
2. On the General tab, check Enable automatic archiving.
42
Copyright © 2014 ADTRAN, Inc.
619500001-1E
UCS Administrator Guide
Setting Administrative, Maintenance, and Diagnostic Options
3. Set the log file size limit.
4. Set the disk storage limit.
5. Select OK.
Configuring Diagnostics System Options
You can configure the system’s diagnostics to notify ADTRAN of any problems with the NetVanta UC
Server. This information is then used to make improvements to the NetVanta UC Server. You can also
configure the exception reports and diagnostic notifications to be sent to you so or your reseller so that the
appropriate action can be taken if the NetVanta UC Server is not functioning properly. Multiple email
addresses can be entered to receive the reports and notifications.
ADTRAN does not take action in response to the emails received. Data is gathered for
statistical purposes only to aid in improving the NetVanta UC Server. ADTRAN will not
take action unless you create a service request, following standard support procedures.
For information on contacting ADTRAN Technical Support, refer to the ADTRAN
website at www.adtran.com/support.
For information, refer to Enabling Diagnostic Information on page 314.
The diagnostics system options allow you to specify the following:
• Exception Reports - Generates and sends a report to ADTRAN or the configured email recipients
whenever the application is not operating properly. A detailed error report, if enabled, can be included
with the exception report. This detailed error report is the contents of the error report file generated when
an exception occurs in NetVanta UC Server. The maximum file size of the detailed error report can also
be configured.
• Diagnostic Notifications - Sends diagnostic notifications to specified email addresses.
• Port Auditing - Specifies how frequently you want to test idle ports. If a port is faulty, it is reset and
returned to idle status.
To configure the NetVanta UC Server to send exception reports
1. In the menu bar of the Administrator application, select Tools > Options.
2. Select the Diagnostics System Options tab.
3. In the Exception reports section, select the Enable check box.
4. In the email address field, enter the email address where you want the exception reports sent. The
default email address is: [email protected]. You can enter multiple email addresses
separated by semicolons.
619500001-1E
Copyright © 2014 ADTRAN, Inc.
43
Setting Administrative, Maintenance, and Diagnostic Options
UCS Administrator Guide
5. Select OK.
An exception report does not contain confidential company information.
Configuring Error Reporting
You can configure whether NetVanta UC Server attaches a detailed error report to the exception report
email if an exception or error occurs in NetVanta UC Server. This detailed error report is the contents of the
error report file generated when an exception occurs. The maximum file size of the detailed error report
can also be configured.
To configure the NetVanta UC Server to attach an error report to the exception report
1. In the menu bar of the Administrator application, select Tools > Options.
2. Select the Error Reporting tab.
3. Select the Include error report details check box.
4. In the Maximum Size KB field, enter the desired maximum file size in kilobytes for the error report
that will be sent as an attachment to the exception report email. The valid range is 1 to 10240.
If the size of the error report attachment exceeds the specified maximum file size, the
error report details file (.dmp file) will not be sent; however, the error report email will
still be sent.
To configure the NetVanta UC Server to send diagnostic notifications
1. In the menu bar of the Administrator application, select Tools > Options.
2. Select the Diagnostics System Options tab.
3. In the Diagnostic notifications section, check the Enable check box.
4. Type an email address in the Email address field, where you want to send the diagnostic
notifications. You can enter multiple email addresses separated by semicolons.
5. Select OK.
To specify the port auditing interval
1. In the menu bar of the Administrator application, select Tools > Options.
2. Select the Diagnostics System Options tab.
3. In the Port auditing section, check the Enable check box.
44
Copyright © 2014 ADTRAN, Inc.
619500001-1E
UCS Administrator Guide
Setting Administrative, Maintenance, and Diagnostic Options
4. In the Audit interval field, enter the number of minutes that you want to elapse between port audits.
The port auditing interval cannot be less than one minute or more than 60 minutes. The
default is 5 minutes.
5. Select OK.
Setting Mail Server Message Buffering
The servers temporarily cache voice and fax messages when the mail server is not available—possibly
because of a power outage or network problems. You can specify the maximum number of voice and fax
messages that are cached on the mail server, the maximum period that is attempted to deliver the messages
to the email server (after that period, the administrator might restart the server to continue delivering the
messages), and the time between successive attempts at delivering the voice and fax messages to the user’s
mailbox. After the mail server communication link has been re-established with the NetVanta UC Server,
you can specify the message throughput to the mail server.
For more information on mail servers, refer to Configuring Servers on page 113.
To configure mail server message buffering
1. In the menu bar of the Administrator application, select Tools > Options.
2. Select the Message Buffering tab.
3. Enter a value in each of the following boxes:
• Maximum days to attempt delivery—specifies the number of days the NetVanta UC Server
attempts to deliver cached messages to the mail server (the default is 7 days).
• Message re-send time interval (min)—specifies the period that the NetVanta UC Server waits
between concurrent attempts to deliver messages to the mail server (the default is 5 minutes).
• Message delivery rate—specifies the number of messages per minute that are delivered to the
mail server (the default is 60 messages per minute).
• Maximum messages to queue—specifies the number of messages that are temporarily stored on
the NetVanta UC Server in the event that communication with the mail server has stopped (the
default is 10,000 messages).
4. Select OK.
Specifying Active Domains
Active domains are domains for which the server supports the creation of Windows users and
authentications based on profiles on those domains. The server also supports single sign-on only for
profiles in active domains. The server’s local domain is always an active domain.
Active domains must have a trust relationship with the server’s local domain. A trust relationship is a
619500001-1E
Copyright © 2014 ADTRAN, Inc.
45
Setting Administrative, Maintenance, and Diagnostic Options
UCS Administrator Guide
logical relationship established between domains to allow authentication and authorization to shared
resources. The authentication process verifies the identity of the user, and the authorization process
determines what the user is allowed to do on a computer system or network.
Active domains are only relevant to systems integrated with Active Directory. For more
information on Active Directory, refer to Integrating with Active Directory on page 49.
To specify active domains
1. In the menu bar of the Administrator application, select Tools > Options.
2. Select the Active Domains tab.
3. From the Trusted Domains field, select the trusted domain that you want to specify as an active
domain.
4. Select the Select>> button. The trusted domain appears in the Active Domains field.
5. Repeat steps 3 and 4 until all the trusted domains that you want appear in the Active Domains field.
6. Select OK.
To remove an active domain from the list
1. In the menu bar of the Administrator application, select Tools > Options.
2. Select the Active Domains tab.
3. From the Active Domains field, select the active domain that you want to remove.
4. Select the <<Select button.
5. Repeat steps 3 and 4 until all the active domains that you want are removed.
6. Select OK.
46
Copyright © 2014 ADTRAN, Inc.
619500001-1E
UCS Administrator Guide
Integrating with Active Directory
3. Integrating with Active Directory
Overview
All users on the system are characterized by user profiles, identities, and authentications. Provided a user
authentication has access to a system profile, a user might manage user profiles, identities, authentications.
For management purposes, authentications can give a user access to the profiles of other users to configure
personal profile settings, such as announcements and notification services.
Active
Directory
NetVanta
UC Server
User Authentication
User Authentication:
Users may be
authenticated with the
NetVanta UC Server or by
Microsoft Active Directory.
User Profile
User Profile:
Authenticated users have a user
profile in the NetVanta UC Server that
manages their business assistants and
their message stores across multiple
identites and devices.
Identities
Business Communications:
Various SIP-Compatible Devices:
Each user can have multiple identities
associated with traditional telephony
equipment such as PBXs.
Each user can have multiple identites
associated with different SIP devices
Users can have any number of identities on the system, such as an extension number. Through the user
profile, users can manage the identities that are associated with their profile. The identities can also exist
on different communications systems.
NetVanta UC Server is integrated with Active Directory. If your network includes Active Directory for
managing networks and shared resources, NetVanta UC Server can take advantage of the Microsoft
619500001-1E
Copyright © 2014 ADTRAN, Inc.
49
Understanding Active Directory
UCS Administrator Guide
credentials for granting access to NetVanta UC Server resources.
For information on selecting an active domain, refer to Specifying Active Domains on
page 46.
For information on changing users to local or Windows users, refer to Changing Users
to Local or Windows Users on page 65.
Understanding Active Directory
Microsoft networks include Active Directory, which contains information about all computer accounts,
users, and network components, such as printers, file shares, and permissions. Active Directory organizes
information about network elements in a tree structure, similar to the way that Windows uses folders and
files to organize information on a computer.
When you use the NetVanta UC Server New User Wizard to create a new user, you must choose the user
type that you want to create, either a Windows user or Local user.
Some users and authentications might be defined entirely within NetVanta UC Server. These are called
local authentications and users.
Authentications might also be defined based on some Windows user. This Windows authentication is
logically linked to exactly one Windows user defined in a domain that has a two-way trust relationship
with the domain within which the server is located. Windows authentications are used to enable single
sign-on.
Windows users are linked to Active Directory. Certain attributes of a user are linked to Active Directory as
well, including the display name, first and last name, Exchange mailbox, and Contacts Database IDs. The
last two are used only if the user is configured to use Exchange Server for messaging.
Using Active Directory, the NetVanta UC Server is able to identify and authenticate Windows user logon,
using Microsoft credentials, and allow Windows users specific privileges and permissions based on their
system-defined roles. Active Directory provides:
50
Copyright © 2014 ADTRAN, Inc.
619500001-1E
UCS Administrator Guide
Using the Active Directory Users and Computers Console
• Single sign-on—allows users to access network resources without logging on every time.
• Single management—provides a single, consistent point of management for users, applications and
devices.
Single sign-on strengthens system security and provides administrators with consistent tools to manage
security services for local users and remote users. Active Directory improves security by centralizing
management and enforcing role-based security, which means that users have access to aspects of the
system based on roles that are defined by the NetVanta UC Server administrator.
Single management of resources allows, for example, one place for managing users, including attributes
related to the NetVanta UC Server, Windows, and Exchange.
You can, however, create a local user that does not have access to Active Directory. Local users must enter
a password each time they log on to the system. For example, creating a local user is useful for the
NetVanta UC Server and mailbox accounts that do not have Windows accounts, or service accounts.
The New User Wizard prompts you to specify a password when you create a local user. For information
about using the New User Wizard to create a user, refer to Using the New User Wizard on page 67.
Using the Active Directory Users and Computers
Console
You cannot use the NetVanta UC Server plug-in for Active Directory Users and
Computers if the client operating system is Windows 2000.
The NetVanta UC Server is integrated with Active Directory Users and Computers Console, which unifies
and simplifies day-to-day system management tasks. It allows administrators to create special tools to
delegate specific tasks to users or groups. Administrators can create unique consoles for workers who
report to them or for workgroup managers. They can assign a tool with a system policy, deliver the file by
email, or post the file to a shared location on the network. Access to Active Directory Users and Computers
is automatic with the installation of the NetVanta UC Client. Administrators can change, and delete
NetVanta UC Server user profiles from the NetVanta UC Server or from Active Directory.
For information on how to create, change, and delete user profiles from the NetVanta UC
Server, refer to Using the New User Wizard on page 67.
For information on changing users to local or Windows users, refer to Changing Users
to Local or Windows Users on page 65.
619500001-1E
Copyright © 2014 ADTRAN, Inc.
51
Using the Active Directory Users and Computers Console
UCS Administrator Guide
To open the Active Directory Users and Computers Console
1. On the Windows desktop, double-click the shortcut Active Directory Users and Computers.
If there is no desktop shortcut, select Start > Programs > Administrative Tools >
Active Directory Users and Computers. If this shortcut doesn’t exist, select Start >
Settings > Control Panel > Administrative Tools > Active Directory Users and
Computers.
2. Once Active Directory Users and Computers Console is open, navigate to the Users folder. From here,
there are two ways to configure users for the NetVanta UC Server:
• Server User Tasks Wizard
• NetVanta UC Server MMC snap-in
The Server User Tasks Wizard allows you to enable or disable users in the NetVanta UC Server, and to
change user attributes. Follow the steps in the Server User Tasks Wizard to perform any or all of the
following tasks:
• Enable a NetVanta UC Server user, including:
• Identity and fax address
• PIN
• Authorization role
• Location of the user’s mailbox and contact information
• Call answering mode and operator properties
• Modify NetVanta UC Server user-specific attributes
• Change PIN (for TUI access)
• Disable a NetVanta UC Server user
To start the Server User Tasks Wizard
1. From the list of users, right-click the user that you want to modify.
2. Select All Tasks > UC Server Tasks.
Similar to the Server User Tasks Wizard, the MMC snap-in allows you to enable or disable users in the
NetVanta UC Server, and to change user attributes. Unlike the Server User Tasks Wizard, the snap-in
provides the ability to configure additional user properties on an attribute-by-attribute basis. For example,
the snap-in allows you to configure additional identities for a user, and allow access to the profile from
other authentications.
To start the NetVanta UC Server MMC snap-in
1. From the lists of users, right-click the user that you want to modify.
2. Select Properties.
3. Select the UC Server tab.
52
Copyright © 2014 ADTRAN, Inc.
619500001-1E
UCS Administrator Guide
Using the Active Directory Users and Computers Console
When you enable a NetVanta UC Server user profile in Active Directory, then the NetVanta UC Server is
To create a new user it is recommended that you use the New User Wizard in the
NetVanta UC Server. When using the New User Wizard, you create an identity for that
user at the same time, and then assign a temporary PIN to that user. If you enable a user
profile in Active Directory, rather than through the New User Wizard, then an identity is
not created for the user, and therefore a PIN number cannot be assigned, and this could
create security issues. For information on creating NetVanta UC Server user profiles,
refer to Creating User Profiles on page 65.
able to identify and authenticate a Windows user logon using Microsoft credentials, and allow Windows
users specific privileges and permissions based on their system-defined roles.
User profile information is available from the UC Server tab. For more information on user profiles, select
the Advanced button to open the User Details menu.
To enable NetVanta UC Server user profiles from Active Directory
1. From the drop-down menu, select the NetVanta UC Server for which you want to configure this user.
2. Check Enable Unified Communications Server for this user to link the NetVanta UC Server user to
their Windows Active Directory profile. The user profile information is now available.
Changing user profiles from Active Directory
You can change the following types of user profile information, depending on the type of user you have
configured for the system:
• General user information
• User messaging information
• User’s phone and identities
• User authentications
You can change general user information from Active Directory, including resetting a user’s PIN. Users
enter a PIN when they access their mailbox using the telephone. You can reset a user’s PIN if the user
forgets it, or for added security.
NetVanta UC Server user profile information includes the first, last, and display name of the user, as well
as the option to include the user in the dial by name directory.
You can specify the call answering mode, either Personal Assistant (PA) or Personal Business Assistant
(PBA).
• The PA user is the default call answering mode, and includes access to all of the standard voicemail
features.
• The PBA user has access to more advanced features, and is for users who want to create personalized
services and announcements.
You can also specify the operator for the user, either System or Personal. Callers are directed to an operator
619500001-1E
Copyright © 2014 ADTRAN, Inc.
53
Using the Active Directory Users and Computers Console
UCS Administrator Guide
by pressing a button in a voicemail greeting, typically 0.
• A System operator is the general operator, and the call is typically transferred to the extension of the
company receptionist.
• A Personal operator is an alternative to the System operator, and callers are directed to a different
extension, for example, to a personal receptionist, or to an individual in a particular department or
location.
Each user profile has a time zone setting that indicates in which time zone the user is located. The time
zone setting affects the times and dates that appear on voice, fax, and email messages when users access
their mailbox using the telephone user interface. For workers who travel, or are relocating to another site
for a period of time, you can change each user’s time zone settings.
To reset a user’s PIN
1. In the Users summary pane, right-click the user name for which you want to reset the PIN, and select
Properties.
2. Select the UC Server tab.
3. Select the server for which you want to configure this user.
4. Ensure that Enable UC Server for this user is checked.
5. Select PIN.
6. Enter a new number in the New PIN field.
7. Reenter the new number in the Confirm new PIN field.
8. Select OK.
The new PIN takes effect immediately.
To change general user information
1. In the Users summary pane, right-click the user name that you want to modify, and select Properties.
2. Select the UC Server tab.
3. Select the server for which you want to configure this user.
4. Ensure that Enable Unified Communications Server for this user is checked.
5. Select the Advanced button to open the User Details menu.
6. On the General tab, in the User Information section, change any of the following options:
• First name
• Last name
• Display name
54
Copyright © 2014 ADTRAN, Inc.
619500001-1E
UCS Administrator Guide
Using the Active Directory Users and Computers Console
7. Enable the Include in dial by name directory check box if you want the user to be accessible by the
dial by name mode.
8. Select OK.
To change the call answering mode for a user
1. In the Users summary pane, right-click the user name that you want to modify, and select Properties.
2. Select the UC Server tab.
3. Select the server for which you want to configure this user.
4. Ensure that Enable Unified Communications Server for this user is checked.
5. Select the Advanced button to open the User Details menu.
6. On the General tab, in the Call Answering section, select one of the following answering modes for
the user:
• Personal Assistant (PA)—allows this user access to all the standard voicemail features. This is
the default call answering mode.
• Personal Business Assistant (PBA)—allows this user access to more advanced features than the
PA user. This call answering mode is for users who want to create personalized services and
announcements.
7. Select OK.
To change the operator for a user
1. In the Users summary pane, right-click the user name that you want to modify, and select Properties.
2. Select the UC Server tab.
3. Select the server for which you want to configure this user.
4. Ensure that Enable UC Server for this user is checked.
5. Select the Advanced button to open the User Details menu.
6. On the General tab, in the Call Answering section, select one of the following operators for the user:
• System—the general operator, typically a company receptionist, where calls are directed when a
caller presses 0 in a voicemail greeting.
• Personal operator—a specific operator, for example a personal receptionist or an individual user
in a particular department or location, where calls are directed when a caller presses 0 in a
voicemail greeting.
7. If you selected Personal operator, enter the operator’s extension number in the field.
8. Select OK.
619500001-1E
Copyright © 2014 ADTRAN, Inc.
55
Using the Active Directory Users and Computers Console
UCS Administrator Guide
To change the time zone setting for a user
1. In the Users summary pane, right-click the user name whose time zone setting you want to change,
and select Properties.
2. Select the UC Server tab.
3. Select the server for which you want to configure this user.
4. Ensure that Enable UC Server for this user is checked.
5. Select the Advanced button to open the User Details menu.
6. On the General tab, in the User Information section, select a Time zone from the drop-down menu.
7. Select OK.
You cannot change the time zone setting for the system profile. The system profile
time zone setting is always the same as the time zone of the server.
For each user profile, you can specify the email storage type, mailbox, and server, which determines where
voice, fax, and email messages are stored.
Select a server to handle contact information. This functionality includes contact matching for messages
and call routing based on contact. It also applies to managing mailbox functionality, including contact
search for manage mailbox, forwarding messages to contacts, and reply or callback to contacts.
The Messaging tab is linked to the user profile mailbox selection. The Messaging tab is
not visible for Active Directory users where Use mailbox defined by Active Directory is
enabled. The Messaging tab is also not visible for Microsoft Exchange Server
mailboxes. For more information, refer to Configuring a user’s message storage on
page 79.
You can enable users to have access to integrated messaging. Enabling integrated messaging adds a
Mailboxes navigation bar to a user’s NetVanta UC Client. The user is then able to manage their voice and
fax messages visually through the Inbox and Sent Items folders in the NetVanta UC Client.
To change messaging information for a user
1. In the Users summary pane, right-click the user name that you want to modify, and select Properties.
2. Select the UC Server tab.
3. Select the server for which you want to configure this user.
4. Ensure that Enable UC Server for this user is checked.
5. Select the Messaging store button to open the Messaging tab.
6. Select an email storage type from the Email Storage drop-down menu.
56
Copyright © 2014 ADTRAN, Inc.
619500001-1E
UCS Administrator Guide
Using the Active Directory Users and Computers Console
7. Check Enable integrated messaging client, if you want the user to have access to integrated
messaging.
8. Select a server from the drop-down menu.
9. Select OK.
An identity is associated with a specific extension. A user profile can have zero or more identities, for
example, a user might have several telephones. However, identities can only be associated to one user
profile.
You can start the New Identities Wizard to create an identity for a user using the Users summary pane in
Active Directory.
To add an identity to a user using Active Directory
1. In the Users summary pane, right-click the user name to which you want to add an identity, and select
Properties.
2. Select the UC Server tab.
3. Select the server for which you want to configure this user.
4. Ensure that Enable Unified Communications Server for this user is checked.
5. Select the Identities button to open the Identities tab.
6. Select Add to add an identity to the user profile. The New Identity Wizard begins. For information on
using the New Identity Wizard, refer to User Identities on page 96.
To delete an user’s identity using Active Directory
1. In the Users summary pane, right-click the user name from which you want to delete an identity, and
select Properties.
2. Select the UC Server tab.
3. Select the server for which you want to configure this user.
4. Ensure that Enable UC Server for this user is checked.
5. Select the Identities button to open the Identities tab.
6. Select the identity that you want to delete.
7. Select the trash can
.
8. Select OK.
An authentication is a set of credentials that allow or deny users access to the system, for example,
using a user name or password. User profiles can have many authentications, and vice versa. Therefore,
when an authentication is used to access the NetVanta UC Client, the user might have access to several
user profiles, each with several identities. For more information, refer to Enabling Access to User Profiles
using Authentications on page 89.
619500001-1E
Copyright © 2014 ADTRAN, Inc.
57
Using the Active Directory Users and Computers Console
UCS Administrator Guide
Authentications are created automatically when a user is added using the New User Wizard. The primary
authentication is the “main” authentication that owns the user profile.
Although it is possible to remove the primary authentication, ADTRAN does not advise
doing so.
When you add an authentication to a user profile, the authentication then has access to another user’s
NetVanta UC Server client application. The profiles that a user has authorization to access are displayed in
the Authentications field, on the UC Server tab.
To add an authentication to a user
1. In the Users summary pane, right-click the user name to which you want to add an authentication, and
select Properties.
2. Select the UC Server tab.
3. Select the server for which you want to configure this user.
4. Ensure that Enable Unified Communications Server for this user is checked.
5. Select the Authentications button to open the Authentications tab.
6. Select Add to add an authentication.
7. Select a user name from the Select Authentication drop-down menu.
8. Select Select.
9. Repeat steps 6 to 8 until you have added all the users that you want.
The users that you select appear in the Authentications field.
10. Select OK.
To delete an authentication from a user
1. In the Users summary pane, right-click the user name from which you want to remove an
authentication, and select Properties.
2. Select the UC Server tab.
3. Select the server for which you want to configure this user.
4. Ensure that Enable Unified Communications Server for this user is checked.
5. Select the Authentications button to open the Authentications tab.
6. Select the authentication that you want to delete.
7. Select the trash can
.
8. Select OK.
58
Copyright © 2014 ADTRAN, Inc.
619500001-1E
UCS Administrator Guide
Using the Active Directory Users and Computers Console
Deleting user profiles from Active Directory
When you delete a user profile, all of that user’s data is lost. For example, all greetings the user recorded,
all announcements, and all services the user created are deleted.
If the local message store user also has messages stored on NetVanta UC Server, the
messages are deleted.
The user’s email account is not affected when you delete the NetVanta UC Server user
profile.
To delete a user profile
1. From the Users folder in Active Directory, right-click a user name.
2. Select Delete.
3. Select Yes to confirm the deletion.
You have deleted the NetVanta UC Server user profile.
619500001-1E
Copyright © 2014 ADTRAN, Inc.
59
Using the Active Directory Users and Computers Console
60
Copyright © 2014 ADTRAN, Inc.
UCS Administrator Guide
619500001-1E
UCS Administrator Guide
Managing User Profiles
4. Managing User Profiles
This chapter outlines the types of user profiles that you can create and add to the system using the New
User Wizard, and how to manage users in the NetVanta UC Server. It includes information about Active
Directory, local users, and Windows users so that you can decide the types of users that you want. The
chapter covers the following topics:
•
•
•
•
•
•
Overview on page 63
Creating User Profiles on page 65
Changing Users to Local or Windows Users on page 65
Using the New User Wizard on page 67
Configuring User Profiles on page 76
Enabling Access to User Profiles using Authentications on page 89
• Managing User Profiles from EBS on page 91
For information on managing user profiles from Active Directory, refer to Using the
Active Directory Users and Computers Console on page 51.
Overview
Accounts for all users on your system might have been imported from the Microsoft Exchange Server
when the NetVanta UC Server was configured at your work site. If accounts were successfully imported
using the NetVanta UC Server Configuration Wizard, you do not have to set up user accounts, or profiles,
unless a user is new to the system. If user profiles were not imported, you need to set up a user profile for
each user in your office.
Each NetVanta UC Server user needs a profile to access unified communications services. A user profile is
associated not only with the general information about a user, such as first and last name, but also with
authentications and identities. An authentication determines whether a user can access the system. For
example, an authentication might correspond to a login name and password, or a Windows log on. An
identity is the address of a user on some device, for example, an extension number.
Each user profile consists of one mailbox and at least one identity, or possibly several identities. You can
also have phantom mailboxes that are not associated with a physical identity, such as an extension number.
NetVanta UC Server routes incoming calls for each user to the user’s extension number so that messages
can be received and then stored in the user’s mailbox for later retrieval. Each identity can have a separate
set of behaviors, but messages are saved in the message store that is associated with the user profile.
For more information on identities, refer to Managing User Extensions and Identities on
page 93.
619500001-1E
Copyright © 2014 ADTRAN, Inc.
63
Creating User Profiles
UCS Administrator Guide
To access user profiles
In the Administration navigation pane, select Users. User names are displayed in the summary pane.
Tabs
Summary
Pane
Topics
Navigation
Pane
Detail
Pane
Navigation
Bars
Identitites
Pane
The Users summary pane lists the following information for each user on the system:
Display name
Displays the name of the user or mailbox.
Identities
Displays the identity of the user or mailbox, for example, an extension number.
Mode
Displays the call answering mode that is configured for the user or mailbox, for
example, Personal Assistant or Personal Business Assistant.
Message Store
Displays the name of the message store type.
The New User Wizard helps you set up each new user profile. You can create either an internal (or local)
user or a user based on a Windows user.
Local users require a password each time they log into the application. The message store for local users
can be Exchange.
Passwords for Windows users are maintained by Active Directory, so that Windows users do not have to
enter a password each time they log on. This functionality is called single sign-on. Windows users can
automatically choose to configure an Exchange mailbox from Active Directory.
Creating User Profiles
Select the Admin tab to obtain the Administration navigation pane.
64
Copyright © 2014 ADTRAN, Inc.
619500001-1E
UCS Administrator Guide
Changing Users to Local or Windows Users
Before you create a user profile
1. Connect the new user’s telephone to the manufacturer’s PBX according to the manufacturer’s
instructions.
2. If you want to create a unified communications mailbox, then you must first create an email account
for the new user, for example, an Exchange mailbox. If you do not want to create a unified
communications mailbox, then you can create a local mailbox for users.
After you connect the new user’s telephone to the PBX and computer to the server, you can create a
NetVanta UC Server user profile.
There are three types of message store for which you can create user profiles: local message store,
Exchange, and IMAP. IMAP is the preferred configuration for Lotus Notes.
The New User Wizard is dynamic and prompts you for different information depending
on the choices that you make when configuring the new user. For example, Active
Directory authentication, extension numbers, message store (Exchange, Integrated
Messaging, Voice Mail, or IMAP4). The procedures below are only a few of the possible
wizard menus that you might view when creating a user profile.
The type of message store that you choose depends on where you want to store the new user’s messages.
Choosing Exchange means that the user’s messages and personal contacts are all stored on the Exchange
server. Choosing local message store means that the user’s messages and Outlook contacts are stored
locally, on the NetVanta UC Server. Choosing IMAP message store means that messages are stored on the
IMAP server.
Changing Users to Local or Windows Users
Using the NetVanta User Migration Wizard you can quickly change the location and status of groups of
users. You can migrate local users to Microsoft Windows users, linked to Microsoft Active Directory,
including converting the users to using Microsoft Exchange Server as a message store.
If a system has been configured off-site, prior to customer installation, users might have been created or
imported as local users. Once at the site, you can migrate all or some of those users to Active Directory by
running the User Migration Wizard. Link users to Active Directory to enable single sign-on. You can also
choose to automatically link users to an Exchange Server.
You can migrate Windows users to local users, which are controlled exclusively by the NetVanta UC
Server. Local users have local authentications and you can also choose to use Local Message Store.
To change local users to Windows users
1. Right-click anywhere in the Users summary pane, and select Migrate Users.
2. Select Next to begin the wizard.
3. Enable Local users to Windows users and authentications.
619500001-1E
Copyright © 2014 ADTRAN, Inc.
65
Changing Users to Local or Windows Users
UCS Administrator Guide
4. From the drop-down menu, select the domain where Active Directory users will be matched to local
users.
5. Select one or both of the following:
• Use Active Directory for messaging configuration—switches users to the Exchange Server
message store
• Delete existing Local authentications that own each user—causes the authentication to be
deleted if the local user is owned by a local authentication
6. Select the local users that you want to migrate to Windows users.
You can select each user by enabling the check box next to the user’s name. Select Select
All to select all users, or select Deselect All to clear all check boxes.
7. Review the information on the summary menu and select Submit if the information is correct.
You must have already performed network integration on the system, using the NetVanta
UC Server Configuration Wizard, prior to attempting to migrate users.
Voice and fax messages do not migrate from one system to another.
To change Windows users to local users
1. Right-click anywhere in the Users summary pane, and select Migrate Users.
2. Select Next to begin the wizard.
3. Enable Windows users to Local users and authentications.
4. Enable any or all of the following check boxes, and select Next:
• Migrate to Local Message Store—migrated users are switched (if necessary) to using Local
Message Store
• Create default login password—the login password is initialized to the first identity for the user
• Delete existing owning Windows authentication—if the Windows user is owned by a Windows
authentication, the authentication is deleted after the users migrates and the new Local
authentication is created
5. Select the Windows users that you want to migrate to local users.
You can select each user by enabling the check box next to the user’s name. Select Select
All to select all users, or select Deselect All to clear all check boxes.
66
Copyright © 2014 ADTRAN, Inc.
619500001-1E
UCS Administrator Guide
Using the New User Wizard
6. Review the information on the summary menu and select Submit if the information is correct.
You must have already performed network integration on the system, using the NetVanta
UC Server Configuration Wizard, prior to attempting to migrate users.
Voice and fax messages do not migrate from one system to another.
Using the New User Wizard
After you finish entering information on a menu, select the Next button to move to the next menu. If you
are missing information that the NetVanta UC Server needs to create a user, a warning displays with
instructions about the type of information that is missing. You can move Back through the menus at any
time to change the information that you entered. You can also select Cancel, which closes the wizard and
deletes all the information that you entered. Restart the wizard to begin again.
If you want the new user to be linked to Active Directory, select Windows User on the User Type
Selection menu. This mode allows user information and messaging options to be linked with Active
Directory. For information about Active Directory, refer to Understanding Active Directory on page 50.
If you want the new user to be exclusive to the NetVanta UC Server, select Local User on the User Type
Selection menu. This mode allows user information and messaging options to be exclusively controlled by
the NetVanta UC Server.
With the New User Wizard you can do the following tasks:
•
•
•
•
•
Create a new user.
Create initial passwords for accessing the new user profile, either over a telephone or from a computer.
Associate the user to a message store for voice or fax messages.
Associate the user with an identifying number, for example, an extension number.
Define the call answering behavior.
To start the New User Wizard
1. In the Administration navigation pane, select Users.
2. Right-click anywhere in the Users summary pane.
3. Select New.
4. Select Next to begin.
619500001-1E
Copyright © 2014 ADTRAN, Inc.
67
Using the New User Wizard
UCS Administrator Guide
To create a Windows user
1. Follow all the steps in To start the New User Wizard on page 68.
2. On the User Type Selection menu, select the Windows User radio button, and select Next.
3. On the User Information (Active Directory) menu, and select Browse. The Select User menu will
appear.
4. If neccessary, use the Object Types button to select the User object type. After selecting the object
type, it will appear in the Select this object type field.
If prompted to do so, enter the name and password of an account with permissions for
the network domain.
5. If neccessary, use the Locations button to select the location of the Active Directory user object. After
selecting the location, it will appear in the From this location field.
If prompted to do so, enter the name and password of an account with permissions for
the network domain.
6. In the Enter the object name to select field, enter the first name and last name of the Active
Directory user object associated with the user you would like to add.
7. Select the Check Names button to verify that the user object entered in the Enter the object name to
select field matches a user object in the selected From this location field. If more than one object
matching the user object name exists, the Multiple Names Found menu will appear.
8. In the Multiple Names Found menu, select the desired object from the Matching names list, and
select OK. The Select User menu will reappear.
9. In the Select User menu, select OK to accept the user object.
10. Enable the Include in dial by name directory check box, if you want the user included in the dial by
name directory.
11. Use the Class of service drop-down menu to select the class of service (CoS) for the user.
12. Use the Voice drop-down menu to select the desired voice that the system will use for prerecorded
announcements, voice mailbox management, and voice mail behavior for the Voice Mail element and
Personal Assistant mode. The properties of a voice combine features of language, gender and Text to
Speech (TTS). For example, the English (U.S.) Female voice provides audio prompts and TTS
spoken in American English by a female speaker.
68
Copyright © 2014 ADTRAN, Inc.
619500001-1E
UCS Administrator Guide
Using the New User Wizard
13. Enable the Use Active Directory for messaging configuration check box to allow the new user to
have Windows user privileges. Active Directory users do not have to enter a password each time they
log into the system. NetVanta UC Server recognizes and authenticates the user.
Enabling Use Active Directory for messaging configuration automatically
configures the user to use Exchange Server as the email message store if the user is
configured to use Exchange Server in Active Directory.
14. Enter an extension number in the Identity # field.
This extension number is also known as an Identity.
15. Using the adjacent drop-down menu, select a server for the identity.
16. If you want the identity to belong to a phantom mailbox, enable the corresponding Phantom check
box.
Phantom extensions can also be created for extensions with no physical phones
attached.
17. If the user requires a fax number, enter a fax number for the user in the Fax # field. This is the number
that callers dial to send faxes to the user. The user receives any faxes directed to them in their Inbox.
The Message Waiting Indicator (MWI) also flashes on their phone, and a voice mail message notifies
the user that a fax has been received.
18. From the adjacent drop-down menu, select a server for the fax number, and select Next. The
Authentication (Active Directory) menu will appear.
19. In the Authentication (Active Directory) menu, enter a numerical telephone access PIN in the PIN
field.
The PIN number is used to access a mailbox using the telephone user interface (TUI),
either locally or remotely.
20. Reenter the PIN in the Confirm field, and select Next. The Messaging menu will appear.
21. In the Messaging menu, use the Email Storage drop-down menu to select a message store for the
user.
619500001-1E
Copyright © 2014 ADTRAN, Inc.
69
Using the New User Wizard
UCS Administrator Guide
22. If you selected Local Message Store for the user’s Email Storage and you want the new user to have
integrated messaging, then select the Enable integrated messaging client check box. Enabling
Integrated Messaging adds a Mailboxes tab to a user's NetVanta UC Client. Within the Mailboxes
tab a user is then able to manage their phone and fax messages visually using Inbox and Sent Items
folders in NetVanta UC Client.
Regardless of the options that are selected, messages accessed by local message store
users are always played in order from oldest to newest.
23. If you selected an Exchange Server message store for the user’s Email Storage, use the Mailbox
drop-down menu to select the the mailbox associated with the user. If desired, enable mailbox
monitoring for the user. Mailbox monitoring ensures that when a user accesses their voice mail
messages through Microsoft Outlook Web Access or through a mobile device, that their message
waiting light on their phone updates accordingly. Without mailbox monitoring enabled, UC Server is
unaware when a user accesses their voice mail messages through Outlook Web access or through a
mobile device, such that the message waiting light on their phone may continue to flash even after
they’ve accessed all their new messages.
Mailbox monitoring works in conjunction with the message waiting light options set.
To enable mailbox monitoring for individual users, you must also configure Exchange
Server to enable mailbox monitoring. For more information see Adding and
Configuring Exchange Server.
Performance issues may arise when mailbox monitoring is enabled. For more
information, refer to Configuring Microsoft Exchange Server on page 114.
70
Use server default
Use the server default setting selected when configuring Exchange
Server. This is the default value.
Enabled
Enabling mailbox monitoring opens the Exchange Server mailbox and
starts monitoring the mailbox at system start up. This applies only to the
Inbox, and other folders are not monitored. When the user accesses
messages through Outlook Web Access or through a mobile device, the
message waiting indicator synchronizes accordingly.
Disabled
If mailbox monitoring is disabled, then when the user accesses messages
through Outlook Web Access or through a mobile device, the message
waiting indicator does not synchronize accordingly. The message waiting
indicator turns on when a new message arrives, and it is managed,
according to the message waiting indicator options set, when messages
are accessed through the regular Outlook client.
Copyright © 2014 ADTRAN, Inc.
619500001-1E
UCS Administrator Guide
Using the New User Wizard
24. If you selected an IMAP message store for the user’s Email Storage, enter the user’s IMAP Mailbox
in the Mailbox field. Then, enter the password for the IMAP mailbox in the IMAP password field,
and reenter the password in the Confirm field.
25. Once you have configured all of the user’s messaging settings, select Next. The Phone Selection
menu will appear.
26. In the Phone Selection menu, enable one of the following:
• Skip assigning a phone to this user
• Assign to a new phone
• Assign to an existing phone
27. If you selected Assign to a new phone, enter the MAC Address and choose a phone type from the
Phone Type drop-down menu.
The MAC address is located on a sticker on the phone.
28. If you selected Assign to an existing phone, select the phone to which you want to assign the new
user.
Only existing phones that have buttons available appear in the drop-down menu. To
show all phones in the drop-down menu, enable the Show all phones check box. If
you select a phone that does not have buttons available, then the Replace Existing
Identity menu appears when you select Next. From the drop-down menu, select an
existing identity to replace with the current identity.
29. Once you have finished configuring a phone for the user, select Next. The Call Answering menu will
appear.
30. In the Call Answering menu, select one of the following call answering modes:
• Personal Assistant—provides standard voicemail features and is the default call answering mode
• Personal Business Assistant—provides more advanced features for the user who wants to create
personalized services and announcements
31. Select the operator for the new user:
• System—the general operator, typically a company receptionist, where calls are directed to when a
caller presses “0” in a voicemail greeting
• Personal operator—a specific operator, for example a personal receptionist or an individual user
in a particular department or location, where calls are directed to when a caller presses “0” in a
voicemail greeting
32. If you selected Personal operator, enter the operator’s extension number in the adjacent field.
33. Select Next. The Summary menu will appear.
34. Review the summary of the information for the new user.
If there is information in the Summary field that is incorrect, you can select Back to the
appropriate menu and change it.
619500001-1E
Copyright © 2014 ADTRAN, Inc.
71
Using the New User Wizard
UCS Administrator Guide
35. Select Submit to create the new user profile.
You cannot use the same name, extension, or mailbox number as another user. The
extension number cannot be the same as a port extension. The NetVanta UC Server
displays a warning if any of the above conditions exist, and the New User Wizard
restarts.
To create a local user
1. Follow all the steps in To start the New User Wizard on page 68.
2. Select the Local User radio button, and select Next.
3. In the User Information (Local) menu, enter the following new user information:
• First name
• Last name
• Display name
4. Enable the Include in dial by name directory check box, if you want the user included in the dial by
name directory.
5. Use the Class of service drop-down menu to select the Class of Service for the user.
6. Use the Voice drop-down menu to select the desired voice that the system will use for prerecorded
announcements, voice mailbox management, and voice mail behavior for the Voice Mail element and
Personal Assistant mode. The properties of a voice combine features of language, gender and Text to
Speech (TTS). For example, the English (U.S.) Female voice provides audio prompts and TTS
spoken in American English by a female speaker.
7. Enter an extension number in the Identity # field.
This extension number is also known as an Identity.
8. Using the adjacent drop-down menu, select a server for the identity.
9. If you want the identity to belong to a phantom mailbox, enable the corresponding Phantom check
box.
Phantom extensions can also be created for extensions with no physical phones
attached.
10. If the user requires a fax number, enter a fax number for the user in the Fax # field. This is the number
that callers dial to send faxes to the user. The user receives any faxes directed to them in their Inbox.
The MWI also flashes on their phone, and a voice mail message notifies the user that a fax has been
received.
11. From the adjacent drop-down menu, select a server for the fax number, and select Next.
12. On the Authentication (Local) menu, in the Password field, enter a login password for the user.
72
Copyright © 2014 ADTRAN, Inc.
619500001-1E
UCS Administrator Guide
Using the New User Wizard
13. In the Confirm field, reenter the login password.
If you do not enter a password, the NetVanta UC Server assigns a 4-digit password
based on the extension number. For example, extension number 300 is assigned the
password 0300.
14. If you would like to require the user to change the password after the next account logon, select the
User must change password at next logon check box.
15. In the PIN field, enter a numerical telephone access PIN for the user.
16. In the Confirm field, reenter the telephone access PIN.
17. If you would like to require the user to change the PIN after the next account logon, select the User
must change PIN at next logon check box.
18. After all user authentication information has been entered in the Authentication (local) menu, select
Next.
19. In the Messaging menu, use the Email Storage drop-down menu to select a message store for the
user.
20. If you selected Local Message Store for the user’s Email Storage and you want the new user to have
integrated messaging, then select the Enable integrated messaging client check box. Enabling
Integrated Messaging adds a Mailboxes tab to a user's NetVanta UC Client. Within the Mailboxes
tab a user is then able to manage their phone and fax messages visually using Inbox and Sent Items
folders in NetVanta UC Client.
Regardless of the options that are selected, messages accessed by local message store
users are always played in order from oldest to newest.
21. If you selected an Exchange Server message store for the user’s Email Storage, use the Mailbox
drop-down menu to select the the mailbox associated with the user. If desired, enable mailbox
monitoring for the user. Mailbox monitoring ensures that when a user accesses their voice mail
messages through Microsoft Outlook Web Access or through a mobile device, that their message
waiting light on their phone updates accordingly. Without mailbox monitoring enabled, UC Server is
unaware when a user accesses their voice mail messages through Outlook Web access or through a
mobile device, such that the message waiting light on their phone may continue to flash even after
they’ve accessed all their new messages.
Mailbox monitoring works in conjunction with the message waiting light options set.
To enable mailbox monitoring for individual users, you must also configure Exchange
Server to enable mailbox monitoring. For more information see Adding and
Configuring Exchange Server.
619500001-1E
Copyright © 2014 ADTRAN, Inc.
73
Using the New User Wizard
UCS Administrator Guide
Performance issues may arise when mailbox monitoring is enabled. For more
information, refer to Configuring Microsoft Exchange Server on page 114.
Use server default
Use the server default setting selected when configuring Exchange
Server. This is the default value.
Enabled
Enabling mailbox monitoring opens the Exchange Server mailbox and
starts monitoring the mailbox at system start up. This applies only to the
Inbox, and other folders are not monitored. When the user accesses
messages through Outlook Web Access or through a mobile device, the
message waiting indicator synchronizes accordingly.
Disabled
If mailbox monitoring is disabled, then when the user accesses messages
through Outlook Web Access or through a mobile device, the message
waiting indicator does not synchronize accordingly. The message waiting
indicator turns on when a new message arrives, and it is managed,
according to the message waiting indicator options set, when messages
are accessed through the regular Outlook client.
22. If you selected an IMAP message store for the user’s Email Storage, enter the user’s IMAP Mailbox
in the Mailbox field. Then, enter the password for the IMAP mailbox in the IMAP password field,
and reenter the password in the Confirm field.
23. Once you have configured all of the user’s messaging settings, select Next. The Phone Selection
menu will appear.
24. In the Phone Selection menu, enable one of the following:
• Skip assigning a phone to this user
• Assign to a new phone
• Assign to an existing phone
25. If you selected Assign to a new phone, enter the MAC Address and choose a phone type from the
Phone Type drop-down menu.
The MAC address is located on a sticker on the phone.
26. If you selected Assign to an existing phone, select the phone to which you want to assign the new
user.
Only existing phones that have buttons available appear in the drop-down menu. To
show all phones in the drop-down menu, enable the Show all phones check box. If
you select a phone that does not have buttons available, then the Replace Existing
Identity menu appears when you select Next. From the drop-down menu, select an
existing identity to replace with the current identity.
27. Once you have finished configuring a phone for the user, select Next. The Call Answering menu will
appear.
74
Copyright © 2014 ADTRAN, Inc.
619500001-1E
UCS Administrator Guide
Configuring User Profiles
28. In the Call Answering menu, select one of the following call answering modes:
• Personal Assistant—provides standard voicemail features and is the default call answering mode
• Personal Business Assistant—provides more advanced features for the user who wants to create
personalized services and announcements
29. Select the operator for the new user:
• System—the general operator, typically a company receptionist, where calls are directed to when a
caller presses “0” in a voicemail greeting
• Personal operator—a specific operator, for example a personal receptionist or an individual user
in a particular department or location, where calls are directed to when a caller presses “0” in a
voicemail greeting
30. If you selected Personal operator, enter the operator’s extension number in the adjacent field.
31. Select Next. The Summary menu will appear.
32. Review the summary of the information for the new user.
If there is information in the Summary field that is incorrect, you can select Back to
the appropriate menu and change it.
33. Select Submit to create the new user profile.
You cannot use the same name, extension, or mailbox number as another user. The
extension number cannot be the same as a port extension. The NetVanta UC Server
displays a warning if any of the above conditions exist, and the New User Wizard
restarts.
Configuring User Profiles
You can change the following types of user profile information, depending on the type of user you have
configured for the system:
•
•
•
•
•
Configuring a user’s general information
Configuring a user’s message storage
Configuring a user’s message waiting indicator
Configuring a user’s identity
Configuring a user’s authentications
The Messaging tab is unavailable for Active Directory Windows users. For information
about Active Directory, refer to Understanding Active Directory on page 50. For
information on how to change, and delete user profiles from Active Directory, refer to
Using the Active Directory Users and Computers Console on page 51.
619500001-1E
Copyright © 2014 ADTRAN, Inc.
75
Configuring User Profiles
UCS Administrator Guide
Configuring a user’s general information
You can change the following types of general user information:
•
•
•
•
•
•
User name
Including the user in or removing the user from the dial by name directory
Time zone
Voice for system announcements
Call answering mode (PA/PBA)
Operator (the extension the caller may be directed to if the user is unavailable)
User information includes the first, last, and display name of the user, as well as the option to include the
user in the dial by name directory.
Each user has a time zone setting that indicates in which time zone the user is typically located. The time
zone setting affects the times and dates that appear on voice, fax, and email messages when users access
their mailbox using the telephone user interface. For workers who travel, or are relocating to another site
for a period of time, you can change each user’s time zone settings, or configure the time zone setting for
multiple users.
In the user information you can configure the voice that is used for the user’s prerecorded announcements,
voice mailbox management, and voice mail behavior for the voice mail element and for Personal Assistant
mode. The properties of a “voice” combine features of language, gender and Text to Speech (TTS). For
example, the English (U.S.) Female voice provides audio prompts and TTS spoken in American English
by a female speaker.
You can specify the call answering mode, either Personal Assistant (PA) or Personal Business Assistant
(PBA).
• The PA user is the default call answering mode, and includes access to all of the standard voicemail
features.
• The PBA user has access to more advanced features, and is for users who want to create personalized
call answering services and announcements.
When a user is unavailable, callers are transferred to an operator’s extension by pressing a button in a
voicemail greeting, typically 0. You can specify the operator for the user, either System or Personal.
• A System operator is the general operator, and the call is typically transferred to the extension of the
company receptionist.
• A Personal operator is an alternative to the System operator, and callers are directed to a different
extension, for example, to a personal receptionist, or to an individual in a particular department or
location.
You can specify the same operator number for several users.
76
Copyright © 2014 ADTRAN, Inc.
619500001-1E
UCS Administrator Guide
Configuring User Profiles
To change a user’s name information
1. In the Users summary pane, right-click the user name that you want to modify, and select Open.
2. Change any of the following options:
• First name
• Last name
• Display name
If the user is a Windows user with access to Active Directory, you can select Browse to
search the system for user name information. For information about Active Directory,
refer to Understanding Active Directory on page 50.
3. Enable Include in dial by name directory if you want the user to be accessible by the dial by name
mode.
4. Select OK.
To change the time zone for a single user
1. In the Users summary pane, right-click the user whose time zone you want to change, and select
Open. The Edit User menu will open.
2. In the Edit User menu, use the Time zone drop-down menu to select the desired time zone for the
user.
3. Select OK..
To change the time zone for multiple users
1. Press Shift and select each user for which you want to change the time zone setting. The selected
users will become highlighted.
2. Right-click one of the highlighted users, and select Change time zone. The Change Time Zone
menu appears.
3. In the Change Time Zone menu, select the time zone from the drop-down menu.
You cannot change the time zone setting for the system profile. The system profile time
zone setting is always the same as the time zone of the server.
To change the system announcement voice for a single user
1. In the Users summary pane, right-click the user whose voice you want to change, and select Open.
The Edit User menu will open.
2. In the Edit User menu, use the Voice drop-down menu to select the desired system announcement
voice for the user.
3. Select OK.
619500001-1E
Copyright © 2014 ADTRAN, Inc.
77
Configuring User Profiles
UCS Administrator Guide
To change the system announcement voice for multiple users
1. Press Shift and select each user for which you want to change the voice setting. The selected users
will become highlighted.
2. Right-click one of the highlighted users, and select the desired system announcement voice for the
users using the Change Voice submenu.
To change a user’s call answering mode
1. In the Users summary pane, right-click the user name that you want to modify, and select Open.
2. Select one of the following answering modes for the user:
• Personal Assistant (PA)—this user has access to all the standard voicemail features. This is the
default call answering mode.
• Personal Business Assistant (PBA)—this user has access to more advanced features than the PA
user. This call answering mode is for users who want to create personalized call answering
services and announcements.
To select a user’s operator
1. In the Users summary pane, right-click the user for which you want to select an operator, and select
Open.
2. Select one of the following operators for the user:
• System—the general operator, typically a company receptionist, where calls are directed to when a
caller presses “0” in a voicemail greeting.
• Personal operator—a specific operator, for example a personal receptionist or an individual user
in a particular department or location, where calls are directed to when a caller presses “0” in a
voicemail greeting. If you selected Personal operator, enter the operator’s extension number in
the field.
3. Select OK.
The operator’s extension must be longer than one digit. An operator number does not
need to be a user extension; it can be a phantom mailbox.
To select an operator for multiple users
1. Press Shift and select all users for which you want to specify the same operator number.
2. Right-click the selected user names, and select Set operator identity.
3. Enter the extension number that you want in the Operator identity field.
The operator extension must be longer than one digit. An operator number does not
need to be a user extension; it can be a phantom mailbox.
78
Copyright © 2014 ADTRAN, Inc.
619500001-1E
UCS Administrator Guide
Configuring User Profiles
4. Select OK. If you leave the Operator identity field blank, or enter the system operator extension,
you are prompted to confirm the selection.
If you do not specify an extension number for a user, callers are transferred to the
system’s operator extension number when they dial ‘0’.
Configuring a user’s message storage
For each user profile you can specify the email storage type, mailbox, and server, which determines where
voice, fax, and email messages are stored. You can also select a server to handle contact information,
including contact matching for messages, call routing based on contacts, and other mailbox functions such
as contact searches for managing your mailbox, forwarding messages to contacts, and reply or callback to
contacts.
The Messaging tab is linked to the user profile mailbox selection. The Messaging tab is
not visible for Microsoft Active Directory® users where Use mailbox defined by Active
Directory is enabled. For more information, refer to Understanding Active Directory on
page 50.
When selecting a message storage server, consider the following:
• Selecting Exchange means that the user’s messages are stored on Microsoft® Exchange Server.
• IMAP (Internet Message Access Protocol) is a method of accessing and storing email messages. This is
the preferred configuration for Lotus Notes and Lotus Domino servers.
• Selecting Local Message Store means that the user’s messages are stored locally, on the NetVanta UC
Server.
When you configure a user’s messages to be stored on Exchange Server, there are some additional options
available related to message delivery, and to mailbox monitoring, which affects message waiting
indicators.
The message delivery mode determines whether voice and fax messages are sent from the system mailbox
or are stored directly in the user's mailbox. This setting affects whether:
• User defined message rules in Microsoft Outlook® or Microsoft Exchange Server are applied
• Messages are sent to third-party applications such as BlackBerry® Enterprise Server
• The caller's phone number appears in the From line of the message
The settings below determine message delivery for the individual user selected, however message delivery
619500001-1E
Copyright © 2014 ADTRAN, Inc.
79
Configuring User Profiles
UCS Administrator Guide
can also be configured system-wide.
Use system-wide setting
Use the system-wide setting for message delivery
configured for Exchange Server. This is the default
value. For more information on the system-wide
setting, refer to Configuring Microsoft Exchange
Server on page 114.
Send messages from system mailbox
Because voice and fax messages are sent from the
system mailbox:
• User defined message rules set in Outlook or
Exchange Server are applied.
For example, a user's rule might direct messages from
a particular contact to a specific folder.
• Messages are sent to any third-party applications
such as BlackBerry Enterprise Server.
• The message appears to be from the system
mailbox, so the From line does not include the
caller's phone number.
Impersonate caller and store to mailbox
Because voice and fax messages are stored directly
in the user's mailbox, rather than being sent:
• User defined message rules in Outlook or
Exchange Server are not applied.
For example, a user's rule directing messages from a
particular contact to a specific folder will not be
applied.
• Messages are not sent to third-party applications
such as BlackBerry Enterprise Server.
• The From line includes the caller's phone number,
or the caller's name from a contact that matches
the phone number.
Mailbox monitoring ensures that when a user accesses their voicemail messages through Microsoft
Outlook Web Access or through a mobile device, that their message waiting indicator on their phone
updates accordingly. Without mailbox monitoring enabled, the NetVanta UC Server is unaware when a
user accesses their voicemail messages through Outlook Web access or through a mobile device. For
example, a user’s message waiting indicator on their phone may continue to flash even after they’ve
accessed all their new messages.
Mailbox monitoring works in conjunction with the message waiting indicator options
set. For example, the message waiting indicator options determine if the message
waiting indicator is turned off when the first message is read, or when all new messages
have been read. For more information, refer to Configuring Message Waiting Indicator
Options on page 24.
80
Copyright © 2014 ADTRAN, Inc.
619500001-1E
UCS Administrator Guide
Configuring User Profiles
In order to enable mailbox monitoring for individual users, you must also configure
Exchange Server to enable mailbox monitoring. For more information on configuring
Exchange Server to enable mailbox monitoring, refer to Configuring Microsoft
Exchange Server on page 114.
Performance issues may arise when mailbox monitoring is enabled. For more
information, refer to Configuring Microsoft Exchange Server on page 114.
Use server default
Use the server default setting selected when configuring Exchange Server.
This is the default value.
Enabled
Enabling mailbox monitoring opens the Exchange Server mailbox and starts
monitoring the mailbox at system start up. This applies only to the Inbox, and
other folders are not monitored. When the user accesses messages through
Outlook Web Access or through a mobile device, the message waiting
indicator synchronizes accordingly.
Disabled
If mailbox monitoring is disabled, then when the user accesses messages
through Outlook Web Access or through a mobile device, the message
waiting indicator does not synchronize accordingly. The message waiting
indicator turns on when a new message arrives, and it is managed,
according to the message waiting indicator options set, when messages are
accessed through the regular Outlook client.
To configure a user’s message storage
1. In the Administration navigation pane, select Users.
2. In the Users summary pane, right-click the user whose information you want to change, and select
Open.
3. In the Edit User menu box, select Messaging.
4. Select an email storage type from the drop-down menu available.
The options that appear on the Messaging tab depend on the Email Storage type
selected.
To store a user’s messages locally
1. On the Messaging tab, for Email Storage select Local Message Store.
2. Select the Enable integrated messaging client check box, if you want the user to have access to
integrated messaging. Integrated messaging adds a Mailboxes navigation bar to a user’s NetVanta UC
Client. The user can then manage their voice and fax messages visually through the Inbox and Sent
Items folders in NetVanta UC Client.
3. Select a server from the Select the server that handles contact information drop-down menu.
619500001-1E
Copyright © 2014 ADTRAN, Inc.
81
Configuring User Profiles
UCS Administrator Guide
To store a user’s messages on Exchange Server
1. On the Messaging tab, for email storage select Exchange.
2. Select an Exchange Server mailbox from the drop-down menu available.
3. From the drop-down menu, select a server to handle the user’s contact information.
4. Select a message delivery mode from the following options:
• Use system-wide setting
• Send messages from system mailbox
• Impersonate caller and store to mailbox
5. Select a mailbox monitoring mode from the following options:
• Use server default
• Enabled
• Disabled
Configuring a user’s message waiting indicator
You can set how the message waiting indicator operates on users' phones after the NetVanta UC Server
receives a message. The instructions below describe how to set the message waiting indicator behavior for
an individual user, however you can also set the message waiting indicator behavior system wide. Users
can also set their own message waiting indicator behavior.
Because message waiting indicator behavior can be set by both the administrator and the user, and the
administrator can set it both system wide and individually, sometimes these settings may differ. The
message waiting indicator behavior in effect corresponds to the last mode set. Thus, if you set the message
waiting indicator behavior for an individual user, then this setting takes effect rather than the system wide
or the user selected mode. However, users can reset the message waiting indicator behavior by selecting an
mode themselves.
For message waiting indicators to update when messages are accessed in Microsoft
Outlook Web Access or on a mobile device, you can configure Microsoft Exchange
Server to monitor for changes in users’ mailboxes, and for the NetVanta UC Server to
adjust the waiting light accordingly. For more information, refer to Configuring
Microsoft Exchange Server on page 114.
To change a user's message waiting indicator behavior
1. In the Users summary pane, right-click the name of the user whose message waiting indicator
behavior you wish to change.
2. Select Open.
3. Select the message waiting indicator tab.
82
Copyright © 2014 ADTRAN, Inc.
619500001-1E
UCS Administrator Guide
Configuring User Profiles
4. Choose one of the following options.
Use system defaults
The message waiting indicator behavior for the user
is set according to the system wide settings made in
the Tool > Options > message waiting indicator
menu.
This is the default setting for new and upgraded
users.
Never turn on or off
The NetVanta UC Server does not manage the
message waiting indicator
Turn on when new message arrives
Turn off when first message is accessed in
mailbox
The light turns off when the user accesses the first
new message, regardless of whether the user
disconnects before listening to the message.
Turn off when no more new messages in
mailbox
The light turns off when the user accesses the last
new message.
5. Select OK.
Any changes to the message waiting indicator options come into effect immediately.
For information on setting the message waiting indicator options system wide, refer to
Configuring Message Waiting Indicator Options on page 24
For troubleshooting information, refer to Troubleshooting Message Waiting Indicators
on page 305.
Configuring a user’s identity
An identity can be an extension assigned to a user, an auto attendant, or receive incoming faxes.
A user can have up to two identities, for example, one for a telephone, and another for a softphone. Any
additional identities require an additional license. Users can have more than one identity, but identities are
always associated with only one user.
619500001-1E
Copyright © 2014 ADTRAN, Inc.
83
Configuring User Profiles
UCS Administrator Guide
You can create a fax identity to receive incoming faxes for a user, and direct the faxes to the user’s Inbox.
You can start the New Identities Wizard to create an identity for a user using the Users summary pane. An
identity that you create in the Users summary pane also appears, and can be managed, in the identities
pane.
To create an identity in the Users summary pane
1. Right-click the user to which you want to associate an identity.
2. Select Create Identity. The New Identity Wizard starts. For information about using the New Identity
Wizard to create a new identity, refer to User Identities on page 96.
To add an identity to an existing user profile
1. In the Users summary pane, right-click the user name that you want to add an identity to.
2. Select Open to open the User menu box.
3. Select the Identities tab.
4. Select Add... to add an identity to the user profile.
5. Select OK.
To delete an identity from an existing user profile
1. In the Users summary pane, right-click the user name that you want to delete an identity from.
2. Select Open to open the User menu box.
3. Select the Identities tab.
4. Select the identity that you want to delete.
84
Copyright © 2014 ADTRAN, Inc.
619500001-1E
UCS Administrator Guide
5. Select the
Configuring User Profiles
.
6. Select OK.
Configuring a user’s authentications
An authentication is a means by which a person can access the system, for example, a user name or
password. Many user profiles can have many authentications, and vice versa. Therefore, when an
authentication is used to access the NetVanta UC Server, the user might have access to several user
profiles, each with several identities. For more information about managing authentications using the
Authentications user pane, refer to Enabling Access to User Profiles using Authentications on page 89.
The primary authentication is the main authentication that owns the user profile. When a user logs in with
the primary authentication, the user profile is on the main tab.
Although it is possible to remove the primary authentication, ADTRAN does not advise
doing so.
When you add an authentication to a user profile, the authentication then has access to another user’s
NetVanta UC Server client application. The profiles that a user has authorization to access are displayed as
a horizontal list of tabs across the top of the application window. The user selects the tab of another user to
change their greetings, change transfer options, or any other function that they might be required to
perform. You can change some aspects of authentications using the Users summary pane. For full
619500001-1E
Copyright © 2014 ADTRAN, Inc.
85
Configuring User Profiles
UCS Administrator Guide
authentications management, use the Authentications pane.
You must restart the application to view changes to user authentication tabs.
To add an authentication to an existing user profile
1. In the Users summary pane, right-click the user name that you want to add an authentication to.
2. Select Open to open the User menu box.
3. Select the Authentications tab.
4. Select Add... to add an authentication.
5. Select a user name from the Select Authentication drop-down menu.
6. Select Select.
7. Repeat steps 4 to 6 until you have added all the users that you want.
The users that you select appear in the Authentications drop-down menu.
8. Select OK.
To delete an authentication from an existing user profile
1. In the Users summary pane, right-click the user name that you want to remove an authentication from.
2. Select Open to open the User menu box.
3. Select the Authentications tab.
4. Select the authentication that you want to delete.
86
Copyright © 2014 ADTRAN, Inc.
619500001-1E
UCS Administrator Guide
5. Select the
Configuring User Profiles
.
6. Select OK.
Resetting a user’s PIN
Users enter a PIN when they access their mailbox using the telephone. Reset the PIN for users on the
system for added security, or if a user forgets the telephone PIN to retrieve messages over the telephone.
To reset a PIN for a user
1. Right-click the user name for which you want to reset the PIN.
2. Select Reset PIN # to open the Change Personal Identification Number (PIN) menu.
3. Enter a new number in the New PIN field.
4. Reenter the new number in the Confirm new PIN field.
5. Select OK.
The new PIN takes effect immediately.
Deleting a user
To delete an existing user profile
1. Right-click a user name.
2. Select Delete.
3. Select Yes to confirm the deletion. You have deleted the NetVanta UC Server user profile. All that
user’s data is lost. For example, all services the user created, all greetings the user recorded, and all
announcements are deleted.
If the local message store user also has messages stored on the NetVanta UC Server, the
messages are deleted.
The user’s email account is not affected when you delete the NetVanta UC Server user
profile.
619500001-1E
Copyright © 2014 ADTRAN, Inc.
87
Enabling Access to User Profiles using Authentications
UCS Administrator Guide
Enabling Access to User Profiles using
Authentications
NetVanta UC Server allows you to manage multiple users using a single client application. An
authentication is a set of credentials that either allow or deny access to system resources. You can allow
specific users to have access to the profiles of other users. For example, department managers might want
to have access to all the employee accounts so that they can change everyone’s service at once.
There are two types of authentication:
• Windows user authentication—whose credentials are based on the single sign-on Active Directory
account into which the user is logged
• Local user authentication—which is created and managed by the NetVanta UC Server. When the
authentication type is local, users must enter a user name and password each time they log on.
Authentications are automatically created when a user is added using the New User Wizard. Manage
authentications only when you want to add authentications that have not already been created for a
Windows user, or that do not have an associated user profile.
Single sign-on is accomplished in Microsoft networks by ensuring the following:
• a Windows Active Directory user is created on the domain
• a NetVanta UC Server Windows user is created
The administrator can grant other users the ability to manage aspects of the system. For example, if the
administrator adds the authentication “Bob Jones” to the Administrator user profile, “Bob Jones” can now
manage the NetVanta UC Server.
You can also enable Windows authentication, which allows you to assign a role to a Windows user.
Authorization is the process by which it is determined whether a user can perform a certain operation on
some object or objects (for example, identities, profiles, ports, announcements, faxes). You can add or
remove users from specific roles. If you have created a custom authorization store on your system, you can
choose from the following roles:
• Administrator — authentications have full access, for example, are fully able to manage system objects
(like users and ports), and they can create, change, and delete objects in shared folders
• Read Only Administrator — authentications can do almost everything that Administrator users can do,
except that they cannot create, change, and delete system objects
• Restricted User — authentications with capabilities typically associated with Personal Assistant and
Personal Business Assistant users, except that they cannot create or delete announcements, and can only
read services
• Standard User — authentications with capabilities typically associated with Personal Assistant and
Personal Business Assistant users
• Executive Assistant — authentications are the same as Standard Users, but can also manage objects that
belong to other profiles to which they have access. For other profiles, their authorization does not allow
them to create or delete announcements, and allows them to only read services.
88
Copyright © 2014 ADTRAN, Inc.
619500001-1E
UCS Administrator Guide
Enabling Access to User Profiles using Authentications
• Restricted Executive Assistant — authentications that have Restricted User capabilities for their own
profile and the same authorization for other profiles to which they have access
• Power User — authentications similar in capability to Executive Assistant, except that they can also
create or delete announcements for other profiles and have full authorization for services
If there is no custom store, all Windows authentications are treated as if they belong to
the Administrator role.
A user’s authorization for a specific profile depends on the following:
• The role associated with a user’s authentication
• The user’s profile type, for example, System, Personal Business Assistant, or Personal Assistant
To create a new authentication for an existing user profile
1. Right-click anywhere in the Authentications summary pane, and select New.
2. Enter a login name for the new authentication in the Login name field.
3. Make sure the Enabled check box is enabled.
4. Enter a password in the Password field.
5. Reenter the password in the Confirm field.
6. Select the Change button to select an owned user from the list of available user profiles.
7. Select the Add button to add accessible users to the new authentication.
8. Select OK.
To assign a Windows user to a role
1. Right-click anywhere in the Authentications summary pane, and select Enable Windows
Authentication.
2. Select Browse.
3. Select a user from the Select User field.
4. Select OK.
5. In the Authorization section of the Enable Windows user section, select a role from the Role dropdown menu.
The drop-down menu is disabled if there are no authorization roles available.
6. Select OK.
619500001-1E
Copyright © 2014 ADTRAN, Inc.
89
Managing User Profiles from EBS
UCS Administrator Guide
To add an accessible user to an existing user profile
1. In the Authentications summary pane, right-click the Login Name of the user to which you want to
allow another user access, and select Open.
2. In the User associations section, select the Add button.
3. In the Select accessible user profile section, select the user that you want to have access.
4. Repeat step 4 until all the users that you want are listed in the Accessible users field.
5. Select OK.
To remove an accessible user from a user profile
1. In the Authentications summary pane, right-click the Login Name of the user for which you want to
remove another user’s access, and select Open.
2. In the Accessible users section, select the name of the user that you want to remove.
3. Select the
.
4. Select OK.
Managing User Profiles from EBS
If your system uses Windows Essential Business Server (EBS) 2008 then you can manage NetVanta UC
Server users from within the EBS’ Administration Console.
To access NetVanta UC Server user profiles from EBS, the NetVanta UC Client must be
installed on EBS.
When the NetVanta UC Client is installed on EBS, then under Business Applications a tab is added for
NetVanta UC Server Users. The information provided in the tab is the same information that is available
from the NetVanta UC Client Users contents and detail panes. Therefore, you can add, edit, and delete
NetVanta UC Server users from within the EBS Administration Console, just as you would in the NetVanta
UC Client. Changes made to NetVanta UC Server user profiles from EBS are automatically updated in the
NetVanta UC Client. From within the UC Server Users tab, you can also open the NetVanta UC Client, or
connect to another server.
To access NetVanta UC Server user profiles in EBS
1. Run EBS’ Administration Console and select the Business Applications tab.
2. Select the UC Server Users tab.
3. If prompted, select the server to login to.
90
Copyright © 2014 ADTRAN, Inc.
619500001-1E
UCS Administrator Guide
Managing User Profiles from EBS
4. If required, login as Administrator, or a user with administrative privileges. A list of NetVanta UC
Server users appears, with the same headings and information available that appear in the NetVanta
UC Client Users summary pane.
5. Select a user. The user’s information appears in the pane below, similar to the detail pane in NetVanta
UC Client.
To add a NetVanta UC Server user from EBS
1. From the right-hand pane, select Add user.
The NetVanta UC Server New User Wizard opens.
2. Follow the steps for the New User Wizard to add a new user. Refer to Using the New User Wizard on
page 67.
To edit a NetVanta UC Server user from EBS
1. Select a user.
2. From the right-hand pane, select Edit user. The Edit user menu opens.
3. Follow the steps for the Edit User menu to edit a user profile. Refer to Configuring User Profiles on
page 76.
To delete a NetVanta UC Server user from EBS
1. Select a user.
2. From the right-hand pane, select Delete user.
3. At the prompt, confirm that you want to delete the user.
619500001-1E
Copyright © 2014 ADTRAN, Inc.
91
Managing User Profiles from EBS
92
UCS Administrator Guide
Copyright © 2014 ADTRAN, Inc.
619500001-1E
UCS Administrator Guide
Managing User Extensions and Identities
5. Managing User Extensions and Identities
This chapter introduces user extensions and identities and how to manage them. It includes the following
topics:
•
•
•
•
Overview on page 93
User Identities on page 96
Configuring Identities Using the Identities Pane on page 105
Configuring the Global Phone Directory on page 106
Overview
An identity, which is defined as a dialable entity, corresponds to any of the following: user extension, auto
attendant, or email address. Using the Identities menu, you can create a new user, or attendant, and you
can edit or remove an identity.
You can associate multiple identities to a single user profile and each identity can have a different behavior
that is managed by the owner of the profile. This behavior can be defined by the administrator by assigning
a service to the identity when the service is created. Services are essentially customized ways of answering
calls. By default:
• The Default Trunk Service is assigned to identities associated with the administrator account.
• The Default Personal Business Assistant is assigned to identities associated with user accounts.
Users can only assign services in the user’s service folder or in the Shared services folder to identities
associated with a user. Similarly, administrators can only assign services in the administrator’s services
folder or the Shared services folder to identities associated with the administrator account. Once created:
• The administrator can change the service attached to identities associated with the administrator account,
but cannot automatically change the services of an identity associated with a user account.
• Users can change the services attached to the identities associated with their own account through the
NetVanta UC Client.
If an administrator wants to change the service associated with a user identity, then they can temporarily
add their user authentication to the authentications of the user account. This allows the administrator to
access the user account through a new tab in the NetVanta UC Client, once they close and re-launch the
NetVanta UC Client. The administrator can then modify the service associated with the user identity in the
user tab and then subsequently remove their authentication from the user account. The tab is removed
when the NetVanta UC Client is restarted. For more information about services and how to build and
activate them Creating Custom Call Answering Services on page 199.
Use an attendant identity to connect a caller directly to an auto attendant or to a service (for example,
Interactive Voice Response, pre-screening, etc.). When callers dial in to the system, they can access, for
example, a user extension, or the auto attendant.
You can create a fax identity to receive incoming faxes for a user, and direct the faxes to the user’s Inbox.
619500001-1E
Copyright © 2014 ADTRAN, Inc.
93
Overview
UCS Administrator Guide
An identity is associated with a communication system using the following formula: identity =
communication system + address. The New Identity Wizard steps you through the process of creating a
new identity.
The New Identity Wizard is dynamic and prompts you to enter different information
depending on the configuration options that you choose, for example: configuring an
identity type, associating a user with an extension number, or defining call answering
behavior. The procedures below are only a few of the possible wizard menus that you
might view when creating an identity.
You can create the following types of identities using the wizard:
User Identity
This identity type belongs to a user and is typically associated with a
softphone or a hardphone.
Attendant Identity
This identity type allows calls to route directly to an auto attendant or to a
service (for example, Interactive Voice Response, pre-screening, etc.)
To access identities
In the Admin tab in the Administration navigation pane, select the Identities topic. Identities are
displayed in the summary pane.
Tabs
Summary
Pane
Topics
Navigation
Pane
Navigation
Bars
Detail
Pane
Identitites
Pane
94
Copyright © 2014 ADTRAN, Inc.
619500001-1E
UCS Administrator Guide
User Identities
User Identities
A user identity is an extension number that is dialed by another telephone or automated attendant. User
identities are intended to be used with ucCompanion, a softphone, or a hardphone
User identities can be configured as phantom identities. A phantom identity is not physically configured on
a communication system, which means that there is no message waiting indicator functionality. Also, any
transfer to a phantom identity automatically runs the behavior associated with that identity. A phantom
identity does not ring at a phone, but goes directly to voicemail.
Configuring a New User Identity
To create a new user identity, follow these steps:
1. Right-click anywhere in the Identities summary pane.
2. Select Create Identity to display the New Identity Wizard menu.
3. Select Next to proceed.
4. In the Select Identity Type menu, select a communication system from the Select a communications
system drop-down menu.
5. From the Select a user profile drop-down menu, select a user profile to which you want to associate
the identity.
6. Select User as the new identity type.
7. On the Configure User Identity menu, enter a name for the new user in the Name field.
8. In the Address field, enter an address for the new user. An address is typically an extension number.
9. If you want to configure the identity as a phantom identity, enable the Phantom check box.
10. From the Run service drop-down menu, choose the service that you want to assign to the new
identity.
11. Select Next to proceed.
12. On the Configure SIP Authentication menu, enter a password in the Password field. The password
allows the phone to connect to the communication system.
13. Select Finish to create the new user identity.
t
619500001-1E
The new user identity appears in the Identities summary pane beside its distinctive
icon. By default, only the auto attendant identities appear, but you can display all
the identities by selecting View > Display User Identity Details.
Copyright © 2014 ADTRAN, Inc.
95
Auto Attendant Identities
UCS Administrator Guide
14.
Changing the Number of Rings for an Identity
To change the number of rings for an identity, follow these steps:
1. In the Identities summary pane, right-click the identity for which you want to change the number of
rings.
2. Select Open. The Identity menu will appear.
3. In the Identity menu, use the Number of rings drop-down menu to select the number of rings that
you want for the identity. The default number of rings is 4.
4. Select OK.
Removing an Identity
To remove an identity, follow these steps:
1. In the Identities summary pane, right-click the identity that you want to remove.
2. Select Delete.
3. Select Yes to confirm the deletion.
Auto Attendant Identities
An attendant service connects callers directly to an auto attendant or to a service (for example, IVR, prescreening, etc.). When the NetVanta UC Server was configured to function with your system, each of the
attendant lines was set to run a default service. This means that the attendant lines already provide basic
extension dialing, dial-by-name support, operator access, and the ability for users to access and manage
their mailboxes remotely.
For the NetVanta UC Server to use a new attendant, the Communication System must be programmed to
do so. If automatic configuration is supported for your Communication System, the NetVanta UC Server
can program the Communication System so that incoming calls for the new attendant are directed to a port
that is connected to the NetVanta UC Server.
The NetVanta UC Server might also support direct inward dialing (DID) attendants, depending on the
switch compatibility.
You can create an attendant service and configure it to receive faxes. Incoming faxes are then directed to
the user's mailbox, for example, through Microsoft Outlook, Microsoft Exchange Server, Lotus Notes, or
96
Copyright © 2014 ADTRAN, Inc.
619500001-1E
UCS Administrator Guide
Auto Attendant Identities
through an integrated messaging client (a Mailboxes navigation bar on the user’s NetVanta UC Client) or
IMAP4. The message waiting indicator (MWI) flashes to indicate that there is a new message waiting, and
a voicemail message indicates that a fax has been received.
You can assign a fax identity to a new user using the New User Wizard, by entering a Direct Inward Dial
(DID) fax number for the user. Alternatively, you can create a fax identity for an existing user using the
New Identity Wizard, and selecting the Receive Fax mode. Either method has the same result in that the
fax number or address entered is configured to receive incoming faxes, and incoming faxes are directed to
the user’s Inbox.
You cannot configure or delete a user DID fax attendant using the identities menu. You
must manage fax attendants using the Users menu.
The options available for an attendant identity depend on the type of user selected. Admin and Personal
Business Assistant (PBA) users can be configured to run a service. The PBA and Personal Assistant (PA)
users can be configured to receive faxes in their mailbox.
For information about selecting a voice for system announcements, or the order in which
callers enter a name (either first or last) refer to Setting Auto Attendant and System
Announcement Options on page 33.
Configuring an Attendant Identity
To configure an attendant identity, follow these steps:
1. Right-click anywhere in the Identities summary pane.
2. Select Create Identity to display the New Identity Wizard menu.
3. Select Next to proceed.
4. In the Select Identity Type menu, select a communication system from the Select a communications
system drop-down menu.
5. From the Select a user profile drop-down menu, select a user profile to which you want to associate
the identity. The user profile that you select is able to manage the behavior of this identity.
6. Select Attendant service as the new identity type.
7. On the Configure Attendant Identity menu, enter a name for the new attendant identity in the Name
field.
8. In the Address field, enter an address for the new attendant identity. An address is typically an
extension number.
9. From the Run service drop-down menu, choose the service that you want to assign to the new
attendant identity. This option is available to Admin and PBA users only.
10. Select Next to proceed.
619500001-1E
Copyright © 2014 ADTRAN, Inc.
97
Auto Attendant Identities
UCS Administrator Guide
11. Select Finish to create the new identity.
t
The new identity appears in the Identities summary pane beside its distinctive icon.
By default, only the auto attendant identities appear, but you can display all the
identities by selecting the View menu > Display Identities for all Profiles.
Configuring a Fax Attendant Identity
1. Right-click anywhere in the Identities summary pane.
2. Select Create Identity to display the New Identity Wizard menu.
3. Select Next to proceed.
4. In the Select Identity Type menu, select a communication system from the Select a communications
system drop-down menu.
5. From the Select a user profile drop-down menu, select a user profile to which you want to associate
the identity. The user profile that you select is able to manage the behavior of this identity.
6. Select Attendant service, and select Next. The options that appear on the Configure Attendant
Identity menu depend on the user profile selected in the previous menu. Admin users do not have the
Receive Fax mode.
7. In the Name field enter a display name for the fax attendant identity. This is the display name that
appears in the Identities summary pane.
8. In the Address field, enter an address for the fax attendant identity. An address is typically an
extension number, but it can be any string of numbers that can be dialed and is unique to a user, such
as an email address. The address is the identity number that callers use to send faxes to the user.
9. Select Receive Fax to configure the attendant identity to receive incoming faxes, and select Next.
Incoming faxes are then directed to the user’s Inbox. The MWI flashes, and a voicemail message
indicates that a new fax has been received. This option is unavailable for Admin users.
10. Select Finish to create the fax attendant identity.
Editing an Attendant Identity
To edit an attendant identity, follow these steps:
1. In the Identities summary pane, right-click the attendant identity that you want to edit.
Attendant Identity
2. Select Open.
98
Copyright © 2014 ADTRAN, Inc.
619500001-1E
UCS Administrator Guide
Auto Attendant Identities
3. Enter changes in any of the following fields:
• Display name
• Address
• Number of rings—the number of rings before the overflow behavior is initiated
4. In the Call answering behavior section, enable or disable the Enable check box.
5. If you want to change the attendant identity Active service, select the value selector
new service.
, and choose a
6. Select OK.
Changing the Number of Rings for an Identity
To change the number of rings for an identity, follow these steps:
1. In the Identities summary pane, right-click the identity for which you want to change the number of
rings.
2. Select Open. The Identity menu will appear.
3. In the Identity menu, use the Number of rings drop-down menu to select the number of rings that
you want for the identity. The default number of rings is 4.
4. Select OK.
Removing an Identity
To remove an identity, follow these steps:
1. In the Identities summary pane, right-click the identity that you want to remove.
2. Select Delete.
3. Select Yes to confirm the deletion.
1.
2.
•
3.
619500001-1E
Copyright © 2014 ADTRAN, Inc.
99
Configuring Identities Using the Identities Pane
UCS Administrator Guide
Configuring Identities Using the Identities Pane
The sections below outline the configuration options available using the identities pane in the lower-left
quadrant of the NetVanta UC Client interface. This pane allows you to directly edit an identity’s active
service, locate the service currently used by the identity in the Service navigation pane, and change an
identity’s active service.
Editing an Active Service Using the Identities Pane
To edit an active service using the Identities pane, follow these steps:
1. In the Identities pane, select the active service icon.
Active Service icon
2. Select Edit Active Service. The service that is active on the identity opens in the Service Editor. For
information about editing services using the Service Editor, refer to Creating Custom Call
Answering Services on page 199.
Locating an Active Service Using the Identities Pane
To locate an active service using the identities pane, follow these steps:
1. In the Identities pane, select the active service icon.
2. Select Locate Active Service. The Services navigation pane opens with the active service highlighted
in the Services summary pane.
Changing a Service Using the Identities Pane
To change a service using the identities pane, follow these steps:
1. In the Identities pane, select the value selector
that you want to change.
in the services list that corresponds to the identity
2. Select Services.
3. Select the desired service for the identity.
For information about services and how to build and activate them, refer to
Creating Custom Call Answering Services on page 199.
Configuring the Global Phone Directory
The Global Phone Directory uses Polycom’s Corporate Directory feature to enable users of Polycom and
100
Copyright © 2014 ADTRAN, Inc.
619500001-1E
UCS Administrator Guide
Configuring the Global Phone Directory
ADTRAN IP phones to use the GUI on their phones to search for identities included in the Global Phone
Directory.
The Global Phone Directory feature is supported for all ADTRAN IP phones (except the
ADTRAN IP 706 and IP 712) and Polycom IP phones using firmware 3.1.8 and higher.
No other phone types are supported. Phones associated with other communication
systems (such as the NetVanta 7100) are not provisioned by NetVanta UC Server, and,
therefore, are outside the scope of this document.
Users can search the Global Phone Directory database using simple and advanced searches. In a simple
search, the user enters either the first name, last name, or phone number of the identity for which they are
searching. In the advanced search, the user can search on one or more of the first name, last name, and
phone number values.
Administrators can include or exclude identities from the Global Phone Directory using the Identities
summary pane. The inclusion status (Included or Excluded) of an identity is displayed in the Global
Phone Directory column in the Identities summary pane.
All newly created eligible identities are added to the Global Phone Directory, with the exception of
619500001-1E
Copyright © 2014 ADTRAN, Inc.
101
Configuring the Global Phone Directory
UCS Administrator Guide
attendant service identities. Eligible attendant service identities can be included after they are created.
Identities that are not associated with the NetVanta ECS communication system and
phantom identities cannot be included in the Global Phone Directory.
Each Global Phone Directory entry contains a first name, last name, and phone number value. The entry's
phone number is the identity's address. However, because identities have a display name but not a first and
last name, an entry's first name and last name are derived from the display name using the following rules:
• If the display name contains exactly two words, the first name will be the first word, and the last
name will be the second word.
• If the display name contains only one word, the first name will be empty, and the last name will be
the full display name.
• If the display name contains three or more words, the first name will be all words except the last
word, and the last name with be the last word.
102
Copyright © 2014 ADTRAN, Inc.
619500001-1E
UCS Administrator Guide
Configuring the Global Phone Directory
For display names ending with the titles Jr or Sr, the above rules for deriving the first
name and last name may not be ideal. For example, for the display name John Doe Jr,
the first name will be John Doe and the last name will be Jr. Consequently, searching
for Doe will not return John Doe Jr. To work around this issue, the last name used in the
display name should be hyphenated (for example, John Doe-Jr).
Including an Identity in the Global Phone Directory
To include an identity in the Global Phone Directory, follow these steps:
1. In the Identities summary pane, select one or more identities, and right-click on the highlighted
identity or identities.
2. Select Global Phone Directory > Include in Global Phone Directory.
Excluding an Identity in the Global Phone Directory
To exclude an identity from the Global Phone Directory, follow these steps:
1. In the Identities summary pane, select one or more identities, and right-click on the highlighted
identity or identities.
2. Select Global Phone Directory > Exclude from Global Phone Directory.
619500001-1E
Copyright © 2014 ADTRAN, Inc.
103
Configuring the Global Phone Directory
104
UCS Administrator Guide
Copyright © 2014 ADTRAN, Inc.
619500001-1E
UCS Administrator Guide
Configuring the NetVanta UC Server
6. Configuring the NetVanta UC Server
The NetVanta UC Server is typically configured at the time of installation, using the NetVanta UC Server
Configuration Wizard. However, further configuration may be required when hardware is replaced, or
when the network or system is upgraded. This chapter presents information on configuring the NetVanta
UC Server and includes the following topics:
• Configuring Ports on page 110
• Configuring Servers on page 113
• Configuring Communication Systems on page 129
• Configuring Licenses on page 134
You can configure gateways, ports, servers, and communication systems from the Administration
navigation bar.
Configuring Ports
You can add and manage ports only if a communication system already exists. For information about
managing communication systems, refer to Configuring Communication Systems on page 129.
To manage ports, in the navigation pane, select the Ports folder. Port names are displayed in the summary
pane.
Tabs
Summary
Pane
Topics
Navigation
Pane
Detail
Pane
Navigation
Bars
Identitites
Pane
619500001-1E
Copyright © 2014 ADTRAN, Inc.
109
Configuring Ports
UCS Administrator Guide
Configuring ports for all types of communication system
You can configure the NetVanta UC Server ports. Ports are the physical connections on the telephony card
that connect the NetVanta UC Server to the communication system.
If you remove a port that is responsible for activating or deactivating message waiting
indicators, you must first delete the message waiting indicators status from the attached
communication system.
If you integrate additional communication systems, the hardware and software components must be
installed before you can configure ports for the communication system. If your system uses a traditional
communication system, you must configure a port for each configured communication system port. To
add a new port so that the NetVanta UC Server answers it
1. Right-click anywhere in the summary pane.
2. Select New to open the Port menu box.
3. In the Name field, enter a name for the new port.
4. In the Extension field, enter the extension number associated with the new port.
5. Enable the Enable use of port for check box if you want the NetVanta UC Server to answer calls on
that port.
6. Enable any of the following check boxes to configure port management:
•
•
•
•
•
•
Handset call
Pager notification
Message delivery
message waiting indicator changes
Fax transmission
Port audit
7. Select a communication system from the Pbx drop-down menu.
8. Select a device from the Device drop-down menu. Devices are channels on the Dialogic telephony
card.
Information about the port device that you select appears in the Information section.
9. If you select a SIP port, enter a port number in the Port number field, and choose a protocol from the
Protocol drop-down menu.
10. Select OK.
110
Copyright © 2014 ADTRAN, Inc.
619500001-1E
UCS Administrator Guide
Configuring Servers
To edit a port
1. Right-click the port that you want to edit.
2. Select Open to open a Port menu box that has the name of the port.
3. If you want to rename a port, enter a new name in the Name field.
You cannot change the extension number of an existing port. To change an extension
number, you must remove and then re-create the port.
4. If you want to disable the port, disable the Enable use of port for check box.
5. If you want to enable the port, enable any of the following check boxes to edit the configuration of
port management:
•
•
•
•
•
•
Handset call
Pager notification
Message delivery
message waiting indicator changes
Port audit
Fax transmission
6. If you want to change the device, select a new device from the Device drop-down menu. Devices are
channels on the Dialogic card.
7. Select OK.
To delete a port so that the application no longer answers it
1. Right-click the port that you want to delete.
2. Select Delete.
3. Select Yes to confirm the deletion.
It is not advisable to delete or change the primary port on the Norstar communication
system. If you do so, all and extensions must be re-configured so that incoming calls are
directed to the new primary port. This is a time-consuming process during which calls
might not be answered.
Configuring Servers
In the Administration navigation pane, you can use the Servers summary pane to add servers. You can add
five types of servers: Microsoft Exchange Server, Microsoft Exchange Server EWS, IMAP, SMTP, and
Trusted UC Server. Lotus Notes and Lotus Domino servers use the IMAP integration.
Adding a server lets you configure a variety of functions. For example, adding an Exchange Server allows
you to store and retrieve voice, fax, and email messages, configure the Send email function, and integrate
619500001-1E
Copyright © 2014 ADTRAN, Inc.
111
Configuring Servers
UCS Administrator Guide
your contact list with NetVanta UC Server clients. Additionally, adding a trusted NetVanta UC Server
allows NetVanta ucCompanion users to use the presence, instant messaging (IM), and other ucCompanion
features to communicate with other users of trusted NetVanta UC Server systems.
For non-Exchange Server set-ups, you can use an SMTP server to send email notification. The IMAP
server configuration is preferred for use with Lotus Notes.
You can also change server information and delete a server.
Tabs
Summary
Pane
Topics
Navigation
Pane
Detail
Pane
Navigation
Bars
Identitites
Pane
For information on setting mail server message buffering options, refer to Setting Mail
Server Message Buffering on page 45.
Configuring Microsoft Exchange Server
When configuring Microsoft Exchange Server, there are several options available to consider. The
following sections describe these options.
Selecting a Method for Connecting to Microsoft Exchange Server
As of version 5.2.0, NetVanta UC Server is able to connect to Microsoft Exchange Server using either
Messaging Application Programming Interface (MAPI) or Exchange Web Services (EWS). Each
connection method is configured using a separate configuration menu accessed from the Servers summary
pane. Exchange Server connections via MAPI are configured using the Microsoft Exchange Server
Configuration menu, and Exchange Server connections via EWS are configured using the Microsoft
Exchange Server EWS Configuration menu. The method NetVanta UC Server can use to connect to
Exchange Server is dependent on the version of Exchange Server. The following table summarizes the
connection methods available for each version of Exchange Server:
112
Copyright © 2014 ADTRAN, Inc.
619500001-1E
UCS Administrator Guide
Configuring Servers
Microsoft Exchange Server Version
Available Connection Method(s)
Microsoft Exchange Server 2007
MAPI
Microsoft Exchange Server 2007 Service Pack 1 (SP1)
MAPI
Microsoft Exchange Server 2007 SP2
MAPI
Microsoft Exchange Server 2007 SP3
MAPI
Microsoft Exchange Server 2010
MAPI
Microsoft Exchange Server 2010 SP1
MAPI, EWS
Microsoft Exchange Server 2010 SP2
MAPI, EWS
Microsoft Exchange Server 2010 SP3
MAPI, EWS
Microsoft Exchange Server 2013 SP1
MAPI, EWS
Selecting the Client Access Server for MAPI Connections to Exchange Server 2010
The Client Access server (CAS) role was introduced in Exchange Server 2007 to accept client connections
to services such as Outlook Web Access, much like the Exchange Server 2003 front-end server.
Nevertheless, in Exchange Server 2007, exchange clients (including NetVanta UC Server) still connect
directly to the Mailbox server via MAPI.
In Exchange Server 2010, the RPC Client Access service was introduced to allow the CAS to handle all
client connections. Instead of Exchange clients (including NetVanta UC Server) connecting to the Mailbox
server directly, they must connect to the CAS to access the Mailbox server. If you are integrating NetVanta
UC Server with Exchange Server 2010, this change can affect which physical server should be designated
as the Server when configuring an Exchange Server 2010 connection in NetVanta UC Server. You must
designate a physical server that hosts the CAS role as the Server. If, for example, the CAS role and
Mailbox server role are hosted on separate physical servers, the server hosting the CAS role should be
designated as the Exchange Server. If multiple physical servers host the CAS role in a CAS array, any one
of these servers can be designated as the Server when configuring the connection.
NetVanta UC Server does not provide failover for Microsoft Exchange Server
configurations with CAS arrays. If the CAS server designated as the Server fails,
NetVanta UC Server will not redirect to another CAS server in the array. However, CAS
arrays do provide failover for remote procedure call (RPC) client connections to
Exchange mailbox databases and database availability groups (DAGs).
In Exchange Server 2013, the CAS role solely provides authentication and proxy redirection for client
connections. As of version 5.5.0, NetVanta UC Server uses Remote Procedure Call (RPC) over Hypertext
Transfer Protocol (HTTP) to connect to the CAS in Exchange Server 2013. Consequently, when adding an
Exchange Server 2013 to the NetVanta UC Server system, no Server is specified.
Selecting the Exchange Server Version when Using a MAPI Connection
NetVanta UC Server can connect to several versions of Exchange Server. As of version 5.1.0, NetVanta UC
Server automatically detects the version of the Exchange Server connected to the NetVanta UC Server and
configures the connection settings accordingly. However, the administrator can manually override the
Exchange Server version selected by NetVanta UC Server using the Version drop-down menu of the
Microsoft Exchange Server Configuration window.
619500001-1E
Copyright © 2014 ADTRAN, Inc.
113
Configuring Servers
UCS Administrator Guide
Each time NetVanta UC Server connects to Microsoft Exchange Server it will detect
Exchange Server’s version. If the version of Exchange Server selected in NetVanta UC
Server does not match the version detected, an error is logged. If the detected version of
Exchange Server is later than the current configuration, then the later version will be
used for connectivity settings. For more information on how to access error logs, refer to
Using Logs in the NetVanta UC Server available on ADTRAN’s Support Forum at
http://supportforums.adtran.com (article 2605).
Configuring Message Delivery
When you configure a Microsoft Exchange Server connection, you can set the system-wide message
delivery mode to determine whether voice and fax messages are sent from the system mailbox or are stored
directly in users’ mailboxes. This setting affects whether:
• User defined message rules in Microsoft Outlook® or Microsoft Exchange Server are applied.
• Messages are sent to third-party applications such as BlackBerry® Enterprise Server.
• The caller's phone number appears in the From line of the message.
The message delivery modes are as follows:
Send messages
from system mailbox
Voice and fax messages are sent from the system mailbox. This mode has the
following effects:
• Any user defined message rules set in Outlook or Exchange Server are
applied. For example, a user's rule might direct messages from a particular
contact to a specific folder.
• Messages are sent to any third-party applications such as BlackBerry
Enterprise Server.
• The message appears to be from the system mailbox, and the From line
does not include the caller's phone number.
Impersonate caller
and store to mailbox
Voice and fax messages are stored directly in the user's mailbox, rather than
being sent. This mode has the following effects:
• User defined message rules in Outlook or Exchange Server are not applied.
For example, a user's rule directing messages from a particular contact to
a specific folder is not applied.
• Messages are not sent to any third-party applications such as BlackBerry
Enterprise Server.
• The From line includes the caller's phone number, or the caller's name from
a contact that matches the phone number.
You can configure Exchange Server to monitor users’ mailboxes to determine when a new message arrives
or is read, or when a message is marked as read or unread. The advantage is that when a user accesses their
voicemail messages through Microsoft Outlook Web Access or a mobile device, the NetVanta UC Server
adjusts the message waiting indicator on the user’s phone accordingly (to turn it on or off). Without
mailbox monitoring, the NetVanta UC Server is unaware when a user accesses their voicemail messages
through Outlook Web Access or a mobile device. For example, even after a user has accessed all their new
114
Copyright © 2014 ADTRAN, Inc.
619500001-1E
UCS Administrator Guide
Configuring Servers
messages, the message waiting indicator on their desk phone may continue to flash.
However, mailbox monitoring can however, negatively impact system performance. Therefore, you may
want to enable mailbox monitoring only for those users who require it.
The mailbox monitoring options are as follows:
Enable mailbox monitoring
Opens the Exchange Server mailboxes of selected users at system start
up. The NetVanta UC Server monitors each mailbox for changes such as
a new message has arrived or is read, or a message is marked as read or
unread. This applies only to the Inbox; other folders are not monitored.
When a user accesses messages through Outlook Web Access or a
mobile device, depending on the message waiting indicator (MWI)
settings selected, the MWI turns on or off accordingly.
Default setting for users
If mailbox monitoring is enabled, then this mode turns mailbox
monitoring for users on or off by default.
Mailbox monitoring works in conjunction with the MWI options set. For example, the
MWI options determine if the message waiting indicator is turned off when the first
message is read, or when all new messages have been read. For more information, refer
to Configuring Message Waiting Indicator Options on page 24. For information on
troubleshooting message waiting indicators, refer to Troubleshooting Message Waiting
Indicators on page 305.
If mailbox monitoring is enabled, you can also configure mailbox monitoring for
individual users. For more information, refer to Configuring a user’s message storage on
page 79.
Mailbox monitoring could negatively impact system performance. Mailbox monitoring
increases the traffic between the Microsoft Exchange Server and the NetVanta UC Server.
On systems with more than 100 users, system design and engineering must consider the
increased load of mailbox monitoring on the Exchange Server. Monitoring more than 500
mailboxes requires careful consideration and should not be done without a slow roll-out
procedure to validate the performance of both Exchange Server and NetVanta UC Server
in the specific customer environment. If your Exchange Server is at or near capacity, then
you may want to disable mailbox monitoring.
619500001-1E
Copyright © 2014 ADTRAN, Inc.
115
Configuring Servers
UCS Administrator Guide
To add a Microsoft Exchange Server (MAPI Connection)
1. In the Administration navigation pane, select the Servers topic.
2. Right-click in the Servers summary pane, and select New > Exchange to open the Microsoft
Exchange Server Configuration menu box.
You can add only one Exchange Server. If you have already added an Exchange
Server, the option is unavailable.
3. Enter a name for the server in the Name field. This name is used as a label to distinguish between
different message servers and appears in the list of server names.
4. Use the Server drop-down menu to select an Exchange Server that has been detected by NetVanta UC
Server. The server name is the name of the physical Exchange Server to which the NetVanta UC
Server is to connect. If you are adding a Microsoft Exchange Server 2010 server, you must select a
server with the CAS role. Refer to Selecting a Method for Connecting to Microsoft Exchange Server
on page 114 for information on selecting the appropriate Microsoft Exchange Server 2010 server.
If Microsoft Exchange Server 2013 is auto-detected or manually selected for the
Version, the Server option is disabled and cannot be changed without first manually
selecting a different Exchange Server Version.
5. In the Mailbox field, enter the Microsoft Exchange Server mailbox name for the NetVanta UC Server
service account. This mailbox is the Microsoft Exchange Server mailbox that has special access
privileges in Exchange Server..
If you change a mailbox name, the corresponding Exchange Server account might
also need to be configured.
If Microsoft Exchange Server 2013 is auto-detected or manually selected for the
Version, the Mailbox option is disabled and cannot be changed without first
manually selecting a different Exchange Server Version.
6. If the version of the selected Exchange Server differs from the version in the Version field, use the
drop-down menu to select the appropriate version of Microsoft Exchange Server.
If Microsoft Exchange Server 2013 is auto-detected or manually selected for the
Version, the Server and Mailbox Exchange Server options will be disabled.
116
Copyright © 2014 ADTRAN, Inc.
619500001-1E
UCS Administrator Guide
Configuring Servers
7. To select the mailbox from which you want email notification sent, enable one of the following:
System mailbox
The email notification appears to come from the configured NetVanta
UC Server Exchange Server account.
User mailbox
The email notification appears to come from the user’s mailbox.
The sender information for Exchange Server applies only if the Exchange Server is
configured to send email notification.
8. In the Message delivery section, select one of the following options:
Send messages from
system mailbox
Voice and fax messages are sent from the system mailbox.
Impersonate caller and
store to mailbox
Voice and fax messages are stored directly in the user's mailbox, rather
than being sent.
9. In the Mailbox monitoring section, check Enable mailbox monitoring if you want to enable mailbox
monitoring for any or all users.
Enable mailbox monitoring
Opens the Exchange Server mailboxes of selected users at
system start up. The NetVanta UC Server monitors each mailbox
for changes in new message status, and depending on the MWI
settings, adjusts the MWI accordingly.
Default setting for users
If mailbox monitoring is enabled, then this mode turns mailbox
monitoring for users on or off by default.
10. After configuring the Exchange Server, the summary pane shows the connection state of the
Exchange Server. The connection state will appear as Disconnected if the service account has no
mailbox or if the service account lacks permissions to access the Exchange Server. For instructions on
configuring a NetVanta UC Server service account mailbox, refer to Appendix A of the NetVanta UC
Server Configuration Guide available from the ADTRAN Support Community
(https://supportforums.adtran.com). For instructions on configuring permissions for the NetVanta UC
Server service account, refer to Configuring Microsoft Exchange 2007 and 2010 Permissions for
Integration with NetVanta UC Server available from the ADTRAN Support Community
(https://supportforums.adtran.com).
To add a Microsoft Exchange Server EWS
1. In the Administration navigation pane, select the Servers topic.
2. Right-click in the Servers summary pane, and select New > Exchange EWS to open the Microsoft
Exchange Server EWS Configuration menu.
You can add only one Exchange Server. If you have already added an Exchange
Server, the option is unavailable.
619500001-1E
Copyright © 2014 ADTRAN, Inc.
117
Configuring Servers
UCS Administrator Guide
3. Enter a name for the server in the Name field. This name is used as a label to distinguish between
different message servers and appears in the list of server names.
4. NetVanta UC Server will automatically detect the Microsoft Exchange Server URL and service
account SMTP address. If necessary, the detected values can be overridden.
To override the automatically detected Exchange Server URL, select the Override Exchange Server
URL check box and enter the Exchange Server URL in the provided field using the format
https://<server>/ews/exchange.asmx. The <server> variable is the fully qualified domain name
(FQDN) of the physical Exchange Server that hosts the CAS role or the FQDN of any Exchange
Server hosting the CAS role in a CAS array.
To override the automatically detected service account SMTP address, select the Override service
account smtp address check box and enter the Exchange Server mailbox name for the NetVanta UC
Server service account. The format for the service account mailbox is [email protected] (for
example, [email protected]). This mailbox is the Microsoft Exchange Server mailbox that
has special access privileges in Exchange Server.
If you change a mailbox name, the corresponding Exchange Server account might
also need to be configured.
5. To select the mailbox from which you want email notification sent, enable one of the following:
118
System mailbox
The email notification appears to come from the configured NetVanta
UC Server Exchange Server account.
User mailbox
The email notification appears to come from the user’s mailbox.
Copyright © 2014 ADTRAN, Inc.
619500001-1E
UCS Administrator Guide
Configuring Servers
The sender information for Exchange Server applies only if the Exchange Server is
configured to send email notification.
6. In the Message delivery section, select one of the following options:
Send messages from
system mailbox
Voice and fax messages are sent from the system mailbox.
Impersonate caller and
store to mailbox
Voice and fax messages are stored directly in the user's mailbox, rather
than being sent.
7. In the Mailbox monitoring section, check Enable mailbox monitoring if you want to enable mailbox
monitoring for any or all users.
Enable mailbox monitoring
Opens the Exchange Server mailboxes of selected users at
system start up. The NetVanta UC Server monitors each mailbox
for changes in new message status, and depending on the MWI
settings, adjusts the MWI accordingly.
Default setting for users
If mailbox monitoring is enabled, then this mode turns mailbox
monitoring for users on or off by default.
8. After configuring the Microsoft Exchange Server EWS, the summary pane shows the connection state
of the Exchange Server. The connection state will appear as Disconnected if the service account has
no mailbox or if the service account lacks permissions to access the Exchange Server. For instructions
on configuring a NetVanta UC Server service account mailbox, refer to Appendix A of the NetVanta
UC Server Configuration Guide available from the ADTRAN Support Community
(https://supportforums.adtran.com). For instructions on configuring permissions for the NetVanta UC
Server service account, refer to Configuring Microsoft Exchange 2007 and 2010 Permissions for
Integration with NetVanta UC Server available from the ADTRAN Support Community
(https://supportforums.adtran.com).
Configuring IMAP Server
IMAP is a method of accessing and storing email messages. The NetVanta UC Server can integrate with
IMAP version 4 revision 1 servers conforming to RFC 2060. For more information on IMAP version 4
revision 1, refer to www.ietf.org/rfc/rfc2060.txt. Add an IMAP server when you need to integrate the
server with Lotus Notes, Lotus Domino, Novell GroupWise, Google Gmail, or other servers.
The NetVanta UC Server can use mailboxes on an IMAP server to store voice and fax messages in order to
provide users with unified messaging functionality. In addition, users licensed for text-to-speech (TTS) can
listen to their email messages from their mailbox over the telephone.
IMAP servers vary in the methods they support for retrieving a user's voice and fax messages, and these
619500001-1E
Copyright © 2014 ADTRAN, Inc.
119
Configuring Servers
UCS Administrator Guide
methods vary in the speed at which they retrieve such messages.
To optimize IMAP server performance and to minimize delay between when a user logs
into the telephone user interface (TUI) to check their mailbox, and when the NetVanta
UC Server can play mailbox and message information, such as the number of new
messages, ensure that you select the fastest search method available that your IMAP
server supports. For more information, refer to Determining the Appropriate Query
Optimization Technique on page 123.
You can add multiple IMAP servers. This can be used to connect to different servers, or
to create different servers with different configuration options.
To add an IMAP server
1. Right-click anywhere in the Servers summary pane.
2. Select New > IMAP to open the IMAP4 Configuration menu box.
3. Enter a server name in the Name field. The server name is used to distinguish the IMAP server from
other server types. This is a descriptive name and cannot be changed after creating the server. Ensure
that you use a distinct and meaningful name.
4. Enter a host name in the Host name field. The host name or IP address must be the host name or IP
address of the IMAP server that the mailboxes are on. In some cases, such as Gmail, this may point to
a proxy instead.
5. Enter a port number in the Port number field.The port number is the Internet protocol port number of
the IMAP service on the target server. The default port number for IMAP servers is 143.
6. If you want the messages that users delete to be permanently deleted from the server, enable the
Permanently delete messages flagged for deletion check box. Some IMAP servers may require this
to be set in order for messages to actually be removed from menu in the user's email client. By default,
when messages are deleted from an IMAP server, they are only marked for deletion. Enabling this
mode causes deleted messages to be removed from the mailbox after a message is marked for deletion
by the NetVanta UC Server. With some IMAP servers, user's may still see messages in their mailbox
after deleting them using the telephone user interface (TUI). If this is the case, then enabling this
mode should resolve this issue.
7. If you want to disable message waiting indicators, enable the Disable message waiting indicators
check box. Disable the message waiting indicators if you do not have a compatible mail client
installed with the NetVanta UC Server voice forms. If you are using Lotus Notes or Lotus Domino
then enable message waiting indicators if client integration is installed, otherwise, if you are not using
NetVanta UC Server client forms then disable the message waiting indicators. In all other cases this
should be disabled.
120
Copyright © 2014 ADTRAN, Inc.
619500001-1E
UCS Administrator Guide
Configuring Servers
8. For Query optimization technique select the fastest option available for retrieving messages that your
IMAP server will support. To determine the appropriate query optimization technique for your IMAP
server, refer to Determining the Appropriate Query Optimization Technique on page 123.
Search custom message headers (requires
SEARCH HEADER; fastest)
This is the default value. Select this mode if you are
using Lotus Notes with Indexing turned On.
Search subject and then check message
headers
(requires SEARCH SUBJECT)
Select this mode if you are using Gmail or
GroupWise.
No query optimization
(use if SEARCH not supported; slowest)
Select this method only if your IMAP server does not
support the other methods available.
Select this mode if you are using Lotus Notes with
Indexing turned Off.
Note: If this method is selected then users must be
informed of the importance of not storing large
numbers of messages in their inbox as this delays
message retrieval.
If you are using Gmail, GroupWise, or Lotus Notes as your IMAP server, then a
supported method of retrieving messages has already been determined. Select the
appropriate query optimization technique noted for your server configuration. If you
are not using Gmail, GroupWise, or Lotus Notes as your IMAP server, then proceed
to the following section Determining the Appropriate Query Optimization Technique
on page 123 to determine the optimal settings.
If you select a search method that is not supported for your IMAP server, then the
NetVanta UC Server first tries the selected method. If the selected search method
returns an IMAP protocol error to the NetVanta UC Server, then the NetVanta UC
Server automatically falls back to the No query optimization method and tries again.
While this method will function with all server configurations, IMAP server
performance may be affected and message retrieval may be delayed as the selected
method is attempted and fails, and then the slowest method is implemented. Select
the fastest method that is supported by your server configuration to minimize
message retrieval delays.
9. Select OK.
Determining the Appropriate Query Optimization Technique
If you are using Gmail, GroupWise, or Lotus Notes as your IMAP server, then a
supported method of retrieving messages has already been determined and you do not
need to follow the steps below. If you are not using Gmail, GroupWise, or Lotus Notes as
your IMAP server, then follow the steps below to determine the optimal settings.
IMAP servers vary in the methods they support for retrieving a user's voice and fax messages, and the
speed at which they retrieve such messages. The procedures below involve selecting the fastest retrieval
method first and testing the results to determine whether your IMAP server supports the method selected.
619500001-1E
Copyright © 2014 ADTRAN, Inc.
121
Configuring Servers
UCS Administrator Guide
If this method is unsuccessful then select the second fastest method and test the results again. If this
method is unsuccessful then select the third method.
If an unsupported method is selected, then the NetVanta UC Server automatically falls back to the No
query optimization, the slowest method, and tries again. For this reason the testing procedures described
must be followed to determine the fastest supported method of filtering messages.
To optimize IMAP server performance and to minimize delay between when a user logs
into their telephone user interface (TUI) to check their messages and when the NetVanta
UC Server can play mailbox and message information, ensure that you select the fastest
message retrieval method available that your IMAP server supports.
The steps below outline the general process used to determine the optimal method of filtering messages, as
detailed in the following sections:
1. Select a query optimization method using the steps outlined in To configure IMAP for searching and
retrieving messages on page 124.
2. Test the query optimization method selected using the steps outlined in To test the selected method of
filtering messages on page 125.
3. Check for message retrieval failure using the steps outlined in To check the software logs for message
filtering fall back messages on page 126.
4. Depending on the outcome of steps 2 and 3 above, follow the relevant procedures below:
• If delay was not detected in step 2, and no message filtering fall back messages were found in step
3, then no further configuration is required.
• If delay was detected in step 2 or the software logs included message filtering fall back messages
in step 3, then the steps above are repeated, starting at step 1, and selecting the second fastest
method of filtering messages.
• If the second fastest method of filtering messages was selected in step 1, and delay was detected in
step 2 or the software logs included message filtering fall back messages in step 3, then repeat step
1 only and select the No query optimization method.
To configure IMAP for searching and retrieving messages
1. From the Administration navigation bar, select Servers.
2. Right-click on the IMAP Server and select Open.
3. Select a Query optimization technique from one of the options listed below, starting with the fastest to
the slowest method in the order presented below.
Trial order Query optimization technique
1
Search custom message headers
(requires SEARCH HEADER; fastest)
122
Description
This is the default value. The NetVanta UC
Server adds custom headers to voice and fax
messages so that they can be identified and
retrieved.
Copyright © 2014 ADTRAN, Inc.
619500001-1E
UCS Administrator Guide
Configuring Servers
Trial order Query optimization technique
2
Search subject and then check message
headers
(requires SEARCH SUBJECT)
3
Description
This method first searches the Subject
header for voice and fax messages. Of those
messages retrieved, the message headers are
then checked for the custom voice and fax
message headers.
No query optimization
This method does not use a query so all
messages have information retrieved from
(use if SEARCH not supported; slowest) the IMAP server, and all messages are then
searched to retrieve the voice and fax
messages. All IMAP servers support this
method, but use this method only if
SEARCH is not supported.
Note: This method will be notably slower if
there are a large number of messages in a
user's inbox as all messages have header
information retrieved and searched. If this
method is selected then users must be
informed of the importance of not storing
large numbers of messages in their inbox.
4. Select OK.
If you select a method that is not supported by your IMAP server, then when the
SEARCH operation returns an IMAP protocol error to the NetVanta UC Server, the
NetVanta UC Server automatically falls back to the No query optimization method and
tries again. While the No query optimization method functions with all IMAP servers, it
is the slowest method, and it will be slowed further if another method is selected and then
fails before the No query optimization method is attempted. To maintain optimum IMAP
server performance and to minimize message retrieval delay, it is important that you
select the fastest retrieval method possible that is supported on your system, and only
select the No query optimization method if neither of the other options are successful
with your IMAP server.
To test the selected method of filtering messages
1. Leave a voice message for a user configured for IMAP.
2. Login to the user's voicemail using the TUI.
3. Check the user's voice messages to determine if the voice message left in step 2 is there. If there is a
time delay in the message being available over the TUI (i.e., checking immediately after leaving the
message fails to present the message, but checking 20 minutes later works), then this may be an
indication that the selected method of filtering messages is not supported by your server.
4. Play the voice message left in step 2.
619500001-1E
Copyright © 2014 ADTRAN, Inc.
123
Configuring Servers
UCS Administrator Guide
To check the software logs for message filtering fall back messages
If a message retrieval method was selected but failed (it is important to identify when the NetVanta UC
Server falls back to the No query optimization method), then this will be noted in the software logs.
1. Navigate to the software logs. The default location is C:\OWLogs. The Software Logging
Configuration Tool can be used to check the location. The most recent log is swlog.txt, and log files
will rotate as they get larger.
2. Look for the following messages after the voice message was left in step 2 of the previous set of
instructions.
"IMAP optimization technique may be This indicates that the IMAP server does not support the
set wrong (SEARCH HEADERS),
selected message retrieval method, and has switched to the
switching to 'brute force' technique." No query optimization method.
"IMAP optimization technique may be This indicates that the IMAP server does not support the
set wrong (SEARCH CUSTOM),
selected message retrieval method, and has switched to the
switching to 'brute force' technique." No query optimization method.
"Failed to brief summary information
about message."
This indicates that the IMAP server does not support the
selected message retrieval method.
"Not connected, or unable to reconnect This indicates that the server cannot be reached.
to server."
3. If you did not find one of these messages in the software logs then no further steps are required.
4. If you find one of the messages noted above in the software logs, then repeat the configuration steps
above and select the next fastest method. Repeat the testing procedures starting at To configure IMAP
for searching and retrieving messages on page 124 to determine if the method selected is supported
by your server. If another one of these messages is found in the software logs, then select the No query
optimization method.
Configuring SMTP Server
To add an SMTP server
1. Right-click anywhere in the Servers summary pane.
2. Select New > SMTP to open the SMTP Server Configuration menu box.
3. Enter a server name in the Server name field.
4. Enter a name for the SMTP server in the SMTP server name field. For example,
mail.yourcompany.com.
5. Enter a port number in the Port number field. The default port number is 25.
6. Enter the Sender email display name.
7. Enter the Sender email address.
8. Select OK.
124
Copyright © 2014 ADTRAN, Inc.
619500001-1E
UCS Administrator Guide
Configuring Servers
Managing Trusted UC Servers
In order for NetVanta ucCompanion users to use desktop presence, IM, click-to-dial, and other
ucCompanion features with users of other NetVanta UC Server systems, a trusted connection must be
established between the systems. When establishing a trusted connection between two NetVanta UC
Server systems, an invitation is sent from the local NetVanta UC Server to a remote NetVanta UC Server.
The remote NetVanta UC Server can either accept or decline this invitation. Accepting the invitation
establishes a trusted connection between the two servers. Subsequently, trusted connections between
NetVanta UC Servers can be disabled or deleted if NetVanta ucCompanion interaction between the users of
the trusted servers is no longer desired.
To add a Trusted UC Server entry
1. Right-click anywhere in the Servers summary pane.
2. In the drop-down menu, select New > Trusted UC Server. The Trusted UC Server window will
appear.
3. In the Name field, enter the desired name for the remote NetVanta UC Server to which you which you
want to establish a trusted connection.
4. In the Location field, enter the IP address or FQDN of the remote NetVanta UC Server to which you
want to establish a trusted connection.
5. Select OK.
6. The Status of the connection will appear in the Servers summary pane as Unauthenticated. Click
Invite menu item to start authentication. You must now invite the remote NetVanta UC Server to
establish a trusted connection.
To invite the Trusted UC Server
1. In the Servers summary pane, right-click the Trusted UC Server entry you created in the previous
section.
2. In the drop-down menu, select Invite.
3. The Status of the connection will appear in the Servers summary pane as Invite sent. Waiting for
Accept from <remote UC Server>, where <remote UC Server> is the Name you assigned the remote
NetVanta UC Server in the previous section. The remote server must now accept the invitation in
order to establish a trusted connection between the two NetVanta UC Servers.
To accept an invitation from a remote NetVanta UC Server
If the local NetVanta UC Server has received an invitation to establish a trusted connection from a remote
NetVanta UC Server, the remote server will appear in the Servers summary pane with the status Invite
received from <remote UC server>, where <remote UC server> is the Name of the remote NetVanta UC
Server that has sent the invitation. You must accept this invitation to establish a trusted connection between
the local and remote NetVanta UC Servers.
619500001-1E
Copyright © 2014 ADTRAN, Inc.
125
Configuring Servers
UCS Administrator Guide
1. In the Servers summary pane, right-click the remote NetVanta UC Server that has sent an invitation to
establish a trusted connection.
2. In the drop-down menu, select Accept.
3. The Status of the connection will appear in the Servers summary pane as Connected. A trusted
connection is now established between the two NetVanta UC Servers.
To disable a Trusted UC Server connection
Disabling a trusted connection between two NetVanta UC Servers disables the use of all ucCompanion
features (Presence, IM, click-to-dial etc.) between the two server systems. For example, if a user on one
NetVanta UC Server (Server A) has a contact on another NetVanta UC Server (Server B) and the trusted
connection between the servers is disabled, the contact’s (Server B) user presence will appear in the user’s
(Server A) ucCompanion client as Offline-Unknown, and the contact’s identity presence will appear as
Unknown. Additionally, the two users will no longer be able to communicate using ucCompanion.
1. In the Servers summary pane, right-click a Trusted UC Server entry with a Connected status.
2. In the drop-down menu, select Disable.
3. The Status of the connection will appear in the Servers summary pane as Unauthenticated. Click
Invite menu item to start authentication. The trusted connection is now disabled between the two
NetVanta UC Servers.
To delete a Trusted UC Server connection
Like disabling a trusted connection, deleting a trusted connection between two NetVanta UC Servers
disables the use of all ucCompanion features (Presence, IM, click-to-dial etc.) between the two server
systems. However, the behavior on the Servers summary pane and in ucCompanion differs depending on
which NetVanta UC Server deletes the connection. For example, if the connection is deleted by the local
NetVanta UC Server, the Trusted UC Server entry will be removed from the Servers summary pane on
the local NetVanta UC Server. Additionally, all ucCompanion user contacts associated with the users on
the deleted remote NetVanta UC Server will be removed from the local NetVanta UC Server. If the
connection is deleted by the remote NetVanta UC Server, the Trusted UC Server entry will remain in the
Servers summary pane on the local NetVanta UC Server with a status of Unauthenticated. Click Invite
menu item to start authentication. Additionally, all ucCompanion user contacts associated with the users
on the remote NetVanta UC Server will remain; however, the remote contact’s user presence will appear in
the local user’s ucCompanion client as Offline-Unknown, and the contact’s identity presence will appear
as Unknown. Refer to Deleting servers on page 129 for instructions on how to delete a Trusted UC Server.
Configuring email notifications
To configure the Send email function
1. Select Tools > Options.
2. Select the Message Delivery tab.
3. From the Send email using drop-down menu, select the server that you want to use.
4. Select OK.
126
Copyright © 2014 ADTRAN, Inc.
619500001-1E
UCS Administrator Guide
Configuring Communication Systems
Changing server information
To change server information
1. In the Servers summary pane, right-click the name of the server whose information you want to
change.
2. Select Open to open the Server Configuration menu box.
The type of information that is available for you to change varies depending on the type
of server. You cannot change the information associated with the Client-side Contact
server.
3. Change the information that you want.
4. Select OK.
Deleting servers
To delete a server
1. In the Servers summary pane, right-click the name of the server that you want to delete.
2. Select Delete.
3. Select Yes to confirm the deletion.
You cannot delete an Exchange Server if there are users assigned to it. You cannot delete
the LMS (Local Message Store) server.
Configuring Communication Systems
You can use the Communication Systems menu to add a communication system, change information for an
existing communication system, or delete a communication system. To manage communication systems,
select the Communication Systems menu in the Administration navigation pane. Configure an existing
619500001-1E
Copyright © 2014 ADTRAN, Inc.
127
Configuring Communication Systems
UCS Administrator Guide
PBX connected to the NetVanta UC Server through a gateway, using the Options category.
Tabs
Summary
Pane
Topics
Navigation
Pane
Detail
Pane
Navigation
Bars
Identitites
Pane
Communication Systems Types
The Communication Systems options allow the installer to integrate the NetVanta UC Server with the
communication system depending on the hardware installed on the NetVanta UC Server.
A variety of PBXs can be connected to the NetVanta UC Server through a Dialogic Media Gateway.
For Generic PBX (via Gateway) gateway configuration information, refer to the
Configuring the Dialogic Media Gateway technical note available from the ADTRAN
Support Community (https://supportforums.adtran.com). For a list of compatible PBXs,
refer to the NetVanta UC Server Release Notes for your software version.
The advanced configuration allows you to program the feature codes to correspond to what is currently
configured on the communication system. Configuring message waiting indicator activation and
deactivation codes ensures that the communication system turns on or off the message waiting indicator.
The message indicator activation code activates the message waiting indicator for user extensions. The
message waiting indicator is lit when there are new messages in a user's mailbox.
The message indicator deactivation code deactivates the message waiting indicator for user extensions
after they listen to their messages.
The NetVanta UC Server can function as a centralized voicemail service for a main office and one or more
remote IP Office sites using a remote agent application.
When calls at a remote site are unanswered and are redirected to the remote site voicemail hunt group, the
128
Copyright © 2014 ADTRAN, Inc.
619500001-1E
UCS Administrator Guide
Configuring Communication Systems
remote agent first sends the call information to the NetVanta UC Server and then redirects the call to the
main site IP Office voicemail hunt group. The NetVanta UC Server uses the information sent by the remote
agent in conjunction with the call information supplied by IP Office at the main site to execute the
appropriate service.
Requirements at the Remote IP Office Site
• Small Community Networking enabled
• Exactly one remote agent application must be installed at each of the remote IP Office sites, and the
firewall configured accordingly.
• Avaya's TAPI driver must be installed on each machine that hosts a remote agent.
• A valid CTI Link Pro license for each IP Office.
• All extensions, hunt group numbers, and display names must be unique across all IP Office sites.
• Each remote IP Office site must have a voicemail hunt group where unanswered calls are redirected. The
extensions in this hunt group are monitored by the remote agent application and must not be in use. The
extensions can be one of the following:
• Analog
• TAPI/Wave - requires a license for the remote IP Office
• Digital - requires a physical digital phone plugged into the corresponding digital port, but must not
be used by anyone
• Each remote IP Office site must have a short-code defined that allows for forceful redirects over the IP
trunk connecting the remote and main site IP Offices.
Requirements at the Main IP Office Site
• Small Community Network enabled
• The NetVanta UC Server must be configured for all of the remote agents and the extensions they are
monitoring.
For more information on configuring IP Office remote agents, refer to the IP office Integration technical
note available from the ADTRAN Support Community (https://supportforums.adtran.com).
The Advanced communication system options allow you to configure a CTI link. The CTI link enables the
NetVanta UC Server to obtain external calling line ID.
You must subscribe to Calling Line ID from your local telephone company to use a CTI
link.
Consult the manufacturer's documentation about how to install and configure the CTI link for your
particular communication system.
If you are connecting the NetVanta UC Server to an existing PBX through a gateway, then there are a few
options to configure. You must enter an IP address or a Fully Qualified Domain Name (FQDN), and a port
number, to configure the gateway.
If your attached PBX does not have true answer supervision, then enable the prompt for handset playback.
Without true answer supervision, then the beginning of playback and recording using the handset may get
619500001-1E
Copyright © 2014 ADTRAN, Inc.
129
Configuring Communication Systems
UCS Administrator Guide
cut off. This affects message playback, announcement playback and recording, and greeting playback and
recording, using the handset.
To configure PBX options for a PBX connected through a gateway
1. In the Communication Systems summary pane, right-click the Generic PBX (via Gateway) that you
want to change, and select Open.
2. In the Options menu, enter the IP address or the FQDN.
3. Enter the appropriate port number, 5060 for a SIP PBX.
4. Enable the Prompt for handset playback mode if you system does not have true answer supervision.
If the beginning of playback and recording using the handset is being cut off, then this indicates that
your attached PBX does not have true answer supervision, and you should enable this check box.
5. Select Change.
To add a new communication system
1. Right-click anywhere in the Communication Systems summary pane.
2. Select New to start the Communication System Wizard.
3. Select Next to begin configuring the communication system.
4. In the Select Communication System Type, select Generic PBX (via Gateway) or NetVanta 7000
Series (if available). Then, select Next.
5. In the Communication System Details menu, enter a name and answering group number for the
communication system in the provided fields. Use the Group name and Priority drop-down menus
to specify a group name and priority, respectively, for the communication system. Then, select Next.
6. In the Summary menu, select Submit to create the communication system, or select Back to make
changes to the configuration.
To change communication system information
1. In the Communication System summary pane, right-click the communication system that you want to
change.
2. Select Open.
3. Change the information about the communication system that you want.
4. Select OK.
To delete a communication system
1. In the Communication Systems summary pane, right-click the communication system that you want
to delete.
2. Select Delete.
3. Select Yes to confirm the deletion.
130
Copyright © 2014 ADTRAN, Inc.
619500001-1E
UCS Administrator Guide
Configuring Licenses
4. Select OK.
Configuring Licenses
The licensing section provides information on how to manage the license keys on the NetVanta UC Server.
ADTRAN has defined the NetVanta UC Server license system using the following concepts and
terminology:
• Purchase Key — The purchase key (product key) is a unique system identifier that was assigned to you
when the NetVanta UC Server system was ordered. The purchase key includes the core software and the
bundled feature contents according to the original product purchase.
The purchase key can be identified as a unique key that XXXXX-XXXXX-XXXXX where X can be any
combinations of numbers or capital letters.
• Upgrade keys — An upgrade key represents a upgrade to an existing product and is used to generate a
license key. Upgrade keys can be purchased to increment components of NetVanta UC Server
independently of the core software.
The NetVanta UC Server software does not keep track of upgrade keys, but they are maintained and used
by ADTRAN to generate the correct license key. In addition to product capabilities, upgrade keys are also
used to extend software assurance. An upgrade key can be identified with the following format XXXXXXXXXX-XXXXX-U where X can be any combination of numbers or capital letters.
• Machine Identifier — A unique signature that is automatically generated based on the computer platform
installed hardware.
• License Key — An encoded key generated by ADTRAN that includes product attributes that will only
work with systems that have a specific purchase key and associated machine identifier.
How to make a request for a new license key
Authorized resellers or customers who maintain their own system may make requests electronically by
using their ADTRAN website account. Once successfully logged into the ADTRAN website, a request can
be made by navigating to My ADTRAN and selecting UC Licensing under Tools.
Product purchases and license key requests are typically fulfilled by ADTRAN authorized
resellers. Please contact your ADTRAN reseller to purchase additional products or
activate a license key.
To review the current licenses on the NetVanta UC Server
1. From the Administration application, select Help > License Information
A list of the current enabled features appears. The current license menu includes the following:
• Description — The name of the NetVanta UC Server product feature or attribute.
• Value — The current licensed maximum number for a specific product attribute.
• Notes — The content is usually the actual number of a specific product attribute that is being used by the
system.
619500001-1E
Copyright © 2014 ADTRAN, Inc.
131
Configuring Licenses
UCS Administrator Guide
The current license key field includes the license key that is currently installed.
To review the purchase key and machine ID on the NetVanta UC Server
1. From the Administration application, select Help > License Information
2. Select Modify License...
The purchase key and machine identifier are shown. You can copy the contents to the Windows clipboard
by selecting the purchase key or machine identifier and press Ctrl-C.
To modify the license key on the NetVanta UC Server
1. From the Administration application, select Help > License Information
2. Select Modify License...
3. Enter the new license key that you received from ADTRAN.
If the license key was delivered in electronic format, simply cut-and-paste the license key from the email
body or accompanying attachment containing the license key into the Enter upgrade field.
132
Copyright © 2014 ADTRAN, Inc.
619500001-1E
UCS Administrator Guide
Configuring Classes of Service
7. Configuring Classes of Service
The user class of service (CoS) feature helps the system administrator configure settings for multiple user
accounts by configuring a single CoS and applying it to multiple users. The NetVanta UC Server user CoS
includes settings for local voice mailbox limits, specifying rules for user passwords and personal
identification numbers (PINs), authentication lockout and tracking of user accounts, and enabling user
access to certain UC server features.
Configuring a User CoS
The user CoS feature helps the system administrator configure settings for multiple user accounts by
configuring a single CoS and applying it to multiple users.
The user CoS features can be applied to multiple users, or each feature can be configured individually on a
per-user basis (without using the CoS). However, a CoS and an individual configuration cannot be applied
to a single user at the same time. If a CoS is applied to the user, individual settings cannot be applied to
override specific aspects of the CoS. If a different variation of settings is necessary, the user either must be
individually configured, or a new CoS with the desired settings must be created and applied to that user.
When adding new users to the NetVanta UC Server system, the default CoS is available to all users. The
default System Voice Mail CoS is available as the user’s CoS default during a new installation of the
NetVanta UC Server or a system upgrade. If another CoS has been configured, it is also available during a
new installation or system upgrade. If another CoS is set as the default, then it will be available as the
default CoS to all new users. If the default CoS does not exist, then the CoS of None is available for all
users.
Creating a User CoS
To create a new user CoS, follow these steps:
1. From the Administration tab, select the Administration navigation bar to access the
Administration navigation pane.
619500001-1E
Copyright © 2014 ADTRAN, Inc.
137
Configuring a User CoS
UCS Administrator Guide
2. Select the Classes of Service topic from the list.
Tabs
Topics
Summary
Pane
Navigation
Pane
Navigation
Bars
Detail
Pane
Identitites
Pane
3. Right-click on the Classes of Service topic in the Administration navigation pane pane and select
New User Class of Service from the drop-down menu. You can also create a new CoS by
highlighting the Classes of Service topic in the Administration navigation pane and right-clicking on
the summary pane. Select New User Class of Service from the drop-down menu. The New User
Class of Service menu appears.
138
Copyright © 2014 ADTRAN, Inc.
619500001-1E
UCS Administrator Guide
Configuring a User CoS
4. In the General tab of the New User Class of Service menu, specify the name for the CoS in the
Name field. The name should be a unique identifier specifically for this CoS.
5. Select the check box next to Use as default for new users if you want this user CoS to be the default.
6. You can select OK to save the user CoS with the default settings or you can continue to edit the user
CoS settings in the Local Mailbox Limits, Security, and Features tabs. The following sections
provide information for configuring the settings available in these tabs:
•
•
•
Configuring the User CoS Local Mailbox Limits on page 140
Configuring the User CoS Security on page 140
Configuring the User CoS Features on page 143
7. After you have finished configuring the user CoS settings, select OK to save the user CoS.
Editing an Existing User CoS
If you would like to make changes to an existing user CoS, follow these steps to open and edit a user CoS:
1. From the Administration tab, select the Administration navigation bar to access the
Administration navigation pane.
2. Select the Classes of Service topic from the list.
3. In the summary pane, double-click on the user CoS that you would like to edit. The Edit User Class
of Service menu appears.
4. Edit the user CoS settings in the Local Mailbox Limits, Security, and Features tabs. The following
sections provide information for configuring the settings available in these tabs:
•
•
•
619500001-1E
Configuring the User CoS Local Mailbox Limits on page 140
Configuring the User CoS Security on page 140
Configuring the User CoS Features on page 143
Copyright © 2014 ADTRAN, Inc.
139
Configuring a User CoS
UCS Administrator Guide
5. After you have finished configuring the user CoS settings, select OK to save the user CoS.
Configuring the User CoS Local Mailbox Limits
The Local Mailbox Limits tab allows the administrator to specify the mailbox storage limits that will be
enforced for members of the CoS. Use the check boxes to enable the limits, and specify the maximum for
each limit using the up and down arrows or enter a value in the provided field.
The following table describes the available local mailbox limit options:
Maximum number of all
voice messages in mailbox
Limits the maximum number of voice messages stored for a user. By
default, all mailbox limits are disabled. When enabled, the maximum
number of voice messages allowed in the mailbox defaults to 100
minutes. The valid maximum message range is 1 to 9999.
Maximum total length of all
voice messages
Limits the maximum combined length (in minutes) of voice messages
stored for a user. By default, all mailbox limits are disabled. When
enabled, the maximum combined length of voicemail messages defaults
to 120 minutes. The valid maximum message length range is 1 to 9999
minutes.
Maximum age of any voice
message
Limits the maximum amount of time (in days) a voice message is stored
for a user. Messages older than the maximum voice message age are
deleted from the system. By default, all mailbox limits are disabled. When
enabled, the maximum storage time for voicemail messages defaults to
90 days. The valid storage range is 1 to 9999 days.
Configuring the User CoS Security
The CoS security measures that can be configured include the account lockout behavior, the minimum
password and PIN lengths, the frequency with which passwords and PINs must be changed, and the
complexity requirements for passwords and PINs. These features can be configured in the Security tab
140
Copyright © 2014 ADTRAN, Inc.
619500001-1E
UCS Administrator Guide
Configuring a User CoS
when editing a user CoS profile.
Account Lockout
In the interest of a more secure voicemail system, administrators can enable an automatic lockout feature
to lock users out of an account if there have been too many failed access attempts. In addition, NetVanta
UC Server can track the number of failed login attempts for a specified amount of time. If the user reaches
the maximum number of failed attempts during the specified tracking time, the user is locked out of the
system until the tracking time expires. The account lockout feature does not apply to Windows
authentications. The following table describes the settings available in the Account lockout section of the
Security tab:
Enable automatic lockout
of accounts
Locks users out of their accounts after they exceed the specified number
of failed login attempts. By default, automatic lockout of accounts is
enabled.
Number of failed attempts
before lockout
Specifies the number of failed login attempts allowed before a lockout
occurs. By default, lockout occurs after 10 failed attempts. The valid
attempt range is 1 to 99.
Failed attempt tracking
period (minutes)
Specifies the time period in which failed attempts are logged and counted
against the maximum allowed number of failed attempts. When this time
period elapses, the tracked number of failed attempts is reset and begins
again. By default, login attempts are tracked for 30 minutes. The valid
tracking range is 1 to 525600 minutes (one year).
Password and PIN Rules
Administrators can specify the rules to which users must adhere when configuring their passwords and
PINs for logging into their voice mailbox. These password and PIN rules revolve around enforcing a
certain level of complexity when defining passwords and PINs, defining minimum and maximum lengths
for both the password and PIN, and mandating password and PIN changes after a certain amount of time.
619500001-1E
Copyright © 2014 ADTRAN, Inc.
141
Configuring a User CoS
UCS Administrator Guide
Specifying these rules helps maintain a more secure voicemail system. The following table describes the
settings available in the Password rules section of the Security tab:
Minimum password
length
Specifies the minimum length of a password. By default, the minimum
password length is 4 characters. The valid password length range is 4 to 128
characters.
Maximum password age
Specifies the frequency (in days) with which the user's password must be
changed. By default, passwords can be used for 120 days. To specify that
passwords must be changed after a particular amount of time, select the
check box next to Maximum password age and enter the number of days
until the next password is required. The valid range is 1 to 9999 days.
Password must meet
Specifies whether passwords must meet complexity rules. By default,
complexity requirements complexity rules for passwords are enabled.
The complexity rules for passwords are as follows:
• Must not match the authentication name.
• Must have at least one uppercase and one lowercase alphabet
character.
• Must have at least one digit or symbol.
A new password cannot be the same as the existing password. This requirement is always
in effect and cannot be disabled.
The following table describes the settings available in the PIN rules section of the Security tab:
Minimum PIN length
Specifies the minimum length of a PIN. By default, the minimum PIN length
is 4 characters. The valid PIN length range is 4 to 15 characters.
Maximum PIN age
Specifies the frequency (in days) with which the user's PIN must be
changed. By default, PINs can be used for 120 days. To specify that PINs
must be changed after a particular amount of time, select the check box
next to Maximum PIN age and enter the number of days until the next PIN
is required. The valid range is 1 to 9999 days.
PIN must meet
Specifies whether PINs must meet complexity rules. By default, complexity
complexity requirements rules for PINs are enabled.
The complexity rules for PINs are as follows:
• Must not match the mailbox number.
• Must not be the reverse of the mailbox number.
• Must not be a single repeated digit (for example, 1111).
• Must not be a consecutive sequence of ascending or descending
numbers (for example, 1234).
• Must not be a consecutive sequence of ascending or descending odd
or even numbers (for example, 7531).
A new PIN cannot be the same as the existing PIN. This requirement is always in effect and
cannot be disabled.
142
Copyright © 2014 ADTRAN, Inc.
619500001-1E
UCS Administrator Guide
Configuring a User CoS
Configuring the User CoS Features
The user CoS features that can be configured include the following NetVanta UC Server Personal Assistant
features: transferring calls, using Active Message Delivery (AMD), using pager and email message
notifications. Also, you can configure whether users are able to send bulletin voice messages. These
features can each be enabled or disabled for user CoS members in the Features tab when editing a user
CoS profile using the check-box next to the feature.
Personal Assistant Features
In the Personal Assistant features section of the Features tab, an administrator can allow user CoS
members to transfer calls, use Active Message Delivery, and receive pager and email message notifications
in the NetVanta UC Server Personal Assistant. By default, users have access to all Personal Assistant
features. To allow user CoS members access to a feature, enable the check box next to the feature. To deny
user CoS members access to a feature, remove the check from check box next to the feature.
Mailbox Features
In the Mailbox features section of the Features tab, you can allow users to create and send bulletin voice
messages. A bulletin message that has already been listened to completely (played or marked heard) will
remain saved and will be presented to the user again at the next TUI access. Users can skip bulletin
messages, but the bulletin message will be presented again on the next TUI access unless it has been
deleted. By default, users cannot create bulletin voice messages. To allow user CoS members access to
sending bulletin messages, enable the check box next to the feature. To deny user CoS members access to a
feature, remove the check from the check box next to the feature.
The bulletin message feature is available for both Local Message Store users and
Exchange Message Store users.
619500001-1E
Copyright © 2014 ADTRAN, Inc.
143
Configuring a User CoS
UCS Administrator Guide
Applying the CoS to User Profiles
Once the user CoS is created, it can be applied to user accounts in a number of ways. You can apply the
CoS to multiple or individual users already configured on the system or users as they are imported into the
system. The following sections outline the different methods of applying a user CoS to various user
accounts.
Applying the CoS to Users Already in the System
If you have users that have already been added to the NetVanta UC Server system, you can apply the user
CoS to an individual user or multiple users simultaneously. To apply a configured user CoS to existing
users, follow these steps:
1. Select the Users topic from the list in the Administration navigation pane.
2. In the Users summary pane, select the users to which you want to apply the user CoS. To select
multiple users, hold down the Shift key while making your selection. Once you have selected the
users to which you want to apply the CoS, right-click in the highlighted area, and select Change
Class of Service from the drop-down menu. The Change Class of Service menu appears.
3. From the Change Class of Service menu, select the desired user CoS from the drop-down menu.
4. Select OK. The Class of service field in the Users summary pane will display the newly assigned
user CoS.
You can also change a user’s CoS in the Edit User menu. To access this menu, right-click
on a user in the Users summary pane and select Open. In the Edit User menu, select the
General tab and select the desired user CoS from the Class of service drop-down menu.
When you have finished with your changes, select OK to apply the new CoS to the user.
Applying the CoS to Multiple Users Being Imported into the System
If you are importing a large number of users into the NetVanta UC Server system, you can apply a user
CoS during the import process. To apply a user CoS as you import users using the NetVanta UC
Configuration Wizard, follow these steps:
1. In the NetVanta UC Configuration Wizard, select the Users wizard. (The NetVanta UC Configuration
Wizard can be accessed at any time by navigating to Start > All Programs > ADTRAN > NetVanta
UC Server Configuration Wizard. You will be prompted for your user name and password before
you can select the Users wizard.)
144
Copyright © 2014 ADTRAN, Inc.
619500001-1E
UCS Administrator Guide
Configuring a User CoS
2. On the wizard Welcome menu, select Next. Proceed through the steps of the Users wizard, entering
the appropriate user import method, file location, etc. Regardless of whether you import users from
Microsoft Exchange, a text-based file, or manually enter them, you have the option to select (from a
Class of service drop-down menu) a CoS to apply to the users as you add them.
Once you have selected the correct CoS for the imported users, follow the remaining steps in the Users
wizard to add these users to the system. When you have completed importing the users, their information
(and CoS type) appears in the Users summary pane. For more informaiton on using the Users wizard, refer
to the NetVanta Unified Communications Server Configuration Guide for your version of NetVanta UC
Server available from the ADTRAN support community (https://supportforums.adtran.com).
619500001-1E
Copyright © 2014 ADTRAN, Inc.
145
Configuring a User CoS
146
UCS Administrator Guide
Copyright © 2014 ADTRAN, Inc.
619500001-1E
UCS Administrator Guide
Faxing
8. Faxing
This chapter provides information on receiving faxes on trunk lines, sending faxes from other applications,
sending cover pages only using Quick Fax, managing faxes, creating and using fax cover pages, queuing
faxes, and automatically sending faxes requested by callers.
This chapter covers the following topics:
• Overview on page 151
• Sending Faxes on page 152
• Receiving Faxes on page 176
For information on setting fax specifications for outgoing faxes or when using the Faxon-demand element, refer to Setting Fax Message Delivery Options on page 29. For
information on setting dialing options related to faxing, refer to Setting Outbound Calls
and Dialing Options on page 38.
Overview
Use the Faxes menu to send and manage fax documents and their cover pages from the NetVanta UC
Client. There are several methods of sending faxes including:
•
•
•
•
•
Sending a fax from other applications using the ADTRAN Fax print driver
Sending a cover page only from the NetVanta UC Client using Quick Fax
Sending a prepared fax from the NetVanta UC Client
Automatically sending faxes requested by callers using the Fax-on-demand element in a service.
Sending faxes to a specific fax number using the Send fax element
The Faxes menu is not used for receiving faxes. Incoming faxes are received and viewed through a user’s
mailbox, for example, through Microsoft Outlook, Microsoft Exchange Server, Lotus Notes, or through an
Integrated messaging client (a Mailboxes navigation bar on the user’s NetVanta UC Client) or IMAP4.
The NetVanta UC Server can always receive a fax, provided adequate fax channels are available, whenever
a fax tone (CNG tone) is detected.
Other methods of receiving faxes include:
• A dedicated fax number (fax identity). That is, a Personal Fax DID (direct-inward-dial) number.
• A shared voice and fax number (using the same identity)
A shared voice and fax number is not recommended for high numbers of incoming fax
calls. If an incoming fax call is answered at the user’s extension, the user will have
difficulties transferring the call into their service.
619500001-1E
Copyright © 2014 ADTRAN, Inc.
151
Sending Faxes
UCS Administrator Guide
You can also use the receive fax element in a service to customize receive fax behavior.
Sending Faxes
You can send a fax document from another application or using the Faxes menu of the NetVanta UC Client.
When a fax document is ready to send, the fax is added to the fax queue. Before you send a fax, you can
change the user that you want to send the fax from. This is useful if a user manages several mailboxes, or
as part of a Fax-on-demand element.
For information on setting fax specifications for outgoing faxes, refer to Setting Fax
Message Delivery Options on page 29. For information on setting dialing options
related to faxing, refer to Setting Outbound Calls and Dialing Options on page 38.
You can send a fax cover page only using Quick Fax. For more information, refer to To
send a cover page only using Quick Fax on page 175.
Sending faxes from other applications using the ADTRAN Fax Printer
You can send faxes from other applications using the ADTRAN Fax Printer. You can also change user
profiles to send a fax from another user, or to save a fax to another user’s profile.
To send a fax document from another application
1. Open the document that you want to send as a fax.
2. Select File > Print to open the Print menu box.
152
Copyright © 2014 ADTRAN, Inc.
619500001-1E
UCS Administrator Guide
Sending Faxes
3. From the printer name drop-down menu select the ADTRAN Fax Printer, and select OK.
4. If you are prompted, enter the user name and password for the user from which you want to send the
fax, and select OK.
5. In the NetVanta UC Client fax printer menu box, select one of the following:
• Send now—sends the fax now, after having made your fax selections
• Save to file—allows you to save the file as a fax to send later
To change the user from which you want to send the fax, refer to To change users when
sending or saving a fax on page 155.
6. If you select Save to file, refer to To save a document as a fax on page 154.
7. If you select Send now, select OK to open the Fax Recipients menu box.
8. Select Addresses to select recipients from your Outlook Contacts list. Otherwise, enter the recipient
names and fax numbers.
9. Select Add to List for each recipient that you specify.
To delete a recipient from the Recipient list, select the recipient and then select Remove.
10. Select Next and the Fax Scheduling menu box opens.
11. Specify when you want to send the fax, select Next, and the Select Cover Page menu box opens.
12. To include a fax cover page select Yes, and double-click a folder to view its contents.
13. Select the cover page that you want, select Next and the Cover Page Details menu box opens. Use the
arrow if you want to return to the previous folder.
Go back arrow
14. Enter the subject and notes that you want to add to the cover page, and then select Next.
15. At the Finished menu select Finish. The fax is sent according to the instructions.
619500001-1E
Copyright © 2014 ADTRAN, Inc.
153
Sending Faxes
UCS Administrator Guide
Saving a document as a fax to send later
To save a document as a fax
1. Open the document that you want to save as a fax.
2. Select File > Print to open the Print menu box.
3. In the Name drop-down menu, select the ADTRAN Fax Printer, and select OK.
4. If you are prompted, then enter the user name and password for the user from which you want to send
the fax, and select OK.
5. If the Server menu box opens then select UC Server from the drop-down menu, enable the Save
server as default check box, and select OK to open the NetVanta UC Client Fax Printer menu box.
6. Enable the Save to file button.
7. Select the Browse button to open the Select Fax Name menu box.
Browse Button
8. In the field, enter a name for the file and then select Select.
9. On the Fax Printer menu box, select OK. The fax document is saved in your fax documents folder.
Changing users when sending a fax or saving a fax to send later
When you send a fax from another application, or when you save a document as a fax to send later, you can
change the user that you want to send or save the fax from. This is useful if a user has several mailboxes, or
as part of the Fax-on-demand element.
If you are faxing from another application, or saving a document as a fax, then from the Print menu once
you have selected the ADTRAN Fax Printer and selected Print, then you are presented with the NetVanta
UC Client Fax Printer menu.
154
Copyright © 2014 ADTRAN, Inc.
619500001-1E
UCS Administrator Guide
Sending Faxes
To change users when sending or saving a fax
1. From the NetVanta UC Client Fax Printer menu box, select the Change user button.
Change user button
2. Enter the user name and password for the user from which you want to send the fax. The user’s
information appears in the Current user information section of the Fax Printer menu box.
3. Select OK.
Sending faxes using the Faxes menu in the NetVanta UC Client
From the NetVanta UC Client, to get the Faxes menu select the Faxes navigation bar.
For information about sharing faxes, refer to Importing and Exporting on page 299.
Content pane
Navigation
pane
detail pane
The Faxes menu displays a Navigation pane, summary pane, and detail pane.
The Navigation pane displays folders for fax cover pages, fax documents, and the fax queue. You can use
these folders to store fax documents and cover pages that are saved to disk. The Queue folder contains the
list of scheduled fax transmissions. Each entry includes the recipient’s name and fax number, the number
of pages to be transmitted, the time and date of transmission, and the cover page that you have associated
with it.
The summary pane displays the contents of a folder when you select it. These contain all the fax
documents that you have prepared to use on trunk-line services containing the Fax-on-demand or Send Fax
element, as well as the cover pages that you use to accompany such transmissions. When you select the fax
Queue folder in the Navigation pane, a list of all faxes scheduled for transmission appears in the Content
pane. Using the Administrator tab, you can see all faxes queued for delivery in the system. You can view
the recipient of the fax, the fax status, size and cover page, and cancel or suspend any fax transmissions
that you want. However, you can only view change the fax documents that you prepare for transmission
yourself.
619500001-1E
Copyright © 2014 ADTRAN, Inc.
155
Sending Faxes
UCS Administrator Guide
The detail pane provides a partial view of a fax document that you select. As you scroll through the list of
available fax documents, you can view them in the detail pane.
Use the Page up and Page down commands on the Preview toolbar to view multiple pages of a fax
document.
Page down
Page up
Use the Rotate commands on the Preview toolbar to change the orientation of a fax in the detail pane. You
can rotate only one page of a fax document, or the entire document.
Rotate single page
180 degrees
Rotate single page left
Rotate single page right
Rotate document
180 degrees
Rotate document left
Rotate document right
To view faxes in more detail, you can use the Fax Viewer. For more information about the Fax Viewer,
refer to Managing outgoing faxes on page 157.
To send a fax using the Faxes menu
1. Select the Faxes navigation bar to open the Faxes menu.
2. Select the Fax Documents folder containing the document that you want to send. The folder’s
contents are listed in the summary pane.
Faxes Folder
3. Select the fax document that you want to send.
4. Select File > Print to open the Print menu box.
5. Follow steps 3 to 18 in Sending faxes from other applications using the ADTRAN Fax Printer on
page 152.
156
Copyright © 2014 ADTRAN, Inc.
619500001-1E
UCS Administrator Guide
Sending Faxes
To specify fax numbers and account code
1. Select the telephone icon in the Fax Recipients menu box.
Telephone icon
2. Enter the area code and telephone number for the fax that you want to specify.
3. Choose a country code from the Country code drop-down menu.
4. Enable the Use Account Code check box. The administrator must enable account codes from Tools >
Options > Dialing tab in order for this mode to be available.
5. Type an account code in the field, and select OK.
Sending faxes to a specific fax number using the Send Fax element
The Send Fax element allows you to set up a list of fax documents to be sent to a specific fax number. You
can specify the fax number, choose a cover page, and then select the list of documents that you want to
send. For more information, refer to Send Fax element on page 228.
Automatically sending faxes requested by callers using a Fax-ondemand element
You can use a Fax-on-demand element to set up a fax-on-demand service on a trunk line. The Fax-ondemand element allows you to select a fax document and an accompanying cover page, and then have the
fax transmitted to callers who select the service from a menu. When callers select Fax-on-demand, they are
prompted to enter a fax number. The fax that you selected is then transmitted. For information about using
the Fax-on-demand element, refer to Fax-on-demand element on page 232.
For information on setting fax specifications when using the Fax-on-demand element,
refer to Setting Fax Message Delivery Options on page 29. For information on setting
dialing options related to Fax-on-demand, refer to Setting Outbound Calls and Dialing
Options on page 38.
Managing outgoing faxes
You can preview or print fax documents that you have prepared for transmission. Likewise, you can
prepare a document, save it, and make it available for transmission at a later time. Prepared fax documents
can be stored in folders for efficient organization and easy retrieval. You can also copy or rename a fax.
A fax transmission report is created and sent with each fax that is sent successfully. A fax transmission
report consists of a graphic page image that contains both the text-based transmission report, and a
reduced-size image of the first page of the fax. The report includes information such as the date and time
the fax was sent, sender’s name, fax number, and total number of attempts. Depending on how your system
has been configured, you may be able to print the fax transmission report, along with the first page of the
fax, by using the File > Print First Page command in the Fax Viewer.
619500001-1E
Copyright © 2014 ADTRAN, Inc.
157
Sending Faxes
UCS Administrator Guide
For information about specifying fax transmission report options, refer to Setting system-wide options,
Setting Fax Message Delivery Options on page 29.
To preview a fax document
1. Select the Faxes navigation bar to open the Faxes menu.
2. Select the fax documents folder containing the document that you want to preview. The folder’s
contents are listed in the summary pane.
Faxes Folder
3. Right-click the fax document that you want to preview, and select Open to display the fax in the Fax
Viewer.
158
Copyright © 2014 ADTRAN, Inc.
619500001-1E
UCS Administrator Guide
Sending Faxes
.
Use the zoom control icons to zoom in or out of the fax.
Zoom in
Zoom out
Use the rotate control icons to rotate only one page of a document, or the entire document. Rotate to the
left, right, or 180 degrees.
Rotate single page
619500001-1E
Rotate entire document
Copyright © 2014 ADTRAN, Inc.
159
Sending Faxes
UCS Administrator Guide
Use the page control icons to scroll through a multiple-page document.
Previous page
Next page
To print the fax document from the Fax Viewer, select the printer icon on the Fax Viewer
toolbar.
To print a fax document
1. Select the Faxes navigation bar to open the Faxes menu.
2. Select the fax documents folder containing the document that you want to print. The folder’s contents
are listed in the summary pane.
Faxes Folder
3. Right-click the fax document that you want to print, and select Open to display the fax in the Fax
Viewer.
4. Select File > Print Setup to open the Print Setup menu box.
5. Select a printer, and select OK.
To print the first page only of a fax document
1. Select the Faxes navigation bar to open the Faxes menu.
2. Select the fax documents folder containing the document that you want to print. The folder’s contents
are listed in the summary pane.
3. Right-click the fax document that you want to print, and select Open to display the fax in the Fax
Viewer.
4. Select File > Print First Page to print the first page only of the fax. Depending on how your system
is configured, the fax transmission report may also be printed.
You can configure whether the fax transmission report is printed in addition to the first
page of the fax. To configure this mode, refer to Setting Fax Message Delivery Options
on page 29.
To rename a fax document
1. Select the Faxes navigation bar to open the Faxes menu.
2. Select the fax documents folder containing the document that you want to rename. The folder’s
contents are listed in the summary pane.
160
Copyright © 2014 ADTRAN, Inc.
619500001-1E
UCS Administrator Guide
Sending Faxes
3. Right-click the fax document that you want to rename, and select Rename.
4. Enter a new name for the fax document.
To copy a fax document
1. Select the Faxes navigation bar to open the Faxes menu.
2. Select the fax documents folder containing the document that you want to copy. The folder’s contents
are listed in the summary pane.
3. Right-click the fax document that you want to copy, and select Duplicate. A copy of the fax
document appears in the summary pane, with the words “Copy of” before its name. You can rename
the copied document.
To delete a fax document
1. Select the Faxes navigation bar to open the Faxes menu.
2. Select the fax documents folder containing the document that you want to delete. The folder’s
contents are listed in the summary pane.
Faxes Folder
3. Right-click the fax document that you want to delete, and select Delete.
4. Select Yes to confirm the deletion.
When you create a fax document for transmission at an undetermined time, you can save it to a fax
documents folder. That makes it easy to find the fax when you open the Faxes menu and schedule its
transmission.
To create a folder for fax documents
1. Right-click anywhere in the summary pane.
2. Select New > Folder. A new folder is added is added to the list in the summary pane.
3. Enter a name for the folder.
To put a fax document in a folder
Select the fax document that you want to store in a folder and drag it to the folder where you want to store
it.
Select a folder to view its contents.
619500001-1E
Copyright © 2014 ADTRAN, Inc.
161
Sending Faxes
UCS Administrator Guide
On the toolbar, use the Go back arrow to return to the list previously displayed in the
summary pane.
Viewing the fax queue and status
Select the Queue icon in the navigation pane of the Faxes menu to view all the faxes that you have
scheduled for transmission.
You can suspend fax transmissions indefinitely, resume transmission, or delete an item from the queue.
All faxes that have been prepared by users on the system are visible to you in the list. However, as
Administrator you cannot view, forward, or change individual faxes unless you have prepared them
yourself. Faxes requested using the Fax-on-demand and Send Fax elements also appear in the fax queue.
When a fax has been successfully transmitted, it is removed from the fax queue. Users receive an email
message signaling successful transmission. As Administrator, you do not have a mailbox. Instead, an email
message is sent to the general or default mailbox in order to signal successful transmission of fax
documents sent by the Administrator. If no general mailbox has been set up, you are not advised of
transmission outcomes. The fax transmission includes a history of the attempts and outcome of the fax. A
fax transmission report is also available in the call logs.
You can specify the maximum number of transmission attempts. For more information about setting fax
options, refer to Setting System-Wide Options on page 21.
If a fax is not successfully transmitted after the maximum number of attempts, users receive an email
message to signal the failure.
To specify the general mailbox
1. Select Tools > Options.
2. Select the Operator Definition tab.
3. In the Default mailbox box, specify a default mailbox.
To specify the maximum number of transmission attempts
1. Select Tools > Options.
2. Select the Fax messages tab.
3. Type the number of transmission attempts in the Try box.
162
Copyright © 2014 ADTRAN, Inc.
619500001-1E
UCS Administrator Guide
Sending Faxes
To view the fax queue
1. Select the Faxes navigation bar to open the Faxes menu.
2. Select the Queue folder icon. The folder’s contents are listed in the summary pane.
For each fax in the list, you can see the recipient’s name and fax number, the scheduled transmission time
and date, and the number of pages including the cover page.
To view an individual fax listed in the fax queue
1. Select the Queue folder. Faxes scheduled for transmission are listed in the summary pane.
2. Right-click the fax that you want to view, and select Open.
To change recipients or fax numbers of a fax listed in the fax queue
1. Select the Queue folder. Faxes scheduled for transmission are listed in the summary pane. You can
change a scheduled fax only if it is in waiting status.
2. Right-click the fax that you want to change, and select Modify. The Recipients menu box opens.
3. Make the changes that you want, and then select Next.
4. To remove a recipient from the list, select the recipient in the list and then select Remove.
5. To change a recipient’s fax number, select the recipient and then make the change.
6. Select Next until the Finished menu appears.
7. Select Finished.
To reschedule transmission of a fax listed in the fax queue
1. Select the Queue folder. Faxes scheduled for transmission are listed in the summary pane. You can
reschedule a fax only if it is in waiting status.
2. Right-click the fax whose transmission you want to reschedule, and select Reschedule to open the
Scheduling menu box.
3. Change the scheduling information that you want and then select Next.
4. Select Next until the Finished menu appears.
5. Select Finished.
619500001-1E
Copyright © 2014 ADTRAN, Inc.
163
Sending Faxes
UCS Administrator Guide
To forward a fax listed in the fax queue
1. Select the Queue folder.
Faxes scheduled for transmission are listed in the summary pane. You can reschedule a fax only if it is
in waiting status.
2. Right-click the fax that you want to forward, and select Forward to open the Recipients menu box.
3. Select Addresses to select a recipient from your Outlook contacts list. Otherwise, enter the name and
fax number of the recipient to whom you want to forward the fax.
When you forward a fax document, it appears as a new entry in the fax queue.
4. Select Add to list.
5. Select Next until the Finished menu appears.
6. Select Finished.
To suspend transmission of a fax listed in the fax queue
1. Select the Queue folder. Faxes scheduled for transmission are listed in the summary pane. You can
suspend a fax only if it is in waiting status.
2. Right-click the fax whose transmission you want to suspend indefinitely, and select Suspend. The fax
transmission is suspended indefinitely. View this information in the status field.
To resume transmission of a fax that had been suspended
1. Select the Queue folder. Faxes scheduled for transmission are listed in the summary pane.
2. Right-click the fax whose transmission you want to resume, and select Resume. The fax transmission
is resumed. View this information in the status field.
To delete a fax listed in the fax queue
1. Select the Queue folder. Faxes scheduled for transmission are listed in the summary pane.
2. Right-click the fax that you want to delete, and select Delete.
3. Select Yes to confirm the deletion.
164
Copyright © 2014 ADTRAN, Inc.
619500001-1E
UCS Administrator Guide
Sending Faxes
Using fax cover pages
This section provides information about how to create and manage fax cover pages. A cover page is sent as
the first page of your document and usually includes your name, your company name and fax number, as
well as that of the recipient, and some information relating to the subject of the fax.
There is a folder for fax cover pages in the navigation pane of the Faxes menu. When you open the Cover
Pages folder, your fax cover pages are listed in the summary pane. From there you can create new cover
pages and manage those that already exist. For information about sharing fax cover pages, refer to
Importing and Exporting on page 299.
You can also send only a fax cover page using Quick Fax.
To create a new fax cover page
1. Select the Faxes navigation bar to open the Faxes menu.
2. Select the Cover Pages icon.
3. Right-click anywhere in the summary pane.
4. Select New > Fax Cover Page. A new untitled cover page appears in the summary pane.
5. Enter a name for the cover page. You can use the Fax Cover Page Editor to design the appearance and
content of the cover page that you created.
6. Select File > Save after you finish the design.
To use an existing fax cover page
1. Select the Faxes navigation bar to open the Faxes menu.
2. Select the Cover Pages icon.
3. Right-click the cover page that you want to use. You can use one of the cover pages that is included,
which are called FaxCoverPage 1 or FaxCoverPage 2.
4. Select Duplicate to create a copy of the cover page.
5. Right-click the copy of the cover page.
6. Select Rename.
7. Enter a new name for the fax cover page.
8. Double-click the new fax cover page to open the Fax Cover Page Editor and make the changes that
you want.
If you do not make a copy of the cover page before you make the changes, the application
permanently replaces the original cover page template with your changed copy.
Use the Fax Cover Page Editor to customize the cover pages that you create and to change those that
619500001-1E
Copyright © 2014 ADTRAN, Inc.
165
Sending Faxes
UCS Administrator Guide
already exist. You can design and manipulate images to give your cover pages a distinctive look, according
to your needs and preferences. Your cover page is like a template: you can use it, store it, change it, and
reuse it as often as you want. You can access the Fax Cover Page Editor by creating a new fax cover page
or by editing an existing fax cover page.
To access the Fax Cover Page Editor
1. From the NetVanta UC Client select the Faxes navigation bar to open the Faxes menu .
2. To open the Fax Cover Page Editor, right-click anywhere in the summary pane, select New in the
shortcut menu and select Fax Cover Page. Alternatively, to open an existing fax cover page, select a
fax cover page, right-click, and select Open.
3. In the summary pane, double-click the icon of the new cover page.
The Fax Cover Page Editor consists of a standard Menu bar and Toolbar, a Tool palette, Canvas area, and
Menu bar
Toolbar
Tool palette
Canvas area
Status bar
Status bar. You design your cover page on the canvas using the tools from the tool palette together with the
toolbar and menu commands.
The Menu bar contains the File, Edit, View, Insert, Format, Layout, and Help menus.
The Toolbar contains shortcuts to the most frequently used menu items. Hold the pointer over a button to
show the tooltips.
The Tool palette contains tools for drawing, editing, and organizing your cover pages.
The Canvas is the design area. This is where you customize your cover page.
The Status bar shows the pointer’s status. For example, if you hold the pointer over a toolbar button, a
description of the button’s function is displayed on the status bar. The coordinates at the bottom right of the
status bar provide precise information about the pointer’s position.
166
Copyright © 2014 ADTRAN, Inc.
619500001-1E
UCS Administrator Guide
Sending Faxes
Inserting and changing labels and message information
You can include information related to your workplace and your fax message with your cover page. This
information can include your workplace name and telephone number, a subject line and short note related
to the fax, along with the transmission date, for example. A complete list of information options is
provided within this section.
Note that you cannot insert labels with recipient information. This is because recipients are callers who use
the Fax-on-demand services that you set up. Such callers are unknown to you. Callers are prompted to
enter their fax number when their call encounters the Fax-on-demand element. The fax number is captured
and automatically entered on the cover page. The recipient’s name may also be captured. This is the only
recipient information that appears. The same is true for transmissions initiated by the Send Fax element:
the recipient’s fax number and name will appear on the fax cover page.
When you create a cover page, you select the type of information you want to include from the list of
information options. You do not enter specific sender or message content manually when designing your
cover page, because content will vary depending on each Fax-on-demand service that you set up. Instead,
you insert labels for the information using the Fax Cover Page Editor. A field is created on the canvas for
each of the labels you insert.
To:
[Label]
{Recipient’s Name}
[Field]
When a fax is transmitted, the NetVanta UC Server captures the fax number and associated name then
inserts the information as content in the field following the appropriate label on the cover page.
When designing the cover page, you can edit a label’s font, style and content. For example, you can change
the “fax” label so that it appears as “facsimile number.” However, you cannot change the actual content
that is associated with the field. This is because the content information is captured when a caller initiates a
fax request using a service element.
The recipient information labels that you can insert include:
•
•
•
•
•
•
•
•
•
•
•
Name
Fax number
Company
Street Address
City
State/Province
Zip/Postal Code
Country
Title
Department
Office location
619500001-1E
Copyright © 2014 ADTRAN, Inc.
167
Sending Faxes
UCS Administrator Guide
• Home telephone number
• Office telephone number
The sender information labels that you can insert include:
•
•
•
•
•
•
•
•
•
Name
Fax number
Company
Address
Title
Department
Office location
Home telephone number
Office telephone number
The message information labels that you can insert include:
•
•
•
•
•
Note
Subject
Date sent
Number of pages
Number of attachments
To insert an information label
1. From the Insert menu, choose one of the following label types:
• Recipient
• Sender
• Message
In this example, the choice is Recipient.
2. From the submenu, select the label that you want. The label is added to the cover page canvas. It
appears in a dotted rectangle. A field is inserted next to the label. The word recipient’s identifies the
field that appears in a second dotted rectangle.
The label name appears in bold, while the word recipient’s is italicized and has a
bracket in front of it. The label name is included as content on the cover page, but the
word recipient’s is not. The application inserts the recipient name associated with a fax
number when a caller initiates a fax request.
To reposition a label on the canvas
1. Select anywhere inside the label’s dotted rectangle and then drag it to the desired position.
2. Do the same with the dotted rectangle of the associated field.
168
Copyright © 2014 ADTRAN, Inc.
619500001-1E
UCS Administrator Guide
Sending Faxes
To change the font and style of a label or field
1. Select the label or field that you want to change.
2. Do any of the following:
• Select a font from the font drop-down menu.
• Select a point size from the size drop-down menu.
• Select a style by selecting a style button.
You can use the familiar, standard font and text style commands from the toolbar to change the font and
style of the cover page, as described above. Alternatively, you can use the menu commands (Format >
Font) which also allow you to change the script and preview the font that you choose.
To change label content
1. Select the label content that you want to change.
2. Enter the changes to the label content.
You can change label content, but you cannot change associated field content from
within the Fax Cover Page Editor. To change field content related to a specific fax
transmission, you need to do so from the fax queue. Select the fax that you want to
change and right-click to get a shortcut menu.
Using the tool palette to customize fax cover pages
The tools available on the tool palette of the Fax Cover Page Editor can be divided into two groups: the
Text and Drawing group, and the Alignment group.
The tools in the Text and Drawing group allow you to draw shapes and insert text or bitmaps on the canvas.
The drawing tools can be selected only from the tool palette. They allow you to select, use shapes, and
619500001-1E
Copyright © 2014 ADTRAN, Inc.
169
Sending Faxes
UCS Administrator Guide
zoom in on the canvas as you work on your design.
Selector
Lock selector
Zoom in
Zoom out
Zoom full page
Text
Line
Rectangle
Ellipse
Insert bitmap
Gridlines
When it is enabled, the Lock selector tool allows you to use the pointer to select and insert a shape, line, or
text on the canvas. Once you have inserted the item of your choice, the pointer resumes its standard
function.
If you select and insert a shape, line, or text when the Selector tool is enabled, the selector tool does not
resume the standard pointer function once you have inserted a shape, line, or text. The Selector tool
continues to insert the drawing tool that you chose from the tool palette. It does so until you select the Lock
selector tool. This disables the Selector tool.
To insert a shape
1. Select the Lock selector tool.
2. Select the shape that you want to insert.
3. Select on the canvas where you want to insert the shape and then drag down and to the right.
4. Release the mouse button to create the shape.
To reposition a shape on the canvas
1. Select the shape to select it.
2. Drag the shape to the position that you want.
You can turn on the gridlines. The gridlines help you to position shapes with ease on the
canvas.
170
Copyright © 2014 ADTRAN, Inc.
619500001-1E
UCS Administrator Guide
Sending Faxes
To change the shape and size of a shape
• Select a handle and drag to change the size or shape of the selected object.
For example, you can change the shape of a circle so that it becomes an ellipse by selecting the handle, as
indicated, and dragging to the right.
To delete a shape
1. Select the shape that you want to delete.
2. Press Delete.
To draw a line
1. Select the Lock selector tool.
2. Select the Line tool.
3. Select on the canvas where you want the line to begin and drag to draw the line.
4. Release the mouse button to create the line.
5. Select anywhere on the canvas to cancel the selection.
To change or reposition a line
1. Select the line that you want to change to select it.
2. Do either of the following:
• To shorten or extend the line, select one of the boxes at the end of the line and then drag as desired.
• To reposition a line on the canvas, select the line and drag it to a new position.
3. Select anywhere on the canvas to cancel the selection.
To delete a line
1. Select the line you want to delete to select it.
2. Press Delete.
To insert text
1. Select the Lock selector tool.
2. Select the Text tool.
3. Select where you want to insert the text.
4. Drag down and to the right. A dotted text box appears on the canvas.
619500001-1E
Copyright © 2014 ADTRAN, Inc.
171
Sending Faxes
UCS Administrator Guide
5. Enter the text that you want to insert. Choose the font, size, and style commands on the toolbar to
change the text.
To insert text in a text box
1. Select the lock selector tool.
2. Select the text tool.
3. Select where you want to insert the text box and then drag to the right and down. A dotted text box
appears on the canvas.
4. Select Format > Line, Fill and Color to open the Line, Fill and Color menu box.
5. Select the Draw border/line check box. The text box lines are now solid.
6. Select line thickness from the Thickness box.
7. Enter the text in the text box. Change the font size and style as desired.
To insert a bitmap
1. Select the Insert bitmap tool to open the Open menu box.
2. Select the bitmap that you want to insert.
3. Select Open. The bitmap is inserted on the canvas.
Using the Alignment tools to customize fax cover pages
The second group of tools in the Fax Cover Page Editor is the Alignment group. These tools are used to
space or align selected objects on the canvas. Alignment tool commands can also be found in the Layout
menu.
Bring to front
Send to back
Space evenly across
Space evenly down
Align left edge
Align right edge
Align top edge
Align bottom edge
To move a shape to the front/back in relation to a second shape
1. Select the shape that you want to move to the front/send to the back to select it.
2. On the tool palette, select Bring to front/Send to back, as desired.
The shape that you selected is brought forward/sent back.
172
Copyright © 2014 ADTRAN, Inc.
619500001-1E
UCS Administrator Guide
Sending Faxes
To space two or more objects evenly across/down the canvas
1. Select the objects that you want to space.
2. On the tool palette, select one of the following:
• Space evenly across
• Space evenly down
Spacing tools
The items that you selected are spaced evenly on the canvas.
To align two or more objects on the canvas
1. Select the objects that you want to align.
2. On the tool palette, select the alignment tool that you want to apply.
Alignment tools
The items that you selected are aligned by the edges that you specify.
To preview a fax cover page
1. Select the Faxes navigation bar to open the Faxes menu.
2. Select the Cover Pages icon. The fax cover pages are listed in the summary pane.
3. Select the fax cover page that you want to preview.
4. In the detail pane, select Download to get the file from the server. The cover page appears in the detail
pane.
619500001-1E
Copyright © 2014 ADTRAN, Inc.
173
Sending Faxes
UCS Administrator Guide
5. Use the cover page toolbar to view the cover page.
Zoom to
Fit All
Zoom in
Page up
Print
Normal
Page down
Rotate single page
180 degrees
Rotate single page left
Rotate single page right
Rotate document
180 degrees
Rotate document left
Rotate document right
To rename a fax cover page
1. Select the Faxes navigation bar to open the Faxes menu.
2. Select the Cover Pages icon. The fax cover pages are listed in the summary pane.
3. Right-click the cover page that you want to rename.
4. Select Rename.
5. Enter a new name for the cover page.
6. Select the icon of the new cover page to make the change.
To copy a fax cover page
1. Select the Faxes navigation bar to open the Faxes menu.
2. Select the Cover Pages icon. The fax cover pages are listed in the summary pane.
3. Right-click the cover page that you want to copy.
4. Select Duplicate. The copy of the cover page appears in the summary pane, with “Copy of” before its
name. You can rename the cover page if you want to.
To delete a fax cover page
1. Select the Faxes navigation bar to open the Faxes menu.
2. Select the Cover Pages icon. The fax cover pages are listed in the summary pane.
3. Right-click the cover page that you want to delete.
174
Copyright © 2014 ADTRAN, Inc.
619500001-1E
UCS Administrator Guide
Sending Faxes
4. Select Delete.
5. Select Yes to confirm the deletion.
To edit a fax cover page
1. Select the Faxes navigation bar to open the Faxes menu.
2. Select the Cover Pages icon. The fax cover pages are listed in the summary pane.
3. Right-click the cover page that you want to edit.
4. Select Open. The fax cover page is displayed in the Fax Cover Page Editor.
Use the toolbar and menu commands to change the fax cover page.
5. Select File > Save.
To send a cover page only using Quick Fax
The Quick Fax feature allows you to send a one-page fax message at any time, to as many recipients as you
choose. When you use Quick Fax, you send only a cover page. Your messages appear in the subject area.
1. On the toolbar, select the Quick Fax icon to open the Fax Recipients menu box.
Quick Fax icon
2. Select Addresses to select recipients from your Outlook Contacts list. If you are not choosing a
recipient from your Outlook Contacts list, enter the names and fax numbers.
619500001-1E
Copyright © 2014 ADTRAN, Inc.
175
Receiving Faxes
UCS Administrator Guide
3. Select Add to List for each recipient that you specify.
To delete a recipient from the Recipient list, select the recipient and then select Remove.
4. Select Next to open the Scheduling menu box.
5. Specify when you want to send the fax.
“When phone rates are discounted” means at midnight of the same day.
6. Select Next to open the Select Cover Page menu box.
7. Select a cover page to use as your Quick Fax document.
8. Select Next to open the Cover Page Details menu box.
9. Enter the subject of your Quick Fax and then enter a message in the Notes section.
10. Select Next and the Finished menu appears.
11. Select Finish. The Quick Fax message is sent according to the instructions.
Receiving Faxes
There are different methods of receiving incoming faxes.
• The default behavior for incoming faxes is that the NetVanta UC Server detects the standard CNG tone
that signals a fax, the NetVanta UC Server receives the fax, and then stores it in a general mailbox. Using
email, an office administrator can then distribute received faxes to user mailboxes. No configuration is
required for this method to work, however, no notifications are sent to the user that they have a received
a fax.
• A company can have a corporate fax attendant identity using a direct-inward-dial (DID) number, which
receives all incoming faxes.
• A user can have a shared voice and fax number, using the same identity.
A shared voice and fax number is not recommended for high numbers of incoming fax
calls. If an incoming fax call is answered at the user’s extension, the user will have
difficulties transferring the call into their service.
Incoming faxes are received and viewed through a user’s mailbox, for example, through Microsoft
Outlook, Microsoft Exchange, Lotus Notes, or through an Integrated messaging client (a Mailboxes
navigation bar on the user’s NetVanta UC Client) or IMAP4.
176
Copyright © 2014 ADTRAN, Inc.
619500001-1E
UCS Administrator Guide
Receiving Faxes
Receiving Trunk-Line Faxes
Trunk lines can receive fax transmissions in various ways. Receiving faxes is automatic when the
application detects the standard CNG tone that signals a fax, receives the fax message, and then stores it in
a general mailbox. Using emails, an office administrator then distributes received faxes to user mailboxes.
You can set up this mailbox on the Options tab for Operator Definition. For information about using the
Options tab, refer to Setting System-Wide Options on page 21.
When you specify user information, you can assign a DID trunk to a user so that faxes arriving on that
trunk go to that user’s mailbox. For information about assigning a DID trunk to a new user, refer to
Creating User Profiles on page 65. You can also create a fax attendant identity for an existing user using
the New Identity Wizard, and selecting Receive Fax. For more information, refer to User Identities on
page 96. Whether you assign a fax identity to a new or an existing user, the result is the same. Incoming
faxes are received in the user’s mailbox, the Message Waiting Indicator (MWI) flashes on their phone, and
a voicemail message indicates that they have received a fax.
Fax reception can also be initiated by a Receive Fax element when you have included one in a trunk-line
service. In this case, a fax arriving on a trunk line is subject to the trunk’s active service.
• You can also use the Receive Fax element in a voice service in conjunction with a Select Extension
element so that the fax can be delivered correctly. Thus, when the call encounters the Select Extension
element of the call flow, callers are prompted to enter the extension of the user to whom they want to
send the fax. From there, the fax message encounters the Receive Fax element. When you have set this
element to the “Current Extension,” the fax message is routed to the extension that the caller specified
and it is stored in the user’s mailbox.
• Alternatively, you can create a dedicated “Receive Fax” service to customize receive fax behavior. For
more information, refer to Receive Fax element on page 230.
Notifying users of an incoming fax on a shared voice and fax identity
Personal Assistant (PA) users will be notified of an incoming fax using the same notification settings that
are configured for Active Message Delivery, Email Notification, or Pager Notification. The settings of
each of these options apply equally for voice and fax messages.
Personal Business Assistant (PBA) users can have an identity specifically dedicated to receiving faxes,
using a direct-inward-dial (DID) number, and a custom service that defines the behavior when a fax is
received.
Alternatively, PBA users can receive faxes on a shared voice and fax identity, but they are not
automatically notified of incoming faxes. In order to receive notifications that a fax has been received, a
Receive Fax service must be created.
The user or the administrator can create a Receive Fax service using the Receive Fax element. For more
information on creating a Receive Fax service, refer to Receive Fax element on page 230.
619500001-1E
Copyright © 2014 ADTRAN, Inc.
177
Receiving Faxes
178
UCS Administrator Guide
Copyright © 2014 ADTRAN, Inc.
619500001-1E
UCS Administrator Guide
Creating Distribution Lists
9. Creating Distribution Lists
Overview
You can use the Distribution Lists menu to create and manage system distribution lists. Distribution lists
allow users to send voice and fax messages to groups of users. Users can create their own distribution lists
but cannot edit system distribution lists.
Two folders are included with the Administrator application, Everyone and System. The Everyone folder
contains all the users that are configured for the system. You cannot add a new folder to the Everyone
folder.
Using System Distribution Lists
You can use the System folder to add new distribution lists to the system, and then add, edit, and delete
users from the distribution lists. You can record an audio identifier for a system distribution list.
To record an audio identifier for a distribution list
1. In the content pane, right-click the system distribution list for which you want to record an audio
identifier, and select Record Identifier.
2. In the Audio Identifier section, select the Record button.
3. Make sure that the desired audio device is selected.
4. Select
. If you are using your telephone, wait for the beep before you begin to record.
5. Select
when you are finished. If you used your telephone microphone, you can hang up the phone
or press the Release button on the phone to end the recording.
6. Select
to hear the recording.
7. Select OK to keep the recording.
Using Personal Distribution Lists
Use the Personal folder to create distribution lists and then add, edit, and delete users from the distribution
lists. You can also record an audio identifier for a personal distribution list.
To create a new distribution list folder
1. Select the Distribution Lists navigation bar to open the distribution lists menu.
2. Right-click the System folder.
3. In the right summary pane right-click, and select New > Distribution List.
619500001-1E
Copyright © 2014 ADTRAN, Inc.
179
Using Personal Distribution Lists
UCS Administrator Guide
4. Enter a Name for the distribution list folder.
5. Enter a unique number in the List Identifier field.
6. If you want to record an audio identifier for the distribution list, select Record and follow steps 2 to 7
of To record an audio identifier for a distribution list on page 179.
7. Select OK.
To add a user to a distribution list
1. Select the folder that contains the user that you want to add to the list.
2. Drag the user name to the distribution list folder that you want to copy it to.
To delete a user from a distribution list
1. Select the folder that contains the user that you want to delete from the list.
2. Right-click the name of the user that you want to delete, and select Delete.
To change distribution list information
1. Right-click the system distribution list that you want to change, and select Open.
2. In the General Information section, do either of the following:
• Enter a new name in the Name field.
• Enter a new number in the List Identifier field.
3. If you want to change the audio identifier, select Record and follow steps 2 to 7 of To record an audio
identifier for a distribution list on page 179.
4. Select OK.
To rename a system distribution list
1. Right-click the distribution list that you want to rename, and select Rename.
2. Enter a name for the distribution list, and select OK.
To copy a system distribution list
1. Right-click the distribution list that you want to copy.
2. Select Duplicate.
180
Copyright © 2014 ADTRAN, Inc.
619500001-1E
UCS Administrator Guide
Using Advanced Features
10. Using Advanced Features
This chapter explains how to use advanced features, that require some custom configuration in order to
use. This chapter covers the following topics:
• Using the Outbound Dialer on page 181
• Customizing System Announcements on the Server on page 196
Using the Outbound Dialer
The Outbound Dialer can be used to make outgoing calls, and to run a service when a call connects. You
can customize the service to meet your organization's needs, but typically it might play an announcement
to notify the person of some information. It could also request that the person enter a PIN or press a
number to indicate that they have received the message, or to input a response into a database.
The Outbound Dialer is an advanced feature that requires some programming to
customize for your business requirements.
The Outbound Dialer requires the following to run:
• A customized application that you create, that may access a company database, and that initiates the
OutDial.exe
• The OutDial.exe provided by the NetVanta UC Server that makes the call request to the NetVanta UC
Server
• A customized NetVanta UC Server service that runs when a call connects
You can create the customized application, script, or .NET application to meet your particular business
requirements. Ideally, the application would gather information from a database, such as the names and the
phone numbers of the people to call. Your custom application must then initiate the OutDial executable,
which makes a call request to the NetVanta UC Server to initiate the calls. When a call is made
successfully, then the service you selected is run.
To create the customized application requires scripting knowledge. Knowledge of
databases would also be beneficial.
Outbound Dialer Requirements
For the Outbound Dialer to function optimally, there are some requirements that must be met, and some
619500001-1E
Copyright © 2014 ADTRAN, Inc.
181
Using the Outbound Dialer
UCS Administrator Guide
options that can be configured.
For best results, the Outbound Dialer should be used in combination with a database.
For example, your custom application might access a database to gather the names and
telephone numbers of the people to call. While a database is not required to use the
Outbound Dialer, not accessing a database limits the capabilities of this feature.
The following requirements must be met in order to use the Outbound Dialer.
• The Outbound Dialer is a licensed option. Only NetVanta UC Server configurations with the Outbound
Dialing Support license have this option available.
• The Outbound Dialer should only be used on trunks with true answer supervision that can accurately
determine when the called party answers the phone, such as digital trunks. Using the Outbound Dialer
with analog gateways may not function reliably.
• By default only Admin users can use the Outbound Dialer. If you have created a custom authorization
store, then PBA users can also use the Outbound Dialer if they have the right to
SubmitOutboundCallRequest.
• You must create a custom application, script, or .NET application, according to your particular business
requirements. For maximum functionality, the application should access a database, and the application
must also initiate the OutDial.exe, which logs into the NetVanta UC Server to make the calls.
• You must create a service to run when a call connects.
• You must configure a port for outbound dialing.
To verify the Outbound dialing support license
1. From the Administrator application, select Help > License Information. A list of the current enabled
features appears.
2. Ensure that Outbound dialing support has the value Yes. If Outbound dialing support has the value
No, then you do not have a license to use the Outbound Dialer. To change your current license, contact
your system integrator or reseller.
Try the Outbound Dialer
The Outbound Dialer requires some customizing to use as a business solution, however we've included a
simple example for you to try in order to see how the Outbound Dialer works. Entering the commands
below into a Command Prompt causes the OutDial.exe to run. OutDial then logs into the NetVanta UC
Server using the authentication provided, calls the phone number that you provided, and runs a sample
service included with the NetVanta UC Server.
To try the Outbound Dialer example requires having the Outbound Dialer license. To
verify whether your configuration has this license available, refer to To verify the
Outbound dialing support license on page 182.
182
Copyright © 2014 ADTRAN, Inc.
619500001-1E
UCS Administrator Guide
Using the Outbound Dialer
To try the Outbound Dialer
1. Open a Command Prompt window by selecting Start > Programs > Accessories > Command
Prompt.
2. Use the change directory command, cd, to change the directory path to the NetVanta UC Server Bin
folder. If the NetVanta UC Server was installed in the default location, then the command and the path
would be:
cd \Program Files\ADTRAN\NetVanta UC Server\Bin
3. Enter the outdial command, followed by the parameters listed below, substituting your own values for
the information in brackets. The command and the parameters have been placed on separate lines for
ease of reading only. The parameters can be listed in any order.
outdial
-h <host>
-u <user name>
-pw <password>
-ph <phone number>
-s \Shared\Default Trunk Service
The outdial command initiates Outdial.exe.
The -h parameter connects Outdial to the host server. The host value can be the host name of the
server or an IP address.
The -u and -pw parameters refer to the user name and password for authentication, so that Outdial can
login into the NetVanta UC Server to make the call. If you are using single sign-on, then you can omit
these parameters.
The -ph parameter refers to your phone number, or the phone number that you want Outdial to call.
This can be the full phone number or an extension number.
The -s parameter refers to the service. The Outdial.exe automatically accesses the Services folder.
Within the Services folder we've entered the path to the Shared folder, and to the Default Trunk
Service, which is a sample service provided with the NetVanta UC Server. We've used quotation
marks around the path because of the spaces in the service name, so that the Outdial.exe includes the
entire path for the -s, service parameter.
Outbound Dialer Applications
To use the Outbound Dialer, you need to create a custom application, script, or .NET application that
satisfies your particular business requirements. Outbound dialing can be used for a variety of purposes,
including the following:
•
•
•
•
•
School Absentee Notifications
Appointment Reminders
Emergency Response Notifications
Cancellation announcements
Information calls
619500001-1E
Copyright © 2014 ADTRAN, Inc.
183
Using the Outbound Dialer
UCS Administrator Guide
• Sale announcements
• Product in-stock notifications
• Overdue book reminders
• Wake up calls
• Surveys
You can use the Outbound Dialer to send school absentee Notifications. In this case, you may want the
custom application to access a database and generate a list of absent students and their parents' contact
numbers. The custom application then must initiate the OutDial.exe, which logs into the NetVanta UC
Server.
When the server runs the call request, a call is attempted at each phone number listed until a successful
connection is made, or until the maximum number of attempts have been made. When a call is made
successfully, then the specified service is run. You can customize the service to meet your organization's
needs, but typically it might play an announcement to notify a parent or guardian that a student has been
marked absent that day. For example, when a call is answered, the caller might hear:
"John Smith is absent from school today."
The service could request that the person press a number to indicate that they have received the message,
and this would update the database to indicate that a response was received. Note that if a home number
was called, it could be the student who answers the phone.
If the person hangs up or if the call goes to voicemail, then no response is given. The custom application
could scan the notification records to determine if any calls were not acknowledged, and if so, new call
requests could be made, up to a specified number of attempts.
You could create a service that asks the person to press a number to indicate a reason for the absence, for
example:
"Press 1 if your child is ill."
The options available, such as illness, appointment, or unauthorized absence, would be stored in a
database, as would the response received.
To prevent students from responding to the call, you could assign a PIN to each parent and ask them to
enter it. The number entered would then be compared to the PIN assigned to the parent, to determine
whether they match.
You can use the Outbound Dialer to send appointment reminders. In this case, you might want your custom
application to extract from a database a list of patients, their contact numbers, and their appointment dates
and times. The custom application then must initiate the OutDial.exe to login into the NetVanta UC Server.
When the server runs the call request, a call is attempted at each phone number listed until a successful
connection is made, or until the maximum number of attempts have been made. When a call is made
successfully, then the service is run.
You can customize the service to meet your organization's needs, but in this example it might play an
announcement to notify the person about their appointment. For example, when a call is answered, the
184
Copyright © 2014 ADTRAN, Inc.
619500001-1E
UCS Administrator Guide
Using the Outbound Dialer
caller might hear:
"John Smith has an appointment at Park Hills Medical Clinic on Wednesday September 7th at 2:00."
You can use the Outbound Dialer to send emergency response notifications. Using the example of fire
fighters, when a fire is reported, you might want the custom application to extract from a database a list of
volunteer fire fighters and their contact numbers. The custom application then must initiate the
OutDial.exe, which logs in to the NetVanta UC Server, to call each fire fighter on the list.
When the server runs the call request, a call is attempted at each phone number listed until a successful
connection is made, or until the maximum number of attempts have been made. When the call connects
successfully, then the service you have selected is run.
You can customize the service to meet your organization's needs, but in this example it might play an
announcement to notify the person about a fire.
You could create a service that requests that the person press a number to indicate that they have received
the message.
• If the correct response was received, the database would be updated to show the message was
acknowledged.
• If the person hangs up, the call goes to voicemail, or if the number requested wasn't pressed, for example
if someone else answers the phone, then the database could be updated to show that the notification was
not acknowledged.
The custom application could scan the database notification records to determine if any calls were not
acknowledged, and if so, new call requests could be made, up to a specified number of attempts.
Configuring the Outbound Dialer
To use the outbound dialer, some configuration is required. There are also options that do not require
configuration, but which can be configured to optimize the outbound dialer.
To use the outbound dialer, you must configure a port for outbound dialing to process the call requests.
If you want, you can increase the number of outgoing calls that can be made simultaneously. Refer to To
specify the maximum number of concurrent calls on page 23 for more information.
Server activities regarding outbound dialing are automatically noted in the Sent Items logs, and can be
viewed in the NetVanta UC Server Client. The information that is logged includes the user making the call
request, the result, the called number for successful calls only, the date and time, the number of attempts,
and any error conditions or failures to complete a call. If you want, you can create custom log entries for
services that are run.
The logs are placed in the Sent Items log category.
619500001-1E
Copyright © 2014 ADTRAN, Inc.
185
Using the Outbound Dialer
UCS Administrator Guide
To configure a port for outbound dialing
1. In the Administration navigation pane, select Ports.
2. Right-click on the port entry, and select Open.
3. Under General information, ensure that Enable use of port for is enabled.
4. Under Enable use of port for, ensure that Outbound dialing is enabled, and select OK. When a call is
made using the Outbound Dialer, the call displays as Outbound Call in the Ports summary pane.
To view Outbound Dialer logs
1. Select the Logs navigation bar to open the Logs menu.
2. Select the Sent Items menu to view the Outbound Dialer call logs. The Outbound Dialer call logs are
listed in the summary pane. The information for a specific log is shown in the preview or information
pane of the Logs menu.
Creating a Custom Application for Outbound Dialing
To create the custom application requires scripting knowledge, and knowledge of
databases would also be beneficial.
The Outbound Dialer can be used for a variety of purposes, whether to convey information only, or to input
responses into a database. The custom application you create, and the service created to run when the call
connects, can be as simple or as complex as you wish. How you create the custom application, script, or
.NET application, and what you decide to include, depends on your particular business requirements.
Ideally, the application would gather information from a database, such as the names and the phone
numbers of the people to call. Your custom application must then initiate the OutDial.exe, which makes a
call request to the NetVanta UC Server to initiate the calls.
For best results, the Outbound Dialer should be used in combination with a database.
While a database is not required, not having access to a database seriously limits the
capabilities of this feature.
The OutDial.exe is available in the following folder, if the was installed in the default location:
\Program Files\ADTRAN\NetVanta UC Server\Bin
The OutDial.exe is a command line utility that uses various required and optional parameters. The
command line syntax is OutDial followed by one or more parameters. Each parameter is composed of a
name and a value, with at least one space in between them. For example:
OutDial parameter_name1 value1 ...
Some parameters are required, while others are optional. An example of a command is shown below, and
the optional parameters are surrounded by square [ ] brackets. The parameters are shown on separate lines
186
Copyright © 2014 ADTRAN, Inc.
619500001-1E
UCS Administrator Guide
Using the Outbound Dialer
for ease of reading only.
OutDial
[-u <username> -pw <password>]
-h <host>
-ph <phone number list>
[-p <prompt delay>]
[-d <delay between attempts>]
[-r <maximum attempts>]
-s <service>
[-pm <parameters>]
[-? |-help]
The default prompt delay between when the call connects and when the service runs, is
1 second. The default delay between call attempts is 3 minutes, and the default
maximum number of call attempts is 3.
Parameters can be specified in any order. For example, all of the following examples are valid, as they
have the required host, phone number, and service parameters, and all would have the same result.
OutDial -h somewhere.com -ph 6135551212 -s myService
OutDial -ph 6135551212 -s myService -h somewhere.com
OutDial -s myService -ph 6135551212 -h somewhere.com
The command line syntax follows normal Windows command line rules. For example, double quotation
marks ("...") are required around any values that include a space ( ) character in those values, such as might
be found in the username, host, phone number list, or service parameters. For example, Admin would not
require double quotation marks, but "John Smith" requires double quotation marks because of the space
between the first and the last name.
The following is a list of required parameters:
619500001-1E
Copyright © 2014 ADTRAN, Inc.
187
Using the Outbound Dialer
UCS Administrator Guide
Table 10–1: :Required Parameters
Parameter
Value
Description
-h
IP Address/Host Name The IP address or host name where the server is located.
-ph
Phone Number List
This is a comma separated list of phone numbers to be dialed.
Each phone number can be specified as a sequence of digits, for
example, 5551212, or using standard formatting characters, for
example, 555-1212, "(613) 555-1212", or "+1 (613) 555-1212".
Numbers that have no formatting characters are dialed as is.
Other numbers have the standard dialing rules applied, as defined
in the Admin options (Tools > Options > Dialing). For example,
the default area code can be added.
Account codes can also be used if they are configured on the user
profile associated with the request.
-s
Service Name
This refers to the NetVanta UC Server service to run when a call is
completed. The value must be the name of a service that belongs
to the owned user profile for the authentication that the utility logs
in as. The service name should be a full path name including any
folders the user has defined. The path is assumed to start from the
Services folder, and thus only any subfolders and the service
name need to be included in the path. The service path should be
from the user's NetVanta UC Server Client.
For example:
OutService
Shared/OutService2
"My Folder\Some Service"
Note: Forward or reverse slashes may be used.
The following is a list of optional parameters:
188
Copyright © 2014 ADTRAN, Inc.
619500001-1E
UCS Administrator Guide
Using the Outbound Dialer
Table 10–2: Optional Parameters
Parameter Value
Description
-u
Login Name
Valid NetVanta UC Server login name. If this parameter is
specified, the -pw parameter (login password) must also be
specified. Specifying -u and not specifying -pw causes an
error. Both values, -u and -pw, are used to login to the
server. If both parameters are omitted, the utility attempts to
connect using single sign-on.
-pw
Login Password
Valid NetVanta UC Server login password. If this parameter
is specified, the -u parameter (login name), must also be
specified. Specifying -pw and not specifying -u causes an
error. Both values, -u and -pw, are used to login to the
server. If both parameters are omitted, the utility attempts to
connect using single sign-on.
-sd
Start Delay
The delay before the outdial request is executed. If this
mode is not specified then the outdial request is executed
immediately (or as soon as possible, depending on the
number of requests in the queue). The default value is zero.
-sdu
Start Delay Units
The units used for the delay. This may be minute, minutes,
hour, hours, day, or days. The default is minutes. The start
delay is calculated from the time the request is entered.
The request will not be processed before the time delay has
elapsed, however it is possible that it may be processed
somewhat later if the system is heavily loaded, for example,
with many Active Message Delivery (AMD) requests.
619500001-1E
Copyright © 2014 ADTRAN, Inc.
189
Using the Outbound Dialer
UCS Administrator Guide
Parameter Value
Description
-p
Pause in seconds before
starting service
The number of seconds to wait after the call has connected,
before starting the service. If the parameter is not specified,
the value of the outgoing call prompt delay (from the Admin
options, Tools > Options > Message Delivery) is used.
On trunks with no true answer supervision, such as analog
trunks, the NetVanta UC Server can determine when a call
is connected, but it cannot determine precisely when the
call is answered. This delay can be used to ensure that the
service is probably started after the call is answered. Note
that using analog trunks with the Outbound Dialer is not
recommended.
-d
Number of minutes delay
before next attempt
When the server fails to connect to a specific phone
number, the request is queued again. The -d option
indicates the number of minutes delay before the request is
attempted again. If this mode is omitted, the server uses
the Active message delivery delay mode (Tools > Options
> Message Delivery) for the user for whom the request is
being processed.
-r
Number of retry attempts
The server tries each number in turn until a call connects. If
all the numbers fail, the server tries the first number again
and so on. This mode specifies how many times each
number is called before the request is abandoned. For
example, if the value of this mode is 2, then each number is
attempted a maximum of two times. If the mode is not
specified, then the server uses the Active message delivery
retry mode (Tools > Options > Message Delivery) for the
user for whom the request is being processed.
-pm
Additional Parameters List
This is a comma separated list of additional parameters that
are passed to the service when it executes. These values
can be accessed within a service definition as special Text
values whose names are Parameter1, Parameter2, and so
on. The first value in the list becomes the value of
Parameter1 and so forth.
-? or -help List Parameters
This parameter requests the utility to list a description of
valid parameters and their meanings.
Creating Outbound Dialing Services
The Outbound Dialer can be used from a command prompt to make outgoing calls, and to run a service
when a call connects. You can also create a service that uses the Queue Outdial element to launch an
outdial request after a specified period of time. The information in this section explains how to create an
outbound dialing service to run when an outbound dialing request is made from a command prompt. For
information on creating a service to initiate an outbound dialing request, refer to Queue Outdial element on
page 251.
The type of service you create to run when an outbound call connects can be as simple or as complex as
you wish. What elements you choose to include in the service depend on your business requirements.
190
Copyright © 2014 ADTRAN, Inc.
619500001-1E
UCS Administrator Guide
Using the Outbound Dialer
At a minimum, you may want to use the Play Announcement element to play a message for the person
answering the call. For more information, refer to Play Announcement element on page 215. You may also
want to use some database elements so that the person answering can input a response into a database. For
more information, refer to Using Database Elements on page 289. For example, you may want the person
to enter a PIN if it's important to ensure that a particular person receives the message. Alternatively, you
may want the person to press a number to indicate a response, for example, "Press 1 to indicate that you
have heard the message. Press 2 to repeat the message..."
You could also use the Generate Tones Element on page 250 for an outbound dialing service to enter
DTMF tones, also known as touch-tone dialing. For example, the Generate Tones element could be used to
enter DTMF digits to dial an extension number for a specific caller in an automated attendant, to access an
external paging system, or to enter an account code.
You can use the Queue Outdial element on page 251 to determine if a call is answered by an answering
machine, so that the behavior of the service can be varied accordingly.
You may want to use additional parameters to customize the outbound dialer service. In the Service Editor,
parameters are not visible by default so you need to modify the view to enable parameters.
Parameter
Value
Description
-pm
Additional Parameters List This is a comma separated list of additional parameters
that are passed to the service when it executes. These
values can be accessed within a service definition as
special Text values whose names are Parameter1,
Parameter2, and so on. The first value in the list becomes
the value of Parameter1 and so forth.
Parameters can be used with the following elements to create custom outbound dialing services:
• The Equals field in the Data Source Selector element (any element that deals with a database)
• The Assisted Transfer, Transfer Call, Deliver Messages, Notify Pager, and Send Fax elements can accept
a parameter as a number to call.
• The Send email element can accept parameters for email addresses.
• The Text To Speech element can read parameters to the person called.
• The Compare Data element can compare a parameter against several values and route the service based
on the outcome.
• The Create Log Entry element can write parameters into the log files.
Note that parameters can be used to obtain a specific record from a database.
To use parameters in defining a service for an Outbound Dialer request
1. From the Services navigation bar, right-click in the summary pane, select New and Service.
2. Select the service, right-click and select Open to open the Service Editor.
619500001-1E
Copyright © 2014 ADTRAN, Inc.
191
Using the Outbound Dialer
UCS Administrator Guide
3. In the Service Editor, select View > Parameters to enable the Parameters. Once Parameters are
enabled, then parameter names are available for selection.
When an Outbound Dialer call connects, and the service selected runs, it initializes the values of the
parameters based on the parameter values in the call request. This uses the optional -pm parameter, which
refers to any additional parameters. Specific values for the parameters can be provided, and system values
are filled in as usual. The values of Called-ID and Called-ID Number are filled in with the called number.
The Called-ID Name is blank, however if the service requires the name of the person being called, then it
can be passed as a parameter in the request.
If an error results from running the service, then the element exits from the Otherwise pin.
If values are not provided for one or more parameters, then their default value is blank.
The server knows when a service has started running, however it does not know whether the service was
run successfully, for example, whether the person listened to the message before hanging up. Additional
parameters can be used to determine whether a service was successful. For example, the person answering
the call might be required to press a number to indicate that they have received the message.
Processing Outbound Call Requests
The custom application initiates the OutDial.exe, which is a command line utility. The OutDial.exe logs in
to the NetVanta UC Server using the authentication provided, or using single sign-on. The OutDial.exe
initiates a call request to the NetVanta UC Server, according to the parameters specified. The utility sends
a request to the server identifying the service, the phone numbers to call, and any additional parameters
provided. The call request is then placed in the Outbound Call Queue.
When a call request is added to the call queue, then an Outbound Call Processor is created for it. The
Outbound Call Processor calls the first number in the list.
• If the call is answered, then the service runs.
• If the call is not completed, then the next number is called.
This process continues up to a specified number of attempts before the request is deleted and a log entry is
created.
Before the calls are made, there are a number of intervening steps. First, the command line parameters
must be verified. When the OutDial.exe is initiated, it scans the command line parameters to ensure that
the required parameters are included, and that the parameters are properly formatted. It verifies that both
the -u <username> and -pw <password) parameters are provided for authentication, or that both are
omitted for single sign-on. It also verifies that the phone numbers in the list are properly formatted. If any
errors occur, they are noted in a written error message, and the OutDial execution ends.
If the parameters pass the validation, then the utility attempts to connect to the server and login. The
connection uses the -h parameter. If the connection succeeds, the login is done using the provided
username and password, or using single sign-on. If any errors occur, they are noted in a written error
192
Copyright © 2014 ADTRAN, Inc.
619500001-1E
UCS Administrator Guide
Using the Outbound Dialer
message, and the OutDial execution ends.
If the login is successful, then the utility sends the call request to the server and waits for confirmation. The
server verifies the following information before validating and queuing the request:
• That the service specified exists
• That the user profile for the login authentication is a system userThat the user is authorized to perform
this operation
If any errors occur, for example the utility times out waiting for confirmation, or the server returns an error,
then these are noted in a written error message, and the OutDial execution ends. If the server receives a
request that matches an existing queued request, then the request is rejected as a duplicate. Two requests
match if they are for the same user, service, parameters, and phone numbers. If there are no errors, then the
utility writes a message summarizing the request, and the OutDial execution ends.
When the OutDial execution ends, the utility returns a numeric return code that could be used by a shell or
batch command processor. If the execution is successful, the utility returns 0. Unique non-zero return
codes are returned for the situations below, and any other specific error returns from the server:
•
•
•
•
•
Failed to connect to server
Failed to login
No response from request to server
Duplicate request
Invalid parameters
If the outbound call request passes the server's validation, then the call request is processed, and the
following actions occur:
• An attempt is made to call the first phone number in the list.
• If the call succeeds, then the service is executed. The execution of the service may be delayed to ensure
the call is answered, using the -p parameter, or the Outgoing call control, prompt delay (Tools > Options
> Message Delivery).
• If the call is not completed, the request is re-queued for the number of minutes indicated in the -d
parameter, or in the user's Active message delivery Delay mode, (Tools > Options > Message Delivery).
The next phone number on the list is then attempted. Calls that were not initially successful are retried
after the period of time has elapsed. The call request is attempted until the maximum number of attempts
have been made, as per the -r parameter, or the Active message delivery Retry mode.
• If a call request is not completed successfully after the appropriate number of call attempts have been
made, then a log entry is written, and can be viewed in the NetVanta UC Server Client. The request is
then removed from the queue.
• When a server receives an outbound call request, this request is copied to disk as well as being entered
in the processing queue. When a request is removed from the queue, because it has been completed, or
because it has not been able to execute the service on any of the phone numbers given, the copy of the
request on the disk is removed. When a server starts up, it reads any requests available and inserts them
into the queue for processing. This ensures that if a server is restarted, any existing call requests are
continued.
619500001-1E
Copyright © 2014 ADTRAN, Inc.
193
Using the Outbound Dialer
UCS Administrator Guide
A call request is considered processed if a call connects, and the service begins to run. This means that the
request is not re-queued, even if errors are subsequently detected, for example, the person hangs up before
the service has finished running.
Server activities related to outbound dialing are noted in the logs. In particular, any
error conditions, failure to complete a call, and successful initiation of the service
should be noted in the logs.
Once the OutDial.exe has successfully logged in to the server, then it sends the call request to the server
and waits for confirmation. The server verifies the information given before validating the request and
queuing the request.When the OutDial execution ends, the utility returns a numeric return code that could
be used by a shell or batch command processor. If the execution is successful, the utility returns 0. Unique
non-zero return codes are returned for the situations below, and any other specific error returns from the
server. The following is a list of the NetVanta UC Server return codes, and contains all the errors that can
be reported by OutDial.
Server activities related to the Outbound Dialer are noted in the logs. In particular, any
error conditions, failure to complete a call, and successful initiation of the service
should be noted in the logs.
194
Copyright © 2014 ADTRAN, Inc.
619500001-1E
UCS Administrator Guide
Using the Outbound Dialer
Table 10–3: Outbound Dialer Return Codes
Return Code
Description
0
Success
1
Unknown failure
2
Unsupported command
3
Communication error
4
License key error
5
Invalid number to dial
6
Specified service not found
7
Subsystem not available
8
Service fails validation
9
Failed to activate service
10
Failed to open line
11
System busy
12
Permission denied
13
Nothing to do
14
Invalid object
15
Invalid parameters
16
Invalid path
17
Not logged in
18
Data store failure
19
File already exists
20
Mailbox list is empty
21
Object does not exist
22
User not available to the server
23
Invalid password
24
Client using an out-of-date version
25
PBX program error
26
Not licensed or license limit exceeded
27
Cannot delete active service
28
Still in use
29
Authentication has been disabled
You can use the OutDial.exe to query any outstanding outbound call requests, using the command line
shown below. The utility then connects to the server and logs in as usual. A request is sent to the server that
returns a summary of each outbound call request that has not yet been processed, that is, the request is still
in the queue for the given user. The utility returns a message describing each request, including the time it
was submitted, the service, the parameters, and the number of attempts so far.
619500001-1E
Copyright © 2014 ADTRAN, Inc.
195
Customizing System Announcements on the Server
UCS Administrator Guide
To query an outbound call request
1. Locate the OutDial.exe. It is available in the following folder, if the NetVanta UC Server was installed
in the default location:
\Program Files\ADTRAN\NetVanta UC Server\Bin
2. From the OutDial command line utility, enter the following command line:
OutDial -q[-u <username> -pw <password>] -h <host> [-? | -help]
The username, password, host, and help parameters function as they do when running the OutDial
utility. In the command above, the -q queries the queued outbound call requests for that user. The
optional parameters appear in the square [ ] brackets. The parameters may be used in any order.
You can use the OutDial.exe to cancel outbound call requests, using the command line shown below. The
utility then connects to the server and logs in as usual. The server looks for a queued call request that
matches the specified parameters, that is, the phone number list, service, and parameters must match
exactly. If a matching request is found, then it's removed from the queue, and a log entry is created
indicating the reason. If an entry is found that has already started, where dialing is in progress, then the
request cannot be canceled and an error code is returned to the client.
To cancel an outbound call request
1. Locate the OutDial.exe. It is available in the following folder, if the NetVanta UC Server was installed
in the default location:
\Program Files\ADTRAN\NetVanta UC Server\Bin
2. From the OutDial command line utility, enter the following command line:
OutDial -c
[-u <username> -pw <password>]
-h <host>
-ph <phone number list>
-s <service>
[-pm <parameters>]
[-? | -help]
The parameters listed function as they do when running the OutDial utility. In the command above,
the -c cancels the outbound call request. The parameters may be used in any order, and the optional
parameters are shown in square [ ] brackets. The parameters are shown on separate lines for ease of
reading only.
Customizing System Announcements on the Server
The NetVanta UC Server is configured with system announcements, which are professionally recorded
audio files used within the application, and play to the user over the telephone. System announcements are
general system prompts that are used throughout the application, for example, for end-of-menu prompts.
However, if you want to change the system announcements, you can customize the announcements file on
196
Copyright © 2014 ADTRAN, Inc.
619500001-1E
UCS Administrator Guide
Customizing System Announcements on the Server
the server. The changes that you make are maintained during NetVanta UC Server software upgrades.
There are three files on the server that the NetVanta UC Server uses for system announcements: English
(U.S.) Male, English (U.S.) Female, and French (CA) Female. You can customize these files. If you
want the files that you add to the custom directories to play in place of the default system announcements,
make sure that the file has the same name.
Customizing system announcements is an advanced feature. It is recommended that you
do not carry out this procedure unless you receive further instruction from ADTRAN.
If the format of the audio file is incorrect, the new file is not heard. Make sure that the
audio of the new file is recorded in G.711 mu-law format, 8-bit samples, 8 kHz, and
Mono.
To customize server English (U.S.) Male system announcements
1. Navigate to the following file:
Program Files\ADTRAN\NetVanta UC Server\Data\System\CustomAnnouncements\
English (U.S.) Male
2. Change the desired system announcement
To customize server English (U.S.) Female system announcements
1. Navigate to the following file:
Program Files\ADTRAN\NetVanta UC Server\Data\System\CustomAnnouncements\
English (U.S.) Female
2. Change the desired system announcement.
To customize server French (U.S.) Female system announcements
1. Navigate to the following file:
Program Files\ADTRAN\NetVanta UC Server\Data\System\CustomAnnouncements\
French (CA) Female
2. Change the desired system announcement.
619500001-1E
Copyright © 2014 ADTRAN, Inc.
197
Customizing System Announcements on the Server
198
Copyright © 2014 ADTRAN, Inc.
UCS Administrator Guide
619500001-1E
UCS Administrator Guide
Creating Custom Call Answering Services
11. Creating Custom Call Answering Services
This chapter describes call answering services, managing services, and building services using the Service
Editor. This chapter covers the following topics:
•
•
•
•
•
•
•
Overview on page 199
Managing Services on page 200
Using the Service Editor on page 203
Working with Elements to Build a Service on page 205
Customizing Services using Parameters on page 208
Validating Services on page 209
Troubleshooting Services on page 209
Overview
A service is like a map that the NetVanta UC Server follows when it answers a call. Services are made up
of elements that are linked together to create a call flow. You can design simple services made up of two or
three elements, or you can create complex call flows made up of a dozen elements or more. Use the Service
Editor to build a service.
For information about designing and changing services, refer to Using Elements to Create Call Answering
Services on page 211. Services can be renamed, copied, organized in folders, and deleted. You can also
share services using the Import/Export feature. For information about the Import/Export feature, refer to
Importing and Exporting on page 299.
To create a service or change information associated with it, from the Administrator application:
• Select the Services navigation bar to open the Services menu. Services are displayed in the summary
619500001-1E
Copyright © 2014 ADTRAN, Inc.
199
Managing Services
UCS Administrator Guide
pane.
Tabs
Summary
Pane
Topics
Navigation
Pane
Detail
Pane
Navigation
Bars
Identitites
Pane
Managing Services
You can create a service, and then you can preview, activate, rename, copy, or delete that service. You can
create and manage the folders in which you save your services.
ADTRAN has provided some samples services to get you started. Before creating a new
service, preview the samples provided to see if a sample service exists that is similar to
what you are looking so. If you find a similar service, copy it, rename it, and then modify
it suit your needs.
Many of the sample services provided by ADTRAN use database integration. If your
NetVanta UC Server version is not licensed for database integration then the database
elements used in the sample services will not work as intended.
To create a service
1. Right-click anywhere in the summary pane.
2. Select New > Service to add a new service to the list in the summary pane. The service icon denotes
the new service and the default name is “Service.”
Service icon
200
Copyright © 2014 ADTRAN, Inc.
619500001-1E
UCS Administrator Guide
Managing Services
3. Enter a name for the service.
You can also right-click the service and then select Rename. Enter the new name again,
and then select the icon next to the service name to make the change.
Working with services
When you select the Services navigation bar, the services you create are listed by name in the summary
pane. You can use the Service Editor to view a service and change it. If you want only an overview of a
service, you can preview it in the Services menu.
To preview a service
1. In the summary pane, select the service that you want to preview.
2. If the service is in the cache, it appears immediately in the detail pane. Otherwise, select the
Download button in the detail pane to get the preview.
To activate a service on an identity
1. Right-click the service that you want to activate, and select Activate Service.
2. In the Activate on section, enable the check box of the identity, or identities, to which you want to
assign the service. The Already activated on section allows you to see on which user identities the
service is already active.
3. Select OK.
The service must already be created and validated before activating it.
Once you have activated a service on an extension, you cannot “deactivate” that
service. To change the service, activate another service on the extension.
To rename a service
1. Right-click the service that you want to rename.
2. Select Rename.
3. Enter the new name for the service.
4. Select the icon next to the service name to make the change.
619500001-1E
Copyright © 2014 ADTRAN, Inc.
201
Managing Services
UCS Administrator Guide
To copy a service
1. Right-click the service that you want to copy.
2. Select Duplicate. The copy of the service appears in the summary pane, with the words “Copy of”
before its name.
3. Rename the copy of the service by following all the steps in To rename a service on page 201.
To delete a service
1. Right-click the service that you want to delete.
2. Select Delete.
3. Select Yes to confirm the deletion.
You cannot delete a service that is active on an identity.
Creating and changing service folders
You can create and manage folders in much the same way as services, and you can use folders to organize
your services. For example, you can create a folder for each of your identities and then store associated
services in it.
Only one service can be active on an identity at any time.
When you want to change the active service on an identity, you can quickly do so if related services are
kept in the same folder. You might have built some services that you are not currently using, for example,
those designed for statutory holidays. Store these together in a folder called “Holidays,” and then retrieve
them when you need them.
To create a folder
1. Right-click anywhere in the summary pane.
2. Select New > Folder to add a new folder to the list in the summary pane. The folder icon denotes the
new folder and the default name is “New Folder.”
Folder icon
202
Copyright © 2014 ADTRAN, Inc.
619500001-1E
UCS Administrator Guide
Using the Service Editor
3. Enter a name for the folder.
You can also right-click the folder and then select Rename. Enter the new name again,
and then select the icon next to the folder name to make the change.
To rename a folder
1. Right-click the folder that you want to rename.
2. Select Rename.
3. Enter the new name for the folder.
4. Select the icon next to the folder name to make the change.
To copy a folder
1. In the summary pane, right-click the folder that you want to copy.
2. Select Duplicate. The copy of the folder appears in the summary pane, with the words “Copy of”
before its name.
3. Rename the copy of the folder.
4. Select the icon next to the folder name to make the change.
To delete a folder
1. Right-click the folder that you want to delete.
2. Select Delete.
3. Select Yes to confirm the deletion.
To store a service in a folder
• Drag the service to the folder where you want to store it.
Using the Service Editor
To access the Service Editor
From the Administrator application:
1. Select the Services navigation bar to open the Services menu. Services are displayed in the summary
pane.
619500001-1E
Copyright © 2014 ADTRAN, Inc.
203
Using the Service Editor
UCS Administrator Guide
2. To open the Service Editor, right-click anywhere in the summary pane. In the shortcut menu, select
New > Service. The newly created service is listed in the summary pane. Double-click the service and
the Service Editor opens.
Alternatively, you can open the Service Editor by double-clicking an existing service.
The Service Editor consists of a standard Menu Bar and Toolbar, a Tool Palette of Elements, and a Canvas
Menu bar
Toolbar
Element
Tool Palette
of Elements
Canvas area
area. You design a service on the canvas using a combination of elements that you choose from the tool
palette.
The Menu Bar contains the File, Edit, View, Tools, and Help menus. Use these menus to manage the
service design.
The Toolbar contains visual shortcuts to the most frequently used menu items. Hold the pointer over a
button to show the tool tips.
The Tool Palette contains all available elements. It has Standard, Advanced, and Database element tabs.
You can dock the Tool Palette to either side of the window.
To access database information, the system must be licensed for database integration. If
you are not licensed for database integration, the Database tab in the Service Editor is
unavailable.
The canvas is the design area. All elements and links are shown here. Each element performs a separate
204
Copyright © 2014 ADTRAN, Inc.
619500001-1E
UCS Administrator Guide
Working with Elements to Build a Service
function within the call flow. Connections between elements are referred to as links, and they define the
call flow.
To view an element
• Drag an element from the tool palette to the canvas. The element is automatically positioned in the topleft corner. Each Element has an icon, title area, T-bar control, help button, and a connector pin
associated with it. Some elements have more than one connector pin depending on their function.
T-bar
Icon
Help
Title
Connector
Pin
The Icon is a visual representation of the element type.
In the Title area you can enter a description of the element’s function.
The T-bar control displays the properties associated with the element. To save canvas space, select the Tbar control to collapse the element as needed. To restore information about a collapsed element, select its
T-bar control. The three modes of display are illustrated below.
Open element
Collapsed element
Icon only
Select the Help button to access the appropriate help page.
The Connector Pin on the element is used to make a connection to the next element in the call flow. An
element might have more than one connector pin, depending on its function. If you do not connect at least
one pin to another element, the call is terminated.
Working with Elements to Build a Service
To build a call flow for incoming calls, you need to create a service and then open the Service Editor. To
begin the call flow, drag elements one by one from the tool palette and link them using the connector pins.
Repeat this procedure with as many elements as you need until the service is complete.
619500001-1E
Copyright © 2014 ADTRAN, Inc.
205
Working with Elements to Build a Service
UCS Administrator Guide
To create a service
1. Open the Services menu.
2. Right-click anywhere in the summary pane.
3. Select New > Service to add a new service to the list in the summary pane. The service icon denotes
the new service and the default name is “Service.”
Service icon
4. Enter a name for the service. If you are unable to enter the name, right-click the service and then
select Rename. Enter the new name, and then select the icon next to the service name to make the
change.
To initiate a call flow for a new service
1. Double-click the new service to start the Service Editor.
2. Drag an element from the tool palette to the canvas to start the call flow. The element is automatically
positioned in the top-left corner.
The Service Editor’s default menu displays the Standard elements tab. To view advanced
or database elements, select the Advanced or Database tab located at the bottom-left
corner of the menu.
The Database tab is available only if the system is licensed for database integration.
To add an element to the call flow
1. Right-click the connector pin of the first element that you put on the canvas, and then select Insert.
2. In the shortcut menu of standard elements, select the element that you want to add. The element is
linked to the first one that you put on the canvas.
To access the shortcut menu of advanced or database elements, select Advanced or
Database on the standard elements shortcut menu. The Database tab is available only if
your system is licensed for database integration.
You can also drag the element that you want from the tool palette to the canvas. Position
the pointer over the connector pin of the existing element until a red box appears around
the connector pin, and then drop the new element onto the canvas.
Build a service by adding elements until the call flow is complete.
206
Copyright © 2014 ADTRAN, Inc.
619500001-1E
UCS Administrator Guide
Working with Elements to Build a Service
Using and deleting links
If you link two elements and then change your mind, you can delete the link and reuse the element in the
service.
To delete a link between two elements
1. Right-click the connector pin linking the two elements that you want to separate.
2. Select Delete link to delete the link.
When you delete a link between two elements, the elements are no longer connected on the canvas. At first
glance, one of the elements seems to have been deleted because it disappears from the place it occupied in
the call flow. The element is repositioned at the bottom-left corner of the canvas. From there, you can
connect it elsewhere in the call flow by linking it with another existing element.
To link existing elements
1. Select and drag from the connector pin to the icon of the element that you want to link.
2. Release the mouse button to link the elements.If you link an element and then decide that you no
longer want to include it in the call flow, you can delete the element from the canvas.
To delete an element from the canvas
1. Select the icon of the element that you want to delete to highlight the element.
Delete
2. Select Delete on the toolbar to delete the element from the canvas, or press the Delete key.
Creating loop-back links
A loop-back link returns a call to a preceding element in the call flow. Loop-back links are useful for
619500001-1E
Copyright © 2014 ADTRAN, Inc.
207
Customizing Services using Parameters
UCS Administrator Guide
repeating a set of menu options or for restating instructions to a caller who has failed to make a selection
on the phone keypad following a prompt.
To create a loop-back link
1. Select the connector pin and drag to the element icon that you want to loop back to.
2. Release the mouse to create the loop-back link.
3. Point to the connector link. The loop-back path is highlighted in red.
Loop-back path
Customizing Services using Parameters
You can use additional parameters in order to customize services. Parameters can be used in most elements
that accept input, such as email addresses, log entries, transfer numbers, or database comparisons.
Parameters can also be used in the Equals field in the Data Source Selector. For more information, refer to
Using the Data Source Selector on page 285.
Parameters can be used with the following elements:
•
•
•
•
•
•
The Assisted Transfer, Transfer Call, Deliver Messages, Notify Pager, and Send Fax elements.
The Send Email element.
The Text To Speech element.
The Compare Data element.
The Create Log Entry element.
The Select Extension.
208
Copyright © 2014 ADTRAN, Inc.
619500001-1E
UCS Administrator Guide
Validating Services
Note that parameters can be used to obtain a specific record from a database.
Parameter
Value
Description
-pm
Additional Parameters List
This is a comma separated list of additional
parameters that are passed to the service when it
executes. These values can be accessed within a
service definition as special Text values whose
names are Parameter1, Parameter2, and so on.
The first value in the list becomes the value of
Parameter1 and so forth.
In the service editor, parameters are not visible by default. Once enabled, you can select parameters for the
elements that use them.
To view parameters
1. From the Services navigation bar, right-click in the summary pane, select New > Service.
2. Select the service, right-click and select Open to open the Service Editor.
3. In the Service Editor, select View > Parameters to enable the Parameters. Once Parameters are
enabled, then parameter values are available for selection.
Validating Services
After you finish building your service, you can validate it. The Service Editor inspects the service for
logical errors or unresolved aspects of the call flow. If there is a problem with your service design, a
message box appears with information about the changes that you need to make.
To validate a service
1. On the toolbar, select the check mark.
Check mark
2. If the Service Editor message informs you that the service is valid, select OK. Otherwise, follow the
Service Editor’s suggestions about how to change your service to make it valid.
Troubleshooting Services
If you are having trouble running services, note that particular issues may be noted in the log files. The
following is a list of potential service warnings that may be noted in the System Errors and Warning logs.
To troubleshoot a warning, locate the log entry below, and note the possible causes of and solutions for the
619500001-1E
Copyright © 2014 ADTRAN, Inc.
209
Troubleshooting Services
UCS Administrator Guide
warning.
Not all errors and warnings necessarily require action. For more information on logs,
refer to Using the NetVanta UC Server Logs on page 308.
To view service warning logs
1. Select the Logs navigation bar to open the Logs menu. All logs are presented in the Content menu.
2. If the logs are not already sorted into categories, then double-click the Logs folder.
3. Select System Errors and Warnings to view the logs in that category.
4. Verify whether either of the following entries appear.
Log Entry
Possible Causes and Solutions
Failed to update %s's database
with the received fax. The fax will
be saved instead to the default
mailbox.
There was a problem communicating with the database defined in
the Receive Fax element.
Check your database connection parameters, and ensure that the
database is available.
The data source, %s, referenced in ServiceStateMachine when an element refers to a data source that
the element, %s, is unknown.
no longer exists. Verify the following:
1.The ODBC data source, if applicable, is correctly configured
2.The fields in the reference data source may have been changed
or deleted. Verify the data source configuration.
210
Copyright © 2014 ADTRAN, Inc.
619500001-1E
UCS Administrator Guide
Using Elements to Create Call Answering Services
12. Using Elements to Create Call Answering
Services
Elements are the building blocks of the services that you create for identities. By combining elements on
the canvas of the Service Editor, you design a call flow that routes incoming calls.
Elements are on the tool palette of the Service Editor. They are divided into three groups: standard,
advanced, and database. Each group has its own tab.
To access database information, the system must be licensed for database integration. If
you are not licensed for database integration, the Database tab is unavailable. For
more information, refer to Using Database Elements on page 289.
This chapter presents information about the individual elements that you use to build a service. This
chapter covers the following topics:
• Service Element Settings and Features on page 211
• Using Standard Elements on page 214
• Using Advanced Elements on page 234
If your system is licensed for database integration then you will also have a Database
elements tab available. For more information, refer to Using Database Elements on
page 289.
Service Element Settings and Features
This section describes the settings that affect the behavior of certain service elements and some global
features available in many service elements.
User Context and Service Elements
When you start a service, it begins by operating in the context of the user who owns the identity (for
example, the extension) that received the call. The different service elements access mailboxes and objects
that are related to this user context. You can change the user context by modifying the service.
The user context of the service is characterized by an authentication and a user profile (that is accessible
from the authentication).
A service is associated with an identity. When a service starts, the identity is used to locate a user profile
(the one that owns the identity). The user context is then established with the user profile that owns the
identity and the authentication that owns that profile.
Elements cannot change the user context. In particular, Transfer Call, Dial by Name, Dial by Extension,
619500001-1E
Copyright © 2014 ADTRAN, Inc.
211
Service Element Settings and Features
UCS Administrator Guide
and Select Extension, do not change the user context. The Select Extension element causes the selected
extension to be saved in the current call object so that it can be used by other elements.
Synchronizing Contacts
The Synchronize contacts mode is only available to users who have a client-side contact database, where
contacts are stored on a user's computer and not on a server like Microsoft Exchange. Examples of clientside contact databases include Microsoft Outlook (running in Internet Only Mode), Outlook Express, and
Windows Address Book.
The NetVanta UC Server cannot access contacts that are stored in client-side contact databases; therefore,
in order to perform real-time contact matching, this contact information must be copied and stored locally
on the server computer. Client-side contacts are synchronized with the server computer every time a user
starts or shuts down the NetVanta UC Client . If a user makes changes to their client-side contact database
while the NetVanta UC Client is open and they want the NetVanta UC Server to recognize these changes
without having to shut down and restart their NetVanta UC Client, the user can force a contact
synchronization by using Synchronize contacts.
To synchronize a user’s contacts to the NetVanta UC Server software
On the menu bar, select Tools > Synchronize contacts.
Selecting Values Within Elements Using the Value Selector
Use the value selector
feature available on some elements to specify the following types of values:
Literal values
For example, a number or piece of text
References to data files
For example, a fax, announcement, or greeting
References to database values
References that have been fetched from a database
System values
For example, caller ID
Strings of digits
Gathered by a Gather Digits element
For example, the Play Announcement element allows you to play a dynamic value, announcement,
greeting, or temporary recording to a caller that encounters the element in a service.
The values that are available using the value selector
212
depend on how your service and system are set
Copyright © 2014 ADTRAN, Inc.
619500001-1E
UCS Administrator Guide
Service Element Settings and Features
up. For example, to use database values, a database element type must be included in the service. To
specify Gather Digits values, a Gather Digits element must be included in the service.
To use database values and elements, your system must be licensed for database
integration.
Allowing Callers to Make Temporary Recordings Within a Service
Some elements allow you to select audio files such as announcements, greetings, database values, or
temporary recordings. Using the Record Announcement element, a caller can record audio into a
temporary recording, and elements like Play Announcement can be used to play the audio.
Temporary recordings exist only for the duration of the service. That is, when a service starts, no
temporary recordings exist. If a caller makes a temporary recording, the recording is stored in a temporary
file that can be played by another element. All temporary recordings are discarded when the service ends.
Up to ten temporary recordings can be created.
Temporary recordings can be referenced in the following elements:
•
•
•
•
•
•
Play Announcement element
Menu element
Send Email element (custom)
Record Announcement element
Add Data element
Update Data element
In order to use the Add Data and Update Data elements, your system must be licensed
for database integration.
Temporary recordings can be used with a Send Email element, or Add Data and Update Data elements
to record audio for form-filling applications, such as requesting quotes or answering general customer
service questions.
619500001-1E
Copyright © 2014 ADTRAN, Inc.
213
Using Standard Elements
UCS Administrator Guide
Using Standard Elements
Select the Standard tab on the tool palette to view the standard elements. The following table gives a brief
description of each available element.
Hang-up Element on page 214
Terminates the call
Play One-time Message Element
on page 215
Allows you to leave a personalized message for a specific caller
Play Announcement element on
page 215
Plays a prerecorded announcement, greeting, temporary recording, or audio
database file to callers
Menu Element on page 218
Allows callers to make a selection using the telephone keypad
Flow Control Element on page 219 Controls the call flow according to phone number or time and day restrictions.
Dial by Extension Element on
page 220
Allows callers to select an extension and be transferred to it
Dial by Name Element on
page 221
Enables callers to dial and be transferred to a user’s extension by entering the
user’s name
Voicemail element on page 222
Provides basic voicemail service
Deliver Messages element on
page 223
Delivers voice or fax messages from a selected mailbox to a specified number
Transfer Call element on page 224 Transfers the call to another number or extension
Assisted Transfer element on
page 225
Allows call transfer recipients to accept or deny calls based on the caller’s
recorded name
Notify Pager element on page 226 Enables you to send a message to a pager number
Send Email element on page 226
Allows you to be notified by email when a caller moves successfully through the
Send Email element
Send Fax element on page 228
Allows you to send a list of faxes
Receive Fax element on page 230 Receives a fax and places it in a mailbox
Fax-on-demand element on
page 232
Captures a caller’s number and faxes the selected document to a caller
The Dial by Extension and Dial by Name elements are available only to
Administrators, and not to Personal Business Assistant (PBA) users.
Hang-up Element
The Hang-up element terminates the current incoming call. If a call is
present, this element terminates the call.The same result occurs if a call
flow leads to an unconnected connector pin.
214
Copyright © 2014 ADTRAN, Inc.
619500001-1E
UCS Administrator Guide
Using Standard Elements
Play One-time Message Element
Including the Play One-time Message element in a service allows you
to leave a personalized message for a specific caller. Once a message has
played, the call flow follows the Message played connection. Calls for
which there is no customized message follow the No message for
current caller connection. Enable the Stop when key pressed button to
stop the message when the caller presses a key. Enable the Play entire
message button to make sure that the caller listens to the message in its
entirety.
Play Announcement element
The Play Announcement element plays prerecorded audio to callers
including audio files stored in a database, announcements, greetings, or
temporary recordings. You can select one of the prerecorded
announcements included with the NetVanta UC Server, or one that you
recorded. Alternatively, you can record one as you build the call flow.
For the Play Announcement element to function, there must be a sound card installed
on the server computer.
619500001-1E
Copyright © 2014 ADTRAN, Inc.
215
Using Standard Elements
UCS Administrator Guide
The greeting type is only enabled if Greetings was selected for the Play mode.
Database Values
Supports playing audio stored in a Data Source. The audio must first
be fetched using a Fetch Data element on page 290, or a Dial for Data
element on page 291. Database values come from a Data Source
element and are not directly affected by user context.
Note: Your system must be licensed for database integration in order
to use this mode. In the Service Editor, if you have the Database tab of
elements available, then your system is licensed for database
integration.
Announcements
Announcements come from the list that belongs to the user profile in
the user context. For more information, refer to User Context and
Service Elements on page 211.
Greetings
You can select [Called Extension] or a specific user's greeting. The
[Selected Extension] mode is available to Administrators only. For
more information, refer to the Select Extension Element on page 235.
If you select Greetings, then select a greeting type, as described
below. If the greeting selected is [Called Extension], it is
recommended to include a Play Announcement element before in
the call flow, because the Administrator application has no greetings.
Temporary Recordings
Temporary recordings can be used to record audio temporarily, after a
service has started. Use the Record Announcement Element on
page 238 to record the audio for a specific temporary recording. The
recordings are then stored in a temporary file, which can be played by
another element that plays audio such as the Play Announcement
element. All temporary recordings are discarded when the service
ends. Up to 10 temporary recordings can be made. For more
information on temporary recordings, refer to Allowing Callers to Make
Temporary Recordings Within a Service on page 213.
Active Greeting
This is the default greeting.
Internal Greeting
Internal greetings are intended for callers calling from extensions at
your workplace.
External Greeting
External greetings are intended for callers calling from outside your
workplace.
Out-of-Office Greeting
Out-of-Office greetings are typically enabled when you are out of the
office for an extended period of time.
Mailbox Identifier
The mailbox identifier consists of your name. This greeting is typically
used when callers are transferred to your extension.
Several additional options are available in addition to the greeting type:
• The Play status message mode preempts the user’s greeting message with a status message and
cannot be interrupted.
• The Stop when key pressed button allows a caller to stop the message by pressing a key.
• The Play entire message button ensures that the caller listens to the message in its entirety before
further action can be taken.
216
Copyright © 2014 ADTRAN, Inc.
619500001-1E
UCS Administrator Guide
Using Standard Elements
To record an announcement for a Play Announcement element
1. On the Play Announcement element, select
. The Select Announcement menu box appears.
2. In the Select Announcement menu box, enter a name for the announcement that you want to record.
3. Select Select to start the NetVanta UC Client Audio Editor.
4. In the tool bar at the top of the NetVanta UC Client Audio Editor, select
menu box appears.
. The Record Audio
5. From the Insert new audio drop-down menu, select at the beginning .
6. Select the button for the computer audio device. The button is enclosed by a dotted line.
7. Select
grey.
and then record the message. As you record, the clock runs and the red record button turns
8. Select
when you are finished recording.
9. Select OK to keep the announcement and return to the NetVanta UC Client Audio Editor.
10. In the NetVanta UC Client Audio Editor menu bar, select File > Update to update the recorded
audio announcement.
To play a greeting from a mailbox using a Play Announcement element
1. On the Play Announcement element, select the value selector
on the Play field.
2. Select Greetings > [Called Extension] to fetch the greeting from the user profile in the current user
context.
To enable the Play status message mode for greetings
On the Play Announcement element, enable the Play status message button.
Make sure that the Play status message mode is enabled on a corresponding Voicemail
element (refer to Voicemail element on page 222).
To play temporary recordings
On the Play Announcement element, select the value selector
select one of the ten temporary recordings available.
, select Temporary Recordings, and
You must use the Record Announcement element in the service in order for a caller to
record the temporary audio file. For more information on temporary recordings, refer to
Allowing Callers to Make Temporary Recordings Within a Service on page 213.
619500001-1E
Copyright © 2014 ADTRAN, Inc.
217
Using Standard Elements
UCS Administrator Guide
Menu Element
The Menu element allows you to make an announcement and then
direct the call flow based on the DTMF input received when a caller
presses a number on the telephone keypad.
This element can play an announcement, database value, greeting, or
temporary recording before it takes the specified menu action. It
retrieves announcements from the set of announcements that belong to
the user profile in the user context. Database values come from a Data
Source element and are not affected directly by user context. The service
retrieves greetings from an explicit user, if such a user is
specified.Temporary recordings are created using the Record
Announcement element, to record the audio for a specific temporary
recording after a service has started, which is discarded after the service
ends. For more information on temporary recordings, refer to Allowing Callers to Make Temporary
Recordings Within a Service on page 213.
When Allow dial by Extension is enabled, the caller can dial a user by entering the user’s extension.
When Allow dial by Name is enabled, the caller can dial a user by entering the first few characters of a
NetVanta UC Server user’s last name. For more information on the operation of dial by name, refer to Dial
by Name Element on page 221.
Callers are allowed to try three times to select from the menu. If they make another attempt, they follow
the Too many attempts connector pin.
When callers press a selection key, they move through the connector pin to the next element, depending on
their choice. When you are finished setting selection keys, you can connect an element for each selection
key that you set.
To set selection keys on a Menu element
1. In the first On drop-down menu, select the number that you want. The number one appears by default.
2. Select Add to add an On drop-down menu for setting additional keys. The NetVanta UC Server enters
the key in numerical sequence. You can also select a key from the drop-down menu. You can set a
maximum of 12 keys. Keys range from one to nine, then include zero, *, and #.
3. To delete a selection key on a Menu element, select the
to the left of the key that you want to
delete. Remember to change the announcement associated with the menu so that it reflects the
changes.
For information about recording an announcement for the Menu element, refer to To
record an announcement for a Play Announcement element on page 217.
218
Copyright © 2014 ADTRAN, Inc.
619500001-1E
UCS Administrator Guide
Using Standard Elements
Flow Control Element
The Flow Control element acts as a decision tree, and allows for two
different comparison methods: matching based on phone numbers or on
time of day and date. The call will be routed to the next element based
on a successful or failed match (a failed match routes the call through
the Otherwise connector pin). You can select either Phone Numbers or
Times, which determines the comparison element.
For example, you could use the Flow Control element with a Receive
Fax element to call your cell phone, send a pager notification, or send an
email to your personal email address, to notify you when you receive a
fax from a particular number after business hours.
Routing incoming calls based on phone numbers
The NetVanta UC Server compares the incoming caller ID to those telephone numbers included in the
Flow Control element list. Telephone numbers in the list can be entered manually, or they can be pulled
from your contact address book by using the value selector
.
For more information, refer to Selecting Values Within Elements Using the Value Selector on page 212.
For information about contact address book synchronization, refer to Synchronizing Contacts on page 212.
The NetVanta UC Server compares the numbers of incoming calls with those included in the list.
• If the numbers match, the call is routed to the subsequent element that you specify.
• If the numbers do not match, the call moves to the element connected to the Otherwise connector pin.
To set call flow according to an unknown phone number category
1. On the Flow Control element in the Compare drop-down menu, select Phone Numbers.
2. Select the value selector
.
3. Select Contacts > Unknown.
4. Select one of the following categories:
• Unknown Number
• Private/Blocked Number
• Out-of-area Number
To enter a phone number manually
1. On the Flow Control element in the Compare drop-down menu, select Phone Numbers.
2. Select the telephone
619500001-1E
button to open the Enter Phone Number menu box.
Copyright © 2014 ADTRAN, Inc.
219
Using Standard Elements
UCS Administrator Guide
3. Enter the desired phone number in the Telephone number field, and select OK.
You can also enter a phone number by right-clicking the blank field in the Flow Control
element and selecting New from the drop-down menu.
You can specify days of the week and a time range. For time restrictions,
if either the From or To field is empty, a 24-hour period is assumed.
•Calls received within the specified time range are directed through the
Times connector pin.
•Calls received outside the specified time range move to the element
connected to the Otherwise connector pin.
To set call flow according to time restrictions
1. On the Flow Control element from the Compare drop-down menu, select Times.
2. Enable the check boxes for the days of the week when the restrictions apply.
3. In the From field, select the hour and minutes when the time restriction begins. Use a 24-hour clock.
4. In the To field, select the hour and minutes when the time restriction ends. Use a 24-hour clock.
Dial by Extension Element
The Dial by Extension element accepts DTMF tones that a caller enters
for an extension. If the tones match a valid extension, the call is
transferred to the specified extension, and the Selected Extension and
Selected User Name system values are changed to the extension and the
user name owning that extension. Since the call has been transferred, no
call is present after leaving the Valid extension connection. The valid
extension is a user account as well as any extensions defined in the
extensions tab of the options menu.
If you enable the On single digit check box, you can connect an Advanced Menu element to provide
single-digit entry processing for multi-function entry. If a caller enters an invalid extension, the call leaves
the element by the Otherwise connector pin.
In order to transfer callers using the the Dial by Extension element, you must define the
list of identities which the calls can be transferred to. For more information, refer to
Configuring Non-user Extensions and Identities on page 37.
220
Copyright © 2014 ADTRAN, Inc.
619500001-1E
UCS Administrator Guide
Using Standard Elements
The Dial by Extension element is not available for PBA users.
Dial by Name Element
The Dial by Name element allows callers to dial a user by entering the
digits that correspond to the first few letters of either the person’s first or
last name. The name is compared to the list of users defined by the
contact list. The alphabetic characters correspond to the numerical digits
on the caller’s telephone keypad. For information on selecting the order
in which callers enter a name, refer to Selecting the Order for Dial by
Name Dialing on page 36.
On certain phone models, the keys on which the letters Q and Z appear can differ. The
Dial by Name element works whether the letter Q corresponds to the 0 or the 7 key, and
whether the letter Z corresponds to the 0 or the 9 key.
Callers hear a standard announcement prompting them to spell either the first or last name. A caller can
attempt to make an exact match of a name by pressing the # key after entering the digits. This is useful for
matching shorter names such as Li. If a caller stops entering digits, and if the digits entered match five or
fewer names, then the caller is presented with a list of names, and is prompted to make a selection. If more
than five names match the digits entered, then the caller is prompted with unable to match the dialed name,
and is prompted to try again.
If the name entered matches a NetVanta UC Server user, the call exits the element by the Valid name
connector pin, and changes the Selected Extension and Selected User Name system values to the
NetVanta UC Server user’s extension and name.
If the digits that the caller enters do not match a valid user or the caller does not enter any digits, the call
moves to the element connected to the Otherwise connector pin. The caller is allowed three attempts to
enter a valid user before the call exits the element.
The alphabetical characters are represented by numerical digits on the caller's telephone key pad. The
following is a list of the DTMF key to alphabetical character mappings on a standard telephone:
619500001-1E
Characters
Dial Pad Number
ABC
2
DEF
3
GHI
4
Copyright © 2014 ADTRAN, Inc.
221
Using Standard Elements
UCS Administrator Guide
JKL
5
MNO
6
PQRS
7
TUV
8
WXYZ
9
Dial by name also supports extended ASCII for users whose names have accented letters. The following is
a list of the accented vowels and the corresponding dial pad number and equivalent letter on the dial pad:
Accented Letter
Dial Pad
Number(s)
Equivalent Dial Pad
Letter
à/À, â/Â, ä/Ä,
2
A
è/È, é/É, ê/Ê, ë/Ë
3
E
î/Î, ï/Ï
4
I
ô/Ô
6
O
ù/Ù, ü/Ü, û/Û
8
U
ÿ/Ÿ
9
Y
ç/Ç
2
C
æ/Æ
2 and 3
A and E
œ/Œ
6 and 3
O and E
The Dial by Name element is not available for PBA users.
Voicemail element
The Voicemail element provides basic voicemail service. It plays the
mailbox greeting and can take a message from a caller. If the caller
presses the access number for mailbox management, the Voicemail
element allows mailbox management for the specified mailbox.
If the Mailbox selection is Called Extension, the mailbox is the one
selected using a Select Extension element. In this case, the Select
Extension element must come before the Voicemail element in the call
flow. If the Mailbox selection is Selected Extension, it refers to the
identity selected in the last successful Select Extension element in the service. If there was none, or the
last one failed, it defaults to be the same as Called Extension.
The Play status message mode is enabled by default. The status message pre-empts the user’s greeting
message and cannot be interrupted. Make sure the Play status message mode is also enabled on a Play
Announcement element, if required.
222
Copyright © 2014 ADTRAN, Inc.
619500001-1E
UCS Administrator Guide
Using Standard Elements
Administrators can specify the mailbox where messages are stored.
A number of system-wide options apply to the Voicemail element. These can be found on the Voicemail
tab under Options on the Tools menu. For information about administrator options for the Voicemail
element, refer to Setting Voicemail Options on page 27.
Deliver Messages element
The Deliver Messages element sends voice and fax messages from a
selected mailbox to the phone numbers that you specify. Called
Extension refers to the identity originally called. Selected Extension
refers to the identity selected in the last successful Select Extension
element in the service. If there was none, or the last one failed, it
defaults to be the same as the Called Extension.
The NetVanta UC Server calls the sequence of numbers, in the order that
you specify, until the call is answered. The call recipient must enter the
password associated with the selected mailbox to retrieve messages over
the phone. You can limit deliveries to new messages or allow full
mailbox management.
Specify call numbers by using the telephone
button, or use the
value selector
. For more information, refer to Selecting Values Within Elements Using the Value
Selector on page 212. For information about contact address book synchronization, refer to Synchronizing
Contacts on page 212.
The Mailbox drop-down menu allows you to specify the mailbox from which the messages are sent.
Message delivery is provided only for messages left by incoming callers. It does not
apply when a caller forwards, replies to, or sends a message.
To specify phone numbers for the Deliver Messages element
1. Select the telephone
button.
2. In the Enter Phone Number menu box, enter a phone number in the Telephone number field.
You can also enter a phone number by right-clicking inside the Call number(s) field
and selecting New.
3. If you want to specify an account code, select the Use account code check box and enter an account
code in the field.
4. Select OK. The target number appears in the Call Number(s) field. The NetVanta UC Server calls the
target number when it attempts to deliver messages.
619500001-1E
Copyright © 2014 ADTRAN, Inc.
223
Using Standard Elements
UCS Administrator Guide
5. Repeat steps 1 to 3 to add more target numbers to the field. The NetVanta UC Server calls each
number in the field, according to the order you specify, until the call is answered.
Refer to Selecting Values Within Elements Using the Value Selector on page 212 to
select a dynamic value for the element.
To change the sequence of target phone numbers listed for Deliver Messages
1. Select the number whose ranking you want to change.
2. Select an arrow
to arrange the order of the numbers in the field.
To delete a target phone number from the list for Deliver Messages
1. Select the telephone number that you want to delete.
2. Select the trash can
.
Transfer Call element
The Transfer Call element transfers calls to another number.
If the transfer fails, the caller leaves the element through the Otherwise
connector pin. The NetVanta UC Server automatically adds a Voicemail
element to the Otherwise connector pin if you do not add an element.
The telephone number that you specify is subject to the outgoing call
restrictions that are specified.
To specify a transfer target for the Transfer Call element
1. In the Transfer call to section, select one of the following:
• This number—if you want to specify a number to transfer callers to
• The operator—if you want to transfer callers to the operator
2. If you selected this number, do one of the following:
• Use thevalue selector
to specify a value.
• Select the telephone
button, and enter the number where you want to transfer the caller.
• Right-click the This number field, select New, and enter the phone number that you want.
For information about selecting a dynamic value using a value selector
, refer to
Selecting Values Within Elements Using the Value Selector on page 212. For
information about contact address book synchronization, refer to Synchronizing
Contacts on page 212.
224
Copyright © 2014 ADTRAN, Inc.
619500001-1E
UCS Administrator Guide
Using Standard Elements
Assisted Transfer element
The Assisted Transfer element allows a transfer call recipient to accept
or deny a call based on the caller’s recorded name..
You can enter the telephone number to which you want to transfer calls.
Specify the conditions under which you want to prompt callers to record
their name. When you enter a list of telephone numbers, calls are
transferred to the numbers in the order that they appear. You can use the
arrow
buttons to change the order of numbers in the list
A call moves to the element connected to the Call is accepted connector
pin when the transfer recipient answers and accepts the call. A call that
is answered, and then declined by the recipient, moves to the element
connected to the Call is denied connector pin.
If the call is not answered, is answered but not accepted within 10
seconds, or is transferred to an invalid number, the call moves to the
element connected to the Otherwise connector pin.
The default is to wait 20 seconds for an answer before recalling an assisted transfer
attempt.
To specify a call number for the Assisted Transfer element
1. In the Call number(s) section, select the telephone
menu box.
button to open the Enter Phone Number
You can also enter a phone number by right-clicking the Call number(s) field and
selecting New.
2. Enter the telephone number to which you want to transfer callers.
3. From the Prompt drop-down menu, select one of the following prompt types:
Never
Never prompts the caller to record a name.
Always
Always prompts the caller to record a name.
Unknown caller
Prompts the caller to record a name if there is no match in the contact list.
Use the value selector
to select a dynamic value for the element. For more
information, refer to Selecting Values Within Elements Using the Value Selector on
page 212. For information about contact address book synchronization, refer to
Synchronizing Contacts on page 212.
619500001-1E
Copyright © 2014 ADTRAN, Inc.
225
Using Standard Elements
UCS Administrator Guide
Notify Pager element
The Notify Pager element allows you to send a message from the
NetVanta UC Server to a specified pager number.
The message sent can be a numeric message with an attached caller ID.
To specify a pager number for the Notify Pager element
1. In the Pager number to dial section, do one of the following:
• Use the value selector
to specify a value. For more information, refer to Selecting Values
Within Elements Using the Value Selector on page 212. For information about contact address
book synchronization, refer to Synchronizing Contacts on page 212.
• Select the telephone
button and enter the pager number that you want
• Right-click the Pager number to dial field, select New, and enter the pager number that you want
2. Enable the Wait check box if you want to specify a pause before paging, and in the Wait...seconds
then field, enter the number of seconds that you want the pause to last.
3. In the Send Message field, enter a prefix that you want as part of the message, before caller ID is
displayed on the pager. Numeric prefixes and suffixes are useful to identify calls that are delivered.
The prefix helps you differentiate between callers whose messages you have instructed the NetVanta
UC Server to deliver, and other callers to the paging system. For example, you can use a prefix such
as 123 or 000 to signal deliveries.
4. Enable the Add Caller-ID check box if you want to have caller ID sent with your messages.
5. In the Append...to message field, enter information that is part of the messages sent following any
caller ID information displayed on your pager.
Send Email element
Using the Send Email element, you can specify the NetVanta UC Server
to notify you, or someone else, by email when a caller moves
successfully through the Send Email element. For example, you could
have an email sent to your personal email address when a caller leaves a
voice message for you after hours, or when you receive a fax. You can
specify the type of message that you want to send and the address where
you want to send it, including multiple email addresses. You can also
send attachments with the email notification. For example, you could
attach a fax of a property listing, or audio describing a property, or some other type of fax or audio specific
226
Copyright © 2014 ADTRAN, Inc.
619500001-1E
UCS Administrator Guide
Using Standard Elements
to your particular business.
To use the Send Email element, ensure that you have a Microsoft Exchange Server or
SMTP Server configured.
Selecting a Custom notification allows you to enter or select information that you want to include in the
notification. You can combine typed text and selected values in the Subject and Body sections of the
element. In the call flow, the text and values are linked together. From the Attach field you can also select
attachments to send with the notification, such as announcements, greetings, temporary recordings, faxes,
or database values (for example, audio or fax).
Temporary recordings are created using the Record Announcement element. Using the Send Email
element with a temporary recording can be used as a form filling application, such as requesting quotes, or
answering general customer service questions, and so on. For more information on temporary recordings,
refer to Allowing Callers to Make Temporary Recordings Within a Service on page 213.
To specify the NetVanta UC Server to send an email when you receive a voicemail
message
1. Select one of the following from the Send drop-down menu:
• Entire Message—sends an email of all the information associated with the voice message that you
received, including the voice message (as a .wav attachment)
• Notification—sends only the information associated with the voice message
• Short Notification—sends only some of the information associated with the voice message. This
mode is useful for small menu devices, such as cell phones, that are capable of receiving email.
• Custom—allows you to add information that you want to include with the email notification. This
includes sending attachments such as announcements, greetings, temporary recordings, faxes, or
database values (for example, audio or fax).
• Custom With Message—allows you to send a custom email with the latest mail message
Custom notification sends an email notification of calls to a user’s mailbox, whether
the caller left a message or not. All other types of notifications send email notifications
only when a caller leaves a message.
2. In the To email address field, enter the email address where you want the notification sent. If you
want to enter more than one email address, enter them with a semicolon separating each one.
Refer to Selecting Values Within Elements Using the Value Selector on page 212 if you
want to select a dynamic value for the To email address field. You can enter only one
dynamic value.
Ensure that you enter a valid email address. The NetVanta UC Server does not
authenticate email addresses used with the Send Email element.
619500001-1E
Copyright © 2014 ADTRAN, Inc.
227
Using Standard Elements
UCS Administrator Guide
To specify a custom notification
1. From the Send drop-down menu, select Custom.
2. In the To email address field, enter the email address where you want the notification sent. Use a
semicolon to separate multiple email addresses.
3. In the Subject field, enter a subject for the email, or use the value selector
4. In the Body field, enter the body of the email, or use the value selector
to select a value.
to select a value.
Refer to Selecting Values Within Elements Using the Value Selector on page 212 to
select a dynamic value for the To email address, Subject, Body, or Attach field. You can
enter only one dynamic value.
5. In the Attach field, select a database value (audio or fax), fax, announcement, greeting, or temporary
recording.
Send Fax element
The Send Fax element allows you to send a list of faxes to a specified
fax number. .
You can enter the fax number to which you want to send a fax message.
A cover page can accompany your fax message and you can select the
fax documents to include in the list. You can choose to send a list of
faxes, the latest fax in your mailbox, all faxes in your mailbox, or all
unread faxes in your mailbox.
To specify a fax number for the Send Fax element
1. On the Send Fax element, select the telephone
button.
2. In the Enter phone number field, enter the fax number where you want the fax messages sent to.
3. If you want to specify an account code, enable the Use account code check box and enter an account
code in the field.
4. Select OK.
Refer to Selecting Values Within Elements Using the Value Selector on page 212 to
select a dynamic value for the element. For information about contact address book
synchronization, refer to Synchronizing Contacts on page 212.
228
Copyright © 2014 ADTRAN, Inc.
619500001-1E
UCS Administrator Guide
Using Standard Elements
To specify a list of faxes for a Send Fax element
1. Select List of Faxes from the Send drop-down menu.
2. Follow all the steps in To specify a fax number for the Send Fax element on page 228.
3. In the To field, select the value selector
The fax appears in the To field.
and select the database value or fax that you want to send.
4. Repeat step 3 until all the faxes that you want are added to the To field.
To include a cover page for the Send Fax element
1. On the Send Fax element, enable the Include cover page check box, which opens the Fax Cover
Page Details field.
2. Select the browse button to open the Select Cover Page field.
3. Select the fax cover page that you want to include.
4. Select Select. The name of the fax cover page appears in the Select cover page field.
5. In the Fax Cover Page Details field, enter information about the fax recipient, the subject of the fax,
and comments that you want to include on the cover page. You can use a combination of typed text
and dynamic values.
Refer to Selecting Values Within Elements Using the Value Selector on page 212 to
select dynamic values for the cover page information.
6. Select OK.
To send faxes in your mailbox using a Send Fax element
1. From the Send drop-down menu, select one of the following:
• Latest Fax in Mailbox
• All Faxes in Mailbox
• All Unread Faxes in Mailbox
2. Follow all the steps in To specify a fax number for the Send Fax element on page 228.
3. If you want to include a cover page, follow all the steps in To include a cover page for the Send Fax
element on page 229.
4. From the From drop-down menu, select the mailbox from which you want to send the fax. Called
Extension refers to the identity originally called. Selected Extension refers to the identity selected in
the last successful Select Extension element in the service. If there was none, or the last one failed, it
defaults to be the same as the Called Extension.
619500001-1E
Copyright © 2014 ADTRAN, Inc.
229
Using Standard Elements
UCS Administrator Guide
Receive Fax element
The Receive Fax element receives incoming faxes and places them into
a specified mailbox or database. Use the Receive Fax element along
with other elements in a service to customize receive fax behavior.
The default behavior for admin users using an attendant service is that
the NetVanta UC Server detects the standard CNG tone that signals a
fax, the NetVanta UC Server receives the fax, and then stores it in the
default mailbox. An office administrator can then send received faxes by
email to a user’s mailbox.
The following table describes the configurable options in the
Receive Fax element.
Save Fax to Mailbox
Selecting this mode enables you to save incoming faxes to your mailbox.
Called Extension
Saves the fax to the mailbox of the extension number that the caller
called.
Selected Extension
This mode refers to the Select Extension element, which is available to
admin users only. If an admin user creates a service using the Select
Extension element, and makes this service available to other users by
saving it to the Shared folder, then PBA users will have this mode
available. However, PBA users should not select this mode when
creating their own service. If an admin user selects this mode then they
must place a Select Extension Element on page 235 somewhere before
the Receive Fax element in the service.
User Extension
Note: Only the administrator can select a specific user's mailbox.
Save Fax to Database
Selecting this mode enables you to save incoming faxes to a database, if
your system is licensed for database integration. If you have the
Database tab available in the NetVanta UC Client Service Editor, then
you can use the Data Source Selector to save incoming faxes to a
database. For more information, refer to Using the Data Source Selector
on page 285.
Note: If the Save Fax to Database mode is selected and the database is
unavailable, the incoming fax is delivered to the default mailbox.
Otherwise
If a problem occurs receiving a fax, then the call exits through the
Otherwise connector pin, and the fax is not received in the selected
mailbox.
Depending on the configuration, there may be a dedicated fax number or identity to receive faxes. In this
case you may want to use the Receive Fax element in a service to initiate some behavior, such as storing
the fax in a database. Alternatively, you may have a shared voice and fax number or identity, where you
receive voice and fax messages on the same identity or extension. If you are using a shared voice and fax
number, then you may want to create a Receive Fax service, for example, in order to receive notifications
that you have received a fax.When the Receive Fax element is used in a voice service, it's typically placed
after a Menu Element on page 218. Callers are instructed using a Play Announcement element on page 215
that they can press a key on the telephone dialpad to send a fax. For example:
230
Copyright © 2014 ADTRAN, Inc.
619500001-1E
UCS Administrator Guide
Using Standard Elements
"If you would like to send a fax, please press 5 and then press the Send button on your fax machine."
When the Receive Fax element is used in a dedicated fax service it is typically the first element in the
service, and it can be combined with other elements to create a custom fax service, such as saving the fax
to a database, or receiving notifications of the received fax.
The Receive Fax service has additional requirements beyond regular service requirements. If you are
using the same identity to receive both voice and fax messages, then you may want to use the Receive Fax
element to create a specific Receive Fax service, for example, to send a notification to a pager, a phone
number, or an email address to notify you that you’ve received a fax. The following is a list of
requirements for a Receive Fax service:
• The Receive Fax service must be called “Receive Fax”.
• The Receive Fax service must contain a Receive Fax element.
• The Receive Fax element must appear as soon as possible within the service, typically the first element
of the service.
• You do not need to activate the Receive Fax service. When a fax call comes in, your active service will
be initiated. When the NetVanta UC Server hears the fax tone, it automatically stops the regular active
service and activates the Receive Fax service.
• The Receive Fax service must be saved in one of the following two locations:
• The shared folder so that it is available to all users in the system (that is, \Services\Shared\Receive
Fax)
• The user's root folder so that it is only available for that user (that is, \Services\Receive Fax)
In order to receive a notification of a received fax you can follow the Receive Fax element in a Receive
Fax service with any or all of the following elements:
• Send Email element
• Deliver Messages element (to send a phone message)
• Notify Pager element
If you want to specify the days of the week or times of day when you want notifications sent, or specify
from which phone numbers you want to be notified of a received fax, then use the Flow Control Element
on page 219.
The following example shows how you might use the Receive Fax element in a Receive Fax service to
notify you during particular days or times, that an incoming fax has been received from a specific fax
number. The example below illustrates that when a fax is received during business hours from a specific
number, then notifications are sent to the user’s cell phone, pager, and personal email account.
619500001-1E
Copyright © 2014 ADTRAN, Inc.
231
Using Standard Elements
UCS Administrator Guide
To specify a general mailbox
1. While signed on to the NetVanta UC Client as an administrator, select Tools > Options.
2. Select the Operator Definition tab.
3. Select a mailbox from the Default Mailbox drop-down menu.
4. Select OK.
To troubleshoot any problems with the Receive Fax element, refer to Troubleshooting
Services on page 209.
Fax-on-demand element
The Fax-on-demand element allows the NetVanta UC Server to send a
fax to callers who move through this element. You can select the fax
document to be made available and a cover page to accompany the fax.
Some callers might cancel their request. You can add an element to the
service to handle such cases and route the call to the next element in the
call flow. For information about configuring fax specifications for the
Fax-on-demand element, refer to Setting Fax Message Delivery
Options on page 29.
To select a fax document for a Fax-on-demand element
On the Fax-on-demand element, select the value selector
to select a fax document or dynamic
database value. The name and button of the document or value appear in the Fax document to send dropdown menu.
To preview a fax document that you selected, select the [...] button in the Fax document
to send section. The preview fax button works only with a real fax, not a database
reference.
To select a fax cover page to accompany the fax document for a Fax-on-demand element
1. On the Fax-on-demand element, enable the Include cover page check box.
2. In the Fax Cover Page Details menu box, select the Browse
button.
3. Select a fax cover page.
4. Select Select. The cover page title appears in the Select cover page file field of the Select Cover
Page menu box.
232
Copyright © 2014 ADTRAN, Inc.
619500001-1E
UCS Administrator Guide
Using Standard Elements
5. In the Subject and Comments fields, enter information that you want to include on the fax cover
page.
6. If you want to include dynamic information in the Subject and Comments fields, use the value
selectors
.
You can include both text and value information in the Subject and Comments fields of
the Fax-on-demand element.
7. Select OK.
619500001-1E
Copyright © 2014 ADTRAN, Inc.
233
Using Advanced Elements
UCS Administrator Guide
Using Advanced Elements
Select the Advanced tab on the tool palette to view the advanced elements. The following table gives a
brief description of each available element.
Select Extension Element on page 235 Waits for callers to enter an extension number using the
telephone keypad; can be used for selecting mailboxes
Record Announcement Element on
page 238
Allows callers with user accounts to record over existing
announcements or greetings, create temporary recordings, or
record into a database, using a remote telephone
Take Message Element on page 241
Triggers the recording of an incoming message for storage to
a mailbox
Advanced Menu Element on page 242
Allows callers to make a selection using the telephone keypad
Manage Mailbox Element on page 242
Allows callers to retrieve messages remotely
Change Mailbox Password Element on Allows users to change their mailbox password
page 243
Verify Password Element on page 243
Allows the service to request a password from callers and
ensure that a given password matches a specified one or the
password for a particular mailbox
Loop Counter Element on page 244
Allows you to limit the number of times the call flow will
execute a path in the call flow
Text To Speech Element on page 245
Reads text to the caller
Gather Digits Element on page 245
Allows users to keep track of information that is entered by
callers
Compare Data Element on page 246
Allows users to compare patterns of data and directs call flow
accordingly
Create Log Entry Element on page 247 Allows users to capture and export detailed call log entry
information
Generate Tones Element on page 250
Enables a service to insert a dual tone multi-frequency
(DTMF) tone to the current call.
Queue Outdial element on page 251
Enables a service to launch an outdial request after a
specified period of time.
Execute Program Element on page 253 Enables a service to launch an external program.
Wait for Silence Element on page 254
Enables an outdialing service to wait for a period of silence.
Detect Remote Party Element on
page 255
Detects whether a call is answered by a person, an answering
machine, or a fax machine, typically during an outdial service.
Change Voice Element on page 256
Changes the voice used by elements in the service’s call flow
The Select Extension, and Execute Program elements are available to administrators
only and not to PBA users. However, admininistrator users can create shared services
that contain these elements, and these services can then be assigned by a PBA user to
one of their identities.
234
Copyright © 2014 ADTRAN, Inc.
619500001-1E
UCS Administrator Guide
Using Advanced Elements
Select Extension Element
The Select Extension element is typically used in services to be shared
by several users.
Callers can be prompted to enter an extension number using their
telephone keypad. When a caller enters a valid extension number, the
call is routed to the next element in the call flow.
Alternatively, an extension number can be selected based on some
information automatically provided, such as the called number, or the
caller ID number. The call information provided is compared to
information in a database, and the call is routed accordingly. The Select
Extension element validates the information provided. For example, if
you use the Voicemail element, and choose Selected Extension within the Voicemail element, then you
must have a Select Extension element in the service to provide the selected extension number.
You can use the Select Extension element to change the Select Extension system value to a different
identity number. The element also changes the Selected User Name system value to the user name
associated with the new valid identity number. The Select Extension element works with several elements
including the Manage Mailbox, Verify Password, and Take Message elements, and generally works with
any element that can reference system values.
You can select an identity number from a Data Source value using the Database Values mode. To access
this mode, first select the From button, then select the value selector
and select Database Values.
When using this mode, you must include a database element (for example, Fetch Data, Dial for Data,
Move Current Row, or Prompt for Current Row) in the service that indexes the Data Source value that
you wish to use. For example, use a database element to verify the password before the Verify Password
element in a call flow, so that you can reference it in the Verify Password element’s Data Source selector.
• The Select Extension element is available to administrators only. However, an administrator can create
a service that uses the Select Extension element, and then share the service so that it is available to PBA
users.
• Ensure that the Data Source value used is a number data type, since only Data Source values of this type
can be selected.
Data Source values that contain non-numeric characters will not provide a valid
identity and will cause the element to follow the Otherwise connector pin.
In order to use the the Select Extension element, you must define the list of extensions
which can be selected. For more information, refer to Configuring Non-user Extensions
and Identities on page 37.
When a caller enters a valid extension number, or the Data Source referenced returns a valid identity
number, the call follows the Valid extension connector pin to the next element in the call flow.
619500001-1E
Copyright © 2014 ADTRAN, Inc.
235
Using Advanced Elements
UCS Administrator Guide
If a caller enters a single digit when On single digit is enabled, the call moves to the element connected to
the On single digit connector pin. This mode is useful if you want to connect an Advanced Menu
element. Callers can then enter a single digit from 0 to 9, from the options available (for example, “Press 1
to speak to an operator”).
When using caller prompt, a call follows the Otherwise connector pin when three sequential selections fail
to match either an extension or a single digit (if enabled). When using a Data Source, a call follows the
Otherwise connector pin if the Data Source does not return a valid identity number.
The Select Extension element is particularly useful when you want to share a service so that it can be used
by many users, and you want to select a particular extension in which to apply some call answering
behavior. The examples below illustrate some ways in which you can use the Select Extension element in
a service.
To record a message in a user’s mailbox or select from a list of menu options
In the example above, the caller first hears the main auto attendant menu. The caller is then prompted to
enter an extension number or select from a list of menu options. If the caller enters a valid extension
number then the caller is transferred to the voicemail of the selected extension, where their message is
recorded. If the caller enters a single digit, then the caller is transferred to the menu mode that corresponds
with that digit (for example, “Press 1 to speak with an operator”).
236
Copyright © 2014 ADTRAN, Inc.
619500001-1E
UCS Administrator Guide
Using Advanced Elements
To transfer caller’s to an assistant’s mailbox
In the example above, callers call into a direct line to a user’s voicemail, and are routed to that user’s
assistant’s mailbox. For example, “You have reached the voicemail field of John Smith. To leave a
message for my assistant, Tony Moore, press 1.” It is not practical to create individual services to associate
each user with their particular assistant, so instead one service is created and shared among many users.
The service determines whose extension was called, and based on the called number, fetches the data from
the database to determine who the assistant is for the called number, and directs the caller to that user’s
assistant’s mailbox. To determine the “Selected Extension” in the second Voicemail element, the Select
Extension element must be included in the service. To determine the appropriate assistant’s extension to
direct the caller to, information must be gathered from a database, in this case using the Fetch Data
element, and using a Data Source table that includes fields for user’s extensions, and their assistant’s
extensions.
To prompt callers to enter an extension number or enter a single digit to access a menu
item
1. In the Select Extension element choose By prompting caller. The service prompts callers to enter an
extension number using their telephone keypad. If a caller enters a valid extension number, then the
call exits through the Valid extension connector pin.
2. If you want callers to be able to enter a single digit to access a menu item, then enable On single digit.
If a caller presses a single digit on their telephone keypad, the call follows the On single digit
connector pin.
To select an extension automatically based on some value selected or on information
provided
1. In the Select Extension element choose From.
2. Select Database Values, Gather-Digits Values, or System Values.
3. Select a specific value from the list available. If you select a database value, then you must include a
database element in the service. If you select a gather-digits value, then you must include a Gather
Digits element in the service. The On single digit mode is not available if a Data Source value is
selected.
619500001-1E
Copyright © 2014 ADTRAN, Inc.
237
Using Advanced Elements
UCS Administrator Guide
Record Announcement Element
The Record Announcement element allows callers to record over an
existing announcement or mailbox greeting, record a temporary
recording, or record into a database, using a remote telephone.
This element is useful for audio information services that must be
updated on a daily basis or at regular intervals. A user can update the
recorded information remotely when you include this element in a
service.
Make sure to include a Select Extension element before the Record
Announcement element in the call flow if you want callers to record to a
different extension than the one they called.
The Record Announcement element sends a voicemail prompt tone to
the caller, and then starts to record the caller. You may want to use a Play
Announcement element before the Record Announcement element to
instruct the caller on how to stop the recording. The caller must press a
telephone key to stop recording.
Action
Key
Description
Stop recording\Plays menu
options
4-9, 0, #
Stops recording and prompts the caller with the menu
options for 1, 2, 3, and the * key on the telephone
keypad. If the caller does not subsequently press a key,
then after repeating the menu options three times, the
element keeps the current recording and the call flow
proceeds. If a caller presses keys 4 to 9 or 0, the
prompt menu is repeated the first time, then
subsequently has the same effect as if the 1 key was
pressed.
Listen to the recording
3
Stops recording, plays the recorded audio to the caller,
and then prompts the caller with the menu options.
Record again
2
Stops recording, discards the current recorded audio,
sends a voicemail prompt tone to the caller, and allows
the caller to start recording again. The caller must
press a telephone key to stop the recording.
Keep the recording/cancel
1
Stops recording, keeps the recorded audio, and the call
flow proceeds.
To enable callers to change a specified announcement using a remote telephone
1. Enable the Specific button.
2. Select the value selector
, select Announcements, and select the recording that you want. The
name of the announcement appears in the Specific field.
238
Copyright © 2014 ADTRAN, Inc.
619500001-1E
UCS Administrator Guide
Using Advanced Elements
To enable callers to change a specified extension or user greeting using a remote
telephone
1. Enable the Specific button. Select the value selector
, select Greetings, and select one of the users
or [Called Extension]. Called Extension refers to the identity originally called. Selected Extension
refers to the identity selected in the last successful Select Extension element in the service. If there
was none, or the last one failed, it defaults to be the same as the Called Extension. The name of the
greeting appears in the Specific field.
Only administrator users can add a Select Extension element to a service. However, if
an administrator user shares such a service with a PBA user, then the Select Extension
element within that service becomes available to the PBA user.
2. From the Greeting type drop-down menu, select one of the following greeting types:
•
•
•
•
Internal Greeting
External Greeting
Out-of-Office Greeting
Mailbox Identifier
Put a Verify Password element before this element if you want to prevent unauthorized
access.
You can use the Record Announcement element to record audio in a specific temporary recording, and
elements like Play Announcement can be used to play the audio. Temporary recordings exist only for the
duration of the execution of a service. That is, when a service starts, none of the temporary recordings
exist. If a caller records a temporary recording, then the recording is stored in a temporary file that can be
played by another element, and the recording is discarded when the service ends. Temporary recordings
can be referenced by the following elements:
•
•
•
•
Play Announcement element
Menu element
Send Email element (custom)
Add Data element
• Update Data element
To use the Add Data and Update Data elements, the system must be licensed for
database integration.
For more information on temporary recordings, refer to Allowing Callers to Make Temporary Recordings
Within a Service on page 213.
619500001-1E
Copyright © 2014 ADTRAN, Inc.
239
Using Advanced Elements
UCS Administrator Guide
To enable callers to create a temporary recording using a remote telephone
1. Enable the Specific button.
2. Select the value selector
, select Temporary Recordings, and select the temporary recording that
you want. The name of the temporary recording appears in the Specific field.
Record the announcement to a database by selecting a Data Source and specifying the filtering
information.
To access database information, the system must be licensed for database integration.
To enable callers to change an announcement in a database
1. Enable the Database button.
2. Select the Data Source Selector
on page 223.
arrow. For more information, refer to Deliver Messages element
3. Specify the Data Source, Filter field, Equals, and Update information using the drop-down menus.
The Advanced Record Announcements allow you to define additional attributes for the recording. To
change the advanced options select on the show or hide advanced options button.
You can limit the length of the message that can be recorded and avoid recording silence. Enable the
corresponding check boxes to allow callers to signal the end of their message, enable a beep before
recording, and enable review message menu.
To limit the length of a recorded message
Enter a number of seconds in the Record for at most field. Callers cannot leave a message that lasts longer
than the time limit that you specify.
To avoid recording silence
1. Enable the Stop recording after check box.
2. Enter a number of seconds in the field.
If you set the number of seconds of silence too low, callers might be cut off while pausing
between phrases or speaking quietly.
To set Take Message specifications
Enable any of the following check boxes:
• Stop when key pressed—callers proceed to the next element after they press a key
• Beep before recording
• Review message menu
240
Copyright © 2014 ADTRAN, Inc.
619500001-1E
UCS Administrator Guide
Using Advanced Elements
Take Message Element
The Take Message element records an incoming message. Called
Extension refers to the identity originally called. Selected Extension
refers to the identity selected in the last successful Select Extension
element in the service. If there was none, or the last one failed, it
defaults to be the same as the Called Extension. This element can
receive voicemail messages and store them in a specific mailbox.
First, select Called Extension from the drop-down menu. Make sure to
include a Select Extension element before the Take Message element in
the call flow so that callers can enter the extension number that they
want. If you do not include a Select Extension element in the service,
the message goes to the Administrator’s mailbox.
This element can receive voicemail messages and store them in a specific mailbox.
First, select Called Extension from the drop-down menu. Make sure to include a Select Extension
element before the Take Message element in the call flow so that callers can enter the extension number
that they want. If you do not include a Select Extension element in the service, the message goes to the
Administrator’s mailbox.
You can limit the length of the message that can be recorded and avoid recording silence. Enable the
corresponding check boxes to allow callers to signal the end of their message, enable a beep before
recording, and enable review message menu.
To limit the length of a recorded message
Enter a number of seconds in the Record for at most field. Callers cannot leave a message that lasts longer
than the time limit that you specify.
To avoid recording silence
1. Enable the Stop recording after check box.
2. Enter a number of seconds in the field.
If you set the number of seconds of silence too low, callers might be cut off while pausing
between phrases or speaking quietly.
To set Take Message specifications
Enable any of the following check boxes:
• Stop when key pressed—callers proceed to the next element after they press a key
• Beep before recording
• Review message menu
619500001-1E
Copyright © 2014 ADTRAN, Inc.
241
Using Advanced Elements
UCS Administrator Guide
Advanced Menu Element
The Advanced Menu element allows callers to make a selection using
the telephone keypad. It is advisable to put an audio element (such as
Play Announcement) that specifies menu options before the Advanced
Menu element. The Advanced Menu element can also be attached to
the “on single digit” connection of certain elements.
Some callers might not make a selection from the menu. For this reason,
the No key in check box is provided. Select the check box and then enter
in a number of seconds to wait in the associated field. You can specify
the amount of time the NetVanta UC Server waits for a response before it moves to the next element.
To allow callers to move to the next element if they do not select a key
1. Enable the No key in check box.
2. In the field, enter the number of seconds to wait.
To set selection keys on a menu
1. In the first On drop-down menu, select the number of the key that you want. The number one appears
by default. When callers press a key, they are sent to the element that is adjacent to the connector pin,
depending on their choice.
2. Select New to add an On drop-down menu for setting an additional key. The NetVanta UC Server
enters the keys in numerical sequence. You can also select a key from the drop-down menu. You can
set a maximum of 12 keys. Keys range from one to nine, then include zero, * and #.
When you have finished setting selection keys, you can connect the subsequent element for each selection
key that you set, as applicable.
To remove a selection key from a menu
Select the trashcan button to the left of the key that you want to delete.
Manage Mailbox Element
The Manage Mailbox element allows callers to retrieve messages
remotely over the telephone. Called Extension refers to the identity
originally called. Selected Extension refers to the identity selected in
the last successful Select Extension element in the service. If there was
none, or the last one failed, it defaults to be the same as the Called
Extension.
As Administrator, you need to specify the mailbox that a caller can
manage or insert a Select Extension element to allow NetVanta UC Servers to select a mailbox. In the
Mailbox drop-down menu, select Called Extension. Make sure to include a Select Extension element
before the Manage Mailbox element in the call flow so that callers can enter an extension number.
You can set up the next element in the call flow depending on whether callers enter a valid extension
242
Copyright © 2014 ADTRAN, Inc.
619500001-1E
UCS Administrator Guide
Using Advanced Elements
number or cancel the management attempt.
This element prompts callers for a mailbox password before allowing access.
Change Mailbox Password Element
The Change Mailbox Password element allows users to change their
mailbox password.
The element prompts callers for a new password, waits until they enter a
new password, and then confirms it by playing it back to callers. Callers
must accept the change or reject it.
In the Mailbox drop-down menu, select Called Extension. Make sure to include a Select Extension
element before the Manage Mailbox element in the call flow so that callers can enter the desired extension
number.
Called Extension refers to the identity originally called. Selected Extension refers to the identity selected
in the last successful Select Extension element in the service. If there was none, or the last one failed, it
defaults to be the same as the Called Extension.
For added security, you might want to put a Verify Password element before this element.
Verify Password Element
The Verify Password element enables the service to request a numeric
password from a caller, and verifies that a given password matches a
specified password, the password for a particular mailbox, or the
password from a Data Source. The Verify Password element would
typically be used to access or to change information based on
authentication.
Administrators may use any of the following sources to verify the password provided.
619500001-1E
Copyright © 2014 ADTRAN, Inc.
243
Using Advanced Elements
UCS Administrator Guide
1. The password associated with any of the following mailboxes:
Called Extension
This refers to the mailbox associated with the identity originally called.
Selected Extension
This refers to the mailbox associated with the identity selected in the last
successful Select Extension element executed in the service. If you choose
this mode, ensure that you include a Select Extension element somewhere
before the Verify Password element in the call flow, to select the mailbox
associated with the identity for which you want to verify the password. If
there was no selection, or the last selection failed, it defaults to be the same
as the Called Extension.
A selected user
2. A password contained in a Data Source value.
If you select this mode, then be sure to include a database element (such as the Fetch Data, Dial for
Data, Move Current Row, or Prompt for Current Row elements) that indexes the Data Source
value that you wish to use to verify the password. The database element must occur before the Verify
Password element in the call flow, so that you can reference it in the Verify Password element’s Data
Source selector.
Data Sources cannot be referenced directly, so you must reference a filtered Data Source created by
one of the database elements referenced above. Ensure that the Data Source value that you use is a
Number data type, since only Data Source values that have this type can be selected.
The Otherwise connector pin is followed when:
• The password does not match the selection criteria after three sequential attempts, or
• The caller has not entered any digits after three sequential attempts.
You can set up the next element in the call flow depending on whether a caller enters a valid extension
number or cancels the attempt.
Loop Counter Element
The Loop Counter element allows you to limit the number of times the
call flow makes a connection. This element affects only call flow
control. Callers do not hear anything or perform an action.
In the Repeat up to field, enter the number of times you want a
connection to be followed.
Once the loop counter is encountered the number of times you have specified, the call follows the When
finished connection.
All loop counters are reset at the beginning of each call.
244
Copyright © 2014 ADTRAN, Inc.
619500001-1E
UCS Administrator Guide
Using Advanced Elements
Text To Speech Element
The Text to Speech element allows users to convert text to speech. The
supplied text is “spoken” to callers by the Text to Speech engine. You
can use this element when you prefer not to make audio recordings.
Enter the text manually, or use the value selector
dynamic value for the text.
to specify a
For more information, refer to Selecting values within elements using the
value selector on page 238. You can also use a combination of typed text
and selected values.
Gather Digits Element
The Gather Digits element allows the caller to enter digits on the
telephone keypad that are compared to a Compare Data element in the
same service. The Gather Digits element is typically used with an
element that plays audio, such as the Play Announcement element, to
give the caller instructions. When the NetVanta UC Server has gathered
the specified number of digits, the caller moves to the connected
element.
If no digits are gathered, the caller moves to the element connected to
the No digits collected connector pin.
If too few digits are gathered or the time limit for entering digits is
exceeded, then the caller moves to the element connected to the Otherwise connector pin.
The Gather Digits element works with the Compare Data element. The Gather Digits element must
appear in the call flow before the Compare Data element but does not need to be connected directly to it.
You can include elements between them in the call flow.
To specify the number of digits to gather
1. Enable one of the following:
• Stop after—the number of digits is fixed. It lets you specify the number of digits.
• Gather up to 20 digits—the number of digits is variable, up to 20
2. If you selected the Stop after button, then enter the number of digits in the field.
619500001-1E
Copyright © 2014 ADTRAN, Inc.
245
Using Advanced Elements
UCS Administrator Guide
Compare Data Element
The Compare Data element compares data that is collected by a
Gather Digits element, system values (for example, Today’s Date), or
database values, and directs the call flow accordingly. For example, you
might want a caller to enter a four-digit number to continue in the call
flow. Once the caller enters the number and it is stored by the Gather
Digits element, the Compare Data element can let you direct a specific
caller through the call flow based on that four-digit number.
The Compare Data element executes as follows:
• The first comparison value is evaluated for a match against the comparison selected. If the comparison
is true, then the call exits through the associated connector. If the comparison is not true, then the next
comparison value is evaluated for a match.
• If no match is found when comparing data, then the call proceeds to the element connected to the No
match connector pin.
Note that if comparisons other than Equals are selected, then the order of comparison values is important,
and can be used to match between two values. For example, if the Compare to value is a numeric value
and the following comparisons are used:
• Less Than: 5
• Greater Than: 10
• Less Than/Equal: 10
Then the following results occur:
•
•
•
•
If the Compare to value is less than 5, then the first connector is taken.
If the Compare to value is greater than 10, then the second connector is taken.
If the Compare to value is between 5 and 10 (including 5 or 10), then the third connector is taken.
If the Compare to value had no value, then the No match connector pin is taken.
To direct a caller using the Compare Data element
1. From the Compare to value selector , select the Gather Digits element, System Value, or database
reference that you want to compare to.
Refer to Selecting values within elements using the value selector on page 238 if you
want to select a dynamic value for the Compare to field.
2. From the drop-down menu select a comparison mode that you want to associate with a specific caller.
246
Copyright © 2014 ADTRAN, Inc.
619500001-1E
UCS Administrator Guide
Using Advanced Elements
3. Select Add to select additional comparison options. You can add up to ten compare data connectors.
Create Log Entry Element
The Create Log Entry element allows detailed call information to be
exported as a tab separated file or XML-based file. You can specify the
type of information that you want to include in the call log entry. Use the
Create Log Entry element with the Gather Digits element if you want
to log the digits that a caller enters.
To specify types of information using the Create Log Entry element
1. In the Enter text or insert value section, select the value selector
. For more information, refer to
Selecting values within elements using the value selector on page 238.
2. Select dynamic values for the log entry, and enter any text that you want to appear in the log.
3. Repeat steps 1 and 2 until all the information that you want to include appears in the list.
Some of the information types appear blank in the call log, depending on the PBX.
Generate Tones Element
The Generate Tones element enables a service to insert a dual tone
multi-frequency (DTMF) tone to the current call. DTMF tones are also
known as touch-tone dialing.
The Generate Tones element would typically be used in an outbound
dialing service. For example, an outbound dialing service might be
required to enter DTMF digits to dial an extension number for a specific
caller in an automated attendant, to access an external paging system, or
to enter an account code.
The characters 0-9, *, and # produce the associated tones. You can introduce pauses between digits by
entering commas between digits. For example, “1,2,3,4”.
If the tones are generated successfully, then the call exits through the Tones connector pin. If the tones
cannot be generated for any reason, for example, the call does not exist, then the call exits through the
Otherwise connector pin.
To select the tones to generate
Under the Tones field select one of the following value reference controls to indicate the DTMF tones to
619500001-1E
Copyright © 2014 ADTRAN, Inc.
247
Using Advanced Elements
UCS Administrator Guide
produce.
Database Values
Requires licensing for database integration. If you have a Database elements tab
in addition to the Standard and Advanced elements tabs, then you are licensed for
database integration.
Gather-Digits Values Use the Gather Digits Element on page 245 prior to the Generate Tones element
to enable callers to input digits into their telephone keypad.
For information on creating services for outbound dialing, refer to Creating Outbound
Dialing Services on page 190.
Queue Outdial element
You can create a service that uses the Queue Outdial element to launch
an outdial request after a specified period of time. When an outdial
element is executed, a new outdial request is inserted into the server, as if
the outdial command had been executed.
For information on the outbound dialer, refer to Using
the Outbound Dialer on page 181.
You can enter one or more phone numbers manually in the Call
number(s) field, or you can use the value selector
numbers from a database or contacts list.
to select phone
For information on using the value selector, refer to
Selecting Values Within Elements Using the Value
Selector on page 212. For information about contact
address book synchronization, refer to Synchronizing
Contacts on page 212
You can use the value selector
to select a specific service to run when
the outdial request is made, and you can specify a delay to indicate when
the outdial request should be processed.
You can specify up to 10 parameter values to be used in the outdial request. Using the value selector
you can select from a database value, a value obtained from the Gather Digits element, or a System Value,
for example, today's date.
The Queue Outdial element executes as follows:
• The call exits through the first connector pin when the outdial request is successfully created. The
element executes without waiting for the request to be performed.
248
Copyright © 2014 ADTRAN, Inc.
619500001-1E
UCS Administrator Guide
Using Advanced Elements
• If the outdial request was unsuccessful, then the call exits through the Otherwise connector pin.
The Queue Outdial element is available for administrators only. If an administrator
creates a service using the Queue Outdial element, and makes this service available to
other uses by saving it to the Shared folder, then PBA users will have this option
available.
To select numbers for the outdial request to call
1. From the Queue Outdial element next to the Call number(s) field, select the value selector
.
2. Select a database value from Database Values or contacts from Contacts.
You can also enter phone numbers manually by selecting the telephone
button to
open the Enter Phone Number menu box. Enter the phone number that you want in the
Telephone number field, and select OK. Alternatively, you can enter a phone number by
right-selecting in the Call numbers field and selecting New.
To select a service to run
Use the value selector
to select a database value or an existing service.
To set a delay before the outdial request is processed
1. Select one of the following:
• minutes
• hours
• days
2. Enter a number in the Delay field.
To specify parameter values to be used in the outdial request
1. In the Parameters section, select the Value field. Select the value selector
that appears.
2. Select one of the following:
• Database Value
• Value obtained from a Gather Digits element
• System Value
3. Continue the steps above to enter up to 10 parameter values.
619500001-1E
Copyright © 2014 ADTRAN, Inc.
249
Using Advanced Elements
UCS Administrator Guide
Execute Program Element
The Execute Program element provides the ability to launch an external
program from within a service.
The Execute Program element is only available to
administrator profile users when creating and editing
services, and is not available to PBA users.
To avoid security concerns, the Execute Program
element is limited to server side configuration files.
Applications for the Execute Program element include the following:
• Integrate with an electronic control system, for example, door controls, alarm systems, or climate control
systems, to retrieve information or to invoke changes to the system.
• Integrate with an Instant messaging (IM) client to provide another way of notifying callers of messages.
• Invoke an application that validates information received from a user, for example, a credit card
transaction.
• Integrate with a third party display device.
You can select which programs can be executed from within a service by including them in a configuration
file stored on the server. A sample configuration file, programs.sample.xml, has been provided for your
use, and is available in the default location listed below.
The XML configuration file defines any programs that are permitted to be executed by a service. Copy and
rename the sample file provided, and using a text editor such as Notepad, manually edit the file to define
the following:
• The programs which can be executed from within a service.
• The complete path of the programs to be executed.
• A unique, logical name for the programs. The logical name is what is displayed in the Execute Program
element, in the drop down list of programs to execute.
• A list of parameters to be passed to the application.
• The computer credentials to be used by the application. Refer to the programs.sample.xml file for more
information on how to edit the configuration file.
The NetVanta UC Server monitors the configuration file for changes, so any
configuration changes are automatically recognized.
Requirements
250
Copyright © 2014 ADTRAN, Inc.
619500001-1E
UCS Administrator Guide
Using Advanced Elements
The configuration file must be called the following: programs.xml
In order for the file to be used by the Application Services, the configuration file must be stored in the
following folder: Data\System
If the NetVanta UC Server was installed in the default location, then the path is:
C:\Program Files\ADTRAN\NetVanta UC Server\Data\System
To use the Execute Program element
1. From the Execute Program element, select a program to execute from the drop-down menu
provided.
If your application does not appear in the drop-down menu provided, then you must configure the
configuration file on the server.
2. Enter the command line parameter names and values as required by the program selected.
Quotes will be inserted if necessary at run time.
• The call flow exits through the Parameters connector pin if the return code from executing the
selected program is zero.
• The call flow exits through the Execution failure connector pin if the program executes, but
returns a non-zero return code.
• The call flow exits through the Otherwise connector pin if the program cannot be executed for any
reason.
Wait for Silence Element
The Wait for Silence element is typically used in an outdialing service to
enable the call to wait for a period of silence.
Look for silence in X secs
Determines whether a specified period of silence has been detected. If a
continuous period of silence is detected, then the call exits through the
silence connector pin. The default is 0.8 seconds.
No silence in X secs
If the specified time period elapses without continuous silence being
detected, then the element exits through the No silence connector pin. If
any other significant event occurs, such as the call being dropped, then
the element exits through the No silence connector pin. The default value
to wait for silence is 20 seconds.
619500001-1E
Copyright © 2014 ADTRAN, Inc.
251
Using Advanced Elements
UCS Administrator Guide
Detect Remote Party Element
The Detect Remote Party element is used to detect whether a call is
answered by a person, an answering machine, or a fax machine. The
element analyzes the incoming sound, and determines by the percentage
of sound versus silence, whether it's a live voice or an answering
machine, or alternatively, a fax machine. The Detect Remote Party
element is typically used with outdial requests.
For more information on creating outbound dialing
services, refer to Creating Outbound Dialing Services
on page 190.
The element modifies the call flow when a call is answered by an
answering machine. Usually, this element is the first, or close to the first,
element in a service. As an example, you may want to create a service that prompts callers to complete an
audio survey. If a person answers the phone, you can instruct them on how to complete the survey, and then
questions can be responded to with dual tone multi-frequency (DTMF, also known as touchtone dialing)
tones. If it is determined that the call has been answered by an answering machine, then you may want to
leave alternate instructions instead.
• When the element is first executed, the Voice connector pin is taken, unless the NetVanta UC Server has
already determined that the remote party is a fax machine. As service execution continues, the NetVanta
UC Server monitors the call to determine if the remote party is a fax or an answering machine. It will
continue monitoring the call for the entire duration as specified by the voice energy period. If during this
period it is determined that the called party is an answering machine, the default voice path is terminated,
and the call flow exits the appropriate connector. If an answering machine is detected, it exits through
the Answering machine connector pin when there is a minimum period of silence that exceeds the value
defined in Wait for silence of.
You can set up the service so that if a call is answered by a fax machine, then a log entry
is made to note that the number is a fax number, so that it can be removed from the list of
numbers to dial in future, or alternatively you can configure a fax to be queued to be
sent to the same telephone number. Also, you will want the service to disconnect the call
if it is answered by a fax machine.
Voice (default)
By default the call is considered to be answered by a live voice, and exits
through the Voice connector pin, unless it is determined to be answered by a
fax or an answering machine.
Answering machine
Enable the Answering machine checkbox if you want the voice to be
analyzed to determine whether the call is being answered by an answering
machine.
Voice energy period
greater than X seconds
The period of time the element analyzes the audio before making a
determination of the caller.
The default value is 2.5 seconds.
Wait for silence of
Enable this check box if you want the service to wait for the period of silence
noted, before continuing with the service.
252
Copyright © 2014 ADTRAN, Inc.
619500001-1E
UCS Administrator Guide
Using Advanced Elements
X seconds
If enabled, this is the period of time that silence must exist before proceeding
with the answering machine behavior. This is an assumed amount of time
when the answering machine or voice messaging system stops speaking and
plays a beep.
The default period is 0.8 seconds, however this number can be modified as
required.
Fax machine
If a fax machine is detected as answering the call, then the element
immediately exits via the Fax machine connector pin.
Change Voice Element
The Change Voice element is used to change the voice used by elements
in the service’s call flow. It can be used when creating a service to
change the voice used by other elements in the call flow to a specific
voice, the calling party’s voice, or the called party’s voice. Also, it can be
used in conjunction with the Menu element to allow a caller to select the
voice used by the service.
The Change Voice element affects other elements using audio or TTS
during service execution. Examples of elements that use audio or TTS
are the following: Voicemail, Send Email, Send Fax, Record Announcement, Play Announcement, and
Menu. Additionally, the Transfer Call element is affected by the Change Voice element. If the call is
transferred to voicemail (the called party did not answer the call), the voicemail greeting is played in the
called party’s voice.
Voice
Specifies the voice that will be used by elements in the service.
[Calling Extension]
This voice option sets the voice used by the service to the configured voice of
the calling party (the initiator of the call). This option enables the Otherwise
connector pin. If the calling party is a NetVanta UC Server user but does not
have a voice configured or if the calling party is not a NetVanta UC Server user,
the element will exit through the Otherwise connector pin.
[Called Extension]
This voice option sets the voice used by the service to the configured voice of
the called party (the receiver of the call).
[Selected Extension] This voice option sets the voice used by the service to the configured voice of
the user whose extension has been previously selected using the Select
Extension element. If the voice has been changed previously in the service
using a Change Voice element, the [Select Extension] option could be used to
reset the voice of the service to that of the selected extension.
English (U.S.)
Female
This voice option sets the voice used by the service to English (U.S.) Female.
This option is listed only if the voice is enabled by the administrator.
English (U.S.) Male
This voice option sets the voice used by the service to English (U.S.) Male.
This option is listed only if the voice is enabled by the administrator.
French (Canada)
Female
This voice option sets the voice used by the service to French (Canada)
Female.
This option is listed only if the voice is enabled by the administrator.
619500001-1E
Copyright © 2014 ADTRAN, Inc.
253
Using Advanced Elements
UCS Administrator Guide
[System Default
Voice]
This voice option sets the voice used by the service to the currently configured
default system voice.
Otherwise
This option is only available if the Voice option selected is [Calling Extension].
If the calling party is a NetVanta UC Server user but does not have a voice
configured or if the calling party is not a NetVanta UC Server user, the element
will exit through the Otherwise connector pin.
The example below shows a service that plays an announcement in the language chosen by the caller. The
service will first attempt to use the caller's configured voice to play the message. If the caller’s voice is
available the message will play in the caller’s configured voice. If the caller’s voice is not available or the
caller is not a NetVanta UC Server user, the service will prompt the caller to select a voice. The
announcement will then be played in the voice that the caller selected.
254
Copyright © 2014 ADTRAN, Inc.
619500001-1E
UCS Administrator Guide
Using Announcements in Call Answering Services
13. Using Announcements in Call Answering
Services
Announcements are the outgoing messages that callers hear when using the auto attendant. These
announcements typically initiate the call flow in a service and are used to guide the caller through the call
process. Announcements can inform callers of your business hours, explain menu options, or provide
instructions about how to leave messages or request information by fax.
This chapter provides information about how to select prerecorded announcements for the call answering
services. It also explains how to record personalized announcements using the Audio Editor. In order for
announcements to function in call answering services, a sound card must be installed on the NetVanta UC
Server computer. This chapter covers the following topics:
• Using Prerecorded Announcements on page 259
• Recording Announcements on page 263
• Managing Announcements on page 271
Using Prerecorded Announcements
As system administrator, you are responsible for managing announcements and incorporating them into the
services that you assign to identities.
The Announcements navigation pane presents folders used to store announcements. Select a folder to
view its contents in the summary pane. Select an announcement to view its waveform representation in the
detail pane. A variety of convenient, prerecorded announcements are available. You can also create custom
announcements using the Audio Editor. For more information on using the Audio Editor, refer to
619500001-1E
Copyright © 2014 ADTRAN, Inc.
259
Using Prerecorded Announcements
UCS Administrator Guide
Recording Announcements on page 263.
Tabs
Summary
Pane
Topics
Navigation
Pane
Detail
Pane
Navigation
Bars
Identitites
Pane
Versions of prerecorded announcements in each system voice are supplied with the application. They are
displayed in the English (U.S.) Male, English (U.S.) Female, and French (CA) Female folders in the
Announcements navigation pane. These voice folders are displayed one at a time in the Announcements
navigation pane. To access the available voice folders, refer to Changing the Voice Folder in the
Announcements Navigation Pane on page 260.
For information about sharing prerecorded announcements, refer to Importing and
Exporting on page 299.
Changing the Voice Folder in the Announcements Navigation Pane
To change the voice folder displayed in the Announcements navigation pane, follow these steps:
The Change Voices drop-down menu is available only to administrators while in the
administration tab. The voice of the announcements available to PBA users is limited to
the voice selected in the General tab of the Options menu.
260
Copyright © 2014 ADTRAN, Inc.
619500001-1E
UCS Administrator Guide
Using Prerecorded Announcements
1. Select the Announcements navigation bar to open the Announcements navigation pane.
2. Right-click the topmost folder (for example, English (U.S.) Male) and select Change Voice from the
drop-down menu. Then, select the voice folder you would like to display from the submenu.
Previewing a Prerecorded Announcement
Some of the elements that are used to build services include a Browse button that allows you to select an
announcement to be played at that particular point in the call flow. Before selecting the announcements
you want to play while the service runs, you can preview them in the Announcements menu. To preview a
prerecorded announcement, follow these steps:
1. Select the Announcements navigation bar to open the Announcements navigation pane.
2. If the appropriate voice folder is not displayed in the Announcements navigation pane, select the
desired voice folder using the steps in Changing the Voice Folder in the Announcements Navigation
Pane on page 260.
3. From the voice folder, select a subfolder to list its contents in the summary pane.
4. In the summary pane, select the announcement that you want to preview.
5. Select Download in the detail pane. A waveform representation of the announcement appears in the
detail pane with a set of audio commands above the waveform.
6. Select the icon of the device that you want to use (either
or
).
The icon that you select is enclosed by a dotted line.
619500001-1E
Copyright © 2014 ADTRAN, Inc.
261
Using Prerecorded Announcements
7. Select
UCS Administrator Guide
to listen to the announcement.
You can also preview announcements using the Service Editor while you are building a
service. You must first select a Play Announcement element and then use the Browse
button to choose an announcement to preview. For more information on using the
Service Editor, refer to Using the Service Editor on page 203.
Selecting a Prerecorded Announcement for an Element
After you preview the announcements and decide which you want to use, open the service to which you
want to add prerecorded announcements. Locate an element that you want to change, or add one to the
service. To select a prerecorded announcement for an element, follow these steps:
1. Select the Services navigation bar to open the Services navigation pane.
2. Double-click a service to open it and start the Service Editor.
262
Copyright © 2014 ADTRAN, Inc.
619500001-1E
UCS Administrator Guide
Recording Announcements
3. Select a Play Announcement element and then drag it to the canvas.
Play Announcement
element
4. Select the arrow next to the Play field and select Announcements from the submenu to browse the
available announcements folders.
5. Select the announcement you would like to use.
Recording Announcements
You can create custom announcements to be played on call answering services. These announcements can
also be copied, renamed, or deleted according to your needs. Custom announcements are created using the
Audio Editor, shown below:
Toolbar
Viewing pane
Marker
Text area
619500001-1E
Copyright © 2014 ADTRAN, Inc.
263
Recording Announcements
UCS Administrator Guide
The Audio Editor has a Viewing pane and a Text area.
The Viewing pane contains a waveform representation of your announcement. As you play an
announcement using the audio commands, the vertical announcement Marker moves across the viewing
pane from left to right so you can identify the exact location of different parts of your recording. You can
edit any part of your announcement by manipulating the waveform and using the commands located in the
toolbar. You can also remove parts of the message that are no longer required.
The Text area allows you to type a script for your announcement before recording it. You can read the
script from the menu while recording to help you eliminate pauses in your announcement.
The Toolbar contains visual shortcuts to the most frequently used menu items. Hold the pointer over a
button to show the tool tips. The toolbar contains View, Select, and Process commands, as well as standard
Audio commands found on most applications.
Make sure that there is a sound card installed on the computer that you are using.
Creating Announcements
You can record a new or specialized announcement for a service. You can include company information,
office hours, a list of people for whom to leave messages, and the option of how to receive company
literature by fax. To create an announcement, follow these steps:
1. Select the Announcements navigation bar to open the Announcements navigation pane.
2. If the appropriate voice folder is not displayed in the Announcements navigation pane, select the
desired voice folder using the steps in Changing the Voice Folder in the Announcements Navigation
Pane on page 260.
3. Select the folder where you want to store your new announcement. The folder’s contents are listed in
the summary pane.
4. Right-click anywhere in the Announcements summary pane.
5. Select New > Announcement. A new announcement is added to the list in the summary pane. The
announcement icon denotes the new announcement.
6. Directly after adding the new announcement, the announcement’s default name will be highlighted in
the summary pane and will be bound by an edit box. Enter a new name for the announcement.
264
Copyright © 2014 ADTRAN, Inc.
619500001-1E
UCS Administrator Guide
Recording Announcements
7. Double-click the announcement that you want to record. The Audio Editor appears.
In the text area of the Audio Editor, you can enter the text to use as a script for the
announcement that you want to record. This is useful for eliminating pauses when
you are recording.
8. On the toolbar, select
to open the Record Audio menu.
9. Using the Insert new drop-down menu, select at the beginning.
10. Select
to begin recording your message. As you record, the Time will increment and the red
record button turns grey.
The maximum length of a recorded announcement is 15 minutes.
11. When you are finished recording, select
.
12. Select OK to keep the announcement.
13. In the menu bar of the Audio Editor, select File > Update to save the update to the announcement.
Changing Announcements
You can change an announcement by deleting a part that you no longer need, adding recorded audio to it,
or adjusting the volume. You can delete portions of the waveform by selecting a portion in much the same
way as you select text using a word processor. A number of commands allow you to change
announcements. The following illustrations provide details about the command icons located on the Audio
Editor toolbar.
Use the edit commands to cut, copy, paste, and erase sections of the waveform. These commands operate
in a fashion analogous to the same commands found in a word processor.
Cut Paste Copy Erase
Use the audio commands to play announcements, position the marker in the waveform, and make
recordings.
619500001-1E
Copyright © 2014 ADTRAN, Inc.
265
Recording Announcements
UCS Administrator Guide
Stop
Skip
Backwards
Skip
Forwards
Record
Move to End
Pause
Move to
Beginning
Play
Before you delete part of an announcement or add to it, you can listen to it and identify the location on the
waveform where you want to make a deletion or insertion. If you have selected a part of the waveform,
audio commands apply only to the selected portion. The move and skip commands are used to position the
marker within the selection.
Use the view and select commands to select a portion of the audio.
Zoom to Fit All
Select None
Zoom Ou t
Select All
Zoom In
The view commands allow you to zoom in and out when you view the waveform so that your selection is
as accurate as possible.
The select commands allow you to select and deselect the entire waveform. If you do not select a section of
the waveform, the changes that you make apply to the whole waveform.
Use the process commands to adjust the volume of the waveform.
Decrease Volume
Maximize Volume
Increase Volume
266
Copyright © 2014 ADTRAN, Inc.
619500001-1E
UCS Administrator Guide
Recording Announcements
Use the playback commands to specify the playback device to use when playing the announcement within
the Audio Editor.
Handset Playback
Computer Speaker Playback
To select part of the waveform
1. Left-click anywhere in the waveform.
2. While still holding down the mouse button, drag across the portion of the audio that you want to
select.
Deselect the waveform by clicking anywhere in the waveform.
To delete part of an announcement
1. Select the Announcements navigation bar to open the Announcements navigation pane.
2. If the appropriate voice folder is not displayed in the Announcements navigation pane, select the
desired voice folder using the steps in Changing the Voice Folder in the Announcements Navigation
Pane on page 260.
3. In the Announcements summary pane, double-click the announcement that contains the part you
want to delete. The Audio Editor displays the announcement as a waveform.
4. From the menu bar, select View > Zoom to Fit All.
5. From the toolbar, select
.
6. On the toolbar, select
. Listen to the announcement once or twice to pinpoint the portion of the
waveform you want to delete.
619500001-1E
Copyright © 2014 ADTRAN, Inc.
267
Recording Announcements
UCS Administrator Guide
7. Select
on the toolbar to stop playback at the point before the part you want to delete. Note the
marker’s position in the Position indicator at the bottom of the menu.
Position Indicator
8. Select the point in the waveform where you want to begin deleting and drag to the position you
determined in Step 7. This will select the portion of the announcement that you want to delete.
If you do not select part of the waveform, the changes that you make affect the entire waveform.
9. Select
to review the selected portion of the announcement.
After you select part of an announcement, the audio commands apply only to the
selected part.
10. Select
on the toolbar of the Audio Editor to delete the selection.
11. From the menu bar, select File > Update to save the update to the announcement.
To add to an announcement
1. Select the Announcements navigation bar to open the Announcements navigation pane.
2. If the appropriate voice folder is not displayed in the Announcements navigation pane, select the
desired voice folder using the steps in Changing the Voice Folder in the Announcements Navigation
Pane on page 260.
268
Copyright © 2014 ADTRAN, Inc.
619500001-1E
UCS Administrator Guide
Recording Announcements
3. In the Aunnouncements summary pane, double-click the announcement to which you want to add.
The Audio Editor displays the announcement as a waveform.
Text area
In the text area of the Audio Editor, you can enter a script of the additional text that you
want to add to your recording. This is useful for eliminating pauses when you are
recording.
4. From the menu bar, select View > Zoom to Fit All.
5. From the toolbar, select the
icon.
6. On the toolbar, select
to play the announcement. Listen to it once or twice to pinpoint the portion
of the waveform to which you want to add. Position the cursor over the stop command on the toolbar
so you can stop the playback immediately before the part to which you want to add. Use the view
commands on the toolbar to zoom in or out to increase or decrease accuracy. Note the marker’s
position in the Position indicator at the bottom of the menu.
7. Select the stop icon on the toolbar to stop playback on the waveform at the point where you want to
add to the announcement.
8. On the toolbar, select
to open the Record Audio menu.
9. In the Record Audio menu, select
.
10. Using the Insert new drop-down menu, select at the current position.
619500001-1E
Copyright © 2014 ADTRAN, Inc.
269
Recording Announcements
UCS Administrator Guide
11. Select
and then record your message. As you record, the clock increments and the red record
button turns grey.
The maximum length of a recorded announcement is 15 minutes.
12. Select the stop button when you are finished.
13. Select
to review the announcement.
14. Select OK to keep the announcement.
15. From the menu bar of the Audio Editor, select File > Update to save the update to the
announcement.
To change the volume of a recording
1. Select the Announcements navigation bar to open the Announcements navigation pane.
2. If the appropriate voice folder is not displayed in the Announcements navigation pane, select the
desired voice folder using the steps in Changing the Voice Folder in the Announcements Navigation
Pane on page 260.
3. In the Announcements summary pane, double-click the announcement that you want to change. The
Audio Editor displays the announcement as a waveform.
4. From the menu bar, select Edit > Select All.
5. On the toolbar, select one of the following process commands:
• Increase Volume
• Decrease Volume
• Maximize Volume
It is advisable to maximize the volume to make sure that your recording is audible to callers.
270
Copyright © 2014 ADTRAN, Inc.
619500001-1E
UCS Administrator Guide
Managing Announcements
6. If you select Increase Volume or Decrease Volume, enter the percentage you want to increase or
decrease the volume of the announcement, and then select OK.
7. Select
to review the changes.
8. From the menu bar, select File > Update to save the update to the announcement.
Managing Announcements
You can keep track of your announcements more efficiently by organizing them in folders. You can also
duplicate announcements, duplicate announcements in another voice, and rename and delete
announcements.
To create a folder for announcements
1. Select the Announcements navigation bar to open the Announcements navigation pane.
2. If the appropriate voice folder is not displayed in the Announcements navigation pane, select the
desired voice folder using the steps in Changing the Voice Folder in the Announcements Navigation
Pane on page 260.
3. Right-click anywhere in the Announcements summary pane, and select New > Folder. A new folder
is added to the list in the summary pane.
Announcements
Folder
4. Enter a name for the folder.
To put an announcement in a folder
In the summary pane, select the announcement that you want to store and drag it to the appropriate folder.
Double-click a folder to view its contents. On the toolbar, use the Go back arrow
return to the list previously displayed in the summary pane.
to
To duplicate an announcement
1. Select the Announcements navigation bar to open the Announcements navigation pane.
2. If the appropriate voice folder is not displayed in the Announcements navigation pane, select the
desired voice folder using the steps in Changing the Voice Folder in the Announcements Navigation
Pane on page 260.
3. In the Announcements summary pane, right-click the announcement that you want to duplicate.
4. Select Duplicate. A copy of the announcement will appear in the summary pane.
619500001-1E
Copyright © 2014 ADTRAN, Inc.
271
Managing Announcements
UCS Administrator Guide
To duplicate an announcement in another voice
To streamline the process of creating multiple versions of the same announcement in different languages
(one corresponding to each voice configured on the system), NetVanta UC Server allows you to duplicate
announcement objects from an announcement directory of the voice currently being managed to the
corresponding directory of another voice. For example, after creating and recording a new announcement
in the English (U.S.) Male/Shared folder, you can use Duplicate in other Voice to duplicate the recorded
file into the English (U.S.) Female/Shared folder. You can then record over this file with the
announcement in the appropriate language. To duplicate an announcement in another voice, follow theses
steps:
1. Select the Announcements navigation bar to open the Announcements navigation pane.
2. If the appropriate voice folder is not displayed in the Announcements navigation pane, select the
desired voice folder using the steps in Changing the Voice Folder in the Announcements Navigation
Pane on page 260.
3. In the Announcements summary pane, right-click the announcement you would like to duplicate in
another voice, or select multiple announcements and right-click one of the selected announcements.
4. Select Duplicate in other Voice, and use the submenu to select the voice in which you would like the
selected announcement(s) to be duplicated.
5. The announcements will be duplicated in the corresponding announcement folder in the selected
language.
If the announcement already exists in the corresponding folder of the selected voice, you
will be presented with an error message, and the duplication will fail. In cases where
multiple files are selected, after selecting OK on the error message, NetVanta UC Server
will attempt to duplicate the remaining files.
To delete an announcement
1. Select the Announcements navigation bar to open the Announcements navigation pane.
2. If the appropriate voice folder is not displayed in the Announcements navigation pane, select the
desired voice folder using the steps in Changing the Voice Folder in the Announcements Navigation
Pane on page 260.
3. In the Announcements summary pane, right-click the announcement that you want to delete.
4. Select Delete.
5. Select Yes to confirm the deletion.
To rename an announcement
1. Select the announcements folder that contains the recording that you want to rename. The
announcements stored in the folder are listed in the summary pane.
2. Right-click the announcement that you want to rename.
3. Select Rename. Enter a new name for the announcement and then select its icon to make the change.
272
Copyright © 2014 ADTRAN, Inc.
619500001-1E
UCS Administrator Guide
Using Databases in Call Answering Services
14. Using Databases in Call Answering Services
This chapter introduces how to use access database information using database elements in call answering
services, and includes the following topics:
• Overview on page 273
• Managing Data Sources on page 273
• Accessing Data using Database Service Elements on page 285
• Using Database Elements on page 289
To access database information the system must be licensed for database integration. If
you are not licensed for database integration then the Database tab of elements is not
visible.
Overview
You can use the NetVanta UC Server to access dynamic database information using services. A user with
access to the Administrator tab can create user data tables. Each user has a copy of the table where they can
save their personal data. All the user data tables that are used in your active services are displayed in the
Assistant pane.
For information about creating user data tables, refer to Managing Data Sources on page 273
Managing Data Sources
Using the Administrator tab, you can create, and users can manage, data sources. Data sources allow users
to access and change information using the computer or over the telephone. For example, a real estate
agent can create a data table that includes information, such as address or price, for each property that the
agent has listed. While away from the office, the agent can call and access the data table to add, change, or
619500001-1E
Copyright © 2014 ADTRAN, Inc.
273
Managing Data Sources
UCS Administrator Guide
delete information about a particular property.
Tabs
Summary
Pane
Topics
Navigation
Pane
Detail
Pane
Navigation
Bars
Identitites
Pane
Data sources are set up like tables. Each table row corresponds to a data row or record. Each table column
corresponds to a field (for example, a name, address, or fax).
There are two types of data sources:
• User Data Sources—the data is managed by the NetVanta UC Server, and users have their own copy of
the data.
• External Data Sources—the data is managed by another server or process (for example, a relational
database management system), and is shared by NetVanta UC Server users and others. External data is
accessed using Microsoft’s ODBC (Open Database Connectivity), so these sources are typically called
ODBC database sources.
Installing a database directly on the NetVanta UC Server is strongly discouraged. Doing
so might cause performance problems.
Using the Administrator menu, you can manage the following aspects of data sources:
• Defining ODBC data sources
• Defining user data sources
• Managing data in user data tables
When you define ODBC data sources, the definition includes table and field information. It also includes
security information, which allows you to define a user name and password to access the database.
274
Copyright © 2014 ADTRAN, Inc.
619500001-1E
UCS Administrator Guide
Managing Data Sources
User data tables allow a user to manage personal data without setting up an entire database. After the
Administrator creates data tables, users can manage them by adding, changing, and deleting the rows
within the tables.
A set of elements allows users to access information in data sources while defining a service. These
elements allow users to retrieve data, manage data sources, and select from sets of values. Most elements
allow users to use information retrieved from data sources.
The data sources feature is available only if database integration is licensed.
To make a user data source available to a user, it must be accessed by an element in the
user’s active service.
Defining ODBC data sources
To use an ODBC data source, you must define an ODBC Data Source Name (DSN) that uses the related
driver. The DSN name, user ID, and password must be configured to connect to the source.
You can define an ODBC data source by using the Administrator utility provided with
Microsoft Windows.
After defining a DSN, you can use the Data Source Editor to define ODBC (Open Database Connectivity)
data sources. ODBC data sources include relational databases and other kinds of data, for example, Excel
spreadsheets, SQL server, or Visual FoxPro database.
You can edit the field attributes of an ODBC data source. For example, you can change the name of the
field, the data type, or whether you want the field to be visible to the user. Other options include filtering
and sorting ODBC data.
To name a new ODBC data source
1. Right-click anywhere in the Data Sources content pane.
2. Select New > ODBC Source.
3. In the Name box, type a name for the data source that you want to define.
4. If you do not want to further define the data source, you can select OK to save it.
To use the data source, you must define ODBC connection parameters.
619500001-1E
Copyright © 2014 ADTRAN, Inc.
275
Managing Data Sources
UCS Administrator Guide
To change the access status of a data source
1. In the Data Sources content pane, right-click the data source that you want to change the access status
of.
2. Select Access.
3. Select one of the following access types:
• Disabled—does not allow access to the data source
• Admin Only—allows only the Administrator to access the data source
• Everyone—allows everyone to access the data source
4. If you selected Everyone, select Yes to confirm.
Allowing everyone to have access to an ODBC data source is a potential security risk.
Make sure that you want to allow all callers to access the data source.
To define ODBC connection parameters
1. In the Data Sources content pane, double-click the ODBC source that you want to define.
2. Select the data source that you want from the ODBC DSN list.
3. In the User ID box, type the user ID required to access the ODBC data source.
4. In the Password box, type the password to access the ODBC data, if required. Some ODBC DSNs
contain the user ID and password so you do not have to enter that information.
5. Select the Connect button to connect to the ODBC data source.
An icon beside the Connect button indicates a successful or unsuccessful connection.
You must have the correct user ID and password to successfully connect.
To define advanced ODBC connection options
1. In the Data Sources content pane, double-click the ODBC source that you want to define.
2. Select the Advanced Connection Options... button.
3. From the Timeout list, select the number of seconds that you want ODBC to wait for a connection
and successful login. The default timeout is 15 seconds.
4. In the Maximum rows to fetch box, type the number of rows that you want the application to fetch
during a query. The default number of rows is 200.
5. Type the Extra Drive Specific Attributes To Be Added To The DSN in the box, if required.
6. Select OK.
276
Copyright © 2014 ADTRAN, Inc.
619500001-1E
UCS Administrator Guide
Managing Data Sources
To define ODBC tables and fields
1. In the Data Sources content pane, double-click the ODBC source that you want to define.
2. From the Table list, select the table that you want to associate with the data source.
3. From the Available Fields list, select the fields that you want to include.
4. Select the Select>> button to include the selected fields.
5. Repeat steps 4 and 5 until all the fields that you want are included.
If you want to include all the available fields, select the All>> button.
If you want to exclude fields that you have included, select the fields and select the
<<Selected button, or select the <<All button to exclude all the selected fields.
6. Select OK.
To change ODBC field attributes
1. In the Data Sources content pane, double-click the ODBC source that you want.
2. From the Table list, select the table that contains the fields that you want to change.
3. In the Included Fields list, select the value for the field attribute that you want to change.
4. In the new window, type the change.
5. Select outside the window to close it.
6. Select OK to save the changes.
A Fetch Data or Dial for Data element can retrieve more than one row depending on the number of rows in
the source, and your filter conditions. When one or more rows are fetched, a reference to a field by another
element is always a reference to the field’s value in the “current” row, in the set of rows fetched. The Move
Current Row and Prompt for Current Row elements can be used to change which row is current.
Immediately after a Fetch Data or Dial for Data element is executed, the current row is the first row.
• When only one row is fetched, the first row is the single row that was fetched.
• When multiple rows are fetched, which row is first depends on whether you defined a sort in the data
source definition.
Defining a sort order
If you define a sort order in a data source, this defines the default order of rows fetched by a Fetch Data or
Dial for Data element. However, a Fetch Data element can override this order.
When an ODBC data source has a defined sort order, the sorting is done by the ODBC server itself, and not
619500001-1E
Copyright © 2014 ADTRAN, Inc.
277
Managing Data Sources
UCS Administrator Guide
by the NetVanta UC Server. In most cases this distinction is unimportant, however some data types
supported by the NetVanta UC Server are not directly supported by ODBC. Thus in some cases, the sort
order produced by the ODBC server is not the same as what would have been produced by the NetVanta
UC Server.
• If no sort order was defined, then the order of the rows is determined by the data source, and you should
not make any assumptions about the order.
• With a defined sort order, the first row is the first row in the sort order specified. However, if the sort
field contains duplicate values, the order of rows with the same sort value is determined by the ODBC
server and not by the NetVanta UC Server, and you should not make any assumptions about the order.
For example, assume that you have a data source with a Date field, and that each row in the data source has
a unique date value. If the data source defines a sort order based on this Date field and descending order,
then any Fetch Data element that fetches from the data source will retrieve rows in descending date order.
In this case, the sort order produced by ODBC is the same as the sort order defined by the NetVanta UC
Server data type. If a Fetch Data element fetches multiple rows, then the first row will be the row in the
fetched set of rows with the newest value in the Date field. Thus another element referencing this Fetch
Data element would always reference the newest row. Without the sort, you cannot predict which row in
the retrieved set would be first.
In another example, a data source containing a field defined to be a character string is defined as Day of
Week in the ODBC data source. A sort order would return the values by character comparison, resulting in
the following order: Friday, Monday, Saturday, Sunday, Thursday, Tuesday, and Wednesday. Day of Week
in the NetVanta UC Server would return the results in the following order: Sunday, Monday, Tuesday,
Wednesday, Thursday, Friday and Saturday.
Thus, the actual sort order, as produced by ODBC, is not the same as the order that you would get from
sorting using the NetVanta UC Server data type.
Defining a sort order using the NetVanta UC Server
You can specify that the NetVanta UC Server sorts the rows fetched by the Fetch Data or Dial for Data
elements, by specifying a sort order in a second Fetch Data element. Sorting using an explicit sort defined
in a Fetch Data element is always done by the NetVanta UC Server.
To define ODBC filtering and sorting
1. In the Data Sources content pane, double-click the ODBC source that you want to define.
2. From the Filter Field list, select the field that you want to test.
3. In the Filter Value box, type the value that you want to compare to.
4. From the Sort Field list, select the field that you want to sort.
5. From the Sort Order list, select one of the following:
• ascending—sorts information in ascending order
• descending—sorts information in descending order
6. Select OK.
278
Copyright © 2014 ADTRAN, Inc.
619500001-1E
UCS Administrator Guide
Managing Data Sources
Defining user data sources
The User Data Source Editor allows you to create user data tables. Display options allow you to define
how the user data table is displayed for the user. Decide which fields you want to include, and how they are
sorted and retrieved. A user data source is defined once, and each user, including the Administrator, has an
individual copy of the table.
Users cannot share user data tables; each user adds data and maintains individual data tables. Only the
Administrator and Personal Business Assistant users can edit the data in their copy of a user data table.
To make a data source available to a user, an element in the user’s active service must
access the data source.
Other options include sorting and retrieving user data.
To create a new user data source
1. Right-click anywhere in the Data Sources content pane.
2. Select New > User Data.
3. Type a name for the new user data source in the Name box.
4. If you do not want to further define the user data source, you can select OK to save it.
619500001-1E
Copyright © 2014 ADTRAN, Inc.
279
Managing Data Sources
UCS Administrator Guide
To edit user data source display options
1. In the Data Sources content pane, double-click the user data source that you want to edit.
2. In the Description box, type the title of the user data source.
3. In the Instructions box, type the instructions that you want the user to follow when using the data
source.
4. In the Add Button Label box, type the title that you want to display on the user add button.
5. Select OK to save the changes.
To add a field in a user data source
If you add a new field to an existing table, then the value of that field for all existing
records in that table will be set to a null value. This appears in the user interface as [NO
VALUE].
1. In the Data Sources content pane, double-click the user data source that you want to add a field to.
2. Select the New button.
3. Select the Name section of the new field.
4. Type a name for the field.
5. Select the Data Type section of the new field to obtain a list of data types.
6. Select a data type from the Data Type list.
The Default Value section changes depending on the data type that you select.
7. Repeat steps 3 to 7 until you have added all the fields that you want.
8. Select OK.
To change the order of a field in a user data source
1. In the Data Sources content pane, double-click the user data source that you want to change.
2. Select the field that you want to change the order of.
3. Select one of the following buttons:
• Up—moves the selected field up one row in the list of fields
• Down—moves the selected field down one row in the list of fields
280
Copyright © 2014 ADTRAN, Inc.
619500001-1E
UCS Administrator Guide
Managing Data Sources
4. Select OK.
The field order defines the order in which the fields are displayed in the User Data edit
window, which is used to edit and change the entries in a user data table.
To delete a field in a user data source
1. In the Data Sources content pane, double-click the user data source from which you want to delete a
field.
2. Select the field that you want to delete.
3. Select the Delete button.
4. Select OK.
A Fetch Data or Dial for Data element can retrieve more than one row depending on the number of rows in
the source, and your filter conditions. When one or more rows are fetched, a reference to a field by another
element is always a reference to the field’s value in the current row, in the set of rows fetched. The Move
Current Row and Prompt for Current Row elements can be used to change which row is current.
Immediately after a Fetch Data or Dial for Data element is executed, the current row is the first row.
• When only one row is fetched, the first row is the single row that was fetched.
• When multiple rows are fetched, which row is first depends on whether you defined a sort in the data
source definition.
Defining a sort order
If you define a sort order in a User Data data source, this defines the default order of the rows fetched by a
Fetch Data or Dial for Data element. However, a Fetch Data element can override this order. Sorting is
always done by the NetVanta UC Server for this type of data source.
• If no sort order was defined, then the order of the rows is determined by the data source, and you should
not make any assumptions about the order.
• If a sort order is defined, the first row is the first row in the sort order specified. However, if the sort field
contains duplicate values, the order of rows with the same sort value is determined by the data source,
and you should not make any assumptions about the order.
For example, assume that you have a data source with a Date field, and that each row in the data source has
a unique date value. If the data source defines a sort order based on this Date field and descending order,
then any Fetch Data element that fetches from the data source will retrieve rows in descending date order.
If a Fetch Data element fetches multiple rows, then the first row will be the row in the fetched set of
records with the newest value in the Date field. Thus another element referencing this Fetch Data element
would always reference the newest row. Without the sort, you cannot predict which row in the retrieved set
would be first.
619500001-1E
Copyright © 2014 ADTRAN, Inc.
281
Managing Data Sources
UCS Administrator Guide
To define user data source sorting and retrieval options
1. In the Data Sources content pane, double-click the user data source that you want to define.
2. From the Sort Field list, select the field that you want to sort.
3. From the Sort Order list, select ascending or descending.
4. In the Maximum Rows box, type the number of rows that you want to retrieve for each query.
The default number of rows is 200.
5. Select OK.
Managing data in user data tables
After you create a user table, you can add, change, and delete the information included in your copy of the
table.
The information—represented above by the numbers 1 to 5—that you enter when you create a user data
282
Copyright © 2014 ADTRAN, Inc.
619500001-1E
UCS Administrator Guide
Managing Data Sources
table in the administrator application (on the top), appears in the user’s copy of the table (on the bottom).
The user data tables are only visible if a service that is associated with an identity, has
an element in the service that uses the data source. This allows the administrator to
create multiple user data sources, without users getting confused by information that is
not relevant to them.
To add information to a user data table
1. In the Data Sources content pane, right-click the user data source that you want to add information to.
2. Select Edit to open the user data source.
3. Select the Add button to add a row to the table. Each field has the default value defined in the data
source definition.
The Add button is editable and might have a different title.
4. Select Close to close the table.
To change information in a user data table
1. In the Data Sources content pane, right-click the user data source that you want to change.
2. Select Edit to open the user data source.
3. Select the field value that you want to change to open a new window.
4. In the new window, type the change.
5. Select outside the window to close it.
6. Select Close to close the table.
To delete a row in a user data table
1. In the Data Sources content pane, right-click the user data source in which you want to delete a row.
2. Select Edit to open the user data source.
3. Select the row that you want to delete.
4. Select the Delete button.
5. Select Close to close the table.
619500001-1E
Copyright © 2014 ADTRAN, Inc.
283
Managing Data Sources
UCS Administrator Guide
Data Type Definitions
Data Type
Value
Examples
Text
A string of characters
123 Maple Avenue
Number
A number with optional sign, decimal places, and commas 160,000.00
Logical
A string whose value can be only true, false, 1 or 0. The
numbers, 1 and 0, correspond to true and false,
respectively.
True
False
1
0
Phone Number Any string that can be parsed as a phone number into
canonical form.
A canonical telephone number represents a dialable
number that can be understood and interpreted around
the world, for example:
+Country Code (Area Code) Subscriber Number
In North America, the following is an example of a
canonical telephone number:
+1 (613) 555-1212
+1 (613) 555-1212
6135551212
Audio
The value of the field in valid .wav format
PropertyDescription.wav
Fax
The value of the field in valid .tif format
Data Sheet.tif
Day of Year
A date without a year, for example, January 1 is New
Year’s Day
September 16
09-16
Sep 16
Date
A date that includes the day, month, and year.
September 16, 2007
Valid formats include YY-MM-DD, YYYY-MM-DD, and text Sep 16, 2007
versions as illustrated in the examples.
07-09-16
2007-09-16
Day of Week
The full day name in English, as a string. The strings can
also be in abbreviated formats.
Sunday
Sun
Time of Day
A time that includes the hour, minutes, and seconds
(optional).
Valid formats include HH:MM AM/PM. The AM/PM is
optional, however AM is assumed unless the hour is
greater than or equal to 12. For example, 12:02 means
12:02 PM.
2:00 PM
Time Range
Two times of day separated by a hyphen, which indicates 2:00 PM - 4:00 PM
a time range.
Valid formats are HH:MM AM/PM - HH:MM AM/PM, with
AM/PM being optional. As above, AM is assumed unless
the hour is greater than or equal to 12. For example, 1:00
means 1:00 AM.
Voice
A string of characters containing the name of a NetVanta English (U.S.) Male
UC Server system voice.
Valid voices are all voices currently enabled on the system
and [System Default Voice].
284
Copyright © 2014 ADTRAN, Inc.
619500001-1E
UCS Administrator Guide
Accessing Data using Database Service Elements
Accessing Data using Database Service Elements
Using database integration, you can set up services that allow callers to access current information. Also,
the service creator can call in to a service to change information remotely at any time, so that callers have
access to the most current information. Data accessed by data sources is dynamic and can be updated at
any time.
Some elements, depending on their function, allow you to specify values or data sources. Database
elements use database integration to provide information to callers and receive information from callers
during a service. For example, callers to a real estate office can hear updated information about a particular
property when they enter the property number over the phone during a service. In this case, the Fetch Data
element processes the query and searches the database for a match.
Likewise, the real estate agent can make changes to the property information in the database by accessing
the service remotely and entering the new information to the database. If the agent wants to change the list
price for a property, he can access the Update Data element in the service, access the price value for the
correct property, change the value, and update the database accordingly.
For more information about accessing data sources using service elements, refer to Using Elements to
Create Call Answering Services on page 211.
To troubleshoot services using data sources, refer to Troubleshooting Services on
page 209.
Using the Data Source Selector
You can use the Data Source Selector feature to specify a data source, and to filter the data that is returned.
The Data Source Selector is available for elements that require access to database information as part of
their functionality, such as the Fetch Data, Update Data, and Dial for Data elements.
You can filter data by selecting a data source field, a comparison operator, and a value. You can filter the
data by selecting the following comparison options:
•
•
•
•
•
•
•
Equals
Less Than
Less Than/Equal to
Greater Than
Greater Than/Equal
Between
Not Equal
Using the value selector
you can specify the value that you want to compare to the filter field.
An easily recognizable icon appears in the Source menu box to indicate the type of data that you are using
619500001-1E
Copyright © 2014 ADTRAN, Inc.
285
Accessing Data using Database Service Elements
UCS Administrator Guide
for the comparison value. For example, the Gather Digits icon appears with the name of the Gather Digits
element that is included in the service.
The values that are available depend on the data source that you choose; the other elements included in the
call flow, for example, a Gather Digits element; and the values that you have set up for your system.
To specify a data source for an element
1. Select the arrow in the Source section of the element.
2. Select the Data source that you want from the drop-down menu.
3. Select the Filter field that you want from the drop-down menu.
4. Select the comparison mode that you want. In the example above, Less Than/Equal was selected.
If you select Between A and C for example, then the values A and C are included.
5. Select the value type that you want. For example, Database values, Gather-Digits values, or System
values.
You can also enter a filter value manually in the filter value field.
6. Select a specific value from the value types drop-down menu.
The values that are available depend on the data source; the other elements that precede
the element in the call flow, for example, a Gather Digits element; and the values that
you have set up for your system.
286
Copyright © 2014 ADTRAN, Inc.
619500001-1E
UCS Administrator Guide
Accessing Data using Database Service Elements
7. Select a sort mode, and enable Descending if you wish the results to be sorted in a descending order.
When you choose a System Value in an element of a service, the information is taken from the current
call and from within your system and used, for example, to fetch a value for a Fetch Data element.
The table below describes and gives examples for available System Values.
System Value
Description
Today
A NetVanta UC Server Date value representing December 25, 2006
today’s date.
Current Time
A NetVanta UC Server Time of Day value
representing the current time.
Format depends on location.
For US and Canada, 12:02
PM.
User Name
The user profile name of the profile that owns
the called extension.
Paul Smith
User Extension
The extension number where the call was
initially received.
224
Selected User Name
If a Select Extension element is executed, this
is the user profile name of the profile that owns
the selected extension. Otherwise, it is User
Name.
Mark Jones
Selected Extension
If a Selected Extension element is executed,
this is the selected extension. Otherwise, it is
User Extension.
225
Caller Name
The same as Matched Contact Name, if the
matched contact name is not blank. If it is, the
value of Caller-Id.
Paul Smith
Caller-Id
A NetVanta UC Server Text Value representing Paul Smith [613-599-9698]
the caller. Typically, it is the form “name
[number]”. However, if the name is blank, it is in
the form “number”. It might also have special
values, such as <Private Number>, <Long
Distance> or <Unknown Caller>. Phone number
format depends on the underlying transport.
Caller-Id Name
A NetVanta UC Server Text Value containing the Paul Smith
caller name as provided by the underlying
transport.
Caller-Id Number
A NetVanta UC Server Text Value containing the 613-599-9698
raw caller telephone number as provided by the
underlying transport.
Caller-Id Canonical
Number
A NetVanta UC Server Phone Number Value
containing the complete, formatted number.
Caller-Id Area Code
A NetVanta UC Server Text Value containing the 613
area code of the number.
Caller-Id Area
Code/Exchange
A NetVanta UC Server Text Value containing the 613599
area code and the exchange.
Caller-Id Exchange
A NetVanta UC Server Text Value containing the 599
exchange.
619500001-1E
Example Format
Copyright © 2014 ADTRAN, Inc.
+1 (613) 599-9698
287
Accessing Data using Database Service Elements
UCS Administrator Guide
Caller-Id Local
Number
A NetVanta UC Server Text Value containing the 5999698
local number without the area code and country
code.
Called-Id
A NetVanta UC Server Text Value representing Mark Jones [613-599-9698]
the called party. Typically, it is the form “name
[number]”. However, if the name is blank, it is in
the form “number”. It might also have special
values, such as <Private Number>, <Long
Distance> or <Unknown Caller>. Phone number
format depends on the underlying transport.
Called-Id Name
A NetVanta UC Server Text Value containing the Mark Jones
called party name as provided by the underlying
transport.
Called-Id Number
A NetVanta UC Server Text Value containing the 613-599-9698
raw called party’s telephone number, as
provided by the underlying transport.
Port Name
The name of the port the call is using.
NetVanta UC Server
Trunk Name
The name of the trunk the call is using.
Admin Trunk 1
Current Date/Time
A NetVanta UC Server Text Value containing the Format depends on the
current date and time
location of the computer, but is
typically: December 25, 2006
12:02 PM
Matched Contact
Name
The caller is matched to the called party’s
contacts. This is a NetVanta UC Server Text
Value containing the contact display name (or
blank if no match).
Sharon Allen
Next Unique Id
A NetVanta UC Server Text Value containing a
globally unique string (36 characters long). This
value can be referenced only using the Add
Data element and is used to assign a unique
value to a database field. The Add Data element
is typically followed by a Fetch Data element
accessing the same table and using the Last
Unique Id value to fetch the record just added.
Do not depend on the specific format of these
unique values
Although the actual format is
not important, it is typically the
following:
0E49D111-55AC-4794-93611B7320D694BD
Last Unique Id
A NetVanta UC Server Text Value containing the Refer to Next Unique Id.
most recent unique string generated by Next
Unique Id.
Voice
A NetVanta UC Server Text Value containing the English (U.S.) Male
name of the enabled system voice. When the
value is set to [System Default Voice], the value
used is the name of the current system’s
default voice.
288
Copyright © 2014 ADTRAN, Inc.
619500001-1E
UCS Administrator Guide
Using Database Elements
Using Database Elements
To access database information the system must be licensed for database integration. If
you are not licensed for database integration then the Database tab of elements is not
visible.
Database elements rely on database integration to provide data to callers during a service. Database
integration allows services to be dynamic and data driven.
The Database elements tab is shown above. A brief description is provided for each element available to
the Administrator.
Table 14–1: Database elements
Fetch Data element on page 290 This accesses the specified data source and fetches the required
data
Dial for Data element on
page 291
This accesses the specified data source and fetches the data
specified by the caller
Add Data element on page 293
This allows a caller to add data to a specified data source
Delete Data element on
page 294
This allows a caller to delete data from a specified data source
Update Data element on
page 295
This updates the data contained in a specified data source
Move Current Row element on
page 296
This allows callers to modify which row is the current row in a multi
row set, retrieved by either the Fetch Data or Dial for Data elements.
Prompt for Current Row element Using a series of prompts, this allows callers to use the keypad to
select which row becomes the current row.
on page 297
619500001-1E
Copyright © 2014 ADTRAN, Inc.
289
Using Database Elements
UCS Administrator Guide
Fetch Data element
The Fetch Data element allows you to specify a data source using the Data Source Selector, and query the
data source so that the NetVanta UC Server fetches the data that you want.
Use a second Fetch Data element to further filter or sort the results of the first, a third to further filter or
sort the results of the second, and so on. For example, a real estate service is set up to access a database of
real estate listings. A Fetch Data element is specified to fetch all rows that match a certain price range. If
several rows are fetched that match that criterion, the call moves through the Many rows fetched connector
pin to another Fetch Data element that further searches those listings and fetches rows based on the number
of bedrooms, until it finds the single listing that matches all criteria.
• If the Fetch Data element fetches one row, the call exits from the One row fetched connector pin.
Fetch Data element
• If the Fetch Data element fetches more than one row, then the call exits from the Many rows fetched
connector pin.
• If no rows of data are fetched, then the call exits the No rows fetched connector pin.
• If any other condition exists, such as an inability to access a Data Source (such as an external database
or internal User Data Table), then the call exits the Otherwise connector pin.
A Fetch Data element can retrieve more than one row depending on the number of rows in the source, and
your filter conditions. When one or more rows are fetched, a reference to a field by another element is
always a reference to the field’s value in the current row, in the set of rows fetched. The Move Current Row
and Prompt for Current Row elements can be used to change which row is current. Immediately after a
Fetch Data or Dial for Data element is executed, the current row is the first row.
• When only one row is fetched, the first row is the single row that was fetched.
• When multiple rows are fetched, which row is first depends on whether a sort order was defined by the
Administrator.
If no sort order was defined, then the order of the rows is determined by the data source, and you should
not make any assumptions about the order. If a sort order is defined, the first row is the first row in the sort
order specified. However, if the sort field contains duplicate values, the order of rows with the same sort
value is determined by the data source, and you should not make any assumptions about the order.
For example, assume that you have a data source with a Date field, and that each row in the data source has
290
Copyright © 2014 ADTRAN, Inc.
619500001-1E
UCS Administrator Guide
Using Database Elements
a unique date value. If the data source defines a sort order based on this Date field and descending order,
then any Fetch Data element that fetches from the data source will retrieve rows in descending date order.
If a Fetch Data element fetches multiple rows, then the first row will be the row in the fetched set of
records with the newest value in the Date field. Thus another element referencing this Fetch Data element
would always reference the newest row. Without the sort, you cannot predict which row in the retrieved set
would be first.
When a Fetch Data element fetches one or many rows, the first row becomes the current row. The order of
the rows is determined by the sorting modes selected, as described above.
Other elements can refer to fields fetched by the Fetch Data element. These elements reference the value in
the current row. A different current row can be selected, using the Move Current Row element on page 296
or Prompt for Current Row element on page 297 elements.
For information about specifying data sources, filter fields, and values, refer to Using the Data Source
Selector on page 285.
Dial for Data element
The Dial for Data element allows you to specify a data source using the Data Source Selector. It is similar
to the Fetch Data element, except the caller uses the telephone keypad to define the data that is fetched. It
is also similar to the Dial By Name element, which is available only to the administrator, except the search
is done on a defined database.
The Dial for Data Source Selector allows you to specify the following:
• data source
• optional filter condition, for example a value
• Select On field
When a caller encounters the Dial for Data element, the element selects the records from the source that
match the filter condition (it fetches all the records if no filter condition is specified). Then the element
prompts the caller to enter the value for the Select On field. A search using the Dial for Data element
ignores blanks and special characters. The default search criteria include only alphabetic characters. If you
619500001-1E
Copyright © 2014 ADTRAN, Inc.
291
Using Database Elements
UCS Administrator Guide
specify Allow numbers, numeric characters are also included in the search.
Dial for Data element
The letters Q and Z appear on different keys on different phones. The Dial for Data
element works whether the letter Q corresponds to the 0 or the 7 key, and whether the
letter Z corresponds to the 0 or the 9 key.
• If the Dial for Data element fetches one row, the call exits from the One row fetched connector pin.
• If the Dial for Data element fetches more than one row, then the call exits from the Many rows fetched
connector pin
• If no data rows are fetched, then the call exits the No rows fetched connector pin.
• If you enable the On Single Digit check box, the call exits that connector pin when the caller enters only
one digit, or the call times out after one digit is entered.
• If any other condition exists, such as the inability to access a Data Source, such as an external database
or internal User Data Table, then the call exits the Otherwise connector pin.
A Dial for Data element can fetch more than one row depending on the number of rows in the source, the
filter conditions, and the field the user will select on. When one or more rows are fetched, a reference to a
field by another element is always a reference to the field’s value in the first row, in the set of rows fetched.
• When only one row is fetched, the first row is the single row that was fetched.
• When multiple rows are fetched, which row is first depends on whether a sort order was defined by the
Administrator.
If no sort order was defined, then the order of the rows is determined by the data source, and you should
not make any assumptions about the order. If a sort order is defined, the first row is the first row in the sort
order specified. However, if the sort field contains duplicate values, the order of rows with the same sort
value is determined by the data source, and you should not make any assumptions about the order.
For example, assume that you have a data source with a Date field, and that each row in the data source has
a unique date value. If the data source defines a sort order based on this Date field and descending order,
then any Dial for Data element that fetches from the data source will retrieve rows in descending date
order. If a Dial for Data element fetches multiple rows, then the first row will be the row in the fetched set
292
Copyright © 2014 ADTRAN, Inc.
619500001-1E
UCS Administrator Guide
Using Database Elements
of records with the newest value in the Date field. Thus another element referencing this Dial for Data
element would always reference the newest row. Without the sort, you cannot predict which row in the
retrieved set would be first.
When a Dial for Data element fetches one or many rows, the first row becomes the current row. The order
of the rows is determined by the sorting modes selected, as described above.
Other elements can refer to fields fetched by the Dial for Data element. These elements reference the value
in the current row. A different current row can be selected, using the Move Current Row element on
page 296 or Prompt for Current Row element on page 297. For information about specifying data sources,
filter fields, and values, refer to Using the Data Source Selector on page 285.
You can put a Play Announcement element before a Dial for Data element to give the
caller instructions about how to use the feature.
Add Data element
Add Data element
The Add Data element allows callers to add to the data in a specified data source. The Record
Announcement element can be used to record temporary recordings, which can be used with the Add Data
element as a form filling application, in order to request quotes, have callers answer general customer
service questions, and so on. For more information on temporary recordings, refer to Allowing Callers to
Make Temporary Recordings Within a Service on page 213.
• If the data is added successfully, the caller exits the regular connector pin.
• If the data is not added successfully, for any reason, the caller exits the Otherwise connector pin.
To specify a source and fields for the Add Data element
1. Select a data source from the Source drop-down menu.
2. Select the Add button to add a Field Assignment to the list.
3. Select the Field column to obtain a drop-down menu of fields in the data source.
4. Select a field from the drop-down menu.
5. Select the New Value column to specify a value for the field.
619500001-1E
Copyright © 2014 ADTRAN, Inc.
293
Using Database Elements
UCS Administrator Guide
6. Enter a value, or select the value selector
in the blank new value field.
7. Select anywhere outside the new value field.
8. Repeat steps 2 to 7 to add more fields to the Field Assignments list.
To delete a field assignment for the Add Data element
1. Right-click the Field column of the field assignment that you want to delete.
2. Press Delete.
Delete Data element
The Delete Data element allows callers to delete data in a specified data source.
Delete Data element
If some rows are deleted successfully, the caller exits the Source connector pin. If no rows are deleted, the
caller exits the No rows deleted connector pin. If any other condition exists, the caller exits the Otherwise
connector pin. For information about specifying data sources, filter fields, and values, refer to Using the
Data Source Selector on page 285.
For security reasons, when including a Delete Data element in a service, you might
want to put a Verify Password element before it. Make sure that you specify exactly the
data that you want to make available for deletion. For example, if you do not include a
filter field and value, all rows are deleted.
294
Copyright © 2014 ADTRAN, Inc.
619500001-1E
UCS Administrator Guide
Using Database Elements
Update Data element
Update Data element
The Update Data element allows callers to update the data in a specified data source. The Record
Announcement element can be used to record temporary recordings, which can be used with the Update
Data element as a form filling application, in order to request quotes, have callers answer general customer
service questions, and so on. For more information on temporary recordings, refer to Allowing Callers to
Make Temporary Recordings Within a Service on page 213.
• If some rows are updated successfully, the caller exits the regular connector pin.
• If some rows are not updated, the caller exits the No rows updated connector pin.
• If any other condition exists, the caller exits the Otherwise connector pin.
To specify field assignments for the Update Data element
1. Use the data source selector arrow to specify the data source that you want.
2. Select the Add button on the Update Data element to add a Field Assignment to the list.
3. Select the Field column to obtain a drop-down menu.
4. Select a field from the drop-down menu.
5. Select the New Value column to specify a value for the field.
6. Enter a new value, or select the value selector
in the blank new value field.
7. Select anywhere outside the new value field.
8. Repeat steps 2 to 7 to add more fields to the Field Assignments list.
Make sure that you specify the filter condition correctly. For example, no filter condition
means that all rows are updated using the specified assignments.
619500001-1E
Copyright © 2014 ADTRAN, Inc.
295
Using Database Elements
UCS Administrator Guide
Move Current Row element
Move Current Row
element
When using the Fetch Data element on page 290 or Dial for Data element on page 291, a set of rows are
fetched from the database. The Move Current Row element moves the current row in a set of rows
fetched. The current row can be moved to be the first row in a set of rows, the last row, the next row, or the
previous row.
The Source element for a Move Current Row element can be the name of any other Fetch Data or Dial for
Data element in the service. The current row can be moved to the first row, last row, next row, or previous
row in the set of rows associated with the Fetch Data or Dial for Data element.
• If the current row moves to another row, then the element exits through the Source element connector
pin.
• If moving the current row moves it beyond the last row, before the first row, if there are no rows, or if
the Source element has not been executed yet, then the element exits through the No more rows
connector pin.
• If an error occurs, then the element exits through the Otherwise connector pin.
We'll use a simplified version of a real estate listing service to illustrate how the Move current row element
works. For example:
• The first element is a Fetch Data element that fetches some real estate listings.
• The second element is the Text to Speech (TTS) element which speaks the property identifier from the
current row, and introduces the audio that follows.
• The third element is a Play Announcement element that plays the audio for the current row, and contains
the address and price for the current listing.
296
Copyright © 2014 ADTRAN, Inc.
619500001-1E
UCS Administrator Guide
Using Database Elements
• The fourth element is the Move current row element, which moves the current row to the next row.
• If there is another row, the service loops back to the TTS element, which now uses the value from
this row.
• If no more rows are available, the Move current row element exits through the No more rows
connector pin.
Prompt for Current Row element
The Prompt for Current Row element prompts callers to select a specific row from multiple rows fetched
by a Fetch Data element on page 290 or Dial for Data element on page 291. Callers press keys on the
keypad in response to prompts such as "For..., press 1, for..., press 2..." Callers select a specific item which
becomes the current row.
Prompt for Current
Row element
The Source element for a Prompt for Current Row element allows you to select a Fetch Data or Dial for
Data element in the service. The Select on drop-down menu contains the names of fields in the Source
element, with the exception of Audio or Fax fields.
• If the Source element has exactly one row, the element exits immediately through the Source element
connector pin.
• If the record set indicated by the Source does not exist (the element has not been executed yet), or if it
has no rows, then the element exits immediately through the No more rows connector pin.
• If the caller presses an invalid key, or fails to press a key within a few seconds, then the last prompt is
619500001-1E
Copyright © 2014 ADTRAN, Inc.
297
Using Database Elements
UCS Administrator Guide
repeated. If this occurs three times, or if an internal error occurs, then the element exits through the
Otherwise connector pin.
If the Source element has more than one row, using Text to Speech (TTS), the element prompts the callers
with "Press 1 for <value 1>, Press 2 for <value 2>," and so on, where the values of the Select on field are
from the set of rows associated with the source element. The caller is prompted for up to six choices.
• The element follows with the prompt "Press 8 to repeat these choices."
• If there are more than six rows, then it prompts with "Press 9 for more choices."
• Finally, the element prompts with "Press 0 to start over."
If the caller enters the number associated with a specific row value, the associated row becomes the current
row, and the element exits through the Source element connector pin.
• If the caller presses 8, the prompts are repeated.
• If the caller presses 0, the same prompt for the first group of rows is repeated.
• If there are more than six rows and the caller presses 9, the element prompts with "Press 1 for <value>..."
as before, but the values are now taken from the next group of rows. This prompt is followed by "Press
7 for previous choices," and the other prompts as noted above. Pressing 7 causes the prompt for the
previous group of rows to be played.
The process continues until the caller selects a specific row. The caller uses the 7 and 9 keys to move
backwards and forwards through the set of rows.
Key Pressed
Results
0
The prompt for the first row set is played.
1-6
This selects the associated row value, and becomes the current row. The element
exits through the Source element connector pin.
7
If there are previous row sets, the prompt is played for the previous six rows.
8
The previous prompt is replayed.
9
If there are more rows, the prompt is played for the next six rows or less.
298
Copyright © 2014 ADTRAN, Inc.
619500001-1E
UCS Administrator Guide
Importing and Exporting
15. Importing and Exporting
This chapter explains how to use the Import/Export Wizard and covers the following topics:
• Overview on page 299
• Starting the Import/Export Wizard on page 299
• Importing and Exporting Items on page 299
Overview
The Import/Export Wizard allows you to share announcements, services, faxes, and fax cover pages by
importing items from another location, or exporting them from your computer to another location so that
other people can import them and use them.
Starting the Import/Export Wizard
To start the Import/Export wizard
1. Select File > Import-Export Wizard to open the wizard welcome menu.
2. Select Next.
Importing and Exporting Items
The Import/Export Wizard guides you through the process of importing or exporting an item.
To import an item
1. Using the Task Selection drop-down menu, select Import data from the File System, and then
select Next.
2. In the Import Directory field, make sure that the destination folders are correct. You can use the
Browse button to change the default destination folder.
The default destination is: C:\Documents and Settings\username\My
Documents\Export\
3. Select Next.
4. Select all the items that you want to import, and then select Next. Make sure that the box next to the
item has a check mark in it before you proceed.
619500001-1E
Copyright © 2014 ADTRAN, Inc.
299
Importing and Exporting Items
UCS Administrator Guide
5. If you want to delete an item in the change destination field, select the item and then select the Delete
button.
6. If you want to change the destination of an item, select the item and then select the Change
destination button.
7. Select Next to transfer the items.
8. Select Next when the wizard is done.
9. Select Finish.
To export an item
1. Using the Select task to perform drop-down menu, select Export to the File System, and then select
Next.
2. Select the directory where the items that you want to export are located, and then select Next.
3. Select all the items that you want to export, and then select Next. Make sure that the box next to the
item has a check mark in it before you proceed.
4. Select Finish when the wizard is finished exporting the items.
300
Copyright © 2014 ADTRAN, Inc.
619500001-1E
UCS Administrator Guide
Maintaining the NetVanta UC Server
16. Maintaining the NetVanta UC Server
Basic maintenance procedures such as backups are recommended in the event that disaster recovery is
required.
For information on restoring files and settings, refer to Restoring NetVanta UC Server
Files and Settings on page 315.
Backing up the NetVanta UC Server
Backing up the NetVanta UC Server and its data are essential for disaster recovery. The NetVanta UC
Server backup should conform to the site policy for backups.
It may be useful to backup the NetVanta UC Server in a working state using third-party
tools. Combined with current data backups, a good image can result in a quick system
restore in the event of a total system failure.
For more information on backing up and restoring the NetVanta UC Server, refer to the
Backup and Restore Procedures technical note available from the ADTRAN Support
Community (https://supportforums.adtran.com). . This and other documents are also
located on the NetVanta UC Server installation media.
619500001-1E
Copyright © 2014 ADTRAN, Inc.
301
Backing up the NetVanta UC Server
302
UCS Administrator Guide
Copyright © 2014 ADTRAN, Inc.
619500001-1E
UCS Administrator Guide
Troubleshooting
17. Troubleshooting
Overview
Occasionally problems may occur where the NetVanta UC Server does not function as expected. Some
potential problems and their solutions are noted below. Note that this is not an exhaustive list.
You can use NetVanta UC Server logs to review calls, events, system errors or warnings.
You can configure the NetVanta UC Server to automatically generate diagnostic information in the event
of errors or problems. You can also configure the diagnostic system options such that ADTRAN, your
reseller, and/or yourself is notified if the NetVanta UC Server is not functioning properly.
If you cannot find the information you are looking for in this manual or in the online help, then you can go
to the ADTRAN website for further information such as training materials, a quick reference card, SIP
phone user guides and technical notes. If you are still unable to resolve the issue then you can contact your
reseller, or ADTRAN Technical Support if a support contract is in place. For more information, refer to the
following sections:
•
•
•
•
•
•
•
•
•
Troubleshooting Playback and Recording on page 303
Troubleshooting Voicemail on page 304
Troubleshooting Message Waiting Indicators on page 305
Troubleshooting the NetVanta UC Server on page 306
Troubleshooting Performance Issues with Exchange Server on page 307
Using the NetVanta UC Server Logs on page 308
Enabling Diagnostic Information on page 314
Accessing Documentation and Training on page 315
Accessing Technical Support on page 315
• Restoring NetVanta UC Server Files and Settings on page 315
For information on configuring diagnostic system options, refer to Configuring
Diagnostics System Options on page 43.
Troubleshooting Playback and Recording
Symptoms
The beginning of message playback, announcement playback and recording, and greeting playback and
recording are being cut off when being played or recorded using the handset.
619500001-1E
Copyright © 2014 ADTRAN, Inc.
303
Troubleshooting Voicemail
UCS Administrator Guide
Cause
You are connecting the NetVanta UC Server through a gateway to an existing PBX, and the attached PBX
does not have true answer supervision.
Solution
To configure the PBX to avoid cutting off the beginning of playback and recording using
the handset
1. In the Communication System content pane, right-click the Generic PBX (via Gateway) that you want
to change, and select Open.
2. In the Options menu, enable the Prompt for handset playback and recording option.
3. Select Change.
Troubleshooting Voicemail
Symptoms
• Users complain that when they login to the telephone mailbox, there is a delay before their mailbox and
message information is available.
• You are using an IMAP server to access voicemail messages.
Causes
IMAP servers vary in the methods they support for retrieving a user's voice and fax messages, and the
speed at which they retrieve such messages.
• No query optimization, the slowest method, was selected, and a user has a large number of messages in
their inbox.
• Another search method was selected that was not supported, then the NetVanta UC Server automatically
defaulted to the No query optimization method when the selected method failed, and a user has a large
number of messages in their inbox.
• The email server is slow in responding, possibly due to a heavy load, a large number of messages in a
mailbox, or slow or unreliable network connections.
Solutions
To optimize IMAP server performance and to minimize delay between when a user logs in to their
telephone user interface (TUI) to check their mailbox, and when the NetVanta UC Server can play mailbox
and message information, such as the number of new messages, ensure that you select the fastest search
method available that your IMAP server supports.
• If you are using Gmail, GroupWise, or Lotus Notes, then ensure that you have selected the recommended
304
Copyright © 2014 ADTRAN, Inc.
619500001-1E
UCS Administrator Guide
Troubleshooting Message Waiting Indicators
method for message retrieval. Refer to Configuring IMAP Server on page 121 for more information.
• If you are not using Gmail, GroupWise, or Lotus Notes with IMAP, then ensure that you selected the
fastest search method available that was successful, as outlined in Determining the Appropriate Query
Optimization Technique on page 123.
Selecting a method that is unsupported for your configuration will decrease server
performance and increase message retrieval delay as the selected method is attempted
and fails, before the NetVanta UC Server defaults to the No query optimization method.
• If you are using the No query optimization method, then encourage users to avoid storing large numbers
of messages in their inbox as this will delay the message retrieval process.
• Reduce the number of messages in the user's inbox.
• Ensure that the email server is operating correctly and that it is not overloaded, or that it was not
overloaded at the time of the complaint.
• Ensure that the network connection between the NetVanta UC Server and the email server is reliable and
has sufficient bandwidth in both directions.
Troubleshooting Message Waiting Indicators
Sometimes message waiting indicators (MWI) on phones are incorrect following a power failure or
changes to the PBX.
For information on configuring message waiting indicators system-wide, refer to
Configuring Message Waiting Indicator Options on page 24. For information on
configuring a user’s message waiting indicator, refer to Configuring a user’s message
waiting indicator on page 83. For information on synchronizing message waiting
indicators when messages are accessed through the web or through a mobile device,
refer to Configuring Message Delivery on page 116.
Symptoms
The MWI on phones are incorrect.
Possible Causes
• A power failure has occurred.
• Changes were made to the PBX.
Solution
You can resynchronize the MWI on phones.
To resynchronize message waiting indicators on phones
Select Tools > Resynchronize All message waiting indicators.
619500001-1E
Copyright © 2014 ADTRAN, Inc.
305
Troubleshooting the NetVanta UC Server
UCS Administrator Guide
Troubleshooting the NetVanta UC Server
ADTRAN has observed that third-party firewall and antivirus products can cause problems with the proper
operation of the NetVanta UC Server.
The NetVanta UC Server is tested with Microsoft security products, such as Windows
Firewall and Windows Defender.
Symptoms
• NetVanta UC Server services keep shutting down with Trend Micro software installed.
• The NetVanta UC Client crashes, doesn't load forms, or produces unknown software errors.
Possible Causes
Sometimes problems can arise from third-party firewall or antivirus software installed on computers
hosting the server or client software.
Solutions
Proceed with the following potential solutions in the order in which they appear. Only when solution A and
B have been attempted and failed, should solution C be tried.
If a problem occurs, ADTRAN Technical Support advises that the third-party product be
removed from the system prior to contacting Technical Support for assistance. For
more information, refer to Accessing Technical Support on page 315.
Verify that the following folders are excluded from antivirus software scanning (as noted in the NetVanta
UC Server Deployment Guide, and in the NetVanta UC Server Installation Guide).
• C:\Program Files\ADTRAN
Or any folder in which the NetVanta UC Server application is loaded.
• C:\ADTRANLogs
Or the folder to which logging application is configured.
• C:\Program Files Microsoft SQL Server
Or the default location of the database folder.
306
Copyright © 2014 ADTRAN, Inc.
619500001-1E
UCS Administrator Guide
Troubleshooting Performance Issues with Exchange Server
1. Uninstall the third-party antivirus or firewall software.
2. Shutdown the NetVanta UC Server and restart.
Antivirus and firewall behavior is unpredictable even after shutting down or
uninstalling.
Wipe clean the computer hosting the server/client software, including the OS, and reinstall.
Troubleshooting Performance Issues with Exchange
Server
Symptoms
• Reduced performance on Microsoft Exchange Server.
Causes
Mailbox monitoring is enabled on the Exchange Server, and the default setting for mailbox monitoring for
users is set to on.
Alternatively, mailbox monitoring is enabled on the Exchange Server, and the default setting for mailbox
monitoring for users is set to off, but a significant number of individual users have mailbox monitoring
enabled.
Mailbox monitoring enables synchronization of message waiting indicators when users access messages
through Microsoft Outlook Web Access or through a mobile device. However, mailbox monitoring can
negatively impact system performance.
For more information on mailbox monitoring, refer to Configuring Message Delivery
on page 116.
Mailbox monitoring increases the traffic between the Exchange Server and the NetVanta UC Server.
Depending on the number of users configured for mailbox monitoring, the bandwidth between the
Exchange Server and the NetVanta UC Server, and the CPU power, performance may be affected. On
systems with more than 100 users, system design and engineering must consider the increased load that
keeping open large numbers of mailboxes will have on the Exchange Server. Enabling monitoring of more
than 500 mailboxes requires careful consideration and probably should not be done without a slow roll-out
procedure to validate the performance of both Exchange Server and the NetVanta UC Server in the specific
customer environment. If your Exchange Server is at or near capacity, then you may want to disable
mailbox monitoring.
619500001-1E
Copyright © 2014 ADTRAN, Inc.
307
Using the NetVanta UC Server Logs
UCS Administrator Guide
Solutions
The following are two possible solutions to improving performance on Exchange Server by disabling or
decreasing mailbox monitoring. Select the option you prefer, and then follow the relevant instructions
below to implement it.
• Disable mailbox monitoring system-wide so that mailbox monitoring is disabled for all users, regardless
of individual user settings.
• Enable mailbox monitoring, and set the default setting for mailbox monitoring for users to off, then
enable mailbox monitoring only for those users who require it.
To disable mailbox monitoring system-wide
1. In the Administration navigation pane select Servers.
2. Double-click on Exchange.
3. Under Mailbox monitoring uncheck Enable mailbox monitoring.
Mailbox monitoring is now disabled for all users, regardless of each users' mailbox monitoring
settings.
To enable mailbox monitoring and set the default for users to off
1. In the Administration navigation pane select Servers.
2. Double-click on Exchange.
3. Under Mailbox monitoring ensure that Enable mailbox monitoring is checked, and set the Default
setting for users to Off. The default setting for users is to have mailbox monitoring turned off,
however individual users can have mailbox monitoring enabled.
To enable or disable mailbox monitoring for an individual user
1. In the Administration navigation pane, select Users.
2. Right-click on the user whose mailbox monitoring settings you want to change, and select Open.
3. Select the Messaging tab.
4. Under mailbox monitoring select Enabled or Disabled to turn mailbox monitoring on or off for the
user.
For more information, refer to Configuring a user’s message storage on page 79.
Using the NetVanta UC Server Logs
This section explains how to manage alert notifications of errors and warnings, logging statistics, and logs
and the information that they record. Logs record events that occur in the system. The administrator can
308
Copyright © 2014 ADTRAN, Inc.
619500001-1E
UCS Administrator Guide
Using the NetVanta UC Server Logs
view logs for events on trunks and user extensions. Four categories of events are recorded in logs: events,
system errors and warnings, sent items, and received calls. You can view logs and store them for future
reference, track activity that takes place, and troubleshoot occasional problems. Using the Import/Export
wizard, you can export call logs as a tab separated or XML-based file. The call log files can be used by
other reporting applications to provide historical reports on voicemail activity. For more information about
the Import/Export wizard, refer to Importing and Exporting on page 299.
Content pane
Navigation pane
Information pane
The Events log tracks information related to user attempts to perform mailbox management.
The System Errors and Warnings log provides information that you can use to troubleshoot problems
that occur with your call answering.
To troubleshoot specific system errors and warnings, refer to Troubleshooting Warning
Logs on page 321.
The Sent Items log tracks information on outgoing faxes and events related to the use of the Notify Pager
and Deliver Messages elements. Details for each delivery or dispatch attempt are recorded, including the
date and time of the attempt; the phone number dialed; the port that handled the attempt; and the final
outcome of the delivery or notification attempt.
The Received Calls log tracks incoming calls, regardless of whether the NetVanta UC Server answered
them or not. Information logged includes the caller name and phone number, if available; the date, time,
and length of the call; whether the call was answered, and by which port; and whether a message was left
or not.
Errors and Warnings Alert Notifications
If an error or warning occurs, for example, the NetVanta UC Server was unable to deliver a message, then
the NetVanta UC Server generates an error or warning log. When an error or warning log is produced, and
there were no previous unacknowledged errors or warnings, then NetVanta UC Server also produces an
entry in the Windows event log to indicate what has happened. Administrators will see an orange bar
displayed at the bottom of the NetVanta UC Client window as an alert that some action may be required.
To learn more about the alert, refer to Appendix B - Troubleshooting Logs on page 319. Conversely, when
errors and warnings are acknowledged, and there are no more unacknowledged errors or warnings, then a
different entry is created in the Windows event log, and the orange bar in the NetVanta UC Client
disappears.
619500001-1E
Copyright © 2014 ADTRAN, Inc.
309
Using the NetVanta UC Server Logs
UCS Administrator Guide
To view system errors and warning logs
1. On the left side of the NetVanta UC Client, select the Logs navigation bar to open the Logs menu.
2. Select System Errors and Warnings. On the right side in the Logs summary pane, the errors and
warning logs appear.
To acknowledge the alert notification
On the right side in the Logs summary pane, right-click on an error or warning log to accept or
acknowledge the error or warning. The orange bar will no longer appear, and the error or warning message
is no longer visible at the bottom of the NetVanta UC Client window.
Microsoft Windows Small Business Server (SBS) 2008 records unacknowledged errors or warnings in the
NetVanta UC Server. This simplifies management such that Administrators do not need to have the
NetVanta UC Client open in order to be aware of any error or warning messages.
When the NetVanta UC Server is installed on Windows SBS 2008, a custom alert is automatically
configured for the SBS 2008 Console. If the NetVanta UC Server is not installed on the SBS 2008 system,
but is installed on another system on the network, then consult the Microsoft documentation for how to
create a custom alert.
To create a custom alert definition when the NetVanta UC Server is not installed on the
SBS 2008 system
1. Refer to www.msdn.microsoft.com/en-us/library/cc721719.aspx for details on how to create a custom
alert.
2. Specify the following:
Path
Application
Provider
NetVanta UC Server
SetEventID
256
ClearEventID
512
The Windows SBS Console display is refreshed every 30 minutes. This means that the
console display will not change immediately when an error or warning occurs, or when
all errors or warnings are accepted or acknowledged.
To access the NetVanta UC Server alerts from Windows SBS 2008
1. From the Start menu access the Event Viewer.
2. Open the Windows SBS Console, and select the Network tab. Under Computers, any NetVanta UC
Server unacknowledged errors or warnings will appear.
Mailbox message logging statistics
In the information pane of the Logs menu, two tables provide a visual representation of the message
310
Copyright © 2014 ADTRAN, Inc.
619500001-1E
UCS Administrator Guide
Using the NetVanta UC Server Logs
summary and the summary of operations done by all users on the system that are managing their
mailboxes:
• Message Count table
• Summary of Operations table
If message summary is skipped during mailbox management, the Message Count table is
not displayed in the information pane.
The log entry types are represented by different icons. The following table explains some of the icons that
might appear in your list of log entries.
Table 17–1: Log entry icon definitions
Icon
Definition
Error—represents an error, for example in voice message delivery
Warning—represents a warning
Received calls—represents calls that come in on a specified port
619500001-1E
Copyright © 2014 ADTRAN, Inc.
311
Using the NetVanta UC Server Logs
UCS Administrator Guide
Table 17–1: Log entry icon definitions
Voice Mail access—represents a voice message event, for example, a voice message
sent from a NetVanta UC Server user to another user
Pager access—represents events in which NetVanta UC Server users send or receive a
page
Message delivered
Voice Mail access—represents user voicemail access, for example, users accessing
their own mailbox to receive voice messages
Log entry
Managing logs
To get the Logs menu, select the Logs navigation bar. You can retrieve and view, remove, and archive logs.
You can rename and delete log archives, and export a call log using the Import-Export wizard.
You can configure the NetVanta UC Server to automatically archive logs. For more
information, refer to Setting Administrative, Maintenance, and Diagnostic Options on
page 42.
To retrieve and view a log
1. Double-click the log folder that you want to view. The contents of the log are displayed in the
summary pane. When a log folder is open, its icon appears as an open book.
Closed log folder
Open log folder
2. Use the vertical scroll arrows to view the list of log entries.
3. Select a log entry to view information about it in the details pane.
312
Copyright © 2014 ADTRAN, Inc.
619500001-1E
UCS Administrator Guide
Using the NetVanta UC Server Logs
To remove old log entries
1. Right-click anywhere in the summary pane.
2. Select Clear log.
3. Select one of the following:
•
•
•
•
Everything
Entries created before today
Entries created before the beginning of the month
Entries created before a specific date
If there are unacknowledged errors or warnings, you cannot archive or clear log items.
You must accept the notifications first.
4. If you enabled Entries created before a specific date, enter the date in the field.
5. Select OK.
To archive a log
1. Right-click anywhere in the summary pane.
2. Select Archive log.
3. Select one of the following:
•
•
•
•
Everything
Entries created before today
Entries created before the beginning of the month
Entries created before a specific date
If there are unacknowledged errors or warnings, you cannot archive or clear log items.
You must accept the notifications first.
4. If you enabled Entries created before a specific date, enter the date in the field. The new archive is
put in the navigation pane as a log with a default title based on the current date.
Log archive
5. Select OK.
To rename a log archive
1. Select the archive that you want to rename.
2. Select Edit > Rename.
619500001-1E
Copyright © 2014 ADTRAN, Inc.
313
Enabling Diagnostic Information
UCS Administrator Guide
3. Enter a new name for the archive.
To delete a log archive
1. Select the archive that you want to delete.
2. Select Edit > Delete.
3. Select Yes to confirm the deletion.
To export a call log using the Import-Export wizard
1. Select File > Import-Export Wizard, and then select Next.
2. Select Export Activity Report, and then select Next.
3. Select the types of logs that you want to export, and then select Next.
4. Enable either of the following, and then select Next:
• All logs—exports all call logs
• Date range—exports call logs from within a range of dates that you specify
5. Select the file type for the call log that you want to export.
6. Do either of the following, and then select Next:
• Enter a location for the file in the Save exported file as field.
• Select Browse to find a location for the file.
7. If you want to save the configuration, enter a name in the field.
8. Select Next to export the log.
9. Select Close.
View the call log files using the appropriate application, for example, Microsoft Excel.
Enabling Diagnostic Information
During the NetVanta UC Server installation, one of the prerequisite components installed was the NetVanta
UC Server Logging Tools. In the event of errors or problems, this tool enables the NetVanta UC Server to
automatically generate diagnostic information. You can configure the NetVanta UC Server so that this
314
Copyright © 2014 ADTRAN, Inc.
619500001-1E
UCS Administrator Guide
Accessing Documentation and Training
diagnostic information is automatically sent to the ADTRAN Technical Support team.
For information on configuring diagnostic information, refer to Configuring
Diagnostics System Options on page 43. ADTRAN does not take action in response to
the emails received, but gathers the data for statistical purposes only to aid in
improving the NetVanta UC Server. ADTRAN will not take action unless a support
incident is raised, following standard support procedures. For information on
contacting ADTRAN Technical Support, refer to the ADTRAN website at
www.adtran.com.
Accessing Documentation and Training
If you want more information than what is available in this manual or in the online help, then go to the
ADTRAN Support Community website at (https://supportforums.adtran.com). Here you will find training
materials, a quick reference card, along with SIP phone user guides, and technical notes.
Accessing Technical Support
Unless there is a support contract in place, please see your reseller for support information. For more
information on ADTRAN Technical Support, refer to the ADTRAN website at www.adtran.com.
If you are contacting ADTRAN Technical Support, then please ensure that you have the following
information readily available.
• Product edition (Standard, SIP, or CEBP)
• Product version
• Service code
The Service code is an identification number to be used when contacting ADTRAN Technical Support. If
you are contacting ADTRAN Technical Support then you will need to enter the service code number over
the phone, so have the number ready when you call. The service contract type and expiry date are available
for your information.
To access the NetVanta UC Server product and service information
From the NetVanta UC Server select Help > About UC Client. Alternatively, select the ? button on the
toolbar.
Restoring NetVanta UC Server Files and Settings
To restore data from a Microsoft backup file requires that the data has been previously backed up using
619500001-1E
Copyright © 2014 ADTRAN, Inc.
315
Restoring NetVanta UC Server Files and Settings
UCS Administrator Guide
appropriate backup procedures.
For disaster recovery purposes, ensure that you backup the NetVanta UC Server
regularly. For information on backing up the NetVanta UC Server, refer to Backing up
the NetVanta UC Server on page 301. For more information on backup and restore
procedures, refer to the Backup and Restore Procedures technical note available from
the ADTRAN Support Community (https://supportforums.adtran.com). This and other
documents are also located on the NetVanta UC Server installation media.
Restoring the NetVanta UC Server from a backup file only restores the system to the
state it was when the backup file was created. Any changes made to the system since
the backup file was created will need to be repeated.
316
Copyright © 2014 ADTRAN, Inc.
619500001-1E
UCS Administrator Guide
Appendix A - Installing and Uninstalling Software
Appendix A - Installing and Uninstalling Software
Overview
This appendix outlines the procedures for installing and uninstalling software for the NetVanta UC Server.
Installing Active Directory Users and Computers
Console
If you do not have automatic access to Active Directory Users and Computers console, you must install the
Microsoft snap-in. The DLLs that you require are:
• CAMMCUserExt.dll
• CAMMCUserContextMenuExt.dll
The server installation puts these files in the BIN folder with the other executable files. The server
installation also “registers” the DLL with Windows so that, on the server, the NetVanta UC Server
extensions are available immediately after installation. This means that, if you start the Active Directory
Users and Computers MMC snap-in, you can see the NetVanta UC Server property page and context menu
extensions.
You must have the Administrator pack installed on the client operating system for the
DLLs to function properly.
You can use these extensions on another computer.
To make the MMC extensions available on another computer
1. Copy the DLLs from the server computer to another folder on the computer on which you want them
to be available. For example: C:\Program Files\ADTRAN\NetVanta UC Server\Bin
2. Register the DLLs by executing the following programs:
regsvr32 "C:\Program Files\ADTRAN\NetVanta UC Server\Bin\cammcuserext” and
regsvr32 "C:\Program Files\ADTRAN\NetVanta UC Server\Bin\cammcusercontextmenuext”
In both cases, a menu appears indicating that the registration is successful.
You do not have to do further configuration. However, both extensions support the use of a configuration
file called “DomainsToSearch.cfg”. Either extension searches for registered NetVanta UC Servers on the
local domain and any domains connected to it with which it has a two-way trust relationship. If any of the
619500001-1E
Copyright © 2014 ADTRAN, Inc.
317
Uninstalling Server Software
UCS Administrator Guide
domains are inaccessible (for example, one domain is a test domain and its domain controller is shut
down), it can take up to 20 seconds for MMC to determine this, which slows initialization. To overcome
this problem, you can specify the explicit list of domain names to search for NetVanta UC Servers. These
names are put, one per line, in the configuration file. If there is no configuration file, then all domains are
searched.
The configuration file (if it exists) is in the same folder as the DLLs.
Uninstalling Server Software
Uninstalling the server software does not automatically delete the NetVanta UC Server user account or
remove the Exchange mailbox or Exchange permissions for the NetVanta UC Server.
To uninstall the server software
1. Select Windows Start > Settings > Control Panel.
2. Select the Add/Remove Programs icon.
3. From the list of programs, select UC Server.
4. Read the instructions and then select Remove.
5. Restart the computer. All components of the software are removed.
Deleting the server user account
Deleting the server user account does not remove the Exchange mailbox for or Exchange permissions.
To delete the server user account
1. Select Windows Start > Programs > Administrative Tools (Common).
2. Select User Manager for Domains to open the User Manager for Domains menu box.
3. From the list of users, select UC Server.
4. Press Delete on the keyboard.
5. Confirm the deletion at the warning prompts.
318
Copyright © 2014 ADTRAN, Inc.
619500001-1E
UCS Administrator Guide
Appendix B - Troubleshooting Logs
Appendix B - Troubleshooting Logs
Overview
The NetVanta UC Server tracks system errors and warnings in log files, which may be used for
troubleshooting. This section includes potential system errors and warnings that may occur, and possible
causes for and solutions to these issues.
Not all errors and warnings necessarily require action.
For more information on troubleshooting, refer to Troubleshooting on page 303.
Troubleshooting System Error Logs
The following is a list of potential system errors that may be noted in the System Errors and Warning logs.
To troubleshoot a system error, search the list below for the log entry, and note the possible causes of and
solutions for the error.
Severity
Log Entry
Serious Error
Failed to create {identity} %s. Internal Verify that all NetVanta UC Server processes are
error %d.
started, and retry creating the identity.
Serious Error
Failed to deliver a message to user
'%s'
A message that was queued for message
delivery has given up attempting to deliver the
message. The messages will be delivered to the
system defined default mailbox.
Verify the connection and permissions to the
message store.
Serious Error
Failed to get server object for user
'%s'.
Verify network connectivity.
Verify the NetVanta UC Server’s service
accounts file permissions on the .\NetVanta UC
Server folder.
619500001-1E
Possible Causes and Solutions
Copyright © 2014 ADTRAN, Inc.
319
Troubleshooting System Error Logs
UCS Administrator Guide
Severity
Log Entry
Possible Causes and Solutions
Serious Error
Failed to update Active Directory
user's extensions (hr=0x%08x).
Verify network connectivity and the connection
to Active Directory.
Verify the NetVanta UC Server’s service
accounts file permissions on the .\NetVanta UC
Server folder.
Re-run the NetVanta UC Server Configuration
Wizard.
Serious Error
Internal error finding the Exchange
Server message store.
Verify the connection to Microsoft Exchange
Server.
Validate the NetVanta UC Server’s service
account has the appropriate permissions.
Serious Error
System diagnostics has detected a
potential problem with port %s.(port
displayed as [name [extension,
deviceId]]).
The port auditing system has detected a
problem with one or more of the system ports.
Possible problems:
PBX port is bad
Wiring is connected to the wrong port on the
PBX. Call each port individually and monitor in
the NetVanta UC Server Ports Manager to
ensure that calls are being received on the
expected port.
Wiring is bad. Verify the wiring.
Serious Error
The minimum disk storage threshold
has been exceeded. New voice
messages will not be saved until the
problem is corrected.
Increase the disk storage, or remove any files
that are not required.
Fatal Error
Application Services have been
restarted to recover from an error
condition. In most situations, the
system will be operating normally
after this occurs. If this log entry
appears regularly or frequently, then
more investigation is required.
For more information, refer to the following
section The following log entry may appear in
the System Errors and Warning Logs: on
page 320.
The following log entry may appear in the System Errors and Warning Logs:
Error: Application Server Restarted
Description
Application services have been restarted to recover from an error condition. In most cases the system will
operate normally after this occurs. However, if this log entry appears regularly or frequently, then further
investigation is required.
Potential Causes
• Microsoft Exchange Server is not responding in a timely manner.
• Slow Microsoft Active Directory responses
320
Copyright © 2014 ADTRAN, Inc.
619500001-1E
UCS Administrator Guide
Troubleshooting Warning Logs
• Slow system behavior (e.g., the CPU is overloaded)
• Other activities are occurring which is suspending or slowing down operation (e.g., virus scanning or
search indexing)
• Software issues
To investigate potential causes of the restart log entry
1. Validate the correct operation of voicemail and auto attendants.
2. Validate the NetVanta UC Client connectivity to the server.
3. Validate access to user mailboxes on all mail servers.
4. Review previous logs of a similar nature to see if there is a pattern (for example, they all occur at 3:00
am).
• If there is an obvious pattern in the logs, consider the possibility of other activities interfering, such
as virus scans, application updates and so on.
• If logs occur rapidly or frequently, there is likely a problem in the configuration or operation. In
this case contact ADTRAN Technical Support.
• If logs occur infrequently, then continue with normal operation.
For information on contacting ADTRAN Technical Support, refer to Accessing
Technical Support on page 315.
Troubleshooting Warning Logs
The following is a list of potential warnings that may be noted in the System Errors and Warning logs. To
troubleshoot a warning, search the list below for the log entry, and note the possible causes of and solutions
for the warning.
Not all warnings necessarily require action.
Log Entry
Possible Causes and Solutions
'%s' display pattern not defined
The Definity PBX configuration file (.\NetVanta UC
Server\Data\System\Definity*Definition.cfg) in use has been
edited manually and a required display pattern is missing.
Call reason code %s is invalid in key :
%s
An analog PBX configuration file (located in .\NetVanta UC
Server\Data\System) has been edited manually and a
specified call reason code for an In Band Signalling key
doesn’t exist in the valid call reasons defined in the same file.
619500001-1E
Copyright © 2014 ADTRAN, Inc.
321
Troubleshooting Warning Logs
UCS Administrator Guide
Log Entry
Possible Causes and Solutions
Cannot write to file xxx.
Verify the NetVanta UC Server’s service accounts file
permissions on the .\NetVanta UC Server folder.
Re-run the NetVanta UC Server Configuration Wizard.
Configuration file could not be copied:
%s
Occurs when the PBX-specific configuration file doesn’t exist
and the template configuration file cannot be copied.
Verify the NetVanta UC Server’s service accounts file
permissions on the .\NetVanta UC Server folder.
Re-run the NetVanta UC Server Configuration Wizard.
Configuration file does not exist: %s
The file .\NetVanta UC
Server\Data\System\CallInfoOverride.cfg has been edited
manually and one or more of the entries in this file are invalid.
Consult the inline documentation for details about valid syntax
rules.
Display format definition error, no
matching '\"' found : %s
Display format error, illegal character
'%c' is found : %s
The Definity PBX configuration file (.\NetVanta UC
Server\Data\System\Definity*Definition.cfg) in use has been
edited manually and an error was encountered in parsing a
’display format’ entry.
Duplicate override spec : %s in key %s
Duplicate pattern type %c in match
pattern : %s in key %s
An analog PBX configuration file (located in .\NetVanta UC
Server\Data\System) has been edited manually and an In
Band Signalling key’s match pattern has been duplicated.
Error : '%s' compiling regular
expression : %s in key %s
An analog PBX configuration file (located in .\NetVanta UC
Server\Data\System) has been edited manually and an In
Band Signalling key’s match pattern cannot be converted to a
regular expression.
Error : '%s' compiling regular
expression '%s' from display rule '%s'
The Definity PBX configuration file (.\NetVanta UC
Server\Data\System\Definity*Definition.cfg) in use has been
edited manually and an error was encountered in parsing a
’display format’ entry.
Error in reason code translation, at
most two characters are allowed in
each field : %s
The Definity PBX configuration file (.\NetVanta UC
Server\Data\System\Definity*Definition.cfg) in use has been
edited manually and a reason code translation has more than
2 characters in a field (fields are separated by a “,”).
Error in repeat count after '_' in : %s
Error in repeat count after '%c' in : %s
The Definity PBX configuration file (.\NetVanta UC
Server\Data\System\Definity*Definition.cfg) in use has been
edited manually and an error was encountered in parsing a
’display format’ entry.
Exception %s caught, Wrong format in
override rule file on line : %s
Exception caught, Wrong format in
override rule file on line : %s
The file .\NetVanta UC
Server\Data\System\CallInfoOverride.cfg has been edited
manually and one or more of the entries in this file are invalid.
Consult the inline documentation for details about valid syntax
rules.
322
Copyright © 2014 ADTRAN, Inc.
619500001-1E
UCS Administrator Guide
Troubleshooting Warning Logs
Log Entry
Possible Causes and Solutions
Failed to parse pattern line '%s',
ignoring
The Definity PBX configuration file (.\NetVanta UC
Server\Data\System\Definity*Definition.cfg) in use has been
edited manually and a display pattern has an invalid value.
Failed to retrieve server address
The NetVanta UC Server is unable to find the network address
on the associated network adapter. This commonly occurs if
the files were copied from one NetVanta UC Server machine
to another.
To correct, navigate to the communications system network
information and re-select the adapter that you want to bind
with the NetVanta UC Server.
Once selected, select OK.
Failed to update %s's database with the There was a problem communicating with the database
received fax. The fax will be saved
defined in the Receive Fax element.
instead to the default mailbox.
Check your database connection parameters, and ensure that
the database is available.
Illegal characters found in
allowedNondigitCharactersInExternalN
umber %s
The Definity PBX configuration file (.\NetVanta UC
Server\Data\System\Definity*Definition.cfg) in use has been
edited manually and the
“allowedNondigitCharactersInExternalNumber tag has one or
more invalid characters.
Illegal characters found in literals in %s The Definity PBX configuration file (.\NetVanta UC
Server\Data\System\Definity*Definition.cfg) in use has been
edited manually and an error was encountered in parsing a
’display format’ entry.
Incompatible match pattern : %s or
overrides in key %s
An analog PBX configuration file (located in .\NetVanta UC
Server\Data\System) has been edited manually and an In
Band Signalling key’s match pattern is invalid.
Input file xxx does not exist
Verify the NetVanta UC Server’s service accounts file
permissions on the .\NetVanta UC Server folder.
Re-run the NetVanta UC Server Configuration Wizard.
Invalid call progress tone spec : %s
A PBX configuration file (located in .\NetVanta UC
Server\Data\System) has been edited manually, and
“StandardTone[x]” (where [x] = 1...9) is defined and formatted
incorrectly.
Invalid disconnect spec : %s
An analog PBX configuration file (located in .\NetVanta UC
Server\Data\System) has been edited manually and there is
an error with the value for the tag “disconnectType.” It must
match one of the following values:
positive
disconnectTone
disconnectDTMFSequence
disconnectSilence
619500001-1E
Copyright © 2014 ADTRAN, Inc.
323
Troubleshooting Warning Logs
UCS Administrator Guide
Log Entry
Possible Causes and Solutions
Invalid disconnect tone spec : %s
An analog PBX configuration file (located in .\NetVanta UC
Server\Data\System) has been edited manually and the tag
disconnectType has a value of disconnectTone. However, the
required corresponding tag disconnectTone is missing from
the same configuration file.
Invalid override spec : %s in key %s
An analog PBX configuration file (located in .\NetVanta UC
Server\Data\System) has been edited manually and an In
Band Signalling key’s match pattern is invalid.
Key 'disconnectType' not defined : %s
An analog PBX configuration file (located in .\NetVanta UC
Server\Data\System) has been edited manually and the tag
‘disconnectType’ is not present.
No key is defined in section : %s
An analog PBX configuration file (located in .\NetVanta UC
Server\Data\System) has been edited manually and all keys
are missing from the section “In Band Signalling”.
No match pattern are defined in key :
%s
An analog PBX configuration file (located in .\NetVanta UC
Server\Data\System) has been edited manually and an In
Band Signalling key is missing a match pattern (i.e., the value
after the “:”).
No reason code are defined in key : %s An analog PBX configuration file (located in .\NetVanta UC
Server\Data\System) has been edited manually and the
reason code (i.e., the value before the “:”) for an In Band
Signalling key is missing.
Pattern length(%d) differs from display
length(%d) in pattern : %s
The Definity PBX configuration file (.\NetVanta UC
Server\Data\System\Definity*Definition.cfg) in use has been
edited manually and an error was encountered in parsing a
’display format’ entry.
Pattern type %d not supported yet
A PBX configuration file (located in .\NetVanta UC
Server\Data\System) has been edited manually, and in-band
signaling protocol definition was added that is not yet
supported.
System did not receive Caller ID
information from the modem and
hence, could not transmit it to your
pager. Ensure that your phone rings at
least twice before answering otherwise
you will not receive Caller ID
information.
Verify that Caller ID is available when attempting to send a
pager notification which includes sending the Caller ID.
The current number of ports has
Verify that you have enough ports or application server
exceeded the number of licensed ports. channels licensed.
To verify the licensing, navigate to Help > Licensing
Information to refer to the existing licensing capabilities.
Contact your ADTRAN reseller to purchase additional ports or
application server media channels.
324
Copyright © 2014 ADTRAN, Inc.
619500001-1E
UCS Administrator Guide
Troubleshooting Warning Logs
Log Entry
Possible Causes and Solutions
The data source, %s, referenced in the
element, %s, is unknown.
ServiceStateMachine when an element refers to a data source
that no longer exists. Verify the following:
1.The ODBC data source, if applicable, is correctly configured
2.The fields in the reference data source may have been
changed or deleted. Verify the data source configuration.
The specified number was disallowed
by dialing restrictions.
Occurs when the application server attempts to dial a number
whose pattern matches a dial restriction entry (configured in
Tools > Options > Dialing).
Verify the application server toll restrictions.
Unable to communicate with remote
agent '%s'
The application server was unable to communicate with the IP
Office remote agent.
Check the remote agent properties, IP address, port, and
network connection state.
Unable to deliver a message to user
'%s'
There was a problem delivering a voice or fax message to a
user.
Check your message store and network connection states to
ensure that the connection to the message store is available.
This error occurs on the first message delivery failure.
Unrecognized character %c in match
pattern : %s in key %s
An analog PBX configuration file (located in .\NetVanta UC
Server\Data\System) has been edited manually and an In
Band Signalling key’s match pattern has an invalid character.
Wrong format in override rule file on line The file .\NetVanta UC
: %s...
Server\Data\System\CallInfoOverride.cfg has been edited
manually and one or more of the entries in this file are invalid.
Consult the inline documentation for details about valid syntax
rules.
619500001-1E
Copyright © 2014 ADTRAN, Inc.
325
Troubleshooting Warning Logs
326
UCS Administrator Guide
Copyright © 2014 ADTRAN, Inc.
619500001-1E


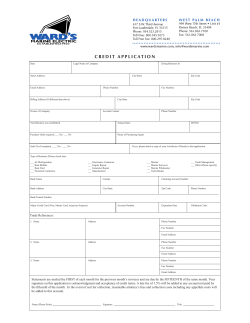
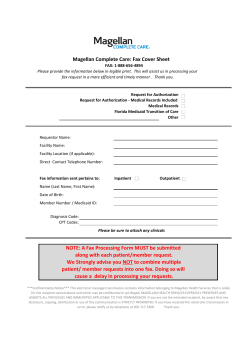
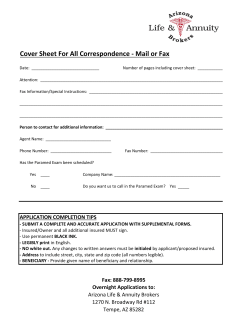
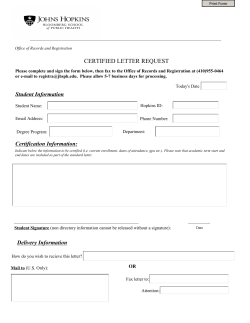
© Copyright 2026