
Review Certification Workbook
Review Certification Workbook Version 8.1 Last Updated: February 4, 2015 Contents Overview.............................................................................4 2 Tab Strip.........................................................................19 Exam Details............................................................................................4 9 Pivot................................................................................32 9.1 Pivot Menu..................................................................................... 32 Before You Begin....................................................................................4 3 Browser...........................................................................20 9.2 Pivot Settings ............................................................................... 32 Workbook Conventions......................................................................4 3.1 Browser Icons................................................................................ 20 9.3 Display Settings........................................................................... 32 Part 1:. Introduction to Relativity......................................6 4 Show/Hide Browser.......................................................21 1 Relativity Overview.........................................................7 5 Batching.........................................................................22 1.1 Browser Restrictions......................................................................7 5.1 Review Batches Tab.................................................................... 22 9.4 Pivot Profiles.................................................................................. 32 Part 2: Special Considerations.........................................34 Part 2: Review Questions.................................................35 5.2 Checking Batches Out............................................................... 22 2 Logging In........................................................................8 5.3 Checking Batches In................................................................... 22 Part 3:. Core Reviewer Interface.......................................36 2.1 User Passwords................................................................................8 5.4 Batch Status................................................................................... 23 Core Reviewer Interface................................................................... 37 5.5 Viewing Your Batched Documents........................................ 23 Image Viewer....................................................................................... 38 3 Terminology.....................................................................9 Core Reviewer Interface and Image Viewer Icons.................. 39 3.1 Workspaces.................................................................................... 10 6 View Bar..........................................................................24 3.2 Fields ............................................................................................... 10 6.1 Show Current Path...................................................................... 24 Part 1: Special Considerations.........................................11 7 Document List Options Strip........................................29 1.2 Native Mode.................................................................................. 40 7.1 Save as Search.............................................................................. 29 1.3 Image Mode.................................................................................. 40 7.2 Reset Column Sizes..................................................................... 29 1.4 Long Text Mode........................................................................... 40 1 Document View Selector...............................................40 1.1 Viewer Mode................................................................................. 40 Part 1: Review Questions.................................................12 Part 2: Workspace Navigation.........................................13 Workspace Navigation..................................................................... 14 Pivot Navigation................................................................................. 16 7.3 Show/Hide Filters........................................................................ 29 7.4 Clear All........................................................................................... 29 2 Viewer and Long Text Options......................................41 7.5 Document Display Count......................................................... 29 2.1 Persistent Highlight Sets........................................................... 41 7.6 Move First/Previous/Next/Last............................................... 29 2.2 Magnification................................................................................ 41 Pivot Icons............................................................................................. 17 2.3 Reset Zoom.................................................................................... 41 1 User Tools........................................................................................... 18 8 Document Set Information Bar....................................31 2.4 Searching in a Document......................................................... 41 1.1 Favorites.......................................................................................... 18 8.1 Returned Set Selector................................................................ 31 2.5 Modes.............................................................................................. 41 1.2 User Drop-down Menu............................................................. 18 8.2 Number of Documents in Set................................................. 31 2.6 Fit Document to Window......................................................... 41 8.3 Number of Items Displayed..................................................... 31 2.7 Print.................................................................................................. 41 OVERVIEW Relativity Reviewer Workbook 2 2.8 Go to Next/Previous Highlight............................................... 42 7.2 Save, Save & Next ....................................................................... 51 5 Stop Words.....................................................................64 7.3 Copy from Previous.................................................................... 52 3 Image Viewer Options...................................................43 7.4 Adding a Choice.......................................................................... 52 6 Conditional Searching...................................................65 3.1 Fit Options..................................................................................... 43 7.5 Switching Layouts....................................................................... 52 6.1 Toggle Conditions On/Off........................................................ 65 3.2 Rotate Page................................................................................... 43 7.6 Collapsible Layout Categories................................................ 52 3.3 Document Selector..................................................................... 43 3.4 Highlights ...................................................................................... 43 8 Related Items Strip........................................................53 3.5 Redactions..................................................................................... 43 8.1 Related Items Icons..................................................................... 53 3.6 Font Size......................................................................................... 44 8.2 Propagation................................................................................... 53 3.7 Delete Redactions and Highlights........................................ 44 8.3 Document Skip............................................................................ 53 3.10 About the Image Viewer........................................................ 45 3.11 Markup Navigation Pane........................................................ 45 3.12 Thumbnails.................................................................................. 45 4 Viewer.............................................................................47 4.1 Email Link to Document........................................................... 47 4.2 Imaging On-the-Fly.................................................................... 47 5 Navigation Bar...............................................................48 6 Core Reviewer Interface Toggle Options.....................49 6.1 Keyboard Shortcuts.................................................................... 49 6.2 Show/Hide Document List....................................................... 49 9 Persistent Highlight Sets Panel....................................54 Part 3: Special Considerations.........................................55 Part 3: Review Questions.................................................56 Part 4: Special Considerations.........................................71 Part 4: Review Questions.................................................72 Appendix 1: Answer Key .................................................73 1.1 Search Index Selector................................................................ 58 2 Filtering..........................................................................59 3 Keyword Search.............................................................60 4 dtSearch.........................................................................61 4.1 Proximity Searching................................................................... 61 6.5 Stand-Alone Document Viewer.............................................. 49 4.2 Fuzzy Searching........................................................................... 61 6.6 Show/Hide Tab Strip................................................................... 50 4.3 Stemming....................................................................................... 62 OVERVIEW 8.2 Keyword Expansion.................................................................... 68 1 Search Features.............................................................58 6.4 Swap Viewer Panes..................................................................... 49 7.1 Coding Documents..................................................................... 51 8.1 Concepts......................................................................................... 68 Part 4:. Searching in Relativity.........................................57 6.3 Dock/Undock Document Viewer........................................... 49 7 Layouts and Coding Forms...........................................51 8 Analytics ........................................................................68 8.3 Find Similar Documents............................................................ 69 3.8 Show Markup History................................................................ 44 3.9 Change Markup Visibility.......................................................... 45 7 Saved Searches Browser...............................................66 4.4 Wildcards........................................................................................ 62 4.5 Auto-recognition......................................................................... 62 4.6 Dictionary....................................................................................... 63 Relativity Reviewer Workbook 3 Overview When working with Relativity during review, it is necessary to understand and familiarize yourself with several features of our software to help streamline your daily productivity. Relativity has many innovative features that allow you to work efficiently, ranging from efficient coding processes to advanced searching functions. Exam Details The Relativity Review Specialist exam is a 100-question quiz. You will have 60 minutes to complete the quiz. Question types include: multiple choice, multiple response, true/false, hotspot, and matching. For more details on the exam itself, please review the Frequently Asked Questions (FAQ) document on the Certifications page of kCura’s website. Before You Begin This workbook is designed to help you learn about Relativity’s capabilities that are utilized throughout the review process and will help you prepare for the Relativity Review Specialist exam. Use this workbook as a reference tool for the Relativity Review Specialist exam in tandem with the following materials located on the Relativity Documentation website: workbook. The online Review Specialist Practice Quiz, which draws on content from this workbook, our documentation, and the other recommended study materials, will give you an idea of what to expect on the exam. You can take this quiz as often as you like to supplement your studies. Workbook Conventions The workbook is divided into four parts. Each part is broken down into subsections, which dive deeper into specific Relativity review features. As you work through this workbook, notice the tutorials, webinars, documentation and videos highlighted in the Table of Contents that appear at the beginning of every part. These resources enhance your experience and further your knowledge on the tasks and features in their associated sections. Other key components of this workbook include the reference guides and icon legends presented in Parts 2 through 4. When analyzing these guides, note the associated numbered callouts and their corresponding sections. These are designed to help you visualize what you should see in Relativity. The legends in various subsections reference Relativity icons used as you progress through the review process. • Relativity Features • Relativity Quick Reference Guides • Relativity Reviewer Documentation Additionally, we suggest you pay close attention to the Special Considerations throughout the workbook and complete the Review Questions, both of which can be found on the last pages of each part. Answers to the Review Questions can be found in our documentation, as well as in the Answer Key at the end of the OVERVIEW Relativity Review Certification Workbook 4 Workbook Callouts Icon Description Tutorial Quick, helpful hands-on resources demonstrating how to navigate through various tasks step-by-step. Webinar Live or on-demand training sessions to provide additional guidance on specific topics. Documentation kCura’s electronic documentation should be referenced to find more information on key topics. Video Helpful resource to gather additional information on specific topics. Note Calls attention to an important note, tip, or key point to remember. Read and understand these notes as they explain key topics or features that may be covered in the Relativity Review Specialist exam. OVERVIEW Relativity Review Certification Workbook 5 Part 1: Introduction to Relativity INTRODUCTION TO RELATIVITY Relativity Review Certification Workbook ¾ 6 1 Relativity Overview Relativity is a feature-rich, web-based platform that provides complete processing capabilities, computer-assisted review, image and native file review, powerful searching, diverse coding options, flexible workflow capabilities and integrated productions, Unicode and foreign language support, and text analytics – all delivered in a highly scalable solution. 1.1 Browser Restrictions Relativity is currently only fully compatible with Internet Explorer and is not yet available for other browsers, such as Chrome, Safari, or Firefox. www.edrm.net Relativity Overview from President and CEO, Andrew Sieja Reviewer Training webinar INTRODUCTION TO RELATIVITY Relativity Review Certification Workbook 7 2 Logging In Before accessing Relativity, a system administrator must create users and set up login credentials, in addition to granting the user permission to access the workspace they will be working in. Getting Started Tutorial 2.1 User Passwords As a user, an administrator may provide you with the ability to reset your password. This can be done by using the Reset Password option in the user dropdown menu. This link directs you to a Reset Password pop-up where you must enter your old password, followed by entering your new password. Users can generate a password request using the Forgot Your Password? link on the login screen. Relativity passwords must meet the following requirements: • Use at least 8 characters • Include the following criteria: –– 1 lowercase letter –– 1 uppercase letter –– 1 number –– 1 non-alphanumeric character Depending on the company you work for and how their Relativity environment is set up, there will be different authentication methods used for your user account. INTRODUCTION TO RELATIVITY Relativity Review Certification Workbook 8 3 Terminology The terms in the table provide definitions for some of Relativity’s most common terms. Familiarize yourself with these terms as you move through this workbook. Term Definition Workspace Workspaces within Relativity are typically document repositories used to store, display, search, organize, and categorize documents related to a specific client. User Users are individuals who have access to the Relativity environment. Group Relativity users are organized by groups and may be associated with more than one at a time. Groups are added to Relativity workspaces and access permissions may vary from workspace to workspace. Document A document is a record within a Relativity workspace. Field Fields are used to store document metadata or coding information within Relativity. Choice Choices are predetermined values that are applied to Single and Multi-Choice List fields. Views Views are customizable lists of items within Relativity. For example, a list of documents is controlled by a view. Layout Layouts are web-based coding forms that allow users to view and edit Document fields values. Batch A static set of documents split into multiple document sets based on administrator-set criteria. INTRODUCTION TO RELATIVITY Relativity Review Certification Workbook 9 3.1 Workspaces • Null: Box has been filled in with a shaded blue square. When running a case in Relativity, documents related to the case or investigation are stored in workspaces. This securable document repository helps facilitate searching, organizing, and categorizing content. Reviewers should be aware that Null and No are not the same coding decision and should ensure they’re selecting the correct one. After logging into Relativity, a list of Relativity workspaces you have access to will display. In order to access the documents of a workspace, you must first click the workspace’s link. Relativity will then navigate to the document list in that workspace, allowing you to begin your review tasks. 3.3 Choices Some coding fields are completed by selecting predetermined values called choices. These choices can be applied to single and multiple choice field lists. The following image displays the designation field as a single choice and the issues field as multiple choice. Single choice lists often appear as radio buttons while multiple choice lists often appear as check boxes. In the case of longer lists, both can appear as a popup picker. 3.2 Fields Fields are used to display information, such as metadata and reviewers’ coding choices. Relativity supports a number of different field types, all of which serve different purposes within the application. For example, the Date field type holds the date on which that document was sent. A Yes/No field is often employed when reviewers need to make quick, binary decisions. Yes/No fields can be displayed on layouts as either drop-downs, radio buttons, or check boxes. In the case of check boxes, remember that a Yes/No field will actually display three states: Yes, No, Null. • Yes: Box is checked. • No: Box is unchecked. INTRODUCTION TO RELATIVITY Some of these fields require only one choice to be selected, while others allow for the selection of multiple choices. For instance, a Designation field might have choices such as responsive or not responsive. A reviewer will need to select the appropriate choice to determine a document’s relevance to the case. Other fields, like the Date Sent field, will not be associated with choices and will display as a read-only field. Relativity Review Certification Workbook 10 Part 1: Special Considerations • Choices can be nested. If a choice is nested and the child choice is selected, the parent choice is automatically selected. • To exit a workspace and return to your list of available workspaces, click Workspaces on the user drop-down menu. • In order to have access to a workspace, you must belong to a group granted permission to the workspace. INTRODUCTION TO RELATIVITY Relativity Review Certification Workbook 11 Part 1: Review Questions REVIEW QUESTIONS Workspace Navigation 1. Which of the following is not a valid password? a. Or@nge11 b. Appl3Pie c. Rasb3rry! 2. Once logged in to Relativity, the case documents will be available in a ___________. 3. True or False: The metadata loaded to Relativity will be stored in fields. 4. How do you open a workspace? a. b. c. d. Select the workspace field button Click on the workspace button Click on the workspace name Select the workspace name from the user drop-down 5. Select the correct definition for these terms: View, Field, Group a. Used to store document metadata b. Used to organize a system of users c. Used to display lists of items INTRODUCTION TO RELATIVITY Relativity Review Certification Workbook 12 Part 2: Workspace Navigation WORKSPACE NAVIGATION Relativity Review Certification Workbook ¾ 13 Workspace Navigation 2 5 7 9 1 6 3 8 4 WORKSPACE NAVIGATION 1 User Tools Access help, support, and customizable user settings 4 Show/hide browser Show or hide browser pane 7 Document List Options Strip Document options to filter and navigate your results 2 Tab Bar Navigate between different Relativity functions 5 View Bar Controls which documents and fields are displayed in the Document List Manager 8 Document Set Info Bar Controls the returned set of documents and how these documents are displayed 3 Browser Panel to view document folders and saved searches 6 Document List Contains document list 9 Search Index Selector Select search indexes to run on your document set GUIDE Relativity Review Certification Workbook ¾ 14 Workspace Navigation Icons USER TOOLS Favorites Hi, Reviewer VIEW BAR Favorites User drop-down Show current path Documents Selected view In This Folder & Subfolders Include Family Scope Menu Include Related Documents BROWSER Folders DOCUMENT LIST OPTION STRIP Save as Search Saved Searches Reset Column Sizes Refresh Show Filters Clear All Items GUIDE 1 - 25 (of 1,000) Document Display Count Relativity Review Certification Workbook ¾ 15 Pivot Navigation 5 3 2 1 4 7 6 8 PIVOT NAVIGATION 4 Pivot Profile selection Select existing or create new Pivot Profiles 7 Chart tool icons Resize chart to fit current window (settings cog and and adjust chart settings resize) Select field(s) for Pivot, including ability to specify Year or Year/Month on date fields 5 Grid Display Renders Pivot results in grid format 8 List Display Enables/disables grid/chart/list results 6 Chart Display Renders Pivot results in chart format 1 Pivot toggle icon Enables/Hides pivot interface 2 Group by/Pivot on field menus 3 Grid/Chart/List toggle icons GUIDE Renders Pivot results in list format Relativity Review Certification Workbook ¾ 16 Pivot Icons PIVOT TOGGLE ICON GRID/CHART/LIST TOGGLE ICONS Toggle Pivot On/Off Toggle Grid On/Off Toggle Chart On/Off GROUP BY/PIVOT ON FIELD DROP-DOWN Custodian Toggle Item List On/Off Group By drop-down Go Applies settings to data set PIVOT PROFILE SELECTION Sent Date Year/Month Clear Pivot On drop-down Summarizes on Year/ Month combination Removes Pivot settings from display Custodians per Month Selected Pivot profile Save Save modifications Save As Save as new profile CHART TOOL ICONS Adjust chart settings Resize chart to fit current window GUIDE Relativity Review Certification Workbook ¾ 17 1 User Tools There are several key areas which are important for a Relativity user to learn. In order to use the system effectively, it is essential to understand the navigation features along with keyboard shortcut basics. After opening a workspace, you will be taken to the main document view. In the top-right corner of the workspace, you will see some tools available to you: Favorites and the user drop-down. Favorites allows you to bookmark certain pages to easily navigate back to them. The user drop-down offers a variety of different user options. 1.1 Favorites The favorites menu contains all of your bookmarks (Favorites) and the last 10 pages in your browsing history (Recents). The Favorites menu appears at the top of the application window next to your user name. You can use Favorites to quickly navigate within Relativity. If you visit a particular page on a regular basis, adding it as a Favorite minimizes the number of clicks it takes to get there. To mark a page as a Favorite, click the gray star next to the page name in the Recent section. Once you click it, the star turns yellow and Relativity adds it to the Favorites section. There is no limit to how many pages you can mark as a favorite. Note: You can make a document a favorite by first clicking the Show/Hide tab strip button to make the Favorites menu visible. • Reset Password: Opens a pop-up window to change your password. • My Settings: Opens a pop-up window that allows you to change various personal settings. The following fields are editable under your user information: –– First name –– Last name –– Email Address –– Item List Page Length: A number indicating the default list length for all your lists in Relativity. It can be set from 1 to 200. –– Default Selected File Type: The default view mode –– Advanced Search Public by Default: Determines whether saved searches are public or private by default. • Logout: Logs you out of Relativity. In the next section, you’ll find: • Help: Launches the Relativity Documentation website. • Support: Opens a new window containing the Technical Support page of the kCura website where you can open a support ticket. • About: Opens a dialog displaying the Relativity version number and licensing agreement information. Note: Depending on your permissions, you may not have the option to edit your settings or reset your password. In the next section, you will see a section displaying the current user’s email address. Finally, at the bottom of the user drop-down menu, you have the option to enable or disable Data Focus using the following options: 1.2 User Drop-down Menu • On: When Data Focus is turned on, Relativity displays an adjusted interface that displays more data in the view by removing the workspace name and white The user drop-down appears in the top-right corner and contains several helpful configuration options, including: space from the main header. • Off: When Data Focus is turned off, Relativity displays the standard interface with the workspace name in the top-left corner. • Workspaces: Returns you to the Workspaces tab where you can open a different workspace. WORKSPACE NAVIGATION Relativity Review Certification Workbook 18 2 Tab Strip A workspace contains tabs that provide easy access to different Relativity features, including documents and batches. You can access different tabs by selecting the tab of choice on the tab strip. Your administrator determines which tabs you can access. As such, tab access may vary from case to case. WORKSPACE NAVIGATION Relativity Review Certification Workbook ¾ 19 3 Browser The browser, located on the left side of the workspace, allows you to navigate to your documents. Depending on your permissions, you may not see the browser. If you can see the browser, it contains the following options for browsing through your documents: • Folders • Saved Searches There are also two other browsers which are typically used for administrator functions: Field Tree and Cluster. Most reviewers will not have access to these browsers. 3.1 Browser Icons The browser icons are located directly below the browser. The folders browser displays the folder hierarchy in your workspace. The folder structure is set when documents are imported into the workspace. A folder often has multiple subfolders. You can expand and collapse desired folders by clicking the + or - signs. Expand (+) will open up the folder so that you can see the sub-folders. Collapse (-) will get you back to just the root folder. By navigating to the saved searches browser, you will be able to create a new search or browse previously saved searches. See Part 5 for more information on saved searches. WORKSPACE NAVIGATION Relativity Review Certification Workbook 20 4 Show/Hide Browser The browser is open by default. You can hide or show the browser by clicking the vertical Hide Browser or Show Browser link to the right of the browser. Clicking Hide Browser closes the browser and expands the document list to the full width of the Relativity window. Depending on what you are doing, you may want to hide the browser to maximize your view. The filtered selections you choose in the browser appear on the vertical bar when the browser is hidden. Reopen the document browser by clicking the Show Browser link. You can also resize the document browser by selecting the browser resize handle – the thick, black vertical bar to the left of the Show/Hide Browser link. Navigating Case Documents Tutorial WORKSPACE NAVIGATION Relativity Review Certification Workbook 21 5 Batching Batching helps structure a large-scale review by giving you the ability to assign documents to multiple reviewers in an organized fashion. They also organize documents into groups based on certain criteria for review. Common examples of batch criteria include custodian, email thread, or issues. Batches will typically include entire document families to help streamline the review. This means emails and their attachments will be grouped together. batches to other users by selecting their names. Your administrator may create batches and assign them to you or, with the appropriate permissions, ask you to check them out. You may also be tasked with assigning batches out to other people. 5.3 Checking Batches In Checking Documents In and Out Tutorial 5.1 Review Batches Tab Note: As a reviewer, you may only be able to check out one batch at a time. However, an administrator can assign you multiple batches at once. Checking batches back in (or reassigning them to others) is a very simple process that can be performed at any time after the batch has been checked out. There are no review percentages or other completion criteria — in fact a batch can be checked back in immediately after it has been checked out if necessary. To check a batch in, navigate back to the Review Batches tab and click Edit next to that batch. A pop up window will open and you will have to choose one of the following options: The review batches tab will hold all of the batches you have permission to see. You can access your assigned batches by clicking on the Review Batches tab. 5.2 Checking Batches Out Once you access the Review Batches tab, you will see the batch list view, along with additional information, such as batch set number, batch size, if the batch has been checked-out/reviewed, and by whom. By clicking Edit next to a batch, you can check it out. • Check In As Pending: Checks in the batch as pending, often used when the batch is only partially complete. • Check In As Completed: Checks in the batch as completed. • Reassign To: Assigns the batch to another user. Note: Depending on your permissions, you may not see the Reassign To button. If an administrator has given you the appropriate permissions, you can also assign WORKSPACE NAVIGATION Relativity Review Certification Workbook 22 5.4 Batch Status There are three different batch statuses. • Blank: The batch is currently inactive. • In Progress: The batch has been checked out, but not yet checked in. • Completed: The batch has been checked in as completed. 5.5 Viewing Your Batched Documents A view can be created by an administrator which will only return documents within your checked out batches. If this view is created and all other documents are secured, you will only see documents in your checked out batches when you log in to the workspace. See the associated image for an example. WORKSPACE NAVIGATION Relativity Review Certification Workbook 23 6 View Bar At the top of the document list window you will see the view bar. The view bar is used to view document sets. The view bar consists of the following sections: • • • • Show current path Views Scope Menu Include Related Documents Any time you see a list of items in Relativity, it is defined by a view. Along with layouts, views represent one of the main places where users can see and interact with a document’s metadata and coding. Different views are created to control: • Items displayed in lists, based on a set of specified criteria • Fields of information related to displayed items • The default sort order of the items Note: There is no limit to the number of columns displayed in a view. 6.1 Show Current Path The show current path icon, which is the left-most icon, displays the current browser location path. This path is helpful if you do not have access to the folder browser or when the browser is collapsed. 6.2 Views The first drop-down on the view bar displays your default view. You can navigate the drop-down menu to access other views. Each view displays a set of fields, arranged into columns, the order of which was chosen when the view was created by an administrator. Some common views a reviewer might see are: • • • • • • My Checked Out Batches Unreviewed Documents Responsive Documents Unassigned and Not Reviewed Documents Email Threads Textual Near Duplicates WORKSPACE NAVIGATION 6.2.1 Batch Views A common reviewer view is one that limits the displayed document to your current batch(es). Within the batch, documents can be grouped by fields, such as custodian or designation. Some batch views are further split up to show only reviewed or unreviewed documents, and update automatically each time a document is coded and saved. 6.2.2 Family Views Some views will display document families (such as emails and their attachments) together. These lists might typically contain blue lines which indicate where one family begins and another ends. It is also common for some family views to indent the attachments in order to make them easier to distinguish from their parents. Views such as these can make it easier to spot-check coding when propagation is enabled. For more information on propagation, please see Part 3. Relativity Review Certification Workbook 24 Note: For family views that already display both the parent and attachment documents, it is not necessary to select include families in the relational field drop-down. Please see section 5.2.4 for more information on including related documents. 6.2.3 Email Threading Views Email threading views are similar to family views, but extend beyond a family of documents to encapsulate entire conversations. For example, consider a very common situation where a document set contains emails from many different custodians. Threading will capture the entire conversation, regardless of the source, and arrange the email chain in order, typically including attachments. • What is inclusiveness? One of the greatest advantages to using email threading during review is the ability to eliminate a lot of duplicate information by focusing on the emails that contain an entire conversation thread. These emails are called inclusive emails. Consider the following two examples: You’ll note that email #2, in addition to containing some new information, also includes all of email #1. Consequently, email #2 is the inclusive email of this thread. As such, it would not be necessary to review email #1, as it is non-inclusive; all of its information can be accessed elsewhere. Please note the following about inclusive emails: • An email thread may contain more than one inclusive email. This often occurs when a conversation branches out into parallel conversations. • An email might be inclusive because of its attachments. Consider the previous two examples again. If email #1 had an attachment that email #2 did not have, then both emails would be considered inclusive. • How are threads displayed in the view? When threading is applied, indentation bubbles indicate each email message’s indentation level within the thread. For example, the first email in the chain would be “1,” an email responding to the first email would be “2,” and an email responding to the third email would have a “4.” This visualization also allows us to quickly identify potentially missing emails in a thread. The color of the indentation bubble indicates inclusiveness and uniqueness. Inclusive email messages contain the prior message content and have a “Yes” WORKSPACE NAVIGATION Relativity Review Certification Workbook 25 value in the Inclusive Email field. Duplicate spare email messages contain the exact same content as another message. • A blue bubble indicates that the email is inclusive and is not a duplicate spare. • A gray bubble indicates that the email is non-inclusive or a duplicate spare. • What do the file icons mean? The Email Threading Display field includes the following file type icons: • • • • • Reply ( ): Original file name begins with RE: Forward ( ): Original file name begins with FW: Other ( ): Original file name does NOT begin with either RE: or FW: Unknown ( ): File type cannot be found. Email contains attachments ( ): File is an email containing attachments, which are sometimes also indented. • How are attachments displayed? Email attachments do not have a number bubble next to their name in the email thread display field. Instead they have an icon that indicates their file type. The following image shows three email threads, separated by blue lines. Note the second thread, which contains document numbers MCASH_007101 – MCASH_007103, consists of a parent email and two Excel attachments. WORKSPACE NAVIGATION Note: Not all inclusive emails will have a blue bubble. An email which is both inclusive and a duplicate spare will have a gray bubble. 6.2.4 Textual Near Duplicate Views As a reviewer, you may be asked to review a set of documents that are extremely similar but not identical to each other. For example, you may need to ensure a series of very similar reports are coded the same way. Another possible use is to help you locate additional privileged documents that might have been missed during the first pass review. In situations like these, it is common to use a view that displays textual near duplicates. Prior to the view’s creation, an admin will run a near duplicate analysis during which documents with similar text patterns are placed together into relational groups. Exact syntax and word order are heavily considered during this analysis, unlike the conceptual analytics tools discussed later in this workbook. For more information on conceptual analytics, please refer to Part 4. Relativity Review Certification Workbook 26 Here are the two most common fields you’ll likely encounter on a textual near duplicate view: • Textual Near Duplicate Principal - identifies the principal document with a “Yes” value. The principal is the largest document (as measured by amount of text) in the duplicate group. It acts as an anchor document to which all other documents in the near duplicate group are compared. • Textual Near Duplicate Similarity - the percent value of similarity between the near duplicate documents in a given group and their principal document. Each group of textually similar documents will contain a principal, which is typically the document in the group that contains the most text. All documents in a near duplicate group will be assigned a score that indicates how similar each document is to its principal. Consider the following example. The first document, AZIPPER_0011323, is the group’s principal, as indicated by the “Yes” value in the Textual Near Duplicate Principal field. It also has a score of 100. All principals will have a score of 100, as they are by definition 100% similar to themselves, however, not all documents with a score of 100 are necessarily principals. The documents underneath are part of the principal’s relational group. The second and third documents are identical to the principal. We know this because they are 100% similar to it, as shown in the Textual Near Duplicate Similarity field on the far right of the view. The last three documents are very closely similar to the principal but are not exact duplicates; their scores indicate they are each 99% similar to the principal. Note: Textual near duplicate groups have a relational field that can be used to code several documents at once. For more information about relational fields and the related items coding strip, please see Part 3. 6.2.5 View Sorting You can use any sort-enabled field in the view to sort the entire searching set - the number of documents indicated in the bottom-right. Click any field heading once to sort the documents in that field in ascending order, alphabetically, and a down arrow appears next to the heading name. Clicking a second time on the field heading sorts the documents in descending order, alphabetically, and an up arrow appears. Click the field name a third time to clear the sort and return the field to its original order. 6.2.6 Scope Menu The second drop-down in your view bar shows the Scope Menu, which controls the folder scope of the documents returned. The scope menu contains the following options: • In This Folder and Sub-folders: Displays the documents in the currently selected folder AND the documents in all of its sub-folders. This is the default option. • In This Folder: Displays only the documents in the currently selected folder in WORKSPACE NAVIGATION Relativity Review Certification Workbook 27 the browser, not its sub-folders. 6.2.7 Include Related Documents The Include related documents drop-down returns items related to the documents in the view. • Blue text indicates language in the second document but not the first. • Red text indicates language in the first document but not the second. • Black text: indicates language common to both documents. Please refer to the following image for an example. The options vary by workspace but may include family groups, email threads, duplicates, and textual near duplicates. Once you use your browser selection and view bar to select the correct set of documents, you can begin working with the document list. 6.2.8 Relativity Compare Sometimes a reviewer is required to find subtle distinctions between very similar documents. A helpful way to identify these differences is by using the Relativity Compare feature. To compare documents, the Compare field icon ( ) must be present on your view, as indicated in the following image. Clicking the Compare icon will open a new window which automatically populates the initial document as the “Compare” document. The reviewer may then choose the second document by clicking the ellipsis button next to “With”, and selecting the desired target. Once both documents are in place, clicking the Compare button will trigger the analysis. WORKSPACE NAVIGATION Relativity Review Certification Workbook 28 7 Document List Options Strip As a reviewer, you have some control in the way you interact with the document list, using the Document List Options Strip. 7.1 Save as Search The Save as Search icon allows you to convert your combined filters and conditions (see Show/Hide Filters section) into a saved search and provide a meaningful name for the saved search. Please refer to Part 4 for more information on conditional searching. 7.2 Reset Column Sizes Within your document list, you can customize the look and feel by changing a column’s size. To do this, hover over the white line at the edge of the column header. A double arrow appears, indicating that you can move the column. At this point you can drag the line in either direction to adjust the column width. The other columns on the page automatically adjust. If the size of your document list columns is changed, select the Reset Column Sizes icon to return to the original settings. Note: Filters are not saved when navigating to a different view. 7.4 Clear All By clicking the Clear All icon, all current filter settings are removed. You can also clear out an individual column’s filter by clearing out the search box and pressing enter. This option is only available after you set a filter. Keep in mind results vary based on the active filters. 7.3 Show/Hide Filters 7.5 Document Display Count Within a view, filtering provides a fast and easy way to search the document list. You can use filters to search within the fields displayed on the active view. Filters are available for item lists displayed on tabs and pop-ups. The Document Display Count shows how many documents you are currently viewing, and how many documents are available. The items displayed per page may vary depending on either administrator or user settings. Filters query across the searchable set of documents in the active view to return desired results. The Show Filters icon activates the filters for an item list, displaying filtering options at the top of each column. By clicking the icon again, it hides the filtering options. The associated image shows the Email To field with filters turned on. For more information on filtering, review Part 4. WORKSPACE NAVIGATION 7.6 Move First/Previous/Next/Last Relativity uses a series of navigation arrows to move through documents in your list. You can use the Move First/Previous/Next/Last icons to navigate to different Relativity Review Certification Workbook 29 documents in your searchable set. Move First brings you to the first document in the searchable set. Move Last brings you to the first document in the last set of items displayed in your searchable set. Move Previous and Move Next brings you backward or forward to the first document of the next or previous page of your searchable set. WORKSPACE NAVIGATION Relativity Review Certification Workbook 30 8 Document Set Information Bar Although many cases have a large volume of documents, in order to help the performance, Relativity only loads the first 1,000 documents by default. Because of this, it’s important to understand how to add additional documents to the review set. more documents to your returned set. Note: If you would like to change your environment’s results set selector defaults, please contact your Relativity Administrator. The document set information bar gives you further control over how you work with your searchable set of documents. The next sections review those options. 8.1 Returned Set Selector The returned set selector indicates how many documents are currently available in your searchable set. Depending on your environment, the default returned set size may be 500 or 1,000. The number of documents in your result set is the number of documents you’re able to browse in the core reviewer interface. For instance, if your returned set selector is set to 1,000 documents, you will be able to browse the first 1,000 documents of your searchable set. You will not be able to browse to document 1,001 in the view. To do so, you can either: • Add more documents • Apply filters to return only the documents you wish to browse 8.2 Number of Documents in Set The number of documents in your searchable set is the number next to the returned set selector drop-down. This is the total number of documents in your view. 8.3 Number of Items Displayed The number of items displayed is the number of documents that you can currently see in your view without navigating to the next page. The default is 25 items per page, but by selecting the drop-down you can change this number. 8.1.1 Adding More Documents From the document set information bar, click the drop-down menu next to ‘Viewing the’ language to add documents to the returned set. Depending on your environment, you may be able to add 500, 1,000, or 5,000 WORKSPACE NAVIGATION Relativity Review Certification Workbook 31 9 Pivot Relativity offers a variety of data analysis resources to help provide greater insight into your case documents and help accelerate the review process. The most significant of these resources is Pivot, which enables the visualization of key data in your case to reveal trends and patterns. Using Pivot, users can create tables and charts to visually summarize and simplify analysis. When it comes to analyzing data, Pivot’s availability is not limited to or dependent on the data set. Pivot can be used whether you are looking at all records, a subset of records, such as search results. 9.1 Pivot Menu The pivot menu displays options to run reports on pivot-enabled items listed in a view or saved search. To display the pivot menu, click on the Toggle Pivot on/off icon ( ) in the top-right corner of any view. Once open, the Pivot menu contains the following sections: Pivot settings, Display settings, and Pivot Profiles. 9.2 Pivot Settings Pivot can be used to identify trends. In order to capture these trends, two fields are used: Group By and Pivot On. Group By is used to define the vertical axis of the Pivot grid. It is possible to run Group By on its own if you wish to only get results on a single field. Pivot On is used to break down the totals displayed in each row. This field acts as the horizontal axis of the report. If you choose a date field for the Group By or Pivot On fields, you can also select month, year, or year/month to further drill down into your results. WORKSPACE NAVIGATION 9.3 Display Settings Pivot can display information in three ways: as a grid, chart, and list. These buttons are used to show or hide the Pivot grid, chart, and item lists. Click the buttons on and off to show or hide the results in that form. • Grid: Displays Pivot results in grid form. Displays results using the Group By field as the vertical axis and the Pivot On field as the horizontal axis. • Chart: Displays Pivot results in chart form. Displays results using the Group By field as the vertical axis and the Pivot On field as the horizontal axis. To further drill down, it can be displayed as a bar, pie, or line chart in a Pivot Profile. • List: Displays result documents in list format. It is possible to run a pivot with any combination of these three settings. 9.4 Pivot Profiles Pivot Profiles are reports that you can save with predefined configurations. The profile is then available for access at a later time. In the profile, there are many configurable settings, including the Group By and Pivot On, and Date fields, as well as the chart formats. To preserve profile settings, you may click save, or if you’re modifying settings for an existing profile, you can select Save as. Relativity Review Certification Workbook 32 There are a few additional chart formats including bar, pie, and line, which can be accessed by clicking on the cog wheel ( ) icon. • Bar: Rectangular bars with lengths proportional to the values that they represent. • Pie: Circular chart divided into sections to illustrate each value. • Line: Compares two values plotted along the vertical and horizontal axes. WORKSPACE NAVIGATION Relativity Review Certification Workbook 33 Part 2: Special Considerations Consider the following points when dealing with workspace navigation: • Always be conscious of the folder you have selected, as the selections in the view bar will impact your sorting and filtering results. • When previewing a document, hover your mouse pointer over a record’s file icon and click to open a pop-up view showing the record. • If you have permission to create and edit views, two icons appear next to the view drop-down menu that allow you to create and edit views. • You can check in a batch of documents that are not completely reviewed. • Press the Enter key to apply a filter to a view. • Views are fully customizable and will update automatically as new documents meet the view criteria. • There is no time limit to how long a batch can be checked out, however, an administrator can check in a batch on behalf of any user if required. WORKSPACE NAVIGATION Relativity Review Certification Workbook 34 Part 2: Review Questions REVIEW QUESTIONS Workspace Navigation 1. True or False: You apply a Favorite by selecting the star option from the user drop-down. 2. When the Data Focus is on, what is the expected behavior? a. Relativity displays an adjusted interface that adds extra white space b. Relativity displays an adjusted interface that removes white space 3. Name the three Pivot display settings. a. ____________________ b. ____________________ c. ____________________ 4. What do views control? (Select all that apply.) a. b. c. d. Items displayed in lists, based on a set of specified criteria. Fields of information related to displayed items. How much white space there is at the top of the workspace. The default sort order of the items. 5. When you see these icons in a document view, what do they mean? a. b. c. WORKSPACE NAVIGATION Relativity Review Certification Workbook ¾ 35 Part 3: Core Reviewer Interface CORE REVIEWER INTERFACE Relativity Review Certification Workbook ¾ 36 Core Reviewer Interface 1 2 4 5 6 7 9 8 CORE REVIEWER INTERFACE 1 Document View Selector Controls which form of the document appears in the viewer 4 Viewer Displays the current document in the selected viewer mode 7 Coding Layouts and Forms Customizable coding forms for document review 2 Viewer and Long-Text Icons Viewer and long-text mode tools to interact with your document 5 Navigation Bar Move through the returned set of documents 8 Related Items Strip Access a document’s related items, such as family and duplicates 3 Image Viewer Icons Image mode tools to interact with your document *See next page 6 Interface Toggle Options Strip Toggle options to customize your viewer settings 9 Persistent Highlight Sets Pane Displays hit counts for highlighted search terms and persistent highlight sets GUIDE Relativity Review Certification Workbook ¾ 37 Image Viewer 3 3 3 GUIDE Relativity Review Certification Workbook ¾ 38 Core Reviewer Interface and Image Viewer Icons VIEWER AND LONG-TEXT OPTIONS IMAGE VIEWER OPTIONS CORE REVIEWER INTERFACE TOGGLE OPTIONS Show/Hide Persistent Highlight Sets Zoom Out/In Email link to document Zoom Out/In Fit Actual/Width/Height Keyboard Shortcuts Legend Reset Zoom Rotate Clockwise and set all images to new rotation/Rotate pages Find Previous/Next Term and Search Modes Fit to Window Width Print Go to Previous/Next Highlight About Relativity Web Client: Native Viewer Enable/Disable Keyboard Shortcuts Show/Hide Document List Print Dock/Undock Document Viewer Document Selector Swap Panes Highlight Launch Stand-Alone Document Viewer Redact - solid black/white box, cross, and text Shows/Hides tab strip Redact - Inverse Redact - Full Page – solid black/white box, cross and text RELATED ITEMS STRIP Mass Redact Duplicate Documents Font Size Family Documents Delete Redactions and Highlights Email Thread Group Change Markup Visibility Near Dup Group About Relativity Web Client: Image Viewer Select Image Profile/ Image-on-the-fly Markup Navigation Pane GUIDE Relativity Review Certification Workbook ¾ 39 1 Document View Selector In this section, you will learn about the Core Reviewer Interface and its components. The Core Reviewer Interface is used to review and interact with your documents. There are four main panels that you will be utilizing as you make your way through the review process. These include the persistent highlight sets pane, the Relativity viewer, layouts (coding forms), and the related items pane. Using the Document View Selector, users can select how the document is displayed in the Core Reviewer Interface. To open a document, you must first click on the link for the document name or identifier from the Document List Manager. Then, you can use the Document View Selector to toggle the loaded formats of the file, such as native, image, long text, or production. Reviewing Your Documents Tutorial 1.2 Native Mode Next, is the native radio button. By selecting the native mode, a document will open using the document’s native application. For example, an Excel file would launch a new window displaying the native document. This option is only presented if a native document has been loaded. Certain document types may be restricted from native view by an administrator. Some documents’ native applications may be restricted by an administrator. In these situations, you will not be able to open the document in its native application. 1.3 Image Mode The third radio button is the Image option. The Image selection will display a TIFF or JPEG version of the document. It’s available only if an image has been loaded or created. You can highlight and redact images in this mode. 1.1 Viewer Mode Starting with the left-most radio button, you will see the Viewer. Clicking on the Viewer radio button opens the document using the Relativity native file viewer. It provides a print preview that shows how the file would look in its native application. 1.1.1 Bandwidth Tester If you experience latency or performance issues while loading a document in the Viewer, you can run a bandwidth test to detect network connection problems. The icon appears in the bottom right corner of the viewer and to the left of the layout or related items pane. Note: To learn more about the icons in Image mode, see Section 3 on Image Viewer icons. 1.4 Long Text Mode The long text radio button is the next option on the Document View Selector. This mode displays a drop-down menu of extracted text and all long text fields that have been made available in the viewer on the field edit/creation page. For example, in addition to a document’s extracted text, there might also be a long text field for translations of foreign language documents. Note: The drop-down menu will not display long text fields that are empty for the current document or fields that you do not have permission to view. CORE REVIEWER INTERFACE Relativity Review Certification Workbook 40 2 Viewer and Long Text Options In both viewer and long text modes, reviewers can utilize different tools on the Document View Selector to assist with document analysis. Working from left to right, let’s discuss how each viewer option works. Printing Case Documents Tutorial 2.1 Persistent Highlight Sets Persistent highlight sets are groups of search terms set by an administrator to be highlighted on a document. Clicking the Show/Hide Persistent Highlight Sets icon will display or hide a panel containing all persistent highlight sets in the workspace, along with each term’s hit count for the document. 2.2 Magnification If you need to zoom in on a document, you can use the Magnification feature. Zoom out and in on the current document with a 10 percent to 300 percent range using this tool. 2.5 Modes The Display Modes drop-down offers a menu for the different viewer display modes including draft, normal, and preview. • Draft –– Displays documents using a single font and size. –– Does not display embedded graphics. –– Does not display graphic or table borders. –– Wraps the text to the size of the view window. • Normal –– Displays all supported formatting. –– Wraps the text to the size of the view window. • Preview –– Displays all supported formatting. –– Wraps the text as it will be printed. Note: Draft mode does not render any embedded objects, including attachments, graphics, graphic borders, or table borders. 2.3 Reset Zoom The Reset Zoom option will reset the zoom function to 100 percent. 2.4 Searching in a Document The Find Previous and Next tool searches for terms in the current document and navigates through the hits. The left and right arrows can be used to find the previous instance of the term and the next instance of the term. 2.6 Fit Document to Window When Preview mode is selected in the user drop-down, you can opt to fit your selected document to the entire window, allowing the reviewer to see the entire page at once. 2.7 Print Some users are given permission to print documents by an administrator. To print CORE REVIEWER INTERFACE Relativity Review Certification Workbook 41 the current native document displayed in the viewer, click the print icon. • To print a native document, ensure the viewer is in native mode. • To print an image, including any redactions or highlights, ensure the viewer is in image mode. 2.8 Go to Next/Previous Highlight Using the Go to Next/Previous Highlight arrows, you can easily navigate between the next and previous highlighted terms within your document. For example, if you ran a search on the word “oil,” then opened one of the returned documents, you could move through all the highlighted hits using these buttons. These arrows may also be used to navigate persistent highlight set term hits. CORE REVIEWER INTERFACE Relativity Review Certification Workbook 42 3 Image Viewer Options In the Core Reviewer Interface, there are a variety of tools you can take advantage of to further interact with your documents. After selecting Image mode, a toolbar will appear with new icons allowing you to markup your files. In Relativity, Markups refer to the highlights and redactions you can add to a document using the Relativity image viewer. Later, we’ll go into more detail about these icons and features. degrees. 3.3 Document Selector The Selector icon allows you to select a markup within a document. Adding Redactions and Highlights Tutorial 3.4 Highlights Using Native Imaging Tutorial The first markup option in the Image viewer bar is the Highlight tool. When you create a highlight, a colored box appears in the area you select, just like using a highlighter. You can choose a color from the Highlight drop-down or use the default highlight color, which is yellow. 3.1 Fit Options There are several Fit Options available on the Image Viewer toolbar: • Fit Actual: After zooming in or out using the magnification tool, you can select Fit Actual to resize the document back to 100 percent. • Fit Width: Select this icon if you would like to see your document expand the entire width of the viewer. • Fit Page: This icon will resize the height of the document, allowing you to see the entire page in the viewer. 3.5 Redactions The next four markup features in the toolbar enable redactions. Redactions are commonly used to hide confidential or privileged information on a page. In Relativity, there are multiple types of redactions including basic, inverse, and fullpage. Users can also utilize the mass redaction tool to apply a full-page redaction to multiple pages of a document. Working left to right, let’s learn about the different markup features. 3.5.1 Black Box/White Box Redaction 3.2 Rotate Page You can choose to rotate your document in two different ways: • Rotate All Document Pages Clockwise: Rotates all pages in a document clockwise 90 degrees. • Rotate Current Page Clockwise: Rotates the current page clockwise 90 CORE REVIEWER INTERFACE The redact drop-down defaults to the black redaction. If you click this redact drop-down, users can also apply cross redactions, white box redactions, or text to a part of a document. 3.5.2 Textbox Redaction A textbox redaction allows a user to create a white redaction box with black text. Relativity Review Certification Workbook 43 The text will fill the box by default. To change the font size, keep the redaction box selected and click from the font size drop-down in the Redactions toolbar. down. New textbox redactions will automatically use the font size of the most recent redaction. You can also edit redaction text by right-clicking on the textbox and selecting Edit. The Enter Redaction Text pop-up opens for you to enter your desired redaction text. 3.7 Delete Redactions and Highlights 3.5.3 Inverse Redaction An inverse redaction creates a black redaction across the full page except on the locations where you draw boxes. A blue cast indicates where the black redaction is created, and the white box indicates the area that is not redacted. It is possible to apply an inverse redaction and other redactions on the same document at the same time. 3.5.4 Full-Page Redaction Clicking the Delete Redactions and Highlights icon will open a pop-up where you can indicate which markups you would like to remove. You will have the option to delete non full-page redactions, full-page redactions, and highlights. You can also specify the range of pages from which the selected markups should be deleted. 3.8 Show Markup History Right-clicking on a markup will allow you to view its history, as indicated in the following image. A full-page redaction creates a redaction across the entire page of a document. The full-page redactions consist of a black box, white box, text box, and cross redactions. Note: If you have a full-page redaction applied to an image, then you apply an additional full-page redaction, the most recently applied full-page redaction appears on top. If you then delete the second redaction, the first full-page redaction persists. 3.5.5 Mass Redaction You can specify a range of pages or select all pages in a document to apply a redaction to. For example, you might have a clinical study where all the patient information is on pages 21-43, so you want to redact those pages. A new window will open titled Markup Information, which displays the following: • Action: Tracks markup creation, deletion, and resizing. • User Name: Indicates who performed the action. • Timestamp: Displays when the action was performed. 3.6 Font Size For text redactions, you can alter the size of your text using the font size drop- CORE REVIEWER INTERFACE Relativity Review Certification Workbook 44 Markup navigation pane displays the following columns: • • • • • • Page Number Markup Type Markup SubType Markup Text Full Page Markup Set 3.9 Change Markup Visibility As you’re adding highlights and redactions to your document, you can opt to change the visibility of your markups. Using the Change Markup Visibility tool, you can alter the visibility mode of the markups between full visibility, transparent, and hidden. The markup visibility status will be displayed in the lower left corner of the viewer. 3.10 About the Image Viewer Clicking the About icon will open a pop-up window that provides information on the Relativity Web Client Image Viewer version. 3.11 Markup Navigation Pane The Markup Navigation Pane can be used to locate all the markups throughout a document. To open this pane, click the icon in the lower right corner of the viewer. The Markup Navigation Pane displays a list of all: • Redactions and highlights reviewers created in the document • References to their page numbers • References to parent markup sets 3.12 Thumbnails Relativity’s thumbnail feature allows you to navigate quickly through each page of a document’s images to ensure that they imaged properly. To activate thumbnails, ensure that you are viewing the current document in image mode, and then click the Show Thumbnails button ( ) at the bottom of the viewer window. By clicking the hyperlinked Markup Type, Relativity will navigate to the page where the markup was added. CORE REVIEWER INTERFACE Relativity Review Certification Workbook 45 Once you are viewing a document’s thumbnails, you can quickly scan through the images for each page. You may also delete individual images by selecting the desired image and clicking the delete button ( ) at the bottom left corner of the viewer. Multiple pages may be selected and deleted by shift-clicking. CORE REVIEWER INTERFACE To exit Thumbnail mode, click the Hide Thumbnails button ( ). Relativity Review Certification Workbook 46 4 Viewer Relativity’s viewer displays the workspace documents. Documents can be displayed as native, extracted text, images, and productions, among other options. 4.1 Email Link to Document By clicking the Email Link to Document icon in the viewer, users can quickly send an email with a link to a specific document in Relativity. A new Microsoft Outlook email message window will open and a secure link to the document will be copied into the body of the message. 4.2 Imaging On-the-Fly An administrator can give you permission to image a single document on-the-fly using the Image button in the viewer. If you have permission to access multiple Imaging Profiles, you will see a drop-down next to the Image button allowing you to select your desired profile when you image your document. CORE REVIEWER INTERFACE Relativity Review Certification Workbook 47 5 Navigation Bar Reviewers can easily move through documents loaded into the viewer by using the Navigation Bar located in the upper-right corner of the Core Reviewer Interface. Simply click on the arrows to find a document. You can go back and forth between documents or navigate directly to the first or last document in your returned set. Users can also type a number into the textbox and press Enter to move to that particular document. Note: You cannot browse past the last document in your returned set. CORE REVIEWER INTERFACE Relativity Review Certification Workbook 48 6 Core Reviewer Interface Toggle Options The Core Reviewer Interface has several icons in the upper-right corner of the window. These toggle options allow you to customize how you access, view, and code documents. Note: The keyboard shortcuts legend will also display your custom keyboard shortcuts. Using Keyboard Shortcuts Tutorial 6.2 Show/Hide Document List 6.1 Keyboard Shortcuts The review process can be tedious and any shortcuts that can speed up the process offer a huge advantage. Keyboard shortcuts allow for quick keyboardexecuted commands that will assist in the editing and review process. Relativity has a set of standard keyboard shortcuts for various navigational commands. However, you can also assign keyboard commands to fields or choices yourself. If you have permission to edit fields and choices, you’ll be able to create additional shortcuts using the Keyboard Shortcuts property on the field or choice. By default, standard user actions use system keyboard shortcuts, which are listed in the shortcut legend along with those used by Internet Explorer. The Keyboard Shortcuts Legend is accessible via the ( ) icon. Within the legend, you can sort, filter, export the list, and print by right-clicking and choosing the Internet Explorer print option. The keyboard shortcuts can be enabled or disabled by clicking the ( 6.3 Dock/Undock Document Viewer The viewer can be docked or undocked from the Core Reviewer Interface depending on your preference. If you select this icon, the viewer will open in a new window. This is particularly helpful in situations where you have more than one monitor. 6.4 Swap Viewer Panes The Swap Panes toggle option provides users the ability to switch the locations of the viewer and the layout so that whichever is on the left side will flip to the right side and vice-versa. ) icon. Note: If a shortcut is chosen for Relativity that is identical to an existing Windows shortcut, both shortcuts will be triggered. CORE REVIEWER INTERFACE Sometimes it is helpful to see both the document list and coding layout at the same time, as they often contain different sets of information. The Show/Hide Document List tool is located in the top-right corner of the Core Reviewer Interface. Clicking this icon brings up the document list on the top of the viewer. 6.5 Stand-Alone Document Viewer To view the document in a separate browser window, click the Launch Standalone Document Viewer icon in the upper-right corner of the Core Reviewer Relativity Review Certification Workbook 49 Interface. This option will open another viewer pane with an Unsynced designation at the top of the screen. This means that the stand-alone viewer is not enabled to be synchronized with the interface. To synchronize the stand-alone viewer with the core viewer, click Unsynced. This switches the stand-alone viewer setting to Synced where you can view text and images, natives, and productions side-by-side while navigating through the document queue. You can also launch more than one stand-alone viewer per document. Once you are finished using the stand-alone document viewer, click the Return to Document List link and the stand-alone viewer will disappear. Note: Keyboard shortcuts are available for use in the stand-alone viewer. For example, if you execute the shortcut for Save & Next in the stand-alone viewer, each window performs the operation and moves to the next document. 6.6 Show/Hide Tab Strip The Show/Hide Tab Strip icon changes the viewer display settings so users can see the Tab Strip as it would appear when viewing the Document List. Selecting this toggle option also displays the case name and the user drop-down menu. This feature is helpful when you wish to add a document as a Favorite, or access your Favorite list from a document. CORE REVIEWER INTERFACE Relativity Review Certification Workbook 50 7 Layouts and Coding Forms After selecting a document from the Documents view, the Core Reviewer Interface will open. Clicking on a document’s control number will open the document in read only mode, whereas clicking on the Edit link will open the document in edit mode. your coding decisions. Coding and Tagging Documents Tutorial Layouts are used to code documents. Specifically, they are web-based coding forms that allow users to view and edit document information. Layouts are the primary place for a reviewer to see and edit workspace fields. Layouts are created to perform specific tasks. For example, you can create a layout specifically for first pass reviewers and another layout for second pass reviewers or QC. These two layouts would contain different fields and choices because they would serve different purposes. In addition to coding, layouts can also simply provide additional information that may be pertinent to the document or case. After a layout has been created, there are several workflow features that can be utilized to enhance a user’s experience. 7.1 Coding Documents To code a document, you must first choose a layout from the layout drop-down then click Edit. 7.2 Save, Save & Next Once a set of coding decisions are made on a document, there are two ways to save these decisions. Clicking Save will only retain the coding decision(s) and the viewer will remain on that particular document until you manually move to the next document in the set and will shift to read only mode. Clicking Save & Next allows a reviewer to code a document, save that information, and move on to the next document in the set. It is also important to note that when navigating to the next document, you will be prompted to save if changes have been made. You are then presented with an editable form of the layout where you can make CORE REVIEWER INTERFACE Relativity Review Certification Workbook 51 7.3 Copy from Previous 7.5 Switching Layouts Layouts can be designed to include the Copy from Previous feature. Copy from Previous enhances review by providing the ability to code the current document using values from the immediately preceding document. Only specific fields enabled by an admin are available to be copied with this feature. You can modify the values as necessary, and then save these changes. Depending on your role in the review, you may have access to more than one layout. Users can easily navigate back and forth between layouts by simply clicking the drop-down at the top of the layout. This is useful for reviewers jumping between a first pass and second pass review layout. You can switch layouts in both read only mode and edit mode. However, if you’ve made unsaved changes to your document in edit mode, you will first be prompted to save your decisions. 7.4 Adding a Choice Administrators will sometimes give users the ability to add a choice directly to a layout. By simply clicking the Add link as seen in the following image, users can add a choice on-the-fly. 7.6 Collapsible Layout Categories Some coding layouts contain many fields, which are only used occasionally during review. In order to make the best use of limited layout space, some administrators will create layouts with collapsible categories. To expand or collapse a category, simply click the arrow next to the category name ( ). The following images display a layout category in both states. Once the new choice is created, it appears selected in the choice field on your layout. If you’ve created multiple new choices, the last one created is selected. New choices will also always appear in the Choices list view under the Choices tab. When creating a new choice, users will be prompted to assign the following values: • • • • • Name Order Parent choice Highlight color Keyboard shortcut CORE REVIEWER INTERFACE Relativity Review Certification Workbook 52 8 Related Items Strip Related items are special groups of documents within a workspace. These groups are connected via a special type of field called a relational field. Common examples include family groups, duplicates, email threads, and textual near duplicates. duplicates of the family member to be propagated as well. Note: Duplicates of the child attachments aren’t coded as Responsive. This action would be a Duplicate propagation triggered by Family propagation. Working with Related Items Tutorial 8.1 Related Items Icons To open a Related Items Pane within the viewer, you must first click on one of the Related Items icons at the bottom of the layout. Selecting one of these options will display a group of documents related to the active document. Depending on how your workspace is set up, these icons and options will vary. You can hover over each icon to display the name of the item. 8.2 Propagation The propagation function can help to enhance your document review workflow, as it saves time spent coding related documents. It is used to automatically force a coding value to a specified group of related items. For example, a user can tag a document as Responsive and have that value propagate to that document’s family members, duplicates, or entire email thread. Note: It is important for Relativity users to understand how propagation is implemented in the review process, as there is no warning to signal that propagation is being applied. There are limits to propagation, though, and it will not travel through multiple relational groups. For example, propagating an entire family will not then cause all CORE REVIEWER INTERFACE Note: Propagation only carries over specifically chosen coding decisions to the other documents in a relational group. Other user actions such as redactions, highlights, or imaging will not be applied to other documents via propagation. 8.3 Document Skip Document skip allows you to more efficiently code documents during review. If you enable skip, Relativity removes any document from the queue, after the current one, which doesn’t meet the view or saved search criteria. When skip is enabled, the skip menu appears at the bottom-right of the layout when you are editing documents. The associated image shows what it would look like if document skip is enabled: Skip tracks coding decisions that were already applied to documents that you have not yet reviewed. For example, the documents have been coded via propagation by an earlier coding decision, or even coded by another reviewer. In these situations, enabling skip will bypass these documents and take you to the next document which requires coding. Note: Document skip will not warn you when it skips a document. If a reviewer codes one of your documents, you will not be notified by the system when that document is skipped. Relativity Review Certification Workbook 53 9 Persistent Highlight Sets Panel Another tool utilized in the document review process is persistent highlight sets. These are reusable and transferable highlight parameters controlled by your administrator to find specified terms within your document set. If there are any persistent highlight sets in your workspace, you can see them displayed in the left-most panel of the Core Reviewer Interface, by clicking the Show/Hide Persistent Highlight Sets toggle icon. It is important to note that your workspace might have more than one persistent highlight set. Once visible, each set can be turned on/off by clicking on its light bulb icon. An additional light bulb will also be present if the current document is being viewed as the result of a search in order to see the search term hits. Using Persistent Highlight Sets Tutorial You can expand and collapse each persistent highlight set by clicking the + and - signs next to the name of the set. If the document you are currently viewing contains any of the terms specified in the set, you can view those terms and the number of times they appear in the document when you expand the set. Note: If an administrator edits a persistent highlight set while a reviewer is using it, the reviewer receives a notification that the set currently in use is undergoing modifications and will appear differently in the panel the next time the reviewer logs in and launches the viewer. Note: Both keyword and dtSearch terms will automatically be highlighted on resulting documents. These highlights can be turned off by clicking the search terms light bulb in the persistent highlight panel. CORE REVIEWER INTERFACE Relativity Review Certification Workbook 54 Part 3: Special Considerations • In order to add a redaction to a document, the document must have an image copy available. • Document skip is controlled by system administrators. Users must be assigned the ability to use document skip. • If two reviewers are working with the same markup set and simultaneously redact the same document, an error will occur. • Be sure you’re using the correct markup set when applying redactions. CORE REVIEWER INTERFACE Relativity Review Certification Workbook 55 Part 3: Review Questions REVIEW QUESTIONS Core Reviewer Interface 1. What viewer mode would you select to see a document’s extracted text? 2. True or False: Once highlights have been applied to a document, they can be switched off. 3. Which of the following are redaction tools? (Select all that apply.) a. b. c. d. Inverse White box Gray box Textbox 4. Where can you view a list of keyboard shortcuts? 5. Which of the following features help speed up your doc-to-doc review speed? (Select all that apply.) a. b. c. d. Save & Next Apply All Copy from Previous Contextual help CORE REVIEWER INTERFACE Relativity Review Certification Workbook 56 Part 4: Searching in Relativity SEARCHING IN RELATIVITY Relativity Review Certification Workbook ¾ 57 1 Search Features Relativity includes flexible search features designed to facilitate the document review process. These easily accessible features support a range of searching needs from filtering on fields and simple keyword searches to the development of complex queries. There are many ways to search your data: • Filtering allows you to search fields present in your view (or search result) for specific values. • Keyword search allows you to perform a word or phrase search, including basic Boolean operators. • dtSearch is an advanced search engine that allows you to perform a word or phrase search, including many advanced operators. • Conditional searching allows you greater flexibility to search across different field values, even on fields which are not displayed in your view. • Analytics is Relativity’s conceptual search engine. It is required for keyword expansion and similar document identification. 1.1 Search Index Selector The Search Index Selector allows you to choose an index from the available indexes in your workspace. You will most likely have one or more of the following index types: • Keyword • dtSearch • Analytics Once an index is selected, a box will appear above the document list where you can type in your search terms. To access the different search indexes in your workspace, there is a drop-down in the top-right corner of the document list. Creating Searches Tutorial Advanced Searching webinar Searching Quick Reference Guide SEARCHING IN RELATIVITY Relativity Review Certification Workbook 58 2 Filtering One of the easiest ways to search for information in Relativity is to filter on fields in a view. Filtering allows you to drill down into your data by employing multiple filters at once. Note: When filtering for dates, ensure that you’re using the greater than or less than sign along with an equal sign. Using them by themselves will produce a syntax error. There are several different filter types. Each of these types has their own set of operators. The following table describes the proper syntax for each filter type. Special Character Function Boolean Available for Yes/No field types. Conditions display a drop-down list similar to list filters. CustomOnly Uses filtering criteria from advanced and Boolean operators. List Usually associated with fields used for coding documents. Conditions vary by the type and purpose of the field associated with it. MultiList Uses multiple conditions from a drop-down menu. You can connect the conditions with the OR or AND operator. Popup Pickers Contains values for multiple or single choice fields, as well as multiple or single choice objects. Used to search on specific terms, numbers, and dates. You can enter multiple terms connected by any of the following operators: • AND Textbox • OR • BETWEEN • = (equal) • >= (greater than or equal to) • <= (less than or equal to) • % (to filter for NOT null) Note: While filtering on multiple columns, each filter is treated as an AND operator. SEARCHING IN RELATIVITY Relativity Review Certification Workbook 59 3 Keyword Search Keyword search is Relativity’s default search engine. You can use Boolean operators (AND, OR, NOT) in keyword searches, quotation marks for exact matches, and asterisks (*) for wildcards. Following are a few examples of keyword search strings using Boolean operators. For more information, reference the Keyword Search section of our online documentation. • books AND paper – the words book and paper • books OR paper – the word books or the word paper • books NOT paper – the word books and not the word paper When attempting to search for more than one word using keyword search, quotations must be used. For example, if you wish to search for the phrase “brown fox,” the query must be submitted with quotes. If quotes are not used, keyword search will interpret this as a search for the word brown and the word fox anywhere in the document regardless of location. Note: Keyword search and dtSearch handle unquoted phrases differently. Be sure to know the correct syntax when using either. SEARCHING IN RELATIVITY Relativity Review Certification Workbook 60 4 dtSearch Relativity’s dtSearch engine provides advanced search functionality such as proximity, stemming, and fuzzy searches, as well as with basic features such as Boolean operators and wildcards. Here are some examples of dtSearch syntax using basic Boolean operators: One of the most powerful and commonly used dtSearch features is the ability to run proximity searches. You can use the terms xfirstword or xlastword to limit a search to the beginning or end of a file, respectively. Another example is if you’re looking for the title of a report which occurs only at the top of the document. • Apple and Pear – Returns documents which contain both “Apple” and “Pear”. • Apple and not Pear – Returns documents which contain “Apple” but not the word “Pear”. • Apple or Pear – Returns documents which contain either the word “Apple” or the word “Pear”. • Apple Pear – Returns documents with the exact phrase “Apple Pear” Here are some examples of proximity search syntax: Note: The Boolean operator “Not” is entered differently in dtSearch and Keyword searching. The proper syntax for a Keyword search would be: Apple not Pear. Note: Searches consisting of two words without an operator are handled differently in dtSearch and Keyword searching. The search Apple Pear would be interpreted as Apple and Pear in a Keyword Search. For more information on distinctions between Keyword and dtSearch, please consult the Searching Quick Reference guide. 4.1 Proximity Searching SEARCHING IN RELATIVITY • Apple w/5 Pear – Returns documents where the word “Apple” appears within 5 words of “Pear”. • Apple not w/5 Pear – Returns documents where the word “Apple” appears, but not within 5 words of “Pear”.* • Apple pre/5 Pear – Returns documents where “Apple” appears first, within 5 words of “Pear”. • Apple w/5 xfirstword – Returns documents where “Apple” appears in the first 5 words of a document. • Apple w/5 xlastword – Returns documents where “Apple” appears in the last 5 words of a document. Note: The operator “Not” can be used in conjunction with all dtSearch proximity searches. 4.2 Fuzzy Searching Using the dtSearch engine, you can perform fuzzy searches, which return documents containing spelling variations of a specified term. Fuzzy searching may be useful when querying documents that contain misspelled terms, typographical errors, or have been scanned with Optical Character Recognition (OCR). The percent sign (%) is the character used for fuzzy searches. The number of (%) used indicates how many characters in the search term will be ignored by the dtSearch engine when it runs the query. The position of the % indicates the Relativity Review Certification Workbook 61 number of characters from the beginning of the term that must match exactly with words in the result set. The following search strings illustrate how this character is used: • “app%ly” indicates that a matching word must begin with “app” and differ from “apply” by only one character. • “a%%pply” indicates that a matching word must begin with “a” and differ from “apply” by only two characters. 4.3 Stemming Using the dtSearch engine, you can perform stemming searches, which return documents containing grammatical variations of a root word. The tilde (~) is the character used for stemming searches when added at the end of the root word. For example, a search on “apply~” returns documents containing the words “apply,” “applying,” “applies,” and “applied.” Because stemming only works with the root word, it generally doesn’t return irregular variations of a verb. For example, a search on “run~” would not return “ran.” Note: Relativity currently only supports stemming for the English language. 4.4 Wildcards The dtSearch engine supports special characters that you can use as wildcards. It also supports the use of leading wildcards, or those added to the beginning of a word. The following characters represent wildcards in dtSearches: Special Character Function ? Matches any single character. * Matches any numbers or characters. This character slows searches when used near the beginning of the word. ~ Matches words containing grammatical variations of a root word. The tilde (~) is the stemming character available in dtSearches. 4.5 Auto-recognition Auto-recognition is a feature sometimes enabled by an administrator which provides you with the ability to search for various date formats, e-mail addresses, and credit card numbers. Date recognition searches for strings that appear to be dates. It uses Englishlanguage months, including common abbreviations, and numerical formats. For example, these date formats are recognized: • January 15, 2006 • • • • • 15 Jan 06 2006/01/15 1/15/06 1-15-06 The fifteenth of January, two thousand six To search for a date, enter a date expression between the parentheses in the string “date()”; for example, “date(jan 10 2006)” To search for range of dates, enter a date range between the parentheses in the string “date()”; for example, “date(jan 10 2006 to jan 20 2006)”. Email address recognition searches for text with the syntax of a valid email address, such as “[email protected].” With this feature, you can search for a specific email address regardless of the alphabet settings for “@”, “.”, or other SEARCHING IN RELATIVITY Relativity Review Certification Workbook 62 punctuation in the email address. To search for an email, enter an email address between the parentheses in the string “mail()”; for example, “mail([email protected])”. textbox on the Dictionary Search dialog. Note: Fuzziness is especially helpful when searching for variations of misspelled names. Credit card number recognition searches for any sequence of numbers that matches the syntax for a valid credit card number issued by a major company, such as Visa, MasterCard, and so on. A credit card number is recognized regardless of the pattern of spaces or punctuation embedded in the number. To search for a credit card number, enter a credit card number between the parentheses in “creditcard()” as exemplified in “creditcard(1234*).” 4.6 Dictionary The dictionary search allows you to search the index for a specific term to see the total occurrences of the term and the number of documents containing it. The dictionary is a great way to gather information, and continue to gather statistics on new terms as they come to light. To launch the dictionary search, click the dictionary link next to the Keywords textbox. The dictionary search options allow you to search for a term, set a fuzziness level, and/or enable stemming. • Fuzziness Level: Select a value from one to 10 to determine the degree of variation in the terms returned. A larger number returns terms with more variation. This option is independent of the fuzziness (%) character that you can enter in the textbox on the Dictionary Search dialog. • Enable Stemming: Select to return grammatical variations of a word. For example, a search on “apply” will return “applying”, “applies” and “applied.” This option is independent of the stemming (~) character that you can enter in the SEARCHING IN RELATIVITY Relativity Review Certification Workbook 63 5 Stop Words When you run a dtSearch or keyword search, certain words are ignored because they do not act as meaningful criteria in a query. They include characters (such as punctuation marks and single letters), numbers, and words (such as “at”, “a”, “on” and “the”). The search for proof of purchase would not recognize the stop word “of” and therefore would bring back any documents where proof and purchase are separated by any word. SEARCHING IN RELATIVITY Relativity Review Certification Workbook 64 6 Conditional Searching Conditional searching allows users even greater flexibility by allowing the ability to tailor the search to include multiple fields, additional operators, and other criteria. This option displays up to five rows, with each row representing a separate criterion. For example, if a user wants to locate documents where the sent date is 1/1/2001 OR the custodian is Sally Beck, a conditional search can be crafted to bring back results which would not be available via simple filtering. Also, depending on the type of field you select, different operators appear. 6.1 Toggle Conditions On/Off Conditional searching is enabled by clicking the Toggle Conditions On/Off icon ( ), which will open a section above the document list where you can enter various searching conditions, similar to a saved search. Note: Once a conditional search is run, it is possible to save the resulting criteria as a saved search. This search will incorporate all conditions and filters utilized. SEARCHING IN RELATIVITY Relativity Review Certification Workbook 65 7 Saved Searches Browser One of the four browsers available in Relativity, the saved searches browser (see Workspace Icons) holds all of the saved searches in your workspace. The saved searches browser provides you with the features used to create, organize, edit, and perform other tasks with saved searches. The saved searches browser can be toggled between two modes: search folder tree ( ) and search list ( ). The search folder tree displays a list of your existing saved searches in nested folders. A saved search is a saved set of criteria which may contain both keyword and conditional searches that can be saved for repeated use. You may also set sort criteria, in addition to the ability to dictate which fields will be displayed in the search results. Saved searches can be performed on the entire workspace or limited to selected folders. The search list is a view that allows you to sort and filter in order to quickly find the desired saved search. SEARCHING IN RELATIVITY For example, if you want to reference documents that contain the terms “confidential” and “property” and are also tagged as Relevant, you can create a saved search with that criteria. Relativity Review Certification Workbook 66 Since saved searches are executed in real-time, you save the search definition but not the results. Relativity executes the search each time you click on it in the saved searches browser and when you return to it after performing other tasks in the workspace. This functionality ensures that only data meeting the search criteria is returned in the result set. Note: You can email a link to a saved search by clicking the email link ( icon or the by right-clicking the saved search. SEARCHING IN RELATIVITY ) Relativity Review Certification Workbook 67 8 Analytics This section deals with conceptual text analytics. Not all review projects will employ analytics, but it is helpful to learn some of the basic functions as its use is becoming more frequent. 8.1 Concepts One of Relativity’s more advanced and powerful set of features stems from a technology known as conceptual analytics. Unlike more traditional forms of data analysis, which depend on exact text and word order, analytics tools are concerned with a document’s conceptual content. To illustrate, consider the following email: document would not be returned as a result. Conceptual searching works differently. It can ascertain what a document is talking about without concerning itself with specific word choices and order. Instead it relies on how certain terms occur with other terms in the overall document set. This email contains the following terms: • • • • • turkey holidays November pumpkin pie football Relativity Analytics is able to identify these terms and see how they are associated with each other in the rest of the available documents. Because of this, the concept of “Thanksgiving” is no longer limited to the actual use of the word. 8.2 Keyword Expansion One simple way to use conceptual analytics is a feature called Keyword Expansion. It allows you to enter a word (or longer passage of text) and retrieve conceptually related terms. It’s important to understand that “conceptually-related” doesn’t mean that the results will be synonyms of the submitted text. Instead, Relativity will return terms that are associated with your search words, terms that are about the ideas they represent within your document set. You may access this feature by one of two ways: Most people who live in the United States can pretty easily infer that this email is about the Thanksgiving holiday. However, if you take a closer look, you’ll notice that the word “Thanksgiving” does not appear in the document at all. 1. From the document view: Consequently, if you entered “Thanksgiving” into a traditional searching tool, the SEARCHING IN RELATIVITY Relativity Review Certification Workbook 68 • • • • Select an Analytics index from the index drop-down Click on the Expand link Type in the term to expand upon Click the Expand button • Your highlight term(s) will be automatically submitted, and your results will display in the pop-up window Note: The words returned for “thanksgiving” are not the same words that were listed in the previous example email to Grandma. Remember, all conceptual analysis is specific to the documents being analyzed. Instead of using a synonym list or external dictionary, the relationships between the terms are defined by the documents themselves. 2. From within a document: • Highlight the word(s) you wish to expand upon in the viewer • Right-click on the document and select the Keyword Expansion contextual menu option SEARCHING IN RELATIVITY Once keyword expansion has been performed, the resulting terms (listed in descending rank) can be copied and submitted for additional searching. It’s an extremely useful way of locating important documents that might otherwise be missed by traditional searching methods. 8.3 Find Similar Documents Another powerful Relativity Analytics feature is the ability to find similar documents. While in the core reviewer interface, right-click on the viewer of the current document, then click Find Similar Documents on the contextual menu. Your results will be displayed in the Search Results pane in the lower right corner of the screen. To navigate to one of the returned documents, simply click its link in Relativity Review Certification Workbook 69 the Control Number column. A few important things to remember about Find Similar Documents: • Documents returned in the Search Results pane are conceptually similar to the current document. As such, this feature should not be confused with Textual Near Duplicates functionality, which operates on precise word count and order. • Even though results for Find Similar Documents are displayed in the lower right corner of the screen, there typically is no relational field for this feature (and therefore no related items icon at the bottom of the layout). Note: An administrator must first enable and grant access to these analytics features in order for them to be available. SEARCHING IN RELATIVITY Relativity Review Certification Workbook 70 Part 4: Special Considerations Consider the following points when dealing with searching: “Only 2,000 results returned.” • IS LIKE and CONTAINS are two approximation operators that work in different ways. They both work with wildcards. CONTAINS leverages a full text index built upon the Extracted Text contained in the documents you are searching. Depending on how your workspace is configured, other useful metadata may be included. CONTAINS does not permit leading wildcards. • When you use the IS LIKE search operator in Relativity, it automatically performs a leading and trailing wildcard search. This search executes against all of the raw data stored in that column. As a result, your search takes longer, and may put great strain against the database. • Use CONTAINS or dtSearch whenever possible for your searches. Your results will return fast and efficiently. • Both the keyword search box, and the conditions that sport the CONTAINS token in the operator list, will leverage the full text index. • Keyword searches are unable to retrieve results for queries consisting of single digits, letters, or characters. dtSearch is able to perform this type of search, so use dtSearch when looking for specific numbers or letters. • When a large number of search terms are entered, Relativity cannot provide results because the search field is too broad. If this occurs, pare down your search criteria a bit. Instead of searching for six terms at once, try two at a time. • When conducting a proximity search, Relativity will highlight every instance of each individual term it hits. For example, every instance of “law” and “order” will be highlighted when your initial search reads “law w/3 order”. This won’t affect your search. Disregard the individual terms and focus on the desired results. • The more conditions added to a search, the longer it will take to see results. Relativity must search on behalf of each individual condition as it relates to the others, slowing return time. Use as few conditions as possible to speed up the return rate. • The Dictionary Search will only return the first 2,000 results. If your search has more than 2,000 hits, the Dictionary Search will display the following message: SEARCHING IN RELATIVITY Relativity Review Certification Workbook 71 Part 4: Review Questions REVIEW QUESTIONS Searching in Relativity 1. Name three search engines in Relativity. a. ___________________ b. ___________________ c. ___________________ 2. True or False: A saved search is a list of terms or phrases that you can use to generate a report showing frequency. 3. A dictionary search returns only the first __________ results. 4. True or False: As a best practice, you should use CONTAINS over the IS LIKE token. 5. True or False: You can access the Find Similar Documents feature by clicking on the Similar Documents radio button in the Viewer. SEARCHING IN RELATIVITY Relativity Review Certification Workbook 72 Appendix 1: Answer Key Part 1: Introduction to Relativity Part 3: Core Reviewer Interface 1. 2. 3. 4. 5. 1. 2. 3. 4. 5. B Workspace True C a. Field b. Group c. View Part 2: Workspace Navigation 1. 2. 3. 4. 5. False B Grid, Chart, List A, B, D Long Text Mode True A, B, D Keyboard Shortcuts Legend A, C Part 4: Searching in Relativity 1. 2. 3. 4. 5. Keyword, dtSearch, Analytics False 2000 True False a. Reply b. Forward c. Unknown APPENDIX 1: ANSWER KEY Relativity Review Certification Workbook 73
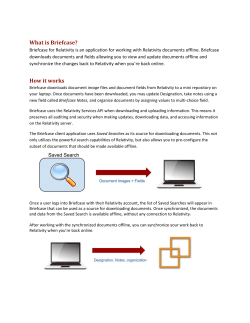


© Copyright 2026