
Leakage Detector Operation Manual (DRV2)
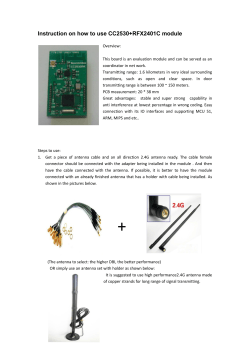
Leakage Detector Operation Manual (DRV2)
v 1.5 / 2012.05.08
© 2012 Effigis. All rights reserved. 006-000010-101
This document provides information proprietary to Effigis and cannot be used or disclosed
without Effigis’ written authorization.
Effigis reserves the right to make changes without notice. Changes affecting the operation of
any component in this manual will be reflected in a subsequent revision. Effigis assumes no
responsibility for any omissions or errors that may appear in this document or for any damages that may result from the use of information contained herein.
DRV2 User Manual
First edition (v1.0): June 2010
Second edition, revised (v1.1): October 2010
Third edition (v1.2): November 2010
Fourth edition (v1.3): February 2011
Fifth edition (v1.4): January 2012
Sixth edition (v1.5): May 2012
Part No. 9570
Published by:
Effigis
4101 Molson St., Suite 400
Montreal, Quebec
CANADA H1Y 3L1
Telephone: + 1 514 495-0018
Toll-free (North America): + 1 888 495-6577
Fax: + 1 514 495-4191
Copyright © 2012 Effigis
All rights reserved
DRV2
2
effigis.com
Contents
1.  General Information. . . . . . . . . . . . . . . . . . . . . . . . . . . . . . 5
1.1 About this Manual . . . . . . . . . . . . . . . . . . . . . . . . . . . . . 5
1.2 Certifications . . . . . . . . . . . . . . . . . . . . . . . . . . . . . . . . . 5
1.2.1 FCC Part 15 Class A. . . . . . . . . . . . . . . . . . . . . . . 5
1.3 Technical Support . . . . . . . . . . . . . . . . . . . . . . . . . . . . . 6
1.4 Calibration . . . . . . . . . . . . . . . . . . . . . . . . . . . . . . . . . . . 6
1.5 Explanation of Symbols Used. . . . . . . . . . . . . . . . . . . . 6
1.6 Cleaning. . . . . . . . . . . . . . . . . . . . . . . . . . . . . . . . . . . . . 6
1.7 Effigis Website. . . . . . . . . . . . . . . . . . . . . . . . . . . . . . . . 6
2.  System Components. . . . . . . . . . . . . . . . . . . . . . . . . . . . . 7
2.1 Initial Verification . . . . . . . . . . . . . . . . . . . . . . . . . . . . . . 7
2.2 DRV2 Optional Accessories. . . . . . . . . . . . . . . . . . . . . . 9
2.2.1 Antennas. . . . . . . . . . . . . . . . . . . . . . . . . . . . . . . . 9
2.2.2 DRV2 Settings Application. . . . . . . . . . . . . . . . . . 9
2.3 Features. . . . . . . . . . . . . . . . . . . . . . . . . . . . . . . . . . . . 10
2.4 Physical Overview . . . . . . . . . . . . . . . . . . . . . . . . . . . . 10
2.4.1 Front View Buttons and Display. . . . . . . . . . . . . 10
2.4.2 Power and Data Interface. . . . . . . . . . . . . . . . . . 11
2.4.3 Antenna Connector. . . . . . . . . . . . . . . . . . . . . . . 11
2.4.4 Batteries. . . . . . . . . . . . . . . . . . . . . . . . . . . . . . . 12
3.  Operation and Maintenance. . . . . . . . . . . . . . . . . . . . . . 13
3.1 Reading the Measurement Mode Screen . . . . . . . . . . 13
3.2 Adjusting Volume during Normal Use . . . . . . . . . . . . . 13
3.3 Using the Snapshot Feature . . . . . . . . . . . . . . . . . . . . 14
3.4 Charging the Battery . . . . . . . . . . . . . . . . . . . . . . . . . . 14
3.5 Replacing the Battery Pack. . . . . . . . . . . . . . . . . . . . . 15
3.6 Using the Vehicule Support Bracket . . . . . . . . . . . . . . 16
3.6.1 Safety Precautions for Installation . . . . . . . . . . . 16
3.6.2 Installing the Vehicule Support Bracket . . . . . . . 17
3.7 Updating the DRV2’s Firmware . . . . . . . . . . . . . . . . . . 18
4. Setup. . . . . . . . . . . . . . . . . . . . . . . . . . . . . . . . . . . . . . . . . 21
4.1 Accessing and Navigating the Setup Menus. . . . . . . . 21
4.2 Setting Up Carrier Frequencies and Frequency
Presets. . . . . . . . . . . . . . . . . . . . . . . . . . . . . . . . . . . . . 21
Operation Manual
3
4.3 Activating Video Detection. . . . . . . . . . . . . . . . . . . . . .
4.4 Using Channel Tag Detection. . . . . . . . . . . . . . . . . . . .
4.5 Using the Proximity Filter. . . . . . . . . . . . . . . . . . . . . . .
4.6 Setting the Volume and Squelch Level . . . . . . . . . . . .
4.7 Adjusting the Screen . . . . . . . . . . . . . . . . . . . . . . . . . .
4.8 Setting the Measurement Display Units. . . . . . . . . . . .
4.9 Selecting the Antenna Type. . . . . . . . . . . . . . . . . . . . .
5.  DRV2 Settings Application . . . . . . . . . . . . . . . . . . . . . . .
22
23
24
24
25
26
26
27
5.1 Installing the Application . . . . . . . . . . . . . . . . . . . . . . . 27
5.2 Connecting the DRV2. . . . . . . . . . . . . . . . . . . . . . . . . . 29
5.3 R
eading, Copying, Saving and Recalling Data . . . . . . 30
5.3.1 Reading the DRV2’s Configuration Parameters. 30
5.3.2 Saving and Recalling Settings . . . . . . . . . . . . . . 30
5.3.3 Copying Setting to a DRV2. . . . . . . . . . . . . . . . . 30
5.4 Setting Up the DRV2’s Parameters . . . . . . . . . . . . . . . 31
5.5 Creating a Configuration File in XML Format. . . . . . . . 32
Appendix A - Specifications. . . . . . . . . . . . . . . . . . . . . . . . . 33
A.1 Technical . . . . . . . . . . . . . . . . . . . . . . . . . . . . . . . . . . .
A.2 Electrical and Environmental. . . . . . . . . . . . . . . . . . . .
A.3 Physical. . . . . . . . . . . . . . . . . . . . . . . . . . . . . . . . . . . .
Appendix B - Our Services. . . . . . . . . . . . . . . . . . . . . . . . . .
33
34
34
35
B.1 Customer Support. . . . . . . . . . . . . . . . . . . . . . . . . . . .
B.1.1 Equipment Return Instructions. . . . . . . . . . . . . .
B.2 Limited Product Warranty. . . . . . . . . . . . . . . . . . . . . .
B.2.1 Hardware . . . . . . . . . . . . . . . . . . . . . . . . . . . . . .
B.2.2 Software. . . . . . . . . . . . . . . . . . . . . . . . . . . . . . .
B.2.3 Exclusions . . . . . . . . . . . . . . . . . . . . . . . . . . . . .
B.2.4 Refurbished Parts and Prior Testing. . . . . . . . . .
B.2.5 Exclusive Remedies. . . . . . . . . . . . . . . . . . . . . .
B.2.6 Dislcamer. . . . . . . . . . . . . . . . . . . . . . . . . . . . . .
35
35
36
36
36
36
37
37
37
DRV2
4
effigis.com
1.  General Information
1.1 About this Manual
This manual describes the features, operation and setup of the DRV2, and the use of its
companion software.
You will find important safety information in this manual. We strongly recommend that all
users read this manual. Use of this product other than for its intended application may compromise the unit’s safety features
1.2 Certifications
1.2.1 FCC Part 15 Class A
This device complies with Part 15 of the FCC Rules. Operation is subject to the following two
conditions:
• This device may not cause harmful interference.
• This device must accept any interference received, including interference that may
cause undesired operation.
Note: This equipment has been tested and found to comply with the limits for a Class A digital
device, pursuant to Part 15 of the FCC Rules. These limits are designed to provide reasonable
protection against harmful interference when the equipment is operated in a commercial
environment. This equipment generates, uses, and can radiate radio frequency energy, and if
it is not installed and used in accordance with the instruction manual, it may cause harmful
interference to radio communications. Operation of this equipment in a residential area is
likely to cause harmful interference, in which case the user will be required to correct the
interference at his own expense.
Modifications: Any modifications made to this device that are not approved by Effigis may
void the authority granted to the user by the FCC to operate this equipment.
IC ICES-003 Class A Notice - Avis NMB-003 Classe A
This Class A digital apparatus complies with Canadian ICES-003.
Operation Manual
5
1.3 Technical Support
Effigis Technical Support Service is available from Monday through Friday from 9:00 AM to
5:00 PM Eastern Time.
Toll free from U.S. and Canada: + 1 888 495-6577
International: + 1 514 495-0018
Fax questions anytime to: + 1 514 495-4191
[email protected]
1.4 Calibration
Your DRV2 unit has been calibrated and tested in the factory, and does not need further
calibration before use.
However, if the unit suffers damage or is repaired, it is recommended that the unit be calibrated by an authorized Effigis service center.
As well, if your company requires regular calibration of all equipment, or requires a calibration certificate for the DRV2, a calibration service is available through Effigis.
For more information on calibration services, please contact your Effigis representative.
1.5 Explanation of Symbols Used
The following symbols are used on the DRV2’s label:
SymbolExplanation
Direct current.
Caution. Indicates that operations or procedures, if carried out without
caution, may cause personal injury or damage to the unit.
1.6 Cleaning
Your DRV2 unit can be wiped clean with a damp cloth. Do not immerse the unit in water.
Avoid solvents and commercial cleaners. For more information on maintaining your DRV2,
see the Operation and Maintenance chapter starting on page 13.
1.7 Effigis Website
Effigis’ website contains product specifications, information, press releases, brochure download and Frequently Asked Questions (FAQs). Please visit our website at:
http://effigis.com
DRV2
6
effigis.com
2.  System Components
The DRV2 is a portable signal leakage detection meter used as a find-and-fix solution for
broadband operators. It is frequency agile from 108 to 135 MHz (DRV2-L, lo-band version)
and from 118 to 155 MHz (DRV2-H, hi-band version) with ten user selectable frequencies
and AM-FM tag detection capability for overbuilt systems. The DRV2 can easily be set up via
its intuitive user interface or by its PC-based application.
This section describes the DRV2 unit in detail including its accessories, and helps you get
started by explaining the features, the use of the buttons, and the powering and data interfaces on the unit.
2.1 Initial Verification
Your DRV2 unit is fully charged, calibrated, and ready to use right out of the box. Upon reception, visually inspect each item for any damage that may have occurred during shipping. If
you see any signs of physical damage, please contact Effigis:
• Callers from the U.S. and Canada can dial + 1 888 495-6577 (toll-free number)
• International callers can dial + 1 514 495-0018.
If there are no apparent signs of physical damage, turn on the unit by pressing the red on/off
button, and make sure the unit boots up properly.
Make sure no items are missing. Your package should contain all the standard items as well
as any accessories you may have ordered. If you ordered the DRV2-L or DRV2-H portable
leakage detection meter kit, the following items are included:
• DRV2 meter with rubber holster
• Rubber duck antenna
• Vehicle support bracket
• Belt strap
• AC adapter
• User manual
Operation Manual
7
Figure 1: DRV2, charger, rubber antenna and battery pack
If any of the standard accessories are lost or damaged, you can order a replacement for the
DRV2. Please quote the following part numbers when placing an order:
Part No. Accessory Description
3500
AC adapter
3600
Replacement battery pack
6710
Rubber duck antenna
9540
Belt strap
9550
DRV2 rubber holster
9560
Vehicle support bracket
9570
DRV2 user manual
To place an order, please call Effigis at + 1 888 495-6577 or + 1 514 495-0018
DRV2
8
effigis.com
2.2 DRV2 Optional Accessories
2.2.1 Antennas
The DRV2 comes with a rubber duck antenna for leakage detection. However, other antennas
available from Effigis can also be used.
NOTE: Only antennas obtained from Effigis can be used effectively with the DRV2. Each
Effigis antenna has been analyzed and the appropriate compensation has been designed into
the DRV2 for optimal results. Effigis cannot guarantee proper results with an antenna from
any other source.
Part No. Antenna Accessories Description
6410Monopole Quarter-wave VHF Antenna Kit (includes magnetic base + whip antenna
+ BNC terminated cable)
6206
Vehicle magnetic mount base for RF antenna with BNC terminated cable
6100
RF whip antenna for 6400, 6410, 6420 and 6425 antenna kits
6710
Rubber duck antenna
2.2.2 DRV2 Settings Application
A PC-based software DRV2 Settings Application is available for configuring the DRV2. This
software is useful when you wish to set up several DRV2 units with the same parameters.
You can obtain this software by visiting our web site and downloading the latest version of
the DRV2 Settings Application:
http://effigis.com/produits/cpat-monitoring-des-reseaux-hfc/ressources-cpat
In order to connect the DRV2 to your PC and use the DRV2 Settings Application or the
firmware upgrade tool, you will need a USB A to A cable or USB-to-serial cable (cables not
provided).
Operation Manual
9
2.3 Features
The DRV2 is a high performance find-and-fix leakage detection meter that offers many
features including:
• F ully agile from 108-135 MHz (lo-band version) and 118-155 MHz ( hi-band version)
• User-adjustable frequency displayed in 100 Hz steps
• 10 favourite frequency presets
• Channel tag compatible
• Based on Effigis’s CPAT leakage monitoring system technology
2.4 Physical Overview
2.4.1 Front View Buttons and Display
The DRV2 has four front panel buttons used to turn on and off the unit, navigate menus, take
snapshots and toggle the unit’s volume between ON and MUTE.
LCD display
On / Off button
Navigation button
Esc / Audio
DRV2
Enter / Snapshot
10
effigis.com
2.4.2 Power and Data Interface
The DRV2 has two interfaces on the bottom of the unit. The round receptacle is used to connect the AC adapter, supplied by Effigis. The data interface is a USB type A receptacle and is
used with the DRV2 Settings Application, and is also used for firmware upgrades.
Charger adapter interface
USB (A) interface
2.4.3 Antenna Connector
The DRV2 has a BNC connector on the top of the unit. This interface is used to connect a
leakage detection antenna supplied by Effigis. By default, the rubber duck antenna is used.
Insert the antenna into the connector and turn slightly to lock the antenna in place.
Antenna interface
Operation Manual
11
2.4.4 Batteries
The DRV2 is powered by a 3-cell 2000mAh NiMH battery pack that has a 3-pin connector
to interface with the unit. The battery pack is already charged when the DRV2 is shipped so
that your unit is ready to use out of the box.
Battery Pack
3-pin interface
DRV2
12
effigis.com
3.  Operation and Maintenance
3.1 Reading the Measurement Mode Screen
The DRV2 starts up in measurement mode by default, and immediately detects and displays
levels for the last frequency selected. Measurement mode shows the following information:
• Current frequency and preset number
• Frequency RF level (numerical and graphical display)
• Battery charge status
• Volume indicator
• Tag detection
• Video detection
Leakage detection frequency
Frequency preset number
Battery charge
indicator
Tag detection indicator
* = Tagged signal detected
Leak level captured
with snapshot feature
Video detection indicator
* = Tagged signal detected
Volume level indicator
Leak measurment in
μV/m or dBμV/m
Leak strength indicator
3.2 Adjusting Volume during Normal Use
The DRV2 emits an audible tone to help you locate the leakage source. The tone increases
with signal strength. You can enable or disable the audio by pressing the volume key labelled
Esc / m.
Operation Manual
13
3.3 Using the Snapshot Feature
During normal operation, you can capture the actual RF level measurement at your leakage
monitoring frequency. This feature can help you compare levels you are reading in different
locations or at different distances from the leakage source.
You can take a snapshot by pressing the key labelled ↵/I, which is the Enter key.
The captured level will appear in smaller numbers, to the right of the current leakage level
reading. To take another snapshot, press the ↵/I key again. The previous level that was
captured is cleared and is replaced with the new snapshot.
3.4 Charging the Battery
The DRV2 can operate on battery power for several hours when fully charged. When the unit
approaches a low charge state, the battery indicator appears and starts to blink slowly. For
best battery maintenance, wait until the battery level indicator on the DRV2’s display shows
a very low level, shown by rapid blinking, before connecting the battery charger.
To maintain good battery health and ensure the longest useful battery life, you must follow
these recommendations for charging the battery:
1.Use only the battery pack and replacement battery pack available from Effigis.
2.Use only the chargers available through Effigis. The battery charges at a rate of
2A/h. A fully discharged battery will be recharged at approximately 90% after 1
hour. The DRV2’s status LED will turn green only when the battery is fully charged.
3.Charge the unit at room temperature. Do not place the unit in a location where temperature extremes occur during charging. The DRV2 is equipped with additional
protection to prevent the battery from charging when the temperature is above
40°C (104°F).
4.Wait until the battery status indicator on the DRV2’s display blinks rapidly before
recharging.
5.Since the DRV2 recharges rapidly and has low power consumption, it is possible to
charge the unit for a short period (e.g. 15 minutes) and return to using it on battery
power when immediate use is required. You should, however, fully recharge the unit
at the earliest opportunity (e.g. end of work shift).
IMPORTANT INFORMATION REGARDING CHARGE AND DISCHARGE
The DRV2 is equipped with a protection against deeply discharged cells that
allows you to charge them even if this situation occurs. It is critical to note that
a deep discharge reduces the lifetime of the battery pack and care must be
taken to prevent this situation.
DRV2
14
effigis.com
3.5 Replacing the Battery Pack
The rechargeable NiMH battery pack is accessible via the DRV2’s rear panel. You will not
need to access the batteries unless they can no longer be recharged.
Battery compartment
Replacement pack
Effigis
P 1 888 495-6577
effigis.com
To change the battery pack:
1.Loosen the battery compartment’s screw using a Philips head screwdriver and
remove the panel.
2.Disconnect the 3-pin mating on the cable between the battery pack and the DRV2.
Replace the battery pack only with a battery pack from Effigis.
3.Plug in the 3-pin connector, and replace the panel on battery compartment. Secure
the panel with the screw. In order to avoid damaging the DRV2’s housing, do not
overtighten the screw.
Operation Manual
15
3.6 Using the Vehicle Support Bracket
3.6.1 Safety Precautions for Installation
1. Never install this product in places where, or in a manner that it could injure the
driver or passengers if the vehicle stops suddenly.
2. Never install this product in places where, or in a manner that it may interfere
with the driver’s operation of the vehicle, such as on the floor in front of the
driver’s seat, or close to the steering wheel or shift lever.
3. Make sure there is nothing behind the dashboard or paneling when drilling holes
in them. Be careful not to damage fuel lines, brake lines, electronic components,
communication wires or power cables. When using screws, do not allow them to
come into contact with any electrical lead.
4. To ensure proper installation, use the supplied parts in the manner specified. If
any parts other than the supplied ones are used, they may damage internal parts
of this product or they may work loose and the product may become detached.
5. It is extremely dangerous to allow the cables to become wound around the steering column or shift lever. Be sure to install this product, its cables, and wiring
away in such a way that they will not obstruct or hinder driving.
6. Make sure that leads cannot get caught in a door or the sliding mechanism of a
seat, resulting in a short circuit.
7. Do not install this system where it may (i) obstruct the driver’s vision, (ii) impair
the performance of any of the vehicle’s operating systems or safety features,
including airbags, hazard lamp buttons or (iii) impair the driver’s ability to safely
operate the vehicle.
8. Never install the system in front of or next to the place in the dash, door, or pillar from which one of your vehicle’s airbags would deploy. Please refer to your
vehicle’s owner’s manual for reference to the deployment area of the frontal
airbags.
9. Do not install the system in a place where it will impair the performance of any
of the vehicle’s operating systems, including airbags and headrests.
DRV2
16
effigis.com
3.6.2 Installing the Vehicle Support Bracket
The vehicle support bracket is designed to store the DRV2 for handy access. It typically
mounts on the vehicle’s dash near the 12V power source so the DRV2 can remain in the
support bracket while charging. You will require 3 screws (not provided) to secure the bracket
to the dash.
CAUTION!
Do not disconnect or modify vehicle security systems as airbags or seatbelts.
Security systems wires use yellow sleeves and yellow connectors. Accidental
triggering of these systems may cause severe injuries.
To install the support bracket:
1. Choose a location on the dash that does not interfere with any of the vehicle’s
safety features or other wiring. See the “3.6.1 Safety Precautions for Installation”
on page 16.
2. For easier installation, remove the back plate from the DRV2 clip by loosening
the large adjustment screw (see Figure 2).
Screw to secure clip to back plate
Bracket’s back plate
Openings for screws
Antenna holder
DRV2 clip
Figure 2: Vehicle support bracket
Operation Manual
17
3. Using the back plate’s screw openings as a template, mark where you will need
to pre-drill holes for the screws.
4. Pre-drill the holes of an appropriate depth and diameter for your screws, making
sure that you do not damage any hidden wiring.
5. Affix the back plate to the dash with the screws.
6. Re-attach the DRV2 clip to the support bracket’s back plate using the large
screw. Do not overtighten.
7. Place the DRV2 in the clip, its antenna in the antenna holder, and, if desired, attach the 12V charger’s wire to the strain relief slots with a cable tie so it is readily
accessible for charging.
3.7 Updating the DRV2’s Firmware
From time to time, firmware updates may be available for the DRV2. Effigis provides these
updates via its website, Please visit the Downloads page to obtain the latest firmware release.
To check which version is currently installed in the DRV2, access the DRV2’s setup mode
by pressing the up or down arrow and scroll to the Version menu. There are two version
numbers, each for different components of the DRV2. The second version number, after the
‘/’ character, is the firmware version.
NOTE
Before plugging a DRV2 for the first time on your Windows based PC you must
install a driver. This driver is included in the DRV2 Settings Application compressed file available from the download section of the Effigis website. Execute
the DRV2USBInstaller file contained in the DRV2CP210xDriverInstall folder.
To update the DRV2’s firmware:
1.Download the firmware file from Effigis from:
http://effigis.com/produits/cpat-monitoring-des-reseaux-hfc/ressources-cpat
Place this file in an easily accessible directory on your PC or on the desktop. The file
is always named DRV02.hex, regardless of the version. The name of the zip folder
indicates the release date of the firmware, and helps you identify the most recent
file.
DRV2
2.Download the Flash Magic tool for updating the DRV2’s firmware, if not already
installed on your PC. You can access the Flash Magic website from the Effigis
downloads page, or go directly to this link to download a free version of the tool:
http://www.flashmagictool.com/
18
effigis.com
3.Click the FlashMagic.exe file to start installing the Flash Magic tool. Note that this
tool can only be used on a Windows-based PC or laptop. Do not use a Macintosh
OS DRV2 22 or a Linux-based computer. By default, the tool is installed in the
C:\Program Files\Flash Magic directory.
4. Turn the DRV2 on.
5. Connect the DRV2 to the PC using a USB cable. The interface on the DRV2 is type
A. You can use a USB A-A cable or use a USB-to-serial cable, depending on the
ports available on your computer. Windows should automatically detect the DRV2
device connected to your computer.
6.Identify COM port number where DRV2 is connected to. Click Start/Control Panel/
Device Manager/Ports (COM and LPT).
7. Identify and take note of Port COM number labelled as DRV2 (COM ’x’).
8.Once the firmware update utility has been installed, run the program and set up the
application as follows:
• In Step 1 - Communications, click Select Device. From the ARM7 directory,
select LPC2109 or LPC2119. (The choice of the device can be done with the
DRV2 Serial number. If xxxx from DRV2-xxxx is less than 1200 then you must
select LPC2109 otherwise you must select LPC2119).
• In COM Port, select the COM port number from the list that your computer has
assigned to the DRV2 connection, as identified in step 7.
• In Baud Rate, select 38400 for the baud rate.
• In Interface, select None (ISP).
• In Oscillator (MHz), enter 12.
• In Step 2 – Erase, check Erase all Flash+Code Rd Prot.
• In Step 3 – Hex File, browse to the directory on your computer where you saved
the DRV02_LPC21xx.hex files you downloaded from the Effigis website. Select
the DRV02_LPC21xx.hex file according to the device type selected in step 1 and
click Open.
Operation Manual
19
• In Step 4 – Options, select Verify after programming. Your main Flash Magic
tool window should look like this:
Figure 3: Setup for firmware update tool
• Go to the Options menu and select Advanced Options. In the Hardware Config tab, check Use DTR and RTS to control RST and ISP pin, and also check
Keep RTS asserted while COM Port open. Click OK to go back to the main
Flash Magic tool window.
Figure 4: Firmware update tool advanced setup options
DRV2
9.With the DRV2 connected, powered on and in normal measurement mode, hold
down the left arrow button on the DRV2, and then click Start in the Flash Magic
tool to begin DRV2 24 the firmware update. When the update is initiated, the status
bar will read “Programming”, at which time you can release the left arrow button
while the programming process continues. Once completed, check the firmware
version that is now loaded into the DRV2 by accessing the Version menu in the
DRV2’s setup menus. The second version number, after the ‘/’ character, is the
firmware version.
20
effigis.com
4.  Setup
There are two ways to set up the DRV2 unit: by using the PCbased DRV2 Settings Application
or by manually setting each parameter directly in the DRV2’s menus. This section describes
how to set up the DRV2 using the unit’s own menus. For information on using the PC-based
DRV2 software, please see the “DRV2 Settings Application” chapter starting on page 27.
4.1 Accessing and Navigating the Setup Menus
When the DRV2 is booted, it defaults to measurement mode (see the “3.1 Reading the
Measurement Mode Screen” section starting on page 13). In order to change the frequency,
enable or disable tagging or video sync, adjust the volume, change the units of measure or
change any other display setting, you must switch to setup mode.
To go to setup mode where you can access the settings menu, press either the up arrow
( s ) or the down arrow ( t ) on the unit’s central navigation button. Once you are in the
settings menu, you can move through the list of configurable elements by scrolling up and
down with the arrows.
To change the settings of an element, press the right arrow ( t ) when the cursor is over the
chosen element of the menu. You can then select a new value among the presets by pressing
the up or down arrow.
To keep a new value and return to the list of settings, press the left arrow ( t ) or Enter
( ↵ ). To save values and exit the settings menu, press the left arrow ( t ); to exit the menu
without saving, press Esc / m.
Please refer to the following sections for details on configuring each element in the settings
menu.
4.2 Setting Up Carrier Frequencies and Frequency Presets
The DRV2 is pre-configured with 10 carrier frequencies for leakage detection. However, you
can edit any of these frequencies and build your own list of 10 carrier frequency presets
ranging from 108 MHz to 135 MHz (lo-band version) or from 118 MHz to 155 MHz (hi-band
version) in 100 Hz steps.
The frequency currently used during leakage detection is indicated with an asterisk (*). This
is also the frequency that is shown at the top of the main screen when you are in normal
measurement mode.
Operation Manual
21
Each preset frequency is numbered from 1 to 10 on the left, and the corresponding preset
frequency is shown on the right. To select a different preset frequency during leakage detection, scroll through the list by pressing the up or down arrow, and press Enter ( ↵ ) to make
your selection. The asterisk will now be next to your new preset number.
To edit any preset frequency:
1. In the settings menu, select Freq.
2. Press the right arrow to display the list of preset frequencies.
3.To edit any preset frequency, scroll through the list until the cursor is on the desired
preset number, and press the right arrow. The cursor moves to the right side of the
display, allowing you to change the second digit of the frequency. Use the arrows to
move to the frequency digits you want to edit individually. To change a value for any
digit, use the up arrow (increase the value), or the down arrow (decrease value).
The new frequency must be within the tuning range of the DRV2 version used (108
MHz to 135 MHz/lo-band or 118 MHz to 155 MHz/hi-band) in 100 Hz steps.
4.To exit frequency-editing mode, press Enter ( ↵ ) or press the left arrow until the
cursor moves to the preset number column. If you press Esc while modifying a
frequency, this cancels any changes you made and brings you back to measurement mode. To go back to the settings menu and make other changes, press the
up arrow then press the left arrow when the cursor is over the preset number you
want to edit.
5.To select a frequency that will be used for leakage detection, scroll through the list
of preset numbers until you find the one that corresponds to the desired frequency,
and press Enter ( ↵ ). The asterisk (*) appears next to this preset.
6.Press Esc / m to return to measurement mode, or press the left arrow to return
to the settings menu and continue configuring other parameters.
4.3 Activating Video Detection
The DRV2 unit detects energy that is present at a selected frequency between 108 MHz and
135 MHz (lo-band version) or from 118 MHz to 155 MHz (hi-band version). However, you
may want to make sure that the energy you are reading is actually television signal leakage
from the CATV network. The DRV2 is equipped with a feature that allows it to detect the
presence of a video horizontal synchronization signal in the selected leakage detection frequency. This feature helps discriminate signals from the CATV network versus off-air noise,
and improves field signal leakage detection by rejecting energy that is not a video signal. This
feature can be enabled or disabled in the DRV2, and is enabled by default.
DRV2
22
effigis.com
When the video detection feature is enabled, the letter ‘V’ appears on the main screen when
you are in measurement mode. As the DRV2 reads the off-air energy levels at the frequency
you are using, it can indicate when a video signal is detected in a standard analog television
channel. When video is detected, an asterisk (*) appears next to the ‘V’.
To enable/disable video detection:
1. In the settings menu, select Video.
2. Press the right arrow to move to the right side of the menu.
3.Use the up and down arrows to toggle the feature on or off. Press Enter ( ↵ ) to
save the value.
4.Press Esc / m or the left arrow to return to measurement mode, or press the up
and down arrows to select another setting and continue configuring parameters.
4.4 Using Channel Tag Detection
In order to use the DRV2’s channel tag detection feature, you must have a channel tagger
device that inserts tags in specified channels that are carried on the CATV network.
If you are using a channel tagger device, you can configure the DRV2’s channel tag detection
for the proper modulation type and audio frequency associated with the tagged RF frequencies. Channel tagging is commonly used in areas where more than one cable operator is
active, and the use of tags allows each operator to identify the leaks that are under its
responsibility.
The DRV2 can be configured for AM or FM tag detection. The parameters that you set up in
the DRV2 must match the settings used by the headend channel tagger. The DRV2 supports
the detection of AM or FM tags with modulation frequencies varying from 3 Hz to 20 Hz.
When the tag detection feature is enabled, the letter ‘T’ appears on the main screen when
you are in measurement mode. As the DRV2 reads the off-air energy levels at the frequency
you are using, it can indicate when a tagged signal is detected in a standard analog television
channel. When a tag is detected, an asterisk (*) appears next to the ‘T’.
To enable/disable channel tag detection:
1. In the settings menu, select Tagging.
2. Press the right arrow to display the list of modulation selections.
3.An asterisk (*) appears to confirm that tag detection is already active. If you want
to disable tag detection highlight OFF and press Enter ( ↵ ). Press Esc / m to
return to measurement mode, or press the left arrow to return to the settings menu
and continue configuring other parameters.
Operation Manual
23
4.If tag detection is not already active, enable it by selecting AM or FM for the tag
modulation type, depending on your channel tagger’s settings.
5.Once you have highlighted AM or FM, use the right arrow to define the tag’s modulation, in hertz. The possible values are from 03 to 20 Hz. Press Enter ( ↵ ) to save
the value.
6.Press Enter ( ↵ ) to select modulation type to enable channel tagging.
7.Press Esc / m to return to measurement mode, or press the left arrow to return
to the settings menu and continue configuring other parameters.
4.5 Using the Proximity Filter
In order to assist you in discriminating the signal source from the estimated distance to the
leakage point, the DRV2 is equipped with a signal proximity filter. By selecting the desired
distance, the DRV2 calculates the appropriate gain to apply to the reading so you can find
the leakage source more easily.
1.Select Proximity, and use the right arrow to choose the estimated distance to the
leakage point. The possible values are 3 meters (approx. 10 ft), 10 meters (approx.
30 ft) or 25 meters (approx. 80 ft). By default the DRV2’s proximity filter is set to 3
meters. Depending on your selection, the DRV2 will then apply the appropriate gain
to the reading to help you discriminate the noise source. Press Enter ( ↵ ) to save
the value.
2.Press Esc / m to return to measurement mode, or press the left arrow to return
to the settings menu and continue configuring other parameters.
4.6 Setting the Volume and Squelch Level
The DRV2 can emit an audible tone to help you locate the leakage source. The reference
volume of the tone can be set to LOW, MED or HIGH, or the sound can be turned off with the
‘mute’ option. In measurement mode, the DRV2’s current volume setting is shown on screen
with the following icons:
Low
m
Medium
m
High
Mute
m
m
The volume setting affects the basic reference level for the tone. During normal use, unless
the ‘mute’ option is used, the tone increases with the leak’s signal strength.
In order to prevent the DRV2 from emitting a tone for very low signal readings, the DRV2 is
equipped with a squelch feature that allows you to adjust a threshold level, so only measured
carrier stronger than the selected threshold and meeting detection mode conditions (video or
DRV2
24
effigis.com
tagged) will trigger an audible tone.
If both video and channel tag detection features are disabled, the DRV2 squelch circuit will
be activated as soon as the level reading exceeds the defined squelch threshold, no matter
what type of radio frequency source (carrier or noise) is detected.
To adjust the sound properties:
1. In the settings menu, select Sound.
2. Press the right arrow to move to the volume options.
3.To change the volume, highlight Volume and press the right arrow to change the
reference volume level (LOW, MED, HIGH). Select OFF to mute the DRV2. Press
Enter ( ↵ ) to save the value.
4.To change the squelch threshold, highlight Squelch and press the right arrow to
edit the threshold (0002 to 2000), in μV/m or dBμV/m. By default, the DRV2 uses
μV/m as its unit of measure. Note that the squelch feature will always be calculated
in μV/m. However, the DRV2 will apply the units of measure to the snapshot feature
(see section 3.3 Using the Snapshot Feature on page 14), depending on which
units you have selected.
5.Press Enter ( ↵ ) to save the settings then press Esc / m to return to measurement mode, or press the left arrow to return to the settings menu and continue
configuring other parameters.
4.7 Adjusting the Screen
You can change the DRV2’s display contrast and enable or disable the backlight. Please note
that even if the backlight is disabled, the DRV2 will briefly illuminate the screen each time a
button is pressed during normal operation.
To adjust the screen properties:
1. In the settings menu, select Cont/BL.
2.Press the right arrow to move to the screen options and press Enter ( ↵ ).
3.To change the contrast, highlight Contrast and press the right arrow to change the
level (8-25) with the up and down arrows.
4. To enable or disable the backlight, highlight Backlite and press the right arrow.
Toggle between ON and OFF using the up and down arrows. Press Enter ( ↵ ) to
save your choice. The backlight setting is valid only until the next time you reboot
the DRV2, at which time the default setting (backlight off) will be applied.
Operation Manual
25
5.Press Esc / m to return to measurement mode, or press the left arrow to return
to the settings menu and continue configuring other parameters.
4.8 Setting the Measurement Display Units
The DRV2 can display leakage levels in two different types of unit. The most common unit
used to measure leaks is μV/m (microvolts per meter) and is DRV2’s default setting. However,
you can also use dBμV/m.
To change the units of measure:
1. In the settings menu, select Units.
2. Press the right arrow, then toggle between μV/m and dBμV/m using the up and
down arrows and save the value by pressing Enter ( ↵ ).
3.Press Esc / m to return to measurement mode, or press the left arrow to return
to the settings menu and continue configuring other parameters.
4.9 Selecting the Antenna Type
DRV2 comes with a rubber duck antenna and this is the default antenna type for leakage
detection. Do not change the antenna type setting in the DRV2 unless you are physically
connecting a different antenna.
Effigis offers other types of antennas that can be used with the DRV2. Regardless of the
antenna you are using, it is very important to make sure the DRV2’s settings match the actual
antenna type connected to the unit in order to accurately measure signal strength. Using an
antenna that is not authorized by Effigis, or setting up the DRV2 with the wrong antenna type
will result in erroneous readings.
To change the antenna type:
1. In the settings menu, select Antenna.
2.Press the right arrow, then scroll through the antenna types using the up and down
arrows until you have highlighted the antenna that is connected to the DRV2. The
option NONE is used by Effigis service personnel for maintenance/calibration purposes. Press Enter ( ↵ ) to save your choice.
DRV2
3.Press Esc / m to return to measurement mode, or press the up and down arrows
to continue configuring other parameters.
26
effigis.com
5.  DRV2 Settings Application
Effigis provides a PC-based application to configure the DRV2 unit. This application is useful
when you have several DRV2 units and you want to use the same settings in each one. By
using the PC-based DRV2 Settings Application, you can standardize the settings that will be
used in each unit. You can also use the application to ‘read’ the settings from a DRV2 unit
that is already configured correctly, and then copy these settings to other DRV2 units.
Note that the DRV2 Settings Application is not a required system component; it is always
possible to change the DRV2’s settings manually by using the DRV2’s menus. This chapter
describes how to set up the DRV2 using the PC-based DRV2 settings software. For information on using the DRV2 unit’s own setup menus, please see the “Setup” chapter starting on
page 21.
5.1 Installing the Application
Effigis provides a PC-based DRV2 Settings Application through its website. If you do not
already have this application, please visit the Downloads page:
http://effigis.com/produits/cpat-monitoring-des-reseaux-hfc/ressources-cpat
NOTE
Before plugging a DRV2 for the first time on your Windows based PC you
must install a driver. This driver is given in the DRV2 Settings Application compressed file. The file to execute is contained in the DRV2CP210xDriverInstall
folder.
Operation Manual
27
1.Download the DRV2 Settings Application and install it by clicking the ‘setup.exe’
file.
2. Once the DRV2 Settings Application has been installed, run the program.
3. The main window will appear:
DRV2 settings
Icons for
commands
and DRV2
status
Message area
Figure 5: DRV2 Settings Application main window
NOTE
The Message area size can be adjusted to view log register messages. Do not
forget to readjust window size back to its original position to avoid masking
the settings window area.
DRV2
28
effigis.com
5.2 Connecting the DRV2
1. Turn the DRV2 on.
2. Connect the DRV2 to the PC using a USB cable. The interface on the DRV2 is type
A. You can use a USB A-A patch cord, or use a USB-to-serial cable, depending on
the ports available on your computer.
Windows should automatically detect the DRV2 device connected to your computer
since the appropriate driver is installed with the DRV2 Settings Application. You
should not need to configure the ports since by default, the application automatically detects the port where the DRV2 is connected.
3.If you want to specify a port, click the options icon
on the command sidebar.
You can then deselect the automatic port use (Auto detect port box is unchecked),
and specify a COM port on your computer in the application settings window:
Figure 6: COM port settings
Click Accept to save the port settings, or click Reset to restore the default settings
(auto detect port is enabled, and the default log file directory is C:\Program Files\
CPAT\DRV2).
4.When a DRV2 unit is detected, the DRV2 icon is outlined in green. If no DRV2 unit
is detected, the icon is outlined in red. If the application is trying to detect a DRV2,
the icon is outlined in grey.
Operation Manual
29
5.3 Reading, Copying, Saving and Recalling Data
The following sections describe the basic procedures for transferring data to and from the
DRV2, and for managing settings files. For information on how to set each parameter, please
refer to the sections describing each setting.
5.3.1 Reading the DRV2’s Configuration Parameters
With a DRV2 unit turned ‘On’ and connected to the PC, select the icon
mand sidebar.
from the com-
The current settings are now loaded into the DRV2 Settings Application, and are displayed
on the right side of the screen. You can save these settings to a file so they can be copied to
another DRV2 later, or you can edit them before you save them.
5.3.2 Saving and Recalling Settings
You can save the settings that are on screen to a file. These settings can be ones you have
manually edited, or they can be settings you have read from a DRV2. In both cases, the
procedure to save the settings is the same.
To save the onscreen settings to a file, select the
icon (arrow points to page icon) from
the command sidebar. Enter a name for the file, and click OK.
To recall saved settings, click the
icon (arrow points to the screen icon) from the command sidebar. Select the file you want to use, and click OK. The settings from the file are now
loaded into the DRV2 Settings Application and are shown on screen.
5.3.3 Copying Settings to a DRV2
You can copy the settings that are on screen to a DRV2. These settings can be ones you
have manually edited, or they can be settings you have read from a file. In both cases, the
procedure to copy the settings is the same.
With a DRV2 unit connected to the PC, select the
icon from the command sidebar. The
settings from the file are now loaded into the DRV2.
For more information on settings, please refer to the sections describing each parameter.
DRV2
30
effigis.com
5.4 Setting Up the DRV2’s Parameters
This section explains how to edit the DRV2 settings with the DRV2 Settings Application. After
you have made the necessary changes to the frequency presets, squelch, units, or any other
setting, you can then save the file.
1.Edit the preset frequencies. To do so, use the up and down arrows to the right of
each frequency to change the value. To select a frequency for leakage detection,
click the radio button (circle) that is next to the preset number corresponding to the
frequency.
For more information on defining frequencies, see page 21.
2.In the Detection section, enable or disable the video detection feature. To enable it,
click in the Video Sync ON/OFF box so a checkmark appears. To disable, click again
to remove the checkmark.
For more information on the video detection feature, see page 22.
3.In the Detection section, enable or disable the channel tag detection feature. To enable it, select the tag modulation by clicking the radio button for AM or FM. Specify
the modulation (3-20 Hz) by using the up and down arrows to adjust the modulation. To disable the channel tag detection feature, select the OFF radio button.
For more information on the channel tag detection feature, see page 23.
4.In the Proximity section, choose a proximity filter for leakage detection. Use the
dropdown menu to select 3m, 10m or 25m.
For more information on the proximity filter, see page 24
5.In the Units section, select the units of measure you want to use to measure leaks.
Click the appropriate radio button next to the Display (μV/m or dBμV/m).
For more information on units of measure, see page 26.
6.In the Sound section, adjust the sound properties. Select the tone’s volume intensity by clicking the desired radio button (OFF, LOW, MED, HIGH). Selecting OFF
mutes the DRV2. Next, select a value for the squelch threshold. This prevents the
DRV2 from emitting a tone for signals below the specified level. Use the arrows to
adjust the squelch threshold.
For more information on the squelch feature and on the DRV2’s volume settings,
see page 24.
7.In the Antenna section, select the model of antenna you are using to detect leaks.
To do so, choose from the list of available options.
Operation Manual
31
For more information on antenna types, see page 26.
You can now save these settings or copy them to a DRV2 that is connected. See the
“5.3 Reading, Copying, Saving and Recalling Data” section starting on page 30.
5.5 Creating a Configuration File in XML Format
The DRV2 Settings Application produces a file in XML format. If you want to create an XML
file directly, without using the DRV2 Settings Application, you can do so by following this
format:
Item
Example
Values
Header
<DRV2>
Always <DRV2>
Frequency section:
Active leakage detection frequency
<FREQUENCY ACTIVE=”8”>
Values from 0-9 (0 corresponds to
preset number 1).
Preset number and associated
frequency
<CHANNEL ID=”0” FRQHz=”119000000” />
<CHANNEL ID=”1” FRQHz=”119000000” />
<CHANNEL ID=”2” FRQHz=”119000000” />
<CHANNEL ID=”3” FRQHz=”118800000” />
<CHANNEL ID=”4” FRQHz=”118800000” />
<CHANNEL ID=”5” FRQHz=”118800000” />
<CHANNEL ID=”6” FRQHz=”128000000” />
<CHANNEL ID=”7” FRQHz=”128000000” />
<CHANNEL ID=”8” FRQHz=”138000000” />
<CHANNEL ID=”9” FRQHz=”137000000” />
</FREQUENCY>
Channel ID presets from 0-9 (0
corresponds to preset number 1).
Each frequency is defined over
9 digits, and represents the frequency in hertz. The last two digits
are always 00.
Detection section:
Video horizontal sync detection
Channel tag detection
<DETECT>
0 = disabled
1 = enabled
0 = disabled
1 = AM
2 =FM
Define frequency for AM and FM,
values from 3 to 20 (hertz).
<SYNCVIDEO ENABLE=”1” />
<TAG TYPE=”0” AMFRQHz=”7”
FMFRQHz=”7” />
</DETECT>
Audio section:
<SOUND INTENSITY=”1” SQUELCH=”31” />
0 = mute
1 = low
2 = medium
3 = high
Squelch threshold from 0000 to
2000 μV/m.
Display section:
<LCD LEVEL=”2” />
Screen contrast from 0 to 31.
Units section:
<DISPLAY UNIT=”0” />
0 = μV/m
1 = dBμV/m
Antenna section:
<ANTENNA MODEL=”1” />
0 = none
1 = rubber duck
2 = dipole
3 = monopole
End
</DRV2>
Always <DRV2>
DRV2
32
effigis.com
Appendix A - Specifications
A.1 Technical
Detector type
Digital receiver/demodulator
Frequency range
Agile from 108 to 135 MHz (lo-band version)
and from 118 to 155 MHz (hi-band version)
Channel tuning
Configurable via USB and by front panel
buttons with 10 presets
Tuning resolution
100 Hz
Equivalent resolution bandwidth
± 4 kHz
Level range
2 to 2000 μV/m
Level accuracy
± 1 dB
Tag detector
AM [3 to 20 Hz] – FM [3 to 20 Hz]
Video detector
Video sync detection [untagged video carriers]
Audible tone
Yes, varies with leak intensity
Adjustable audio volume
Yes, variable
RF level scale display
Unique scale from 0 to 2000 μV/m
Measurement units
μV/m and dBμV/m
Operation time
6 hours nominal on battery power
Operating temp
0°C – 40°C (32°F – 104°F)
Storage temp
-20°C – 45°C (-4°F – 113°F)
Communication port
USB serial port
Operation Manual
33
A.2 Electrical and Environmental
Power
Inputs: +12VDC 1.2A max;
+5VDC (USB powered) ~ 0.3A;
+3.6VDC 3-cell NiMH battery pack of
2000mAh ~ 0.3A.
AC battery charger
Input: 100-240V ~ 50-60Hz 0.7A;
Output: +12VDC 1.66A;
Transient overvoltage II;
Rated pollution degree 2.
Mains supply voltage fluctuations
Up to ±10 % of the nominal voltage.
Recommended use
Indoor use or outdoor use without exposing to direct sunshine or wet
location.
Altitude
Up to 2000 m (6560 ft).
Maximum relative humidity
80% for temperatures up to 31°C (88°F)
decreasing linearly to 50% relative humidity at 40°C (104°F).
A.3 Physical
Dimensions
7’’ x 3.4’’ x 1.3’’ [H x W x D]
17.8 cm x 8.6 cm x 3.3 cm
Weight
14 ounces / 397 g
* Specifications subject to change without prior notice.
DRV2
34
effigis.com
Appendix B – Our Services
Effigis offers a portfolio of services to deploy and support purchased equipment through its
Customer Support organization. Customer Support is standard with every product sale and
consists of business hour technical assistance, in-warranty repair and calibration.
B.1 Customer Support
Customer Support is accompanied with the sale of every Effigis product. Customer Support
services include:
- Product and Service Literature
- Technical Assistance (Business Hour)
- Equipment Repair (Under Warranty Repair and Calibration Services)
- Equipment Return Authorizations
Contact a Customer Support representative through your local distributor or by accessing
http://effigis.com for information on calibration and warranty policies.
B.1.1 Equipment Return Instructions
Please contact your local Customer Support location via telephone for Return Authorization
to accompany your equipment. For each piece of equipment returned for repair, attach a tag
that includes the following information:
– Owner’s name, address, and telephone number
– The serial number, product type, and model
– Warranty status (If you are unsure of the warranty status of your instrument,
contact Effigis’ Customer Support.)
– A detailed description of the problem or service requested
– The name and telephone number of the person to contact regarding questions
about the repair
– The return authorization (RA) number
If possible, return the equipment using the original shipping container and material. If the
original container is not available, the unit should be carefully packed so that it will not be
damaged in transit; when needed, appropriate packing materials can be obtained by contacting Effigis Support. Effigis is not liable for any damage that may occur during shipping.
The customer should clearly mark the Effigis’ issued RA or reference number on the outside
of the package and ship it prepaid and insured to Effigis.
Operation Manual
35
Equipment repaired or replaced under warranty will be returned at Effigis’ expense to Customer (Canada/USA) or Effigis’ representative (all other countries).
All other non-warranty repairs will be returned at Customer’s expense to Customer (Canada/
USA) or Effigis’ representative (all other countries).
B.2 Limited Product Warranty
B.2.1 Hardware
Effigis warrants to the original end user (Customer) that the new Effigis branded products will
be free from defects in workmanship and materials, under normal use, for one (1) year from
the date of original shipment.
Effigis warrants repaired products for ninety (90) days from date of shipment. Any Product
repaired or replaced under warranty is only warranted for the period of time remaining in the
original warranty for the Product.
Any third party products, including software, included with Effigis products are not covered
by this Effigis warranty and Effigis makes no representations or warranties on behalf of such
third parties. Any warranty on such products is from the supplier or licensor of the product.
B.2.2 Software
Effigis warrants to the Customer that new Effigis branded software and firmware will perform
in substantial conformance to program specifications for a period of ninety (90) days from
the date of original shipment. Effigis warrants the media containing software against failure
during the warranty period.
Effigis makes no warranty or representation that the operation of the software products will
be uninterrupted or error free, or that all defects in the software products will be corrected.
B.2.3 Exclusions
This warranty excludes:
• Damage to the physical surface of the product, including cracks or scratches to
any part.
• Damage caused by misuse, neglect, improper installation or testing, unauthorized attempts to open, repair, or modify the product, or any other cause beyond
the range of the intended use.
• Use of the product with any non-recommended device or service if such device
or service causes the problem.
• Installation or maintenance of Product by someone other than Effigis or persons
certified by Effigis
DRV2
36
effigis.com
• Changes to the Customer environment in which Product was installed
• Damage caused by accident, fire, power changes, other hazards, or acts of nature.
• Consumable Product or parts thereof (e.g., parts with an expected useful life of
less than ninety (90) days, such as certain batteries)
• Product not returned in accordance with Effigis’ RA procedure.
B.2.4 Refurbished Parts and Prior Testing
Product may incorporate reconditioned or refurbished parts or subassemblies and may have
been used in testing prior to sale.
B.2.5 Exclusive Remedies.
If any Product materially fails to conform to the limited warranty set forth in this Section
(Limited Warranty) and actually fails during the applicable warranty period and under normal
use, Effigis shall, at its sole discretion (i) repair or replace the non-conforming Product to
remedy the nonconformity identified by Customer in accordance with this Section (Limited
Product Warranty); or (ii) issue a credit to Customer for the amounts paid for the Product in
exchange for return of the non-conforming Product, in which case Customer’s licenses to
any Firmware shall be automatically revoked. Customer hereby transfers to Effigis title and
ownership of any parts that Effigis replaces.
B.2.6 Disclaimer.
THE REMEDIES EXPRESSLY PROVIDED IN THIS SECTION WILL BE CUSTOMER’S SOLE AND
EXCLUSIVE REMEDIES AND SHALL BE IN LIEU OF ANY OTHER RIGHTS OR REMEDIES CUSTOMER MAY HAVE AGAINST EFFIGIS WITH RESPECT TO ANY NON-CONFORMANCE OF
PRODUCTS. EXCEPT AS SPECIFIED IN THIS LIMITED PRODUCT WARRANTY, EFFIGIS MAKES
NO EXPRESS REPRESENTATIONS OR WARRANTIES WITH REGARD TO ANY PRODUCT.
EFFIGIS DISCLAIMS ALL IMPLIED WARRANTIES, CONDITIONS, AND REPRESENTATIONS INCLUDING, BUT NOT LIMITED TO, ANY WARRANTIES OR CONDITIONS OF MERCHANTABILITY,
SATISFACTORY QUALITY, FITNESS FOR A PARTICULAR PURPOSE, AND NON-INFRINGEMENT, REGARDLESS OF THE LEGAL THEORY ON WHICH SUCH IMPLIED WARRANTY MAY
BE BASED, INCLUDING, WITHOUT LIMITATION, CONTRACT, COURSE OF DEALING, USAGE,
OR TRADE PRACTICE.
Operation Manual
37
effigis.com
1.888.495.6577


© Copyright 2026