
Owner’s Manual & Recipe Book
Owner’s Manual & Recipe Book
Greetings new Primo owner!
I’ve been asked to write a few words to introduce you to your new grill,
which, if you’re at all like me or the many Primo-istas I’ve met in the last
year, is going to change your life; or at least the hours of your life that
you spend at the grill.
Let me tell you right off the bat that I’m an odd choice to be writing
this introduction. I’m not associated with the company, I don’t know
the difference between North Carolina and Kansas City barbecue,
and until very recently I thought of grilling as strictly a “guy thing,” like
understanding fantasy football or not asking for directions.
Primo changed all that. It isn’t just the look and feel of the thing,
although the simple lines and the heavy ceramic heft have grown on
me, like a piece of art that is both prosaic and exotic. I love introducing
my friends to the Primo by having them just lift the dome – all that
weight in your hand, yet balanced and manageable because of the
clever engineering of the hinge – then let it close, and the dome stops
with a satisfying thump, decisive and secure, on the felt gasket. Right
away the serious heft of the Primo lets you know you’ve left the land of
Webers far behind.
But I’m not a Primo fan because it looks good. I’m a fan because
Primo makes me look good. Even for a grill novice like myself, the
Primo method of grilling/smoking makes it easy to cook everything
from perfectly flash-seared tuna to 20-hour low & slow genuine
barbecue, succulent, smoky and falling-off-the-bone tender. I’ve
always been a serious chef inside my kitchen; Primo lets me take
my culinary adventures outdoors and it has become my partner-increation, inspiring me to try everything from grilled pizza to coldsmoked cheese; from sour dough bread to (I kid you not) fried eggs for
breakfast. Why stop with burgers when the Primo beckons me to ever
new possibilities? It is a cooking phenom.
And then there’s the big secret that Primo has let me in on after all
those years: Grilling and smoking isn’t hard (so much for the “mystery
on the deck!”); in fact, it’s really fun. Perhaps this is why I’ve become
such a Primo fan. It’s just fun to use.
In this over-hyped world, where gizmos and gadgets are hawked
24/7, it’s rare to come across a product, and a company, that is actually
better than it claims to be. The guys at Primo have made an amazing
product. They stand behind it with integrity, and with pride. Get to
know your Primo, and you’ll understand why.
Good grilling!
Maria Nation (aka Grill Girll on the forum), Massachusetts
Visit the enthusiastic Primo users forum at: www.primogrill.com
2
Kamado Theory
Ancient Japanese Kamado
As developed by the Japanese over 2000 years ago, heat is trapped
and stored in the thick walls and dome of the kamado oven creating
a unique environment of moist, even heat around and above the grill
surface. Because heat is radient, as well as direct from the coals below,
food not only crisps, browns, sears, and/or smokes but it stays moist
and tender. The thick walls surrounding the cooking area create a
consistency of temperatures that further contributes to the succulence
of all food cooked in the Kamado style.
Grills & Smokers
3
Table ofGreetings
Contents
General Information
Greetings .............................................2
Kamado Theory ....................................3
Table of Contents ............................. 4 - 5
First Use .......................................... 6 - 8
Damper Adjustment Guide ....................9
First Cooking Experience .............. 10 - 11
All About Charcoal ..............................13
FAQ & Suggestions ....................... 14 - 17
Meat Temperature Guide .....................18
Meat Cooking Guide ............................19
Safety Precautions..............................20
Just So You Know ................................21
How Much Meat..................................21
4
Kamado
Table of Contents
Theory
Recipes
Primo Ceramics trying to help customers enjoy their Primo grill &
Smoker Has collect many recipes from people using Ceramic grills and
smokers. Primo Ceramics does not claim any ownership for the recipes,
and thanks everybody for submitting these wonderful recipes.
Rubs & Marinades ........................ 22 - 27
Casseroles ................................... 28 - 32
Breads & Pizza ............................. 33 - 40
Beef/venison ............................... 41 - 54
Pork/ Ribs/ Barbecue ................... 55 - 66
Lamb .......................................... 67 - 71
Seafood ...................................... 72 - 85
Sausages ..................................... 86 - 90
Poultry....................................... 91- 110
Vegetables/ Fruits/ Salsa ...........111 - 128
All About Brining ......................129 - 131
Flavor Brines ............................132 - 135
Grills & Smokers
5
Greetings
First Use
Setting up your Primo to Cook
A. Determine Firebox Filling (Half or Full).
1) HALF FIREBOX *Applicable with the Primo Oval only: Use the iron
firebox divider (sold as an accessory) to cook only on one small section of your
grill OR use it for INDIRECT COOKING (light your fire on one side; cook on the other side.
This is for slower, more gentle cooking.) You can also grill over the lit coals and do
more gentle cooking at the same time on the other, unlit, side. Or you
can sear on the lit side, then move the meat over to the cooler, unlit
side, and finish your cooking there. REMEMBER: on the Primo you always cook with the top
DOWN.
2) FULL FIREBOX: Use this for larger loads of food, or hotter cooking, or
longer cooking (aka “low and slow”). If you use the full firebox you can also
cook INDIRECT by placing aluminum foil sheet or pan over one or two
drip pan racks (sold as an accessory) . This will block the direct flame and allow
you to roast or bake rather than grill.
B. Fill The Firebox With Lump Charcoal.
1) Only use pure lump charcoal. No briquettes! Sprinkle in smoking
woods (fruit wood, hickory, etc) for flavor if desired.
2) Pour in enough lump charcoal to go up to 1/2 of the firebox. In the
Primo you use the same load of charcoal for many cooks – so you have
to remember to shut down the Primo after your cook (see more on this
later)
3) Open the dome vent and lower vent FULL OPEN to allow air flow
when first starting the Primo.
C. Sweep Out Ash/small Coal Bits.
Primo sells a special tool for removing ash and small bits of charcoal
that have fallen into the bottom. Use this ash rake to “stir” the coals
from your prior cooks and thus remove ash from the leftover coals in
the firebox (it naturally falls down at the bottom of the grill), then use
the ash rake to remove ashes from the bottom of the firebox. Scoop
them out of the lower vent. Throw COLD ashes/coals in garden or
compost because they are good for the garden.
6
Kamado
First
Use Theory
D. Lighting The Charcoal
1)
2)
3)
Never use starter fluid. NEVER, NEVER, NEVER, NEVER!!!
Use the Primo Quick Lights (can be bought from Primo – or other
starter helpers.) For a ½ firebox, place one or two starter pouch buried
half way down into the coal. For a full firebox use two to three pouch
in various places of the firebox.
You may use an electric starter as long as you monitor it.
4) Chimney starters are helpful, but they are messy.
E. Once Fire Has Started - Close Dome & Open Vents.
This directs the flow of oxygen in from the bottom of the Primo and
out the top. It helps ignite the coals.
WATCH CLOSELY NOW… It only takes a few minutes for the Primo to
get hot enough to start prepping your cook. When you are sure the
coals are ignited, CAREFULLY OPEN the dome and finish setting up
your Primo. CLOSE THE DOME AGAIN and let the Primo and grates
continue to warm up.
F. Be Careful Opening The Dome To Avoid Fireballs!
In rare occasions the opening of the dome (the lid) will cause a
spontaneous blast of flame. This is very rare and happens only when
the burning coals are severely deprived of oxygen. Opening the dome
quickly allows a blast of oxygen which causes the fireball to erupt
briefly. TO AVOID THIS always crack the lid open a few times before
opening it fully. This allows oxygen to get to the coals in a controlled
fashion and eliminates the possibility of a fireball. It is a good practice
to get into this habit every time you open the dome.
G. How Do I Get The Whole Bed Of Coals To Burn?
You DON’T. This is important. With the Primo you DON’T use the old
fashioned “let all coals go grey” system. With Primo you watch the
temperature gauge. Depending on what you are cooking you start
closing the vents fairly quickly (within 5 – 10 minutes) to achieve
optimum heat in the Primo (see cooking with the Primo)
Grills & Smokers
7
Greetings
First Use
H. How Long To Wait For Coals
a.
This depends on what you are cooking.
If you want a “low and slow” cook, close down your two vents fairly
quickly- before the temperature gauge reaches 220 degrees. It is
easier to regulate your temperature as it rises than it is to cool down
your Primo if you overshoot your desired temperature. Since 220
degrees seem to be the favorite target temperature for smoking foods,
regulating the air flow through the vent to get this temperature level
will come with experience.
b.
DO NOT LEAVE THE DOME OPEN LONGER THAN NECESSARY.
This allows too much air to reach your coals and throws off your
temperatures. It also allows too much heat to escape from the Primo.
c.
If you are medium roasting (vegetables, a whole chicken, a turkey)
allow your Primo to reach about 300 degrees then shut down your
vents to about ½ inch. Again, experience will teach you how much to
reduce the vents to achieve your desired cooking temperature.
d.
If you want high-heat searing (steaks or searing meats) allow your
temperature to reach about 500 to 600degrees, then close down your
vents to about 1 inch. Again, experience will guide you. Variables
include how much and what kind of lump charcoal you are using,
how much food you are putting on the Primo, what the ambient
temperature is, etc etc.
e.
Always mind your vents. It doesn’t take long for the Primo to reach
temperatures of 600 - 700 degrees which is too hot for most cooking
and becomes dangerous and/or time consuming to cool your cooker
down to your desired temp.
8
Kamado
First
Use Theory
Damper
Adjustment Guide
Approximate Damper Adjustment
������ �������������
������������� �������������
����� ���������������
����
����������������
����� �����������������
����
����� �������
�������������
����� ���������������
�����������
����� ��������������
����
������
Top Damper
Bottom Damper
Grills & Smokers
9
First Cooking
Greetings
Exp.
First
PRIMO Turkey
Grill Temp - 275° - 300°F
Place Turkey 10-15 lbs on a Primo Sitter (recommended) and coat with
your favorite spices. You may place beer, herbs, or any favorite flavored
juices/sauces inside your sitter before setting your chicken upright.
Retain Temperatures of 275 - 300°F until done. Use a meat
thermometer for safe temperature of poultry.
You may allow 2 cooking hour per pound.
Raise the temperature to 500ºF in the last 20 minutes for a stronger
roasting effect.
* Our Ceramic Sitters are perfect for roasting a turkey. Our Turkey Sitter is washable and has a porcelain glossy
finish. 2 sizes available (chicken & turkey size)
First
PRIMO Chicken
Grill Temp - 325° - 350°F
Place Chicken on a Primo Sitter (recommended) and coat with your
favorite spices. You may place beer, herbs, or any favorite flavored
juices/sauces inside your sitter before setting your chicken upright.
Retain Temperatures of 325 - 350°F until done. Use a meat
thermometer for safe temperatures of poultry.
You baste your chicken with extra sauce, though it isn’t necessary
when using your Primo Grill. The moisture retaining capability of your
Primo will not dry your food.
* Our Ceramic Sitters are perfect for beer can chicken, or any other liquids, herbs, or sauce you wish to use. The
Chicken Sitter is washable and has a porcelain glossy finish. 2 sizes available (chicken & turkey size)
First
PRIMO Burger
Grill Temp - 450° - 500°F
Cook burgers with lid down for 6 minutes on each sides. Cook onions
at this time also.
Reduce temperature by closing draft doors. (chimney top and
bottom door)
Add cheese (optional) within the last 3 minutes of cooking session.
Also warm-up buns during this same time period.
Salmon is a preferred 1st time choice
First
PRIMO
Fish
Grill Temp - 325° - 350°F
Place your salmon Steak or filet on your Primo Grill when temperature
level is achieved. You may sprinkle herbs, sea salt and fresh ground
pepper.
Retain Temperatures of 325 - 350°F until done. 10-15 minute per lb
of fish . Use a meat thermometer for safe temperature for fish.
10
Kamado
First
Cooking
Theory
Exp.
For medium rare, meat temperature should reach 135ºF. Cook longer
for achieving a well done finish.
* To achieve grill marks on your fish, you may sear at a higher temperature first. Usually 500ºF is sufficient for
searing. Sear both sides of your fish for 2 minutes.
First
PRIMO Rib Roast
Grill Temp - 450°F
Place your Rib Roast on a Primo V-Rack Rib Roast and cook for
approximately 35 minutes for a 6 lbs Roast. If using our Primo Oval, use
firebox divider and cook indirectly.
Reduce grill temperature to 300º F
Turn Roast over and simply cook to desired meat temperature level.
Use meat temperature probe for accurate temperature level.
* Our V-Rack is perfect to cook Rib Roast. You may use this rack for many other roasting feast: Ribs, pork loin,
pork roast and Boston Butt.
First
PRIMO Ribs
Grill Temp - 325° - 350°F
Place your ribs on your Primo Grill when temperature level is achieved.
You may sprinkle herbs, spices. Wait until the last 20 minutes to pour
your sauces.
Retain grill temperatures of 275-300°F until done. Using a meat
thermometer can be misleading with ribs. Check the temperature
frequently
1 hours per pound is a conservative time period. If you are using our
Primo Oval, utilize the cast iron divider to do ‘true indirect’ cooking.
* Our V-Rack is great for ribs. It allows you to place your ribs on your grill without direct contact with the primary
cooking grid.
First
PRIMO Vegetables
Grill Temp - 400°F
Place your Zucchini first, cook for 10 minutes at 400ºF. Add peppers,
mushrooms and onions after the first 5 minutes.
Lower temperature to 300ºF
Turn over all vegetables and cook for another 10-15 minutes to desired
tenderness.
Serve with balsamic vinegar.
Grills & Smokers
11
General
Greetings
Info.
(Oval) Inner Component of Primo Grills and Smokers products:
Oval Firebox: This is the main engine of your Primo. The firebox is made
with a special ceramic composition which allows your Primo to achieve
low and high temperature levels without compromising the longevity
of your investment.
Bottom Ceramic Plate: This protective plate puzzles into the base of your
firebox. This mandatory piece will reflect all radiant heat back into your
Primo. This will ensure maximum efficiencies and a good protection for
your Oval base. Make sure that it is well positioned at the base. Failure
to put this piece at the base of your Primo will damage the bottom
base and will forfeit your warranty. Be sure that it is well positioned!
Coal Grate: This cast iron grate must be positioned with the center groves
pointing upward. This is where the cast iron divider will be placed. The
firebox divider is sold as an accessory.
Common Parts for all Primo Grills/Smokers:
Ceramic Feet: The ceramic feet are used to support your Primo in the case
that you don’t purchase our metallic cart. Your ceramic feet should be
used when you place your Primo in an Outdoor Kitchen or a wooden
table. Follow the direction for proper installation.
Chimney Slide Top: This Chimney Slide Top is made of durable cast iron.
It’s rounded center is designed to repel water naturally. The small screw
on it’s side was placed there to secure it from falling.
Parts:
Primo Round Inner parts:
Your Primo Round Large is composed of two inner ceramic parts:
Firebox: This one piece firebox is the only one piece firebox in the world.
While other manufacturer usually cast them in two pieces, Primo
has found a way to make into one. Make sure that the bottom vent
opening is positioned directly in front of the slide vent of the outer
shell of your Primo.
Ceramic Coal Grate: This piece is simply placed loosely on top of your
firebox.
12
All
Kamado
AboutTheory
Charcoal
1. What Kind Of Charcoal Can I Use?
We strongly recommend that you to use the Natural Lump Charcoal.
This natural lump charcoal, unlike the briquettes, contains no fillers
or additives and it lasts longer and gives you the smoky taste of
natural lump charcoal. Another reason we recommend the natural
lump charcoal is that after cooking, the remaining charcoal can be
re-used and there is very little ash to remove. Look for the natural lump
charcoal at farmer’s markets, hardware stores, barbecue equipment
stores, home improvement stores, and your local dealer.
Note that natural charcoal produce from trees may be harder to ignite
and harder to control when cooking at very low temperature. Natural
charcoal produced from scrap wood pieces (lumber yards-furniture
wood processing plants) can be more volatile to air and can ignite
quickly and obtain low temperature with more ease. While most
charcoal rating on the internet has been done by passionate natural
charcoal user, we have found that natural charcoal made from scrap
wood is easier to use and is more readily available. As long as you use
natural lump charcoal of any forms, you should be the judge as to
which product brand is best.
Perhaps you may want to let us know if you have a preferred brand...
we are always looking for information on lump charcoal.
2. How Much Charcoal Should I Use?
You may fill your Primo with charcoal above the air holes of the firebox.
Don’t feel that you need to adjust the amount of charcoal input in
relation to the time of your cooking session. Putting too much charcoal
will not affect the performance. Note that you will be controlling the
air flow which will in turn control the temperature. Any remaining
charcoal can be used again. For extra long and slow cooking, filling the
firebox to 3/4 of its capacity may be recommended.
Grills & Smokers
13
General
Greetings
Info.
FAQ & General Suggestions
1. Is It Safe To Use My Primo During All Seasons?
Yes. You can use your PRIMO all year around. Enjoy the superior
cooking performance and unique flavor that Primo offers throughout
the year. From Tropical weather areas to Arctic location, your Primo will
perform very well. . . better than any metal constructed product on the
market.
2. Can I Leave My Primo Outside In The Rain?
Yes. The exterior shell of your PRIMO is protected with a lead-free glaze
that is thermally bonded with the ceramic material in order to protect
the unit from rain or snow. We do recommend that you use a PRIMO
vinyl cover to protect the metal parts of the grill.
3. What Is The Purpose Of The Gasket?
The gasket is a seal between the two sections of your grill and allows
you to regulate the temperature through the metal slide door and the
slide top. It also protects your PRIMO if the lid is lowered too quickly.
Your gasket is made of a generic chemical-free felt which will
deteriorate over time. You may purchase a replacement from your local
dealer or through Primo.
4. Do I Ever Need To Replace The Gasket?
Yes, time will tell. It can be re-glued with a high temperature adhesive.
In the event that you would like to change it, a gasket kit is available
through our company or the point of purchase of the unit.
5. How Can I Extinguish My Primo?
We recommend that after cooking simply close the slide door and the
cast iron top completely so the remaining charcoal will extinguish. Reuse the remaining charcoal the next time you grill. Due to the thermocharacteristics of your PRIMO, the grill will take a few hours to cool off.
DO NOT USE WATER TO EXTINGUISH THE COALS.
6. How Do I Reduce The Temperature Quickly?
Close the bottom slide door and the top damper completely. Keep
them completely closed until you reach the cooking temperature;
afterward readjust the slide door and the top damper to regulate the
temperature.
7. Should I Ever Use Liquid Lighter Fluid?
14
KamadoInfo.
General
Theory
No. You should never use liquid lighter fluid because the ceramic will
absorb the smell of the liquid and will affect the taste of your food.
8. Can I Cook With The Lid Open?
No. If you cook with the lid open you are losing all the cooking
characteristics of your Primo and all the benefits of cooking with a
ceramic grill. In the end, you will wind up with dried-out food.
9. Do I Need A Rotisserie With My Primo?
You will not need a rotisserie. Due to the reflection of the heat within
the ceramic your Primo will cook your food evenly. Most foods such as
roasts, whole turkeys, or chickens do not need to be turned. For slow
cooking you should keep the temperature of your PRIMO around 250F
and for quicker cooking keep the temperature at 350°F.
10. Can I Cook Different Foods At The Same Time?
Yes. Your Primo allows you to cook different foods the same time.
11. Can I Cook Pizza Or Bread In My Primo?
Yes. Use the ceramic PRIMO PIZZA plate, or a baking stone and you will
have an exceptional result.
12. Should I Use A Drip Pan?
Some times you can use a drip pan to prevent flame ups, especially
when you are roasting large pieces of meat.
13. Should I Raise Or Lower The Porcelainized Grill?
No. The heat circulates all around the food and you don’t need to place
the grill closer to the charcoal.
14. Can I Use My Primo For Smoking?
Yes. For smoking you need to adjust the temperature of your PRIMO
between 150F-250F. If you want to add flavor you can put in some of
your favorite wood chips.
15. Do I Need To Clean The Interior Walls of My Primo?
No. You don’t need to clean the interior walls of the Primo...nor the
inside. It is best to simply clean the cooking grates and remove the
ashes only. You may clean the exterior glaze surface with warm water
and regular dishwater soap.
16. Can I Use My Primo On A Wood Deck?
Yes. If you plan to put your PRIMO on a wood deck or on a wood
Grills & Smokers
15
General
Greetings
Info.
table we recommend that you use the ceramic shoes provided with
your PRIMO . You may also place it into an Outdoor Kitchen for the
ultimate outdoor cooking experience. If you choose to do so, there
are clearances that you must be aware of. Contact Primo’s website for
updates on building your unit into an outdoor kitchen.
17. How Do I Remove The Ash?
Very easy. Just open the bottom slide door and use your ash tool to
rake out the remaining dead ashes. Do not remove the firebox or the
ceramic plate. By using natural lump charcoal you will need to empty
the ashes probably every 8-10 uses. If the ashes build up the airflow
will be reduced and you may have a problem heating your PRIMO
quickly.
18. My New Primo Shows Tiny Cracks. . .
Should I Be Concerned?
If you Grill/Smoker shows tiny cracks, you shouldn’t be concerned
about it’s durability nor it’s performance over time. These tiny cracks
are known through the ceramic industry as “crazing”. Your Primo
product may have these cracks which may be more visible with our
newest “Slate black” color.
Yes, this is normal. This “crazing” does no harm and is no reason to be
concerned. If you should have chunks of ceramic popping out or big
chips coming off, that would be a different matter. But the fine lines or
tiny cracks are normal and can be ignored. Because we choose not to
use lead in our glaze mix, you benefit from a manufacture who cares
about your health and the environment.
Shall there be any concerns, you may address your questions directly
to Primo.
19. Why Is My Primo Better Than Any Other Grill?
Your PRIMO is made from a hi-tech ceramic material that holds the
heat better than any other ceramic grill on the market today. The
thermo-shock resistance is very high and stands high temperatures
without cracking.
This material also makes your PRIMO resistant to any changes in
temperature. Thus allowing you to cook without worrying about rain
or snow.
16
KamadoInfo.
General
Theory
The outside surface of your grill has been glazed with a lead-free nontoxic glaze that is bonded with the ceramic body so that it retains its
nice finish forever.
Your PRIMO is the result of years of research and more that 20 years of
cooking experience. We are the only company who manufactures in
the US which allows us to maintain a high standard of quality control
for each unit produced.
The advantages of a PRIMO Ceramic Grill & Smoker over other charcoal
grills are that you will cook your food without flames so that your
food will not dry out. Other grills require you to add water pans or
injections to keep your food juicy. With PRIMO, the juice of the food
stays in the meat without losing any flavor so your food shrinks less. It
is also ready to cook in 10 minutes, that’s even faster than a gas grill.
Grills & Smokers
17
General
Greetings
Info.
Meat
Temperature Guide
for Perfect Primo Results
The following meat temperatures are given as an approximation. For your safety, we recommend using a meat thermometer to ensure the quality and the proper safe temperature of your
food.
Low & Slow Cooking 225° F - 275° F
Prime rib roast
Chicken Wings
Ribs to die for (pork)
Boston Butt (pulled pork)
Roast (8-15 lbs.)
2.5-3 hrs
60-70 minutes
3-4 hrs
18+ hrs
2-4 hours
Cooking at 325°F - 350° F
Chicken (whole)
Chicken (cut)
Ham
Turkey (whole, stuffed, 18 lbs.)
Turkey (whole, stuffed, 12 lbs.)
Shrimp
Pork Tenderloins
Leg of Lamb
60-80 minutes
30-45 minutes
2-5 hours
3-4 hours
2-3 hours
5-8 minutes
45-60 minutes
3-4 hours
Searing Temperatures 500° F - 700° F
Steak
Hamburgers
Pork Tenderloins
Pork Chops (2” thick)
London Broil (2lb)
Fish
8-10 minutes
8-10 minutes
45-60 seconds
10-15 min
15-20 min
15-40 minutes
18
KamadoInfo.
General
Theory
Meat Cooking Guide
Raw Food
Internal Temp
Ground Products
Hamburger
Beef, veal, lamb, pork
Chicken, turkey
160°F
160°F
165°F
Beef, Veal, Lamb Roasts & Steaks
medium-rare
145°F
medium 160°F
well-done 170°F
Pork Chops, Roast, Ribs
medium
well-done
Ham,
Sausage,
160°F
170°F
fresh 160°F
fresh 160°F
Poultry
Chicken, whole & pieces
Duck
Turkey (unstuffed)
Whole
Breast
Dark meat
Stuffing (cooked separately)
180°F
180°F
180°F
180°F
170°F
180°F
165°F
Eggs Fried, poached
Sauces
yolk & white are firm
Casseroles
160°F
custards
160°F
Grills & Smokers
19
General
Greetings
Info.
Safety
Precautions
1. This unit is for outdoor use only.
2. Do not use lighter fluids.
3. Keep children away from the unit while in use and during cool-down
time.
4. Do not modify the design without written approval by the Primo Grills
and Smokers (CCT) company.
5. Operate your PRIMO in a safe area well away from overhanging trees,or
buildings.
6. Children should never use the PRIMO.
7. IF YOU OPERATE THE UNIT AT TEMPERATURES ABOVE 500° F WITH
BOTH DAMPERS CLOSED BE VERY CAREFUL WHEN YOU REOPEN THE
LID. FIRST, OPEN BOTH DAMPERS, WAIT 10-15 SECONDS. THEN OPEN
THE LID AN INCH AND PAUSE BEFORE RAISING THE LID. This will allow
the sudden rush of oxygen to burn safely, and not as flashback which
could startle you and possibly cause injury.
8. If your product is to be placed in an “outdoor kitchen” or as a built-in
configuration, please allow the proper clearance for this application.
You may call our sales/marketing office or find us on the web to get
more information. Failure to follow our clearance guideline may result
in severe damages that would void your warranty.
20
KamadoInfo.
General
Theory
Just
So You Know
Boston butt = Boston roast = pork butt roast = pork shoulder Boston butt
= Boston-style shoulder = Boston shoulder = Boston-style butt = fresh
pork butt
Notes: This economical, rectangular roast is the cut of choice for pulled
pork barbecue, since it’s marbled with enough fat to keep the meat moist
while cooking. You can buy it bone-in or boneless.
Substitutes: pork picnic roast (also works for pulled pork) OR pork center cut loin
roast (This is lower in fat, so roast it at a lower temperature and avoid overcooking it.) 2 hours per
pound at 225 degrees is a good rule of thumb. Remember this is for the
individual piece of meat not the total weight. Two 5 pound butts (10 pounds
total) should cook in about 10 hours as long as there is some separation on
the grill.
How
Much Meat?
For pulled pork, a typical sandwich (or serving) is 4 oz of cooked meat. For
adult males, you might want to plan on 2 sandwiches per person. For
women and children, plan on one sandwich per person. The average butt
loses about 40% of its weight while cooking. So, to get 6 pounds of cooked
pork (24 sandwiches) you would need to start with 10 pounds of butt (2.4 servings per
LB of uncooked meat). So a simple little table is all you need:
People
Servings
Number of men
x2=
Number of women
x1=
Number of children
x1 =
÷ 2.4
=
Total Servings =
Pounds of Butt to Buy =
Grills & Smokers
21
Rubs & Marinades
Rubs &
Marinades
22
Rubs & Marinades
JJ’s Rub JJ
Ingredients:
5
4
1
4
4
4
3
¼
Tbs.
Tbs.
Tbs.
tsp.
tsp.
tsp.
tsp.
tsp.
dark brown sugar
paprika
rosemary
onion powder
garlic powder
dry mustard
dried sweet basil
ground cumin
2
tsp.
1½ tsp.
1½ tsp.
1½ tsp.
1½ tsp.
1½ tsp.
salt, to taste
ground bay leaves
(if you can’t find ground use whole)
ground coriander
ground savory
dried thyme
ground black pepper
white pepper
Directions:
1. Place all ingredients into a food processor and blend. If you use whole
bay leaves blend until leaves are pulverized.
2. Rub meat and cover with saran wrap. Marinade over night in fridge.
3. Allow to come to room temperature and place in smoker.
Nature Boy’s Rib Rub Chris Capell
This is a rub I developed for ribs, but have been using it on chicken and fish as well. It has a fresh
zing to it from the ginger and the lemony flavor of the coriander seeds, and plenty of pepper.
Ingredients:
1/2 cup turbinado sugar
(or brown sugar)
1 Tbs. black peppercorns
1 Tbs. green peppercorns
1/3 cup kosher salt
2 Tbs. hungarian paprika
2 tsp. celery salt
2 Tbs.. onion powder
(i use penzey’s toasted)
1 tsp. cayenne pepper (optional)
1 tsp. rubbed sage
1 tsp. ground chipotle
(or more to taste)
1 Tbs. ginger powder
(i use penzey’s china cracked ginger & grind myself)
1 Tbs. brown mustard seeds
(optionally yellow)
1 Tbs. curry powder
1 Tbs. coriander
Directions:
Grind peppercorns, coriander seeds and cracked ginger. Blend all
ingredients together.
Grills & Smokers
23
Rubs & Marinades
Sugarless Texas Sprinkle
Ingredients:
1/3 cup
1/4 cup
3 Tbs.
1 Tbs.
salt
1 Tbs. garlic powder
paprika
1 Tbs. ground cumin
chili powder
2 Tbs. black pepper
cayenne (or less to taste) can substitute 1 tsp of chipotle powder
Slap yo’ Momma butt Rub Tember2
Rub, Perfect for Boston Butts
Ingredients:
1
½
½
1
1
1
3
cup
cup
cup
Tbs.
tsp.
tsp.
tsp.
sugar (can be split into ½ cup brown ½ cup white)
salt (can be split into ¼ kosher ¼ table)
spanish paprika (hungarian will work)
garlic pepper
½ cup
coriander
1 Tbs.
cinnamon
1 Tbs.
cayenne pepper
1 pinch
garlic salt
black pepper
chili powder
love
Directions:
1. Slap it all together and mix it up
2. Rub your butt and throw it on the ceramic cooker.
3. Cook low temp 225 or so and let the temp in the meat get to 180.
Pull meat once it has cooled and sprinkle with the rub for additional
flavor.
* When cooking I suggest getting a squirt bottle filled with equal parts apple juice and cider vinegar. Spray yo’
butt with it and it will help open the muscle striations up and give it a good sweet flavor.
All Purpose Rub Palisin
Used with Swordfish with Mango Chutney.
Ingredients:
1 Tbs. chopped ginger
1 tsp.
1 Tbs. chopped garlic
1 Tbs.
1 Tbs. chopped scallions
1 tsp.
1 tsp. allspice
1 tsp.
dried hot peppers to taste (i recommend it spicy)
Directions:
24
soy sauce
olive oil
black pepper
salt
Rubs & Marinades
Combine in mortar & pestle or food processor cover steaks or seafood
generously.
Emeril’s Rustic Rub
Good with poultry or fish.
Ingredients:
8
3
6
3
5
Tbs.
Tbs.
Tbs.
Tbs.
Tbs.
paprika
2 ½ Tbs.
cayenne
2 ½ Tbs.
garlic powder
6 Tbs.
onion powder
freshly ground black pepper
dried thyme
dried oregano
salt
Directions:
1. Combine all the ingredients in a mixing bowl.
2. Blend well.
3. Store in an airtight container in your spice cabinet for up to three
months.
Mojo Marinade
great on roast pork
Ingredients:
1/3 cup lemon juice
15 cloves garlic
1/3 cup orange juice
10 allspice berries
1/3 cup white vinegar
1 bunch cilantro
1 oz. salt
1 oz.
Peppercorns
2 serrano peppers (seeds removed)
2 oz. annato seeds (soaked in warm water for 2 hours)
Directions:
Place all ingredients in blender and puree.
NOTE: Annato seeds are from the Achiote plant and are available at Mexican groceries or
specialty groceries.
Grills & Smokers
25
Rubs & Marinades
Killer Jerk Marinade Turkey (Mark)
Been making this for years and the ceramic cooker made it the best yet. I like it, HOT! You can do
what you want with the peppers, the recipe my mom gave me just said 1 “hot” pepper.
Ingredients:
1 medium onion (quartered)
2-3 jalapeno peppers (or other peppers)
3 Tbs. soy sauce
1 Tbs. olive oil
1 Tbs. vinegar
3-4 Tbs. Spice Mix (side)
Spice Mix Ingredients:
4
2
4
2
1
1
2
Tbs.
Tbs.
Tbs.
Tbs.
Tbs.
Tbs.
Tbs.
Thyme (fresh or dried)
salt
Sugar
Allspice
ground cinnamon
ground nutmeg
ground black pepper
Directions:
1. Take 3-4 Tbs. of the spice mix (I use 4) and put in a food processor with
onion (quartered), hot peppers, soy sauce, oil and vinegar.
2. Pulse until everything is chopped fine but not liquefied.
I like it with chicken thighs (bone in) or pork tenderloin but it’s really good on everything. I
usually marinate at least 4-6 hour or overnight if I can. I make a big batch of this and keep it in a
ziploc bag as I cook this often in the summer. ENJOY!!
Tampa Mojo Marinade
Great on Rost Pork!
Ingredients:
Juice from 3 large oranges
(approximately 1-1/2 cups)
Juice from 2 large limes
6 Tbl. olive oil
1 tsp.
2 Tbl.
1/3 cup
salt
minced fresh oregano
minced fresh parsley
Directions:
Place all ingredients in blender and puree.
The roast pork here in Tampa is usually done in the oven with a nice crust.
26
Rubs & Marinades
RUB FOR ROAST
Ingredients:
1 Tbs.
1/2 Tbs.
1/4 tsp.
1/4 tsp.
1 Tbs.
1 Tbs.
garlic powder
chilly powder
salt
pepper
basil
oregano
Directions:
1. Mix well, rub into roast and let sit 30-40 minutes.
2. Then mix 1/4 cup soy sauce, 1-tablespoon extra virgin olive oil, 1
teaspoon Dijon.
3. Mix well and marinate for 1-2 hours.
4. Grill at 325° until meat thermometer is 170°-180°.
Grills & Smokers
27
Rubs & Marinades
Casseroles
Casseroles
28
Rubs & Marinades
Casseroles
JJ’s Quiche JJ
Ingredients:
1 tsp. butter
¼ lb.
grated parmesan cheese
8 oz. sausage, crumbled
½ cup flour
1 lb.
mushrooms, sliced thin
1 Tbs. baking powder
Pinch fresh ground pepper
½ tsp. salt
3
9
½
2
½
oz
cream cheese
eggs, beaten
lb.
ricotta cheese
cup chopped chives
lb.
monterey jack cheese
shredded
¼ lb.
extra sharp cheddar cheese
shredded
Preparation Directions:
1.
2.
3.
4.
5.
6.
Spray large rectangular pan with Pam
In a skillet over medium heat, brown the sausage for 4 to 6 minutes.
Add mushrooms and sauté until wilted, about 3 to 4 minutes.
Season with black pepper.
Remove from heat and cool slightly.
In a large mixing bowl, combine the cream cheese and ricotta cheese
and mix thoroughly.
7. Add the eggs, a little at a time, and mix until fully incorporated.
8. Stir in the sausage/mushroom mixture, grated cheese and chives
9. Pour into the prepared pan and cover tightly with plastic wrap.
10. Refrigerate overnight or for at least 12 hours.
Cooking Directions:
1. Preheat the ceramic cooker to 400 degrees using an inverted plate
setter or fire bricks
2. Remove mixture from refrigerator and bake for about 45 minutes - or
until golden brown and the ante, slightly jiggles.
3. Remove from the ceramic cooker and cool for 5 minutes before
serving; spoon onto serving plates and serve immediately.
Ceramic Cooker Meatloaf Sprinter
Been lots of talk lately about pork butts, briskets, chicken etc. Thought I’d add my two cents
about a relatively unknown or at least seemingly unspoken Ceramic cooker meal, a meatloaf.
Last night I cooked one and I had forgotten myself what a great meal they make. This was a real
nice change of pace from the steaks and chicken and pork that we’ve been cooking lately and the
family really enjoyed it as well. Not too many things for which the kids (4 and 2) ask for seconds,
this was one of them. Another one is grilled fish, go figure.
Grills & Smokers
29
Rubs & Marinades
Casseroles
Ingredients:
2
1
lb.
lb.
ground chuck
sage breakfast
pork sausage
2
1
Tbs.
cup
1 egg
½ cup
½ cup diced green & red pepper ¾ cup
½ cup italian bread crumbs
3 Tbs.
(I had homemade, could use others)
Fajita Seasoning
shreaded sharp cheddar
cheese
diced red onion
ketchup
Worchestershire Sauce
(more or less to your liking)
Directions:
Cook indirect at about 325 until the internal temp was 170. It took
about 1 ½ to 2 hours. No wood chips added.
I have one of those adjustable V racks. It adjusts from completely flat to a V of about 20 degrees
in small increments. I lay it flat, cover it with foil and poke holes in the foil every couple of
inches, then adjust the sides to about a 45 degree angle and place the meatloaf inside of that.
Works out great and it allows the smoke to penetrate the whole loaf, not just the top.
Smoked Chili
Ingredients:
Jim Brownlow
1 ½ lbs ground beef
1 garlic bud
1 green pepper chopped
1 large red onion chopped fine
2 Tbs. bacon drippings
2 cans chopped tomatoes
2
cans mexican chili beans or
kidney beans
1 bay leaf tabasco (optional) to taste
1 ½ tsp. salt
2 Tbs. chili powder
3 whole cloves
Directions:
1. Brown ground beef, garlic bud, green pepper, and red onion in bacon
drippings.
2. Add chopped tomatos, cloves, chili powder, salt, bay leaf, tabasco and
beans.
3. Simmer 2 hours in the smoker.
30
Casseroles
Rubs
& Marinades
Smoked Meatloaf Mike Harmon
Ingredients:
2 lbs
1 Tbs.
1 lb.
½ cup
1 ½ cups
2 Tbs.
1 tsp.
½ cup
lean ground beef
3
canola oil
1
lean ground pork
1
minced onion
¼
bread crumbs
1
Worcestershire Sauce
½
tobasco
chopped green/red pepper
cloves minced garlic
egg
tsp. ground black pepper
cup beef stock
tsp. salt
tsp. ground cumin
Directions:
1. Warm the oil in a skillet over medium heat.
2. Add the pepper, salt, onion, bell pepper and cumin and sauté until the
veggies are softened.
3. Put the veggies into a large bowl.
4. Add the rest of the meatloaf ingredients and mix well with your hands.
5. Then mound the meat into a metal loaf pan and season with Ultimate
Steak and Roast rub.
6. Add smoking woods to the coals and put the meatloaf in the Ceramic
cooker. Cook at 350F.
7. All you do now is add more smoking woods (if you want to) and wait till
it is time to eat. * I use Jack Daniel’s Barrel Chips for this and the result is amazing.
8. If you want to top the meatloaf with sauce, you can do so about 20
minutes before you take the meatloaf out of the ceramic cooker. Enjoy!
Meat Loaf Cat
Not for the cholesterol-conscious. This is good cold too.
Ingredients:
1
¼
½
¼
½
1
lb
ground chuck
3 large garlic cloves, minced
cup Worcestershire sauce
½ tsp. ground chipotle
lb
ground pork
½ cup diced red pepper
cup Dijon mustard
½ tsp. ground cumin
lb
ground veal
2 Tbs. olive oil (or bacon grease)
cup shredded mild cheese
salt & fresh ground pepper to taste
(I mix Colby cheddar & Monterey jack)**
3 Tbs. sour cream
3 large egg yolks
½ cup minced fresh parsley
1 ½ cup diced yellow onion
10 oz. andouille sausage, coarsely chopped*
*Three Aidells sausages. Subsitute any cooked sausage; chop in food processor.
Grills & Smokers
31
Rubs & Marinades
Casseroles
Preparation Directions:
1.
2.
3.
4.
5.
6.
Saute onion & garlic in olive oil until lightly browned.
Add red pepper & saute until soft.
Season with salt & pepper. Cool.
Mix cooked vegetables with other ingredients.
Pack into a 9x5x3” loaf pan lined with foil or plastic wrap.
Chill for several hours.
Cooking Directions:
1. Turn loaf out onto a shallow pan.
2. Heat ceramic cooker to 200 dome. Add a few chunks smoking wood (I
like red oak) if desired. Put meat loaf on the fire & gradually increase dome
temp to 300 over 20 minutes or so.
3. Cook until the loaf’s internal temperature is 150. This takes an hour to
an hour and a half.
4. Let rest for 20 minutes before slicing. Serve with Jimsberry finishing sauce if desired.
Roasted Garlic & Grape
Tomatoes Spaghetti Sauce Rich
This spaghetti recipe works perfectly in the Primo and BOY does it taste great. Give it a try.
Ingredients:
2
16
½
¼
lbs grape tomatoes, halved
cloves garlic, peeled
cup extra virgin olive oil
tsp crushed red pepper
flakes
1
1
¼
½
handful torn fresh basil leaves
lb
spaghetti
tsp
black pepper
tsp
salt
Preparation directions:
1. Arrange tomatoes and garlic cloves so they fit snugly in an oven tray or
oven proof pan (I used the ceramic cooker drip pan).
2. Drizzle with oil and sprinkle with red pepper flakes, salt and pepper.
Cooking directions:
1. Heat ceramic cooker to 400 degrees. (I added soaked peach wood chips to the fire, but this
is optional and you can add what ever you like).
2. Put the tray directly on the grill (no pizza stone).
3. Roast until the garlic is soft and golden, about 25 minutes (try not to peek).
4. Add to cooked spaghetti. Toss well to coat.
5. Sprinkle with basil.
6. Serve immediately.
32
Rubs & /Marinades
Breads
Pizza
Breads
/ Pizza
Grills & Smokers
33
RubsBreads
& Marinades
/ Pizza
Naan Vishnu Shenoy
Traditionally, naan, an Indian bread, is made by “slapping” the dough onto the inside wall of a
tandoori, a clay oven. The dough cooks in about a minute or so and is then peeled off the side of
the tandoori using a metal or wooden spatula. Given that the inner dome surface of most of our
Primo is neither easily accessible nor “fit for dough slapping,” a 600 degree pizza stone was used.
Additionally, a number of different fillings can be used to enhance the flavor.
Ingredients:
2.5 cup unbleached flour
1 beaten egg
1 tsp. sugar
2.5 tsp. baking powder
1.5 tsp.
½ cup
½ cup
chopped ginger
chopped raisins
chopped almonds
Preparation Directions:
1. Mix the first four of the above ingredients in a mixing bowl.
2. Slowly add milk until the mixture forms a stiff dough. Allow the dough
to rise overnight then divide it into fist-sized balls and set aside.
3. Mix the raisins, ginger and almonds in a separate bowl.
4. Using your fingers, create a small hollow in a ball of dough and
deposit about 2-3 tsps of the raisin/almond/ginger mixture into it,
sealing the mixture inside the dough by pinching it closed at the top of
the hollow.
5. Flatten out the dough on a floured surface with a rolling pin.
Cooking Directions:
1. “Slap” the rolled dough onto a preheated 600 degree pizza stone (a little
extra ceramic mass below the stone would be more desirable, but not absolutely necessary).
2. Peek through the top of the grill to ensure that the bread doesn’t burn.
One flip of the bread may be necessary to be certain that the bread is
baked evenly.
Try baking a piece of plain bread without the filling.
* Other fillings, including onions and garlic, are also very good, but “Passage Naan” is my
favorite.
Special Instructions:
After removing the naan from the grill, brush the surface with some
butter and serve.
34
Breads
Rubs
& /Marinades
Pizza
Hamburger/Hot Dog Buns Char-Woody
Summer is the time of year when everyone thinks about grilling outdoors. Homemade buns
make hamburgers and hot dogs taste out of this world. If you live in an area where the temperature gets so hot you don’t want to heat up your oven, make a bunch of buns early in the season
and freeze them. To give them a heartier texture, you can substitute 2 cups of King Arthur Traditional Whole Wheat Flour for an equal amount of King Arthur Unbleached All-purpose Flour.
Ingredients:
2 Tbs. granulated sugar
2 packets or 2 scant tablespoons active dry yeast
1/2 cup warm water (105°F to 115°F)
2 cups warm milk (105°F to 115°F)
2 Tbs. vegetable oil
2 tsp. salt
6 - 7 1/2 cups King Arthur Unbleached All-purpose Flour*
egg wash:
1 egg beaten with 1 tablespoon cold water
sesame, poppy or caraway seeds or coarse salt (optional)
* We give you this fairly wide variation for a couple of reasons.
First, you’ll find in the summer that you’ll need a bit more flour to absorb a given amount of liquid than you will in the
winter. This is because it’s humid and flour acts somewhat like a slightly dampened sponge as a result.
Second, this particular dough should be quite slack, i.e., very relaxed in order to make soft and tender buns. So you
want to add only enough more flour, past the 6-cup point, to make the dough just kneadable; sprinkling only enough
more to keep it from sticking to you or the board.
Preperation Directions:
1. In a large bowl, dissolve the sugar and then the yeast in the warm
water. Add the milk, oil, salt and 3 cups of flour to the yeast mixture.
Beat vigorously for 2 minutes.
2. Mixing: Gradually add flour, 1/4 cup at a time, until the dough begins
to pull away from the sides of the bowl. Turn the dough out onto a
floured work surface.
3. Kneading: Knead until you have a smooth, elastic dough. Because this
dough is so slack, you may find that a bowl scraper or bench knife can
be helpful in scooping up the dough and folding it over on itself.
4. Rising: Put the dough into an oiled bowl. Turn once to coat the entire
ball of dough with oil. Cover with a tightly-woven dampened towel
and let rise until doubled, about one hour.
5. Shaping: Turn the dough out onto a lightly oiled work surface. Divide
into 18 equal pieces. This is done most easily by dividing the dough
first into thirds, then those thirds into halves, then the halves into
thirds.
Grills & Smokers
35
RubsBreads
& Marinades
/ Pizza
6. Shape each piece into a ball. For hamburger buns, flatten the balls into
3 1/2-inch disks. For hot-dog buns, roll the balls into cylinders, 4 1/2inches in length. Flatten the cylinders slightly; dough rises more in the
center so this will give a gently rounded top versus a high top.
7. For soft-sided buns, place them on a well-seasoned baking sheet a half
inch apart so they’ll grow together when they rise. For crisper buns,
place them three inches apart.
Second Rising: Cover with a towel and let rise until almost doubled,
about 45 minutes.
Nutrition information per serving (1 bun, 93 g):
255 mg sodium
119 mg potassium
2 mg iron
120 mg calcium
83 mg phosphorus
206 cal
3 g fat
7 g protein
37 g complex carbohydrates
1 g sugar
1 g dietary fiber
17 mg cholesterol
Baking:
1. Fifteen minutes before you want to bake your buns, preheat your
ceramikc cooker to 400°F. Just before baking, lightly brush the tops of
the buns with the egg wash and sprinkle with whatever seeds strike
your fancy.
2. Bake for 20 minutes or until the internal temperature of the bread
reaches 190°F. (A dough thermometer takes the takes the guesswork out of this.)
3. When the buns are done, remove them from the baking sheet to cool
on a wire rack. This will prevent the crust from becoming soggy.
This recipe reprinted from King Arthur Flour’s Baking Sheet, Vol. III, No. 5, May-June, 1992.
Copyright 2000, King Arthur Flour Co. All rights reserved.
Frozen Pizza
Directions:
Place unfrozen pizza on ceramic baking stone or cast iron plate.
Preheat grill to 375°-400°. Place pizza in grill approx. 20-25 minutes.
When using a ceramic stone, remove pizza when done from stone and
serve. The ceramic stone will continue to cook the bottom of pizza
after it’s removed from the grill and burn bottom of pizza.
36
Breads
Rubs
& /Marinades
Pizza
Mrs. Puj’s Calzone Cheryl Pugda
Preparation - Dough
1 ¾ cups water
4 ½ cups unbleached white
or all-purpose flour
1 Tbs.
2 tsp
1/3 tsp
olive oil
fine sea salt
honey
This dough is prepared using the dough cycle of a bread machine.
Place ingredients into the bread machine, set the dough cycle, and let
the machine do its work. Divide dough into 8 equal pieces and wrap in
plastic wrap. Keep cool until ready to bake.
Preparation - Sauce
12 oz.
1 - 12 oz.
1 - 15 oz.
1/2 tsp.
1/4 tsp.
1/8 tsp.
water
can tomato paste
can tomato sauce
salt
pepper
garlic powder
1/2 tsp.
1 tsp.
1 Tbs.
2 Tbs.
1 tsp.
1/2 tsp.
parsley flakes
oregano
chopped basil leaves
olive oil
italian seasoning
sugar
Combine all ingredients into a sauce pan and simmer for 45 minutes.
Stir sauce throughout the simmer. Let cool.
Baking Instructions
1. Light the ceramic cooker and place the plate setter and pizza stone in
the grill when the internal temperature reaches 200°F.
2. Bring the cooker to 500°F to 530°F and let the temperature stabilize for
30 to 45 minutes.
3. Prepare the calzone with ingredients that you like; different cheeses,
sausages*, pepperoni, vegetables are all good. Roll each dough ball
into a thin rectangle.
4. Sprinkle corn meal on the pizza peel & put the rolled dough on the
peel.
5. Place the sauce and ingredients on one side of the rectangle.
6. Fold over the dough and crimp the open ends tightly.
7. Spread olive oil on top of the dough**.
8. Bake for 18 to 20 minutes.
* Recommended to precook all meats prior to baking
** Optional
Grills & Smokers
37
RubsBreads
& Marinades
/ Pizza
Grilled Bread
Ingredients:
10 Thick slides of bread
(French or Italian)
2 cloves garlic
Oregano
Olive oil
Salt, pepper
Directions:
1. Set your PRIMO at 320°-350° F and toast the bread from both sides,
until crispy.
2. Remove the bread from the PRIMO and rub generously all over with
the peeled garlic.
3. Drench with olive oil, sprinkle with salt, pepper and oregano.
Grilled Pita Chips
Ingredients:
4 pita breads ( flat bread / no pocket bread)
4 Tbl. olive oil
1 crushed garlic
Salt, pepper
1/2 cup oregano
Directions:
1. Mix olive oil, salt, pepper, oregano, and garlic into a cup.
2. Brush the pita with the mix
3. Grill pita on the PRIMO at 350°F for 2-4 minutes, turning with tongs,
until nicely browned.
4. Place the pitas on a plate and cut them in half or smaller pieces.
* Excellent for dipping.
38
Rubs & /Marinades
Breads
Pizza
Stuffed Pizza
Dough Ingredients:
1/2 oz fresh compressed yeast
1 1/4 cups warm water
a pinch of salt
oil for greasing
Filling Ingredients:
2 1/3 cups all-purpose flour.
10 canned anchovies
6 sun- dried tomatoes
1/2 (1 cup) ricotta cheese
Directions:
1. Pile the flour on the worktop and push your fist into the center to make
a hole.
2. Crumble the yeast into the center and add the sugar.
3. By using a fork, blend enough water into the yeast to make a smooth
paste.
4. Gradually add more water as necessary and knead the flour, yeast and
sugar mixture together very thoroughly with your hands.
5. About halfway through the kneading add the salt and oil.
6. Continue to knead the dough until it is smooth and elastic.
7. Place the ball of dough in a lightly floured bowl and cover it with a
lightly floured cloth. Let rise in a warm spot about 2 1/2 hours, when it
should have doubled in volume.
Meanwhile make the filling.
a. Rinse the anchovy fillets, then chop the anchovies and tomatoes
into small pieces and mix with the ricotta.
b. Set aside until required.
8. When the dough has doubled in volume, remove it from the bowl and
divide it into 6 pieces.
9. Flatten each piece about 1/4 inch thick on a plate.
10. Place filling in the middle of the dough, then fold the dough in half
and seal the edges carefully with your fingers.
11. Brush the surface of the pizza with the olive oil.
12. Place the pizzas on the PRIMO PIZZA PLATE, heat your PRIMO at 400°F
and place it into the grill.
13. Cook for 20 minutes or until is golden brown.
Grills & Smokers
39
RubsBreads
& Marinades
/ Pizza
Sprinter’s
Smoked Cheese Loaf
Sprinter
Been debating whether or not to post this recipe for the past few months, kind of an odd duck
as far as ceramic cooker recipes go, but all of this talk of bread, smoke, some like smoke, others
don’t etc. Give this one a shot and you can use storebought bread (I’ve used bagels, french and
italian breads) or make a loaf of your own, either way is great. This is so simple it’s stupid but we
bring this to a lot of get togethers and it’s gone in a flash. Give this a go and let me know what
you think of it. It’s not for those who are watching their waistlines but it sure tastes good.
Ingredients:
1 loaf Round unsliced white bread (can use French, Italian, Sourdough or whatever)
2 Tbs. butter
1½-2 cup mayonnaise
1 ½ cup Parmesan or Romano cheese (or Kraft 3 cheese blend)
1 Tbs. minced garlic
Directions:
1. Get your cooker setup for indirect cooking, like pizza or calzones. You
want a dome temp of about 450-500 degrees. Preheating the stones is
not necessary but do it if you want.
2. Take a round loaf of white bread and cut it equally in half widthwise (cut
the top off in other words). Any bread will work, those with a bit more body like
sourdough work well but softer breads will work. You now have 2 large
rounds of bread.
3. Butter (about 1 tablespoon per side) each half-loaf well on the cut side.
4. Mix about 1½ to 2 cups of mayo with about 1½ cups cheese.
5. Add about a tablespoon of minced garlic to the mixture.
6. Stir it all well. You want it spreadable but not runny. Add more cheese
or do not add as much mayonnaise to get a good consistency.
7. Once this is mixed and the cooker is hot, put one half-loaf of buttered
bread onto the stone and melt the butter well, then do the other one. I
like to get the edges of the bread a bit charred but just be sure that the
loaf is heated through well and the butter is melted into the loaf.
8. Spread 1/2 of the cheese mixture on each of the loaves and again, one
at a time, put them into the grill.
9. Look through the dome to see when the cheese and mayo is
browning. The mayo and cheese will bubble nicely and be browned
when it’s done. Times depend on the heat of the ceramic cooker but
watch it carefully so it doesn’t burn.
10. Take the loaf out, slice into pieces and do the other one.
40
Rubs/&Venison
Beef
Marinades
Beef /
Venison
Grills & Smokers
41
Rubs
Beef
& Marinades
/ Venison
Morton
Salt-Crusted Beef
From the Kosher Salt Co recipe files contributed by Char-Woody
Preparation: 10 minutes
Marinate Time: 2 hours
Cooking Time: Approx. 1 hour 20 min. (for medium doneness) Servings: 8-10
Ingredients
1/3 cup olive oil
1 1/4 cups water
1/4 cup grated onion
1/4 tsp. pepper
1 tsp. Morton® Garlic Salt
1/2 tsp. dried thyme leaves
1 tsp. dried basil leaves
1/2 tsp. dried marjoram leaves
One 2-1/2 to 3-LB beef eye of round roast
One 3-LB box Morton® Coarse Kosher Salt
Preparations:
1. Combine oil, onion, and seasonings including Morton® Garlic Salt in a
heavy plastic bag, mix well.
2. Add roast; coat well with marinade.
3. Marinate in refrigerator 2 hours or overnight.
4. Line roasting pan with aluminum foil.
5. Combine Morton® Coarse Kosher Salt and water to form a thick paste.
Pat 1 cup paste to a 1/2 inch thick rectangle in pan.
6. Pat roast dry with paper towels; insert meat thermometer.
7. Place roast on salt layer; pack remaining salt paste around meat to seal
well.
8. Cooking Bake at 350° F, until thermometer registers 140°,
approximately 1 hour and 20 minutes.
9. Steam may cause salt crust to crack slightly during roasting.
10. Remove from oven; let stand 10 minutes.
11. Remove and discard salt crust.
42
Beef /&Venison
Rubs
Marinades
Sugar Coated Brisket Uncle Dave
Ingredients:
Brisket (3-5 pounds)
1/4 cup favorite rub
2 cups white sugar
1 can beer
1 onion
Directions:
1. Coat Brisket with rub of choice over night.
2. Next morning, pour 2 cups of white sugar over brisket. Hard to do but
trust me. That night all sugar will have disappeared.
3. Put on ceramic cooker Fat down 250 one hour.
4. Then put in a v rack in drip pan, 1 hour more 250.
5. Take brisket off and set it on a double sheet of foil. Form the edges into
a crude bowl.
6. Pour 2/3 of a beer on meat
7. Slice an onion and throw it on too.
8. Close top up with a third piece of foil.
9. Return to grill for 3 hours at 200.
Five hours total cook time and you can cut this with a plastic fork! Served 8 for lunch today and
they just couldn’t believe it. It was the finest brisket anyone would want.
Thrill’s Venison Burger Thrill
I had to share my first experience with venison burgers. They were absolutely awesome. I was
amazed that they didn’t dry out, as is the case when grilled on conventional grills.
Ingredients:
2 lbs. ground venison
2 Tbs. Dale’s seasoning
¼ cup Italian bread crumbs
black pepper to taste
1 egg
Directions:
1. Combined the above, mix, form into patties
2. Coat the patties with yellow mustard.
3. Throw them onto the Primo at 400 degrees along with some mesquite
chips.
4. Cook for 5 minutes on a side, and then a 5 minute dwell.
Welcome to burger heaven.
Grills & Smokers
43
Rubs
Beef
& Marinades
/ Venison
Bobby
Que’s
Bobby Que
Ingredients:
2 1/2
lb. Skirt Steak
2 Tbs. Bada fajita powder
3 Tbs. Key West lime juice
Skirt Steak
8
1
oz.
Tbs.
Coca-Cola
Black Bead molasses
Molasses and Coca-Cola put a little sugar on the surface to give a little crust
Preparation:
1. Mix all ingredients in glass bowl
2. Marinate meat for at least four hours
Cooking:
1. Bring ceramic cooker up to 400 degrees
2. Cook steak on each side for 4 1/2 minutes
3. Close vents and allow the steak to dwell for 4 to 8 minutes to bring to it
from rare to medium or well done
Grilled
Thick Cut Pork Chops
SpiceCooks
Great method to cook pork.
Ingredients:
¾ cup lightly packed light
brown sugar
½ cup kosher salt
10 clove garlic, minced
4 bay leaves, crushed
3 Tbs.
whole black peppercorns,
crushed
4 bone-in or boneless 12-oz pork
chops, 1 ½ inches thick
Preparation Directions:
1. In bowl or measuring cup, dissolve sugar and salt in 2 cups hot water.
2. Add garlic, bay leaves, peppercorns, and 4 more cups cold water, cool
mixture to room temperature.
3. Pour mixture in gallon size Zip-Loc® bag.
4. Add pork chops, then seal bag, pressing out as much air as possible,
refrigerate until fully seasoned, about 2-3 hours.
5. Remove chops from brine, rinse and dry thoroughly with paper towels.
6. Season with favorite dry rub.
Cooking Directions:
Grill over direct heat about 13-15 minutes turning once at 450°F.
44
Rubs/&Venison
Beef
Marinades
Spin’s Burger Edwin Hignutt
Preparation:
I also like to keep them simple. Minced onion, kosher salt, and some fresh
cracked pepper. For some variety, you can add caraway seed, red pepper
flakes, crushed fennel seed (small amount - strong flavor), ground chipotle
pepper, a touch of dry white wine, or a touch of orange juice with small
amount of crushed raisins. These are some of what I have tried and you
need to use your imagination of what the finished burger will be. Lots of
other possibilities.
I like my burger mix to be on the moist side. I add a egg to help bind the
mix together. I never use bread crumbs - a bit of paper towel dries it quickly
without the burnt crispness bread crumbs add. The burger will stick together better as it cooks. Another helpful hint is to make the interior of the
burger thinner than the edges. This will keep the burger from “pooching”
up in the middle as it cooks.
Cooking:
For my burgers (5/8-3/4” thick), I tend to favor cooking 5 minutes per side
(direct on the grill) at 450°F with a dwell of 2 minutes. I add rendered bacon,
a thin onion slice, and the cheese(s) prior to the dwell.
Comments:
After the meat, the next biggest component of a hamburger is the bun.
Egged homemade buns can be made just prior to the meat cook and the
burger can be served while they are still nice and warm. I definitely encourage you to look into this possibility. Even if made the day before, homemade is much more better :-).
If you not willing to consider making your own rolls, consider changing the
rolls you use. A club roll offers an elongated shape, which provides more
meat to bread. Toasting the bread is nice.
Lots of room here to upgrade an American favorite.
Marinating a ground meat is a very quick marinade, as the time involved in
the marinade process is needed only for the meat to absorb the marinade.
Since the meat is ground up, the marinade has access to it throughout. The
problem is you wind up with a very juicy meat to make a hamburger out of.
Concentrate on dry flavorings to add something to the meat.
Grills & Smokers
45
Rubs
Beef
& Marinades
/ Venison
Dr. Chicken’s Rib Roast Dr. Chicken
From: An anonymous elderly lady from Eureka Springs, AR
A simple but extremely tasty, tender and fantastic Rib Roast
Ingredients:
4 lbs.
large end or small end
1 cup rock salt (crushed)
standing rib roast
(ice cream salt or kosher salt can be used as well)
3 Tbs. Worcestershire sauce
1 Tbs. water
1 Tbs. Paprika
1 egg white
3 Tbs. Crushed garlic
2 tsp. Adolph’s unseasoned/no MSG/no Sodium tenderizer
Salt & Pepper to taste
Preparation Directions:
1. Place the rib roast in a shallow glass casserole dish and apply the
seasonings as listed and in that order. Rub paprika, crushed garlic &
unseasoned tenderizer into surface of the roast.
2. Apply salt & pepper to suit your own tastes. Be sure entire surface of
the roast is covered with all seasonings. Set roast aside in V rack.
3. In the casserole dish, add the rock salt, flour, egg white & water. Mix
until it forms a tacky paste.
4. Place roast back in casserole dish and press the salt/flour mixture on
to the roast surface. Continue to do so until the entire roast surface is
covered with the salt/flour mix
* Note: You can use cheese cloth to hold the salt to the surface of the roast, if desired.
Cooking Directions:
1.
2.
3.
4.
5.
6.
Prepare your ceramic cooker as normal for an indirect cook.
Bring cooker up to 500 to 520 degrees (dome temp.)
Place desired type and amount of wood chunks on burning lump.
Place pizza stone or firebricks in place to deflect heat
Over a drip pan with no water, place roast in a roasting rack.
Close dome and adjust upper and lower vents to insure 500 to 520
degrees cooking temperature.
7. Cook roast 15 minutes per pound for medium rare.
8. Insert polder into roast last 30 minutes of the cook, protecting cable
where it is in the cooking chamber and where it comes through the
dome.
Use internal temp of 145for rare, 160 for medium, 175 for well done.
When cooking is done, remove roast & allow it to sit uncovered for 10 min. before removing salt.
Special Instructions:
When roast has set for 10 minutes break the shell of salt away from
46
Rubs/&Venison
Beef
Marinades
the roast and remove. The salt will be very brittle and may have to be
scraped from the meat surface. Allow roast to sit another 5 minutes,
slice and serve.
Au Jus Sauce:
1. In a 10” skillet or other shallow pan place 4 to 6 small chunks of the
roast along with 3 to 4 tablespoons of water.
2. Stir & heat over a medium heat until the water becomes dark and
viscous from the chunks of the roast.
3. Add 1 to 2 cups of hot water and increase heat under pan.
4. When water just starts to boil, add 2 teaspoons of beef bullion crystals.
5. Stir until crystals are completely dissolved.
6. Remove from heat, strain to remove any chunks of roast used for
flavoring and serve.
Grills & Smokers
47
Rubs
Beef
& Marinades
/ Venison
GFW’s
3/1/1.5 Ribs GFW
Baby back ribs are about my favorites. And my favorite method of
preparation has become the 3/1/1.5 method - first let me say that the
first part of the idea came from George T with his 3/2/1 method and
my method is about the equivalent. Three steps...
When the dome hits about 200 degrees I drop on some chips and put
on the ribs - it will take about 10-15 minutes to slowly hit the 250 mark
- smoke time.
3 hours indirect at 250 degrees over firebricks and a drip pan. During
this stage I turn every 30-45 minutes.
1 hour wrapped in foil and back on the grill - still indirect at 250
degrees.
1.5 hours split between indirect and direct, but still at 250 degrees.
I generally put the ribs back on indirect for about 30-45 minutes and
then remove the firebricks and drip pan and put them back on direct
- at this stage, during the last 30-45 minutes, I will sometimes add BBQ
sauce - but then again, there are other times when I don’t.
Don’t worry about being exact and may sure that you watch the temp
- last week I did the first 3 hours and noticed that the temp had risen to
300 degrees - only 45 minutes in foil followed by about 1 hour direct
- great ribs - shorter time, but still the same great taste. Good luck and
have Fun!
A Blow by Blow Description
First 3
12:26pm - the ribs are on the grill. They were covered with the
Memphis Style rub yesterday at about 3pm and then rested in the
Refrigerator until now. The grill is at 225 and the drip pad is sitting on
the traditional ‘|__|’ firebrick setup. The drip pan has a little water.
1:15pm - Just flipped the ribs - it’s still a long time until 6 - time to
mow the yard - next flip will be about 2:15.
2:06pm - The bottoms have been up since the last flip. Now it’s time to
do it again - about every 45 minutes.
Next 1
2:55pm - The grass is mowed and for the next 45 minutes while I trim
a few trees, I will commit, according to many ceramic cookers forum
members, a sacrilege - the ribs are wrapped in foil and put back into
the ceramic cooker. Over the last few months I have received several
messages about results- not once have I received that didn’t like the
end result. The best ribs are the ones that you think are the best - not
necessarily the ones that others like!
48
Rubs/&Venison
Beef
Marinades
Last 1.5
3:48pm - The ribs are out of the foil and back on the grill. No,
they aren’t mushy but I’m sure that they will be tender. The dome
temperature is about 240 degrees.
* In about 1.5 hours (5:15) I’ll remove the two flat firebricks and the
drip pan and put the ribs on direct. They are already starting to look
good.
5:13pm - almost time for the BBQ sauce - Click on the picture for
a larger view - it doesn’t look like the 1 hour of foil time did much
damage! At 5:30 we’ll add a little of Gfw’s BBQ Sauce for the finish. Note
the drip pan is gone - ribs are on direct at 240 degrees dome temp.
5:25pm - 1st layer of BBQ Sauce applied to the bone side
6:04pm - ready to eat - and I ate them all!
6:30pm - ALL GONE! again the picture speaks for itself! Try these ribs
- you’ll like em. Tonight’s ribs are all gone - these are what I call “Pull
off the bone” ribs - if you need a knife, they just aren’t right. If the meat
doesn’t pull, they just aren’t right. Done by the 3/1/1.5 method, the
results were about perfect.
Grills & Smokers
49
Rubs
Beef
& Marinades
/ Venison
Best
Ribs in the Universe
Ray Basso
I talked to Mike Scrutchfield last night and he gave me permission to post this. He said that
while this is a really good and a prizewinner he now has one that’s better. This recipe and cooking procedure won the prestigious title “Best Ribs in the Universe” at the 1993 American Royal
Bar-B-Que contest as the Overall Grand Champion. They also took “Reserve Grand Champion” at
the 1994 American Royal. This is the largest Bar-B-Que contest in the World. Enjoy!
Ingredients:
Meat:
IBP Brand Loin Baby Back Ribs. 1 3/4 - 2 lb. Size. Membrane on the inner
(Stomach) side removed. All excess fat trimmed.
Dry Rub:
Mix all ingredients thoroughly and store unused in moisture proof
container
1 cup sugar
4 tsp
onion powder
1 cup non-iodized table salt
4 tsp
garlic powder
½ cup brown sugar
4 tsp. cayenne pepper
(dried out lightly by exposing on cookie sheet room temp. several hours, or slightly warmed)
5 Tbl. + 1 tsp. chili powder
4 Tbl. MSG (accent)
2 Tbl. + 2 tsp. ground cumin
4 tsp. black pepper freshly ground (important)
Directions:
Sprinkle meat 2 hours before cooking with rub and allow meat to
come to room temperature. Do not over-season. A good overall
dusting of the spices is all that’s needed. The spices will become a nice
red liquid coating after sitting for about an hour, if you used the proper
amount.
Basic Cooking procedure:
1. Smoke ribs in your Primo by using a drip pan and a rib rack. You may
elect to use 4 chunks of White Oak and 2 chunks of Cherry wood
(about the size of a tennis ball) at least 1 hour before cooking. Remove
all bark from wood chunks, do not soak. Very little smoke will be
visible. Don’t worry about that you’ll get the Flavor. Control oven
temperature of cooker by regulating the bottom vents only. Never,
ever, completely close the top vent! A meat thermometer may be wise
to use at this time.
2. Cook ribs for 3 hours fairly cool at 225 degrees on rib racks.
3. After 3 hours lift the lid for the first time, flip the slabs end for end,
and upside down, and open all the vents on the smoker wide open.
Temperature of the cooker should rise into the 250 to 275 degree
50
Rubs/&Venison
Beef
Marinades
range.
4. Peek every ½ hour to monitor doneness. Ribs will be finished when
fairly brown in color, and the meat has pulled down on the long bones
at least ¾ of an inch. (usually another 1 or 2 hours)
5. Remove from cooker and sauce both sides before cutting individual
ribs. I like K. C. Masterpiece BBQ sauce sweetened even more. ( 5 parts
sauce, 1 part Honey), and so do the Judges!
6. This basic cooking procedure is probably the most important of all,
and works very well with other meats as well. Forget about how much
smoke is coming out of the cooker, if you’ve got the wood you like in
there burning up cleanly, the flavor will be in the meat. Any smoke
coming out of the top of the cooker is flavor lost!
* Use a digital thermometer and when you think the ribs are done stick it
in the meat between the ribs and it should read 205 degrees.
Grills & Smokers
51
Rubs
Beef
& Marinades
/ Venison
Steak Dunigan
* Reprinted from Texas Home Cooking, ©1993, Cheryl Alters Jamison and Bill Jamison, published by Harvard Common Press, Boston, Massachusetts. Originally printed in The Pink Adobe
Cookbook, © 1988, Rosalea Murphy. This is served at The Pink Adobe restaurant in Sante Fe,
New Mexico.
Ingredients:
1 - 2 Tbs. Char Crust®Rub
2 14- to 15-ounce New York sirloin strip steaks
Sauce:
2 Tbs. olive oil
4 large mushrooms, sliced thin
1 medium onion, chopped fine
4 Tbs. unsalted butter
1 tsp minced jalapeño (optl.)
1/4 tsp
salt
1 cup chopped roasted green 1/4 tsp
minced cilantro
chile, pref. New Mexican, fresh or frozen
1/4 tsp dried oregano
Directions:
1. About 30-40 minutes before cooking time, rub the Char Crust into the
steaks, and let them come to room temperature.
2. Cut the steaks in half to satisfy four non-Texas appetites. Prepare the
sauce:
3. Heat the oil in a small saucepan, and add the onion.
4. Sauté it briefly, until it is soft.
5. Add the remaining ingredients, including the jalapeño if you want the
extra heat, and cook for 5 minutes.
6. Keep the sauce warm.
7. Heat the butter in a small skillet, and add the mushrooms. 8. Sauté
them until they are soft, about 5 minutes. Keep them warm, too.
8. Grill the steaks at 650-750 degree for 3 minutes, flip, cook for an
additional 3 minutes. Close both top and bottom vents and allow to
dwell (1-8 minutes) to desired doneness.
9. Transfer the steaks to a platter. Spread the mushrooms over the tops of
the steaks. Cover each steak equally with the green chile sauce.
10. Serve the steak immediately.
52
Beef /&Venison
Rubs
Marinades
The Original Brunswick Stew
from
Brunswick, GA
Timmy Sparrow, Georgia On My Mind Magazine
Ingredients:
1
½
1
½
1
3
3
2
4
3 lb. chicken
tsp. dry mustard
lb.
lean beef
stick of butter
lb.
lean pork
Tbs. vinegar
medium onions
can
small butter beans
can
tomatoes
5 Tbs.
Wochestershire Sauce
1 can
small English peas
1 ½ bottles catsup
3 small diced Irish potatoes (optl.)
1 tsp.
Tabasco Sauce
1 box
frozen sliced okra (optl.)
2 bay leaves
½ bottle chili sauce
2 can
cream style corn
Preparation Directions:
1.
2.
3.
4.
5.
6.
Place Meat in large heavy pot.
Season with salt and pepper.
Add Onions and cover with water.
Cook until meat falls from bones (several hours).
Remove from heat and allow to cool.
Tear meat into shreds and return to stock.
Cooking Directions:
1. Add next 8 ingredients and cook 1 hour, stirring occasionally to
prevent sticking.
2. Add all remaining ingredients and cook over low heat until thick.
Special Instructions:
Instead of boiling the meats, I like to smoke them in the ceramic cooker then, proceed with the
remainder of the recipe.
Grills & Smokers
53
Rubs
Beef
& Marinades
/ Venison
Georgia Bar-BQ Hash
Ingredients
2-3 lbs. lean pork roast
2-3 lbs. lean beef roast or chuck
1 lb.
white meat chicken (optl)
1 large onion
1 large can tomatoes (28 ounce)
1 can white corn
1
1/2
1
2
1
1
Directions
Tbl.
salt
Tbl. crushed red pepper
Tbl. ground red pepper
Tbl. black pepper
cup cider vinegar
can creamed corn
1. Cut meat into large chunks.
2. Place in a heavy pot and add water to barely cover. Simmer more than
an hour.
3. When the meat is very tender, drain and reserve any broth.
4. Grind the meat with a coarse hand grinder or chop finely. (Using a food
processor destroys the texture.)
5. Grind one large onion.
6. Place onion and the meat back into the pot and add one large can of
tomatoes -juice and all.
7. Add corn, vinegar and seasonings. Simmer a few minutes.
8. Add the reserved broth to the meat until it reaches the consistency of
stew.
9. Serve it over white rice or bread with dill pickles on the side as a
condiment.
54
Rubs/&Ribs
Pork
Marinades
/ BBQ
Pork /
Ribs / BBQ
Grills & Smokers
55
Rubs
Pork&/ Marinades
Ribs / BBQ
Georgia Bar-BQ Hash
Ingredients
2-3 lbs.
2-3 lbs.
1 lb.
1 large
1 can
1 can
lean pork roast
lean beef roast or chuck
white meat chicken (optl)
onion
tomatoes - large (28 ounce)
white corn
1
1
2
1
1/2
1
can
cup
Tbl.
Tbl.
Tbl.
tsp.
creamed corn
cider vinegar
black pepper
ground red pepper
crushed red pepper
salt
Directions
1. Cut meat into large chunks. Place in a heavy pot and add water to
barely cover. Simmer more than an hour.
2. When the meat is very tender, drain and reserve any broth.
3. Grind the meat with a coarse hand grinder or chop finely. (Using a
food processor destroys the texture.)
4. Grind one large onion. Place onion and the meat back into the pot and
add one large can of tomatoes -juice and all.
5. Add corn, vinegar and seasonings. Simmer a few minutes.
6. Add the reserved broth to the meat until it reaches the consistency of
stew.
7. Serve it over white rice or bread with dill pickles on the side as a
condiment.
N’awlins
Pork Tenderloin
Courtesy of the Mike Anderson’s Restaurant (New Orleans) cookbook.
For a pair of pork tenderloins (usually 1 package and 2-2.5 LBs of meat)
Ingredients:
1 cup soy sauce
1/4 cup honey
2-3 Tbs. Cajun seasoning such as
Prudhommes, Essence of Emeril, etc.
Directions:
1. Mix all ingredients and marinate pork tenderloins 2-4 hours.
2. Pull from fridge and allow to approach room temp and make a cut
lengthwise in each loin not quite all the way through (a sandwich roll cut)
3. Spread a light layer of softened cream cheese in the pocket you’ve
created & arrange some thinly sliced jalapenos on top of the cheese.
4. Fold the loins back together and grill over a hot fire of 600º or so.
A wide spatula comes in handy here. I used cherry chips for firespice. It was wonderful blend of flavors (hehe) although
maybe too intense for the unaccustomed palate.
56
Pork /&Ribs
Rubs
Marinades
/ BBQ
Big
Murth’s “Puerco Adobo”
Steve Murtha
Succulent and simple, this Southwestern variation on Pork Tenderloin will keep them coming
back for more. The finished product is a lot milder than the marinade, so even Granny and the
other tenderfoots will enjoy. Serve with Garlic-Rosemary mashed potatoes, and in some HD foil,
chop up a vegetable medley with mushrooms and garlic, drizzle over with balsamic vinegar and
olive oil with some oregano sprinkled on, and place on the Primo about 1/3 through the cook.
Ingredients:
2 lb
12 oz.
pork tenderloin(s)
jar of jalapeno
peppers, undrained
4 Tbs. oregano
4 clove garlic, chopped
2 tsp. ground Cumin
4 tsp.
4 Tbs.
1 tsp.
½ tsp.
cider or red wine
vinegar
olive oil
black pepper
salt
Preparation Directions:
1. Combine all the ingredients, except the pork, in the blender or food
processor.
2. Place the pork tenderloins in a large plastic food storage bag, or glass
dish and immerse in the marinade from the blender.
3. Cover and marinate in refrigerator 4-24 hours.
Cooking Directions:
1. Let the tenderloins sit out when you start your cooker, to get to room
temperature.
2. Fire up the grill and bring it up to 300-325. A light wood, like apple or cherry would be
appropriate to the delicate nature of the pork, or no wood at all. Up to you.
3. Stabilize temperature, and place pork on, direct.
4. Turn after ten minutes & spoon on some of the reserved marinade.
5. Repeat after ten minutes on other side.
6. Now’s the time to throw on any veggies you’d like to cook, too.
7. Keep an eye on your temps, and pull your tenderloin off when internal
temp hits 145-150, lower if you like a little more pink in the middle.
Special Instructions:
If you like, heat up the reserved marinade on the stove, serve as a topping.
Grills & Smokers
57
Rubs
Pork&/ Marinades
Ribs / BBQ
JSlot’s Ribs Technique
Part I- The Preparation
Your ribs should be purchased at least 24 hours in advance of cooking
and the following steps completed. The first thing you must do is
select your spare ribs. Not beef ribs. Not wimpy baby back loin ribs.
But, big, meaty spare ribs. I buy my spareribs at Sam’s Club. They
are consistently good. Sam’s carries them in the cryovac packages
containing three slabs weighing about 3½ lbs each. By the way, I hear
people using the term slab and rack interchangeably quite often, but
they are not the same. A slab is a whole side of ribs. A rack is usually
half a slab, or 4-6 ribs. Don’t just buy ribs from any grocer. Do some
investigating and find a good source. It will pay off in the long run.
The ribs from Sam’s come with the brisket bone, or chine, attached.
This is the end of the ribs that contains the cartilage, or knuckles, that
attached the ribs to the sternum of Mr. Piggy. Cut this portion off as
close to the end of the rib bone as you can. Save these pieces to cook
for family, not for presentation to guests. They eat just as well, but they
don’t look as nice! Removing this portion also allows for more even
cooking of the ribs. Now, cut each slab of ribs in half to make two racks.
This will allow us to fit more on the grill.
The next thing you must do (yes, must!) is remove the membrane from
the back of the ribs. This is best accomplished by sliding the edge of a
knife or screwdriver under the edge of the membrane on the first rib
and pulling gently down the bone, not across. A paper towel makes
gripping the membrane very easy once you have it started, although I
still prefer using catfish skinnin’ pliers since I keep them handy. With a
little practice, you will be able to remove the membrane in one piece
most of the time. Not removing the membrane is probably the #1
cause of tough ribs that I have encountered.
Now we are ready for the fun part!! Take each rack and rub generously,
VERY generously, with French’s mustard. Coat each rack of ribs with
your favorite rub until you can’t see the mustard any more. I have a
crushed red pepper shaker (taken from Pizza Hut in my larcenous
younger days, I must admit) with large holes that I use to dispense my
rub. It works great! Place ribs in air tight container, ziploc bags, or wrap
in plastic wrap for 24 hours or until you are ready to place ribs on the
cooker.
Part II- The Fire
Elder Ward covered the fire starting technique very well, so I will
58
Rubs/&Ribs
Pork
Marinades
/ BBQ
reference anyone who has questions to his text for assistance if
needed. I’ll quickly go over how I start my fire for the record.
First, I remove the fire ring from the ceramic grill. Then, I stir the
remaining charcoal with the ash tool until all the ash and small pieces
of coal have fallen through the fire grate. If needed, I then empty the
ash from the bottom vent. I don’t feel it is necessary to do this every
time. I do it about once every two weeks and don’t have any problems.
Next, I fill the grill with charcoal to just below the top of the firebox and
place 3-4 fist sized chunks of hickory on top and spaced evenly around
the outer edge of the fuel.
With the lower vent wide open and top up, I place my electric starter
in the charcoal, plug it in, and go remove the prepped ribs from the
refrigerator. This is a good time to arrange your ribs on the rack for
cooking. I’ll cover that in the next section. In about 7-8 minutes, the
charcoal is burning well and I remove the starter.
Once the grill is ready, place a drip pan underneath the cooking grid
(the Oval works best for this method). You may use round or square
foil pans for catching all drippings. Keep the bottom vent open at this
time and close the lid while the chimney top is open somewhat. The
dome temperature should be 300 F. Allow temperature to climb, but
maintain a 375F. At that time, you may place the ribs on the grill.
Part III- Cooking
By now you’re probably all thinkin’ that ol’ Jim’s done lost his mind and
I would’ve thought the same thing a month or two ago!!! Cook ribs at
375°? What happened to 200-225°? Well, the pizza stone in the bottom
of the cooker changed everything. So, just trust me and go with it!!
It is extremely important to be sure your thermometer is reading the
proper temp. Check it with the boiling water method if you have any
doubts. If you haven’t already done so, now you will need to place your
ribs in the rib rack. I prefer the el-cheapo Home Depot rib rack (about $6)
over the inverted V-rack. It holds five racks of ribs easily and they can’t
flop around as much. Place ribs in the rack and transfer to the grill in
the middle of the grill. If you have another rack or two of ribs, place
them on the grill leaning them against the outer edge of the ribs in the
rack taking care that all of the meat is protected by your drip pan.
Grab a cold beverage of your choice, or a glass of JD, and sit back for
two hours or so and watch the grass grow. DO NOT open the lid on the
ceramic grill for any reason!! I mean DO NOT even think about it, not
never, not no how!!! The beauty of the grill is the wonderful moisture
Grills & Smokers
59
Rubs
Pork&/ Marinades
Ribs / BBQ
JSlot’s Ribs Technique ~ continued ...
retention quality and that is diminished by opening the lid, IMO. I
never, ever, open the lid when cooking on the grill until I feel the food
should be done, or the Polder tells me to! After two hours, check your
ribs. The rub should have formed a nice crust and the meat should
have pulled back about a ¼” on the bone. Try to twist a rib off of one of
the racks (careful! it’s hot!!). If you can pull one off easily, they are done. If not,
close the grill and cook for another 15 minutes or until done.
Part IV- Serving
To serve the ribs, separate ribs into single bone pieces and place on a
platter or in a pan. If your ribs are done properly, you should be able to
pull them apart easily one rib at a time. You can use a knife to separate
them if you like, but it should not be needed. Disposable foil pans work
great for holding ribs if you are not going to eat right away (betcha
can’t keep from nibblin’!!!). IMHO, ribs done properly should never
need sauce and I don’t put any on mine. However, different strokes for
different folks, as they say, so I’ve included a link to my dippin’ sauce
recipe below for them that wants it. Enjoy!!!!
Jim’s Jack Sauce Jim Slotterback
Ingredients:
½ cup cider vinegar
1 tsp crushed red pepper
½ cup brown sugar
tsp. cayenne
1 cup Jack Daniels
1 tsp black pepper
1 cup French’s mustard
1
1
¼
3
2
3
1
med.
cup
cup
Tbs.
Tbs.
tsp.
tsp.
bottle of Heinz ketchup
molasses
Worcestershire
soy sauce
lemon juice
garlic powder
garlic salt
Cooking Directions:
Mix ingredients in saucepan and simmer until desired consistency.
Special Instructions:
If you use both cayenne and crushed red pepper it will be on the warm
side for most palates, but if you like the bite, go for it!
Notes from the Kitchen Table:
JJ’s direct cooking method is by far the best rib cooking method I
have used. Unfortunately, you can’t do a large quantity that way. Since
I routinely cook 10-12 LBs of ribs at once, I developed the method
detailed above. The results come as close to JJ’s as any other method I
60
Rubs/&Ribs
Pork
Marinades
/ BBQ
have tried. I would also like to add a note of thanks to Char-Woody and
Spin for pioneering the firebrick/pizza stone idea and all the resulting
experiments that made this method possible!!
Pulled Pork JJ
The methods of pulled pork go far beyond the history of this forum and dates over the last 100
or so years in the south. Its really rather simple, yet its finished product is a revelation. And this is
where JJ comes from in his admonitions. Forgive me JJ if I am intruding here.
JJ has been a outstanding advocate of doing pulled pork in the following method.
Directions:
1. Heat...maintained at 200 to 220 degree’s in the dome of your ceramic
cooker
2. Boston butt is placed over burning charcoal on a grill directly over the
fire with a drip pan to contain liquids under the Butt.
3. You can use JJ’s rub, or plain salt and pepper or Jamaican Jerk to
season prior to cooking.
4. This is low and slow... very low and slow, and a top Boston butt will
take approximately 2 to 2.5 hours per lb. to reach the ultimate internal
temperature of 200 degrees F.
5. Served southern style with buns, side sauces, cold slaw and assorted
side dishes its a real treat.
I don’t think anyone can claim to have invented it as it has evolved thru the southern cooks to
its present day status. Some have improved the techniques, and the rubs, and this is where JJ
shines Cheers...Char-Woody
Grills & Smokers
61
Rubs
Pork&/ Marinades
Ribs / BBQ
My Favorite Mustard Sauce ColaCooker
Ingredients:
1 cup white vinegar
3/4 cup prep. yellow mustard
1/2 med. onion - minced
1/4 cup
1/2 cup
1/3 cup
tomatoe catsup
Brown Sugar
water
Directions:
1. Mix the ingredients together in a saucepan and bring to a boil.
2. Reduce the heat to low and simmer until the onions are tender and the
sauce thickens up a bit, about 25 or 30 minutes.
3. Pour sauce into a blender and blend until smooth.
4. Use hot or cold. Refrigerate unused sauce.
Santa Fe Cured Pork Loin W.J. Miller
From: National Pork Producers Council. For a taste of the Southwest and easy summer barbecues,
grill this pork roast seasoned with chili powder, thyme, cumin and oregano.
Ingredients:
1 3-4 lb boneless pork loin roast
8 cup water
2 tsp.
1 cup sugar
6 Tbs. chili powder
2 tsp.
2 Tbs. salt
1 Tbs.
2 Tbs. crushed thyme
coarsely ground black
pepper
crushed oregano
ground cumin
Preparation Directions:
1. In large saucepan, heat all ingredients EXCEPT pork loin to boiling,
stirring to dissolve ground spices and mix cure ingredients thoroughly.
2. Remove from heat and cool to room temperature.
3. Place pork loin in glass container large enough to immerse roast in
cure solution, cover and refrigerate 2-4 days. OR
4. Place roast in 2-gallon self-sealing plastic bag and pour cure solution
over; seal bag and place in large bowl, refrigerate 2-4 days.
Cooking Directions:
1. Light the Primo and stabilize at 325°F;
2. Remove pork roast from cure, discarding cure solution. Pat pork gently
dry with paper towels.
3. Place roast in rack over drip pan and cook for 45 minutes to an hour,
until internal temperature is 155°F-160°F.
62
Rubs/&Ribs
Pork
Marinades
/ BBQ
JJ’s Q Sauce
Ingredients:
1
4
2
2
2
½
med.
Tbs.
Tbs.
tsp.
tsp.
tsp.
onion chopped
dark brown sugar
paprika
salt
dry mustard
chili powder
¼
2
2
¾
1
tsp.
cups
cups
cup
cup
cayenne pepper
cider vinegar
tomato juice
catsup
water
Directions:
1. Sauté the onions until they become transparent.
2. Place onions and the rest of the ingredients into a sauce pan and
simmer, stirring often.
3. Taste after 20 minutes and adjust taste to suit you. Allow to simmer for
6-8 hours.
4. The longer the simmer, the better the taste. Water has to be added
while simmering to keep it from getting too thick.
Muzzy’s Smoked Sausage
Stuffed Jalapenos
Ingredients:
Jalapeno Peppers
1 lb.
Jimmy Dean Sausage
1 cup bread crumbs
1/2 cup parmesan cheese
Directions:
1. 1. Mix the Sausage, Bread Crumbs, & Parmesan Cheese. Cut the stem
off the Jalapenos, ream out the seeds and membrane with an apple
corer or potato peeler.
2. 2. Poke a hole through the end with a skewer.
3. 3. Stuff with the stuffing mixture. Don’t fill the pepper all the way - leave the end concave.
The filling swells up when cooking. Don’t forget the hole, either - the filling will pop out when it gets hot. Use latex
gloves and don’t touch anything private.
4. 4. Cook along with your Q until the peppers are wrinkly, 1½ - 2 hours.
Enjoy.
Grills & Smokers
63
Rubs
Pork&/ Marinades
Ribs / BBQ
Mr. Beal’s ‘J.K’s Wild Boar Soul
BBQ’ Sauce mike.flaherty
Yes, we have (all sorts of) real BBQ in Seattle. An eclectic mix of folks from lots of different
places. In the 80’s there was a tiny place up on Cherry St, called J.K’s Wild Boar Soul BBQ. You had
to watch out for the needles on the sidewalk, dark little room with years of smoke on it, you’d
order a pile of meat, and get a side of incredible beans, and 2 slices of white bread wrapped in
foil. And change for the pop machine if you needed it. The proprietors name was Beal, I believe.
As I recall, a retired navy cook and utter BBQ maestro. His sauce was spectacular, and he’s also
use that sauce as a base for his beans.
When Beal quit in the mid 80’s, I thought my life was over. There was no other BBQ that even
came close here. And it was the sauce that shone.
So the other night, I’m at a guy’s house, downing margaritas and sampling various hot sauces,
and he says “Try this!” I immediately knew what it was..... Beals sauce! Amazing. This guy had
eaten at the wild boar every week for years. He and his wife would bring in their attempts to
duplicate the sauce, and after months of trying, Mr. Beal took pity on them and finally gave
them his recipe. This is a “1/2” recipe, and makes 2 quarts.
Ingredients:
1/6 cup salt
2 cups (16oz) tomato paste
2 cups sugar
1 cup Worcestershire
1/2 cup heaping packed
1/2 cup white vinegar
brown sugar
1 cup yellow mustard
1 cup beef bouillon strong
6 cups water
1/2 cup Wrights liquid smoke. Yes, that’s right.
Kitchen Bouquet to darken (Optional, don’t worry if you don’t have this)
Chili Powder (the real thing), cayenne, Daves, whatever to add heat.
Hatch ground chile is my favorite. I might try adding baby schezuan peppers or chili pequins next time. I also like to
make a not too hot sauce, and serve with lots of sliced fresh jalapeno.
Directions:
1. Mix in a big pot salt, sugar, brown sugar, beef bouillon and water.
2. When sugar dissolves, add yellow mustard, white vinegar, liquid
smoke, Worcestershire, tomato paste, kitchen bouquet and chili
powder.
3. Simmer bubbling slowly for 2 hours.... will reduce by 1/3 and darken.
Q&A’s:
How Much Chile Powder To Add?
It’s impossible to tell- some chile powder is as hot as hell, some’s not,
64
Rubs/&Ribs
Pork
Marinades
/ BBQ
and some folks like really HOT sauce, some can’t handle it. But I think
you can find out quickly..... if it’s HOT, just add so much (1/4 cup?) at
a time, and then taste. That’s about the only way I know of not to get
into trouble with Scoville!
Personally. I like stuff pretty dang HOT. But since not many of my
friends do (weenies!), I make it pretty “weak”, and then add the hot
either by spice or by fresh chopped japalano or serrano, to my own
servings. I’ve been using this stuff called Chipotle Morita lately (Kinda
like rough chopped chipotle peppers). Or (my soapbox) seek out
HATCH chile powder from HATCH N.M. Delicious deep red rich stuff.
OR...since it makes so much, I split it up and leave some of it “MILD” and
make some of it “ROCKIN’”.
How Much Kitchen Bouquet To Add?
Well, I haven’t the vaguest, but the recipe says “Add to darken” so a few
small pourings (3 TBS) seems to darken the sauce somewhat, so there
I go!
How Long To Cook?
I watched a friend make this one weekend, and he got confused. He
didn’t cook it enough. You need to simmer, so it’s bubbling at, gosh
how shall I say it... a low to medium rate, for 2 hours. Stove set at 2/3
the distance between low and medium. It will lose about 1/3 of its
volume, and get darker and thicker. When it’s done, it’s not thin like it
started out, and it’s not paste. Stir occasionally, but I’ve never had it
stick. If it’s getting sauce on your stove as it cooks, you probably have
it on too high!
Vaya Con BBQ!
Grills & Smokers
65
Rubs
Pork&/ Marinades
Ribs / BBQ
I Adulterated Muzzy’s Stuffed
Jalapenos and they were incredible !
Ingredients:
1 lb.
Jimmy Dean hot sausage, browned in a skillet and drained on paper towel on a plate
3 8 oz. packs of Philly cream cheese
3/4 cup bread crumbs
1/2 cup parmesan or romano finely grated
Directions:
1. Combine everything but the parmesan/romano.
2. Warm the cream cheese a little to make it easier to mix.
3. Stuff the same way ‘ole Muzz says including the hole in the bottom of
the pepper.
4. Once peppers are stuffed, sprinkle the parmesan/romano over the top.
5. Smoke with pecan for one hour at 240° - then kick up the temp to
350° for one hour to really soften the pepper. Try to keep the peppers
standing up and they won’t lose much of the filling at all. I used the
Texas crutch only to keep my peppers standing upright. This stuffed 50
large Jalapenos.
Barbecued Ribs
Ingredients:
2 Tbl.
1 large
1 cup
1/4 cup
2 Tbs.
olive oil
garlic clove minced
ketchup
packed dark brown sugar
Worcestershire sauce
1
1
1/4
1
1/2
Directions:
onion chopped
celery stalk, chopped
cup red wine vinegar
Tbs. Dijon mustard
lbs. baby back ribs
1. Heat olive oil in heavy saucepan and sauté the onion, garlic, and celery
until tender, but not brown. (about 5 min).
2. Add remaining ingredients and cook over low heat for 10 minutes.
3. Poach the ribs in large pot of simmering water for 5 minutes.
4. Drain and baste both sides with sauce.
5. Cook the ribs at 300° until are done.
66
Rubs & Marinades
Lamb
Lamb
Grills & Smokers
67
Rubs & Marinades
Lamb
Balsamic/Garlic/Rosemary
Lamb
Mike Poole
Ingredients:
1
lg.
leg of lamb.
butterflied & trimmed of excess fat
4 garlic cloves peeled and crushed
mesquite wood chips
soaked 30 minutes before use
2 lg.
sprigs of fresh rosemary
½ cup olive oil
freshly ground pepper
¾ cup balsamic vinegar
Directions:
The Marinade
1. Remove leaves and from the Rosemary and chop lightly.
2. In a large bowl combine olive oil, balsamic vinegar, garlic, fresh
rosemary, and several turns of a pepper mill.
3. Whisk together and pour into a large plastic ziploc bag.
4. Place the lamb in the bag and work the marinade in thoroughly.
5. Marinate for several hours at room temp or overnight in the
refrigerator.
The Cooking
1. Build a fire in your ceramic cooker allow it to stabilize around 350-400°.
2. Add the mesquite chips.
3. Grill lamb for 12 minutes, turn and grill another 12 minutes on the
other side. Resist the urge to peek before turning.
4. Check temp with a fast reading thermometer in the thickest part of the
leg (135-140 F is medium rare).
5. Let rest for about 10 minutes after cooking and carve across the grain.
6. Serve with a full-flavored red wine (we had this with a wonderful
Gigondas), grilled potatoes and a big salad.
68
Lamb& Marinades
Rubs
Italian Hamburgers
Ingredients:
2 1/4 lb. lean ground beef
1 egg
1 cup green olives, sliced or chopped
1 onion, chopped
3 Tbl.
olive oil
salt
fresh ground pepper
Directions:
1.
2.
3.
4.
Mix together the beef, olives, onion, egg, and salt and pepper to taste.
Shape into 6 flat, thick disks.
Brush with olive oil on both sides.
Grill on the Primo at 325° for 10-12 minutes each side.
The Perfect Leg Of Lamb
Ingredients:
leg of Lamb 5-8 lbs.
1 bay leaf
1-2 cloves of garlic
1 tsp. powdered ginger
salt, pepper
1
1
1
3
3
Directions:
tsp.
tsp.
tsp.
Tbl.
Tbl.
thyme
sage
marjoram
soy sauce
olive oil
1. Bring a 5 to 8 lbs. leg of lamb, with bone, to room temperature.
2. Prepare the following sauce: Mix together ....
a. A clove or two of chopped garlic.
b. 1 teaspoon each of salt and fresh ground black pepper.
c. A crushed bay leaf.
d. 1 teaspoon each of powdered ginger, thyme, sage and marjoram.
e. 3 tablespoons each of soy sauce and olive oil.
3. Trim excess fat off the lamb and pierce the meat with a fork in several
places evenly over its surface.
4. Spread the sauce over the lamb on a baking pan ( appox.. 12”x 9”)
5. Heat your PRIMO to 400°F and cook the lamb for about 20 minutes.
6. Reduce heat to 325°F and roast for approximately 40 more minutes or
until internal temperature reaches 170°F for medium.
7. Let the roast on a cutting board for about 15 minutes.
Grills & Smokers
69
Rubs & Marinades
Lamb
Balmy
Rosemary’s Lamb Loin Chops
Boris Karaman
Ingredients:
6 lamb loin chops, cut 1¼ inch thick
several sprigs of fresh rosemary
6 cloves of fresh garlic
¼ cup extra virgin olive oil
1 tsp. balsamic vinegar
freshly ground pepper
1 tsp. mustard ( I use either Stadium mustard or Kosciusko Spicy Brown Mustard by Plochman’s Inc.)
Salt (I use sea salt)
Directions:
1.
2.
3.
4.
5.
Soak wood chips of choice, they will make less of a contribution to the
flavor than when slow smoking.
The Marinade
Mince the garlic finely.
Heat the oil in a small frying pan until hot but not smoking.
Add the rosemary and several grinds of pepper to the oil, remove from
the heat.
Strain the rosemary sprigs out of the oil, the oil will retain enough
rosemary flavor.
Add the balsamic vinegar, mustard, and garlic to the oil. Stir until
blended.
Preperation:
1. Trim the chops to your liking and place in a non-reactive bowl. (I use
glass)
2. Pour the marinade over the lamb, working it into the meat.
3. Marinate for an hour or so, or overnight in the refrigerator. If marinated
in the refrigerator, allow them to come to room temperature before
cooking.
4. Fire up the grill to 700°, tossing in the chips. Caution: When operating
the smoker at temperatures above 500° DO NOT open the lid quickly.
Open it about an inch or so and let the flames subside before opening
fully.
(Get everything ready to work quickly, have a pair of good tongs
available)
5. Remove the lamb from the marinade, leaving a thin coating of oil with
some of the garlic.
6. Sear the lamb on each side for about two minutes.
7. Close top and bottom dampers to barely open and roast the chops for
an additional twenty minutes. A read with a quick check thermometer
should show about 125° for rare and about 140° for medium to
medium-well.
70
Rubs & Marinades
Lamb
*Note: 140° is recommended for the “safe” temperature but I like it more
rare. As always, I use only the freshest I can get from a source I trust.
I might substitute lime juice for the vinegar in the marinade. Consider adding grated ginger or
grated fresh horseradish to the marinade. Spice as you wish. A dry rub of spices and herbs can
be added after the marinade and before the grilling. My fiancee loves this dish, even though she
hates mustards of all kinds. Try it with mashed potatoes, steamed carrots glazed with sugar and
butter and a really cold beer or two or three.
Lamb
Spiedies (the original)
Or venison, pork or beef, chicken
Ingredients:
1 cup
1/4 cup
1/4 cup
1+ clove
1 tsp.
salad oil
wine vinegar
Worcestershire sauce
garlic, chopped
oregano
1
1
1
1
3
tsp.
tsp.
tsp.
tsp.
lb.
basil
parsley
salt
pepper
cubed meat (3/4” cubes)
Procedure:
1.
2.
3.
4.
Pour marinade over cubed meat in glass bowl.
Marinate for 24 hours (except chicken, only a few hours).
Pull meat on skewers, cook over hot coals. (350 for 15-20 minutes)
Pull off skewers with Italian bread
La Bamba Spiedies Endicott, New York Specialty
Ingredients:
2 LB
1 TBS
2 TBS
6 TBS
1 tsp
Meat - beef, lamb, & pork
[cut into 3/4”-1” cubes]
oregano
vinegar
olive or salad oil
parsley
Salt & Pepper [to taste]
1 tsp
garlic salt
1 Tbs. onion [minced]
1 fresh lemon juiced
1 tsp
basil
1 tsp
fresh mint
Procedure:
1. Combine all and soak overnight. [ Best if a week ]
2. Place meat cubes on skewer and cook on grill (350 for 15 minutes) until
brown.
3. Serve on French or Italian bread or Hoagie buns.
NOTE: Substitute Chicken if unable to obtain lamb. GUTEN APPETIT !
Grills & Smokers
71
Rubs & Marinades
Seafood
Fish - whether whole or cut into fillets - is becoming popular on the grill. But not every fish is a
good candidate for the coals. Meaty fish such as swordfish, tuna, shark and monkfish are best,
followed by grouper, halibut, mahi mahi and salmon. Though I hate messing with fish bones,
they do keep fish moist and in one piece. So choose steaks over fillets. And with fillets, keep the
skin on ...
Seafood
72
Rubs & Marinades
Seafood
Since fish have less fat than red meat, it is essential that the grill surface be lubricated or that
the fish brushed with oil, or both, before grilling to prevent sticking. But don’t overdo it or you’ll
cause flare-ups. Putting the skin side down first also helps to develop a firm outside crust. And
be patient before turning the fish over. Cooked fish will naturally ease off the grill when it’s done
on one side.
Strong marinades obscure the delicate nature of fish, so steer clear of seasonings such as sesame
oil, garlic and rosemary. (Keep seafood marinades light and short. No more than 30 minutes.)
Heavy charring also masks the subtle flavor of fish. Therefore, you should cook fish at a lower
temperature than red meat.
Knowing when fish is done is almost as tricky as getting poultry just right, though underdone
salmon is less hazardous than rare chicken legs. For fillets or steaks, use the finger- poking
method. When pressed with your index finger, the fish should spring back. If the flesh is mushy
or leaves a permanent indentation, it’s not yet done. If it flakes, it’s overdone.
Whole fish are a little trickier, though the finger poking method still works. You can also cut and
peek by slicing into the thickest part of the fish and taking a look. Fish is done when it’s opaque
rather than translucent. You can also use the so-called Canadian method of 10 minutes per inch
of fish measured at the thickest point.
Shellfish, with their delicate meat, require even more care on the grill. Shrimp are a natural,
the larger the better. Ditto for large scallops and soft shell crabs. A few minutes on either side is
all you’ll need for any of them, unless the shrimp are unusually large. Mollusks such as oysters,
clams and mussels are fun on the grill. Just scrub the shells and put them on the grate. Remove
them when they open, discarding any that don’t.
(Copyright 2001 Sam Cooks Newsletter, from Sam Gugino, cookbook author of “Cooking to Beat the Clock.”)
Grouper Filets Use the Peach Salsa with this.
Ingredients:
2 grouper filets
1 tsp cilantro
1 tsp Worcestershire
1/4 tsp pepper
1 Tbs.
1 Tbs.
1/8 tsp
Directions
1.
2.
3.
4.
olive oil
lime juice
salt
Combine olive oil, cilantro, lime juice, Worcestershire, salt and pepper
Marinate filets in the mixture for about an hour.
Cook the fish over fresh lump at 400 to 450 for about 12 minutes.
Tender, flaky and delicious!
Grills & Smokers
73
Rubs & Marinades
Seafood
Clams Casino Spin and UncleBuck
Our rendition of a favored appetizer in the Northeast. The recipe serves 4 (3 clams each) and is
much easier to make than it reads.
Ingredients:
12
2
1
3
1/3
12
¼
top neck clams
Tbs. Red bell pepper - diced small
tsp. garlic - diced small
Bacon strips - rendered
cup Parmesan cheese - grated
dash Tabasco sauce
cup fresh parsley - minced fine
2
1
12
½
½
2
1
Tbs Green bell pepper - diced small
Tbs. Shallot - diced small
Pimiento pieces (¼ x 3/8)
cup Monterey jack cheese - grated
cup unsalted butter - clarified
lemons
mini muffin pan
Preparation Directions:
1.
2.
3.
4.
5.
Render the bacon in a pan over low heat - do not cook (takes about 10 minutes).
Remove, drain, cut each strip into 4 equal pieces, and set aside.
Mix the peppers, shallot, and garlic together and set aside.
Cut the lemons into 6 wedges each, set aside.
Shuck the clams. Rinse the meat well, drain, and pat dry, set aside. Pick
the 12 best ½ shells, thoroughly clean and dry. Clams tend to have
some sand and mud in them and this should be removed.
6. Brush the inside and lip of the shells with butter and set level on the
mini muffin pan.
7. Add a dash of Tabasco to each shell.
8. Add a clam to each shell, pressing down to form a shallow well in the
center.
9. Place a pimiento in each well.
10. Cover the clams with Monterey jack cheese.
11. Top each with 1+ tsp of the pepper mixture.
12. Cover each with the parmesan cheese.
13.Top each with the bacon, pressing down slightly to contain the casino
mixture within the shell. Sprinkle with the parsley.
Cooking Directions:
1. Prep your grill to cook indirect at 450F. Allow time for your cooking
setup to be fully heated before starting the cook.
2. Cook for 15 minutes and remove. Serve with lemon wedges and the
remaining butter.
Special Instructions:
Top neck clams are one size smaller than cherrystone clams. I use them
because they are always tender, where cherrystones can sometimes
provide a tough chew. The unused shells can be preserved for future
74
Rubs & Marinades
Seafood
use by simmering in water until the meat stuck to the shell can be
removed (30-45 minutes). Store wet (dry shells tend to flake pieces) in the freezer.
Swordfish
with Mango Chutney
Palisin
Ingredients:
4
swordfish fillets (6-8 ounces each)
1/2 cup
all purpose rub (see recipe in Rubs and Marinades)
1
cup
Mango Chutney (see recipe in Vegetables/Fruits./Salsa)
Directions:
1. Coat each side of the fillet with 1 Tbs. of all purpose rub.
2. Allow to sit covered in the refrigerator for at least 30 minutes.
3. Cook at 350 degrees for 7-8 minutes on each side (or 15-18 minutes without
turning if cooking indirect).
4. Top with Mango Chutney and serve.
Smoked
Fish in Soy Sauce & Wine Brine
3 Men with Nothing Better to Do
Ingredients:
1 fillet of Fish
1/4 cup non-iodized salt
1 cup water
1/2 tsp. garlic powder
1/2 tsp. Tabasco sauce
1/3
2
1/2
1/2
1
Directions:
cup
cups
tsp.
tsp.
cup
sugar
soy sauce
onion powder
pepper
dry white wine
1. Mix the above brine ingredients well, ensuring that all dry ingredients
are well dissolved.
2. Soak the fish in the brine for 8 or more hours, keeping all pieces
covered with brine and refrigerated.
3. Smoke in your favorite smoker over Hickory, Alder, or a mix of 2/3
Apple and 1/3 Cherry wood. Smoking times will depend on the
thickness of the fish and the type of smoker you are using. Place largest
and thickest pieces closest to the heat/smoke source
Grills & Smokers
75
Rubs & Marinades
Seafood
Gretl’s Tuna Gretl
“I bought some beautiful yellow fin steaks last night. They were lean and as red as filet mignon. I
marinated them very simply in olive oil, fresh limejuice, and pepper while waiting for the Primo
to heat up. Then I peeled and seeded two fresh mangoes and pureed them in the blender with
salt, pepper, more fresh limejuice, and red wine vinegar. I sliced a baguette loaf lengthwise and
brushed it with olive oil. I grilled the bread on the cut side (very quickly!), brought the temp
down to about 400, and then grilled the fish; about 3 min/side and a 4 min dwell. It was juicy
and tender, and just barely pink in the center. I plated the bread first, topped by the sliced fish,
followed by a few slices of Vidalia onion and drizzled generously with the mango sauce, which
was then sprinkled with chopped cilantro for color. I served a salad and some asparagus on the
side. The whole shebang from grocery to table took about 45 minutes, give or take, including
heat-up time.”
Ingredients:
4 5-8 oz yellowfin tuna steaks
2 fresh limes
1 fresh mango
1/3 cup red wine vinegar
1 sliced medium vidalia onion
1/4 cup
1 1/2 tsp.
1/4 tsp.
1 loaf
2 Tbs.
Directions:
olive oil
black pepper
salt
french baguette
fresh chopped cilantro
(parsley or basil)
1. Using a ziploc bag, marinate the yellowfin tuna with a mixture of
1/4 cup olive oil, the juice of one fresh lime, and 1 teaspoon of black
pepper. Allow to sit for at least 15 minutes.
2. Peel and seed the mango.
3. In a blender, combine the mango, 1/4 tsp salt, 1/2 tsp pepper, the juice
of one lime and 1/3 cup red wine vinegar.
4. Slice the baguette lengthwise and brush with olive oil. Cut into
lengths suitable for the slices of tuna desired.
5. Get the grill to 400 degrees. Place the bread cut side down for about a
minute (check for correct browning). Remove to plate.
6. Grill the fish on the ceramic cooker at 400 degrees for 3 minutes a side
then allow to dwell for about 4 minutes.
7. If desired, onion slices may be placed on top of the tuna when they are
flipped. Otherwise the raw onion can be used in the next step.
8. Slice the tuna and fan five or so slices on top of the bread with onion
slices on top of the fish and then generously drizzle mango sauce on
top of it all.
9. Sprinkle with cilantro (or parsley or basil) for color.
76
Seafood
Rubs
& Marinades
Seared
Tuna with Onion Marmalade
Bobby Que
My wife picked up a 2 pound plus fresh tuna filet from our fish monger today. I got some piment
d’esplette from our local Williams-Sonama store yesterday. The piment d’espelette is exotic but
can be replaced by very good Hungarian hot paprika or Mexican Chile pepper. Here is what we
did with them.
Ingredients:
2
1
lbs.
tsp.
fresh tuna
black pepper
1/2 Tbs.
olive oil
For the onion marmalade:
olive oil
1 large onion, finely sliced
aged balsamic vinegar
1/8 cup sherry vinegar
water
(we used Nakano rice wine vinegar)
Kosher salt
1/8 ts.p white pepper
sugar
1/2 tsp. Kosher salt
piment d’esplette (a hot paprika like spice that is available at Williams-Sonoma)
1/8 cup
1/4 cup
1/4 cup
1/2 tsp.
1/2 tsp.
1/8 tsp.
Directions: To make the Onion Marmalade.
1.
2.
3.
4.
Warm 1/8 cup olive oil in a saute pan over medium high heat.
Add onions and saute until golden brown.
Stir in both vinegars, water, salt, pepper,sugar and piment d’espelette.
Bring to a slow boil and cook until the liquid is evaporated. set aside.
Cooking Directions: To cook the tuna.
1. Marinate the tuna steak in the olive oil and pepper for at least 30
minutes
2. Get the grill up to 600 degrees
3. Place the olive oil and pepper coated tuna filet on direct for 2 minutes
on side one, 3 minutes on side two, dwell an additional 2 to 6 minutes
if you prefer the fish more well done.
4. Serve the tuna with the Onion Marmalade on the side.
Enjoy.
Grills & Smokers
77
Rubs & Marinades
Seafood
Melt-in-your-mouth
Salmon
Greg Richey
Ingredients:
4 eight oz. skinless, boneless Salmon filets
1 lemon
1 lime
2 Oz Extra Virgin Olive Oil
Tony Chachery’s Cajun spice
Paul Prudomme’s Poultry Magic
(red & yellow container)
(green label)
Preparation Directions:
1. Wash filets and drain on paper towels.
2. Pour oil in small sauce pan, and squeeze the juices from the lemon and
lime in.
3. Barely bring to a boil and remove from heat, cool down a bit.
4. Sprinkle the Tony Chachery’s on one side and Paul Prudhomme’s on
the other side of the salmon.
5. Place in a lasagna pan, paint the oil mixture on the filets, and pour
the remainder over them. Cover with plastic wrap and marinate in the
refrigerate 1 - 2 hours.
Cooking Directions:
1. Bring the grill up to 300. Spray fish grill with Pam or similar product.
2. Add Jack Daniel’s and Applewood chips to coals.
3. Cook salmon approx. 12 minutes per side and test for doneness (I press
on the fish with my finger to test). Do not overcook.
Lemon-Herb Fish Fillets
Jack Dickson
For those who requested a recipe for orange roughy.
Ingredients:
¼ cup dry white wine
4 medium orange roughy fillets
½ tsp. dried tarragon
1/8 tsp. white pepper
lemon wedges -- optional
2 Tbs. lemon juice
½ tsp. dried dill weed
¼ tsp. salt
vegetable cooking spray
Directions:
1.
2.
3.
4.
Combine wine and lemon juice in a shallow dish
Add fish, turning to coat.
Sprinkle fish with dillweed and next 3 ingredients.
Cover and marinate in refrigerator 30 minutes.
78
Rubs & Marinades
Seafood
5. Remove fish from marinade; discard marinade.
6. Arrange fish in a wire grilling basket coated with cooking spray; place
on grill over medium-hot coals.
7. Cook 4 minutes on each side or until fish flakes easily when tested with
a fork.
8. Serve with lemon wedges, if desire.
If you would prefer not to grill, this should also work on a 275-300* ceramic cooker for 20-30
minutes using apple chips.
Scallops Wrapped in Bacon Method 1:
Ingredients:
½
lb.
fresh sea scallops (1 ¼ to 1 ½ “ across) (10-16 in number)
¼
lb.
raw bacon (very lean center cut).
10-16 toothpicks soaked in water for 30 minutes
Perparation Directions:
1. Marinate scallops for 30 minutes or so in wine or lemon juice with
water.
2. Take a ½ piece of bacon and wrap around the scallop securing in place
with a toothpick.
3. Coat the exposed ends of the scallop with a favorite rub (Paul
Prudhomme’s Cajun magic or similar.)
Cooking Directions:
1. Cook over a drip pan on a seafood grill for 30 minutes at 375 degrees.
2. Turn half way through.
3. Serve alone or with a favorite cocktail sauce.
Scallops
Wrapped in Bacon Method 2:
1. Precook the bacon in a microwave (less curling than a pan), rendering
it on paper towels until it just starts to look like it is drying out. It
should be limber but firm.
2. I sprinkle the exposed ends of the scallop with a favored rub and then
lightly coat them with either unsalted melted butter or the rendered
bacon fat.
3. I cook direct on a fish grill at 450F for 2 minutes per side.The scallop
will be a tasty sear on the ends and a nice tenderness in the middle.
The bacon will be cooked to chewy.
I can obtain fresh scallops. These are 1.25-1.5+” in diameter and at least 1” thick. You may have
to adjust timing for the size you use.
Grills & Smokers
79
Rubs & Marinades
Seafood
Mesquite Crusted Salmon Don Ianitelli
Ingredients:
1 large Salmon Filet (not steak)
Lemon Pepper Seasoning
½ lemon (juice of)
Jamaican Jerk Sauce
Mesquite Seasoning
½ stick butter
½ cup heavy cream
Preparation Directions:
1. Cut Salmon into serving portions as desired.
2. Spray tin foil or cooking grill with nonstick oil.
3. Sprinkle mesquite and lemon pepper seasoning liberally on salmon
portions covering evenly and completely.
4. Let stand for 20 minutes.
5. Meanwhile, melt butter in saucepan adding lemon juice and heavy
cream.
6. Add jerk sauce to taste.
Cooking Directions:
Cook salmon at 300 degrees until flaky but do not overcook. Serve
salmon with sauce over top.
Salmon
with Dijon Bourbon Glaze
Gretl
This is a very forgiving recipe; you really can’t screw it up. A higher heat with shorter cooking
time produces a darker glaze. A lower heat for a longer time is better if you want to add some
alder chips and get a smoky flavor.
Ingredients:
1 Salmon fillet, about 3-4 lbs.
4 Tbs. Dijon mustard
A bunch of fresh dill
3 Tbs. brown sugar
3 Tbs. Bourbon
Freshly ground black pepper to taste
Preparation Directions:
1. Combine the mustard, brown sugar, and bourbon.
2. Lay the salmon, skin-side down, on a rack over a drip pan with some
water in it.
3. Slather the sauce over the salmon, sprinkle liberally with freshly
ground black pepper, and lay fresh dill on top.
Cooking Directions:
Heat the grill to about 350 or so. I use a stone or firebricks to keep the
80
Rubs & Marinades
Seafood
drip pan up off the grill just so the pan doesn’t burn.
Special Instructions:
To serve, discard the dill and replace with fresh sprigs for appearance.
This is good served surrounded by roasted new potatoes and fresh
asparagus.
Gretl’s Grilled Oysters Gretl
Ingredients:
1 pt. oysters
2 Tbs. extra virgin olive oil
1/4 tsp. black pepper
1 Tbs. chopped garlic
1/2 tsp. hot sauce (Sriracha sauce is good) 1/2 fresh lime (or lemon) juiced
3-4 branches fresh Rosemary
Directions:
1. Drain a pint of oysters (save the liquid for stew) and toss them with
extra virgin olive oil, chopped garlic, freshly ground black pepper, a
squirt or two of hot sauce (Sriracha sauce is very good; it’s available in Asian markets), and
maybe a squeeze or two of lemon or lime.
2. Get the grill going to about 300 to 350.
3. On a rack over a shallow pan lined with foil, lay branches of fresh
rosemary. I put a bit of water in the pan to keep the drippings from
burning.
4. Lay the oysters right on the rosemary in one layer.
5. Set the pan on a couple of firebricks.
6. Check the oysters after about a half an hour. They’re done when
they’ve shrunk up and are a nice brown color and are tender but not
squishy. They have been left for as long as two hours without being
ruined.
Notes:
I’ve used lower heat and longer time, and higher heat if I’m in a hurry.
They are truly amazing. As far as smoke flavor...I have used alderwood
chips, and I’ve used no chips at all. Both are good. Most of the flavor
seems to come from the rosemary. Experiment and see what suits you!
Grills & Smokers
81
Rubs & Marinades
Seafood
Janet’s Simple Haddock Janet
Ingredients:
4 5-8 oz haddock filets
1/4 cup olive oil
1/4 cup bread crumbs
1/2 cup
2 Tbs
1/4 cup
milk
chopped garlic
parmesan cheese (fresh grated)
Directions:
1.
2.
3.
4.
Soak fish in milk for about an hour.
Douse it in olive oil and garlic.
Put it on grill at about 300 for 10 minutes.
Then put a bread crumb and parmesan cheese (fresh grated) mixture on
top and cook it about 10 minutes longer.
Dwell in the Shell Houndog
“elegant, yet pleasingly casual”
Ingredients:
4 huge lobster tails
1 bit peanut oil
1-2 each limes
Garlic Powder
1 touch Lawry’s Seasoning Salt
Butter
New Mexican green chili powder (Optional)
Minced Garlic
Serves 2
Preparation:
Picked up 4 huge lobster tails. Thought at first, 1 pound tails for each of us would be ok.
Naaaaahhhh - if two tails would be good, 4 tails for the two of us would be better, right ?
1. Get your shears and cut the clear membrane off the belly of the tail,
getting rid of the tiny feet, exposing the meat.
2. Rinse them good, dry them with paper towel and place them shell side
up on a cutting board. Take a heavy knife or cleaver, place it longwise
(parallel) in the center of the shell and tap the back of the blade into
the shell, cracking it ever so slightly. This is so our tail will lay flat on the
grill. Do not take meat out of the shell !
3. Now flip them over, belly side up. Take a bit of oil ( I used peanut )and
pour a small amount on your fingers, and lightly rub the meat. Don’t
use much at all, barely a drizzle.
4. Grab a lime or two and squeeze juice and pulp all over the meat,
liberally.
5. Then shake on garlic powder and a touch of Lawry’s seasoning salt.
6. I then have to throw my favorite ingredient of all time, which goes on
82
Rubs & Marinades
Seafood
everything I cook, New Mexican green chili powder. Don’t worry if you
don’t have this, it’s hard to find, and your lobsters will still be far and
above any lobster you ever had before.
7. Place covered tails in fridge for an hour or so to marinade while your
gettin’ your cooker ready.
8. Get a good hot bed of lump going and preheat your cooker to 400 450 degrees. As all of you know, when it comes to seafood and a good
hot fire, you must move swiftly because every minute counts.
9. Place tails, meat side down on the grill and press them flat. This is why
we weakened the shells earlier with the tapping cleaver.
10.Set your metal cup on the grill also with butter and minced garlic so
it will melt and sauté the garlic. Close the lid. If you don’t have a metal
cup to use on the grill while you’re cookin’, get one !
11.Open the cooker after 5 minutes and with a leather glove, carefully
turn tails over onto their shells so meat is facing up towards the sky.
12.Take your cup (grab it with a leather glove please) with the butter and
garlic, and spoon sautéed mixture onto the lobster tails. The tails will
form a slight cupped shape which will hold most of the butter in place,
but your fire will rage for a minute, and that is great.
13.Close the lid down and slowly begin to close top and bottom drafts so
they can “Dwell in the Shell” for 5 more minutes.
Remember - with a good hot fire, 5 minutes per side, that’s it. With 50 dollars worth of lobster
on the grill, you definitely want to pay attention. I don’t recommend holding any conversations
with your company while you’re fixin’ this supper. Tell your family and friends that you’ll socialize again after this crucial 10 minutes is over. Once everyone tastes what you’ve agonized and
sweated over for 10 minutes, no more explanations will be necessary. Simply, Heaven on Earth
! Serve with long grain and wild rice, corn on the cobs, asparagus, salad, just about anything.
Even though we had melted butter to dip the lobster in, it wasn’t really necessary. It was so good
that were doing it again for the family tomorrow night. They’ll be surprised when they get beef
tenderloin steaks and lobster tails out of their brisket and pulled pork Houndog. I’m not that
good a cook, but these tails are truly world class. Give ‘em a try.
Simple Spicy Shrimp Cat
Ingredients:
3
2
Tbs. honey mustard (mix enough honey into grainy mustard until it tastes sweet/hot)
Tbs. dark soy sauce
1/2 tsp. Tabasco sauce
Directions:
Mix the above and stir into a pound of shelled shrimp. When they’re
well coated, lift them out of the sauce, skewer and grill.
Grills & Smokers
83
Rubs & Marinades
Seafood
Simple
Pecan Smoked Salmon
The Naked Whiz
I don’t know how it could be any easier! (Unless you come over and eat mine!)
Ingredients:
2
12 oz. salmon filets
1
bottle Wishbone Italian Dressing
Preparation Directions:
Place the salmon in a baking dish and cover with Italian dressing. Make
sure both sides are thoroughly covered. Cover with plastic wrap and
place in the refrigerator for 2 hours.
Cooking Directions:
1. Stabilize your grill at 375 degrees.
2. Place two packets of BBQr’s Delight Pecan Wood Pellets (follow their
directions on the package to prepare the little foil packets) on the fire
(or use three to four chunks of pecan).
3. While you give them a couple minutes to start smoking, place the
salmon filets in a fish grilling basket (I use the generic flat rotisserie
basket that you can find at Lowes). Place the basket on the grid, skin
side up.
4. Cook 12 minutes.
5. Turn the basket over and cook 13 more minutes.
Special Instructions:
If you like, slice 6-inch pieces of french bread lengthwise, lightly butter,
add shredded parmesan cheese, close back up, wrap in foil, and place
on the fire at the same time you start the fish.
Miso Salmon Nature Boy
“Thanks to RhumAndJerk for the book, and thanks to the book for the idea! The book: “The Asian
Grill” Barich & Ingalls. I did the recipe with some variations/substitutions. Not sure how much of
it had to do with the super fresh Wild Alaskan King Salmon that I used, but this was extremely
tasty. The miso added a wonderful contrast of flavors.”
Ingredients:
1/3 cup miso paste (this might be white, yellow or red)
1 egg yolk
4 Tbs. sake
3 Tbs. brown sugar
1 Tbs. your favorite soy sauce
3 Tbs. broth (dashi or chicken broth)
1 lb.
salmon filet
1 tsp. Sriracha Red Chili Sauce 1 tsp. onion powder
84
Rubs & Marinades
Seafood
Directions:
1. Heat the miso in a double boiler to soften.
2. Add the egg yolk, sake, brown sugar, broth, soy sauce, chili sauce,
onion powder to the miso to make a paste.
3. Cut the filets into thick strips to allow more surface area for crusting.
4. Slather the filets with the paste, and let sit 30-60 minutes.
5. Grill 4-5 minutes a side at 500-550 (brushing additional paste on before and after flipping)
until nicely crusted, and just flaking.
Salmon Dijon
Ingredients:
4 Salmon steaks
2 tsp. mustard
1/2 cup olive oil
1/4 cup lemon juice
salt, pepper
chopped fresh dill
Directions:
1. In a cup combine all ingredients and mix well by using a fork.
2. Marinate the salmon with the sauce and refrigerate for more than 30
minutes.
3. Grill at 300°F for 20 minutes by turning once. Salmon is done when
firm to the touch.
Grilled Tuna With Orange Butter
Ingredients:
6 Tbs. unsalted butter
zest and juice of 1 orange
1 Tbs. chopped savory or flat leaf parsley
1 1/2 lb. Fresh tuna 3/4-inch thick steaks
Coarse kosher salt and black pepper
Directions:
1.
2.
3.
4.
In a small bowl, beat the softened butter with orange zest.
Beating constantly slowly add the orange juice.
Stir in the savory- set aside.
Heat the grill at 350°F and place tuna on grill for 4-5 minutes on each
side, brushing with orange butter.
5. Remove, season to taste.
Grills & Smokers
85
Rubs & Marinades
Sausage
Sausage
86
Rubs & Marinades
Sausage
Originally Sausage making was a way to preserve meat trimmings left over on the butchers
table. Salt and other spices were added to help extend the shelf life as were process of curing either by drying, smoking (hot or cold) or salting. As techniques improved people found
Sausage to be not only a cheap and easy food, but a delicious one as well. Sausage is generally
made from pork, but also from beef, veal, lamb, chicken, turkey and game. In recent times the
quest for lower fat foods has driven many people to chicken and turkey sausage and the quality
of these types of Sausage has improved drastically.
Since we are interested in Barbecue here, I will spend a little time on the curing process. Cold
smoking occurs at 70-90 degrees and can take up to a week. Hot smoking is done anywhere
between 100 and 190 degrees. If you are interested in making your own sausage I would suggest starting with the hot smoke method since the cold method can be dangerous if you don’t
watch it carefully. Hot smoking is done just like you would Barbecue a Brisket. Heat up your
smoker once you have your Sausage prepared and place in smoker. Use a mild wood and smoke
at a low temperature. Ideally to eliminate any chance of food poisoning you need to bring the internal temperature to 160 degrees. However you can take a middle ground. Smoke the Sausage
partially at a low temperature to add a smoky flavor and then remove it from the smoker before
they start to shrink and dry. Then when you are ready to serve them, cook until heated through
being sure to cook sufficiently to kill any bacteria.
Types of Sausage
Andouille Sausage: A spicy, heavily smoked sausage made from pork chitterlings
and tripe. French in origin, Andouille is a specialty of Cajun cooking. It’s used in specialties like
Jambalaya and Gumbo. Andouille is also especially good served cold as an hors d’oeuvre.
Bauerwurst: A coarse-textured German Sausage that is smoked and highly seasoned. It’s
usually steamed or sautéed.
Bierwurst or Beerwurst: (Does not contain Beer) A German cooked Sausage made
with lots of garlic and is a dark red color. It’s usually sold as sandwich meat.
Blood Sausage or Blood Pudding or Black Pudding: A large link
sausage is made of pig’s blood, suet, bread crumbs and oatmeal. Almost black in color, blood
sausage is generally sold precooked. It’s traditionally sautéed and served with mashed potatoes.
Bockwurst: Flavored with chopped parsley and chives, this ground-veal sausage is of German origin. It’s generally sold raw and must be well cooked before serving.
Bratwurst: A German sausage made of pork and veal seasoned with a variety of spices
including ginger, nutmeg and coriander or caraway. Though it is now available precooked,
bratwurst is generally found fresh and must be well grilled or sautéed before eating.
Chorizo: A highly seasoned, coarsely ground pork sausage flavored with garlic, chili powder
and other spices. It’s widely used in both Mexican and Spanish cookery. Mexican Chorizo is made
with fresh pork, while the Spanish version uses smoked pork. The casing should be removed and
the sausage crumbled before cooking.
Frankfurter: A hot dog. You should know this one.
Grills & Smokers
87
Rubs & Marinades
Sausage
Head Cheese: Not a cheese at all, but a sausage made from the meaty bits of the head of
a calf or pig (sometimes a sheep or cow) that are seasoned, combined with a gelatinous meat
broth and cooked in a mold. When cool, the sausage is unmolded and thinly sliced. It’s usually
eaten at room temperature.
Italian Sausage: This favorite pizza topping is a coarse pork Sausage, generally sold
in plump links. Italian Sausage is usually flavored with garlic and fennel seed or anise seed. It
comes in two styles hot (flavored with hot, red peppers) and sweet (without the added heat). It
must be well cooked before serving, and is suitable for frying, grilling or braising.
Kielbasa or Kielbasy or Polish Sausage: This smoked Sausage is usually made
of pork, though beef can also be added. It comes in chunky (about 2 inches in diameter) links
and is usually sold precooked, though an occasional butcher will sell it fresh. Kielbasa can be
served separately or cut into pieces as part of a dish. Even the precooked Kielbasa tastes better
when heated. This is my favorite in a bun.
Loukanika Sausage: Seasoned with orange rind, this Greek Sausage is made with both
lamb and pork. Loukanika is a fresh Sausage and must therefore be cooked before eating. It’s
usually cut into chunks and sautéed.
Weisswurst: German for “white Sausage,” weisswurst is a delicate Sausage made with veal,
cream and eggs. It’s traditionally served during Oktoberfest with sweet mustard, rye bread and
beer.
This is just a sampling of the traditional Sausages you can find. Anyone equipped to make their
own Sausage can come up with any mixture they please. Also many of these Sausages are now
available (generally at health food stores) in a lower fat, chicken or turkey variation. The taste
maybe somewhat different however.
Remember a couple of things. Many Sausages are now available in an uncooked variety so you
can take advantage of smoking them yourself. Don’t try to smoke a smoked Sausage unless you
do it at a high temperature (225 degrees) and for a short period (1-2 hours). Do this to basically
warm the sausage. If you are smoking uncooked sausages, please make sure that internal
temperatures reach at least 160F.
88
Sausage
Rubs
& Marinades
Andouille Sausage sprinter
Heres the recipe for all of you who asked for it. Holler if you have any questions at all.
Makes 5 pounds of sausage:
Ingredients:
3 Tbs.
2 Tbs.
1 tsp.
1/4 tsp.
2 tsp.
1 tsp.
5 lbs.
30 mm.
sweet Hungarian paprika 2 Tbs. minced garlic
kosher salt
2 Tbs. sugar
red pepper flakes
1/2 tsp. dried thyme
ground mace
1/2 cup water
ground cayenne pepper 1 Tbs. freshly ground black pepper
curing salt (optional-necessary only if cold smoking)
pork cut into 1 inch chunks (I used pork butt)
casings (could use larger, maybe 35mm-40mm)
Directions:
1. Grind meat through 3/8 inch grinder plate
2. Mix water and spices into meat
3. Combine well and pack tightly into casings.
Cooking:
Cook direct at 350 degrees for 7-8 minutes on each side.
Old-Fashioned
Brats In Beer
* Exported from MasterCook *
Recipe By : Grilling, Picnics & Camping Cookbook by Pillsbury
Serving Size : 4
Ingredients:
1 can beer -- (12 oz.)
1 tsp.
4 each bratwurst
1 can
4 each Pepperidge Farm Hoagie Rolls
1/4 cup bell pepper -- chopped
Directions:
caraway seed
sauerkraut - drained (8 oz.)
1. In medium saucepan or skillet, combine beer and caraway seed.
2. Prick bratwurst with fork several times; add to beer mixture.
3. Bring to a boil. Reduce heat; cover & simmer 10 to 15 minutes or until
bratwurst are no longer pink.
4. Remove bratwurst from beer mixture.
5. Add drained sauerkraut and bell pepper to beer mixture; heat ‘til hot.
6. When ready to cook on the grill, prepare the ceramic cooker
accordingly.
Grills & Smokers
89
Rubs & Marinades
Sausage
7. Place bratwurst on the grill, cook at 350°, turning often until browned.
Cook 4 to 6 minutes.
8. Place buns, cut side down, on the grill. Cook 1 to 2 minutes or until
buns are lightly toasted. Place bratwurst in buns.
9. Using slotted spoon, spoon sauerkraut on top of bratwurst. Enjoy.
Note: To broil, place bratwurst and buns on broiler pan; broil 4 to 6
inches from heat using times above as a guide. For a richer beer flavor,
use a heartier dark ale or stout.
Char-Woody’s
Fire Cracker Brats
Char-Woody Credits to whomever..if there is one.
Bratwurst in onion/beer sauce.
Ingredients:
As many brats of your brand as you like!
1 cup or more of sliced or cubed onions, Vidalia, or Texas Sweet or to your taste.
20 can of your favorite beer... guests drink 18 or 19 save the rest for cooking :-)
2 Tbs. of Butter...your brand :-) Fun isn’t it??
Preparation Directions:
Be prepared for some great eating...see cooking!
Cooking Directions:
1. Sauté the onions in butter in a pan suitable for how many brats you
wish to make, or portions of em.
2. Sauté till clear...not burned.
3. Add half the beer to the onions.
4. Add the brats to fill the frying pan (loosely)
5. Add more beer to half way up the sides of the brats.
6. Turn the brats until the brats are nice and puffy and changed to a gray
color.
7. Once they are nicely boiled in beer, but not splitting, remove to a
platter and coat with common French’s mustard.
8. Grill over open fire at 400° to 500°F and turn ‘em several times to get a
nice browned exterior crusting with grill marks.
9. Use your left over onions for a fill in the buns, your favorite sauce,
sauerkraut, or however you like em. Even stuck on the end of a fork...
10. Do not puncture the brats anywhere during the cook. They will cook
internally with their own intense flavor as they are intended.
Enjoy... And if this is a duplicate of anyone’s prior recipes..my apology!
90
Rubs & Marinades
Poultry
Lamb
Poultry
Grills & Smokers
91
Rubs & Marinades
Poultry
Lamb
Lemon, Garlic, & Pepper Wings
A wing to introduce folks who don’t like hot wings to.
Ingredients:
2 ½ lbs.
½ cup
5 tsp.
1 Tbs.
2 tsp.
1/4 cup
wings, trimmed and separated
lemon juice
garlic powder
black peppercorns
salt
olive oil
Directions:
1. Mix all ingredients in a bowl. Marinade for at least two hours at room
temperature.
2. Saving marinade, put wings on broiling rack and broil until browned
and cooked through, (about 20 minutes) basting wings with marinade
about every 10 minutes.
3. For ceramic smoker: Cook over direct heat for about 35-45 minutes at
250 degrees.
4. Transfer to platter and serve.
Cornfed’s Wing Sauce Cornfed
Ingredients
5 Tbs.
4 Tbs.
2 pints
1/4 cup
2 Tbs.
2 Tbs.
unsalted butter
flour
Franks Red Hot Sauce
fresh grated garlic
chopped habanero peppers
assorted fresh herbs
Preparation
1. Prepare a simple roux with a load of unsalted butter and some flour.
2. Add to this a large amount of Franks Red Hot (or whatever mild hot
sauce you have on hand) and some fresh garlic
3. Let simmer for 20 minutes or so.
4. Add some fresh herbs at this stage of the game.
5. At some point during the simmer, I like to add several drops of Dave’s
Insanity Sauce to kick up the heat. This can be substituted with
whatever insanely hot sauce you have on hand or, perhaps even better,
some real habanero peppers.
92
Lamb& Marinades
Rubs
Poultry
Chicken
Cordon Bleu
YB Source: Better Homes and Gardens
Ingredients
6 medium skinless, boneless, chicken breast halves
1 5 oz. container semisoft cheese with garlic and herbs
2 oz. very thinly sliced fully cooked ham
½ cup fine dry seasoned bread crumbs
1 Tbs. snipped fresh parsley
½ cup milk
Nonstick spray coating
1 Tbs. margarine or butter, melted
Directions:
1. Place each chicken breast half,boned side up, between pieces of clear
plastic wrap.
2. Working from the center to the edges, pound lightly with the flat side
of a meat mallet to 1/4-inch thick.
3. Remove plastic wrap.
4. Spread chicken with cheese.
5. Place ham, cutting to fit, over each chicken breast.
6. Fold in the long sides of the chicken and roll up into a spiral starting
from the short edge.
7. Secure with wooden toothpicks.
8. Combine bread crumbs and parsley in a shallow dish.
9. Dip chicken rolls first in milk and then into the bread crumb mixture to
coat.
10. Spray a 2-quart rectangular baking dish with nonstick coating.
11. Place chicken rolls, seam side down, in prepared baking dish.
12. Drizzle with melted margarine or butter.
13. Place pan on plate setter and pizza stone in the Primo.
14. Bake in a 400 degree F Primo for 30 to 35 minutes or until lightly
browned and chicken is tender and no longer pink.
Grills & Smokers
93
Rubs & Marinades
Poultry
Lamb
Buffalo Wings
This is the official recipe for Buffalo wings. They aren’t from some forgotten part of a bison,
they’re actually chicken. (hey, some people have asked!) They’re named for the city where they
were created: Buffalo, New York. The legend of their creation is another testament to American
ingenuity; if I get enough requests, I’ll add it. Until then, check out the recipe!
Ingredients:
2 ½ lbs. chicken wings, trimmed and separated
( and use that triangular meatless part for soup, or throw it out...)
½ stick of butter/margarine
4 - 5 Tbs. Tabasco, or other hot sauce
enough oil to deep-fry
Directions:
1. In a saucepan, melt butter.
2. Add hot sauce to melted butter. (a little experimentation with amounts
will be necessary to find the right amount of heat for you.)
3. After mixing the butter/hot sauce, lower heat.
4. Heat frying oil to medium high and deep fry wings until brown and
crisp, 10 to 15 minutes.
5. Drain on a paper towel.
6. Put wings in saucepan, and toss to coat evenly.
7. Transfer to platter and serve with Blue Cheese (traditional) or Ranch
dressing and celery sticks.
For ceramic cooker:
1. Melt butter, add hot sauce, marinate in the warm mixture for ten
minutes or so.
2. Place on indirect heat in the grill for about 35-45 minutes at 250
degrees (butter will burn on direct heat).
BRINE Boneless Skinless Chicken
Directions:
1. Brine them for 90 minutes (1/4 cup each salt & sugar to 1 quart water).
2. Rinse & pat dry, sprinkle on some dry rub (one without too much salt).
3. Put them on the grill at 170 and run it up gradually to 300 over the
next half hour, with apple & pecan for smoke. They’re done in 30-40
minutes; flip part way through.
This makes a great sandwich: toasted crusty roll, lettuce, tomato, sweet onion, grainy mustard.
94
Rubs & Marinades
Poultry
Lamb
Chicken Ya Ya WessB
Yield: 4 servings
Ingredients:
1
2 ½-3 LB chicken skinned &
cut into halves
½ tsp. red pepper
½ tsp. paprika
1 cup finely chopped onions
½ cup fnely chopped celery
2 Tbs. tomato paste
1 Tbs. low sodium
Worcestershire Sauce
1/4 tsp. ground ginger
1/4 tsp. hot sauce
1/2 tsp. salt
1/2 tsp. chili powder
1 Tbs. reduced calorie
margarine
1/2 cup finely chopped bell
pepper
1 6 oz can orange juice
concentrate
2 Tbs. honey
1 tsp. grated orange peel
Directions:
1. Preheat the grill to 350 degrees F. Set up for an indirect cook
2. Arrange the chicken halves in an eight inch pan sprayed with
vegetable cooking spray.
3. Combine the salt, red pepper, chili powder and paprika; mix well and
sprinkle over the chicken; set aside.
4. Combine the melted butter, onions, bell pepper and celery in a small
pan. Sauté, stirring constantly for five minutes.
5. Add all the remaining ingredients. Cook, constantly stirring, for five
more minutes, or until the sauce thickens, then remove from the heat
and pour over the chicken. Cook for 30 minutes.
6. Turn the chicken over and baste with the sauce. Cook, uncovered, for
30 minutes longer, or until the chicken is tender, basting often.
Note: Rather than use margarine to sauté the vegetables, I have used Pam, spraying both the
vegetables and the pan. Works just as well. Also, for a little spicier dish, try using Chinese red
pepper instead of the ground red and use a Tbs. of hot sauce. I also usually leave out the ginger.
Grills & Smokers
95
Rubs & Marinades
Poultry
Lamb
Parmesan Cornish Hen JJ
Ingredients:
2 cornish hens or one cooking hen
1 eggs
1 pt.
6 Tbs. Italian bread crumbs
6 Tbs.
sour cream
Parmesan Cheese
Preparation Directions:
1. Mix the eggs and sour cream and coat the birds completely.
2. Mix the Italian bread crumbs and parmesan cheese then liberally cover
the birds with this mixture.
Cooking Directions:
1. Get the grill up to 350* temp and place birds on a rack over a drip pan.
2. Cook for 1 hour and then kick up the temp to 400° for 10 minutes to
brown.
3. Let sit at room temperature for an hour or so, or cover and refrigerate
for several hours.
Peruvian Roasted Chicken
Ingredients: Serves: 4
2 ½ Tbs.
4 tsp.
4 Tbs.
2 ½ Tbs.
2 tsp.
3 Tbs.
garlic powder
ground cumin
white vinegar
paprika
black pepper
white wine
1 whole chicken
Directions:
1. In med. sized bowl, mix the first 6 ingredients.
2. Wash chickens thoroughly with lemon water and remove excess fat
from inside chickens.
3. With a large carving fork poke deep holes all over chicken, including
under wings.
4. Rub the marinade thoroughly inside and outside the chicken.
5. Seal chicken in a large plastic bag and marinate for at least 2 hours (but
preferably up to 24 hours) in refrigerator.
6. Remove chicken from bag. Use left over marinade for basting.
7. Place the chicken on a vertical roasting stand (or V-rack) over a drip
pan and roast at 350 degrees for 45 to 55 minutes.
96
Rubs & Marinades
Poultry
Lamb
Un-fried Chicken Newsense
After one taste, my kids asked if they could have this every night.
Ingredients:
1
4
3
4
½
1
1
1
Chicken, cut up (about 3.5 pounds)
Tbs. butter
cup buttermilk
cloves garlic, minced
cup parmesan cheese
tsp. basil
tsp. rosemary
tsp. parsley
1 tsp. thyme
1 tsp. lavendar
salt and pepper to taste
5 tsp. kosher salt
1 ½ cup prepared breadcrumbs
Prepared breadcrumbs
2 ½ tsp. black pepper
2 cup unseasoned croutons
Preparation Directions:
1. Preparation time: 45 minutes
2. Cooking time: 1 hour
For the Chicken:
1. Place the cut-up chicken (2 breasts, 2 thighs, 2 wings and 2 legs) in a
bowl and pour the buttermilk over it.
2. Let it stand a room temperature for 30 minutes.
3. Meanwhile, prepare the bread crumbs (see method below.)
4. Whisk together the bread crumbs, cheese, thyme, rosemary, salt and
pepper in a wide pan. Evenly coat the chicken with the bread crumbs
and place the pieces on a baking sheet.
5. Let the coated chicken stand for 15 minutes.
6. Meanwhile, heat up the grill.
For the bread crumbs:
1. Put the croutons in a food processor.
2. Put the butter, garlic and herbs in a small saucepan and heat over low
heat until the butter melts.
3. Put the butter mixture in the food processor with the croutons and
add the salt and pepper. Process until the croutons are reduced to a
wet and fine bread-crumb mixture.
Cooking Directions:
1. Heat the grill to 350-400 and put on a place-setter.
2. Put the pan with the chicken right on top of the place-setter and cook
for 1 hour or until the juices run clear.
3. Eat and enjoy.
Grills & Smokers
97
Rubs & Marinades
Poultry
Lamb
Rosemary Garlic Turkey
Ingredients:
Whole turkey
Tony’s Creole dry seasoning
2 cloves garlic
Directions
1. Wash turkey and pat dry.
2. Place one clove of garlic under the skin of the leg and one inside the
cavity of the turkey.
3. Oil the outside of the turkey, sprinkle with dry seasoning and place the
rosemary and dry thyme into the turkey.
4. Set your PRIMO at 275° and smoke the turkey on a V-rack.
5. Use meat thermometer. When it reads 180° it is done.
6. Let cool for at least 20 minutes before carving.
Honey Mustard Chicken Cathy Loup
When there’s no time to brine, this is our favorite way to do chicken on the ceramic cooker. Good
with smoke (I like pecan and/or cherry) or without.
Ingredients:
4 lb.
chicken, butterflied
3 Tbs. Dijon mustard
1 Tbs. honey
2 tsp. soy sauce
2 Tbs. olive oil
salt & pepper
Olive oil
Rosemary
Dry thyme
Preparation Directions:
1. Flatten the chicken out, skin side up. Whack it with your fist to crack
the breastbone (for easier carving). Fold the wing tips back and tuck
them under the chicken. Salt and pepper both sides.
2. Blend the mustard, honey, soy and oil. Brush generously on both sides.
Let sit at room temperature for an hour or so, or cover and refrigerate
for several hours.
Cooking Directions:
1. Roast over direct heat (no drip pan), at a grill temp. of 270 (about 300 dome).
2. Start skin side up; after 50-60 minutes, flip the skin side toward coals.
3. Roast another 30 minutes or so, until skin is golden brown and crispy
and the meat is done to your liking.
98
Lamb& Marinades
Rubs
Poultry
Goat Cheese-Stuffed Turkey
Burgers with Roasted Red
Pepper Relish FlaBQ
Ingredients
1
1 ⁄2 lbs. ground turkey
6 Tbs. fresh breadcrumbs
1 Tbs. fresh lemon juice
1 tsp. dried thyme
1 1/8 tsp. salt
1⁄2 tsp. ground black pepper
6 Tbs. soft fresh goat cheese
(such as Montrachet)
6 hamburger buns
3 Tbs. olive oil
4
7-ounce jars roasted sweet
red peppers rinsed, drained,
patted dry, chopped
1 1⁄2 cups chopped onions
3 tsp. finely chopped garlic
4 1⁄2 Tbs. cider vinegar
3 Tbs. sugar
1⁄4 tsp. dry mustard
1⁄4 tsp. cayenne pepper
Preparation:
For Burgers:
1. Combine turkey, bread crumbs, lemon juice, thyme, salt and pepper in
large bowl.
2. Mix well.
3. Divide turkey mixture into 6 equal portions.
4. Form 1 portion into two 4-inch diameter patties.
5. Place 1 tablespoon goat cheese atop 1 turkey patty; place second
patty atop cheese.
6. Seal patties at edges to enclose cheese.
7. Repeat with remaining 5 portions. (Can be prepared 4 hours ahead. Cover and refrigerate.)
For Relish: Makes about 2 cups.
1. Heat oil in heavy large skillet over medium-high heat.
2. Add red peppers and sauté 2 minutes.
3. Add onions and garlic.
4. Cook until onions are tender, stirring frequently, about 5 minutes.
a. Mix vinegar and sugar in small bowl until sugar dissolves.
b. Stir vinegar mixture into red peppers.
c. Mix in mustard and cayenne pepper.
5. Season with salt.
6. Continue cooking relish until all liquid has evaporated, stirring
frequently, about 6 minutes.
7. Cool to room temperature.
Can be prepared 1 day ahead. Cover and refrigerate. Bring to room temperature before using.
Grills & Smokers
99
Rubs & Marinades
Poultry
Lamb
Cooking
1.
2.
3.
4.
5.
Prepare the grill to 450*.
Grill burgers until cooked through, about 5 minutes per side.
Grill hamburger buns, cut side down, until lightly toasted.
Place turkey burgers on bottom half of buns.
Top burgers with Roasted Red Pepper Relish, then bun tops and serve.
Serves 6
Mouth Watering Chicken Wings
Ingredients
12-24 Chicken wings
1 stick of butter
4
1
large lemons
Bottle of Texas Pete’s hot sauce
Directions: Heat your PRIMO to 300°-325° F
1. Take the pieces of chicken wings and cut drum and wings in half at the
joint.
2. Clean chicken with water. Place cleaned chicken into large pot, cover
with cold water.
3. Take 4 large lemons, cut in half and squeeze juice into water with
chicken. Add squeezed lemon halves and let sit for 35 minutes.
4. Place wings on grill. Flip wings every 15 minutes for one hour or until
skin is crisp.
5. Take one stick of butter and one bottle of Texas Pete’s hot sauce and
heat on stove to simmer.
6. Place wings and sauce in large bowl and mix.
Teryaki Chicken
Ingredients:
1 ½ Tbl.
½ tsp.
1 tsp.
soy sauce
sesame oil
ground ginger
1
1
2
Directions:
Tbl. honey
garlic glove, crushed
chicken breasts
1. In a shallow bowl, combine the soy sauce, honey, ginger, oil and garlic
and stir to blend.
2. Add the chicken, toss to coat completely, and let stand to marinate.
3. Start your PRIMO and set the temperature at 300°F. Grill the chicken
breasts for 30-40 minutes or until are done. Turn the chicken once
while cooking.
100
Lamb& Marinades
Rubs
Poultry
Butterflied
Turkey w/ Mushroom Stuffing
Cathy Loup , adapted from Richard Olney
Stuffing the bird under the skin adds great flavor & helps it brown.
Ingredients:
1 turkey (12-15 lbs.) with no rips or tears in the skin, brined overnight*
6 oz.
sweet butter
2 lb.
fresh white mushrooms, minced (by hand, or pulsed in processor)
2 oz. dried porcini mushrooms (optional), soaked in warm water until soft
lemon juice & grated nutmeg to taste (optional)
salt & pepper to taste
1 large onion, minced
1 lb.
fresh ricotta cheese
½ cup freshly grated Parmesan cheese
¼ cup heavy cream (approximate)
½ cup dried bread crumbs (approximate)
thyme or other fresh herbs, minced (optional)
olive oil
Preparation Directions:
Make stuffing:
1. Melt 4 oz. butter in large skillet
2. Sauté mushrooms over high heat until they give up their liquid & cook
dry.
3. Add optional porcini - drained, squeezed dry, & minced - when
mushrooms start to brown.
4. Season with salt & pepper plus a squeeze of lemon & a bit of nutmeg if
desired.
5. Cool & chill. Can be made ahead & frozen.
6. Melt the remaining 2 oz. butter and sauté onion slowly until golden.
Salt & pepper. Cool and chill.
7. In large bowl, blend mushrooms, onions & ricotta well. Add enough
parmesan to bring to a firm consistency.
8. Add a little heavy cream & a handful or two of bread crumbs to help
bind stuffing.
9. Add herbs, salt & pepper to taste.
10.Chill very well.**
Turkey:
1. Rinse & dry the turkey well. With a sharp knife or poultry shears, cut it
down the backbone.
2. Spread it out, breast up, & whack it with the flat of your hand to flatten
it. I cut out the wishbone for easier carving later.
3. Loosen the skin from the flesh along legs, thighs & breast. This is easy
Grills & Smokers
101
Rubs & Marinades
Poultry
Lamb
4.
5.
6.
7.
to do if the skin is not torn. If you do tear it, it can be patched with
needle and thread.
Stuff the bird: use one hand to lift the skin and other to push handfuls
of stuffing underneath. Coat the legs & thighs well first, using your
clean hand to mold & force stuffing into place. Then coat the breast.
Fold the neck skin flap under the bird. Anchor by folding the wing tips
back & under.
Rub the exterior with olive oil, then season with salt & pepper.
The bird can be stuffed the night before cooking and refrigerated; the
meat picks up even more flavor this way.
Cooking Directions:
1. Roast over a water-filled drip pan at a dome temp of about 325. Smoke
is optional; I like apple & pecan. Figure roughly 15 minutes per pound
& take the bird off when the breast meat reaches 160 degrees.
2. Let it rest 30 minutes before carving. No gravy needed.
Special Instructions:
*Brine: 1 cup each kosher salt & sugar to 1 gallon water. Chill brine well
before adding turkey.
**Stuffing can be made several days ahead & refrigerated. I’ve even
frozen it for months with no significant loss in flavor; if you do this, add
some fresh herbs & a little lemon juice after it’s defrosted.
Duck
Ingredients:
1 whole duck
1 apple, chopped
Chinese barbeque sauce (red dry powder)
Directions:
1.
2.
3.
4.
Wash whole duck.
Chop 1 apple and place inside.
Rub outside of duck with Chinese barbecue sauce. (Red dry powder).
Place duck on grill and cook at 325° for 1 1/2 to 2 hours or until thickest
part of meat reaches 180° with meat thermometer.
102
Lamb& Marinades
Rubs
Poultry
Dead Simple Spatchcocked
Chicken The Naked Whiz
Time and temp suggested by BluesnBBQ - Thanks! Spatchcocking details from an article in the
Washington Post. Here’s a dead simple method of cooking whole chickens in less time than
cooking them whole, and less bother than cooking pieces. Spatchcocking is supposedly of 18thcentury Irish origin and means “to butterfly”. My English wife says she always used to go down
to Tesco’s (English supermarket) on Saturday afternoon to buy spatchcocked chickens half price.
She knew all about them!
Ingredients:
1 whole young chicken
2-3 Tbs. favorite rub (JJ’s is nice)
Preparation Directions:
Spatchcock the chicken:
1. With sharp kitchen or poultry shears, cut the backbone out of the
chicken by cutting along one side of the backbone, then along the
other.
2. Turn the chicken over and press down to flatten it. If you find that the
chicken doesn’t want to stay flat, you can use two skewers in an “X”
pattern to hold it flat.
Cooking Directions:
1. Place the chicken cut side down on the cooking grid and cook for
about 20 minutes at around 300F.
2. Turn it over for another 20-25 minutes at the same temperature level.
Final check should be done with a meat thermometer.
Special Instructions:
1. You can add your favorite rub before placing the chicken on the grill.
2. You can also add your favorite sauce 10 minutes from the finish.
3. Smoking is optional. I used BBQr’s Delight Orange smoking pellets for
the entire cook.
Grills & Smokers
103
Rubs & Marinades
Poultry
Lamb
Whole Roaster Chicken Sprinter
I cooked a 6 pound whole roaster, the first time in a long time as the wife is not too crazy about
chicken cooked this way. I promised her it would turn out good and that it would be done all the
way through and not raw, she gave me the go ahead. Bird was moist, tender, and VERY flavorful
and even the wife had great things to say about it. Kids both had seconds as well and we have
some leftover for sammiches. Pretty simple but I often find that simple is better.
Ingredients:
1 6 lb. whole roaster
½ cup Emeril’s Rustic rub (see rub section)
Garlic flavored olive oil (can use oil from the tomatoes)
12 oil packed sun dried tomatoes
Directions:
Day ahead
1. Mix ¼ cup of the rub with enough water and oil to make a nice paste.
2. Rub the underskin portion of the chicken with the paste. Lifted as
much of the skin as possible and get it all over and inside the cavity
well.
3. Insert about a dozen or so large sun dried tomatoes packed in garlic oil
(made these earlier this year from the garden). (The oil I mixed the rub with was from this sun dried tomato
bottle and was VERY flavorful, garlic and tomato flavor was great.)
4. Rub down the outside of the skin with the oil and then applied some
more dry rub to the whole thing.
5. Take more rub and add water to make a liquid solution out of it and
inject the whole bird with it. (I make this somewhat thin as too much spice in this and you really
get a concentrated spice bite of meat, then some with none. I like to make the injector marinade 6). Place in
the fridge for 24-30 hours.
Day of the cook
1. Cooking is simple. Get the grill to about 350.
2. Place some fire bricks on the grill and set a pie plate on those. Then set
a vertical chicken sitter in that with some water in the pie place and in
the pan of the chicken sitter (if the sitter has a pan).
3. Cook for about 2 hours at 325-350 with some orange or pecan wood.
4. Let it rest for 10-15 minutes and then carve.
104
Lamb& Marinades
Rubs
Poultry
Brant’s
Brined Beer-Butt Bird
Brant Warren
An incredibly moist and delicious variation of beer-butt chicken. This recipe also works well with
turkey.
Ingredients:
1 roaster chicken
Brine
2 qrt. water
½ cup salt
½ cup honey
¼ cup red wine vinegar
2 tsp. ground cinnamon
3 or so whole bay leaves
Dry Rub
Equal parts paprika and dark
brown sugar
Mix in whole basil to taste
Add a little cayenne pepper
Beer-Butt Mixture
Mostly beer
Some red wine vinegar
Even less Worcestershire sauce
Directions:
Brine
Leave chicken in refrigerator while preparing the brine mixture.
Combine brine ingredients and bring to a boil over high heat.
Remove from heat and stir down any foam.
Chill the mixture (warm water may spoil the chicken???).
Clear chicken cavity and wash.
Place chicken in brine mixture, breasts facing down.
Add water to cover the chicken and stir.
Cover and refrigerate for 12 hours.
Marinade
1. Discard brine mixture.
2. Rinse chicken thoroughly and pat dry with paper towel.
3. Apply dry rub between skin and meat by starting at the bottom of the
front of the chicken, the skin can by gently separated from the breasts.
Try not to tear the skin.
4. For a prettier finished chicken, wipe off any dry rub on the outside of
the skin, and lightly rub the skin with butter.
5. Wrap tightly in plastic wrap, place in a plastic bag, and refrigerate for
24 hours.
Cooking
1. Bring grill to 275 degrees.
2. In a chicken sitter, combine the beer-butt mixture ingredients. Do not
overfill.
3. Set sitter on a drip pan, and set the chicken on the sitter.
4. Using a Polder in the thigh, cook at 250 - 275 degrees until 180 degrees
internal. The breast should be about 170 when the thigh hits 180.
1.
2.
3.
4.
5.
6.
7.
8.
Grills & Smokers
105
Rubs & Marinades
Poultry
Lamb
Mexican
Chicken Lasagna
El Paso Chile Co. Cookbook
Ingredients:
6
8
long green chiles
cup (approx) smoked chicken,
chopped
3 tbs. olive oil
2 cup corn oil
3 cup chopped onion
24 6” corn tortillas
3 garlic cloves, peeled & minced
2 tsp. ground cumin
2
2
2
1½
4
tsp. salt
cup tomato-based salsa
cup chicken broth
tsp. oregano, crumbled
cup grated cheese
(combo of mexican cheeses is good)
16 oz.
sour cream,
whisked until smooth
Preparation:
1. Roast, peel, and coarsely chop peppers (should be about 1 cup).
2. Warm the olive oil over low heat. Add onions, garlic, cumin and
oregano. Cook covered, stirring once or twice, for about 15 minutes.
3. Stir in chicken broth, salsa, green chiles and salt. Raise heat. Bring
mixture to a boil, lower heat slightly, then cook briskly for about 20
minutes uncovered.
4. Let sauce cool to room temperature. Reserve two cups and combine
the rest with the chicken.
5. Warm about 1” of corn oil in a deep skillet over medium heat. Using
tongs, immerse the tortillas one at a time in the oil then transfer to
absorbent paper. The tortillas should only be in the oil a few seconds
each. The oil should be hot enough to soften the tortillas, but not hot
enough to brown or crisp them.
6. Arrange 8 of the tortillas overlapping in the bottom of a 10x14 pan.
Spread half the chicken over the tortillas.
7. Arrange 8 more tortillas over the chicken. Sprinkle half the cheese over
the tortillas and cover with remaining chicken mixture.
8. Arrange the final 8 tortillas on top of the chicken mixture. Cover with
the reserved sauce. Sprinkle remaining cheese over the sauce.
9. Spread the sour cream on top of the cheese. Bake about 45 minutes
at 350F or until the dish is bubbling, crisp around the edges and the
topping is set.
106
Lamb& Marinades
Rubs
Poultry
Outrageously Good Duck Gail
Last night I cooked duck. It was a late dinner, but unbelievable according to my better half and
others. I used a concoction of my own and you really need to try it. It looks long, but it only takes
a moment to squeeze the limes and orange directly into the duck. Very quick to prepare.
Ingredients:
1
1
2
1
½
5 lb. duck, washed and dried inside and out
orange (juiced - valencia worked fine)
limes
piece ginger about the size of a thumb
tsp salt
Directions:
1. Lightly salt the inside of the duck
2. Peel the ginger and cut two small 1 inch thin slices off and stick one
piece in between each breast and the breast skin. You can find a way to
do this near the neck area, just go slow so you don’t make a hole in the
skin.
3. Slice the remaining ginger in thin slices and place two or three pieces
in the cavity.
4. Cut the orange in two and squeeze the juice from both halves inside
the cavity, rub the outside of the duck with the cut side of the orange
just to give it some more flavor and then stick ½ of the already
squeezed orange inside the duck.
5. Do the same with the limes, but no need to rub the duck with it.
* You will have to tilt the duck up a little to keep the juice inside while you are doing the rest of
this operation ...
6. Tie the legs together with wire or other non flammable stuff--I wired
together two paper clips and it did the job.
7. Take the remaining ginger, peel and boil it in about ½ cup water and
put in the bottom of the drip pan.
8. Put the duck on the v-rack in the drip pan, lightly salt the outside and
cook at 400 degrees for 2 hours. (None of the juice came out because the legs were tied pretty
closely.)
9. When done, let sit with aluminum foil over it for about 5 minutes.
10. Carve and spoon some of the juice over each serving.
SERVES 3 if you aren’t very hungry, otherwise, you need two ducks for 4 people, even though
they look big when raw.
Grills & Smokers
107
Rubs & Marinades
Poultry
Lamb
Beer Can Chicken
Ingredients
1
2
1
whole chicken
Tbs. dry Creole seasoning
can beer
Directions
1. Rinse the chicken inside and out under cold running water.
2. Sprinkle 1 tablespoon of seasoning inside the body and another
tablespoon at the outside of the bird.
3. Prepare the PRIMO at 325°. Pop the tab on the beer can.
4. Using a “church key”- style can opener, make 6-7 holes in the top of the
can.
5. Pour out the top inch of the beer, and then spoon the remaining dry
seasoning through the holes into the beer.
6. Holding the chicken upright, with the opening of the body cavity
down, insert the beer can into the cavity.
7. Place the chicken on the grill by standing the chicken up in the center
of the grate.
8. Spread out the legs to form a sort of tripod, to support the bird.
9. Cook it at 325° for 1 hour and 15 minutes.
Chicken Lemon-Honey
Ingredients
4
3
1
boneless chicken breast
Tbl. fresh lemon juice
Tbl. honey
1 tsp.
1/4 tsp.
1 Tbl.
Directions
soy sauce
ground ginger
oil
1. In a shallow bowl, combine the lemon juice, honey, oil, soy sauce and
ginger.
2. Add the chicken breasts, turn to coat and let stand for at least 30
minutes.
3. Grill chicken at 300°F for 10-15 minutes per side or until done.
108
Lamb& Marinades
Rubs
Poultry
Orange Roast Duck
Ingredients:
1 cup fresh orange juice
1/4 cup orange marmalade.
1 bone-in whole duck breast
½ cup
1 Tbs.
½ tsp.
dry white vermouth
chopped fresh thyme
salt
Directions:
1. In a bowl whisk together the orange juice, orange marmalade, salt and
thyme.
2. Score the duck skin with several crisscross cuts about 1/4 inch deep.
3. Marinate the duck for at least 1 hour. Grill at 325°F for 20-30 minutes.
4. Occasionally brush with the reserved marinade. For well done add few
more minutes.
Spiced Grilled Turkey
Ingredients
1
1
4
½
1
3
Turkey
2 cups fresh lime juice
cup water
Salt and ground black pepper
cloves garlic, minced
1 Tbs. annatto seeds
tsp. ground cumin
1 bunch fresh marjoram
Tbs. olive oil
Cascabel chiles or 2 small dried red peppers
Directions
1. Rinse the turkey inside and out with running water.
2. Season the turkey inside and out with salt and pepper, cover and
refrigerate.
3. Combine the cascabel chilies, annatto seeds, and water in a small
saucepan and bring to a boil over a medium- high heat. Cook until the
chilies have softened and all liquid has been absorbed. (5-10 minutes)
4. Blend the chilies and annatto seeds with the marjoram, orange juice,
limejuice, garlic, cumin, 1-teaspoon salt and 1/4-teaspoon pepper.
Process until smooth. Pour the mixture into a strainer and press it with
a spoon. Taste for seasoning, adding salt and pepper as necessary.
5. Spoon a few tablespoons of the marinade into the body cavity of the
turkey. Brush the outside of the bird with additional marinade, and a
little oil.
6. Let marinate in the refrigerator for 4 hours.
7. Adjust your PRIMO at 300° and cook the turkey for about 3 hours. The
estimated time is 12-15 minutes per pound.
Grills & Smokers
109
Rubs & Marinades
Poultry
Lamb
Italian Chicken
Ingredients
6-8 chicken breasts
1 ½ tsp. garlic
1 tsp. lemon-garlic seasoning
½ Tbs.
1 cup
oregano
Italian salad dressing
Directions
1. Marinate chicken with salad dressing for 30 minutes.
2. Remove and sprinkle with seasonings.
3. Place it on the PRIMO at 300° for 30-40 minutes. * Turn once.
Olive Garden Chicken Spiedies
Ingredients:
Marinade:
1/4 cup
1/4 cup
2 tsp.
1 tsp
1 tsp.
1 ½ lbs.
olive oil
½ tsp. dried oregano
red wine vinegar
½ tsp. dried tarragon
sugar
½ tsp. pepper
garlic minced
½ tsp. salt
Dijon mustard
chicken breast, boned, skinned, and cut in 1” squares
This marinade can also be used for the original lamb spiedies, or beef or pork and also venison.
Directions:
1. Cut the chicken into 1 inch pieces, marinade in glass dish for 2 hours in
refrigerator.
2. Assemble with alternating red pepper, onion and chicken or just use
plain chicken on skewers (if using wood skewers, presoak in water).
3. Grill, (350F for 15-20 minutes) turning frequently until done. Don’t
overcook.
110
Rubs & Marinades
Veggies
Lamb
/ Fruits
Veggies
/ Fruits
Grills & Smokers
111
Rubs
Veggies
& Marinades
/ Lamb
Fruits
The Great Pumpkin RhumAndJerk
This recipe is loosely based upon a recipe that I found in a Native American cookbook. Pumpkin
was a staple of both Colonial America and Native Americans. In my house, we have been eating
pumpkin for some years, as it is very flavorful. This recipe is fun to make and has a great presentation. It is also a lot of work but relax and enjoy. You can also be creative as to what you put
in the stuffing so substitute as needed. The original recipe called for ground buffalo or ground
venison mixed with Italian sausage. One final note: it is actually my wife that gave me the idea
to cook this.
Ingredients:
1 Pie Pumpkin, about 4-5 lb.
1 cup Long-Grain Rice
1 cup Wild Rice
1.5 pounds Bulk Country Sausage
1 can low sodium Chicken Broth
(approx. 1 ¾ cup)
1 medium Yellow Onion
peeled and sliced
1 Leek, sliced in half, rinsed and sliced
1 clove Garlic, crushed
2 tbsp Butter
6 Mushrooms, medium-sized,
cleaned and sliced
2 Apples, medium-sized
peeled and chopped
1 tsp Fresh Thyme
1 tsp Fresh Thyme
1 tsp Sage
¼ cup Bourbon
¼ cup Raisins
¼ cup Golden Raisins
¼ cup Dried Currents
¼ cup Dried Cranberries
Salt and pepper, to taste
2 Eggs, lightly beaten
¼ cup fresh Parsley, chopped
3 Green Onions, chopped
¼ pound Tasso Ham, diced
Preparation:
1. Cook the Long-Grain Rice as you normally would.
2. Rinse the Wild Rice with cold water. Bring the chicken broth and wild
rice to a boil in a saucepan. Cover and simmer for about 45 minutes,
stirring occasionally. Start checking after 35 minutes for doneness. It is
ok if it is a little under done and all of the liquid is not absorbed.
3. Brown the sausage in a skillet and drain most of the grease.
4. Wash off the outside of the pumpkin. Clean the pumpkin like you
would for a Jack-O-Lantern. Save the top and the seeds.
5. With a fork pierce the inside of the pumpkin being careful not to break
the skin. Sprinkle the inside of the pumpkin with salt and pepper.
6. In a skillet, sauté the onion, leek and garlic in the butter for a couple of
minutes
7. Add the Mushrooms and Green Onions to the skillet and continue to
sauté for a couple of minutes more.
8. Add the Apples, Sausage and Ham to the skillet. Continue cooking
until all is heated.
112
Rubs & Marinades
Veggies
Lamb
/ Fruits
9. Remove from heat.
10. In a large bowl, combine the rice, wild rice, the mixture from the skillet
and the rest of the ingredients (except eggs)
11.Mix in the beaten eggs.
12.Fill the pumpkin with the stuffing and put the top back on.
Cooking Instructions:
1. Place the stuffed pumpkin in shallow baking dish or pie plate.
2. Cook on a Primo, over indirect heat at 350 for about 1.5 to 2.5 hours.
3. The pumpkin will tell you when it is done. When you touch the outside
of the pumpkin, it should feel soft.
4. Make sure that the stuffing reaches 180 degrees just to be on the safe
side.
5. Let the pumpkin rest for 15 minutes after cooking. This is important to
allow the juices to be absorbed back into the stuffing.
6. You can serve the pumpkin two ways, you can slice it or you can scoop
out the contents making sure to include some of the pumpkin meat
with stuffing.
Special Notes:
1.
2.
3.
4.
5.
6.
7.
8.
9.
The White Rice can be made the day before.
I browned the Sausage the day before.
I used a mixture of Apples: one Gala, ½ Granny Smith, ½ Cortland.
I used a mixture of Mushroom: ½ button, ½ Cremini. You could use
whichever kind you would like. Wild Mushrooms would be appropriate.
You can experiment with the type of Sausage and Ham.
To make this a vegetarian meal, just leave out the meat and add more
mushrooms.
Save the Pumpkin Seeds for the children to clean and roast.
Place any extra stuffing in a covered baking dish and bake at 350 for
about an hour.
If baking the pumpkin in a conventional oven, place the pumpkin in a
shallow baking dish with some water in it to maintain moisture.
Asparagus
Directions:
1. Make a tray out of aluminum foil and put asparagus in it.
2. Flavor them with olive oil, lemon, salt and pepper.
3. Cook in the Primo for 20 minutes at 300 degrees. Perfect.
Grills & Smokers
113
Rubs
Veggies
& Marinades
/ Lamb
Fruits
Eggplant & Pepper Salsa
Wow!!! The wife proclaimed this stuff the most delicious thing she’s put in her mouth. YOU MUST
TRY IT!! (I strongly dislike eggplant, but off the ceramic cooker in this salsa, it’s great.) I got this
from the food network’s web site (Bobby Flay cooked this on the first episode of grillin’ & chillin’)
OK, credit has been given:
Ingredients:
2 eggplants, cut vertically into 1/2-inch thick slices
2 red peppers, quartered and seeded
2 yellow peppers quartered and seeded
2 red onions, sliced 1/2-inch thick
6 Tbs. olive oil
2 cloves garlic, finely chopped
2 Tbs. lemon juice
4 oz. soft goat cheese, crumbled
2 Tbs. oregano finely chopped
Salt
freshly ground pepper
Directions:
1. Cook at a 350˚ dome temp with no smoke.
2. OH, I cooked the peppers whole -- I carved them up after they were
cooked. They were so juicy! I will start doing this on a regular basis.
3. Brush eggplant, peppers and onions on both sides with 1/4 cup of the
oil and season with salt and pepper to taste. [I sprayed with Pam Olive
oil and didn’t even use salt and pepper -- I relied on the lump for the
flavor. A good decision I think]
4. Grill for 5 to 8 minutes on each side, until lightly golden brown and
almost cooked through. Remove vegetables from grill and cut into 1/2inch dice. Combine eggplant, peppers and onions in a medium bowl.
Add remaining ingredients including the remaining 2 tablespoons of
olive oil and season with salt and pepper, to taste.
Grilled Portobello Mushrooms
Ingredients:
1/4 cup olive oil
4 tsp. balsamic vinegar
1/8 tsp. salt
1/8 tsp. pepper
Leaves from one sprig rosemary
4 large portobello mushrooms
114
Rubs & Marinades
Veggies
Lamb
/ Fruits
Directions:
1. Mix first 5 ingredients well and pour over mushrooms
2. Marinate for 1 hour
3. Grill them at 350-400 degrees until nicely grillmarked and tender
Grilled Portobello Sandwich
With Goat Cheese And Green Sauce
Treat’em like hamburgers and pop’em into toasted rolls. They are so good, you might like’em
yourself.
Ingredients:
4 portobello mushrooms
2 Tbs. olive oil
8 oz. goat cheese, sliced
(quarter of an inch or a little more per slice)
Green Sauce:
1/4 cup baby spinach
1 tsp
capers
(I usually leave out the spinach leaves and just make it all basil, or even parsely)
1/4 cup basil leaves
1 tsp
tarragon
1 tsp balsamic vinegar
2 cloves roasted garlic
(industrial grade is fine)
2 Tbs. extra virgin olive oil
Directions
1.
2.
3.
4.
5.
Puree the green sauce ingredients in a blender.
Rub mushrooms with oil and season with salt and pepper.
Set the grill to 400.
Grill rib side down first for four minutes.
Turn over and spoon green sauce over portobello - a neat, generous
puddle in the middle.
6. Add slices of goat cheese.
7. Touch with just a bit more of the green sauce.
8. After four minutes check to see how done they are.
9. Remove from grill and allow to cool slightly.
10. Place on a toasted kaiser roll and enjoy.
Grills & Smokers
115
Rubs
Veggies
& Marinades
/ Lamb
Fruits
Peach Salsa
Ingredients:
1 cup
1 cup
1 Tbs.
1/2 tsp.
chopped tomato (I used canned, but would be better with fresh roma)
chopped peaches
1/2 tsp. sugar
cilantro
1/2 lime, juiced
cumin
several shakes of Tabasco
Directions:
Let sit for at least an hour.
Simple Peach Salsa
Makes about 3 cups. Great on fish (tuna, swordfish steaks). If you don’t have peaches, you can
substitute a number of other yellow-orange fruits, including mangoes, pineapples, and papaya.
Ingredients:
2 ripe but not mushy peaches, pitted and chopped coarse
1 small red bell pepper, cored, seeded, and sliced thin
1 small red onion, cut into long, thin slices
1 cup chopped fresh parsley leaves
1 medium clove garlic, minced
1 cup pineapple juice
6 Tbs. juice from 3 medium limes
1 jalapeño or other medium hot chile pepper, minced
1/4 tsp. salt
1/4 tsp. ground black pepper
Preparation
1. Mix all ingredients, including salt and pepper to taste, in medium bowl.
2. Cover and refrigerate to blend flavors, at least 1 hour or up to 4 days.
Baba Ghanoush Roasted Eggplant Dip
Ingredients:
tahini (sesame seed paste)
garlic
lemon juice
salt
roasted eggplant
Directions:
116
Rubs & Marinades
Veggies
Lamb
/ Fruits
1. Puree in a food processor
2. Garnish with a bit of olive oil, chopped parsley, and if you like with a
few olives.
3. Serve with warm pita bread!
Potato Wedges Spin
A very adaptable recipe. The spices and cheeses can be changed to suit the main meal. We like
them served as is or with a light smattering of sour cream. Serves 4.
Ingredients:
4 red potatoes
4 tsp
butter
6 Tbs. Olive oil
dash salt
pinch cracked pepper
2 oz.
mozzarella cheese finely grated)
pinch Emeril’s Essence spice mixture (recipe available at foodtv.com)
Preparation Directions:
1. Clean and cut potatoes into 6 wedges each.
2. Add olive oil to a glass baking pan or pie pan.
3. Coat one side of each wedge by setting it in the oil and then place
them (coated side up) in the pan.
4. Lightly salt, pepper, and sprinkle with essence. Place the butter evenly
dispersed on top of the wedges.
Cooking Directions:
1. Cook at 325F for 20 minutes. Remove from grill and flip each wedge.
2. Add equal amounts of the cheese on top of each wedge. Return to
grill.
3. Cook for another 20 minutes or until cheese is bubbly and browning.
Special Instructions:
1. To prepare as an appetizer, omit the cheese and cook at 375F.
2. This will produce a french fry crust to the wedge.
3. For a spicier wedge add another pinch of essence when the wedges
are turned.
Grills & Smokers
117
Rubs
Veggies
& Marinades
/ Lamb
Fruits
Jalepeño Corn Casserole Marti Slotterback
This can be prepared both on the ceramic cooker or in a conventional oven. Enjoy!
Ingredients:
1 16 oz
1 16 oz
½ cup
1 clove
chopped
can whole kernel corn
¾ cup yellow corn meal (plain)
can creamed corn
1 egg
sugar
1 small chopped onion
minced garlic
1 stick melted REAL butter (salted)
jalapeño to taste ( Either fresh on in the jar will work...fresh will make it hotter.)
Directions:
Mix it all up...pour in casserole...350 degrees for 45 min.
Firecrackers
Ingredients:
6
4
jalapenos
oz
cream cheese
6 slices lean bacon
6 1/2” cubes of chicken, ham or shrimp
Directions:
1. Slice lengthwise several large jalapenos in half, dig out the seeds.
2. Coat both halves with a healthy dollop of cream cheese on the inside.
3. Place a cube or chunk of chicken breast (or small shrimp) between the
pepper halves sandwich style, small enough so that the peppers cover the meat.•
4. Wrap the pepper sandwich with a slice of bacon. Line ‘em up on a
skewer and grill ‘em over your favorite smoke for 10 to 15 minutes.
Mango Chutney Palisin
Great with Swordfish!
Ingredients:
1 unripe mango
1/4 cup cilantro
3 plum tomatoes
1 jalapeno
1 Tbs. chipotle pepper flakes
1
1/2
1
1
1
Directions:
red cherry Pepper
green pepper
lime (juiced)
tsp
kosher salt
Tbs. olive oil
Chop & mix all ingredients. Use to top steaks or any seafood. Also
good for salsa and chips.
118
Rubs & Marinades
Veggies
Lamb
/ Fruits
Grilled Grits Julie Appledog
Inspired by Steve Raichlen in his The BARBEQUE! Bible
Grits for 6, grilled direct.
Ingredients:
1 package grits or polenta, NOT instant
1-2 clove garlic, minced
1 tsp. Mrs. Dog’s or your favorite hot sauce
½-¾ cup grated cheese.
Gruyere or cheddar. Again, your choice
1/3
1
½
1
cup
can
tsp.
tsp.
butter, melted
chicken broth + water
fresh ground pepper
seasoned salt, your choice
Preparation Directions:
Butter a non-stick round pan. I use a cake pan or a straight-sided
skillet.
Cooking Directions:
1. Grits vary from brand to brand. Cook enough for 4 servings using
chicken broth and/or water in the amount specified, plus the garlic, hot
sauce, salt and pepper. When the grits are cooked, stir in the cheese
until it’s melted. Adjust seasonings to taste.
2. Spread mixture evenly into greased pan and chill until firm. This can be
done up to 2 days in advance.
3. When grill is ready, cut grits into wedges and put on a plate. Brush
with melted butter and grill until browned, about 3-4 minutes per side,
brushing with remaining butter while they cook.
Special Instructions:
If I’m in a hurry I will float the cake pan in ice water to set up the grits.
Portobello Mushroom
Ingredients:
4 large portobello mushrooms
3 crushed cloves garlic
2 tablespoons balsamic vinegar
salt, pepper
oregano
4 Tbs. olive oil
Directions:
1. In a platter mix the olive oil, the garlic, salt pepper, balsamic vinegar
and oregano.
2. Grill the portobello mushrooms at 300°F for 10 minutes.
3. Take them out of the Primo, and place into the platter with the olive oil
mix.
4. Cut the portobello in pieces and mix them well.
Grills & Smokers
119
Rubs
Veggies
& Marinades
/ Lamb
Fruits
Quick Grilled Garlic Grits Janet
Saw a similar recipe in Cooking Light magazine (a good complement to Cooking Heavy magazine). Give these a try as a side dish - turned out well last night:
Ingredients:
3/4 cup instant grits
1/2-1 cup grated cheddar cheese
1 tsp. garlic powder (or a few cloves of fresh garlic)
4 slices bacon
Directions:
1.
2.
3.
4.
5.
6.
7.
8.
Fry bacon well done. Allow to cool and crumble finely.
Make 4 servings of quick-cooking grits according to package
To hot grits add grated cheddar cheese, garlic and crumbled bacon.
Poor mixture in 11x9-inch well-greased pan (or equivalent).
Let firm in fridge for a couple of hours.
Prepare Primo to 300-350.
Oil grill topper well and preheat.
Cut grits into squares and put onto topper. Cook 5 or so minutes on
each side. They should should brown nicely.
Baked
Beans on Ceramic Cooker
Gretl
The walrus’ modification for the ceramic cooker from Dorothy Thomas’ recipe
Ingredients:
2
9
½
2
1
cup
cup
cup
Tbs.
Tbs.
dry beans (dried little white pea (or navy) beans)
water
¼ cup onion, chopped
molasses
2 Tbs. dry mustard (optional)
brown sugar
½ tsp. baking soda
vinegar
Directions:
1. Soak beans in 4 cups of water with ½ teaspoon of soda overnight.
2. Drain, put back in pot with 5 cups of water and cook until tender (about
one hour).
3. Drain and save cooking liquid.
4. Put beans in a cast iron Dutch oven and add the molasses, brown
sugar, vinegar, and dry mustard.
5. Pour all the cooking liquid over the beans.
120
Rubs & Marinades
Veggies
Lamb
/ Fruits
Baking:
1. Place Dutch oven uncovered in the grill.
2. Use your favorite wood for smoking.
3. Keep the temperature between 150 and 200 for about 1 hour, less time
for less smoke flavor. (If not using wood smoke, start baking at 300 degrees for a total of 3 and ½
hours.)
4. After smoking, bring the temperature to 300 degrees gradually.
5. Cook for approximately 3 1/2 hours at 300 degrees, stir hourly
6. Remove the Dutch oven from the grill when the beans are about the
consistency of a thick stew.
7. Cover the Dutch oven and let the beans rest. The rest of the liquid will
be absorbed by the beans.
Red-Potato Salad with Tomato
and Pickle Sippi - Ken Haedrich
Old Bay Potato Salad. In the August issue of Bon Appetit there is an article about the history
of Old Bay Seasoning. Among the recipes printed in the article was one for potato salad which I
thought made a really good side for the PP which we had for lunch today.
Ingredients:
2
3
3
1
1
lbs.
medium-sized red-skinned potatoes
unpeeled, cut into 1/2 pieces
3 Tbs. chopped fresh parsley
Tbs. red wine vinegar
1 large dill pickle, chopped (about 3/4 cup)
Tbs. olive oil
2 ½ tsp. Old Bay Seasoning
cup chopped onion
2 garlic cloves, minced
large tomato, seeded, diced (about 3/4 cup)
Directions:
1. Steam potatoes until just tender, about 12 minutes.
2. Transfer to large bowl.
3. Cool potatoes slightly.
4. Drizzle with vinegar, toss to coat.
5. Heat oil in heavy medium skillet over medium low heat.
6. Add onion: saute until begining to soften, about 2 minutes.
7. Stir in garlic and Old Bay Seasoning; saute 1 minute.
8. Remove from heat, cool to room temperature.
9. Add onion mixture to potatoes.
10.Add remaining ingredients.
11.Toss gently to combine.
12.Season with salt and pepper.
Grills & Smokers
121
Rubs
Veggies
& Marinades
/ Lamb
Fruits
Grilled Veggies
Ingredients:
eggplant
olive oil
onion
zucchini
oregano
Tony’s
Directions:
1. Peel and clean onion, cut cross wise.
2. Wash thoroughly the zucchini, squash and eggplant, and cut off ends
and leave skin on.
3. Cut 1/4” lengthwise lay flat on dish, pat dry and sprinkle each side with
a little Tony’s and dried oregano.
4. Put in a large ziploc bag with extra virgin oil in bag just enough for a
light coating.
5. Seal bag, turn it around, and let marinate for 1-2 hrs.
6. Place veggies in foil, cover with more foil and seal edges tightly.
7. Place on the grill at 325° and cook for 10 minutes.
Grilled Veggies 2
Ingredients:
1
1
lb.
fresh okra
Tbs. sesame oil
Yellow squash
salt and freshly ground black pepper
Directions:
1.
2.
3.
4.
5.
6.
Trim the tips off the stems of the okra;
Do not cut into the pods.
Lay 5-6 okra side by side in a neat row at the edge of a cutting board.
Stick a skewer through each end of each piece.
Lightly brush both sides with sesame oil and season with salt & pepper.
Grill them on the Primo at 350° for 4-5 minutes per side.
122
Lamb& Marinades
Rubs
Veggies
/ Fruits
Baked Bananas Balinese Christina Hurn
Bananas halves spread with mixture of coconut, butter, brown sugar, nuts and brandy. Then, grill
to perfection and topped w/ ice cream and whipped cream.
Ingredients:
½ cup butter (room temp; not melted)
1 tsp. Vanilla Extract
¾ cup Brown Sugar, firmly packed
¾ cup Coconut (sweetened, flaked)
1 tsp. Cinnamon
1 qt.
Vanilla Ice cream
½ cup Walnuts or Pecans, finely chopped (pieces size of small pea)
1-2 Tbs. Liqueur of Choice (brandy or rum seems best)
1 cup Heavy Whipping Cream, whipped and chilled
8 Bananas, large and Yellow, with a little green on skins
Preparation Directions:
1. Put grid in the grill.
2. While Charcoal is ramping up to 350 F temp, stir together butter,
brown sugar, walnuts, coconut, vanilla, liqueur, and cinnamon in
medium mixing bowl until well-combined. Note: this topping may be
made up to 2 days ahead, covered and refrigerated.
3. Cut stem ends off bananas. Carefully cut bananas into even halves
lengthwise. Do not peel them.
4. Place cut bananas on baking sheet, skin side down.
Cooking Directions:
1. Spread topping on banana halves, allowing about 2 Tablespoons per
banana half.
2. When bananas have been topped and grill is at 350 F, place halves on
grid, skin side down, leaving ½ inch space around each.
3. Close lid. Top vent should be quarter way open. Bottom vent open
about ¼ to ½ inch. Temp is forgiving with this recipe but should keep
a range between the 325-350. Cook 17-20 minutes. Finished bananas
will pull slightly away from sides of skins and coconut will be slightly
crispy. Skins will be dark brown. Do not let coconut blacken. A little
charring around edges is okay.
4. Remove bananas with long spatula.
5. Allowing 2 halves per serving, place on plate and top with scoop of
ice cream, dollop of whipped cream and an additional dusting of
cinnamon, if desired.
Special Instructions:
Before spreading topping mixture, if it seems loose,add more coconut.
Use firm bananas for best results.
Use of wood chips is not a good idea; heavy smoke taste to be avoided.
Grills & Smokers
123
Rubs
Veggies
& Marinades
/ Lamb
Fruits
Banana halves closest to edge of grid will cook a little faster.
Nuts must be finely chopped to spread properly.
Peach Cobbler Zip
Ingredients:
3/4 cup
1 cup
1 qt.
1 Tbs.
sugar
1 stick butter (use the real thing)
self-rising flour
1/2 cup milk
sliced fruit (sweetened with 1/3 cup sugar) Use no sugar if using canned fruit.
cinnamon-sugar
Directions:
1. Melt the butter in the pan you intend cook it in and set aside.
2. Mix flour, sugar and milk together, but don’t try to get all the lumps
out.
3. Pour into dish on top of butter.
4. Don’t stir it no matter what. It should look like batter with butter
surrounding all sides.
5. Add fruit to top and sprinkle with cinnamon sugar (Don’t feel obligated to use the
entire tablespoon. A light dusting is sufficient.) Once again, don’t stir it.
6. Using an indirect setup, bake at 350º for about 45 minutes until the top
is golden brown. I use the big cans (29oz) of sliced peaches in light syrup
or the Osage brand (I think) of freestone peaches.
This is only one of many versions of peach cobbler, however this is how my family has made it for
generations.
124
Lamb& Marinades
Rubs
Veggies
/ Fruits
ROASTED APPLES
Ingredients:
8 firm sweet apples
4 Tbs.
1/4 cup dark brown sugar
1/4 cup
1/4 cup graham-cracker crumbs 1/2 tsp.
1/4 tsp. grated nutmeg
1 tsp.
toasted bread crumbs, or ground almonds
unsalted butter
dried currants
ground cinnamon
vanilla extract
Directions:
1. Core the apples, using an apple corer or melon baller, but don’t cut
all the way through to the bottom. You want to create a cavity for
stuffing.
2. Cream the butter and sugar in a medium-size bowl until light and
fluffy.
3. Beat in the currants, graham-cracker crumbs, cinnamon, nutmeg, and
vanilla.
4. Spoon this mixture into the apples.
5. Set the apples in a foil pan. Place the pan on the grill and cook at 250°
for 40-60 minutes.
The
Apple Lady’s Apple Cake
Wise One
Adapted from a recipe courtesy The Paris Cookbook - Patricia Wells
I saw this recipe on FoodTV one day and decided it would be good on the grill. It came from a
woman who sells apples in one of the Parisian fruit and vegetable markets. It is quite simple and
quite delicious. Serve with ice cream or my wife used a cinnamon yogurt mixture to spoon over
the top. This is a great thing to cook as you eat your main course.
Ingredients:
½ cup all-purpose flour
1/3 cup sugar
1 TBS baking powder
1/8 tsp fine sea salt
½ tsp pure vanilla extract
2 large eggs, lightly beaten
2 TBS vegetable oil
1/3 cup whole milk
4 baking apples (about 2 pounds total), cored, peeled, and cut into thin wedges
Topping:
1/3 cup sugar (turbinado sugar works well) 1 large egg, lightly beaten
3 TBS unsalted butter, melted
Directions:
1. Get the grill up to 400 degrees F.
2. Line a 10” cast iron frying pan with aluminum foil.
Grills & Smokers
125
Rubs
Veggies
& Marinades
/ Lamb
Fruits
3. Butter the foil lining liberally and set it aside.
4. In a large bowl, combine the flour, sugar, baking powder, and sea salt,
and stir to blend.
5. Add the vanilla extract, eggs, oil, and milk, and stir until well blended.
6. Add the apples and stir to thoroughly coat them with the batter. Spoon
the mixture into the prepared frying pan.
7. Place the pan on some firebricks or a pizza stone and cook until fairly
firm and golden, about 25 minutes.
8. Meanwhile, prepare the topping: In a small bowl, combine the sugar,
egg, and melted butter, and stir to blend.
9. Set it aside. Pour the topping mixture over the cake in the pan.
10.Continue cooking the cake until the top is a deep golden brown and
the cake feels quite firm when pressed with a fingertip, about 10
minutes.
11.Remove the pan from the grill and then lift out the cake by grabbing
the tinfoil and place on a rack and allow to cool for 10 minutes.
12.Then pull the tinfoil down by holding the cake edge with one hand
and pulling the tinfoil down around it. Serve at room temperature, cut
into small rectangles.
Lemon Garlic Roasted Potatoes
Ingredients:
3 lbs. small red potatoes
4 cloves garlic, coarsely chopped
1 tsp. dried oregano
3 lemons, cut in half
2 Tbs. chopped fresh dill
1/4 cup extra virgin olive oil
2 bay leaves
salt and pepper
2 Tbs. unsalted butter
Directions:
1. Scrub and cut the potatoes in half.
2. Place the potatoes in a roasting pan and toss with the oil, garlic, bay
leaves, oregano, salt and pepper.
3. Squeeze lemon juice over the potatoes, then place the rind halves on
top.
4. Heat your grill at 350° and set the roasting pan in the center of the grill.
5. Cook until the potatoes are tender and browned, (1 to 1 1/4 hours).
6. Stir from time to time and put the butter and dill the last 10 minutes of
cooking.
126
Lamb& Marinades
Rubs
Veggies
/ Fruits
Grilled Sweet Peppers
Ingredients:
4
3
3
large sweet peppers
cloves garlic
Tbs. chopped fresh parsley
salt
6-8 Tbs. olive oil
fresh ground pepper
Directions:
1. Cut the sweet peppers in half and remove all the seeds and
membranes.
2. Brush the peppers with a little olive oil and put them into the Primo for
3-4 minutes each side at 300°F.
3. Transfer peppers to a dish and sprinkle with the garlic, parsley, black
pepper and the remaining olive oil.
4. Let marinate about 15 minutes before serving.
Eggplant Salad
Ingredients:
4-6 slices eggplant
3 Tbs. olive oil
4 Tbs. chopped fresh parley
1/2 tsp. paprika
2 Tbs. fresh lemon juice
1/2
1/2
1
1/2
Directions:
tsp. salt
tsp. ground white pepper
clove garlic, minced
tsp. ground cumin
1. Slice the eggplants 1/2 inch thick, brush them with about 1/2
tablespoon of olive oil, and place them on the grill.
2. Set the temperature at 300°F and grill until charred and the flesh is
very soft. (About 7-10 minutes).
3. Transfer the eggplants to a cutting board to cool.
4. Scrape off the charred skin with a paring knife, and then finely chop
the flesh and transfer to a serving bowl.
5. Stir in the remaining oil, the parsley, 2 tablespoons lemon juice, garlic,
cumin, paprika, pepper, and 1/2 teaspoon salt.
Grills & Smokers
127
General
Greetings
Info.
All About Brining
Background
Brining is a centuries-old method used to preserve meat. Meat is soaked for many days in a very
strong saltwater solution with the addition of sugar, spices, and other ingredients. This curing
process binds or removes water from the meat so it’s not available for the growth of food-spoiling microorganisms.
With the advent of mechanical refrigeration, brining became less necessary for food safety, but
remained popular as a way of flavoring meats. Traditional brining methods are still used today in
the production of some meats like Canadian bacon.
Flavor Brining
Today there’s a surge in the popularity “flavor brining”. Flavor brining is a quick, low salt method
that improves the flavor, texture, and moisture content of lean meats such as chicken, turkey,
and pork tenderloin. While traditional brining methods remove moisture from meat, flavor brining actually increases the moisture content of meat by exposing it to a low salt concentration for
just a few hours to a couple of days.
At a minimum, a flavor brine consists of salt and water, usually about 1 cup of kosher salt to
1 gallon of water. Other flavoring ingredients are added to taste, such as sugar, brown sugar,
honey, molasses, maple syrup, fruit juices, beer, booze, bay leaves, pickling spices, cloves, garlic,
onion, chilies, citrus fruits, peppercorns, and other herbs and spices.
Sometimes a small amount of a curing agent like Morton’s Tender Quick is added to the flavor
brine. The sodium nitrate and sodium nitrite in this product creates a distinctive color and taste
in the meat reminiscent of ham. These ingredients can also act as anti microbial agents that prevent the growth of botulism in meat. Morton’s Tender Quick can be purchased at butcher supply
stores or from suppliers like Allied Kenco.
Some flavor brine recipes suggest dissolving all the ingredients in cold water, into which the
meat can be placed immediately. Others require that you bring the water to a boil, add the
ingredients to dissolve them and release their flavors, then cool the mixture to 40-45*F before
adding the meat.
The meat must be completely submerged in the brine solution. You’ll need a non-reactive plastic
or glass container or bucket large enough to hold the meat, and enough flavor brine to cover the
meat. To estimate the amount of brine you’ll need for something large like a turkey, place the
turkey, still in its wrapper, in a container and covering with plain water. Remove the turkey and
measure the remaining water to determine the amount of flavor brine you’ll need to make.
It’s important to remember that flavor brining does not preserve meat, so meat must be kept
at 40*F or below while soaking in a flavor brine. If you’ll be storing the meat in the refrigerator
128
KamadoInfo.
General
Theory
during flavor brining, make sure you select a container that fits in your fridge!
Most meats will tend to float in the salty brine. You can place a heavy ceramic plate or bowl on
top of the meat to keep it submerged.
How Long To Flavor Brine
The length of time meat soaks in a flavor brine depends on the type of meat and its size, as well
as the amount of salt used in the brine -- the saltier the brine mixture, the shorter the soaking
time. Here are common brining times found in recipes:
Whole Chicken
4-12 hours
Chicken Pieces
1-2 hours
Whole Turkey
1-2 days
Turkey Breast
5-8 hours
Cornish Game Hens
1-2 hours
Pork Chops
4-6 hours
Pork Tenderloin
6-8 hours
Whole Pork Loin
1-3 days
It is possible to end up with meat that’s too salty for your taste, so you may want to brine on the
low end of the time range to see how it turns out. You can always brine longer next time, but
there’s no way to salvage a piece of meat that’s been brined too long.
After brining, some people just pat it dry, while others will rinse the meat and pat it dry. I prefer
to rinse brined meat before proceeding, since there’s already plenty of salt inside. You can apply
butter or olive oil and sprinkle herbs and spices to the surface of meat after brining -- just don’t
add any salt!
How Flavor Brining Works
Brining is based on the principle of osmosis, a chemical process in which the salt concentration
of the brine solution migrates into the meat, in an attempt to find balance. Once inside, the salt
changes the structure of the meat protein, causing it to trap and hold more water than it would
normally. Flavors added to the brine are also drawn into the meat and trapped with the salt. As a
result, you have flavor throughout the meat, improved texture, and higher moisture content.
Figures 1 and 2 show a simplified version of how the process works. A meat cell consists of water
and proteins contained within a cell wall (the black circle). The meat is submerged in a brine
solution consisting of water and salt (Figure 1). Since there’s more water and salt outside the cell
than inside the cell, nature wants to balance things out. So, a small amount of water and salt
pass through the cell wall into the meat (Figure 2). Any other seasonings added to the brine are
also drawn into the meat along with the water and salt.
Since the cell wall is semi-permeable, the water and salt can pass into the cell, but the proteins
cannot pass out of the cell. Once inside the meat, salt causes the strands of protein to denature,
Grills & Smokers
129
General
Greetings
Info.
Osmosis occurs when
water flows from a lower
concentration of a solution
to a higher concentration
through a semipermeable
membrane.
�������������
�����
�������������
or unwind. This changes the structure of the proteins, causing them to become tangled together
and trapping moisture.
When the meat is cooked, the denatured proteins solidify and form a barrier that keeps the
moisture and salt in the meat. The result is meat with higher moisture content and improved
texture. And since salt amplifies the flavor of foods, you have flavor throughout the meat.
Cook’s Illustrated magazine performed a test in which they weighed turkeys before and after
flavor brining. They found that 11 pound turkeys weighted an average of 12 ounces more after
brining, and 6-8 ounces more after roasting. So flavor brining does result in a more moist piece
of meat.
Recipes To Get You Started
There are many recipes on brines. You may want to use the online Primo User Forum to get some
of the latest recipes that many owners have perfected. The internet is full of diverse tips and
“know how” on this subject.
130
Flavor Brines
Flavor
Brines
PRIMO Grills & Smokers
131
Flavor Brines
Brined Chops NatureBoy
Here is a recipe for you to try with pork chops. You know the kind of pork chops with very little
fat that often comes out like cardboard if even slightly overcooked. A brine works great for these,
and I have been using a brine posted on another forum from Spice Cooks. I wanted to try something new with the brine, and the results were fab. Next time you have those super lean loin
chops, give it a try. I think an overnight brine with the same mix would be good on a whole loin.
Ingredients:
1 cup water
1 cup apple juice
1/4 cup salt
1/4 cup soy sauce
1 chopped stalk lemongrass
6 cloves chopped fresh garlic
1/4 cup brown sugar
1/4 cup pure maple syrup
2 Tbs. pepper
Directions:
1. Boil the mixture to infuse the flavors, and chill with ice-in-a-ziplock.
2. Brine the chops in a ziplock for 4 hours
3. Rinse, pat dry, and coat with pepper/corriander/sage/onion powder
(don’t use any salt), and a layer of yellow mustard.
4. Grilled the chops like steaks, maybe 600 for 4 minutes a side, then
reduced to an internal temp of 145-150.
They were juicy and the flavor was awesome all the way through.
132
Flavor Brines
Basic Meat Brine
This much brine will take care of a 3 or 4 pound piece of pork loin, a chicken (or chicken pieces),
a 3 or 4 pound beef, lamb or veal roast. How long to leave the meats in the brine? Depends. For
poultry, at least 24 hours. Up to about 36 hours. Roasts benefit from 3 days or more.
Ingredients:
1 qt. water
3 Tbs. kosher salt
1 tsp thyme
4-5 bay leaves, crumbled
2 Tbs. vinegar
4
1
2
4
Tbs. sugar
Tbs. black pepper
tsp. oregano
cloves garlic, smashed
Directions:
1. Heat the water and add the remaining ingredients.
2. Bring to a low simmer, stir a few times and remove from the heat.
3. Let cool.
That’s the brine. How to use it? One very easy way is a gallon freezer
bag. Put the meat in the bag and pour the cooled brine over it.
Squeeze out much of the air, put the bag in a container and refrigerate.
Just in case of leaks.
Variations:
Well, for the basic brine, you can add or subtract any flavorings you
want. The amounts of water, salt and sugar should remain fairly
constant, but the other ingredients are variable.
• For duck, goose and other oily birds, add 2 tablespoons ground
ginger, a cup of soy sauce and 1/4 cup orange juice concentrate. Stick
the duck all over with a fork and brine for 3 or 4 days. Roast in a 400
oven for about an hour.
• Chicken pieces benefit from the juice of a lemon and a tablespoon of
rubbed sage added to the brine.
Apple-Brined Whole Turkey
Ingredients:
1 12-14 lbs. turkey
1 lb.
brown sugar
3 qts. water
4 oz
fresh ginger, sliced thin
6 bay leaves
vegetable oil
PRIMO Grills & Smokers
2
1
3
15
6
133
qts . apple juice
cup kosher salt
oranges, quartered
whole cloves
large garlic cloves, crushed
Flavor Brines
Directions:
1.
2.
3.
4.
5.
Combine apple juice, brown sugar, and salt in a large saucepan.
Bring to a boil over high heat, stirring to dissolve.
Boil for one minute, remove from heat, and skim any foam.
Let mixture come to room temperature.
In a large container, combine the room temp apple juice mixture with
the remaining ingredients and stir.
6. Place rinsed, drained whole turkey into the brine.
7. Use a heavy weight to keep the bird submerged, if necessary.
8. Refrigerate for 24 hours. Remove turkey from brine and pat dry.
9. Brush with vegetable oil and place on vertical roasting rack.
10. Cook at 225-250*F to 180*F in the thigh, 165*F in the breast. Wings
can be wrapped in foil part way through cooking process to prevent
burning.
Fish Fillets in a Maple & Dill Brine
This brine works well on fillets of tuna, salmon, orange roughy and trout. Brining fish is faster
than meats. You need real maple syrup for best results.
Ingredients:
1
2
3
1
¼
qt. water
2 Tbs.
Tbs. maple syrup
1 Tbs.
cloves garlic, smashed
2 Lbs
bunch fresh dill, coarsely chopped (about 1/ 2 cup)
tsp. freshly ground black pepper
kosher salt
brown sugar
fish fillets, center cuts if possible
Directions:
1. Combine the water, salt, maple syrup and brown sugar in a large
nonreactive (glass) container.
2. Stir to dissolve the salt.
3. Add dill, garlic, and pepper.
4. Submerge the fish skin side up in the brine.
5. Cover the container and refrigerate for 8 to 10 hours.
To cook:
1. Remove the fish from the brine and pat dry.
2. Brush or spray with oil.
3. To grill, put on a sheet of foil directly on the grill rack over medium
heat (350-400 degrees) for about 10 minutes per inch of thickness.
134
PRIMO Grills & Smokers
135
PRIMO
Owner’s Manual & Recipe Book


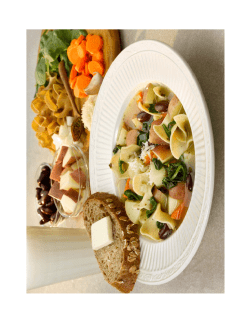


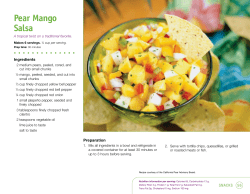


© Copyright 2026