
Family Outdoor Cooking - 4
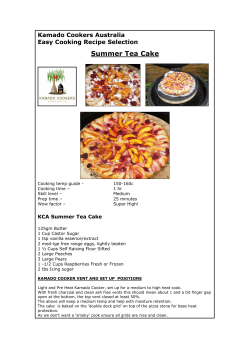
Family Outdoor Cooking
Lesson Time: 4 Hours
Skill Level: Basic
Number of Families: 8
Deployment Segment: Reunion/Reintegration
Target Audience: Families with K-12 Youth
Internet Required: Yes/option to download
Life Skill Objectives:
• Problem Solving: Work together as a Family to solve problems or conflicts using
inquiry learning and practice positive communication skills
• Teamwork: Practice working together as a Family in making choices and working sideby-side
Resilience Skill Objectives:
• Family: Practice communication skills through problem solving and teamwork activities
• Social: Respond to other’s emotions with authentic, active and constructive interest
Science and Technology Objectives:
• Understand the basic heating elements of aluminum foil through the process of
conduction
• Explore the different cooking patterns of a wood fire and charcoal fire
Activity Overview:
Youth and Families will be introduced to outdoor cooking from building the fire to sampling
tasty treats they have cooked themselves. Families will have the opportunity to explore outdoor
cooking through the use of recipes they will get to take home for future use.
Shout Out To Families!
Have you ever tried outdoor cooking? Let’s build a fire and do some cooking! We’ll make pizza,
cake and banana boats that you’ll taste at the end of the activity; and a take home outdoor
cooking device - our surprise.
Prerequisites: None
Breakdown of Activities:
Icebreaker
Activity 1:
Activity 2:
Activity 3:
Activity 4:
Activity 5:
Cooking Grab Bag
Getting Started
Buddy Burners
Outdoor Box Oven
Food Preparation
Share Your Outdoor Cooking Story
(15 Minutes)
(45 Minutes)
(55 Minutes)
(40 Minutes)
(45 Minutes)
(20 Minutes)
1
Family Outdoor Cooking
Talk It Over
Closing & Cleanup
(10 Minutes)
(10 Minutes)
Budget Range for Activity: $12/Family
Space Needed:
Large outdoor space, 2 fire pits with cooking grates and tables accessible for preparation.
2
Family Outdoor Cooking
Before the Event
Get Ready:
Tasks for Lead Volunteer
• Do Volunteer Training with the additional Tech Discovery training
(http://www.4-hmilitarypartnerships.org/p.aspx?tabid=187 )
• Practice the activities, review all materials and handouts
Do Ahead:
In coordination with the Military Point of Contact:
1. Ensure wireless Internet access.
2. Schedule use of the Tech Discovery Tool Kit (2 Tool Kits = 8 Families).
3. Contact volunteers and go through online training.
4. Recruit a specialized Tech volunteer if needed.
5. Collect dry kindling, twigs and logs for wood fire.
6. Collect 8-10 sturdy banana boxes (40 pound size are ideal), larger than the pans you will
use for cooking, you want at least 1” of room on all sides of the cooking pan.
7. Collect 24 cooking utensils/items (can be duplicate items: apron, oven mitts, matches,
spatula, rubber scraper, whisk, dish towel, recipe book, pan or baking sheet, etc.)
8. Gather 32 empty, clean soda cans.
9. Gather 32 empty, clean tuna style cans.
10. Gather several buckets for water just in case of emergency.
11. Borrow or buy supplies.
Copy:
• Family Letter (1 per Family)
• Outdoor Cooking Recipes (1 per Family)
Get from Tech Discovery Tool Kit:
• Laminated Life/Resilience Skill signs to post around the room (Problem Solving,
Teamwork, Family, Social)
• Nametags
• 8 iPad 2 devices (1 per Family) which have the following apps updated:
o
My Photo Story
o
YouTube
Get from Mobile Technology Lab:
• Wireless router
3
Family Outdoor Cooking
Buy or Borrow Supplies
Icebreaker: Cooking Grab Bag
• Nametags for all Family members, volunteers and anyone else who will be present (Tech
Discovery Tool Kit)
• Sign-in sheet
• Writing utensils
• 12 cooking items - can be duplicate items (apron, oven mitts, matches, spatula, rubber
scraper, whisk, dish towel, recipe book, pan or baking sheet)
• 1 bag to hold the 12 cooking items (shopping bag, paper bag, tote bag)
Activity 1: Getting Started
• 8 iPad 2 devices (1 per Family) (Tech Discovery Tool Kits)
• Matches
• Kindling
• Twigs
• Logs
• Newspaper
• 2 buckets of water
• 10 pound bag of charcoal briquettes
• Lighter fluid
Activity 2: Buddy Burners
• 8 iPad 2 devices (1 per Family) (Tech Discovery Tool Kits)
• Wireless router (Mobile Tech Lab)
• Ensure wireless Internet connection
• 16 pot holders (2 per Family)
• #10 can (for melting paraffin wax)
• 32 empty clean tuna style cans (4 per Family)
• 32 wicks @ 2 inches (70 total inches needed) (4 per Family)
• 4 boxes of paraffin wax
• Corrugated cardboard (old boxes or sheets of cardboard)
• 8 Scissors, box cutters or utility knife to cut cardboard (1 per Family)
• Permanent marker (1 per table)
• Plastic tablecloth (1 per table)
• Large soup ladle (that will get covered in wax)
Activity 3: Outdoor Box Oven
• 8 iPad 2 devices (1 per Family) (Tech Discovery Tool Kits)
• 3 rolls of duct tape
• 8 banana boxes (40 pound size is best) (1 per Family)
• Heavy duty aluminum foil - 75 feet (1 box per Family)
• 8 plastic oven roasting bags (1 per Family)
4
Family Outdoor Cooking
•
•
•
•
32 empty clean soda cans (4 per Family)
112 charcoal briquettes
8 pair of tongs (1 per Family)
Buckets of water
Activity 4: Food Preparation
• 8 iPad 2 devices (1 per Family) (Tech Discovery Tool Kits)
• 8 9x13 inch aluminum cake pans (1 per Family)
• Small paper plates, plastic silverware and napkins for food tasting (1 place setting per
person)
• Bottled water (1 per person)
• 1 can of cooking spray
For Cake:
• 2 boxes of chocolate cake mix
• Appropriate amounts of eggs, oil and water as directed on cake mixes
• 2 boxes of zip-top gallon freezer bags
• 4 pairs of scissors
• 4 pairs of long-handled tongs or small metal shovels
• 4 metal spoons
For Pizza:
• 1 package of bite size English muffins (1 per Family)
• 12 ounce jar of pizza sauce
• 8 ounce package of low fat mozzarella cheese
For Vegetables:
• 1 bag of small carrots (8-10 carrots per Family)
• 5 pound bag of potatoes
• Onions (1 per Family)
• 4 Small cans of nibblet corn (1/2 can per Family)
• 1 can opener
• 2 potato peelers
For Banana Boats:
• Bananas (2-3 per Family)
• 1 12 ounce bag of chocolate chips
• 1 12 ounce bag of small marshmallows
• 4 dinner knives
For Cinnamon Sticks:
• Long stick (2-3 per Family)
• 1 can refrigerated breadsticks (1 per Family)
• Cinnamon sugar
Activity 5: Share Your Outdoor Cooking Story
• 8 iPad 2 devices (1 per Family) (Tech Discovery Tool Kits)
5
Family Outdoor Cooking
Day of the Event
Roles for Volunteers:
• Help Families with all activities and form a positive connection with the Families
• Provide positive support for Families throughout the activities
• Assist Families in setting positive goals
• Facilitate problem solving and use teamwork when Families become frustrated or have
questions
• Assist with setup and cleanup
Before the Families Arrive…..
1. Orient volunteers to the overall objectives of the lesson, make sure they all have
nametags and introduce themselves to each other before you get started.
2. Activity Orientation for all Volunteers (before the beginning of the event):
• Review each activity emphasizing application of each of the identified life skills
(page 1)
• Cue volunteers where to look for the Life/Resilience Skill objectives in the directions
and remind them of the importance of discussing them with Families during the
activity
• Remind volunteers how these skills will help youth and Families manage
reunion/reintegration issues and adjustments
• Have volunteers help set up for the event and get ready to welcome Families
Set Up Your Space:
Space: Tables and chairs, outdoor cooking fire pit with wood
1. Post Life Skill/Resilience Skill Signs around the space.
2. Set up a greeting table with a sign-in sheet.
3. 2 fire rings are needed with space around them for movement.
4. 4 tables are needed outdoors for space to work and prepare materials (picnic tables or
folding tables).
WHAT TO DO
Outdoor Cooking
As the Families Arrive….
• Have youth and Family members write their names on the sign-in sheet and put on a
nametag
• Introduce yourself, your team of volunteers and others that might be in the room along
with their roles
Icebreaker:
Cooking Grab Bag (15 Minutes)
“Welcome to the Outdoor Cooking event! I would like us all to get a little more acquainted.
1. To get us all ready for the activities ahead, I’d like someone from each Family to reach
into this bag and pull out an item. Each of the items in the bag has something to do with
6
Family Outdoor Cooking
cooking. After you have an item, talk with your Family and come up with a short
sentence about that item you will share back with the whole group.
2. Each Family will need a spokesperson. The spokesperson for the Family should be the
person who is the closest in age to 12.
3. I will ask the Family spokesperson to report about their Family’s item and each Family
member will have the chance to share their name. For example, if your item was the
apron, you might say: ‘I never saw my Grandmother without one when she was in the
kitchen.’”
Debriefing Questions:
● How did your Family get engaged in talking about the cooking item?
● What type of stories did the cooking item generate from your Family?
● If you could have picked your own item, what item would you pick and what story
would you tell?
Activity 1:
Getting Started (45 Minutes)
“I’d like everyone to gather around near the fire ring as we get started today. We are going to
do some outdoor cooking and we will need to have everyone hear all of the instructions as we
move forward. Before we get started, I have a few things to review with you about what is going
to happen today.
“First, each Family is going to get an iPad 2 device for use during this activity.” Hand out the
iPad 2 devices and discuss the iPad 2 Rules and Regulations (read the following out loud and
then ask for examples of what NOT to do from the Families)
• Handle with care
• Use 2 hands at all times
• Keep it clean
• If you break it, you buy it ($500.00)
“I would like to ask that each Family member take a turn taking photos of each of the stages of
the events we’ll be doing. At the end of the activities, we’ll be asking you to select pictures
you’ve taken and put into an app called ‘My Photo Story’ which we will e-mail to you at the end
of the program. Remember to take pictures!
“We’re also going to cook and we’ll have each of you involved in that process as well!
“Let’s review a few important things about safety and fires.
1. As you look at the fire rings in front of us, what do you notice? (Possible responses: it’s
a ring, enclosed by rocks, no grass near it, clear of obstacles, water source nearby.)
Before you ever start a fire, there are some important things to keep in mind. Let’s see
how we do with safety near our fire ring.
• The fire ring is enclosed - either rocks around it to protect it or a metal fire ring to
keep the fire contained
7
Family Outdoor Cooking
•
There is no grass or kindling laying close to the fire ring that would allow for a fire to
start easily
• There is water in a bucket nearby to throw on the fire in case it would escape the fire
ring and to completely douse the fire when cooking is completed
• There are no obstacles near the fire pit that would cause anyone to trip and stumble
into the fire
• Ensure that someone is always present when you have a fire; you cannot walk away
and leave the fire unattended
2. Safety is always the first concern and you should never start a fire without knowing what
the conditions are around you - is there a fire ban or is it a windy day and you shouldn’t
have a fire at all. Know your surroundings and what the options are for having a fire!
3. The other important thing to think about before you get started is what you want to do
with your fire. Is it a bonfire for recreation and relaxing? Is it for warmth and heat? Is
it for cooking? There are many different reasons for an outdoor fire and how you build it
and what you are using it for should always be considered. For today’s purposes, we are
actually going to build two fires - one will be a wood fire that will be used to cook some
of our food items and one will be a charcoal fire that will also be used with some of the
food.
4. You’ll notice that both fire rings have a bucket of water nearby before the fire is even
started. This is an important first step.
Wood Fire
“We’ll build our wood fire first. We’ll start with the types of wood needed. This is what we’ll be
looking for today:
• Tinder (small twigs, dry leaves or grass and dry needles)
• Kindling (sticks smaller than an inch around)
• Fuel (larger pieces of wood that will easily fit into our fire pit)
Would you each take a short walk around the camp area and find examples of these items.”
Give Family members some boundaries for gathering their fire supplies and a short time period.
“We’ll start by putting a few handfuls of tinder in the center of the fire ring - loose - not tightly
packed together. Can I have a youth volunteer to do this?
“Then we are going to use a tipi (teepee) fire for our cooking today - so we’ll lay the kindling
over the tinder….just like we are building a tent. Could I have another youth volunteer to help
with this step?
• There are other types of fires to build such as a cross or a lean to or a log cabin. They
are useful for different purposes such as longer lasting heat.
“You’ll want to ignite the tinder with a match or lighter. If using a match, discard it in the fire never throw it away! I would like another youth volunteer to assist me with this step. As the fire
grows, add more tinder. You can blow lightly at the base of the fire - the air is good for the fire.
8
Family Outdoor Cooking
As the fire catches hold on the tinder, continue to add kindling. When the kindling has caught
fire, add the larger pieces of wood as fuel. Continue to keep an eye on the fire.
“Sometimes if the fire won’t catch quickly, using newspaper tightly rolled or balled up or a fire
starter can help the tinder light. Do NOT use starter fluid as it can quickly ignite when people
may not expect it.
Charcoal Fire
“Let’s move to the other fire pit and get our charcoal fire started. Begin by emptying the bag of
charcoal briquettes in the center of the fire ring. Keeping the briquettes close together is how
they will heat best. Squirt some lighter fluid on the charcoal briquettes – be careful not to spray
anything beyond the briquettes. Once the briquettes have been soaked, move the lighter fluid
away from the fire and set in a safe place. Using the matches, light the briquettes near the
bottom of the pile and set a match amongst the briquettes. It may take 2 or 3 matches before you
notice it working. Briquettes will start to smoke when they ignite – and will turn gray when they
are heating. Leave burning for a while to get them all heating.
“Once our charcoal fire has a good start, we’ll place the charcoal briquettes toward the outside
of the fire for later use. Now we can move into the next steps where we’ll get the cooking
started! Thank you for your help with the fire!
Debriefing Questions:
● How might you have built the fire if you were looking for heat on a cold day?
● Where would you look to find the essential supplies to get the fire started?
Activity 2:
Buddy Burners (55 Minutes)
“Another source of heat is a Buddy Burner. Before we begin this next station, I’d like to invite
you all to use the iPad 2 device to watch a YouTube video of a Buddy Burner so you understand
what we will be doing. Select the YouTube app on the iPad 2 device and tap on the magnifying
glass in the upper right corner. Search for ‘Buddy Burners – How To!’ and watch the video as a
Family. (It may take a while to download.)”
While Families are watching the video, cover tables with plastic tablecloths and distribute
supplies.
“Each Family should have 4 small tin cans that will be used as the containers for your Buddy
Burners. Please write your name in marker on the side of each tin can so it will be easily
identified at the end of the activity.
“One important ingredient in making this Buddy Burner is paraffin wax. We are going to melt
the wax in a tin can while we work on other steps of the Buddy Burner, so I would like to ask for
volunteers to put the wax in this large tin can. We’ll heat the wax over our wood campfire in this
can while we work on other steps. Let’s set this on the fire and move on to the next important
step.
9
Family Outdoor Cooking
“You’ll see there is corrugated cardboard on each table. Can anyone tell me the difference
between corrugated cardboard and box board (what a cereal box is made of)? The corrugated
cardboard has the ripple between two layers of board which creates a bit of stability and in our
Buddy Burner will readily soak up the paraffin wax and serves as a good energy source.
1. Lay the tin can on its side on the cardboard (ensure that Families are marking and cutting
their cardboard against the grain) and use it to measure and draw a line across the entire
piece of cardboard.
2. Cut the cardboard into enough strips so that when rolled tightly, they will fill the can.
3. Roll the strips tightly and fit inside your tin can.
4. Be sure that all of your Family members can work on this project together.
5. After you have the strips cut and rolled and stuffed into each of your tin cans, please let
me know by having your Family team take a step away from the table.
“Now I would like a volunteer to help pass out the wicks. Each Family will get four 2 inch wicks
that will be used in their Buddy Burner. Take this wick and wedge it down into the center of the
can in the cardboard - leaving about the size of a pencil eraser sticking over the top of the can.
Make sure that the wick stands taller than the can - you’ll need to be able to light that wick!
“Now it is time to pour the wax into the can. I am going to ask the adults at each table to help
me out here. I will have the potholders to hold the can with the melted wax, and I would like the
adult at each table to use the ladle to pour the wax into each can.
“Now we will let our Buddy Burners cool and let the wax harden. After we’ve prepared our
food, we can come back and refill the can with wax.
“To use your Buddy Burner as a stove, you’ll need to light the wick and set it under a grill or
grate - or use pop cans to hold the pan. This heat source could be used for cooking a small
amount of food or you could use several Buddy Burners for more heat or to spread the heat out
more evenly.”
Debriefing Questions:
• When do you think it would work to use this heat source?
• How do you think this would work differently than a campfire to cook food?
• How did you involve each Family member during this activity?
Activity 3:
Outdoor Box Oven (40 Minutes)
“Each Family is going to make their own box oven that you will get to take home with you to use
for outdoor cooking when you go camping or even in your backyard or at the local park. You
can bake anything in a box oven that you can bake inside in your regular oven! Just remember
that practice is the best teacher!
“Outdoor cooking can be a fun Family activity and a great tool for camping. Cooking
successfully outdoors requires some understanding of the science behind cooking. How does
food get cooked or heated? Heat moves in predictable ways. It flows from warmer objects to
cooler objects until everything is the same temperature. There are three ways that heat is
10
Family Outdoor Cooking
transferred to food: conduction, convection, and radiation. The box ovens you will be creating
in this activity and then using in the next activity use conduction. Conduction occurs when heat
is transferred by contact with a heat source through a material such as aluminum foil or a pan.
The heat from the foil is transferred to the food by a process called conduction.
“Foil cooking is one of the easiest ways to cook in any outdoor setting. Aluminum foil is
lightweight, versatile and reduces cleanup time. Aluminum foil is a dense metal. Dense
substances conduct heat better because the particles are closer together and allow faster heat
transfer. As you make your box oven, don’t be shy with your use of aluminum foil! Use two
layers if there is enough aluminum foil. The extra thickness will prevent food from burning and
will conduct heat more evenly and efficiently. Don’t forget to take pictures as you work with
your Family!”
1. Provide each Family with one 40 pound banana box
and one box of aluminum foil.
2. Work together as a Family to completely line the
inside of the box with aluminum foil. Place the shiny
side of the aluminum foil so that it faces the inside of
the box. Wrap the foil at least 1 inch past the outside
of the box on all sides. If there is enough aluminum
foil, line two times.
3. Tape the aluminum foil in place with duct tape on the
outside of the box. If the aluminum foil is not staying in place, take a piece of duct tape,
make a loop and put it behind the foil and stick it to the box. Do not leave tape exposed
inside the box.
4. Cut and fold the foil back to open the window.
5. Cover window with the oven roasting bag. Tape in
place from the outside of the box.
Your box oven is now complete and ready to use.
Getting ready to use your Outdoor Box Oven:
1. Place a sheet of aluminum foil a little larger than your
box on level ground.
2. Space 4 empty, clean, aluminum soda cans on the foil
so that they will support your baking pan. We are not using bricks as illustrated in the
pictures.
3. Place your baking pan so that it sits securely on the aluminum cans.
11
Family Outdoor Cooking
4. Use tongs to carefully retrieve and arrange hot charcoal briquettes evenly beneath the
pan. Remember: safety first when handling and moving hot objects!
a. Approximately 14 briquettes will be needed for cakes
or other items requiring about a 350 degree oven
b. Approximately 16 briquettes will be needed for
biscuits or other items requiring about a 400 degree
oven
c. Make sure the briquettes have burned until covered
with a light layer of gray ash before moving them to
your box oven
5. Prop one corner of the box oven up on a small rock to allow air circulation (not necessary
if the hand holes in the box are open)
6. Make sure you don’t overfill the pan so that whatever you are cooking spills over.
The charcoal will keep the box oven hot for about 45 minutes. If the item you are baking
requires more time than this, start new charcoal after 30 minutes and then switch out the old
briquettes with the newer ones after 45 minutes.
Debriefing Questions:
• Why is it good to use plenty of aluminum foil?
• What did your Family learn about how a box oven works as you were making your box
oven?
• Did each Family member have an active role in constructing your box oven? How did
your Family decide who did what?
• How does your Family address “creative” differences when working together?
Activity 4:
Food Preparation (45 Minutes)
Distribute one Outdoor Cooking Recipes handout to each Family.
“In this activity your Family will select one item to cook and which cooking tool (box oven or
charcoal/wood fire) to use. There are several items to select from based upon your choice of
cooking tool:
1. For either the charcoal or wood fire:
• Cinnamon sticks, banana boats, pizza, vegetables
2. For the box oven:
• Cake in a bag, pizza
The only rules are that every Family member participates in the decision making and has a role
in the food preparation and cooking. Don’t forget to take pictures!”
12
Family Outdoor Cooking
Directions for Cake in a Bag using the box oven (makes 2 cakes):
1. Open two chocolate cake mixes and pour them into gallon freezer bags (one mix per
bag).
2. Carefully add eggs, water and oil as directed on the packages into each bag.
3. Seal the bags, squeezing out the excess air. Put these bags inside two additional bags
each, sealing each one.
4. Have all Families making the Cakes in a Bag form a large circle.
5. Toss the bags back and forth to each other for about 5 minutes, or until the batter is well
mixed. Get all the bags going at once! Be sure to have everyone toss the bags high
enough for the ingredients to slosh around. Turn it into a game - try not to drop it!
6. Coat two 9x13 inch cake pans with cooking spray.
7. Ask the Families to take their freezer bags with the cake batter out of the other bags.
Hand an adult a pair of scissors to cut off one bottom corner; squeeze the batter out into
the 9x13 inch pans.
8. Place the pans in the box ovens as instructed in Activity 3 and allow 30 minutes to bake.
Cake is done when the edges of the cake pull away from the sides of the pan. Don’t peek
too many times though, as you will reduce the heat and cause the cake to not bake
completely!
9. Remove with pot holders.
10. Enjoy your cake!
Directions for Pizza using the box oven or the charcoal/wood fire:
1. Spray 9x13 inch pan with cooking oil if using the box oven, if using charcoal/wood fire
spray an 18x26 inch piece of aluminum foil.
2. Place up to 10 bite-size English muffins in the center of the foil or into the pan. Top each
English muffin with a teaspoon of pizza sauce and a teaspoon of mozzarella cheese. If
using the box oven, place the pan on the soda cans over the briquettes and cook for 10
minutes. If using the charcoal/wood fire, wrap/close the aluminum foil around the pizza,
place on the cooking grate for 10 minutes.
3. Remove with tongs, strong sticks or pot holders.
4. Enjoy your pizza!
Directions for Vegetables using the charcoal/wood fire:
1. Spray an 18x26 inch piece of aluminum foil with cooking oil.
2. Peel several potatoes and quarter. Place on the foil.
3. Peel 8-10 baby carrots. Place on foil.
4. Quarter 2 onions. Place on foil.
5. Open a can of corn, drain the water. Place on foil.
6. Wrap/close the aluminum foil tightly around the vegetables making sure the edges of the
aluminum foil are tightly closed.
7. Place on the grate or directly on the coals for 30 minutes.
8. Remove with tongs or strong sticks.
9. Enjoy your vegetables!
13
Family Outdoor Cooking
Directions for Banana Boats using the charcoal/wood fire:
1. Take 2-3 bananas and peel back a ½ inch strip of the banana peel along one side of each
banana but do not separate it from the rest of the banana.
2. Cut a “V” down the exposed area of each banana (this should look like a canoe). Save
any banana that is taken out while doing this.
3. Fill the “V” section with chocolate chips and marshmallows. Place the “V” section of the
banana that was cut out in step 2 over the top. Place the ½ inch strip of banana peel back
into place - looks like a whole banana once again?
4. Tightly wrap the banana with aluminum foil.
5. Place directly into charcoal/wood fire and cook for 10 minutes.
6. Remove with tongs or strong sticks.
7. Enjoy your Banana Boats!
Directions for Cinnamon Sticks:
Charcoal/Wood Fire Preparation
1. Spray a strong stick lightly with cooking oil.
2. Open and unwrap breadstick dough.
3. Carefully wrap each section of breadstick dough around the stick and sprinkle with
cinnamon and sugar.
4. Hold over the fire (similar to cooking a marshmallow) and turn every so often to get all
sides toasted. This may take 5-8 minutes depending upon the heat of the fire.
5. When it has turned a deep golden brown, it should be done on the inside as well as the
outside. Remove from heat.
6. Carefully remove Cinnamon Sticks from the stick (it will still be hot) and put on a plate.
Let cool a few moments before eating.
7. Enjoy your Cinnamon Stick!
Box Oven Preparation
1. Find short sticks that will fit in a 9x13 inch pan and spray with cooking spray.
2. Open and unwrap breadstick dough.
3. Carefully wrap each section of breadstick dough around a stick and sprinkle with
cinnamon and sugar.
4. Place in the 9x13 inch pan and turn every so often so all sides get toasted. This may take
5-8 minutes.
5. When it has turned a deep golden brown, it should be done on the inside as well as the
outside. Remove from heat.
6. Carefully remove from the stick (it will be hot) and put on a plate. Let cool a few
moments before eating.
7. Enjoy your Cinnamon Stick!
14
Family Outdoor Cooking
Debriefing Questions:
• What was challenging about this activity? How did your Family go about meeting these
challenges?
• How did each Family member participate together to complete the tasks?
• If you had chosen a different cooking tool how do you think it would have been
different?
REMEMBER: Return to the Buddy Burners which have now cooled so they can be refilled
with wax.
Activity 5:
Share Your Outdoor Cooking Story (20 Minutes)
“Let’s look at the pictures you took on the iPad 2 devices during this activity. We are going to
use the “My Photo Story” app on the iPad 2 device and create a story board about your
experience today. Please open the “My Photo Story” app and look for a board that will allow
for pictures so that each Family member is represented (three tiles or four tiles - depending on
your pictures).
“Click on a tile and you’ll be able to insert a photo - just look at your camera roll and tap on the
picture you want and it will appear on the story board. When you have all your pictures (make
sure all of your Family members appear on the story board), make sure to click save! We’ll
email you those photos so you will have another memory from today!”
Talk It Over
(15 Minutes)
1. To help you focus the discussion, briefly look at Life Skill, Resilience Skill, and Science
and Technology Objectives on page 1.
2. Lead the entire group through the Talk It Over discussion.
3. Have a volunteer take comments/notes about group dynamics and specific Family
comments.
Share/Reflect
• Why do you like having choices about ways to cook your food?
• How do you feel about food cooked over a campfire?
• Which of the food options did you enjoy the most?
• Did you have any difficulties in accomplishing any of your individual tasks in these
activities?
• How did your Family team help you overcome these challenges?
• Was it challenging to work with your Family to follow all of the directions given by
someone else?
Process
• What would have happened if you hadn’t followed all of the directions?
• How did it feel deciding who would do which parts of the activities?
• Why was it important to have each of your Family members actively involved?
15
Family Outdoor Cooking
Generalize
• In this activity, you had to work with your Family to make different decisions. When
might you have to work with your Family at home to make some decisions resulting from
your Service Member’s return home?
• How can working as a Family team help you make good decisions?
• What key points did you learn today from this activity?
Apply
• How can working as a team help you work through a situation?
• What can you do to help your Family continue working together in positive ways to make
good decisions in the future?
• How will you apply what you learned today about teamwork within your Family?
Debrief Families on Life/Resilience Skills:
Point to the Life/Resilience Skill Signs that are posted around the space: Problem Solving,
Teamwork, Social and Family. As you point to each sign, ask:
• How have our activities today helped you develop your __________ skills?
• Why do you think these skills are important?
Closing & Cleanup:
(10 Minutes)
“Thank you for joining us for Family Outdoor Cooking today. There are a few key things we
need to do before this activity is completed. If you would please collect all of the supplies at
your tables and return them to this table - this might include potholders, extra flatware or plates,
aluminum foil, etc.
“The next thing we need to do is think about where all of our trash from our food is going. When
we cook outdoors, we need to be mindful of the creatures that might scavenge or be attracted to
this spot after we leave. We must be careful to leave the space in better shape than we found it.
So for the next 3 minutes, I would like to have everyone move around this space and pick up any
litter - food scraps, garbage or leftover items - and put them in the garbage containers.
“Now it’s time to put all of your supplies in a location for you to be able to take the items you
made home with you - including the box oven and the Buddy Burners. Please make sure your
name is on the items so they get home with you.
“As you think about doing these activities again in the future, please remember how important it
is to talk with your Family members about how each of you plays an important role in helping
with the process.”
Extend the Activity:
Families may wish to try the different recipes or try cooking the different options using a
different heat source. Experimenting with these will give them a better perspective on what they
may prefer when they go on a future camping trip or cook in their backyard.
16
Family Outdoor Cooking
Post Event
Lead Volunteer:
• Check to make sure that the space is clean
• Have all equipment and supplies back into kits or packed up to return to appropriate
Military Point of Contact
• Fill out report
o Names of all volunteers
o Number and names of youth and Family members (attach sign-in sheet)
o Quotes from youth and Family members on activities
o Other important notes on activities, volunteers and youth
o Critical follow-ups (parents about behavior/worries about a particular youth,
inappropriate language from a volunteer etc.)
Activity Developed for Tech Discovery Curriculum by:
Stephanie Graf, Youth, Family and Community Development Program Leader, Cornell
Cooperative Extension Association of Jefferson County
Kia Harries, Regional Extension Educator, University of Minnesota Extension Center for Youth
Development
Kerri L. Ashurst, Ph.D., Senior Extension Specialist, University of Kentucky Family and
Consumer Sciences Extension
Acknowledgement:
Permission granted to adapt and use materials by Martha Yount, Cooperative Extension Agent for Family
& Consumer Sciences, Breathitt County Cooperative Extension Service, University of Kentucky
The Tech Discovery Curriculum was developed at the University of Minnesota Extension Center for
Youth Development through a partnership of the Department of Defense, Office of the Secretary of
Defense, Military Community & Family Policy, Office of Family Policy/Children and Youth and the
United States Department of Agriculture, National Institute of Food and Agriculture, Institute of Youth,
Family and Community, 4-H National Headquarters under Kansas State University special project
number 2010-48713-21882.
The University of Minnesota Extension is committed to the policy that all persons shall have
equal access to its programs, facilities, and employment without regard to race, color, creed,
religion, national origin, sex, age, marital status, disability, public assistance status, veteran
status, or sexual orientation.
© 2014, Regents of the University of Minnesota. Rights reserved by Department of Defense, USDA/NIFA.
17
Family Outdoor Cooking
Family Outdoor Cooking
Dear Family,
Today we learned that outdoor cooking can be a great way to get the entire Family involved in an
activity. We explored different ways to cook food and built a campfire and even made two of
our own heat sources to cook food.
While exploring these cooking options, we learned that aluminum foil is a great heat conductor
and can help the cooking process. We used aluminum foil in different ways, including lining our
box oven and wrapping food to place in a heat source. It’s fun to see how aluminum foil can be
used in different ways.
We were able to eat the different foods that were made and enjoyed seeing how the food turned
out after being cooked in different ways. We built our own fire that was used, as well as made a
box oven and a Buddy Burner.
Through these activities, we explored how we interact as a Family as our loved ones return from
a deployment, and also how we make decisions together that can sometimes affect the whole
Family. Working together to cook outdoors was a great way to spend time together but also
enjoy tasting the food we made!
Best regards,
Conversation starters
• If we had to come up with a team name for our Family, what
would it be?
• How do you think our Family would do if you had to cook
outdoors for every meal?
• Why would a Family enjoy doing outdoor cooking?
• How would you feel if you couldn’t eat immediately or use a
microwave to cook your food?
18
Family Outdoor Cooking
Family Outdoor Cooking Recipes
Directions for Cake in a Bag using the box oven (makes 2 cakes):
1. Open two chocolate cake mixes and pour them into gallon freezer bags (one mix per
bag).
2. Carefully add eggs, water and oil as directed on the packages into each bag.
3. Seal the bags, squeezing out the excess air. Put these bags inside two additional bags
each, sealing each one.
4. Have all Families making the Cakes in a Bag form a large circle.
5. Toss the bags back and forth to each other for about 5 minutes, or until the batter is well
mixed. Get all the bags going at once! Be sure to have everyone toss the bags high
enough for the ingredients to slosh around. Turn it into a game - try not to drop it!
6. Coat two 9x13 inch cake pans with cooking spray.
7. Ask the Families to take their freezer bags with the cake batter out of the other bags.
Hand an adult a pair of scissors to cut off one bottom corner; squeeze the batter out into
the 9x13 inch pans.
8. Place the pans in the box ovens as instructed in Activity 3 and allow 30 minutes to bake.
Cake is done when the edges of the cake pull away from the sides of the pan. Don’t peek
too many times though, as you will reduce the heat and cause the cake to not bake
completely!
9. Remove with pot holders.
10. Enjoy your cake!
Directions for Pizza using the box oven or charcoal/wood fire:
1. Spray 9x13 inch pan with cooking oil if using the box oven, if using charcoal/wood fire
spray an 18x26 inch piece of aluminum foil.
2. Place up to 10 bite-size English muffins in the center of the foil or into the pan. Top each
English muffin with a teaspoon of pizza sauce and a teaspoon of mozzarella cheese. If
using the box oven, place the pan on the soda cans over the briquettes and cook for 10
minutes. If using the charcoal/wood fire, wrap/close the aluminum foil around the pizza,
place on the cooking grate for 10 minutes.
3. Remove with tongs, strong sticks or pot holders.
4. Enjoy your pizza!
Directions for Vegetables using the charcoal/wood fire:
1. Spray an 18x26 inch piece of aluminum foil with cooking oil.
2. Peel several potatoes and quarter. Place on the foil.
3. Peel 8-10 baby carrots. Place on foil.
4. Quarter 2 onions. Place on foil.
5. Open a can of corn, drain the water. Place on foil.
6. Wrap/close the aluminum foil tightly around the vegetables making sure the edges of the
aluminum foil are tightly closed.
7. Place on the grate or directly on the coals for 30 minutes.
8. Remove with tongs or strong sticks.
9. Enjoy your vegetables!
19
Family Outdoor Cooking
Directions for Banana Boats using the charcoal/wood fire:
1. Take 2-3 bananas and peel back a ½ inch strip of the banana peel along one side of each
banana but do not separate it from the rest of the banana.
2. Cut a “V” down the exposed area of each banana (this should look like a canoe). Save
any banana that is taken out while doing this.
3. Fill the “V” section with chocolate chips and marshmallows. Place the “V” section of the
banana that was cut out in step 2 over the top. Place the ½ inch strip of banana peel back
into place - looks like a whole banana once again?
4. Tightly wrap the banana with aluminum foil.
5. Place directly into charcoal/wood fire and cook for 10 minutes.
6. Remove with tongs or strong sticks.
7. Enjoy your Banana Boats!
Directions for Cinnamon Sticks:
Charcoal/Wood Fire Preparation
1. Spray a strong stick lightly with cooking oil.
2. Open and unwrap breadstick dough.
3. Carefully wrap each section of breadstick dough around the stick and sprinkle with
cinnamon and sugar.
4. Hold over the fire (similar to cooking a marshmallow) and turn every so often to get all
sides toasted. This may take 5-8 minutes depending upon the heat of the fire.
5. When it has turned a deep golden brown, it should be done on the inside as well as the
outside. Remove from heat.
6. Carefully remove Cinnamon Sticks from the stick (it will still be hot) and put on a plate.
Let cool a few moments before eating.
7. Enjoy your Cinnamon Stick!
Box Oven Preparation
1. Find short sticks that will fit in a 9x13 inch pan and spray with cooking spray.
2. Open and unwrap breadstick dough.
3. Carefully wrap each section of breadstick dough around a stick and sprinkle with
cinnamon and sugar.
4. Place in the 9x13 inch pan and turn every so often so all sides get toasted. This may take
5-8 minutes.
5. When it has turned a deep golden brown, it should be done on the inside as well as the
outside. Remove from heat.
8. Carefully remove from the stick (it will be hot) and put on a plate. Let cool a few moments
before eating.
9. Enjoy your Cinnamon Stick!
20
Family Outdoor Cooking


© Copyright 2026