
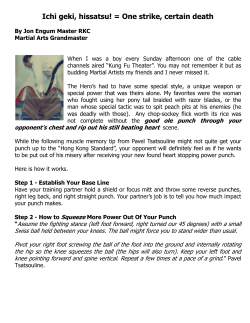
# 144 ” Punch Needle Design by Melanie Pinney
“C” is for “CAT” # 144 5 ” Punch Needle Design by Melanie Pinney American Pie Designs (Copyright - American Pie Designs by Melanie Pinney) Please Visit Me at American Pie Designs 11132 Tioga, Boise, Idaho 83709 Telephone: (208) 870-9118 Email: [email protected] Website: http://www.amerianpiedesigns.com Etsy Shop: http://www.etsy.com/shop/americanpiedesigns Blog: americanpiedesigns.blogspot.com Facebook: http://www.facebook/americanpiedesigns The Skinny on Punch Needle There is a good amount of instruction on the internet on the punch needle craft, and I have to admit I spent a fair amount of time (uh, $$) following bad instruction. Since we’re friends here, I want to help you avoid frustration: Number one, you will have a superior result if you use “weavers cloth” for your punching foundation. Anyone who tells you to punch on aida cloth, evenweave, muslin or an old sheet isn’t telling you how much difficulty you are going to have or how crummy your finished project will look. If your loops are uneven or missing in places, chances are you are not using weaver’s cloth. Number two, use an “Ultra-Punch” brand needle (sometimes called a “Cameo” punch needle). I’ve used Boye, Clover, Dimensions and many other brands (and I hope I don’t make those nice folks mad), but Ultra-Punch is the only brand I recommend and stock in my online store. Why? Hey, it’s simple--I want my loops to look good! And number three, don’t try to use a standard embroidery hoop to hold your foundation cloth--it just doesn’t work. Instead, I use an inexpensive Morgan interlocking hoop. There are also lap frames made especially for punch needle embroidery which work very well, but they are more expensive. If you purchased weavers cloth, an Ultra-Punch needle and a Morgan hoop when you bought this pattern, then you are set to go! If not, you can get them with fast delivery through my website at www.americanpiedesigns.com. Now, the first thing you will notice about this pattern is it is drawn backwards on the weavers cloth. That’s because you’ll punch from the back side of your project, so the pattern is intentionally “reversed” or is a mirror image of the picture on the front of this booklet. Don’t worry, your finished loops will appear on the underside of your hoop or frame and your completed design will look exactly as shown in the model for this pattern. A Little Preparation: 1. I used standard DMC® embroidery floss. You can use the colors shown in this pattern or choose your own. Embroidery floss is not expensive and goes a long way in punch needle. 2. Thread your needle with 6 strands of embroidery floss (just follow the easy instructions that come with your punch needle). Then, I recommend setting your needle in the #2 position (Ultra-Punch needles are easy to adjust and lock into position). You can play around with other settings and see what you think, but I personally love the height of my loops with the #2 setting. 3. Be sure to stretch the weaver’s cloth drum-tight in your hoop or frame. The fabric should “thump” when you flick it with your fingertip. To get nice loops, it is essential to keep the fabric tight at all times. Don’t worry if your piece of weavers cloth is not big enough to fit your hoop or frame--just machine stitch some waste fabric to the sides and then stretch it over your frame. You can cut away the waste fabric later. Punching Instruction: 1. You’ll notice the tip of your punch needle has an open, scooped side. Normally, the scooped side should face in the direction you want to punch your stitches, but I often rotate the needle a bit so I am punching with the scooped side facing sideways (or towards my thumb): 2. Hold your punch needle like a pencil and keep it straight up and down (not at an angle). If you are right-handed, you should punch from right to left. If you are left-handed, punch from left to right. 3. Be sure your needle is loaded with the “medium” tip if it came with more than one size needle. Following the manufacturer’s instructions, thread it with six strands of embroidery floss. You can start punching anywhere in the design that you like, except always punch the outline of each shape and then fill it in. To begin, punch your needle down through the fabric as far as it will go (you will hear a “popping” sound if your fabric is tight enough in the frame) and slowly pull your needle back up until it barely emerges from the fabric. Leave a short 1/4” tail of floss sticking up from your work--don’t worry; this will not unravel later. Slide the tip over the fabric by about the width of your needle and punch it down again. Try to keep the tip of the needle in contact with the fabric at all times. Punch down through the fabric again, slowly lift, slide, punch, slowly lift, slide, punch . . . that’s all there is to it! Do this until you are familiar with the movement and then you will pick up speed very quickly. You’ll notice loops forming on the underside (this is actually the front) and small running stitches appearing on the side facing you (this is the back). Punch . . . Slowly Lift . . . Slide . . . Punch Again! Once you have punched at least a 1” square, you’ll notice your stitches are beginning to “lock” into each other on the right side, forming a nice, soft, textured surface where your stitches will not pull out later. 4. I always begin each project by choosing a dark color and punching a single row of dense, tightly-packed loops around the entire outside border of my design (this frames my project and helps keep the edges square). Although not required, I usually continue by punching the shapes that appear in the foreground first. For example, if a design has lettering in it, I usually punch the letters first and then punch the background. Whatever order you punch the design, always punch the outline of each shape and then fill it in. The background should be the very last thing you hook. I usually punch a couple of rows around everything in the main background color and then a row of a secondary detail color here and there to add depth and interest to the background. 5. If you reach a corner or need to change direction, stop with your needle in the down position, rotate your hoop or frame, and then continue to punch. 6. Remember, your stitches should be about a needle’s width in length and your rows of punching should be about a needle’s width apart. If the stitches or rows are packed much tighter, your finished project will “hump” and the edges will tend to curl under when you remove your design from the hoop. 7. If you are not happy with a punched row, simply pull out the thread, gently scrape your nail over the weaver's cloth to close the holes, and re-punch. 8. When you come to the end or want to change thread color, place your fingertip firmly against the last stitch to hold it in place. Pull the needle gently up and away from the fabric and cut the floss, leaving an approximate 1/4” tail sticking up from your work (this tail will not unravel later): 9. Although you should usually hold your punch needle straight up and down, there is an exception when punching a row immediately next to another color. In that case, slightly angle your needle down and away from the other row of color. This will minimize the chance the different colors tangle with each other and will create nice clean shapes on the front side of your project. However, if some loops have tangled with others and strayed where they shouldn’t be, take the tip of your punch needle and simply push them around to where you want them. Taking that extra step will make your lines clear and well-defined. Here is an example of colors tangling with each other (left) versus the correct way to punch and clean up your work (right): Wrong: Shapes Not Clearly Defined Correct: Lines are Clear and Clean Finishing Your Punch Needle: 1. When your hooking is complete, remove the design from your hoop. If you have any loops or threads sticking up too far on the front side, just snip them off with your scissors (don’t worry, your design will not unravel). 2. If you packed your rows a bit too tight and your project “humps” a little or the edges tend to curl under, place it face down on an old terry cloth towel and gently steam the back with an iron. (Caution: Use more “steam” than pressure. If you apply much pressure, your loops will permanently flatten.) 3. Some punchers like to antique their projects and make them look old and worn. One way to do this is to mix two or three tablespoons of instant coffee in hot water and dab it onto your project with a sponge. Allow it to dry and then reapply if you want it darker. If it is too dark, carefully rinse some of the coffee away with cool water and allow your punch needle to air dry. 4. If you want to finish your design as a pillow or pin keep, trim the excess weavers cloth approximately 1” away from your last row of loops. Place your punch needle face down with right sides together onto muslin or other fabric you chose for the back. Stitch the front and back together using a zipper foot on your sewing machine (a zipper foot will let you stitch as close as possible to the outside row of punched loops). If you do not have a zipper foot, get as close as possible to the last row of loops without getting them caught in your seam line. Stitch all the way around, leaving about a 2-1/2” opening at the bottom for turning. Trim the excess fabric to approximately 1/4” from your stitched seam. Turn your design rightside-out and stuff it very firmly with polyester fiberfill. Finish the bottom by joining the opening together with tiny hidden stitches. 5. To finish your design as a little mat for your table or under a candle, trim the excess weavers cloth approximately 1/2” away from your last row of hoops. Fold that seam allowance toward the back side and gently steam press it in place, being careful not to flatten your loops on the front side. Cut a piece of wool craft felt the same size as your finished design and pin it to the back. Using a needle and single strand of thread, whipstitch or blanket stitch around the outside edges. If you would like to see how I prepare wool felt for my punch needle projects, see the “Special Tips for Using Wool Felt” on the next page. Special thanks to Earl at Punch Needle Marketplace for allowing me use of graphics and images from www.punchneedlemarketplace.com. Special Tips for Using Wool Felt as a Backing for Your Project: Wool felt (sometimes called wool craft felt) can be inexpensively purchased from craft and fabric stores (it’s the same stuff used for kids’ Halloween costumes and craft projects). It is made from a combination of wool and rayon. Be sure the felt you buy is at least 20% wool (35% wool is even better, if you can find it). Cut your felt at least 1-1/2” larger on all sides than your finished punch needle mat, as the felt will shrink during the following process: (1) Soak your felt in very hot water for two minutes and then plunge it into cold water. (2) Squeeze out the excess water (do not wring) and put the felt in the dryer with an old towel for a few minutes until it is almost dry. (3) Remove it from the dryer and allow it to finish air drying. (4) When completely dry, lightly steam-press the felt, but be careful not to iron out all the wonderful little bumps and textures you have created. When you stitch the felt to the back of your punch needle project, the result will be a wonderful, soft-textured backing for your finished design!


© Copyright 2026