
Here
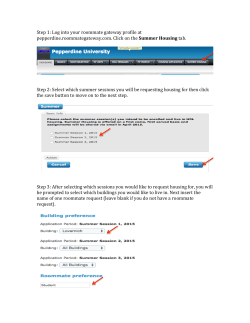
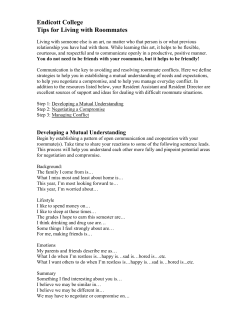
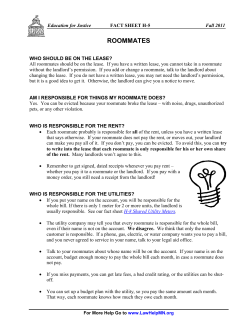
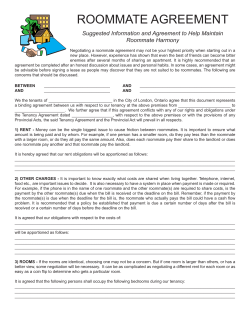
Students can go through their MIX account or the direct link of MyHousing.wvu.edu/Student to reach the housing
application. All communication is sent to the MIX account.
PLEASE NOTE: THE HOUSING APPLICATION AND THE ROOM SELECTION
PROCESS ARE COMPLETED IN THE HOUSING PORTAL . AFTER THE
HOUSING APPLICATION IS COMPLETED, THE STUDENT CAN SEE THE
SECTION THEY WILL USE TO SELECT A ROOM. THE ROOM SELECTION
SECTION CAN BE REACHED BY CLICKING ON THE TIMELINE ACROSS THE
TOP TO REACH THE ROOM SELECTION SECTION. STUDENTS CAN USE
THIS SECTION AFTER A TIMESLOT HAS BEEN ASSIGNED. ALL STUDENTS
ARE SENT AN EMAIL WITH THEIR TIMESLOT DATE AND TIME (WHICH IS
IN MILITARY TIME). A TIMESLOT IS THE DATE AND TIME THE STUDENT
CAN START TO SELECT THEIR ROOM.
The first page is the ‘Profile Summary Page’ – sample below.
Students read the information displayed. Then they and click on Housing
and Dining Application in the gold bar toward the top of the screen.
Page two is ‘Select A Term’ – sample below. The student needs to read the information on the page.
Then select from the application(s) options listed the appropriate application. Make sure you are
completing it for the correct academic year or for the spring term only. Other options besides two
will appear.
You are now ready to start your West Virginia University Housing Application. Read the information
on the page and if you are ready to enter into the contract for room and meals click Start Housing
Application.
‘Personal Details’ – Read Personal Details. Enter the information under Contact Details and click Save
Personal Details & Continue.
‘Housing Exemption’ – Click on the dropdown box to indicate whether you meet the requirements
listed to live off campus.
‘Emergency Contact Information’ – you must complete the emergency contact information. It is your
choice to list someone in the ‘Missing Persons Contact Details’ and you must select from the
dropdown box for the ‘Immunization Information’. NOTICE: the progression of the tab progress
across the top, you are on step 4. Click Save Emergency Contact Information and Continue.
‘Special Housing Accommodation’ section is next. Do you want to live in Gender Neutral Housing?
Do you require Accessible Housing Accommodations? Read the information carefully if you answer
yes to either of these. Both of these stop you from being able to select a room/roommate of your
choice. Click Save Special Housing Accommodation & Continue to continue.
‘‘Terms and Conditions – Housing and Dining Contract’ – If you are under the age of 18, you will not
see this page, continue to the next page. If you are over the age of 18 and agree to the Terms and
Conditions enter your Student ID as your electronic agreement. Click I Agree to the Terms and
Conditions to continue, or click Cancel Application in the upper right hand corner.
Make sure you read this. It is a legally binding contract.
‘Terms and Conditions (Under 18)’ – This page appears and you can read the terms and conditions of the
contract. YOU cannot legally accept this information. You must provide at the bottom your Parent/Guardian’s
First Name, Parent/Guardian’s Last Name and the Parent/Guardian’s Email Address. An email will be sent to the
email provided. Click Save & Continue.
If you are over the age of 18, please continue to the next page. If you are under 18 you will see
‘Awaiting Parent/Guarantor Signature’ - You cannot continue any further until the terms and
conditions in the email have been accepted. After this has been accepted continue with the next
page.
‘Housing Preferences’ – this must be completed but the information will only be used if you do not
self-select a space for the upcoming academic year or if the system is turned off prior to you
selecting. After making your selections click Save Housing Preferences & Continue.
‘My Profile’ If you want other students to see you as a potential roommate match, click the box.
Create your own screen name and tell potential roommates about yourself. Click ‘Save My Profile &
Continue’.
‘My Profile – Part 2’ Use the scrolls to describe whether you are likely or unlikely to do certain this.
This will give you a better match for your roommate.
‘Housing Deposit’ – This is the section where you will pay your housing deposit. You will be directed
away from the application to a different site. Once paid, you will need to re-login to the housing
application and it will start you at the next section automatically.
‘Selecting a Meal Plan’ – Students can select a meal plan from the options listed. ALL students in the
halls are required to have a meal plan. Select the meal plan from the drop down box and more
information about each plan will be displayed. Click ‘Save Meal Plan & Continue’.
‘Roommate Groups’ – look at and use the links at the top right. At the bottom you can click to ‘Add
yourself to a group’ or ‘Create a new group’. If you do not want to be a member of a group, just click
‘Save Roommate Groups & Continue’.
If you click on the tab ‘Create a Roommate Group’ in the upper right hand corner of Roommate
Groups you will see this section. The leader of the group creates the name and password and shares
this information with others who will be in the group. You MUST verify your roommate group to finish
the process.
If you click on the tab ‘Join a Roommate Group’ in the upper right hand corner of Roommate Groups, you will
see this section. The leader who created the group shares the name and password with others who will be in
the group. If you are part of a group you will need to enter that information as the sample below. Click Save &
Continue.
Wanting to see roommate matches or suggested roommates? After creating a group and completing
answering the matching questions, this page will appear. Click on the links below options to see
potential roommates.
‘Room Selection’ – This slide will tell you timeline on when you will be able to select your room.
Clicking ‘rooms available’ in the upper right will tell you the type of rooms offered in each building.
‘Complete Application’ – Your Application is complete AFTER you click on ‘Click Here – Housing
Application/Dining Contract is Complete’
‘Application Status’ at the top will display like in the screen shot below. It tells you the dates your application is
legally bound. Once a room has been chosen this screen will show, the room reservation details, and the
occupancy information in the room/suite. It will list each specific person in the room or suite.
‘Room Selection’ – This is where it tells you how to do the room selection. Please read carefully: Each student in the group
must be assigned to a space by the leader of the group. This is done by the leader selecting a space in a room for
themselves. They continue by clicking on Room Search Wizard and select the hall, floor, and room (either the same room for
the roommate or the connecting suite for the suitemates). The leader then selects the name of the next student in the group
to assign. This must be done for each person in the group. Click Save & Continue. (FYI-After students have selected a room,
they can use the Room Swap feature to move to another room. Students are not moved out of their current room, until they
click they want to move to the new room.)
‘Room Selection – Rooms Available’ will appear. Students can use this page for a number of reasons. They can
search ahead for a room, they can renew their current bed (returners to the halls only for the dates of
homesteading) and Room Search Wizard. Students cannot select a room until they have been assigned a
RANDOM timeslot by the lottery generator. The timeslot is sent to the student MIX account.
‘Rooms Available’ – this will let you view only spaces which are available. You must select a hall, then it will
display the floors which have vacancies. Select a floor and click Save & Continue (Image on the left). The next
page will be Room Selection – Rooms Available (Image on the right). It will show every space in the hall and
floor you selected. Click on the magnifying glass and it will displays the beds which are still open. ‘Room Search
Wizard’ works the same as ‘Rooms Available’ except you will reserve a room through the Wizard.
‘Room Search Wizard’ is where you actually select a space for yourself. After you are done selecting
your space, you must continue and select a room for your roommate and the remainder of your
group.
Each student in the group must be assigned to a space by the leader of the group. This is done by
the leader selecting a space in a room for themselves. They continue by clicking on Room Search
Wizard and select the hall, floor, and room (either the same room for the roommate or the
connecting suite for the suitemates). The leader then selects the name of the next student in the
group to assign. This must be done for each person in the group. When students in the group click
on Application Status (above the timeline in the top right hand corner), they will see the room/suite
and the students assigned to each space in the room/suite.
If a leader does NOT assign everyone in the group, those spaces are open for any student to
select. We will NOT move those students. At this point the group must decide if they want to move
to another room or hall, or if they want to break the group apart.
‘Timeline Across the Top’ – make sure you are watching the timeline across the top of your pages.
Putting the mouse over an item will help you to know when an item is opening.
Depending upon what information was
required during the application process, there
maybe pages which appear to be missing.


© Copyright 2026