
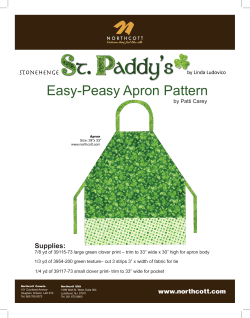
0507 FREE Apron Pattern Guidesheet English 1 Illustration legend
0507 FREE Apron Pattern Guidesheet
Illustration legend
RIGHT
side of fabric
WRONG
side of fabric
pattern tissue
pocket lines are printed on the pattern to show
you exactly how each pocket should be positioned
on a garment. Pocket lines are the same size and
shape of the finished pockets, so no guesswork is
necessary. Simply line up the finished edges of the
pocket with the line, and it will be right every time.
Finished garment
English 1
the fold to hold it in place, but only do it lightly or
you could wind up with a crease up the center of
your garment that you’ll never be able to get rid of!
side. For example, if you hold and cut with your
right hand, the pattern should be to the right of
the scissors, and the excess to the left. This gives
maximum control during cutting, while enabling you
to gently pull away the excess with your other hand
to keep it out of the way while you work. Cut along
the solid cutting line, all around the pattern piece.
What if the pencil lines show and don’t wash out?
The basting may take a little extra time at the
beginning, but is well worth it in the long run.
0507
1
dots are the small circular markings printed on
the pattern piece. Their job is to guide the placement of one piece onto another. Most pieces have
a definite top and a definite bottom, so there are
differently-sized dots to be marked, helping you
make sure that you don’t place something upsidedown or backwards. Match them up exactly, and
you can’t go wrong!
What you’ll need
fabric
thread to
match fabric
for sewing
thread to
contrast fabric
for basting
sewing machine
straight pins
fabric scissors
pencil or fabric
marking pen
ruler
hand sewing
0507
1
07
05
3
needle
dowel, pencil or
chopstick
This pattern comes in ONE SIZE, which fits most
body types and sizes. Use the apron ties to adjust
the fit, just like you would with a store-bought one.
Simplicity’s seam & hem allowances are all
included in each pattern piece, but are not marked
as actual lines. The standard seam allowance given
is 5/8", unless noted differently. Hem allowances
vary and depend on each individual garment; hem
allowances are noted as text on the pattern tissue.
The arrow printed on each pattern piece is the
grain line. Grain lines are printed on the pattern to
show the proper direction and position of each
piece on the fabric. Unless noted otherwise, the
grain line should be matched up to the lengthwise
grain of the fabric. If you look at a yard of fabric,
you’ll see that there are two edges that look finished and don’t unravel or come apart; each of
these edges is called the selvage, which is formed
during the fabric weaving process. Woven fabrics
have two grains: the lengthwise grain, which runs
parallel to the selvage, and the crosswise grain,
which runs perpendicular to the selvage.
0507
2
1
3
1. Lay the folded fabric on a large flat surface.
Begin by placing PIECE 1, which is the largest
piece, on the fabric—place the grain line-marked
straight edge along the fold of the fabric. Since the
pattern piece represents half of the shape that you
will need, placing the pattern on the fold will result
in a full-sized and shaped fabric piece, once it has
been cut out and unfolded.
0507
small wooden
About this pattern
0507
0507
Cutting instructions
0507
0507
3
4
1
Prep your pattern
When you first open up the pattern tissue, you’ll
find that it comes in one big piece. Cutting the
individual pattern pieces apart will make them
much easier to work with. Cut around each piece
just outside the cutting line, which is printed as a
solid line. Once the pieces have been separated,
go ahead and throw away the leftover tissue—
you’re not going to need it anymore.
Make sure that the pattern is smooth and flat,
as wrinkles and folds can distort the shape of the
piece. Press each piece with a warm, dry iron with
absolutely no steam; the tissue is fragile, and
doesn’t hold up when wet.
0507
3. To mark dots, start by removing the pattern
tissue from the two-ply cut fabric piece. Since
the dots need to be marked on the RIGHT side
of the fabric, re-fold the fabric piece with WRONG
sides together. Re-pin the pattern tissue to the
two-ply fabric, carefully lining up all of the edges.
0507
1
Place a pin through the center of each dot, going
through both pattern tissue and fabric. Turn the
fabric over carefully, so that these pins stay in
place. Take a pencil and mark a dot where each
pin point comes through, on the right side of the
fabric. Be sure to mark large dots as large dots
and small dots as small dots. Remember that these
dots are different sizes on purpose, and this will
matter when you’re sewing your apron together!
2
4
05
1. To mark the pocket lines on the apron, poke
pins through all thicknesses at the two ends and
the two corners of the pocket lines. When you turn
the fabric over to the other side, you will see four
pins poking through to the wrong side of the fabric,
forming an invisible square. Take a ruler and pencil
and draw lines connecting the dots at the sides
and bottom, forming an angled “U” shape. Repeat
the process so that you’ll have one pocket line on
each side of the apron.
0507
0507
0507
3
There are two different types of markings that you
will need to transfer to your fabric: pocket lines
and dots.
2. Lay the remaining pattern pieces on the fabric,
placing them around PIECE 1 and lining up the grain
line on each piece with the lengthwise grain of the
fabric. Some pattern pieces aren’t placed on the
fold; when cut out, these will create two exact fabric
copies of those pattern pieces. Your final Cutting
Layout should look like the one printed here:
0507
7
050
Marking instructions
3
1
07
4
1
0507
2
Prep your fabric
0507
2
0507
0507
4
3
0507
1
4. Cut with your scissors positioned so that the
pinned pattern is on the side that is holding the
scissors, and the excess fabric is on the other
2. With a hand sewing needle and thread that
contrasts with your fabric, HAND BASTE along the
pencil-marked pocket lines you’ve just drawn.
Basting stitches are formed by simply pulling the
needle and thread in and out of the fabric, in
approximately 1/2" long stitches. This stitching
will show through to the right side of the fabric,
showing the pocket lines. You may ask: why not
mark the pocket lines on the right side from the
beginning and skip this part? Two reasons: first,
pencil lines may not show up on your fabric, depending on its print and color. Second, you really don’t
want to draw on the right side of your fabric in case
the pocket placement winds up being a tiny bit off.
Remove the pins from the centers of the dots, and
re-insert them through the markings you have just
made, until they go all the way through the fabric
and tissue. Turn the fabric over, and carefully pull
back the tissue so that you can mark the dots
on the side of the fabric that’s underneath.
* flip over for sewing instructions >
)
Treat your fabric the same way you would treat
your finished garment; wash and dry as per fabric
care instructions. This will pre-treat your fabric so
that you don’t have your garment shrinking the first
time you put it in the laundry. Fabric needs to be
smooth and flat before cutting, so take the time
to press your fabric carefully after laundering.
Fold your fabric in half along the lengthwise grain,
with right sides together and selvages matching.
For example, if you have 2 yards of 45" wide
fabric, you’ll have a 2 yard length of 22 1 ⁄ 2" wide
fabric when folded. You may want to lightly press
3. Pin the pattern pieces to the fabric, pinning
through all thicknesses. Start at the middle of
each piece and work your way to the corners,
smoothing the pattern as you go to avoid bunches
or bubbles. Be sure to place the pins parallel to
the cutting line, so they don’t get in the way when
you are doing the actual cutting.
0507 FREE Apron Pattern Guidesheet
Illustration legend
RIGHT
side of fabric
WRONG
side of fabric
8. Fold the bottom edge and side edges of the pocket
along the stitched lines, forming 5/8" wide hems.
Press these folds.
English 2
14. Fold the neck tie piece in half lengthwise, with the
RIGHT sides of the fabric facing each other. It should look
like a long narrow tube. Machine stitch the two long edges
together 3/8" (1 cm) from the cut edges, forming a 3/8"
(1 cm) seam.
21. With the RIGHT side of the fabric facing you,
machine stitch the hem in place, stitching 3/8" (1 cm)
from the folded edge. Then remove the basting stitches.
The apron is now ready for the tie ends to be attached.
pattern tissue
Sewing instructions
1. Open the apron front and lay it on a flat surface, with
the RIGHT side of the fabric face up.
9. After preparing both pockets, place each pocket on
the front, with the WRONG side of each pocket facing
the RIGHT side of the front. Match up the pocket edges
with the basting stitches on the front, fitting them as
exactly as possible and making sure that the machinestitched hem is at the top. Pin both pockets in place
along the bottom and sides only, leaving the top open.
2. On the RIGHT side of one pocket, machine stitch 1"
(2.5 cm) from the top edge of the pocket.
3. With the WRONG side of the fabric facing you, fold
the top down, so that the cut edge meets the machine
stitching. Press this fold. Fold the top down again, this
time folding along the machine stitching. Press this fold;
this forms the finished pocket hem. Hand baste the hem
to keep it in place while you machine sew.
4. With the RIGHT side of the fabric facing you, sew a
row of machine stitching 3/8" (1 cm) from the finished
edge, stitching the pocket hem securely in place. Press
the machine stitching to set the stitches. You can now
pull out the basting stitches.
5. On the RIGHT side of the pocket, machine stitch 5/8"
(1.5 cm) from the cut edges of both sides and the bottom.
Run the stitching from edge to edge each time, so that the
stitched lines cross at all four corners, as shown here.
10. Hand baste the pockets to the front, sewing your
basting stitches 3/8" (1 cm) from each pinned edge.
Machine stitch the pockets to the apron, following the
basting stitches; sew each row of stitches to the edges
of the pockets, crossing the stitching at the two bottom
corners. Pull out the basting stitches, now that the
pockets are securely sewn on. It’s a good idea to put
a second row of stitching, right on top of the first row—
this will keep the pockets in place, even with regular
wear and tear.
11. On the RIGHT side of the apron, machine stitch 1"
(2.5 cm) from the cut edge at each armhole.
12. With the WRONG side of the fabric facing you, turn
down the upper edge of each armhole, so that the cut
edge just meets the stitched line. Press these folds.
Fold each armhole down again, folding along the stitched
lines; press these folds. Hand baste the armhole hems
to keep them in place.
15. To turn the neck strap right side out, start by threading
a hand needle with a long piece of thread. Knot the two
ends of the thread together in a big knot, and slide the
needle until it is exactly at the center of the now-connected
thread. A double ply thread will be stronger, so you don’t
have it breaking in mid-turn! Pull the needle and thread
through the seam allowance at one end of the neck tie,
pulling it until it stops at the knot. Give it a tug—if the
thread pops out, you’ll need to make the knot bigger.
16. Insert the needle, eye-first, into the open end of
the tube, using the needle to guide the thread through
the tube. Once the needle emerges from the other end
of the tube, starting pulling on the thread. Since the
thread is attached to the other end of the tube, it will
pull the fabric through itself, turning it right side out in
the process. Pull it gently and take your time to get it
all turned in one piece. Once the entire neck strap has
been turned right side out, you can snip off the thread.
17. Flatten the neck strap so that the seam runs the
length of the strap and the other edge of the strap forms
a fold; press the strap flat. Lay the strap horizontally,
so that the small dots are in the two top corners, and
the large dots are in the two bottom corners.
7. Snip off the tips of the triangles, about 1/4" (6 mm)
from each fold. This will reduce the bulk in the corners
of the pocket, making it easier to stitch through when
attaching the pocket to the front.
26. With the RIGHT side of the fabric facing you, machine
stitch the side hems in place, stitching 3/8" (1 cm) from
the folded edges. Then remove the basting stitches.
Your apron is almost finished!
23. Turn each strap RIGHT side out by using a small
wooden dowel, unsharpened pencil or chopstick. Place
the dowel on the sewn short end and gently push the
end inside, over the end of the dowel. Keep pushing
the fabric over the dowel, until the tie end is completely
turned right side out and the dowel is inside the tie end.
Use the end of the dowel to push the corners of the
tie ends out as far as possible, until you get two sharp
corners—just be careful not to push too hard, or the
stitching at the corners will break and cause holes in
the end! Press each tie end flat in the same way you
pressed the neck strap.
27. With the RIGHT side of the fabric facing you, machine
stitch 1" (2.5 cm) from the cut lower edge. With the
WRONG side of the apron facing you, fold the cut edge
up until it meets the stitching; press. Fold up again,
along the stitching line and press in place. Hand baste
the hem.
18. Fold the two strap ends up, forming a “U” shape.
Now the neck strap is ready to be attached to the apron.
19. Place the strap on the RIGHT side of the apron at
the neck, matching the cut edges, large dots and small
dots on the strap with the coordinating cut edge, large
dots and small dots on the apron. Pin the strap to the
apron to hold it in place. Machine stitch across the
apron neck 1" (2.5 cm) from the cut edge, catching the
strap ends in the stitching as you sew. Once the stitching is complete, you can remove the pins.
6. Hold the pocket with WRONG side of the fabric facing
you and the hemmed edge at the top. Turn up one of the
bottom corners on a diagonal, with the fold meeting the
crossed stitching and forming a small triangle. Press the
fold in place. Repeat with the other bottom corner.
13. With the RIGHT side of the fabric facing you,
machine stitch the armhole hems, stitching 3/8" (1 cm)
from the finished edges. Press the hems to set the
stitches—you can now go ahead and pull out your
basting, as you no longer need it. Your apron is now
ready for the neck strap and tie ends.
22. Fold each tie end in half lengthwise, with the RIGHT
sides facing each other and matching the long cut
edges. Pin together along the long cut edges and the
short end that does NOT have dot markings. Machine
stitch along the pinned edges in a 3/8" (1 cm) seam.
Then remove the pins and clip off the corners of the
stitched end, being careful not to clip the stitching.
24. Place each tie end on the RIGHT side of the apron
at the corner of the finished armhole and side, matching
the cut edges, large dots and small dots on the tie ends
with the coordinating cut edge, large dots and small dots
on the apron. Pin the tie ends to the apron to hold them
in place. Machine stitch along each apron side 1" (2.5
cm) from the cut edge, catching the tie ends in the
stitching as you sew. Then remove the pins.
28. On the RIGHT side of the apron, machine stitch the
hem, stitching 3/8" (1 cm) from the folded edge. Then
remove the basting. Your apron is now complete!
20. With the WRONG side of the fabric facing you, fold the
neck edge down until the cut edge meets the stitching; be
sure to fold the strap ends at the same time. Press this
fold. Turn the neck down again, folding along the stitching
line; press. Hand baste the neck hem to hold it in place.
25. With the WRONG side of the fabric facing you, fold
each side until the cut edge meets the stitching; be sure
to fold the tie ends at the same time. Press these folds.
Turn each side again, folding along the stitching line;
press. Hand baste these hems to hold them in place.
Need sewing help? Call our hotline: 1-888-588-2700
(toll-free in U.S. & Canada)
…or email your question to: [email protected]
SHOP 24/7 AT SIMPLICITY.COM
© Copyright 2007 Simplicity Pattern Co., Inc. Printed in USA. Simplicity is a registered trademark of Simplicity Pattern Co., Inc.


© Copyright 2026