
Objective-C Bonus ChapteR
Bonus ChapteR
Objective-C
If you want to develop native iOS applications, you must learn
Objective-C. For many, this is an intimidating task with a steep
learning curve. Objective-C mixes a wide range of C-language
constructs with a layer of object-oriented design. In addition, iOS
applications leverage a number of design patterns. While these
patterns provide both flexibility and power, they can often confuse beginners.
This bonus chapter presents an overview of the Objective-C
features needed to successfully develop iOS applications, as well
as an explanation of new technologies that tame Objective-C’s
more complex aspects. This will help reduce the learning curve to
a gentle speed bump.
BC-3
Note: Everything in this bonus chapter is important, but don’t feel like you
have to memorize it or even understand it completely after just one reading.
Instead, you should continue to use this chapter as a reference as we
move through the book. Many of the issues discussed will make more
sense once we are dealing with concrete, real-world examples, and I encourage you to come back and re-read the explanations in this chapter, after you
get some hands-on experience working with the code.
Objective-C Overview
Objective-C is a small, elegant, object-oriented extension to the C language. Strictly speaking, it is a superset of C. You can use any valid C code in an Objective-C project. This gives
us access to numerous third-party libraries, in addition to Apple’s Objective-C and C
frameworks.
Objective-C borrows much of its object syntax from Smalltalk. Smalltalk was one of the
earliest object-oriented languages. It was designed to be simple—both easy to implement
and easy to learn. Despite its age, Smalltalk remains one of the most innovative program
languages on the market. Many modern languages are just now rediscovering techniques
originally developed in Smalltalk. And Objective-C gains a lot from this heritage: a highly
dynamic, very expressive foundation upon which everything else is built.
As a dynamic language, Objective-C binds methods and arguments at runtime instead of
compile time. You don’t need to know the object’s class. You can send any object any message. This is a double-edged sword. It can greatly simplify your code. Unfortunately, sending an object a message that it doesn’t understand will crash your application. Fortunately,
Xcode analyzes our code, giving us warnings about undeclared messages. Furthermore, we
can use static types for our objects, which increases the compiler’s ability to analyze our
code and produce warnings.
Objective-C is also a highly reflective language—it can observe and modify itself. We can
examine any class at runtime, getting access to its methods, instance variables, and more.
We can even modify classes, adding our own methods using categories or extensions or even
dynamically replacing existing methods at runtime.
Finally, Objective-C—and in particular the Cocoa and Cocoa Touch frameworks—utilize
a number of design patterns to reduce the binding between the different sections of our
code. Loosely bound code is easier to modify and maintain. Changes to one part of the program do not affect any other parts of our code. However, if you are not familiar with these
patterns, they can make the code hard to follow.
These patterns include using a Model-View-Controller (MVC) framework for our programs, using delegates instead of subclassing, enabling key-value coding (KVC) for highly
dynamic access to an object’s instance variables, using key-value observing (KVO) to monitor
any changes to those variables, and providing our applications with an extensive notifications framework.
BC-4 Bonus ChapteR Objective-C
As you master Objective-C, you will find that you can often solve complex problems with
considerably less code than you would need in more traditional programming languages,
such as C++ or Java. This is because we can more carefully tailor our solution to fit the problem, rather than trying to hammer a square peg into a round hole.
Additionally, Apple makes good use of this flexibility when designing both the Cocoa
Touch frameworks and Xcode’s developer tools. These tools make common tasks easy to
accomplish without a lot of repetitive boilerplate, while still making it possible to work outside the box when necessary.
The rest of this bonus chapter describes the Objective-C programming language. It is not
meant to be all-inclusive; you could easily write an entire book on Objective-C. In fact, several people have. Instead, this chapter is the “vital parts” version. It provides enough information to get started, while pointing out many of the key features and common mistakes.
While previous experience with objective-oriented programming is not necessary, I
assume you have a basic understanding of other C-like programming languages (e.g., C, C++,
or Java). If the following example leaves you completely baffled, you may want to brush up
your C skills before proceeding. If you can correctly predict the output,1 you should be fine.
#include <stdio.h>
int main (int argc, const char * argv[])
{
int total = 0;
int count = 0;
for (int y = 0; y < 10; y++)
{
count++;
total += y;
}
printf(“Total = %d, Count = %d, Average = %1.1f”,
total,
count,
(float)total / (float)count);
return 0;
}
1 The correct answer is “Total = 45, Count = 10, Average = 4.5.” Bonus points if you can actually compile and
run the program.
Objective-C Overview BC-5
Fundamental Building Blocks of
Objective-C
I won’t kid you. Previous versions of Objective-C had an incredibly steep learning curve.
Some aspects, such as memory management, were practicable only by robotically following
a strict set of rules. Even then, you could easily slip up and get things wrong, leading to bugs,
errors, and crashes. Fortunately, Apple continues to improve the Objective-C language and
reduce its complexity. As a result, we spend less time shepherding the programming language and more time solving real problems.
Still, if you haven’t done any object-oriented programming, it can be a lot to wrap your
head around. There are many new concepts to master: classes, objects, subclasses, superclasses, overriding methods, and more.
Even worse, experience with other object-oriented programs might not help as much as
you expect. Objective-C handles objects and methods very differently than languages such as
Java and C++. Leaning too heavily on your previous experience may actually lead you astray.
With all that said, there are really only a few key elements you need to understand. These are
the foundation upon which everything else is built: standard C data types, structures, enums,
functions, operators, objects, protocols, categories, and extensions. Once you understand these
(and—most importantly—the differences between them), you are 90 percent home.
In general, these elements can be divided into two categories: data and procedures. Data
(C types, structures, and enums) represent the information we are processing. If you compare
our code to an English sentence, the data is the nouns. Procedures (C operators and functions),
on the other hand, are processes that manipulate or transform that data. They are our verbs. A
computer program is basically a list of steps defining data and then manipulating it.
Objects play a particularly interesting role, since they combine both the data (instance
variables) and the procedures (methods) into a unified entity. Still, before we look at objects,
we need to understand the low-level data and procedures.
The rest of this section will focus on the fundamental building blocks that Objective-C
inherits from C. Everything in this section is simply old-school C code. We may use it somewhat differently than a traditional C application would, but it hasn’t been modified in any
way. This provides a solid foundation for us to build upon when we start looking at objects
and object-oriented programming.
C Data Types
Objective-C is built upon the C programming language. As a result, the C data types are our
most primitive building blocks. All other data structures are just advanced techniques for
combining C types in increasingly complex ways.
All C data types are, at their root, fixed-length strings of 1s and 0s either 8, 16, 32, or 64
bits long. The different data types simply define how we interpret those bits. To begin with,
we can divide the data types into two main categories: integer values and floating-point
values (Table1 and 2).
BC-6 Bonus ChapteR Objective-C
Table 1 Common C Data Types for 32-Bit iOS (ILP32)
Integer Data Type
Bit Length
Signed Range
Unsigned Range
BOOL
8 bits
N/A
YES or NO
char
8 bits
-128 to 127
0 to 255
short
16 bits
-32768 to 3276
0 to 65535
int
32 bits
-2147483648 to 2147483647
0 to 4294967295
long
32 bits
-2147483648 to 2147483647
0 to 4294967295
long long
64 bits
approx. -1E19 to 1E19
0 to approx. 2E19
pointer
32 bits
none
0 to 4294967295
NSInteger
32 bits
-2147483648 to 2147483647
0 to 4294967295
Float Data Type
Bit Length
Min
Max
Epsilon
float
32 bits
1.175494E-38
3.402823E+38
1.192093E-07
double
64 bits
2.225074E-308
1.797693E+308
2.220446E-16
CGFloat
32 bits
1.175494E-38
3.402823E+38
1.192093E-07
Table 2 Common C Data Types for 64-Bit iOS (ILP64)
Integer Data Type
Bit Length
Signed Range
Unsigned Range
BOOL
8 bits
N/A
YES or NO
char
8 bits
-128 to 127
0 to 255
short
16 bits
-32768 to 3276
0 to 65535
int
32 bits
-2147483648 to 2147483647
0 to 4294967295
long
64 bits
-2147483648 to 2147483647
0 to approx. 2E19
long long
64 bits
approx. -1E19 to 1E19
0 to approx. 2E19
pointer
64 bits
none
0 to approx. 2E19
NSInteger
64 bits
approx. -1E19 to 1E19
0 to approx. 2E19
Float Data Type
Bit Length
Min
Max
Epsilon
float
32 bits
1.175494E-38
3.402823E+38
1.192093E-07
double
64 bits
2.225074E-308
1.797693E+308
2.220446E-16
CGFloat
64 bits
2.225074E-308
1.797693E+308
2.220446E-16
Fundamental Building Blocks of Objective-C BC-7
Integer values are used for storing discrete information. This most often means positive
and negative whole numbers but could represent other symbolic information (e.g., BOOLs
are used to represent YES and NO values, while chars are used to represent ASCII characters).
The integer types include BOOL, char, short, int, long, and long long data types. The main
difference between them is the number of bits used to represent each value. The more bits,
the wider the range of possible values; however, the data also takes up more space. Discrete
values also come in signed and unsigned variants. This determines how the numbers are
interpreted. Signed data types can be both positive and negative numbers, while unsigned
data types are always zero or greater.
note: C (and by extension, Objective-C) does not have a defined standard for
the size or alignment of its data types. This means the exact size can vary
depending on both the compiler that you are using and the target platform.
For example, long values could be either 32 or 64 bits long. As a result, your
program shouldn’t make assumptions about either the number of bits or the
minimum and maximum values of each data type. Instead, use the sizeof()
function and the macros defined in limits.h and float.h or to determine these
values at runtime. Apple also provides minimum and maximum constants in
the Foundation Constants Reference and the GCGeometry Reference.
Floating-point values (float and double) are used to approximate continuous numbers—basically, any number with a decimal point. I won’t go too deep into the theory and
practice of floating-point numbers here; you can find all the eye-bleeding detail in any
introductory computer science book. Suffice it to say, floating-point numbers are only
approximations. Two mathematical formulas that are identical on paper may produce very
different results. However, unless you are doing scientific calculations, you will typically run
into problems only when comparing values. For example, you may be expecting 3.274, but
your expression returns 3.2739999999999999. While the values aren’t equal, they are usually
close enough. Any difference you see is probably the result of rounding errors. Because of
this, you will often want to check to see whether your value falls within a given range (3.2739
< x < 3.2741) rather than looking for strict equality.
C has two types of floating-point values: float and double. As the name suggests, a double is twice as big as a float. The additional size improves both the range and the precision
of its values. For this reason, it is tempting to always use doubles instead of floats. In some
programming languages, this is idiomatically correct. I could probably count the number of
times I used floats in Java on one hand. However, when developing for 32-bit iOS devices,
floats are much more common. 64-bit values cannot be processed in a single operation on
32-bit machines, so working with doubles will take longer on these devices.
In fact, despite the wide range of available C data types, we will typically only use BOOL,
int, and floats (BOOL, long, and doubles in 64-bit code). However, it often feels like we are
using a much broader range of data types, since the core framework frequently uses typedef
to create alternative names for int and float (and occasionally other data types as well).
Sometimes this is done to provide consistency and to increase portability across multiple
BC-8 Bonus ChapteR Objective-C
Floating-Point Approximation
Perhaps I’m being a bit unfair when I say that binary floating-point numbers are an
approximation. After all, decimal numbers are also an approximation. As we all learned in
fifth grade, there are certain fractions that cannot be represented exactly: The fraction ⅓
must be approximated as 1.3333…. The real problem is that some numbers, which can be
represented exactly in decimal notation, can be approximated only in binary. For example,
0.210 is 0.001100110011…2.
There are two places where this causes problems. The first is in scientific programming—
or really any programming that involves a lot of math. As the number of calculations
increases, small errors may be magnified until they have significant effects on the results.
Anyone performing scientific computing should take steps to help minimize these effects.
The second place is financial calculations—and, in particular, when calculating U.S. dollars, where we represent currency out to two decimal places. Imagine you want to store
20 cents in your application. If you use a floating-point number, saving this as 0.2, the
actual representation will be either slightly more or slightly less than 20 cents.
People are funny when it comes to their money. They get really upset when their bank
balance says $999.9999999 instead of $1,000.00. While we can see that this is just a
rounding error and round up to the nearest $0.01—it’s easy to make mistakes. What happens if they try to withdraw $1,000.00? The system should let them—but a naïve check
will say that they have insufficient funds. In practice, it’s very easy to accidentally introduce a whole slew of off-by-one errors.
Fortunately, there is a solution. Objective-C has a data type specifically designed for dealing with decimal-based floating-point values. NSDecimalNumber is a subclass of NSNumber.
This is a class—so it’s not as easy to use in calculations as a simple C floating-point value.
However, it can be invaluable whenever you need precise decimal calculations.
platforms. For example, CGFloat and NSInteger are both defined so that their size matches
the target processor’s integer size (32- or 64-bits). All else being equal, these values should
be the most efficient data type for that particular processor. Other types are defined to better
communicate their intent, like NSTimeInterval.
You can use the documentation to see how these types are defined. For example, in
Xcode, open the documentation by selecting Help > Documentation and API Reference.
Search for NSTimeInterval. This should open the Foundation Data Type Reference and automatically scroll to the NSTimeInterval entry (though I had to scroll up slightly to find it on
my machine). As you can see, the actual definition is shown as follows:
typedef double NSTimeInterval;
This means NSTimeInterval is just an alias for double.
Fundamental Building Blocks of Objective-C BC-9
Supporting 64-bit Code
Before the release of the iPhone 5S, iOS was a purely
32-bit environment. Now, we need to support both
32-bit and 64-bit devices.
64-bit devices can run 32-bit code. So, we could
just compile our projects for 32-bit processors, if we
wanted. However, there are a number of reasons to
support 64-bit.
First, the 64-bit processor has twice as many registers
as the earlier 32-bit versions. This means that code
compiled for 64-bit will be able to work with more
data at once. This can result in significant increases in
performance—especially for applications that require
a lot of 64-bit math.
Additionally, to support 32-bit programs, 64-bit applications must have two versions of every library. The
system will use the 64-bit version by default, but will
load the 32-bit version when necessary. If you are only
running 64-bit programs, you never need to load any
of the 32-bit libraries. This could be a significant savings in memory for the entire system. Admittedly, this
isn’t likely to be important right away. However, you
don’t want to be the last 32-bit application on someone’s device. This is especially true for any applications
that perform tasks in the background.
The downside is that 64-bit data uses up more
memory than 32-bit data. Additionally, we will need
to do additional work to make sure our code compiles
properly for both 32- and 64-bits. We also need to
make sure our data formats are compatible with both
versions of our application.
When saving data, we need to make sure that we’re
saving all our C data in a common format. This means
we should never save NSInteger, NSUInteger, or
CGFloat data directly. Instead, we should convert that
data to a type that is guaranteed to not change size
when moving from device to device.
Obviously, we need to think about this when saving
data to iCloud—but it can also be a problem, even if
the data never leaves the current device. After all, our
users may upgrade to a new 64-bit device at some
point. When they do, they may restore all their application data from their backups. The new, 64-bit version of our app must be able to open the data saved
by the old, 32-bit version.
For integer data, this probably means casting our
data to the C99 explicit data types before saving. C99
defines a number of size-specific integers: int8_t,
int16_t, int32_t and int64_t. Each of these also has
an unsigned variant: uint8_t, uint16_t, uint32_t,
C Data Structures
Simple data types are all fine and good, but we often need to organize our data into more
complex structures. These structures fall into three main categories: pointers, arrays,
and structs.
Pointers
The pointer is the simplest structure—at least in concept. Basically, it is a variable that
points to the memory address of another value. This allows indirect access and modification
of those values.
In software engineering, we can often solve complex problems by adding an additional
layer of indirection. This gives us more power and more flexibility, but it comes at a great
cost. The code is harder to understand and reason about. Pointers are no exception. There
BC-10 Bonus ChapteR Objective-C
and uint64_t. Alternatively, we can convert our C-data
to NSNumber objects, which will then handle the underlying C-data for us.
We also need to make sure we’re not accidentally
truncating 64-bit values. Often, this doesn’t matter.
Many applications never use values large enough to
worry about truncating. Unfortunately, this tends to
encourage a bit of laziness in developers—bad habits,
which will eventually come back and bite us.
Remember, it’s not just big numbers. On a 64-bit
device, pointers and hash values will use the entire
64-bit range. If we accidentally convert them to 32-bit
values, our code may break badly.
To avoid possible bugs, we will set our build settings to
generate errors whenever we have an implicit conversion between 64-bit and 32-bit data types. We can still
cast the data from one type to another—but we have
to explicitly tell the system to do so. Unfortunately, this
often means our code may generate different warnings
and errors when built for 32-bit or 64-bit devices.
We also need to make sure we’re using the correct
placeholders in our formatting strings. For example,
under 32-bit, an NSInteger would require a %d
placeholder. In 64-bit, it needs a %ld placeholder. This,
obviously, creates problems when we are compiling
our applications for both 32- and 64-bits. We will look
at specific techniques for getting our application to
compile for both 32- and 64-bits in the book.
By default, all new projects created with Xcode 5 will
be compiled for both 32- and 64-bit. The application
bundle will include both executables, and the iOS
device will load the correct one when it launches the
app. Xcode 5 projects will also have the Implicit Conversion to 32 Bit Type warning turned on by default.
Projects made with earlier versions of Xcode will only
be compiled for 32-bit projects. We can manually set
this by changing the Architectures setting in our application’s Build Settings.
Additionally, projects that are compiled with 64-bit
support enabled must have a deployment target of
iOS 6 or above. Projects that are just compiled for
32-bit devices can have a deployment target of iOS 4.3
or above. So, if you need to support older devices, you
may not be able to support 64-bit.
are very few things as powerful as the pointer—and very few things that can create serious
bugs quite so easily.
In fact, many modern programming languages hide pointers away from mere mortals.
They use pointers internally, of course, but they don’t give developers direct access to the
raw pointers. For better or worse, Objective-C is not one of these languages. We are free to
use and abuse pointers to our heart’s content.
You declare a pointer by placing an asterisk between the type declaration and the variable name. You also use the asterisk before the variable name to dereference the pointer (to
set or read the value at that address space). Likewise, placing an ampersand before a normal
variable will give you that variable’s address. You can even do crazy things like creating
pointers to pointers for an additional layer of indirection.
Fundamental Building Blocks of Objective-C BC-11
int a = 10;
int *b = &a;
// Creates the variable a.
// Creates the pointer, b, that points to the
// address of a.
*b = 15;
// Changes the value of variable a to 15.
int **c;
// Creates a pointer to a pointer to an int.
note: When you declare a pointer, the compiler does not request memory
space for the underlying values. It requests only enough space to store the
memory address. You must either use the pointer to refer to an existing
variable (as we did in the example above) or manually manage the memory on the heap. We will explore this issue in more depth when we discuss
memory management later in this chapter.
By themselves, pointers are not very interesting; however, they form the backbone of
many more-complex data structures. Additionally, while pointers are conceptually quite
simple, they are difficult to master. Pointers remain a common source of bugs in programs,
and these bugs are often very hard to find and fix. Unfortunately, a full description of pointers is beyond the scope of this chapter.
Fortunately, we will normally use pointers only when referencing Objective-C objects,
and these objects largely have their own syntax. In many ways, you can think of the asterisk
as part of the class’s name and largely ignore pointers. This is, in my opinion, one of the biggest differences between C and Objective-C programming.
C Arrays
C arrays allow us to define a fixed-length series of values. All of these values must be of the same
type. For example, if we want a list of ten integers, we would simply define it as shown here:
int integerList[10];
// Declares an array to hold ten integers.
We can then access the individual members of the list by placing the desired index in the
brackets. Note, however, that arrays are zero-indexed. The first item is 0, not 1.
integerList[0] = 150;
// Sets the first item in the array.
integerList[9] = -23;
// Sets the last item in the array.
int a = integerList[0];
// Sets a to 150.
We can also use the C literal array syntax to declare short arrays with a static set of initial
values. We write literal arrays as a pair of curly braces surrounding a comma-separated list of
values.
int intList2[] = {15, 42, 9};
// Implicitly declares an array
// to hold three integers,
// then sets their values
// using the literal array.
BC-12 Bonus ChapteR Objective-C
As this example shows, we do not even need to define the length of intList2. Instead,
its size is automatically set equal to the literal array. Alternatively, you could explicitly set
intList2’s size, but it must be equal to or longer than the literal array.
Arrays are also used to represent C-style strings. For example, if you want to store someone’s name in C, you usually store it as an array of chars.
char firstName[255];
Since they are based on arrays, C-style strings have a fixed size. This leads to a very common source of bugs. Yes, 254 characters should be enough to store most people’s first name,
but eventually you will run into a client that needs 255 characters (not to mention international character sets).
As this example implies, the string does not need to use up the entire array, but it must fit
within the allocated memory space. Actually, the array’s size must equal or exceed the number of characters in the string + 1. C-style strings always end with a null character.
String values can be assigned using literal strings—anything within double quotes. C will
append the null value automatically. In this example, s1 and s2 are identical.
char s1[5] = “test”;
char s2[5] = {‘t’, ‘e’, ‘s’, ‘t’, ‘\0’};
note: A and A are completely different data types. In C, single quotes are
used to represent char values. Therefore, A is a char with the value of 65 (the
ASCII value for the uppercase letter A). On the other hand, A is an array
of chars with the values {'A', '\0'}.
Like pointers, arrays can become quite complex—particularly when passing them into or
returning them from functions, and we haven’t even begun talking about advanced topics
like multidimensional arrays and dynamic arrays. Fortunately, unless you are calling a C
library, we will almost never use arrays in Objective-C. Instead, we will use one of ObjectiveC’s collection classes (NSArray, NSSet, or NSDictionary). For strings, we will use NSString.
Structs
Structs are the most flexible C data type. While arrays allow us to declare an indexed list of
identical types, the struct lets us combine different types of data and lets us access that data
using named fields. Also, unlike C-style arrays, Cocoa Touch makes heavy use of C structures. In particular, many of the lower-level frameworks are written in pure C. These often
make heavy use of structures.
The easiest example is the Core Graphics framework. It declares structures to represent
points, sizes, and rectangles (among others). We will often use these structures in our drawing code—even if we are using higher-level, Objective-C drawing libraries.
Fundamental Building Blocks of Objective-C BC-13
To see a typical struct, look up CGPoint in Xcode’s documentation. You will see that it is
declared as shown here:
struct CGPoint {
CGFloat x;
CGFloat y;
};
typedef struct CGPoint CGPoint;
First, the framework creates a structure called CGPoint. This structure has two fields,
x and y. In this case, both fields happen to be the same data type (CGFloat).
Next, we use typedef to define a type named CGPoint. This is an alias for the CGPoint
struct. That may seem odd, but it is actually quite helpful. If we didn’t use the typedef, we
would constantly have to refer to this entity as struct CGPoint in our code. Now, however,
we can drop the struct keyword and treat it like any other data type.
You access the fields as shown here:
CGPoint pixelA;
// Creates the CGPoint variable.
pixelA.x = 23.5;
// Sets the x field.
pixelA.y = 32.6;
// Sets the y field.
int x = pixelA.x;
// Reads the value from the x field.
Apple’s frameworks often provide both the data structures and a number of functions
to manipulate them. The documentation tries to group related structures and methods
together wherever possible. For any struct type, Apple provides a convenience method
for creating the struct, a method for comparing structs, and methods to perform common
operations with the struct. For CGPoint, these include CGPointMake(), CGPointEqual
ToPoint(), and CGRectContainsPoint().
These methods become more important as the structures grow increasingly complex.
Take, for example, CGRect. This struct also has just two fields: origin and size; however,
these fields are each structs in their own right. Origin is a CGPoint, while size is a CGSize.
The following code shows three different approaches to creating a CGRect. All three
approaches are equivalent.
CGRect r1;
r1.origin.x = 5;
r1.origin.y = 10;
r1.size.width = 10;
r1.size.height = 20;
CGRect r2 = CGRectMake(5, 10, 10, 20);
CGRect r3 = {{5, 10}, {10, 20}};
BC-14 Bonus ChapteR Objective-C
In particular, notice how we created r3 using a struct literal. Conceptually, these are
simple. Each pair of curly braces represents a struct (just like the curly braces that represented literal arrays earlier). The enclosed comma-separated list represents the fields in the
order they were declared.
So, the outer braces represent the CGRect structure. The first inner pair of braces is
the origin, and the second is the size. Finally, we have the actual fields inside the two
inner structures.
Now, all things considered, the CGRect isn’t that complicated, but it should be clear, as
our structures get more complex the literal struct construction becomes harder and harder
to understand. In general, I rarely use literal structs, and I would consider using them only
for simple data structures and arrays. Instead, I use the helper function (as shown for r2) to
quickly make structures, and I use direct assignment (as shown for r1) when I need additional flexibility. However, you will undoubtedly run into third-party code that uses struct
literals, so you should be able to recognize and understand them.
note: If you are compiling an application with automated reference count-
ing (ARC)—and we will use ARC for all applications in the book—you cannot
store Objective-C objects inside a struct. Instead, you need to use an
Objective-C class to manage the data. This is one of the few rules we
must follow to enable automatic memory management. We will discuss this
in more detail in the “Memory Management” section later this chapter.
Complex structs can get quite large. Often, creating a pointer to a struct and passing
around the pointer is more efficient than passing around the entire struct. However, the
notation for getting and setting the value of the fields gets a bit hard on the eyes. First we
have to dereference the pointer. Then we access the field.
(*myStructRef).myField = newValue;
Fortunately, C has a solution. The -> operator both dereferences the pointer and accesses
the field in a single step. This allows us to simplify our code as shown here:
myStructRef->myField = newValue;
Enumerations
Let’s say we want to represent the days of the week in our code. We could use strings and
spell out the words. While this approach works, it has several problems. First, it requires
extra memory and computational effort just to store and compare the days. Furthermore,
string comparison is tricky. Do Saturday, saturday, and SATURDAY all represent the same
day? What if you misspell the name of a day? What if you enter a string that doesn’t correspond to any valid day?
One alternative is to manually assign an unsigned char value for each day. In this example, the static keyword tells the compiler to create the variable at compilation time. This
Fundamental Building Blocks of Objective-C BC-15
data is accessible anywhere within the current file, while the const keyword tells the compiler that these values cannot be changed once they have been initialized.
static const unsigned char Sunday = 0;
static const unsigned char Monday = 1;
static const unsigned char Tuesday = 2;
static const unsigned char Wednesday = 3;
static const unsigned char Thursday = 4;
static const unsigned char Friday = 5;
static const unsigned char Saturday = 6;
static const unsigned char Humpday = Wednesday;
This works, but there’s no way to refer to the set of days as a group. For example, you
cannot specify that a function’s argument needs to be a day of the week. That brings us to
enumerations. Enumerations provide a concise, elegant way to defining a discrete set of
values. For example, our days of the week could be as follows:
enum Day
{
Sunday,
Monday,
Tuesday,
Wednesday,
Thursday,
Friday,
Saturday
};
typedef enum Day Day;
static const Day Humpday = Wednesday;
Just as in the earlier struct example, we use a typedef to declare a type for our enum.
Now, this isn’t exactly the same as the unsigned char example. The enums take up a little
more memory. However, they sure save on typing. More importantly, the enum better communicates our intent. When we define HUMPDAY as a const unsigned char, we are implicitly
saying that it should have a value between 0 and 255. In the enum example, we are explicitly
stating that HUMPDAY should only be set equal to one of our DAY constants. Of course, nothing
will stop you from setting an invalid value.
static const Day Humpday = 143;
// While this compiles fine
// it is just wrong!
Stylistically, it is best to always use the named constants when assigning values to enum
types. And while the compiler won’t catch assignment errors, it can help in other areas,
especially when using enums with switch statements.
BC-16 Bonus ChapteR Objective-C
By default, the enum assigns 0 to the first constant, and the values increase by 1 as we
step down the list. Alternatively, you can assign explicit values to one or more of the named
constants. You can even assign multiple constants to the same value, making them aliases of
each other.
enum Style
{
Bold = 1 << 0,
Italic = 1 << 1,
Underline = 1 << 2,
AllCaps = 1 << 3,
Subscript = 1 << 4,
Strong = Bold
};
typedef enum Style style;
A couple of interesting things are going on in this example. Not only are we assigning
values to the named constants, we’re using the bit shift operator to calculate those values.
Here, we start with the number 1, which is the lowest value bit in binary. Then we shift this
bit over a number of places.
For Bold, we shift it over 0 places, giving it a value of 1. For Italic, we shift it over one
place, giving it a value of 2. Underline shifts over 2 places (value = 4) and so forth.
Enums of this style are often referred to as bitmasks, because each value corresponds to
a separate bit. This means we could, in theory, turn multiple bits on at once, creating a single
value that represents a combination of multiple items. For example, a header value could be
Bold, Italic, and AllCaps. When making these combinations, we use the bitwise OR operator (|) to combine them and use the bitwise AND operator (&) to pull them apart.
Style header = Bold | Italic | AllCaps; // Sets the style to bold,
// italic, and all caps.
if ((header & Bold) == Bold)
{
// Checks to see if the
// BOLD bit is set.
// Process bold text here
}
Cocoa Touch makes extensive use of enumerations. As you look through the iOS SDK,
you will find two common usage patterns. Normal enums are used for mutually exclusive
options. Here, we must select one and only one option from a limited set of choices. Bitmapped enums, on the other hand, indicate that we can combine multiple values into a
single complex value.
Fundamental Building Blocks of Objective-C BC-17
And some enums use both techniques. Look up UIViewAnimationOptions in the documentation. You will see the following declaration:
enum {
UIViewAnimationOptionLayoutSubviews
= 1 << 0,
UIViewAnimationOptionAllowUserInteraction
= 1 << 1,
UIViewAnimationOptionBeginFromCurrentState
= 1 << 2,
UIViewAnimationOptionRepeat
= 1 << 3,
UIViewAnimationOptionAutoreverse
= 1 << 4,
UIViewAnimationOptionOverrideInheritedDuration = 1 << 5,
UIViewAnimationOptionOverrideInheritedCurve
= 1 << 6,
UIViewAnimationOptionAllowAnimatedContent
= 1 << 7,
UIViewAnimationOptionShowHideTransitionViews
= 1 << 8,
UIViewAnimationOptionCurveEaseInOut
= 0 << 16,
UIViewAnimationOptionCurveEaseIn
= 1 << 16,
UIViewAnimationOptionCurveEaseOut
= 2 << 16,
UIViewAnimationOptionCurveLinear
= 3 << 16,
UIViewAnimationOptionTransitionNone
= 0 << 20,
UIViewAnimationOptionTransitionFlipFromLeft
= 1 << 20,
UIViewAnimationOptionTransitionFlipFromRight
= 2 << 20,
UIViewAnimationOptionTransitionCurlUp
= 3 << 20,
UIViewAnimationOptionTransitionCurlDown
= 4 << 20,
UIViewAnimationOptionTransitionCrossDissolve
= 5 << 20,
UIViewAnimationOptionTransitionFlipFromTop
= 6 << 20,
UIViewAnimationOptionTransitionFlipFromBottom = 7 << 20,
};
typedef NSUInteger UIViewAnimationOptions;
These values can be grouped into three sections. All the values in the first section are
defined sequentially. The second and third sections are not bitmasks, but they are carefully
spaced so that they will not conflict with any of the other values. This means we can combine
any number of values from group 1, one value from group 2, and one value from group 3.
Note: With the release of iOS 6, Apple introduced two macros to help cre-
ate enumerations: NS_ENUM() is used to create normal enumerations; and
NS_OPTIONS() is used to define bitmasks. Both macros allow us to specify both the enum’s name and the underlying data type. Currently, Apple
is using this notation for only a few of its enums, but we should expect the
usage to become more common over time.
BC-18 Bonus ChapteR Objective-C
Operators
Operators are a predefined set of procedural units in C. You use operators to build expressions—sets of commands that the computer will execute. For example, the expression a = 5
uses the assignment operator to set the value of a variable equal to the literal value 5. In this
example, = is the operator, while a and 5 are the operands (the things that get operated upon).
Operators perform a wide variety of tasks; however, most operators can be grouped into
a few broad categories: assignment (=, +=, -=, *=, etc.), arithmetic (+, -, *, /, %, etc.),
comparison (==, <, >, !=, etc.), logical (&&, ||, !), bitwise (&, |, ^), and membership
([], *, &).
You can also categorize operators by the number of operands they take. Unary operators take a single operand. The operator can be placed either before or after the operand—
depending on the operator. In the case of the increment (++) and decrement (--) operators,
the operand’s position affects the final value of the expression.
a++
// Increment the value of variable a by 1.
// The value of the expression is a’s original value.
++a
// Increment the value of variable a by 1.
// the value of the expression is a’s new value.
-b
// The opposite of b. If b equals 5, -b equals -5.
!c
// Boolean NOT. If c is true, !c is false.
Binary operators take two operands and are usually placed between the operands.
a + b
// Adds the two values together.
a <= b
// Returns true if a is less than or equal to b.
a[b]
// Access the value at index b in array a.
Finally, C has only one ternary operator, the ternary conditional operator.
a ? b : c
// If a is true, return b. Otherwise return c.
note: In several cases, two different operators use the same symbol.
For example, the multiply and indirection operators both use a single asterisk. The compiler will select the correct operator based on the number of
operands. In the example *a = b * c, the first asterisk is the indirection
operator (unary operator), allowing us to set the value at the memory location pointed to by a. The second asterisk is multiplication (binary operator).
Order of Precedence
Each operator has an order of precedence determining its priority relative to the other operators. Operators with a high precedence are executed before those with a lower precedence.
This should be familiar to most people from elementary math classes. Multiplication and
division have a higher order of precedence than addition and subtraction.
Fundamental Building Blocks of Objective-C BC-19
Whenever an expression has more than one operator (and most expressions will have
more than one operator), you must take into account the order of precedence. Take a simple
expression like a = b + c. The addition (+) occurs first, and then the sum is assigned (=) to
the variable a.
For the most part, the order of precedence makes logical sense; however, there are a lot
of rules, and some of them can be a bit surprising. Fortunately, we can force the expression
to execute in any arbitrary order by using parentheses. Anything inside the parentheses is
automatically executed first. Therefore, when in doubt, use parentheses.
When an expression is evaluated, the computer takes the operand with the highest
precedence and determines its value. It then replaces the operator and its operands with
that value, forming a new expression. This expression is then evaluated until we reduce the
expression to a single value.
5 + 6 / 3 * (2 + 5) // Initial expression.
5 + 6 / 3 * 7
// Operand in parentheses evaluated first.
5 + 2 * 7
// When two operators have the same precedence,
// evaluate from left to right.
5 + 14
// Perform multiplication before addition.
19
Here are a couple of rules of thumb: Any expressions inside a function or method’s
arguments are evaluated before the function call or method call is performed. Similarly, any
expression inside an array’s subscript is performed before looking up the value. Function
calls, method calls, and array indexing all occur before most other operators. Assignment
occurs after most (but not all) other operators. Here are some examples:
a = 2 * max(2 + 5, 3); // max() returns the largest value among its
// arguments. Variable a is set to 14.
a[2 + 3] = (6 + 3) * (10 - 7); // The value at index 5 is set to 27.
a = ((1 + 2) * (3 + 4)) > ((5 + 6) * (7 + 8)); // Variable a is set
// to false.
Functions
Functions are the primary procedural workhorse for the C programming language. A C program largely consists of defining data structures and then writing functions to manipulate
those structures.
We will typically use functions in conjunction with structs, especially when dealing
with the lower-level frameworks. However, you will find some functions that are explicitly
designed to work with Objective-C objects as well. In fact, we saw a function like this in
Chapter 1 of the book: UIApplicationMain().
BC-20 Bonus ChapteR Objective-C
Unlike operators, we can define our own functions. This allows us to encapsulate a series
of procedural steps so that those steps can be easily repeated as many times as necessary.
Functions are defined in an implementation file (filename ending in .m). It starts with the
function signature. This defines the function’s name, the return value, and the function’s
arguments. Arguments will appear as a comma-separated list surrounded by parentheses.
Inside the list, each argument declares a data type and a name.
A pair of curly brackets follows the function signature. We can place any number of
expressions inside these brackets. When the function is called, these expressions are executed in the order in which they appear.
CGFloat calculateDistance(CGPoint p1, CGPoint p2) {
CGFloat xDist = p1.x - p2.x;
CGFloat yDist = p1.y - p2.y;
// Calculate the distance using the Pythagorean theorem.
return sqrt(xDist * xDist + yDist * yDist);
}
In the previous example, reading left to right, CGFloat is the return value, calculate
Distance is the function name, and CGPoint p1 and CGPoint p2 are the function’s two
arguments.
Inside the function, we first create two local variables. These variables are stored on the
stack and will be automatically deleted when the method returns. We assign the difference
between our point’s x- and y-coordinates to these variables.
The next line is blank. Whitespace is ignored by the compiler and should be used to organize your code, making it easier to follow and understand. Then we have a comment. The
compiler will ignore anything after // until the end of the line. It will also ignore anything
between /* and */, allowing us to create comments spanning several lines.
Finally, we reach the return keyword. This evaluates the expression to its right and then
exits the function, returning the expression’s value (if any) to the caller. The calculateDistance() function calculates the distance between two points using the Pythagorean theorem.
Here we square the x and y distances using the multiply operator. We add them together. Then
we pass that value to the C math library’s sqrt() function and return the result.
You would call the function by using its name followed by parentheses containing a
comma-separated list of values. These can be literal values, variables, or even other expressions. However, the value’s type must match its corresponding argument. C can convert
some of the basic data types. For example, you can pass an int to a function that requires a
double. If the function returns a value, we will usually assign the return value to a variable
or otherwise use it in an expression.
Not all functions return values. Some functions create side effects (they create some sort
of lasting change in the application—either outputting data to the screen or altering some
aspect of our data structures). For example, the printf() function can be used to print a
message to the console.
Fundamental Building Blocks of Objective-C BC-21
CGPoint a = {1, 3};
CGPoint b = {-3, 7};
CGFloat distance = calculateDistance(a, b);
printf(“The distance between (%2.1f, %2.1f)”
“ and (%2.1f, %2.1f) p is %5.4f\n”,
a.x, a.y,
b.x, b.y,
distance);
In this sample, we first create our two point structs. Then we call our calculate
Distance() function, passing in a for argument p1 and passing in b for argument p2. We
then assign the return value to the distance variable. Finally, we call the printf() function,
passing in a format string and our data.
The printf() function prints a message to the console. It constructs its message from
a variable-length list of arguments. The first argument is a format string, followed by a
comma-separated list of values. The printf() function will scan through the string, looking for any placeholders (a percentage symbol followed by one or more characters). In this
example, we use the %2.1f conversion specifier. This tells printf() to insert a floating-point
value at least two digits long with exactly one digit after the decimal point. The %5.4f
conversion specifier indicates a five-digit number with four of these digits after the decimal
point. printf() will replace these conversion specifiers using the provided values in order.
If you run this code, it prints the following message to the console:
The distance between (1.0, 3.0) and (-3.0, 7.0) is 5.6569.
Finally, in C we can use the function in the file where it’s defined, but we must either
define it or declare it before we can use it. Most of the time we simply place a function declaration in a corresponding header file (filename ending in .h). The function declaration is just
the function signature followed by a semicolon.
CGFloat calculateDistance(CGPoint p1, CGPoint p2);
We can then include the header file before using the function. Additionally, this lets us
use our functions in other files. When we include a header file, we gain access to all of its
publically declared functions.
Pass by Value
In C, all functions pass their arguments by value. This means the compiler makes local copies of the arguments. Those copies are used within the function and are removed from memory when the function returns. In general, this means you can do whatever you want to the
local copy, and the original value will remain unchanged. This is a very good thing. Consider
the following examples:
BC-22 Bonus ChapteR Objective-C
void inner(int innerValue)
{
printf(“innerValue = %d\n”, innerValue);
innerValue += 20;
printf(“innerValue = %d\n”, innerValue);
}
void outer()
{
int outerValue = 10;
printf(“outerValue = %d\n”, outerValue);
inner(outerValue);
printf(“outerValue = %d\n”, outerValue);
}
Calling outer() will set outerValue to 10. It then prints out outerValue and then passes
outerValue to the inner() function.
Inside inner(), innerValue is the argument that was passed in (should be 10). The
inner() method prints out this value, increases it by 20, and then prints it out again. Finally,
control returns to outer(), which prints out outerValue one last time. If you run this code,
you should see the following result in the console:
outerValue = 10
innerValue = 10
innerValue = 30
outerValue = 10
As you can see, the value of outerValue does not change when we modify innerValue.
However, this is only half of the story. Consider the following code:
void inner(int* innerRef)
{
printf(“innerValue = %d\n”, *innerRef);
*innerRef += 20;
printf(“innerValue = %d\n”, *innerRef);
}
void outer()
{
int buffer = 10;
int* outerRef = &buffer;
printf(“outerValue = %d\n”, *outerRef);
inner(outerRef);
printf(“outerValue = %d\n”, *outerRef);
}
Fundamental Building Blocks of Objective-C BC-23
Dangling Pointers
Even though the buffer variable is deleted when the getPointer() method ends, the
actual value stored at that memory location may not change immediately. At some point,
the application will reuse that memory space, writing over the current value. However, for
the time being, the pointer may continue to function as if nothing were wrong.
This is the worst kind of bug, the kind that crashes your application at some random time
in the future. The error might even occur in a completely unrelated section of code. These
errors can be very hard to track down and fix.
Superficially, this looks very similar to the earlier code. However, there are some important differences. First, we create a buffer variable and set its value to 10. Then, we create a
pointer to this buffer and pass that pointer into the inner() function. Next, inner() modifies the value pointed at by its innerRef argument. This time, we get the following output:
outerValue = 10
innerValue = 10
innerValue = 30
outerValue = 30
Here, both the innerValue and the outerValue change. We’re still passing our argument
by value. However, this time the value is the address of the buffer variable. The inner()
function receives a copy of this address, but the address still points to the same piece of data
in memory. When we dereference the pointer (either to modify it or to print its value), we are
actually reaching out and modifying the buffer’s value.
Bottom line, functions can modify the values pointed to by pointer arguments. This is
important since both Objective-C objects and C-style arrays are passed as pointers. Whenever
you are using these data types, you must avoid accidentally modifying the underlying data.
Return values are also passed by value, but this has an additional complication, since the
original value is deleted when the function returns. Consider the following method:
int* getPointer()
{
int buffer = 100;
int* pointer = &buffer;
return pointer;
}
When it is called, we create a local variable named buffer and then create a pointer to
our buffer. Our function then returns the pointer. As we discussed earlier, the pointer is
copied, but that simply makes a copy of buffer’s address. The new pointer still points at
buffer. However, when the function ends, buffer is deleted. This leaves us with a pointer
that now points to an undefined piece of memory.
BC-24 Bonus ChapteR Objective-C
Objects and Object-Oriented
Programming
All the language features we’ve discussed so far come from C. However, with the introduction of objects, we leave C behind and enter the world of Objective-C.
Superficially, an object combines the data management of structs with a set of related
functions. In traditional C, I might use a struct to define my data. For example, I could create
a Car struct, as shown here:
struct Car {
float odometer;
float lastOilChange;
};
typedef struct Car Car;
I can then create functions to modify Cars.
void drive(Car *car, float miles)
{
car->odometer += miles;
}
void changeOil(Car *car)
{
car->lastOilChange = car->odometer;
}
float distanceSinceLastOilChange(Car *car)
{
return car->odometer - car->lastOilChange;
}
An object, on the other hand, combines these into a single entity. There’s a slight change
in naming. Fields become instance variables and functions become methods, but they are
actually implemented using structs and functions under the hood.
As we will see, there’s one immediate advantage to using objects. Since we call methods on specific object instances, there’s no need to pass the object to the method. This
means our Car class’s drive: method would take only a single argument. changeOil and
distanceSinceLastOilchange wouldn’t take any arguments at all.
Objects and Object-Oriented Programming BC-25
However, simplifying our code is a relatively trivial improvement. Object-oriented
programming is really a method for taking a large, complex procedure and breaking it into
smaller, more manageable chunks. It has three main advantages over traditional C code:
encapsulation, inheritance, and polymorphism.
Encapsulation
Encapsulation is one of the main advantages of object-oriented code. Objects should hide
away much of their complexity, exposing only the methods and properties that a developer
needs to use them effectively.
To put it another way, objects function as black boxes. They have a public interface,
which describes all the methods and properties that can be accessed from the outside. The
actual implementation of the object may include any number of private instance variables
and methods; however, you shouldn’t need to know anything about these details in order to
use the object in your code.
Since Objective-C is a highly dynamic, reflexive programming language, the public interface is more of a suggestion than a strict rule of law. You can always gain access to hidden
instance variables and methods, but doing so breaks encapsulation. This is bad. Sure, it may
make things easier in the short term, but you’re undoubtedly setting yourself up for longterm pain. Furthermore, if you’re accessing the private API of a class from Apple, your app
will be rejected from the app store. They check for that sort of thing.
In an ideal world, an object’s interface should remain static and unchanging. You can
add new methods over time, but you shouldn’t remove or alter any existing methods. The
interior details, however, are fair game. The object’s developer may completely redesign the
implementation from one build to the next, and as long as the rest of your code interacts
with the object only through its interface, everything will continue to function properly.
Of course, we live in the real world, and we often need to alter an object’s interface,
especially during early development. This isn’t a big deal if you’re the only one using the
object—but if other people depend on your classes, you will need some way of coordinating
these changes with them.
Apple, for example, will occasionally mark methods as deprecated. These methods will
continue to operate as normal; however, developers should stop using them, because they
will disappear in some future release. This gives developers an opportunity to redesign their
applications before these changes take effect.
Inheritance and Polymorphism
Inheritance and polymorphism are the other major benefits of object-oriented code. Most
descriptions of object-oriented programming treat these as separate benefits, but they are so
closely intertwined, I like to discuss them together.
Inheritance allows one class to inherit the instance variables and methods of another.
The new class can then override those methods (replace the original version with their own)
or add new methods and instance variables to provide specialized behaviors.
BC-26 Bonus ChapteR Objective-C
When a Manager class inherits from an Employee class, we say that Manager is a subclass
of Employee. Similarly, Employee is the superclass of Manager.
Inheritance allows us to avoid duplication. Both Employee and Manager need a generateW2 method to create the W2s at tax time. We can simply define this method in the
Employee class, and Manager gets it for free.
Similarly, both classes would need a calculateBenifitsPackage method. However,
Managers get better benefits than Employees. The Manager class would therefore override
the Employee’s method and provide its own implementation. The Manager’s version of
calculateBenfits could even call the Employee’s version to handle all the benefits they
have in common.
We also describe this superclass/subclass relationship as an “is a” relationship. In other
words, the Manager is an Employee. This leads us to the next major advantage of objectoriented design—polymorphism.
Polymorphism means we can use a subclass wherever we could have used the superclass.
The system will correctly dispatch any method calls to the correct class. If the subclass overrides the superclass’s method, its version will be called. Otherwise, the system will default to
the superclass’s implementation.
Say, for example, we have a class called Vehicle. This contains all the common features
of a vehicle: methods to allow you to set or retrieve the driver, passengers, cargo, current
location, destination, and so on. You might even have some methods to query the vehicle’s
capabilities: canOperateOnLand, canOperateOnWater, canFly, cruiseSpeed. In our Vehicle
implementation, we provide the default implementations necessary to operate most vehicles. For the query methods, we simply return NO.
We then create subclasses that inherit from Vehicle—Boat, Airplane, and Car. The
Boat subclass would inherit all the methods from Vehicle. Most of the time, we would
want to simply use the default implementation; however, we would need to override the
canOperateOnWater method to return YES. Airplane would similarly override canFly, and
Car would override canOperateOnLand. This way, we can specialize the behavior for each
particular type of vehicle.
Finally, we might make Maserati and Yugo subclasses of Car. Maserati’s cruise speed
would return 150 MPH, while Yugo’s would return 15 MPH (or something close to that,
I’m sure).
Then let’s say we have a function that consumes vehicles: canVehicleReachLocation
InTime(Vehicle* vehicle, Location* location, Time* deadline). We could pass any
instance of Boat, Airplane, Car, Maserati, or Yugo to this function. Similarly, we could pass
any Car, Maserati, or Yugo object to the estimatedTimeToFinishIndy500(Car* sampleCar)
function.
The NSObject root class ensures that all objects have a basic set of methods (memory
management, testing for equality, testing for class membership, and the like). Next, UIResponder adds an interface for objects that respond to motion and touch events, allowing
them to participate in the responder chain. Finally, UIView adds support for managing and
displaying rectangular regions on the screen.
Objects and Object-Oriented Programming BC-27
Abstract Classes
In our sample class hierarchy, Vehicle, Boat, Airplane, and Car may be implemented as
abstract classes. An abstract class is a class that cannot be instantiated into an object
(or, at least, one that is not typically instantiated). Often it leaves one or more methods
undefined. To use the abstract class, you must create a subclass that fully defines all the
required methods. You can then create instances of your subclass.
Objective-C does not provide explicit support for abstract classes. However, we can create
informal abstract classes by throwing exceptions in the undefined methods. Check out
the documentation for NSCoder to see one of Apple’s abstract classes in action.
We will most frequently run into inheritance and class hierarchies when we
interact with Cocoa Touch view objects (Figure 1). UIView inherits from UIResponder,
which inherits from NSObject. NSObject is one of our root classes—almost all other
objects inherit from it. There are a few exceptions (e.g., NSProxy), but these tend to be
unusual corner cases.
Figure 1 A partial class
hierarchy for UIView
BC-28 Bonus ChapteR Objective-C
Browsing the Superclass’s Methods
If you look at UIButton’s class reference, you will not find any information about the frame
property. That’s because the class reference shows only the new methods declared for
that particular subclass. So, how do you find all the inherited methods?
When looking at the class reference in Xcode’s documentation viewer, you want to open
tab on the right side). At the very top, you’ll see a secthe class’s detail panel (the
tion labeled “Inherits from.” This lists the complete chain of superclasses going all the
way back to NSObject. By slowly walking back along the inheritance chain, you can look
through all available methods and properties.
Figure 1 also shows a few subclasses of UIView. As you can see, some screen elements
(like UILabel) inherit directly from UIView. Others (UIButton and UITextField) inherit from
UIControl, which adds support for registering targets for events and for dispatching action
messages when the events occur.
Let’s look at a concrete example. UIView has a method called addSubview:. This lets you
add another UIVew to be displayed inside the current view. Since UILabel, UIButton, and
UITextField all inherit from UIView (either directly or indirectly), they can all be added
using the addSubview: method. In addition, they also inherit addSubview:. In theory, you
could add a subview to your button or text field (though it’s hard to imagine a situation
where this would be useful). More practically, the subclasses also inherit the UIView’s frame
property. This allows you to set its size and position within the superview’s coordinate system. Everything that inherits from UIView (either directly or indirectly) has a frame.
Defining a Class
When we create a class, we will be working with two distinct parts: the interface and the
implementation. The interface is ordinarily declared in the class’s header file (filename ending in .h). This allows us to easily import our class declaration into any other part of our
project. The interface should define all the information needed to effectively use the class—
this traditionally included the public methods (methods that can be called from outside the
class) as well as the class’s superclass and its instance variables.
Now, exposing the instance variables in the public interface is a bit odd. In theory, we
shouldn’t touch the instance variables from outside the class. We should use accessor methods to get or set their value. The variables themselves should be a private implementation
detail, hidden away inside the class. After all, isn’t encapsulation one of the main benefits of
object-oriented programming?
Well, yes. In an ideal world these details would be safely hidden away. However, earlier
versions of the Objective-C compiler needed this information in the header file to properly
lay out the memory of subclasses. Unfortunately, this had the side effect of leaking internal
implementation details.
Objects and Object-Oriented Programming BC-29
Objects vs. Classes
When we talk about object-oriented programming, we typically talk about two different
aspects: the class and the object. The class is the technical specification. It describes the
methods and instance variables that the object will have. An object, on the other hand, is
an instantiation of a class in memory. You can create multiple objects from a single class—
each one will have the same set of features, but the individual values will be independent
from each other. Setting an instance variable or calling a method on one object does not
affect any other objects of the same class.
Think of it this way: The class is the blueprint, and the object is the house. You can build
several different houses from the same blueprint. Each house will have a setThermostat
ToTemperature: method. However, calling setThermostatToTemperature: on my house will
not affect the thermostat settings in yours.
The good news is, with modern versions of Objective-C, we no longer need to expose our
instance variables. There are a number of techniques to let us move them from the interface
to the implementation. Unfortunately, publicly declaring instance variables are like a zombie
that just won’t die. The idiom continues to linger, even though it’s no longer necessary (or
even recommended). You will undoubtedly see it in in online tutorials and sample code.
The class’s interface starts with an @interface keyword and ends with @end. The format
is shown here:
@interface ClassName : SuperClassName {
// Optionally declare old-style instance variables here
}
// Declare public methods and properties here.
@end
Every class in your application needs a unique class name. As we saw in Chapter 1’s
“Creating the Project” section, if you’re building a library that will be used in other projects,
you will want to prefix all of your class names. This helps prevent possible naming conflicts.
Apple’s frameworks follow this advice, typically beginning their class names with either NS
or UI—though they have recently branched out, using an ever-increasing number of twoletter prefixes. This means we should generally use three-letter prefixes.
Each class also has one and only one superclass. You will usually use NSObject, unless
you are explicitly subclassing another class. Unlike other object-oriented programming
languages, we always have to specify the superclass.
Next, we could define our instance variables inside a pair of curly brackets; however, I
don’t recommend doing this. We will see a better option when we look at declared properties. In fact, if you aren’t declaring any instance variables, you don’t need the curly brackets.
BC-30 Bonus ChapteR Objective-C
The @ symbol
Objective-C uses the @ symbol in a number of ways. While its meaning can vary,
it always indicates that whatever follows is Objective-C specific.
We will often use the @ symbol for Objective-C specific directives.
@interface
@implementation
@end
@selector
It is also used to declare strings, number, arrays, and dictionaries using Objective-C’s
literal syntax.
@”This is a string”
@5.32
@[this, is, an, array]
@{this:is, a:dictionary}
It can also be used as an object placeholder in formatting strings.
[NSString stringWithFormat:@”My Object: %@”, myObject];
While the @ symbol often feels a bit clunky, it has one distinct advantage. It’s one of the
few symbols not used by C. This means Objective-C is free to use it without introducing
any possible conflicts.
The actual code is stored in the implementation file (filename ending in .m). Like the
interface, the implementation begins with an @implementation keyword and ends with @
end. Like @interface, it can include curly brackets to declare instance variables—in this case,
private instance variables. It will also contain our method implementations.
@implementation ClassName {
// Optionally declare private instance variables here
}
// Define methods here.
@end
Objects and Object-Oriented Programming BC-31
Instance Variables
Instance variables represent the data contained inside an object. We can explicitly declare
instance variables inside curly brackets at the beginning of either the @interface or
@implementation block.
// in Employee.h
@interface Employee : NSObject {
NSString *_firstName;
NSString *_lastName;
int _idNumber;
}
// Declare methods here
@end
// in Employee.m
@implementation Employee {
NSString *_firstName;
NSString *_lastName;
int _idNumber;
}
// Define methods here
@end
We can also specify the variable’s visibility as either @public, @protected, or @private.
@public means they can be freely accessed from anywhere in our project. @protected means
they can be accessed only from within this class or any of its subclasses. @private means it
can be accessed only by this class—you cannot access it in a subclass.
note: The @public, @protected, and @private directives apply only to
instance variables. We cannot use them to label our methods or properties.
In Objective-C, a property or method is public if it’s declared in the
class’s public interface. If it’s not declared in the .h file, it’s private.
By default, instance variables declared in the .h file are @protected. Instance variables
declared in the .m file are effectively @private. This is typically what we want—so, we
almost always just use the default visibility.
BC-32 Bonus ChapteR Objective-C
As a general rule of thumb, we should avoid directly accessing instance variables wherever possible. Instead, we should create accessor methods for our class, and we should use
the accessors to get and set our instance variables.
-(NSString *)firstName
{
return _firstName;
}
-(void)setFirstName:(NSString *)aFirstName
{
_firstName = aFirstName;
}
By convention we use an underscore at the beginning of the instance variable’s name.
This helps remind us that our variable is a private implementation detail that should not, in
general, be used in our code. The getter’s name is the same as the instance variable’s name,
without the underscore. The setter’s name has the word set appended to the front, and the
first letter of the instance variable’s name is capitalized (again, the underscore is dropped).
It turns out that this naming convention is surprisingly important. Some of Objective-C’s
design patterns expect properly named variables and accessor methods. If we don’t follow
the rules, those patterns might not work correctly (see “Key-Value Coding” and “Key-Value
Observing” later this chapter).
Here are a few additional rules of thumb:
JJ
JJ
JJ
Never declare a @public instance variable.
If possible, do not explicitly declare any of your instance variables at all. As we will see,
declared properties provide an elegant, modern alternative for managing both your
instance variables and their accessor methods.
If you must explicitly declare an instance variable, hide it away in the implementation file.
Finally, we should access the variables directly only in a few specific situations:
JJ
JJ
JJ
In any custom accessor methods. Here, we really have no choice. Direct access is the only
option (see “Declared Properties” for more information).
In your class’s init... and dealloc methods (see the “Initializers” and “Memory Management” sections for more information).
When optimizing our code and profiling shows that direct access gives us a significant
performance increase at a critical bottleneck; however, this should be very rare.
Declared Properties
In traditional Objective-C code, we would first declare our instance variable. Then we would
write a getter and a setter for that variable. It was a lot of work, just to add a variable to our
class. Worse yet, it was tedious boring work, with a surprising number of restrictions and rules.
Objects and Object-Oriented Programming BC-33
Improvements to Objective-C
Apple has been steadily improving the Objective-C language over the past few years.
The major milestones are listed here:
OS X 10.5: Objective-C 2.0, which included garbage collection, declared properties,
dot-notation, fast enumeration, 64-bit support, and other syntax improvements.
OS X 10.6 and iOS 4: Blocks.
OS X 10.7 and iOS 5: Automatic reference counting.
OS X 10.8 and iOS 6: Literals, subscripting, and automatically synthesizing properties.
OS X 10.9 and iOS 7: Modules.
Manual memory management caused most of these complications. Before automatic
reference counting, we couldn’t just stick values into our variables. We had to make sure the
old versions were released and the new versions were retained (see “Memory Management”
for more information). We also had to successfully manage edge cases, for example, what
happens if the setter is called twice with the same value?
Don’t get me wrong, accessor methods weren’t particularly hard—but they were tedious,
were time-consuming, and (if not handled properly) could be a source of bugs. Fortunately,
Apple provided a tool for automating the creation of accessors: declared properties.
Declared properties let us declare both our getter and setter in a single line of code. But
wait, that’s not all. We can also tell the system to synthesize the accessor methods for us—
we no longer have to write code for our accessors. Furthermore, if we are targeting a modern
Objective-C runtime (e.g., 64-bit OS X applications or all iOS apps), then the system can
automatically create the underlying instance variable as well.
We declare a property in the class’s interface, as shown here:
@property (<attributes>) <data type> <property name>;
The attributes determine how our accessors are implemented. The most common attributes are described in Table 3.
Attributes can be divided into four groups: atomicity (atomic and nonatomic), ownership
(strong, weak, copy, and assign), mutability (readwrite and readonly), and naming (getter
= and setter =). Object properties are strong, atomic, and readwrite by default. Nonobject
properties are assign, atomic, and readwrite.
The mutability attributes are the only ones that can be overridden. This lets us publically
declare our properties as readonly but privately declare them as readwrite.
note: Before iOS 5.0, properties often used retain attributes to handle
manual memory management. However, retain attributes are no longer
valid when compiling under ARC. See the “Memory Management”
section, later in this chapter, for more information.
BC-34 Bonus ChapteR Objective-C
Table 3 Property Attributes
atomic
The accessors guarantee that the value will be fully set or fully retrieved, even if the
accessors are called from different threads.
nonatomic
The accessors simply get or set the value, with no guarantees about thread safety.
readwrite
The property declares and synthesizes both a getter and a setter for the property.
readonly
The property only declares and synthesizes the getter.
strong
The setter stores a strong reference to the assigned value (see “Memory
Management”).
weak
The setter stores a zeroing weak reference to the assigned value (see “Memory
Management”).
copy
The setter creates a copy of the incoming value and saves a strong reference to
the copy.
assign
The setter stores the assigned value but does not perform any memory management. This should be used only for storing non-object data (e.g., floats, ints, structs,
etc.). Objective-C objects should use strong or weak attributes instead.
getter =
Specifies the getter’s name. By default the getter’s name will match the
property’s name.
setter =
Specifies the setter’s name. By default, the setter’s name will be the property’s name
with the first letter capitalized and the word set appended to the front.
Typically, I always declare my properties as nonatomic. There are two main reasons for
this. First, nonatomic properties are considerably faster than atomic properties. Second,
atomic properties don’t actually make the class thread-safe. Yes, each individual call to a
getter or setter will be thread-safe—but we typically perform more complex operations.
Imagine the following:
NSUInteger age = [person age];
age++;
[person setAge:age];
Having an atomic property doesn’t help us here. The value of our age property could be
modified by another thread any time between the age and setAge: method calls.
In my opinion, the atomic properties handle the multithreading issue at the wrong level
of abstraction. I prefer to make all my properties nonatomic and then guarantee that they
are accessed from only a single thread. Fortunately, Apple’s frameworks make this relatively
easy (see Chapter 5, “Loading and Saving Data” for more information).
Also, I always explicitly specify the atomicity and the ownership attributes. I specify the
mutability attribute only when I explicitly want a read-only property. The only real exception is when I’m creating a virtual property—a property that does not set and get the value
of an underlying instance variable—but calculates a value instead. In those cases, I leave off
Objects and Object-Oriented Programming BC-35
the ownership attribute—since it would be misleading at best. We will look at virtual properties in more depth in Chapter 2, “Our Application’s Architecture.”
The property declaration automatically declares the accessor methods, as shown here.
We’ll talk about declaring methods more in “Writing Our Own Methods.”
// This property
@property (strong, nonatomic) NSString *firstName;
// Declares these methods
- (NSString *)firstName;
- (void)setFirstName:(NSString *)aFirstName;
In addition, the compiler will look at our implementation file and follows the these rules:
JJ
JJ
JJ
JJ
If we have not implemented the getter ourselves, it will automatically implement the
getter for us. The getter’s implementation may vary, depending on the attributes we’ve
specified.
If our property is readwrite and we haven’t implemented the setter ourselves, it will
automatically implement the setter for us. Again, the setter’s implementation will vary
depending on the attributes we’ve specified.
The compiler will also look at the instance variables we have declared. If it finds a
matching variable, it will use that variable. By default the instance variable’s name is the
property’s name with an underscore appended to the beginning (e.g., _firstName in our
earlier example).
If the compiler cannot find a matching variable and it is creating at least one of the accessors for us, it will also create the instance variable.
For the most part, this means we just write a single @property declaration and let the
compiler handle everything else. However, we can also provide custom getters or setters
when necessary. Simply implement the desired accessor, and the system will choose our
implementation instead of creating its own.
I recommend using properties wherever possible. They are faster and require less code.
After all, the best code is the code we don’t have to write. Even better, properties actually
document our code better than declaring everything by hand. When we create the accessors manually, we declare only the type. When we use a property, we also provide additional information on how the memory will be managed and whether the accessors are
thread-safe.
note: I highly recommend you do not explicitly declare instance variables
when using properties. Declaring the variables may seem like a good way
to document your code’s intent—however, it can introduce bugs. If
your declared variable is not named correctly, the compiler will create a
new one for you. This means some of your code may end up using one
variable, while the rest uses the other. Bad things are bound to happen.
BC-36 Bonus ChapteR Objective-C
@synthesize and @dynamic
Before Mac OS X 10.8 and iOS 6, we had to tell the compiler to synthesize our accessor
methods and instance variables for us. We did this using the @synthesize directive at the
beginning of our @implementation block.
@synthesize firstName = _firstName;
Here, the = _firstName part is optional. We use it to specify the instance variable’s name.
By default, instance variables created using the @synthesize directive use the property’s
name without the underscore (automatically adding the underscore was added with
automatic synthesis).
This meant that creating properties was a two-step procedure. First we would declare the
property using the @property directive. Then we would synthesize it with @synthesize.
However, the @synthesize directive was not, strictly speaking, required. We didn’t need it
if we implemented all the accessor methods ourselves. Alternatively, we could have used
the @dynamic directive. @dynamic basically tells the compiler, “Hey, trust me. These methods will be there.”
In modern Objective-C, the only reason to use @synthesize is if we want to explicitly set
the instance variable’s name or if we want to force the compiler to create our instance
variable for us, even though we’ve implemented both a custom getter and setter.
Still, we are much more likely to find uses for @dynamic. Typically we would use @dynamic
when we want to prevent the compiler from implementing the accessors for us. We
might do this if we plan to dynamically provide the method at runtime. More realistically,
we use @dynamic to re-declare properties from the class’s superclass. We might do this
to change a property’s mutability attribute in the subclass—or to give the subclass access
to one of the superclass’s private properties.
Methods
Once all the bells and whistles are stripped away, an Objective-C method is simply a C
function. Therefore, everything we learned about functions applies equally to methods.
However, there is one important difference. When we call a C function, the function and its
arguments are connected at compile time (static binding). In contrast, in Objective-C we are
not actually calling the method; we are sending a message to the object, asking it to call the
method. The object then uses the method name to select the actual function. This connection of selector, function, and arguments is done at runtime (dynamic binding).
This has a number of practical implications. We can forward methods from one object to
another. We can even dynamically add or change methods at runtime. Most importantly, we
can send any method to any object.
We often use this feature along with dynamic objects. These are variables that can be of
any object type. We declare them using the id type identifier. Notice that we do not use an
asterisk when declaring id variables. The id type is already defined as a pointer to an object.
Objects and Object-Oriented Programming BC-37
There is a similar dynamic type for classes, not surprisingly named Class. While we
could use id to refer to classes as well, using the Class type better expresses our intent.
id myString = @”This is a string object”; // This is an NSString Object
Class myStringClass = [myString class];
// This is a class
The one-two punch of dynamic types and dynamic binding lets us avoid a lot of the complex, verbose constructions that statically bound languages ordinarily require, but it’s not
just about running around naked and free. As developers, we typically know more about our
application than the compiler does. We should use that knowledge to our advantage.
For example, if we know that all the objects in an array respond to the update method,
we can just go ahead and iterate over the array, calling update on each object. We don’t need
to worry about each object’s actual type. In C++ or Java, we would need to convince the
compiler to let us make that call (by casting the objects, creating a common subclass, using
an interface, or some other technique). Objective-C (for the most part) trusts that we know
what we’re doing.
Of course, we will get in trouble if we don’t know what we’re doing. If you try to call a
method that the object has not implemented, the application will crash. So, you’ve been
warned. If you’re using dynamic types, you’re taking your code into your own hands.
Still, it’s not all Wild West shooting from the hip. Xcode’s compiler and static analyzer
do an excellent job of analyzing our code and finding common errors (such as misspelled
method names), even when writing highly dynamic code. If we try to call a method that the
compiler has not seen before (e.g., none of the imported header files declare the method),
it will generate a warning. The code will still compile and run (and possibly crash, if you did
make a mistake)—but we will at least be alerted about the possible error.
Sending Messages to Nil
Another difference between Objective-C and other object-oriented programming languages
is the way it handles nil values. In Objective-C it is perfectly legal to send messages to nil.
This often comes as a shock to people from a Java background. In Java, if you call a method
on null (null and nil are identical, a pointer with a value of 0—basically a pointer that
points to nothing), your application will crash. In Objective-C, the method simply returns 0
or nil (depending on the return type).
Newcomers to Objective-C often argue that this hides errors. By crashing immediately,
Java prevents the program from continuing in a bad state and possibly producing faulty
output or crashing inexplicably at some later point. There is a grain of truth to this. However,
once you accept the fact that you can send messages to nil, you can use it to produce simple,
elegant algorithms.
Let’s look at one of the more common design patterns. Imagine an RSS reader that must
download a hundred different feeds. First you call a method to download the XML file. Then
you parse the XML. Because of potential networking problems, the first method is likely
to be highly unreliable. In Java, we would need to check and make sure that we received a
valid result.
BC-38 Bonus ChapteR Objective-C
XML xml = RSS.getXMLforURL(myURL);
// Make sure we have a valid xml object.
if (xml != null) {
xml. parse();
...
}
In Objective-C, those checks are unnecessary. If the XML is nil, the method call is simply a noop, it doesn’t do anything at all. That is exactly what we want.
XML* xml = [RSS getXMLforURL:myURL];
[xml parse];
...
Also, if we’re being honest, null pointers are a common source of bugs in Java applications. More importantly, Java’s null pointer violates the language’s otherwise strict static
typing. If you can assign it to an object variable, you should be able to treat it just like any
other object. That includes calling instance methods and receiving reasonable results.
Calling Methods
Objective-C methods are called using square brackets. Inside the brackets, we have the
receiver and the message. The receiver can be any expression that evaluates to an object
(including self), the super keyword, or a class name (for class methods). The message is the
name of the method and any arguments.
[receiver message]
In C, the method’s arguments are all grouped together in parentheses after the function’s
name. Objective-C handles them quite differently. If the method doesn’t take any arguments,
the method name is simply a single word (usually a camel-case word with a lowercase
first letter).
[myObject myFunctionWithNoArguments];
If the method takes a single argument, the name ends in a colon (:), and the argument
immediately follows it.
[myObject myFunctionWithOneArgument:myArgument];
If the method takes multiple arguments, we split the name into several parts. Each argument gets its own name segment. These segments usually contain some information about
their argument. Also, each segment ends in a colon. This means our arguments end up scattered throughout the method’s name.
[myObject myMethodWithFirstArgument:first
secondArgument:second
thirdArgument:third];
Objects and Object-Oriented Programming BC-39
When referring to methods, we concatenate all the name segments without spaces or the
arguments. For example, the previous method is named myMethodWithFirstArgument:sec
ondArgument:thirdArgument:. Remember, the colons are part of the name. myMethod and
myMethod: would refer to two separate methods.
But, of course, that’s too easy. Objective-C methods also have two hidden arguments:
self and _cmd. The self argument refers to the method’s receiver and can be used to access
properties or call other instance methods from inside our method’s implementation. The
_cmd argument is the method’s selector.
The selector is a unique identifier of type SEL that is used to look up methods at runtime.
You can create a SEL from a method’s name using the @selector() directive or dynamically
using the NSSelectorFromString() function. You can also get the string representation of a
SEL using NSStringFromSelector().
Method Lookup
Each class has a lookup table containing all the methods defined in that class. The table consists of selector and implementation pairs. The selectors are of type SEL, and the implementations are of type IMP—which is simply a function pointer to the underlying code that will
actually execute at runtime.
When we call a method, the system looks at the receiver object and determines its class.
It then looks at the class’s dispatch table and searches for a matching selector. If it finds a
match, it executes that implementation. If not, it goes to the class’s superclass and searches
there. The search will continue until a match is found or until we reach the root object. If
the root object (usually NSObject) doesn’t implement the method, then our application will
throw an NSInvalidArgumentException—which, if it isn’t caught, will crash the application.
Within a method, the self variable refers to the method’s receiver. We can use this variable to call other methods on the same object. Similarly, we can use the super keyword to
change where we start our lookup. Basically, super starts the search at the dispatch table for
self’s superclass. This is particularly useful when we are overriding one of the superclass’s
methods. Often we want to do some custom work and then call the superclass’s implementation. We do that with the super keyword. Again, unlike many other programming languages,
we can use super to access any of the superclass’s methods—not just the method we are
currently overriding.
One of the side effects of Objective-C’s lookup procedure is that each method must have
its own, unique name. In many programming languages, we can overload a method, providing different implementations based on the arguments. We cannot do this in Objective-C. If
we want two different methods, we must give them two separate names. This isn’t usually a
problem, since each argument must have its own name segment anyway.
Overall, the Objective-C naming convention has two profound effects on our code. First,
Objective-C tends to use long method names, sometimes very long or even ridiculously long
method names. While this can be a bit awkward at first, it’s really not that bad. Xcode’s autocomplete is your friend. It will help you find the correct method with just a few keystrokes. I
highly recommend leaning on autocomplete as much as possible. Not only does it reduce the
wear and tear on your fingers, it helps prevent accidental spelling mistakes.
BC-40 Bonus ChapteR Objective-C
Long Path vs. Short Path
As you can probably guess, the described lookup procedure is not very efficient. Fortunately,
it’s not the whole story. The full lookup procedure is only one of two methods used to look
up our methods. It’s also called the long path—because it takes the most time. The system
uses the long path the first time a given method is called on a given class. However, it then
caches the result. The next time the method is called, the system can execute it immediately. This is called the short path, and short-path lookups are extremely efficient.
The system is also smart enough to clear the cache if we dynamically change our methods at runtime. This gives us the best of both worlds. We have all the freedom of late
binding but still get nearly the same efficiency as static binding.
There are also several other steps that occur when a method is not found. The system
actually calls a number of methods on the receiver before throwing an exception. Each
one gives us a chance to respond to the method in different ways.
JJ
resolveInstanceMethod: or resolveClassMethod:
This is our opportunity to dynamically add the method to our class. resolveInstanceMethod: is used for adding instance methods. resolveClassMethod: is used for resolving class methods. If no method is added to the class, forwardingTargetForSelector:
is called.
JJ
forwardingTargetForSelector:
We can override this method to return an object. That object will become the receiver
for the method. This is often a quick and easy way to delegate methods to other
objects. The default behavior can vary. If the class overrides methodSignatureForSelector: to return a signature for this selector, the system will call forwardInvocation:.
Otherwise, it calls doesNotRecognizeSelector:
JJ
forwardInvocation:
This is another opportunity to delegate the method. Here, we are given an NSInvocation
object representing the method call. We can examine and modify the NSInvocation
before invoking it. This is a lot slower than using forwardingTargetForSelector: so
it should be used only for cases that forwardingTarget… cannot handle. By default, it
throws an NSInvalidArgumentException.
JJ
doesNotRecognizeSelector:
This is typically our last chance to handle the error. By default, doesNotRecognize
Selector: throws an NSInvalidArgumentException.
Objects and Object-Oriented Programming BC-41
Class Methods
Class methods are called on the class (using the class name), not on individual objects.
For example, for the class method string, we would call [NSString string], not
[@”a string object” string].
Most class methods are convenience methods that simplify the creation of new objects.
For example, the string method creates a new, empty NSString object.
Others encapsulate useful utility functions related to the class. For example, NSString
defines another class method named availableStringEncodings. You can call this method
to get a nil-terminated list of all the string encodings supported by the NSString class.
However, the most commonly used class method is, without a doubt, alloc. As we will
see in “Initializers,” we use alloc to allocate memory for a new object on the heap. It is
the first step in our two-step instantiation procedure.
Second, Objective-C’s names actually make it easier to write code. It’s almost impossible
to accidentally place the arguments in the wrong order (something I used to do all the time
in C-like languages). And, for my money, longer, more descriptive names are almost always
better than short, vague ones.
Writing Our Own Methods
Methods are normally declared in the class’s @interface block and defined in the
@implementation block. Like C functions, the declaration is simply the method signature
followed by a semicolon. The definition is the method signature followed by a block of code
within curly brackets.
Method signatures start with either a + or – character. The – is used for instance methods, while the + is used for class methods. Next we have the return type in parentheses and
then the method name. Arguments are defined in place within the name. Simply follow the
colon with parentheses containing the argument type. Place the argument’s name after the
parentheses.
// No arguments, no return value
- (void)simple;
// No arguments, returns an integer.
- (int)count;
// Takes an integer argument. Returns a string object.
- (NSString*) nameForID:(int)idNumber;
// Class method with multiple arguments.
BC-42 Bonus ChapteR Objective-C
+ (NSString*) fullNameGivenFirstName:(NSString*)first
middleName:(NSString *)middle
lastName:(NSString *)last;
Remember, Objective-C methods are really just C functions in disguise. The connection
between C functions and Objective-C methods becomes clear when you start dynamically
adding methods to an object. This isn’t something we do very often. But it does demonstrate
the connection between our methods and the underlying C code.
// Define before the @implementation block
void myFunction(id self, SEL _cmd) {
NSLog(@”Executing my method %@ on %@”,
NSStringFromSelector(_cmd),
self);
}
// Define inside the @implementation block
+ (void)addMethod {
SEL selector = @selector(myMethod);
class_addMethod(self, selector, (IMP)myFunction, “v@:”);
}
Running the class method addMethod will add myMethod to the current class at runtime. You can then call [myObject myMethod], and the system will call the function
myFunction(myObject, @selector(myMethod)).
There is one, huge difference between functions and methods, however. As we saw earlier, functions must be either declared or defined before they are used. However, this is not
true for methods. Modern versions of Xcode are smart enough to find methods, regardless of
which order they are called or defined.
This is especially important when it comes to private methods—since private methods
are simply methods that are not declared in the class’s .h file.
Initializers
Objective-C uses a two-step instantiation process to create new objects. First, you allocate
memory on the heap. Next, you initialize that memory region with the object’s initial values.
To perform the first step, we call the alloc class method. For the second step, we call init
or one of its siblings.
For example, the following line will create an empty NSString object:
NSString* myString = [[NSString alloc] init];
A few key points are worth noting. First, we declare our NSString variable as a pointer.
It will point to the memory address where the object’s data is stored on the heap.
Objects and Object-Oriented Programming BC-43
Positioning the Asterisk
When declaring a pointer to an object, where should we place the pointer? As far as the
compiler is concerned, it doesn’t matter. All three of the following are correct:
NSString* myString
NSString * myString
NSString *myString
However, by tradition the asterisk is appended to the front of the variable name as
shown here:
NSString *myString
In the first edition of the book, I chose to break with tradition and append the asterisk at
the end of the type. When I started writing Objective-C code, I found that appending the
asterisk to the type helped me remember where the asterisk needed to go.
// Asterisk stays with the type
- (void)setFirstName:(NSString *)aFirstName;
// Not with the variable name
- (void)setFirstName:(NSString) *aFirstName;
In this edition, I’ve decided to return to the traditional approach. However, if you find
yourself forgetting the asterisks or putting them in the wrong place, try switching their
location. Most of the time you can just consider the asterisk part of the class name, and
you’ll be using it correctly.
Second, we always nest the alloc method inside the init method. This is important,
since many classes are implemented using class clusters. With a class cluster, the API
describes a single class, but the actual implementation uses two or more variations on that
class. The different versions are created and used under different circumstances, often to
improve performance. However, all of this complexity is hidden from the developer.
This means that init may ignore the object we called it on, instead allocating and returning a completely new object. If we had stored a reference to the original object returned
by alloc, we’d be holding onto the wrong object. Fortunately, nesting the init and alloc
methods guarantees that we will always get back the expected result.
It’s important to realize, this is not a hypothetical edge case. Many of the classes in
Apple’s Foundation framework are implemented as class clusters. This includes a number
of classes that we use every day. In fact, NSString is probably the most commonly used class
cluster. We can see this by breaking up the steps as shown here:
BC-44 Bonus ChapteR Objective-C
// Create an empty string
NSString* allocString = [NSString alloc];
NSLog(@”allocString: pointer = %p, class = %@”,
allocString, allocString.class);
NSString* initString = [allocString init];
NSLog(@”initString: pointer = %p, class = %@”,
initString, initString.class);
NSLog() works very similarly to printf(). The first argument is a literal NSString. As
we saw earlier, double quotes create C-style strings. By adding the @ before the first double
quote, we tell the compiler to generate an NSString instead.
Next, NSLog scans through that string looking for placeholders. For the most part, these
placeholders are identical to those used by printf(). There are some small changes, however. For example, %@ is used to display objects.
Basically, this code prints the value of the class’s pointer and the class name to the console after both alloc and init. If you run this code, it will produce the following output
(note that the actual pointer values will undoubtedly change):
2013-07-20 14:36:20.318 Scratchpad[460:303] allocString: pointer =
p 0x100109210, class = NSPlaceholderString
2013-07-20 14:36:20.320 Scratchpad[460:303] initString: pointer =
p 0x7fff7e7e2198, class = __NSCFConstantString
As you can see, both the pointer and the class change after init is called. Furthermore,
our NSString is actually a member of the __NSCFConstantString subclass.
Multiple Initialization Methods
An object may have more than one initialization method. NSString has several: init,
initWithString:, initWithFormat:, initWithContentsOfFile:encoding:error:, and
more. Each of these provides alternate ways for setting the string’s initial value. The
complete list can be found in the NSString class reference.
In addition, NSString has a number of convenience methods—class methods that typically start with the word string: string, stringWithString:, stringWithFormat:,
stringWithContentsOfFile:encoding:error:, and others. These convenience methods
combine the allocation and initialization steps into a single method.
While [NSString string] and [[NSString alloc] init] may seem similar, there is a
subtle but significant difference in how the system manages the resulting object’s memory.
In the past, we had to carefully choose which method to use, keeping these differences in
mind. Fortunately, if you are compiling your applications with ARC, these differences disappear. You can freely use whichever method best fits your application and programming style.
Objects and Object-Oriented Programming BC-45
Figure 2 Viewing code snippets
Figure 3 Autocompleting snippets
Writing Initialization Methods
We can freely create our own init methods for our classes. For the most part, these are just
like any other method. However, there are a few conventions we need to follow to make sure
everything works.
First, there’s the name. All the initializers start with init. Do yourself (and anyone who
might maintain your code in the future) a huge favor and always follow this naming convention. Likewise, other methods should not start with init.
Next, there are two methods that require special attention: the class’s designated initializer and the superclass’s designated initializer.
Each class should have one and only one designated initializer—a single method responsible for performing all of the object’s setup and initialization. Typically, this is the initializer
with the largest number of arguments. All the other initializers should call the designated
initializer—letting it do the heavy lifting.
Similarly, your designated initializer needs to call your superclass’s designated initializer.
By chaining our class hierarchy together, designated initializer to designated initializer, we
guarantee that the object gets initialized properly all the way up the class hierarchy.
Finally, your class should always override its superclass’s designated initializer. This
will reroute any calls to the superclass’s designated initializer back through your designated
initializer and then up the class hierarchy.
Once all of these steps are performed correctly, we can freely call any init method from
anywhere in our class hierarchy. The system will route the message to our class’s designated
initializer, and from there it will pass up the chain through all of its ancestors’ designated
initializers.
Now let’s take a closer look at the designated initializer itself. Initializers aren’t hard to
write—but there are a number of required steps. It can be hard to remember them all, especially when you’re first starting. So, let’s start by cheating. We’ll look up Xcode’s init snippet.
There are two ways to access the snippet. We can pull it from the snippet library. To do this,
make sure the Utilities area is open. In the Library section, click the Code Snippet tab (
).
Scroll down to the Objective-C Init Method snippet. Clicking this will show the snippet (Figure 2). We can also drag it out into the code editor. Alternatively, if you type init inside the
@implementation block, autocomplete will suggest the init snippet (Figure 3).
BC-46 Bonus ChapteR Objective-C
Both approaches produce the same basic code. The code is listed next—though I’ve
replaced the initializations placeholder with a comment, to make the text clearer.
- (id)init
{
self = [super init];
if (self) {
// place initialization code here.
}
return self;
}
As you can see, this template has several key features.
JJ
JJ
JJ
JJ
The method must begin with the word init. I’ve mentioned this already, but it’s worth
repeating.
init methods always return an id type. While this technically means it could return any
object, the compiler is smart enough to know that this id must be a member of current
class (or possibly one of its subclasses). As a result, Xcode will do the appropriate type
checking when it analyzes our code.
The designated initializer must call the superclass’s designated initializer.
Since the superclass’s designated initializer may return a different object, we must assign
the result of calling the superclass’s initializer to self. This is similar to the rule about
always nesting alloc and init calls and has the same underlying cause.
note: Assigning the return value to self may seem odd. After all, self is
roughly equivalent to Java’s this keyword. But in Java, we cannot assign values to this. Once again, Objective-C is just a little bit different. And,
we’ve actually seen the underlying reason. In Objective-C, self isn’t a
special keyword. It is simply one of the hidden arguments that get passed to
every method—and, just like any argument, we are free to assign our own
values to it.
JJ
Initializers should return nil if there is an error. Therefore, we must check to make sure
self is not equal to nil before performing any initialization. The snippet uses a C trick to
do this. By default, C treats zero as false and any nonzero numbers as true. Since nil is
equal to 0, it would be treated as a false value in the if statement.
JJ
We must actually perform our custom initialization.
JJ
We must return self.
OK, this is a lot to take in. Let’s look at a concrete example. Imagine we are making an
Employee class. This will be a subclass of NSObject. NSObject has only one initializer, init.
This is (by default) its designated initializer. Our Employee class, on the other hand, will have
Objects and Object-Oriented Programming BC-47
three instance variables: _firstName, _lastName, and _idNumber. Its designated initializer
will set all three values. In most cases, this means it will have three arguments.
// Designated initializer.
- (id)initWithFirstName:(NSString *)aFirstName
lastName:(NSString *)aLastName
idNumber:(int)anID
{
self = [super init];
if (self) {
_firstName = aFirstName;
_lastName = aLastName;
_idNumber = anID;
}
return self;
}
As you can see, this follows all of our rules for the designated initializer. It begins with
init…. It returns an id. It uses the super keyword to call the superclass’s designated initializer (in this case init). It assigns the result of calling the superclass’s designated initializer to
self. It checks to make sure self is not equal to nil. We initialize all our instance variables,
and finally we return self. There are a number of minor variations to this pattern—but all
designated initializers must perform these steps.
So far, so good. I would call this designated initializer functionally correct. It works
fine as long as we always call it to initialize our class. However, we should be able to call
any init method from anywhere in the class hierarchy, and we should still get a properly
initialized object. To do this, we have one more step. We must override the superclass’s
designated initializer.
And, as I said earlier, once we have a designated initializer, all other initializers must call
the designated initializer. It can do some preprocessing before or postprocessing after. But it
must call that initializer.
This makes overriding the superclass’s designated initializer very simple. In our case,
it’s just a couple lines of code.
- (id)init
{
return [self initWithFirstName:nil lastName:nil idNumber:-1];
}
Here, I’m just providing default values to our designated initializer and returning the result.
BC-48 Bonus ChapteR Objective-C
note: Many developers write correct designated initializers, but don’t bother
overriding the superclass’s designated initializer. As I said before, this works,
but it forces you to always call your class’s designated initializer.
This means we need to be a little careful when using third-party libraries,
if we do not know how they’ve implemented their classes. However, accidentally calling the wrong initializer may not cause any obvious problems.
The alloc method automatically sets all instance variables to nil or zero. If
the designated initializer assigns values to only these instance variables,
then the nils and zeros may work as reasonable defaults.
Fortunately, Apple always provides the full set of designated initializers. This
means we don’t have to use a particular class’s designated initializer when
instantiating the built-in classes. We’re free to call any init method from
anywhere in the class hierarchy. As we will see in the book, we can take
advantage of this fact to simplify our code.
Convenience Methods
Many classes have convenience methods that instantiate objects with a single method call.
Most often, these methods mirror the init methods. Like the initializers, they follow a specific naming pattern. The first word indicates the type of object that the method creates. The
rest of the name describes the arguments.
For example, our Employee class may have a method employeeWithFirstName:lastName:
idNumber:. This acts as a thin wrapper around our designated initializer. Other convenience
methods may involve more-complex computations, either before or after calling the designated initializer—but the basic ideas remain the same.
+ (instancetype) employeeWithFirstName:(NSString *)aFirstName
lastName:(NSString *)aLastName
idNumber:(int)anID
{
return [[self alloc] initWithFirstName:aFirstName
lastName:aLastName
idNumber:anID];
}
Two subtle points are worth highlighting here. First, the convenience method returns
instancetype, not id. As we discussed earlier, when the compiler sees an init method (or
an alloc method, for that matter), it knows that the return value is actually a member of the
receiver’s class or one of its subclasses. Therefore, the compiler does additional type checking based on that knowledge.
We can get the same enhanced type checking for our convenience methods, but we need
to do a little additional work. Basically, the instancetype keyword tells the compiler that
this method will return an id but that it should treat that id as a related result type—either
an instance of the receiver or one of its subclasses.
Objects and Object-Oriented Programming BC-49
Second, we use [self alloc] and not [Employee alloc]. At first this seems odd. Isn’t
alloc a class method. Shouldn’t we call it on a class?
Yes, yes we should. And that’s exactly what we’re doing. Remember, self refers to the
message’s receiver. Since this is a class method, its receiver will be the Employee class. This
means self will be the Employee class. So, when we call this on Employee, [self alloc]
and [Employee alloc] are identical.
However, what happens when we create a subclass of Employee called PartTimeEmployee. We should still be able to call employeeWithFirstName:lastName:idNumber on
PartTimeEmployee, and everything should work as expected.
If we hard-coded in the class, our convenience method would always return Employee
objects—even when we called it on the PartTimeEmployee class. By using [self alloc],
we guarantee that our convenience method creates a member of the correct class.
// Returns an Employee object.
id firstPerson = [Employee employeeWithFirstName:@”Mary”
lastName:@”Smith”
idNumber:10];
// Returns a PartTimeEmployee object.
id secondPerson = [PartTimeEmployee employeeWithFirstName:@”John”
lastName:@”Jones”
idNumber:11];
Protocols
Some object-oriented languages (most notably C++ and Python) allow multiple inheritance.
This means a class can inherit behaviors from more than one superclass. While this could be
used to build very powerful abstractions, it also tends to create problems, especially when
both parents define identical methods. This may sound like a rare corner case, but it accidentally happens all the time. If the classes share a common ancestor (and all classes share a
root ancestor), both superclasses will have copies of the common ancestor’s methods. If you
override one of these methods anywhere in either of the superclasses’ hierarchies, your subclass will inherit multiple implementations for that method.
Other languages (like Java and Objective-C) do not allow multiple inheritance, largely
because of these added complexities. However, there are times when you still want to capture common behaviors across a number of otherwise unrelated classes. This is particularly
true in static, strongly typed languages like Java.
Let’s say you want to have an array of objects, and you want to iterate over each object,
calling its makeNoise() method. One approach would be to make a NoisyObject superclass
and have all the objects in your array inherit from that class. While this sounds good, it is not
always possible. Sometimes your objects must inherit from another, existing class. In C++,
BC-50 Bonus ChapteR Objective-C
no problem. Your class could inherit from both. In Java, we can simulate multiple inheritances using a Noisy interface. Any class implementing this interface must also implement
the makeNoise() method.
In Objective-C, this is less of a concern. We don’t have Java’s strict static typing (and all
the extra convolutions that come with it). After all, we can already send any message to any
object. So, this is really a matter of communicating our intent. After all, we could just make
sure that all the objects in our array implement the makeNoise method, and we would be
good to go. However, we often want to explicitly capture these requirements. In this case,
protocols fill a similar role to Java’s interfaces—but they have other uses as well.
A protocol declares a number of methods. By default, these methods are required. Any
class adopting the protocol must implement all of the required methods. However, we can
also declare methods as optional. The adopting class may implement optional methods, but
they do not have to do so.
At first glance, optional methods may seem a bit odd. After all, any object can implement
any method; we don’t need the protocol’s permission. However, it’s important to remember
that Objective-C’s protocols are really about communicating developer intent. Developers
often use optional methods when developing protocols for delegates. Here the optional
methods document the list of methods that the delegate can implement to monitor or modify the delegating class’s behavior. We will examine this topic in more depth in “Delegates”
later this chapter.
Adopting Protocols
To adopt a protocol, simply place a set of angled brackets after the superclass declaration in
our class’s @interface block. Inside these brackets we can place a comma-separated list of all
the protocols our class is adopting.
@interface ClassName : SuperClassName <list, of, protocols>
// Declare Methods and Properties Here
@end
We must also implement any required methods declared in these protocols. Notice that
we do not need to declare these methods in the @interface block. The protocol takes care of
that for us.
Declaring Protocols
Protocol declarations look a lot like class declarations. Like the class’s @interface block,
protocol declarations are normally placed in a header file—either their own header file or
the header file of a closely related class (e.g., delegate protocols are often declared in the delegating class’s header).
Protocols can declare methods or properties; however, the compiler will not synthesize
either the methods or the instance variable for a protocol’s properties. It simply declares the
Objects and Object-Oriented Programming BC-51
accessor methods. We must do the rest of the work inside the adopting class. Additionally,
protocols cannot declare instance variables.
@protocol ProtocolName
// Declare required methods here.
// Protocol methods are required by default.
@optional
// Declare optional methods here.
// All methods declared after the @optional keyword are
// optional.
@required
// Declare additional required methods here.
// All methods declared after the @required keyword are required
// again.
@end
As you can see, you can use the @optional and @required keywords to partition your
methods as necessary. All methods after an @optional keyword (until the next @required
keyword) are optional. All methods after a @required keyword (until the next @optional
keyword) are required. Methods are required by default.
One protocol can also inherit from other protocols. You simply list these in angled brackets after the protocol name. Any class that adopts a protocol also adopts all the protocols it
inherits. In fact, it’s considered best practice to always inherit the NSObject protocol.
@protocol ProtocolName <NSObject, additional, protocols, to, incorporate>
...
@end
note: NSObject is somewhat unusual, since it is both a class and a protocol.
The NSObject protocol defines the methods that are required for an object to
function properly inside the Objective-C runtime. Both the NSObject and
NSProxy classes adopt the NSObject protocol. Unfortunately, this means if
you want to see the complete list of all methods implemented by every
object, you need to look up both the NSObject class and the NSObject protocol.
Categories and Extensions
Categories allow you to add new methods to existing classes—even classes from libraries or
frameworks whose source code you otherwise cannot access. There are a number of uses for
categories. First, we can extend a class’s behavior without resorting to rampant subclassing.
This is often useful when you just want to add one or two helper functions to an existing
class—for example, adding push:, peek, and pop methods to an NSMutableArray.
BC-52 Bonus ChapteR Objective-C
You can also add methods to classes farther up the class hierarchy. These methods are
then inherited down the class hierarchy just like any other methods. You can even modify
NSObject or other root classes—adding behaviors to every object in your application.
In general, however, you should avoid making such broad changes to the language. They
may have unintended consequences. At the very least, they will undoubtedly make the code
somewhat confusing to anyone else who has to maintain it.
Lastly, you can use categories to break large, complex classes into more manageable
chunks, where each category contains a set of related methods. The Cocoa Touch frameworks often do this, declaring specialized helper methods in their own categories. This is
particularly useful if you’re working on a large project. You can have different teams responsible for different categories.
Creating Categories
We create categories much like we create new classes. The @interface block looks almost
identical to its class counterpart. There are only two differences. First, instead of declaring a
superclass, we provide the category name in parentheses. This can, optionally, be followed
by a list of new protocols adopted by the category. Second, we cannot add instance variables
with a category. If you need additional instance variables, you must make a subclass instead.
@interface ClassName (CategoryName) <new protocols>
// Declare methods here.
@end
The @implementation block is even closer to the class version. The only change is the
addition of the category name in parentheses.
@implementation ClassName (CategoryName)
// Implement the extensions methods here.
@end
Like a class, the category’s @interface block will typically be placed in an .h file. The
@implementation will be in an .m file. However, we use a special naming convention for
these classes. Typically we would use the base class’s name, a +, and then the category name.
For example, if we wanted to create a Stack category on the NSMutableArray class, we would
create both NSMutableArray+Stack.h and NSMutableArray+Stack.m. This makes spotting
categories inside a project much easier.
There’s one important rule when it comes to categories. Never, ever use a category to
override an existing method. Obviously, changing the behavior of built-in classes is dangerous. We may accidentally modify a behavior that the system is depending on, putting our
entire application into a bad state.
Objects and Object-Oriented Programming BC-53
note: Of course, Objective-C is a dynamic language, so we can change
method implementations at runtime. However, if you really want to do this,
there are better ways than using categories. Just look up the dark arts of
method swizzling online. You’ll find all the gory details—plus a list of
arguments about whether method swizzling is cool and clever or evil and
demented. I’ll let you make up your own mind.
There are two other, pragmatic reasons why using categories to modify methods is a bad
idea. First, there’s no way to call the original method from within a category. More importantly, there’s no way to guarantee the order in which categories are loaded, and the last
category wins.
As I said earlier, Apple loves to split up its classes with categories. This means many of
the methods are actually defined in categories—and we don’t know whether our categories
will be loaded before or after Apple’s. Worse yet, the order could change the next time Apple
updates Xcode.
Because of this, I highly recommend you always prefix all the method names in any of
your categories.
Here is a simple FMSStack category on the NSMutableArray class. Notice that I’ve prefixed both the category and the method names.
// in NSMutableArray+FMSStack.h
#import <Foundation/Foundation.h>
@interface NSMutableArray (FMSStack)
- (void)FMS_push:(id)object;
- (id)FMS_peek;
- (id)FMS_pop;
@end
// in NSMutableArray+FMSStack.m
#import “NSMutableArray+FMSStack.h”
@implementation NSMutableArray (FMSStack)
- (void)FMS_push:(id)object
{
[self addObject:object];
}
BC-54 Bonus ChapteR Objective-C
- (id)FMS_peek
{
return [self lastObject];
}
- (id)FMS_pop
{
id object = self.lastObject;
[self removeLastObject];
return object;
}
@end
One final word about categories: The compiler does not check to make sure that the
methods you declare in a category are actually defined anywhere your project. If you start
writing the category’s @implementation() block, it will give you a warning if some of the
methods are missing. But if you leave out the entire @implementation block, it will simply
assume we know what we’re doing.
We can use this to get around pesky compiler warnings when working on dynamic code.
Extensions
An extension is very similar to a category, with three significant differences. First, it does not
have a name. Instead, we use empty parentheses after the @interface or @implementation
declaration. Second, the methods declared in the extension must be implemented in the
class’s main @implementation block. Third, and most important, we can declare instance
variables inside an extension. This also means that any properties we declare in our
extensions will be fully synthesized—the compiler will create both the accessors and the
instance variables for us.
Extensions are most often used to declare private properties. The extension is typically
placed in the class’s main implementation file above the @implementation block.
@interface ClassName ()
// Declare private properties here.
@end
And remember, we can declare a property as readonly in the public interface and redeclare
it as readwrite in the extension. This will generate public getter and private setter methods.
Objects and Object-Oriented Programming BC-55
Class Extensions and Private Methods
In the first edition of the book, I recommended using extensions to declare private
methods. While you can still do this, it’s not something I typically do in production
code anymore.
As mentioned earlier, a private method is simply a method that is not listed in the .h file.
However, back in the dark ages of iOS 5, we had to either declare or define our methods
before we could call them.
If we did not declare our private methods in the class extension, we would often have to
define them in an awkward or unnatural order. By placing them in the class extension,
we were free to implement our methods in whatever order we wanted. This made it a lot
easier to keep our implementation files clean and well organized.
Now, with modern iOS projects, the compiler is smart enough to find our methods no
matter what order they are defined. This means we no longer need to declare the private
methods before we can use them.
At this point, declaring private methods in a class extension is just busy work. Personally,
I don’t feel that it improves the readability of the class at all. However, if you find that the
benefits for explicitly declaring the methods outweigh the additional typing and maintenance that they incur, then by all means continue to use them.
Dot-Notation, Literals, and Subscripts
Originally, Objective-C had a very simple syntax. Everything was shoehorned into method
calls. This gave the language a consistency—but often made it somewhat more verbose than
necessary.
Over time, Apple has added alternative syntaxes to the language. These are often syntactic sugar, making Objective-C easier to use but also making it more complex. We no longer
have a single, unified syntax. Instead, we have a mishmash of special case syntaxes.
Dot-notation was the first alternate syntax, originally introduced in 2006. Not surprisingly, many old-school Objective-C programmers seem to hate dot-notation with a fury
usually reserved for telemarketers. They claim it is both unnecessary and confusing.
On the other hand, many newer developers readily adopted dot-notation. It was familiar
to anyone coming from Java or C++ and could greatly streamline code. This led to a great
many arguments about code formatting and style—some of which continue to this day.
Meanwhile, Apple largely ignored everyone and continued to push ahead, adding even more
alternate syntaxes to Objective-C.
BC-56 Bonus ChapteR Objective-C
The ugly truth is that Objective-C has always been a bit of a mutt. While some developers may pine for the days of simpler syntaxes—those days are largely fictional. We’ve always
used a mixture of Objective-C bracket notation with C structures, operators, and functions.
In my opinion, dot-notation, literals, and subscripts actually make Objective-C code
easier to read in most cases. I will, therefore, use them throughout the book.
Dot-Notation
Dot-notation is designed to make it easier to use properties. As we saw in the section
“Declared Properties,” when you declare a property, you are actually declaring a getter and a
setter for that property.
For example, if we declare a firstName property, we get two methods: firstName and
setFirstName:. We would then call these methods as shown here:
NSString *name = [person firstName];
[person setFirstName:@”Bob”];
With dot-notation, we can use <receiver>.<property name> instead of the getter and
use <receiver>.<property name> = instead of the setter. As you can probably guess, it’s
called dot-notation because of the dot between the receiver and the property’s name.
Dot-notation simplifies our early method calls to the following code:
NSString *name = person.firstName;
person.firstName = @”Bob”;
This, by itself, isn’t a huge difference. However, small differences do build up over time.
Still, consider the following two lines:
employee.department.company.name = @”Apple”;
[[[employee department] company] setName:@”Apple”];
While they are semantically identical, I think most people would agree that the dot-notation version is a lot easier on the brain.
note: In many programming languages (e.g., Java), writing code like
employee.department.company.name would be strongly discouraged. Java programmers often refer to this type of code as a train wreck—partially
because it resembles train cars connected with the dots. This is partially
because if any of these accessor methods returned NULL, the code will crash.
Even worse, it is often very hard to determine where the error occurred. However, in Objective-C, this style of coding is generally acceptable, especially if
you are simply chaining together a string of getters. In part, this is because
Objective-C won’t crash just because one of the accessors returned nil.
Remember, dot-notation is purely syntactic sugar. When the compiler sees person.
firstName, it automatically converts it to [person firstName]. There is no difference
between the two.
Dot-Notation, Literals, and Subscripts BC-57
Importantly, dot-notation should be used only on properties. For example, imagine we
have an NSArray named people. NSArray as a method called count. It is therefore tempting
to call people.count to get the number of people in our array. In fact, the compiler will convert people.count to the method call [people count]. So, this will build and run correctly.
Furthermore, this works for any method that takes no arguments.
Unfortunately, count is a method, not a property, and Apple’s documentation explicitly
states that we should use dot-notation only for properties. So, while this currently works,
Apple may change the compiler’s behavior in future releases of Xcode, and people.count
might suddenly stop working. Bottom line, don’t do it.
Additionally, we cannot use dot-notation if we are using dynamic types. If you’re using a
variable of type id, you will have to use fully bracketed method calls.
Despite the initial controversy surrounding dot-notation, the Objective-C developer
community has largely come to terms with it. In fact, the general consensus is that dotnotation should always be used when dealing with properties and should never be used
with methods. The more consistent you are with your usage, the easier it is to search
through your code.
Personally, I like that dot-notation mirrors the way we get and set values in C-style
structs. This makes a clear distinction between accessors and other methods.
Literals
Objective-C has always had a literal notation for NSString. We’ve already run across this a
few times. Simply start the string with @” and end it with “.
NSString *name = @”Bob”;
With Mac OS X 10.8 and iOS 6, Apple added literal syntax for NSNumber, NSArray, and
NSDictionary.
NSNumber
NSNumber is an object wrapper around simple numeric values. We can use NSNumber to store
integers, floating-point values, and even Boolean values. We will often use NSNumber when
storing numeric values in arrays or dictionaries, since we cannot store nonobject data in
Objective-C’s collections.
note: Don’t let the names confuse you. NSNumber and NSDecimalNumber are
Objective-C objects, while NSInteger and NSUInteger are simply typedefs for
basic C types (32-bit integer and unsigned integer values in iOS). Not
everything that begins with NS is an object.
Before the NSNumber literal syntax, if we wanted to create a number, we typically called
one of the many convenience methods. NSNumber provides separate convenience methods
for each type: numberWithInteger:, numberWithFloat:, numberWithBool:, and so on.
BC-58 Bonus ChapteR Objective-C
NSNumber *integer = [NSNumber numberWithInteger:456];
NSNumber *floatingPoint = [NSNumber numberWithFloat:123.456];
NSNumber *boolean = [NSNumber numberWithBool:YES];
Fortunately, we can simplify this code using the new, literal syntax. To create a literal
NSNumber, we simply add the at sign before the value, as shown here:
NSNumber *integer = @456;
NSNumber *floatingPoint = @123.456;
NSNumber *boolean = @YES;
We can also use @(<expression>) to convert the result of an arbitrary expression to an
NSNumber—as long as the expression evaluates to a numeric C data type, of course. This is particularly helpful when converting enums or the return values from functions and method calls.
NSNumber *day = @(Tuesday);
NSNumber *sum = @(32 + 43 + 68);
NSNumber *value = @(person.age);
NSArray
An NSArray is simply a collection that stores objects as an ordered list. All the items in the
array must be Objective-C objects (no structs, enums, or scalar C values); however, they do
not all have to be the same type of object.
There are a number of ways to create NSArrays, but one of the most common involves
using the arrayWithObjects: convenience method. Here, we pass a nil-terminated list of
objects, as shown here:
NSArray *people = [NSArray arrayWithObjects:@”Bob”, @”Sally”, @”Jane”,
@”Tim”, nil];
We can replace this with the new, literal syntax. Not surprisingly, this starts with @[ and
ends with ]. We simply have a comma-separated list of objects between the square brackets.
NSArray *people = @[@”Bob”, @”Sally”, @”Jane”, @”Tim”];
The NSArray literal syntax actually compiles to arrayWithObjects:count:. This is a lot
safer than using arrayWithObjects:, since it verifies that none of the objects are nil before
creating the array. If you use arrayWithObjects: and one of the values happens to be nil, the
compiler would assume you’ve reached the end of the list and simply create a truncated array.
Unfortunately, arrayWithObjects:count: is somewhat less convenient, especially since
you need to remember to update the count every time you modify the array’s contents.
Historically, this forced us to choose between safety and convenience. Now, with the literal
array syntax, we can have the best of both worlds.
Dot-Notation, Literals, and Subscripts BC-59
NSDictionary
NSDictionaries are a collection for storing key-value pairs. Typically the keys are NSStrings
(though they can be any Objective-C object, as long as it adopts the NSCopying protocol). The
values can be any non-nil object.
NSDictionary also has a variety of convenience methods. The simplest to use is
dictionaryWithObjectsAndKeys:.
NSDictionary *people = [NSDictionary dictionaryWithObjectsAndKeys:
@”Bob”, @”Father”,
@”Sally”, @”Mother”,
@”Jane”, @”Sister”,
@”Tim”, @”Brother”, nil];
Again, we pass the method a comma-separated list of objects ending in nil. It will interpret the objects in pairs, the value first followed by its key.
This method, however, has a number of problems. First, there’s no obvious relationship
between the keys and the values. In the previous example, I used whitespace to put each
key-value pair on its own line—but nothing forces you to do that. If you look at examples of
Objective-C code, you will often see the entire list of objects in a single, unbroken line.
Even worse, it expects the values first, followed by the keys. However, we naturally think
of key-value pairs as a key followed by a value. It’s therefore very easy to accidentally put
things in the wrong order.
The literal syntax makes this a lot cleaner. Here we simply start with @{ and end with }.
Inside the curly brackets, we have a comma-separated list of key-value pairs. Each pair is
written as <key>:<value>. Notice that the key and value are now in the correct order, and
the separating colon explicitly identifies the relationship.
NSDictionary *family = @{@”Father”:@”Bob”,
@”Mother”:@”Sally”,
@”Sister”:@”Jane”,
@”Brother”:@”Tim”};
The NSDictionary literal syntax compiles down to dictionaryWithObjects:forKeys:
count:. Like the array example, this is a safer—though somewhat less convenient method.
Fortunately, when using the convenience method, we get the safety for free—plus a much
improved syntax.
There is one important difference between the older, NSString literals and the newer
NSNumber, NSArray, and NSDictionary literals. NSString literal syntax produces static
strings. This means they are created at compile time and will exist for the duration of the
application. NSNumber, NSArray, and NSDictionary literals are simply converted to the
appropriate convenience methods, which are then evaluated at runtime.
This means we can create static strings, as shown here:
static NSString * const MyAppSomeKey = @”MyAppSomeKey”;
BC-60 Bonus ChapteR Objective-C
However, we cannot do the same for NSNumber, NSArray, or NSDictionary.
// These produce an “initializer element is not a
// compile-time constant” error.
static NSNumber * const MyAppMagicNumber = @42;
static NSArray * const MyAppArrayOfPeople = @[@”Bob”, @”Sally”];
static NSdictionary * const MyAppDictOfFamily =
@{@”Father”:@”Bob”, @”Mother”:@”Sally”};
Subscripts
While we’re on the subject of NSArrays and NSDictionaries, in old-school Objective-C we
accessed the objects in these collections using regular method calls. As you can see, this works.
It’s consistent with the other Objective-C code. But, it’s also a bit on the cumbersome side.
NSString *person = [people objectAtIndex:2];
NSString *mother = [family objectForKey:@”Mother”];
Thankfully, with the new subscript syntax, we can simplify this code. This syntax should be
familiar to anyone who has developed in—well—basically, any other programming language.
NSString *person = people[2];
NSString *mother = family[@”Mother”];
We can also use subscript notation to set values in our arrays and dictionaries, but there’s
a slight catch. NSArray and NSDictionary (as well as NSNumber, NSString, and most Foundation objects) are immutable. They cannot be changed once they’re created.
However, many of these classes have a mutable subclass. So, as long as we make sure to
use NSMutableArray or NSMutableDictionary, the following code will work:
NSMutableArray *mutablePeople = [people mutableCopy];
mutablePeople[3] = @”John”;
NSMutableDictionary *mutableFamily = [family mutableCopy];
mutableFamily[@”Brother”] = @”John”;
The literal syntax always creates immutable objects. However, we can create a mutable
version by calling mutableCopy. Then we simply use [<index or key>] = to set our value.
For the NSMutableDictionary, this is similar to calling setObject:forKey:. If the key
already exists, you will replace the current value with the new value. If the key doesn’t exist,
both the key and the value will be added to the dictionary.
For NSArray, it’s a little more complicated. Basically, if you use the index of an object currently in the array, it is the same as calling –replaceObjectAtIndex:withObject:, replacing
whatever is currently stored at that index. If you use the first empty index (e.g., index 4 for an
Dot-Notation, Literals, and Subscripts BC-61
array containing four items), it will add the value to the end of the array. If you use a higher
index, you will get an NSRangeException, with the index out of bounds.
Finally, we can add subscript notation to our own classes. We simply need to add one or
more of the following methods to our class:
// Enable getting values with an unsigned integer index
- (id)objectAtIndexedSubscript:(NSUInteger)index;
// Enable getting values with key
- (id)objectForKeyedSubscript:(id)key;
// Enable setting values with an unsigned integer index
- (void)setObject:(id)anObject atIndexedSubscript:(NSUInteger)index;
// Enable setting values with a key
(void)setObject:(id)object forKeyedSubscript:(id < NSCopying >)key;
Notice that we will be adding these methods, not overriding them. This means we cannot
use Xcode’s autocomplete to generate the method signatures for us—we must type in the
entire thing by hand (or copy the method signature from the docs, which is what I usually
do). Also, we must declare these methods in our class’s header file, or it will give us compilation errors whenever we try to use subscripting.
Classes can support both indexed and keyed subscripting at the same time. It’s a little
odd—but I’m sure someone will find a cool use for this feature.
Memory Management
I’m not going to lie to you. Before iOS 5.0, memory management was undoubtedly the most difficult part of iOS development. Here’s the problem in a nutshell. Whenever we create a variable,
the compiler sets aside some space in memory for that value. For local variables, the compiler
uses memory on the stack. This memory is managed automatically. When a function returns, any
local variables defined within that function are automatically removed from memory.
This sounds great, but the stack has two important limitations. First, it has a very limited amount of space, and if you run out of memory, your application will crash. Second, it
is hard to share these variables. Remember, functions pass their arguments and returns by
value. That means everything going into or out of a function will get copied. This isn’t too
bad if you are just tossing around a few ints or doubles. But what happens when you start
moving around large, complex data structures? Pass an argument from function to function,
and you find yourself copying the copy of a copy. The costs in both time and memory would
build up frighteningly fast.
BC-62 Bonus ChapteR Objective-C
Alternatively, we can declare variables on the heap and use a pointer to refer to that
chunk of memory. The heap has several advantages of its own. We have considerably more
space available, and we can pass pointers around freely; only the pointer gets copied, not the
entire data structure.
However, whenever we use the heap, we must manually manage its memory. When we
want a new variable, we must request enough space on the heap. Then, when we’re done,
we must free up that space, allowing it to be reused. This leads to two common memoryrelated bugs.
First, we could free the memory but accidentally continue using it. This is called a dangling pointer. These bugs can be difficult to find, because freeing a variable does not necessarily change the actual value stored in the heap. It simply tells the OS that the memory can
be used again. This means a pointer to the freed memory might appear to work fine. You get
into trouble only when the system finally reuses that memory.
This can cause strange errors in completely unrelated sections of code. Imagine this: You
free Object A’s memory from the heap but accidentally continue to use its pointer. Meanwhile, an entirely unrelated section of code requests a new object, Object B. The operating
system gives it a chunk of the memory that once belonged to A. Then we change a value on
Object A. This overwrites the memory now owned by B, corrupting the data stored there.
The next time you try to read from Object B, we’re bound to have problems. The best thing
we can hope for is a crash. Unfortunately, sometimes the system lumbers on, displaying
bizarre, unexplainable, and often intermittent errors.
The second common memory error occurs when you forget to free up memory. This is
called a memory leak, and it can cause your application to grab more and more memory as it
continues to run.
On the one hand, memory leaks aren’t necessarily all that bad. All the memory will be freed
when the application exits. I’ve heard of server software that deliberately leaks all its memory.
After all, if you’re running thousands of copies of the server anyway, it may be easier to periodically kill and respawn individual copies than to risk crashes from dangling pointers.
However, on the iOS we do not have that luxury. All iOS devices have extremely limited
memory. Use too much and your app will shut down. Correct and effective memory management is therefore a vital skill.
Still, of the two, dangling pointers are a much more serious problem than memory leaks.
Yet, for some reason, we as developers tend to spend a lot more time and energy worrying
about memory leaks.
For iOS applications, we’re mainly concerned with the memory used by our objects. All
objects are created on the heap—and anything created on the heap must be deallocated. Yes,
we could create C data types or structs on the heap as well—but that is rarely done in most
iOS applications. If you need to go down that road, consult a good book on C programming
for the details.
So, within the context of iOS, when we talk about memory management, we’re really
talking about managing objects.
Memory Management BC-63
note: Apple claims that running out of memory is the number-one cause
of crashes in iOS apps. While this is undoubtedly true, we cannot necessarily
blame this on memory leaks. Applications are perfectly capable of grabbing and holding onto too much memory, even if none of that memory is
technically leaked.
What makes memory leaks special is that once all the pointers to a particular
chunk of memory are gone, there’s no way to get that memory back. We will
have to wait until the application exits before the leaked memory will be freed.
Objects and Retain Counts
One of the biggest problems is simply determining which portion of the code should have
responsibility for freeing up an object’s memory. In simple examples, the solution always
appears trivial. However, once you start passing objects around, saving them in other
objects’ properties or placing them in collections, things get murky fast.
We want to delete the object from memory as soon as we’re done with it, but how do we
tell the system that we’re done?
Traditionally, Objective-C used an approach called reference counting to monitor and
deallocate its objects. When we created an object, it started with a reference count of 1.
We could increase the reference count by calling retain on the object. Similarly, we could
decrease the reference count by calling release. When the reference count hit 0, the system
deleted the object from memory.
This made it possible to pass objects around without worrying about ownership. If you
wanted to hold onto an object, you retained it. When you were done, you released it. As long
as you kept all the retains and releases paired up correctly (not to mention autoreleases and
autorelease pools), you could avoid both dangling pointers and memory leaks.
Reference counting basically took a complex global task and broke it into a large number of
smaller, local tasks. As long as each piece worked properly, the whole system held together.
Unfortunately, getting it right was never as simple as it seemed. Objective-C’s memory
management conventions had a number of rules and a more than a few odd corner cases.
Worse yet, as developers, we had to get everything right 100 percent of the time. This was
possible only by robotically following the same set of steps every time we created a new
variable. It was tedious. It created a lot of boilerplate code—some of which wasn’t strictly
necessary—but if we didn’t follow each step every single time, we ran the risk of forgetting
something important.
Of course, Apple tried to help. Instruments has a number of tools to track allocations and
deallocations and to search for memory leaks. In recent versions of Xcode, the static analyzer has gotten better at analyzing our code. It can even find many common memory errors.
Which raised the question: If the static analyzer could find these errors, why couldn’t
it fix them? After all, memory management is a tedious, detail-oriented task that follows
a strict set of rules. Human brains simply aren’t good at tasks like these—but computers
are. Apple took its compiler and analyzer technologies and applied them to this task. After
analyzing millions of lines of code, it produced a new technology for managing memory:
automatic reference counting (ARC).
BC-64 Bonus ChapteR Objective-C
ARC vs. Garbage Collection
ARC is not garbage collection. They share a goal—both technologies automate memory
management, making it easier to develop our applications. However, they represent very
different solutions.
Garbage collection tracks objects at runtime. When it determines that an object is no longer
in use, it deletes the object from memory. Unfortunately, this creates several potential performance problems. The infrastructure needed to monitor and delete objects adds overhead
to your application. We also have very little control over when a garbage collector initiates its
scan. While modern garbage collectors try to minimize their impact on an application’s performance, they are inherently nondeterministic. This means the garbage collector may cause
your application to slow down or pause randomly during the application’s execution.
ARC, on the other hand, handles all the memory management at compile time. There
is no additional overhead at runtime—in fact, because of numerous optimizations, ARC
code runs faster than manually managed memory. In addition, the memory management
system is completely deterministic, meaning there will be no unexpected surprises.
Previously, Apple released garbage collection for OS X. However, because of the performance issues, we were never allowed to use garbage collection on iOS. In fact, garbage collection is now deprecated for OS X as well, and ARC is used as the default on both platforms.
Introducing ARC
ARC provides automated memory management for Objective-C objects. Conceptually, ARC
follows the retain and release memory management conventions. As your project compiles,
ARC analyzes the code and automatically adds the necessary retain, release, and autorelease method calls at compile time.
For developers, this is very good news. We no longer need to worry about managing the
memory ourselves. Instead, we can focus our time and attention on the truly interesting
parts of our application, such as implementing new features, streamlining the user interface,
or improving stability and performance.
In addition, Apple has worked to improve the performance of memory management
under ARC. For example, ARC’s automated retain and release calls are 2.5 times faster than
its manual memory management equivalents. The new @autoreleasepool blocks are 6
times faster than the old NSAutoReleasePool objects, and even objc_msgSend() is 33 percent
faster. This last is particularly important, since objc_msgSend() is used to dispatch every
single Objective-C method call in your application.
All in all, ARC makes Objective-C easier to learn, more productive, simpler to maintain,
safer, more stable, and faster. That’s what I call a win-win-win-win-win-win situation. Best
yet, for the most part, we don’t need to do anything. We don’t even need to think about
memory management. We just write our code, creating and using our objects. ARC handles
all the messy details for us.
Memory Management BC-65
Finding and Preventing Memory Cycles
While ARC represents a huge step forward in memory management, it doesn’t completely
free developers from thinking about memory issues. It’s still possible to create memory leaks
under ARC; ARC is still susceptible to retain cycles.
To understand this problem, we have to peek a bit under the hood. By default, all variables in ARC use strong references. When you assign an object to a strong reference, the
system automatically retains the object. When you remove the object from the reference (by
assigning a new object to the variable or by assigning a nil value to the variable), the system
releases the object.
Retain cycles occur when two objects directly or indirectly refer to each other using
strong references. This often happens in parent-child hierarchies, when the child object
holds a reference back to the parent.
Imagine I have a person object defined as shown here:
@interface Person : NSObject
@property (strong, nonatomic) Person* parent;
@property (strong, nonatomic) Person* child;
+ (void)myMethod;
@end
And myMethod is implemented as shown here:
+ (void)myMethod {
Person* vader = [[Person alloc] init];
Person* luke = [[Person alloc] init];
vader.child = luke;
// Do something useful with vader and luke.
}
In this example, when we call myMethod, two Person objects are created. Each of them
starts with a retain count of 1. We then assign luke to the vader’s child property. This
increases the luke’s retain count to 2.
ARC automatically inserts release calls at the end of our method. These drop vader’s
retain count to 0, and luke’s retain count to 1. Since the vader’s retain count now equals 0,
it is deallocated. Again, ARC automatically releases all of vader’s properties. So, luke’s retain
count also drops to 0, and it is deallocated as well. By the end of the method, all our memory
is released, just as we expected.
Now, let’s add a retain cycle. Change myMethod as shown here:
+ (void)myMethod {
Person* vader = [[Person alloc] init];
Person* luke = [[Person alloc] init];
vader.child = luke;
BC-66 Bonus ChapteR Objective-C
luke.parent = vader;
// Do something useful with vader and luke.
}
As before, we create our vader and luke objects, each with a retain count of 1. This time,
the vader gets a reference to luke, and luke gets a reference to the vader, increasing both
retain counts to 2. At the end of our method, ARC automatically releases our objects, dropping both retain counts back to 1. Since neither has been reduced to 0, neither object gets
deallocated, and our retain cycle creates a memory leak. Once the method ends, all pointers
to that memory disappear, and there’s no way to free the memory.
Fortunately, ARC has a solution. We simply need to redefine the parent property using a
zeroing weak reference. Basically, this means changing the property attribute from strong
to weak.
@interface Person : NSObject
@property (nonatomic, weak) Person* parent;
@property (nonatomic, strong) Person* child;
+ (void)myMethod;
@end
Zeroing weak references provide two key advantages. First, they do not increment the
object’s retain count; therefore, they do not extend the lifetime of the object. Second, the
system automatically sets them back to nil whenever the objects they point to are deallocated. This prevents dangling pointers.
Applications typically have object graphs that branch out from a single root object. You
should use strong references to point from the root object to the leaf objects. Think of the
strong references as a directed acyclic graph.
Use zeroing weak references whenever you need to refer to objects back up the graph
(anything closer to the graph’s root). Additionally, we should use zeroing weak references for
all our delegates and data sources (see the “Delegates” section later in this chapter). This is a
standard convention in Objective-C, since it helps prevent inadvertent retain cycles.
So far, the cycles we have seen have all been somewhat obvious, but this is not always the
case. A retain cycle can include any number of objects—as long as it eventually loops back
on itself. Once you get beyond three or four levels of references, tracking possible cycles
becomes nearly impossible. Fortunately, our developer tools come to the rescue again.
Instruments is a profiling tool that comes with Xcode. It has an amazing number of useful features, but one of the coolest is its ability to seek out and find retain cycles. It will even
display the retain cycle graphically.
Simply profile your application. Select Product > Profile from the main menu. Select the
Leaks template in Instruments’ the pop-up window and click Profile (Figure 4). This will
launch both Instruments and your app.
Memory Management BC-67
Figure 4 Selecting the
Leaks profile
Instruments will launch with two diagnostic tools running. Allocations tracks memory
allocations and deallocations, while Leaks looks for leaked memory. Memory leaks will
appear as red bars in the Leaks instrument. Be aware, they can take several seconds to show
up—so you will need to be patient. Once the leak appears, stop the profiler, and select the
Leaks instrument.
The actual leaks will appear in the detail panel below. In the jump bar, change the detail
view from Leaks to Cycles & Roots, and Instruments will display all the retain cycles it has
identified (Figure 5). You can now double-click one of the red links, and Xcode will automatically open the relevant code in a popup window. Fix it (either by changing it to a zeroing
weak reference or by restructuring the flow of our application), and test again.
note: Retain cycles are not a feature of ARC. They’re an unfortunate side
effect of the underlying reference counting system, affecting both ARC and
manual reference counting equally. However, they earn a little extra
attention in ARC, since they are one of the few ways you can actually
screw things up.
BC-68 Bonus ChapteR Objective-C
Figure 5 Finding and displaying retain cycles
Rules of the Road
For the most part, ARC remains stress-free and easy to use. Most of the time, we don’t need
to do anything. In fact, all of Xcode’s templates use ARC by default. If we want to turn it off,
we need to go in and edit the build settings. Fortunately, we can turn it off, if necessary. We
can even enable ARC on a file-by-file basis. This lets us freely mix ARC and non-ARC code.
However, for ARC to work correctly, the compiler must be able to unambiguously interpret our intent. This requires a few additional rules. Don’t worry if you don’t understand
many of these—most are rare edge cases, that wouldn’t occur during regular day-to-day
coding. More importantly, the compiler will enforce all of these rules. Breaking them creates
compiler errors—which we must find and fix them before our code will even run.
Memory Management BC-69
The dealloc method
The dealloc is automatically called by the system just before our object is removed from
memory. It is our last chance to clean up any resources that our object is using.
Before ARC, the dealloc method played a vital role in our object’s life cycle. We would
need to release the contents of our properties and instance variables in our dealloc
method. Therefore, except for the simplest classes, every class had a dealloc method.
With ARC, the system will automatically release our properties and instance variables for
us. Therefore, we need a dealloc method only if we have some other sort of resource that
we need to clean up. We will see a practical example of this in the “Notifications” section.
Otherwise, in ARC code, most classes do not have their own dealloc method.
All the rules are listed here:
JJ
Don’t use object pointers in C structs. Instead, create an Objective-C class to hold the data.
JJ
Don’t create a property with a name that begins with new.
JJ
Don’t call the dealloc, retain, release, retainCount, or autorelease methods.
JJ
JJ
JJ
JJ
Don’t implement your own retain, release, retainCount, or autorelease methods. You
can implement dealloc, but it’s usually not necessary.
When implementing dealloc in ARC, don’t call [super dealloc]. The compiler handles
this automatically.
Don’t use NSAutoreleasePool objects. Use the new @autoreleasepool{} blocks instead.
When casting between id and void*, we must use augmented casts or macros. This lets
us move data between Objective-C objects and Core Foundation types (see the “ARC and
Toll-Free Bridging” section).
JJ
Don’t use NSAllocateObject or NSDeallocateObject.
JJ
Don’t use memory zones or NSZone.
ARC and Toll-Free Bridging
First, it’s important to realize that ARC applies only to Objective-C objects. If you are allocating
memory for any C data structures on the heap, you still need to manage that memory yourself.
Real problems start to crop up when using Core Foundation data types. Core Foundation
is a low-level C API that provides a number of basic data management and OS services. Many
of these C data types are suspiciously similar to objects from the Objective-C Foundation
framework. Core Foundation has CFStringRef. Foundation has NSString. In fact, they share
the same underlying implementation. Core Foundation exposes a C API for manipulating the
data, while Foundation wraps everything in an Objective-C layer.
Now here’s the cool part. These data types are actually interchangeable. We can freely
pass a CFStringRef reference to an Objective-C method—or pass an NSString to a Core
Foundation function. This interoperability is referred to as toll-free bridging.
BC-70 Bonus ChapteR Objective-C
This is where ARC gets confused. If we create the data in C, we need to release it in C.
ARC won’t help us out. If, however, we create it in Objective-C, we don’t need to worry about
it. ARC handles everything.
But, what happens if we create it in C and pass it to Objective-C? Or when we create it in
Objective-C and pass it to C? Who is responsible for deleting the data?
We need to consider four basic scenarios.
JJ
JJ
JJ
The data is allocated in C, passed temporarily to Objective-C, and once the Objective-C
method returns, it’s deallocated in C.
The data is allocated in Objective-C, passed temporarily to C, and once the C function
returns, it’s deallocated in Objective-C.
The data is allocated in C, passed to and stored in Objective-C. It will need to be deallocated at some point in the future, but since it’s stored in Objective-C, it will need to be
deallocated in Objective-C.
The data is allocated in Objective-C, passed to and stored in C. It will need to be deallocated at some point in the future, but since it’s stored in C, it needs to be deallocated in C.
The first two are easy. We aren’t changing the ownership. The code that allocated the
object will also be responsible for deallocating it. We need to tell ARC that nothing is changing. We do that by casting the data from one type to another using the __bridge keyword.
The third scenario switches the ownership from C to Objective-C. Here, we need to tell
ARC that it is now responsible for deallocating the object when we are done. We do this
using the __bridge_transfer keyword.
Finally, in the last scenario, we are moving ownership from Objective-C to C. Here, we
need to tell ARC not to delete it completely. It should leave a single retain count, which we
will release in our C code by calling CFRelease() or a related function. Here, we use the
__bridge_retained keyword.
These four different casts are shown here:
JJ
CFStringRef bob = CFSTR(“Bob”);
NSString *sally = @”Sally”;
// Number 1
NSString *objcTemp = (__bridge NSString *)bob;
// Number 2
CFStringRef cTemp = (__bridge CFStringRef)sally;
// Number 3
NSString *objcStored = (__bridge_transfer NSString *)bob;
// Number 4
CFStringRef cStored = (__bridge_retained CFStringRef)sally;
Memory Management BC-71
Getting to Know the Documentation
It’s worth spending a little time to get familiar with
Xcode’s documentation. It’s an excellent resource
when first learning Objective-C, and it will continue
to function as an indispensable reference manual
throughout your iOS development career.
Let’s get a little practice. Open the documentation
window by selecting Help > Document and API Reference. Search for UIWindow, and select the UIWindow
Class Reference from the results.
This will open the class reference. Our Help window
has three panes: bookmarks on the left, the reference
text in the middle, and a right pane containing either
the table of contents or a detail view of the class. Not
all of these panes may show initially. You can hide and
display the left and right pane using the buttons in
the upper right corner.
The reference text starts with an overview of the class.
It’s usually worth reading through the overview, since
it often contains important information on how the
class should be used. Next, it lists the common tasks.
This is a list of methods and properties, organized
based on the task you may be trying to perform. This
is an excellent place to search for methods when
you’re not quite sure what you need.
After the tasks, we have the detailed entries for the
properties, methods, notifications, constants, and
other parts of the class. These are grouped by type and
listed alphabetically within each category.
The detailed entry shows how the item is declared,
describes its use, and provides information about
its availability. For example, scroll down to the
rootViewController property. As you can see, it stores
a reference to the UIViewController that manages the
window’s contents. Its default value is nil, and it is
available only in iOS 4.0 and newer.
BC-72 Bonus ChapteR Objective-C
Now let’s switch to the right pane. Notice that we can
toggle it between two different tabs: the table of con) and the details (
).
tents (
The table of contents gives us a quick overview of all
the properties, methods, constants, notifications, and
any other details described by the documentation. We
can click any line to scroll to that part of the documentation. This is often the quickest way to find a particular element of the class.
UIWindow’s detail pane, on the other hand, tells us how
the class relates to the rest of the API. For example,
UIWindow inherits from UIView, UIResponder, and NSObject. It also adopts the following protocols: UIAppearance, NSObject, UIDynamicItem, UIAppearanceContainer,
and NSCoding. It is declared in the UIKit framework
and has been available since iOS 2.0. It also lists sample code and related documentation. Most of these
items are clickable and will take us to the corresponding place in Apple’s documentation.
By comparison, search for CGPoint. Unlike the UIWindow
class, CGPoint does not have its own reference. It is
described inside the CGGeometry reference. Like the
class reference, this file starts with an overview and
then lists tasks, geometry functions, data types, and
constants. The CGPoint entry includes the struct’s
declaration and a description of all its fields and
its availability.
As we work our way through the book, periodically take
some time to look up any new classes or structures in
the documentation. I will try to show good examples
of the class’s typical usage, but most classes contain far
too many methods and features to describe in detail.
Besides, looking through the documentation may give
you ideas for alternative approaches that may work
better in your own applications.
Important Design Patterns
We’ve covered most of the basic features of Objective-C, but that’s not the whole story. Apple
uses a number of design patterns. We need to be familiar with these patterns if we want to
really understand how iOS apps function.
Model-View-Controller
Model-View-Controller (MVC) is a common architectural pattern for building applications
with a graphical user interface (GUI). This pattern divides the application into three sections.
The model maintains the application’s state. This typically includes both managing the state
during runtime and saving and loading the state (archiving objects to file, persisting the data
to a SQL database, or using frameworks like Core Data).
As the name suggests, the view is responsible for displaying application information, possibly in an interactive manner. Most of the time this means displaying the information using a
GUI. However, it could include printing documents and generating other logs and reports.
The controller sits between the two. It responds to events (usually from the view) and
then sends commands to the model (to change its state). It must also update the view whenever the model changes. An application’s business logic may be implemented in either the
controller or the model, depending on the needs of the application. However, you should
really pick one approach and stick with it throughout the entire application.
In its purest form, the MVC components are very loosely bound. For example, any number of views could observe the controller, triggering controller events and responding to any
change notifications. One might display information in the GUI. One might save data to a log
file. The controller doesn’t know or care about the details. On the other end, the model and
the controller would be similarly loosely bound.
Apple’s implementation sacrifices a bit of theoretical idealism for simple pragmatics. iOS
apps expect a very specific relationship between the controllers and the views. Typically, we
create a separate controller object for each scene, and these controllers are more tightly bound
to the views they control. We saw this in Chapter 1 of the book.
Cocoa Touch builds each scene from a hierarchy of UIView subclasses and uses UIView
Controller subclasses for the controllers. Controllers typically call methods and set properties on the view objects directly. Communication from the view to the controller generally
uses target-action and delegate patterns. We’ll look at those in a bit.
On the model side, we have a lot more wiggle room. Apple doesn’t specify how we should
implement our models or how we should connect them to the controllers. Different applications use different approaches.
For example, we could implement our model using custom classes, SQLite, or Core Data.
In many cases, model objects and controllers communicate directly with each other—
though we can create more-loosely bound connections using notifications, delegates, and
data sources.
Important Design Patterns BC-73
Even direct connections between the model and the controller vary. We could use a
singleton pattern to manage our model, giving you access to it anywhere in our app. Or we
could park the data in our app delegate—also letting us access it from anywhere. However,
I recommend using a baton-passing approach. Here, the root view controller is connected to
the model. Our application then passes model objects from view controller to view controller as we transition from scene to scene.
One of the big advantages of the baton-passing approach is that we don’t have to give
every controller access to the entire model. We can simply pass along just those objects that
the incoming view controller actually needs.
Delegates
Delegates let us monitor, extend, or modify an object’s behavior without having to subclass
the object. You can even change the object’s behavior at runtime by swapping delegates—
though in practice, this is somewhat rare.
We have already seen delegates in action. For example, instead of subclassing the
UIApplication class within each project, we use a generic UIApplication and implement
a custom UIApplicationDelegate. The application delegate protocol defines more than 30
optional methods that we can override to both monitor and alter the application’s behavior.
Any class that uses a delegate usually has a property named (not surprisingly) delegate.
By convention, delegate properties should always use weak references. This helps avoid
retain loops. However, we need to make sure we have a strong reference to our delegate
object somewhere else in our application—otherwise, ARC will deallocate it.
@property (weak, nonatomic) id<DelegateProtocol> delegate;
As this example shows, we typically declare a protocol that our delegate must implement.
This defines the interface between the delegating class and our delegate. Note that the delegating class is the active partner in this relationship. It calls these methods on the delegate.
Some of them pass information to the delegate; others query the delegate. In this way, we
pass information back and forth between the two objects.
A delegate’s methods usually have a somewhat formulaic name. By convention, the
names start with an identifier that describes the delegating object. For example, all the
UIApplicationDelegate methods start with the word application.
The method also passes a reference to the delegating object back as its first argument.
For example, every UITableViewDelegate method has the delegating UITableView as its
first argument. In theory, this means we could use a single UITableViewDelegate to manage multiple UITableViews—though this is rarely done in practice. More pragmatically, we
don’t have to save a reference to the delegating class, since our delegate can always access it
through this argument.
Additionally, the delegate’s methods often have will, did, or should in their names. In all
three cases, the system calls these methods in response to some change. Will methods are
BC-74 Bonus ChapteR Objective-C
called before the change occurs. Did methods are called after the change. Should methods,
like will methods, are called before the change, but they expect the delegate to return either
a YES or NO value. If the delegate returns YES, the change will proceed as normal. If the delegate returns NO, the change is canceled.
Finally, delegate methods are almost always optional. As a result, the delegating class
must first check to make sure the delegate has implemented the method before calling it.
This code shows a hypothetical implementation.
- (void) doSomething
{
BOOL shouldDoSomething = YES;
// Ask if we should do it.
if ([self.delegate respondsToSelector:
@selector(myObjectShouldDoSomething:)])
{
shouldDoSomething =
[self.delegate myObjectShouldDoSomething:self];
}
// Abort this method if the delegate returns NO.
if (!shouldDoSomething) return;
// Tell the delegate that we will do it.
if ([self.delegate respondsToSelector:
@selector(myObjectWillDoSomething:)])
{
[self.delegate myObjectWillDoSomething:self];
}
// Just do it.
[self.model doSomething];
// Tell the delegate that we did it.
if ([self.delegate respondsToSelector:
@selector(myObjectDidDoSomething:)])
{
[self.delegate myObjectDidDoSomething:self];
}
}
Important Design Patterns BC-75
Delegates are easy to implement. Simply create a new class and have it adopt the protocol. Then implement all the required methods (if any), as well as any optional methods that
may interest you. Then in your code, create an instance of your delegate class and assign it to
the main object’s delegate property.
Many of the UIView subclasses can take delegates. This means we will often connect
views and delegates using Interface Builder.
note: Optional protocol methods were introduced with Objective-C 2.0.
Before this, most delegates were implemented using informal protocols. This
convention involved declaring categories on the NSObject class; however,
the methods were left undefined. While this worked, the IDE and compiler could not provide much support. Over time, Apple has slowly replaced
most, if not all, of the informal protocols with actual protocols; however,
you may still run into references to them.
Some view subclasses also require data sources. Data sources are basically a type of
delegate—the main difference is their intended use. While delegates monitor and change an
object’s behavior, data sources focus on providing data to an object. Other differences flow
from this distinction. For example, delegate methods are usually optional; the delegating
object should be able to function without one. Data sources, on the other hand, are often
required for the main class to do anything at all. As a result, data sources often have one or
more required methods declared in their protocol.
Otherwise, data sources act just like delegates. The naming convention is similar, and—just
like the delegate property—the main class should have a weak reference to its data source.
Target-Action
The target-action pattern is a way to dispatch event notifications from our user interface
controls. Despite the two-part name, each target-action actually consists of three elements: a
target, an action, and an event.
Let’s take these in reverse order. When the user interacts with a control, they may trigger
an event. If someone has registered a target-action for that event, the action will be called.
UIKit defines a number of events. The complete list is shown here:
enum {
BC-76 UIControlEventTouchDown
= 1 << 0,
UIControlEventTouchDownRepeat
= 1 << 1,
UIControlEventTouchDragInside
= 1 << 2,
UIControlEventTouchDragOutside
= 1 << 3,
UIControlEventTouchDragEnter
= 1 << 4,
UIControlEventTouchDragExit
= 1 << 5,
UIControlEventTouchUpInside
= 1 << 6,
UIControlEventTouchUpOutside
= 1 << 7,
Bonus ChapteR Objective-C
UIControlEventTouchCancel
= 1 << 8,
UIControlEventValueChanged
= 1 << 12,
UIControlEventEditingDidBegin
= 1 << 16,
UIControlEventEditingChanged
= 1 << 17,
UIControlEventEditingDidEnd
= 1 << 18,
UIControlEventEditingDidEndOnExit = 1 << 19,
UIControlEventAllTouchEvents
= 0x00000FFF,
UIControlEventAllEditingEvents
= 0x000F0000,
UIControlEventApplicationReserved = 0x0F000000,
UIControlEventSystemReserved
= 0xF0000000,
UIControlEventAllEvents
= 0xFFFFFFFF
};
Different controls use different events. When we’re using a UIButton, we will register for the UIControlEventTouchUpInside event. When using UISlider, we want
UIControlEventValueChanged.
Next we have the action. This is the method that the system will call when the event is
triggered. These methods can use one of three signatures. They either take no argument,
take a single argument (which will be the control that triggered the event), or take two arguments (the control and a UIEvent that contains additional information about the event).
- (void)action
- (void)action:(id)sender
- (void)action:(id)sender forEvent:(UIEvent *)event
The target is simply the receiver of the action. In most cases, this will be our view controller.
While we can register target-actions in code by calling addTarget:action:forControl
Event:, these are typically drawn in Interface Builder. In fact, we already have some experience connecting target-actions from Chapter 1’s “Refining the Interface” section.
Notifications
Notifications allow objects to communicate without tightly coupling them together. In iOS,
notifications are managed using a notification center. Objects that want to receive notifications must register with the notification center. Meanwhile, objects that want to broadcast
notifications simply post them to the center. The notification center will then filter notifications by both the sending object and the notification name—forwarding each notification to
the proper receivers.
Notifications are easy to implement. We start by creating an NSString constant for our
notification’s name. Both the sending and receiving objects need access to this constant,
Important Design Patterns BC-77
so we typically declare it in a common header file. Usually this will be the .h file for the class
that is sending the notification.
extern NSString * const MyNotification;
Then define the notification name in the corresponding implementation file.
NSString * const MyNotification = @”MyNotification”;
The content of the string doesn’t matter, as long as each notification has a unique name.
I typically use the constant’s name for the string’s content.
Next, objects can register to receive notifications. You can specify the sender and the notification names you are interested in. In addition, you can pass nil for either of these values. If
you pass nil for the name, you will receive all the notifications sent by the specified object. If
you pass nil for the sender, you will receive all notifications that match the notification name.
If you pass nil for both, you will receive all notifications sent to that notification center.
NSNotificationCenter* center = [NSNotificationCenter defaultCenter];
[center addObserver:self
selector:@selector(receiveNotification:)
name:MyNotification
object:nil];
Here we get a reference to the default notification center and then add ourselves as an
observer. We register to receive all notifications from any objects whose name matches the
MyNotification constant. When a match is found, the notification center will call the specified selector.
Next, we need to implement our callback method. This method should accept a single
NSNotification object as an argument.
- (void)recieveNotification:(NSNotification *)notification
{
NSLog(@”Notification Recieved”);
// Now do something useful in response.
}
Finally, it’s important to remove the observer before it (or any object mentioned in addOb
server:selector:name:object:) is deallocated. Otherwise, the notification center will contain dangling pointers. Often this should be done in the observing object’s dealloc method.
- (void)dealloc
{
NSNotificationCenter* center = [NSNotificationCenter defaultCenter];
// Remove all entries for the given observer.
[center removeObserver:self];
}
BC-78 Bonus ChapteR Objective-C
Sending a notification is even simpler. Our sending object just needs to access the default
notification center and then post the desired method.
NSNotificationCenter* center = [NSNotificationCenter defaultCenter];
[center postNotificationName:MyNotification object:self];
Notifications are posted synchronously. This means that the call to postNotification
Name will not return until after the notification center has finished calling the callback
method for each matching observer. This could take a considerable amount of time, especially if there are a large number of observers or the responding methods are slow.
Alternatively, we can send asynchronous notifications using an NSNotificationQueue.
Notification queues basically delay a notification until the current event loop ends (or possibly until the event loop is completely idle). The queue can also coalesce duplicate messages
into a single notification.
The following sample code delays the notification until the run loop is idle:
NSNotification* notification =
[NSNotification notificationWithName:MyNotification
object:self];
NSNotificationQueue* queue = [NSNotificationQueue defaultQueue];
[queue enqueueNotification:notification
postingStyle:NSPostWhenIdle];
Key-Value Coding
Key-value coding is a technique for getting and setting an object’s instance variables
indirectly using strings. The NSKeyValueCoding protocol defines a number of methods for accessing or setting these values. The simplest examples are valueForKey: and
setValue:forKey:.
NSString *oldName = [employee valueForKey:@”firstName”];
[employee setValue:@”Bob” forKey:@”firstName”];
For this to work, your objects must be KVC compliant. Basically, the valueForKey:
method will look for an accessor named <key> or is<key>. If it cannot find a valid accessor, it will look for an instance variable named <key> or _<key>. On the other hand,
setValue:forKey: looks for a set<key>: method and then looks for the instance variables.
Fortunately, any properties you define are automatically KVC compliant.
Some KVC methods can also use key paths. These are dot-separated lists of keys. Basically, the getter or setter will work its way down the list of keys. The first key is applied to the
receiving object. Each subsequent key is then used on the value returned from the previous
key. This allows you to dig down through the object graph to get to the value you want.
Important Design Patterns BC-79
// Will return the company name, assuming all intermediate values
// are KVC compliant.
NSString *companyName =
[employee valueForKeyPath:@”department.company.name”];
One particularly interesting KVC method is setValuesForKeysWithDictionary:. This
method takes an NSDictionary of key-value pairs. For each pair, it calls setValue:forKey:
on the receiving object. This lets us bulk-load a number of properties in one call.
NSDictionary *data = @{@”firstName”:@”Bob”,
@”lastName”:@”Smith”};
// Sets both the first name and last name
[employee setValuesForKeysWithDictionary:data];
This can be particularly useful when setting up test data or when loading data from a
web service. It is very easy to convert a JSON response into an NSDictionary. As long as our
object has a property that matches each key in the dictionary, we can populate our object
with one method call.
Unfortunately, this is rarely the case. Incoming JSON data is typically too complicated to
be modeled by a single object. So, there’s usually a bit of additional work left to do.
Still, as you can see, KVC can be used to produce highly dynamic, very loosely bound
code. However, it is a somewhat specialized technique. You may never end up using KVC
code directly. Still, it powers a number of very useful technologies (for example, see “KeyValue Observing”).
Key-Value Observing
Key-value observing allows one object to observe any changes to another object’s instance
variables. While this superficially resembles notifications, there are some important differences. First, there is no centralized control layer for KVO. One object directly observes
another. Second, the object being observed generally does not need to do anything to send
these notifications. As long as their instance variables are KVO compliant, notifications are
automatically sent whenever your application uses either the instance variable’s setter or
KVC to change the instance variable’s value.
Unfortunately, if you are changing the value of an instance variable directly, the observed
object must manually call willChangeValueForKey: before the change and didChangeValueForKey: after the change. This is yet another argument for always accessing instance
values through a property.
It is also the reason we typically don’t use accessors inside init and dealloc. We don’t
want to accidentally trigger any side effects during these methods.
To register as an observer, call addObserver:forKeyPath:options:context:. The
observer is the object that will receive the KVO notification. The key path is the dotseparated list of keys used to identify the value that will be observed. The options argument
BC-80 Bonus ChapteR Objective-C
determines what information is returned in the notification, and the context argument lets
you pass arbitrary data that will be added to the notification.
As with notification centers, it’s important to remove an observer before it is deallocated.
While the NSNotificationCenter had a convenience method that would remove all the
notifications for a given observer, in KVO you must release each addObserver call separately.
// You will receive notifications whenever this employee’s
// last name changes.
[employee
addObserver:self
forKeyPath:@”lastName”
options:NSKeyValueObservingOptionNew | NSKeyValueObservingOptionOld
context:nil];
Next, to receive the notification, you must override the observeValueForKeyPath:
ofObject:change:context: method. The object argument will identify the object you
were observing. The keyPath argument indicates the particular property that changed. The
change argument holds a dictionary containing the values that we requested when registering as an observer. Finally, the context argument simply contains the context data provided
when registering as an observer.
- (void)observeValueForKeyPath:(NSString *)keyPath
ofObject:(id)object
change:(NSDictionary *)change
context:(void *)context
{
if ([keyPath isEqualToString:@”lastName”])
{
NSString *oldName = [change objectForKey:NSKeyValueChangeOldKey];
NSString *newName = [change objectForKey:NSKeyValueChangeNewKey];
NSLog(@”%@’s last name changed from %@ to %@”,
object, oldName, newName);
}
}
Singletons
In its most basic concept, a singleton is a class that will only ever have a single object instantiated from it. Whenever you request a new object of that class, you gain a pointer back to
the original.
Singletons are typically used to represent unique resources. The UIApplication class is a
good example. Each application has one and only one application object. Furthermore, you can
access that application anywhere through the [UIApplication sharedApplication] method.
Important Design Patterns BC-81
Of course, singletons are a constant source of Internet debates. Some argue that they are
the spawn of all that is evil and that they should be avoided like the plague. If you use singletons, the terrorists win. Or, somewhat more rationally, a singleton is nothing more than an
over-engineered global variable with good PR.
There is some truth to these complaints. When developers first encounter the singleton
pattern, they often overdo it. Too many singletons can make your code very hard to follow.
Singletons are also deceptively hard to write correctly (and there are different ideas about
what “correctly” means). However, they can be incredibly useful when used appropriately.
Furthermore, Cocoa Touch uses a number of singleton classes—so you should at least
understand the basics, even if you never write your own.
Actually, Cocoa Touch tends to use what I will call a “shared instance” pattern. In many
cases it’s not truly a singleton. We could create additional instances of the class if we wanted.
But 99.99 percent of the time, we will simply use the shared version.
The following is a typical, relatively safe implementation. In the class’s header file,
declare a class method to access your shared instance.
+ (SampleSingleton *)sharedSampleSingleton;
Then open the implementation file. We are going to create a private designated initializer. Remember, a private method is simply a method that’s not listed in the class’s .h file.
And, since we can send any message to any object in Objective-C, we can’t really keep people
from calling it. It’s more of a warning to other developers. They shouldn’t call this initializer
directly.
We will also want to override the superclass’s designated initializer. However, in this case
we won’t call our designated initializer—we will throw an exception. This forces everyone
to call our designated initializer directly. And, since it’s a private method, it should discourage people from making additional SampleSingleton instances (see “Writing Initialization
Methods” for more information).
// Private Designated Initializer.
- (id)initSharedInstance
{
self = [super init];
if (self)
{
// Do initialization here.
}
return self;
}
// Override the superclass’s designated initializer to prevent
// its use. Calling this method will throw an exception.
- (id)init
BC-82 Bonus ChapteR Objective-C
{
[self doesNotRecognizeSelector:_cmd];
return nil;
}
Finally, implement our sharedSampleSingleton method.
+ (SampleSingleton*)sharedSampleSingleton
{
static SampleSingleton* sharedSingleton;
static dispatch_once_t onceToken;
dispatch_once(&onceToken, ^{
sharedSingleton = [[SampleSingleton alloc]
initSharedInstance];
});
return sharedSingleton;
}
This code uses lazy initialization to create our shared instance. We don’t actually allocate
the instance until sharedSampleSingleton is called. Within sharedSampleSingleton, we use
a dispatch_once block to protect our shared instance. The dispatch_once block is a threadsafe way to ensure that a block of code is executed only once during an application’s lifetime.
note: Before ARC, many singleton implementations would override a number
of additional methods: allocWithZone:, copyWithZone:, mutableCopyWithZone:,
and release were all common candidates. By locking down these methods, we provided additional safeguards against accidentally creating additional copies of our singleton. However, these methods either cannot be
overridden when compiling under ARC or are simply unnecessary. Apple currently recommends using a simpler singleton design and relying on convention
and communication to prevent duplicates.
Note that copy and mutableCopy are also disabled by default. Unless we adopt
the NSCopying and NSMutableCopying protocols (and implement copyWithZone: and
mutableCopyWithZone:), the copy and mutableCopy methods will simply throw exceptions.
This implementation doesn’t deal with the tricky issue of loading or saving your singleton from disk. How you implement the archiving code depends a lot on what loading and
saving the singleton means in your application. Do you load the singleton once from disk
when it is first created? Or does loading the singleton simply change the value stored in
the singleton?
For example, your application may have a GameState singleton. You will only ever have the
one GameState object—but the state values may change as the user loads and saves games.
For an even more advanced twist, some of Cocoa Touch’s singletons let you specify the
singleton’s class in the application’s info.plist file. This allows you to create a subclass of
Important Design Patterns BC-83
the singleton and still ensure that the proper version is loaded at runtime. If you need this
sort of support, modify your code as shown here:
+ (SampleSingleton*)sharedSampleSingleton
{
static SampleSingleton* sharedSingleton;
static dispatch_once_t onceToken;
dispatch_once(&onceToken, ^{
NSBundle* main = [NSBundle mainBundle];
NSDictionary* info = [main infoDictionary];
NSString* className = [info objectForKey:@”SampleSingleton”];
Class singletonClass = NSClassFromString(className);
if (!singletonClass)
{
singletonClass = self;
}
sharedSingleton = [[singletonClass alloc] initSharedInstance];
});
return sharedSingleton;
}
This code accesses the info.plist file and looks for a key named SampleSingleton. If it
finds one, it interprets the corresponding value as a class name and attempts to look up the
corresponding class object. If that succeeds, it uses that class to create the singleton object.
Otherwise, it just uses the default singleton class.
Blocks
Blocks are, without a doubt, my favorite feature of Objective-C . Unfortunately, they probably have the worst possible syntax. It’s not really Apple’s fault; it was mirroring the syntax for
function pointers, and it had to fit everything into the existing C and Objective-C syntaxes.
Still, it can be difficult to work with when you’re just beginning.
Fortunately, it’s worth the pain. Block-based APIs can often greatly simplify your code,
especially if you’re working with anything asynchronous. In particular, blocks often replace
callback methods and delegates.
For example, the UIView class had a number of regular methods for animating views.
These methods were somewhat hard to use properly. We had to call one method to set up
the animation. Then we called a number of methods to configure the animation. We made
our changes to the view and then called a final method to commit the animations. All the
methods had to be called in the correct order—and if we forgot one, we could end up with
unexpected results.
BC-84 Bonus ChapteR Objective-C
With iOS 4, Apple introduced an alternate set of block-based methods. The block-based
methods are more concise, more elegant, and easier to use than the older API. In fact, we will
get a chance to play with block-based animations in Chapter 4, “Custom Views and Custom
Transitions.”
Blocks are somewhat similar to methods and functions. They let us bundle up a number
of expressions for later execution. Blocks, however, can be stored as variables and passed as
arguments. We can create block variables as shown here:
returnType (^blockName)(argument, types);
For example, let’s declare a block variable named sum that returns an integer and takes
two integers as arguments.
int (^sum)(int, int);
To assign a value to this variable, we must create a literal block starting with the caret (^)
and then declaring the arguments in parentheses and the actual code in curly brackets.
sum = ^(int a, int b){return a + b;};
If our block doesn’t take any arguments, we can drop the parentheses, as shown here:
callback = ^{ NSLog(@”Our callback has been executed.”);};
Once a block variable is assigned, you can call it just like any other function.
NSLog(@”The sum of %d and %d is %d”, 5, 6, sum(5, 6));
It’s important to note that blocks can capture any data that is in scope when the block is
defined. For example, in this sample, addToOffset will take a single argument and add the
offset variable to it.
int offset = 5;
int (^addToOffset)(int) = ^(int value){return offset + value;};
note: When a block captures a variable, it treats this variable as a const
value. You can read the value but not modify it. If you need to mutate the
variable, you must declare it using the __block storage type modifier.
Generally, this applies only to C types and structs. If our block captures an
object, it’s actually capturing the value of the object’s pointer. Even though
the pointer is a constant value, we can still use it to manipulate the object,
changing the value of its properties. We would only need to declare our
object as a __block type if we wanted to assign a different object’s address
to the pointer inside our block.
Actually creating block variables is somewhat rare—at least when you’re starting out.
Developers usually run across blocks when they’re trying to use one of Apple’s block-based
APIs. Originally, the block-based APIs were rare and tended to be optional. However, in
recent years their usage has greatly expanded. At this point, there’s no getting around them.
Important Design Patterns BC-85
There is definitely a hierarchy to block mastery. Start by calling methods and functions that take block arguments. Then start writing your own methods and functions that
consume blocks. Pretty soon, you’ll be using blocks within blocks that take other blocks as
arguments…and then you’re so far down the rabbit hole that there is probably no hope of
ever making it back with your sanity intact.
So, let’s look at a simple example of passing a block as an argument. NSArray has a
method, enumerateObjectsUsingBlock:, that takes a single block. This method will iterate
through all the objects in the array. For each object, it calls the block, passing in the object,
the object’s index, and a reference to a stop value.
The stop value is used only as output from the block. Setting it to YES halts enumerate
ObjectsUsingBlock:. Here is a simple example using this method:
NSArray *people = @[@”Bob”, @”Sally”, @”Jane”, @”Tim”];
[people enumerateObjectsUsingBlock:
^(id obj, NSUInteger idx, BOOL *stop) {
NSLog(@”Person %d: %@”, idx, obj);
}];
This returns the following output to the console:
2013-07-30 23:50:14.432 Scratchpad[5098:70b] Person 0: Bob
2013-07-30 23:50:14.435 Scratchpad [5098:70b] Person 1: Sally
2013-07-30 23:50:14.435 Scratchpad [5098:70b] Person 2: Jane
2013-07-30 23:50:14.435 Scratchpad [5098:70b] Person 3: Tim
Notice that we could duplicate the functionality of enumerateObjectsUsingBlock: by
passing in a selector and having our enumeration method call the selector for each item in
the array. We start by creating a category on NSArray.
@implementation NSArray (EnumerateWithSelector)
- (void)enumerateObjectsUsingTarget:(id)target
selector:(SEL)selector
{
for (int i = 0; i < [self count]; i++)
{
[target performSelector:selector
withObject:[self objectAtIndex:i]
withObject:[NSNumber numberWithInt:i]];
}
}
@end
BC-86 Bonus ChapteR Objective-C
Then, to use this enumerator, we need to implement our callback method.
- (void)printName:(NSString*)name index:(NSNumber*)index
{
NSLog(@”Person %d: %@”, [index intValue], name);
}
Then we can call our enumerator, passing in the selector.
NSArray *people = @[@”Bob”, @”Sally”, @”Jane”, @”Tim”];
[people enumerateObjectsUsingTarget:self
selector:@selector(printName:index:)];
That’s arguably a little chunkier than our block example. Instead of keeping everything
together, we’re splitting our behavior across several methods. Still, that’s not the biggest problem.
What happens if we want to change the enumerator’s behavior? Right now we’ve hardcoded our callback method to print out the word Person. What if we wanted to pass the
prefix as an argument instead?
To start with, we’d have to modify enumerateObjectUsingTarget:selector: to take the
prefix argument, and then we’d have to modify printName:index: to also take the prefix.
However, we run into problems almost immediately. performSelector:withObject:withObj
ect: can take only two arguments. There’s no version of performSelector:… that takes three
arguments. So, we’d need to find another way to dynamically dispatch our messages.
Even if we overcome that problem, we’d need to remember to change our code in several places. Sure, it’s not a ton of work, but what happens if we need to make more than one
change? The complexity adds up fast. We may soon find ourselves juggling multiple enumeration methods, each handling slightly different set of arguments.
Alternatively, we could create an instance variable to hold the prefix and access it in the
printName:index: method. Here, we don’t need to modify enumerateObjectUsingTarget:s
elector: or printName:Index:. We don’t need to worry about the limitations of performSel
ector:withObject:withObject:. However, it’s still somewhat sloppy.
The prefix really shouldn’t be part of our class—we just added it as a sneaky way to avoid
the extra parameters. And again, if we need to make multiple modifications, we may soon find
ourselves storing quite a bit of excess data. How many instance variables are we willing to add?
Fortunately, blocks don’t have any of these problems. We can simply declare the prefix as
a local variable and then use that variable inside our block. The block will automatically capture the variable for us. This modifies the enumerateObjectsUsingBlock: method’s behavior
with only minimal changes to our code.
NSArray *people = @[@”Bob”, @”Sally”, @”Jane”, @”Tim”];
NSString *prefix = @”Person”;
[people enumerateObjectsUsingBlock:
^(id obj, NSUInteger idx, BOOL *stop) {
NSLog(@”%@ %d: %@”, prefix, idx, obj);
}];
Important Design Patterns BC-87
Notice that we did not need to alter the implementation of enumerateObjectsUsing
Block: at all. We also didn’t need any instance variables. Most importantly, everything is
kept nicely in one place.
Best of all, the solution is highly scalable. Need to pass in more values? No problem. Just
declare them in scope and let the block capture them. But what if we want different behaviors somewhere else? Again, no problem. We write a new block, capture all the local variables we need at that point, and then call our generic enumeration method. Blocks give us an
immense amount of flexibility, so a single generic method can handle all our needs.
It may take a little while to completely wrap your head around blocks. I know, the first
time I ran into them, I was confused and unimpressed. However, after seeing the cool things
people could build with blocks, I became a convert.
Just remember, when you create a block, that code won’t necessarily run immediately.
It might. Or it might be saved until some arbitrary point in the future. It might also be run
more than once, or not at all. It all depends on the method consuming the block. When in
doubt, check the documentation.
note: When working with blocks, Xcode’s autocomplete is your friend. If
you’re calling a method that takes a block as an argument, make sure Xcode
autocompletes the method name, and then select the placeholder for
the block argument. Now, if you hit Return, it will automatically fill in the
correct syntax for your block. You may need to add the trailing bracket and
semicolon—but much of the ugliness in block syntax is handled for you.
Blocks and Memory Management
When a block captures an object it retains that object. Most of the time, this is what we want.
The object shouldn’t be released while we’re waiting for the block to execute. However, this
can lead to problems. Imagine the following:
NSArray *people = @[@”Bob”, @”Sally”, @”Jane”, @”Tim”];
[people enumerateObjectsUsingBlock:
^(id obj, NSUInteger idx, BOOL *stop) {
NSLog(@”%@’s friends: %@”, self.firstName, obj);
}];
Here, our block is going to capture self, not firstName. Now, in this case, this isn’t a
huge problem. The block is going to be used immediately, and it will be deallocated before
the end of the current method. This will, in turn, release self. However, that is not always
the case. Most of the time, blocks will be saved to execute at some future point. We may not
want to let the system hold onto our objects indefinitely.
Additionally, capturing self is particularly bad, since it often leads to retain cycles. If the
self object ends up storing the block—either directly or indirectly—we will create a retain
cycle, which will result in a memory leak. Fortunately, the compiler is pretty good at finding the most obvious block-based retain cycles for us. Unfortunately, it’s not perfect. I know
BC-88 Bonus ChapteR Objective-C
from experience that it’s possible to introduce retain cycles, even when you think the block
will never be saved by the current object.
Therefore, as a general rule, I recommend never referring to self inside a block. In many
cases, you can create a local variable for the value that we want to capture and explicitly
capture that variable.
Furthermore, we will often use zeroing weak references for these local variables, by using
the __weak keyword. This means the block won’t be able to keep the object in memory—no
matter how long the system holds onto the block.
Here, __weak acts as a safety valve, preventing our system from grabbing and holding
onto too much memory. Also, in most cases we don’t need to worry about the captured value
being deallocated out from under us. The self-object retains it—so, as long as our application continues to actively use the self object, the captured value will remain intact. In
practice, this is typically what we want.
NSArray *people = @[@”Bob”, @”Sally”, @”Jane”, @”Tim”];
__weak NSString *firstName = self.firstName;
[people enumerateObjectsUsingBlock:
^(id obj, NSUInteger idx, BOOL *stop) {
NSLog(@”%@’s friends: %@”, firstName, obj);
}];
Sometimes, however, we actually need to refer to the self object inside the block. This
often happens when you want to call a method on self. In these cases, we must create a zeroing weak reference to the self object and let the block capture our weak reference instead.
NSArray *people = @[@”Bob”, @”Sally”, @”Jane”, @”Tim”];
__weak MyObject *_self = self;
[people enumerateObjectsUsingBlock:
^(id obj, NSUInteger idx, BOOL *stop) {
[_self printOutPerson:obj];
}];
Retain cycles (as well as the more general problem of just holding onto captured memory
for too long) are really the only things that make using blocks difficult. However, preventing
blocks from capturing self goes a long way toward avoiding any possible problems.
note: Before ARC, we had to be a little careful with how we handled blocks.
By default, blocks were built on the stack, and they were destroyed once
they went out of scope. To store a block in an instance variable for later
execution, we had to copy the block to the heap. Then we had to release
it once we were done. Fortunately, ARC has simplified this. We can create
blocks, store them, use them, and even return them. We don’t need to worry
about whether they’re on the heap or on the stack. ARC now handles all the
copying and memory management for us.
Important Design Patterns BC-89
Wrapping Up
Whew. This bonus chapter has covered a lot of ground. Don’t worry if you didn’t catch it all
on the first pass. Unfortunately, this chapter really only scratches the surface. Many of these
topics are quite deep. It will take time and practice to truly master it all.
Next up, let’s start applying what we’ve learned and build a productivity application
from scratch.
Other Resources
For more information, check out the following resources:
JJ
Programming with Objective-C
iOS Developer’s Library
This guide provides a detailed description of the Objective-C programming language.
If you want additional information on any of the language features, this is a good place
to check first.
JJ
Object-Oriented Programming with Objective-C
iOS Developer’s Library
This is a concise overview of object-oriented programming using Objective-C. It is more
theoretical and geared toward object-oriented design—rather than just describing language features.
JJ
Cocoa Fundamentals Guide
iOS Developer’s Library
This guide gives a solid overview of both the Cocoa and Cocoa Touch frameworks.
This includes information on how the frameworks are organized, as well as detailed
descriptions of the many design patterns used in Cocoa and Cocoa Touch. I particularly
recommend checking out this guide if you want more information about common iOS
design patterns.
JJ
64-Bit Transition Guide for Cocoa Touch
iOS Developer’s Library
While this chapter covered the basics in supporting both 32-bit and 64-bit applications,
there are a number of other, less common issues that can crop up. This document provides additional details on a wide range of possible problems. It is worth reading, especially if you are converting an older application from 32- to 64-bit.
JJ
BC-90 Key-Value Observing Programming Guide
Bonus ChapteR Objective-C
iOS Developer’s Library
This goes into even more detail on how to use KVO, including more complex issues like
dependent keys. It has detailed information on making an object KVO compliant. It even
discusses KVO’s implementation. If you’re going beyond the basics with KVO, be sure to
check out this guide.
JJ
Block Programming Topics
iOS Developer’s Library
This is the definitive guide to using blocks. If you have any questions or concerns about
using blocks, read this guide.
JJ
NSHipster
http://nshipster.com
I can, without reservation, highly recommend reading every single post on this blog.
NSHipster exists to focus a spotlight on the dark, poorly understood, and often forgotten
corners of Objective-C, Cocoa, and Cocoa Touch. However, there are several posts that
are particularly relevant to this chapter: C Storage Classes, @, Object Subscripting,
instancetype, nil / Nil / NULL / NSNull, BOOL / bool / Boolean / NSCFBoolean,
NSFastEnumeration / NSEnumerator / enumerateObjectsUsingBlock:, and KVC
Collection Operators.
For more advanced explorations of the dark, inner workings of Objective-C, you can also
check out these resources:
JJ
Objective-C Runtime Programming Guide
iOS Developer’s Library
This is definitely a more advanced topic. However, if you want to learn more about
dynamic method resolution or message forwarding, this is the place to go. It’s also an
interesting read if you’re just interested in what’s going on under the hood.
JJ
Cocoa Samurai: Understanding the Objective-C Runtime
http://cocoasamurai.blogspot.com/2010/01/understanding-objective-c-runtime.html
This is a thorough exploration of the Objective-C runtime. It does a great job in explaining exactly what is happening.
JJ
bbum’s weblog-o-mat: objc_msgSend() Tour (parts 1-4)
http://www.friday.com/bbum/2009/12/18/objc_msgsend-part-1-the-road-map/
This is a detailed exploration of objc_msgSend(). This is the C function that underlies
every single method call in our application. Whenever you send a message to an object,
you’re calling objc_msgSend(). When it comes to Objective-C, this is where the rubber
really hits the road.
Other Resources BC-91


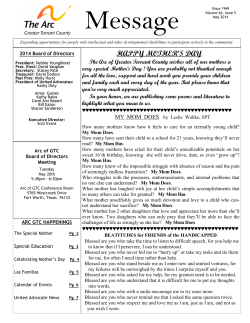

© Copyright 2026