
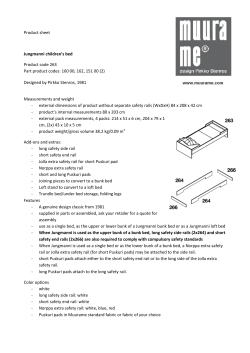
INSTALLATION INSTRUCTIONS
ELECTRIC RETRACTABLE HARD TONNEAU COVER
INSTALLATION
INSTRUCTIONS
“American Dream”
BedLocker™ on 2002 Ford Explorer Sport Trac
project vehicle by Go Rhino! Products
Part #BL-INSTALL (SC-FL-ST-SS)
Revised: 08/04
Ford Super Crew
Ford Flareside
Ford Explorer Sport Trac
Toyota Tundra StepSide
TABLE OF CONTENTS
Tools Required for Assembly (FIG. 1) .................................................................................................................2
Before You Start ................................................................................................................................................2
Drain Hole Locations (FIG. 2) ...............................................................................................................................3
Optional Wiring Harness for Dashboard Switch .............................................................................................3
Packaging Contents (FIG. 3) ................................................................................................................................3
Hardware Kit Supplied with Unit (FIG. 4) .............................................................................................................4
Rail Clamp Set (FIG. 5)...........................................................................................................................................4
Ford Super Crew Set (FIG. 6) ...............................................................................................................................4
Toyota Tundra StepSide Set (FIG. 7) ...................................................................................................................4
Ford Explorer Sport Trac Set (FIG. 8) ..................................................................................................................4
STEP 1:
Remove Contents from Box ............................................................................................................5
STEP 2:
Install Wiring Harness .....................................................................................................................5
STEP 3:
Attach Rail Blocks (Sport Trac Only) .............................................................................................5
STEP 4:
Place Canister and Install Rigid Foam (FIG. 9) .................................................................................5
STEP 5:
Begin Installing Rails (FIG. 10) ...........................................................................................................6
STEP 6:
Install Channel (Tundra StepSide Only) (FIG. 11) .............................................................................6
STEP 7:
Complete Installing Rails ................................................................................................................6
STEP 8:
Install Clamps (FIGS. 12-16) ...............................................................................................................6-8
STEP 9:
Install Electronics (FIG. 17) .................................................................................................................8
STEP 10: Install Drain Tubes ...........................................................................................................................9
STEP 11: Install Top Cover ..............................................................................................................................9
STEP 12: Operating Instructions .....................................................................................................................9
Helpful Maintenance Hints ................................................................................................................................9
TOOLS REQUIRED FOR ASSEMBLY:
3/8” and 7/16" wrenches, #2 Philips screwdriver, wire
crimper. Note: There should be no drilling into the truck
body needed on most standard or full-size trucks.
BEFORE YOU START:
Read the instructions carefully before you start. If you have
questions regarding the installation of your new
BedLocker™ electric retractable tonneau cover, please call
our Technical Support Line at 800.338.3697 or visit our web
site at www.paceedwards.com.
BEDLOCKER® INSTALLATION INSTRUCTIONS (#BL-INSTALL SC-FL-ST-SS)
Ford Super Crew / Flareside / Explorer Sport Trac & Toyota Tundra StepSide
FIG. 1
Revised: 08/04
Page 2 of 10
DRAIN HOLE LOCATIONS:
The BedLocker™ cover is designed to carry rainwater
from the ribbed cover into the canister and then out
through drain tubes to the street. Most truck models
have standard OE drain holes or plastic/rubber access
ports in the front of the truck bed. Route drain tubes
through the OE drain holes so that drilling into the sheet
metal is not required. If drilling is necessary, be sure to
check the underside of the truck bed for the best
location. The holes should be located near the side and
as far forward as practical. Use a drill bit suitable for
sheet metal (such as a taper drill or step drill). Drill
drain tube clearance holes at 5/8" (16mm).
Drain Tube Holes
FIG. 2
OPTIONAL WIRING HARNESS FOR DASHBOARD SWITCH:
The BedLocker™ cover also offers an optional wire harness to manually operate the tonneau cover from inside
the cab of your truck (order part # BL1120). This harness and switch assembly is designed to plug into the
custom-built electronics control box (refer to plug “C” in the wiring diagram in Fig. 16 on page 8). Simply run
the wire and momentary on/off/on switch to the cab and attach with bracket under the dash in a suitable
location.
PACKAGING CONTENTS:
FIG. 3
1. Canister Unit
2. Rails (2ea), left and right
side (separate rail box)
3. Top Cover
4. Channel
(Tundra only)
Items 1, 2 & 3 shown are
generic. Your parts may vary
in actual shape & size.
BEDLOCKER® INSTALLATION INSTRUCTIONS (#BL-INSTALL SC-FL-ST-SS)
Ford Super Crew / Flareside / Explorer Sport Trac & Toyota Tundra StepSide
Remove plywood packaging
supports before installation.
Revised: 08/04
Page 3 of 10
HARDWARE KIT SUPPLIED WITH UNIT:
1.
2.
3.
4.
5.
6.
7.
8.
9.
Wire Harness w/ Optional Door
Lock Wires
Fuse Holder w/10 AMP Fuse
Rigid Foam Shim Strip*
Top Cover Screws
(2 each)
4-Button Remotes w/ Key Fobs
(2 each)
Drain Tubes (2 each)
Drain Tube Fittings
(2 each)
Self-Tightening Hose Clamps (2
each)
Plastic Wire Ties
(5 each)
1
3
10
2
9
9
RAIL CLAMP SET
8
4
5
6
3
7
8
7
* (Some units contain more
than one size to fit multiple
vehicles)
11.
FIG. 4
4
5
6
FORD SUPER CREW SET:
(all except Sport Trac)
FIG. 5
12. Rubber Spacers and
Tek Screws (2 each)
TOYOTA TUNDRA
STEPSIDE SET:
These parts may
be included and
are not used in all
applications.
FIG. 6
FIG. 7
13. Channel washers (2 each)
14. Channel screws (black 1032x3/4” flathead) (2 each)
15. Channel nuts (2 each)
16. Closed cell foam ¼” x ¾”
FORD EXPLORER
SPORT TRAC SET:
FIG. 8
(2 each)
17.
18.
19.
20.
Front rail blocks & bolts
Shims
Rear clamp blocks & bolts
Front rail block screws (black)
BEDLOCKER® INSTALLATION INSTRUCTIONS (#BL-INSTALL SC-FL-ST-SS)
Ford Super Crew / Flareside / Explorer Sport Trac & Toyota Tundra StepSide
Revised: 08/04
Page 4 of 10
STEP 1: REMOVE CONTENTS FROM BOX
Remove canister and top cover from the box. Remove components from inside canister. Perform a quick
inventory to insure all parts are there.
STEP 2: INSTALL WIRING HARNESS
Install the long wire harness through the stake pocket on the driver’s side of truck. (If the optional wire harness
Part# BL1120 is used, which is designed to operate the BedLocker™ cover via manual switch from inside the
cab of your truck you may want to tape it to the main harness to ease having to pull them through the stake
pocket separately). From inside the box, push the end without the plug through the stake pocket and out the
underside of box. Leave a couple of feet of slack inside the box for mounting the electronics. Route the wire
harness under the truck and to the battery in the engine compartment. Attach the fuse holder to the end of the
red/positive wire (Do not attach to battery at this time). Secure the harness with wire ties provided after
canister is mounted and any slack is eliminated.
STEP 3: ATTACH FRONT RAIL BLOCKS (SPORT TRAC ONLY)
Use bolts provided and attach a front rail block to each side of the bed in the existing OE threaded holes
approximately 4 inches from front of box. Place angled side down and against box. Place front rail blocks so
that top is level with the bed rail, then tighten securely (refer to Front Rail Block diagram, Fig. 15 on page 8).
STEP 4: PLACE CANISTER AND INSTALL RIGID FOAM
Support the canister with a block or stool placed in the truck bed so that the canister is raised above the bed
rails by 2-3 inches, about one foot from the cab, and centered side-to-side.
Top of canister
should clear
truck bed rails
by 2-3”
Support
piece
FIG. 9
Peel and attach the rigid foam stripping under the 1.0” lip of the canister on the forward (cab) side of canister
(Between truck and canister). This foam will reduce any sag and ensure a consistent level between canister
and rails.
Hang onto the ribbed blanket and cut the zip tie. (Do not let the blanket roll back on itself or the brackets
attached to the underside on the first three ribs can damage the visual surface of the other rolled ribs).
Remove all of the vinyl sheeting protecting the blanket. Pull the blanket out about one foot from the canister
and let it hang.
BEDLOCKER® INSTALLATION INSTRUCTIONS (#BL-INSTALL SC-FL-ST-SS)
Ford Super Crew / Flareside / Explorer Sport Trac & Toyota Tundra StepSide
Revised: 08/04
Page 5 of 10
FIG. 10
STEP 5: BEGIN INSTALLING RAILS
The machined end of the rail attaches to the canister. You
will need to lift the hanging portion of the ribbed blanket and
place the rail over this section while sliding the rail into the
rail grip mounted to the ends of the canister (the underside
of the ribs need to nest on the gear).
Make sure both flanges of rail slide into the rail grip. Push
the rails forward against the canister.
STEP 6: INSTALL CHANNEL
(TUNDRA STEPSIDE ONLY)
Rail Grip
Rail flange
Black #10-32 x ¾
Flat head screw
Rail
Rigid Foam
Peel the foam backing, and attach
foam to the channel.
#10 Washer
Bolt the channel/foam assembly to
the rails.
#10-32 Nut
Channel
FIG. 11
Rail
Grip
Canister
End Plate
Closed cell
foam
STEP 7: COMPLETE INSTALLING RAILS
Remove support or stand and lower the canister onto the rails and front edge of box. Mount the canister
forward and centered in the box. This will ensure a square fit in relation to canister and rails. Close tailgate
and pull rails toward it leaving approximately 1/16”-1/8” gap. Hold canister in place to ensure it does not move
with the rails while adjusting the gap to tailgate.
STEP 8: INSTALL CLAMPS
Once you’ve made sure the canister is centered and forward in the bed, you can install the brackets and
clamps needed for your model of truck
BEDLOCKER® INSTALLATION INSTRUCTIONS (#BL-INSTALL SC-FL-ST-SS)
Ford Super Crew / Flareside / Explorer Sport Trac & Toyota Tundra StepSide
Revised: 08/04
Page 6 of 10
Ford Flareside / Super Crew and Toyota Tundra StepSide Only: Place the four (4) clamps (Fig. 12 below)
over the brackets located on the underside of the rails and tighten securely. Locate the lower groove of inner
clamp bracket onto the lip of rail bracket. Rotate the outer clamp bracket clockwise to tighten rail downward
against bed rail. Tighten bolt securely. (Adjust pressure against tailgate by moving rails forward or backward as
needed prior to final tightening of clamps.)
Rail Clamp
FIG. 12
Rail Bracket
Super Crew
uses upper slot
to attach to rail
Rail
Inner clamp
bracket
Outer clamp
bracket
Rotate outer clamp
bracket clockwise to pull
rail against truck
Do not tighten
over 120-inch
pounds!
Bolt and
Lock washer
Super Crew, Flareside and StepSide
Ford Super Crew Only: Follow the directions in the previous section and then continue with this paragraph.
Hold the rail level and against the side of bed, then install self-drilling tek screw into the vertical post at the rear
of box (Fig. 13 below). Place the rubber grommet between the bracket and post and screw snug but you do
not need to compress the grommet very much.
Rail
Rear Rail Bracket
Rail bracket
Rubber grommet
(Tighten screw securely but
don’t over compress grommet)
FIG. 13
Vertical post at
rear of bed
FIG. 13
Super Crew only
Ford Explorer Sport Trac: Install the rear clamps as shown (refer to Fig. 14 on page 8) using the OE holes at
the rear of the box. Locate the lower groove of rear clamp block onto the lip of the rail bracket. Tighten against
bed rail. The ¼-20 bolt at the top of the clamp can be used to level the rail by turning the bolt out to apply
pressure against the rail. Tighten bolts securely. (Adjust pressure against tailgate by moving rails forward or
backward as needed prior to final tightening of clamps.)
BEDLOCKER® INSTALLATION INSTRUCTIONS (#BL-INSTALL SC-FL-ST-SS)
Ford Super Crew / Flareside / Explorer Sport Trac & Toyota Tundra StepSide
Revised: 08/04
Page 7 of 10
Rear Clamp Block
Front Rail Block
Rail bracket
Front rail block
right side
Leveling bolt
Rear clamp
block
FIG. 14
Bolt
FIG. 15
Bolt
Sport Trac only
Sport Trac only
FIG. 16
With rear clamps in place, make sure the canister is centered from side to
side. Using the two black screws provided, screw through the rails into the
front rail block (refer to Figs. 15 and 16). If needed, add shims (included)
on front rail block to level rails.
FIG. 17
WIRING DIAGRAM
A: Canister Harness
Blue…Close
Green…Open
Orange…Cargo Light
Brown…Cargo Light
Yellow…Brake
Brown…Brake
Sport Trac only
B. Battery Harness
Red…Power
Black…Ground
White w/ Green…Door Unlock
White w/ Red…Door Lock
C: Optional Manual
Switch Harness
Gray…Open
Violet…Closed
STEP 9: INSTALL ELECTRONICS
Plug together the wire harnesses from canister and
battery (also optional manual switch harness, if
installed). Remove tape and release antenna so that
it can hang freely. Attach the red (positive) and black
(negative) wires to battery at this time.
Plugs cannot be
connected
incorrectly. This
diagram is provided
for reference only.
A
B
C
BEDLOCKER® INSTALLATION INSTRUCTIONS (#BL-INSTALL SC-FL-ST-SS)
Ford Super Crew / Flareside / Explorer Sport Trac & Toyota Tundra StepSide
Revised: 08/04
Page 8 of 10
Pace Edwards offers a door lock relay kit (part # BL-73572-K). Please refer to the Wiring Diagram, Figure 17
on page 8. Pace Edwards disclaims any liability or responsibility arising from any inaccuracies of this
information or its use for installations or otherwise. It is provided solely as a reference to our
customers per customer requests. Pace Edwards recommends using a certified auto electrician or
qualified stereo/alarm installer).
STEP 10: INSTALL DRAIN TUBES
Close the cover and insert the aluminum drain tube fittings into the pre-drilled holes on the bottom surface of
the canister by popping them in place from the inside of the canister. With cover open, place the plastic drain
tubes with self-tightening spring clamps onto the tube fittings. Insert the other end of the drain tube into the
drain holes (described on page 3).
STEP 11: INSTALL TOP COVER
Place the top cover on the canister opening and install the two (2) black oxide screws into the attachment
blocks mounted to the inside of the canister. Hold the top cover tight against the cab side of the box while
tightening. (The top cover can be adjusted slightly to align evenly with the ribbed blanket).
STEP 12: OPERATING INSTRUCTIONS
Unit is now ready to operate. Press the Open button to open cover and press the Close button to shut the
cover. To operate the light, hold the light On/Unlock button for 3 seconds, to turn off hold light Off/Lock button
for 3 seconds. (The light has a 5-minute timeout if you forget to turn it off). If optional electric door lock circuit
is hooked up, the light Off/Lock button will activate the door lock cycle and the light On/Unlock button will
activate the door unlock cycle. (If electric door locks are used, Lock and Unlock will activate immediately
when pushing the button). The black control box contains a spare 15-amp blade mini-fuse should you need a
replacement.
HELPFUL MAINTENANCE HINTS
After installation, if the cover is tight or hard to open and close, the shimming may need to be redone.
Drain tubes may become clogged over time and should be removed and cleaned. Periodically remove the
top cover and clean out the canister.
To help keep the Bedlocker retractable tonneau cover looking its best, we recommend washing it the same
as caring for your truck finish. However due to the hammer texture, removal of wax can be difficult so you
should not wax your cover.
BEDLOCKER® INSTALLATION INSTRUCTIONS (#BL-INSTALL SC-FL-ST-SS)
Ford Super Crew / Flareside / Explorer Sport Trac & Toyota Tundra StepSide
Revised: 08/04
Page 9 of 10
WARRANTY STATEMENT
Pace Edwards Company prides itself in fast, friendly warranty service for all of our products. Our goal is to design quality
into everything we make.
We warrant our products to be free from defects in material and workmanship under normal use for one year from the
date of purchase. In the event of defect in materials or workmanship, we will warrant parts only at no charge, which in
our judgment show evidence of such defect within one year from date of purchase. This warranty is void if the product has
direct or indirect damage resulting from accident, misuse or abuse, lack of reasonable care, modifications, alterations,
loss of parts, acts of God, normal wear and tear, improper installation or damage during shipping. This warranty does not
cover installations on commercial vehicles or to trucks used for racing or off-road. This warranty is void when service or
repair is performed by a non-approved service center.
At the end of the warranty period, Pace Edwards Company shall be under no further warranty obligation, express or
implied. No other warranty or affirmation of fact, written or oral, is authorized or made by Pace Edwards Company and
the terms of this warranty constitute the purchaser's sole and exclusive remedy. This warranty gives the purchaser
specific legal rights and the purchaser may also have other rights that may vary from state to state.
This warranty gives the purchaser specific legal rights and the purchaser may also have other rights that may vary from
state to state.
WARRANTY REQUIREMENTS:
1) Original sales receipt
2) Product returned must be in original packaging
3) Product Serial Number
4) Product Model Number
For your convenience, you may register your warranty claim at Pace Edwards’ web site at www.paceedwards.com. This
will help expedite your warranty claim. If you need warranty assistance, please call 1-800-338-3697 and one of our
technical service representatives will be happy to help you. Please have your model and serial numbers and your original
sales receipt ready when you call. For written inquiries, please send a letter with the warranty requirements information
(listed in the box above) to:
Pace Edwards Company
Attn: Warranty Claims
2400 Commercial Blvd.
Centralia, WA 98531 USA
Thank you for choosing products by…
BEDLOCKER® INSTALLATION INSTRUCTIONS (#BL-INSTALL SC-FL-ST-SS)
Ford Super Crew / Flareside / Explorer Sport Trac & Toyota Tundra StepSide
Revised: 08/04
Page 10 of 10


© Copyright 2026