
Safety Policy and Procedure
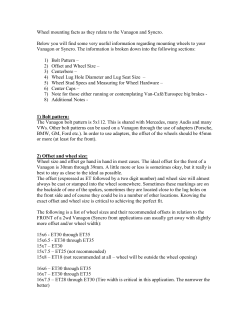
Safety Policy and Procedure Policy Number: Title: 049 Grinder Use and Operations Program Authorized By: The Cianbro Companies Alan Burton Effective Date: 12/01/08 Page 1 of 11 1 Status 1.1 2 Purpose 2.1 3 4 Update of existing policy, effective 12/06/10. To provide guidelines for using grinders safely on all Cianbro sites. Applicability 3.1 This policy applies to all subsidiary companies and departments of The Cianbro Companies. 3.2 All organizations are required to comply with the provisions of this policy and procedure. Any deviation, unless spelled out specifically in the policy, requires the permission of the Corporate Safety Officer or designee. Definitions 4.1 Angle Grinders: Are good choices for bigger work pieces too large or heavy to work at a bench. Angle grinders are a hand held portable tool with wheels from 4 to 9 inches. 4, 5, and 6 inch grinders are suited for grinding, cutting and finishing on concrete, masonry, and base metals. 7, 8, and 9 inch angle grinders are more suited for large areas, weld finishing, and dressing torch cut steel. 4.2 Anti Kick Back Angle Grinders: Made by several different manufacturers features an electronic control that detects rapid RPM decrease and shuts off the power, as when the wheel binds in material, lessening the possibility of the tool kicking out and back towards the user. This type of tool may be the best choice when cutting is necessary with .045(or similar) cut off wheels. 4.3 Bench Grinders: Stationary tool mounted to a bench, table, or stand. Available from 6 inch wheel or larger (8 inch is most common). Ideal for sharpening hand tools and blades. Good for shaping, smoothing, or polishing hand held parts. Often equipped with one wire wheel for rust removal or polishing, and one abrasive wheel for grinding/sharpening. 4.4 Die Grinder (or pencil grinder): Is a specialty hand held power tool designed to shape and polish the inside of cylindrical objects and hard to reach areas. With long thin spindle and shaft they can reach deep inside a work piece. Mostly to be used for deburring, machining, metalworking and piping applications. Die grinders can be used with many different shape and size accessories and grinding tips. Most manufacturers do not allow a cut off wheel to be used with this type of grinder. 4.5 Dynafile Grinder: Is an abrasive belt grinder/sander, ideal for grinding, deburring, blending, finishing and surface conditioning of small, precision, or hard to reach areas. Used with grinding belts from ¼ inch to ¾ inch wide and 18 inches long. Good for metal, plastic, composites, and when precise control is needed. 4.6 Shrouded and Wet Method Grinders: Should be used when grinding concrete. To smooth form work marks, or remove paint and glue. Most shrouded concrete grinders come with an attached dust vacuum. Some are available with a water hose hook up for wet method of dust control. Policy: 049 Grinder Use and Operation Rev 12/06/10 Page 1 5 4.7 Tuck Point Grinders: To be used for removing worn, weathered, or loose mortar from masonry joints, as in repointing brick or block structures. Diamond blades are used and typically will include vacuum dust collection or attachment for water hose as dust suppressant. 4.8 Tungsten Grinders: are specially designed for sharpening tungsten welding electrodes. Available through the Cianbro small tool department, they are able to grind precise angles while reducing the risk to hands, eyes and lungs. Policy 5.1 6 The use of grinders shall be minimized. Grinders shall be used with all handles and guards in place with one hand on the trigger and one hand on the handle. The use of cut off wheels requires a JHA and approval by a superintendent. Responsibilities 6.1 The Corporate Safety Officer or designee is responsible approving deviations from this policy excluding those specifically spelled out below. 6.2 The top Cianbro manager of the job site is responsible for the implementation of this policy on the job site. 6.3 Superintendents are responsible for approval of the use of cut off wheels and for approving deviations from the handle and guard requirement. 6.4 Corporate Safety is responsible for maintaining this document. Policy: 049 Grinder Use and Operations Program Rev. 12/06/10 Page 2 7 Grinder Use and Operations Program Index 7.1 Activity Planning..................................................................................................................................... 3 7.2 Right Tool for the Job............................................................................................................................. 3 7.3 Training .................................................................................................................................................. 4 7.4 Tool Inspection....................................................................................................................................... 4 7.5 Tool Care ............................................................................................................................................... 5 7.6 Tool Use................................................................................................................................................. 5 7.7 Environment........................................................................................................................................... 6 7.8 Using Grinders as Cut-Off Tools............................................................................................................ 6 9.1 Appendix A Grinders vs RPM ................................................................................................................. 8 9.2 Appendix B Dos and Don’ts for Grinder Use .......................................................................................... 9 9.3 Appendix C Mounting Cut-off Wheels on Portable Angle Grinders ...................................................... 10 7.1 7.2 Activity Planning (See form SD1013 for the Grinder Use Planning Checklist) Cianbro believes the best way to protect its team members is to plan the activities today so that alternative safer methods can be identified and if grinders are required that they are used properly to reduce the risk to team members. 7.1.1 Eliminate the hazard if possible. Make sure we look at alternatives to grinding. How can we not have to grind? • Buy material already cut or beveled • Use different tool to make cuts 7.1.2 Identify the type and size of grinder and appropriate wheel in the activity plan 7.1.3 Grinding hazards to address: • Cuts from grinding wheel (proper hand and finger protection). • Wheel binding up causing kickback. • Wheel still spinning when move away from work piece. • Foreign body in eyes from particles given off during grinding. • Wheels shattering causing flying particles. • Soft tissue injuries due to vibration, gripping of the grinder, and body position. • Respiratory hazard from materials in particles given off (e.g. lead): Avoid inhalation of dust generated by grinding and cutting operations. Exposure to dust may cause respiratory ailments as well as irritation to eyes and skin. In most cases, the greater hazard is the exposure to the dust/fumes from the base material being ground or paint or coatings applied to it. Refer to the MSDS before using the grinding wheel. • Combustible materials in the work environment. • Long hair and dangling objects such as jewelry. • Long sleeves and loose clothing. • Before energizing the grinder determine the position you will hold the tool to perform the work, ensure proper guard and handle adjustment. 7.1.4 Clearly identify how to access the work. Plan to keep work in front of team member between knees and shoulders. 7.1.5 Ensure team members have been trained for the specific tool they are going to use. Right Tool for the Job 7.2.1 Ensure the correct type of grinding wheel is used for the work that is to be done. Refer to the manufacturer’s literature for appropriate use of the different grinding wheels. 7.2.2 Available technology: • Grinders with brakes on them. • Anti–kickback grinders - Cianbro requires electric grinders to have this feature. All new grinders purchased must have this feature. Existing grinders will be phased out as they wear out. • Special guards for using cut-off wheels on grinders. Policy: 049 Grinder Use and Operations Program Rev. 12/06/10 Page 3 • • • 7.2.3 7.3 7.4 Air tools – These are less likely to kickback and because they are smaller than electric grinders they are more ergonomically friendly. Ergonomic friendly grinders. Grinders with smaller grips, with triggers that take less force to keep depressed, triggers that can be repositioned so that different fingers can be used to squeeze, etc. Track grinders – grinders that move on a track set up like track torches. Alternatives to grinder use • Alternatives to consider: Structural: Cut off saws Metal cutting circular saw Band saw Portable band saw Track torch Track plasma torch Track grinder Nibblers Shears Die grinder Pipe: Electric/Pneumatic Beveling/Cutting Tools (Portable machining tools to replace abrasive grinding). Mill hog “Prepzilla” Clam shell Track torch Metal cutting circular saw (good for pipe in stands that can be rolled). Circular saw w/ blue blade (good for pipe in stands that can be rolled). Band saw Portable band saw Cut off saw Concrete: Diamond bit grinding wheel Cut off saw Paint: Needle gun scaler Flapper wheel grinder Grinder w/ hepa vac Grit blasting Rotopeen Scabbler Training 7.3.1 Ensure each team member has had training to include general grinder safety (use this Safety Policy and Procedure) and hands on for each type of grinder to be used. 7.3.2 Send training records to the Cianbro Training Institute; scan and email them to [email protected]. Tool Inspection 7.4.1 Inspect the cord and pneumatic fitting 7.4.2 All guards in place 7.4.3 Handles in place Policy: 049 Grinder Use and Operations Program Rev. 12/06/10 Page 4 7.5 7.6 7.4.4 Body/housing in good condition 7.4.5 Wheel rpm matches grinder rpm 7.4.6 Grinding wheel is in good condition 7.4.7 Dead man switch is working Tool Care 7.5.1 Changing discs • Unplug the tool to ensure zero energy. • Replace the worn disc with the correct new disc. Ask your supervisor for help if unsure. 7.5.2 Proper storage of grinders and discs to prevent damage: Make sure grinders are stored to prevent damage from being dropped. Grinding discs need to be stored out of the weather. Make sure discs do not have materials piled on top of them that could cause damage. If a disc is dropped whether on the grinder or not, do not use that disc. Tool Use 7.6.1 Ergonomics • Make sure to take frequent breaks. Specify the length of breaks and how often in the activity plan. • Rotate workers if you need long periods of grinding during a shift. Make sure that the job rotated into uses different muscles and vibration is not an issue. • Not all team members can handle the bigger grinders. • Bring the work to you if possible • Look for ergonomic friendly tools Less weight Less vibration Easier to grip (reduced force triggers, triggers that are positionable, smaller diameter handles). Air tools are lighter than the equivalent electric grinders. 7.6.2 Body positioning • Make sure you can handle the grinder for the job that needs to be done. • Use knee protection whenever you have to kneel. • Work at a comfortable position, ideally directly in front of you between knees and shoulders. • Make sure you have firm footing and solid grip on the grinder. • Make sure sparks are directed away from other team members and from flammables and combustibles. • Keep two hands on the grinder (one on the trigger and one on the handle) at all times positioned at 6 and 9 o’clock for an angle grinder. • Avoid loose clothing that could get caught between the wheel and guard. 7.6.3 Work area set up • Provide good lighting. • Good working surface (level ground, use scaffolds rather than ladders as working surface). • Use barriers and guards to protect other workers (welding screens). 7.6.4 Grinders must be used with guards in place and both hands on the grinder. If the grinder is designed with two handles then both handles must be used. One hand is required to be on the body and trigger and the other hand has to be on the second handle. Any deviation from this policy has to be approved by a superintendent level person. The reason for deviation from the policy, why this is the safest method, and what additional steps will be taken to ensure the safety of team members while deviating will be included in the activity plan and signed off on by the superintendent. Failure to meet this requirement will result in disciplinary action. Policy: 049 Grinder Use and Operations Program Rev. 12/06/10 Page 5 7.6.5 7.7 7.8 Tricks of the trade • Allow the grinder to come up to full speed before applying to the task. • Don’t force the disc against the surface; let the grinding disc do the work. • Keep grinding disc at a 15 to 30 degree angle to the work, unless disc manufacturers specify otherwise then follow their specifications. • Do not set grinder down until disc has stopped turning. Use the work piece to stop the wheel more quickly after releasing trigger. • Use outer edge of the disc (but not the side of the disc), working it away from your body. • Don’t use portable grinders as bench grinders by securing the grinder in a vise or similar. Instead, secure your work in a vise. • Recognize pinch points where the grinder disc could bind. • When using a cut off wheel (in an approved task), remember to cut the piece so that it does not pinch in towards and bind the wheel. In the case of pipe, start at the bottom and end up on top. By finishing at the top rather than the bottom, the weight of the piece won’t cause it to bind against the wheel. • Inspect the disc as you work to ensure it does not need to be changed due to damage or wear. • Position guard to direct sparks away from you based on your body position. • Keep the slag and dust cleaned up in the work area. • Mount disc on the grinder in the manner described by the manufacturer with the appropriate hardware (flanges, nuts, and blotters). • Be careful not to over tighten the spindle nut. Too much pressure will deform the flange and put stress on the wheel. • Gloves and long sleeves should be tight fitting, as loose clothing actually poses a greater threat; it can catch in the wheel and pull the operators hand into the wheel. • When using a tungsten grinder, a tungsten holder should be used to hold and secure the tungsten. Environment 7.7.1 Seek alternative tools and/or practices to eliminate, control, or reduce the environmental impact. 7.7.2 Provide adequate ventilation 7.7.3 Air monitoring – monitor for the following depending on the activity and the MSDS. Involve the safety specialist in determining if sampling is needed. • Heavy metals • Silica • Refer to MSDS for grinding wheels and for the material being ground. • Other possible contaminants depending on coatings on the material to be ground. Using Grinders as Cut-Off Tools 7.8.1 Cianbro policy • Limit the access. Cut off wheels must be controlled and issued by a superintendent level manager. • The activity plan has to specifically address the use of cut off wheels, why it is the right tool and how to use it safely. • Angle grinders used with cut off wheels must have an anti kickback feature unless it is an air grinder. They must be used with guards designed for use with cut off wheels. • If die grinders are used, ensure the manufacturer actually allows them to be used with a cut off wheel and do not exceed the manufacturer recommended cut off wheel diameter or rpm. • Most manufacturers make specific “cut-off tools” designed for use with cut off wheels and have appropriate guards. • Refer to 9.3 Appendix C Mounting Cut-off Wheels on a Portable Angle Grinders Policy: 049 Grinder Use and Operations Program Rev. 12/06/10 Page 6 8 Budget / Approval Process 8.1 9 It is the responsibility of each jobsite to procure and provide all materials and PPE required and provide necessary training. Related Documents 9.1 See attachments. 9.2 Documents available on Cianbro.net/Resources/Forms Grinder Use Planning Checklist Checklist for Abrasive Wheel Equipment Grinders Policy: 049 Grinder Use and Operations Program Rev. 12/06/10 SD1013 SD1014 Page 7 9.1 Appendix A Grinders vs RPM Grinders vs. RPM Cianbro Grinder Matrix Type/Make Model RPM Electric DEWALT 5” R/Angle Makita 5” R/Angle Milwaukee 5” R/Angle DEWALT 7” R/Angle Black & Decker 7” R/Angle DEWALT 9” R/Angle Black & Decker 9” R/Angle DEWALT 1 1/2” Die DEWALT 2” Die Milwaukee 2” Die Black & Decker 5” Straight Black & Decker 6” Straight DEWALT 6” Straight Milwaukee 6” Straight DW831 GA5010Z 6155-20 DW474 4255 DW493 4052 DW887 DW888 5194 4271 4278 DW882 5243 10,000 11,000 11,000 6,000 5,000 5,000 6,000 25,000 19,000 21,000 4,750 4,000 5,700 6,000 G2A120RP105 G2L120RP105 77A60P107 G1H200RG4 12,000 12,000 6,000 20,000 Air Ingersoll-Rand 5” R/Angle Ingersoll-Rand 5” R/A Extended Ingersoll-Rand 7” R/Angle Ingersoll-Rand 2” Die Policy: 049 Grinder Use and Operations Program Rev. 12/06/10 Page 8 9.2 Appendix B Dos and Don’ts for Grinder Use Grinding Wheel Safety Cut-Off wheel Safety and Cutting Procedures DO: 1. Always handle and store wheels in a careful manner. 2. Always visually inspect all wheels before mounting for possible damage in transit. Resinoid can only be checked visually for possible damage. 3. Always check maximum operating speed established for wheel against machine speed. 4. Always check flanges for equal and correct diameter. 5. Always use a machine guard covering at least onehalf of the grinding wheel. 6. Always allow newly mounted wheels to run at operating speed, with guard in place for at least one minute before grinding.” 7. Always wear approved double eye protection when grinding. 1. Cut-off wheels should never be stored on edges. Instead they should be laid on solid flat surfaces away from excessive heat and moisture to avoid warping. 2. Machines must have adequate power transmission and capacity, spindle speeds and proper guarding of the wheel. It is best to have extra power to insure good cutting efficiency. 3. Check the speed of the machine spindle against the maximum speed specified for the wheel by the manufacturer. The maximum specified speed for the wheel should never be exceeded. 4. Flanges should be clean, straight and of equal diameter so the wheel will run true. For diameters above 10” it is recommended that the flange be at least 1/3 the diameter of the wheel. 5. The bore size of the wheel is so constructed that the wheel should fit freely on the machine spindle without any slack. Never attempt to force a wheel on the spindle! 6. Always use blotter, when supplied with the wheels. 7. Be sure that the flanges are tightened securely but not too tightly to avoid springing the flanges and changing the pressure area. 8. Be sure the work piece is securely held down, including both side of the cut, if practical. Cut-off wheels withstand a great deal of radial stress but not side stress. Even reinforced wheels are not completely unbreakable. Side pressure must be avoided to insure straight and avoid possible wheel breakage. 9. The wheel must be brought into contact with the work piece without “bumping” or impact. The wheel should cut freely without forcing and the speed of the wheel should be reduced by the cutting operation. 10. Abrasive cutting generates a great deal of localized heat which causes rapid expansion speeds significantly below efficient speed and wheels fed through the cut too slowly will generate excessive heat. Result: Rapid wheel wear, fraying around edge of reinforced wheels, and wheel breakage.” DON’T: 1. Don’t use a wheel that has been dropped. The impact may result in breakage 2. Don’t force a wheel onto the machine or alter the size of the arbor hole. Don’t use a wheel that fits the arbor too loosely. If the wheel doesn’t fit the machine, get one that fits correctly. 3. Don’t exceed maximum operating speed established for the wheel. 4. Don’t use mounting flanges which are warped, nicked, sprung, or which are not clean. 5. Don’t tighten the mounting nut excessively. On multiple screw mountings, 15-foot pounds per screw are usually enough. 6. Don’t grind on the edge of the wheel unless the wheel is specifically designed for that purpose. 7. Don’t start the machine unless all guards are in place. 8. Don’t stand directly in front of a grinding wheel when a grinder is started. 9. Don’t grind material for which the wheel is not designed. 10. Don’t use relieved or recessed flanges with threaded hole cup wheels, cones or plugs. Reference Pferdus.com. PFERD INC., 2008. http://www.pferdusa.com/info/lookups.htmlhttp://www.pferdusa.com/info/lookups.html> (15 October 2008). Offers a wide variety of quality abrasives and cutting tools. Policy: 049 Grinder Use and Operations Program Rev. 12/06/10 Page 9 9.3 Appendix C Mounting Cut-off Wheels on Portable Angle Grinders Policy: 049 Grinder Use and Operations Program Rev. 12/06/10 Page 10 Policy: 049 Grinder Use and Operations Program Rev. 12/06/10 Page 11


© Copyright 2026