
Guitar Center Operations Warehouse Training Module (revision 16) (1/2014)
Guitar Center Operations Warehouse Training Module (revision 16) (1/2014) Table of Contents Guitar Center Operations Warehouse Training Module (revision 15) (5/2013) .................................................... 1 Table of Contents ...................................................................................................................................................... 2 01. Warehouse Safety: .............................................................................................................................................. 5 02. Warehouse Door: ................................................................................................................................................ 6 03. Trash Runs: .......................................................................................................................................................... 7 04. Paging for a Manager: ......................................................................................................................................... 8 05. Building Maintenance: ........................................................................................................................................ 9 06. Warehouse Standards: ...................................................................................................................................... 10 07. Warehouse Organization: ................................................................................................................................. 11 08. Warehouse Supplies:......................................................................................................................................... 12 09. Cages: ................................................................................................................................................................ 13 10. Cage Log: ........................................................................................................................................................... 14 11. SKUs and Inventory Tagging: ............................................................................................................................. 15 12. SKU Hang Tags: .................................................................................................................................................. 16 13. Reprinting SKUs: ................................................................................................................................................ 17 14. Runaway Reports: ............................................................................................................................................. 18 15. Return Shelf:...................................................................................................................................................... 19 16. Scissor Lifts: ....................................................................................................................................................... 22 17. Operating Scissor Lifts: ...................................................................................................................................... 23 18. Incoming Shipments: ......................................................................................................................................... 24 19. Incoming DC Shipments Truck Unload: ............................................................................................................. 25 20. Signing for Deliveries:........................................................................................................................................ 27 21. Receiving Philosophy:........................................................................................................................................ 28 22. Printing a Receiving Worksheet: ....................................................................................................................... 29 23. Receiving Purchase Orders:............................................................................................................................... 30 24. Consumable Inventory Items: ........................................................................................................................... 31 25. Receiving MITs and SITs: ................................................................................................................................... 32 26. RF Gun: .............................................................................................................................................................. 33 27. Distribution Centers: ......................................................................................................................................... 34 28. Floor Loading ..................................................................................................................................................... 35 WAREHOUSE MODULE | Table of Contents 2 29. Incoming Scan Report ....................................................................................................................................... 36 30. Incoming Scan Report Exceptions: .................................................................................................................... 37 31. Receiving DC Cartons: ....................................................................................................................................... 38 32. Carton Discrepancy Report ............................................................................................................................... 39 33. Receipt Report: ................................................................................................................................................. 40 34. Serial Numbers: ................................................................................................................................................. 41 35. Same Day Serial Number Fix: ............................................................................................................................ 42 36. Unreceivables: ................................................................................................................................................... 43 37. Unreceivable Report: ........................................................................................................................................ 44 38. Distribution Center Unreceivables: ................................................................................................................... 45 39. Vendor Unreceivables: ...................................................................................................................................... 46 40. Resolving Unreceivables: .................................................................................................................................. 47 41. Damage Claims: ................................................................................................................................................. 48 42. Packing Outgoing Shipments: ........................................................................................................................... 49 44. UPS Worldship:.................................................................................................................................................. 51 45. MIT/Outgoing SIT/MOTO/Guitarcenter.com Shelf: .......................................................................................... 53 46. Maintaining the Outgoing SIT Shelf: ................................................................................................................. 54 47. Transferring MITs and SITs: ............................................................................................................................... 55 48. Open Outgoing and Incoming Transfers: .......................................................................................................... 56 49. MOTO Rolls: ...................................................................................................................................................... 57 50. Dropships and Will Calls: ................................................................................................................................... 58 51. Outgoing Shipments: ......................................................................................................................................... 59 52. Freight Shipments: ............................................................................................................................................ 60 53. International Shipping: ...................................................................................................................................... 61 54. Shipping Documents: ........................................................................................................................................ 62 55. Generating SOG Repair Orders: ........................................................................................................................ 63 56. Generating COG Repair Orders: ........................................................................................................................ 64 57. Voiding Repair Orders and Changing Repair Descriptions: ............................................................................... 66 58. Repair Order Reports: ....................................................................................................................................... 67 59. Repair Stations: ................................................................................................................................................. 68 60. RA Numbers: ..................................................................................................................................................... 69 61. Three Filters: ..................................................................................................................................................... 70 WAREHOUSE MODULE | Table of Contents 3 62. Destroy at Store Program.................................................................................................................................. 71 63. DC Repair Support: ............................................................................................................................................ 73 64. Reverse Logistics: .............................................................................................................................................. 74 65. Inventory Return Request Report (IR Report):.................................................................................................. 75 66. Resolving IRs:..................................................................................................................................................... 76 67. RTV Entry: .......................................................................................................................................................... 77 68. RTV Aging Report: ............................................................................................................................................. 78 69. Receiving RTVs from Repair Stations: ............................................................................................................... 79 70. Building a Repair Book: ..................................................................................................................................... 80 71. Repair Letters: ................................................................................................................................................... 82 72. Layaway, Incoming SIT, SPO Shelves: ................................................................................................................ 83 73. Receiving Multi-Boxed Items from DC Shipments: ........................................................................................... 84 74. GuitarCenter.com Orders:................................................................................................................................. 85 75. GuitarCenter.com Returns: ............................................................................................................................... 87 76. Inventory Adjustment ....................................................................................................................................... 89 Warehouse Lab Test:............................................................................................................................................... 91 01. Receiving: ............................................................................................................................................ 91 02. Reports: ............................................................................................................................................... 91 03. Shipping: .............................................................................................................................................. 92 04. Inventory: ............................................................................................................................................ 92 WAREHOUSE MODULE | Table of Contents 4 01. Warehouse Safety: Safety is the first concern of all associates in the warehouse. Acting in an unsafe manner while working in the warehouse can result in serious injuries. All equipment must be used in the proper manner to ensure a safe working environment. Always wear a back support belt. Fasten them only when lifting; get assistance from another employee if a load is too heavy to lift on your own. Empty pallets are always stacked safely. Only stack pallets to a manageable/safe height. Only Guitar Center approved orange safety knives with retractable blades are used. When using safety knives, cut away from yourself and others, this reduces the chance of cutting injuries. Warehouse machinery such as pallet jacks, conveyor belts, hand trucks or lift gates are never ridden on or misused, these are unsafe actions that could lead to serious injury. Operate scissor lifts, elevators, lifts, or conveyor belts with extreme caution only after proper instruction. Avoid trip hazards by keeping the warehouse floor swept and free of debris. Use ladders, never climb or hang from warehouse shelving. Safety standards must be met at all times while working, report unsafe conditions to Operations immediately. WAREHOUSE MODULE | 01. Warehouse Safety: 5 02. Warehouse Door: The warehouse door/receiving bay remains closed and locked throughout the day. The door/bay is opened for incoming and outgoing shipments, trash or bin runs only. There are always two employees present while the door/bay is open, one being a Keyholding Manager. Only Keyholding Managers can open the door, keys are never given to a non-Keyholding employee to open doors. The purpose of the Keyholder is to verify, not to participate, in trash runs, pickups, or deliveries. Once deliveries and/or trash runs are complete the warehouse door is shut, secured and locked. Avoid opening warehouse doors after dark for extra safety. Smoke breaks or lunches are never allowed at the back door. Employees may never leave or enter the building through the back door. WAREHOUSE MODULE | 02. Warehouse Door: 6 03. Trash Runs: Trash runs are done first thing in the morning to make room for incoming shipments, as needed throughout the day, and prior to the end of the warehouse crew’s shift. All boxes are flattened to make sure no gear is lost inside. Only CLEAR can liners are used to allow for visual inspection of trash bag contents. Garbage cans do not leave the building, only the bags may be removed. There is always a minimum of two employees present during all trash runs, a Keyholder and any other employee. The Keyholder visually inspects all trash to verify that inventory is not mistakenly thrown away. Avoid completing trash runs after dark for extra safety. The area around dumpsters is kept neat, clean and swept as necessary. WAREHOUSE MODULE | 03. Trash Runs: 7 04. Paging for a Manager: Multiple times throughout the day the receiving door must be unlocked and opened to receive deliveries. All pages are repeated twice in a clear commanding voice. Always page like this: o Assistant Manager please dial extension (XXX) Assistant Manager please dial extension (XXX) o Operations Manager please dial extension (XXX), Operations Manager please dial ext (XXX) (XXX would be your extension number) Once the manager calls you back, you can explain that there is a delivery in the back and the receiving bay needs to be opened. Doing so removes the added danger of alerting others that the back door is open NEVER page a manager like this: o Manager to the back to open the door o Manager with keys come to the receiving door o I need the back door opened WAREHOUSE MODULE | 04. Paging for a Manager: 8 05. Building Maintenance: Operations is depended upon to maintain store facilities/building appearance and upkeep. This includes: o Inspecting that bathrooms are clean and stocked with supplies o Changing light bulbs throughout the interior of store including display cases as well as exterior lighting o Sweeping parking lots o Emptying ashtrays o Shoveling snow and salting ice o Inspecting the building exterior for defacement or graffiti o Vacuum cleaner maintenance o Repair of hazardous carpet tears o Ensuring stairs are swept, free of debris and in good condition o Warehouse cart and hand-truck maintenance o Informing the Ops Manager of needed supplies such as tape, blue bar paper, safety knives, toilet paper, soap, etc. The warehouse is considered sales support. Maintaining the store and its facilities contribute greatly to the success of each location as well as the entire company. WAREHOUSE MODULE | 05. Building Maintenance: 9 06. Warehouse Standards: Warehouses must be extremely neat and organized, this allows for: o A safe working environment o Quick speed of sales o Accurate inventories o Increased profitability of locations Every aisle is clean, free of gear and ladders are closed. Supplies are kept organized and easily accessible. Desks are free of debris and wiped down daily. Stickers are never stuck on computer equipment, warehouse equipment, walls or desks. POS computer standards apply to all warehouse computer equipment. RF guns are kept in a secure spot to ensure they are not accidentally dropped or damaged. Computer terminals are maintained daily to check for loose connections or dusty components. Cardboard and boxes are neatly flattened and stacked away from walkways or aisles. Clear can liners are always used in garbage cans, this allows the trash to be inspected for possible discarded inventory or attempts at theft. Ensure all warehouse lighting is functional, replace bulbs as needed. The entire warehouse is swept daily before the crew leaves for the day. A full walk of the warehouse by the Operations Manager is conducted twice daily to verify standards are being met. o Once in the morning before the store opens o Once in the evening before the warehouse crew leaves WAREHOUSE MODULE | 06. Warehouse Standards: 10 07. Warehouse Organization: It’s important to keep the warehouse in a uniform and organized layout. Just as the sales floor and departments follow the same set pattern from store to store, so do Guitar Center warehouses. Warehouses are organized by category, and by vendor within that category. All inventory, is classified by department, category and type. (DCT) Example: The DCT for electric guitars is: o Dept 11 stringed merchandise o Category 01 guitars o Type 334 electric Within each category shelf, inventory is arranged with like products of the same vendor and type of merchandise. For example: o All Fender guitars together, separated by solid body or acoustic o All Yamaha speakers together separated by subwoofers, speaker cabs, speaker towers Boxes are always kept organized and “lip loaded”. o ”Lip loaded” means being brought to the very edge of the shelf. All boxes are SKU’d with Guitar Center SKU tags or a valid UPC. o SKUs are always affixed to the top right corner of the exposed side of a box, making sure to never cover vendor serial number labels or product names o Never affix SKUs to plastic over-wrap found on some boxes, cut the plastic and affix the SKU directly to the box Items with UPCs that cannot be front faced are SKU’d on warehouse shelves. Boxes must be kept at least 18 inches from sprinkler heads or as mandated by local fire code. Multi-packed items must be removed from their pack boxes. Out of box, demo, or used gear is never kept in the warehouse; it is brought to the sales floor for prompt sale. Never block electrical panels or fire exits. Stack boxes to safe and manageable heights. The warehouse is swept daily, making sure possible trip hazards are removed, all aisles are clear, equipment such as hand trucks or pallet jacks are safely stored, and ladders are folded to ensure clear walkways. WAREHOUSE MODULE | 07. Warehouse Organization: 11 08. Warehouse Supplies: Warehouse supplies are organized and maintained by warehouse personnel. Warehouse personnel keep track of all supply levels and inform Operations when more supplies are needed. Shipping supplies for Guitarcenter.com shipments such as boxes, bubble wrap, and packing peanuts are ordered on ePro, or from an approved vendor listed on Backstage. Only new packing materials are used when shipping store sourced Guitarcenter.com orders containing new items. Recycled packing materials may be used for shipping store sourced Guitarcenter.com orders containing used items, provided the materials are in excellent condition. Shipping supplies such as tape, markers, or blue bar paper are ordered from Staples. Cleaning supplies are ordered through Staples. UPS shipping supplies such as pouch boxes, pouch envelopes, UPS labels, invoice pouches, or overweight stickers are ordered from UPS.com o UPS.com orders are free and can be placed by all warehouse personnel Blank SKU rolls and SKU Hangtags are ordered through Staples Print Solutions. Back Support Belts are ordered from Ossur Americas in ePro. Approved Guitar Center safety knives are ordered through Staples. While receiving, warehouse personnel should save packing material found in incoming boxes and store it neatly for future use. Packing peanuts are kept in a separate large box, garbage bag or peanut chute (if equipped). All other packing material such as Styrofoam, bubble wrap, air pillows or cardboard are organized and stored for later use. Supplies are kept separate from regular stock. Always verify that supplies are adequately stocked with at least a two month supply back stock. WAREHOUSE MODULE | 08. Warehouse Supplies: 12 09. Cages: Cages and lock-up rooms are utilized for securing expensive inventory of small size, such as: o Microphones o Software o Computer memory o Drum machines o MP3 players All Apple and ProTools gear is locked up or secured as it is highly desirable and expensive inventory. Only employees cleared by Loss Prevention can hold keys to the cages and lock up rooms. The Keyholder must be present when cages are opened. Every piece of gear removed from the cage must be signed out on the “Cage Log”. The Cage Log is removed, verified and filed on a regular basis by Operations. After receiving high-end gear it should immediately be locked up in a cage to prevent theft. Gear removed from the cage for demo use is immediately returned if it is not sold. The warehouse crew maintains all cages. Always fill out the Cage Log completely and be sure to lock the cage after it has been opened. WAREHOUSE MODULE | 09. Cages: 13 10. Cage Log: The Cage Log is used to monitor daily cage activity. A Cage Log is kept inside every cage and/or lock-up room. The Keyholding Manager that removes gear from the cage is required to log the gear out, filling in all information required on the Cage Log. Every time a piece is removed from or returned to a cage or lock-up room it is logged on the Cage Log, including: o Sales o Demos o Display o SITs, Will Calls, Dropships or MOTOs o Returns Serial numbers should always be recorded if available. UPCs or SKU numbers are always recorded for non-serialized inventory. Operations collects all Cage Logs on Mondays. o Sales are verified and recorded on the lines provided o Displays are verified o All unsold items are verified to have been returned to the cage o Completed logs are filed by Operations in the dead file WAREHOUSE MODULE | 10. Cage Log: 14 11. SKUs and Inventory Tagging: SKU stands for Stock Keeping Unit. SKUs are printed automatically when serialized inventory is received. They are printed on “piggyback” labels, meaning the SKU itself is printed on a label with dual layers of adhesive. Dual layer labels are used to facilitate removing inventory from boxes and being able to SKU the contents without having to reprint a SKU tag. SKUs contain all necessary inventory information for inventory control purposes. SKUs contain the following info: o Numbers Item description with model o A DCT number o A 10 digit SKU number o A serial number if the piece of inventory is serialized in our computer system o Month and year the SKU was received o A list price Items always have a GC SKU, a DC barcode, or active UPC barcode affixed to them before stocking or taking them to the sales floor. o Serialized items have unique SKUs that match the serial number of the items o Verify the serial number on the GC SKU tag against the serial number of the item before affixing it to the item o Unique SKU number will end in the store’s number. 110, 522, 711, etc. o Un-serialized items are labeled with recurring SKUs which do not contain serial numbers o GC SKUs are always placed in the upper right corner of the item’s packaging. SPO, COG, repair returns, MITs, and Layaway SKUs are placed directly below the regular GC SKU o SKU placement is based on how the items are positioned when stocked in the warehouse Items that have the potential to be displayed out of their packaging are labeled with a piggyback SKU. SKUs are affixed to the items so that they lie flat and can be scanned. o Barcodes cannot wrap around corners SKUs are placed on products in discreet locations if they have the potential to be merchandised in displays. Do not place SKUs over a vendor or item name or serial number. WAREHOUSE MODULE | 11. SKUs and Inventory Tagging: 15 12. SKU Hang Tags: Hang tags are cardboard flags used to affix SKU tags to a product. There are two types of hang tags with different applications. String – This type of hang tag is used to affix SKU tags to items with a delicate finish which could be damaged by a wire hang tag. Typical uses for string hang tags are guitars and drum kits. The string hang tag is the least secure method of affixing a GC SKU tag to an item. Wire – This type of hang tag is used to affix SKU tags to items that will not be damaged by the steel wire but requires a more secure tag than string. Typical uses are drum hardware, cases, etc. When affixing SKUs to SKU hang tags, remove the piggyback SKU and stick it directly to the tag, this will prevent employees removing the SKU from the piggyback tag for price checks or POP lists. Cymbals that are missing vendor bar codes are SKU’d using wire SKU hang tags and plastic washers (Can be ordered through Victory Display) which are threaded through the hole in the bell of the cymbal. SKU tags are not affixed directly to cymbals. WAREHOUSE MODULE | 12. SKU Hang Tags: 16 13. Reprinting SKUs: Every piece of inventory in a Guitar Center store is labeled with a UPC or GC SKU tag. In order to reprint a SKU follow these steps: o Access the “REPRINT TAG MENU” in the Inventory Management screen o Select “Reprint Bar Code Tags” o To print: You may enter the serial number to reprint serialized piece SKUs Dot look-up a recurring item, ensure dot look-ups are correct Enter an Item ID number Enter a UPC number Enter a qty to print Serialized SKUs will only print one at a time Quantities for recurring SKUs may be entered When reprinting Layaway, SIT or SPO tags, the sales ticket number is needed Affix SKUs to inventory using the proper application method for the piece WAREHOUSE MODULE | 13. Reprinting SKUs: 17 14. Runaway Reports: When reports are run accidentally or with the wrong information they are considered runaway reports. Runaway reports can run for an extremely long time and waste a large amount of printer paper. Runaway reports cannot be canceled or cleared out by turning off the printer. When the printer is turned back on it will begin printing again. The MIS Helpdesk must be contacted to cancel a runaway report. Call the Support Center (818) 735-8800 or speed dial 600 and ext. 2660 to reach MIS. MIS will need to know: o Which store you are calling from o Which printer needs to be stopped o The type of report being run Once MIS cancels the runaway report, press select on the printer and wait for it to stop printing. Never leave runaway reports printing indefinitely. Doing so only wastes supplies and makes the printer unavailable for use by other employees. WAREHOUSE MODULE | 14. Runaway Reports: 18 15. Return Shelf: The return shelf is the shelf or area of the warehouse designated for returned merchandise. All items that are returned are placed on the return shelf with the return receipt attached (for retail orders) or the Inventory Return Slip (for web orders) by the Sales Associate that completed the return ticket. Some inventory is exempt from returns including: open box software, open blister pack harmonicas, ear plugs, in-ear monitors, and books and media. o If exempt inventory is found to have been returned, notify a manager immediately. Returned open box software will be immediately zeroed out on a sales ticket. o Zeroed out software is saved until a reverse logistics day and shipped to the DC where it will be destroyed. The return verification process must be completed each morning before the store opens. To verify that returns are done correctly and returned in their entirety the “RETURNS” query is used. To verify that street buy/trades are done correctly the “TRADES” query is used. o Cases or bags accompanying street buys/trades in department 11 (guitars, basses, miscellaneous stringed instruments) are built as separate items and assigned a Used Case Tag ID number. o A product SKU and Used Case Tag ID SKU are placed on each case/bag and stocked in the warehouse in the numbered location matching their Used Case Tag ID. To verify that web returns are done correctly, the following reports are run daily from the Guitarcenter..COM SPO Dashboard: o o Returns Status Report Select the desired date range for the report. It is run for the prior day (select the Yesterday option) on weekdays, and by a specific date range for the weekend. Select the following statuses by holding the Ctrl key and clicking on the following: Returned to Store Returned Receive in Store Click the Search button and then print the report (right click your mouse and select the Print option from the drop-down menu). Failed Returns Report When running the report, set the From Date to the beginning of the previous month. Click on the Failure Status drop-down menu and select Unresolved and click the Search button. To print, right click your mouse and select the Print option from the dropdown menu. WAREHOUSE MODULE | 15. Return Shelf: 19 Failed returns occur if the system has an error during the return process. They will have a distinguishing black box at the bottom of the return slip identifying them. Once the error is corrected, the return is re-processed by the Contact Center and the order is updated as resolved. This places the order into the returns queue. Once verified, Failed Returns should be kept on a separate shelf or area until resolved. Notify Operations immediately if items are missing from the return shelf. Items on the “RETURNS” and web returns reports are compared to the items on the Front Door Gear Log for the same date. The reports are checked against all items on the shelf. o As inventory items are verified, they should be inspected for missing manuals, power supplies, functionality, missing knobs etc. o If an item of inventory is found to be incomplete a manager should be notified and the return ticket verified for correct Replacement Charge. o If a piece of inventory is found that is not factory sealed, verify the open box flag has been marked. If it is eligible for open box and was not flagged, update the flag in SKU Activity Display. o If a returned item is found to be broken, generate a repair order ticket for the item if one has not already been generated. o Microphome is used on returns requiring sanitizing such as microphones or headphones. o Reprint SKUs for any items missing SKUs or if UPC barcodes are unable to be scanned. o Tape all boxes shut. Items that have been inspected, verified, and labeled or SKU’d should be processed in one of two ways: o Retail returns are brought to the sales floor or stocked on warehouse shelves o Web returns are processed using the disposition listed on the Inventory Return Slip. There are three dispositions for web returns: Receive in Store o These are KCDC sourced items that are to be received into store inventory. These returns are received as part of the return verification process via the DC Receipt Entry program, and are restocked. o A barcode and KIS number are listed on the Inventory Return Slip that is used to receive the item into store inventory. o These barcodes are similar to a DC carton label. To receive these items from a RF gun or in the POS system: Select Receipt Entry. (In POS, select DC Receipt Entry.) Select DC Receipt and press Enter. WAREHOUSE MODULE | 15. Return Shelf: 20 Enter your approval password. At the Enter Carton No. prompt, scan the Receive in Store barcode on the Inventory Return Slip, or type in the Receive in Store number and press Enter. Enter NA at the Shipper prompt and press Enter. Enter the web order number from the Inventory Return Slip at the Pro Number prompt and press Enter. Enter through the Check Number prompt. Scan or enter the item ID or UPC of the returned item. Enter quantity (if required). Enter serial number (if required). Continue to scan or enter items if there are additional items to receive from the return. Press C to close the carton. Press U to update. If the inventory’s factory box has been opened, update the open box flag in SKU Activity Display. If the item is broken, place on Repair Order. Returned to Store o These items are to be returned to the KCDC. Items showing this status are re-packaged and prepared for shipment back to the KCDC. Returned o Returned items are store sourced items that are already in the return location’s inventory and should be restocked as normal store inventory. If the inventory’s factory box has been opened, update the open box flag in SKU Activity Display. The RETURNS query and web returns reports are run daily for the previous day’s returns. If weekend Operations coverage is not scheduled, on Monday the query is run for the previous Friday, Saturday and Sunday. WAREHOUSE MODULE | 15. Return Shelf: 21 16. Scissor Lifts: A scissor lift is a hydraulic device used to raise and lower pallets between trucks and warehouse doors. Scissor lifts are installed at some Guitar Center stores that do not have truck-level loading docks. Scissor lifts will not operate without the control pendant and power cord attached; they are kept secured in the warehouse. When loading/unloading is completed, remove control pendant and power cord and return them to the warehouse. Never leave the lift unattended with the control pendant and power cord installed. Use caution when operating in wet or icy conditions; do not operate the scissor lift if it is buried in snow or ice until after the snow or ice has been shoveled. Scissor lifts are only operated by fully trained Guitar Center personnel. Contact the District Loss Prevention Manager to obtain the scissor lift safety video. WAREHOUSE MODULE | 16. Scissor Lifts: 22 17. Operating Scissor Lifts: To operate a scissor lift: o Plug controller into control box and turn coupler clockwise until it is secured, plug power cord to control box and turn coupler clockwise until it is secured, plug power cord to the building outlet and turn coupler clockwise until it is secured o Lower the exit ramp platform and push pallet jack onto the scissor lift from loading dock o Raise and secure the exit ramp platform o Check that the ramp and bridge chains are secured in the upright position o With chains still secure, platform plates in the upright position, and the operator standing on the lift, press the “UP” button to raise the lift until the lift main platform is level with the trailer floor, announce “Going Up!” o Remove bridge chains (trailer side) and lower the bridge platform plates onto the back of the trailer. Make sure that the bridge platform plates overlap into the trailer a minimum of two inches and that the bridge platform is level with the trailer bed o Using a pallet jack, transfer one pallet to the center of the lift platform o Release (lower) the pallet jack so the skids of the pallet rest on the platform o Lift the bridge platform plates to the upright position and re-secure the chains on the lift hooks o Lower the lift by pressing the “DN” button on the controller, announce “Going Down!” o When the lift is in the fully lowered position, remove the ramp chains and lower the ramp platform plates on the exit side of the lift o Raise the pallet jack o Remove the pallet from the lift and transfer into the warehouse staging area Reverse the procedure above for loading pallets onto the truck. WAREHOUSE MODULE | 17. Operating Scissor Lifts: 23 18. Incoming Shipments: Incoming shipments are accepted at the warehouse receiving door. Incoming shipments are never accepted at the front door, delivery people are instructed to use the warehouse receiving door only. Incoming shipments are counted and verified by the keyholding manager signing for the delivery. If carton counts do not match Bills of Lading or UPS DIADs (Delivery Information Acquisition Device: a handheld device UPS uses to account for packages), shipments are double counted in the presence of the delivery person. When carton counts are agreed upon or over/short claims have been made, the shipment can be signed for. Arrange all incoming shipments in order of priority: o Next Day/Air packages are removed from the pile and received first o The pouch is removed from the pile and brought to Operations o Guitarcenter.com orders are received o Inter-Store Transfers are received o Followed by regular purchase order shipments or cartons Be sure to keep packages organized to ensure no cartons are missed or misplaced. All incoming shipments must be received the same day that they arrive. WAREHOUSE MODULE | 18. Incoming Shipments: 24 19. Incoming DC Shipments Truck Unload: The incoming DC shipments truck unload process is broken down into three basic steps. o Unload o Sort o Receiving, Tagging, and Stocking Using these steps creates standardization for how the incoming cartons are kept until stocked either in the warehouse or the sales floor. Unload Begin the unloading process with the fewest people necessary to safely and efficiently unload the truck. Increase or decrease the help as needed during the truck unload and sort process. The Operations Manager or approved personnel verifies that the incoming cartons belongs to their location and scans each carton utilizing the Incoming Scan Report. As cartons are scanned, write large and legible letters on each carton label with a highlighter, based upon the type of carton. Write directly on the labels so no damage is caused to the packaging. o A = Auto Receive o M = Manual Receive o X = Exceptions (NCL Cartons, Invalid Cartons, Carton for another location, or Parent/Child Cartons) Complete incoming scans one pallet at a time to assure an accurate count. Sort Cartons will either have the prefix “995” or “902”. Both are received and processed in the same manner. There are five different types of cartons: o Auto, Non-Store Pack o Manual, Non-Store Pack o Auto, Store Pack o Manual, Store Pack o Cartons with exceptions Sort and stage each carton type in a designated area in the warehouse. Since staging areas vary by store, determine specific areas of the warehouse for each carton type. Items that require manual receiving are kept as close as possible to the main receiving area. Like vendors and like products are staged together Maximize efficiency and safety by utilizing hand trucks, and GC lifting techniques. WAREHOUSE MODULE | 19. Incoming DC Shipments Truck Unload: 25 Receiving, Tagging, and Stocking Overlap the initial stocking of Auto Non-store Pack cartons with the receiving of Manual Non-Store Pack cartons. Focus on stocking large items first to free up space. o Stock Auto Non-Store Pack cartons o Receive, tag, and stock Manual Non-Store Pack Cartons o Receive and tag Manual Store Pack cartons o Sort all store pack into like items and departments o Distribute, stock, or lock up all items WAREHOUSE MODULE | 19. Incoming DC Shipments Truck Unload: 26 20. Signing for Deliveries: All deliveries are made at the warehouse receiving door. They are never signed for at the front door. Shipments are never refused, even if damaged. Check all packages for the correct address. Only a Keyholding Manager may sign for deliveries. o The Keyholding Manager that opens the receiving door, signs for the delivery Inspect all deliveries received for damage and box count accuracy. o Count all pieces received and verify the UPS DIAD board matches your total If damage is found on a UPS package ask the driver to remark that package’s tracking number as damaged. After signing for a UPS delivery the Keyholding Manager must ask the driver to press the STOP/COMPLETE button on their UPS DIAD board, this will ensure boxes cannot be scanned after a signature is obtained. Signing for DC deliveries: Record the truck or trailer number on the Bill of Lading. Verify the Shortages link on the driver’s scan gun and remark the Bill of Lading with any carton numbers listed. If the Expected and Actual numbers match on the gun, you will still verify the shortages tab at each delivery. o Carton quantities may be correct, but an individual carton number may have been replaced with a different carton at the pool point o Notate the carton numbers on each copy of the BOL under a written heading “Drivers Gun Shortages”. You may use the back of the BOL if more room is needed. o Missing carton numbers may be written in abbreviations such as: 995-197955676 or 902-695006778 (omitting the middle zeroes) o Carton shortages in excess of 15 units do not need to be individually remarked on the BOL o For example, you would notate “missing 17 cartons” and not write out every carton number If a carton is damaged: o Remark the carton by pressing “D” then enter while completing the Incoming Scan Report o Remark the damage on the Bill of Lading, using specific details, with no abbreviations. example; o Carton 99500008100084710473 - ripped, item damaged inside Sign and date the Bill of Lading WAREHOUSE MODULE | 20. Signing for Deliveries: 27 21. Receiving Philosophy: One of the main functions of Guitar Center warehouse personnel’s position is receiving inventory. Accuracy and speed are keys to effective warehouse receiving. Without an effective warehouse crew, a store’s business can come to a standstill. Inventory must be received accurately in order to ensure speedy sales, limit potential customer service issues, and to avoid loss or shrink. Inventory must be received in a timely manner to make sure Special Orders can be picked up, inventory transfers can be sold, and new inventory can hit the floor as soon as possible. Items are never received off the packing slip, it may be incorrect; boxes are opened to verify all items and quantities. Keeping our stores fully stocked is part of what keeps our customers coming back. It’s the warehouse staff’s responsibility to always keep the merchandise flowing. All shipments should be received the day they are signed for. WAREHOUSE MODULE | 21. Receiving Philosophy: 28 22. Printing a Receiving Worksheet: A Receiving Worksheet or “Receiver” is needed to process all purchase order receipts. A Receiving Worksheet is not needed for DC receiving. To print a Receiver: o Access the “RECEIPTS,REPAIRS,TRANSFERS & RTV’S” menu in “Inventory Management” of the POS system o Select “Receipt Worksheet” o Print the Receiver to a blue bar paper printer o At the prompt “Enter PO number”, enter the Purchase Order number on the packing slip of the items being received o The Receiver will automatically print WAREHOUSE MODULE | 22. Printing a Receiving Worksheet: 29 23. Receiving Purchase Orders: Receiving via Purchase Order is commonly used for Special Orders or book and media orders. A Purchase Order or PO is issued by Guitar Center Purchasing to our vendors. Vendors receive the order and ship the merchandise directly to store locations. When gear arrives at the store, it is verified and received by the warehouse staff by following the steps below: o Locate the packing slip or “packer” either attached to or inside of the carton. The packing slip lists all items that were shipped along with the PO number o Verify the packing slip matches the contents within the shipment; remark any discrepancies on the packing slip o Locate the 6 digit PO number on the packing slip. Using the PO number on the packing slip, print a receiving worksheet o Fill in quantities and serial numbers if applicable, and a zero “0” is written in for quantities that have not been shipped o When complete the worksheet should match the packing slip. Remark any discrepancies by writing them on the receiver; include as many details as possible including model numbers. Such as: Model # 360452, short shipped 2 pieces, only 1 received Item ID # 1001002542 over shipped 1 piece, putting on UR o All quantities are entered into the computer system using the “Purchase Order Receipts” screen found in the “Receipts, Repairs, Transfers and RTV’s” menu under the heading “Receipt Entry” of the POS system o Remark the discrepancies in the remarks field of the Purchase Order receipt screen o Once all quantities have been entered, an approval password is entered and a “Receiving Number” is generated, write this number on the bottom right line of the worksheet o SKUs print for all applicable inventory. Attach the SKUs to each piece and be sure to verify all serial numbers against actual serial numbers on the gear o Staple the packing list to the back of the worksheet and move on to the next shipment o Keep all worksheets and documents in the order that they are received. This will allow accurate and efficient verification by Operations WAREHOUSE MODULE | 23. Receiving Purchase Orders: 30 24. Consumable Inventory Items: Receiving Consumable Inventory Consumable inventory items are hand delivered by the vendor and received using purchase orders. Run an Open PO report by vendor number 22326 to verify quantities and product prior to accepting deliveries Deliveries of consumable inventory without a valid purchase order are refused. At the time of delivery, verify packaging integrity and all “Best Taste by Date” or “Use By” dates for each case. Prior to signing for deliveries, refuse all cases where the “Best Taste by Date” is less than 8 weeks away. For each case received, write the “receiving date” and “Best Taste by Date” on a piece of paper and attach it to each case of consumable product before storing the product. Restocking Consumable Inventory Items are restocked by Accessories personnel during the store closing process. Restock the display by pulling older product out and putting the newest product in first. (This rotation will put the oldest product at the front of the display.) Keep beverage coolers full at all times, even if it cannot be kept according to set planograms. o For products exceeding the “Best Taste by Date” by a week or more, contact Inventory Control for guidance. o For product exceeding the “use by date”, remove the item(s) from the display, and contact Inventory Control for guidance. o Product nearing the “Best Taste by Date” can be sold to employees at a discount with approval from district management. WAREHOUSE MODULE | 24. Consumable Inventory Items: 31 25. Receiving MITs and SITs: MITs and SITs are received in the same manner as receiving Purchase Orders. For MITs and SITs, the transfer paperwork from the transferring store serves as a packing list as well as a receiving worksheet. There is no need to print a receiver. Using the transfer paperwork from the transferring store, verify all shipments for correct quantity, model, color and serial numbers. Discrepancies are brought to the attention of Operations immediately. Once the contents of the transfer have been verified, proceed to the “Receipt Entry “screen in the “RECEIPTS, REPAIRS, TRANSFERS & RTV’S” menu. In “Receipt Entry” select “2) Transfer receipts” to receive the transfer. Type the transfer number (found on the top left of the transfer paperwork) in the line “#1 Ref no”. o This will automatically load the transferred items on the screen Verify the quantities and serial numbers match the transfer sheet and enter quantity numbers into the screen. Enter through the remarks field, remark any short shipments or split received orders in the “Remarks” line, and approve the receipt. A receiver number is generated in the “Receiver no” field, which is written on the bottom right of the transfer paperwork. Received transfer paperwork is filed with the other receivers in order of receipt. WAREHOUSE MODULE | 25. Receiving MITs and SITs: 32 26. RF Gun: RF guns are used for receiving Distribution Center shipments, printing Access Via POPs, and conducting inventory cycle counts. The reprint tag screen is also available to conveniently reprint SKUs when needed. Item DCT check is available to check DCT and quantity of items scanned throughout the store. Logging into RF guns is conducted in the same fashion as logging into a green screen terminal. Remember; RF gun login counts toward your maximum level of 3 logins at a time. o Logins are limited to 3 terminals at a time; 3 green screens, 3 RF guns or any combination totaling 3 logins. Always make sure that Caps Lock is enabled when using the RF gun. Always log out of the RF guns after use. When not in use, RF guns or RF gun battery packs are returned to the charging station. Although ruggedly constructed, RF guns can be seriously damaged if dropped or misused, always keep RF guns in a safe place and exercise extreme care when using. Contact MIS at ext. 2660 for assistance with all RF gun issues. WAREHOUSE MODULE | 26. RF Gun: 33 27. Distribution Centers: Guitar Center’s Distribution Center in Brownsburg, Indiana supplies the entire chain with inventory. A west coast DC in Chino, California supplies many stores with case pack inventory. In addition, the KCDC located in Kansas City supplies web orders to the chain. Our vendors ship their products to both of the Distribution Centers. Through a vast system of computers and conveyor belts the inventory is sorted for shipment to pool points, who then palletize and ship the inventory to the stores. The computer system accounts for every piece of inventory that is expected to arrive at each location. There are a large amount of precautions taken to ensure every piece of inventory is received at the stores accurately. WAREHOUSE MODULE | 27. Distribution Centers: 34 28. Floor Loading Floor loading is a cost effective way to transport cartons from our Distribution Center to store locations. Shipping gear from the DC as cartons, instead of shipping the gear on pallets, maximizes the use of trailer space. Floor loading eliminates the need for pallet wrapping machines, as well as the time, labor and maintenance that they require. Transfer records are generated at the trailer level instead of the pallet level Shipments are delivered to pool points where they are off-loaded and sorted, and are delivered on a “first in, first out” basis. Pool points scan the cartons at various stages of the delivery process establishing a “chain of custody” and better tracking. As cartons are off-loaded at the store, they are scanned by the driver prior to entering the building. WAREHOUSE MODULE | 28. Floor Loading 35 29. Incoming Scan Report The Incoming Scan Report is used when receiving floor loaded shipments from the Distribution Center. This report is designed to verify and document incoming carton numbers. Verify on the driver’s gun the Actual amount listed is zero before beginning your initial scan. Each carton number is scanned with an RF Gun as it is offloaded from freight trucks. Once all cartons have been scanned, the report is updated and a print out of all carton numbers, exceptions, and carton count totals is printed. Using BearWare on the driver’s gun, select the Shortages link, or the Short tab, to reveal missing carton numbers that should have been included in this delivery. o These numbers are recorded on the Bill of Lading The Incoming Scan Report total is verified against the Bill of Lading. o If totals do not match, thoroughly notate discrepancies on both the Bill and the report. Cartons may have to be recounted by hand if the total on the ISR does not match the total on the freight bill. o Sign for the delivery on the BOL, and file both the Incoming Scan Report and the Bill of Lading. Cartons and store pack boxes containing UPC’d items that are not serialized and that have the SKU flag turned off, are auto-received during the Incoming Scan process. Once the Incoming Scan Report process is completed auto-received items may be immediately stocked or brought to the floor All cartons that are not auto-received during the Incoming Scan process are to be received. Once all cartons have been received, the “Carton Discrepancy Report” is run to verify that it is clear and that all non-kitted cartons have been received. All non-kitted cartons need to be received the same day they are signed for and scanned. WAREHOUSE MODULE | 29. Incoming Scan Report 36 30. Incoming Scan Report Exceptions: When scanning incoming cartons, users may encounter cartons that are considered exceptions on the Incoming Scan Report. Cartons with exceptions appear in a separate column heading on the report, but still list in scan order. Some exceptions are entered by the user and some are accepted by the user. Damaged cartons can be remarked as such by pressing “D”, then “enter” on the RF Gun before scanning the carton number. o The carton will be flagged as damaged on the Incoming Scan Report print-out. o All damaged cartons need to be thoroughly referenced and noted on all copies of freight bills. If a carton with an unreadable or missing carton label is delivered; the user notates it by pressing “N”, then “enter”, for No Carton Label (NCL). The Incoming Scan Report generates a unique identifier number that is listed on the Incoming Scan print-out. This unique identifier number is only used to notate that a carton has arrived without a label to ensure accurate box counts, the number cannot be used to receive the carton. The NCL carton is posted to UR, using vendor “995” and group code “DC”, so the Transportation Department has visibility of them. This is done whether the carton has the “995” or “902” prefix. When a carton for a different location is scanned, the user has the option to accept or refuse the carton. If a carton for another location is accepted, it appears in the exception heading of the report. Cartons belonging to stores outside of the store’s pool point are scanned and added to the ISR. These cartons are kept at the store and placed on UR to vendor 995 group DC. (For both 995 and 902 cartons.) Cartons belonging to stores serviced by the same pool point are scanned, refused, and remarked on the Bill Of Lading. They are then redirected to the correct location by the pool point carrier. During the Incoming Scan process, if a label is scanned and the prompt “Carton Received” appears, the carton is most likely a duplicate carton number that has been previously received. It could also be a carton that was closed out as a claim to a carrier. o These cartons are inventory adjusted back into the original carton number. During the Incoming Scan process, if a label is scanned and the prompt “Duplicate Carton” appears, the carton may already exist, but was assigned to a different transfer record, or is actually a duplicate carton. These cartons are inventory adjusted back into the original carton number. During the Incoming Scan process, if a label is scanned more than once, the gun prompts “Overwrite? Y/N.” Enter “Y” to continue. The carton is not entered again; it is overwritten. WAREHOUSE MODULE | 30. Incoming Scan Report Exceptions: 37 31. Receiving DC Cartons: RF guns or POS computers equipped with laser scanners are used to receive DC Cartons. Login to the gun by following the same steps as logging into a green screen terminal. o Select “INV MGMT” and enter o Select “RF Receiving” and enter o Select “Receipt Entry” and enter o Select the appropriate tag printer o Select the appropriate “PR” printer (e.g., XXX.PR0, XXX.PR1 where “XXX” is the store number) o Select #4 “DC Receipt” and enter o Enter approval password o At the “Enter Carton No.” prompt, scan or manually enter a carton bar code o At the “SCAN ITEM” prompt, scan each item in the carton. Each item will have either a UPC bar code, or an item ID bar code from the DC o Type serial numbers where required o Scanning a different item in the carton automatically updates the previously scanned item(s) o After all items in a carton are scanned, Press “C” to close the carton and press “enter” o The RF prompts: “<CR> New Carton, ‘S’can, or ‘U’pdate” o If “<CR>”Continue on to the next carton, and repeat entire receiving process o If ‘S’, Continue scanning items within the current open carton o If ‘U’, The RF updates all entered carton information, generates a receiver, and prints necessary SKUs Updates should be completed frequently while receiving cartons. This is to avoid losing all scans in the event of power outage or system down time. If problems are encountered while scanning incoming DC cartons or items, contact the Operations Manager immediately. WAREHOUSE MODULE | 31. Receiving DC Cartons: 38 32. Carton Discrepancy Report The “Carton Discrepancy Report” is run daily after all cartons have been received. This report lists all cartons scanned during the incoming scan process that have yet to be received. Ideally this report will always be clear. Cartons that will appear on this report are: o o o Mismatched Parent Cartons With the prefix “P” in front of the carton number These cartons are placed on UR (using 995 and group code IC) (for both 995 or 902 cartons) Cartons Belonging to Other Stores Stores that share the same pool point of the store the carton belongs to The report will list the store the carton belongs to These cartons will stay on the report until they are received at the correct store Cartons Missed During the Receiving Process Show status “O” for “Open” with no other remarks or warnings listed These cartons are located and received immediately To run the Carton Discrepancy Report: o Access the “RECEIPTS,REPAIRS,TRANSFERS & RTV’S” menu o Enter the “DC REPORTS MENU” o Select “Carton Discrepancy Report” o Choose a printer to print the report to o Enter through the starting and ending date fields o Enter the store location number for “Starting and Ending LOC’s” o Enter through the “Starting and Ending Carton ID” fields o The report will print WAREHOUSE MODULE | 32. Carton Discrepancy Report 39 33. Receipt Report: The Receipt Report is a report run daily to verify everything that has been received. The report shows quantities and serial numbers of everything that has been received from Purchase Orders, Inter-store Transfers, and DC shipments. Reviewing this report daily verifies that serial numbers and quantities have been entered correctly. Serial numbers can be easily corrected on the day of receipt by utilizing the “Same Day Serial Fix” screen, follow the prompts for correcting the errors. Correcting serial numbers immediately can save Operations extra work and ensure accurate inventory. Receipt reports are verified against the receivers for accuracy. This is completed daily by Operations. To print the Receipt Report: o Go to the “Receipts, Repairs, Transfers and RTV’S” menu in the green screen o Select “Receipt Report” o Enter to the options field and select option #3 to run the report by the receipt date o Enter the receipt date you wish to verify twice o Enter through the rest of the options to print the report WAREHOUSE MODULE | 33. Receipt Report: 40 34. Serial Numbers: To ensure serial numbers are entered correctly, extra care must be taken during the receiving process. Special characters such as slashes and dashes are never entered when entering a serial number. o Similarly if a serial number begins with a (21), the (21) in not entered Serial numbers are entered in capital letters and numbers only. Many vendor serial number barcodes will scan incorrectly, adding multiple extra characters to the serial number if scanned during the receiving process. To make sure the correct serial number is entered, serial numbers are manually typed into the RF gun rather than scanning vendor labels. Double check all serial numbers as they are entered into the RF gun. If the serial number already exists in the system, place a “#” sign in front of the serial number. o If the piece is used and the serial number exists in the system while completing a street buy, place a “#” sign in front of the serial number If the serial number exists in the system with a “#” sign in front of it, add another “#” sign in front of the first “#” sign. Do not place a “#” sign at the end of a serial number. Recheck serial numbers on SKUs before they are affixed on items, verify they match. Complete same day serial fixes as needed. WAREHOUSE MODULE | 34. Serial Numbers: 41 35. Same Day Serial Number Fix: The Same Day Serial Number Fix program can be used to correct incorrectly entered serial numbers. This program will change the serial number on a SKU for items received the SAME DAY, all other fixes will need to be completed on a CCF. If any activity has taken place on the SKU with the incorrect serial, such as a transfer, RTV, or sale you will not be able to change the serial number with this program. This includes items reserved on SIT or SPO. To change a serial using this program: o Access the “RECEIPTS,REPAIRS,TRANSFERS & RTV’S” menu found in “Inventory Management” o Select “Same Day Serial Number Fix” o Enter “Y” at the prompt “Do you want to continue? (Y OR CR)” o Enter the SKU of the incorrect serial number o Enter the new serial number o Enter manager approval o New SKUs will automatically print o Remove or destroy old SKUs WAREHOUSE MODULE | 35. Same Day Serial Number Fix: 42 36. Unreceivables: When an unforeseen receiving issue arises, and an item is unable to be received into inventory, the unreceivable (UR) process is used. Examples of unreceivable issues are: Vendor errors such as over shipments, missing paperwork and DC receiving issues such as invalid carton numbers or invalid or cancelled POs. Items are placed on UR immediately after they have been determined to be unreceivable or if prompted by the RF gun while receiving DC shipments. PO numbers, carton numbers, DC transfer numbers, and/or RTV numbers are entered on all URs. DC URs are entered using location 995 as the vendor number (for both 995 and 902 cartons); vendor numbers are dot looked-up for non-DC items. For vendor URs, please enter the appropriate department group code. Items are entered on UR by using either an item ID or the “dot look-up” feature. If an item ID is not in the system, enter a complete description including vendor, model, description and color. Enter serial numbers if applicable, Example: o Line 6 Spider 4x12 GTR CAB o Do not use UPC numbers as item descriptions Include specific remarks describing the reason items cannot be received. Examples: o PO cancelled o Not on PO, mis-shipment o PO is for three but vendor sent four and packer lists four o Mis-shipped three BR1 should have been three BR2 o Over-shipped Fender 014-2002-791 Original packing lists or copies are kept with items when placed on UR. The UR shelf is a shelf or designated area of the warehouse used for “Unreceivable” merchandise. Items placed on UR are labeled using blue masking tape with the UR numbers written on the tape before they are placed on the UR shelf. (Do not write on inventory boxes themselves.) WAREHOUSE MODULE | 36. Unreceivables: 43 37. Unreceivable Report: The Unreceivable Report is run daily to review all items that are on UR. All items on the UR Report must match the items on the UR Shelf. Items on the UR shelf are verified daily by Operations personnel. To run an Unreceivable Report: o In the “Receipts, Repairs, Transfers & RTV’S” menu select “Unreceivables Report” o Enter through the default date o Select “Status Code”, then press enter o Type “A” to accept o Enter the beginning status code “E” o Enter the ending status code “R” o Enter through additional criteria o Select a printer, then press enter to print the report The report lists all URs that are status code E, M, and R. o Status E – Entered at the store, not responded to by the Support Center yet o Status R – Responded to by the Support Center o Status M – Not all items resolved by the store The UR is processed by the Support Center and when a solution is reached, the UR is responded to with instructions on how to proceed. o URs that have been entered are viewed using the “Unreceivables Report” o URs are addressed daily at the store level to keep the report free of inventory concerns o Once URs are received they can be brought to the sales floor or stocked on the appropriate shelf All items that have been responded to must be received and resolved daily. o Items placed on UR cannot be sold in any way until they are received WAREHOUSE MODULE | 37. Unreceivable Report: 44 38. Distribution Center Unreceivables: Occasionally cartons arrive at a store from the DC with invalid cartons labels, sets, or ID problems. Cartons from the DC (995 or 902) are put on UR when: o The RF gun prompts the user to put the item on UR o Incomplete multi-box set o A store is mis-shipped an item for which there is no item ID o If a store is mis-shipped a carton that is intended for a store that is outside of their pool point When scanning a carton, if the RF gun displays “Carton Invalid – Enter UR”, proceed with the following steps: o In Unreceivables Maintenance press enter o Enter “995” as the vendor (This is done for 995 and 902 cartons) o Scan or enter the carton number, “995unknown” appears in the PO/Ref. field, the DC group automatically loads, “Carton not on file” in the description field, and the carton number automatically loads on the first remarks line o There is no need to enter item IDs o The DC knows what is in each carton by the carton number o Label the item(s) with blue masking tape and the generated UR number and place them on the UR shelf The Support Center responds to URs with directions to receive the carton or in cases of misdirected cartons, instructs the store to forward it to the appropriate location. If an item with no item ID is mis-shipped from a vendor to the DC, then transferred to the store, proceed with the following: o In Unreceivables Maintenance press enter o Enter “995” as the vendor o Scan or enter the carton number o Enter the receiver number of the carton the item arrived on in the “Receiver Field” o Enter your employee number o Enter the appropriate group code for the item, such as IC or DC o Enter the quantity o Enter a complete description of the item sent including vendor’s part number and color o Label the item(s) with blue masking tape and the generated UR number and place on the UR shelf o The Support Center will build a new item ID for the item, and will respond to the UR with instructions on how to proceed WAREHOUSE MODULE | 38. Distribution Center Unreceivables: 45 39. Vendor Unreceivables: Occasionally packages arrive at a store location from vendors that are unable to be received into inventory. Examples of why a package from a vendor may need to be put on UR are: o The purchase order (PO) is invalid or voided o Items are over shipped and all quantities are unable to be received o The wrong item was shipped in the package o The item is back from repair To enter a vendor UR: o Select “Inventory Management” in the Green Screen o Select the “RECEIPTS, REPAIRS, TRANSFERS & RTV’S” menu o Select “Unreceivables Maintenance” o Press enter to generate a new UR o Enter the vendor number. If the vendor number is not known, use the “dot-look” function to obtain the vendor number o Enter a PO or a reference number o Enter a receiver number if it is an over shipment o Enter your employee number o Enter the department group code such as “A” for Accessories, “G” for Guitars etc. Group code “IC” should not be used on vendor URs. o Enter the quantity o Enter or dot look-up the item ID. Always try to find an item ID for items before typing a description o Select “Y” if the UR item is serialized, and enter serial number(s) o Select “N” if the items is not serialized o Enter remarks describing why the item is unreceivable such as: “PO voided”, “PO invalid”, “Item back from vendor repair, need new PO”, “Sent wrong item on PO”, “Set/component mismatch” o If there are multiple UR items in the shipment, continue on the next line item until all of the items are entered. WAREHOUSE MODULE | 39. Vendor Unreceivables: 46 40. Resolving Unreceivables: Once URs are responded to by the Support Center they are ready to be resolved, follow the directions given in the response such as: o Receive with PO #xxxxxx o Vendor owned, return to vendor o Carton ok to receive o Inventory Adjust URs are resolved immediately after items have either been received, adjusted into inventory, or returned to a vendor on an RTV. To resolve a UR: o Select “Inventory Management” in the Green Screen o Select the “RECEIPTS, REPAIRS, TRANSFERS & RTV’S” menu o Select “Unreceivables Maintenance” o Enter UR number in the “Unrec” field o Enter “Y” to resolve o If there is more than one item and not all items are being resolved, enter “S” to skip items not being resolved. o Enter an approval password o Enter a receiver number, an RTV number, an Inventory Adjustment number, or new UR number. o Once resolved, a UR is automatically removed from the UR Report. o Remove the blue tape with the UR number on it from the item, and return it to stock. WAREHOUSE MODULE | 40. Resolving Unreceivables: 47 41. Damage Claims: When items are received and they are damaged (from a shipping or freight company) a Damage Claim must be completed. Never refuse deliveries even if they are damaged. Inspect the item with driver if the damage is found while signing for delivery. If possible, take photographs of damaged deliveries. If a damaged carton is discovered during the Incoming Scan process, mark them as damaged. To do so: o Press “D” then enter on the RF gun then scan the carton number o The carton number will be flagged with a “D” on the incoming scan report print out o Report DC damage issues via the Outlook email group CYCDC immediately. Ask the driver to provide a damage claim number; this is usually called in to the shipping or freight company by the driver. Write the claim number on the Bill of Lading. Notate all damage on the Bill of Lading, write specific details without abbreviations, examples: o One box ripped and items visible o Box received with corner missing, item exposed, and damaged UPS drivers can remark an item as damaged on the DIAD board that they use to scan packages. In cases of SITs, the receiving store must initiate the damage claim. Save all packaging of damaged items being claimed, they may need to be inspected by the carrier. Navigate to Backstage > Departments > Operations > Document Library > Warehouse > Receiving > Damage Claim Form Follow the claim procedures in the Freight Claims document to process all damage claims. WAREHOUSE MODULE | 41. Damage Claims: 48 42. Packing Outgoing Shipments: Operations personnel make sure that merchandise flows out of the building quickly and safely. The safety of valued instruments and other accessories is a priority and there is a set list of rules to follow when shipping anything from a Guitar Center warehouse. Unless inventory for shipment is still packed in its original factory box, a strong sturdy box must be used with a minimum of two inches of packing material surrounding the piece. Prior to items being packed they are verified by the Operations Manager. Guitarcenter.com customer shipments are shipped in new cardboard boxes using only new packing materials. Items are never shipped in inner display, or “point of sale” boxes. Guitar Center SKU tags are removed from the outside of all boxes. Remove all POPs, POP holders, SKU tags, leather hanging straps, etc. from items. Secure all boxes with heavy duty packing tape, ensuring all seams and openings are secure. Verify that all components are included. If inventory is incomplete, missing pieces, or manuals, the receiving stores Operations Manager is contacted before the item is shipped. Smaller accessories are wrapped with bubble wrap to maintain two inches of packing material on all sides. Cases can be added to any transfer for safe shipping of out of box gear. Stringed instruments are shipped with a case unless factory sealed. If shipping with a case, the case must be on the transfer paperwork Stringed Instruments are detuned and any loose parts such as tremolo arms or bridges are wrapped separately. Used stringed instruments without cases are wrapped in Kraft paper, then bubble wrapped and double boxed. All amplifiers over $250 are shipped using Instapak foam corners. Tubes are wrapped and secured prior to shipping. Casters are wrapped and secured prior to shipping. Drum kits being shipped via a domestic air service or internationally are nested inside one another. Drums and drum hardware are packed and shipped in separate boxes if not shipping in original packaging. Hardware is never packed in the same boxes as drum shells. Out of box drum kits that are transferred between stores are placed in cases or bags prior to packing (cases/bags are added to the transfer). Keyboards not in original boxes are packed with bubble wrap and a minimum of two inch buffer of packing materials and packed inside a shipping box. Once everything has been packed give the box the “shake test” to make sure the packing is sound, if the gear rattles or moves, the box should be reopened and repacked. WAREHOUSE MODULE | 42. Packing Outgoing Shipments: 49 43. Vintage Guitar Shipping Guidelines: If the guitar is worth $5000 or more, use inner and outer shipping cartons. Avoid thin, flimsy cardboard at all times. Only one guitar per box. If the original case is not suitable for shipping (worn, flimsy, broken latches, no padding inside, etc.) use a new case to ship the guitar in, and ship the original case separately. Include remarks on transfer paperwork when shipping in this fashion, and notify the receiving store that the case will arrive separately. Always slacken the strings. If you are shipping a guitar with a “floating style” bridge, meaning the bridge is held onto the guitar via the pressure from the strings, the instrument is de-tuned, the bridge is removed, it is wrapped in bubble wrap, placed in the pocket of the guitar case, and the pocket is snapped or taped closed. If the guitar has a sliding tailpiece, place Kraft paper between it and the body of the guitar to prevent damage to the finish. Remove whammy bars whenever possible. Wrap them in bubble wrap, place it in the pocket of the guitar case, and snap or tape the pocket closed. If you are not using a form fitting case, line the inside of the case with Kraft paper so the guitar fits snugly in the case. Secure the headstock in the same manner, but do not over-pack as to apply too much pressure to the headstock. Secure all loose items (accessory packs, strings, knobs, etc.) in the pocket of the case. Again, make sure the pocket is snapped or taped shut. Do the “Shake Test”. Prior to boxing the guitar, gently shake the case. If you feel or hear the guitar or items move inside the case, repack it. When you are ready to box the guitar, place a piece of bubble wrap at the bottom of the box, place the guitar in the box, and fill the box with peanuts. Push the peanuts down so they settle into the box. Place another piece of bubble wrap on top of the case, and seal the box. Perform the “Shake Test” again, and repack if necessary. WAREHOUSE MODULE | 42. Packing Outgoing Shipments: 50 44. UPS Worldship: “UPS Worldship” is the UPS program we use to ship all inter-store transfers, Dropships etc. that are not oversized or over 100lbs. The UPS Worldship computer is also used for ordering UPS supplies, generating shipping labels, and tracking all UPS shipments. o Some supplies that can be ordered are: Packing slip pouches Overweight labels Boxes and envelopes Next Day Air stickers It is necessary for all warehouse personnel to be able to process shipments using this system. Access UPS Worldship on the UPS computer located in the warehouse. In order to process a shipment, packages are first packed following the packing and shipping procedures. The package is placed on the scale attached to the UPS terminal. This automatically weighs the package and records the weight on the screen. Complete the address fields including, name or department, address, and company if applicable. The customer’s phone number is entered in the telephone field in the UPS computer for all COG shipments. For International shipments and shipments using air services, measure and enter the dimensions of the carton being shipped in the Length, Width and Height boxes. The Reference Number 1 field must contain: o Transfer numbers for SITs and MITs o Ticket numbers for MOTOs, Drop Ships and sales o RTV numbers for RTVs o Order numbers for multi-channel shipments or returns The Reference Number 2 field must contain the description of the shipment: o Sale type, MOTO, Drop Ship o RTV o Transfer o .com Order, .com Return Select the type of shipment, NEXT DAY AIR, GROUND, THREE DAY SELECT, etc. Each change made to this field increases or decreases the cost of the shipment. Always ship UPS ground unless otherwise instructed. WAREHOUSE MODULE | 44. UPS Worldship: 51 When all fields have been completed, click the process shipment button on the screen. o A shipping label prints and is attached to the box being shipped Do not add non-UPS software to the UPS Worldship computer, it is used only for UPS purposes. Do not enter inappropriate words or messages in the screen saver. WAREHOUSE MODULE | 44. UPS Worldship: 52 45. MIT/Outgoing SIT/MOTO/.com Shelf: Commonly referred to as the “SIT Shelf” this is the shelf, shelves or section of the warehouse designated for outgoing inventory transfers or mail order shipments. o Items usually secured in cages are not put on the SIT Shelf, they are left in the cage with SIT tickets or MOTO receipts attached o The SIT Shelf is a temporary staging area for MITs, SITs ,MOTOs and .com orders, each of which are defined below: A MIT is a Management Initiated Transfer. This is a transfer of inventory that Management has initiated to balance stock between locations, or to fulfill Special Order requests. o When an MIT is generated it appears on the “Management Initiated Transfer Report” o MITs are shipped in a timely matter to ensure proper stocking levels throughout the chain A SIT is a Store Initiated Transfer. This is a transfer of inventory arranged by Store Management to obtain merchandise orders for customers between stores. o SITs are shipped as soon as they are generated o Shipping SITs is important; customers are waiting for these transfers to arrive so that they may pick them up o SITs are not generated for stock balances, meaning an SIT would not be entered if a store needed to replenish their stock of a sold out piece of inventory MOTO stands for “Mail Order Telephone Order”. o MOTOs are paid in full orders done via telephone that are shipped directly to a customer’s home o MOTOs are rolled on 26 tickets and shipped the same day o MOTOs are only shipped to the billing address of the credit card used to make the purchase; this is verified by an Assistant Manager or higher o MOTOs are shipped via UPS ground unless otherwise specified and paid for by customers o The shipping cost of a MOTO is charged to the customer when the initial order is placed A .com order is a paid in full order that was placed by a customer using the .com website from home, or placed by a salesperson for the customer on the .com SPO website at the store. o Web orders are confirmed prior to being shipped o Web orders may be shipped directly to a customer, shipped to another GC store for customer pickup, or held at the store for customer pickup WAREHOUSE MODULE | 45. MIT/Outgoing SIT/MOTO/.com Shelf: 53 46. Maintaining the Outgoing SIT Shelf: The outgoing SIT shelf is maintained daily by Operations. All SITs on reserve for more than three days without having 28 tickets generated by the receiving store are canceled and returned to stock. To maintain the SIT shelf, run an Unresolved Outgoing SIT Reservation Report. To run report: o In the “Sales Ticket Processing” menu, select “SIT Reservation Report” o Select option “1. Open SIT Reservations (Unresolved)” and press “enter” o Select option “2. Outgoing SIT Reservations (Transfer-Out's From Your Store)” and press “enter” o Enter passed the date field, and press “A” to accept the criteria o Enter through the rest of the options o Select a printer and print the report Mark all items five days or older for cancellation. To cancel Unresolved SITs: o Enter the SIT reservation number found on the report in the “SIT Reservation Entry” o The transfer automatically loads o “VOID” is typed at the bottom of the screen o Remarks are entered such as: no 28 ticket completed or store does not want out of box item o Enters your Manager Approval Number o The SIT is now voided or canceled Once items are canceled they are removed from the SIT shelf and returned to stock for sale. Maintaining the Outgoing SIT Shelf ensures that items are not left in the warehouse and off of the sales floor. WAREHOUSE MODULE | 46. Maintaining the Outgoing SIT Shelf: 54 47. Transferring MITs and SITs: The Management Initiated Transfer report is run daily by the warehouse crew. The report shows all open SITs and MITs that are waiting to be shipped. MITs are only shipped in factory sealed packages unless otherwise noted by the Support Center. If an SIT is out of box, the receiving store is contacted and notified of the condition of the merchandise before shipment. Follow the packing procedures for all shipping of inter-store transfers. Inventory is transferred via green screen and shipped via UPS Worldship or designated freight carrier. Gather all pieces waiting to be shipped by using the “Management Initiated Transfer Report” (MIT) report as a reference. Using the reservation number found on the MIT report, a transfer is generated using the “Inter-store Transfer Out Entry Screen” in the “Receipts, Repairs, Transfers & RTV’S” menu in POS. Once the transfer is complete, the item is shipped using UPS Worldship or designated freight carrier. Enter the receiving store’s number and address. The transfer number is entered in reference field one of the shipping screen. “MIT” or “SIT” is entered in reference field two of the shipping screen. A brief description of the item is typed in the contents remarks field. o Never type item descriptions in reference fields 1 or 2, these fields are printed on the UPS shipping label and will not keep the contents of the package confidential A shipping label is generated and affixed to the box. The transfer paperwork printed on blue bar paper is attached to the box using a UPS packing slip pouch. Ensure no words are showing from the transfer paperwork so the contents of the package are kept confidential. WAREHOUSE MODULE | 47. Transferring MITs and SITs: 55 48. Open Outgoing and Incoming Transfers: To ensure inter-store transfers are received in a timely manner, the “Open Outgoing Transfer Report” and the “Open Incoming Transfer Report” are used. The outgoing report lists all items transferred out from your location that have yet to be received. The incoming report lists all items transferred to your location that have yet to be received. Inter-store (non-DC) transfers should never take more than 10 days to arrive from either coast. Contact the receiving or transferring store for tracking numbers to track deliveries. If proof of delivery can be obtained, contact the receiving store to ensure packages were not missed while receiving. The transferring location is responsible for filing claims on lost or damaged items. Run these reports daily and address issues immediately. To run the outgoing report: o In the “RECEIPTS, REPAIRS, TRANSFERS & RTV'S” menu, select “Open Outgoing Transfer Report”. o Enter through all criteria and enter “A” to accept then press ”enter” o Select a printer to print the report and press “enter” o Enter “Y” and print the report. o The report will list all items transferred to stores as well as the DC that have yet to be received To run the incoming report: o In the “RECEIPTS, REPAIRS, TRANSFERS & RTV'S” menu, select “Open Incoming Transfer Report”. o Enter through all criteria and enter “A” to accept then press ”enter” o Select a printer to print the report and press “enter” o Enter “Y” and print the report. o The report will list all items transferred to your store from other locations as well as the DC that have yet to be received WAREHOUSE MODULE | 48. Open Outgoing and Incoming Transfers: 56 49. MOTO Rolls: MOTO stands for Mail Order Telephone Order; it is a transaction that is done over the phone using a credit card. The billing address of the credit card is verified and an authorization to charge the card is obtained by an Assistant Manager or higher. MOTOs are processed as 25 tickets in the sales ticket entry screen. The approving manager completes the ticket, o The item(s) requested by the customer is entered into the screen o All shipping information and the correct ship code it entered o The item(s) along with the 25 ticket is brought to the warehouse o “Shipping and Handling No GP” must appear on the ticket MOTOs are only shipped to the verified billing address of the credit card used to make the purchase. MOTOs are boxed and packed as per established packing guidelines. Take extra care when packing MOTO shipments as to avoid customer complaints. Packages are shipped via UPS ground unless otherwise specified and paid for by the customer. MOTOs cannot be shipped to PO Boxes. Once the 26 ticket is rolled, the sales ticket number is entered in reference field one in the UPS computer. “MOTO” is entered in reference field two. WAREHOUSE MODULE | 49. MOTO Rolls: 57 50. Dropships and Will Calls: Dropships and Will Calls are methods of taking care of customers and fulfilling their needs when a store runs out of or does not stock a particular piece of gear. Customers have the option to pay for an item in one location and pick it up in another location; this is called a Will Call. Customers can also pay for inventory in one location and then have it shipped to their home from another location; this is called a Drop Ship. Will Calls: o The requesting store follows all the same procedures as they would for requesting an SIT. o Once they complete the 28 ticket on the receiving end, the transferring location transfers and criticals the gear via green screen to generate a transfer number, this is called a Critical Transfer. This is completed by an Assistant Manager or higher over the phone o The requesting store is supplied with the transfer number and serial number if applicable so that they may receive it. This makes the inventory available in their system. o The inventory is sold at the receiving location and a copy of the 29 ticket is faxed to the store holding the gear. Dropships: o Instead of the customer coming to the store to pick up their purchase, it is shipped to them at their expense via UPS ground or your designated freight carrier. o UPS ground is always used unless otherwise specified and paid for by the customer o The 29 roll ticket is faxed to the store holding the gear; the roll is verified for serial number accuracy and quantity. o All shipping and packing procedures are followed to ensure customer’s purchases arrive unharmed. o A UPS shipping tag is generated. o Regular items are not insured unless paid for and requested by the customer. o Vintage Items are insured for full market value o The faxed copy of the roll ticket is included as a packing slip. o The salesperson completing the sale is emailed the UPS tracking numbers. WAREHOUSE MODULE | 50. Dropships and Will Calls: 58 51. Outgoing Shipments: Outgoing items are only staged in the designated staging area. Pallets shipped to the DC from stores that do not have a loading dock and lift-gate service are assembled and stretch-wrapped on delivery trucks. Operations Managers audit all outgoing shipments. o Weight accuracy is verified o Shipping reference numbers are validated (RTV, Transfer, Sales ticket numbers, .com order numbers, etc.) o Packing standards are inspected o Packages are verified prior to pick-up times to minimize driver wait time All outgoing items are sent through the back door only. Keyholders keep an accurate count of all boxes leaving the building. End of day reports are run for all shipments processed on the UPS computer. Keyholders verify the last four digits of the UPS tracking number on outgoing packages against the end of day report. The original signed package total receipt is attached to the back of the end of day report and submitted to Operations. For carriers other than UPS, shipping documentation is verified. If the documentation contains carbon copies, verify that all copies have the same information. Any outgoing shipments picked up after shipping/receiving hours require Keyholding Manager approval prior to leaving the store. WAREHOUSE MODULE | 51. Outgoing Shipments: 59 52. Freight Shipments: Freight shipments are sometimes necessary when transporting larger items such as digital pianos or subwoofers. All other avenues of shipping or pickup should be discussed with your Operations Manager before committing to freight companies. Some examples of when a freight company is used for shipments are: o If a single IR shipment is greater than 150 lbs. o Oversized items that are too big to ship UPS to a store or repair center If an item is shipped via a freight forwarder, a Bill of Lading is downloaded from Forms and Templates. The Bill of Lading is completely filled out in legible hand writing. Always choose Third Party Billing on the Bill of Lading, and provide this billing information: o Guitar Center c/o Trendset Inc. PO Box 1208 Mauldin, South Carolina 29662 Include: o Address to and from o Description of shipment, make model and serial number if applicable o Value o Weight o Dimensions o Date o Quantity if multiple pieces Items are placed on a pallet and secured with stretch wrap. A copy of the Bill of Lading is made. Both copies of the Bill of Lading are verified and signed by the driver picking up the shipment. One copy goes with the shipment, and the other copy is kept at the store. The signed Bill of Lading is submitted to the Operations Manager, and is filed at the store with the daily shipping documents. WAREHOUSE MODULE | 52. Freight Shipments: 60 53. International Shipping: Only used and vintage items are authorized to be shipped internationally. The preferred carrier for international shipments is UPS. Computers are federally prohibited from being shipped internationally. Sales information including ticket number, ship to name address and phone number, and a list of items sold and their value are emailed to the International Logistics department, or 8 ½” X 11” copies of receipts are faxed to the International Logistics Department at the Distribution Center (317) 852-818 or email [email protected] prior to scheduling pick-up of international shipments. Use the UPS computer to draft a shipping quote. This quote must be approved by customers prior to updating a sale. All packing procedures are followed for international shipments. Fill out the UPS air bill completely. o o A valid contact phone number including the country code for the shipment destination is provided for all international shipments A pro-forma Invoice will be faxed back to the store. o Do not schedule a pick-up until a pro-forma invoice is obtained from the DC. Invoices and UPS air bills accompany all international shipments. o Once the package has been signed for by UPS and picked up, the Completed UPS air bills are faxed to the International Logistics Department at the Distribution Center (317) 852-8189. Customers are responsible for all customs charges levied by their destination country. Falsification of sales tickets for customs or other purposes is not permitted for any reason. To ship with an international freight forwarder: o Only a customer may set up an international shipment using a freight forwarder Operations is responsible for maintaining all international shipment records at the store level, see Backstage, Operations Document Library, Warehouse for the International Shipping Guide. WAREHOUSE MODULE | 53. International Shipping: 61 54. Shipping Documents: Each shipment made is automatically recorded on the UPS end of day report and/or a freight bill of lading. When UPS computers are closed at the end of the day, an end of day report prints along with a pickup label that is signed by the UPS pickup driver. This label is affixed to the back of the end of day report. When freight carriers are used for larger shipments, Bills of Lading are completed to process shipments. Bills of Lading are signed by the pick-up driver. Bills of Lading and UPS end of day reports are considered Shipping Documents. Copies are made of all shipping documents and filed in the warehouse files. All original shipping documentation is collected by or submitted to Operations. Operations requires all shipping documentation to verify tax exempt reports. Original shipping documents are filed at the store level in a dead file. WAREHOUSE MODULE | 54. Shipping Documents: 62 55. Generating SOG Repair Orders: Before a piece of inventory can be placed on repair it must be thoroughly inspected and tested. Once repair needs are established, a Repair Order can be generated. Always enter concise remarks on Repair Orders regarding the repairs needed. “Doesn’t Work” or “Broken” is not enough information. To generate a Repair Order: o In Repair Order Entry at field 1 press enter o Enter employee number o Select 01 (SOG REPAIR) o Enter SKU, Ser, Item, or UPC number o If items are recurring you will be able to enter a quantity after you enter a SKU, item, or UPC number o If item is unique, a quantity of one will automatically be entered o Enter a description of the repair needed, for example: o o Left channel is out Bad power tube socket No sound Enter condition of item(s) if necessary, or press enter to continue, for example: New in box New out of box Enter appropriate remarks and/or repair estimates, for example: Return to vendor Use RA 555555 $50 parts and labor at Joe’s Repair o Enter approval number o Assign a printer o Press enter to print a copy of the repair order and a repair order SKU label o Attach the repair order and the SKU to the item(s). o Put the item(s) on the repair shelf in the warehouse. Item(s) on repair order (QRO) are not available for sale. They are ready to be RTVd for repairs or returned to the DC via the Reverse Logistics process once Filter #2 has inspected the item(s), or processed with the Destroy at Store program. WAREHOUSE MODULE | 55. Generating SOG Repair Orders: 63 56. Generating COG Repair Orders: Customer Owned Repairs are thoroughly inspected in front of customers by Sales Associates before they are placed on repair (filter one). To avoid any issues with damage perceived by the customer to have arisen from repairs, remark the condition of the item(s) on the repair order, include any nicks, dings, dents or scratches. Remark any accessories such as cases or gig bags that are being left with the repair. Warranty repairs are performed by warranty certified technicians only. o 3rd Party Repair in-house repair technicians are not approved to use warranty RO’s/warranty pay type To generate a COG Repair Order: o In Repair Order Entry at field 1 press “enter” o Enter employee number o Select 02 (COG REPAIR), 03 (COG IN HOUSE TECH), or 04 (COG 3RD PARTY TECH) o If there is a sales ticket number: o Enter sales ticket number and press enter o If a sales ticket number is entered and there is more than one item on the ticket, select the item in need of repair o If a sales ticket number is entered and there is only one item on the ticket, the item will be automatically selected o o o Select Warranty Repair (Y or N) Customer information automatically loads (verify all info) If there is not a sales ticket number, press “enter” o Enter complete customer information o Enter SKU, Ser, Item, Or UPC number o If an item ID does not exist in the system, type COG and press “enter” o Enter serial number or N/A, declared value, and a description of the item including vendor, model, type, color, etc. o Select a repair description type o String Change o Basic Set-up o Other (if other is selected additional remarks are required) Note – if this is a warranty repair, the repair description type defaults to “Other” o Enter condition of item(s) o Enter appropriate remarks and/or repair estimates o Enter approval number and assign a printer WAREHOUSE MODULE | 56. Generating COG Repair Orders: 64 o Press enter to print copies of the Repair Order and a Repair Order SKU label o Have the customer sign the store copy of the Repair Order. o Give the unsigned copy of the Repair Order to the customer, and attach the signed copy of the Repair Order and the COG SKU to the item(s) o Place item(s) on the repair shelf in the warehouse WAREHOUSE MODULE | 56. Generating COG Repair Orders: 65 57. Voiding Repair Orders and Changing Repair Descriptions: If a Repair Order is entered incorrectly it can be corrected by either voiding the entire Repair Order or by simply correcting the repair description. If the item placed on repair is incorrect the Repair Order must be voided. If the repair description needs to be corrected or changed the Repair Order will not need to be voided, the repair description is easily changed. To void a Repair Order: o In Repair Order Entry at field 1 enter RO number o Type VOID o Enter approval password A RO can be voided at any time as long as it has not been used on an RTV. To change Repair Descriptions, Unit Descriptions, or Remarks in an RO (SOG ROs with status E only): o In Repair Order Entry at field 1 o Enter RO number o Type 17, 18, or 19 to select line to be changed, then enter o Enter new repair description, unit condition, or remarks o Enter to update and reprint the RO Customer IDs or item information on COG Repair Orders cannot be changed or voided. WAREHOUSE MODULE | 57. Voiding Repair Orders and Changing Repair Descriptions: 66 58. Repair Order Reports: The Operations staff maintains all repair shelves and repair reports. Repair order reports are run daily to verify new repairs, process reverse logistics and to maintain the repair shelf. Access the Repair Order Report in the Sales Ticket Processing Menu of the green screen. To run a report listing all entered SOG repair orders, follow these steps: o Choose selection 2 (by repair type), and 6 (by status code) and press enter o Type the letter “A” to accept the selection or “TOP” to start over o Enter repair type “01” (SOG), press enter and repeat o Enter status code “E” (entered), press enter and repeat To run a report listing all COG repair orders, follow these steps: o Choose selection 2 (by repair type), and 6 (by status code) and press enter o Type the letter “A” to accept the selection or “TOP” to start over o Enter repair type “02”(COG), and press enter o Enter repair type “04”(COG GC TECH OFFSITE), and press enter o Enter status code “E” (entered), press enter and repeat To run a report listing all COG repairs that have been received from RTVs, follow these steps: o Choose selection 2 (by repair type), and 6 (by status code) and press enter o Type the letter “A” to accept the selection or “TOP” to start over o Enter repair type “02” (COG), press enter and repeat. (Repair types 03 and 04 will automatically update to type 02 if they are RTVd.) o Enter status code “R” (received), press enter and repeat Once the Repair Order Report is printed, match the report to all the gear on the repair shelves. Remove gear from the shelves that does not match the report, or build new ROs if necessary. The Repair Order Report shows a lot of important information such as: o Repair order number o The date that the repair was entered o A repair description o Employee that entered the repair o Item description All of this information helps the Operations Manager complete the repair filter 2 process. WAREHOUSE MODULE | 58. Repair Order Reports: 67 59. Repair Stations: Guitar Center utilizes many local repair stations throughout the country. Repair items that do not fall under manufacturer’s warranty cannot be sent to the DC for consolidation, therefore Repair Stations are set up to take care all non-warranty repair needs. Repair Stations must be approved and set up by Operations Store Support before inventory can be RTVd to them. To check if a repair station is already set up, dot-lookup the repair station’s name in Vendor Master Maintenance, vendors already set up will be displayed on the green screen. To setup a repair station: o Obtain a list of manufacturers that the repair station is authorized to repair o Obtain an address, phone number and contact person o Fill out a “Repair Station Setup Request” form on Backstage (Operations>Document Library>Warehouse>Reverse Logistics and Repairs> Repair Station Setup) o Email the completed form to [email protected] o Operations Store Support verifies all information to be accurate and authorizes the setup of all new repair stations o Repair Stations that are considered retailers and may potentially be competitors will not be set up Many local repair stations have the ability to pick up repairs directly from the store, otherwise repairs must be shipped via UPS ground. For repair pickups, an extra copy of the RTV paperwork is: o Printed o Signed by the driver picking up o Filed by Operations as proof inventory has been picked up for repair WAREHOUSE MODULE | 59. Repair Stations: 68 60. RA Numbers: RA number stands for “Return Authorization” number. All IR returns have RA numbers assigned by vendors. There is no need to call for an RA on IR items unless otherwise specified on IR reports. Items that are transferred to the DC after being reviewed by the Operations and/or Store Manager do not require RA numbers. Non-warranty repairs may be returned to vendors for repair at the store’s expense. Return Authorizations are obtained from vendors in order to return inventory to the vendor for repair. COG repairs are occasionally returned to vendors for repair, these will require an RA number. Contact the vendor and ask to speak to someone about obtaining an RA number. Explain the situation to the company representative and they will instruct you how to proceed or provide you with an RA number to return the item(s). Write the RA number on the shipping boxes. RA numbers should never be written directly on product or product packaging. WAREHOUSE MODULE | 60. RA Numbers: 69 61. Three Filters: Guitar Center receives a constant flow of repairs from customers as well as store stock inventory. The “3 Filter” system was developed to make sure all repairs sent back to vendors or repairs stations are actually in need of repair and/or covered by warranties. The “3 Filter” system saves the company and our customers unnecessary bench fees and repair charges. When a customer brings in a piece for repair, it is thoroughly checked by sales associates to ensure a repair is needed. When a store owned piece of inventory is found to be in need of repair it is also thoroughly “teched” by the sales staff. This is referred to as: Repair Filter One o The sales staff verifies there is actually a repair needed; user error is frequently found to be the problem. o Teching includes checking for the correct power supply, correct parameter settings for digital items, missing pieces, missing or dead batteries, etc. o Once the repair need is determined: A Repair Order Ticket is generated The ticket is attached to the piece Together they are placed on the repair shelf Repair Filter Two o The Operations Manager and Store Manager review the repair again o They verify that the repair description listed on the Repair Order ticket is valid; make any necessary changes and determine whether or not it’s eligible to be returned for warranty credit o If Repair Filter Two finds a repair to be non-warranty or not in like new condition, the gear is RTVd to local repair stations o If the repair is found to be a warranty repair and in like new condition it is transferred to the Distribution Center for consolidation Repair Filter Three o Once the gear is received at the Distribution Center it is verified for a third time by on site inventory specialists o Once the repairs are verified, they are shipped from our Distribution Center back to the vendor for credit o Repairs sent to the DC will not be returned to stores unless items do not meet the guidelines above These items are returned to the store from which they came WAREHOUSE MODULE | 61. Three Filters: 70 62. Destroy at Store Program Eligible SOG repair orders are entered in a maintenance screen to create a Destroy at Store (DAS) record. The record is then updated by Operations Managers as part of the monthly Destroy at Store procedure with District Managers. Once the record is updated, the items on the DAS record are automatically RTVd or adjusted out of inventory, and the repair orders are updated accordingly. DAS items are to remain in store until the District Manager visit. A eligible brand list for DAS can be found by navigating to: Backstage > Operations > Warehouse > Destroy at Store Creating a DAS Record DAS records can be created by level 5 and above employees. In POS, from the RTV Menu in Receipts, Repairs, Transfers and RTV’s o Select Destroy at Store Entry o Press Enter to generate a DAS Record o Enter approval password at the Employee field o Scan or enter repair orders for DAS items (dot search is available) Note: the system will recognize and reject RO’s with items that do not fall under the DAS vendor/brand/item criteria.) o You may also be prompted to enter a vendor number for an item o Continue to add additional repair orders (They do not have to be from the same brand/vendor.) o When all repair orders have been entered, enter manager approval to create the DAS record o Once a DAS record is created, it will have a status of “O”, and all repair orders on the record will have a status of “Q” o Additional RO’s can be added to existing status “O” DAS records o Existing RO’s can be deleted from status “O” DAS records o Status “O” DAS records can be voided (level 7 and above) Updating DAS Records Use the query “DAS.STAT” to review DAS records by status and displays the following: o DAS Number o Create Date o Close Date Status o RO Number o Item ID o Description o Quantity o Serial Number WAREHOUSE MODULE | 62. Destroy at Store Program 71 During the District Manager verification o Run the DAS.STAT by starting and ending status “O” o Compare and verify items on the DAS record are physically in the DAS area/shelf o Enter a status “O” DAS record number in the DAS Entry screen o Press “U” and enter manager approval (level 7 and above) to update the DAS Record o A DAS Update summary prints o Proceed to physically destroy and dispose of the items When a DAS record is updated, the following occurs: o The DAS Record status updates to “U” o Repair orders are updated to status “D” (destroyed) o An RTV is automatically generated for the item(s) or, o An adjustment is made to the inventory, and item(s) are removed o In Inventory by Location Maintenance, “QRO” and “QOH” are decremented o DAS records display In Inventory by Location Maintenance “T & D” as either a “DR” (Destroy RTV) or a “DA” (Destroy Adjustment) record depending on how they are reimbursed by the vendor: DR – Destroy at Store RTV. An automatic RTV record that is created when a Destroy at Store record is updated by Operations DA – Destroy at Store Adjustment. An automatic removal of inventory record created when a Destroy at Store record is updated by Operations o Both of these records can be selected and viewed for research purposes WAREHOUSE MODULE | 62. Destroy at Store Program 72 63. DC Repair Support: The Distribution Center maintains a list of vendors that are not “good to go” for reverse logistic repairs. The current list can be accessed online on Backstage under the Operations, Document Library tab. The “Non-Good To Go” list is based on vendor policies regarding repairs. Some vendor warranties do not allow for returns, these items would need to be repaired by local repair stations. While completing filter number 2 and 3, the DC can be contacted to verify items are eligible for return via the reverse logistics process. Email QC in the Outlook email group [email protected] to ask questions regarding items, warranties, or tech support. The QC department’s sole purpose is to verify items being returned to vendors are fully warranted and valid, they have extensive product knowledge that can assist in the process of filter one and two. WAREHOUSE MODULE | 63. DC Repair Support: 73 64. Reverse Logistics: Reverse Logistics is the process of transferring outdated, discontinued or warranty repair inventory to the Distribution Center (DC) via the Repair Order (RO) or Inventory Return (IR) process. Each store has a set reverse logistics day which is twice a month on the last receiving day of the week. (Navigate to: Backstage > Operations > Document Library > Warehouse > Reverse Logistics and Repairs > Reverse Logistics Store Grouping and Shipping Schedule) Only one transfer is allowed per box, but there can be multiple Repair Orders/Inventory Returns shipped within a box. All outgoing shipment packing procedures for reverse logistics transfers are followed. Include all manuals, accessories, and power supplies when shipping items to the DC. When shipping via your pool point’s carrier always remark the transfers and total of palletized pieces on the Bill of Lading. Repair Orders: o On the reverse logistics day, all warranty RO items are transferred to the DC, location (986) via inter-store transfers. o RO transfers to the DC, location (986) may be generated the day before a store’s Reverse Logistics ship day, not earlier. o RO reverse logistics boxes are palletized and shipped via the store’s pool point. Interline stores use the freight company listed on the Reverse Logistics Schedule. o RO shipments are labeled with the proper DC labels; using orange RO Return Labels and yellow Return Labels and then shipped to location (986). Inventory Returns: IR transfers to the DC, location (985) may be generated at any time during the IR window. IR shipments less than 100 lbs are shipped via UPS. IR shipments greater than 100 lbs are palletized and shipped via the store’s designated freight carrier (Currently FedEx National). Interline stores use the freight company listed on the Reverse Logistics Schedule. IR shipments are labeled with the proper DC labels, using green IR Return Labels. If the shipment is sent on a pallet to the DC attach a yellow Return Label to the pallet as well. Label all boxes with RA numbers as directed on IR reports. WAREHOUSE MODULE | 64. Reverse Logistics: 74 65. Inventory Return Request Report (IR Report): The IR report is run daily by the warehouse staff. It lists all gear designated by the Support Center or vendors, for return. Typically IRs are generated for slow moving, outdated, discontinued or defective gear. IR items that cannot be located are brought to the attention of the Operations Manager immediately. Department Managers are responsible for locating items to be sent back that are located outside of the warehouse, verifying they are complete and then bringing the items to the warehouse for shipping. IRs are completed and resolved within the time window indicated. IRs are sent out only if they meet all criteria for the return: o i.e. Factory sealed boxes only, complete with stand Vendor RA numbers are obtained from the Inventory Return Request report unless otherwise specified. IRs are transferred to the Claims Consolidation Department (location 985) at the Distribution Center unless otherwise noted on the IR report. For IR items that are sent directly to vendors, vendor RA numbers are included on the labels that are attached to the outside of return cartons. RA numbers are not written directly on the item cartons. Follow these steps to run an Inventory Return Request Report (unresolved): o In Inventory Return Request Report Enter through default date Select Status Code, and then “enter” Enter beginning status code “E” Enter ending status code “S” Enter through additional criteria Select printer, then “enter” The Operations Manager will mark the IR as complete in Dayforce Task Management as each IR is finished. WAREHOUSE MODULE | 65. Inventory Return Request Report (IR Report): 75 66. Resolving IRs: You can resolve IRs either in “Inter-Store Transfer-Out Entry”, while generating a transfer, or, in “Inventory Return Request Maint”. To resolve IRs in “Inventory Return Request Maint”: o Enter IR number o Enter the field number to be resolved o Enter approval password, and then enter the RA number that is listed on the IR report. If there is no RA number listed, contact Ops Store Support prior to shipping. Ship all IRs to the DC as a transfer to location 985 unless otherwise instructed on the IR report. To un-resolve an IR that you have resolved: o If the IR window is still open, go to “Inventory Return Request Maintenance” in the “RECEIPTS, REPAIRS, TRANSFERS & RTV'S” menu. o Enter the IR number o Select the line item you wish to un-resolve o Type "UN" and press "enter" o The IR will be reopened If the IR window has closed, contact Operations Store Support. WAREHOUSE MODULE | 66. Resolving IRs: 76 67. RTV Entry: RTV stands for “Return to Vendor”. All items in need of repair that are not vendor warranty repair must be RTVd before they can leave the store. This processed is used for sending items directly to vendors or repair stations. RTV numbers are generated for each item on Repair Order using the RTV entry screen. Once items are RTVd they can be shipped to or picked up by repair stations or vendors. RO repair descriptions cannot be changed in RTV entry. If RO repair descriptions need to be changed, they are changed in RO entry first, and then the RTV is re-entered. RO quantities cannot be changed in RTV entry. If RO quantities need to be changed, the RO is voided and re-entered with the correct quantity. To generate an RTV number using Repair Order number as a reference: o In “RTV and Repair Entry” press enter o Select 01 (Store Owned Goods) or 02 (Customer Owned Goods) o Enter vendor number in destination ID field Vendor number must match items on RO, or be a repair station o Enter RO number o Enter vendor RA number o Enter through, or enter new remarks o Enter carrier being used for shipment o If carrier used is UPS, enter tracking number o Enter Approval password o Enter “0” at the “Freight” field and press enter o Select printer, then enter to print the RTV WAREHOUSE MODULE | 67. RTV Entry: 77 68. RTV Aging Report: The RTV Aging Report is run to track all Repair Orders sent out to repair stations or vendors. RTV Aging Reports are monitored daily to ensure repairs are being handled in a timely manner by repair stations. Items are broken down on the report by repair station and listed by length of time they have been out on repair. Repair stations are called to obtain updates on repairs or an ETA of their return. Repair stations will commonly be waiting for parts to repair broken items, by keeping in touch with repair stations, items are more likely to be repaired and returned in a timely manner. To run an RTV Aging Report for SOG RTVs: o In the RTV Menu select “RTV Aging Report” and press “enter” o Enter past the date field o Select (1) for SOG RTVs and press “enter” o For SOG RTVs, select option (2) for Repair Station and press “enter” o Enter “A” to accept the report criteria selected and press “enter” o The report offers options to narrow the report by RTV number, Date, Vendor Number, etc., this field may be entered past to show all items on RTV o Enter “A” to accept the report criteria selected and press “enter” o Enter past the additional criteria field o Select a printer and press “enter” to print the report To run an RTV Aging Report for COG: o In the RTV Menu select “RTV Aging Report” and press “enter” o Enter past the date field o Select (2) for COG RTVs and press “enter” o Enter “A” to accept the report criteria selected and press “enter” o The report offers options to narrow the report by RTV number, Date, Vendor Number, etc., this field may be entered past to show all items on RTV o Enter “A” to accept the report criteria selected and press “enter“ o Enter past the additional criteria field o Select a printer and press enter to print the report WAREHOUSE MODULE | 68. RTV Aging Report: 78 69. Receiving RTVs from Repair Stations: Once an RTV has been repaired and returned to a store it is received. To receive an RTV follow the same steps used to receive an MIT, SIT or PO. o In the “RECEIPTS, REPAIRS, TRANSFERS & RTV’S” menu select “Receipt Entry” o Select option “(03) RTV and Repair Receipts” o Enter the RTV number in the “Ref no” field and the items will automatically load o Continue to receive the RTV by filling in all necessary fields o Do not enter check numbers or freight costs in fields (9)and (10), leave them blank o Enter any pertinent remarks in the remarks field o Enter Approval Number to complete the receipt o Write the receiving number generated by the system on the bottom right corner of the RTV paperwork and include it with the daily receivers o SKUs print for serialized SOGs and COGs when they are received o Operations must update Buy Account checks immediately if there are repair fees incurred SOG RTVs that have been repaired and received are returned to stock. COG RTVs that have been repaired and received are labeled with the SKUs that print after receipt. o The SKUs state that the piece has been received back from repair SKUd COGs are placed on the COG status “R” shelf or area designated in the warehouse. When COG RTVs are returned, the employee that generated the original Repair Order receives an email automatically generated by the computer system. o The employee calls the customer to pick up their item(s) Once items have been received they are automatically removed from the RTV Aging Report. SOG RTVs returned from vendors or manufacturers must be entered on Unreceivables in order to be received. WAREHOUSE MODULE | 69. Receiving RTVs from Repair Stations: 79 70. Building a Repair Book: The Repair Book is used to manage all repairs processed within a Guitar Center Store. The Repair Book is updated weekly as new repairs are entered or received. Have your Ops Manager order a three-ring binder and 5 tabbed dividers. Label each tab with the following: “COG Stat E” “COG Stat R” “SOG Stat E” “COG RTV Aging” “SOG RTV Aging” “COG Repair Letters” All reports are run to the OPER0 printer so that they easily fit into a standard sized 3 ring binder. COG Repair Order Status E Report – This report is run daily. Highlight all entries that are older than three days (72 hours). These are the repairs that should be RTVd to the vendor or a local repair station first. COG Repair Order Status R Report – This report is run daily. Once a week, physically compare entries on the report with the COG shelf. If there is a discrepancy, notify Operations. SOG Repair Order Status E Report – This report is run daily. Items on this report are either transferred to the DC on the next Reverse Logistics ship day, or are RTVd to vendors or local repair stations for repair COG RTV Aging Report – This report is run weekly. Print each RTV entry from the report separately and place them in this section beginning with the oldest date. On each RTV printout, draw a T-bar and label the left column “Repair/Vendor Remarks”, and label the right column “Customer Remarks”. Use the columns to document conversations between you and the vendor/repair station, and any follow-up with the customer. Include time frames for repairs, warranty information, possible repair charges involved, etc. SOG RTV Aging Report (Repair Stations only) – This report is run weekly (select “Repair Stations” from the selection criteria). Print each RTV entry from the report separately and place them in this section beginning with the oldest date. On each RTV entry, draw a T-bar and label the left column “Calls from Repair Station”, and label the right column “Calls to Repair Station”. WAREHOUSE MODULE | 70. Building a Repair Book: 80 Document all conversations between you and the repair station. Include time frames for repairs, warranty information, possible repair charges involved, etc. WAREHOUSE MODULE | 70. Building a Repair Book: 81 71. Repair Letters: Occasionally COG repairs are abandoned by customers; perhaps the price of the repair is more than the piece is worth to them. For whatever reason we do not have the room or the means of holding gear indefinitely until it is picked up. A system has been put in place to ensure all COG repairs are picked up or dealt with in a timely manner. The customer is called as soon as their repair arrives. After 60 days if the repair is not picked up, the document Repair Letter found on Backstage is used to notify the customer via certified mail. Certified Mail requires a signature to be delivered; this makes sure that the letter informs the customer of Guitar Center’s policy and lists a final deadline to pick-up the repair. List all the attempts at communication with the customer on the bottom of the repair letter. 30 days after the letter is sent, (90 days after the repair is complete) Guitar Center assumes ownership of the piece and it is bought into the system for the price of the repair. Following the above guidelines, COG status ‘R” repairs have a total of 90 days allotted for pickup. The repaired item is then put on sale in the store to recover the cost of the repair. Items in un-saleable condition are rolled on 60 tickets at zero dollars, stripped of any usable parts and thrown away. WAREHOUSE MODULE | 71. Repair Letters: 82 72. Layaway, Incoming SIT, SPO Shelves: Layaways, Incoming SITs and Special Orders are held for a period of 30 days unless otherwise mandated by Sales Management. There are separate sections or shelves within each warehouse that accommodate Layaways, SITs and SPOs. Items normally secured in cages are placed in the cage with proper Layaway, SIT, SPO tags affixed. The Sales Management Staff is responsible for maintaining and keeping these sections up to date and purged. It is the Warehouse staff’s responsibility to maintain the neatness and organization of these sections. Proper tags are always affixed to gear in each section; tags should be reprinted if needed. Layaway, SIT, or SPO guitars are hung on peg-walls, if peg-wall is unavailable; guitars are placed in cases before placing on the shelf. These sections are not used to hold merchandise for employee purchase or customers. Layaway, SIT or SPO Items that are of small size and high value are kept in lockup rooms and cages. These sections are purged at least once a month by Sales Management to verify that customers are picking up their orders in a timely fashion. Customers are notified of overdue pickups by Sales Associates and Managers. Layaway, SIT, and SPO tickets are canceled by Sales Management and inventory is returned to regular stock by warehouse personnel, if they are abandoned by customers after 30 days. Warehouse personnel assist Sales Management in purging the shelves to ensure all purged gear is returned to the proper section of the warehouse or sales floor. Layaway discrepancies of any kind are brought to the attention of Operations for investigating. WAREHOUSE MODULE | 72. Layaway, Incoming SIT, SPO Shelves: 83 73. Receiving Multi-Boxed Items from DC Shipments: While receiving incoming DC transfers, stage all multi-boxed items in an area out of the way. Multi-boxed items may be split between truck deliveries. When receiving multi-box items from the DC such as drum kits or studio desks, the main box is labeled with a “Parent” carton label while all other boxes are labeled with “Child” carton labels. Parent cartons must always be scanned first. The RF prompts, “This is a child carton!” if a child carton is scanned before the parent. Child cartons do not need to be scanned in their exact sequential order, but the child cartons must be part of the multi-carton item that is being received. Make sure that all cartons for the multi-boxed items have arrived before attempting to receive them. It is best to receive all other incoming items before receiving the kits to ensure extra care is taken while receiving kits. Another way of describing multi-boxed Items is “Kitting” o This refers to the Kitting Program which is designed to help track of multi-boxed items which is described above To receive a multi-boxed item: o Scan the Parent Carton number o The RF Gun will prompt “Are “X” Child Cartons Available? (Y/N)” o Ensure the proper amount of Child Cartons available and press “Y” then “enter” o Scan the Item ID of the Parent Carton o The RF Gun prompts to scan the first Child Carton o Once all Child Carton are scanned, close the cartons by pressing “C” then “enter” o Then “U” to update If child cartons are not available, by pressing “N” at the availability prompt, the parent carton will clear, and the user may scan a new carton after addressing the missing child cartons. In the event that a parent or child carton is missing from a multi-box item, or if part/model numbers on the children do not match the parents, the cartons in question must be entered in Unreceivables using the following criteria: o Do not zero receive the carton unless instructed to do so by Inventory Control o Enter vendor “995” o Enter buyer group “IC” o Dot look-up or enter the item ID of the problem carton o Enter UR code “08” multi-box mismatch Provide a detailed description of the problem with the carton(s), such as: Missing parent carton, Missing child carton, Have box A of XXX, and Box B of YYY, etc. WAREHOUSE MODULE | 73. Receiving Multi-Boxed Items from DC Shipments: 84 74. GuitarCenter.com Orders: www.GCRetail.com is the specific URL used by stores to place and track customer orders placed on Guitarcenter.com. Orders placed from the www.GCRetail.com URL and placed by customers on Guitarcenter.com can be shipped to a Guitar Center location instead of the customer’s address. Upon arrival at the store, status of customer orders shipped to Guitar Center locations are updated using the Dashboard Page on GCRetail.COM. Guitarcenter.com customer orders shipped to Guitar Center locations have the customer name on the shipping label which distinguishes them from other orders. Example: John Smith Guitar Center Store #110 7425 Sunset Blvd Hollywood, CA 90046 Guitarcenter.com orders that are shipped “store to store” will also have an identifying “Pro Coverage Web Order” label attached to them. Customer Owned GuitarCenter.com orders are tracked by stores using the GCRetail.com Ship to Store process. To receive orders: o Log in to the GCRetail.com Dashboard Page. o Select “Receive Orders” from the Order Fulfillment section o Select the order number of the order to be received from the Receiving Queue o In the “Add Status Update” section of the Order Status Update screen, select the dropdown menu under “Select New Status” and select “Received”. Enter your credentials to update the order. Cartons and the orders are verified (factory sealed cartons are not opened without the customer present). For correct orders the status of the order is updated as status “Received at Store” and the item is placed in the COG area of the warehouse awaiting customer pick-up. Damaged orders are updated as status “Problems with Carton” and are returned by following the GuitarCenter.com return process. Guitarcenter.com Order labels are filled out and placed on received items once they have been updated as “Received”. Customer Orders not picked up within fourteen days are returned following the Guitarcenter.com return process. Customer owned orders that are picked up, are updated by Level 2 employees or above. WAREHOUSE MODULE | 74. GuitarCenter.com Orders: 85 Upon pick-up of customer owned orders, the Customer Receipt is printed and given to the customer. Customer orders shipped to Guitar Center locations are logged and signed for on the Will Call Log upon pick-up. Upon exiting the building, all orders are inspected and verified by the associate at the front door for accuracy in the customer’s presence. For a more in depth training on all Guitarcenter.com processes including: o Confirming Orders o Shipping Orders o Receiving Orders and o Shipping Returns Complete the suite of Guitarcenter.com interactive training modules which can be found in “My enrollments” on SABA. WAREHOUSE MODULE | 74. GuitarCenter.com Orders: 86 75. GuitarCenter.com Returns: Guitarcenter.com is the E-commerce website for Guitar Center. Customers can order items from the Guitarcenter.com website and have them shipped to a store location or their home address. Items purchased from Guitarcenter.com can be returned at store locations. Guitarcenter.com returns are processed via the GCRetail website. Inventory Return Slips are generated once the return has been processed online. They are printed out and attached to the return and state what action needs to be taken with each item. Guitarcenter.com returns are placed on the return shelf in the warehouse and verified by Operations. The Returns Status Report and Failed Returns Report are run daily by Operations and used to verify completed Guitarcenter.com returns. All returned items with Returned to Store disposition on the Inventory Return Slip are to be returned to the KCDC. Items showing this status are re-packaged and prepared for shipment back to the KCDC. All labels and stickers are removed from returned items prior to shipment. GuitarCenter.com returns are packed using an outer shipping box. They are never shipped in the manufacturer’s display box only. You do not have to use new cartons and packing materials for shipping Guitarcenter.com returns. Guitarcenter.com items are shipped using the UPS account number 7R03F5 and by selecting “Receiver” in the “Bill Transportation To” field of the UPS WorldShip system. Guitarcenter.com Returns are sent to the following address: Guitarcenter.com Returns Center 4005 N. Norfleet Rd. Kansas City MO 64161 The return’s order number is entered in the “Reference Number 1” field in the UPS WorldShip computer. If multiple returns are packed into a single carton, only reference a single order number. “Guitarcenter.COM RETURN” is entered in the “Reference Number 2” field in the UPS WorldShip computer. Once the item is shipped via UPS Worldship it is updated in the Guitarcenter.com admin site as shipped. WAREHOUSE MODULE | 75. GuitarCenter.com Returns: 87 WAREHOUSE MODULE | 75. GuitarCenter.com Returns: 88 76. Inventory Adjustment IA is used to add items into inventory not on a transfer from the DC. Reasons why an Inventory Adjustment would be necessary: o The wrong piece was physically shipped. o An overage in the expected quantity was physically shipped with the transfer. o A previously zero received carton that a claim has been filed with the carrier that is delivered/located. o Instructed to do so by Inventory Control to correct a discrepancy. o Instructed to do so by the Store Support as a response to a UR. IA’s can be done using an RF gun or using the POS system. o Must be level 7 or above to approve IA. To process an IA using POS: o Access the “Receipts, Repairs, Transfers & RTV’s” menu in “Inventory Management” o Select “DC Receipt Entry” menu o Select tag printer o Select printer o Select “Inv. Adjust.” o Enter approval password o Enter carton number o Enter either the UR or receiver number o For zero received cartons, T&D the ID and locate zero receiver number o Enter or scan item ID o Enter quantity o Select “C” for close o Select “D” for DC Issue o Select “U” for update To process an IA using an RF gun: o Select “INV MGMT” o Select “RF Receiving” o Select “Receipt Entry” o Select tag printer o Select printer o Select “Inv. Adjust.” o Enter approval password o Enter carton number o Enter either UR or receiver number o For zero received cartons, T&D the ID and locate zero receiver number o Enter or scan item ID o Enter quantity o o Select “C” for close Select “D” for DC Issue WAREHOUSE MODULE | 76. Inventory Adjustment 89 o Select “U” for update WAREHOUSE MODULE | 76. Inventory Adjustment 90 Warehouse Lab Test: All topics are to be performed or explained in person, step by step through the entire procedure: 01. Receiving: Log into RF gun How is CAPS LOCK set? How is # typed? Receive a DC Carton What special steps are taken on multi-carton items (parent/child cartons)? Where is a Guitar Center SKU affixed to a carton? Receive an item on a PO Print PO Worksheet and fill it out correctly and file it. Receive a transfer Where does the item go after received? Explain what items go on what shelf: ROs, SITs, URs, and DCT. Receive an RTV Explain the difference in processes for vendor and repair stations. Explain the Inventory Adjustment Process Receive a Guitarcenter.com order Explain how to update the status, approve, label and stage the order. 02. Reports: Run CDR Report and explain discrepancies and how to resolve them. Run RO Reports and update RO Book Run UR Report Run IR Report Run Open Incoming Transfer Report Run Open Outgoing Transfer Report Run SIT Reservation Report Run Receipt Report DC Carton Report Child Carton Lookup ISR Report What is done for the different kinds of exceptions? WAREHOUSE MODULE | Warehouse Lab Test: 91 Guitarcenter.com status updates Explain what each different status is used for and show process to update them 03. Shipping: Pack an outgoing shipment Demonstrate the “Two inch rule” Pack a Web Order shipment Demonstrate the differences from packing a non-Guitarcenter.com shipment Demonstrate knowledge of UPS World-ship software Demonstrate knowledge of all fields and what should be filled out in what areas Ship a package Search for a previous shipment, find a tracking number and track a package End of day process Ship carton to DC (IR/RO) Fill out proper DC sticker such as green (IR) or orange (RO), or yellow (returns label) Palletize RL shipment Show how to fill out the freight bill Ship transfer (SIT/MIT) Generate and ship an RTV Explain RTV types and the differences GuitarCenter.com returns Pack a return Display the steps taken on the UPS CPU when shipping out a .com return. Update the return as shipped on the Guitarcenter.com admin website. 04. Inventory: Same day serial fix Reprint a unique SKU Resolve an Unreceivable What is the reference number used to resolve? Place an item on Unreceivable What is physically done with the item that is put on UR? Explain the group codes: (995, DC, IC, etc.) Resolve an IR Generate a RO (SOG, COG 02, 03, 04) WAREHOUSE MODULE | Warehouse Lab Test: 92 Return Verification process Run the reports Compare against door logs What do you look for in this process? How do you handle discrepancies? WAREHOUSE MODULE | Warehouse Lab Test: 93


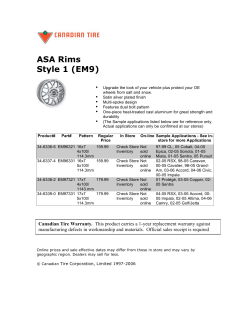


© Copyright 2026