
NAVEX Global [Product] User`s Guide
PolicyTech™ 8.0 User's Guide
PolicyTech™ 8.0 User's Guide
Copyright © 2013 NAVEX Global, Inc. NAVEX Global™ is a trademark/service mark of
NAVEX Global, Inc. The NAVEX Global™ logo is a trademark/service mark of NAVEX Global,
Inc. Unauthorized use of NAVEX Global, Inc.'s trademarks/service marks is strictly prohibited
without prior written permission from NAVEX Global, Inc.
3/16/2015
Table of Contents - 3
Table of Contents
Table of Contents
Introduction to User Topics
The Publishing Process
Roles and Permissions
Document Roles
System Permissions
Logging in to PolicyTech
Things to Do in PolicyTech
Resetting a Forgotten Password
Changing Personal Preferences
Changing Your Password
Changing Default Display Options
Changing the Default Search Options
Changing the Interface Language
Working with My Tasks
Task List with Help Topic Links
Using the Messages Inbox
Viewing and Acting On Messages
Managing Messages
Finding and Opening a Document
Using the Sort Bar
Searching for a Document
Search Text Options
Finding a Document in a Specific Status
Using the All Documents Feature
Viewing Archived Documents
Finding a Document You Are Assigned to Own, Proxy Author, Write,
Review, Approve, or Read
Using the Quick Menu in a Document List
Document Access Table
Customizing the Document List Display
Working with Advanced Sort and Search Features
Advanced Search
Custom "Arrange by" Sort
Editing or Deleting a Custom Sort
Display/Export Options
3
13
13
14
14
16
19
20
21
24
25
26
27
29
30
31
32
32
33
35
35
36
40
43
44
49
49
54
57
59
60
60
63
66
67
PolicyTech 8.0 User's Guide
4 - Table of Contents
Showing and Hiding Document List Columns
Changing Document List Display Options
Adding Simple Filters to a Document List
Adding an Advanced Filter to a Document List
Exporting a Document List
Working with the Document Overview
About the Properties Page of the Document Overview
About the Document History Page of the Document Overview
Snapshot Triggers
About the Writer, Reviewer, and Approver Status Pages of the
Document Overview
Icon Descriptions
About the Reader Status Page of the Document Overview
Icon Descriptions
About the Links Page of the Document Overview
About the Security Page of the Document Overview
Printing Documents
Printing a List of Documents
Printing Documents (Content)
Using Custom Print
Print Documents Options
Paging Options
Properties
Attachments
Reading a Required Document
Installing WordModulePlus
Install WordModulePlus as an Internet Explorer Add-on
Install WordModulePlus as an Internet Explorer Add-on
Install WordModulePlus as a Firefox Add-on
Install WordModulePlus as a Chrome Extension
Reading a Document That Opens Outside of PolicyTech
Taking a Questionnaire
Reviewing Supplementary Materials
Reviewing Attachments and Links
Reviewing Notes
Reviewing Discussions
Reviewing the Changes Summary
Viewing a Document's URL
Viewing URLs for the Current Version of a Document
PolicyTech 8.0 User's Guide
69
69
70
72
74
76
77
78
80
81
81
81
82
82
83
84
84
87
91
96
96
98
100
101
104
104
104
106
107
108
115
117
118
120
122
124
126
126
Table of Contents - 5
Viewing a URL for a Previous Version
Creating and Working with Draft Documents
High-Level Steps for Creating a Document (Windows)
High-Level Steps for Creating a Document (Mac)
Assigning Document Properties
Step 1: Settings
Optional Document Settings
Document Review Interval
Warning Period
Publication Date
Assigned Proxy Author
Document Keywords
Original Creation Date
Email Notifications
Editing Document
Email Notification Levels
Step 2: Departments and Categories
Adding a Subcategory
Step 3: Writers
Other Ways to Select Writers
Writer Groups
Departments
Departments
Job Titles
Step 4: Reviewers
Other Ways to Select Reviewers
Reviewer Groups
Departments
Job Titles
Step 5: Approvers
Other Ways to Select Approvers
Approver Groups
Departments
Job Titles
Step 6: Readers
Other Ways to Select Readers
Department Groups
Job Titles
Job Title Groups
127
129
129
134
139
139
143
143
144
145
145
146
146
146
146
147
152
156
158
161
161
162
162
162
163
166
166
166
167
167
171
171
172
172
173
175
175
176
176
PolicyTech 8.0 User's Guide
6 - Table of Contents
Reader Search
Reader Groups
Readers
Step 7: Security
Security Levels
Encryption Modes
Other Allowed Users
Working with Levels
Setting Due Dates for Writing, Reviewing, Approving, and Reading
Tasks
Setting a Due Date for a Writing, Reviewing, or Approving Task
Setting a Due Date for a Reading Task
Assignees and Site Access
Adding Notes for Writers, Reviewers, and Approvers
Writing a Document (Windows)
Adding Content to a Word or Excel Document
What You Should Know about Using Word or Excel inside of
PolicyTech
Adding Document Content
Working with Template Content
Inserted Document Property Fields
Inserting Document Properties
Inserting Into a Word Document
Changing the Field Shading Option
Deleting a Property Field in a Word Document
Inserting Into an Excel Document
Document Property Details
Document Info Fields
Title
Reference #
Keywords
Version Number
Supersedes
Affected Department(s)
Version Change Summary
Company Info Fields
Business Title
Logo
Site Name
Category Fields
PolicyTech 8.0 User's Guide
176
177
177
178
180
180
181
181
184
184
186
188
188
191
193
193
194
198
198
199
199
200
202
203
204
205
205
207
208
209
211
213
215
218
218
220
221
223
Table of Contents - 7
Category Titles
[Assigned Category]
Category Name
Values (by comma) and Values (by hard return)
Descriptions and Value: Description
Affected Department(s)
Date Fields
Date Created
Date Approved
Last Periodic Review Date
Next Periodic Review Date
Publication Date
Original Creation Date
Date Last Modified
User Info Fields
Document Creator and Document Owner
Writers, Reviewers, Approvers, and Readers
Security
Inserting Links to Documents and Websites
Inserting a Link to an Existing Document
From within a Word Document
From within an Excel Document
Inserting a Link to a New (Not Yet Created) Document
From within a Word Document
From within an Excel Document
Inserting a Link to a Web Address
From within a Word Document
From within an Excel Document
Removing or Deleting a Link
Working with Word or Excel Undocked
Undocking Word or Excel
Adding Content to a Rich Text Document
Inserting a Video into a Rich Text Document
Security Considerations for Inserted Videos
Adding Content to a Document with an Upload File Template
Importing Content
Writing a Document (Mac)
Enabling WordModulePlus (Mac)
Attaching Files and Adding Reference Links
223
225
226
227
230
233
236
236
237
239
241
243
244
246
248
249
250
254
258
258
258
260
262
262
264
266
266
268
269
270
271
273
277
281
281
284
287
289
292
PolicyTech 8.0 User's Guide
8 - Table of Contents
Adding a Link to an Existing PolicyTech Document
Adding a Link to a New (Not Yet Created) PolicyTech Document
From the Links & Attachments Menu
From the Attachments Window
Adding a Link to a Web Address
Adding a Web Address Link in the Attachments Window
Managing Attachments and Links
Inserting a Link
Removing an Attachment or Link
Converting an Attachment
Creating a Questionnaire
Planning a Questionnaire
1. Define Learning Objectives
2. Write Questions
3. Write Answers
4. Decide on a Passing Percentage
5. Decide whether to Include Optional Information
Adding Questions and Answers
Creating a Subquestion
Adding a Follow-on Task
Setting an Exception Trigger
Questionnaire Settings
Basic Settings
Questionnaire Introduction
Randomization
Questionnaire Results
Changing a Questionnaire
Changing Questionnaire Content
Changing Questionnaire Settings
Disabling and Reactivating a Questionnaire
Designating a Document to Be Replaced
Saving and Closing a Draft Document
Saving a Copy of a Document to Disk
Editing a Draft Document
Deleting a Draft Document
Submitting a Document to Writers, Reviewers, or Approvers
Submitting a Document to Writers (for Collaboration)
Submitting a Document for Review
Requesting a Document Review (Proxy Author)
PolicyTech 8.0 User's Guide
293
295
295
297
299
299
301
302
304
305
307
308
308
308
309
309
309
309
315
316
317
318
318
318
319
319
319
319
321
322
323
326
327
327
328
328
329
330
333
Table of Contents - 9
Submitting a Document for Approval
Working with Documents in Review and Approval
Checking Writer, Reviewer, and Approver Status
Status Descriptions
Making Changes to Document Properties
Sending a Document Back to Draft
Editing Document Content
Forcing a Document from Review to Approval
Working with a Revised or Declined Document
Working with Tracked Changes in a Word Document
Track Changes and Comment Options
Word 2010
Word 2007
Word 2003
Working with Marked-up Text and Comments
Find Markup in the Text
Word 2010 and 2007
Word 2003
Find Comments in the Text
Word 2010 and 2007
Word 2003
View Markup in the Reviewing Pane
Word 2010 and 2007
Word 2003
Accept or Reject a Change
Word 2010 and 2007
Word 2003
Accept or Reject All Changes at Once
Word 2010 and 2007
Word 2003
View the Original Document before Changes
Word 2010 and 2007
Word 2003
Comparing Draft Versions in an Excel Document
Reapplying a Template to a Document
Doing a Periodic Review and Creating a New Version
Collaborating on (Helping to Write) a Document (for assigned
writers)
Reviewing and Approving a Document
335
338
338
339
340
341
342
343
346
347
348
348
348
349
349
349
349
349
349
349
350
350
350
350
350
351
351
351
351
351
352
352
352
352
354
356
359
362
PolicyTech 8.0 User's Guide
10 - Table of Contents
Reviewing a Document
Approving a Document
Reviewing a Questionnaire
Accepting a Document
Revising a Word Document
Revising an Excel Document
Revising an Uploaded Document
Declining a Document
Working with Notification Emails
Notification Lists
For All Roles
For Readers
For Writers
For Reviewers
For Approvers
For Document Owners
For Proxy Authors
For Department Managers
For Document Control Administrators
Updating Document Links
Updating Links from My Tasks
Updating Links from a Notification Email
Working with Document Discussions
Starting a Document Discussion
Viewing and Replying to a Discussion
Viewing a Discussion in an Email Notification
Viewing a Discussion in a Document
Who Sees Discussions?
All Discussions
Public Discussions for Documents in the Draft, Collaboration,
Review, and Approval Statuses
Public Discussions for Documents in the Pending and Published
Statuses
Private Discussions
Discussion Notifications
Managing Department Reader Assignments
Viewing the Status of Reader Tasks
Generating Reports
Document Research
Using Optional Advanced Features
PolicyTech 8.0 User's Guide
362
365
367
369
370
370
371
373
374
375
375
376
376
377
377
378
381
382
382
383
383
385
388
388
392
392
392
394
394
395
396
397
397
398
400
402
403
406
Table of Contents - 11
Working with the Public Viewer
Using Case Management Integration as a Case Manager
Exporting Documents
Changing Reader Task Status as Proxy
Using Third-Party Contact Features
Assigning Tasks to a Third-Party Contact
Completing a Task as a Third-Party Contact
Logging In for the First Time
Responding to a Task Assignment after Initial Login
Logging in to PolicyTech as a Third-Party Contact
406
406
406
408
412
412
413
414
417
418
PolicyTech 8.0 User's Guide
Introduction to User Topics - 13
Introduction to User Topics
The User's Guide helps you learn about and efficiently use
PolicyTech™.
To get started, please read the following introductory topics:
The Publishing Process
Roles and Permissions
Logging In to PolicyTech
Changing Personal Preferences
Resetting a Forgotten Password
Working with My Tasks
The Publishing Process
All documents created in PolicyTech™ must go through the publishing
process before they can be made available for general access to
readers (all users). There are seven possible stages or statuses in the
publishing process: draft, collaboration, review, approval, pending,
approved, and archived.
The process starts when a document owner writes the original draft of
the document. If desired, the document owner can collaborate with
other writers to complete the first draft. The document owner then
submits the document to review, where each reviewer can accept,
revise, or decline the document. If all reviewers accept it, the document
is automatically moved to the approval status. If revised or declined by
one or more reviewers, the document is placed back in draft status, and
a task email is sent to the document owner to review the revised or
declined document, make the necessary changes, and then resubmit
the document for review. (The document goes back to draft status only
PolicyTech 8.0 User's Guide
14 - Introduction to User Topics
after all reviewers have accepted, revised, or declined it.) This part of
the process can be repeated as many times as necessary to create an
acceptable document.
Once all reviewers approve a subsequent draft, the document is moved
automatically to approval status. Approvers have the same options as
reviewers for dealing with the document (accept, revise, and decline). If
all approvers accept it, the document is automatically published. If one
or more approvers revise or decline the document, it again goes back to
draft status where the document owner can again make needed
changes and resubmit the document for review or directly to approval.
The only time a document is not immediately published upon approval is
if the document owner designates a publication date sometime in the
future. In that case, the document is moved to pending status until that
date arrives, and then the document is published.
As soon as a document is published, task notifications to read the
document are sent to all assigned readers.
If an approved document is a new version of an existing document, the
previous version is automatically archived when the new version is
published.
Roles and Permissions
The things you can do in PolicyTech™ are determined by the document
roles and system permissions assigned to you by the document control
administrator (DCA), as shown in the following tables.
Document Roles
Document
Role
Description
Document
Owner
A document owner has the following responsibilities for
each owned document:
PolicyTech 8.0 User's Guide
n
Create the document
n
Assign writers, proxy authors, reviewers, approvers,
and readers
n
Assign departments and categories
n
Write the document content or assign another user
to write it
n
Manage the document through the review and
approval process, making revisions as necessary
Introduction to User Topics - 15
n
As the document is periodically reviewed, create
new versions and make necessary updates
When necessary, a document owner can also do the
following with an owned document:
Approves
Own
Document
n
Submit the draft document directly to approval if no
reviewers are assigned
n
Set the document as approved if assigned the
"approves own documents" role
n
Modify the assigned readers of published
documents
n
Archive the document
This document role applies only to users assigned the
document owner role. With the "approves own
document" role assigned, a document owner can
approve his or her own documents without having to go
through the review and approval process.
Note: If a document's template contains required
reviewers or approvers, the document owner is not
allowed to approve the document, even with the
"approves own document" role assigned.
Writer
A document owner can assign any user with the writer
role to write or collaborate in writing a document. A
writer cannot, however, access or change any of the
document's properties (assignments, roles, permissions,
and so on). A writer can edit an assigned document for
as long as it is in the draft status.
Reviewer
A document owner can assign any user with the
reviewer role to review documents. A reviewer can
accept an assigned document as is, revise it, or decline
it. Those assigned the reviewer role are typically subject
matter experts and managers.
Approver
A document owner can assign any user with the
approver role to approve documents. An approver can
accept an assigned document as is, revise it, or decline
it. Because an approver is legally responsible for a
document's contents, those assigned the Approver role
are typically managers or company executives.
Pending
A user assigned the pending documents role can see
Documents documents that are approved but not yet published
PolicyTech 8.0 User's Guide
16 - Introduction to User Topics
because of a pending publication date. Access is limited
to documents the user would be able to see once the
document is published.
Reader
A user assigned the reader role can see all published
documents whose security is set to All Users.
Archived
A user assigned the archived documents role can see
Documents archived documents. Access is limited to documents the
user would be able to see if the document were in
published status.
Template
A user assigned the template role can view, create, and
edit document templates, but cannot delete them.
Proxy
Author
The following list describes what user assigned the
proxy author role can and cannot do:
n
Can create documents for assigned document
owners only
n
Can access and edit all draft documents for
assigned document owners regardless of whether
the documents were created by the proxy author or
the document owner
n
Cannot submit a document for review or approval
but can request that the document owner do so
n
Can view assigned document owners' documents
through the review and approval process
System Permissions
System
Permission
Description
Category
Owner
A user assigned this permission can immediately
access and edit all unassigned categories and their
subcategories.
Document
Control
Administrator
for All Sites
(Global
DCA)
When assigned this permission, a user can do the
following:
Preferences: Access and edit all preferences
(Company Setup, User Setup, Document Setup,
and System / IT Settings), including designating
other users as global or site document control
administrators.
Reports: Generate and view management and
administrative reports and access other reporting
PolicyTech 8.0 User's Guide
Introduction to User Topics - 17
options.
Documents:
1. Do everything a document owner can do, except
be assigned as a document's owner.
2. Set a document as approved, skipping all
assigned writers, reviewers, and approvers.
3. Edit a document in its current state without
sending it back to draft or creating a new version.
(The document owner receives notification that
the document has been edited.)
4. Skip the next review date anytime (designate as
"No Revision Necessary"), even before the review
warning period.
Document
Control
Administrator
for a Single
Site (SubDCA)
Except for the exceptions listed below, a document
control administrator for a single site (sub-DCA) can
do everything on that site that a document control
administrator for all sites (global DCA) can do.
n
A sub-DCA cannot access the following
preferences: General Properties in Company
Setup; Default Properties in Document Setup;
all System / IT Settings preferences.
n
Because a global DCA can assign a category or
template to multiple sites, changes a sub-DCA
makes to an existing category or template affects it
at all assigned sites. However, a sub-DCA cannot
assign new categories or templates to other
existing sites. But a sub-DCA can choose to have
the new category automatically assigned to new
sites as they are created.
n
When assigning system permissions to users, a
sub-DCA can only assign them for that sub-DCA's
assigned site.
Company /
User
If assigned this permission for all sites, a user can
access and edit all the Company Setup and User
Setup preferences that a global DCA can access and
edit. A user assigned this permission for a single site is
limited to the Company Setup and User Setup
preferences a sub-DCA can access and edit.
System / IT
A user assigned this permission can access and edit all
of the System / IT Settings for all sites.
PolicyTech 8.0 User's Guide
18 - Introduction to User Topics
Report
Manager
When assigned this permission, a user can access
Management Reports and Other Reporting
Options in Reports.
Access Site
By default, a user only has access to the site assigned
to that user. A user assigned the access site
permission can access other sites.
View Docs
This permissions applies only if the DCA has restricted
All
users to seeing only the documents assigned to their
Departments departments. (By default a user assigned the reader
role can view all unrestricted published documents
assigned to any department.) When assigned this
permission, a user can see unrestricted documents in
all departments, as if the department restriction were
not in place.
Department
Manager
PolicyTech 8.0 User's Guide
A user assigned the department manager role can do
the following:
n
Add or change a user, with control over a limited
set of settings
n
Run management reports on department users
n
Receive escalation notifications for department
users' overdue tasks
n
Change reader assignments for documents
assigned to the department
Logging in to PolicyTech - 19
Logging in to PolicyTech
PolicyTech™ runs in your Internet browser, so, to log into PolicyTech,
you must have its web address.
When PolicyTech was installed, one of your organization's users was
designated as a document control administrator, or DCA. The DCA has
responsibilities and permissions to set up PolicyTech users and
preferences and will know the web address for accessing PolicyTech.
Note: Your information technology (IT) professional or system
administrator may have set up a different way to access PolicyTech,
such as a link from within your organization's web portal. In any case,
the PolicyTech DCA should be able to help you get to the PolicyTech
login window.
1. Contact your PolicyTech DCA to get the following:
n
PolicyTech web address or link
n
Your PolicyTech user name and password
2. Open your Internet browser, and then do one of the following:
n
In the browser's address box, type the PolicyTech web address,
and then press Enter.
n
Or go to the page containing the PolicyTech link, and then click the
link.
3. In the login window, type your user name and password.
Notes:
n If a PolicyTech language module has been installed, you will
also have the option of selecting a language for the user
interface text.
n If you see the NAVEX Global logo instead of the PolicyTech
logo, that means that your organization has two or more
NAVEX Global products and that the Single Sign-on feature
is in use. After signing in, you will need to access PolicyTech
from the Gateway. See your document control administrator if
you have questions.
PolicyTech 8.0 User's Guide
20 - Logging in to PolicyTech
You should now see the default PolicyTech window your DCA has
selected for your site (location), which may or may not look like the
one below.
Things to Do in PolicyTech
Once you've successfully logged in, go to one of the following sections,
depending on what you want to do next:
Changing Personal Preferences (for all users)
Finding and Opening a Document (for all users)
Reading a Required Document (for all users)
Creating and Working with Draft Documents (for document owners,
proxy authors, and writers)
Working with Documents in Review and Approval (for document
owners, proxy authors, and writers)
PolicyTech 8.0 User's Guide
Logging in to PolicyTech - 21
Reviewing and Approving a Document (for reviewers and
approvers)
Resetting a Forgotten Password
If you have forgotten your password, you may be able to have
PolicyTech™ send you a link to reset it.
Important:
n The document control administrator (DCA) has set you up to
receive PolicyTech emails.
n PolicyTech is not currently using a network service called Active
Directory® to keep the user list in PolicyTech synchronized with
the network user list.
If you don't receive an email after following the steps below, contact
your DCA, who can reset your password.
1. In the login window, click Forgot Password?
2. In the Username box, type the user name you normally use to log
in, and then click Submit.
Note: If you've forgotten your user name, you will need to contact
your DCA for help.
PolicyTech 8.0 User's Guide
22 - Logging in to PolicyTech
3. You should now see the message "Email sent." Close the Forgot
Password? window.
Note: If you see the message "User not found in records" or "User
does not have an email address," contact your DCA.
PolicyTech 8.0 User's Guide
Logging in to PolicyTech - 23
4. Check your in box for an email with the following subject: "Reset
Password for PolicyTech." Open the email, and then click the
provided link.
Note: It could take several minutes for the email to be processed and
sent to your in box. If you don't receive an email, contact your DCA.
PolicyTech 8.0 User's Guide
24 - Logging in to PolicyTech
5. Type a new password, and then type it again to confirm it.
6. Click Save.
Changing Personal Preferences
You can set personal preferences for the following:
n
Your password (if changing a password anytime is enabled). See
Changing Your Password.
Note: If you've forgotten your password, see Resetting a Forgotten
Password.
PolicyTech 8.0 User's Guide
Logging in to PolicyTech - 25
n
What you see after you first log in to PolicyTech™. See Changing
Default Display Options.
n
What options are selected by default for the basic search feature.
See Changing the Default Search Options.
n
The language for user interface text (only if a language module has
been added). See Changing the Interface Language.
Changing Your Password
1. Click PREFERENCES, and then click Personal Settings.
Important: The Change Password area of the Personal Settings
window appears only if your document control administrator (DCA)
has set up PolicyTech™ to allow the resetting of passwords anytime.
If you don't see the Change Password area and you need to change
your password, contact your DCA, who can reset it for you. If you
have simply forgotten your current password, go to Resetting a
Forgotten Password.
2. Type your current password.
3. Type a new password, and then type it again to confirm it.
4. Click Save.
PolicyTech 8.0 User's Guide
26 - Logging in to PolicyTech
Changing Default Display Options
Use the Default Display options to select what you want displayed by
default when you first log in to PolicyTech™ and whenever you click a
status in the DOCUMENTS tab.
1. Click PREFERENCES, and then click Personal Settings.
2. Use the Default Tab list to specify which tab—DOCUMENTS, MY
TASKS, REPORTS, or PREFERENCES—will be selected by
default after you log in.
In the Default Tab list, click a tab name.
3. Use the Default View option to specify what will be selected by
default within the Default Tab.
Note: The Default View options change depending on the Default
Tab selection.
4. Use the Default Arrangements option to specify what will be
selected by default within the Arrange by box whenever you click a
PolicyTech 8.0 User's Guide
Logging in to PolicyTech - 27
status (Draft, Collaboration, Review, and so on) in the
DOCUMENTS tab. (See Finding a Document in a Specific Status
for details on this display feature.)
5. Click Save.
Changing the Default Search Options
Use the Basic Search options to specify what you want selected by
default as the In and By options for the Basic Search feature.
1. Click PREFERENCES, and then click Personal Settings.
2. Use the In setting to specify the default Basic Search setting for
how much of a document you want to search: just the title, only document contents (full text), only keywords, only the reference number, or all of the previous.
In the In list, click a setting.
PolicyTech 8.0 User's Guide
28 - Logging in to PolicyTech
3. Use the By list to specify which status or arrangement you want
selected as the default By option for Basic Search.
PolicyTech 8.0 User's Guide
Logging in to PolicyTech - 29
4. Click Save.
Changing the Interface Language
Important: Additional languages are available only if one or more
language modules have been installed.
Use this option to specify which language for the user interface text is
selected by default when you log in.
1. Click PREFERENCES, and then click Personal Settings.
2. Click the Language box, and then click a language.
3. Click Save.
PolicyTech 8.0 User's Guide
30 - Working with My Tasks
Working with My Tasks
If PolicyTech™ is set up to use your organization's email system,
PolicyTech sends you a notification email each time you receive a new
task (see Working with Notification Emails for details). Each task is also
added to your My Tasks page in the appropriate task type section.
The types of tasks you can receive depend on the document roles and
system permissions you've been given.
Note: If PolicyTech or your user profile is not set up for you to receive
email notifications, you will see an Inbox option on the My Tasks
menu. Click Inbox to view and manage your task and other
notifications. See Using the Messages Inbox for details.
1. Click MY TASKS. The image below is an example of what a My
Tasks page could look like for a user assigned the reviewer and
reader roles.
Notes:
n When assigning writers, reviewers, and approvers to a
document, assigning a due date, a warning period, and a date
when a task becomes critical are optional. If one or more of
these dates have been assigned, you may see one of the
following icons: (when the current date is within the
designated warning period before the due date); (when the
due date has passed); (when the designated critical date has
arrived).
n By default, all task sections are expanded. You can click
or
the section title to collapse a section.
PolicyTech 8.0 User's Guide
Working with My Tasks - 31
2. To open a document, click the document title.
3. Perform your task, and then take the appropriate action to indicate
that you've completed the task. The list below refers you to topics
with instructions about performing assigned tasks.
Task List with Help Topic Links
The table below shows what tasks users with each document role or
system permission might receive and links to topics that explain how to
perform those tasks.
Role
"My Tasks" Section
Heading
Help Topic Link
Reader
Read the following
documents as soon
as possible and mark
that you have read
them
Reading a Required
Document
Writer
Collaborate in writing
the following
documents as soon
as possible
Collaborating on
(Helping to Write) a
Document (for
assigned writers)
Reviewer
Review the following
documents as soon
as possible
Reviewing a
Document
Approver
Approve the following Approving a
documents as soon
Document
as possible
Document owner
Submit the following
Documents for
Review or Approval
Submitting a
Document for Review
Document owner,
proxy author
Periodic Review
required on these
documents that are
due or almost due for
review
Doing a Periodic
Review and Creating
a New Version
Document owner,
proxy author
Links need to be
updated on the
following documents
Updating Document
Links
Document control
administrator
Reassign these
authors' documents
"Reassigning
Document Owners" in
PolicyTech 8.0 User's Guide
32 - Working with My Tasks
Role
"My Tasks" Section
Heading
to another author or
authors
Help Topic Link
the Administrator's
Guide
Using the Messages Inbox
If one or both of the following are true, your task and informational
notifications will be posted to the Messages Inbox instead of being sent
to you via your organization's email system.
n
A document control administrator has not configured PolicyTech to
use your organization's email system.
n
Your user profile (set up and managed by the document control
administrator) does not include a valid email address.
Viewing and Acting On Messages
To access a message in the Inbox,
1. Click MY TASKS, click Messages, and then click Inbox.
Note: If you don't see the Messages option on the My Tasks menu,
then you are set up to receive notifications via your organization's
email system. If you're not receiving notifications, contact your
document control administrator for help.
2. To view a message's contents in the lower panel, click the message
subject.
PolicyTech 8.0 User's Guide
Working with My Tasks - 33
3. If the message is a task notification, click the document title to open
the document, and then perform the task (see Task List with Help
Topic Links in the "Working with My Tasks" topic).
Managing Messages
You can do any of the following to manage messages in the Messages
Inbox and Trash.
Refresh the inbox. Click Get New Messages.
Delete selected messages. Select check boxes in the left-most
column, and then click Delete.
Delete all messages. Click Delete All, and then click Yes.
Restore deleted messages. On the Messages menu, click Trash.
Select check boxes in the left-most column, and then click Restore. On
the Messages menu, click Inbox to see the restored messages.
Change the size of the message viewing panel. Click the up arrow
in the divider bar between the message list and the viewing panel to
expand the viewing panel to maximum size. Click and drag anywhere
else on the divider bar to resize the message list and viewing panels.
PolicyTech 8.0 User's Guide
34 - Working with My Tasks
Sort a column. Click a column header to sort by that column's
contents. Click the same column header again to reverse the sort order.
PolicyTech 8.0 User's Guide
Finding and Opening a Document - 35
Finding and Opening a Document
PolicyTech™ is a powerful tool that provides several ways to find a
document stored in the PolicyTech database. Whatever you know
about a document can helpyou to find it. For example, suppose a user
knows the following about a document she needs to find:
n
The word cash is in the title.
n
The document is assigned to the accounting department.
n
The document has already been approved and published.
With this knowledge, the user could search for documents containing
cash in the title, arrange (list) documents by department, or arrange
documents by status. Or the user could use all three methods together
to narrow down the list of documents with all three attributes.
There are two major ways to begin finding a document—using the All
Documents feature or the My Documents feature. All Documents
lets you start finding a document by selecting a status, such as draft or
published. My Documents lets you start by selecting the role or roles
you are assigned to perform with documents, such as document owner,
reviewer, or reader. We recommend learning how to use both methods,
as one may be more helpful than another in a given situation.
To find documents using the All Documents feature, go to Finding a
Document in a Specific Status.
To find documents using the My Documents feature, go to Finding a
Document You Are Assigned to Own, Proxy Author, Write, Review,
Approve, or Read.
The following tools can also help you find a document:
Sort Bar
Basic Search
Advanced Search
Quick Menu
Document Access Table
Custom Document List Display
Custom "Arrange by" Sort
Display/Export Options
Using the Sort Bar
Anytime a list of documents is displayed, you can use the sort bar to
view only those documents that start with a specific letter or that start
PolicyTech 8.0 User's Guide
36 - Finding and Opening a Document
with a number or any other non-alphabetic character.
The sort bar will contain each letter that at least one document in the list
starts with. Click a letter or # to view only those documents that start
with that letter or non-alphabetic character. To see all documents again,
click ALL.
Searching for a Document
Using the basic Search feature, you can search for a text string in a
document's title, its contents, or its keywords. You can also search for all
or part of a document's reference number.
Note: A document owner can add keywords when creating a
document, but is not required to. Keywords are words or phrases the
document owner thinks users might search for when trying to find a
particular document.
You can search all of the documents in a site or narrow the search by
looking only in a specific status such as draft or approved, in a role
assignment such as the documents you're assigned to review or read,
or within only those documents with a specific property such as a
particular department or category.
1. Click DOCUMENTS.
2. (Optional) If you have access to multiple sites, in the site list, click
the site containing the document you want to find.
Important: You can search in only one site at a time using basic
search. If you need to search across all sites, see Advanced Search.
PolicyTech 8.0 User's Guide
Finding and Opening a Document - 37
3. (Optional) To narrow the search, click All Documents or My
Documents, and then click a document status or role assignment.
You can stop here or in the Arrange by list, click an item to filter out
additional documents (if you need help, see Finding a Document in
a Specific Status or Finding a Document You Are Assigned to Own,
Proxy Author, Write, Review, Approve, or Read).
4. Click the Search for box to display the search options (highlighted
in the sample screen below).
5. In the Search for box, type the text you want to search for. See
Search Text Options below for details on building search text.
6. In the In list, click an option for what part of the document you want
to search. You can choose to search the title only, the full text (document contents) only, the assigned keywords only, the reference
number only, or in all four of the previous.
PolicyTech 8.0 User's Guide
38 - Finding and Opening a Document
7. In the By list, click the area within the currently selected site that you
want to search. You can search through all documents in the currently selected status or role assignment, within the selected item in
the Arrange by list (department, category, and so on), or through
all documents in all active (not archived) statuses in the entire site.
8. Click Search.
The search returns a list of all documents, if any, that match the
search text in the selected areas of the document and within the
selected areas of the current site.
9. (Optional) Click Clear Search to start over with new search criteria.
PolicyTech 8.0 User's Guide
Finding and Opening a Document - 39
10. To open one of the listed documents, click the document title. The
document opens in a separate browser window, as shown below.
Important: If a File Information window is displayed instead of the
document contents, see Reading a Document That Opens Outside of
PolicyTech for further instructions.
What you can do with the open document depends on your assigned
role. Go to a topic below that corresponds with your role.
Document Owner or Proxy Author:
Creating and Working with Draft Documents
Working with Documents in Review and Approval
Doing a Periodic Review and Creating a New Version
Working with My Tasks
Writer:
Creating and Working with Draft Documents
Working with My Tasks
Reviewer or Approver:
Reviewing and Approving a Document
Working with My Tasks
Reader:
Reading a Required Document
PolicyTech 8.0 User's Guide
40 - Finding and Opening a Document
Search Text Options
Use any of the following options to create a search string. If you find that
these options are not enough to perform the type of search needed, see
Advanced Search for instructions on building more complex searches.
Type a single word. The search will return a list of all documents that
contain that word (or string of characters) anywhere within the
documents' titles, contents, keywords, or reference numbers
(whichever you select in the In box).
For example, if you typed red as the search text and chose to search by
title, the search would return documents with any of the following words
in the title: Red, Credit, Redundant, Hundred.
Type multiple words, with each word separated from the next by
a space. The search will return a list of all documents that contain all of
the words you typed that are anywhere within the selected document
areas.
For example, if you typed 2013 schedule as the search text and chose to
search by document content (full text), the search would return
documents containing at least one instance of each word anywhere in
the document content, even if the word schedule is found on page 2 and
the word 2013 is found on page 7.
PolicyTech 8.0 User's Guide
Finding and Opening a Document - 41
Type multiple words, with each word separate from the next by
OR in all uppercase letters. The search will return a list of all
documents that contain at least one of the words you typed that are
anywhere within the selected document areas.
Note: You can use the vertical bar character ( | ) in place of OR.
For example, if you typed holiday OR schedule OR 2013 as the search
text and chose to search keywords, the search would return all of the
following documents: a document with schedule but not holiday or 2013
as assigned keywords; a document with 2013 and holiday but not
schedule as assigned keywords; a document with all three words as
assigned keywords.
PolicyTech 8.0 User's Guide
42 - Finding and Opening a Document
Type one or more words with each preceded by NOT in all
uppercase letters. The search will return a list of all documents that do
not contain the words in the search text anywhere within the selected
document areas.
Note: You can use the dash or minus character ( - ) in place of NOT.
The NOT operator can be especially useful when combined with
another word you want to find. For example, if you typed account NOT
accountant as the search text and chose to search document titles, the
search would find documents with the words Account, Accounts, and
Accounting in the title but not documents with Accountant or
Accountants in the title.
Type one or more words enclosed in quotation marks. The
search will return a list of all documents that contain the exact text within
the quotation marks anywhere within the selected document areas.
For example, if you typed "holiday schedule" as the search text and
chose to search document titles, the search would find the following
PolicyTech 8.0 User's Guide
Finding and Opening a Document - 43
document title: 2013 Holiday Schedule; but the search would not find
the following document title: 2013 Holiday and Shutdown Schedule.
Finding a Document in a Specific Status
A document can be in any of the publication process statuses listed
below. You may or may not be able to access a document in any given
status, depending on both the document roles you've been assigned
and the document's assigned security level (see Document Access
Table for details).
n
Draft
n
Collaboration
n
Review
n
Approval
n
Pending
n
Published
n
Archived (see Viewing Archived Documents below)
The high-level steps for finding a document starting within its status are
the following:
n
Using the All Documents feature, select the document's status
n
Select a criterion, such as departments or categories, by which to
arrange or display a list containing the document
n
Select an item, such as a specific department or category, within
the display criterion to display a list of documents with the selected
status and that are assigned the selected item
PolicyTech 8.0 User's Guide
44 - Finding and Opening a Document
Note: You can also find a document with a specific status using the
Search feature (see Searching for a Document) or My Tasks
feature (see Working with My Tasks).
Using the All Documents Feature
1. (Optional) If you have access to multiple sites, click the currently
selected site name (see the sample screen below), and then click
the site containing the document you want to find.
2. If the All Documents menu is not already displayed, click
DOCUMENTS, and then click All Documents. You should see a
window similar to the one shown below, but the statuses you see
under All Documents may be different.
Note: The document control administrator controls what opens by
default when you first log into PolcyTech™ at a specific site. To
change what is displayed when you log in, see Changing Default
Display Options.
The All Documents menu below shows all the statuses that could
be available, along with the document roles associated with each
PolicyTech 8.0 User's Guide
Finding and Opening a Document - 45
status. By default, all new users are given the reader role, so you
should at least see the Published status.
Note: A document control administrator can always see all statuses.
3. Click the status of the document you need to find.
4. Next, you need to decide by what criterion you want to arrange or
display documents. The criteria are all roles or properties that can
be assigned to a document. Once you select a criterion (role or property type), you can select a specific role or property. For example, if
you select Departments as the Arrange by criterion, then a list of
all departments within the currently selected site are displayed.
Click the Arrange by box, and then click a criterion.
The user selected Document Owner as the criterion in the
sample screen below. Notice that the Arrange by list changed to
document owner user names with a number in parentheses after
each user name. The number indicates how many documents will
be displayed if you click that user name.
Note: If you see no numbers after the listed items, then either none of
the items contain matching documents or the document control
administrator has modified the default display options to hide
document counts.
PolicyTech 8.0 User's Guide
46 - Finding and Opening a Document
5. Click an item to display a list of matching documents. For example,
the user selected Hansen, Tom in the sample screen below to display all documents currently in the published status and that are
owned by Tom Hansen.
Note: If a document is assigned to more than one item in the
Arrange by list, such as being assigned to multiple departments, you
can click any of the assigned items to access the document.
6. (Optional) If the document list is long, especially if it spans multiple
pages, and if you know the document's title, click the letter, number,
or other character in the Sort Bar that comes first in the document
title. Only those documents whose titles start with what you selected are displayed.
PolicyTech 8.0 User's Guide
Finding and Opening a Document - 47
7. (Optional) By default, a document list is sorted by title in ascending
alphabetical order (a to z, with special characters and numbers preceding all letters). To change how the documents are sorted, see
Customizing the Document List Display or Working with Advanced
Sort and Search Features.
8. (Optional) By default, the following information is shown for each
document in the list: document type, title, version number, and current status. To add columns to and remove columns from the list,
see Display/Export Options.
9. To open one of the listed documents, click the document title. The
document opens in a separate browser window, as shown below.
Important: If a File Information window is displayed instead of the
document contents, see Reading a Document That Opens Outside of
PolicyTech for further instructions.
PolicyTech 8.0 User's Guide
48 - Finding and Opening a Document
What you can do with the open document depends on your assigned
role. Go to a topic below that corresponds with your role.
Document Owner or Proxy Author:
Creating and Working with Draft Documents
Working with Documents in Review and Approval
Doing a Periodic Review and Creating a New Version
Working with My Tasks
Writer:
Creating and Working with Draft Documents
Working with My Tasks
Reviewer or Approver:
Reviewing and Approving a Document
Working with My Tasks
Reader:
Reading a Required Document
Working with My Tasks
PolicyTech 8.0 User's Guide
Viewing Archived Documents - 49
Viewing Archived Documents
A document version is sent to archived status if any of the following
occur:
n
A new version of the document is approved and published.
n
Another document set to replace the current document version is
approved and published.
n
A document owner or document control administrator (DCA) manually archives the document.
Access to archived documents is limited to DCAs and those users
assigned the archived role. If you have access to archived documents,
you will see the Archived status under All Documents, as shown
below.
If you don't have access to archived documents but feel you have a
need for accessing them, contact your DCA.
Finding a Document You Are Assigned to Own,
Proxy Author, Write, Review, Approve, or Read
When you are assigned to a document, you receive a notification email,
and a task is added to your My Tasks list. You can access the assigned
document directly from the notification email or task, or you can find the
document using the My Documents feature, as explained below.
Note: The document control administrator may not have set up
PolicyTech™ to send you notification emails.
PolicyTech 8.0 User's Guide
50 - Viewing Archived Documents
1. (Optional) If you have access to multiple sites, click the currently
selected site name (see the sample screen below), and then click
the site containing the document you want to find.
2. Click DOCUMENTS, and then click My Documents.
Note: To change your preferences so that My Documents is
selected when you log into PolicyTech, see Changing Default Display
Options.
The My Documents menu below shows all the options that could be
available, along with the document roles associated with each option.
By default, all new users are given the reader role, so you should at
least see the I Read option.
PolicyTech 8.0 User's Guide
Viewing Archived Documents - 51
3. Click the option corresponding with the document you need to find.
4. Next, you need to decide by what criterion you want to arrange or
display documents. The criteria are all roles or properties that can
be assigned to a document. Once you select a criterion (role or property type), you can select a specific role or property. For example, if
you select Departments as the Arrange by criterion, then a list of
all departments within the currently selected site are displayed.
Click the Arrange by box, and then click a criterion. In the sample
screen below, a document owner selected I Own and then
selected Status as the criterion. Notice that each status is followed
by a number in parentheses. The number indicates how many
documents will be displayed if you click that status.
Note: If you see no numbers after the listed items, then either none of
the items contain matching documents or the document control
administrator has modified the default display options to hide
document counts.
PolicyTech 8.0 User's Guide
52 - Viewing Archived Documents
5. Click an item to display a list of matching documents. For example,
the user selected Published in the sample screen below to display
all documents the user owns and that are currently in the Published
status.
Notes:
n
n
n
If you are having difficulty finding a document, you may want to
use Search instead. See Searching for a Document for details.
If a document is assigned to more than one item in the Arrange
by list, such as being assigned to multiple departments, you
can click any of the assigned items to access the document.
You may also see documents assigned to other users,
depending on the security level of those documents. See
Document Access Table for details.
PolicyTech 8.0 User's Guide
Viewing Archived Documents - 53
6. (Optional) If the document list is long, especially if it spans multiple
pages, and if you know the document's title, click the letter, number,
or other character in the Sort Bar that comes first in the document
title. Only those documents whose titles start with what you selected are displayed.
7. (Optional) By default, a document list is sorted by title in ascending
alphabetical order (a to z, with special characters and numbers preceding all letters). To change how the documents are sorted, see
Customizing the Document List Display or Working with Advanced
Sort and Search Features.
8. (Optional) By default, the following information is shown for each
document in the list: document type, title, version number, and current status. To add columns to and remove columns from the list,
see Display/Export Options.
9. To open one of the listed documents, click the document title. The
document opens in a separate browser window, as shown below.
Important: If a File Information window is displayed instead of the
document contents, see Reading a Document That Opens Outside of
PolicyTech for further instructions.
PolicyTech 8.0 User's Guide
54 - Viewing Archived Documents
What you can do with the open document depends on your assigned
role. Go to a section listed below that corresponds with your role.
Document Owner or Proxy Author:
Creating and Working with Draft Documents
Working with Documents in Review and Approval
Doing a Periodic Review and Creating a New Version
Working with My Tasks
Writer:
Creating and Working with Draft Documents
Working with My Tasks
Reviewer or Approver:
Working with Documents in Review and Approval
Working with My Tasks
Reader:
Reading a Required Document
Working with My Tasks
Using the Quick Menu in a Document List
To access the Quick Menu for a document in a document list, click the
down arrow in the Type column (which is the first column by default).
PolicyTech 8.0 User's Guide
Viewing Archived Documents - 55
The Quick Menu options available depend on the document's status
and your assigned roles and permissions. The Quick Menu below
shows the three possible options for a standard PolicyTech™
installation.
Note: Activating certain advanced feature add-ons and modules can
also add options to the Quick Menu.
Document URLs. Displays the URLs (web addresses) of the current
and previous versions (if any) of the document. To go directly to a
specific document, copy and paste the document's URL into a
browser's address bar and then press Enter.
Note: If you're not currently logged in to PolicyTech, you will be
prompted to log in before the document is opened.
View Properties. Opens the document with the Properties page of
the Overview displayed.
PolicyTech 8.0 User's Guide
56 - Viewing Archived Documents
Add to Favorites. Adds the current document to the Favorites list in
Personal Items.
PolicyTech 8.0 User's Guide
Document Access Table
- 57
Document Access Table
The table below explains what roles can access a document in each
publication process status with the three different document security
levels.
Publishing
Status
Description
Roles with Access
(DCA=Document Control
Administrator)
Security
Level:
All
Users
Draft
Contains new
documents not
yet submitted
for review and
documents that,
after completion
of the review or
approval
process, have
been revised or
declined by one
or more
assigned
reviewers or
approvers.
Collaboration Contains
documents
submitted to
assigned
writers before
being reviewed
and approved.
Security
Security
Level: All
Level:
Users
Restricted
- Severe
DCAs
and any
document
owner,
proxy
author,
writer,
reviewer,
and
approver,
whether
assigned
to the
document
or not
DCAs and
only the
assigned
document
owner,
proxy
authors,
writers,
reviewers,
and
approvers
DCAs and
only the
assigned
document
owner and
proxy
authors
DCAs
and any
document
owner,
proxy
author,
writer,
reviewer,
and
approver,
whether
assigned
to the
document
or not
DCAs and
only the
assigned
document
owner,
proxy
authors,
writers,
reviewers,
and
approvers
DCAs and
only the
assigned
document
owner,
proxy
authors,
and writers
PolicyTech 8.0 User's Guide
58 -
Document Access Table
Review
Contains
documents
submitted for
review but not
yet reviewed by
all assigned
reviewers.
DCAs
and any
document
owner,
proxy
author,
writer,
reviewer,
and
approver,
whether
assigned
to the
document
or not
DCAs and
only the
assigned
document
owner,
proxy
authors,
writers,
reviewers,
and
approvers
DCAs and
only the
assigned
document
owner,
proxy
authors,
and
reviewers
Approval
Contains
documents
accepted by all
reviewers but
not yet
reviewed by all
assigned
approvers.
DCAs
and any
document
owner,
proxy
author,
writer,
reviewer,
and
approver,
whether
assigned
to the
document
or not
DCAs and
only the
assigned
document
owner,
proxy
authors,
writers,
reviewers,
and
approvers
DCAs and
only the
assigned
document
owner,
proxy
authors,
and
approvers
Pending
Contains
approved
documents that
have not yet
reached their
designated
effective
dates—the
dates when
they will move
into the
published
status.
DCAs
and any
document
owner,
proxy
author,
writer,
reviewer,
and
approver,
whether
assigned
to the
document
or not
DCAs and
only the
assigned
document
owner,
proxy
authors,
writers,
reviewers,
and
approvers
DCAs and
only the
assigned
document
owner,
proxy
authors,
and writers
PolicyTech 8.0 User's Guide
Document Access Table
- 59
Published
Contains
documents
accepted by all
assigned
reviewers and
approvers and
that have been
published on
their designated
effective date.
DCAs
and any
document
owner,
proxy
author,
writer,
reviewer,
approver,
or reader,
whether
assigned
to the
document
or not
DCAs and
only the
assigned
document
owner,
proxy
authors,
writers,
reviewers,
approvers,
and
readers
DCAs and
only the
assigned
document
owner,
proxy
authors,
and writers
Archived
Contains
previous
versions of
documents,
documents
replaced by
new
documents, and
manually
archived
documents.
DCAs
and any
user
assigned
the
Archived
role
DCAs and
any user
assigned
both the
Archived
role and
any
document
role
assignment
(document
owner,
proxy
author,
writer,
reviewer, or
approver)
DCAs and
any user
who is both
assigned
the
Archived
role and is
assigned
as the
document
owner or a
proxy
author for
the current
document
Customizing the Document List Display
Once a document list is displayed using All Documents or My
Documents, you can modify column placement, adjust column sizes,
and change the sort column and order.
Note: For even more options for customizing the document list
display, see Display/Export Options.
Adjusting a column's width: Hover the pointer over the line between
two column headers until the pointer changes to a two-headed arrow,
and then click and drag the column separator.
PolicyTech 8.0 User's Guide
60 -
Document Access Table
Moving a column: Click and drag a column header over a column
separator to display the placement arrows, and then drop the header.
Selecting a column to sort by: Click a column header to sort the user
list by that item. An up or down arrow appears in the current sort
column.
Changing the sort order: Click the header of the current sort column
to reverse the sort order from ascending to descending, or vice versa.
Working with Advanced Sort and Search Features
PolicyTech™ includes the following advanced features for creating
complex searches, sorts, and filters:
Advanced Search
Custom "Arrange by" Sort
Display/Export Options
Advanced Search
Advanced Search provides more options for narrowing a search. For
example, you can search for documents within a specific date range,
and you can search across all sites at the same time.
PolicyTech 8.0 User's Guide
Document Access Table
- 61
1. Click DOCUMENTS, and then click All Documents or My
Documents.
2. Click the Search for box to display the basic search options, and
then click Advanced Search.
The Advanced Search form is displayed.
3. In one or more of the Find results boxes, type the search text.
Note: Advanced searches are not case-sensitive.
If you type text in more than one box, then all of the text must be
found within the selected document areas in order for a document
to be found. In the Advanced Search form below, for example,
for a document to be found by this search, its title and contents
combined must contain both of the words schedule and work plus
the exact phrase "monday through friday."
4. In the Search Fields area, select the document areas you want to
search and deselect what you want excluded from the search.
PolicyTech 8.0 User's Guide
62 -
Document Access Table
5. In the Status area, select the statuses to include and deselect the
statuses to exclude.
6. (Optional) In the Date Range area,
a. Click the top box, and then click the document milestone you
want to search by.
b. Click by the From and To boxes and select the date range
start and end dates.
Important: To search all dates, leave the From and To boxes blank.
7. Click the Search In box, and then click All Sites or an individual
site.
PolicyTech 8.0 User's Guide
Document Access Table
- 63
8. (Optional) Click the View Top box, and then click how many of the
most relevant matching documents you want listed.
9. Click Search.
The matching documents, if any, are displayed below the Advance
Search form, with some of the matching text highlighted.
10. (Optional) If you searched all sites, in the Site(s) column click View
to see which site or sites the document is assigned to.
11. To open a document, click its title.
12. To exit the Advance Search form, in the main PolicyTech™ window, click any status under All Documents or any role assignment
under My Documents.
Custom "Arrange by" Sort
In a regular sort there are the following two levels of sort criteria:
PolicyTech 8.0 User's Guide
64 -
Document Access Table
n
Level 1: A status under All Documents or an assigned role under
My Documents
n
Level 2: An item in the Arrange by list
For example, the search criteria might be to find all documents in the
draft status that are also in the accounting department.
To create a sort with more or different levels, create a custom Arrange
by sort.
1. Click DOCUMENTS, and then click All Documents or My
Documents.
2. Under the Arrange by box, click Add Custom.
In the Custom Arrange By window, you can set up to four levels
of sort criteria. The sample Arrange by list below shows what it
could look like with all four levels.
PolicyTech 8.0 User's Guide
Document Access Table
- 65
3. In the Custom Arrange By window, in the Arrange by list, click a
criterion.
4. (Optional) Select one or more Then by criteria.
5. In the Name box, type a descriptive name for the sort, and then click
Save.
The custom arrangement is immediately applied and is added to
the Arrange by list under the Custom heading for future use.
PolicyTech 8.0 User's Guide
66 -
Document Access Table
6. In the custom arrangement, each item that has a sort level below it
has the icon before it. Click to show the next sort criterion level,
and then continue clicking until a last-level criterion is displayed.
Click a last-level criterion to display a list of the documents, if any,
that match all levels of the custom sort.
Editing or Deleting a Custom Sort
1. Click DOCUMENTS, and then click All Documents or My
Documents.
2. In the Arrange by list, click the custom sort you want to edit or
delete.
3. Below the Arrange by box, click Edit Custom.
PolicyTech 8.0 User's Guide
Document Access Table
- 67
4. Do one of the following:
n
Make changes to the custom sort, and then click Save.
n
Click Delete.
Display/Export Options
By default, a document list contains 20 documents per page and
displays the following information in separate columns:
n
Document type
n
Title
n
Version number
n
Status
Using Display/Export Options, you can change what information is
displayed in the list and the number of documents per page. You can
also add column filters and export the current document list to a
Microsoft® Excel® file.
1. Click DOCUMENTS, and then click All Documents or My
Documents.
2. In the Arrange by list, click an item to display a list of documents.
3. Below the Search for box, click Display/Export Options.
PolicyTech 8.0 User's Guide
68 -
Document Access Table
4. Click before a display or export category to display the available
options.
5. Make changes to the options. See one of the following sections for
detailed instructions:
n
Showing and Hiding Document List Columns
n
Changing Document List Display Options
n
Adding Simple Filters to a Document List
n
Adding an Advanced Filter to a Document List
n
Exporting a Document List
6. (Optional) Back in the document list, you can change column order
by clicking and dragging a column header to a new position. You
can also change which column the list is sorted by, by clicking a
column header. Reverse sort order by clicking the column header
again.
Note: To change the columns back to their original order including
only the default columns, click Display/Export Options, and then
click Reset Column Layout.
PolicyTech 8.0 User's Guide
Document Access Table
- 69
7. When you're finished making changes, click Close.
Showing and Hiding Document List Columns
1. With a document list displayed in the DOCUMENTS screen, click
Display/Export Options, and then click before Show/Hide
Columns.
2. Select or click to clear a check box to show or hide the corresponding column.
3. Click Close.
Changing Document List Display Options
1. With a document list displayed in the DOCUMENTS screen, click
Display/Export Options, and then click before Display
Options.
2. In the Documents Per Page list, click a number.
3. (Optional) Select the Lock Title check box to freeze the title as the
second column from the left as you scroll right and left to see other
columns. The Lock Title option is especially useful when the
PolicyTech 8.0 User's Guide
70 -
Document Access Table
document list contains more columns than can be displayed in the
browser window.
Note: If you have moved the Title column to a different location, it will
be moved to its default position if you select Lock Title. If you then
deactivate Lock Title, the Title column goes back to where you
moved it.
4. Click Close.
Adding Simple Filters to a Document List
You can use a simple filter to narrow the list of documents to only those
whose information within a column (title, version, status, etc.) matches
the filter criterion for the text you type. Simple filter criteria include the
following: Begins with, Contains, Doesn't contain, Ends with,
Equals, Doesn't equal. You can also apply a simple filter to only one
column at a time.
Note: To apply a filter that checks information in multiple columns at
once or that uses other, more advanced criteria, see Adding an
Advanced Filter to a Document List.
1. With a document list displayed in the DOCUMENTS screen, click
Display/Export Options, and then click before Filter Options.
2. To enable simple filters, select the Show Column Filters check
box, and then click Close. A text box is now displayed below each
column heading.
PolicyTech 8.0 User's Guide
Document Access Table
- 71
3. Click inside a filter box, and then type the text that you want to filter
by within that column's information.
4. To the right of the filter box click , and then click a filter criterion.
5. (Optional) To temporarily turn off the filter, at the bottom of the document list, select the check box before the filter formula.
6. (Optional) To clear the filter, at the bottom of the document list, click
Clear.
PolicyTech 8.0 User's Guide
72 -
Document Access Table
Adding an Advanced Filter to a Document List
1. To create an advanced filter, in a document list, click
Display/Export Options, click Filter Options, and then click
Create Advanced List Filter.
2. In the Filter Builder, click
filter condition.
after the And operator to add a default
Note: If a simple filter is currently applied to the document list, that
filter appears in the Filter Builder. You can either build upon the
simple filter or delete it.
In the formula above, the operator is in red font, the column name
is in blue font, the filter type is in green font, and the condition
parameter is in gray font.
3. Use the following guidelines to create the filter.
PolicyTech 8.0 User's Guide
Document Access Table
- 73
Note: It is not within the scope of this Guide to teach how to build
complex filters. The guidelines below only explain how to use the
Filter Builder tool.
n
To change any displayed filter element, click it and select an option,
or type in the text box and press Enter.
n
A group is an operator and all the conditions below it. To add a condition to a group, click after the operator.
n
To delete a condition, click
after the condition.
PolicyTech 8.0 User's Guide
74 -
Document Access Table
n
To add a group, click the operator under which you want to add a
group, and then click Add Group. The new group is a subgroup of
(indented below) the one above it. In other words, in the filter hierarchy the added group is a child of its parent group.
n
To delete a group, click the group operator, and then click Remove.
4. Click OK.
Exporting a Document List
1. To export the currently displayed document list, click
Display/Export Options, click Filter Options, and then click
Export List.
2. Do one of the following:
n
If you have Excel 2003 or earlier, click Export List as XLS.
n
If you have Excel 2007 or later, click Export List as XLSX.
PolicyTech 8.0 User's Guide
Document Access Table
n
- 75
Click Export List as CSV.
3. Open the file or save it to disk.
PolicyTech 8.0 User's Guide
76 - Working with the Document Overview
Working with the Document Overview
A document's overview provides quick views of a document's
properties, history, assigned task status, links, and security settings.
To access a document's overview, do either of the follow:
n
Open the document, and then click Overview.
n
In a document list, click the document's Quick Menu arrow, and
then click View Properties.
The overview opens with the Properties page selected. Notice the links
to other overview pages (Document History, Writer Status, etc.) and
the printer icon next to Properties. You can print any overview page.
PolicyTech 8.0 User's Guide
Working with the Document Overview - 77
Each overview page is described in the sections that follow. Click a link
below to go directly to a specific section.
Properties
Document History
Writer, Reviewer, and Approver Status
Reader Status
Links
Security
Discussions
About the Properties Page of the Document Overview
The Properties page shows most of the document settings from the
Properties Wizard, the dates of workflow milestones, and the
document URL.
All of this information is for the document in its current state. You can
also view the properties on the date when the document was approved.
In the example below, the user would click View overview on
approved date (02/18/2012). There may be differences between the
two Properties pages, because document control administrators and
the document owner can change document properties within the
approved document. A document control administrator can also change
PolicyTech™ preferences that may affect document properties.
PolicyTech 8.0 User's Guide
78 - Working with the Document Overview
About the Document History Page of the Document
Overview
The Document History page can contain two areas: the Current
Revision History and the Approved Document History. You will
see the Current Revision History if a version of the document is being
created or revised and is in the draft, collaboration, review, or approval
status. The Approved Revision History appears if one or more
versions of the document have been approved.
Notes:
n See Snapshot Triggers for details on when a new snapshot
(stored copy) of a document is taken.
n By default, snapshots of the draft versions of documents are
deleted when the document is approved. There is an add-on
module available that enables the keeping of all draft snapshots
PolicyTech 8.0 User's Guide
Working with the Document Overview - 79
after approval. Talk to your document control administrator if
you feel you need this functionality.
In the Document History page, you can do any of the following:
n
Click View Document & Properties to open the document. What
you see will be the same as if you opened the document directly
from a document list for the document's current status (draft, collaboration, review, etc.).
n
Click a version number to see an uneditable view of the document
only.
n
Click View in the Changes Summary column to display the
change summaries (if any) entered by the document owner when
submitting the document for review or approval. Changes to inserted fields are also displayed.
n
Click Compare, and then click the version number you want to compare the currently open version to. The Microsoft® Word
Reviewing Pane opens showing the current document, the version being compared, and a combined document with changes
marked up.
Note: If you don't see both documents, make sure that Show Both is
selected as the Show Source Documents setting in Word. With the
ribbon displayed in Word, click Review. Depending on the version of
Word you have, you can either find the Show Source Documents
setting under Compare or as an option on the ribbon next to
Compare.
n
Click a number (except 0) in the Read By column to see who has
read that version of the document.
n
Click All in the Read By column to see all users who have read that
version of the document, including revisions.
PolicyTech 8.0 User's Guide
80 - Working with the Document Overview
Snapshot Triggers
A snapshot is a stored copy of a document in a specific state. Whenever
a Microsoft® Word or Excel® document goes through a significant
change (see table below), PolicyTech™ makes a copy of the document
as it exists immediately before that change takes place.
There are two types of snapshots—document (content) and properties.
The type of snapshot PolicyTech takes depends on the change. The
table below lists all changes that trigger a snapshot, along with the types
of snapshots taken. Snapshot types followed by an asterisk (*) are
deleted once the document is approved.
Snapshot Trigger
Snapshot
Type
The document owner submits draft document to one of
the following statuses: collaboration, review, approval.
Document*
All assigned writers finish writing the document, thus
sending the document from collaboration back to draft.
Document*
A reviewer or approver revises or declines a document,
thus sending it back to draft.
Document*
All assigned approvers accept the document, thus
moving it to pending or published status.
Document
and
properties
A document control administrator (DCA) sets an
unapproved document as approved.
Document
and
properties
A DCA edits an unapproved document in its current
state and then takes an action that moves the document
to a different state. For example, after editing a
document in review, a DCA submits the document for
approval or sets the document as approved.
Document
and
properties
A DCA edits in its current state an approved document's Document
content.
A DCA edits in its current state an approved document's Properties
properties.
A document owner or DCA archives a document.
Properties
* Indicates that the snapshot is deleted once the document is approved.
PolicyTech 8.0 User's Guide
Working with the Document Overview - 81
About the Writer, Reviewer, and Approver Status
Pages of the Document Overview
Use these pages to check the status of users assigned to write, review,
and approve the document. Each page lists the assigned users with a
status icon before each name. If a user has completed an action
(writing, reviewing, or approving) and typed comments when doing so,
you can see them by clicking that user's name.
Icon Descriptions
The user has accepted the document as is (no revisions).
The user has revised or declined the document (applies only to
reviewers and approvers).
The user has received notification that the document is ready to be
written, reviewed, or approved, but the user has not completed the task.
The document owner or document control administrator moved the
document directly on to another workflow status, such as from draft to
approval, skipping an assigned workflow step, such as review. This icon
can also mean that the user did not complete the assigned task before a
new version or revision of the document was made.
The user has not yet received notification to write, review, or approve
the document.
The user was once assigned the task, but has since been
unassigned.
About the Reader Status Page of the Document
Overview
This page shows the status of reader tasks.
PolicyTech 8.0 User's Guide
82 - Working with the Document Overview
Icon Descriptions
The user has marked the document as read.
The user has received notification that the document is ready to read,
but the user has not completed the task.
The user did not mark the document as read before a new version or
revision of the document was made.
The user has not yet received notification to read the document.
The user was once assigned to read the document, but has since
been unassigned.
About the Links Page of the Document Overview
The Links page shows links both out of and into the current document
and shows whether a link has been inserted into the document.
In the Links page, do any of the following:
PolicyTech 8.0 User's Guide
Working with the Document Overview - 83
n
Click Document Links to display documents the current document
is linked to.
n
Click Links to this Document to display other documents that link
to the current document.
n
Click the title of a listed document to open it.
n
Click a document owner's name to display that user's site, department, job title, and email address.
About the Security Page of the Document Overview
The Security page shows the document's security settings from the
Properties Wizard, plus any additional users given permission to view
the document.
PolicyTech 8.0 User's Guide
84 - Printing Documents
Printing Documents
The options you have for printing documents depends on the document
roles and system permissions you've been assigned.
All users with at least the reader role have access to the Print List
(Standard) option. See Printing a List of Documents for details.
If you've been assigned the document control administrator or report
manager permission, you'll also have access to the Print Documents
and Custom Print options for printing document contents. See Printing
Documents (Content) and Using Custom Print for details.
Printing a List of Documents
You can print or save to disk a list of the documents displayed in the
main document list, such as all the published documents from the
accounting department. Each document entry always contains at least
the following information:
n
Date created
n
Date submitted
n
Last reviewed date
n
Date approved
n
Publication date
n
Date archived
You can also add date information about when the document was
created, submitted, published, and so on.
1. With the DOCUMENTS tab selected, use any of the various methods of finding documents to display a list of the documents you want
included in the printed list. See any of the following topics if you
need help:
n
Using the Sort Bar
n
Searching for a Document
n
Finding a Document in a Specific Status
n
Finding a Document You Are Assigned to Own, Proxy Author,
Write, Review, Approve, or Read
n
Customizing the Document List Display
n
Working with Advanced Sort and Search Features
PolicyTech 8.0 User's Guide
Printing Documents - 85
Note: Information about all of the listed documents is printed, even if
the list spans multiple pages.
2. (Optional) The following details are always included for each document in the printed list:
n
Reference number
n
Title with version number
n
Document owner
n
Site and department
n
URL
n
Security level
n
Review interval in months
You can also include any of the following dates:
n
Date created
n
Date submitted
n
Last reviewed date
n
Date approved
n
Publication date
To add one or more dates to the printed document list, click
Display/Export Options, click Show/Hide Columns, and then
select one or more of the date columns listed above.
Note: These are the only column selections that have any effect on
the content of the printed document list.
PolicyTech 8.0 User's Guide
86 - Printing Documents
3. Click Print, and then click Print List (Standard).
The list opens in a separate browser window where you can view,
print, and save the list to disk in several different formats.
PolicyTech 8.0 User's Guide
Printing Documents - 87
Printing Documents (Content)
Important: You will see this print option only if you've been assigned
the document control administrator or report manager permission.
1. With the DOCUMENTS tab selected, use any of the various methods of finding documents to display a list of the documents you want
to print. See any of the following topics if you need help:
n
Using the Sort Bar
n
Searching for a Document
n
Finding a Document in a Specific Status
n
Finding a Document You Are Assigned to Own, Proxy Author,
Write, Review, Approve, or Read
n
Customizing the Document List Display
n
Working with Advanced Sort and Search Features
Note: If you have access to management reports, you can also use
the Print Multiple Documents report to select and print documents
(see "Print Multiple Documents" in the Reports Supplement).
2. Click Print, and then click Print Documents.
PolicyTech 8.0 User's Guide
88 - Printing Documents
3. In the Print Options window under Print Documents, click the
check boxes of what you want printed. The options are described in
the sections that follow.
n
Properties. Select Properties if you want a cover page with document properties added for each document.
PolicyTech 8.0 User's Guide
Printing Documents - 89
n
To change which properties are included on each cover page, click
More, and then, in the Select Overview Items Below area, click
to clear the check boxes of the properties you don't want included,
and then click OK.
n
To include more information than just properties on the cover page,
click More, click the check boxes of additional items from the menu
on the left, and then click OK.
PolicyTech 8.0 User's Guide
90 - Printing Documents
n
Document. This option is selected by default. If you only want to
print one or both of the other two options and not the document content, deselect Document.
n
Attachments. Select this option if you want to also print any
Microsoft® Word and Excel® documents attached to the documents
you selected to print.
4. Click Print Documents.
Important: PolicyTech™ opens and prints each selected document
one after the other. This may take several minutes if many documents
are selected. Do not attempt to work with any open document until
the printing process has completely finished.
5. The last thing to be printed is the table of contents page, at which
time you'll see the message displayed below.
To use the default table of contents that has already been printed,
click Cancel, which closes the table of contents.
To edit the default table of contents page, click OK, and then make
changes as you would with any other Word document within
PolicyTech. When finished, print the modified table of contents
from within Word.
PolicyTech 8.0 User's Guide
Printing Documents - 91
Using Custom Print
Important: You will see this print option only if you've been assigned
the document control administrator or report manager permission.
The Custom Print feature uses a different method of selecting
documents (not the document list) and offers more options for what to
print.
1. With the DOCUMENTS tab selected, click Print, and then click
Custom Print.
2. In the Print Options window, select the documents you want to
print (see Selecting Documents).
Important: By default, only documents assigned the All Users
(default) security level are displayed in the Available Documents
box. To display and have the option to select documents assigned the
Restricted - High or Restricted - Severe security level, click Show
Restricted Documents. Restricted document titles are preceded by
the lock icon ( ) and are displayed in red font.
PolicyTech 8.0 User's Guide
92 - Printing Documents
3. Do one of the following:
n
To start the automated printing of the selected documents, click
Print Documents.
n
To change one or more report settings, click Next, and then continue with step 5.
4. Select one of the following outputs for the selected documents:
PolicyTech 8.0 User's Guide
Printing Documents - 93
n
Print Documents: Automatically opens and prints all selected documents. To change what is printed by default, see "Print Documents Options" below. If you select this option, skip step 5.
n
Print Display Table: A display table is what is currently displayed
in the Document Arrangement area, which you can modify (see
the next step below). After selecting this option, select Standard to
create a report containing the document list, or select Microsoft
Excel Raw to export the list to an Excel (.xls) file.
5. The Document Arrangement area controls what document
information is included in the printed output and the document sort
order. Do any of the following:
Important: Making changes in the Document Arrangement area
directly affects what is printed or exported with the Print Display
Table options.
n
By default, the following information is included about each document listed in the Document Arrangement area:
l
Reference number
l
Title
l
Version number
l
Status
l
Date Created
l
Date Submitted
l
Publication Date
l
Date Approved
l
Next Review Date
To change which columns of information are displayed in the document
list, click Show/Hide Columns, and then select what you want added
and deselect what you want removed.
Important: Changing what is displayed in the Document
Arrangement list does not affect output when Print Documents is
selected, but it does affect the output for Print Display Table. With
Print Display Table and Standard selected, deselecting the
following columns hides them in the Document Arrangement list,
but it does not remove them from the standard display table:
Reference #, Ver #,Review Interval, Document Owner, URL,
Categories; however, all of the date column selections do affect the
PolicyTech 8.0 User's Guide
94 - Printing Documents
contents of the standard display table. With Print Display Table and
Microsoft Excel Raw selected, all column changes you make
directly affect what is included in the exported display table file.
Note: The Security Details option functions differently than the
other Show/Hide Columns options. First, it is only selectable if
Microsoft Excel Raw is selected. Second, it causes two columns to
be added to the display table: Allowed Access Type and Allowed
Access. These two columns will contain information only for
documents that have the Restricted - High or Restricted - Severe
security level assigned, and only if one or more other allowed users
are selected (for details on security levels, see Step 7: Security). The
Allowed Access Type column shows how other allowed users
were selected (by department, by job title, or by readers), and the
Allowed Access column shows the departments, job titles, and
readers that were selected. Notice in the example below that a
separate row is included for each of a document's Allowed Access
entities that were selected.
Screenshot...
By default, the document sort order in the report is ascending by title. To
change what the documents are sorted by, click a different column
header. Click the same column header again to reverse the sort order.
PolicyTech 8.0 User's Guide
Printing Documents - 95
Note: Changes to the document sort column and sort order directly
affect both Print Display Table outputs.
6. Do one of the following, depending on what output you've selected:
n
Print Documents: To start the automated printing of the selected
documents, click Print Documents.
Important: PolicyTech™ opens and prints each selected document
one after the other. This may take several minutes if many documents
are selected. Do not attempt to work with any open document until
the printing process has completely finished.
The last thing to be printed is the table of contents page, at which
time you'll see the message displayed below.
To use the default table of contents that has already been printed,
click Cancel, which closes the table of contents.
To edit the default table of contents page, click OK, and then make
changes as you would with any other Word document within
PolicyTech. When finished, print the modified table of contents
from within Word.
n
Print Display Table: Click View Report.
If Standard is currently selected, the report opens in a separate
browser window.
PolicyTech 8.0 User's Guide
96 - Printing Documents
If Microsoft Excel Raw is selected, at the Windows system
prompt, open or save the display table file.
Print Documents Options
Use the following options to customize what is printed with the selected
documents.
Paging Options
When you print multiple documents, PolicyTech™ adds a table of
contents page listing each document printed. The paging options control
pagination of the printed material and whether page numbers are
displayed in the table of contents.
Click Paging Options and then click one of the following:
n
Keep Original Paging: Uses whatever automatic page numbering has been inserted into the documents, restarting pagination
for each successive document. Page numbers are not included on
the table of contents page, or on properties cover pages, if that
option is selected.
PolicyTech 8.0 User's Guide
Printing Documents - 97
n
Continuous Paging: Starts pagination with the first document in
the list and continues with that pagination (does not start over) in
each successive document and any attached Word or Excel documents. Page numbers are added to properties cover pages, if
included, and for each document listed in the table of contents.
Note: If any of the selected documents contain automatic page
numbering with a format similar to "Page 1 of 5," the current page
number will be updated to be continuous throughout the print batch,
but the "of" number will not. For example, you could see something
like "Page 7 of 5."
PolicyTech 8.0 User's Guide
98 - Printing Documents
Properties
Select Properties if you want a cover page with properties added for
each document.
PolicyTech 8.0 User's Guide
Printing Documents - 99
To change which properties are included on each cover page, click
More, and then, in the Select Overview Items Below area, click to
clear the check boxes of the properties you don't want included. Click
OK.
To include more information than just properties on the cover page, click
More, click the check boxes of additional items from the menu on the
left, and then click OK.
PolicyTech 8.0 User's Guide
100 - Printing Documents
Attachments
If one or more of the selected documents has attached Word or Excel
files, select Attachments to have those documents printed as well.
Important: Only Word and Excel attachments will be printed. Any
other attachment file types will be skipped.
PolicyTech 8.0 User's Guide
Reading a Required Document - 101
Reading a Required Document
You can read any document that is listed in a Published document list,
but you may not be required to read all of those documents.
If you are required to read a document, you will receive a task
assignment. The task assignment notification will come in the form of an
email (if you are set up to receive emails from PolicyTech™) and will be
added to your My Tasks list in PolicyTech.
1. To open a document you are required to read, do one of the following:
n
Open the task notification email, and then click the document link.
n
Click MY TASKS, and then, in the Read area, click the document
title.
PolicyTech 8.0 User's Guide
102 - Reading a Required Document
If you see a window similar to the one below, with the document
contents displayed in a browser window, move on to step 2.
If you see a window like the one below, go to Reading a Document
That Opens Outside of PolicyTech.
PolicyTech 8.0 User's Guide
Reading a Required Document - 103
2. Thoroughly read the document.
3. Check for and review the following: attachments, notes, discussions, change summary (see Reviewing Supplementary Materials for details).
4. Click Mark as Read at the top of the document window.
Note: If you don't see the Mark as Read button, then you are not
required to read this document. However, you can still mark it as read
by clicking Options, and then clicking Mark as Read (Optional).
You will see one of the following windows, depending on whether
the document has an accompanying questionnaire and whether
enhanced validation has been activated.
PolicyTech 8.0 User's Guide
104 - Reading a Required Document
5. Follow the instructions below for the window you see:
Read the message, and then click Mark as Read to confirm
the action.
Click Take Questionnaire, and then go to Taking a
Questionnaire.
Type your user name and password, and then click Mark as
Read.
Type your user name and password, click Take
Questionnaire, and then go to Taking a Questionnaire.
Installing WordModulePlus
If, when you open a Word document, you see an alert asking you to
choose how to open the file, we highly recommend that you install
WordModulePlus so you can take full advantage of PolicyTech features.
Follow the instructions for your browser to install WordModulePlus.
Install WordModulePlus as an Internet Explorer Add-on
Install WordModulePlus as a Firefox Add-on
Install WordModulePlus as a Chrome Extension
Install WordModulePlus as an Internet Explorer Add-on
Install WordModulePlus as an Internet Explorer
Add-on
1. When the Choose how to open the file alert is displayed, click
UseWordModulePlus Plug-in, and then click Install Plugin.
PolicyTech 8.0 User's Guide
Reading a Required Document - 105
2. Do one of the following, depending on what you see on your
screen:
n
If asked whether you want to allow the installation program to make
changes to the computer, click Yes.
n
If you are asked for the user name and password of someone with
administrator privileges, then you do not currently have permission
to install software on your computer. Contact your document control administrator or network administrator for help.
3. When the installation is finished, the message below is displayed
and the document is opened in the original document window. Click
to close the message window.
PolicyTech 8.0 User's Guide
106 - Reading a Required Document
Install WordModulePlus as a Firefox Add-on
1. When the Choose how to open the file alert is displayed, click
UseWordModulePlusPlug-in, and then click Install Plugin.
2. Do one of the following, depending on what you see on your
screen:
n
If you see a message saying that Firefox prevented PolicyTech
from asking you to install WordModulePlus, click Allow.
n
If you are asked for the user name and password of someone with
administrator privileges, then you do not currently have permission
to install software on your computer. Contact your document control administrator or network administrator for help.
3. Click Install Now.
PolicyTech 8.0 User's Guide
Reading a Required Document - 107
4. Click Restart Now.
5. Once Firefox restarts, log back into PolicyTech, and then reopen
the document. The document contents should now be displayed.
Install WordModulePlus as a Chrome Extension
1. When the Choose how to open the file alert is displayed, click
UseWordModulePlusPlug-in, and then click Install Plugin.
PolicyTech 8.0 User's Guide
108 - Reading a Required Document
2. Do one of the following, depending on what you see on your
screen:
n
If asked whether you want to allow the installation program to make
changes to the computer, click Yes.
n
If you are asked for the user name and password of someone with
administrator privileges, then you do not currently have permission
to install software on your computer. Contact your document control administrator or network administrator for help.
Reading a Document That Opens Outside of PolicyTech
There are four reasons why you would be prompted to open the
document outside of PolicyTech™:
n
You have not yet installed the WordModulePlus browser add-on on
your computer.
n
The document is not a Word or Excel document.
n
The document is a Word or Excel document, but the document is
set to open outside of the browser anyway.
n
You're using a Mac computer.
If you have not yet installed the WordModulePlus add-on and you are
using a computer with Windows, you will have a chance to install it as
you perform the steps below. After the plug-in is installed and if the
document is a Word or Excel document, it will automatically open in a
PolicyTech window.
PolicyTech 8.0 User's Guide
Reading a Required Document - 109
Note: You only need to install the WordModulePlus add-on once on
any given computer.
If the document doesn't open in PolicyTech for any of the three
remaining reasons above, you will need to open the document using its
default program.
1. To open a document you are required to read and which opens outside of PolicyTech, do one of the following:
n
Open the task notification email, and then click the document link.
n
Click MY TASKS, and then, in the Read area, click the document
title.
PolicyTech 8.0 User's Guide
110 - Reading a Required Document
2. In the File Information window, click the document file name.
3. (For Windows users only) If you see a window like the one below,
see Installing WordModulePlus and then continue with step 4 below
after completing the instructions in that section.
Important: The following instructions are for Internet Explorer. If
you're using Firefox or Chrome, see...
a. Click Use WordModulePlus Plug-in, and then click Install
Plugin.
PolicyTech 8.0 User's Guide
Reading a Required Document - 111
b. Do one of the following, depending on what you see on your
screen:
l
l
If asked whether you want to allow the installation program to make
changes to the computer, click Yes.
If asked for the user name and password of someone with administrator privileges, then you do not currently have permission to
install software on your computer. Contact your document control
administrator or network administrator for help.
c. When the installation is finished, the message below is displayed
and the document is opened. Click
to close the message
window.
d. Do one of the following:
PolicyTech 8.0 User's Guide
112 - Reading a Required Document
l
l
If you see a screen similar to the one above, go to step 2 in "Reading
a Required Document."
If what you see is similar to the screen below (just like the one you
saw in step 2 above), then, in the File Information window, click
the document file name again and continue with the next step.
4. Windows
You will see a Microsoft® Windows® prompt similar to the one
below. Click Open to open the document in its default program.
PolicyTech 8.0 User's Guide
Reading a Required Document - 113
Notes:
n Your prompt may look different, depending on the version of
Windows you have, but you should still see options to open or
save the document.
n Windows controls which program is used to open a specific
type of file.
n You must have the default program installed on your computer
in order to open the document.
Mac
In the Downloads window, double-click the file name to open the
document.
Note: You must have a program installed on your computer that can
open this type of document.
PolicyTech 8.0 User's Guide
114 - Reading a Required Document
5. Thoroughly read the document, and then close it.
6. Back in PolicyTech, check for and review the following: attachments, notes, discussions, change summary (see Reviewing Supplementary Materials for details).
7. Click Mark as Read at the top of the document window.
Note: If you don't see the Mark as Read button, then you are not
required to read this document. However, you can still mark it as read
by clicking Options, and then clicking Mark as Read (Optional).
8. You will see one of the following windows, depending on whether
the document has an accompanying questionnaire and whether
enhanced validation has been activated.
PolicyTech 8.0 User's Guide
Reading a Required Document - 115
9. Follow the instructions below for the window you see:
Read the message, and then click Mark as Read to confirm
the action.
Click Take Questionnaire, and then go to Taking a
Questionnaire.
Type your user name and password, and then click Mark as
Read.
Type your user name and password, click Take
Questionnaire, and then go to Taking a Questionnaire.
Taking a Questionnaire
If the current document includes a questionnaire, you will see one of the
following windows when you click Mark as Read. You must
successfully complete the questionnaire before you can finish marking
the document as read.
PolicyTech 8.0 User's Guide
116 - Reading a Required Document
1. Click Take Questionnaire, or, if you see the Sign Here area, type
your user name and password, and then click Take
Questionnaire.
2. Read each question carefully and select or type the best answer.
3. When you have answered all the questions, click Submit
Answers, and then click Submit Answers again in the Confirm
window.
4. (Conditional) If the questionnaire creator associated a task with one
or more of the answers you selected, you will see the following
alert. Click OK to clear the alert. You can find the new task in the
Questionnaire Tasks area in the MY TASKS list (see Working
with My Tasks).
5. Do one of the following, depending on your score:
PolicyTech 8.0 User's Guide
Reading a Required Document - 117
n
If you passed the questionnaire, one of the following windows is displayed:
Important: If the questionnaire creator opted to let you print out a
certificate showing that you passed the questionnaire, you will see
the Print Certificate option in one of the windows below. Click Print
Certificate, click , and then click Print.
Click Mark as Read, or, if the window includes the Sign Here
area, type your password, and then click Mark as Read.
Notes:
n If a feedback window is displayed, click Next to display one of
the windows shown above.
n If you passed the questionnaire but would like to improve your
score, click Retake Questionnaire and try again.
n If you did not pass the questionnaire, click Retake
Questionnaire if you want to try again immediately, or click
Close Questionnaire if you want to review the document
again before retaking the questionnaire.
Reviewing Supplementary Materials
Any of the following types of information may be available to review in a
document:
n
Attachments: A document owner can attach any number of files to
a document.
n
Links: These can be links to other PolicyTech™ documents and to
websites.
n
Notes: A document owner has the option of writing notes during
certain steps of the document creation process.
n
Discussions: Those involved with document creation, review, and
approval can start discussions with others assigned to the document and with any user. As a reader, you can also start a discussion with the document owner and document control
administrator.
PolicyTech 8.0 User's Guide
118 - Reading a Required Document
n
Changes Summary: A document owner has the option of describing changes in the document when submitting it for review or
approval.
You can access most of these items using the Please Review pop-up
menu. If a document contains an attachment, note, discussion, or
change summary, the Please Review pop-up menu is displayed when
you open the document, as shown in the screenshot below.
This and other ways to access supplementary materials are described
in the topics below.
Reviewing Attachments and Links
Reviewing Notes
Reviewing Discussions
Reviewing the Changes Summary
Reviewing Attachments and Links
1. Do any of the following:
n
In the Please Review pop-up menu, click Attachments.
n
Click the Attachments tab.
PolicyTech 8.0 User's Guide
Reading a Required Document - 119
n
Click the Attachments (paper clip) icon.
2. The Attachments window below contains two attached files (with
in the Type column), a link to another document in PolicyTech™
(with in the Type column), and a link to a website (with in the
Type column).
In the Links & Attachments window, do any of the following:
n
Windows
Click an attachment file name, and then click Open when you see a
Microsoft® Windows® prompt similar to the one below. When
you're finished reviewing the attachment, close it.
Notes:
n Your prompt may look different, depending on the version of
Windows you have, but you should still see options to open or
save the document.
n Windows controls which program is used to open a specific
type of file.
n You must have the default program installed on your computer
PolicyTech 8.0 User's Guide
120 - Reading a Required Document
in order to open the file.
n
Mac
In the Downloads window, double-click the file name to open the
document.
Note: You must have a program installed on your computer that can
open this type of document.
n
Click a linked document to open the document or display its file
information in another PolicyTech window. After reviewing the document, close that window.
n
Click a website link to open that website in a separate browser window. After reviewing the website, close the browser window.
3. Back in the Links & Attachments window, click OK.
Reviewing Notes
1. Do either of the following:
n
In the Please Review pop-up menu, click Unread Notes.
PolicyTech 8.0 User's Guide
Reading a Required Document - 121
n
Click the Notes (page) icon.
2. In the Notes window, click a note to open it.
3. After reading the note, in the upper right corner click , and then
click Close.
PolicyTech 8.0 User's Guide
122 - Reading a Required Document
Reviewing Discussions
1. Do any of the following:
n
In the Please Review pop-up menu, click Discussions.
n
Click the Discussions (paper clip) icon.
n
Click Overview, and then click Discussions.
2. In the Discussions window, click a discussion title to open it.
3. (Optional) To respond to the discussion, click Post Reply, type a
reply, and then click Save.
PolicyTech 8.0 User's Guide
Reading a Required Document - 123
Note: The reply will go to all current discussion participants. If you
want to include others in the discussion, click Participants before
clicking Post Reply, and then select other users. Be aware that only
those users with access to this document can view the discussion.
4. Click Close.
PolicyTech 8.0 User's Guide
124 - Reading a Required Document
Reviewing the Changes Summary
1. Do one of the following:
n
In the Please Review pop-up menu, click Changes Summary.
Note: The Changes Summary option is available only if the
document owner opted to describe changes when submitting the
document to review or approval.
n
Click Overview, click Document History, and then, in the
Changes Summary column, click View.
2. After reading the summary, do one of the following:
n
If you clicked Changes Summary in step 1, click OK.
n
If you clicked View in step 1, click Close.
PolicyTech 8.0 User's Guide
Reading a Required Document - 125
PolicyTech 8.0 User's Guide
126 - Viewing a Document's URL
Viewing a Document's URL
Each document in PolicyTech™ has a unique URL (web address) that
can be used to access the document directly. You can add the URL to a
link in a document or enter it on the address line of a browser.
Depending on the current PolicyTech configuration and the document
state, a single document may have multiple URLs associated with it.
You can view all of a document's URLs in one of two ways:
n
Open a document's Overview and go to the URL section (see
Working with the Document Overview for details on using this
method)
n
Access a URL list quickly from a document list (read on for details
on using this method)
Viewing URLs for the Current Version of a Document
To view all of the URLs associated with the current version of a
published document,
1. Click Documents, and then click Published.
2. Find the document whose URLs you want to view.
3. Click the down arrow ( ) in the document's Type column, and then
click Document URLs.
You should see dialog box similar to the one below, which shows
the URL for the latest version of the document.
PolicyTech 8.0 User's Guide
Viewing a Document's URL - 127
4. To see other URLs, if any, associated with this version of the document, click Other Links.
Note: You will see these additional URLs only if the corresponding
features have been enabled (see URL Types below).
5. Copy the desired URL. You can then paste it into a document link.
Viewing a URL for a Previous Version
1. Perform steps 1 through 4 under "Viewing a Document's URL"
above.
2. Click Previous Versions to display the document's history.
3. Click the desired version to open it.
4. Copy the URL in the browser's address line. You can then paste it
into a document link.
Note: Only those with permission to view archived documents will be
able to access previous versions.
The table below lists the four different URL types and details of when
these URLs are available for which documents.
URL Type
version
Available When
Applies To
any document version is published
all versions of all
published
documents
anonymous anonymous access has been
all published
access
enabled for a site (see "Adding a
documents on the
Site" in the Administrator's Guide for enabled site
more information about anonymous
PolicyTech 8.0 User's Guide
128 - Viewing a Document's URL
login)
public
access
the public viewer has been enabled
(see "Pubic Viewer" in the
Administrator's Guide for more
information about the public viewer)
all published
documents that
have been
explicitly granted
public access
public
download
downloading documents in their
source format has been enabled
all published
documents
PolicyTech 8.0 User's Guide
Creating and Working with Draft Documents - 129
Creating and Working with Draft Documents
Creating a document is a multi-step process, consisting of the following
tasks:
n
Setting document properties
n
Writing or uploading the document content
n
(Optional) Adding links and attachments
n
(Optional) Creating a questionnaire that readers must pass before
they can mark the document as read
n
(Optional) Selecting documents this document will replace
n
Submitting the document for review or approval
A document owner can write and edit Microsoft® Word documents and
Microsoft Excel® spreadsheets directly within PolicyTech. Document
content can also be created outside of PolicyTech and then uploaded
into a PolicyTech document. Keep in mind, however, that some
PolicyTech features are not available for an uploaded file.
Important: You must have Word and Excel installed on your
computer in order to create and view these types of documents in
PolicyTech.
Depending of the type of computer you're using, go to one of the
following sections to continue:
High-Level Steps for Creating a Document (Windows)
High-Level Steps for Creating a Document (Mac)
High-Level Steps for Creating a Document (Windows)
Important: If you are using a Mac computer, go to High-Level Steps
for Creating a Document (Mac).
1. The following steps provide an overview of the document creation
process, along with references to more detailed instructions.
Click DOCUMENTS. If you're a document owner, you'll see the
New Document option, as shown below.
PolicyTech 8.0 User's Guide
130 - Creating and Working with Draft Documents
Note: If you do not see the New Document option, then you have
not been assigned the document owner role. Contact your document
control administrator if you have questions.
2. Click New Document, and then click one of the following:
n
Word Document
n
Excel Spreadsheet
n
Upload a File
Your screen should now look similar to the one below. These
settings constitute the first step of the Properties Wizard, which
guides you through all of the available document properties.
PolicyTech 8.0 User's Guide
Creating and Working with Draft Documents - 131
3. Work your way through the Properties Wizard steps, which are
fully described in Assigning Document Properties.
Important: You must at least type a title, choose a template, and
then save the document before you can see the remaining
Properties Wizard steps and edit the document.
4. Click Edit Document, and then do one of the following, depending
on the document type you chose in step 2 above:
n
Word Document or Excel Spreadsheet: add, format, and edit
the content (see Adding Content to a Word or Excel Document).
PolicyTech 8.0 User's Guide
132 - Creating and Working with Draft Documents
n
Upload a File: follow the prompts to upload a document file into
PolicyTech (see Adding Content to a Document with an Upload File
Template).
5. (Optional) Add links to and attachments for supplementary and reference materials (see Attaching Files and Adding Reference
Links).
PolicyTech 8.0 User's Guide
Creating and Working with Draft Documents - 133
6. (Optional) Create a questionnaire that readers must pass in order
to mark the document as read (see Creating a Questionnaire).
7. (Optional) Start a discussion about the document (see Working with
Document Discussions).
8. (Optional) Select the documents this new document will replace
(see Designating a Document to Be Replaced).
9. Submit the document to writers, for review, or for approval (see
Submitting a Document to Writers, Reviewers, or Approvers).
PolicyTech 8.0 User's Guide
134 - Creating and Working with Draft Documents
10. Manage the document through the review and approval process
(see Working with Documents in Review and Approval).
High-Level Steps for Creating a Document (Mac)
The following steps provide an overview of the document creation
process, along with references to more detailed instructions.
1. Click DOCUMENTS. If you are a document owner, you will see the
New Document option, as shown below.
Note: If you do not see the New Document option, then you have
not been assigned the document owner role. Contact your document
control administrator if you have questions.
2. Click New Document, and then click one of the following:
n
Word Document
n
Excel Spreadsheet
n
Upload a File
Your screen should now look similar to the one below. These
settings constitute the first step of the Properties Wizard, which
guides you through all of the available document properties.
PolicyTech 8.0 User's Guide
Creating and Working with Draft Documents - 135
3. Work your way through the Properties Wizard steps, which are
fully described in Assigning Document Properties.
Important: You must at least type a title, choose a template, and
then save the document before you can see the remaining
Properties Wizard steps and edit the document.
4. Click Edit Document.
5. You should now see the window shown below. Click Choose File.
PolicyTech 8.0 User's Guide
136 - Creating and Working with Draft Documents
6. In the Mac Finder, find and click the document you want uploaded,
and then click Choose.
7. The file name now appears in the Upload New Document window. Click Upload File.
8. The following window appears when the upload is finished. Click
OK.
Note: You may have to minimize the default program window or
switch windows back to PolicyTech to see this Alert window.
9. In the File Information window, click the document file name.
Note: You can import (re-upload) an external document to replace
the contents of the PolicyTech file at any time. See Importing Content
for details.
PolicyTech 8.0 User's Guide
Creating and Working with Draft Documents - 137
10. The file opens in its default program. While working on the document outside of PolicyTech, be sure to save it periodically. PolicyTech detects each time the document is saved re-uploads a copy
of it.
Note: If you see the Alert window below after you click the file name,
go to Enabling WordModulePlus below.
11. (Optional) Add links to and attachments for supplementary and reference materials (see Attaching Files and Adding Reference
Links).
PolicyTech 8.0 User's Guide
138 - Creating and Working with Draft Documents
12. (Optional) Create a questionnaire that readers must pass in order
to mark the document as read (see Creating a Questionnaire).
13. (Optional) Start a discussion about the document (see Working with
Document Discussions).
14. (Optional) Select the documents this new document will replace
(see Designating a Document to Be Replaced).
15. Submit the document to writers, for review, or for approval (see
Submitting a Document to Writers, Reviewers, or Approvers).
PolicyTech 8.0 User's Guide
Creating and Working with Draft Documents - 139
16. Manage the document through the review and approval process
(see Working with Documents in Review and Approval).
Assigning Document Properties
The Properties Wizard breaks up property assignment for a document
into the following seven steps:
Note: You will most likely not need to perform all seven steps for
every document you create.
n
Step 1: Set the document's critical properties (Title, Document
Owner, Document Template) and other optional properties (Document Review Interval, Warning Period, Publication Date, Assigned
Proxy Author, Document Keywords, Original Creation Date). See
Step 1: Settings.
n
Step 2: Assign the document to departments and categories. See
Step 2: Departments and Categories.
n
Step 3: Assign the document to the writers who will collaborate on
the document's creation. See Step 3: Writers.
n
Step 4: Assign the users who will review the document. See Step 4:
Reviewers.
n
Step 5: Assign the users who will approve the document. See Step
5: Approvers.
n
Step 6: Assign the users who will be required to read the document
once it has been published. See Step 6: Readers.
n
Step 7: Set the document's security level. See Step 7: Security.
Step 1: Settings
1. If you have not already started a new document, click
DOCUMENTS, click New Document, and then click one of the following:
PolicyTech 8.0 User's Guide
140 - Creating and Working with Draft Documents
n
Word Document
n
Excel Spreadsheet
n
Upload a File
The new document opens with only the first step—Settings—of
the Properties Wizard displayed.
2. Type the document title.
3. Do one of the following to select a document owner:
n
If you have been assigned the document owner role, your user
name is automatically selected. Move on to step 4.
n
If you have been assigned as proxy author for a single document
owner, that document owner's user name is automatically selected.
Move on to step 4.
n
If you have been assigned as proxy author for more than one document owner, in the Choose a document owner list, click a user
name.
n
If you are a document control administrator (DCA), in the
Document Owner list, click a user name.
Note: If you are a DCA but have not been assigned the document
owner role, you cannot assign the document to yourself.
4. Your DCA can create any number of templates with specific settings and assignments in the Properties Wizard and with
PolicyTech 8.0 User's Guide
Creating and Working with Draft Documents - 141
document content, such as section headings. In the Document
Template list, click a template for the type of document you are creating (Microsoft® Word, Excel®, or upload).
Notes:
n Click Preview to see the template contents.
n The template list includes all templates from all sites you have
access to.
n If you select a template for a document type that is different
than the type you selected from the New Document menu, the
document will be changed to that type when you click Save.
n Your list of templates will most likely be different than the one
shown below.
n If you have questions about which template to use, contact your
DCA.
5. (Optional) The default version number for a new document is 1.
One instance where you might want to change the version number
is if you are uploading a document from outside the PolicyTech™
system and that document is a version other than 1.
Note: You cannot change the version number after the document
has been approved.
6. (Optional) Depending on how your document control administrator
has set up PolicyTech, you may or may not need to enter a reference number.
n
If you see To be generated on next step after Reference #,
move on to step 7.
n
If you see a blank box after Reference #, type a number. The number can contain numbers, letters, and all other standard characters
except <, |, and ^.
PolicyTech 8.0 User's Guide
142 - Creating and Working with Draft Documents
Important: A document's reference number must be unique
throughout the PolicyTech system. If you are not sure what
numbering scheme your organization is using, contact your DCA.
7. Click Save.
Important: You must save the document at this point before you can
access Optional Settings and the other Properties Wizard steps.
You should now see all seven Properties Wizard steps, as shown
below.
Note: These instructions assume that your DCA has not removed
steps from the document workflow. If you do not see all seven
Properties Wizard steps, skip the instructional steps that do not
apply.
8. (Optional) Click Optional Settings, and then change one or more
settings. See Optional Document Settings below for details on each
setting.
PolicyTech 8.0 User's Guide
Creating and Working with Draft Documents - 143
9. Do one of the following:
n
To continue with assigning properties, click Next Step, and then go
to Step 2: Departments and Categories.
n
To stop assigning properties and finish later, click Options, and
then click Save and Close. (When you are ready to continue with
assigning properties, go to Editing a Draft Document.)
n
To work on document content, click Edit Document. (When you
are ready to continue with assigning properties, if the document is
still open click Properties Wizard,or go to Editing a Draft Document if you need to reopen it.)
Optional Document Settings
Document Review Interval
When a review interval is set, the document will come due for review
after the specified interval has passed. The document owner receives
an email and a PolicyTech™ task as the review date approaches (see
the next setting section—"Warning Period"—for details on when the
document owner receives notification). The default review interval
setting is whatever the template creator selected.
1. To change the default setting, in the Document Review Interval
drop-down menu, do one of the following:
n
Click Every [number] months from [selected event or
specified date], and then type a number of months. In the last list,
click one of the following:
l
approve/last reviewed date: Sets the review date the
number of specified months after version 1 of the
PolicyTech 8.0 User's Guide
144 - Creating and Working with Draft Documents
document is approved and after the previous review date
for all subsequent versions.
l
specified date: Sets the review date the number of specified months after the specified date. After clicking
specified date, click , and then click a date.
At this point, the Force next review on [date] option appears.
By default, PolicyTech uses Smart Scheduling to determine the
next review date at the time a document is approved. When a
document is approved within the warning period for the currently
selected review interval, Smart Scheduling equates the
approval to a completed review and postpones the next review
for another review interval. Select the Force next review on
[date] check box to override Smart Scheduling and leave the
next review due date as it is.
n
Click No Review Date only if you do not want a reminder and a
task sent to the document owner. The document owner will then
need to use some other means to track when the document needs
reviewing.
2. Click anywhere outside the Document Review Interval menu to
close it.
Warning Period
Use this setting to change when the document owner receives
notification that the next review due date is approaching.
1. In the Warning Period list, do one of the following:
n
Click Warn [n] months before Review Interval, and then type a
number in the box.
n
Click Use Default Warning of [n] month(s) before Review
Interval.
Note: The default warning period is set by the document control
administrator.
2. Click anywhere outside the Warning Period menu to close it.
PolicyTech 8.0 User's Guide
Creating and Working with Draft Documents - 145
Publication Date
This is the date when the approved document becomes available to
readers.
1. To change the current selection, in the Publication Date list, do
one of the following:
n
Click Publish the document as soon as it gets approved.
n
Click Wait to publish the document until the following date,
click , and then click a date. By default, notifications are sent to
required readers when the document is published. Also click
Require reading before publication if you want the notification
sent as soon as the document is approved. Assigned readers can
then access the document during the interval between approval
and publication (in the pending status).
Notes:
n If the document is approved after the specified publication date,
it will be published immediately.
n Users who mark the document as read before the publication
date will not be required to read it again when it is published.
2. Click anywhere outside the Publication Date menu to close it.
Assigned Proxy Author
This setting applies only if a proxy author has been assigned for the
document owner selected in Basic Settings.
If you see No Available Proxy Authors in the Assigned Proxy
Author list, you cannot change this setting. (Contact the document
control administrator if you need a proxy author assigned to a document
owner.)
If one or more proxy authors are available and you want to assign one of
them to the current document, click Unassigned - Choose an
Assignable Proxy Author, and then click a proxy author.
PolicyTech 8.0 User's Guide
146 - Creating and Working with Draft Documents
Document Keywords
Type any words you think users might use to search for this document.
Keywords are especially useful for including relevant words that are not
contained in the document title or contents.
Original Creation Date
This setting is intended for documents originally created outside of
PolicyTech and then uploaded into PolicyTech. For historical purposes,
enter the date the document was first created.
Email Notifications
You may or may not see this optional setting, depending on how the
document control administrator set up PolicyTech.
If you see the setting but the text for the Email Notifications list is
displayed with a gray font rather than black, the setting is displayed for
your information only; you cannot change it.
If the setting is active, in the Email Notifications list click a notification
level. See Email Notification Levels for a detailed description of each
level.
Editing Document
You may or may not see this optional setting, depending on how the
document control administrator set up PolicyTech. Also, the Editing
Document setting applies only to templates for Word and Excel
documents.
If you see the setting but the text for the Editing Document list is
displayed with a gray font rather than black, the setting is displayed for
your information only; you cannot change it.
If the setting is active, click the Editing Document box, and then click
Inside the Browser or Outside the Browser. The benefits of editing
a Word document within a PolicyTech browser window include the
following:
n
Ability to insert document property fields that update automatically if
they change
n
Automatic display of an unremoveable watermark in documents in
the draft, review, and approval statuses
If you choose to have the document open outside of the PolicyTech
browser, when a user opens the document it will open in its default
program. PolicyTech detects each time the document is saved in the
default program and re-uploads a copy of the document.
PolicyTech 8.0 User's Guide
Creating and Working with Draft Documents - 147
Notes:
n
n
n
n
A user must have the document's default program installed on
his or her computer in order to open a document outside of the
browser.
To be able to open and edit a document, besides a Word or
Excel document, outside of the browser, that file type must
have been enabled in PolicyTech. Contact your document
control administrator if you are not sure which file types have
been enabled.
Your operating system (Windows or Mac OS) controls what
program a document is opened in by default.
When using a Mac computer, all documents, including Word
and Excel documents, can only be opened outside of the
browser.
Email Notification Levels
Minimum
Only the following messages are sent.
Email Subject
Action That Triggers
Notification
Recipients
You have been
assigned to own new
documents
Document control
Document owner
administrator assigns
an owner to a
document.
You have been
assigned to proxy
new documents
Document owner or
Proxy authors
document control
administrator assigns
a proxy author to a
document.
Submit for review
needed: "[document
title]"
Assigned proxy
author requests a
document be
submitted for review.
Document owner
Link update needed: " A document linked to Document owner,
[document title]"
from within a
proxy authors
document is replaced
by a new version of
that document or by a
different document.
Your "[document title] The current date is
" document expires on within the warning
[periodic review due period of a document
Document owner,
proxy authors
PolicyTech 8.0 User's Guide
148 - Creating and Working with Draft Documents
Email Subject
Action That Triggers
Notification
Recipients
date].
assigned a periodic
review interval.
[escalation label]
(Due: [due date])
Writing collaboration
required: [document
title]
A document with
assigned writers is
submitted to writing.
[escalation label]
(Due: [due date])
Review required: "
[document title]"
A document with
Assigned reviewers
assigned reviewers is
submitted to review.
[escalation label]
(Due: [due date])
Approval required: "
[document title]"
All reviewers accept a Assigned approvers
document or a
document is forced to
the approval status
from the draft,
collaboration, or
review status.
[escalation label]
(Due: [due date])
Required to read: "
[document title]
A document is
Assigned readers
approved and
published or a
document is approved
and moved to pending
status when it has
been assigned a
future publication date
and the "Require
reading before
publication" option
has been selected in
the template.
The document owner
[document owner's
name] has been
deactivated or
changed positions.
A document's owner
is deleted or has the
document owner role
removed.
Approved version
modified: "[document
title]"
A document control
Document owner,
administrator used
proxy authors
the Edit in Current
State feature to make
PolicyTech 8.0 User's Guide
Assigned writers
Document control
administrators
Creating and Working with Draft Documents - 149
Email Subject
Action That Triggers
Notification
Recipients
changes to an
approved document
(in the pending or
published status).
Document
replacement intent: "
[document title]"
When a document is Document owner,
created, it is set to
proxy authors
replace one or more
other documents, and
then it is moved out of
draft or collaboration
status to the review,
approval, pending, or
published status.
Document Owner
Escalations
The due date has past Document owner,
for a writer's,
proxy authors
reviewer's,
approver's, or
reader's unfinished
task.
No revision
necessary: "
[document title]"
A document owner,
Selected recipients
proxy author, or
document control
administrator clicks
No Revision Required
in a published
document.
PolicyTech Tasks
Summary
The scheduled date
All users with
and time set for
currently assigned
sending out task
tasks
summary notifications
has arrived. (Sent
only if a document
control administrator
has scheduled and
enabled task
summary emails in
Email Settings.)
[discussion title]: "
[document title]"
A user starts a new
Selected recipients
discussion in a
document or replies to
an existing one.
PolicyTech 8.0 User's Guide
150 - Creating and Working with Draft Documents
Email Subject
Sent back to Draft: "
[document title]"
Action That Triggers
Notification
All reviewers or
approvers complete
their assigned tasks
and one or more
revised or declined
the document.
Recipients
Document owner,
proxy authors
Medium
All minimum-level messages are sent, plus the ones listed below.
Email Subject
Action That Triggers
Notification
Writer(s) completed: " Last assigned writer
[document title]"
clicks "Finished
Writing."
Recipients
Document owner,
proxy authors
Approved: "
[document title]"
All required approvers Document owner,
take action on the
proxy authors
document and accept
it.
Sent to approval: "
[document title]"
All required reviewers Document owner,
take action on a
proxy authors
document and accept
it.
Set as Approved: "
[document title]"
A document control
Document owner,
administrator sets a
proxy authors
document in the draft,
collaboration, review,
or approval status as
approved.
High
All minimum- and medium-level messages are sent, plus the ones listed
below.
Email Subject
Action That Triggers
Notification
Recipients
Level [integer] review All required reviewers Document owner,
complete: "[document on a specific level take proxy authors
title]"
action on a document
(see Working with
Levels for more
information about
levels).
PolicyTech 8.0 User's Guide
Creating and Working with Draft Documents - 151
Email Subject
Level [integer]
approval complete: "
[document title]"
Action That Triggers
Notification
Recipients
All required approvers Document owner,
on a specific level take proxy authors
action on a document
(see Working with
Levels for more
information about
levels).
Maximum
All minimum- medium-, and high-level messages are sent, plus the ones
listed below.
Email Subject
[writer's name]
finished writing: "
[document title]"
Action That Triggers
Notification
A writer clicks
Finished Writing.
Recipients
Document owner,
proxy authors
[reviewer's name]
A reviewer accepts,
reviewed: "[document revises, or declines a
title]"
document.
Document owner,
proxy authors
[approver's name]
An approver accepts,
reviewed: "[document revises, or declines a
title]"
document.
Document owner,
proxy authors
No [task action]
required: "[document
title]"
A document owner,
Document owner,
proxy author, or
proxy authors
document control
administrator takes an
action that removes
the document from
the collaboration.
review, or approval
status before all
writers, reviewers, or
approvers,
respectively, have
completed their tasks.
Such actions include
sending a document
back to draft, deleting
it, forcing it to review
or approval, and
setting it as approved.
PolicyTech 8.0 User's Guide
152 - Creating and Working with Draft Documents
Step 2: Departments and Categories
An important part of document creation is determining who should
interact with the document you're creating. In this step of the
Properties Wizard, you indicate which sites and departments should
have access to the document and in which categories the document
belongs.
1. In step 2. Departments & Categories, in the First list, click one or
more sites, and then click outside of the menu to close it.
What you see in the Next box depends on the template you
assigned to this document in step 1. Settings. You will always see
Departments under the Required heading, but the template
creator decides which categories, if any, should be required and
optional. If your Next box looked like the one in the example below,
you would be required to choose a department and a Document
Type category. You could also assign the document to one or
more FLSA and Manuals categories, but wouldn't have to.
PolicyTech 8.0 User's Guide
Creating and Working with Draft Documents - 153
2. In the Next box, click Departments.
3. In the Choose Departments Below box, select the departments
that will have access to this document.
Important: You must select at least one department within at least
one site. If you select multiple sites and do not select a department
within one or more of those sites, the current document will be listed
under Unfiled on those sites.
Notes:
n If you selected multiple sites in step 1 above, then, in the
Choose Departments below box, in the Site list, click another
site, and then select departments for that site as well.
n You can click the department name to see the users in the
department.
n The document owner's department is selected by default when
you create a new document. You can deselect it if needed.
n A department group is a combination of two or more
departments from a single site or from multiple sites. If desired,
click Department Groups, and then click before a site or
Multi-Site (Global) Groups. Either select a department group
or click the group name and select departments from within the
group. If you select a department group, the document will be
seen in all departments within the group, regardless of whether
the department is selected under Departments.
PolicyTech 8.0 User's Guide
154 - Creating and Working with Draft Documents
4. If a category is listed under Required, click it, and then select one
or more subcategories.
Notes:
n Some categories allow only one subcategory selection, while
others allow multiple selections. To see this and other category
attributes, click View Category Properties.
n The upper right box (under View Category Properties)
contains the category description if the category creator
included one.
n The category creator has the option of allowing document
owners to create new subcategories. If the current category
allows new subcategories, Add Subcategories appears
above the category list box, as shown below. See Adding a
Subcategory below if you need to add a subcategory.
PolicyTech 8.0 User's Guide
Creating and Working with Draft Documents - 155
5. (Optional) If one or more categories is listed under Optional, click
each category, and then select one or more subcategories for each.
6. Click Save.
7. Do one of the following:
n
To continue with assigning properties, click Next Step, and then go
to Step 3: Writers.
n
To stop assigning properties and finish later, click Options, and
then click Save and Close. (When you are ready to continue with
assigning properties, go to Editing a Draft Document.)
n
To work on document content, click Edit Document. (When you
are ready to continue with assigning properties, if the document is
still open click Properties Wizard, or go to Editing a Draft Document if you need to reopen it.)
PolicyTech 8.0 User's Guide
156 - Creating and Working with Draft Documents
Adding a Subcategory
1. In the category list, click the top-level category ( [Document
Type] in the example below) or subcategory to which you want to
add a subcategory, and then click Add Subcategories.
2. Type a subcategory name.
Note: The Reference ID is automatically filled in with the
subcategory name as you type it. You can change the Reference ID
if needed.
3. (Optional) Type a description to let other users know when they
should assign this subcategory to a document.
4. Click Add to add the new subcategory to the Categories box.
Important: Only subcategories that have been added to the
Categories box will be saved.
PolicyTech 8.0 User's Guide
Creating and Working with Draft Documents - 157
5. (Optional) Repeat steps 2 through 4 to continue adding subcategories under the currently selected category.
6. With the one or more subcategories listed in the Categories box,
click Save.
PolicyTech 8.0 User's Guide
158 - Creating and Working with Draft Documents
Step 3: Writers
A user assigned the writer role can help with the creation of document
content. You can invite one or more writers to collaborate on the current
document.
Note: A writer cannot change document properties and cannot
submit a document for review.
Assigning writers is an optional Properties Wizard step, unless the
template includes one or more required writers.
1. In step 3. Writers, check the Selected Users box for any writers'
names the template creator may have added. In the example
below, the template has automatically added two writers. Notice
that the first writer's user name is marked with two asterisks (**),
which means that this writer is required for documents using the currently selected template. The other writer assignment is optional
and can be treated as a suggestion. To remove an optional writer
from Selected Users, double-click the writer's name (or select one
or more writers' names, and then click ).
PolicyTech 8.0 User's Guide
Creating and Working with Draft Documents - 159
2. In the Site list, click a site containing one or more writers you want
to assign.
Important: If you will be assigning writers from other sites, see
Assignees and Site Access before doing so.
3. A list of writers within the selected site is displayed by default. If you
want to use another method for selecting writers, see Other Ways
to Select Writers. Otherwise, select one or more writers from the
list.
4. (Optional) When you're finished adding writers from the current
site, repeat steps 2 and 3 for any other sites containing writers you
want to assign.
5. (Optional) As you assign writers, they are all assigned to level 1 of
the collaboration status, meaning that they will all receive a writing
PolicyTech 8.0 User's Guide
160 - Creating and Working with Draft Documents
task at the same time when you submit the document to writers. If
you want the document to go to writers in a specific order, click New
Level to create additional writing levels. See Working with Levels
for details.
6. (Optional) Set a due date for when all writers should be finished collaborating on the document. For details on the different ways to set
a due date, see Setting Due Dates for Writing, Reviewing, Approving, and Reading Tasks. (You can specify a different due date for
each level.)
7. (Optional) Click Add Note to include instructions or other information for the assigned writers. See Adding Notes for Writers,
Reviewers, and Approvers for details.
8. Do one of the following:
n
To continue with assigning properties, click Next Step, and then go
to Step 4: Reviewers.
n
To stop assigning properties and finish later, click Save and Close.
(When you are ready to continue with assigning properties, go to
Editing a Draft Document.)
PolicyTech 8.0 User's Guide
Creating and Working with Draft Documents - 161
n
To work on document content, click Edit Document. (When you
are ready to continue with assigning properties, if the document is
still open click Properties Wizard, or go to Editing a Draft Document if you need to reopen it.)
Other Ways to Select Writers
The default writer selection method is to select individual writers. You
can also select by writer group, department, or job title.
Writer Groups
Click the Writers tab, and then click the Writer Groups heading. If you
see Multi-Site (Global) Groups or a site name preceded by , click
to display group names. Select a department group.
Notes:
n A group is a combination of writers from a single site or from
multiple sites.
n To assign individual writers from a group, click the group name,
and then select writers.
PolicyTech 8.0 User's Guide
162 - Creating and Working with Draft Documents
Departments
Departments
Click the Departments tab, click a department, and then select one or
more listed writers.
Job Titles
Click the Job Titles tab, click a job title, and then select one or more
listed writers.
PolicyTech 8.0 User's Guide
Creating and Working with Draft Documents - 163
Step 4: Reviewers
You can assign one or more reviewers to check the document for
accuracy and completeness. A user must have been assigned the
reviewer role before you can assign that user to review a document.
Assigning reviewers is an optional Properties Wizard step, unless the
template includes one or more required reviewers.
1. In step 4. Reviewers, check the Selected Users box for any
reviewers' names the template creator may have added. In the
example below, the template has automatically added two reviewers. Notice that the second reviewer's user name is marked with
two asterisks (**), which means that this reviewer is required for
documents using the currently selected template. The other
reviewer is optional and can be treated as a suggestion. To remove
an optional reviewer from Selected Users, double-click the
reviewer's name (or select one or more reviewers' names, and then
click ).
2. To add reviewers, in the Site list, click a site containing one or more
reviewers you want to assign.
Important: If you will be assigning reviewers from other sites, see
Assignees and Site Access before doing so.
3. A list of reviewers within the selected site is displayed by default. If
you want to use another method for selecting reviewers, see Other
Ways to Select Reviewers. Otherwise, select one or more reviewers.
PolicyTech 8.0 User's Guide
164 - Creating and Working with Draft Documents
4. (Optional) When you are finished adding reviewers from the current
site, repeat steps 2 and 3 for any other sites containing reviewers
you want to assign.
5. (Optional) As you assign reviewers, they are all assigned to level 1
of the review stage, meaning that they will all receive a review task
at the same time when you submit the document to review. If you
want the document to go to reviewers in a specific order, click New
Level to create additional review levels. You can then specify how
many of the assigned reviewers within a level must finish their
reviews before the document moves on to the next level. You can
also specify a due date for each level. See Working with Levels for
details.
PolicyTech 8.0 User's Guide
Creating and Working with Draft Documents - 165
6. (Optional) Set a due date for when all reviewers should be finished
reviewing the document. For details on the different ways to set a
due date, see Setting Due Dates for Writing, Reviewing, Approving, and Reading Tasks in the "Working with Levels" topic. (You can
specify a different due date for each level.)
7. (Optional) Click Add Note to include instructions or other information for the assigned reviewers. See Adding Notes for Writers,
Reviewers, and Approvers for details.
Note: If you have assigned multiple reviewers to an Excel®
document, consider adding a note assigning a different text font color
to each reviewer so you can differentiate among the reviewers'
changes should they revise the document. (This isn't necessary for
Microsoft® Word documents, because the Track Changes feature
automatically includes information about who made each change.)
8. Do one of the following:
n
To continue with assigning properties, click Next Step, and then go
to Step 5: Approvers.
n
To stop assigning properties and finish later, click Options, and
then click Save and Close. (When you are ready to continue with
assigning properties, go to Editing a Draft Document.)
PolicyTech 8.0 User's Guide
166 - Creating and Working with Draft Documents
n
To work on document content, click Edit Document. (When you
are ready to continue with assigning properties, if the document is
still open click Properties Wizard, or go to Editing a Draft Document if you need to reopen it.)
Other Ways to Select Reviewers
The default reviewer selection method is to select individual reviewers.
You can also select by reviewer group, department, or job title.
Reviewer Groups
Click the Reviewers tab, and then click the Reviewer Groups heading.
If you see Multi-Site (Global) Groups or a site name preceded by ,
click to display group names. Select a reviewer group.
Notes:
n A group is a combination of reviewers from a single site or from
multiple sites.
n To assign individual reviewers from a group, click the group
name, and then select reviewers.
Departments
Click the Departments tab, click a department, and then select one or
more listed reviewers.
PolicyTech 8.0 User's Guide
Creating and Working with Draft Documents - 167
Job Titles
Click the Job Titles tab, click a job title, and then select one or more
listed reviewers.
Step 5: Approvers
You must assign at least one approver to a document. Before you can
assign a user to approve a document, that user must have been
assigned the approver role.
Approvers are usually management/executive level users who give their
approval to publish the final draft of a document. They are considered
PolicyTech 8.0 User's Guide
168 - Creating and Working with Draft Documents
an organization's top-level approving authority and have legal
responsibility for what they approve. Only individuals with appropriate
authorization should be given the approver role.
1. In step 5. Approvers, check the Selected Users box for any
approvers' names the template creator may have added. In the
example below, the template has automatically added two
approvers. Notice that the second approver's user name is marked
with two asterisks (**), which means that this approver is required
for documents using the currently selected template. The other
approver is optional and can be treated as a suggestion. To remove
an optional approver from Selected Users, double-click the
approver's name (or select one or more approvers' names, and
then click ).
2. To add approvers, in the Site list, click a site containing one or more
approvers you want to assign.
Important: If you will be assigning approvers from other sites, see
Assignees and Site Access before doing so.
3. A list of approvers within the selected site is displayed by default. If
you want to use another method for selecting approvers, see Other
Ways to Select Approvers. Otherwise, select one or more reviewers.
PolicyTech 8.0 User's Guide
Creating and Working with Draft Documents - 169
4. (Optional) When you are finished adding approvers from the current site, repeat steps 2 and 3 for any other sites containing
approvers you want to assign.
5. (Optional) As you assign approvers, they are all assigned to level 1
of the approval stage, meaning that they will all receive a task at the
same time when the document goes to approval. If you want the
document to go to approvers in a specific order, click New Level to
create additional approval levels. You can then specify how many of
the assigned approvers within a level must finish their reviews
before the document moves on to the next level. You can also specify a due date for each level. See Working with Levels for details.
PolicyTech 8.0 User's Guide
170 - Creating and Working with Draft Documents
6. (Optional) Set a due date for when all approvers should be finished
with the document. For details on the different ways to set a due
date, see Setting Due Dates for Writing, Reviewing, Approving,
and Reading Tasks in the "Working with Levels" topic. (You can specify a different due date for each level.)
7. (Optional) Click Add Note to include instructions or other information for the assigned approvers. See Adding Notes for Writers,
Reviewers, and Approvers for details.
Note: If you have assigned multiple approvers to an Excel®
document, consider adding a note assigning a different text font color
to each approver so you can differentiate among the approvers'
changes should they revise the document. (This isn't necessary for
Microsoft® Word documents, because the Track Changes feature
automatically includes information about who made each change.)
8. Do one of the following:
n
To continue with assigning properties, click Next Step, and then go
to Step 6: Readers in this guide.
n
To stop assigning properties and finish later, click Options, and
then click Save and Close. (When you are ready to continue with
assigning properties, go to Editing a Draft Document.)
PolicyTech 8.0 User's Guide
Creating and Working with Draft Documents - 171
n
To work on document content, click Edit Document. (When you
are ready to continue with assigning properties, if the document is
still open click Properties Wizard, or go to Editing a Draft Document if you need to reopen it.)
Other Ways to Select Approvers
The default approver selection method is to select individual approvers.
You can also select by approval group, department, or job title.
Approver Groups
Click the Approvers tab, and then click the Approver Groups
heading. If you see Multi-Site (Global) Groups or a site name
preceded by , click to display group names. Select an approver
group.
Notes:
n A group is a combination of approvers from a single site or from
multiple sites.
n To assign individual approvers from a group, click the group
name, and then select approvers.
n There may be situations where a board or committee needs to
approve a document, and many of the board or committee are
not PolicyTech™ users. In this case a document control
administrator can set up an approver group to represent the
board or committee, with as few as one user in the group. An
administrative assistant or other individual representing the
board or committee can then log in to PolicyTech during the
board's or committee's meeting and accept the document on
their behalf. This will ensure that the approval data in
PolicyTech match the actual approval date. You may also want
to have a legal review of such a situation in order to protect the
individual who represents the board or committee.
n Some organizations choose to create an approval group of one
or more users who have the responsibility to make sure the
document is clean (all markup is removed; the department and
category settings are correct; and so on) before it is approved
and published. The group with this gatekeeper or editor role
receives the document first (see Working with Levels for details
on approval levels and workflow). The document then moves
on to the other approvers.
PolicyTech 8.0 User's Guide
172 - Creating and Working with Draft Documents
Departments
Click the Departments tab, click a department, and then select one or
more listed approvers.
Job Titles
Click the Job Titles tab, click a job title, and then select one or more
listed approvers.
PolicyTech 8.0 User's Guide
Creating and Working with Draft Documents - 173
Step 6: Readers
You can assign any accessible PolicyTech user as a required reader.
Then, when the document is published, all assigned readers receive an
email notification and a task to read the document.You can choose to
simply have each reader mark the document as read, or you can include
a questionnaire that readers must pass in order to mark the document
as read (see Creating a Questionnaire for details).
Assigning readers is a completely optional Properties Wizard step. (A
template creator cannot add required readers to a template—only
optional readers.) If you don't assign any readers, the document will be
accessible to all users assigned the reader role that have access to the
sites and departments you assigned the document.
Important: We recommend that you select readers by department or
job title so you don't have to worry about adding or removing readers
from the document as they are added or removed from PolicyTech™.
Departments and job titles are automatically updated as user
changes are made.
1. In step 6. Readers, check the Selected Users box for any reviewers' names the template creator may have added. Any readers
added by the template are optional and can be treated as suggestions. To remove an optional reader, reader department, or
reader job title, double-click it (or select one or more items, and then
click ).
PolicyTech 8.0 User's Guide
174 - Creating and Working with Draft Documents
2. To add readers, in the Site list, click a site containing one or more
readers you want to assign.
3. A list of departments within the selected site is displayed by default.
If you want to use another method for selecting readers, see Other
Ways to Select Readers. Otherwise, select one or more departments to assign all users within those departments as required readers.
Note: To assign individual users from a department, click the
department name, and then select users.
4. (Optional) When you are finished adding readers from the current
site, repeat steps 2 through 4 for any other sites containing readers
you want to assign.
5. (Optional) Set a due date for when all readers should have marked
the document as read. For details on the different ways to set a due
date, see Setting Due Dates for Writing, Reviewing, Approving,
and Reading Tasks.
PolicyTech 8.0 User's Guide
Creating and Working with Draft Documents - 175
6. (Optional) By default, the selected readers will be required to read
the document once. If you need the document to be read
repeatedly, for Read Interval, click Every, and then type a number
of months.
7. (Optional) Click Add Note to include instructions or other information for the assigned readers. See Adding Notes for Writers,
Reviewers, and Approvers for details.
8. Do one of the following:
n
To continue with assigning properties, click Next Step, and then go
to Step 7: Security in this guide.
n
To stop assigning properties and finish later, click Options, and
then click Save and Close. (When you are ready to continue with
assigning properties, go to Editing a Draft Document.)
n
To work on document content, click Edit Document. (When you
are ready to continue with assigning properties, if the document is
still open click Properties Wizard, or go to Editing a Draft Document if you need to reopen it.)
Other Ways to Select Readers
The default reader selection method is to select departments. You can
also select by department group, job title, job title group, individual
readers, and reader group.
Note: A group is a combination of departments, job titles, or readers
from a single site or from multiple sites.
Department Groups
Click the Departments tab, and then click the Department Groups
heading. If you see Multi-Site (Global) Groups or a site name
preceded by , click to display group names. Select a department
group.
Note: To assign individual departments from a group, click the group
name, and then select departments.
Screenshot...
PolicyTech 8.0 User's Guide
176 - Creating and Working with Draft Documents
Job Titles
When you select a job title, all users assigned that job title will be added
as required readers. Click the Job Titles tab, click the Job Titles
heading, and then select one or more job titles.
Job Title Groups
Click the Job Titles tab, and then click the Job Title Groups heading.
If you see Multi-Site (Global) Groups or a site name preceded by ,
click to display group names. Select a job title group.
Reader Search
To find and select readers one by one, click Readers, and then in the
Search Readers box, start typing a user name. As soon as you see the
user you want to add, click the user's name.
PolicyTech 8.0 User's Guide
Creating and Working with Draft Documents - 177
Reader Groups
Click the Readers tab, and then click the Reader Groups heading. If
you see Multi-Site (Global) Groups or a site name preceded by ,
click to display group names. Select a reader group.
Readers
Click the Readers tab, click the Readers heading, and then select one
or more individual readers.
PolicyTech 8.0 User's Guide
178 - Creating and Working with Draft Documents
Step 7: Security
You can assign different security and encryption levels to a document to
restrict who can work with, view, or search the contents of the
document.
1. In step 7. Security, click the Security Level box, and then click a
level. See Security Levels below for details on each level.
2. Do one of the following:
n
If you selected the All Users security level (the default setting for all
new documents), you are done with security options. Go to step 5
below.
n
If you selected Restricted - High or Restricted - Severe, continue with step 3.
3. (Optional) Click the Encryption Mode box, and then click Normal
(Recommended) or High. See Encryption Modes below for
details on the two modes.
PolicyTech 8.0 User's Guide
Creating and Working with Draft Documents - 179
4. (Optional) If you want to grant special access permissions to specific users who would not normally have access under the
Restricted - High or Restricted - Severe security level, select
those users by department, by job title, or by those who have been
assigned the reader role. See Other Allowed Users below for
details on what permissions will be granted.
5. Do one of the following:
n
If you are finished with the document for now, click Options, and
then click Save and Close. (When you are ready to work on the
document again, go to Editing a Draft Document.)
n
To work on document content, click Edit Document (see Writing a
Document (Windows) for detailed instructions).
PolicyTech 8.0 User's Guide
180 - Creating and Working with Draft Documents
Security Levels
A document control administrator can assign users various roles for
working with documents. These roles include document owner, writer,
reviewer, approver, pending, and archived. These roles allow these
users access to the workflow statuses that correspond with their roles.
For example, a document owner will see documents in the draft status,
a writer will see documents in the collaboration status, and a reader will
see documents in the published status. Which documents they can see
in each of these statuses depends on the documents' assigned security
levels, as explained below.
All Users. When a document is assigned this security level, all users
with the roles mentioned above can see that document in the workflow
statuses they have access to, even if they are not specifically assigned
to that document. For example, someone with the document owner role
who is not a document's owner can see that document while it is in the
draft status, and someone with the reviewer role who is not assigned to
a document can see that document while it is in the review status.
Restricted - High. With this security level assigned to a document, only
those specifically assigned to one or more workflow statuses of the
document have access to it. They can also access the document in any
workflow status except archived. For example, someone assigned as a
document's approver can see that document while it is in the draft,
collaboration, review, approval, pending, and published statuses.
Restricted - Severe. As with the Restricted - High security level, only
users specifically assigned to one or more workflow statuses of the
document have access to it. However, they can only view that document
while it is in the status to which they are assigned. For example, an
assigned writer can only see the document while it is in collaboration
status.
Encryption Modes
The encryption mode determines how much of a document is
searchable when a user searches for a document from a document list,
such as when the Published status is selected.
Normal. The document's title, keywords, and contents are all
searchable.
High. Only the document's title and keywords are searchable.
(Keywords can be added in step 1. Settings of the Properties
Wizard.)
Important: Be aware that documents with high encryption take
longer to open and increase the PolicyTech™ server's processing
load.
PolicyTech 8.0 User's Guide
Creating and Working with Draft Documents - 181
Other Allowed Users
If you assign a document the Restricted - High or Restricted Severe security level, you have the ability to allow other users who are
not assigned to this document to access the document as if they were
assigned to it. As with users assigned to the document, where users can
access the document depends on their document roles and the security
level.
To allow other users to access this document, do one of the following:
n
Click the Departments tab, click the Departments heading, and
then select the departments whose users you want to grant access
to this document.
n
Click the Departments tab, and then click the Department
Groups heading. If you see Multi-Site (Global) Groups or a site
name preceded by , click to display group names. Select a
department group.
n
Click the Job Titles tab, click the Job Titles heading, and then
select one or more job titles. All users with that job title will have
access to the document
n
Click the Job Titles tab, and then click the Job Title Groups heading. If you see Multi-Site (Global) Groups or a site name preceded by , click to display group names. Select a job title group.
n
Click Readers, and then in the Search Readers box, start typing a
user name. As soon as you see the user you want to add, click the
user's name.
n
Click the Readers tab, and then click the Reader Groups heading.
If you see Multi-Site (Global) Groups or a site name preceded by
, click to display group names. Select a reader group.
n
Click the Readers tab, click the Readers heading, and then select
one or more individual readers.
Working with Levels
When, in the Properties Wizard, you assign writers, reviewers, and
approvers to a document, you can create levels to specify which users
get the document first, second, and so on. When you create multiple
levels, all users on the first level must complete their tasks, such as
reviewing the document, before the same task can be sent to the users
at the next level.
The following instructions assume that you are currently working on one
of these Properties Wizard steps: 3. Collaboration, 4. Review, 5.
Approval.
PolicyTech 8.0 User's Guide
182 - Creating and Working with Draft Documents
1. To add a level, do one of the following:
n
At the bottom of the Selected Users box, click New Level.
n
Click a user's name, and then click Down until a new level appears.
Notice in the screenshots above that a black Level 2 heading
appears. The black color indicates that this level is now active. Any
additional users selected at this point are added to Level 2. To
make Level 1 active again, click the Level 1 heading.
PolicyTech 8.0 User's Guide
Creating and Working with Draft Documents - 183
2. Do one of the following to put selected users in a level:
n
Click a level heading to activate that level, and then select the users
by department, job title, or role for that level.
n
Click a user already listed in the Selected Users box, and then use
Up or Down to move the user to a different level.
Note: Clicking Down when the user is already at the last level (highest
numerically) automatically creates a new level.
3. (Optional) In a level heading, click the Require box, and then click
All or a number. This indicates how many users within each level
must complete their tasks before the document can move to the
next level. For example, if there are two users on a specific reviewers level, and you only need one or the other to review the document, you would select 1 in the Require list for that level.
PolicyTech 8.0 User's Guide
184 - Creating and Working with Draft Documents
4. (Optional) In a level heading, click the No Due Date box, and then
select a due date for that level. See Setting Due Dates for Writing,
Reviewing, Approving, and Reading Tasks for detailed instructions.
Setting Due Dates for Writing, Reviewing, Approving, and Reading Tasks
You can set a task due date that is a specific number of days after the
user receives the task, or you can select a specific calendar date as the
due date. The way you set a due date for a writing, reviewing, or
approving task is the same, while setting a due date for a reading task is
slightly different.
Setting a Due Date for a Writing, Reviewing, or Approving
Task
Important: The instructions in this section assume that you are
working in one of the following Properties Wizard steps: 3. Writers,
4. Reviewers, 5. Approvers.
1. After clicking No Due Date to display the Due Date for Level
[number] window, do one of the following:
n
Click Due on Date Interval, and then type a number in the Due
box. For example, if you type 7, the user assigned the task, such as
reviewing or approving the document, must complete the task
within one week from the time that user was notified of the task.
PolicyTech 8.0 User's Guide
Creating and Working with Draft Documents - 185
Notes:
n The number of days you type for the date interval represents
calendar days, not work week days.
n When setting a due date interval, consider the task that needs
to be completed. For example, a document in review may be
sent back to draft stage one or more times before an assigned
reviewer accepts the document, while a document in approval
(a final draft) may take much less time to be approved.
n
Click Due on a Specific Date, click
get due date.
, and then find and click a tar-
PolicyTech 8.0 User's Guide
186 - Creating and Working with Draft Documents
2. (Optional) Click Delay Phase Change. The Delay Phase
Change option applies only if you selected a number less than All
in this level's Require list. This option is useful when you want as
many users as possible to complete their tasks up until the due
date, but then want the document moved on to the next level if at
least the number of required users have completed their tasks. The
document will move to the next level earlier than the due date only if
all users on the current level complete their tasks.
3. (Optional) Click Warn, and then type a number of days before the
due date that you want all that level's assignees notified that the due
date is near. For example, if you set seven days after the level
begins as the due date, and then you type 2 as the warning setting,
any users who haven't finished their tasks for that level by the end of
the fifth day will receive a task reminder.
4. (Optional) Click Make this critical on, click , and then find and
click a specific date that is on or after the due date. If any users
haven't completed their tasks by the critical date, an escalation
email is sent to both the assignees and the document owner.
Setting a Due Date for a Reading Task
Important: The instructions in this section assume that you are
working on the 6. Readers step of the Properties Wizard.
1. After clicking No Due Date to display the Due Date for Level 1
window, do one of the following:
n
Click Due on Date Interval, and then type a number in the Due
box. For example, if you type 7, the user assigned the reading task
must mark the document as read within one week from the time that
user was notified of the task.
Note: The number of days you type for the date interval represents
calendar days, not work week days.
PolicyTech 8.0 User's Guide
Creating and Working with Draft Documents - 187
n
Click Due on a Specific Date, click
get due date.
, and then find and click a tar-
Important: We recommend that you not set a specific due date for a
reading task as that could cause past due notices to go out to new
users who were added after the due date and assigned to read the
document.
2. (Optional) Click Warn, and then type a number of days before the
due date that you want all reader assignees notified that the due
date is near. For example, if you set seven days after the task is
sent as the due date, and then you type 2 as the warning setting,
PolicyTech 8.0 User's Guide
188 - Creating and Working with Draft Documents
any users who haven't finished their tasks by the end of the fifth day
will receive a task reminder.
Assignees and Site Access
As users are added to PolicyTech™, the document control
administrator decides which sites each user should have access to.
When you assign a writer, reviewer, approver, or reader to a document
and that user is not assigned or and has not been given access to the
site containing the document, PolicyTech lets the user open the
document anyway in order to complete the assigned task. However, the
user can only open the document from the task in MY TASKS or from
the link in the notification email. The document cannot be found in the
document list, since the user cannot select that site.
Keep this in mind as you assign users from other sites. Be sure that
you're not granting a user access to a document that the user should not
have access to.
Adding Notes for Writers, Reviewers, and Approvers
When assigning writers, reviewers, approvers, and readers in the
Properties Wizard, you can include a note with instructions or other
information concerning the writing, reviewing, approving, or reading of
the document. Any note you write is included in the task notification
email sent to assignees as soon as the document moves to the stage for
which the note was written. For example, if you include a note while
working on step 4. Reviewers, that note will be sent as soon as the
document goes to review. An assignee can also access a note from
within the document (see Reviewing Notes for details).
1. Click Add Note.
2. Click To... As you select note recipients, you will only see the users,
groups, and multi-site groups currently assigned to the document.
PolicyTech 8.0 User's Guide
Creating and Working with Draft Documents - 189
3. To select writers, reviewers, or approvers as note recipients, click
the Writers, Reviewers, or Approvers tab, and then do any of the
following:
n
Under the Writers, Reviewers, or Approvers heading, select individual assignees.
n
Click the Groups heading, and then select one or more assigned
groups.
PolicyTech 8.0 User's Guide
190 - Creating and Working with Draft Documents
n
Click the Multi-Site (Global) Groups heading, and then select one
or more assigned multi-site groups.
n
To select readers as note recipients, click the Readers tab, and
then click Send this note to all required readers.
PolicyTech 8.0 User's Guide
Creating and Working with Draft Documents - 191
4. Type a subject.
Note: You must type a subject before you can save the note.
5. Type the instructions or other information, and then click Save and
Close.
Writing a Document (Windows)
Refer to the section below that corresponds with the type of document
you need to write.
PolicyTech 8.0 User's Guide
192 - Creating and Working with Draft Documents
Adding Content to a Word or Excel Document
Adding Content to a Rich Text Format Document
Adding Content to a Document with an Upload File Template
Importing Content
PolicyTech 8.0 User's Guide
Adding Content to a Word or Excel Document - 193
Adding Content to a Word or Excel Document
Important: Before you can write or otherwise add content to a
Microsoft® Word or Excel® document, you must complete at least
step 1. Settings of the Properties Wizard. If you have not already
done so, complete the instructions under Assigning Document
Properties.
What You Should Know about Using Word or Excel inside
of PolicyTech
Writing a Word or Excel document within PolicyTech™ is much the
same as writing a document in the Word or Excel program outside of
PolicyTech. For example, while using Word or Excel inside of
PolicyTech, you will see any customizations you have made to the Quick
Access Toolbar and Ribbon while using Word or Excel outside of
PolicyTech. Some of the differences you might notice when using Word
or Excel inside of PolicyTech include the following:
n
When you click Edit Document or open a document from a document list, some processes run that enable the editing of the Word
or Excel document within PolicyTech. You cannot work with the document until those processes are finished.
n
Most, but not all, Word and Excel features are available.
n
Up until the document is approved and published, PolicyTech automatically adds a watermark to a Word document indicating its current location in the writing, review, and approval process. For
example, when you start a document, it is placed in the draft stage
and includes a draft watermark.
Note: While you can add a watermark of your own, that watermark
will be overwritten.
n
When you save the Word or Excel document, it is saved to the PolicyTech database rather than as a file on a hard drive. You might
also notice that a process runs each time you save the document.
n
If the document contains unsaved changes and you click one of the
other tabs (Properties Wizard, Overview, or Edit
Questionnaire), PolicyTech automatically saves the document.
PolicyTech 8.0 User's Guide
194 - Adding Content to a Word or Excel Document
n
Depending on the template you select in the Properties Wizard, a
new Word or Excel document may already contain text, tables,
graphics, and so on.
n
One extra thing you can do when using Word or Excel within PolicyTech is to insert fields that contain certain document properties,
such as the title you typed in step 1. Settings of the Properties
Wizard, or the names of the reviewers you assigned in step 4.
Reviewers. These fields are automatically updated whenever the
property information changes.
Adding Document Content
Note: It is not within the scope of this guide to instruct on how to use
the Word or Excel program to write documents. The instructions that
follow assume you have a working knowledge of Word and Excel.
1. Do one of the following to open the Word or Excel editing window:
n
If you currently have the document open and have the Properties
Wizard, Overview, or Edit Questionnaire tab selected, click the
Edit Document tab near the upper left corner or the Edit
Document button at the bottom of the currently displayed
Properties Wizard step.
n
If the document is currently closed, click DOCUMENTS, and then
click Draft. Use any of several methods to find and display the document in the document list (see Finding and Opening a Document
for details), and then click the document title.
PolicyTech 8.0 User's Guide
Adding Content to a Word or Excel Document - 195
You should now see a window similar to one of the windows below.
Notes:
n The Word or Excel user interface may look different, depending
on the version you have.
n The document may or may not already have content,
depending on whether the template you selected has content. If
you see prewritten content, see Working with Template
Content.
PolicyTech 8.0 User's Guide
196 - Adding Content to a Word or Excel Document
2. Do one of the following to add content to the document:
n
Use any available Word or Excel features to write and format the
document.
Note: If you would like to see more of the document within the
window, click Editor Tools, and then click Collapse Header Bar.
When you are ready to use a feature in the header bar, click Editor
Tools, and then click Expand Header Bar.
n
Click Editor Tools, click Import/Overwrite, and then follow the
prompts to import the content of an existing Word or Excel document from outside of PolicyTech (see Importing Content for
detailed instructions).
Important: Importing content completely overwrites any existing
content. Copy and paste information from another document if you
don't want to overwrite this document's existing content.
PolicyTech 8.0 User's Guide
Adding Content to a Word or Excel Document - 197
3. (Optional) Place your cursor in the document where you want to
insert a document property field. Click Editor Tools, click Insert
Properties, and then find and insert a document property (see
Inserting Document Properties for detailed instructions).
4. When finished adding content, do any of the following:
n
Save and close the document (see Saving and Closing a Draft
Document).
n
Add supplementary materials to the document (see Attaching Files
and Adding Reference Links and Working with Document Discussions).
n
Finish assigning document properties (see Assigning Document
Properties).
n
Create a questionnaire for marking the document as read (see
Creating a Questionnaire).
n
Look at the document overview (see Working with the Document
Overview).
n
Submit the document to assigned writers (see Submitting a Document to Writers (for Collaboration)).
n
Submit the document to assigned reviewers (see Submitting a
Document for Review).
PolicyTech 8.0 User's Guide
198 - Adding Content to a Word or Excel Document
n
Submit the document to assigned approvers (see Submitting a
Document for Approval).
Working with Template Content
The template you selected in the Properties Wizard may include
document content. If you have any questions about the prewritten
content, contact your document control administrator.
Inserted Document Property Fields
The content may also include inserted fields that contain document
property information from the Properties Wizard, such as the
document title or a list of reviewers. Be careful not to change the content
of a property field as that information is automatically inserted. If you do
change field contents, the changes will be lost the next time
PolicyTech™ updates that field information.
To see if a Microsoft® Word template's prewritten content contains
property fields, you can set the Field Setting option in Word to always
shade inserted fields, as shown in the screenshot below. See Changing
the Field Shading Option in the "Inserting Document Properties" topic
for details.
To see if an Excel template's prewritten content contains property fields,
select the field, and then look in the Formula Bar. A property field
contains the following formula: =[field_name], where [field_name] is the
name PolicyTech has assigned to this document property (Document_
Title in the example below).
PolicyTech 8.0 User's Guide
Adding Content to a Word or Excel Document - 199
Note: To add document property fields, see Inserting Document
Properties.
Inserting Document Properties
As you create a document and throughout its life cycle much information
about the document is tracked and stored in the PolicyTech™
database. You can access this information and have it appear within the
content of the Microsoft® Word or Excel® document itself by inserting
what are called property fields. For example, you could insert property
fields to show the name of the document owner, the date the document
is approved, and names of the departments the document affects. The
contents of these fields automatically change as events occur that affect
those document properties.
The instructions below explain how to insert a property field into a
document. For details on each document property, see Document
Property Details.
Inserting Into a Word Document
1. In an Edit Document window, place the cursor where you want
the document property field inserted.
2. Click Editor Tools.
3. Click Insert Properties, and then navigate to and click the information you want to insert.
PolicyTech 8.0 User's Guide
200 - Adding Content to a Word or Excel Document
Some fields that are inserted will immediately display the correct value,
such as the document title, the document owner's name, or the current
date. Other fields display the correct information only after certain
events have occurred. For example, if you insert the Publication Date
field, you will see "Not Approved Yet" as the field text until the document
is approved, at which time the approval date will appear. Also keep in
mind that some of a document's properties, such as its title or assigned
approvers, are editable. If a property is changed in the Properties
Wizard or in Preferences, that change will automatically be reflected in
the corresponding inserted property field.
When you insert a field into a Word document, it looks like normal text,
but a field is treated differently than normal text. For example, the
document shown below includes the Business Title, Document Title,
and Version Number fields in the header. One way to tell that these are
fields is to place the cursor within the field text, which shades all of the
field text (if the Word setting for Field shading is When selected). In
the document below, the cursor is in the Document Title field.
Important: While the text of a property field is editable, we strongly
recommend that you not edit field text, as whatever changes you
make will be lost the next time the field is updated.
Changing the Field Shading Option
You can change the Field shading option in Word so that all inserted
fields are always shaded, as shown below.
PolicyTech 8.0 User's Guide
Adding Content to a Word or Excel Document - 201
The way you access the Field shading option depends on your version
of Word.
In Word 2010:
1. Click File, click Options, and then click Advanced.
2. Scroll down to the "Show document content" area.
3. In the Field shading list, click Always, and then click OK.
In Word 2007:
1. Click the Microsoft Office Button
then click Advanced.
, click Word Options, and
PolicyTech 8.0 User's Guide
202 - Adding Content to a Word or Excel Document
2. Scroll down to the Show document content area.
3. In the Field shading list, click Always, and then click OK (see
screenshot in "Word 2010" section above).
In Word 2003:
1. Click Tools, and then click Options.
2. Click the View tab.
3. In the Show area, in the Field shading list, click Always.
Deleting a Property Field in a Word Document
To delete a property field you've inserted into a Word document, do one
of the following:
n
Select the entire field, and then press Delete or Backspace.
n
Place the cursor immediately before the first letter in the property
field text, press Delete to select the entire field, and then press
Delete again to delete the field.
n
Place the cursor immediately after the last letter in the property field
text, press Backspace to select the entire field, and then press Backspace again to delete the field.
PolicyTech 8.0 User's Guide
Adding Content to a Word or Excel Document - 203
Note: If you place the cursor anywhere inside the field instead of
before or after the field, pressing Delete or Backspace will delete a
character in the field text instead of selecting the field.
Inserting Into an Excel Document
1. In an Edit Document window, select the empty cell where you
want the document property field inserted.
Important: A property field cannot be inserted into a spreadsheet
cell that already contains information or that is being edited. Make
sure that the cell you select is empty and that you are not in edit mode
(that the cursor is not active in the Formula Bar or inside the cell).
2. Click Editor Tools.
3. Click Insert Properties, and then navigate to and click the information you want to insert.
4. If you see the prompt, "Warning: Using this feature with Excel will
erase your undo history," do one of the following:
n
Click OK to erase the undo history and continue to insert the field.
n
Click Cancel to go back to editing the document without inserting
the field.
Important: You will see the warning only once during an editing
session, but inserting a field always erases the undo history. To avoid
erasing information from the undo history that you might need later,
we suggest you insert fields either as the first or last step of creating
an Excel document.
Some fields that are inserted will immediately display the correct
value, such as the document title, the document owner's name, or
the current date. Other fields display the correct information only
after certain events have occurred. For example, if you insert the
Publication Date field, you will see "Not Approved Yet" as the
field text until the document is approved, at which time the
approval date will appear. Also keep in mind that some of a
document's properties, such as its title or assigned approvers, are
editable. If a property is changed in the Properties Wizard or in
Preferences, that change will automatically be reflected in the
corresponding inserted property field.
When you insert a field into a Microsoft Excel document, it looks
like normal text, but it is not. You can identify a document property
field in Excel by clicking on a cell and then looking in the Formula
PolicyTech 8.0 User's Guide
204 - Adding Content to a Word or Excel Document
Bar, or by double-clicking a cell to activate edit mode. A property
field contains the following formula: =[field_name], where [field_
name] is the name PolicyTech has assigned to this document
property (Document_Title in the example below). Because an
inserted property field contains a formula, you cannot edit the
property field text in an Excel document.
Document Property Details
Each of the document properties you can insert into a Microsoft® Word
or Excel® document is explained in detail in the sections listed below.
Document Info
Title
Reference #
Keywords
Version Number
Supersedes
Affected Department(s)
Version Change Summary
Company Info
Business Title
Logo
Site Name
Categories
Category Titles
[Assigned Category]
Category Name
Values (by comma) and Values (by hard return)
Descriptions and Value: Description
Affected Department(s)
Dates
Date Created
PolicyTech 8.0 User's Guide
Adding Content to a Word or Excel Document - 205
Date Approved
Last Periodic Review Date
Next Periodic Review Date
Publication Date
Original Creation Date
Date Last Modified
User Info
Common User Info Properties
Document Creator and Document Owner
Writers, Reviewers, Approvers, and Readers
Security
Document Info Fields
Title
Reference #
Keywords
Version Number
Supersedes
Affected Department(s)
Version Change Summary
Title
Location on Insert Properties menu:
Example of an inserted title:
PolicyTech 8.0 User's Guide
206 - Adding Content to a Word or Excel Document
Source: The document creator enters a title while creating a document.
(Properties Wizard > 1. Settings > Basic Settings > Title)
When it changes: The document owner or document control
administrator can change the title anytime in any active document.
Where to view: The title you insert will be the same as the title displayed
in the document overview. (Overview > Properties)
TABLE OF CONTENTS FOR DOCUMENT PROPERTY DETAILS
PolicyTech 8.0 User's Guide
Adding Content to a Word or Excel Document - 207
Reference #
Location on Insert Properties menu:
Example of an inserted reference number:
Source: PolicyTech™ auto-generates the reference number the first
time the document is saved.
When it changes: The reference number cannot be changed and
remains the same for all subsequent versions of a specific document.
PolicyTech 8.0 User's Guide
208 - Adding Content to a Word or Excel Document
Where to view: The reference number you insert will be the same as the
one displayed in the document overview. (Overview > Properties)
TABLE OF CONTENTS FOR DOCUMENT PROPERTY DETAILS
Keywords
Location on Insert Properties menu:
Example of an inserted keyword list:
Note: Adding keywords to a document is optional. If no keywords are
added, the inserted field contains "Not Set."
Source: The document creator enters keywords while creating a
document. (Properties Wizard > 1. Settings > Optional Settings >
Document Keywords)
PolicyTech 8.0 User's Guide
Adding Content to a Word or Excel Document - 209
When it changes: The document creator or document control
administrator can change the keywords anytime in any active
document.
Where to view: The keywords you insert will be the same as those
displayed in the document overview (Overview > Properties).
TABLE OF CONTENTS FOR DOCUMENT PROPERTY DETAILS
Version Number
Location on Insert Properties menu:
Example of an inserted version number:
PolicyTech 8.0 User's Guide
210 - Adding Content to a Word or Excel Document
Source: PolicyTech™ auto-generates the version number. The
document creator can enter a different version number when the
document is first created (first version). (Properties Wizard > 1.
Settings > Basic Settings > Version Number)
When it changes: The document creator can change the version
number only when creating the document and only while it is in draft
status.
Where to view: The version number you insert will be the same as the
one displayed in the document overview. (Overview > Properties)
PolicyTech 8.0 User's Guide
Adding Content to a Word or Excel Document - 211
TABLE OF CONTENTS FOR DOCUMENT PROPERTY DETAILS
Supersedes
Location on Insert Properties menu:
Example of an inserted list of superseded documents:
Note: Selecting documents to replace is optional. If no documents
are selected, the inserted field contains "Not Set."
PolicyTech 8.0 User's Guide
212 - Adding Content to a Word or Excel Document
Source: When the document owner creates a new version of a
document, the previous version is automatically superseded. The
document owner can also select other documents to supersede.
(Options > Replace Documents)
When it changes: A superseded previous version cannot be removed
from the Superseded property. A document owner or document
control administrator can change other superseded documents only
while the document is in draft or collaboration status.
Where to view: The list of superseded documents you insert will be the
same as the one displayed in the document overview. (Overview >
Document History > View (in Superseded Documents column))
PolicyTech 8.0 User's Guide
Adding Content to a Word or Excel Document - 213
TABLE OF CONTENTS FOR DOCUMENT PROPERTY DETAILS
Affected Department(s)
Location on Insert Properties menu:
PolicyTech 8.0 User's Guide
214 - Adding Content to a Word or Excel Document
Example of an inserted list of affected departments:
Source: When creating a document, the document creator selects
which departments will have access to the document. (Properties
Wizard > 2. Departments & Categories > Departments)
PolicyTech 8.0 User's Guide
Adding Content to a Word or Excel Document - 215
When it changes: The document owner or document control
administrator can change the department selections anytime in any
active document.
Where to view: The list of affected departments you insert will be the
same as the one displayed in the document overview. (Overview >
Properties)
TABLE OF CONTENTS FOR DOCUMENT PROPERTY DETAILS
Version Change Summary
Location on Insert Properties menu:
Example of an inserted version change summary:
Note: The document creator must enter a version change summary
when taking any action that moves the document out of draft status,
such as when sending the document to review or approval. If you are
PolicyTech 8.0 User's Guide
216 - Adding Content to a Word or Excel Document
creating the first version of a document and it is still in draft status, the
inserted field will contain "Not Set."
Source: When a document owner creates a new version of a document
and then submits it for review or approval, he or she has a chance to
specify the changes made in the new version. If the document owner
does not specify changes, the text "New Version" appears by default.
(Properties Wizard > 2. Departments & Categories >
Departments)
PolicyTech 8.0 User's Guide
Adding Content to a Word or Excel Document - 217
When it changes: The document owner or document control
administrator can change the version change summary only if the
document is sent back to draft and then resubmitted to review or
approval.
Where to view: The version change summary you insert will be the
same as the one displayed in the document overview. (Overview >
Document History > View (in Changes Summary column))
PolicyTech 8.0 User's Guide
218 - Adding Content to a Word or Excel Document
TABLE OF CONTENTS FOR DOCUMENT PROPERTY DETAILS
Company Info Fields
Business Title
Location on Insert Properties menu:
Example of an inserted business title:
Note: When setting up PolicyTech™, entering a business title is
optional. If no business title is entered, the inserted field contains "Not
Set."
PolicyTech 8.0 User's Guide
Adding Content to a Word or Excel Document - 219
Source: The document control administrator enters a business title
while setting up PolicyTech. (PREFERENCES > Company Setup >
General Properties > Business Title)
When it changes: The document control administrator can change the
business title anytime.
Where to view: The business title you insert will be the same as the one
displayed in the document overview. (Overview > Properties)
PolicyTech 8.0 User's Guide
220 - Adding Content to a Word or Excel Document
TABLE OF CONTENTS FOR DOCUMENT PROPERTY DETAILS
Logo
The Logo option appears only if a logo graphic file has been uploaded
in the Company Setup preferences or when creating the current site.
See your document control administrator if the Logo option is not
available and you would like to be able to insert your company logo into
documents.
Location on Insert Properties menu:
Example of an inserted logo:
PolicyTech 8.0 User's Guide
Adding Content to a Word or Excel Document - 221
Source: The document control administrator may upload a company
logo graphic file while setting up PolicyTech™. (PREFERENCES >
Company Setup > General Properties > Document Logo)
When it changes: The document control administrator upload a different
logo graphic or delete the current one anytime.
Where to view: Unless you have been assigned the document control
administrator role, the only way to view the currently uploaded logo is to
insert it into a document.
TABLE OF CONTENTS FOR DOCUMENT PROPERTY DETAILS
Site Name
Location on Insert Properties menu:
Example of an inserted site name:
PolicyTech 8.0 User's Guide
222 - Adding Content to a Word or Excel Document
Source: While creating a document, the document creator selects the
sites where the document will be accessible. (Properties Wizard > 2.
Departments & Categories > First: Choose which sites can
access this document).
When it changes: The document owner or document control
administrator can change the site assignments anytime for any active
document.
Where to view: The site name list you insert will be the same as the one
displayed in the document overview. (Overview > Properties)
PolicyTech 8.0 User's Guide
Adding Content to a Word or Excel Document - 223
TABLE OF CONTENTS FOR DOCUMENT PROPERTY DETAILS
Category Fields
Category Titles
Assigned Category
Category Name
Values (by comma) and Values (by hard return)
Descriptions and Value: Description
Affected Departments
Category Titles
Note: This option inserts a list of all top-level categories a document
is assigned to. To insert a single category name, see Category Name
below.
Location on Insert Properties menu:
Example of an inserted list of category titles:
PolicyTech 8.0 User's Guide
224 - Adding Content to a Word or Excel Document
Note: Assigning a document to categories is optional. If no
categories are selected, the inserted field contains "Not Set."
Source: While creating a document, the document creator can assign a
document to categories. (Properties Wizard > 2. Departments &
Categories > [category name])
When it changes: The document owner or document control
administrator can change the category assignments anytime in any
active document.
Where to view: The category titles you insert will be the same as those
displayed in the document overview. (Overview > Properties)
PolicyTech 8.0 User's Guide
Adding Content to a Word or Excel Document - 225
TABLE OF CONTENTS FOR DOCUMENT PROPERTY DETAILS
[Assigned Category]
Location on Insert Properties menu: When a document creator
assigns a category to a document, that category name appears on the
Categories submenu of Insert Properties. The image below shows a
Categories submenu of a document assigned to the Compliance
Standards and Document Type categories.
Each assigned category option on the Categories menu is also a
submenu. Each assigned category submenu is the same as the one
shown for the Compliance Standards category below.
The assigned category submenu options are explained below.
TABLE OF CONTENTS FOR DOCUMENT PROPERTY DETAILS
PolicyTech 8.0 User's Guide
226 - Adding Content to a Word or Excel Document
Category Name
Location on Insert Properties menu: The image below shows the
Category Name option on the assigned category submenu called
Compliance Standards. The categories defined for any given
company and the categories assigned to any given document will vary,
so the category names you see will most likely be different than the ones
in the image below.
Example of an inserted category name:
Source: The document creator assigns categories to a document while
creating it. (Properties Wizard > 2. Departments & Categories >
[category name])
PolicyTech 8.0 User's Guide
Adding Content to a Word or Excel Document - 227
When it changes: The document owner or document control
administrator can change category assignments anytime in any active
document.
Where to view: The assigned category name you insert will be the same
as the one displayed in the document overview. (Overview >
Properties)
TABLE OF CONTENTS FOR DOCUMENT PROPERTY DETAILS
Values (by comma) and Values (by hard return)
A value is the lowest-level assignable subcategory in a category
hierarchy. In the image below, Compliance Standards is the top-level
parent category, Personnel is a next-level subcategory, and P.1.10
ST:1 is a lowest-level subcategory, or value.
PolicyTech 8.0 User's Guide
228 - Adding Content to a Word or Excel Document
Locations on Insert Properties menu:
Example of an inserted list of subcategory (value) names, separated by
commas:
PolicyTech 8.0 User's Guide
Adding Content to a Word or Excel Document - 229
Example of an inserted list of subcategory (value) names, separated by
hard returns:
Source: The document creator assigns categories to a document while
creating it. (Properties Wizard > 2. Departments & Categories >
[category name])
PolicyTech 8.0 User's Guide
230 - Adding Content to a Word or Excel Document
When it changes: The document owner or document control
administrator can change the category assignments anytime in any
active document.
Where to view: The assigned category values you insert will be the
same as those displayed in the document overview. (Overview >
Properties)
TABLE OF CONTENTS FOR DOCUMENT PROPERTY DETAILS
Descriptions and Value: Description
A value is the lowest-level assignable subcategory in a category
hierarchy. In the image below, Sarbanes-Oxley Guidelines is the toplevel parent category, Section 208 is a next-level subcategory, and
Sec. 208-2 is a lowest-level subcategory, or value. A description can be
entered for each category and subcategory.
PolicyTech 8.0 User's Guide
Adding Content to a Word or Excel Document - 231
Locations on Insert Properties menu:
Example of inserted lists of descriptions (Descriptions option):
PolicyTech 8.0 User's Guide
232 - Adding Content to a Word or Excel Document
Example of inserted list of descriptions, including value names (Value:
Description option):
Source: A document control administrator can enter descriptions while
creating categories. (PREFERENCES > Document Setup >
Categories > New > Description)
PolicyTech 8.0 User's Guide
Adding Content to a Word or Excel Document - 233
When it changes: The document control administrator can change the
category descriptions anytime.
Where to view: The category descriptions you insert will be the same as
those displayed when assigning a category in the Properties Wizard.
(Properties Wizard > 2. Departments & Categories > [category
name])
TABLE OF CONTENTS FOR DOCUMENT PROPERTY DETAILS
Affected Department(s)
PolicyTech 8.0 User's Guide
234 - Adding Content to a Word or Excel Document
Note: Inserting affected departments from the Categories submenu
is the same as inserting them from the Document Info submenu.
Location on Insert Properties menu:
Example of an inserted list of affected departments:
Source: When creating a document, the document creator selects
which departments will have access to the document. (Properties
Wizard > 2. Departments & Categories > Departments)
PolicyTech 8.0 User's Guide
Adding Content to a Word or Excel Document - 235
When it changes: The document owner or document control
administrator can change the department selections anytime in any
active document.
Where to view: The list of affected departments you insert will be the
same as the one displayed in the document overview. (Overview >
Properties)
TABLE OF CONTENTS FOR DOCUMENT PROPERTY DETAILS
PolicyTech 8.0 User's Guide
236 - Adding Content to a Word or Excel Document
Date Fields
Note: The format of inserted dates is controlled by the Date Format
setting in General Properties in Company Setup
(PREFERENCES > General Properties > Date Format) and in
the Regional Settings of a site in Company Setup
(PREFERENCES > Company Setup > Sites > New Site or [site
name] > Date Format).
Date Created
Location on Insert Properties menu:
Example of an inserted creation date:
Source: A document's creation date is set the first time a draft document
is saved, which typically happens the first time the document creator
clicks Save, Next Step, or Edit Document in the Properties Wizard.
The creation date is specific to a document version and a new date is set
each time a new version is first saved.
PolicyTech 8.0 User's Guide
Adding Content to a Word or Excel Document - 237
When it changes: The creation date cannot be changed.
Where to view: The creation date you insert will be the same as the one
displayed in the document overview. (Overview > Properties)
TABLE OF CONTENTS FOR DOCUMENT PROPERTY DETAILS
Date Approved
Location on Insert Properties menu:
PolicyTech 8.0 User's Guide
238 - Adding Content to a Word or Excel Document
Example of an inserted approval date:
Note: Until a document is approved, this field contains "Not
Approved Yet."
Source: A document's approval date is set when the last assigned
approver accepts the document after all other approvers have accepted
it. Each version of a document has its own approval date.
PolicyTech 8.0 User's Guide
Adding Content to a Word or Excel Document - 239
The approval date will also be set if the document owner or document
control administrator sets the document as approved.
When it changes: The approval date for a specific version cannot be
changed once it has been set.
Where to view: The approval date you insert will be the same as the one
displayed in the document overview. (Overview > Properties)
TABLE OF CONTENTS FOR DOCUMENT PROPERTY DETAILS
Last Periodic Review Date
Location on Insert Properties menu:
Example of an inserted date when the document was last reviewed:
PolicyTech 8.0 User's Guide
240 - Adding Content to a Word or Excel Document
Note: Because the last periodic review date is not set until a
document is approved, this field contains "Not Approved Yet" before
the document is approved. Also, assigning a periodic review date is
optional. If one is not assigned, the inserted field contains "No Review
Date."
Source: A document's last periodic review date is set when a document
is approved, which means that the last periodic review date is typically
the same as the approval date (see Source under "Date Approved"
above).
When it changes: The last periodic review date of a published document
is reset only if the document owner or document control administrator
change the review interval in the Properties Wizard (Properties
Wizard > 1. Settings > Optional Settings > Document Review
Interval) or by selecting No Revision Necessary (Options > No
Revision Necessary).
Where to view: The only place to view the last periodic review date
besides the inserted property field is in a published document list with
the optional Last Reviewed column activated. (DOCUMENTS >
Published or Pending > [any Arrange by item that displays a
document list] > Display/Export Options > Show/Hide Columns >
Last Reviewed > Close)
PolicyTech 8.0 User's Guide
Adding Content to a Word or Excel Document - 241
TABLE OF CONTENTS FOR DOCUMENT PROPERTY DETAILS
Next Periodic Review Date
Location on Insert Properties menu:
Example of an inserted date when the document will next be reviewed:
Note: Because the next periodic review date is not set until a
document is approved, this field contains "Not Approved Yet" before
the document is approved. Also, assigning a periodic review date is
optional. If one is not assigned, the inserted field contains "No Review
Date."
PolicyTech 8.0 User's Guide
242 - Adding Content to a Word or Excel Document
Source: By default, a new document is set to be reviewed one year from
the approval date. The document creator can also choose a different
review interval as well as a specific initial review date, in which case the
next periodic review date will be the specified number of months after
the specified initial review date.
When it changes: The next periodic review date of a published
document is reset only if the document owner or document control
administrator change the review interval in the Properties Wizard
(Properties Wizard > 1. Settings > Optional Settings > Document
Review Interval) or by selecting No Revision Necessary (Options >
No Revision Necessary).
Where to view: The next review date you insert will be the same as the
one displayed in the document overview. (Overview > Properties)
TABLE OF CONTENTS FOR DOCUMENT PROPERTY DETAILS
PolicyTech 8.0 User's Guide
Adding Content to a Word or Excel Document - 243
Publication Date
Location on Insert Properties menu:
Example of an inserted publication date:
Note: Until a document is published, the inserted field contains "Not
Approved Yet."
Source: The publication date is typically the same as the approval date,
because, by default, a document is published at the same time it is
approved. However, the document creator can set a specific publication
date. If the publication date is later than the approval date, the document
remains in pending state until the publication date.
When it changes: Each version of a document has its own publication
date, which does not change.
Where to view: The publication date you insert will be the same as the
one displayed in the document overview. (Overview > Properties)
PolicyTech 8.0 User's Guide
244 - Adding Content to a Word or Excel Document
TABLE OF CONTENTS FOR DOCUMENT PROPERTY DETAILS
Original Creation Date
Location on Insert Properties menu:
Example of an inserted original creation date:
Note: Entering an original creation date is optional. If no date is
entered, this inserted field contains "No Date Set."
PolicyTech 8.0 User's Guide
Adding Content to a Word or Excel Document - 245
Source: Original Creation Date is an optional setting in the
Properties Wizard and is useful for adding information to imported
documents. The creation date for an imported document is set on the
day it is imported, while the document was most likely created outside of
the PolicyTech™ setting at an earlier date. After the document has
been imported, the document owner or document control administrator
can indicate when the document was originally created. (Properties
Wizard > 1. Settings > Optional Settings > Original Creation Date)
When it changes: The document owner or document control
administrator can change the original creation date anytime in any
active document.
Where to view: The original creation date you insert will be the same as
the one displayed in the document overview. (Overview > Properties)
PolicyTech 8.0 User's Guide
246 - Adding Content to a Word or Excel Document
TABLE OF CONTENTS FOR DOCUMENT PROPERTY DETAILS
Date Last Modified
Location on Insert Properties menu:
Example of an inserted last modified date:
PolicyTech 8.0 User's Guide
Adding Content to a Word or Excel Document - 247
Source: This date is captured whenever a document's contents are
changed.
When it changes: The date is updated each time one of the following
occurs:
n
A document owner, proxy author, or writer makes changes in edit
mode.
n
A reviewer or approver revises the document.
n
A document control administrator edits the document in its current
state.
Where to view: The last modified date you insert will be the same as the
one displayed for the latest version in the document history.
TABLE OF CONTENTS FOR DOCUMENT PROPERTY DETAILS
PolicyTech 8.0 User's Guide
248 - User Info Fields
User Info Fields
With almost all User Info options you can insert one of the following
document properties:
Property
Example
Full Name (F L) Susan Howard
Full Name (L, F) Howard, Susan
Job Title
Document Control Administrator
Name & Title
Howard, Susan (Document Control Administrator)
Department
Administration
When inserting writer, reviewer, approver, reader, and security
properties, you also have the option to include information about
groups, as shown below.
Note: When including specified or all users with group names, you
have the same user information options as shown in the table above.
For "Group Names and Specified Users" and "Group Names and All
Users" in the table below, the examples are for when Name & Title
are selected.
Property
Example
Group
Names
Only
Managers, Officers
Group
Names
and
Specified
Users
Managers, Officers, Brad Thomas (Director of
Operations), Darren Breen (Personnel Manager), Teresa
Monson (Chief Operations Officer), Tom Hansen
(Accounting Manager)
Group
Names
and All
Users
Managers, Officers, Alice Lavin (Manager), Anne Jones
(Chief Finance Officer), Brad Thomas (Director of
Operations), Carol Benton (Environmental Control
Manager), Darren Breen (Personnel Manager), Douglas
Johnson (Chief Executive Officer), Edward Gleeson
(Manufacturing Manager), Fred Wright (Software
Development Manager), John Farnsworth (Information
Systems Manager), Teresa Monson (Chief Operations
Officer), Tom Hansen (Accounting Manager)
TABLE OF CONTENTS FOR DOCUMENT PROPERTY DETAILS
PolicyTech 8.0 User's Guide
User Info Fields - 249
Document Creator and Document Owner
Locations on Insert Properties menu:
Examples of inserted document owner and creator properties:
Source: The document creator is the person logged into PolicyTech™
when the document is created.
By default the document owner is the same as the document creator,
but the creator can assign another user with the document owner role
or document control administrator permission as the document owner.
PolicyTech 8.0 User's Guide
250 - User Info Fields
(Properties Wizard > 1. Settings > Basic Settings > Document
Owner)
When it changes: The document owner or document control
administrator can change the document owner assignment anytime in
any active document.
Where to view: The document creator or owner name you insert will be
the same as the one displayed in the document overview. (Overview >
Properties)
TABLE OF CONTENTS FOR DOCUMENT PROPERTY DETAILS
Writers, Reviewers, Approvers, and Readers
Locations on Insert Properties menu:
PolicyTech 8.0 User's Guide
User Info Fields - 251
Examples of inserted writer, reviewer, approver, and reader properties:
Note: Only approvers are required for a document. If a document has
no writers, reviewers, or readers assigned, an inserted field for one of
these roles contains "Not Assigned."
PolicyTech 8.0 User's Guide
252 - User Info Fields
Source: The document creator assigns writers, reviewers, approvers,
and readers while creating a document.
PolicyTech 8.0 User's Guide
User Info Fields - 253
When it changes: The document owner or document control
administrator can change the writer, reviewer, approver, and reader
assignments anytime in any active document.
PolicyTech 8.0 User's Guide
254 - User Info Fields
Where to view: The document writer, reviewer, approver, and reader
names you insert will be the same as the one displayed in the document
overview. The writers, reviewers, and approvers are displayed on the
Properties page (Overview > Properties) and the corresponding
status pages (Overview > Writer Status, Overview > Reviewer
Status, and Overview > Approver Status), while the readers are only
displayed on the Reader Status page (Overview > Reader Status).
TABLE OF CONTENTS FOR DOCUMENT PROPERTY DETAILS
Security
The Security option applies only when a document is set to Restricted
- High or Restricted - Severe. With one of these security options
selected for a document, only certain users are able to view the
document in its various workflow stages (see Step 7: Security in the
"Assigning Document Properties" section for details). When selecting
one of the restricted security options, the document creator has the
PolicyTech 8.0 User's Guide
User Info Fields - 255
option of selecting additional users who will have the same permissions
as those users automatically granted permissions by the selected
security level. The names, job titles, departments, or group names
(depending on your selection) of these other allowed users will be
displayed in an inserted Security property field.
Location on Insert Properties menu:
Example of inserted security properties:
Note: Assigning additional users restricted security permissions is
optional. If no additional users are assigned, the inserted field
contains "Not Assigned."
PolicyTech 8.0 User's Guide
256 - User Info Fields
Source: The document creator assigns additional users permissions
within the current restricted security level.
PolicyTech 8.0 User's Guide
User Info Fields - 257
When it changes: The document owner or document control
administrator can change security level assignments anytime in any
active document.
Where to view: You can view the additional users allowed permissions
within a restricted security level in the document overview. (Overview >
Security)
TABLE OF CONTENTS FOR DOCUMENT PROPERTY DETAILS
PolicyTech 8.0 User's Guide
258 - User Info Fields
Inserting Links to Documents and Websites
You can do the following to insert links in a Word or Excel document.
Click an item for detailed instructions.
n
Link to an existing PolicyTech™ document
n
From within a PolicyTech document, create and link to a new PolicyTech document at the same time
n
Link to any web address
Note: Links you insert into a Word or Excel document are also listed
in the Attachments window. See Attaching Files and Adding
Reference Links for details.
Inserting a Link to an Existing Document
You can insert links to existing PolicyTech™ documents from within a
Word or Excel document.
Notes:
n You can remove a PolicyTech link from a document just as you
would remove a hyperlink you inserted using the Insert
Hyperlink feature in Word or Excel (see Removing or Deleting
a Link).
n Inserted document links do not appear in the Attachments
window (when you click Links & Attachments and then
Attachments).
From within a Word Document
Place the cursor where you want the link inserted.
1. Click Links & Attachments, and then click Insert Link to
Existing Document.
PolicyTech 8.0 User's Guide
User Info Fields - 259
2. In the Choose a Document window, find the document you want
to link to (see Finding and Opening a Document if you need help),
and then click the document title.
4. In the Confirm window, do one of the following:
n
Click Done.
n
Click Add Another to insert another link at the current cursor location, repeat step 3, and then click Done when you are finished
adding links.
PolicyTech 8.0 User's Guide
260 - User Info Fields
The link or links are inserted into the document.
From within an Excel Document
1. Click the cell where you want the link inserted.
Important: A link cannot be inserted into a spreadsheet cell that
already contains information or that is being edited. Make sure that
the cell you select is empty and that you are not in edit mode (that the
cursor is not active in the Formula Bar or inside the cell).
2. Click Links & Attachments, and then click Insert Link to
Existing Document.
3. If you see the window shown below, do one of the following:
PolicyTech 8.0 User's Guide
User Info Fields - 261
n
Click OK to erase the undo history, and then move on to step 4.
n
Click Cancel, and then insert the link at a later time.
Important: You will see the warning only once during an editing
session, but inserting a link always erases the undo history. To avoid
erasing information from the undo history that you might need later,
we suggest you insert links either as the first or last step of creating an
Excel document.
4. In the Choose a Document window, find the document you want
to link to (see Finding and Opening a Document if you need help),
and then click the document title.
5. Click OK to clear the alert.
The link is inserted into the document.
PolicyTech 8.0 User's Guide
262 - User Info Fields
Inserting a Link to a New (Not Yet Created) Document
From within a Word or Excel document, you can both create another
draft document and link to it at the same time.
Note: You can remove a PolicyTech™ link from a document just as
you would remove a hyperlink you inserted using the Insert
Hyperlink feature in Word or Excel (see Removing or Deleting a
Link).
From within a Word Document
1. Place the cursor where you want the link inserted.
2. Click Links & Attachments, and then click Create New
Document and Link to It.
3. A new document opens with step 1. Settings of the Properties
Wizard displayed. Type a title, select a template, and then click
PolicyTech 8.0 User's Guide
User Info Fields - 263
Save.
4. The link to the new document is inserted into the original document.
To return to the original document and finish the new document
later, do one of the following:
n
Minimize the new document window.
n
Click Options, and then click Save and Close.
5. You should now see the Confirm window in the original document.
Do one of the following:
n
Click Done.
n
Click Add Another to create another new document and insert
another link at the current cursor location, repeat steps 2 through 4,
and then click Done when you are finished adding links.
The link or links are inserted into the document.
PolicyTech 8.0 User's Guide
264 - User Info Fields
From within an Excel Document
1. Click the cell where you want the link inserted.
Important: A link cannot be inserted into a spreadsheet cell that
already contains information or that is being edited. Make sure that
the cell you select is empty and that you are not in edit mode (that the
cursor is not active in the Formula Bar or inside the cell).
2. Click Links & Attachments, and then click Create New
Document and Link to It.
3. If you see the window shown below, do one of the following:
PolicyTech 8.0 User's Guide
User Info Fields - 265
n
Click OK to erase the undo history, and then move on to step 4.
n
Click Cancel, and then insert the link at a later time.
Important: You will see the warning only once during an editing
session, but inserting a link always erases the undo history. To avoid
erasing information from the undo history that you might need later,
we suggest you insert links either as the first or last step of creating an
Excel document.
4. A new document opens with step 1. Settings of the Properties
Wizard displayed. Type a title, select a template, and then click
Save.
5. The link to the new document is inserted into the original document.
To return to the original document and finish the new document
later, do one of the following:
n
Minimize the new document window.
n
Click Options, and then click Save and Close.
6. Click OK to clear the alert.
PolicyTech 8.0 User's Guide
266 - User Info Fields
The link is inserted into the document.
Inserting a Link to a Web Address
You can insert links to web addresses from within a Word or Excel
document.
Notes:
n
n
You can remove a PolicyTech™ link from a document just as
you would remove a hyperlink you inserted using the Insert
Hyperlink feature in Word or Excel (see Removing or Deleting
a Link).
You can also use the Insert Hyperlink feature in Word and
Excel to insert links to web addresses, but those links won't be
listed in and manageable from the PolicyTech Attachments
feature (see Attaching Files and Adding Reference Links for
details).
From within a Word Document
1. Place the cursor where you want the link inserted.
2. Click Links & Attachments, and then click Insert Link to Web
Address.
PolicyTech 8.0 User's Guide
User Info Fields - 267
3. In the Add Web Address window, type or copy and paste the web
address, type the text you want displayed as the link in the document, and then click Add.
4. In the Alert window, select and copy the new link, and then click
OK.
5. Paste the link in the document.
PolicyTech 8.0 User's Guide
268 - User Info Fields
From within an Excel Document
1. Click the cell where you want the link inserted.
2. Click Links & Attachments, and then click Insert Link to Web
Address.
3. In the Add Web Address window, type or copy and paste the web
address, type the text you want displayed as the link in the document, and then click Add.
PolicyTech 8.0 User's Guide
User Info Fields - 269
4. In the Alert window, select and copy the new link, and then click
OK.
5. Click a cell in the document, and then paste the link.
Important: A link cannot be inserted into a spreadsheet cell that
already contains information or that is being edited. Make sure that
the cell you select is empty and that you are not in edit mode (that the
cursor is not active in the Formula Bar or inside the cell).
Removing or Deleting a Link
To remove a document or web address link and leave the text, rightclick anywhere within the link, and then click Remove Link.
PolicyTech 8.0 User's Guide
270 - User Info Fields
To delete the link—to remove both the link and the link text—do one of
the following:
n
Select the entire link, and then press Delete or Backspace.
n
Place the cursor immediately before the first letter in the link text,
press Delete to select the entire field, and then press Delete again
to delete the field.
n
Place the cursor immediately after the last letter in the link text,
press Backspace to select the entire field, and then press Backspace again to delete the field.
Note: If you place the cursor anywhere inside the link instead of
before or after the link, pressing Delete or Backspace will delete a
character in the link text instead of selecting the field.
Working with Word or Excel Undocked
While you can edit Microsoft® Word and Excel® documents within
PolicyTech™, you can also work on PolicyTech documents with Word
or Excel in its normal program window rather than in the embedded, or
docked, program in a PolicyTech browser window . With Word or Excel
undocked, you can still use PolicyTech features, such as inserting
document property fields or links to other PolicyTech documents. Also,
anytime you save the document in the undocked program, a copy of it is
saved in the PolicyTech database. So, working with Word or Excel
docked or undocked is simply a matter of preference, and you can
switch between the two modes anytime.
Word docked in a PolicyTech browser window
PolicyTech 8.0 User's Guide
User Info Fields - 271
Word undocked, but with the document still controlled by PolicyTech
Undocking Word or Excel
1. With the document open and the Edit Document tab selected,
click Editor Tools, and then click Undock Word Module.
PolicyTech 8.0 User's Guide
272 - User Info Fields
The document opens in a separate Word program window, and
the following message is displayed in the PolicyTech Edit
Document window.
2. Work on the document in the undocked Word window as you normally would.
3. (Optional) Switch back to the PolicyTech Edit Document window
to insert a link or document property field into the undocked document (follow the instructions under Inserting Links to Documents
and Websites or Inserting Document Properties).
4. When finished working on the document, you cannot close the
undocked Word or Excel window. Instead, switch back to the PolicyTech Edit Document window, and then click Dock Word
Module. This closes the undocked Word or Excel window and redis-
PolicyTech 8.0 User's Guide
User Info Fields - 273
plays the document in the Edit Document window.
5. Click Options, and then click Save and Close.
Adding Content to a Rich Text Document
Important: Before you can write or otherwise add content to a rich
text document, you must complete at least step 1. Settings of the
Properties Wizard. If you have not already done so, complete the
instructions under Assigning Document Properties.
To write a rich text document in PolicyTech™, you must have selected a
Rich Text Document template in the Properties Wizard (see Step 1:
Settings if you need to reselect a template). If there is no Rich Text
Document template available in the Properties Wizard, contact your
document control administrator, who can create one.
Note: Documents created using a Rich Text Document template
are saved as HTML files.
1. Do one of the following to open the rich text editing window:
n
If you currently have the document open and have the Properties
Wizard, Overview, or Edit Questionnaire tab selected, click the
Edit Document tab near the upper left corner or the Edit
Document button at the bottom of the currently displayed
Properties Wizard step.
PolicyTech 8.0 User's Guide
274 - User Info Fields
n
If the document is currently closed, click DOCUMENTS, and then
click Draft. Use any of several methods to find and display the document in the document list (see Finding and Opening a Document
for details), and then click the document title.
You should now see a window similar to the one below.
Note: The document may or may not already have content,
depending on whether the template you selected has content.
PolicyTech 8.0 User's Guide
User Info Fields - 275
The rich text editor has three available modes—Design, HTML, and
Preview—that you can access with the tabs below the content area.
The Design (default) mode offers many of the editing features found in
word processing applications. In HTML mode, you can add HTML tags.
The Preview mode approximates what the document will look like when
a reader opens it in a browser.
2. Do any of the following to add content to the document:
n
Use any available editing features to write and format the document.
Note: If you would like to see more of the document within the
Design pane, click Editor Tools, and then click Collapse Header
Bar. When you are ready to use a feature in the header bar, click
Editor Tools, and then click Expand Header Bar.
n
In Design mode, insert a video into the document. See Inserting a
Video into a Rich Text Document below for details.
n
Click Editor Tools, click Import/Overwrite, and then follow the
prompts to import the content of an existing document from outside
of PolicyTech (see Importing Content for detailed instructions).
Important: Importing content completely overwrites any existing
content. Copy and paste information from another document if you
don't want to overwrite this document's existing content.
PolicyTech 8.0 User's Guide
276 - User Info Fields
3. When finished adding content, do any of the following:
n
Save and close the document (see Saving and Closing a Draft
Document).
n
Add supplementary materials to the document (see Attaching Files
and Adding Reference Links and Working with Document Discussions).
n
Finish assigning document properties (see Assigning Document
Properties).
n
Create a questionnaire for marking the document as read (see
Creating a Questionnaire).
n
Look at the document overview (see Working with the Document
Overview).
n
Submit the document to assigned writers (see Submitting a Document to Writers (for Collaboration)).
n
Submit the document to assigned reviewers (see Submitting a
Document for Review).
n
Submit the document to assigned approvers (see Submitting a
Document for Approval).
PolicyTech 8.0 User's Guide
Inserting a Video into a Rich Text Document - 277
Inserting a Video into a Rich Text Document
When adding content to a document created with a Rich Text
Document template, you can insert a video hosted by a web server or a
video-sharing website.
Note: You cannot insert a video file—only an externally hosted video.
1. In the open document, in the Design mode toolbar, click
.
2. You can reference the video using embed code or a URL. Do one
of the following:
n
Video-sharing sites typically have an option for copying a video's
embed code, which, in addition to the video URL, contains HTML
formatting for the frame that will contain the video. After copying the
code, in the Insert Video window in Policy Tech, click Embed
code from a video sharing site, and then paste the embed code
into the text box.
n
To format the video frame yourself, click Or manually enter the
values. In the URL box, type or paste the video URL, including the
scheme name (http:// or https://), and then set the frame size by typing a width and height in pixels.
PolicyTech 8.0 User's Guide
278 - Inserting a Video into a Rich Text Document
Some videos include a play button, while other videos start
immediately. To prevent such a video from starting immediately,
select the Include a Play button check box, and then, in the list
below that option, click one of the following:
l
l
Play inline. Plays the video in the inserted frame within the document.
Popup over document. Clicking the play button in the inserted
frame opens a pop-up window above the document (within the
document browser window).
PolicyTech 8.0 User's Guide
Inserting a Video into a Rich Text Document - 279
l
Open in new browser window. Clicking the play button
launches a new, separate browser window.
Note: The Width and Height settings apply only to the frame
inserted into the rich text document. They do not apply to the pop-up
window or new browser window.
3. Click OK.
PolicyTech 8.0 User's Guide
280 - Inserting a Video into a Rich Text Document
Important: If you see a warning stating that you are attempting to
insert a video from a non-secure site, see Security Considerations for
Inserted Videos.
4. To test the inserted video, click the Preview tab at the bottom of the
document window, and then click the play button or whatever play
control the video includes.
If you need to make changes to the inserted video, you can either
delete the video and start again, or you can switch to HTML mode
(click the HTML tab at the bottom of the document window) and
modify the text in the <iframe> tag.
PolicyTech 8.0 User's Guide
Security Considerations for Inserted Videos - 281
Security Considerations for Inserted Videos
If you see the warning below when you attempt to insert a video into a
rich text document, it is because you are logged in to PolicyTech™
using the HTTPS (Hypertext Transfer Protocol Secure) protocol, and
you referenced a video using the normal HTTP, which is not a secure
protocol.
Do one of the following:
n
(Recommended) Click No to cancel the video insertion, change the
URL scheme name to https://, and then click OK again to see if the
web server hosting the video supports the HTTPS protocol.
n
If you fully understand the possible security risks but want to proceed anyway, click Yes. What you see next depends on the
browser you're using. Consult your browser's Help for further
instructions.
Important:
n
n
Consult with your IT specialist before using this option.
We highly recommend that you not use this option. In addition to
the security issue, the reader's experience will be undesirable at
best. When a reader attempts to view the video, the reader will
have to create an exception for accessing insecure material from
within an application running on a secure server. The method for
creating this exception varies widely, depending on the type and
version of the reader's browser.
Adding Content to a Document with an Upload File
Template
Important: Before you can add content to a document, you must
complete at least step 1. Settings of the Properties Wizard. If you
have not already done so, complete the instructions under Assigning
Document Properties.
1. Do one of the following to open the document editing window:
PolicyTech 8.0 User's Guide
282 - Security Considerations for Inserted Videos
n
If you currently have the document open and have the Properties
Wizard, Overview, or Edit Questionnaire tab selected, click the
Edit Document tab near the upper left corner or the Edit
Document button at the bottom of the currently displayed
Properties Wizard step.
n
If the document is currently closed, click DOCUMENTS, and then
click Draft. Use any of several methods to find and display the document in the document list (see Finding and Opening a Document
for details), and then click the document title.
2. You should now see the window shown below. Do one of the following to select a file to upload:
n
Click Browse, find and click the file you want to upload, click Open,
and then click Upload File.
PolicyTech 8.0 User's Guide
Security Considerations for Inserted Videos - 283
n
Open Windows Explorer, and then find the file you want to import.
Click and drag the file onto the box that contains the text Or drag a
file here to upload it. (Optional). The file is immediately
uploaded.
Note: If ever needed, you can import another and replace the
currently uploaded file's contents. See Importing Content for details.
3. An alert appears stating that the uploaded file has been renamed to
match the document title you typed in the first step of the
Properties Wizard. Click OK.
4. To view or modify the uploaded document's contents, in the File
Information window, click the file name. The document opens in
the Windows default program for that file type.
Note: Besides Word and Excel, PolicyTech™ supports the upload
and launching of Microsoft PowerPoint® (.pptx, .ppt) and Microsoft
Visio® (.vsd, .vss, .vst, .vdx, .vsx, .vtx, .vsw) file types. Your document
control administrator (DCA) must enable the launching of any other
file type. Contact your DCA to find out what additional file types, if
any, have been enabled.
5. You will see the alert shown below in PolicyTech. Click OK.
PolicyTech 8.0 User's Guide
284 - Security Considerations for Inserted Videos
Note: You can use Default Programs in the Windows Control
Panel to change what program automatically opens .
6. Make the desired changes, save the file, and then close the program.
7. When finished adding and modifying content, do any of the following:
n
Save and close the document (see Saving and Closing a Draft
Document).
n
Add supplementary materials to the document (see Attaching Files
and Adding Reference Links and Working with Document Discussions).
n
Finish assigning document properties (see Assigning Document
Properties).
n
Create a questionnaire for marking the document as read (see
Creating a Questionnaire).
n
Look at the document overview (see Working with the Document
Overview).
n
Submit the document to assigned writers (see Submitting a Document to Writers (Collaboration)).
n
Submit the document to assigned reviewers (see Submitting a
Document for Review).
n
Submit the document to assigned approvers (see Submitting a
Document for Approval).
Importing Content
You can import a document from outside of PolicyTech™ into a
PolicyTech document. If you import a Microsoft® Word or Excel®
document, you can edit the imported content within PolicyTech. If you
import any other type of file, you will see a link in the Edit Document
page that will open the imported file in the default program for that file
type.
PolicyTech 8.0 User's Guide
Security Considerations for Inserted Videos - 285
Note: Besides Word and Excel, PolicyTech supports the import and
launching of Microsoft PowerPoint® (.pptx, .ppt) and Microsoft Visio®
(.vsd, .vss, .vst, .vdx, .vsx, .vtx, .vsw) file types. Your document
control administrator (DCA) must enable the launching of any other
file type. Contact your DCA to find out what additional file types, if
any, have been enabled. You can import any other type of file, but
users will not be able to launch (open) the document directly from
within PolicyTech. Instead, they will be prompted to open the
document outside of PolicyTech or to save the document to disk.
Important: The imported document will completely overwrite the
contents of the PolicyTech document. PolicyTech does, however,
save a version of the document before performing the import. You
can access document versions from the Document History page in
a document's Overview tab (see Working with the Document
Overview for details). Nonetheless, we recommend using this feature
only when the PolicyTech document is empty or if you are certain that
its contents can be overwritten without losing important information. If
the document already contains important information, we
recommend that you copy and paste information from the external
document rather than importing it.
To import and overwrite the contents of a PolicyTech document with the
contents of an external document,
1. Open the document, and then click Edit Document (if it is not
already selected).
2. Click Editor Tools, and then click Import / Overwrite.
3. Do one of the following:
n
Click Browse. Find and click the file you want to import, and then
click Open. Click Upload File.
PolicyTech 8.0 User's Guide
286 - Security Considerations for Inserted Videos
n
Open Windows Explorer, and then find the file you want to import.
Click and drag the file onto the box that contains the text "Or drag a
file here to upload it. (Optional)." The file is uploaded automatically.
4. Click OK when you see the alert shown below.
What you see in the Edit Document tab depends on the type of file you
uploaded. If you uploaded a Word or Excel file, the uploaded file's
contents are displayed. If you uploaded any other file type, you will see a
window similar to the one below with the uploaded file listed.
Important: If the template's currently selected document type is not
Word or Excel but you import a Word or Excel document, the
document type is automatically changed and the contents of the
Word or Excel document are displayed.
You can then click the file name to open it in your Windows default
program for that file type (see Adding Content to a Document with an
Upload File Template).
5. Close the document.
PolicyTech 8.0 User's Guide
Security Considerations for Inserted Videos - 287
Writing a Document (Mac)
You can import a document from outside of PolicyTech™ into a
Microsoft® Word or Excel® PolicyTech document.
Note: Besides Word and Excel, PolicyTech supports the import and
launching of Microsoft PowerPoint® (.pptx, .ppt) files types. Your
document control administrator (DCA) must enable the launching of
any other file type. Contact your DCA to find out what additional file
types, if any, have been enabled.
Important: The imported document will completely overwrite the
contents of the PolicyTech document. PolicyTech does, however,
save a version of the document before performing the import. You
can access document versions from the Document History page in
a document's Overview tab (see Working with the Document
Overview for details). Nonetheless, we recommend using this feature
only when the PolicyTech document is empty or if you are certain that
its contents can be overwritten without losing important information. If
the document already contains important information, we
recommend that you copy and paste information from the external
document rather than importing it.
To import an external document into a PolicyTech document,
1. Open the document, and then click Edit Document (if it is not
already selected).
2. Click Editor Tools, and then click Import / Overwrite.
3. Click Choose File, find and click the file you want to import, and
then click Choose.
4. Click Upload File.
PolicyTech 8.0 User's Guide
288 - Security Considerations for Inserted Videos
5. When you see the alert shown below, click OK.
6. In the File Information window, click the file name to open the document in the Mac OS default program for that file type.
7. In the Alert window, click OK.
Note: You may have to minimize the default program window or
switch windows back to PolicyTech to see this Alert window.
PolicyTech 8.0 User's Guide
Security Considerations for Inserted Videos - 289
8. Save the imported file in the default program that was launched,
and then close that program.
9. Back in the PolicyTech Edit Document window, click Options,
and then click Save and Close.
Enabling WordModulePlus (Mac)
Important: The WordModulePlus module for Mac is a Java applet,
which means that you must have Java installed on your Mac
computer in order to open and edit a document and have
PolicyTech™ automatically re-upload the document each time it is
saved. For Mac OS X versions 10.6 and earlier, Java is pre-installed
on your computer. For Mac OS X 10.7 and later, Java does not come
pre-installed. You will need to download the latest version of Java, if
you haven't already done so. See the following article on the Java
website for instructions: How do I install Java for my Mac?
1. When you see the window below, click Use WordModulePlus
Plug-in.
2. Click Inactive Plug-In.
PolicyTech 8.0 User's Guide
290 - Security Considerations for Inserted Videos
3. You will see one of the following windows:
n
If you see this window, click Enable.
n
If you see the window below, in the lower box, select the check
boxes in the On column to enable Java, and then click Enable
applet plug-in and Web Start applications. Close Java
Preferences.
4. For the changes to take effect, you must close and restart your
browser. Close the document window, log out of PolicyTech, and
then close all other browser windows.
5. Restart the browser and log in to PolicyTech.
PolicyTech 8.0 User's Guide
Security Considerations for Inserted Videos - 291
6. Find and open the document you were working on (see Finding a
Document in a Specific Status for help finding the new document in
the draft stage).
7. In the File Information window, click the document file name.
8. Click Use WordModulePlus Plug-in again.
9. When asked if you want to give the PolicyTech applet access to
your computer, click Allow.
PolicyTech 8.0 User's Guide
292 - Security Considerations for Inserted Videos
Note: Clicking Allow will let the applet run for the duration of the
current browser session. If you don't want to have to click Allow in
each new browser session, select the Allow all applets from "
[PolicyTech server name]" with this signature check box.
10. The document opens in its default program, and the following window is displayed in PolicyTech. Click OK to close the alert.
Note: The Mac OS controls which program opens a file of a certain
type.
11. While working on the document outside of PolicyTech, be sure to
save it periodically. PolicyTech detects each time the document is
saved re-uploads a copy of the file.
12. When you are finished working on the document contents, save the
document, and then close the program.
13. Back in PolicyTech, continue with step 11 in the "High-Level Steps
for Creating a Document (Mac)" section.
Attaching Files and Adding Reference Links
You can attach any type of file to a document in PolicyTech™.
However, you may want to create or upload a document into PolicyTech
instead of attaching it so that the file can be controlled and tracked.
Please consider the following facts about attachments before deciding
to attach a file.
Attachments:
PolicyTech 8.0 User's Guide
Security Considerations for Inserted Videos - 293
n
Are not indexed or searchable
n
Are not controlled independently
n
Cannot be attested to independently (cannot be marked as read,
for example)
n
Cannot be linked to from within any document
n
Cannot be printed in bulk if they are not Word or Excel files
n
Are not accessible unless the document with the attachment is
opened
Note: To view a file attached to a document, the reader must have a
program installed on his or her computer that is capable of opening
that type of file.
Go to one of the sections listed below for detailed instructions:
Adding a Link to an Existing PolicyTech Document
Adding a Link to a New (Not Yet Created) PolicyTech Document
Adding a Link to a Web Address
Managing Attachments and Links
Adding a Link to an Existing PolicyTech Document
1. To add a reference link to an existing document, do one of the following:
n
Click the attachments (paper clip) icon.
n
Click Links & Attachments, and then click Attachments.
2. In the Attachments window, click PolicyTech Document.
PolicyTech 8.0 User's Guide
294 - Security Considerations for Inserted Videos
3. Click Existing Document.
4. Using any available method, find the document you want to link to
(see Finding and Opening a Document if you need help), and then
click the document title.
5. Do one of the following:
PolicyTech 8.0 User's Guide
Security Considerations for Inserted Videos - 295
n
Click Add Another, and then repeat step 4 above.
n
Click Done, and then move on to the next step.
6. (Optional) To also insert the link into the document at the current
cursor location, click Insert Link.
Note: You can come back to the Attachments window at any time to
insert the link into the document. See Managing Attachments and
Links for details.
7. In the Attachments window, click OK.
Adding a Link to a New (Not Yet Created) PolicyTech Document
To add a link to a PolicyTech™ document that doesn't yet exist and
create the document in the process, use one of the following methods.
From the Links & Attachments Menu
1. Click Links & Attachments, and then click Create New
Document and Link to It.
PolicyTech 8.0 User's Guide
296 - Security Considerations for Inserted Videos
2. A new document opens with step 1. Settings of the Properties
Wizard displayed. Type a title, select a template, and then click
Save.
Note: You can finish creating the new document at any time. The
steps that follow are for completing the action of adding a link to the
original document.
3. The link to the new document is added to the Attachments window. To return to the original document and finish the new document later, do one of the following:
n
Minimize the new document window.
n
Click Options, and then click Save and Close.
4. Do one of the following:
n
Click Add Another, and then repeat step 2 above.
n
Click Done.
PolicyTech 8.0 User's Guide
Security Considerations for Inserted Videos - 297
From the Attachments Window
1. To create a new document and add a reference link to it from within
the Attachments window, do one of the following:
n
Click the attachments (paper clip) icon.
n
Click Links & Attachments, and then click Attachments.
2. In the Attachments window, click PolicyTech Document.
3. Click New Document.
PolicyTech 8.0 User's Guide
298 - Security Considerations for Inserted Videos
4. A new document opens with step 1. Settings of the Properties
Wizard displayed. Type a title, select a template, and then click
Save.
Note: You can finish creating the new document at any time. The
steps that follow are for completing the action of adding a link to the
original document.
5. The link to the new document is added to the Attachments window. To return to the original document and finish the new document later, do one of the following:
n
Minimize the new document window.
n
Click Options, and then click Save and Close.
6. Do one of the following:
n
Click Add Another, and then repeat steps 4 and 5 above.
n
Click Done, and then move on to the next step.
PolicyTech 8.0 User's Guide
Security Considerations for Inserted Videos - 299
7. (Optional) To also insert the link into the document at the current
cursor location, click Insert Link.
Note: You can come back to the Attachments window at any time to
insert the link into the document. See Managing Attachments and
Links for details.
8. In the Attachments window, click OK.
Adding a Link to a Web Address
You can add a link to a web address within the body of a Microsoft®
Word or Excel® document using the application's hyperlink feature. You
can also add web address links within the Attachments window. You
can then choose whether to insert the link into the body of the Word or
Excel document.
Note: By adding a web address link to the Attachments window,
you can add those links to any type of document, but you can only
insert the links into the body of a Word or Excel document in
PolicyTech™.
Adding a Web Address Link in the Attachments Window
1. Do one of the following:
PolicyTech 8.0 User's Guide
300 - Security Considerations for Inserted Videos
n
Click the attachments (paper clip) icon.
n
Click Links & Attachments, and then click Attachments.
2. In the Attachments window, click Web Address.
3. In the Web Address box, type or copy and paste the web address.
4. In the Display Text box, type a descriptive name for the link that
will appear in the Attachments window.
5. Click Add.
6. Do one of the following:
PolicyTech 8.0 User's Guide
Security Considerations for Inserted Videos - 301
n
Click Add Another, and then repeat steps 4 and 5 above.
n
Click Done, and then move on to the next step.
7. (Optional) To also insert the link into the document at the current
cursor location, click Insert Link.
Note: You can come back to the Attachments window at any time to
insert the link into the document. See Managing Attachments and
Links for details.
8. In the Attachments window, click OK.
Managing Attachments and Links
In the Attachments window, you can do the following:
n
Add attachments and reference links (see Attaching Files and
Adding Reference Links)
n
Insert an existing link into the document (see Inserting a Link)
n
Delete an attachment or reference link (see Removing an Attachment or Link)
n
Convert an attached external file into a controlled PolicyTech™ document (see Converting an Attachment)
PolicyTech 8.0 User's Guide
302 - Security Considerations for Inserted Videos
Inserting a Link
These steps are for inserting a link that has already been added to the
Attachments window. To create a new link and insert it at the same
time, see Inserting Links to Documents and Websites.
1. In an open document with Edit Document selected, place the
cursor where you want to insert a link from the Attachments window.
2. Do one of the following:
n
Click the attachments (paper clip) icon.
n
Click Links & Attachments, and then click Attachments.
3. In the Attachments window, click Insert Link for the attachment
or link you want to insert into the document.
4. What you see next depends on the type of link you're inserting.
n
PolicyTech Document: An alert is displayed saying that the link
has been inserted into the document. Click OK.
PolicyTech 8.0 User's Guide
Security Considerations for Inserted Videos - 303
n
Web Address: In the Insert Link window, select and copy the link,
click Return to Document, and then paste the link.
n
External File: Before you can insert a link to an external file attachment, you must convert the attachment into a PolicyTech document. Click Convert Now.
A new document opens with step 1. Settings of the Properties
Wizard displayed and the attachment's file name as the title, which you
can change.. Select a template, and then click Save.
Note: Unless the external file is a Word, Excel, or Rich Text Format
document, select an Upload File template.
PolicyTech 8.0 User's Guide
304 - Security Considerations for Inserted Videos
5. The link to the converted document is inserted into the document.
To return to the original document and finish the converted document later, either minimize the converted document window, or
click Options, and then click Save and Close.
6. An alert is displayed saying that the link has been inserted into the
document. Click OK.
Removing an Attachment or Link
1. In an open document, do one of the following:
n
Click the attachments (paper clip) icon.
n
Click Links & Attachments, and then click Attachments.
PolicyTech 8.0 User's Guide
Security Considerations for Inserted Videos - 305
2. Do one of the following:
n
Select the check boxes for the attachments or reference links you
want to remove, and then click Remove Selected.
n
To delete all attachments and links, select the check box in the
column header, and then click Remove Selected.
Converting an Attachment
When you attach an external file, PolicyTech™ only uploads a copy of
that file into the PolicyTech database. You cannot be sure that a user
has read an attachment, because attachments are not tracked. If you
want to control and track an external file, you will first need to convert it
into a PolicyTech document.
PolicyTech 8.0 User's Guide
306 - Security Considerations for Inserted Videos
Note: You can also convert an external file into a PolicyTech
document while inserting a link to that file into the document (see
Inserting a Link).
1. In an open document, do one of the following:
n
Click the attachments (paper clip) icon.
n
Click Links & Attachments, and then click Attachments.
2. In the Attachments window, in the Actions column, click Convert
for the external file you want to convert.
3. In the Confirm window, click Convert Now.
PolicyTech 8.0 User's Guide
Security Considerations for Inserted Videos - 307
4. A new document opens with step 1. Settings of the Properties
Wizard displayed and the attachment's file name as the title.
Change the title, if desired, select a template, and then click Save.
Note: Unless the external file is a Word, Excel, or Rich Text Format
document, select an Upload File template.
5. When you click Save, the external file is automatically uploaded into
the new document. Finish creating the document (see Creating and
Working with Draft Documents), and then save and close it.
6. Back in the Attachments window of the original document, click
OK. The Convert option for the converted document is no longer
available.
Creating a Questionnaire
When you create a document, you can include a questionnaire to test
readers' understanding of the document. Assigned readers will then be
required to take the questionnaire in order to mark the document as
read.
Use the links below to find instructions on creating, editing, and
disabling questionnaires.
Important:
n A questionnaire's validity is checked when you submit the
document for review or approval. If there are errors, you must
correct them before you can successfully submit the document.
PolicyTech 8.0 User's Guide
308 - Security Considerations for Inserted Videos
n
A questionnaire is activated as soon as the document containing
the questionnaire is approved.
Planning a Questionnaire
Adding Questions and Answers
Questionnaire Settings
Changing a Questionnaire
Disabling and Reactivating a Questionnaire
Planning a Questionnaire
Depending on the length and complexity of a questionnaire, you may
want to plan it on paper before creating it in a document. The following
sections give an overview of what you should consider as you plan a
questionnaire.
1. Define Learning Objectives
Decide what you want users to have learned from reading the
document. For example, if the document is about your company's family
and medical leave policy, you might include the following as learning
objectives.
Be able to:
n
Name the different types of leaves.
n
Give at least three reasons why leave may be taken.
n
Describe what happens to your pay and benefits when you take
leave.
n
State the maximum number of weeks per year that a leave can last.
n
Describe the process for requesting a leave.
2. Write Questions
Each learning objective can be tested with one or more questions. Go
through each of your learning objectives and decide what and how
many questions are needed to adequately test whether the learning
objective has been met. If you come up with multiple questions for
different objectives, consider grouping each set of questions under a
stated learning objective that is visible to the questionnaire taker.
You also need to decide what type of questions to use. You can create
multiple-choice, true-or-false, and open-ended questions. Open-ended
questions allow for survey-type questions for soliciting feedback, such
as opinions or preferences, or for questions for which no single answer
is correct.
You can also choose which question a reader will see next based on
how the reader answers the current question. For example, a
PolicyTech 8.0 User's Guide
Security Considerations for Inserted Videos - 309
questionnaire for a conflict of interest policy might ask if the user had
ever accepted a gift from a vendor. If the reader answers no, the
questionnaire could move on to the next top-level question. If the reader
answers yes, the questionnaire could go to a survey question where the
reader could describe the gift before moving on to the next top-level
question.
Write down your questions and make a note as to what type of question
each should be. Leave room below each question to write the correct
and incorrect answers.
3. Write Answers
True or false questions always have only two answers, while multiple
choice questions can have any number of answers to select from.
Open-ended questions have no prewritten answers; rather, the user
sees a text box to answer the question essay style. If your questionnaire
will branch depending on the answers selected, map out all the possible
paths a reader could follow when taking the questionnaire.
Write down answers below each question.
4. Decide on a Passing Percentage
Decide how many of the questionnaire questions a reader must answer
correctly in order to pass the questionnaire and mark the document as
read. You will need to express the passing score as a percentage in the
questionnaire settings. (To calculate the passing percentage, divide the
minimum number of questions that must be correct by the total number
of questions. For example, if a questionnaire contains 5 questions, and
you decide that readers can only get one of those questions wrong and
still pass the questionnaire, divide 4 by 5 (4/5), which equals 0.8, or 80
percent.)
5. Decide whether to Include Optional Information
When creating the questionnaire, you can, but don't have to, include
introductory text and include feedback on the answered questions when
the reader finishes taking the questionnaire. If you decide to include
feedback, you must also decide whether to provide it for all questions or
only those that were incorrectly answered. You can also choose
whether to include all possible answers, readers' responses, and the
correct answers with the feedback.
Once you have planned your questionnaire, move on to Adding
Questions and Answers.
Adding Questions and Answers
Important: If you have not already done so, consider planning the
questionnaire content before starting to add questions and answers.
PolicyTech 8.0 User's Guide
310 - Security Considerations for Inserted Videos
See Planning a Questionnaire for details.
To create a new questionnaire and start adding questions and answers,
1. Open the draft document you want to add a questionnaire to.
2. Click the Edit Questionnaire tab.
3. If a questionnaire has not yet been created for this document, click
Create Questionnaire.
4. (Optional) If you want to include a learning objective as a heading
for the first group of questions, click New Learning Objective, type
the objective, and then click Save.
Note: If you don't add a learning objective, a default objective called
General Questions is added for you.
5. To add a question, do one of the following:
n
Click New Question near the upper left corner of the 1. Questions
& Answers window.
PolicyTech 8.0 User's Guide
Security Considerations for Inserted Videos - 311
n
Click New Question in the learning objective header.
Important: When you have only one learning objective, clicking
either New Question option does the same thing. However, if you
have multiple objectives, clicking New Question in the upper left
corner adds a question to the first learning objective, while clicking
New Question in a learning objective header adds the question to
that learning objective.
6. Click the Question Type box, and then click an option. As shown
below, the options in the Answers area change based on the question type selected.
Important: If you change the question type after typing answers,
those answers will be deleted.
PolicyTech 8.0 User's Guide
312 - Security Considerations for Inserted Videos
7. If you selected Open Ended as the question type, move on to the
next step. If you selected Multiple Choice, True or False, or Yes
or No, then, in the header of the Answers area, do one of the following:
n
If you're creating a test-type question, select Only one answer is
correct.
n
If you're creating a survey-type question, select Any answer is
acceptable.
8. Do one of the following:
n
If you selected Multiple Choice, True or False, or Yes or No
type answers—one correct answer and one or more distracters
(incorrect answers)—click the correct answer. If you selected
Multiple Choice and want to include more than four possible
answers, click Add another answer.
Notes:
n The answers will appear in the questionnaire in the same order
that you enter them here.
n To delete an answer, click the trash icon ( ) next to it.
PolicyTech 8.0 User's Guide
Security Considerations for Inserted Videos - 313
n
If you selected Open Ended, you don't need to provide any
answers, because the questionnaire taker will see a blank text box
and provide an essay-type answer. Move on to the next step.
Note: An open-ended question is not included when calculating a
reader's questionnaire score.
9. (Optional) At this point, you can set up several actions for
PolicyTech™ to take based on which answer a questionnaire taker
chooses. Click an item in the list below to go to detailed instructions
about an action.
PolicyTech 8.0 User's Guide
314 - Security Considerations for Inserted Videos
Important: Before you can assign an action, you must type a
question and, if it's not an open-ended question, type answers and
select the correct answer.
n
Present a follow-on question (subquestion)
n
Present a follow-on task with an optional web link
n
Flag an exception that can be viewed in a report
10. (Optional) In Questionnaire Settings (see Questionnaire Settings)
you can choose to show all questions or only incorrectly answered
questions along with questionnaire results (score). Only if one of
these two options is selected will the Feedback box be activated.
The feedback can be anything you feel would be useful for the questionnaire taker, such as an explanation of the concept the question
is about.
If you want to add feedback text, you can do either of the following:
n
To activate the Feedback box now, click Save and Close, click
Questionnaire Settings, and then, in the Questionnaire Results
area, click either Show all questions or Show incorrectly
answered questions. Then, to return to the question you were
working on, click Questions & Answers, and then click Edit
Question.
n
To add feedback text later, complete the remaining steps below,
including configuring the questionnaire settings. Then, after selecting Show all questions or Show incorrectly answered
questions in Questionnaire Settings, return to the Questions &
Answers page and edit each question to add feedback text (see
Changing a Questionnaire for help).
Note: You cannot include feedback for an open-ended question.
11. (Optional) In the Learning Objective area, do one of the following:
n
To create a new objective and assign the current question to that
objective, click New Objective (Optional), type an objective, and
then click Save.
PolicyTech 8.0 User's Guide
Security Considerations for Inserted Videos - 315
n
To keep the question in the currently selected objective and edit the
objective text, click Edit Selected, make changes, and then click
Save.
n
If you've already defined two or more learning objectives and want
to assign the current question to a different learning objective, click
the Learning Objective box, and then click an objective.
12. To create additional questions and, optionally, learning objectives,
repeat steps 5 through 11 as many times as necessary.
13. Click Questionnaire Settings, and then go to Questionnaire
Settings below for detailed instructions.
14. Click Save.
Creating a Subquestion
1. To the right of an answer you've typed, click Options, and then click
Add Sub Question.
A new Question window appears with the display condition at the top.
In the example below, this open-ended subquestion will only display if
the reader answers True to the question, "I have accepted a gift worth
more than $20 from a vendor." The reader is asked to describe the gift
and its worth.
PolicyTech 8.0 User's Guide
316 - Security Considerations for Inserted Videos
2. Define the subquestion the same as you would a top-level question.
You can add any number of question sublevels.
3. (Optional) To add another subquestion under the same answer,
click Add Next Question, and then repeat step 2.
4. Click Save and Close.
Adding a Follow-on Task
1. To the right of an answer you've typed, click Options, and then click
Advanced Settings.
2. Select Create Task, and then type the task instructions.
PolicyTech 8.0 User's Guide
Security Considerations for Inserted Videos - 317
3. (Optional) If completing the task includes accessing a website or
web page, select Include Hyperlink, type or copy and paste the
web address, and then type a link title. If you want to test the link,
click Test URL.
Important: The URL must include the scheme (http:// or https://).
4. Click Save.
Setting an Exception Trigger
By setting an exception for an answer, you can run a report that shows
who selects that answer (see "Report: Exceptions by Document" in the
Reports Supplement for details on generating the report).
1. To the right of an answer you've typed, click Options, and then click
Advanced Settings.
2. Select Create Exception, and then click Save.
PolicyTech 8.0 User's Guide
318 - Security Considerations for Inserted Videos
Questionnaire Settings
Basic Settings
Minimum Score to Pass. Type the percentage of questions readers
must answer correctly in order to pass the questionnaire. The default
setting is 100.
Show Printable Certificate. Select this option to give readers the
ability to print out a certificate once they pass the questionnaire.
Disable Questionnaire. Select this option if, after creating a
questionnaire, you decide not to require it for marking a document as
read.
Questionnaire Introduction
(Optional) In the Questionnaire Introduction box, type text that you
want to appear at the top of the questionnaire. The text will be preceded
by the text "Read This First."
PolicyTech 8.0 User's Guide
Security Considerations for Inserted Videos - 319
Randomization
By default, all questions you add under a learning objective are included
in the questionnaire. If you want PolicyTech™ to randomly select one
question from each learning objective and include only that question in
the questionnaire, in the Randomization area, click Only show one
random question per learning objective.
Note: You might want to select this option if readers must take the
same questionnaire more than once, as they are most likely to see
different questions each time they take it.
Questionnaire Results
Questions. To show questions when a reader fails a questionnaire,
click Show all questions or Show incorrectly answered questions.
Don't show questions is selected by default.
Important: Selecting an option to show questions also shows
question feedback, if any exists. If you are opting to show questions
for the first time for this questionnaire, none of the already added
questions will have feedback text as the Feedback box in the
Question window is disabled until you've opted to show questions. If
you want to include feedback, you'll need to edit the questions to add
it. (See Changing a Questionnaire for help with editing questions.)
Answers. The options under the Answers area are selectable only if
one of the options for showing questions is selected. To show answers
with questions when a reader fails the questionnaire, select one or more
of the following:
n
Show all possible answers. Lists all of a question's answers.
n
Show the user's response. Shows the answer the reader selected and marks it with if the answer was correct or with if it was
incorrect.
n
Show the correct answer. Displays the correct answer preceded
by .
Changing a Questionnaire
As a document owner, you can change a questionnaire's content and
settings at any time until the document is approved.
Changing Questionnaire Content
1. Open the document, which must be in one of the following statuses:
draft, collaboration, review, or approval.
PolicyTech 8.0 User's Guide
320 - Security Considerations for Inserted Videos
Note: If you need to change the questionnaire content in an
approved document, either create a new version of the document or
ask a document control administrator to change the questionnaire for
you.
2. Click the Edit Questionnaire tab.
3. In the 1. Questions and Answers window, do one of the following:
n
Add a learning objective, question, answer, or subquestion (see
Adding Questions and Answers if you need help).
n
To change a question or subquestion's type, click Edit Question,
and then click a different type.
Important: Changing a questions type deletes all currently defined
answers for that question.
Note: To edit a subquestion, click before the answer to show the
question, and then click Edit Question.
n
To change the text of a learning objective, question, or answer, click
Edit Learning Objective or Edit Question (for editing answers
as well), make the change, and then click Save.
n
To delete a learning objective, question, or subquestion, click Edit
Learning Objective or Edit Question, click Delete, and then click
Yes to confirm.
Important: Deleting a learning objective also deletes all questions
currently assigned to that objective. Deleting a question also deletes
its answers and any subquestions attached to those answers.
n
To delete an answer from a question or subquestion, click Edit
Question, and then click for that answer.
PolicyTech 8.0 User's Guide
Security Considerations for Inserted Videos - 321
n
To assign a question to a different learning objective, click Edit
Question, click the Learning Objective box, and then click an
objective.
4. Do one of the following:
n
If you're editing a learning objective, click Save.
n
If you're editing a question, subquestion, or answers, click Save
and Close.
Changing Questionnaire Settings
1. Open the document, which must be in one of the following statuses:
draft, collaboration, review, or approval.
Note: If you need to change the questionnaire settings in an
approved document, either create a new version of the document or
ask a document control administrator to change the questionnaire for
you.
2. Click the Edit Questionnaire tab, and then, in the 1. Questions
and Answers window, click Questionnaire Settings.
3. Make changes, and then click Save.
Note: For details on the Disable Questionnaire feature, see
Disabling and Reactivating a Questionnaire.
PolicyTech 8.0 User's Guide
322 - Security Considerations for Inserted Videos
Disabling and Reactivating a Questionnaire
By default, a questionnaire is automatically activated as soon as the
document containing the questionnaire is approved. As a document
owner, you can disable a questionnaire anytime before a document is
approved. Then, when the document is approved, readers will not have
to take the questionnaire in order to mark the document as read.
Note: If you need to disable a questionnaire in an approved
document, either create a new version of the document or ask a
document control administrator to disable the questionnaire for you.
1. Open the document, which must be in one of the following statuses:
draft, collaboration, review, or approval.
2. Click the Edit Questionnaire tab.
3. In the 1. Questions and Answers window, click Questionnaire
Settings.
PolicyTech 8.0 User's Guide
Security Considerations for Inserted Videos - 323
4. In the 2. Questionnaire Settings window, select the Disable
Questionnaire check box.
5. Click Save, and then close the document.
To reactivate the questionnaire, repeat the steps above, but click to
clear the Disable Questionnaire check box in step 4.
Designating a Document to Be Replaced
Important: This option is not intended for creating a new version of
an existing document—it is for replacing one or more existing
documents with an entirely new and different document. If you need
to create a new version of an existing document, see Doing a
Periodic Review and Creating a New Version.
If you're creating a document that will completely replace one or more
other documents, you can designate the documents to be replaced.
Then, when the document is approved, the designated documents will
automatically be archived.
1. Start creating or open the document that will replace one or more
other documents.
2. Click Options, and then click Replace Documents.
3. In the Site list, click a site containing at least one of the documents
you want to replace.
PolicyTech 8.0 User's Guide
324 - Security Considerations for Inserted Videos
4. In the Select By list, click the way you want to find the documents
to be replaced.
5. The list below the Select By list changes, depending on the Select
By option you choose. Do one of the following:
PolicyTech 8.0 User's Guide
Security Considerations for Inserted Videos - 325
n
If the Select By setting is currently Title or Reference #, type the
text you want to find. As you type, a list of documents matching the
search text is displayed. Click a document to add it to the Selected
Documents box.
n
If the Select By setting is any other option, in the list below Select
By, find and click an item. For example, if you chose Department
for Select By, in the Department list you would click a department.
Then, in the document list, click one or more documents to add
them to Selected Documents box.
PolicyTech 8.0 User's Guide
326 - Security Considerations for Inserted Videos
Notes:
n To narrow a long list of documents, you can add one or more
filters. See Adding Simple Filters to a Document List or Adding
an Advanced Filter to a Document List for details.
n To remove a document from the Selected Documents box,
double-click the document title, or click it and then click .
6. Once you have the document or documents you want to replace listed in the Selected Documents box, click Save.
Saving and Closing a Draft Document
To save and close a draft document, do one of the following:
n
If you are ready to submit the document for review, see Submitting
a Document for Review for detailed instructions.
n
If you are collaborating with one or more other writers to complete
the document, see Submitting a Document to Writers (Collaboration).
n
If you are not finished with the document and want to save and
close it without submitting it, click Options and then click Save and
Close. You can then open the draft document at a later time to continue working with it.
PolicyTech 8.0 User's Guide
Security Considerations for Inserted Videos - 327
Note: We also recommend that you periodically save a document
while working on it. Click CTRL+S (or click File, and then click Save)
to save the document without submitting or closing it.
Saving a Copy of a Document to Disk
If you need to save a copy of a document to disk,
1. In an open document, click File, and then click Save As.
2. Navigate to where you want the file saved, type a file name, and
then click Save.
Important: PolicyTech™ does not track a file you save to disk and
can no longer impose security restrictions on that file.
Editing a Draft Document
You can freely make changes to a document's properties and contents
for as long as it remains in draft status.
Notes:
n Documents submitted to writers that are still in the collaboration
status are considered draft documents and are completely
editable by document owners.
n For instructions on editing a document after it has been
returned to draft after one or more reviewers or approvers have
revised or declined it, see Working with a Revised or Declined
Document.
n As the document owner, you can make changes to the
document even after submitting it for review. See Editing
Document Content for details.
To edit a draft document, find it in the draft or collaboration status, and
then open it (see Finding a Document in a Specific Status if you need
help). You can then add or change any of the following:
n
Document content (see Writing a Document (Windows) or Writing
a Document (Mac))
n
Document properties (see Assigning Document Properties)
n
File attachments and web address links (see Attaching Files and
Adding Reference Links)
n
Questionnaire (see Creating a Questionnaire)
n
Documents to be replaced (see Designating a Document to Be
Replaced)
PolicyTech 8.0 User's Guide
328 - Security Considerations for Inserted Videos
Be sure to save your changes.
Deleting a Draft Document
Important: You can only delete a document while it is in draft or
collaboration status. To delete a document currently in review or
approval, send it back to draft (see Sending a Document Back to
Draft), and then follow the instructions below to delete it.
To delete a draft document,
1. Find and open the document in the draft or collaboration status (see
Finding and Opening a Document if you need help).
2. Click Options, click Delete, and then click Yes to confirm.
Note: Deleted documents are placed in the Recycle Bin. If you ever
need to restore a deleted document, contact your document control
administrator.
Submitting a Document to Writers, Reviewers, or
Approvers
Where a newly created draft document should go next depends on the
assignments made in the document's Properties Wizard. Because
assigning an approver is required, the document must at least be
submitted for approval, but it could also be submitted to assigned writers
or reviewers.
Note: You can skip assigned writers by submitting directly to review
or approval from the draft status. You can also skip assigned
reviewers by submitting directly to approval from the draft or
collaboration status. However, you cannot skip submitting the
document to assigned approvers.
Go to the section below for what you need to do next with the draft
document.
Submitting a Document to Writers (for Collaboration)
Submitting a Document for Review
Submitting a Document for Approval
PolicyTech 8.0 User's Guide
Security Considerations for Inserted Videos - 329
Submitting a Document to Writers (for Collaboration)
If you, as a document owner or proxy author, assigned one or more
writers to a document and are ready for them to work on it, your next
step is to submit the document to writers. While a document is assigned
to writers it is in the collaboration status.
Note: If you did not assign writers, move on to Submitting a
Document for Review or Submitting a Document for Approval.
As each assigned writer indicates that he or she has finished writing,
you receive a notification email. When all assigned writers have
indicated that they are finished writing the document, PolicyTech
returns the document to draft status and notifies you that the document
is ready to submit to review.
You can also check writer status from the document's Overview page
(see Working with the Document Overview for details). To access the
document while it is in collaboration status, see Finding a Document in a
Specific Status.
Note: Because assigning writers is not a required Properties
Wizard step, if the assigned template contains no required writers,
you can skip any assigned writers and submit the document directly
to review or approval if needed.
1. Find and open the document (see Finding and Opening a Document if you need help).
2. Click Submit to Writers.
3. In the Results window, click OK. The document is automatically
closed for you.
PolicyTech 8.0 User's Guide
330 - Security Considerations for Inserted Videos
Note: If no writers have been assigned to the document, you will see
a window like the one below. Click Go there now, assign one or
more writers, and then click Submit to Writers again.
Submitting a Document for Review
It is time to submit the document to review when both of the following
are true:
n
The document owner, the assigned proxy author (if any), and all
assigned writers (if any) have finished writing the document.
n
The document has been assigned to one or more reviewers in the
Properties Wizard.
PolicyTech 8.0 User's Guide
Security Considerations for Inserted Videos - 331
Important: Only the document owner or a document control
administrator can submit a document for review. If you wrote the
document as a proxy author and are finished, see Requesting a
Document Review (Proxy Author).
Once you submit a document for review, each assigned reviewer has
the option to accept, revise, or decline the document in its current state.
As each reviewer acts on the document, you receive a notification email.
When all reviewers have finished, you receive another email
notification, and the document is sent to one of two places. If one or
more reviewers revise or decline the document, it is sent back to draft
status. If all reviewers accept the document, it is automatically submitted
for approval.
You can also check reviewer status from the document's Overview
page (see Working with the Document Overview for details). To access
the document while it is in review status, see Finding a Document in a
Specific Status.
Note: Depending on your organization's policies and the type of
document, you may not need to assign and submit the document to
reviewers. If this is the case, move on to Submitting a Document for
Approval. Also, because assigning reviewers is not a required
Properties Wizard step, if the assigned template contains no
required reviewers, you can skip any assigned reviewers and submit
the document directly to approval if needed.
To submit a document for review,
1. Find and open the document in the draft or collaboration status (see
Finding and Opening a Document if you need help).
2. Do one of the following:
n
If the document is currently in draft status, click Submit for
Review.
n
If the document is currently in collaboration status, click Options,
and then click Submit for Review.
Important: As the document owner, you can make changes to the
document even after submitting it for review. See Editing Document
Content for details.
PolicyTech 8.0 User's Guide
332 - Security Considerations for Inserted Videos
3. (Optional) If the document has any assigned writers who have not
finished yet, a window similar to the following is displayed. To skip
any unfinished writers and submit the document for review, click
OK.
4. (Optional) In the Submit for Review window, delete the default
text—"New Document" or "New Version"—and then type the purpose of the new document or a summary of changes for the new
version of the document. All assigned reviewers, approvers, and
readers will be able to see your comments.
5. (Optional) To add what you wrote to this document's discussion
board, click Post to Discussion Board (see Working with Document Discussions for details).
6. Click Submit.
PolicyTech 8.0 User's Guide
Security Considerations for Inserted Videos - 333
7. In the Results window, click OK. The document is automatically
closed for you.
Note: If no reviewers have been assigned to the document, you will
see a window like the one below. Click Go there now, assign one or
more reviewers, and then click Submit for Review again.
Requesting a Document Review (Proxy Author)
If you are a proxy author and have finished writing a document, you can
send a request to the document owner to submit the document for
review.
1. Find and open the document (see Finding and Opening a Document if you need help).
PolicyTech 8.0 User's Guide
334 - Security Considerations for Inserted Videos
2. Click Options, and then click Request Submit for Review.
3. (Optional) In the Comments box, type any comments you want to
include.
4. (Optional) To add what you wrote to this document's discussion
board, click Post to Discussion Board (see Working with Document Discussions for details).
5. Click Save.
6. In the Results window, click OK. The document is automatically
closed for you.
PolicyTech 8.0 User's Guide
Security Considerations for Inserted Videos - 335
Submitting a Document for Approval
Important: If you submitted a document for review, you don't need to
submit it to approval. The document will automatically be submitted to
approval once all reviewers accept it.
If a document's template contains no required reviewers, you can
submit a draft document directly to approval, skipping the review step.
You must assign at least one approver before submitting a document for
approval.
Note: Only the document owner or a document control administrator
can submit a draft document for approval.
Once you submit a document for approval, each assigned approver has
the option to accept, revise, or decline the document in its current state.
As each approver acts on the document, you receive a notification
email. When all approvers have finished, you receive another email
notification, and the document is sent to one of two places. If one or
more approvers revise or decline the document, it is sent back to draft
status. If all approvers accept the document, it is automatically published
(unless the document has been assigned a publication date sometime in
the future, in which case the document is moved to pending status until
that date).
You can also check approver status from the document's Overview
page (see Working with the Document Overview for details). To access
the document while it is in approval status, see Finding a Document in a
Specific Status.
To submit a document for approval,
PolicyTech 8.0 User's Guide
336 - Security Considerations for Inserted Videos
1. Find and open the document in the draft, collaboration, or review
status (see Finding and Opening a Document for help).
2. Click Options, and then click Submit for Approval.
3. (Optional) If the document has any assigned reviewers who have
not finished yet, a window similar to the following is displayed. To
skip any unfinished writers and submit the document for review,
click OK.
4. (Optional) In the Submit for Approval window, delete the default
text—"New Document" or "New Version"—and then type the purpose of the new document or a summary of changes for the new
version of the document. All assigned reviewers, approvers, and
readers will be able to see your comments.
PolicyTech 8.0 User's Guide
Security Considerations for Inserted Videos - 337
5. (Optional) To add what you wrote to this document's discussion
board, click Post to Discussion Board (see Working with Document Discussions for details).
6. Click Submit.
7. In the Results window, click OK. The document is automatically
closed for you.
Note: If no approvers have been assigned to the document, you will
see a window like the one below. Click Go there now, assign one or
more approvers, and then click Submit for Approval again.
PolicyTech 8.0 User's Guide
338 - Working with Documents in Review and Approval
Working with Documents in Review and
Approval
As a document owner, you can do any of the following with a document
you own while it is in the review or approval status:
n
Find and open a document (see Finding and Opening a Document)
n
Check the status of assigned writers, reviewers, or approvers (see
Checking Writer, Reviewer, and Approver Status)
n
Make changes to document properties (see Making Changes to
Document Properties)
n
Edit document content (see Editing Document Content)
n
Send the document back to draft (see Sending a Document Back to
Draft)
n
Check the document's discussion board (see Working with Document Discussions)
n
Force a Document from Review to Approval (see Forcing a Document from Review to Approval)
Checking Writer, Reviewer, and Approver Status
As a document owner, once you have submitted a document for writing,
review, or approval, you can check that document's status at any time
from within the document's Overview page.
Important: You can also check writer, reviewer, and approver status
by generating various Tasks by Document and Tasks by User
reports.
1. Find and open the document (see Finding a Document You Are
Assigned to Own, Proxy Author, Write, Review, Approve, or Read
if you need help).
2. Click Overview.
3. In the Overview page, click Writer Status, Reviewer Status, or
Approver Status.
PolicyTech 8.0 User's Guide
Working with Documents in Review and Approval - 339
4. In the Writer Status, Reviewer Status, or Approval Status window, each assignee's name is preceded by a status icon. The
status icon legend briefly describes each status. See "Status
Descriptions" below for more detailed descriptions.
5. To view any comments a user may have included when completing
a task, click that user's name. The comments, if any, appear in the
Rationale box.
6. Close the document.
Status Descriptions
The assigned writer has finished writing the document, or the
assigned reviewer or approver has accepted the document as is.
The assigned reviewer or approver has either revised or declined the
document.
The assigned writer, reviewer, or approver has been notified that he
or she has a task that needs to be completed, but has not completed it
yet. For example, you would see this icon for a reviewer in the
Reviewer Status window if the document is currently in the review
workflow status and the user has not finished reviewing the document.
The assigned writer, reviewer, or approver did not complete his or
her task before the document was moved to another workflow status.
For example, while a document is in collaboration status, the document
owner clicks Submit for Review before one of the writers clicks
Finished Writing. The document is moved to review status, and the
Skipped icon appears before the writer's name in the Writer Status
window.
The assigned writer, reviewer, or approver has not yet received the
task assignment. For example, you are looking at an approver in the
Approver Status window while the document is still in review.
PolicyTech 8.0 User's Guide
340 - Working with Documents in Review and Approval
The assigned writer, reviewer, or approver received a task
assignment but was subsequently unassigned before completing the
task. For example, while a document is in review and all reviewers have
received their task notifications, the document owner edits the
document's Properties Wizard and removes one of the assigned
reviewers. That user is now marked as unassigned.
Making Changes to Document Properties
A document owner, a document control administrator (DCA), and a
proxy author can all make changes to an assigned document after it
leaves the draft workflow status. A document owner or DCA can make
changes to a document's properties in the following non-draft statuses:
n
Collaboration
n
Review
n
Approval
n
Pending
n
Published
An assigned proxy author can make document property changes in the
following non-draft statuses:
n
Collaboration
n
Review
n
Approval
However, the following document properties cannot be changed for
documents in certain statuses. If you need to change one of these
properties, you will have to return the document to draft status (see
Sending a Document Back to Draft) or create a new version (see Doing
a Periodic Review and Creating a New Version).
n
Template: can only be changed in the draft and collaboration
statuses
n
Approvers: cannot be changed after a document is approved and
moved to pending or published status
n
Publication Date: Cannot be changed once ta document is moved
to published status
To change a document's properties after it has been moved out of draft
status,
PolicyTech 8.0 User's Guide
Working with Documents in Review and Approval - 341
1. Find and open the document (see Finding and Opening a Document or Finding a Document You Are Assigned to Own, Proxy
Author, Write, Review, Approve, or Read for help).
2. Click Properties Wizard.
Note: If you are working on a document in the pending or published
status, you will see the following alert. Click OK to continue.
3. Click a Properties Wizard step, and then make the desired
changes.
4. Click Save.
Important: If you close the document without clicking Save first, your
changes will be lost.
5. Close the document.
Sending a Document Back to Draft
A document owner can send a document in the collaboration, review, or
approval status back to draft status.
1. Find and open the document (see Finding a Document You Are
Assigned to Own, Proxy Author, Write, Review, Approve, or Read
for help).
2. Click Options, and then click Send to Draft.
PolicyTech 8.0 User's Guide
342 - Working with Documents in Review and Approval
3. In the Results window, click OK.
The document is moved to draft status and remains open. Any writers
(collaboration status), reviewers (review status), or approvers (approval
status) in the current status who had not completed their assigned tasks
are notified that their tasks no longer need to be completed.
Editing Document Content
If you are the owner of a document, you can make changes to that
document while it is in the review or approval status.
1. Find and open the document (see Finding a Document You Are
Assigned to Own, Proxy Author, Write, Review, Approve, or Read
for help).
2. At the top of the document window, click Revise, and then click
Revise again to confirm.
3. An alert is displayed informing you that the revised document will be
declined and sent back draft, just as if a reviewer or approver had
revised the document. Also, any changes you make will be tracked.
Click Revise to continue.
PolicyTech 8.0 User's Guide
Working with Documents in Review and Approval - 343
4. Make your changes, and then click Done Revising.
5. (Required) In the Done Revising window, type a brief description
of what you changed.
6. (Optional) To start a discussion that includes your revision explanation, click Post to Discussion Board, and then see Working with
Document Discussions for details on selecting recipients and making the discussion private.
7. Click Save, and then click OK.
Important: When the last assigned reviewer is done with the
document, it will be returned to draft status. There you can accept
your marked changes and any reviewers' changes (see Working with
a Revised or Declined Document) and then resubmit the document
for review or submit it directly to approval.
Forcing a Document from Review to Approval
When necessary, as a document owner or document control
administrator you can move a document currently in the review status to
PolicyTech 8.0 User's Guide
344 - Working with Documents in Review and Approval
the approval status, skipping any reviewers who have not yet completed
their review tasks.
Important: If you are not a document control administrator, you
cannot force a document from review to approval if the document's
template contains required reviewers.
1. Find and open the document currently in review that you need to
move on to approval (see Finding a Document in a Specific Status).
2. Click Options, and then click Submit for Approval.
3. You will see a message like the one below listing the reviewers that
will be skipped if you continue. Click OK.
4. (Optional) The comments provided when the document was submitted for review are displayed. Replace or edit those comments.
PolicyTech 8.0 User's Guide
Working with Documents in Review and Approval - 345
5. Click Submit, and then click OK. Skipped reviewers are notified
that they no longer need to complete their review tasks for this document, and assigned approvers receive new tasks.
PolicyTech 8.0 User's Guide
346 - Working with a Revised or Declined Document
Working with a Revised or Declined Document
Once all reviewers or approvers have reviewed the document, there are
two possible outcomes:
n
If the document was accepted by all of the assigned reviewers or
approvers, it is automatically moved to the next status (approval,
pending, or published) and the appropriate assignees are notified.
In this case, you, as the document owner, do not need to do anything. You receive e-mail notification that the document has been
moved on.
n
If the document was revised or declined by at least one of the
reviewers or approvers, it is automatically sent back to draft status.
You, as the document owner, are notified via email so you can
make needed changes and resubmit the document for review.
Note: As individual reviewers or approvers revise or decline the
document, you receive email messages with any comments from the
reviewers or approvers.Only after the last reviewer or approver has
taken action is the document automatically placed back in draft.
1. To edit the document and resubmit it for review or approval, do one
of the following:
n
Open the notification email, read the comments made by the
reviewer or approver, and then click the document link.
PolicyTech 8.0 User's Guide
Working with a Revised or Declined Document - 347
n
Click MY TASKS, and then, in the Submit area, click the document
title.
2. What you do next depends on whether the document was revised
or declined and what type of document it is.
n
n
n
If the document you're editing is a Microsoft® Word document and
one or more of the reviewers or approvers revised the document,
their changes will be highlighted with the Word Track Changes feature. You need to accept or reject the changes (see Working with
Tracked Changes in a Word Document below for details).
If the document you're editing is a Microsoft Excel® document and
one or more reviewers or approvers revised the document, you will
need to compare document snapshots (draft versions) to see what
was changed (see Comparing Draft Versions in an Excel Document below for details.)
If the document you're editing was declined and none of the reviewers or approvers revised it, refer to the comments entered when the
document was declined and make changes accordingly. (No text
will be marked up.) These comments are included in the notification
email and in the Reviewer Status or Approver Status page of the
document overview (see Working with the Document Overview for
details).
3. When you've finished making the necessary changes, resubmit the
document to review or approval.
Working with Tracked Changes in a Word Document
PolicyTech™ turns on Track Changes whenever a reviewer or
approver chooses to revise a Word document. Track Changes marks
all text changes, including insertions, deletions, moved text, and
formatting changes. Reviewers and approvers can also insert
comments to explain marked up text or to identify other changes that
need to be made.
PolicyTech 8.0 User's Guide
348 - Working with a Revised or Declined Document
Note: Reviewers and approvers cannot turn off Track Changes
while revising a document.
The screenshot below shows what marked-up text looks like. If multiple
reviewers or approvers revised the document, each reviser's changes
appear in a different color. You'll want to take action on each change by
accepting or rejecting it so that no marked-up text remains when you
resubmit the document for review or approval.
Track Changes and Comment Options
The location and appearance of the Track Changes and Comments
options vary depending on the version of Word you're using.
Word 2010
Comments, Tracking, and Changes groups on the ribbon's Review
tab
Word 2007
Comments, Tracking, and Changes groups on the ribbon's Review
tab
PolicyTech 8.0 User's Guide
Working with a Revised or Declined Document - 349
Word 2003
Reviewing toolbar (View > Toolbars > Reviewing)
Working with Marked-up Text and Comments
Using the Track Changes and Comments options, you can do any of
the following:
Note: We recommend using the Track Changes tools to find
marked-up text in the document as some very small changes (such
as adding a period) may be missed otherwise.
Find Markup in the Text
After finding marked-up text, hover the cursor over the change to see
who made it.
Word 2010 and 2007
On the Review tab, in the Changes group, click Next or Previous.
Word 2003
On the Reviewing toolbar, click
or
.
Find Comments in the Text
Word 2010 and 2007
On the Review tab, in the Comments group, click Next or Previous.
PolicyTech 8.0 User's Guide
350 - Working with a Revised or Declined Document
Word 2003
On the Reviewing toolbar, click
or
.
View Markup in the Reviewing Pane
In the Reviewing Pane, you can see each markup in a categorized list
and then click a markup to go to it in the document. You can also see
who made each change.
Word 2010 and 2007
On the Review tab, in the Tracking group, click the arrow next to
Reviewing Pane, and then click Reviewing Pane Vertical or
Reviewing Pane Horizontal.
Word 2003
On the Reviewing toolbar, click
.
Accept or Reject a Change
Accepting a change removes the markup and leaves the normal text.
Rejecting a change deletes the marked-up text.
PolicyTech 8.0 User's Guide
Working with a Revised or Declined Document - 351
Word 2010 and 2007
Either select the changed text or place the cursor anywhere within or
immediately before it. Then, on the Review tab, in the Changes group,
click Accept or Reject.
Word 2003
Either select the changed text or place the cursor anywhere within or
immediately before it. Then, on the Reviewing toolbar, click or .
Accept or Reject All Changes at Once
Word 2010 and 2007
On the Review tab, in the Changes group, click the arrow below
Accept or Reject, and then click Accept All Changes in Document
or Reject All Changes in Document.
Word 2003
On the Reviewing toolbar, click the arrow next to or , and then click
Accept All Changes in Document or Reject All Changes in
PolicyTech 8.0 User's Guide
352 - Working with a Revised or Declined Document
Document.
View the Original Document before Changes
Word 2010 and 2007
On the Review tab, in the Tracking group, click the arrow next to Final:
Show Markup, and then click Original.
Word 2003
On the Reviewing toolbar, click Show, and then click Original.
Comparing Draft Versions in an Excel Document
Because the Track Changes feature in Excel® is not activated (it
doesn't work in the same way as Track Changes in Microsoft® Word),
you will need to compare draft versions in order to find changes made
by a reviewer or approver.
PolicyTech 8.0 User's Guide
Working with a Revised or Declined Document - 353
Note: Excel has no feature comparable to the Compare
Documents feature in Word, so you must manually compare the
draft versions.
To find and compare the different versions of a revised or declined Excel
document,
1. Open the document, click the Overview tab, and then click
Document History.
The draft versions of the document, such as the original draft you
submitted to review or approval, are listed in the Current
Revision History area. The version listed on top is the one you'd
see if you clicked Edit Document. The others are previous draft
versions.
2. To compare the current draft version with another one, click the
other draft version link. This opens that version in a separate
browser window.
3. In the current draft version (the one you opened in step 1 above),
click the Edit Document tab.
4. Compare the two drafts.
PolicyTech 8.0 User's Guide
354 - Reapplying a Template to a Document
Reapplying a Template to a Document
If you think changes have been made to a template you've already
assigned to a document, you can reapply the template to ensure the
document has the latest version. You can reapply a template while a
document is in any of the following statuses: draft, collaboration, review,
approval.
Note: A document control administrator can reapply a template to
multiple documents at once using Bulk Editor.
1. Open a document (see Finding and Opening a Document if you
need help).
2. Click Properties Wizard.
3. To the right of the Document Template box, click Reapply.
4. You have the option of applying the change to the document contents only, to the document properties only, or to both. Select the
part of the document you want updated.
Important: Selecting Document will replace all of the current
document contents with the document contents from the template.
Be sure this is what you really want to do before clicking Save as this
procedure cannot be undone.
PolicyTech 8.0 User's Guide
Reapplying a Template to a Document - 355
5. (Optional) If you selected Document, click Preview Template to
see what the document contents will look like once you click Save.
The document contents are displayed in a separate browser window, which you can close once you're done viewing the document.
6. Click Save, and then close the document.
PolicyTech 8.0 User's Guide
356 - Doing a Periodic Review and Creating a New Version
Doing a Periodic Review and Creating a
New Version
When you, as a document owner, create a document, you have the
opportunity to indicate how often you want to be reminded to review the
document and see if it needs updating (see Step 1: Settings). If you set
a periodic review date, either relative to the approval date or on a
specific date, you'll receive a task notification email and a task in MY
TASKS as the review due date approaches.
1. To start a periodic review, do one of the following:
n
Open the task notification email, and then click the document link.
n
Click MY TASKS, and then, in the Periodic Review area, click the
document title.
n
Find and open the document using the I Own option under My
Documents (see Finding a Document You Are Assigned to Own,
PolicyTech 8.0 User's Guide
Doing a Periodic Review and Creating a New Version - 357
Proxy Author, Write, Review, Approve, or Read for details.)
2. Review the document, and then take one of the following actions:
n
If the document needs to be revised, click Create New Version to
make a copy of the approved document and place it in draft status.
Make updates, and then move the new version of the document
through the review and approval process as you normally would.
Once the new version is approved, the previously approved version
is archived.
n
If the document does not need to be revised, click Options, and
then click No Revision Necessary.
A discussion window appears for you to explain why you are
resetting the review interval without making changes. Complete
the discussion form (see Working with Document Discussions for
details), click Save, and then click OK.
n
If the document is obsolete (needs no revision and will no longer be
used), click Options, and then click Archive.
PolicyTech 8.0 User's Guide
358 - Doing a Periodic Review and Creating a New Version
A discussion window appears for you to explain why you are
archiving the document. Complete the discussion form (see
Working with Document Discussions for details), click Save, and
then click OK.
PolicyTech 8.0 User's Guide
Collaborating on (Helping to Write) a Document (for assigned writers) - 359
Collaborating on (Helping to Write) a Document (for assigned writers)
If you've been assigned the writer role, a document owner can assign
you to help write a document. The document owner may assign you to
write all of the document or only parts of it. Or, the document owner may
also just want you to edit the document to check for subject matter
accuracy or grammatical correctness.
When a document owner assigns you as a document's writer and then
submits the document to you, you receive an email notification with the
subject, 'Writing collaboration required: "[document title]."' The task is
also added to My Tasks.
1. Do one of the following to open a document you've been assigned
to write:
n
Open the task notification email, and then click the document link.
n
Click MY TASKS, and then, in the Collaborate area, click the document title.
PolicyTech 8.0 User's Guide
360 - Collaborating on (Helping to Write) a Document (for assigned writers)
2. Write the document, or your portion of the document, using any
available Microsoft® Word or Excel® features and any PolicyTech™ features. See the following topics for detailed instructions:
Writing a Document (Windows)
Writing a Document (Mac)
Attaching Files and Adding Reference Links
3. When you're finished working on an assigned document, do one of
the following:
n
If you're not finished writing the document and plan to come back to
it later, click Save and Close.
n
If you're finished with your writing assignment, click Finished
Writing.
(Optional) Then, in the Finished Writing window, type comments
for the document owner, and then click Save.
Note: To add what you wrote to this document's discussion board
where all assignees can see it, click Post to Discussion Board
(see Working with Document Discussions for details).
PolicyTech 8.0 User's Guide
Collaborating on (Helping to Write) a Document (for assigned writers) - 361
In the Results window, click OK. The document is automatically
closed for you.
PolicyTech 8.0 User's Guide
362 - Reviewing and Approving a Document
Reviewing and Approving a Document
The instructions in the topics below apply only if you have been
assigned as a document reviewer or approver. If a document owner
assigns you as a reviewer or approver or you assigned yourself, (as the
document owner) as a reviewer when creating a new document, you
will be notified by e-mail and in MY TASKS (see My Tasks for details)
when that document is submitted for review or is moved to the approval
stage.
Reviewing a Document
Approving a Document
Reviewing a Questionnaire
Reviewing a Document
If you have been assigned the reviewer role in PolicyTech™, a
document owner can assign you to review a document. Then, when that
document is submitted to review, you receive a task assignment
notification in the form of an email (if you are set up to receive emails
from PolicyTech), and a task is added to your My Tasks list.
1. To open a document you've been assigned to review, do one of the
following:
n
Open the task notification email, and then click the document link.
n
Click MY TASKS, and then, in the Review area, click the document title.
PolicyTech 8.0 User's Guide
Reviewing and Approving a Document - 363
n
Find and open the document using the I Review option under My
Documents (see Finding a Document You Are Assigned to Own,
Proxy Author, Write, Review, Approve, or Read for details.)
2. (Optional) If, when you open the document, you see a window like
the one below, go to Reading a Document That Opens Outside of
PolicyTech.
Note: If you see an alert like the one below, it means that another
user (another reviewer or a document control administrator) is
working on the document in edit mode. You will not be able to revise
the document until the other user finishes and closes the document. If
you want to be notified when the document is available, select Notify
me by email when the document is no longer checked out.
Click OK to clear the warning.
PolicyTech 8.0 User's Guide
364 - Reviewing and Approving a Document
3. Check for and review the following: attachments, notes, discussions, change summary (see Reviewing Supplementary Materials for details).
4. Read the document carefully and completely.
Note: If one or more other reviewers have already reviewed the
document and made revisions, you see those revisions, with each
reviewer's changes in a different color text. You can rest your cursor
on (hover over) one of the color-coded changes to see who made the
change and when.
5. To see if other assigned reviewers have revised or declined the document and their reasons for doing so, go to the Reviewer Status
page of the Overview (see Working with the Document Overview
for details).
6. Accept, revise, or decline the document. Go to a section listed
below for further instructions.
n
Accepting a Document
n
Revising a Word Document
n
Revising an Excel Document
n
Revising an Uploaded Document
n
Declining a Document
PolicyTech 8.0 User's Guide
Reviewing and Approving a Document - 365
Approving a Document
If you have been assigned the approver role in PolicyTech™, a
document owner can assign you to approve a document. Then, when
that document is submitted or automatically moved to approval, you
receive a task assignment notification in the form of an email (if you are
set up to receive emails from PolicyTech), and a task is added to your
My Tasks list.
1. To open a document you've been assigned to approve, do one of
the following:
n
Open the task notification email, and then click the document link.
n
Click MY TASKS, and then, in the Approve area, click the document title.
n
Find and open the document using the I Approve option under My
Documents (see Finding a Document You Are Assigned to Own,
PolicyTech 8.0 User's Guide
366 - Reviewing and Approving a Document
Proxy Author, Write, Review, Approve, or Read for details.)
2. (Optional) If, when you open the document, you see a window like
the one below, go to Reading a Document That Opens Outside of
PolicyTech.
Note: If you see an alert like the one below, it means that another
user (another approver or a document control administrator) is
working on the document in edit mode. You will not be able to revise
the document until the other user finishes and closes the document. If
you want to be notified when the document is available, select Notify
me by email when the document is no longer checked out.
Click OK to clear the warning.
3. Check for and review the following: attachments, notes, discussions, change summary (see Reviewing Supplementary Materials for details).
4. Read the document carefully and completely.
Note: If one or more other approvers have already reviewed the
document and made revisions, you see those revisions, with each
approver's changes in a different color text. You can rest your cursor
on (hover over) one of the color-coded changes to see who made the
change and when.
5. To see if other assigned approvers have revised or declined the document and their reasons for doing so, go to the Approver Status
PolicyTech 8.0 User's Guide
Reviewing and Approving a Document - 367
page of the Overview (see Working with the Document Overview
for details).
6. Accept, revise, or decline the document. Go to a section listed
below for further instructions.
n
Accepting a Document
n
Revising a Word Document
n
Revising an Excel Document
n
Revising an Uploaded Document
n
Declining a Document
Reviewing a Questionnaire
A reviewer or approver can review a questionnaire that is attached to a
document that he is required to review or approve.
1. Open a document that you are required to review or approve.
2. You will be prompted that there is a questionnaire attached to the
document.
3. Click the Questionnaire link to go directly to the questionnaire, to
review it.
4. Review the learning objectives, questions and answers.
PolicyTech 8.0 User's Guide
368 - Reviewing and Approving a Document
5. Click the Questionnaire Settings button at the bottom of the
page.
6. Review the questionnaire settings.
7. If you do not accept the questionnaire, at the top of the page click
the Options sub-tab, and then click Decline.
8. Click Make Comment and explain why the questionnaire has a
problem that caused you to decline the document.
9. Click the Decline button to display the Results box. Click OK to
close the box and close the document.
PolicyTech 8.0 User's Guide
Reviewing and Approving a Document - 369
Accepting a Document
1. With a document open that you've been assigned to review or
approve, click Accept.
2. (Optional) Type comments about your review of the document.
3. (Optional) To add what you wrote to this document's discussion
board, click Post to Discussion Board (see Working with Document Discussions for details).
4. Click Accept, and then click OK.
PolicyTech 8.0 User's Guide
370 - Reviewing and Approving a Document
Revising a Word Document
1. With a Microsoft® Word document open that you've been assigned
to review or approve, click Revise, and then click Revise again to
confirm.
2. The document is reloaded in edit mode with Track Changes
turned on. Use any available Word and PolicyTech features to
revise the document.
Note: You cannot turn off Track Changes while revising a
document in review.
3. When you're done working on the document, do one of the following:
n
If you're finished with your revisions, click Done Revising, and
then click OK.
n
If you're not finished with revisions but need to close the document
for now, click Finish Later.
Revising an Excel Document
1. With the Excel® document open that you've been assigned to
review or approve, click Revise, and then click Revise again to confirm.
2. The document is reloaded in edit mode. Use any available Excel
and PolicyTech™ features to revise the document.
Important: Consider adding comments to or highlighting any cells
you change so the document owner can quickly see your revisions
without having to compare draft versions.
3. When you're done working on the document, do one of the following:
PolicyTech 8.0 User's Guide
Reviewing and Approving a Document - 371
n
If you're finished with your revisions, click Done Revising, and
then click OK.
n
If you're not finished with revisions but need to close the document
for now, click Finish Later.
Revising an Uploaded Document
1. With the document open that you've been assigned to review or
approve, click Revise, and then click Revise again to confirm.
2. In the File Information window, click the name of the uploaded file.
3. You should now see a Windows® or Mac® system prompt with
options to open or save the file. Click Open.
Note: Your system prompt may look different than the one below,
depending on which operating system and version your computer is
using.
4. The file opens in whichever program is associated with that file type
in your Windows or Mac settings. Make your revisions, and then
save the file to disk.
5. Back in the File Information window, click Import / Overwrite.
PolicyTech 8.0 User's Guide
372 - Reviewing and Approving a Document
6. Click Browse (or Choose File on a Mac), find and select the
revised file you saved to disk, and then click Open (or Choose) to
add the file name to the Upload New Document window.
7. Click Upload File, and then click OK.
8. Click Done Revising.
9. Type an explanation of the changes you made.
Important: You can't move on until you type an explanation.
PolicyTech 8.0 User's Guide
Reviewing and Approving a Document - 373
10. (Optional) To add what you wrote to this document's discussion
board, click Post to Discussion Board (see Working with Document Discussions for details).
11. Click Save, and then click OK.
Declining a Document
1. With the document open that you've been assigned to review or
approve, click Options, and then click Decline.
2. In the Decline window, type an explanation of why you're declining
the document.
Important: You can't move on until you type an explanation.
3. (Optional) To add what you wrote to this document's discussion
board, click Post to Discussion Board (see Working with Document Discussions for details).
4. Click Decline, and then click OK.
PolicyTech 8.0 User's Guide
374 - Working with Notification Emails
Working with Notification Emails
If you are assigned any task for a document, you will receive a
notification email when it is time to perform that task. You will also
receive notifications if one of your tasks includes a due date and the task
becomes overdue. See Notification Lists below for descriptions of the
notifications you could receive.
Important: You will receive notification emails only if the document
control administrator has both set up PolicyTech™ to send out emails
through your organization's email system and has included your
email address in your user profile. If this is not the case, the task
notifications are posted to the Messages Inbox under My Tasks. See
Using the Messages Inbox for details.
If you receive a notification email, do the following:
1. Find and open the email in your organization's email system. The
notification serves one of the following purposes:
n
Tells you what task you've been assigned and the document you
need to perform the task on, as shown in the sample email below.
n
Provides you with information about a task assignment or document you own.
PolicyTech 8.0 User's Guide
Working with Notification Emails - 375
2. To open a referenced document, click the document title.
3. If applicable, perform your task, and then take the appropriate
action to indicate that the task is done. The lists below refer you to
topics with instructions about performing assigned tasks.
Notification Lists
The tables below show what notifications users with each document
role might receive and links to topics that explain how to act on those
notifications.
Note: Each document has an email notification level setting that
controls whether certain types of emails will be sent (see Email
Notification Levels for details). The actions described in the "Sent
When..." columns of the tables below will cause notification emails to
be sent only if those notification types are allowed under the current
notification level setting.
For All Roles
Notification Subject
Sent When...
Help Topic Link
PolicyTech Tasks
Summary
A document control
Working with My
administrator (DCA) Tasks
has configured
PolicyTech to send
out task summaries to
all assignees on a set
frequency. The task
summary in the email
matches the task list
displayed after
clicking MY TASKS.
[discussion title]: "
[document title]"
A user creates or
Working with
replies to a discussion Document
and includes you as a Discussions
PolicyTech 8.0 User's Guide
376 - Working with Notification Emails
Notification Subject
Sent When...
Help Topic Link
recipient.
No revision
necessary: "
[document title]"
A document that is
due for periodic
review has been
marked "No Revision
Necessary" by a
document owner or
DCA, and you were
included as a
notification recipient
at the time the
document was
marked.
Not applicable.
Contact the person
named in the
notification with
questions or
concerns.
For Readers
Notification Subject
Required to read: "
[document title]"
Sent When...
A document that
users are assigned to
read is approved and
published.
Help Topic Link
Reading a Required
Document
No longer required to A published, required Not applicable. No
read: "[document title] document is removed action required.
"
from published status,
such as when an
authorized user
forces the document
to a different status,
before all readers
have clicked Mark as
Read. Also sent when
an authorized user
removes a reading
assignment from a
document.
For Writers
Notification Subject
Writing collaboration
required: [document
title]
PolicyTech 8.0 User's Guide
Sent When...
Help Topic Link
A document owner or Collaborating on
document control
(Helping to Write) a
administrator assigns Document (for
Working with Notification Emails - 377
Notification Subject
Sent When...
Help Topic Link
a writer to a
document.
No collaboration
required: "[document
title]"
assigned writers)
An authorized user
Not applicable. No
moves a document in action required.
collaboration status to
a different status
before all writers have
clicked Finished
Writing. Also sent
when an authorized
user removes a
writing assignment
from a document.
For Reviewers
Notification Subject
Sent When...
Help Topic Link
Review required: "
[document title]"
A document with
assigned reviewers
enters the review
status.
Reviewing a
Document
No review required: "
[document title]"
An authorized user
Not applicable. No
moves a document in action required.
review status to a
different status before
all reviewers have
completed their
assignments. Also
sent when an
authorized user
removes a review
assignment from a
document.
For Approvers
Notification Subject
Approval required: "
[document title]"
Sent When...
Help Topic Link
A document enters
the approval status.
Approving a
Document
No approval required: An authorized user
"[document title]"
moves a document in
Not applicable. No
action required.
PolicyTech 8.0 User's Guide
378 - Working with Notification Emails
Notification Subject
Sent When...
Help Topic Link
approval status to a
different status before
all approvers have
completed their
assignments. Also
sent when an
authorized user
removes an approval
assignment from a
document.
For Document Owners
Notification Subject
Sent When...
Help Topic Link
You have been
assigned to own new
documents
A document control
administrator assigns
a document to a user
with the document
owner role.
Creating and Working
with Draft
Documents, Working
with Documents in
Review and Approval,
Working with a
Revised or Declined
Document
[writer's name]
finished writing: "
[document title]"
An assigned writer
clicks Finished
Writing.
Not applicable. No
action required unless
there is only one
assigned writer, in
which case the
"Writer(s) completed"
message is also sent.
Writer(s) completed: " The last assigned
Submitting a
[document title]"
writer clicks Finished Document for Review
Writing, which
usually means the
document is ready to
be submitted for
review.
Submit for review
needed: "[document
title]"
A proxy author
Submitting a
requests that a
Document for Review
document owner
submit a document for
review.
[reviewer's name]
An assigned reviewer Not applicable. No
PolicyTech 8.0 User's Guide
Working with Notification Emails - 379
Notification Subject
Sent When...
Help Topic Link
reviewed: "[document accepts, revises, or
title]"
declines a document.
action required unless
there is only one
assigned reviewer
and that reviewer
revises or declines the
document, in which
case the "Sent back to
Draft" message is
also sent.
Level [integer] review The last reviewer of a
complete: "[document review level accepted,
title]"
revised, or declined a
document.
Not applicable. No
action required unless
the review level just
completed was the
last and one or more
reviewers revised or
declined the
document, in which
case the "Sent back to
Draft" message is
also sent.
Sent to approval: "
[document title]"
The last reviewer
Not applicable. No
accepts the document action required.
after all other
reviewers (if any)
have accepted the
document.
Sent back to Draft: "
[document title]"
Someone other than Creating and Working
a document's owner
with Draft Documents
(a document control
administrator or
another user with the
document owner role)
sends the document
back to draft status
from the collaboration
(writing), review, or
approval status.
[approver's name]
An assigned approver No action required
reviewed: "[document accepts, revises, or
unless there is only
title]"
declines a document. one assigned
approver and that
approver revises or
PolicyTech 8.0 User's Guide
380 - Working with Notification Emails
Notification Subject
Sent When...
Help Topic Link
declines the
document, in which
case the "Sent back to
Draft" message is
also sent.
Level [integer]
approval complete: "
[document title]"
The last approver of
an approval level
accepted, revised, or
declined a document.
Approved: "
[document title]"
The last approver
Not applicable. No
accepts the document action required.
after all other
approvers (if any)
have accepted the
document.
Document Owner
Escalations
An assigned writing,
review, approval, or
reading task becomes
overdue.
Not applicable.
Contact the
assignees named in
the notification with
questions or
concerns.
Your "[document title]
" document expires on
[periodic review due
date].
The current date is
the first day within a
document's assigned
warning period for a
periodic review.
Doing a Periodic
Review and Creating
a New Version
Your "[document title]
" document expires on
[periodic review due
date].
The current date is
the first day within a
document's assigned
warning period for a
periodic review.
Doing a Periodic
Review and Creating
a New Version
Link update needed: " An inserted link to
[document title]"
another PolicyTech
document becomes
PolicyTech 8.0 User's Guide
Not applicable. No
action required unless
the approval level just
completed was the
last and one or more
approvers revised or
declined the
document, in which
case the "Sent back to
Draft" message is
also sent.
Updating Document
Links
Working with Notification Emails - 381
Notification Subject
Sent When...
Help Topic Link
out of date, such as
when a new version
of the linked
document is approved
and published, or
when it is deleted or
replaced.
Approved version
modified: "[document
title]"
A document control
administrator used
the Edit in Current
State feature to make
changes to an
approved document.
Not applicable.
Contact the document
control administrator
named in the
notification with
questions or
concerns.
Document
replacement intent: "
[document title]"
A document owner or
document control
administrator has
created a document
and set it to replace
one or more other
documents with a
different owner.
Not applicable.
Contact the document
owner or document
control administrator
named in the
notification with
questions or
concerns.
Set as Approved: "
[document title]"
A document control
administrator sets a
document in the draft,
collaboration, review,
or approval status as
approved, thus
skipping any assigned
writers, reviewers,
and approvers who
have net yet acted on
the document.
Not applicable.
Contact the document
control administrator
named in the
notification with
questions or
concerns.
For Proxy Authors
Notification Subject
You have been
assigned to proxy
new documents
Sent When...
Help Topic Link
A document owner or
document control
administrator assigns
a user to a document
as a proxy author.
Creating and Working
with Draft
Documents,
Requesting a
Document Review
PolicyTech 8.0 User's Guide
382 - Working with Notification Emails
Notification Subject
Sent When...
Help Topic Link
(Proxy Author)
For Department Managers
Notification Subject
Document Owner
Escalations
Sent When...
An assigned writing,
review, approval, or
reading task becomes
overdue.
Help Topic Link
Not applicable.
Contact the
assignees named in
the notification with
questions or
concerns.
For Document Control Administrators
Notification Subject
Sent When...
Help Topic Link
The document owner
[document owner's
name] has been
deactivated or
changed positions.
A document control
administrator deletes
a document owner or
removes the
document owner role
assignment for a user
with currently owned,
active documents.
"Reassigning
Document Owners" in
the Administrator's
Guide
PolicyTech 8.0 User's Guide
Updating Document Links - 383
Updating Document Links
When a document in PolicyTech™ is changed in any of the following
ways and that document is linked to from one or more other documents,
the owners of those other documents containing the links are notified
that the links need to be updated.
n
A new version of the linked document is published.
n
The linked document is deleted or archived.
If you're a document owner with links that need updating, a notification
is posted to the MY TASKS page (see Working with My Tasks). It is
also sent via your organization's email system if a document control
administrator has set up PolicyTech™ to use that functionality (see
Working with Notification Emails). Otherwise, it is also sent the
Messages Inbox (see Using the Messages Inbox). If you haven't
already used one of these notifications to update the links, you'll see a
message informing you that you need to update links as soon as you
open the document containing those links. The instructions below are
for updating links from any of these notifications.
Updating Links from My Tasks
1. Click MY TASKS, and then go to the Links section. What you see
in the Links section depends on what action was taken to cause the
link to become outdated. If the linked document was replaced by a
new version of that document or by a different document, you will
see a task similar to the following with the Accept Link and
Change Link options.
If the linked document was deleted or archived without being
replaced, the task will look similar to the following.
PolicyTech 8.0 User's Guide
384 - Updating Document Links
2. PolicyTech automatically updates links to documents that were
replaced by a new version or by a different document, but you are
given the option of accepting the updated link (Accept Link) or
manually changing the updated link to a different document
(Change Link). If the linked document was deleted or archived
without being replaced, your only option for completing the task is to
manually take care of the now invalid link (Change Link).
In the Action column, take one of the following actions:
n
Click Accept Link, and then, in the Update Links window, click
Update Links.
n
Click Change Link to open the document, and then, in the Update
Links pop-up, click Close. Find the link in the document and then
either delete the link and any text referring to it or replace it with a
link to a different PolicyTech document. Replacing a link is best
accomplished by deleting the link and then inserting a new one (see
Inserting a Link to an Existing Document for details).
PolicyTech 8.0 User's Guide
Updating Document Links - 385
Note: It may take a few seconds for the Update Links pop-up to
appear.
3. Close the document.
Updating Links from a Notification Email
1. Open the notification email. What you see in the body of the email
depends on what action was taken to cause the link to become outdated. If the linked document was replaced by a new version of that
document or by a different document, you will see a notification similar to the following.
If the linked document was deleted or archived without being
replaced, you will see a notification similar to the following.
PolicyTech 8.0 User's Guide
386 - Updating Document Links
2. Click the title of the document containing the automatically updated
or invalid link.
3. In the Update Links pop-up, click click here.
Note: It may take a few seconds for the Update Links pop-up to
appear.
4. Do one of the following, depending on whether the linked document
was replaced or not.
n
If the linked document was replaced by a new version or by a different document, you'll see a window similar to the one below. Click
Update Links to accept the automatic link update, and then close
the document.
n
If the linked document was deleted or archived without being
replaced, you'll see a window like the one below. Because the link
could not automatically be updated, you must take care of the
invalid link manually. Click Cancel, find the link in the document,
PolicyTech 8.0 User's Guide
Updating Document Links - 387
and then either delete the link and any text referring to it or replace it
with a link to a different PolicyTech document. Replacing an invalid
link is best accomplished by deleting the link and then inserting a
new one (see Inserting a Link to an Existing Document for details).
5. Close the document.
PolicyTech 8.0 User's Guide
388 - Working with Document Discussions
Working with Document Discussions
The Discussion Board provides an area in each document where all
those who work on it or have permission to access it can make
comments and carry on a discussion about that document without
rejecting it or sending it back to draft. This can streamline the publishing
process by reducing the number of review cycles.
See the following topics for help with using discussions:
Starting a Document Discussion
Viewing and Replying to a Document Discussion
Who Sees Document Discussions?
Starting a Document Discussion
To start a discussion,
1. In an open document, click the discussion (speech balloon) icon in
the upper right corner.
2. Click Create New Discussion.
The appearance of the Create New Discussion window
depends on your assigned role and the document's workflow
status. If you are the document owner, an assigned proxy author,
or a document control administrator, you will always see the
following window. You will also see the following window if you
are an assigned writer, reviewer, or approver, and the document is
in the draft, collaboration, review, or approval status. If you see this
window, continue with step 3.
PolicyTech 8.0 User's Guide
Working with Document Discussions - 389
If you are not the document owner, an assigned proxy author, or a
document control administrator, and the document is in the
pending, published, or archived status, you may see the following
window, which does not include the option to select notification
recipients. In this case, the discussion is automatically marked
private and will be viewable only by the document owner, assigned
proxy authors (if any), and document control administrators. If you
see this window, you can skip to step 6.
Note: The ability for readers to send public messages in the pending,
published, or archived status is controlled by a document setup
preference which the document control administrator can change.
3. (Optional) If you want to send notifications to make certain users
aware of the new conversation, click Send Notifications To, and
then click Writers, Reviewers, Approvers, or Other Users.
PolicyTech 8.0 User's Guide
390 - Working with Document Discussions
Note: Selecting a user does not change that user's permission to
access the document in any way. If the added participant can already
access the document by virtue of an assigned role or permission, that
user will be able to open the document and see the new discussion. If
the user cannot currently access the document, the user still receives
an email notification with the discussion's original text and a link to the
document, but clicking the link goes to an "access to resource denied"
message.
4. Do one of the following:
n
If you selected Writers, Reviewers, or Approvers, select the
check boxes for the users you want to notify, and then click OK.
Note: If no users appear in the Writers, Reviewers, or Approvers
tab, then no one has been assigned that role for this document.
n
If you selected Other Users, find users by department, by job title,
or by searching for a user's name. Select the users you want to
notify, and then click OK.
PolicyTech 8.0 User's Guide
Working with Document Discussions - 391
5. (Optional) Notice that the document owner's name (and the proxy
author's name, if one is assigned) appears in the recipient list preceded by a check box. The document owner will not be notified by
default. If you want to include the document owner, select the check
box.
6. Type a message.
PolicyTech 8.0 User's Guide
392 - Working with Document Discussions
7. (Optional) Notice that the first 70 characters of the message are
copied into the Title box. You can change the title text.
8. (Optional) By default, the new discussion will be accessible to anyone who can access the document. To restrict who can see the message to only those you select as recipients, the document owner,
assigned proxy authors, and document control administrators, click
Make Private. (See Who Sees Document Discussions below for
details.)
9. Click Save.
Viewing and Replying to a Discussion
You can view a discussion in an email notification or from within a
document.
Viewing a Discussion in an Email Notification
If you are set up to receive email notifications within PolicyTech™, you
will receive an email whenever someone includes you as a recipient
when creating or replying to a discussion. The email includes the
discussion text and a link to the document containing the discussion.
To reply to the discussion, click the document link, and then follow the
steps under "Viewing a Discussion in a Document" below, starting with
step 2.
Note: If you are not set up to receive email, click MY TASKS, click
Messages, and then click Inbox to view discussion notifications.
Viewing a Discussion in a Document
1. Open the document containing the discussion.
2. Do one of the following:
n
Click the discussion (speech balloon) icon in the upper right corner.
PolicyTech 8.0 User's Guide
Working with Document Discussions - 393
n
Click Overview, and then click Discussions.
3. Click the discussion title.
4. If you want to respond to the discussion, click Post Reply.
5. (Optional) If you are the discussion creator or a document control
administrator, you will see the Participants button and list. To add
or remove a participant, click Participants, click a tab, select from
the available participants, and then click Save.
PolicyTech 8.0 User's Guide
394 - Working with Document Discussions
6. Type a reply, click Save, and then click Close.
Note: Anyone included as a notification recipient in the original
discussion will also be notified of the reply.
Who Sees Discussions?
A discussion can be created within any particular document. Which
users are allowed to view and participate in a discussion depends on
several factors, including the document's current status and users'
ability to access the document by virtue of their assigned roles and
permissions.
All Discussions
For any particular document, those with the following roles have access
to and complete control over all of that document's discussions:
n
Any document control administrator assigned to the site containing
the document
PolicyTech 8.0 User's Guide
Working with Document Discussions - 395
n
The document's owner
n
A proxy author assigned to the document
This control includes the ability to do the following:
n
Create new discussions
n
Select any other user as a discussion participant
Note: Selecting a user does not change that user's permission to
access the document in any way. If the added participant can already
access the document by virtue of an assigned role or permission, that
user will be able to open the document and see the new discussion. If
the user cannot currently access the document, the user still receives
an email notification with the discussion's original text and a link to the
document, but clicking the link goes to an "access to resource denied"
message.
n
View and participate in (reply to) all discussions, including those
marked private, in any workflow status (draft, collaboration, review,
etc.)
n
Change a discussion's security level from private to public and from
public to private
n
Delete any discussion
Public Discussions for Documents in the Draft, Collaboration, Review, and Approval Statuses
Discussions function differently in the statuses before a document is
approved (draft, collaboration, review, and approval) than they do in the
post-approval statuses (pending and published). What users can do
with a document's discussions in the earlier statuses also depends on
whether or not they are assigned a task to write, review, or approve the
document.
Note: For details on what assigned document owners and proxy
authors can do with discussions, see All Discussions above.
A document's assigned writers, reviewers, and approvers can do the
following with that document's discussions:
n
Create new discussions
n
Select any other accessible user as a discussion participant
Note: Selecting a user does not change that user's permission to
access the document in any way. If the added participant can already
access the document by virtue of an assigned role or permission, that
PolicyTech 8.0 User's Guide
396 - Working with Document Discussions
user will be able to open the document and see the new discussion. If
the user cannot currently access the document, the user still receives
an email notification with the discussion's original text and a link to the
document, but clicking the link goes to an "access to resource denied"
message.
n
View and participate in all public discussions created in the
assigned document while it is in any accessible workflow status
n
Change a discussion's security level from private to public and from
public to private
n
Delete a discussion that that user created
Document owners, writers, reviewers, and approvers can also do the
following with any unrestricted document they are not assigned to while
the document is in any accessible status:
n
Create new discussions that only a document control administrator
and the assigned document owner and proxy authors can see.
n
View and participate in a discussion that that user created. In other
words, unassigned document owners, writers, reviewers, and
approvers cannot view any discussions created by anyone else and
cannot remove default participants or select additional participants.
For example, a user assigned the reviewer role can see all unrestricted
documents (those assigned the All Users security level) while they are
in the review status. This includes unrestricted documents the user is
not assigned to review. In an unrestricted document, an unassigned
reviewer can create a new discussion that automatically includes only
the assigned document owner, any assigned proxy author's, and any
document control administrator with access to that document.
Public Discussions for Documents in the Pending
and Published Statuses
After a document is approved, writers, reviewers, and approvers
assigned to that document can see all public discussions, including
those created in the draft, collaboration, review, and approval statuses.
Note: For details on what assigned document owners and proxy
authors can do with discussions within pending and approved
documents, see All Discussions above.
The following users can see a document's discussions created in the
pending and draft statuses but cannot see those created in the draft,
collaboration, review, and approval statuses, unless they were added
as a participant in one or more of those discussions:
PolicyTech 8.0 User's Guide
Working with Document Discussions - 397
n
Writers, reviewers, and approvers who are not assigned to the document
n
All readers, including those assigned to the document
Private Discussions
When a document discussion is marked private, only those explicitly
selected as recipients, a document control administrator, the document
owner, and any assigned proxy authors can view the discussion.
Note: If selected recipients are removed from the recipient list for a
private discussion, they will no longer be able to see that discussion,
even if they previously contributed to it.
Discussion Notifications
If a document control administrator has set up PolicyTech™ to send out
email notifications using your organization's email system, emails will be
sent to selected or default participants each time a discussion is created
or replied to.
Note: When a user doesn't have the option to select participants, the
default recipients who receive email notifications are the document
owner, any assigned proxy authors, and any document control
administrators with administrative permission for the document's site.
It is important to understand that email notification for a discussion has
nothing to do with whether the recipient has access to the document
containing the discussion. If a user without the role or permission
necessary to access a document is included as a discussion recipient
and receives an email notification, that user can open the email and see
the text from the discussion, but clicking the document link will result in a
message saying that access to the requested document is denied.
PolicyTech 8.0 User's Guide
398 - Managing Department Reader Assignments
Managing Department Reader Assignments
If you have been assigned the department manager role, you can view
and change reader assignments for the documents and readers within
your department.
Use the Properties Wizard to assign and unassign required readers
for a document. If you assign a user who was not previously assigned, a
reading task will be sent to the user. If you unassign a user who was
previously assigned, that user's reading task for the document will be
deleted.
1. Open a published document assigned to your department.
2. Click Properties Wizard.
3. An alert appears warning you that the changes you make will take
immediate effect on the document. Click OK.
4. The currently selected required readers for this document (if any)
are listed in the Selected Users box. To make changes to the
required readers, do one of the following:
n
In the Departments tab (displayed by default), click your department, select or click to clear check boxes, and then click OK.
PolicyTech 8.0 User's Guide
Managing Department Reader Assignments - 399
n
Click Job Titles, and then click a job title. Select or click to clear
check boxes, and then click OK.
n
Click Readers, and then select or click to clear check boxes.
PolicyTech 8.0 User's Guide
400 - Managing Department Reader Assignments
5. Click Save, and then close the document.
Viewing the Status of Reader Tasks
To see which users have and have not completed their required reading
tasks,
1. Open a published document assigned to your department.
2. Click Overview, and then click Reader Status.
The Reader Status window will look similar to the one below, with
a list of required readers with icons before their names indicating
whether or not they have read the document.
PolicyTech 8.0 User's Guide
Managing Department Reader Assignments - 401
3. When finished checking reader status, close the document.
PolicyTech 8.0 User's Guide
402 - Generating Reports
Generating Reports
PolicyTech™ includes many reports that let you check the status of and
statistics about documents and users. There are three main types of
reports—personal, management, and administrative. You can find
report descriptions and instructions on how to use each report in the
Reports Supplement.
PolicyTech 8.0 User's Guide
Document Research - 403
Document Research
In the DOCUMENTS window directly below the Personal Items menu
is the Research menu, which gives you access to the PolicyShare™
service.
Notes:
n The PolicyShare option is available only if you've been
assigned as a document owner or document control
administrator (DCA).
n This feature is enabled by default, but your DCA may have
disabled it.
PolicyShare is a location where anyone can find or share policies and
procedures. Many organizations have already uploaded hundreds of
documents, greatly easing the new policy and procedure writing
process. PolicyShare also serves as a forum to discuss and get
answers to policy and procedure management issues.
1. In the Research menu, click PolicyShare™.
PolicyTech 8.0 User's Guide
404 - Document Research
2. To learn more about what PolicyShare has to offer, click a blue button.
3. To start using PolicyShare, click Log In, and then click Create New
Account.
4. In the Register New Member Account form, type a user name,
your email address, and a password (twice).
PolicyTech 8.0 User's Guide
Document Research - 405
5. After reading the terms of use, select I have read, understood
and I agree to abide by the PoicyShare™ Terms of Use, and
then click Create Account.
6. Check your email periodically for an email address verification message. When you receive it, click Verify Email Address. You will
see a message telling you that your email address has been verified.
7. Click Log In, type your user name (or email address) and your password, and then click Login.
PolicyTech 8.0 User's Guide
406 - Using Optional Advanced Features
Using Optional Advanced Features
The following features are available only if they've been enabled. If in
doubt, contact your document control administrator.
Working with the Public Viewer
Using Case Management Integration Features
Exporting Documents
Changing Reader Task Status as Proxy
Using Third-Party Contact Features
Working with the Public Viewer
Important: The features described in the sections that follow are
available only if your organization has purchased and enabled the
Public Viewer module.
Using Case Management Integration as a Case Manager
Important: The features described in the sections that follow are
available only if your organization has integrated PolicyTech™ with
EthicsPoint Case Manager.
Exporting Documents
Important: The ability to export documents is available only if it has
been enabled. Contact your document control administrator if you
have questions.
To export documents (save them to a local disk) in their existing file
formats, use the Print Multiple Documents report. Refer to "Report:
Print Multiple Documents" in the Reports Supplement for detailed
instructions, along with the changes noted below.
n
After clicking Next in step 4, you will see the Export Documents
output option, as shown below. For step 5, click Export
Documents.
PolicyTech 8.0 User's Guide
Using Optional Advanced Features - 407
n
In step 7, click Export Documents, read the security warning, and
then click Continue.
Then, when you see the alert below, click OK.
n
Periodically check your email in box for a message with the following subject: "Document Export Notification." When the message
arrives, open it and click the download link.
Note: If you are not set up to receive email notifications from
PolicyTech™, click MY TASKS, click Messages, and then click
Inbox. Click the Document Export Notification message to view
its contents, and then click the download link.
PolicyTech 8.0 User's Guide
408 - Using Optional Advanced Features
PolicyTech opens in a browser window. If you see the login window, log
in as you normally would. You should now see a Windows system
prompt asking if you want to open or save the download zip file. Save it
to disk, and then unzip the files.
Changing Reader Task Status as Proxy
Important: The Modify Reader Tasks feature is included with your
PolicyTech license, but it is not enabled by default. To have this
feature enabled, contact Client Care at 866-359-8123 (toll-free in the
U.S. and Canada) or 208-359-8123.
A document owner or document control administrator can use Modify
Reader Tasks to do either of the following:
n
Acting as a reader's proxy, mark that reader's task complete (as if
the reader had clicked Mark as Read)
n
Assign readers who have already completed their reading tasks to
read the document again.
1. Open a published document assigned to your department.
2. Click Options, and then click Modify Reader Tasks.
3. In the list at the top do one of the following:
n
Click Choose users with incomplete tasks if you want to mark
reader tasks as completed.
n
Click Choose users with complete tasks if you want to reassign
reading tasks.
PolicyTech 8.0 User's Guide
Using Optional Advanced Features - 409
4. In the Site list, click a site containing one or more readers whose
assignments you want to modify.
5. Do one or more of the following to select users:
Note: You only see departments, job titles, and readers that are
assigned to the department you manage.
n
With the Readers tab selected, select individual readers.
n
Click the Departments tab, and then select a department to select
all readers in that department.
Note: You can also click the department name and then select
individual users from that department.
PolicyTech 8.0 User's Guide
410 - Using Optional Advanced Features
l
Click the Job Titles tab, click before a job title, and then select a
department to select all readers in that department who are
assigned that job title.
Note: You can also click the job title or department name and then
select individual users.
6. (Optional) In the Task Change Rationale box, type the reason
why you're changing the reader tasks for the selected users.
7. Do one of the following:
n
If you selected Choose users with incomplete tasks in step 3
above, click Mark Task(s) Complete as Proxy.
n
If you selected Choose users with complete tasks in step 3
above, click Require Task(s) again.
PolicyTech 8.0 User's Guide
Using Optional Advanced Features - 411
8. In the Change Tasks alert window, click Continue.
9. Close the document.
PolicyTech 8.0 User's Guide
412 - Using Third-Party Contact Features
Using Third-Party Contact Features
If you are a document owner and need to assign third-party contacts to
write, review, or read a document, see Assigning Tasks to a Third-Party
Contact.
If you are a third-party contact who has been assigned to write, review,
or read a PolicyTech™ document, see the following sections:
Completing a Task as a Third-Party Contact
Logging In Directly to PolicyTech as a Third-Party Contact
Assigning Tasks to a Third-Party Contact
If the Third-Party Accounts module has been enabled in
PolicyTech™, you can assign third-party contacts as writers, reviewers,
and readers when you create a document.
Important: Before you can assign third-party contacts to a
document, that document must be assigned a template with ThirdParty Accounts enabled. Your document control administrator can
tell you which templates have Third-Party Accounts enabled.
1. Create a new document (see "Creating and Working with Draft
Documents" in the User's Guide for help) or open a draft document.
Important: If you opened an existing draft document, you may need
to reapply the current template or assign a different template for
Third-Party Contacts to be available. See "Reapplying a Template
to a Document" in the User's Guide for help.
2. Click one of the following wizard steps: 3. Writers, 4. Reviewers,
6. Readers.
3. In the Site list, click a site to which one or more third-party contacts
are assigned.
4. Click the Third-Party Contacts tab.
PolicyTech 8.0 User's Guide
Using Third-Party Contact Features - 413
5. In the Account list, click an account to display its contacts.
6. Select the check boxes of one or more contacts, and then click
Save.
Completing a Task as a Third-Party Contact
The email you receive when you're assigned to read, write, or review a
PolicyTech document depends on whether or not you have logged in to
PolicyTech before.
If you've never logged in to PolicyTech, you'll receive a task assignment
email similar to the one below. If your task email looks like this, go to
Logging in for the First Time.
PolicyTech 8.0 User's Guide
414 - Using Third-Party Contact Features
If you have logged in to PolicyTech before, you'll receive an email similar
to the one below. If your task email looks like this, go to Responding to a
Task Assignment after Initial Login.
Logging In for the First Time
To log in for the first time and see your task assignment,
1. In the email you received, click the Click here link.
PolicyTech 8.0 User's Guide
Using Third-Party Contact Features - 415
2. Do one of the following, depending on the welcome screen displayed:
n
If your screen looks like the one below, click Continue.
n
If your screen looks like the one below, in the Choose your
language list, click your preferred language, and then click
Continue.
PolicyTech 8.0 User's Guide
416 - Using Third-Party Contact Features
3. Type a password, type it again to confirm, and then click Save.
4. Read the task instructions, and then click Proceed to Document.
Note: If you don't want to see these instructions for future task
assignments, select the Don't prompt again check box before
clicking Proceed to Document.
Screenshot...
PolicyTech 8.0 User's Guide
Using Third-Party Contact Features - 417
5. For further instructions, go to the section listed below that corresponds with your assigned task:
n
"Collaborating on (Helping to Write) a Document (for assigned
writers)" in the User's Guide
n
"Reviewing a Document" in the User's Guide
n
"Reading a Required Document" in the User's Guide
Responding to a Task Assignment after Initial Login
If you receive a task assignment and you've previously logged in to
PolicyTech,
1. In the email, click the document title to launch PolicyTech.
PolicyTech 8.0 User's Guide
418 - Using Third-Party Contact Features
2. PolicyTech opens with the document displayed in a browser
window. For further instructions, go to the section listed below that
corresponds with your assigned task:
n
"Collaborating on (Helping to Write) a Document (for assigned
writers)" in the User's Guide
n
"Reviewing a Document" in the User's Guide
n
"Reading a Required Document" in the User's Guide
Logging in to PolicyTech as a Third-Party Contact
If a PolicyTech™ user gives you the web address to PolicyTech, you
can log in directly and see all tasks you've been assigned.
Important: You must have logged in at least once and set your
password before you can log in directly to PolicyTech. If you have not
set a password, follow the instructions under Completing a Task as a
Third-Party Contact above.
1. In a browser, type the PolicyTech web address and then press
Enter.
2. In the Username box, your email address (the one for where you
received your first task email).
3. Type the password you set when you first responded to a PolicyTech task, and then click Log in. 4. You should now see a screen similar to the one below, with all of
your currently assigned tasks listed under a task type (Write,
Review, or Read).
PolicyTech 8.0 User's Guide
Using Third-Party Contact Features - 419
5. To work on a task, click the document title to open the document in
a separate browser window. Go to one of the User's Guide sections
listed below for further instructions.
n
"Collaborating on (Helping to Write) a Document (for assigned
writers)" in the User's Guide
n
"Reviewing a Document" in the User's Guide
n
"Reading a Required Document" in the User's Guide
6. When you're finished, click LOG OUT.
PolicyTech 8.0 User's Guide


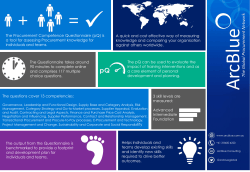


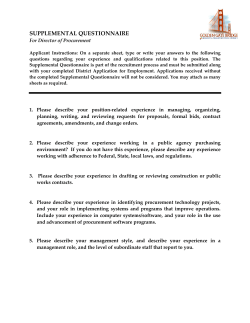
© Copyright 2026