
Microsoft Excel Design a crossword puzzle in Microsoft®Excel 2000
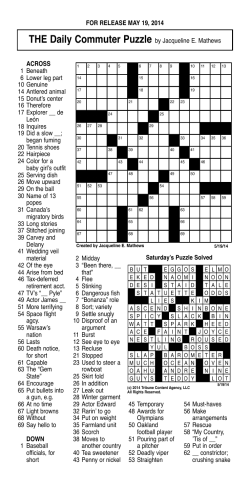
Design a crossword puzzle in Microsoft Excel
Curriculum Area: Language arts/math/social studies/science
Grade Level: 4 and up
Application: Microsoft®Excel 2000
Tip: Use special formatting features to design a crossword puzzle.
Description: Students design their own crossword puzzle. Because of the
unique column and row layout in Excel, as well as its cell formatting features,
students can design a crossword puzzle to learn vocabulary words,
definitions, and concepts that are relevant to practically any area of the
curriculum. Students can write a crossword puzzle, then trade with a
classmate to solve each other's puzzle -- a great way for students to review
before a test.
Sample Crossword Puzzles
Basic puzzle
Puzzle with extra formatting and two columns of clues next to each other
The Excel features that will be used in this exercise are:
•
•
Changing multiple column widths at the same time.
Formatting a number in a cell so that it is not only small, but also positioned at the top
left of the cell.
•
Using the Format Painter tool to repeat formatting
How To:
1.
On graph paper, sketch out a crossword puzzle to go along with any curriculum area
or lesson.
2.
Start Microsoft Excel, and make sure a new, blank worksheet is open.
3.
Begin by making a group of columns very narrow; these will be the columns for your
crossword puzzle. To change the width of several columns at once:
•
Click on a column letter at the top of the spreadsheet, and drag the mouse
across as many columns as you need for your puzzle. For example, select
columns A-U if your puzzle will be that many columns wide.
•
Point between the letters at the top of the columns, where two selected
columns meet. (Your mouse pointer will change to a double-sided arrow when
you are in the right place.) Drag left to make all of the selected columns
smaller. As you drag, note that the width of the columns appears just above
the column headings. A good width for a crossword puzzle is about 4.00 (or
larger for younger students, so that the fill-in boxes are bigger).
4.
Next, change the rows of your puzzle to be taller. For example, in the samples above,
rows 3-12 are taller than the other rows. To change the height of many rows at the
same time:
•
Click the row number (on the left edge of the spreadsheet) for the first row
that will be part of your puzzle, and drag down to include as many rows as you
need.
•
Point between the row numbers for two selected rows. (Your mouse pointer
will change to a double-sided arrow when you are in the right place.) Drag
down to make all of the selected rows taller. As you drag, note that the height
of the rows pops up. An average height is 24.00 (or taller for younger
students).
5.
After you have set up the columns and rows, format the cells that will include the
small numbers indicating crossword puzzle clues. To insert a tiny number in the topleft corner of a cell:
•
First, click in a cell where a number belongs.
•
Select Cells from the Format menu
•
On the Alignment tab, select Left (Indent) from the list under Horizontal,
and select Top from the list under Vertical.
•
6.
On the Font tab, select a small font size such as 8, and then click OK
Before you repeat these steps to format the other cells in the same way, format the
cell so that it has a dark border around it. (Later, you'll use a special tool on the
toolbar to repeat the format of this cell elsewhere in the spreadsheet.) To add a dark
border around the cell:
•
Make sure that the cell you want to format is selected.
•
Next, click the drop-down triangle next to the Borders button on the
Formatting toolbar. Click either Outside Borders or Thick Box Border. Keep
in mind that the thicker the border, the easier it is to see when it is printed.
7.
Now it's time to copy the special formatting (the small number in the top-left corner
and the border) that you've applied to this one cell and apply it to other cells. To do
this, you will use the Format Painter tool.
•
Make sure that the cell that contains the special formatting and the small
number is selected. Double-click the Format Painter button on the Standard
toolbar (it looks like a paintbrush). Note that double-clicking the tool keeps it
selected.
•
Click another cell where you want to repeat this formatting. You can even click
and drag the mouse over a group of cells across or down to format a whole
word in your puzzle. Continue clicking the Format Painter tool in cells where
words belong in your puzzle. If you apply the formatting to a cell accidentally,
just press CTRL+Z.
•
When you are finished using the Format Painter, press ESC to stop this
special way of copying a cell's format to other cells.
8.
Now, type in the rest of the numbers where they belong in your crossword puzzle.
9.
Finally, type your clues below your puzzle. Type a heading for the Across and Down
clues, and then type the clues below each heading. Format the text as needed.
Tip: If you have a clue that begins with a number, type the number assigned to the
clue, and then a space or two before you start typing the clue itself.
10. Save and then print your masterpiece! Let someone else try out your new puzzle.
More Ideas:
•
You might want to fill in some cells with solid black, just like in real crossword puzzles
(see the sample above). On the Drawing toolbar, click the Fill Color button (it looks
like a paint bucket) to fill in the cells with a solid color, such as black.
•
Add some clip art that fits the theme of your crossword puzzle.


© Copyright 2026