
Document 156814
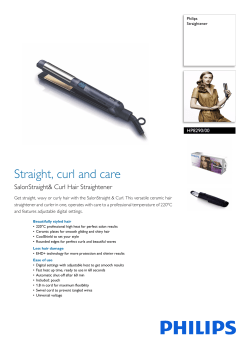
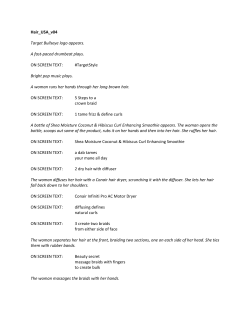
Forget your curly hair!
Curls look really great. But sometimes you just feel like a completely new look.
That‘s easy with this GRUNDIG hairstyler. It makes your curly hair straight.
In the twinkling of an eye!
You can use these instructions for straightening curly hair with all GRUNDIG
hair straighteners.
Step 1
Stand in front of the mirror, give your freshly washed,
quickly blow-dried and carefully combed curls a friendly
smile – and get ready for your new look. Make sure your
hair is free of hairstyling products, as the strong heat could
have an unfavourable effect on your hair.
Step 2
It is all very quick and easy, if you carry out the following
steps carefully. Before you begin straightening, brush your
hair thoroughly and section it. Keep the section as it is for
the following steps, as this avoids having to redo parts of
your hair and saves time. Now you are ready!
Step 3
First, switch on the hairstyler by pressing the button for
three seconds. Select a suitable temperature setting: low
for thin and coloured hair, high for coarse hair. Take the
first section of hair of about 2–3 cm directly from the scalp.
Make sure the hair strand is not wider than the hairstyler
plates.
Step 4
Clamp the hairstyler onto the section of hair with one hand
and check in the mirror that the whole width of the hair is
covered by the plates. Use your other hand to hold the hair
strand flat and taut. This prevents kinks from forming. Gradually pull the appliance down the length of hair to the ends.
Step 5
The speed at which you guide the hairstyler down the
hair depends on various factors. The coarseness of your
hair, the colour, a perm, the degree of moisture – all these
affect your hair style. Slow down the process if your hair is
not sufficiently straight. Then fix the hair strand with a
hair clip.
Step 6
Fix the first strands of hair out of the way on top, so that
you can keep on straightening the rest of the hair, section
by section from the scalp (you can also work from bottom
up). Keep following the instructions in step 4 and 5. You
will be amazed how quickly you get a feel for the ideal
width of the hair section and the best way to pull the
hairstyler through your hair.
Step 7
While you are moving around your head, you should also
be taking out the hair clips as you go. This allows you to
position the hairstyler at the right section of hair properly
and pull it down to the ends. You will be rewarded with a
great new, really different look!
Step 8
Last of all, briefly focus on the top of your head.
To straighten the hair on the scalp perfectly, we advise you
to clamp the hairstyler in your hair as upright as possible
and then pull it straight upwards. Have a look in the mirror
to see your curly hair gone straight!
Your straight hair curled into
a great hairstyle!
On the subject of hair, most women agree that something new every now
and then is a good thing. This GRUNDIG hairstyler makes it quick and easy
and it is cheap, too.
You can use these instructions for making curls from straight hair with all
GRUNDIG products with the “Straight & Curls” attachment.
Step 1
If you are tired of your straight hair when you look in the
mirror – get rid of it for a while! How? Wash thoroughly,
quickly blow-dry and comb through carefully. That is the
best way to start your new look. Due to the affect of the
strong heat, make sure your hair is free of hair styling
products.
Step 2
There is no need for curling tongs or brushes.
The GRUNDIG hairstyler features everything in one
appliance. It forms beautiful, shiny curls which hold
perfectly. And it is so quick and easy. Press the on button
for three seconds and select a suitable temperature setting:
low for thin and coloured hair, higher for coarse hair.
Step 3
Part your hair. Take the first section of hair from there,
making sure the hair strand is not wider than the curling
part of the hairstyler. Place the hairstyler tightly onto the
hair section and turn it round on its axis slowly, while you
wind it round the ends of the hair carefully and evenly.
Step 4
Check in the mirror to see if the whole strand of hair is
covered by the hairstyler. Make sure you always really turn
the hairstyler continuously and the section of hair is also taut.
Stop winding it once the ends slide off the hairstyler
automatically.
Step 5
Continue in the same way for the remaining hair. Place the
hairstyler tightly onto the hair section, wind it down through
the whole length of hair and fix the strand with a clip. The
rounded plate edges and the ceramic coating help you to
wind it continuously.
Step 6
Always press both plates on the hairstyler tightly together
to guide and keep the strands properly in place. The
ideal – temperature: start by setting it slightly lower and
then increase it, depending on your type of hair and the
tightness of the curls you want. The second time round you
will be used to it!
Step 7
Pay special attention to forming curls around your face.
The affect here should be even more perfect. We recommend redoing a few strands for the final finish. To have a
free hand, pin the rest of the hair back out of the way.
You will be amazed!
Step 8
Finally, a few words of advice: make sure you stay
happy with your new look for a nice long time. Fix what
the GRUNDIG hairstyler did with some hair spray or
lacquer. After all, you didn‘t style your straight hair into
these wonderful curls just for a few brief moments!


© Copyright 2026