
Unit 2: Air Quality Table of Contents
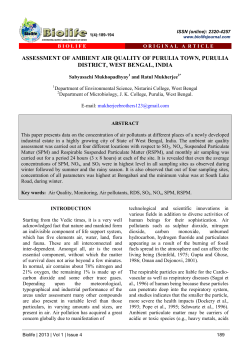
Unit 2: Air Quality Table of Contents Unit Overview ................................................................................................................... 3 Lesson Plans L 2.1 What’s in My Air? ............................................................................................... 4 L 2.1.1 Objectives, Materials, and Teacher Preparation .............................................. 4 L 2.1.2 Activator........................................................................................................... 4 L 2.1.3 Activity ............................................................................................................ 4 L 2.1.3.1 Teacher Sample Answer Key ............................................................ 5 L 2.2 How Clean Is Your Air? Lab Activity, Part 1 ......................................................... 6 L 2.2.1 Objectives, Materials, and Teacher Preparation .............................................. 6 L 2.2.2 Activator ......................................................................................................... 6 L 2.2.3 Activity (How Clean Is Your Air? Lab, Part 1) .................................................. 7 L 2.3 How Clean Is Your Air? Lab Activity, Part 2 .......................................................... 8 L 2.3.1 Objectives, Materials, and Teacher Preparation .............................................. 8 L 2.3.2 Activity (How Clean Is Your Air? Lab, Part 2) ................................................... 8 L 2.4 Stick with Clean Air ................................................................................... 10 L 2.4.1 Objectives, Materials, and Teacher Preparation .............................................. 10 L 2.4.2 Activator ......................................................................................................... 10 L 2.4.3 Activity ........................................................................................................... 10 Helpful Web Sites for Teachers .......................................................................................... 11 Student Handouts What’s in My Air? H 2.1.1 What’s in My Air? Student Activity Sheet ....................................................... 15 How Clean Is Your Air? Lab Activity, Part 1 H 2.2.1 How Clean Is Your Air? Part 1 Lab Overview / Procedures ............................. 16 How Clean Is Your Air? Lab Activity, Part 2 H 2.3.1 How Clean Is Your Air? Part 2 Lab Overview / Procedures ............................. 17 H 2.3.2 How Clean Is Your Air? Lab Results Sheet ....................................................... 18 H 2.3.3 How Clean Is Your Air? Lab Rubric .................................................................. 21 Stick with Clean Air H 2.4.1 Stick with Clean Air Student Activity Sheet..................................................... 22 Unit 2 Glossary .................................................................................................................. 27 Unit 2: Air Quality Unit Overview This unit uses the Tox Town Web site (toxtown.nlm.nih.gov) developed by the National Library of Medicine to introduce students to environmental health issues in their everyday life through inquiry-based learning and problem-based learning approaches. Inquiry-based learning is a student-centered approach that promotes in-depth understanding and critical thinking by fostering students’ active engagement with the subject matter. Students explore ideas, formulate meaningful questions, collect and analyze data, and evaluate and communicate their findings. Problem-based learning is another student-centered approach, where students develop content knowledge and scientific reasoning skills through collaborative work on real world problems. National Science Education Standards E.C.3 Organisms and Environments c. All organisms cause changes in the environment where they live. Some of these changes are detrimental to the organism or other organisms, whereas others are beneficial. H.F.4 Environmental Quality a. Natural ecosystems provide an array of basic processes that affect humans. Those processes include maintenance of the quality of the atmosphere, generation of soils, control of the hydrologic cycle, disposal of wastes, and recycling of nutrients. Humans are changing many of these basic processes, and the changes may be detrimental to humans. Unit Objectives At the end of this unit, students will be able to: Identify at least five air pollutants; discuss their sources, locations, and health effects Evaluate the occurrence of particulate matter in indoor and outdoor air in and around the school Communicate their findings about the occurrence of particulate matter to the community Essential Questions How does air pollution affect human health? What human activities impact air quality? Technology Education Skills Students will use computer resources to explain how air pollution can affect human health. Unit 2: Air Quality — Lessons Plans 3 L 2.1 What’s in My Air? L 2.1.1 Objectives, Materials, and Teacher Preparation Objectives Students will be able to: Describe how different pollutants affect air quality Identify where air pollutants can be found in the environment and discuss their sources Materials Needed for Lesson Dirty furnace or air filter Computers with Internet access What’s in My Air? Student Activity Sheet (H 2.1.1) Teacher Preparation 1. Prepare copies of What’s in My Air? Student Activity Sheet (H 2.1.1). 2. Find and bring a dirty furnace or air filter to show the students. 3. Ensure access to computers with Internet connection (for accessing Tox Town, toxtown.nlm.nih.gov). L 2.1.2 Activator Teacher Directions 1. Allow student to have a close look at the dirty furnace or air filter and ask them to describe what they see. 2. Have a small group discussion about their observations and introduce the concept of air pollution. 3. Explain that the dirt and particles found on the filter come from particulate matter (also called particle pol lution), a pollutant found both inside and outside the home. 4. Ask students to give examples of other substances that pollute the air and impact human health (e.g., ciga rette smoke, exhaust from cars, smoke from smoke stacks of industrial plants, etc.). L 2.1.3 Activity Teacher Directions 1. Assign students to working pairs or groups, or instruct them to work individually. 2. Distribute What’s in My Air? Student Activity Sheet (H 2.1.1) and go over the explanation and the instruc tions. Emphasize the following: There are many kinds of air pollutants. The Environmental Protection Agency (EPA) calculates the Air Quality Index (AQI) for five major air pollutants regulated by the Clean Air Act: ground-level ozone, particle pollution (particulate matter), carbon monoxide, sulfur dioxide, and nitrogen diox ide. Ozone and particle pollution (particulate matter) are two common pollutants found in many parts of the country. 3. Instruct students to complete the chart on the What’s in My Air? Student Activity Sheet (H 2.1.1) using the Tox Town Web site (toxtown.nlm.nih.gov). 4. Let the students know that the five pollutants located on the chart are the five pollutants used by the EPA to measure air quality. 4 Unit 2: Air Quality — Lessons Plans 5. After students have completed their worksheets, ask them to reflect upon what they learned about each pollutant. Use L 2.1.3.1Teacher Sample Answer Key below to scaffold the discussion. L 2.1.3.1 Teacher Sample Answer Key For What’s in My Air? Student Activity Sheet (H 2.1.1) Air Pollutant How can I be exposed? Impact on my health Particulate Matter Outdoors by breathing polluted air that contains it; in the summer, when the sun and hot temperatures react with pollution to form smog; at home or at work, indoors or outdoors, through smoking cigarettes or breathing second-hand smoke. Exposure can aggravate respiratory conditions such as asthma. It can also cause increased coughing, wheezing, respiratory irritation, and painful breathing. Nitrogen Oxides (Nitrogen Dioxide and Nitric Oxide) Outdoors by breathing air that contains it, especially if you live near a coal-burning electric power plant or areas with heavy motor vehicle traffic. Exposure to high industrial levels of nitric oxide and nitrogen dioxide can cause death. It can cause collapse, rapid burning and swelling of tissues in the throat and upper respiratory tract, difficult breathing, throat spasms, and fluid build-up in the lungs. It can interfere with the blood's ability to carry oxygen through the body, causing headache, fatigue, dizziness, and a blue color to the skin and lips. Note 1: Teachers can also mention that humans can be exposed to nitrogen oxides from tobacco smoke and second-hand smoke. Low-level exposure may occur from kerosene heaters, stoves, and fireplaces that burn wood. Ground-Level Ozone Outdoors in the summer, when the sun and hot temperatures react with pollution to form ozone; if you exercise or work outdoors during the summer. Exposure to ozone can irritate your respiratory system, causing you to cough, feel irritation in your throat, or feel uncomfortable in your chest. Breathing ozone can cause headache, upset stomach, congestion, fatigue, and vomiting. Sulfur Dioxide Outdoors by breathing air that contains it, most likely in the summer, when the sun and hot temperatures react with pollution to form smog; through natural pollution sources, such as plant decay and volcanoes. Breathing sulfur dioxide can irritate the nose, throat, and lungs and cause coughing and shortness of breath. Short-term exposure to sulfur dioxide can cause stomach pain, menstrual disorders, watery eyes, inhibition of thyroid function, loss of smell, headache, nausea, vomiting, fever, convulsions, and dizziness. Carbon Monoxide Motor vehicle exhaust; appliances at home that burn fuel but are not operating correctly; if your appliances are not vented; if your chimneys, vents, and flues are blocked or damaged; leaving your car running in a garage; using stoves or clothes dryers for heating your home; breathing tobacco smoke; burning charcoal or using portable fuel-burning camping equipment inside your home, garage, vehicle, or tent; using gasoline-powered tools and engines indoors. Exposure can cause fatigue, chest pain, shortness of breath, memory loss, skin lesions, sweating, and flu-like symptoms. In the long term, exposure to low levels can cause heart disease and damage to the nervous system. Skin contact with liquid carbon monoxide in the workplace can cause frostbite. Note: Teachers can also mention that accidental CO poisoning kills a few hundred people a year. Unit 2: Air Quality — Lessons Plans 5 L 2.2 How Clean Is Your Air? Lab Activity, Part 1 L 2.2.1 Objectives, Materials, and Teacher Preparation Objectives Students will be able to: Hypothesize about locations in and around the school that have the greatest occur rence of particulate matter Set up an experiment to observe the amount of particulate matter in and around the school Materials Needed for Lesson Vaseline Index cards (4x6) with a hole punched in a corner String Glass slides Permanent markers Heavy-duty tape Pennies Images of household dust, dust mites, and mold under a microscope (e.g., from the Internet image search) How Clean Is Your Air? Part 1 Lab Overview / Procedures (H 2.2.1) handout Teacher Preparation 1. Prepare copies of How Clean Is Your Air? Part 1 Lab Overview / Procedures (H 2.2.1). 2. Use the Internet to find images of dust, dust mites, and mold under a microscope. 3. Create a lab kit for each student group that will be participating in the activity. Each kit should contain the following: a small Vaseline container, three strings, a permanent marker, three index cards with holes punched in the corner, three glass slides, heavy-duty tape, and a penny. L 2.2.2 Activator Teacher Directions 1. Explain to the students that they will be participating in an experiment to determine the amount of particulate matter found in the air in and around their school. 2. Ask students “Where do you think we will find the most particulate matter within our school community?” This can include indoor or outdoor locations. 3. Discuss with the students why they believe that some locations may have more particulate matter than others. 4. Using a computer or paper printouts, show the students images of dust, dust mites, and mold to give them a visual representation of what they can find. 6 Unit 2: Air Quality — Lessons Plans L 2.2.3 Activity (How Clean Is Your Air? Lab, Part 1) Teacher Directions 1. Divide students into small groups and distribute a lab kit to each group. 2. Ask students to brainstorm locations in and around the school where they would like to measure particu late matter. Create a list of student responses on a white board. Ask each group to choose one location (groups’ selections should not overlap). Tell students that they will collect three samples of particulate matter at that location. Note: If some of the chosen locations are outdoors, you may want to check the weather forecast for the chance of rain or snow and plan accordingly. 3. Instruct the groups to open their kits. Ask students to label the back of each card with the location name and sample number, e.g., “Media room, Sample 1.” 4. Have students read the following instructions from How Clean Is Your Air? Part 1 Lab Overview / Procedures (H 2.2.1), which are as following: 1. Tie a string through the hole in each card to make loops for hanging cards in chosen locations. 2. Using a permanent marker, trace the outline of a penny onto a glass slide in order to create your sample area. 3. Securely tape the edges of the slide to the center of one of your index cards. 4. Smear a thin layer of Vaseline on the sample area on the glass slide. 5. Repeat steps 2-4 for the remaining cards. 6. As a group, take your index cards to your chosen location and find three secure places to hang or place your cards for collecting your samples. 7. Leave your index card at its location until the next session. Unit 2: Air Quality — Lessons Plans 7 L 2.3 How Clean Is Your Air? Lab Activity, Part 2 L 2.3.1 Objectives, Materials, and Teacher Preparation Objectives Students will be able to: Conduct an experiment to observe the amount of particulate matter found in and around their school Analyze and interpret the results Materials Needed for Lesson Glass slides with collected samples of particulate matter Magnifying glass and/or microscope Images of household dust, dust mites, and mold under a microscope (e.g., from the Internet image search) How Clean Is Your Air? Part 2 Lab Overview/Procedures (H 2.3.1) handout How Clean Is Your Air? Lab Results Sheet (H 2.3.2) handout How Clean Is Your Air? Lab Rubric (H 2.3.3) handout Teacher Preparation 1. Prepare copies of How Clean Is Your Air? Part 2 Lab Overview/Procedures (H 2.3.1), How Clean Is Your Air? Lab Results Sheet (H 2.3.2), and How Clean Is Your Air? Lab Rubric (H 2.3.3). 2. Set up microscopes or magnifying glasses at group tables around the room. L 2.3.2 Activity (How Clean Is Your Air? Lab, Part 2) Teacher Directions 1. Remind students to work with their original groups from Part 1 of the lab. 2. Have students read the following instructions from How Clean Is Your Air? Part 2 Lab Overview / Procedures (H 2.3.1): 1. Carefully collect your index cards from their locations, making sure not to touch the Vaseline-covered sample area. Bring your index cards to your group’s workstation where you have either a magnifying glass or a microscope. 2. Carefully remove the glass slide from the Sample 1 index card. If using a microscope, hold the slide by the edges, making sure not to touch the sample area, and place it under the microscope. If using a magnifying glass, carefully place the index card with the slide on a flat surface for examination. 3. Using either a microscope or a magnifying glass, count the number of particles in the sample size found inside the Vaseline-covered collection area. A particle is any speck on the slide. It may be dust, pollen, or some other type of matter. If using a microscope and the Vaseline-covered area does not fit within the microscope field, count the particles in the microscope field only. 4. Record the number of particles you counted in the How Clean Is Your Air? Lab Results Sheet (H 2.3.2) data table. Make sure your location is labeled in the corresponding row of the table. 5. Repeat steps 2-4 for the remaining two samples collected by your group. 8 Unit 2: Air Quality — Lessons Plans 6. Compute the average number of particles collected from your samples. 7. After computing the average at your workstation, move to the next workstation and record the data for the three samples at that workstation. Compute the average. Repeat for each workstation in the room. (Teacher note: Instruct students to move in a structured rotation to avoid confusion.) 8. After completing your data table, construct a bar graph of the data using three locations: your group’s location and two other locations from the data table. Remember to label the axes on your graph. 3. Prepare a sample bar graph to show what the students’ results should look like (see Figure 1 below). Figure 1. Sample Bar Graph of the Results 4.5 Represents various locations in the area chosen by students to collect samples. 4 3.5 3 2.5 Sample 1 Sample 2 2 Sample 3 1.5 1 0.5 0 Tree Media Room Parking Lot 4. After students construct the bar graphs, ask students to analyze their data using the questions found at the end of the How Clean Is Your Air? Lab Results Sheet (H 2.3.2). 5. Ask students to complete the lesson rubric How Clean Is Your Air? Lab Rubric (H 2.3.3). 6. Initiate a discussion using the following questions: What were the similarities in their findings? What were the differences in their findings? How might the placement of their slides affect their results? Do they have any ideas for ways to reduce the particulate matter in and around their school? Unit 2: Air Quality — Lessons Plans 9 L 2.4 Stick with Clean Air L 2.4.1 Objectives, Materials, and Teacher Preparation Objectives Students will be able to: Understand what actions individuals and societies can take to improve air quality Communicate ways to improve air quality to their community Materials Needed for Lesson Computers with Internet access Colored pencils/markers Medium-sized flat magnets White glue Cardstock/construction paper Stick with Clean Air Student Activity Sheet (H 2.4.1) Teacher Preparation 1. Prepare copies of Stick with Clean Air Student Activity Sheet (H 2.4.1). 2. Ensure access to computers with Internet connection (for accessing Tox Town, toxtown.nlm.nih.gov). L 2.4.2 Activator Teacher Directions 1. Ask students to brainstorm actions people can take to improve indoor and outdoor air quality (prompt stu dents to discuss personal steps, such as replacing air filters, and societal actions, such as supporting public transportation). Write down their ideas on a whiteboard or chart paper. L 2.4.3 Activity Teacher Directions: Divide students into small groups. Distribute Stick with Clean Air Student Activity Sheet (H 2.4.1) to each group. Instruct each group to select three ideas from the list on the white board or chart paper. Ask each group to list their three ideas in the table on the Stick with Clean Air Student Activity Sheet (H 2.4.1) and find at least two supporting details for each idea using the following links: Link: Improving Indoor Air Quality (Environmental Protection Agency) - epa.gov/iaq/is-imprv.html Link: Improving Air Quality in Your Community (Environmental Protection Agency) epa.gov/air/community Link: Tox Town (National Library of Medicine) - toxtown.nlm.nih.gov 5. Refer students to the magnet templates on the Stick with Clean Air Student Activity Sheet (H 2.4.1). Instruct them to create a magnet that promotes one or more of their ideas for improving air quality. 6. Have groups present their magnets and supporting ideas for improving air quality. 1. 2. 3. 4. 10 Unit 2: Air Quality — Lessons Plans Helpful Web Sites for Teachers 1. Air Now (Environmental Protection Agency) – defines the Air Quality Index that is frequently refer enced in the news airnow.gov/index.cfm?action=aqibasics.aqi 2. Air Now Kids’ Page (Environmental Protection Agency) – includes games airnow.gov/index.cfm?action=aqikids.index 3. Particulate Matter (Environmental Protection Agency) – general information on particulate matter epa.gov/pm 4. Environmental Health Student Portal (National Library of Medicine) – information about air pollu tion and human health for middle school students kidsenvirohealth.nlm.nih.gov 5. AQI Air Quality Index: A Guide to Air Quality and Your Health (Environmental Protection Agen cy). Information on the Air Quality Index and human health effects of air pollutants epa.gov/airnow/aqi_brochure_08-09.pdf Unit 2: Air Quality — Lessons Plans 11 INTENTIONALLY LEfT BLANK Student Handouts INTENTIONALLY LEfT BLANK H 2.1.1 What’s in My Air? Student Activity Sheet Name(s): Date: What Is Air Pollution? We get the oxygen we need by breathing air; it’s a natural thing. We don’t usually stop to think about what’s in the air. However, besides elements like oxygen and nitrogen, the air we breathe may also con tain pollutants. Air pollution is a problem that affects life all over the world. For example, you saw the pollutants that were collected on the dirty air filter. We can see these pollutant particles once they have accumulated on the filter, but we do not always see them in the air. There are many kinds of air pollutants. The Environmental Protection Agency (EPA) calculates the Air Quality Index (AQI) for five major air pollutants regulated by the Clean Air Act: ground-level ozone, particle pollution (particulate matter), carbon monoxide, sulfur dioxide, and nitrogen dioxide. Ozone and particle pollution (particulate matter) are two common pollutants found in many parts of the country. Many human activities create air pollution. In turn, the pollution causes problems for the health of humans and other life on our planet. To slow down that process, we can learn about what causes poor air quality and how to protect our life on Earth. Here is your chance to learn more about air pollution. Check out Tox Town at toxtown.nlm.nih.gov and investigate all the different things you can breathe and how they can affect you. Air Pollutant How can I be exposed? Impact on my health Particulate Matter Nitrogen Oxides (Nitrogen Dioxide and Nitric Oxide) Ground-Level Ozone Sulfur Dioxide Carbon Monoxide Unit 2: Air Quality — Student Handouts 15 H 2.2.1 How Clean Is Your Air? Part 1 Lab Overview / Procedures Name(s): Date: Objective In this experiment you will test the quality of air by measuring the number of particles from different locations. Testable Question How does the testing location (indoors or outdoors) affect the amount of particulate mat ter collected on the index card samples? Materials Vaseline Three index cards (4x6) with a hole punched in a corner Three strings Three glass slides Permanent marker Heavy-duty tape A penny Procedure 1. Tie a string through the hole in each card to make loops for hanging cards in chosen locations. 2. Using a permanent marker, trace the outline of a penny onto a glass slide in order to create your sample area. 3. Securely tape the edges of the slide to the center of one of your index cards. 4. Smear a thin layer of Vaseline on the sample area on the glass slide. 5. Repeat steps 2-4 for the remaining cards. 6. As a group, take your index cards to your chosen location and find three secure places to hang or place your cards for collecting your samples. 7. Leave your index card at its location until the next session. 16 Unit 2: Air Quality — Lessons Plans H 2.3.1 How Clean Is Your Air? Part 2 Lab Overview / Procedures Name(s): Date: Objective In this experiment you will test the quality of air by measuring the number of particles from different locations. Testable Question How does the testing location (indoors or outdoors) affect the amount of particulate mat ter collected on the index card samples? Materials Magnifying glass and/or microscope Procedure 1. Carefully collect your index cards from their locations, making sure not to touch the Vaseline-covered sample area. Bring your index cards to your group’s workstation where you have either a magnifying glass or a microscope. 2. Carefully remove the glass slide from the Sample 1 index card. If using a microscope, hold the slide by the edges making sure not to touch the sample area, and place it under the microscope. If using a magnifying glass, carefully place the index card with the slide on a flat surface for examination. 3. Using either a microscope or a magnifying glass, count the number of particles in the sample size found inside the Vaseline-covered collection area. A particle is any speck on the slide. It may be dust, pollen, or some other type of matter. If using a microscope and the Vaseline-covered area does not fit within the mi croscope field, count the particles in the microscope field only. 4. Record the number of particles you counted in the How Clean Is Your Air? Lab Results Sheet (H 2.3.2) data table. Make sure your location is labeled in the corresponding row of the table. 5. Repeat steps 2-4 for the remaining two samples collected by your group. 6. Compute the average number of particles collected from your samples. 7. After computing the average at your workstation, move to the next workstation and record the data for the three samples at that workstation. Compute the average. Repeat for each workstation in the room. 8. After completing your data table, construct a bar graph of the data using three locations: your group’s loca tion and two other locations from the data table. Remember to label the axes on your graph. Unit 2: Air Quality — Student Handouts 17 H 2.3.2 How Clean Is Your Air? Lab Results Sheet Name(s): Date: Directions: 1. Record the number of particles you counted in the data table below. Make sure your locations are labeled in the corresponding rows of the table. Title: Location Name Example: Locker Room 18 Unit 2: Air Quality — Lessons Plans Sample 1 # particles collected Sample 2 # particles collected Sample 3 # particles collected Average 6 7 5 6 2. Complete a bar graph of your results. Unit 2: Air Quality — Student Handouts 19 3. Analyze the results collected from your samples. Answer the following questions: A. Which location had the most particulate matter over the same time period? B. Overall, did indoor air have more or less particulate matter than outdoor air? (if relevant) C. Describe the environmental conditions at each location (i.e., spring day, trees are blooming). D. What conclusions can you draw from your data? 20 Unit 2: Air Quality — Lessons Plans H 2.3.3 How Clean Is Your Air? Lab Rubric Name(s): Date: Results - Data Table Does your data table have a title? ___ yes ___ no Have you filled in all the boxes? ___ yes ___ no Did you calculate the average for each column? ___ yes ___ no Does your graph have a title? ___ yes ___ no Does your graph have correct labels on the axes? ___ yes ___ no Are your data correctly plotted? ___ yes ___ no If a key was needed, was it constructed correctly? ___ yes ___ no ___ yes ___ no ___ yes ___ no location (i.e., spring day, trees are blooming)? ___ yes ___ no Did you draw conclusions from your data? ___ yes ___ no Results - Graph Data Analysis and Conclusions Did you determine which location had the most particulate matter? Did you state whether the indoor air had more or less particulate matter than the outdoor air? (if relevant) Did you describe the environmental conditions at each Unit 2: Air Quality — Student Handouts 21 H 2.4.1 Stick with Clean Air Student Activity Sheet Name(s): Date: Directions: Get the word out! Help your family, friends, and neighbors understand the importance of air quality by creating a magnet to place on your refrigerator or car. 1. Select three ideas for improving air quality. 2. List your ideas in the table on the following page and find at least two supporting details for each idea using the following links: Link: Improving Indoor Air Quality (Environmental Protection Agency) epa.gov/iaq/is-imprv.html Link: Improving Air Quality in Your Community (Environmental Protection Agency) epa.gov/air/community Link: Tox Town (National Library of Medicine) - toxtown.nlm.nih.gov 3. Create a magnet that explains your group’s ideas for improving air quality. Use these materials to create your magnet: Colored pencils/markers Medium-sized flat magnets White glue Cardstock/construction paper A. Create your magnet on cardstock or construction paper using text and/or images to convey your message. You may use one of the templates provided or design your own shape. B. Cut out your design. C. Glue a magnet to the back of your design. 22 Unit 2: Air Quality — Lessons Plans List your ideas for improving air quality. Ideas Supporting Detail 1 Supporting Detail 2 Supporting Detail 3 Unit 2: Air Quality — Student Handouts 23 INTENTIONALLY LEfT BLANK Optional Templates for Your Magnet Unit 2: Air Quality — Student Handouts 25 INTENTIONALLY LEfT BLANK Unit 2 Glossary The following vocabulary is featured in Unit 2 of the Tox Town curriculum. carbon monoxide—Carbon monoxide is a colorless, odorless, and tasteless gas that is highly poi sonous. The chemical formula for carbon monoxide is CO, one molecule of carbon and one mol ecule of oxygen. Under high pressure, it becomes a liquid. It is produced by the incomplete burning of natural gas, gasoline, liquefied petroleum gas, oil, kerosene, coal, charcoal, or wood. exposure—The act of a living organism coming into contact with another organism or something in the organism’s environment. nitrogen oxides— Nitrogen oxides are a group of gases that are composed of nitrogen and oxygen. Two of the most common nitrogen oxides are nitric oxide and nitrogen dioxide. Nitrogen oxides are the most common pollutants found in most of the air in the United States. You can be exposed to ni trogen oxides outdoors by breathing air that contains them, especially if you live near a coal-burning electric power plant or areas with heavy motor vehicle traffic. Exposure to high industrial levels of nitric oxide and nitrogen dioxide can cause death. It can cause collapse, rapid burning and swelling of tissues in the throat and upper respiratory tract, difficult breathing, throat spasms, and fluid build up in the lungs. It can interfere with the blood’s ability to carry oxygen through the body, causing headache, fatigue, dizziness, and a blue color to the skin and lips. ozone—Ozone is a gas that occurs both at the earth’s ground level and in the earth’s upper atmo sphere. Its chemical formula is O3. The ozone in the atmosphere occurs naturally and protects life on earth from the sun’s harmful ultraviolet rays. The ozone that occurs on the ground level is formed when sunlight reacts with pollution from motor vehicles, power plants, industrial boilers, refineries, chemical plants, and other industrial sources. Ground-level ozone is the main ingredient of smog, a kind of air pollution found in many U.S. cities, which contributes to climate change. particulate matter— Particulate matter is the term for tiny particles found in the air. These particles can include dust, dirt, soot, smoke, and liquid droplets. Some particulate matter is large and dark enough to be seen, such as soot and smoke. Other particulate matter is so fine that it can be detected only with a microscope that examines air, unless it gets past our nose’s filter and into our lungs where it can cause many health issues. sulfur dioxide—Sulfur dioxide is a colorless gas with a pungent and suffocating odor, similar to a just-struck match. It has an acidic taste and is a liquid when under pressure. Sulfur dioxide is formed when fuel containing sulfur, such as coal and oil, is burned. The chemical symbol for sulfur dioxide is SO2. Most sulfur dioxide in the air comes from the burning of coal and oil at electric power plants. Unit 2: Air Quality — Lessons Plans 27


© Copyright 2026