
Color Resource Guide
Color Resource Guide
Since being founded in 1969, Tressa has never strayed from its original vision:
to exclusively support salon professionals with the highest quality products and education on the market.
We deliver every day on this promise because we are one of the few companies in this industry who develop
and manufacture our own products. Because we directly maintain control of what we create, we can offer
the best in color, color care, waves and care and styling, while also focusing on you, the professional stylist.
Offering permanent color, deposit-only color, a lift and tone system, powder lightener as well as color support
and maintenance products, Tressa has everything you need to gain confidence and increase your salon profits.
Within this Color Resource Guide, you will acquire knowledge about all of Tressa’s integrated color systems
and find the answers to your color questions. We pride ourselves on giving you the best tools and education
to ensure your clients will experience beautiful, vibrant, healthy hair — every time!
Chapter
Chapter
1:
p4
p4
Hair Structure
p22
Color Wash
p4
Physical Properties
p22
Color Refresher
p5
Types of Hair Color
p22
Glossing
2:
p6
Chapter
8:
p 23
The Law of Color
p6
Color Wheel
Corrective Color
p23
Principles of Corrective Color
p6
Level System
p23
Steps to Corrective Color
p6
Residual Pigment Contribution (RPC)
p24
Common Corrective Color
Problems & Solutions
9:
p 30
3:
p8
Chapter
Irresistible Deposit-Only Color
p8
Colourage Features and Benefits
p30
How Irresistible Works
p9
Colourage Tonal Series
p30
Irresistible Tonal Series
p10
Color Additives
p30
Formulating, Mixing
& Application
p31
Irresistible as Filler
p31
Irresistible as Toner
4:
p 11
p11
The Client Consultation
p11
5 Steps to Formulating
p14
Mixing Guidelines
p14
Application Methods
Chapter
5:
p 16
Gray Coverage
p16
Resistant Gray Hair:
Pre-Softening Technique
p16
Formulating Gray Hair
p17Timing
6:
p 18
Blonding to Perfection
p18
High Lift Blondes
p18
Colourage Blonding Booster
p19Pre-Lightening
p19
LITEnUP Dual Moisturizing Powder
p20
Virgin Bleach Application
& Bleach Retouch Application
p20Toners
10 :
p 32
LITEWORX Lift & Tone System
p15Timing
Chapter
p 22
Special Salon Services
Formulating Colourage
Chapter
7:
Hair & Hair Color Basics
Colourage Translucent
Permanent Gel Color
Chapter
Chapter
Table of Contents
Chapter
Chapter
p32
How LITEWORX Works
p32
The LITEWORX System Components
p32
Formulating, Mixing & Processing
p33
Removing Oxidized Color
with LITEWORX
11 :
p 34
Watercolors Color
Maintenance Shampoo
p34
How Watercolors Works
p34
Watercolors Chart
p35
Toning Effects of Watercolors Chart
Glossary of Color Terminology p 36
Colouarge Color Conversion Chart p 39
3
Hair & Hair Color Basics
Chapter 1: Hair & Hair Color Basics
To become an expert in color and to have confidence
providing the color services your clientele desires,
you must first understand hair and hair color basics.
1
Physical properties of the hair are extremely important
and can affect your color formula.
Texture
Hair Structure
There are three main sections to the hair shaft, each
with their own importance.
Cuticle
This is the scale or shingle-like protective covering of
the hair shaft is hydrophobic (water-repelling). You can
demonstrate the hydrophobic properties and/or porosity
of the hair by placing one strand of clean, dry hair in
a glass of water (also called a water test). If the cuticle
is intact, the hair floats on the surface; if not, it will rapidly
sink below the surface. If the hair sinks, do not proceed
with a chemical service at this time. Permanent hair color
products must penetrate the cuticle to change the hair color.
Cortex
The primary structural segment of the hair shaft that contains
the protein chains. These long, high-molecular weight chains
give hair its strength and elasticity. The cortex is hydrophilic
(water-loving) and readily absorbs water. The pigment within
the cortex determines the natural color of the hair. Permanent
changes are made in the cortex during perm and color
services.
Medulla
The hollow central core of the hair shaft. The medulla is like
a small, hollow tunnel in the center of the hair. The medulla
may not continue down the entire hair shaft and it may not
be present in all hair types.
When we speak of hair texture, we are referring to the
actual diameter or thickness of an individual hair strand
(coarse hair has a thicker diameter than fine hair). The
texture of the hair can affect your choice of developer
strength. Fine hair will lighten more readily than coarse hair.
Density
This refers to the number of individual hairs on the head.
The average head has approximately 100,000 to 150,000
hairs. Normal hair loss is approximately 50 to 100 hairs
daily. The density of the hair will affect the application of
your color product. The denser the hair is, the smaller the
section of hair that can be colored at one time.
Elasticity
One of the prime indicators of the hair’s condition is
elasticity. Elasticity is affected by chemicals, excessive
heat, sun, etc., and refers to the hair’s ability to return
to its normal length after having been stretched. Elasticity
is only evident on wet hair. The healthier the hair is, the
better the ability to return to its normal length after stretching.
Tensile Strength
The condition of the cortex layer of the hair determines
its tensile strength. The tensile strength is affected by
chemicals and heat and is determined by the amount of
stress hair can withstand without breaking. The healthier
the hair, the more stress it can withstand. Note: Elasticity
and tensile strength should be used to determine how
aggressive a service the hair can handle.
Porosity
Hair Structure Illustration
Scales
Medulla
Cortex
Cuticle
4
Physical Properties
Previous treatment of the hair shaft determines the condition
and/or the porosity of the hair. The more cuticle damage
to the hair shaft, the more porous the hair. Before beginning
any chemical service, you must determine the porosity so
you can better understand how the hair is going to respond.
When coloring hair, the protective cuticle layer must be lifted
to allow the color to penetrate the cortex. This promotes
longevity and more natural-looking color. If the cuticle has
been damaged by excessive lightening or too harsh or too
frequent chemical services, precautionary measures must
be taken to ensure natural-looking color. Overly porous hair
may not hold color well because of the damage done to
the cuticle. A water test on clean, dry hair will determine
whether to proceed with a chemical service. If the cuticle
is too damaged, the hair will not retain color. Porosity is
Deposit-Only Hair Color
Pigment
• Excellent gray coverage
• Penetrates the cuticle and multiple layers of the cortex
• Mixed with low volume developer
• Fades slowly over time with little to no line
of demarcation
1
Melanin is the natural hair color pigment in the cortex.
As a result of the melanin’s molecular weight, it cannot
be significantly altered except by intense oxidation or
concentrated alkaline solutions. Natural hair color differs
from person to person, and from hair to hair on the same
head. It may also differ from one area of the hair strand
to another. The distribution of natural pigment (melanin)
inside the hair and the amount of natural pigment
determines the color of each strand. When discussing
natural pigment, it is important to understand that there
are two basic types of pigment: granular and diffuse.
Granular pigment varies from light brown to black and
responds more strongly to oxidants than diffuse pigment.
Diffuse pigment varies from pale yellow to brownish
red. It is much easier to remove the darker natural tones
(granular) than to remove the lighter reddish tones
(diffuse) during a bleaching or color-lifting service.
Hair & Hair Color Basics
a key factor when coloring hair. Porous hair attracts
cool tones and rejects warm tones. Healthy hair does the
opposite; it attracts warm tones and rejects cool tones.
Adjusting color formulas for porosity is covered in detail
in Chapter 8.
• Uses a combination of coupling dyes and direct dyes
• Does not lighten natural pigment
Permanent Hair Color
• Fully penetrates the cortex
• Mixed with any volume developer
• Can not be readily washed out
• Full gray coverage
• Permanently alters natural pigment
• Can lighten hair
Bleaches
• Lightens natural hair color
• Can be used to prepare hair for the application
of a toner, or to decolorize unnatural pigment
for corrective work
• Decolorizes the natural pigment through oxidation
Types of Hair Color
The definitions below will help you to better understand
the hair color products available on the market.
Temporary Hair Color
• Only coats the cuticle layer
• Not mixed with developer
• Lasts approximately one shampoo
• Does not alter the natural pigment
• Examples include color-enriching shampoos, hair color
sprays, color styling mousses and color intensifiers
Semi-Permanent Hair Color
• Coats the cuticle and penetrates the outer layer
of the cortex
• Not mixed with developer
• Lasts approximately four to five shampoos
• Uses large, direct dyes
• Using heat will help lift the cuticle, lodging the large
dyes under the cuticle
• Can add tones to existing shades, dye gray fibers
to a natural shade and help rid gray or white hair
of yellowish tones
• Does not alter natural pigment
• Results depend on the natural hair color and whether pigments are granular (darker) or diffuse (lighter)
There are also other less common types of hair color of
which you should be aware. Henna and Metallic Dyes are
rarely used, but if already on a client’s hair they may alter
your color service results.
Henna
Henna is a vegetable dye that dates back thousands of
years. The active ingredient in henna is obtained from the
leaves and stems of the henna plant. The leaves and stems
are crushed to a fine powder and added to hot water,
forming a paste that is then applied to the hair for 30 to
60 minutes. Henna is rarely used because it produces
unpredictable, unbecoming shades. It is not compatible
with professional chemical services because it coats and
builds up on the hair shaft.
Metallic Dyes
Metallic dyes are used today in over-the-counter products.
The daily application results in the gradual coloration of
gray hair. The most commonly used metallic dyes on the
market today are solutions of lead acetate. It is generally
thought that this color is a formation of a metallic sulfide
at the expense of the keratin sulfur on the outer layers of
the hair. Metallic dyes are incompatible with professional
chemical services.
5
The Law of Color
Chapter 2: The Law of Color
2
To produce natural-looking colors, the hair must have all
three primary colors (red, yellow and blue) present in varying
degrees. When hair is minus a primary, a secondary color
(green, violet and orange) is created. To correct this, you
need to replace the missing primary color. This is extremely
important in corrective color services.
Color Wheel
The Color Wheel has a cool side and a warm side. Colors
that are opposite one another on the wheel are complementary to each other. When two complementary colors are
mixed together, they neutralize or cancel each other. This
is the single most important factor of the color wheel.
can only be considered a guide. It is important to remove
“color” as a factor when determining the natural hair color
level. Try to look at it as if you were only seeing shades of
black, gray or white.
Since there is no universal measurement of a level, one
manufacturer’s color level system can vary from another.
They will be comparable though, since there is only so much
variation between light and dark. Think of the level system as
a ladder. You can either go up the ladder (lighter) or down
the ladder (darker). Our level system is from 1, being the
darkest, to 10, being the lightest.
Level System
Look at your Color Wheel. You’ll see that red neutralizes
green; therefore to rid hair of unwanted green tones, you add
red to your color formula. The resulting color will be a natural
brown. The Color Wheel can help you choose the appropriate
tonal series to use.
10
9
8
Color Wheel
LEVEL
7
6
5
4
3
2
1
Understanding the Color Wheel is the key to successful,
predictable hair color. This Law of Color never changes.
Knowing this makes formulating easier and results more
predictable.
Level System
The level of a color indicates whether it is light, medium or
dark. Levels are measured numerically for better understanding.
This system is referred to as the Level System.
A level is simply a measurement of light to dark. Since color
and light are perceived differently by the human eye, a level
6
L
I
G
H
T
E
R
D
A
R
K
E
R
Residual Pigment Contribution (RPC)
When doing single process hair color, the natural hair color
goes through various lifting stages. This is because part of the
chemical process of hair color is to break down the natural
pigment (melanin) in the hair and remove it from the cortex.
The amount of natural pigment left in the hair at the desired
level is referred to as Residual Pigment Contribution or RPC
and is different at each level.
This is essential information. Study it and refer to it when
formulating your colors. It is important to note that this chart
also has variance. For instance, if a natural level 4 head of
The Law of Color
hair is being taken to a level 7 and that particular hair has
mostly red pigment, the RPC may be closer to red/orange
than orange. Within our Color System we have formulated
with these variables in mind.
2
Remember, whenever we speak of Residual Pigment
Contribution (RPC) we are addressing the natural pigment
left in the hair, after lifting, at the desired level. RPC is not
a factor unless you are lightening. Tonal results are always
a combination of what pigment is in the hair naturally
(RPC) and what tonal series is used in the formula.
RPC can also be used when filling hair that has been over
lightened. To return to the natural color, a filler is used
to replace pigment that was lightened out of the natural
hair color. This will allow you to create the level and tonal
value desired.
Once you determine the RPC, then you can work with
the Color Wheel to determine the tonal series needed
to achieve the desired color results.
RPC Chart
Destination Level
RPC
Level 10
Pale Yellow/Yellow
Level 9
Yellow/Orange
Level 8
Orange/Yellow
Level 7
Orange
Level 6
Red/Orange
Level 5
Red
Level 4
Red
Level 3
Red Brown
Level 2
Red Brown
Level 1
Red Brown
7
Colourage Color
Chapter 3: Colourage Translucent Permanent Gel Color
wonderful light-reflecting qualities, which increases the shine
and therefore results in healthier looking hair. Opaque color
products result in solid color, which is less natural-looking
and has less light-reflecting qualities.
3
Colourage Translucent Permanent Gel Color has 61 shades
(included in 10 tonal series) plus 4 Concentrates, Blonding
Booster and Clear. With the richest shades and most natural
tones, you’ll find Colourage is the only permanent color
line you’ll ever need. Whether you’re just starting out in
color or you’re an experience colorist, we’re confident that
Colourage Color will give you the versatility to create the
most jaw-dropping color!
Colourage has an Oleic Acid base that helps prevent the
natural oil from being disturbed during the color service. It
also adds other conditioning benefits, which create beautiful
shine from one retouch to the next. Its low ammonia content of
0.8% to 1% when mixed allows you to pair a color service
with any other chemical service while still maintaining a
healthy, shiny head of hair.
Colourage is a translucent color, as opposed to an opaque
color. Translucent colors produce the most natural-looking
results because they create multiple tones and have
Colourage Features and Benefits
Feature
Benefits
Feature
Benefits
Shelf Life
•Antioxidants and chelating agents prevent metallic contamination and ensure
shelf life of 2 years
•Fast and easy mixing
Gel Color
•Stays where you put it
•Easy spreadability
•Beautiful, natural-looking shades
Translucent
Color
Wax Free,
Low
Ammonia
Versatile
•Choice of Colourage Developer or Processing Cream for maximum versatility
•Never flat or muddy-looking
•Promises incredible shine
and condition
•Perm and color in the same day
•Superior gray coverage
•Minimum fading
•Can be used as permanent color, deposit-only color,
toner and filler
Colourage
Developer
& Processing
Cream
Shade
Selection
•Less inventory saves money
•Able to achieve any color desired
Coupling
Dyes
8
•Uniquely formulated for minimum fading in all shades
•Vibrant reds that last
•Processing Cream has a thick, gel-like consistency and is recommended for bowl and brush application
•Ready to use in five volume strengths: 5, 10, 20, 30 & 40
•Apply with applicator bottle
or bowl and brush
•61 Shades (included in 10 Tonal Series), plus 4 Concentrates, Clear and Blonding Booster
•Colourage Developer has a smooth, velvety consistency
and is recommended for bottle application
Economical
•Uses a 2 to 1 ratio (2 parts
developer or processor to
1 part color)
•Just one 2 ounce tube provides 6 ounces of mixed gel color
Colourage Levels
10
9
8
7
6
Very Light Blonde
Light Blonde
Medium Blonde
Dark Blonde
Light Brown
5
4
3
2
1
Medium Brown
Dark Brown
Darkest Brown
Black
Blue Black
Tonal Series Description
N - Natural Series
The Natural Series is a brown base color and is used as
a color guide. This series creates natural or neutral looking
colors. This Series includes: 1N, 2N, 3N, 4N, 5N, 6N,
7N, 8N, 9N and 10N.
A – Ash Series
The Ash Series has a brown base with calibrated
(measured) predominate blue/violet tones to neutralize
unwanted warmth. This Series includes: 4A, 5A, 6A, 7A,
8A, 9A and 10A.
AA – Ash Ash Series
The double Ash Series has a brown/blue base to
neutralize extreme warmth. This Series includes: 5AA,
6AA, 7AA and 8AA.
Colourage Color
Each color is identified in the Colourage system by the
level and the tonal series. The number refers to the level,
for example; (7) = Dark Blonde. The letter refers to the
tonal value of the color, for example; (N) = Natural (see
the Colourage Levels Chart below). This is helpful when
describing colors to clients. For example, 7N is called
Natural Dark Blonde.
RB – Red Brown Series
The Red Brown Series has a brown base with red/blue
tones. This Series includes: 4RB and 5RB.
R – Red Series
The Red Series has a brown base with calibrated
predominant red tones. This Series includes: 2R, 3R,
4R, 5R, 6R, 7R, 8R and 9R.
3
Colourage Tonal Series
Specialty Red Series
The Specialty Red Series contains even more intense,
true red tones than the red series. This Series includes:
4RA, 4RM, 5NM, 5NC, 6NC, 6RV, 6RO, 6RR and 7RC.
Super Ultra Light Blonde Series
The Super Ultra Light Blonde Series has predominate
toning for clients that want to be the lightest blonde
possible in a single process. They give maximum lift and
deposit of tone to create the most translucent blondes.
The color results will be lighter and clearer without a lot
of residual RPC. This Series includes: 11A, 12N, 12G,
12A, 12AB and 12AG.
For best results with these shades follow the chart below:
Natural Level
Desired Level
RPC Lift Shade
High
5 or 6
9 – 10
12AB or 12AG
6
10
7 & up
10
11A, 12A, 12N, 12G
or 12AG
••••••••••••••••••••••••••••••
Helpful Hints:
G – Gold Series
The Gold Series has a predominately brown base with
a gold tone. This Series is great used alone for covering
gray or added to the red series to enhance a red tone.
The Gold Series includes: 4G, 5G, 6G, 7G, 8G, 9G
and 10G.
When mixing our color, you may notice that it doesn’t
B – Beige Series
The Beige Series has a brown base with a predominant
pink tone and creates beautiful champagne blondes.
This Series includes: 7B, 8B, 10B and 10NB.
the color is mixed it is ready and working.
always oxidize to its base tone. The color is working, so
don’t panic. We use colorless intermediates that change
color tone in the hair, versus in the bowl or bottle. In
some of the reds, because of the addition of direct
dyes, you may see a red color tone. Either way, once
••••••••••••••••••••••••••••••
CG – Copper Gold Series
The Copper Gold Series has a brown base with copper
gold tones. This Series includes: 7CG, 8CG, 9CG
and 10CG.
9
Colourage Color
3
Color Additives
Helpful Hints:
Concentrates
Concentrates can be added to a formula to correct or
adjust tonal values. They can also be used to make color
more or less intense. The Colourage concentrates are:
Red (Level 5)
Red can be used to produce brighter, more intense reds.
It can also be used to adjust color formulas for porosity,
cancel green and as a filler.
Yellow (Level 7)
Yellow is the lightest and brightest of the warm concentrates.
Whenever yellow is added to a formula, it will not only
appear more golden, but also lighter. Yellow will enhance
gray coverage.
Violet (Level 8)
Violet is the lightest of the cool concentrates. It can be used
to neutralize yellow and cool lighter blonde colors. Violet
can be added to the Natural, Ash and Beige Series levels
7 through 10 to help neutralize excess warmth.
Blue (Level 4)
Blue will control unwanted orange tones. It can be added
to levels 1 through 6 in the Ash or Natural Series to help
control unwanted warm tones. Never use blue in lighter
shades where yellow is predominant. To do so would
produce green!
Mixing Concentrates
• Add 1/8 oz. concentrate to every 1oz. of color
• If more is needed, add another 1/8 oz. to every
1oz. color
• Remember to add 2 parts developer for every
1 part concentrate in your formula
• To adjust tonal value, extra developer is not necessary
EXAMPLE
• 13/4 oz. of 10A + 1/4 oz. of Violet Concentrate
• Add 4oz. of chosen developer
10
••••••••••••••••••••••••••••••
• Remember, these are concentrated and a little
goes a long way.
• When adding the concentrates to adjust the tonal value of color for refreshment of the shaft and ends, extra developer is not necessary.
••••••••••••••••••••••••••••••
Blonding Booster – Not just for Blondes
Blonding booster may be added to Colourage Color to give
added vibrancy to the final tonal result. Blonding Booster
clears the way by adding up to 1/2 to 1 level of additional
lift, therefore allowing more of the tonal value of the color
to be exposed.
You can add Blonding Booster to give a clearer result for
your blondes, a brighter result for your reds or a richer result
for your browns. When adding Blonding Booster to your
color formula, the amount should not exceed up to 1/2 oz.
for every 1oz. of color. Add the same amount of developer
to your formula as you do Blonding Booster (see the
example below).
EXAMPLE
• 1oz. Colourage Color + 1/2 oz. Blonding Booster
• Add 21/2 oz. of chosen developer
Blonding Booster should not be used with the Super Ultra
Light Blonde Series or when depositing color and no lift is
required. In addition, on higher percentages of resistant
gray hair (over 50%) for complete tonal coverage do not
use Blonding Booster so that maximum color is deposited on
hair.
Colourage Clear
This versatile product can be added into your color for pull
through and to add extra shine and condition to any color
formula. Please see Chapter 7: Glossing for more services
utilizing Colourage Clear.
••••••••••••••••••••••••••••••
The Client Consultation
Helpful Hints (cont.):
More than any other factor, with the exception of the
service itself, the Client Consultation is the most important
step in successful hair coloring. Tressa has a 3-step plan
that guarantees a satisfied client: 1) inquire, 2) inform,
and 3) perform.
• If you do not read the natural level correctly, your entire formula will be wrong and the final color result will not meet client’s expectations.
• Let the client talk about themselves
••••••••••••••••••••••••••••••
Step 2: Determine the Client’s Desired Level & Tone
• Consultation should take place in a quiet place
• Sit face-to-face and maintain direct eye contact
• Make notes about skin tone and condition of the hair
• Understand the color and look your client desires
Communication is the key when selecting the client’s desired
color result. Use the Colourage Swatch Book to give your
client a preview of the final level and color result before you
begin the color service. Place selected swatch over client’s
hair, next to eyes and below the chin.
••••••••••••••••••••••••••••••
Step 2: Inform: Give Your Professional Opinion
Helpful Hints:
• Is the color desired possible
• Would the color complement client’s skin tone
4 Primary results you can achieve with color:
• Do features need softening
1.Lighten the natural hair color
• Which technique do you feel is right
2.Darken the natural hair color
• How much time is needed to achieve the result
3.Match the natural hair color
• How frequently will the client need to repeat the
color service
4.Change the tone of the natural hair color
• What products are needed to support the color service
• Answer your client’s questions and be sure you’re both on the same page
• Tip: Use your Colourage Swatch Book to communicate and preview color selection
Step 3: Perform: Prepare to Create Color Formula
• A Skin Patch Test is recommended 48 hours prior
to color application (see page 14)
••••••••••••••••••••••••••••••
Step 3: Determine the Client’s Residual Pigment
Contribution (RPC)
If lightening the hair, reference the RPC Chart to determine
the RPC at the desired level. Decide if you want to enhance
or neutralize the RPC.
RPC Chart
Destination Level
RPC
5 Steps to Formulating
Level 10
Pale Yellow/Yellow
Step 1: Determine the Client’s Natural Level
Level 9
Yellow/Orange
Using the Natural Series in the Colourage Swatch Book,
determine the natural level and percentage of gray. Check
for natural level at the scalp and nape area of the hair.
Take a subsection of the client’s hair and push it up, then
insert the swatch into hair (check the level above and
below to confirm natural level).
Level 8
Orange/Yellow
Level 7
Orange
Level 6
Red/Orange
Level 5
Red
••••••••••••••••••••••••••••••
Level 4
Red
Level 3
Red Brown
Level 2
Red Brown
Level 1
Red Brown
Helpful Hints:
• If client’s natural level falls between two levels and you are lifting the hair to a lighter level, formulate from the darker level.
••••••••••••••••••••••••••••••
11
4
• If you are going darker use the lighter level
so hair doesn’t appear too dark.
Step 1: Inquire: Listen to Understand
• Ask the questions “what do you like about your hair?” and “what don’t you like about your hair?”
Formulating Colourage
Chapter 4: Formulating Colourage
••••••••••••••••••••••••••••••
Use the Color Wheel to choose the appropriate tonal
series for the desired results. The client is a natural level
5 and desires to be a level 7 with cool results. First, look
at the RPC, which is orange at a level 7. Look at the Color
Wheel and you will see that blue is opposite orange and
therefore, will neutralize it. The base of 7A is blue. The Ash
Series will neutralize unwanted warmth. Use the Colourage
Swatch Book to assist in the proper tone of the final color.
Refer to chart below that shows the coolness and warmth
of the Colourage Tonal Series. Also below, the Tonal Series
Mix Chart explains how each tonal series may be mixed
with one another for optimum creativity. For example,
for best results we recommend mixing the Ash Series
with the Natural Series only.
Helpful Hints:
• Cool (Ash) tones neutralize warm (red or gold) and warm tones neutralize cool tones
• When coloring gray hair with predominate cool tones, add warmth to the formula or the results may be to cool or ashy
••••••••••••••••••••••••••••••
COOLER
Natural
Natural
Natural
Ash
Red
Red
Beige
Natural
Gold
Step 5: Determine Proper Strength Developer
Tressa offers two different types of developer for maximum
versatility: Colourage Developer and Processing Cream.
Colourage Developer is an ideal choice for bottle
applications or for colorists who prefer a thinner mixing
consistency. Processing Cream is a thicker, richer developer,
ideal for brush, foil and other creative applications. Both
developers are available in 5, 10, 20, 30 and 40 volume
strengths for maximum versatility. The Level Finder Guide
on the opposite page is an excellent reference to further
identify the developer strength.
Red Concentrate
Specialty Red Series
Red Series
Red Brown Series
Copper Gold Series
Yellow Concentrate
Beige Series
WARMER
BEIGE COPPER GLD RED BRN
Beige
12
Gold Series
NEUTRAL
Tonal Series Mix Chart
NATURAL ASH ASH ASH GOLD
Gold
Natural Series
Ash Series
Ash Ash Series
Violet Concentrate
Warm to Cool Chart
Blue Concentrate
Formulating Colourage
4
Step 4: Determine the Tonal Value Desired
RED
SPEC RED ULT LIGHT
Natural
Natural
Natural
Natural
Gold
Gold
Gold
Gold
Red
Red
Copper
Gold
Copper
Gold
Red Brown
Other
Ultra
Lights
Red
••••••••••••••••••••••••••••••
Helpful Hints:
• For resistant hair level on level or darker, use
10 or 20 volume developer
• For superior coverage on over 50% gray hair,
use 20 volume developer
• For an extra 1/2 to 1 level of lift when creating
very light blondes, use Colourage Blonding Booster with 30 volume developer
• When working with 5 volume developer in any service, be sure to choose a color 2 levels lighter than desired level to ensure proper results
••••••••••••••••••••••••••••••
Formulating Colourage
Level Finder Guide
DESIRED LEVEL
NATURAL LEVEL
1
1
2
3
4
5
2
1
2
3
4
5
6
3
1
2
3
4
5
6
7
4
1
2
3
4
5
6
7
8
5
1
2
3
4
5
6
7
8
9
6
1
2
3
4
5
6
7
8
9
10
7
1
2
3
4
5
6
7
8
9
10
8
1
2
3
4
5
6
7
8
9
10
9
1
2
3
4
5
6
7
8
9
10
10
1
2
3
4
5
6
7
8
9
10
4
12 345678910
No lift/deposit: use 5 volume
Level on level or darker: Use 10 volume
1-2 levels of lift or true tonal value:
Use 20 volume
3 levels of lift: Use 30 volume
4 levels of lift: Use 40 volume
Hair must be pre-bleached
Formulating Examples:
EXAMPLE 1
EXAMPLE 2
Natural Level = 6
Natural Level = 4
Desired Level = 6 (Cool)
RPC = Red/Orange
Select 1oz. 6A + 2oz.
20 volume developer
Desired Level = 6 (Red)
RPC = only a factor when
lightening hair
EXAMPLE 3
Natural Level = 7
Desired Level = 10 (Golden)
RPC = Yellow
Select 1/2 oz. 10G or
1/ oz. 10N + 2oz. 30
2
volume developer
Select 1oz. 6R + 2oz.
10 volume developer
EXAMPLE 4
Natural Level = 5
Desired Level = 8 (Cool)
Select 1oz. 8A + 2oz.
30 volume developer
RPC = Orange/Yellow
13
Formulating Colourage
Mixing Guidelines
Checklist:
• Take a Hair Strand Test (see below), if changing or applying color to new client.
4
• Make sure client has had a Skin Patch Test (see below).
• Do not shampoo unless the hair has a buildup, which will interfere with the color. If you need to shampoo, use Remove-All Plus and do not over stimulate the scalp area. To dry, place client under cool dryer, prior to color application.
• Before you begin, make sure to have everything necessary for color application at your fingertips.
• Leave area untouched for 48 hours. Examine after 48 hours. If negative, desired formulation can be applied immediately. If burning, itching, swelling, irritation or abnormal reaction occurs in or around the area at any time during the test period, the color must not be used.
CAUTION: Do not let color come in contact with the area
in or around eyes. In case of accidental contact with eyes,
immediately flush with a continuous flow of water for 15
minutes and consult a physician.
Mixing Colourage:
• Bowl and brush or bottle application
• 1oz. color + 2oz. of developer
• Drape the client with a towel and cape. Section
the hair for the selected procedure.
• Use cap to pierce tube; use key to roll out color
• Mix to thick, gel-like consistency
• Do not mix color until ready to apply.
Hair Strand Test Procedure for Colourage
Application Methods
We recommend this important test to ensure professional,
consistent results.
• Mix 1 part color to 2 parts developer
There are three types of applications to be discussed
in this section.
• Apply mixture to entire hair strand and allow to process for 20 to 30 minutes
1) Virgin Application Going Lighter
• Check frequently
• Remove color and dry to preview color
• Apply Colourage Color to dry hair, begin approximately 1/2" from scalp and apply out
through the shaft and ends; taking 1/4" partings.
If ends are over porous do not pull through at this time.
The hair strand test is also used to verify if you’ve chosen
the correct color formula. After performing this test, you’ll be
able to assess whether your formula needs to balance too
warm or too cool results or if you need to adjust your shade
or developer strength.
• Process 20 minutes.
• Remix fresh color. Apply to the scalp and work color through shaft and ends.
Skin Patch Test Procedure
• Process 30 to 45 minutes.
Some people are allergic or hypersensitive to certain drugs,
foods, cosmetics, and/or chemicals in hair color. These
individuals are considered predisposed. To establish whether
your client may be predisposed to Colourage Color (or any
of Tressa’s color systems), do the following preliminary Patch
Test 48 hours prior to application.
• Rinse thoroughly, until water runs clear. Shampoo hair using Tressa Replenishing Shampoo.
2) Virgin Application Going Darker
• Section hair into T-parting. Begin application at the crown or the grayest area.
Check the scalp carefully for any abrasions, cuts, open
sores, or sensitivity. Color should not be used if the scalp
or adjacent areas show abnormal or diseased conditions.
• Clean a small area behind the ear or inside the elbow using soapy water. Let dry.
• Mix minimal amount of desired color formula per directions.
• Apply prepared color to previously cleaned area using a cotton-tipped applicator. Let dry.
14
• Section hair into T-parting. Begin applying color
in the darkest area.
• Apply Colourage Color to dry hair, from scalp to ends; taking 1/4" partings. If ends are over porous, do not pull through at this time.
• Process 30 to 45 minutes.
• Rinse thoroughly, until water runs clear. Shampoo hair using Tressa Replenishing Shampoo.
••••••••••••••••••••••••••••••
• Section hair into a T-parting.
1/4" partings.
• Process 30 minutes.
• Refresh mid-lengths and ends for last 5 to 15 minutes (see below for using Colourage as a refreshment).
• Do not use Colourage Color if scalp has open sores, abrasions, or scalp disorder.
• Do not mix your color until you are ready to apply. Be sure to apply thoroughly and quickly.
• Rinse thoroughly, until water runs clear. Shampoo hair using Tressa Replenishing Shampoo.
•
Using Colourage as a No-Lift/Deposit-Only Color
• Always perform a Patch Test and a Strand Test 48 hours prior to any color service (see page 14).
Tressa’s unique formulation of Colourage Color allows
you yet another option: no lift/deposit-only color. This
unique service can be used in a variety of ways including
to refresh color on the mid-lengths and ends. It can also
be used to blend gray, enhance the natural color, or to
introduce clients to color. This color service does not lift
natural color, it only deposits color which makes it a great
option for color refreshment.
All 61 Colourage shades (with the exception of the Super
Ultra Light Blonde Series) can be used as deposit-only
color by mixing with 5 volume developer and modifying
the processing time to 15 to 20 minutes. Application of
no lift/deposit services is the same as a virgin application
going darker. Remember, when working with 5 volume
developer, choose a color two levels lighter than that
desired to ensure proper level results.
••••••••••••••••••••••••••••••
Helpful Hints:
• Average re-growth is a 1/2" or less. If lightening or changing tonal value and the re-growth area exceeds a 1/2", you must do a virgin application.
• Use only Colourage Developer or Processing Cream with Tressa Colourage Color. This ensures
the proper consistency for predictable results.
• Discard all unused, mixed product.
4
Helpful Hints (cont.):
• Apply Colourage Color to new growth, taking
When working with formulas containing 30 or 40 volume developer and highlighting or encountering longer application time, remix fresh color every 15 to 20 minutes.
••••••••••••••••••••••••••••••
Timing
For best results, the following times are recommended for
Colourage Color:
Best Results For
Developer
RPC
Time/Min.
No lift/deposit
5 Vol.
15-20
Same level/darker
10 Vol.
30
1-2 levels of lift
20 Vol.
30
3-4 levels of lift
and all formulas using Blonding
Booster
30 or 40 Vol.
45
—
45
Color Wash/
Refreshers
5 or
10 Vol.
5-15
Glossing
5 Vol.
10-15
Filler
5 Vol.
5-15
Toner
5 or
10 Vol.
5-20
Resistant Gray
Formulating Colourage
3) Normal Retouch
• Always wear protective gloves.
• Protect the client’s skin from possible staining
by using Tressa’s Protage Skin Protectant.
• Do not apply color to eyelashes or brows,
to do so could result in blindness.
••••••••••••••••••••••••••••••
15
Gray Coverage
Chapter 5: Gray Coverage
5
The ability to cover gray hair and still give it a naturallooking appearance is one of the greatest attributes of
Tressa’s Colourage Color. Gray hair has an absence of
natural color, especially red and yellow. The percentage
of warmth in your finished shade will be reduced by the
same percentage of gray present in the natural color.
Therefore, when coloring gray hair you must first determine
the percentage of gray. To determine that percentage, look at
the client’s hair. If you see the natural color first, gray will be
under 50%. If you see gray first, gray will be over 50%. The
color formula should contain the same percentage of natural
or gold series as the percentage of gray in the hair. The rest
of the formula should be used for the tonal value desired.
••••••••••••••••••••••••••••••
Helpful Hints (cont.):
• 30 and 40 volume will not cover gray but will
give a blended effect.
• If client wants 100% gray coverage and the same color from scalp to ends, it is recommended that you lift them no more than 2 levels.
• When lifting more than 4 levels, it is necessary
to pre-lighten.
••••••••••••••••••••••••••••••
Resistant Gray Hair: Pre-Softening
Technique
GRAY FORMULA
1. Place client in a draft free area of salon.
% of Gray = % of Natural or Gold Series;
2. Apply color to the grayest area first; re-apply color around hairline if hair should pop out of color.
Remaining Formula = Tonal Value Desired
3. Process for a full 45 minutes.
Pre-Softening Technique:
This method of formulating for gray hair will achieve natural
or cooler looking results. When desiring brighter or warmer
results, the percentage of the Natural or Gold Series should
not exceed half of the formula. Add the Gold Series when
desiring brighter or warmer tonal results.
For extreme resistant gray hair, pre-soften the hair utilizing
the following method:
• Choose color from Gold Series 2 levels lighter than desired level
• Mix with 20 volume developer
• Apply to the resistant area
• Process 15 minutes
••••••••••••••••••••••••••••••
Helpful Hints:
• Use Natural and Gold Series; never use Ash Series.
• Gold Series will give you a brighter, warmer looking color.
• On high percentages of gray hair the color formula may appear lighter; you may want to add some
of the darker level.
• For developer: if up to 50% gray, use 10 volume; if 50% or over, use 20 volume
16
• Apply desired color to entire head and process
for 45 minutes
Formulating Gray Hair
• On high percentages of gray hair, the Natural Series will give warmer looking color.
••••••••••••••••••••••••••••••
• Towel blot off excess color
Utilize the 5 Steps to Formulating (see Chapter 4):
Step 1: Determine the clients Natural Level and % of gray
Step 2: Determine the clients Desired Level and Tone
Step 3: Determine the clients Residual Pigment
Contribution (RPC)
Step 4: Determine the Tonal Value Desired
Step 5: Determine proper strength developer
Note: For coverage of gray under 50%, use 10 volume
developer. For coverage of gray over 50%, use 20
volume developer.
Gray Coverage
Timing
Non-resistant gray hair: 30 to 45 minutes
Resistant gray hair: 45 minutes
5
Gray Formula Examples
EXAMPLE 1
Natural Level = 3, 30% gray
Desired Level = 5 Red (warm)
EXAMPLE 2
Natural Level = 6, 50% gray
Select 1oz. 5R + 2oz.
20 volume developer
RPC = Red
Desired Level = 8 Gold (warm)
Select 1oz. 8G + 2oz.
20 volume developer
RPC = Orange/Yellow
EXAMPLE 3
Natural Level = 7, 75% gray
Desired Level = 10 Gold (warm)
RPC = Yellow
Select 1oz. 10G or
1oz. 10N + 2oz.
30 volume developer
EXAMPLE 4
Natural Level = 7, 50%gray
Desired Level = 9 Red (warm)
Select = 1oz. 9R + 2oz.
20 volume developer
RPC = Yellow/Orange
Note: This formula will result in a blending of the gray.
EXAMPLE 5
Natural Level = 4, 50% gray
Desired Level = 6 (cool to neutral)
RPC = Red/Orange
Select 1/2 oz. 6A +
1/ oz. 6N + 2oz.
2
20 volume developer
EXAMPLE 6
Natural Level = 7, 40%
Desired Level = 7 (cool)
RPC = only a factor when
lightening hair
EXAMPLE 7
Desired Level = 9 Natural
EXAMPLE 8
Natural Level = 5, 50% gray
Natural Level = 5, 80% gray
Select 1oz. 9N + 2oz.
40 volume developer
RPC = Yellow/Orange
Select 1oz. 7A + 2oz.
10 volume developer
Desired Level = 7 (cool to neutral)
RPC = Orange
Select 1/2 oz. 7A +
1/ oz. 7N + 20 volume
2
developer
Note: This formula will result in a highlighted effect on the
gray hair. It is best to pre-lighten & tone hair with the 9N.
17
Blonding to Perfection
Chapter 6: Blonding to Perfection
Tressa Colourage Color has an array of blonde colors, from
gold to beige to the coolest, palest blondes achievable.
High Lift Blondes
6
Colourage has 6 high lift blonde shades to give you
maximum lift and deposit of tone to create the most
translucent blondes in a single process. They are:
11A, 12N, 12G, 12A, 12AB, and 12AG (refer
to the Colourage Swatch Book).
For best results follow this chart:
Natural Level
Desired Level
RPC Lift Shade
High
5 or 6
9 – 10
12AB or 12AG
6
10
7 & up
10
11A, 12A, 12N, 12G
or 12AG
••••••••••••••••••••••••••••••
Helpful Hints (cont.):
• When working with formulas containing 30 or 40 volume developer and highlighting or encountering longer application time, remix fresh color every
15 to 20 minutes.
•
Processing time will be a full 45 minutes for high lift or higher volume developer color services. This will ensure maximum lift, as well as maximum deposit or tone.
• Strand Test upon completion of your application
to the re-growth area. If the hair has not faded,
do not pull color through.
••••••••••••••••••••••••••••••
Colourage Blonding Booster
••••••••••••••••••••••••••••••
Helpful Hints:
• Ultra Lights, in the Ash Series, have a violet predominant tone. This neutralizes the RPC encountered, which is Pale Yellow/Yellow.
•
The Ultra Light Ash Blonde (11A) has more toning quality than the Super Ultra Light Ash Blonde (12A). If controlling the tone is most important, choose the Ultra Light Ash Blonde (11A). If lighter is better and tone is not of such concern, the Super Ultra Light Ash Blonde (12A) is recommended. In addition, 12AB or 12AG may be added
for more blue or green base toning.
• When working with high lift blondes use
40 volume developer.
•
When working with any high lift color, the formula used at the scalp should not be pulled through the shaft and ends for refreshment. You will need to remix a different color formula, with 10 volume developer. Since this area is already lightened, deposit is all that is necessary. Match the level and tonal value of the scalp area to choose
your refreshment color.
•
Make adjustments for tonal value due to porosity. Strand Test (see page 14) for appropriate timing. This timing will be similar to a toner, 5 to 20 minutes. A Strand Test should be done while the re-growth color is processing.
••••••••••••••••••••••••••••••
18
There are times when your desired blonde shade needs
a boost to achieve the lift you want. Colourage Blonding
Booster can be mixed with Colourage Color when creating
very light blondes to achieve an extra 1/2 to 1 level of lift
(with the exception of the Super Ultra Light Blonde Series).
When you add the Blonding Booster to your formula, you
accelerate the lightening action and lessen the deposit of
the color. This achieves a lighter color result. Keep in mind,
unwanted warmth will not be controlled with the addition
of Blonding Booster. Blonding Booster is best used when
extra lift is required. When adding Blonding Booster to your
formula, add the same amount of developer to your formula
as you do Blonding Booster.
••••••••••••••••••••••••••••••
Helpful Hints:
•
When highlighting or encountering longer application time, remix the formula every 15 to 20 minutes. Remix the formula with 10 volume developer. Strand Test
for appropriate time (5 to 20 minutes).
•
When using Blonding Booster in the formula, do not pull it through the shaft and ends for refreshment. Choose your refreshment color by matching the level and tonal value of the scalp area.
• Remember to adjust the new formula for porosity and check for proper timing of the shaft and ends.
• Strand Test upon completion of your application
to the re-growth area. If the hair has not faded,
do not pull color through.
••••••••••••••••••••••••••••••
Mix: 1oz. 10A + 1/2 oz. Blonding Booster
+ 21/2 oz. 30 volume developer
EXAMPLE
Natural Level = 4 Dark Brown
Desired Level = 10 Beige Blonde
Pre-Lightening
Many clients require pre-lightening to achieve the light
results they desire. Anytime more than 4 levels of lift are
needed, a bleach service is required. Single-process
color services are not designed to lift more than 4 levels.
Lightener will allow you to lift 5 to 7 levels. Clients that
have a dark natural level may require bleaching to control
the level of the color and the tonal value results. Clients
who are “salt and pepper gray” sometimes require prelightening to become as light as they desire.
Tressa offers two types of lightener to pre-lighten: LITEnUP
Dual Moisturizing Powder and LITEWORX Lift and Tone
System. LITEWORX is recommended for highlighting only,
not as an all-over bleach (see Chapter 10).
Prior to a pre-lightening service, there are two questions
that need to be answered:
1. What is the natural level?
2. What is the desired level and tonal value?
Tressa has designed the Stages of Blonding Chart (shown
below) to eliminate the guesswork from lightening services.
There are seven phases used to determine the level
you have reached. This chart illustrates the color level
achievable for toning at each phase of pre-lightening.
Stages of Blonding
Stage of Blonding Color Level Achievable for Toning
Pre-lighten to pale
yellow and tone with
Colourage10B using 5
or 10 volume developer.
A Patch Test is recommended 48 hours prior to a color
application (see page 14).
LITEnUP Dual Moisturizing Powder
Tressa’s LITEnUP Dual Moisturizing Powder is a fast acting,
on and off the scalp lightener/bleach that protects while it
lightens and gives you predictable results every time. This
high performance, de-dusted powder contains Aloe so it
is gentle to the hair and scalp and conditions while it lifts,
making it a perfect product with which to perform all your
pre-lightening services. We recommend using Processing
Cream which has a creamy consistency that stays where
you put it and will not dry out.
Mixing:
2 scoops of LITEnUP Powder + 3oz. Tressa Processing Cream
On-Scalp:
Use only 10 or 20 volume Processing Cream. Do not place
under dryer heat.
Off-Scalp:
Use 10, 20, 30 or 40 volume Processing Cream. Do not
place under dryer heat.
NOTE: If you prefer to use Colourage Developer instead
of Processing Cream, the mixing ratio is 2 scoops
LITEnUP Powder to 2oz. Colourage Developer.
Pale Yellow/Yellow
Level 10
Yellow/Orange
Level 9
Application:
Orange/Yellow
Level 8
Orange
Level 7
Red/Orange
Level 6
On-Scalp:
Do not pre-shampoo hair for on-scalp applications.
Do a strand test. Wait 24 hours before applying
the lightening service.
Red
Level 5
Red
Level 4
Red Brown
Level 3
Red Brown
Level 2
Red Brown
Level 1
Off-Scalp:
May utilize foils, caps or specialized techniques
designed for off-scalp. Do a strand test. Wait
24 hours before applying the lightening service.
19
Blonding to Perfection
It is important to recognize that the phase you lighten to is
directly related to the level you are able to successfully tone.
6
EXAMPLE MIXTURE
Blonding to Perfection
Timing:
Bleach Retouch Application
Depends on the natural level you are starting with and the
desired level of lightness you wish to achieve, as well as the
condition of the hair. Check hair frequently until desired level
of lift is achieved.
1. Part hair into four sections; apply lightener around
each of four partings, do not overlap onto previously lightened hair
6
Removal:
Rinse hair thoroughly with tepid water and shampoo with
Tressa’s Replenishing Shampoo. Follow up with Tressa’s
Replenishing Conditioner.
NOTE: You may use Colourage Color or Irresistible DepositOnly Color to tone (see following Toning Charts).
CAUTION: Do not apply if scalp is broken or irritated. Keep
mixture away from face, eyes and neck. Do not use on
eyelashes, eyebrows, facial hair or any other body hair.
In case of accidental contact with eyes, immediately flush
with water for 15 minutes and consult a physician. Keep out
of reach of children. Store in a cool dry place. Do not use
metal mixing bowls, stirrers, or brushes. Always tightly seal
package after use.
Virgin Bleach Application & Bleach
Retouch Application
Virgin Bleach Application
1. Part hair into four sections; apply lightener 1/2" from
the scalp around each parting
2. Begin application in the darkest area, take 1/4" partings and apply lightener 1/2" away from scalp through the mid lengths and ends, complete all four sections. Note: Apply cotton strips between each parting.
3. Allow to lighten half the final stage of lightening
4. Remove cotton strips. Remove excess lightener from ends
5. Remix lightener and apply to scalp and again over
mid-lengths and ends
6. Process 30 to 55 minutes; check frequently. If hair is extremely porous it may not take the full 30 to 55 minutes
7. At the appropriate lightening level, rinse hair with cool water thoroughly; shampoo with Replenishing Shampoo
8. Towel dry and prepare for toner
FORMULA EXAMPLE
Natural Level = 5 Medium Brown
Desired Level = 10 Very Light Blonde
Process mid-length and
ends to a gold tone then
apply the lightener to the
scalp and through midlengths and ends
Refer to the Stages of Blonding Chart on page 19.
20
2. Begin application in the darkest area; take 1/4" partings and apply lightener to re-growth only
3. Process for 30 to 55 minutes, check progress frequently
4. Once lightening is achieved, rinse with cool water
and towel dry; prepare for toner
Toners
Tressa offers three options for toners. You may select
Colourage Color which will give a more sheer tonal result.
You may also choose Irresistible Color which will give
a more opaque tonal result. A third option for temporary
toning can be achieved with Watercolors Color Maintenance Shampoos (see page 35). See toning charts below
and on the next page for toning with Colourage
and Irresistible.
Colourage Color Toning Chart
Underlying
Pigment
Natural
Cool
Warm
10 Pale Yellow
– Yellow
9N
or 9V
9A, 10A
or 11A
9G, 10G
10B
or 10NB
10CG
9 Yellow –
Orange
9N
or 9V
9A
9G, 10B
or 10NB
9CG
or 9R
8 Orange –
Yellow
8N
or 8A
8A
8G
or 8B
8CG
or 8R
7Orange
7N
or 7A
7A
8G
or 7B
7CG,
7R or 7RC
6 Red –
Orange
6N
or 6A
6A
6G
7CG, 6R,
6NC, 6RV,
6RO
or 6RR
5Red
5N
or 5A
5A
5G
5R, 5NM
or 5NC
4Red
3N
or 4A
4A
4G
4RB, 4RA
or 4RM
3N
4A
4G
4RB, 4RA
or 4RM
3 Red –
Brown
Natural
Red
See Mixing, Application and Timing on the next page.
••••••••••••••••••••••••••••••
pigment at the level you wish to tone. Refer to chart
on the previous page.
Mixing: 1oz. color + 2oz. Colourage Developer
• Do not shampoo prior to pre-lightening
(5 or 10 volume)
• Do not stimulate the scalp prior to pre-lightening
Application: Apply to damp hair from scalp to ends
• Pre-lighten when a client wants to exceed 4 levels of lift
Timing: Strand Test every 5 to 15 minutes
• Pre-lightened and toned client should have a retouch every 3 to 5 weeks
• If in doubt regarding toner formula, do a
strand test
Natural
Red
• Use only cool water to rinse lightener from hair
9G
9CR
+ Clear
••••••••••••••••••••••••••••••
9A
+ Clear
9G
+ Clear
9CR
+ Clear
9V
9A
9G
9CR
7Orange
9N
+ Clear
8A
8G
6RO
+ Clear
6 Red –
Orange
6N
+ Clear
6A
+ 8A
6G
+ 8G
6RO
+ Clear
5Red
6N
6A
6G
6RO
4Red
5N
5A
4G
+ 6G
5R
+ Clear
3 Red –
Brown
4N
4A
4G
5R
+ Clear
Natural
Cool
Warm
9V
9A
9 Yellow –
Orange
9V
+ Clear
8 Orange –
Yellow
10 Pale Yellow
– Yellow
• Do not pull toner over previously toned hair after
a retouch
Irresistible Deposit-Only Color Toning Chart
Underlying
Pigment
6
Helpful Hints:
Blonding to Perfection
Selecting Toner Formula: Determine the underlying
• Do not overlap lightener when doing a retouch
Selecting Toner Formula: Determine the underlying
pigment at the level you wish to tone. Refer to the
chart above.
Mixing: 1oz. Color + 2oz. Irresistible Processor
Application: Apply to damp hair from scalp to ends
Timing: Strand Test toner every 5 up to 15 minutes
21
Special Salon Services
Chapter 7: Special Salon Services
7
These services can be used to introduce clients to hair color
or to restore faded color to tinted hair. It can also be used
to refresh color after a permanent wave or add depth and
richness to enhance natural color. These services deposit
tone and/or add shine and condition to the hair, providing
minimal to no lift.
Color Wash
This service is designed to deposit color and enhance or
change color tones. When choosing the color formula,
choose 1 to 2 levels lighter from the desired results. This
will prevent the results from becoming darker than expected.
Example: If a level 6 result is desired, choose a level
7 or 8 color.
The choice between 5 and 10 volume developer depends
on the results you desire. For maximum deposit, choose
5 volume and a color choice 2 levels lighter than desired.
If a brighter or a truer tonal value is desired, choose
10 volume and a color choice that is 1 level lighter than
desired. When using this service to introduce clients
to hair color, choose 10 volume developer.
Mixing/Timing/Application
1. Shampoo lightly with Remove-All Plus and towel
blot hair.
2. Mix 1oz. Colourage Color, 2oz. 5 or 10 volume developer and 1/2 oz. of Tressa Replenishing Shampoo.
3. Apply quickly and work thoroughly into hair.
4. Process 5 to 15 minutes. Check color development frequently.
5. Rinse and shampoo with Tressa Replenishing Shampoo.
Color Refresher
This formula is similar to the Color Wash formula, only the
shampoo has been replaced with clear. You would choose
a Color Refresher over a Color Wash if the client already
has hair color in their hair. Use the Refresher service for
the mid-lengths and ends of the hair. Follow the same
recommendations as Color Washing.
Mixing/Timing/Application
1. Shampoo lightly with Remove-All Plus and towel
blot hair.
2. Mix 1oz. Colourage Color, 2oz. 5 or 10 volume developer and 1/2 oz. Colourage Clear.
22
3. Apply quickly and work thoroughly into hair.
4. Process 5 to15 minutes. Check color development frequently.
5. Rinse and shampoo with Tressa Replenishing Shampoo.
••••••••••••••••••••••••••••••
Helpful Hints:
•
When used to cover gray and choosing a color formula that matches the client’s natural color, a line of demarcation will only be seen as the gray starts to appear at the re-growth.
• If you choose a formula other than the client’s natural hair color, more of a demarcation line
will be seen as the new growth appears.
••••••••••••••••••••••••••••••
Glossing
Colourage Clear is the perfect choice to add incredible
shine to natural hair color or color treated hair between
color services. Clear is the base of our color without any
free ammonia or pigment, and contains all the conditioning
benefits. Glossing services add shine and condition only,
so it becomes a service you can offer anyone who comes
into the salon.
Mixing/Timing/Application
1.Shampoo lightly with Remove-All Plus and towel
blot hair.
2.Mix 1oz. Colourage Clear with 2oz. 5 volume developer. Mix thoroughly. (We recommend using
only 5 volume developer for this service.)
3.Apply quickly and work thoroughly into hair.
4.Process 10 to15 minutes.
5.Rinse and shampoo with Tressa Replenishing Shampoo.
Corrective color services will put you at the top of the list
as a successful professional colorist. Clients who have
experienced hair color disasters tend to be very loyal
to the person who has successfully solved their problems.
1: Determining the Client’s Natural Level will need to be
expanded.
Step 1: Determine the Client’s Natural Level and the
Level of the Mid-shaft and Ends
Keep in mind that corrective color may involve multiple
services. On the following pages, you’ll learn how to
determine if and when you need multiple services and
how to go about solving the most common corrective
color problems. We’ll start with understanding some key
principles which will help you manage your time and
ensure that you’re giving your client the best solution.
• Understand what the client wants. What is their
desired level and tone?
8
Determining the different levels of the hair strand ensures
that you’re taking all color issues into consideration before
you formulate. By doing this, you can actually pinpoint
what needs to be done and where (see the following
illustration).
Principles of Corrective Color
Determining All Levels of the Hair
Ex. 1: Natural Level: 4
Desired Level: 7
NL
4 7 8 10
• Diagnose the hair. Identify the current level, tone, and other important characteristics such as porosity for each different section of the hair from root to tip. This is critical in determining what service(s) you will need to do and on what sections of the hair to achieve the desired results.
• Make sure you factor in all Hair Characteristics and Tonal Adjustment Requirements (see this page).
Corrective Color
Chapter 8: Corrective Color
Ex. 2: Natural Level: 7
Desired Level: 7
NL
u
A filler will
be required
on the level
10 area.
7 5 4
u
Decolorizing
will be
required on
the 4 & 5
level areas.
In addition to determining the levels along the hair shaft, you
will also need to take the following points into consideration:
• When choosing the color formula, it is always safer
to go lighter or brighter. You can easily tone down
a color or add depth. However, if you go darker or
not bright enough, decolorizing will be necessary.
Hair Characteristics
Healthy Hair
• If sections of the hair are too dark to begin with, decolorizing (pre-lightening) with bleach will be required. Remember that hair color will not remove
hair color.
•Holds red, orange and gold
•Needs ash to neutralize
Porous Hair
• In the box below, you’ll see that there is a general progression of services to keep in mind:
•Holds ash
•Needs red, orange or gold to neutralize
Tonal Adjustment Requirements
General Progression of Services
Pre-lightening u Fillers u Color (adjusted) Formulas u Toners
All of these steps may not be required, but this
is the correct progression.
Steps to Corrective Color
When working with a corrective color client, you will still
formulate using the 5 Steps to Formulating. However, Step
Color Fading Adjustments
•When coloring porous ends, faded areas will appear cooler or more ash; adjust color with warm tones prior to pulling color through
mid-lengths and ends or refresh with Irresistible Deposit-Only Color
•If porous hair is faded within 2 levels of desired result, adjust formula
Fill Hair & Color Back
•Fill hair when its not holding desired hair color and it fades quickly or when hair has faded more than 2 levels prior to coloring back
23
Corrective Color
LITEnUP FORMULA EXAMPLE
Now that you’ve reviewed the Principles to Corrective Color
and have completed Step 1 of Formulating, you may now
continue with the remaining Steps to Formulating:
2 scoops of LITEnUP + 3oz. 10 vol. Processing Cream
8
Step 2: Determine the Client’s Desired Level & Tone
Step 3: Determine the Client’s RPC
Step 4: Determine the Tonal Value Desired
Step 5: Determine Proper Strength Developer
1. FORMULA EXAMPLE: Gold Band
Natural Level: 7 Dark Blonde
Level to be Used: 8
For more in-depth explanation of the steps above, please
see Chapter 4.
7
You are now ready to perform your corrective color
service. Keep in mind, it is best to plan out each step
of the service(s) before beginning.
Re-growth
8
Mid-shaft
Ends
• Mix 1oz. 8A + 2oz. 10 volume developer
• Apply formula to gold band
• Timing will depend on how dark the gold band
Note: If band is dark gold, you will want to use LITEnUP Dual
Moisturizing Powder to pre-lighten band and tone with 1oz.
Colourage 8A + 2oz.10 volume developer
The following section shows typical color corrective
problems. We have provided solutions and examples to
these issues. As a professional you will need to adjust these
examples to your specific corrective color client.
Problem 2: Bright Scalp
Problem 1: Banding
A bright scalp or “hot roots” is when the hair at the scalp
is lighter or brighter in appearance than the rest of the
head. This is the result of improper formulation, incorrect
application or a high percentage of gray.
Bands are narrow darker or lighter sections along the
length of the hair shaft. Banding occurs from improper
application, incorrect formulation or too low volume of
developer and when too much time has elapsed between
retouch applications. Gold bands occur when new growth
goes beyond the warm zone of the scalp. Clients should
return every 3 to 4 weeks for a retouch. There are 2 possible
solutions to banding:
Solution:
• Assess the tonality at the scalp area and determine
the difference between the scalp area and the ends
• Choose a neutral shade that is the same level as the ends. Mix with an equal amount of 10 or 20 volume developer.
Solution 1:
• To remove band, apply Colourage formula to new growth
• Apply this formula to the bright scalp area only
• Process for 30 to 45 min; check for desired result
• Process until brightness is reduced. This can occur in as little as 10 minutes. Check frequently for desired results.
• Rinse thoroughly, cleanse lightly and condition
• Rinse thoroughly and shampoo
Solution 2:
2. FORMULA EXAMPLE: Bright Scalp
• Begin with the LITEnUP Formula Example #1 following
or Refer to Stages of Blonding Chart on page 19
to select proper formula
Natural Level: 8 Medium Blonde Tone to be Used: N
Level to be Used: 8
Developer to be Used: 10 vol.
Bright Scalp
• Always leave hairline for last as this hair normally processes faster
Re-growth
• Process at room temperature until color is evenly matched, up to a maximum of 50 minutes. Do not
use heat.
• Apply chosen formula where banding is noticeable, starting 1/8" out from both sides of the band(s)
• Shampoo lightly. Rinse thoroughly and condition.
• Towel blot so hair is damp, not dripping
24
8
Application/Mixing/Timing
Common Corrective Color Problems
& Solutions
• Apply same Colourage formula with Blonding Booster to band
Gold Band
Tone to be Used: A
Developer to be Used: 10 vol.
Neutral Zone
8
8
Mid-shaft
8
Ends
Application/Mixing/Timing
• Mix 1oz. Colourage 8N + 2oz. 10 volume developer
• Apply to re-growth area
• Timing will depend on deposit needed to eliminate lightness, check every 5 minutes
• Apply color formula from scalp to ends
Hair may become brassy due to improper formulation. As
the color fades, the natural Residual Pigment Contribution
is revealed. Use the Color Wheel to choose appropriate
tonal value needed. A Color Wash or Color Refresher can
be used to neutralize the unwanted tone. Eliminating the
off-tone is all that is needed.
• Process for 20 to 30 minutes. Check progress frequently.
4. FORMULA EXAMPLE: Too Light
Solution:
Step 1: Identify levels of color along hair shaft
• Assess the level and tonality of the warmth
Natural Level: 5 Medium Brown
Level on Mid-shaft: 8 Medium Blonde
Level on Ends: 10 Very Light Blonde
• Select a Natural or Ash Series shade that is one level lighter than the warmth in the hair and mix with
5 volume developer
5
• Shampoo and towel-dry hair. Apply the formula.
Re-growth
• Process 5 to 15 minutes. Check every 3 to 5 minutes
for desired results.
3. FORMULA EXAMPLE: Too Warm
Re-growth
8
Mid-shaft
Mid-shaft
10
Ends
Desired Level: 5 Medium Brown
Tone to be Used: A
Developer to be Used: 5 vol.
Missing RPC: Red
5
Orange-Yellow
7
8
Step 2: Determine level and tone desired. Identify RPC missing
in mid-shaft and ends.
• Rinse thoroughly and cleanse.
Natural Level: 7 Dark Blonde
Level to be Used: 8
8
Note: Avoid using the Ash Series for coloring back. If you
fill the hair with Colourage, your final color must also
be Colourage.
8
Re-growth
Ends
Orange-Yellow
Yellow
8
10
Mid-shaft
Ends
Step 3: Choose proper Tressa filler (see formula below)
Application/Mixing/Timing
Level: 7
Tone: R
Developer: 5 volume
• Mix 1oz. Colourage 8A + 2oz. 5 volume developer
• Apply to shampooed, towel-dried hair
• Process 5 to 15 minutes. Check every 3 to 5 minutes for desired results
Step 4: Mix Tressa filler formula (see formula below)
Mixing Proportions: 1oz. color + 2oz. developer
Problem 4: Too Light
Step 5: Tinting back procedure
Hair may be fading too quickly or may be more than
2 levels lighter than desired level. When this happens,
filling or coloring back is necessary.
1.Fill mid-shaft and ends (7R + 5 volume) on damp hair for 5 to 15 minutes
Solution:
2.Towel blot excess filler off hair
Follow steps 1 through 5 listed in the Formula Example #4
following, as well as performing the procedures below:
3.Apply desired level formula (1oz 5N + 2oz.
10 volume). Process 30 minutes
4.Rinse desired color until water runs clear
• Mist mid-lengths with porosity equalizer, such as
Tressa’s Balancing Mist
5.Shampoo with Replenishing Shampoo
6.Apply Tressa Balancing Mist as your conditioner
• Apply filler formula sparingly to porous lightened areas
• Process 15 minutes
• Remove filler formula with lukewarm water. Do not shampoo. Towel dry.
Corrective Color
Problem 3: Too Warm
• Mix Colourage formula using 10 volume developer
25
Corrective Color
Mixing Option 3: LITEWORX Formula
for On or Off-the-Scalp Removal
Follow the recommendations below for on or off the-scalp
removal using Tressa’s LITEWORX.
Problem 5: Too Dark
8
If hair has processed too dark, then you need to decolorize
(remove tint) from only the area of hair where the darkness
lies. Decolorizing is the process of removing artificial color
from the hair or removing unwanted tones. Since hair color
will not remove hair color, the hair must be lightened to the
underlying pigment stage of the desired result. If in doubt,
refer to the Residual Pigment Contribution Chart on page 7.
Solution: Decolorizing (Removal of Tint)
• Determine RPC stage of desired result
• Choose a mixing option below
• Check progress every 3 to 5 minutes.
Mixing Option 1: LITEnUp Formula
for Off-the-Scalp Removal
Follow the recommendations below for off-the-scalp
removal using Tressa’s LITEnUP.
Levels of Lift
Formula
1 to 2 Levels
1 to 2 scoops of LITEWORX Power Lifting Powder with 2oz. Processing Cream 10
or 20 volume. Mix until
uniform consistency. Add
2oz. LITEWORX Conditioning Oil Lightener and mix until a uniform, creamy consistency.
If after decolorizing porosity has generated an off-color
result, refer to Adjusting Your Color Formula for Porosity on
page 27.
• Apply to damp hair and only to the hair that needs decolorizing. Choose an application option below
Levels of Lift
Formula
1/ to 1 Level Mix 2 scoops LITEnUP 2
with 21/2 to 3oz. HOT water
1 to 2 Levels
Mix 2 scoops LITEnUP with 21/2 to 3oz.
5 volume Processing Cream
3 to 4 Levels
Mix 2 scoops LITEnUP
with 3oz. 10 volume Processing Cream
3 to 4 Levels
3 to 4 scoops of LITEWORX Power Lifting Powder with
2oz. Processing Cream 10
or 20 volume. Mix until
uniform consistency. Add
2oz. LITEWORX Conditioning
Oil Lightener and mix until
a uniform, creamy consistency.
Application Option 1: For Off-Scalp Color Removal
• Perform a Strand Test and select proper formula. Apply formula to darkest areas first. Pull color through ends
to test for pull-through time.
• Section T-parting. Apply formula to damp hair. Apply color in the darkest area first. Check every 5 minutes.
• Process at room temperature.
• Follow the Stages of Blonding Chart (see page 19)
to lift to the proper level.
• If one area has lifted to desired level and another area needs to continue, remove product using a damp towel.
Mixing Option 2: LITEnUP Formula
for On-the-Scalp Removal
Follow the recommendations below for on-the-scalp
removal using Tressa’s LITEnUP.
• When desired color removal is achieved, shampoo with Tressa Clarifying Shampoo.
Application Option 2: For On-Scalp Color Removal
Levels of Lift
Formula
1/ to 2 Levels Mix equal parts LITEnUP
2
and 5 volume
Processing Cream 3 to 4 Levels
Mix equal parts LITEnUP
and 10 volume
Processing Cream
• Dry client under a cool dryer prior to proceeding with color application.
• Perform a Strand Test and select proper formula. Apply formula to darkest areas first. Pull color through ends
to test for pull-through time.
• Section T-parting. Apply color in the darkest area.
• Apply formula to damp hair. Begin application approximately 1/2" from scalp and apply through the shaft and ends. If ends are over porous, do not
pull through at this time.
• Process at room temperature, a total of 5 to 20 minutes.
26
• When desired color removal is achieved, shampoo
with Tressa Clarifying Shampoo.
• Add a warmer color to the existing color formula before pulling the color through for refreshment. This will achieve even results from scalp to end (see Adjusting Tonal Series Breakdown below).
Tips for Checking Progress
• Take a strand of hair and place it on a damp towel.
• Spray the strand of hair with water.
Tinting After Decolorizing
• To tint after decolorizing hair, use the desired color and adjust the color formula for porosity.
• Mix formula with 10 volume developer. For bright tonal results, mix with 20 volume developer.
• You may need to apply in sections, due to porosity. Example: Apply to the mid-shaft first and wait to pull
the formula through the ends.
• Strand Test for timing and tonal value adjustments.
The tint back formula should process approximately
30 minutes.
5. FORMULA EXAMPLE: Too Dark
Desired Level: 8 Medium Blonde
Lighten Residual Pigment to: 8
Re-growth
• Apply to the re-growth, and then add the adjustment color into the existing formula.
• Strand Test to check tonal results and timing.
Adjusting Tonal Series: Breakdown
Natural Series
• Add the same level of color from the Gold Series.
•
Add an 1/8 oz. for every mixed ounce
remaining (add more if necessary). In extreme cases where remixing is necessary, use the same level color from the Gold Series and mix with 10 volume developer.
Ash Series or Ash Ash Series
•Add the same level of color from the Natural Series. In extreme cases of porosity remix a fresh formula using the same level color from the Natural Series and mix with 10 volume developer.
Gold Series
Orange-Yellow
8
Controlling tonal value results may be difficult when colortreating porous hair. The scalp area is the color tone you
wanted, but the ends have browned or cooled down. This
is a result of the porous hair attracting cooler tones and
rejecting warm tones.
Solution:
• Dry client under a cool dryer prior to proceeding
with color application.
• Gently blot dry and refer to the Stages of Blonding Chart on page 19 to ensure proper level results.
Corrective Color
• Remix fresh product. Apply to scalp and work color through the already saturated shaft and ends.
Adjusting Your Color Formula For Porosity
8
• Check progress frequently. When shaft and ends have achieved approximately half the desired amount of lift, continue to next step.
6
Mid-shaft
4
Ends
Using
Add
4G
Red Concentrate
5G
Red Concentrate
6G
8R
Decolorizing Procedure:
7G
8R
1.Apply your lightening formula on damp hair to
mid-shaft and ends
8G
8R
2.Process 5 to 20 minutes or until you see orange/yellow in the mid-shaft and ends
9G
8R
10G
8R
3.Mix desired level formula (1oz. 8N + 2oz. 10 volume)
apply to mid-shaft and ends. Feather the formula slightly
over the line of demarcation between re-growth and mid-shaft.
Beige Series
• Add the same level color from the Gold Series. In extreme cases, you may need to add 8R.
4.Process desired level formula for 30 minutes
27
Corrective Color
8
Copper Gold Series
Using
Add
7CG
Yellow Concentrate or 8R*
8CG
Yellow Concentrate or 8R*
9CG
Yellow Concentrate or 8R*
10CG
Yellow Concentrate
* Use Yellow Concentrate to enhance gold tones or 8R
to enhance copper tones.
Mixing & Application (Extreme Cases)
• Remixing a completely different formula for the shaft and ends may be necessary.
Red Brown Series
• This would also be necessary if working with a developer higher than 20 volume at the scalp area.
Using
Add
• Remember to do a Strand Test.
4RB
Red Concentrate
5RB
Red Concentrate
Reasons to Use Fillers
Red Series
Using
Add
2R
Red Concentrate
3R
Red Concentrate
4R
Red Concentrate
5R
Red Concentrate
6R
Red Concentrate
7R
• When adjustment color becomes over half the formula, it’s time to remix fresh color formula for shaft and ends.
• A filler (re-pigmentizing) is a formula designed to replace pigment that has been lightened out of the hair.
• Color results that are too light are caused by incorrectly determining the natural level, abuse from the sun, chemicals, or thermal abuse from styling
• Color is more than 2 levels lighter than the desired level
• It is necessary to replace this pigment for proper level and to aid in tonal value results.
• RPC chart is a great guide for determining what pigment needs to be replaced and why.
Red Concentrate
8R
9R
Mixing:
9R
7RC
• 1oz. color mixed with 2oz. 5 volume developer
Specialty Red Series
For extremely porous hair, use:
Using
Add
4RA
Red Concentrate
• 1oz. color mixed with 2oz. 5 volume developer
and 2oz. distilled water
4RM
Red Concentrate
5NM
Red Concentrate
5NC
Red Concentrate
6NC
Red Concentrate
6RV
Red Concentrate
6RO
Red Concentrate
6RR
Red Concentrate
7RC
7RC
Mixing & Application
• Start by adding 1/8 oz. of the adjustment color
for every mixed ounce of color left in the bowl
or applicator.
• Strand Test the shaft and ends; make sure that it
is enough of an adjustment.
• If Strand Test results look browner or cooler, add another
1/8 oz. for every mixed ounce of color product remaining.
28
• When adding color for tonal value adjustments,
do not add extra developer. The addition of the
warmer pigment is all that is required.
Colourage Filler Chart
Filler
Choice
If Overly
Porous, Add
1
Red Concentrate
—
2
Red Concentrate
—
3
Red Concentrate
—
4
Red Concentrate
—
5
7R
6
8R
1/8 oz. Red
1/8 oz. Yellow
1/8 oz. Yellow
1/8 oz. Yellow
Returning
to Level
7
8R
8
Equal Parts 10G/8R
9
Equal Parts 10G/8R
10
Not Necessary to Fill
1/8 oz. 8R
—
NOTE: This is only a guide. Tressa recommends a Strand
Test to determine proper filler choice. Adjustments may
be necessary.
Corrective Color
Problem 6: Too Cool
Excessive porosity can cause the hair, particularly the ends,
to grab deeper and go drabber than desired, leaving color
too cool.
Solution:
8
• You may need to remove some color to lighten drab ends slightly
• Apply blonding formula to damp hair. Process for 2
to 10 minutes at room temperature until ends are a half level lighter than desired result
• Rinse thoroughly and cleanse
• Mix and apply desired Colourage formula to new growth, avoid coloring over the hair that was just treated with color removal product
• Process 30 to 35 minutes
• Pull color through ends and process for an additional
5 to15 minutes, check frequently
• Rinse thoroughly and cleanser
6. FORMULA EXAMPLE: Too Cool
For Blondes (Levels 7-11): Use Gold (G) or Light Butterscotch
Strawberry Blonde (CG)
Natural Level: 7 Dark Blonde (with cool cast)
Level to be Used: 8
Tone to be Used: CG
Developer to be Used: 10 volume
Cool Cast
7
Re-growth
7
7
Mid-shaft
Ends
For Browns (Levels 4-6): Use Red (R)
Natural Level: 5 Medium Brown (with greenish cast)
Level to be Used: 6
Tone to be Used: R
Developer to be Used: 10 volume
Greenish Cast
5
Re-growth
5
Mid-shaft
5
Ends
Application Technique:
• Apply formula over cool or greenish cast area
• Process until you see color change
29
Irresistible Color
Chapter 9: Irresistible Deposit-Only Color
9
Irresistible Deposit-Only Color is the perfect product for a
variety of clients. Because of its no lift, no ammonia color
formula, Irresistible is the step between not coloring and
using permanent color. With 30 beautiful shades, plus
clear, Irresistible gives you 100% gray coverage, lustrous
shine and condition all in one easy step.
Use Irresistible for:
• Covering gray
• Refreshing hair color
after a perm
• Color correction
• Introducing clients to color
• Toning pre-lightened hair
• Clients with no time to main-
tain permanent hair color
• Filling overly porous hair
• Male clients
Specialty Series (Containing Slate, Silver and Clear)
Slate – Blue base color used on levels 1– 6 to assist in
neutralizing warm tones.
Silver – Violet base color used on levels 7– 10 to assist in
neutralizing warm tones.
Clear – Clear may be added to lessen or lighten color result.
The more clear added, the lighter and less intense the color.
Clear may also be used just for added shine (Mix 1 part
Clear to 1 part Irresistible Processor).
Colourage Color Concentrates may be mixed with any
Irresistible shade. They are available in Red, Yellow, Blue
and Violet.
How Irresistible Works
Formulating, Mixing & Application
Irresistible does not alter the natural pigment of the hair,
but adds color to existing pigment. Irresistible is ammoniafree with a delayed oxidation system. This allows the color
molecules to oxidize within the cuticle resulting in deeper
penetration, better coverage and longer-lasting results.
Formulation
This optimized color delivery system softens the cuticle
layer resulting in truer, richer tones and the surfactant base
transports color molecules faster into the hair shaft.
Irresistible Processor is formulated to be used only with
Irresistible colors. This Processor is not a standard developer.
Special ingredients in this processor allow Irresistible color
to bond with the hair without altering its natural structure.
Irresistible Tonal Series
Natural Series
Natural Series gives you a neutral color without much
warmth. This series includes: 2N, 4N, 5N, 6N, 7N,
8N and 9N.
Cool Series (Containing Ash and Violet)
Cool Series helps to neutralize unwanted warmth in hair.
This series includes: 4A, 5A, 6A, 8A, 9A and 9V.
Warm Series
Warm Series gives extra warmth and improves gray
coverage. This series includes: 4G, 6G, 7G, 8G and 9G.
Red Series (Containing Red Brown, Copper Gold, Copper
Red, Red Orange, Red and Red Violet)
Red Series gives you natural, subtle or vibrant red color
results. This series includes: 4RB, 6CG, 8CG, 6NR, 9CR,
4RO, 6RO, 5R, 4P and 5RV.
Step 1: Determine level of hair using the Natural Color
Series. Check entire length of hair.
Step 2: Select Irresistible Color based on level and tone
desired.
Mixing
Mix equal parts of Irresistible Color and Irresistible Processor
in a plastic applicator bottle. Mix well. Irresistible Clear may
be added if a lighter shade is desired. Irresistible Processor
is recommended for processing Irresistible Color to ensure
consistent results.
Application
Normal Hair: Apply to entire head. Process at room
temperature for 20 minutes.
Resistant Hair: Apply to entire head. Cover with plastic cap
and process under dryer up to 15 minutes, followed by a 5
minute cool-down at room temperature.
Used as a Refresher: Apply color to new growth only and
process. Pull through ends as needed.
Finish: Rinse thoroughly with tepid water. Shampoo with
Tressa Replenishing Shampoo.
••••••••••••••••••••••••••••••
Helpful Hints:
• Chemically treated hair may receive color quicker than non-treated hair. Always perform a Strand Test to determine proper timing.
• If client has color treated hair remember that tint
on tint will go dark.
••••••••••••••••••••••••••••••
30
Irresistible as a Toner
Irresistible has been formulated to assure beautiful color
every time. However the condition of the client’s hair or
the color that is requested may require a filler. Filling
simply means that you need to replace missing pigment
prior to applying the final color formulation.
Irresistible is the perfect toner for any double-process
coloring service that is used following a pre-lightening
service.
2 Reasons to Fill:
1. Fill prior to a tint back; this occurs when you darken
or are returning the hair to its natural color.
2. Fill when shafts and ends are not holding the desired color and fade quickly. Causes are extremely porous hair, high lift color, improper color or perm services and excessive damage from heat or styling products.
Irresistible Deposit-Only Color Filler Chart
Irresistible Deposit-Only Color Toning Chart
9
Filling the hair will replace the natural pigmentation, if you
do not replace the natural pigment your color may result
in drab, muddy results or the hair may fade more rapidly.
Refer to Chapter 8: Corrective Color for more details.
Irresistible Color
Irresistible as Filler
Underlying
Pigment
Natural
Red
Natural
Cool
Warm
9V
9A
9G
9CR
+ Clear
9 Yellow –
Orange
9V
+ Clear
9A
+ Clear
9G
+ Clear
9CR
+ Clear
8 Orange –
Yellow
9V
9A
9G
9CR
7Orange
9N
+ Clear
8A
8G
6RO
+ Clear
6 Red –
Orange
6N
+ Clear
6A
+ 8A
6G
+ 8G
6RO
+ Clear
10 Pale Yellow
– Yellow
Filler
Choice
If Overly
Porous, Add
1
5R
1/8 oz. Red
5Red
6N
6A
6G
6RO
2
5R
1/8 oz. Red
4Red
5N
5A
4G
+ 6G
5R
+ Clear
3
5R
1/8 oz. Red
4N
4A
4G
4
5R
1/8 oz. Red
3 Red –
Brown
5R
+ Clear
5
6RO
1/8 oz. Red
6
6RO
1/8 oz. Yellow
7
9CR
1/8 oz. Yellow
8
9CR
1/8 oz. Yellow
9
9CR
1/8 oz. Yellow
10
9CR
NA
Returning
to Level
Selecting Toner Formula: Determine the underlying pigment
at the level you wish to tone. Refer to the chart above.
Mixing: 1oz. Color + 1oz. Irresistible Processor
Application: Apply to damp hair from scalp to ends.
Timing: Strand Test toner every 5 up to 20 minutes.
Selecting Filler Formula: Determine the level to which you
are filling. Refer to the chart above.
Mixing: 1oz. Color + 1oz. Irresistible Processor
Application: Apply to damp hair on all areas requiring a
filler. Towel off filler or rinse. Apply desired level from scalp
to ends.
Timing: Strand Test filler every 5 up to 20 minutes.
31
LITEWORX Lift & Tone
Chapter 10: LITEWORX Lift & Tone System
10
Harness the colors of the sun with this revolutionary Lift
and Tone System. Now you can create fabulous, one-step
highlight and lowlights with perfect tonal results and a shiny,
silky finish in as little as 20 minutes!
How LITEWORX Works
The LITEWORX LTC Complex allows you to lift up to 7
levels while it tones and conditions in a single application.
With a specially designed formula of wheat protein, oleic
acid, chamomile extract and other powerful lifting, toning
and conditioning ingredients, LITEWORX can create a full
spectrum of beautiful shades in half the time of a doubleprocess service.
10A (Level 10 Ash Natural): Neutralizes warm tones for lighter natural blonde results.
12V (Level 12 Ash Violet): Neutralizes warm tones for lighter ash blonde results.
Perform Skin Patch Test (see page 14) and Hair Strand
Test (see below) prior to Using LITEWORX.
Hair Strand Test Procedure for LITEWORX
To insure professional results, a preliminary hair strand
test is recommended. Mix a minimal amount of the exact
formula to be used on the client. Apply to a small strand
of hair beginning 1/4" away from scalp. Leave on until
desired results are achieved. Shampoo and rinse thoroughly.
Examine hair for condition. If breakage occurs, your
client’s hair is not in suitable condition for the service. Do
not proceed. An unsatisfactory hair strand test may be an
indication that the hair is over porous or there is a build
up of product or minerals. You may put your client on a
conditioning regimen and try another strand test at a later
date, perhaps 1 to 2 weeks later.
Conditioning Oil Lightener:
• Contains special shine and conditioning ingredients
to protect and maintain the health of the hair
• Allows formula to remain moist during processing
for maximum coverage and consistent results
Power Lifting Powder
• Provides optimum lift in minimal time
• Contains triple lifting agents that provide a power
boost to allow up to 7 levels of lift
Highlighting Formulation
10 & 20 Volume Processing Creams
• Activates the toners
• Provides a rich, luxurious consistency for flawless applications
• Added conditioning agents leave hair in remarkable condition
Non-Ammonia Color Toners
• Delivers pure, luminous color with extra shine enhancers
• Seven toners combine to achieve 15 highlight and
8 lowlight shades:
32
8CG (Level 8 Copper Gold): Achieves warm,
soft golden results.
Formulating, Mixing & Processing
The LITEWORX System Components
4NG (Level 4 Natural Gold): Achieves natural golden brown results.
6R (Level 6 Red): Achieves rich red to copper blonde results.
6AN (Level 6 Ash Natural): Neutralizes warm tones for natural blonde results.
6AB (Level 6 Ash Blue): Neutralizes warm tones for ash blonde results.
Step 1: Determine client’s Desired Highlight Color, using
the LITEWORX Swatch Ring or the printed shade chart
(contact Tressa or your Tressa Distributor for a LITEWORX
Formulation/Shade Chart).
Step 2: Determine client’s Natural or Tinted Level, using
the LITEWORX Swatch Ring.
Step 3: Determine if the client desires a Medium or
Maximum Lift (Medium Lift = 1–4 levels lighter;
Maximum Lift = 5–7 levels lighter).
Step 4: Once highlight formula is chosen, move across the
formulation chart to the Natural Starting Levels & Scoops of
Power Lifting Powder area and determine how many scoops
of Power Lifting Powder are needed for the desired level.
Step 5: Proceed to the Highlighting Mixing Procedure below.
Highlighting Mixing Procedure
Step 1: With the 5 gram scoop provided, measure the
desired amount of LITEWORX Power Lifting Powder into
a non-metallic mixing bowl.
Step 2: Measure the desired amount of LITEWORX
Conditioning Oil Lightener into the measuring cup.
Step 5: Pour contents of measuring cup into the mixing
bowl and whip the ingredients into a smooth gel-like
consistency.
Lowlighting Formulation
Step 1: Determine client’s Desired Lowlight Color, using
the LITEWORX Swatch Ring or the printed shade chart
(contact Tressa or your Tressa Distributor for a LITEWORX
Formulation/Shade Chart).
Step 2: Determine client’s Natural or Tinted Level, using
the LITEWORX Swatch Ring.
Step 3: Once lowlight formula is chosen, move across
chart to the Natural Starting Level area and determine on
which level(s) your chosen shade is best recommended.
Step 4: Proceed to Lowlighting Mixing Procedure below.
Lowlighting Mixing Procedure
Step 1: Add the desired amount of LITEWORX NonAmmonia Toner(s) to the measuring cup.
Step 2: Add the desired amount of Processing Cream
10 volume to the measuring cup.
Step 3: Pour contents of measuring cup into a non-metallic
mixing bowl and whip the ingredients into a smooth
gel-like consistency.
Processing Highlights & Lowlights
Dryer: Preheat dryer on medium setting. Process for
5 to 20 minutes, or until desired results are achieved.
Room Temperature: Up to 45 minutes, check frequently.
NOTE: If processing exposed highlights (i.e. with a cap)
with a dryer, a loose fitting processing cap should be
used over the exposed highlights to prevent drying out.
Rinse hair and shampoo with Tressa Replenishing
Shampoo. Follow with Tressa Clarifying Rinse
or Tressa Replenishing Conditioner.
Helpful Hints:
• Hair characteristics make a difference! When highlighting over tinted hair, coarse resistant, dark tint or hard water deposit, add 1 additional scoop of LITEWORX Power Lifting Powder to the formula. Up to 8 total scoops of LITEWORX Power Lifting Powder may be used for maximum lightening
power.
•
Each scoop of Power Lifting Powder provides
up to 11/2 to 2 levels of lift. Lowlight formulas
are designed to deposit tone only with minimal
to no lift.
• When more lift is desired, increase the amount
of Power Lifting Powder. When less lift is desired, decrease it.
• When more color deposit is desired, decrease
the volume of Processing Cream from 20 volume
to 10 volume, or even 5 volume.
• For maximum color deposit, you may double the Color Toner amount in the formula.
•
LITEWORX Lift & Tone
Step 4: Add the desired amount of Processing Cream
10 or 20 volume to the measuring cup.
••••••••••••••••••••••••••••••
10
Step 3: Add the desired amount of LITEWORX NonAmmonia Toner(s) to the measuring cup.
When using dryer heat and highlighting through
a cap or painting, place a loose plastic cap over
the exposed processing highlights in order to keep the product from drying out while under the dryer.
••••••••••••••••••••••••••••••
Removing Oxidized Color with
LITEWORX
For lightening tinted hair 1 to 2 levels when results are
too dark.
Mixing Procedure
Mix 2 scoops of LITEWORX Power Lifting Powder with
2oz. of Processing Cream (10 or 20 volume). Mix until
blended. Add 2oz. of LITEWORX Conditioning Oil
Lightener and mix to a uniform, creamy consistency.
Application & Processing
Apply to damp hair off-scalp. Process at room temperature,
typically from 5 to 20 minutes. Check frequently. When
desired removal is achieved, cleanse by shampooing
with Tressa Clarifying Shampoo.
NOTE: If results are too warm, tone with a shade of
Irresistible Deposit-Only Color or Colourage Color.
33
Watercolors Shampoos
Chapter 11: Watercolors Color Maintenance Shampoos
Use Watercolors for:
11
Creative color services demand creative color maintenance.
Give your clients the gift of beautiful hair color between
salon visits with the ultimate color enhancing and
maintenance shampoo.
• Customize tones right after a color service
• Maintain tone of pre-lightened hair
• Add temporary highlights with foil application
• Correct color that has been damaged by the sun
How Watercolors Works
• Fill porous hair before a color service
• Gently deposit color on damaged hair
Watercolors is a sulfate-free shampoo that actually
deposits a small amount of color while cleansing, keeping
your clients’ hair color vibrant and true-to-tone between
appointments. The Watercolors rich, foaming lather
nourishes every hair strand, keeping color-treated hair soft,
shiny and conditioned.
• Boost retail sales when recommended to every
color client
The toning effects of Watercolors are only maintained with
continued use. You may also alter the intensity of the tonal
adjustment by increasing or decreasing usage.
Watercolors Chart
The chart below illustrates each Watercolors’ base tone as well as what it does at each level.
Shade
Level
Base
12345 678910
Gray
Violet Washe
Violet
Neutralizes gold or yellow tones
Wet Sand
Neutral Blonde
w/ Light Brown
Enhances natural tones
in light blondes
Golden Mist
Neutral Blonde
w/ Light Gold
Enhances soft golden tones
Warm Spice
Light Brown
w/ Copper Gold
Enhances strawberry blonde tones
Molten Bronze
Light Brown
w/ Light Orange
Enhances auburn tones
Liquid Copper
Orange
Enhances copper or orange tones
Hazelnut
Light Brown
w/ Blue Green
Neutralizes copper or orange tones
Cocoa
Brown
Fluid Fire
Red
Crimson Splash
Red w/ Blue
Wet Brick
Dark Brown
w/ Red/Orange
Enhances rich auburn tones
Mocha Drench
Dark Brown
w/ Green
Neutralizes red or brassy tones
34
Enhances natural medium browns
Enhances bright red tones
Enhances deep red tones
Watercolors Shampoos
11
Toning Effects of Watercolors Chart
The chart below will assist you in selecting the proper Watercolors Shampoo for your toning needs.
Shade
When Applied to
Results
Violet Washe
Light/Medium Blonde – Gray
Adds sparkle to platinum blondes and silvers, while washing away golden tones.
Wet Sand
Light – Medium Blonde
Enhances natural tonal vibrancy with sandy shades of the beach.
Golden Mist
Light – Medium Blonde
Showers hair with a soft, golden brilliance.
Warm Spice
Strawberry Blonde
Spices up the warm, red-golden tones in strawberry blonde and butterscotch shades.
Molten Bronze
Light Brown – Auburn
Enhances subtle, polished, orange-red tones, bronzed to perfection.
Liquid Copper
Light Orange – Red
Helps brazen copper oranges flaunt their sunny warmth.
Hazelnut
Light Brown
Refreshes cool coffee shades in light brown hair while filtering out copper/orange tones.
Cocoa
Light – Medium Brown
Refreshes and maintains rich, natural medium brown shades.
Fluid Fire
Medium – Dark Red
Creates bright, passionate, fiery red-orange tones.
Crimson Splash
Deep Brunette – Medium Red
Infuses deep browns with crimson reds, creating sultry, black-cherry tones.
Wet Brick
Deep Brunette
Complements warm, brown hues with rich, terra cotta reds.
Mocha Drench
Deep Brunette
Saturates hair in chocolate cappuccino blends, while filtering out red or brassy hues.
35
Glossary of Color Terminology
Glossary
A
Ammonia: (Ammonium Hydroxide) Refers to a solution
of ammonia gas in water. This solution is commonly used
in hair-lightening preparations and permanent hair color.
Analogous Colors: Colors that appear next to each other
and share a common primary. Example: red orange/red
violet; the common denominator is red.
Antioxidants: Ingredients used to prevent the oxidation
of hair dye intermediates within the tube. Helps to ensure
shelf life.
Application: The act of applying color.
contains the protein chain. Natural pigments (melanin) are
present in the cortex. Permanent color changes are made
here.
Cuticle: The outermost layer of overlapping scales on the
hair shaft (like shingles). The cuticle serves as a protective
sheath and is “hydrophobic” (water-repelling).
D
Decolorize: To remove color from hair (natural or artificial).
Ash: Term describing hair color with no gold or red tones.
Deposit-Only Color: A hair color activated by mixing the
base with a developer. Deposit-Only Color contains direct
and coupling dyes and has little to no line of demarcation. It
will not lift or lighten hair.
B
Developer: Containing Hydrogen Peroxide, this oxidizing
agent is used to activate permanent hair color.
Base: The predominant primary or secondary tone in a color.
Bleach: A chemical mixture used to lighten hair.
Blending: The act of dispersing hair color through the entire
hair strand by working color mixture through to the ends.
This ensures uniformity in the finished color.
Direct Dye: A molecule that has color. Direct dyes are used
in semi-permanent and deposit-only color.
Discoloration: An off-color or unnatural shade.
Drab: In hair coloring, this term is used to describe ash or
blue tones that neutralize red and gold tones.
Blonding: The process of lightening hair to a desired blonde
shade.
F
C
Calibrated: Measured amount.
Chelating Agents: Removers of metallic ions and metallic
contaminants
Color Wheel: A wheel consisting of the primary, secondary
and tertiary colors used as a guide to assist the professional
colorist in reaching a “color destination” or desired result.
Color Wash: A technique used to enhance or accent tonal
value without significantly changing the base color.
Complementary Color: Colors opposite one another on the
Color Wheel. Complementary colors neutralize each other.
Cool: Term used to describe tonal values of a color
containing violet and blue tones.
Cortex: The primary structural segment of the hair shaft that
36
Filler: A product used to replace pigment in lightened hair
prior to corrective color service.
Formulation: A mixture of two or more ingredients. This
mixture usually combines color and developer.
G
Gold Bands: Unwanted gold or brassy tones which occur
when areas of hair are insufficiently lightened.
H
Hair Lightener: Products used to lighten hair, such as
boosters, bleach, etc.
Hair Shaft: A versatile fiber that is made up of the cuticle,
cortex and medulla.
N
Hydrogen Peroxide: Oxidizing agent used to develop
permanent hair color.
Neutral Colors: The Colourage Natural Series is brown
based and considered neutral. Neutral colors don’t have
a predominant tonal value.
I
O
Insoluble: Not able to be dissolved in water.
Overlap: When the applied color goes beyond the regrowth area onto previously colored hair, often causing
uneven results. This can cause breakage if done during
a bleach service.
Intermediates: Colorless dye molecules found in permanent
hair color. When mixed with developer, the colorless
molecules create permanent hair color changes in the hair
shaft.
Glossary
Humectants: An agent or chemical in hair products that
helps the hair retain water.
Intermix: The ability of one color to mix with another.
Oxidation: The reaction that occurs when permanent dyes
are mixed with hydrogen peroxide. This reaction activates
the color.
K
P
Keratin: An insoluble protein which makes up about 95%
of the hair shaft.
Patch Test: A recommended skin test given 48 hours prior
to application of hair color to determine whether or not a
client is allergic or hypersensitive to the product.
L
Permanent Hair Color: A dye that penetrates into the
cortex layer of the hair shaft and remains there until the
hair grows out.
Level: A degree of measurement of the darkness or
lightness of a color. There are 10 levels in the Tressa
Color System.
Lifting: Describes the process of removing pigment or
lightening hair.
Pigment: Coloring matter found in the cortex layer
of the hair.
Porosity: The ability of hair to absorb water.
Light Absorption: The ability of the hair to absorb light. The
darker the natural hair, the more light it will absorb.
Powdered Bleach: A chemical used for on or off-the-scalp
lightening, depending on the product.
Light Reflection: The ability of the hair to reflect light.
The lighter the natural hair, the more light it will reflect.
PPD (Para-Phenylenediamine): A primary intermediate used
in permanent hair color.
Lightening: The process of removing natural pigment from
the hair.
Pre-lightening: Usually the first of a two-step process, in
which the natural pigment is lifted from the hair.
Line of Demarcation: A line of distinction between virgin
re-growth and previously colored hair.
Pre-softening: A process done on resistant gray hair to
allow better penetration of the hair color.
Low Lift: Less than one level of hair color lightening.
Primary: The three main colors of the color wheel from
which all other colors are derived. These are yellow, red
and blue.
Lowlighting: The process of depositing darker color into
selected strands of hair. The opposite of highlighting.
M
Melanin: The natural color pigment in hair.
R
Retouch: The application of color or lighteners to the new
growth hair on previously colored hair.
37
Glossary
RPC (Residual Pigment Contribution): The natural color left in
the hair when it is lifted to the desired level.
S
Secondary Colors: Colors created by the mixing equal
proportions of two primary colors. These are green, orange
and violet.
Semi-permanent Hair Color: Natural-looking direct dye color
that lasts through several shampoos.
Shade: A color of hair. A small but visible difference can be
seen from one shade to the next.
Strand Test: Applying color formula to a small strand of hair
until desired results are achieved. This test is used
to check condition of hair and expected results of the
color formula.
T
Temporary Hair Color: Hair color that is deposited on, not
in, the hair shaft.
Tertiary Colors: The color result of combining primary and
secondary colors. These are red-orange, yellow-orange,
yellow-green, blue-green, blue-violet and red-violet.
Texture: The actual diameter of the hair strand. For example:
fine, medium, coarse.
Tinting Back: A corrective color procedure that replaces
missing pigment in the hair.
Tinted Hair: Hair that has been previously treated with
any artificial color product.
Tonal Value: The warm or cool value of the color.
Toner: A color used after pre-lightening to deposit
a tonal value.
V
Virgin Hair: Hair that has not received chemical services.
Volume: In hair color, the concentration of hydrogen
peroxide in a water solution. The higher the volume,
the greater the concentration.
38
W
Warm: Term used to describe tonal values of a color
containing neither blue or green tones.
1N Blue Black
2N Black
3N Darkest Brown
4N Dark Brown
5N Medium Brown
6N Light Brown
7N Dark Blonde
8N Medium Blonde
9N Light Blonde
10N Very Light Blonde
4A Dark Ash Brown
5A Medium Ash Brown
6A Light Ash Brown
7A Dark Smoke Ash Blonde
8A Medium Smoke Ash Blonde
9A Light Smoke Ash Blonde
10A Very Light Smoke Ash Blonde
5AA Medium Cool Ash Brown
6AA Light Cool Ash Brown
7AA Dark Cool Ash Blonde
8AA Medium Cool Ash Blonde
4G Dark Golden Brown
5G Medium Golden Brown
6G Light Golden Brown
7G Dark Golden Blonde
8G Medium Golden Blonde
9G Light Golden Blonde
10G Very Light Golden Blonde
7B Blush Beige
8B Light Blush Beige
10B Lightest Blush Beige
10NB Light Champagne Blonde
7CG Dark Butterscotch Strawberry Blonde
8CG Medium Butterscotch Strawberry Blonde
9CG Light Butterscotch Strawberry Blonde
10CG Light Blush Blonde
4RB Deep Red Wine
5RB Wine
2R Dark Cool Red
3R Dark Warm Red
4R Eggplant
5R Medium Hot Red
6R Medium Cool Red
7R Light Red Orange
8R Light Orange Red
9R Strawberry Blonde
4RA Dark Auburn
4RM Dark Mahogany
5NM Medium Mahogany Brown
5NC Medium Chestnut Copper Brown
6NC Light Chestnut Copper Brown
6RV Medium Red Violet
6RO Intense Copper
6RR Intense True Red
7RC Copper
11A Ultra Light Ash Blonde
12N Super Ultra Light Natural Blonde
12G Super Ultra Light Golden Blonde
12A Super Ultra Light Ash Blonde
12AB Super Ultra Light Ash Blonde
12AG Super Ultra Light Ash Blonde
Blonding Booster
Colourage Shades
1NW 2NW —
3NW 4NW 5NW 6NW 7NW 8NW 9NW 4NA
5N
6N
7N
8N
9N
9NA
5NA
6NA
7NA
8NA
—
4NG
5NG
6NG
7NG
8NG
9NG
—
—
—
10NM
—
8WG
9RO
10WG
4R
5RV
—
3RB
4RV
5RO
—
7R
8R
—
—
4RB
5RB
4WG
6WG
—
6RO
6R
7RO
—
—
10NG
—
—
10N
—
1N
2N
3N
4N
5N
6N
7N
8N
9N
10N
—
4A
—
6A
—
8A
10A
—
—
—
—
—
4G
—
6G
—
8G
—
6CB
8CB
10CB
10NB
—
—
8RO
10CB
—
—
—
—
4RV
—
—
—
8R
—
—
—
4R
4RO
—
6RV
6RO
6R
—
—
11N
11G
11A
—
—
—
JPMS The
Color
1AB
—
—
1N
1N
M1
1/NP
1V
2A
2N
O15/1N
2/O
2N
2N
—
2/NP
3N
2N
3N
211/2N 3/O
—
— M3 3/NP4N 3N
4N
311/3N
4/O
3N
3N
M4
4/NP
5N
4N
5N
411/4N
5/O
4N
4N
M5
5/NP
6N
5N
6N
611/6N
6/O
5N
5N
M6
6/NP
7N
6N
7N
711/7N
7/O
6N
6N
M7
7/NP
—
7N
8N
811/8N
8/O
7N
7N
M8
8/NP
—
8N
9N
911/9N
9/O
8N
8N
M9
9/NP
8N
9N
10N
1001/10N
10/O
9N
9N
M10
10/NP
10N
10N
—
148/3A
—
—
3A
—
—
3V
—
—
237/4A —
4A
4A
— 5/CP 4V 6NA
—
632
6/01
5A
5A M6.016/CP 5V 7NA
—
462/6A 7/01
6A
6A M7.017/CP 6V 8NA
7Av
672/7A 8/01
7A
7A M8.018/CP 7V 9NA
—
940/9A 9/01
8A
8A M9.019/CP 8V
—
9Av
1030/10A 9/1
9A
9A M10.1 — 10V —
4Ab
256/5A 5/1
—
— M5.12 5CC 3B
5A
6Ab
336
6/1
—
— M6.12 — 4B
6A
—
542
7/1
—
— M6.2 7CC 6B
7A
8Ab
—
8/1
—
— M9.129CC 8B 8A
—
257/4G
—
—
—
M4.51 —
3G
—
—
435/5G
5/3
4G
4G
M5.3
—
4G
—
5Go
555/6G
6/3
5G
5G
M6.3
6/BP
—
6G
—
7G
7/3
6G
6G
M7.3
7/BP
6G
7G
7Go
8G
8/3
7G
7G
M8.3
8/BP
8G
8G
—
9G
9/3
8G
8G M9.3 9/BP —
—
—
—
10/3
9G
—
— — 10G —
6Gb
7NG 7/93 6WB
— M7.13 6G —
—
8Gb
8NG 8/93
7WB
— M8.13 7G —
—
9Gb
9NG
9/93
—
10GV —
— —
—
—
1070 10/16
—
11VG — 11/B — 11B
7Cr
643/7WR 7/34
6RG
6Rg M7.43 7/SD —
7KG
8Gr
8GR
8/34
7RG
7Rg
M8.45 7 1/2/SD 8RO
8KG
—
841
9/34
8RG
8Rg M9.04 8/SD — 9G/N
—
1036/10GV —
—
— M10.0311D 10RO 11GB
3Rv
—
4/6
—
—
— — 4RV —
4R
5WV 55/46
—
—
—
— — 5VR
2GR
—
—
—
—
— — 2RV —
—
367/3RV
—
—
—
—
—
3RV
6KG or 4V
—
—
3/66
3RV
3RV M5.204/VB —
4R
5R
633 55/44 6RR
—
— — 4RO —
6R
—
6/4
—
— M6.6 — —
—
—
810/7R 7/4
—
— M7.4 7/RP 7R —
8Or
729
8/4
—
—
— 8/RP —
—
9Or
9WR
—
—
—
— 9/TRP —
9KG
—
347
—
5RR
—
— — 4R —
—
356/4R
—
4RV
4RV
M4.45
—
—
—
5Rv
5RV
5/46
4BR
—
M5.35
4/VR
—
5K
4Gr
5WR
5/4
—
—
M5.15
—
—
5NK
5Cr
6GR
6/34
5BR
— M6.45 — — 6RB
—
607/6RV 6/45
5RV
5RV
— 6/RP —
6V
—
544/6RG
77/44
—
—
M6.64
7/TRP
6RO
6RR
—
6R
66/44
7RR
—
—
6/TRP
6R
6RV
6Or
—
—
—
— M7.408/TRP —
7KR
—
—
10/1
11A
11A M10.01 — —
—
12N 1200/12N12/1 S12/N
— — —12N11N
12Go
12NG 12/0
12G
12G — US/D12G 11G
—
1210/12A12/11
12A
12A
— 10C 12V 11V
12Av
1120/12A/B12/62 S12/CV
—
— US/A 12B
11A
12Ab
12P
12/89
S12/CA
—
Hi B 921
US/C
—
11P
—
—
—
Blonding B.
—
—
—
—
B Cream
This chart is a guide only. Conversions may differ slightly.
Redken
Redken
Wella Color Wella Wella Color Wella L’Oreal
Goldwell
Framesi Logics
Color Gels Color Fusion
Charm
Koleston
Perfect
ColorBre Majirel
Topchic
1
2
3
4
5 or 505
6 or 506
7 or 507 8 or 508 9 or 509 10 or 510 4A 5A
6A
7A
8A
9A
—
5AA
6AA
7AA
—
504W
5W or 5G 6W or 506W 7W or 7G 8W or 508W 9G
—
—
8B
10B
—
7CG
8RB
9CG
—
—
5RR
—
3RV
—
—
6RB
7R
—
9CC
—
4RB 5RV or 503-R 5CG or 505R 6R
6RV
6RR or 507R 7RR —
11A
ULN
—
ULA
UL-PA
—
—
Matrix
SoColor
Colourage Color Conversion Chart
www.tressa.com • 1.800.879.8737 • [email protected]
©2011 Tressa Inc. Cincinnati, OH 45275
TZ901CLRMAN
Questions or comments welcome at 1.800.TRY.TRESSA or at [email protected]
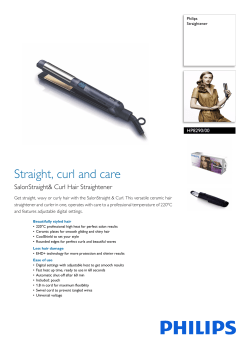
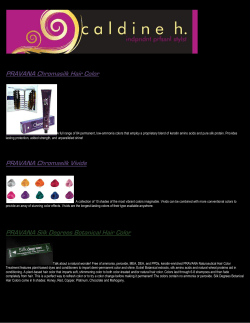
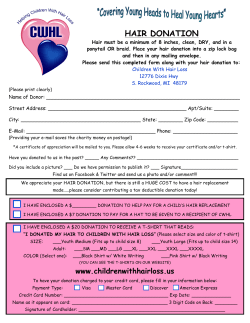

© Copyright 2026