
WELDWELL NEW ZEALAND Private Bag 6025 NAPIER 4142 Telephone (06) 834-1600
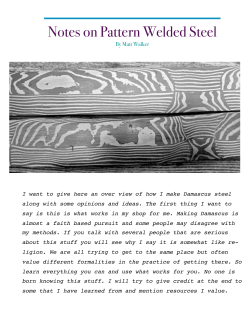
WELDWELL NEW ZEALAND
Private Bag 6025
NAPIER 4142
Telephone (06) 834-1600
Fax (06) 835-4568
www.weldwell.co.nz
INTRODUCTION
Our business is welding and we offer this handbook to both the handyman
and industry in general, in an earnest endeavour to assist all those engaged
in electric arc welding.
We have not covered all phases of welding, but present briefly, the basic
facts of the arc welding process and techniques.
LIST OF CONTENTS
Page No
Arc Welding - The Process
2
Welding Equipment
4
The Welding Electrode
5
The Welding Current
7
Welding Technique
(A word to beginners)
9
Branches and Outlets throughout New Zealand
Check your Yellow pages
or www.weldwell.co.nz
1
ARC WELDING
THE PROCESS
FUSION WELDING is really a melting and casting process in miniature,
the various components of the welding process (base metal, weld metal
slag, etc) forming the crucible and contents of a tiny electric furnace.
The electric arc, with a temperature of the order of 6,000oC, is a concentrated
and efficient source of heat. This heat is utilised in the metal arc welding process
by employing a flux-coated electrode to provide filler metal. The electrode
and parent metal act as poles of the arc, the core wire of the electrode melting
and being transferred across the arc to coalesce with the molten parent metal
and form a bond which in most cases, is stronger than the parent metal. The
flux covering melts more slowly than the core wire and a cup is formed at the
electrode tip which assists in directing the molten droplets to the required spot.
The weld metal itself, as deposited, has a cast structure, its composition is
determined by the core wire and coating of the electrode, and by the amount of
pick-up of parent metal during welding. For example, a deposit of alloy steel,
say, stainless steel on mild steel, no longer has just the properties expected of
that alloy, due to dilution with the parent metal. This effect, in many cases, is
not important, but, if desired, it may be eliminated by using multi-layer welds.
Welding on materials that have been strengthened by heat-treatment or coldworking generally creates a zone of lower strength along the weld boundary.
This may not affect the serviceability of the welded joint, but sometimes it
is necessary to restore this strength by further heat-treatment or cold-work.
ADVANTAGES OF WELDING:
Some of the advantages that welding has over riveting and casting methods
of assembly are as follows:
1. Welding is usually a cheaper process than riveting for any particular
joint, and the joint can often be made much more quickly.
2. It gives a stronger joint and permits the use of less material, thus
reducing the weight and cost of the structure.
3. Weld seams are normally pressure tight, and do not need caulking
as do riveted joints. Joints are smooth, which is important in many
applications. For example, painting is much easier on welded joints,
and turbulence in pipes is reduced.
2
4. Designs not practicable for riveting may be constructed by welding.
5. Plate preparation for welding is generally cheaper than for riveting.
6. Labour necessary can often be cut to less than one-third of that
necessary for riveting.
7. Welding is not as noisy as riveting, and permits building and alterations
to proceed with the least disturbance to occupants.
8. Welding is more versatile than casting; changes can be made quickly
without having to produce a new pattern.
9. Rolled section is often cheaper than cast section, and fabrication
by welding of rolled section may be cheaper than casting the same
article.
10. No storage of patterns is necessary for welding, as with castings.
11. Articles of consistent and known quality can be produced by welding,
whereas castings may have external or hidden internal flaws causing
their rejection, or failure in service.
3
WELDING EQUIPMENT
BESIDES THE welding machines and suitable electrodes, the accessories
necessary for a welder are:
1. A substantial work table with a fairly heavy mild steel plate for a top.
2. Leads. Two are required — one from the machine to the electrode
holder, called the electrode lead, and one from the job or work table
back to the machine to complete the circuit, called the work or earth
lead. These leads should be heavy enough to carry the required
current without overheating. They must be kept in good condition and
in close electrical contact with the holder and the work for the best
utilisation of current.
3. Electrode Holders. These should be heavy enough not to overheat and
have well-insulated handles to avoid electric shocks and accidental
arcing. Holders are available that are designed for continuous welding
at high amperages. These are fully insulated and the jaws are made
of metals having high heat conductivity.
4. Shields. These are necessary for protecting the eyes and face from
glare and ultra-violet radiation from the arc, and spatter from the weld
pool. Special tinted glass is used in the shields to absorb ultra-violet
rays. A clear piece of replaceable glass is used in front of the coloured
glass to protect it from spatter and smoke.
5. Clothing. Leather gauntlets and apron should be worn, and clothes
should be of material that will deflect spatter and sparks.
6. Chipping Hammer. Used for deslagging of welds.
7. Wire Brush. Used for removing rust, cleaning slag off welds, etc.
Welding machine AC or DC
power source and controls
Electrode Holder
Electrode
Arc
Work
Work Cable
Electrode cable
Fig. 1
4
THE BASIC ARC-WELDING CIRCUIT
THE WELDING ELECTRODE
METAL ARC welding electrodes consist of a core wire surrounded by a flux
coating. The flux coating is usually applied to the core wire by an extrusion
process.
It is important, for uniform running qualities, for the flux coating to be
concentric with the core wire, and the extrusion process allows close control
to be kept over this.
The coating on arc welding electrodes serves a number of purposes:
1. To provide a gaseous shield for the weld metal, and preserve it from
contamination by the atmosphere whilst in a molten state.
2. To provide a steady arc by having “arc stabilizers” present, which
provide a bridge for current to flow across.
3. To remove oxygen from the weld metal with “deoxidizers”.
4. To provide a cleansing action on the work piece and a protective slag
cover over the weld metal to prevent the formation of oxides while
the metal is solidifying. The slag also helps to produce a bead of the
desired contour.
5. To introduce alloys into the weld deposits in special type electrodes,
eg the Weldwell hardfacing electrodes, which have mild steel core
wire, but contain alloys in the coating.
A wide variety of ingredients are used in the coating of arc welding electrodes.
Among them are the minerals limestone, fluorspar, silica, rutile and feldspar
for slag and gas shield formation, ferro-manganese and ferro-silicon for
deoxidation of the weld metal; ferro-chromium, ferro-molybdenum and nickel
powder to introduce alloys for hardening and raising the tensile strength of
steel weld metal; potassium and sodium silicates (water glass) to bind the
particles together and cause them to adhere to the core wire.
Core Wire
Flux Coating
Gaseous Shield
Slag
Arc Stream
Molten Pool
Weld Metal
Work Piece
Fig. 2
THE WELDING ELECTRODE
5
STORAGE OF ELECTRODES:
Electrodes not stored in a dry place will absorb moisture from the atmosphere.
Dampness in electrodes may have some of the following effects:
1.
Fiery arc.
2.
Excessive spatter.
3.
Porosity in weld metal.
4.
Spalling of flux coating.
5.
Blistering of electrode tip.
6.
High arc voltage.
7.
Introduction of hydrogen into the weld metal, with increased danger
of hard zone cracking on hardenable steels.
8.
Formation of white “fur” on flux coating. In most cases this does not
have any deleterious effect.
Mild steel electrodes may be stored in a warm, dry room. Low hydrogen
and some special electrodes (eg stainless steel) require to be stored in
a proper heated cabinet if the best results are to be achieved. Provided
the temperature of the cabinet is 10oC above that of the outside air, and
some ventilation is allowed, the electrodes cannot pick up moisture. Mild
steel electrodes which have become damp should be redried at 120oC for
15-30 minutes. Low-hydrogen electrodes should always be dried at the
temperature recommended for that particular electrode.
6
THE WELDING CURRENT
BOTH DIRECT and alternating currents may be used for arc welding.
AC welding machines have several advantages over DC machines, among
them being a lower purchase cost, higher operating efficiency and negligible
maintenance. The quality of welds produced using AC is equally as good as
when DC is used. However, AC is limited in that it will not satisfactorily run
many of the non-ferrous types of electrodes.
The open-circuit voltage of an AC machine is important, because some
electrodes need a fairly high voltage to prevent the arc cutting out during
welding. The open-circuit voltage depends on the design of the machine.
The question of open-circuit voltage is not so important with DC machines,
since there is not the constant reversal of current necessitating continual reestablishment of the arc.
When using AC it does not matter to which terminal the electrodes and the
work piece are attached, but when DC is used more heat is produced
at the positive pole with most electrode types and the manufacturers’
recommendations for the most suitable polarity should be followed. With
the welding of mild steels, although either polarity can be employed, it is
usual for the work piece to be made the positive pole. The greater amount of
heat generated at the work piece in this way assists the welding operation,
especially when the components have a heavy mass. Proper fusion and
good penetration are assured in this way. If on the other hand, the electrode
is connected to the positive pole, the greater heat generated at the electrode
tip results in a faster burn-off rate and the electrode is deposited more quickly.
This increase in deposition rate, however, may not amount to more than 5
percent and the advantage gained in this way is offset by the reduction in
depth of penetration obtained with the resulting weld deposit. The burnoff rate with AC supply is approximately the same for DC supply with the
electrode connected to the negative pole.
Most of the non-ferrous and stainless steel electrodes should be connected
to the positive terminal, but this is recommended because of the greater arc
stability obtained.
7
ARC BLOW:
This is peculiar to DC. The arc, instead of playing steadily on one spot, is
deflected away from the point of welding due to the influence of surrounding
magnetic fields created by welding currents flowing in the work. It may often
be overcome or minimised by shifting the earth clamp to another part of the
work piece.
RECOMMENDED CURRENT RANGES FOR STANDARD
MILD STEEL TYPES OF ELECTRODES
8
Size
mm
1.6
2.0
2.5
3.15
4.0
5.0
6.0
Amperes
20-30
45-70
65-100
100-140
140-190
170-240
230-320
WELDING TECHNIQUES
A Word to Beginners
FOR THOSE who have not yet done any welding, the simplest way to
commence is to run beads on a piece of scrap plate. Use mild steel plate
about 12 mm thick and a 4.0 mm electrode. Clean any paint, loose scale or
grease off the plate and set it firmly on the work bench so that welding can
be carried out in the downhand position. Make sure that the earth clamp is
making good electrical contact with the work, either directly or through the
work table. For light gauge material, always clamp the earth lead directly to
the job, otherwise a poor circuit will probably result.
ELECTRODE - TYPE AND SIZE:
The type of electrode will depend on the material to be welded and the
position in which welding is to be carried out (ie whether downhand, vertical
or overhead). In this case, the general purpose PH28 electrode is the most
suitable. We have already chosen a 4.0 mm electrode, but for other jobs
the size will depend on the thickness of the material and the type of joint to
be welded. For example, on thin material a small size is required, otherwise
holes will burn through. The electrode size should allow for adequate root
penetration. On vee butt joints, the root run is often made with 4.0 mm
or 3.2 mm electrodes and the remaining welding is done with 5.0 mm
electrodes.
Generally, the maximum size which may be used on vertical and overhead
welding is 5.0 mm, but these more specialised applications can be left for the
moment while we concentrate on downhand welding.
AMPERAGE:
Suitable amperages for the various sizes of electrodes are usually printed on
the packets. These amperages may be varied to suit conditions — welds on
thin plate require low amperages to prevent burn-through, while high welding
rates or deep penetration of the weld metal require higher amperages. For
4.0 mm set the machine at about 170 amps.
There are several effects produced by incorrect amperage. If it is too high,
spatter becomes excessive, and the weld pool becomes very hot, producing
a flattened bead with elongated ripple marks, and the electrode overheats.
If the current is too low, it is difficult to maintain the arc and prevent the
electrode from sticking, the bead is high and rounded, with poor edge fusion,
and penetration is slight. Figures 3, 4 and 5 show the effects of different
amperages.
9
WELDING CURRENT
Correct Current
Fig. 3
Current too high
Flattened Bead
Excessive Spatter
Undercut
Fig. 4
Current too low
Trapped Slag
Rounded bead
Low penetration
Fig. 5
THE WELDER:
Place yourself in a comfortable position before beginning to weld. Get a seat
of suitable height and do as much work as possible sitting down. Don’t hold
your body tense. A taut attitude of mind and a tense body will soon make you
feel tired. Relax and you will find that the job becomes much easier. You can
add much to your peace of mind by wearing a leather apron and gauntlets.
You won’t be worrying then about sparks setting alight your clothes.
Place the work so that the direction of welding is across, rather than to or
from your body. The electrode holder lead should be clear of any obstruction
so that you can move your arm freely along as the electrode burns down.
If the lead is slung around the back of your neck and over your shoulder,
it allows greater freedom of movement and takes a lot of weight off your
hand. Be sure the insulation on your cable and electrode holder is not faulty,
otherwise you are risking an electric shock.
10
STRIKING THE ARC:
Practise this on a piece of scrap plate before going on to more exacting work.
You may at first experience difficulty due to the tip of the electrode “sticking”
to the work piece. It is caused by making too heavy a contact with the work
and failing to withdraw the electrode quickly enough. A low amperage will
accentuate it. This freezing-on of the tip may be overcome by scratching the
electrode along the plate surface in the same way as a match is struck. As
soon as the arc is established, withdraw the electrode very slightly (2.0 mm)
from the plate and feed it into the weld pool as it melts down. (See Fig. 6)
Another difficulty you may meet is the tendency, after the arc is struck, to
withdraw the electrode so far that the arc is broken again. A little practice will
soon remedy both of these faults.
20o
1.6 mm
ARC LENGTH:
Fig. 6
The securing of an arc length necessary to produce a neat weld soon
becomes almost automatic. You will find that a long arc produces more
heat. A very long arc produces a cracking or spattering noise and the weld
metal comes across in large, irregular blobs. The weld bead is flattened
and spatter increases. A short arc is essential if a high quality weld is to be
obtained, although if it is too short there is the danger of it being blanketed
by slag and the electrode tip being frozen in. If this should happen, give the
electrode a quick twist back over the weld to detach it. Contact or “touchweld” electrodes do not stick in this way, and make welding much easier.
RATE OF TRAVEL:
After the arc is struck, your next concern is to maintain it, and this requires
moving the electrode tip toward the molten pool at the same rate as it is
melting away. At the same time, the electrode has to move along the plate
to form a bead. The electrode is directed at the weld pool at about 20o from
the vertical. The rate of travel has to be adjusted so that a well-formed bead
is produced. If travel is too fast, the bead will be narrow and strung out and
may even be broken up into individual globules. If the travel is too slow, the
weld metal piles up and the bead is too large.
11
MAKING WELDED JOINTS:
Having attained some skills in the handling of an electrode, you will be ready
to go on to make up welded joints.
BUTT WELDS:
Set up two plates with their edges parallel, as shown in Fig. 7, allowing a
1.6 mm gap between them and tack weld at both ends. This is to prevent
contraction stresses from the cooling weld metal pulling the plates out of
alignment. Plates thicker than 6.0 mm should have their mating edges
bevelled to form a 70-90o included angle. This allows full penetration of the
weld metal to the root. Using a 4.0 mm electrode at 170 amps, deposit a
run of weld metal on the bottom of the joint. Do not weave the electrode,
but maintain a steady rate of travel along the joint sufficient to produce a
well-formed bead. At first you may notice a tendency for undercut to form,
but keeping the arc length short, the angle of the electrode at about 20o from
vertical, and the rate of travel not too fast, will help to eliminate this. The
electrode needs to be moved along fast enough to prevent the slag pool from
getting ahead of the arc. To complete the joint in thin plate, turn the job over,
clean the slag out of the back and deposit a similar weld.
BUTT WELD
20o - 30o
Electrode
Tack weld
Tack weld
Fig. 7
Heavy plate will require several runs to complete the joint. After completing the
first run, chip the slag out and clean the weld with a wire brush. It is important
to do this to prevent slag being trapped by the second run. Subsequent runs
are then deposited using either a weave technique or single beads laid down
in the sequence shown in Fig. 57. The width of weave should not be more
than three times the core wire diameter. When the joint is completely filled,
the back is either machined, ground or gouged out to remove slag which
may be trapped in the root, and to prepare a suitable joint for depositing the
backing run. If a backing bar is used, it is not usually necessary to remove
this, since it serves a similar purpose to the backing run in securing proper
fusion at the root of the weld.
12
FILLET WELDS:
These are welds of approximately triangular cross-section made by depositing
metal in the corner of two faces meeting at right angles (Fig. 18).
A piece of angle iron is a suitable specimen with which to begin, or two
lengths of strip steel may be tacked together at right angles. Position the
angle iron so that the two legs are at 45o to the bench and run in a weld bead
using a similar technique as for butt welds, using a 4.0 mm electrode at 170
amps. When you are familiar with this, position another piece of angle iron
with one leg horizontal and the other vertical. This is known as a horizontalvertical (HV) fillet. Strike the arc and immediately bring the electrode to a
position perpendicular to the line of the fillet and about 45o from the vertical.
Some electrodes require to be sloped about 20o away from the perpendicular
position to prevent slag from running ahead of the weld. (See Fig. 8.) Do
not attempt to build up much larger than 6.0 mm leg length with a 4.0 mm
electrode, otherwise the weld metal tends to sag towards the base, and
undercut forms on the vertical leg. Multi-runs can be made as shown in Fig.
9. Weaving in HV fillet welds is undesirable.
H.V. FILLET WELD
BUILD UP SEQUENCE FOR H.V. FILLET
O
45 from
vertical
o
o
60 - 70 from line
of weld
Fig. 9
Fig. 8
VERTICAL WELDS:
Vertical up.
Tack weld a 1 metre length of angle iron to your work bench in an upright
position. Use a 4.0 mm electrode and set the current at 140 amps. Make
yourself comfortable on a seat in front of the job and strike the arc in the
corner of the fillet. The electrode needs to be about 10o from the horizontal
to enable a good bead to be deposited. (See Fig. 10.) Use a short arc,
and do not attempt to weave on the first run. When the first run has been
completed deslag the weld deposit and begin the second run at the bottom.
This time a slight weaving motion is necessary to cover the first run and
obtain a good fusion at the edges. At the completion of each side motion,
pause for a moment to allow weld metal to build up at the edges, otherwise
undercut will form and too much metal will accumulate in the centre of the
weld. Fig. 11 illustrates multi-run technique and Fig. 12 and 13 show the
effects of pausing at the edge of weave and of too rapidly weaving.
13
VERTICAL FILLET WELDS
SINGLE RUN
Electrodes at
right angles, or 10o from
perpendicular
Fig. 10
Weaving motion
for second and
subsequent runs
MULTI RUN
Pause at edge
of weave
Fig. 11
14
VERTICAL FILLET WELDS
CORRECT
Fig. 12
INCORRECT
Pause at edge of
weave allows weld
metal to build up,
and eliminates
undercut
Note weld contour
when insufficient
pause at edge
of weave
Fig. 13
Vertical down.
To execute this method, it is advisable to use electrodes which are designed
to have a very quick freezing slag. Generally higher amperages are used
with fast travel speeds. The easiest type to use when learning is the contact
PH C18. The electrode is pointed slightly upward at approximately 80o
and when the arc is struck, the tip is pressed onto the work and welding
commences and advances as the electrode is drawn slowly down the work.
OVERHEAD WELDS:
Apart from the rather awkward position necessary overhead welding is not
much more difficult than downhand welding. Set up a specimen for overhead
welding by first tacking a length of angle iron at right angles to another piece
of angle iron or a length of waste pipe. Then tack this to the work bench or
hold in a vice so that the specimen is positioned in the overhead position as
shown in the sketch. The electrode is held at 45o to the horizontal and tilted
10o in the line of travel (Fig. 14 shows this). The tip of the electrode may be
touched lightly on the metal, which helps to give a steady run.
A weave technique is not advisable for overhead fillet welds. Use a 4.0 mm
electrode at 160 amps, and deposit the first run by simply drawing the
electrode along at a steady rate. You will notice that the weld deposit is
rather convex, due to the effect of gravity before the metal freezes. Second
and third runs are deposited in the order shown in Fig. 15.
15
OVERHEAD FILLET WELD
o
Tilted 10
in line of
travel
45o to plate
Angle tacked
to pipe
Fig. 14
BUILD UP SEQUENCE
Fig. 15
16


© Copyright 2026