
The Renogy Firefly
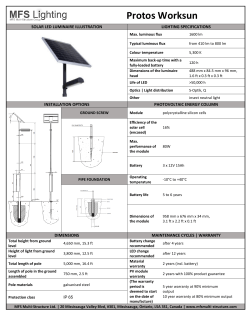
The Renogy Firefly 20W Portable Solar System RNG Group Inc. (Renogy) 14288 Central Ave., Suite A Chino, CA 91710 1-800-330-8678 Product Description The Renogy Firefly 20W portable solar system combines highly efficient Renogy Solar Panels, a solar charger, a power inverter and a Lithium Polymer battery into a robust, waterproof case creating an easy-to-use, ‘plug and play’ back-up system. This system is specifically designed for mobile off-grid applications, where space and weight limitations are abundant. The Renogy Firefly 20W portable solar system is the perfect system for emergencies providing up to 175 Watt-hours of energy. The built-in solar charge controller allows the expansion of an additional 12v solar panel (Max. 50w). Components Pull to open Latches Top bezel Solar Panels Hinge LED Flashlight Body I/O access door LED Flashlight switch Door lock Display Gasket Handle Main switch Figure 1. Properties of the 20w Firefly portable solar system 1 Using the accessories Open the I/O access door by setting the door locks to the “OPEN” position. It is recommended that the unit is placed horizontally as shown in Figure 1. AC Output AC Input (2-pin inlet) 12V Cigarette Output DC Output Switch Exhaust vents AC Output Switch DC Input (Solar) 12V Outputs 5V USB Outputs Figure 2. Accessories Flip the Main switch to the ON position, this will turn on the digital display. OFF ON 2 AC output Once the Main switch is ON, press the AC output switch to turn the internal inverter on. AC Output Switch Figure 3. Turning ON the AC output When the AC output is turned ON, the LCD display will light up blue, and “AC OUT” along with the light bulb icon will be shown. Figure 4. Digital Display when AC output is ON The AC output can now be used. The maximum load it can handle is 120 Watts. Please do not overload the output, doing so may damage the unit. Please turn OFF the AC output when not in use. Inverters have small idle power consumption, leaving the switch ON will drain the battery over time. 3 DC output With Main switch is ON, press the DC output switch to turn the internal inverter on. DC Output Switch Figure 5. Turning ON the DC output When the DC output is turned ON, the LCD display will light up blue, and “DC OUT” along with the light bulb icon will be shown. Figure 6. Digital Display when DC output is ON The DC output can now be used. Please limit the current load for each DC output. Please do not overload the output, doing so may damage the unit. Please turn OFF the DC output when not in use. Figure 7 shows the maximum current per DC output. 4 12V, 8A Max. 12V, 5A Max. 5V, 2A Max. Figure 7. Maximum current ratings for DC outputs AC and DC outputs The AC and DC outputs can be ON at the same time. When the Main switch is ON, press the AC output switch and then the DC output switch (or vice versa) to turn both outputs on. When both outputs are turned ON, the LCD display will light up blue, and “DC OUT” and “AC OUT” along with the light bulb icon will be shown. Figure 8. Digital Display when both outputs are ON Please turn OFF the AC and DC outputs when not in use. 5 Flashlight The 20w Firefly portable solar system has a built-in flashlight. To use the flashlight, flip the Main switch to the ON position, this will turn on the digital display. OFF ON Then press the flashlight switch located next to the left latch. The first press on the switch is going to activate Lighting Mode. A second press will activate SOS Mode (for emergency situations). Finally, a third press will turn OFF the flashlight. 6 Charging Charging via Solar If not planning on using the unit while charging with solar, make sure that the Main switch is in the OFF position. OFF ON Find a dry and sunny location that is free from overhanging tree branches, obstructions or shading. Unclip the two latches on the side of the unit and open the top cover completely as shown in Figure 9. Figure 9. Charging via solar panels When charging with the built-in 2x10w solar modules, it will take about 13 hours to fully recharge the internal battery. 7 Charging with additional solar panels To speed up the charging time, a 12V solar panel can be used at the DC input terminal with a maximum of input of 50 Watts. Male DC Power Plug 2.5 mm inner diameter 5.5 mm outer diameter MC4 to SAE Adapter Compatible solar panels: Renogy 10w Mono Renogy 20w Mono Renogy 30w Mono Additional panels*: Renogy 50w Mono Renogy 50w Poly *Requires MC4 to SAE Adapter 12V Solar Panel Figure 10. Adding external solar panel 8 Additional Solar panel Charge Time 10w 10 hours 20w 7.5 hours 30w 6 hours 50w 4.5 hours Table 1 Charging times with additional solar panel If planning on using the unit while charging with solar, make sure that the Main switch is in the ON position. Then turn ON the desired output. AC and DC outputs can also be used while the unit is being charged by solar however, limit the current output to the values mentioned earlier. Charging via AC When charging via AC 2-pin inlet, make sure that the Main Switch is in the OFF position. It is recommended that when charging via AC input do not use the AC and DC output terminals. OFF ON Connect the 2-pin inlet AC cable that is included with the unit. The unit can be charged in vertical or horizontal position. Figure 11 shows the unit being charged horizontally with the AC cable. 9 Figure 11. Charging via AC power cable It will take about 5 hours to fully recharge the internal battery. Do not cover or block the exhaust vents when charging with the AC cable. The unit can be left plugged in once the battery is fully charged. This will maintain the battery when the unit is not in operation. State of Charge When charging with the solar panel (s) or with AC power, the display will turn on, and after a few seconds the backlight will turn off. Figure 12. Digital display charging motion The display will show a “charging motion” when charging via solar panel (s) or AC power. The state of charge is shown by percentage, and by the battery icon. Each bar in the battery icon represents about 20% of charge. Once the battery is fully charged, the “charging motion” will stop, and the state of charge will remain at 100%. 10 Troubleshooting AC output load exceeded the maximum rating of the inverter: If the AC output load exceed the maximum power rating of 150 Watts, the internal inverter will shut off to avoid damaging the unit. When this happens, the digital display will show a flashing “ERROR” message with a sad face light bulb icon as shown in Figure 13. The “AC OUT” text will flash as well. Figure 13. AC output error message To clear the message, disconnect all the load (s) and press the AC output switch to turn the inverter on to restore power. AC Output Switch Once the AC output button is pressed, the message should be gone and the system should be back to normal. 11 DC output load exceeded the maximum current rating: If the DC outputs exceed the maximum current rating shown in Table 4, the DC output will shut off to avoid damaging the unit. When this happens, the digital display will show a flashing “ERROR” message with a sad face light bulb icon as shown in Figure 14. The “DC OUT” text will flash as well. Figure 14. AC output error message To clear the message, disconnect all the load (s) and press the AC output switch to turn the inverter on to restore power. DC Output Switch Once the DC output button is pressed, the message should be gone and the system should be back to normal. AC output load exceeded the maximum rating while DC output is on (or vice versa): If one of the outputs overloads while the other is in operation, the digital display will only flash the “ERROR” message and flash the output that has encountered the issue. Please correct the issue as described above. Unit won’t power on: If the unit won’t power on, try to flip the Main switch ON and OFF a couple times to check if there is a connection issue. If the unit still won’t power on please call Renogy Technical Support to find a possible resolution. 12 Unit not charging with the built-in solar panels: If the unit is not detecting the solar panels, make sure that the unit is not shaded or that the unit is not being blocked from sunlight. If the unit is exposed to full sunlight and still won’t charge via solar please call Renogy Technical Support to find a possible resolution. Unit not charging with external solar panel: Please make sure that the DC power plug is in the right socket, and that is making proper connection. Make sure that the solar panel is not shaded or that is not being blocked from sunlight. If none of the above fixes the problem, please call Renogy Technical Support to find a possible resolution. Unit not charging via AC power cord: Please make sure that the AC power plug is making proper connection. Make sure that both end plugs are all the way in. If none of above fixes the problem, please call Renogy Technical Support to find a possible resolution. 13 Do’s and Don’ts Do’s: Clean the built-in solar panels when dirty with window cleaner or with a wet cloth. Store the unit in a dry place free from moisture, heat, and water. Ensure the solar panels are exposed to sufficient light – ideally position them to face the sun directly. Don’ts: Store or place the unit near fire or places that can achieve higher temperatures. Doing so may cause damage to the unit internals, and or battery explosion. Submerge the unit under water. Although the unit is not waterproof, it is water resistant as long as the accessory door is closed. Leave the unit outside when raining. Overload the AC or DC outputs. Follow the power and current ratings mentioned earlier in this manual. Warnings Keep the unit away from small children. Allow only adults to use the unit. Do not dismantle or modify the system. Doing so, can result in damage to the unit and or onto your-self. Any modifications that will alter the device will void the warranty. In case of a hazard or emergency, turn OFF the unit immediately. 14 Specifications Solar Panels Description Maximum Power Cell Type Operating Temperature Parameter 10W (x2) Monocrystalline −40°F to +185°F Table 2 Solar panels specifications Built-in Electrical Components Component Power inverter Battery Charge Controller LED Flashlight Table 3 Built-in electrical components Parameter 150w, AC 110V, 60 Hz Lithium Polymer 12.1V, 16 Ah 12V, 10A (rated current) 3W, lighting mode, SOS mode Accessories Accessory 110VAC output 110VAC input 12VDC power plug outputs 12VDC cigarette socket Solar input 5VDC USB output Table 4 Accessories parameters Parameter 120w Max. 110VAC 5A Max. 8A Max. 23VDC Max. 50w Max. 2A Max. Physical Properties Value Weight Dimension Package size Table 5 Physical properties Parameter 10.8 lbs. 15.75 x 12.20 x 4.13 inches 17.13 x 13.19 x 5.31 inches 15 www.Renogy.com RNG Group Inc. Limited Warranty Thank you for your interest in the products and services of RNG Group Inc. The products manufactured by RNG Group Inc. (the “Warrantor”) is warranted to be free from defects in workmanship and materials under normal use and service. The warranty is in effect from the date of purchase by the user (the “Purchaser”). The warranty covers substantial defects in material or workmanship including but not limited to: solar panels, charge controllers, battery inverters, wiring, accessories, etc. Warranty period for various components: Renogy brand solar panels (Monocrystalline and polycrystalline models 150W and below, exclude bendable models) 5 year product material and workmanship warranty 5 year 95% output warranty 10 year 90% output warranty 25 year 80% output warranty Renogy brand solar panels (Monocrystalline and polycrystalline models 240W and above) 10 year product material and workmanship warranty 5 year 95% output warranty 10 year 90% output warranty 25 year 80% output warranty Renogy brand solar panels (Suitcase models excluding charge controller and wires) 5 year product material and workmanship warranty 5 year 95% output warranty 10 year 90% output warranty 25 year 80% output warranty Renogy brand solar panels (bendable models) 5 year product material and workmanship warranty Renogy brand charge controllers 1 year product material and workmanship warranty Renogy brand battery inverters 3 year product material and workmanship warranty Renogy brand mounting hardware and wiring 1 year product material and workmanship warranty Other Renogy brand products (LED & camping gear) 1 year product and material workmanship warranty Please note that all outsourced products will not be covered by RNG Group Inc. limited warranty. Instead, outsourced products will be covered under the original manufacturer’s warranty, if applicable. RENOGY is a trademark of RNG Group Inc. 2015 RNG Group Inc. All rights reserved. 16 For warranty outside the United States, the Purchaser should contact the Warrantor for specific warranty claims. The warranty extends only to the original purchaser of the Warrantor’s products. Products or components that have been serviced or replaced under their warranty period do not receive extended warranties. Instead, the serviced/replaced products will abide to the original warranty period issued when first purchased. The warranty does NOT cover any failures that result from incorrect handling, product modifications, installation, natural elements, excessive or deficient energy supply, chemicals, or improper troubleshooting. It is the sole responsibility of the Purchaser to communicate to the Warrantor of any issues experienced with the product. If the Warrantor determines that the problem with the product is not due to a manufacturing or workmanship defect, then the Purchaser is responsible for all costs necessary to repair and transport the product back to the original Purchaser. If the Purchaser experiences any difficulty with a potentially defective product, it is their responsibility to contact the Warrantor’s Technical Support Team. The technicians will offer steps and procedures to repair a product or require the Purchaser to ship the product to the Technical Team if needed. Based on the outcome, the warranty service will then be in effect. The Warrantor does not make any other warranties or conditions not explicitly defined on this page. Under no circumstances will the Warrantor, its employees, and its representatives be liable or responsible for any loss of use, business interruption, lost profits, lost data, and indirect/special/incidental consequential damage of any kind regardless of the form of action. They are neither liable for injury to any persons or property incurred through the use or sale of the equipment. The Warrantor assumes no liability for incidental or consequential damages of any kind. RNG Group Inc. (the “Warrantor”) 14288 Central Ave, Chino, CA 91710 Phone: 909-517-3598 Fax: 888-543-1164 Email: -General Inquiries: [email protected] -Sales Inquiries: [email protected] -Technical Support Inquiries: [email protected] -Customer Services Inquiries: [email protected] RENOGY is a trademark of RNG Group Inc. 2015 RNG Group Inc. All rights reserved. 17


© Copyright 2026