
DocuSign for Salesforce User Guide v6.0.1
DocuSign for Salesforce
User Guide
v6.0.1 — Published: April 3, 2015
221 Main Street, Suite 1000, San Francisco, CA 94105 Ι Tel. 866.219.4318 Ι www.docusign.com Ι © DocuSign, Inc.
Copyright
Copyright ©2003-2015 DocuSign, Inc. All rights reserved.
For information about DocuSign trademarks, copyrights and patents refer to the DocuSign
Intellectual Property page (https://www.docusign.com/IP) on the DocuSign website. All other
trademarks and registered trademarks are the property of their respective holders.
No part of this document may be reproduced or transmitted in any form or by any means,
electronic or mechanical, for any purpose, without the express written permission of DocuSign,
Inc. Under the law, reproducing includes translating into another language or format. Every
effort has been made to ensure that the information in this manual is accurate. DocuSign, Inc.
is not responsible for printing or clerical errors. Information in this document is subject to
change without notice.
Documentation Changes
Documentation Changes
This topic details the documentation updates that have been made for each release of this
documentation.
Contact DocuSign Documentation
If you have any comments or feedback on this guide, please email
[email protected]. We welcome your questions and feedback.
v6.0.1—April 3, 2015
l
l
l
Major update for new user interface - This guide has been extensively revised to reflect
the new user interface introduced with v6.0. sending envelopes is easier and offers a
cleaner interface. Key topics updated:
l
Select a Salesforce Object
l
Add Documents to the Envelope
l
Add and Edit Recipients
l
Set Reminders and Expirations
l
Create and Send an Envelope for In Person Signing
Sending Documents with DocuSign - Added note that slash and vertical bar characters
are not supported in file names.
View Detailed Status of Envelopes - Added note clarifying that you must be the
envelope sender to use the Correct in DocuSign action button.
v5.6—January 5, 2015
l
l
Add and Edit Recipients —added 50 alphanumeric character limit for access code
authentication.
DocuSign for Salesforce1 Mobile Users — for Salesforce1- for iOS, the Publisher menu
was replaced by the Action Bar (Salesforce1 for iOS v7.0). The Android UI is unchanged
and still uses the Publisher menu.
v5.0—June 25, 2014
l
DocuSign for Salesforce1 Mobile App Users — new section describing DocuSign for
Salesforce new support for the Salesforce1 mobile app.
221 Main Street, Suite 1000, San Francisco, CA 94105 Ι Tel. 866.219.4318 Ι www.docusign.com Ι © DocuSign, Inc.
Documentation Changes
l
Sending Documents with the Salesforce1 Mobile App — new topic providing
instructions on how to send a document for signature in Salesforce1 using the DocuSign
publisher action.
v4.0—July 5, 2013
l
Added information about the Allow Sender to Edit check box for merge fields.
l
Updated office address and Copyright, Trademark and Patent Information sections.
221 Main Street, Suite 1000, San Francisco, CA 94105 Ι Tel. 866.219.4318 Ι www.docusign.com Ι © DocuSign, Inc.
Table of Contents
Table of Contents
Documentation Changes
3
DocuSign for Salesforce Overview
7
Sending Documents with DocuSign for Salesforce
8
Select a Salesforce Object
8
Add Documents to the Envelope
9
Add and Edit Recipients
11
Set Reminders and Expirations
15
Place Tags
16
Review and Send Your Document
20
In Person Signing with DocuSign for Salesforce
21
How In Person Signing Works
21
Create and Send an Envelope for In Person Signing
22
Conduct an In Person Signing Session
23
DocuSign for Salesforce1 Mobile App Users
Send Documents Using the Salesforce1 Mobile App
DocuSign Tag Information
27
32
34
Tag Types
34
The Tag Toolbar
52
Merge Fields
55
Create Merge Fields
55
Edit Merge Field Settings
59
Add Custom Tags with Merge Field Settings
60
5
Table of Contents
Automatic Anchor Text and Tags
62
Automatic Anchor Tags and Recipient Signer Roles
62
Place Automatic Anchor Text in a Document
63
Use Automatic Anchor Text with Custom Tags
63
Send Documents with Anchor Text
65
Free-Form Signing
67
Viewing Envelope Status
69
View the Status of Groups of Envelopes
69
View Detailed Status of Envelopes
69
View Status Updates in Chatter
72
6
DocuSign For Salesforce User Guide
7
DocuSign for Salesforce Overview
The DocuSign® for Salesforce managed package allows users to send a document for signatures
from within Salesforce and guide signers in the signing process. If you are using the Salesforce
Professional, Enterprise or Unlimited Editions, DocuSign for Salesforce easily integrates into
your Salesforce account. DocuSign for Salesforce is available from the AppExchange™.
DocuSign for Salesforce keeps track of the progress of deals from within Salesforce and uses
your Salesforce tabs (Accounts, Contacts, Opportunities, Contracts, Cases or any other standard
or custom tab in Salesforce) to address your documents.
DocuSign for Salesforce also supports the new Salesforce1 mobile app experience for iOS and
Android. Your organization can configure a DocuSign action for standard Salesforce objects and
enable sending documents for signature from supported mobile devices, using the Salesforce 1
mobile app.
221 Main Street, Suite 1000, San Francisco, CA 94105 Ι Tel. 866.219.4318 Ι www.docusign.com Ι © DocuSign, Inc.
DocuSign For Salesforce User Guide
8
Sending Documents with DocuSign for Salesforce
The general steps for sending a document for guided signing from DocuSign for Salesforce are:
1. From a Salesforce object, select an instance of the Salesforce object to send for signing
and create an envelope by clicking the Send with DocuSign button.
2. Add additional documents and set the document order.
3. Add additional recipients and set recipient information.
4. Add email subject and message information for the envelope.
5. Place signature and information tags on the documents in your envelope.
6. Review and send the envelope.
A DocuSign envelope is a container used to send one or more documents for signature using the
DocuSign system. An envelope can have multiple documents and several recipients. The
documents in an envelope can have multiple pages.
Important: DocuSign for Salesforce does not support file names containing a slash or
vertical bar (/ \ |). If you send a document with a slash or bar in the file name, it will not get
published back into Salesforce.
Select a Salesforce Object
DocuSign for Salesforce uses your Salesforce objects (accounts, contacts, opportunities,
contracts, cases or any other standard or custom object in Salesforce) to address your
documents.
Note: There are some differences in how the Send with DocuSign process works depending
on the Salesforce tab detail page used. If you are sending from the Cases, Contacts,
Contracts or Leads tab, the person selected is automatically added as a recipient. If you are
sending from the Opportunities tab, the Contacts associated with the opportunity are
automatically added as recipients.
1. In Salesforce, find the object and open the detail page for the object. Click the Send with
DocuSign button. 221 Main Street, Suite 1000, San Francisco, CA 94105 Ι Tel. 866.219.4318 Ι www.docusign.com Ι © DocuSign, Inc.
DocuSign For Salesforce User Guide
9
The Send with DocuSign page appears.
Next: Add Documents or Attachments to the Envelope
Add Documents to the Envelope
Use the Documents section to add documents to your envelope. You must place a document in
an envelope so you can send it for signatures. You can add multiple documents and
attachments to an envelope.
Note: When you select a lead from the Salesforce Leads tab, DocuSign for Salesforce
automatically adds any documents to the envelope that were previously associated with
that lead in Salesforce. You can delete any of these documents or add additional
documents to the envelope.
221 Main Street, Suite 1000, San Francisco, CA 94105 Ι Tel. 866.219.4318 Ι www.docusign.com Ι © DocuSign, Inc.
DocuSign For Salesforce User Guide
10
1. To add a new document, select the document source from the Add Documentmenu:
2. Select the document to add and click Save.
3. For Document and Attachment sources, if the file you want to add is not listed, you can
add it by clicking Add Attachment. l
l
For documents, a new browser window opens and you can add a document to a
folder. For attachments, the view updates to allow you to upload a file to the Salesforce
object.
After adding the document, you can select it for sending. DocuSign for Salesforce
adds the document to your envelope and returns you to the Send with DocuSign
page.
4. Set document order: If you have more than one document or attachment in the envelope,
you can reorder the documents by dragging and dropping them into the new order. The
number in the Document Order field updates to indicate the order that the document or
attachment is viewed by the recipients.
5. You can continue to add new, edit or delete documents:
l
l
Adding New Documents: To add a new document, repeat steps 1 through 3.
Deleting Documents: You can delete a document from the list by clicking the Del
link to the left of the document name.
After adding documents and attachments, you are ready to add or modify recipients.
Next: Add and Edit Recipients
221 Main Street, Suite 1000, San Francisco, CA 94105 Ι Tel. 866.219.4318 Ι www.docusign.com Ι © DocuSign, Inc.
DocuSign For Salesforce User Guide
11
Add and Edit Recipients
Use the Add Recipients section to set who you want to send your document to, add Signers,
Carbon Copy recipients, and Certified Delivery recipients to your envelope.
1. To add a recipient, select the source from the Add Recipient menu:
l
l
l
Contacts, Leads or Users: Search for the recipient to add, select it from the results
and click Next.
Add Me: Add yourself as a recipient. Go to step 2.
Quick Add: Add a recipient who is not already a Salesforce Contact, Lead, or User. Go to step 2.
221 Main Street, Suite 1000, San Francisco, CA 94105 Ι Tel. 866.219.4318 Ι www.docusign.com Ι © DocuSign, Inc.
DocuSign For Salesforce User Guide
12
2. Complete the Add Recipient fields:
a. Recipient Type: Select the appropriate value from the list (your account may not
have all of the recipient types listed):
l
l
l
Signer: Select this signer type if your recipient must sign, initial, date or add
data to tags on the documents in the envelope.
Signer – sign now: Select this signer type when you are the recipient and
want to sign the document after sending.
Carbon Copy: Select this signer type if the recipient should get a copy of the
envelope, but the recipient does not need to sign, initial, date or add
information to any of the documents. This type of recipient can be placed in
any order in the recipient list. The recipient receives a copy of the envelope
221 Main Street, Suite 1000, San Francisco, CA 94105 Ι Tel. 866.219.4318 Ι www.docusign.com Ι © DocuSign, Inc.
DocuSign For Salesforce User Guide
13
when the envelope reaches the recipient’s order in the process flow and
when the envelope is completed.
l
l
l
l
Certified Delivery: Use this signer type if the recipient must receive the
completed documents for the envelope to be completed, but the recipient
does not need to sign, initial, date or add information to any of the
documents.
Host in person and Host in person – sign now: Use this signer type if the
signer is in the same physical location as a DocuSign user who will act as a
Signing Host for the transaction. See In Person Signing with DocuSign for
Salesforce for more information.
Address recipients: This recipient can add name and email information for
recipients that appear after the recipient in workflow order. This signer type
is only available if the Send to Manage feature is enabled for the sender and
document visibility is not enabled. Refer to the Using Agent Managed
Envelopes Quick Start Guide or the DocuSign Service User Guide for more
information about this feature.
Manage envelope: This recipient has the same management and access
rights for the envelope as the sender and can make changes to the envelope
as if they were using the Advanced Correct feature. This recipient can add
name and email information, add or change the routing order and set
authentication options for the remaining recipients. Additionally, this
recipient can edit signature/initial tabs and data fields for the remaining
recipients. This recipient must have a DocuSign account and is only available
if the Send to Manage feature is enabled for the sender. Refer to the Using
Agent Managed Envelopes Quick Start Guide or the DocuSign Service User
Guide for more information about this feature.
b. Signer Role: (Optional) If the document you are sending uses automatic anchor
text, use the Signer Role list to select the recipient role. If you will manually add
tabs to the document, skip this step. For more information about this option, see
the Automatic Anchor Text section.
c. Access Code: (Optional) Use the Access Code field to enter an access code to
restrict who can actually open and sign the envelope. If you type an Access Code,
this recipient must provide that code before they can open the envelope. You
should provide this Access Code to your recipient over the phone or some other
secure method to serve as an effective authentication enhancement. This field is
limited to fifty alphanumeric characters.
221 Main Street, Suite 1000, San Francisco, CA 94105 Ι Tel. 866.219.4318 Ι www.docusign.com Ι © DocuSign, Inc.
DocuSign For Salesforce User Guide
14
d. Language: (Optional) Set the email language for the recipient. You can select the
email language used for this recipient. The languages available for selection are
set by your Salesforce Administrator and typically include a default Email Subject
and Email Message. This option sets the language used in the standard email
format for the recipient, but it does not automatically translate the Email Subject
or Email Message text. You must type the subject, message or note in the correct
language.
e. Personal Message If your account is set up to support multiple languages, the
Personal Message section is included to communicate information to individual
recipients about the documents sent to them using DocuSign for Salesforce.
Otherwise, use the general Message to All Recipients, to communicate a standard
message to all recipients. The message can be an extremely effective tool in
improving your success rate in getting documents returned.
l
l
Message Subject: Use the provided default subject, or type the subject for the
email in the top field. This text appears in the email subject line your
recipient receives. This is a required field.
Message: Use the provided default subject, or type a message in the bottom
field. This text appears in the email body your recipients receive.
f. Note for Recipient: (Optional) Use this field to enter specific instructions to your
recipient. The note is included in the email notification sent to the recipient. The
note is also displayed when the recipient is viewing the documents in the envelope. The note does not appear on the completed document.
3. Click Save Recipient to add the recipient and return to the edit envelope page.
4. [OPTIONAL] Set Routing Order: If you have more than one recipient in the envelope, type
the order number in the Order field. The routing order sets the order in which your
recipients receive, perform signing and other activities. You can also drag the recipients
into a new order, by clicking on the grab handle at the left of the row, and then drag and
drop the row into the desired order.
Note: If you selected a User or Add me you can optionally select the Signature used
for the signer.
5. You can continue to add new, edit or delete recipients:
l
l
Adding New Recipients: To add a new recipient, repeat steps 1 through 3.
Editing Recipients: To edit a recipient, click the Edit link to the left of the
recipient’s name and repeat steps 2 through 3.
221 Main Street, Suite 1000, San Francisco, CA 94105 Ι Tel. 866.219.4318 Ι www.docusign.com Ι © DocuSign, Inc.
DocuSign For Salesforce User Guide
l
l
15
Changing Recipient Order: You can change the order in which recipients receive
the envelope by typing a different value in the Order field.
Deleting Recipients: You can delete recipients from the list by clicking the Del link
to the left of the recipient’s name.
6. Complete the Message to All Recipients. This is a general communication to all
recipients about your document.
After adding all recipients and setting email subject and message information, you are
ready to set any reminders and expiration information for the envelope.
Next: Set Reminders and Expirations
Set Reminders and Expirations
In the Settings section you can set reminders to be sent to recipients if they haven’t signed the
envelope and set a time for the envelope to expire. These settings are optional.
Note: This section might have default values entered or might not be active for your
account. Any envelope custom fields configured for your DocuSign account are not available
for envelopes sent through Salesforce. If you have questions about this, contact your
Salesforce Administrator. 221 Main Street, Suite 1000, San Francisco, CA 94105 Ι Tel. 866.219.4318 Ι www.docusign.com Ι © DocuSign, Inc.
DocuSign For Salesforce User Guide
16
1. Set Reminders: Select Send automatic reminders to enable the reminder feature. You
define rules to remind your recipients of their signing tasks. l
l
Remind signers by email [ ] day(s) after receipt - Type the number of days
between when the envelope is sent and when the first reminder is sent.
Continue to send reminders every [ ] day(s) after receipt - Type the number of
days between when a reminder is sent (including the first reminder) and when the
next reminder is sent. 2. Set Expiration information: Select Expire envelope to enable the expire/void envelope
feature. You define rules to expire envelopes. l
l
Expire envelope [ ] day(s) after receipt - Type the number of days between when
the envelope is sent and when the envelope should expire (or be voided).
Warn signers [ ] days(s) before request expires - Type the number of days before
the envelope expires that a warning message should be sent to the recipients. If
you type 0 (zero) in this field, no warning message is sent to the recipients.
3. Enable Chatter Updates: If your account is set up to allow you to enable or disable
Chatter message updates, you can select or clear Enable Chatter Status Updates for this
envelope.
4. After creating the envelope, you are ready to add signing and information tags to the
documents or send the envelope.
If you want to send the document for free-form signing, click Send Now to send the
envelope. The document is sent for signing and a message showing that the sending is
complete appears.
If the document you are sending uses automatic anchor text, you can click Send Now to
send the envelope or you can place additional tags and review the placement of tags on
the documents.
Note: Refer to the Free-Form Signing and Automatic Anchor Text sections for more
information about these options.
Next: Place Tags in Your Documents
Place Tags
Using DocuSign for Salesforce, you can place tags for signatures and other information in
documents. The tags serve as guideposts to help your signers know where you want them to
sign, initial or provide other information in the document. 221 Main Street, Suite 1000, San Francisco, CA 94105 Ι Tel. 866.219.4318 Ι www.docusign.com Ι © DocuSign, Inc.
DocuSign For Salesforce User Guide
17
1. When you are ready to add signature and other information tags, click Tag at the top or
bottom of the Send with DocuSign page. The DocuSign Add Tags page opens showing the
documents you added to the envelope.
Note: If Automatic Template Matching is enabled for your account, the system checks
to see if your document matches a template in your system. If a match is found, the
system gives you the option of applying that template to the document.
Click Apply to apply the template and continue with tagging OR click Cancel to not
apply the template and continue with tagging.
2. To add more documents, including documents from external sources before you start
tagging, click the Documents button above the document list to open the Documents for
Signature dialog box.
3. To add a document from your local computer, click Browse from my Computer.
221 Main Street, Suite 1000, San Francisco, CA 94105 Ι Tel. 866.219.4318 Ι www.docusign.com Ι © DocuSign, Inc.
DocuSign For Salesforce User Guide
18
4. To add a template or document from an external source,
a. Click Choose an Online Document.
b. Select the location of the Template or online document you want to upload on the
left side of the dialog box.
c. Select the Template or document and then click Add.
The document is added to the envelope and a thumbnail image of the document is
added to the section.
Note: If you want to select a document from an external source, such as
Box.Net or GoogleDocs, you might need to log on to the external document
source.
5. Click on the recipient’s name on the left side of the screen to select a recipient.
6. Drag and drop the DocuSign tags from the Tags palette, below the recipient’s name, onto
the document in each place where you want the selected recipient to sign or provide
information.
221 Main Street, Suite 1000, San Francisco, CA 94105 Ι Tel. 866.219.4318 Ι www.docusign.com Ι © DocuSign, Inc.
DocuSign For Salesforce User Guide
19
For information about DocuSign tags and the options available for adjusting them, see the
DocuSign Tag Information section of this guide.
7. Repeat the previous step for each recipient.
8. After adding tags to your documents, you are ready to review and send the document.
l
l
Preview. Launches a preview showing how your recipient will see the tagged
document.
Send. Skips the review stage and sends the envelope without reviewing the tag
placement.
Next: Review and Send Your Document
221 Main Street, Suite 1000, San Francisco, CA 94105 Ι Tel. 866.219.4318 Ι www.docusign.com Ι © DocuSign, Inc.
DocuSign For Salesforce User Guide
20
Review and Send Your Document
1. Select the recipient you want to preview tags for and use the arrowhead icons to advance
or move back. Alternately, you can click Auto-Advance to automatically cycle through
the tags.
2. Click Exit Preview or <Go Back to return to the Add Tags page.
3. When you have added all the needed tags and are done previewing the envelope, click
Send.
The envelope is sent and DocuSign for Salesforce shows the sending completed
information.
4. Click Return to go back to the detail page.
221 Main Street, Suite 1000, San Francisco, CA 94105 Ι Tel. 866.219.4318 Ι www.docusign.com Ι © DocuSign, Inc.
DocuSign For Salesforce User Guide
21
In Person Signing with DocuSign for Salesforce
The In Person Signing feature lets you use the DocuSign® Service for electronic signatures for
face-to-face transactions or in cases where a signer does not have access to email or a
computer and needs someone to host a signing session.
With the In Person Signing feature, you set up an envelope or template normally but assign a
DocuSign user as a recipient, who will act as a Signing Host for the session. The signer goes to
the same physical location as the signing host; the host then initiates the signing session and
then helps the signer complete the envelope. After completing the process, the envelope
documents can be emailed to the signer, saved and printed as needed.
How In Person Signing Works
In today’s busy business environment, there are many times when your customers will be
visiting your office or you will be visiting them and you want to get their signature during that
visit. For a normal DocuSign envelope, you meet with your customer, after the meeting, you
create and send the envelope to your customer and then they would sign the documents when
they have access to their email. With In Person Signing, the whole transaction can be completed face-to-face. You can create
an In Person envelope during your meeting, assign yourself as the signing host, start the session
and guide your customer through the signing process, completing the whole process during the
meeting. After signing, the envelope documents can be saved, emailed to your customer and
printed as needed.
221 Main Street, Suite 1000, San Francisco, CA 94105 Ι Tel. 866.219.4318 Ι www.docusign.com Ι © DocuSign, Inc.
DocuSign For Salesforce User Guide
22
Create and Send an Envelope for In Person Signing
The process for setting up in person signing is similar to the standard procedure for sending
documents with DocuSign for Salesforce. The steps that are different from the normal process
are shown in this procedure.
Note: If you have a custom button for In Person Signing, you just need to click that button to
start a session.
1. Create a new envelope by clicking Send with DocuSign and add documents to the
envelope normally.
2. To add the signing host, select Add Me from the Add Recipient menu:
Only the logged in Salesforce user can be a signing host.
3. Add the signing host and signer information in the Add Me dialog box.
in the Signer Type list, select Host in person – sign now to start the signing session
immediately after sending or select Host in person to send an email for starting an in
person signing session. The Signer Name field appears.
4. Type the name of the signer in the Signer Name field. This is the legal name the signer
uses for signing documents.
5. (Optional) Enter an Access Code for the signer. Note: If your DocuSign account is set up to require an ID Question, the system
automatically asks the signing host to type the information into the system before
starting the signing process. This information is saved and viewable in the Certificate
associated with the completed envelope. Contact your DocuSign Customer
Administrator to determine if there is an ID Question associated with in person
signing for your account. If you are an individual user, you are the Customer
221 Main Street, Suite 1000, San Francisco, CA 94105 Ι Tel. 866.219.4318 Ι www.docusign.com Ι © DocuSign, Inc.
DocuSign For Salesforce User Guide
23
Administrator and can adjust the question yourself by going to Preferences and then
Features.
6. Click Add Recipient to add the signing host and return to the edit envelope page.
7. Add other recipients as needed normally.
8. Add the Message to All Recipient details, select any Settings, and place tags normally.
Note: When adding tags for the signer, the signer’s name is shown with the email
address for the signing host.
9. Send the envelope.
The email notification with the signing request is sent to the signing host. The host
can open the email and initiate the signing process when the signer is available. Refer to the Conduct an In Person Sign Session procedure for more information.
If Host in person – sign now was selected as the Signer Type, the envelope
automatically opens and you are ready to start the In Person Signing Session, see step
2 of the Conducting an In Person Sign Session procedure.
Conduct an In Person Signing Session
When the signer is ready to sign the document, follow the procedure below to complete an in
person signing session.
Important: The dialog boxes that provide additional instructions for signing hosts and
signers can be enabled, disabled, and modified using the account branding signing resource
file. Contact your DocuSign Account Administrator for more information about the dialog
boxes and resource file.
To conduct an in person signing session
1. Open the email and click Review Documents to start the signing process. 2. The signing host overview dialog box is shown. Review the information and click
Continue.
221 Main Street, Suite 1000, San Francisco, CA 94105 Ι Tel. 866.219.4318 Ι www.docusign.com Ι © DocuSign, Inc.
DocuSign For Salesforce User Guide
24
3. The next view depends on if the requires an In Person Signer ID question:
l
If the sender’s account is set up to require an ID question, the system asks the
signing host to collect the information. Type the information into the system and
click Continue.
Note: The In Person Signer ID question information is saved and viewable in the
Certificate associated with the envelope. The question is set up in the
Preferences for your account.
l
If no question is required or after entering the required information, the normal
signing process starts.
4. The signer completes any security authentication, providing information and answering
questions as needed.
5. The signer goes through the standard orientation process and agrees to the Consumer
221 Main Street, Suite 1000, San Francisco, CA 94105 Ι Tel. 866.219.4318 Ι www.docusign.com Ι © DocuSign, Inc.
DocuSign For Salesforce User Guide
25
Disclosure.
6. The signer adds information, initials and signatures as needed to the document. The
signing host can assist the signer as needed. The first time the signer clicks a Sign Here
or Initial tab, the signer is asked to adopt a signature and initials.
Note: If the browser is HTML5 capable and the sender has enabled this option, the
signer can click Write your Signature, below the sample signature, to write their
own custom signature.
l
l
l
To adopt a signature, the signer verifies that the signing name and initials are
correct. The signer can change the name or initials as needed by typing in the
Your Full Name and Your Initials.
The signer reviews the signature styles shown to the right and selects the style they
want to use for signatures and initials. This style is used for all signatures and
initials in the document.
The signer clicks Adopt your Signature to save the save the name, initial, and
signature style and return to the document. The signer then clicks the Sign Here or
Initial tab.
Note: A signature or initial can be removed from the document by clicking on
the signature or initial. The signature/initial is replaced with a signature/initial
tab.
7. After the signer has completed adding information to all the required tabs in the
envelope, the indicator arrow change to a box that says Confirm Signing and a message
box appears around the box.
The signer can stay and review the document and make any changes to the information
and to optional information tabs. After they are done reviewing the document, click the
Confirm Signing indicator. The signer has the option of adding an email address where a copy of the completed
documents is sent and printing the documents. 221 Main Street, Suite 1000, San Francisco, CA 94105 Ι Tel. 866.219.4318 Ι www.docusign.com Ι © DocuSign, Inc.
DocuSign For Salesforce User Guide
26
If the signer does not want to enter an email, they click Continue and pass control back to
the host.
8. The next action depends on how the Signer Type selected when sending the envelope:
l
l
If Sign in person or Host in person was selected, the signing host is asked to log on
to their account, which completes this process. The envelope is sent to the next
recipient or is completed if there are no more recipients.
If Host in person – sign now was selected, the signing host is returned to the
sending completed information page of DocuSign for Salesforce. If there are
multiple In Person signers, the signing process starts for the next signer. After that,
the envelope is sent to the next recipient or is completed if there are no more
recipients.
221 Main Street, Suite 1000, San Francisco, CA 94105 Ι Tel. 866.219.4318 Ι www.docusign.com Ι © DocuSign, Inc.
DocuSign For Salesforce User Guide
27
DocuSign for Salesforce1 Mobile App Users
DocuSign for Salesforce includes support for the Salesforce1 mobile app. As an iOS 7.1 or above
or Android mobile device user, you can use DocuSign on the Salesforce1 app through a
publisher action. The DocuSign publisher action provides one-click access to sending a
document for signature for any supported object. The DocuSign action can be added to the
following standard Salesforce objects:
l
Opportunities
l
Leads
l
Cases
l
Contacts
l
Accounts
Note: Currently, the out-of-the-box DocuSign action is only supported for these standard
objects. Custom objects and custom buttons are not supported at this time.
For iOS, if configured the DocuSign action appears in a record's Action Bar:
Tap the Action Bar to open the menu and select the DocuSign action:
221 Main Street, Suite 1000, San Francisco, CA 94105 Ι Tel. 866.219.4318 Ι www.docusign.com Ι © DocuSign, Inc.
DocuSign For Salesforce User Guide
28
221 Main Street, Suite 1000, San Francisco, CA 94105 Ι Tel. 866.219.4318 Ι www.docusign.com Ι © DocuSign, Inc.
DocuSign For Salesforce User Guide
29
For Android, if configured, the DocuSign action appears in a record's Publisher menu:
221 Main Street, Suite 1000, San Francisco, CA 94105 Ι Tel. 866.219.4318 Ι www.docusign.com Ι © DocuSign, Inc.
DocuSign For Salesforce User Guide
30
Selecting documents and signers
Using the DocuSign action, you can use the Salesforce1 mobile app to send documents for
signature with DocuSign, either by email notification or using in person signing. You can send
any documents that are attached to a record, as listed in the Notes & Attachments section or
the record's Chatter feed. Depending on the object type, contacts on the record are available to
quickly select as signers for your document. You can also add signers and set a signing order.
Note that anyone you add is only added to the DocuSign envelope and not to the Salesforce
record.
221 Main Street, Suite 1000, San Francisco, CA 94105 Ι Tel. 866.219.4318 Ι www.docusign.com Ι © DocuSign, Inc.
DocuSign For Salesforce User Guide
31
Tagging and sending your envelope
From your tablet, you tag and send your documents just as you normally would. You can use
standard or custom tags, and anchor text is also supported.
Note: For smaller screens, such as an iPhone, you can only send documents by email; in
person signing is not available, and you cannot add tags to the document. Your signers use
free-form signing or anchor tags. This limitation is because rotation is not available on
small screen devices, which is required for in person signing and tagging.
221 Main Street, Suite 1000, San Francisco, CA 94105 Ι Tel. 866.219.4318 Ι www.docusign.com Ι © DocuSign, Inc.
DocuSign For Salesforce User Guide
32
Adding DocuSign events to Chatter feed
DocuSign events (such as when a document is sent or completed) can be included in a record's
Chatter feed. The types of events included depends on how your environment is configured.
The ability to send and sign documents with the Salesforce1 mobile app must be configured by
your Salesforce administrator, as described in the DocuSign for Salesforce Administrator Guide.
Send Documents Using the Salesforce1 Mobile App
Send any document attached to a Salesforce record for signature with DocuSign quickly and
easily using the Salesforce1 mobile app.
The following procedure describes how to send a document for signature or initiate an in
person signing. This procedure assumes you are using a tablet and not a smaller display device
(such as an iPhone), allowing you to either send by email or conduct an in person signing event.
When you use a mobile device with a small display, you can only send documents by email.
To send documents using Salesforce1
1. Log in to your Salesforce account on your mobile device using the Salesforce1 mobile
app.
2. Locate the record with the document you want to send for signature.
221 Main Street, Suite 1000, San Francisco, CA 94105 Ι Tel. 866.219.4318 Ι www.docusign.com Ι © DocuSign, Inc.
DocuSign For Salesforce User Guide
3. From any view in the record, click the
The publisher actions appear.
33
in the lower-right hand corner.
4. Locate and tap the DocuSign action:
The mobile DocuSign prepare view appears for you to select your documents and signers.
5. In the Documents list, select one or more documents to sign. The documents attached to
the record, as listed in the Notes & Attachments section, are included in the list.
Note: You cannot upload files through DocuSign using the Salesforce1 mobile app.
6. In the Signers list, select one or more contacts to sign. The contacts associated with the
record are included in the list.
7. For each signer, choose whether to sign via email or use in person signing. You can select
different options for each signer, but only the first signer in the signing order can be an in
person signer; all others must be sign via email.
8. To add additional signers not listed in the Signers list, tap Add another signer and enter
the signer's name and email address.
9. To change the signing order, tap Reorder then tap and drag the signers into the desired
order. Tap Done when finished.
10. Tap DocuSign.
The DocuSign tagging view appears.
11. Tag your document and tap Send.
Your envelope is sent. If you included an in person signer, the in person signing session
launches and walks you through that process.
12. You can view your envelope's progress in the record's Chatter feed. Refresh the feed to
see the latest updates.
Note: Chatter updates must be configured by your Salesforce system administrator.
221 Main Street, Suite 1000, San Francisco, CA 94105 Ι Tel. 866.219.4318 Ι www.docusign.com Ι © DocuSign, Inc.
DocuSign For Salesforce User Guide
34
DocuSign Tag Information
This section describes all the different DocuSign tag types, when the tags are used and the
properties associated with each tag type. Note: Your account might not support all of the tag types and tag properties. Tag
properties that are not standard have an asterisk (*) after the name. If you have questions
about supported tag types, check your DocuSign account.
Tag Types
Click on the Properties icon adjacent to the tag to open the Properties dialog box for the
tag. The Properties dialog box is divided into several sections, which depend on the type of tag.
Signature Tag
Place this tag where the recipient must sign the document. The following properties can be
edited for this tag:
Basic Properties
l
l
Recipient: This shows the recipient associated with the tag. If there are multiple
recipients in the envelope, you can use this list to select the recipient associated with the
tag.
Label: A unique identifier for the tag. This is only seen by the sender and in the Form
Data for the envelope.
Location
l
l
From left and From top: These fields show the position of the tag on the document and
can be used to manually set the position.
Anchor: Anchors the tag to the specified word(s) in the envelope. See Using Anchor Text
in the DocuSign Service User Guide for more information on using the anchor feature.
Formatting Properties
l
Scale: Sets the size of the tag. The size can also be set by clicking and dragging the slider
bar on the left side of the tag.
Conditional Fields
221 Main Street, Suite 1000, San Francisco, CA 94105 Ι Tel. 866.219.4318 Ι www.docusign.com Ι © DocuSign, Inc.
DocuSign For Salesforce User Guide
35
See Using Conditional Fields in the DocuSign Service User Guide for more information about
conditional fields.
l
Parent Tab: Selects the Parent Tab for the Conditional Field
l
Parent Value: Sets the value used to activate this field. Optional Signature Tag
Place this tag where the recipient can sign, if they wish, it is not a required tag. The following
properties can be edited for this tag:
Basic Properties
l
l
Recipient: This shows the recipient associated with the tag. If there are multiple
recipients in the envelope, you can use this list to select the recipient associated with the
tag.
Label: A unique identifier for the tag. This is only seen by the sender and in the Form Data
for the envelope.
Location
l
l
From left and From top: These fields show the position of the tag on the document and
can be used to manually set the position.
Anchor: Anchors the tag to the specified word(s) in the envelope. See Using Anchor Text
in the DocuSign Service User Guide for more information on using the anchor feature.
Formatting Properties
l
Scale: Sets the size of the tag. The size can also be set by clicking and dragging the slider
bar on the left side of the tag.
Conditional Fields
See Using Conditional Fields in the DocuSign Service User Guide for more information about
conditional fields.
l
Parent Tab: Selects the Parent Tab for the Conditional Field
l
Parent Value: Sets the value used to activate this field. 221 Main Street, Suite 1000, San Francisco, CA 94105 Ι Tel. 866.219.4318 Ι www.docusign.com Ι © DocuSign, Inc.
DocuSign For Salesforce User Guide
36
Initial Tag
Place this tag where the recipient must initial the document. The following properties can be
edited for this tag:
Basic Properties
l
l
Recipient: This shows the recipient associated with the tag. If there are multiple
recipients in the envelope, you can use this list to select the recipient associated with the
tag.
Label: A unique identifier for the tag. This is only seen by the sender and in the Form Data
for the envelope.
Location
l
l
From left and From top: These fields show the position of the tag on the document and
can be used to manually set the position.
Anchor: Anchors the tag to the specified word(s) in the envelope. See Using Anchor Text
in the DocuSign Service User Guide for more information on using the anchor feature.
Formatting Properties
l
Scale: Sets the size of the tag. The size can also be set by clicking and dragging the slider
bar on the left side of the tag.
Conditional Fields
See Using Conditional Fields in the DocuSign Service User Guide for more information about
conditional fields.
l
Parent Tab: Selects the Parent Tab for the Conditional Field
l
Parent Value: Sets the value used to activate this field.
Optional Initial Tag
Place where the recipient can initial, if they wish, but it is not required. The following
properties can be edited for this tag:
221 Main Street, Suite 1000, San Francisco, CA 94105 Ι Tel. 866.219.4318 Ι www.docusign.com Ι © DocuSign, Inc.
DocuSign For Salesforce User Guide
37
Basic Properties
l
l
Recipient: This shows the recipient associated with the tag. If there are multiple
recipients in the envelope, you can use this list to select the recipient associated with the
tag.
Label: A unique identifier for the tag. This is only seen by the sender and in the Form
Data for the envelope.
Location
l
l
From left and From top: These fields show the position of the tag on the document and
can be used to manually set the position.
Anchor: Anchors the tag to the specified word(s) in the envelope. See Using Anchor Text
in the DocuSign Service User Guide for more information on using the anchor feature.
Formatting Properties
l
Scale: Sets the size of the tag. The size can also be set by clicking and dragging the slider
bar on the left side of the tag.
Conditional Fields
See Using Conditional Fields in the DocuSign Service User Guide for more information about
conditional fields.
l
Parent Tab: Selects the Parent Tab for the Conditional Field
l
Parent Value: Sets the value used to activate this field. Signer Attachment Tag
The signer attachment is where the recipient initiates the process of adding supporting
documents to an envelope. See Requesting Documents from Your Recipients in the DocuSign
Service User Guide for more information about signer attachments. The following properties
can be edited for this tag:
Basic Properties
l
l
Recipient: This shows the recipient associated with the tag. If there are multiple
recipients in the envelope, you can use this list to select the recipient associated with the
tag.
Label: A unique identifier for the tag. This is only seen by the sender and in the Form Data
for the envelope.
Location
l
From left and From top: These fields show the position of the tag on the document and
can be used to manually set the position.
221 Main Street, Suite 1000, San Francisco, CA 94105 Ι Tel. 866.219.4318 Ι www.docusign.com Ι © DocuSign, Inc.
DocuSign For Salesforce User Guide
l
38
Anchor: Anchors the tag to the specified word(s) in the envelope. See Using Anchor Text
in the DocuSign Service User Guide for more information on using the anchor feature.
Formatting Properties
l
Require Signer Review After Upload: If the recipient sends the documents by fax,
selecting this option requires the recipient to verify the faxed documents are correct
before the envelope is complete. After the fax is received by DocuSign, the recipient
receives a new email asking them to verify the documents. The default is not required.
Conditional Fields
See Using Conditional Fields in the DocuSign Service User Guide for more information about
conditional fields.
l
Parent Tab: Selects the Parent Tab for the Conditional Field
l
Parent Value: Sets the value used to activate this field.
Full Name Tag
Place this tag on the document where you want the recipient’s name to appear. The following
properties can be edited for this tag:
Basic Properties
l
l
Recipient: This shows the recipient associated with the tag. If there are multiple
recipients in the envelope, you can use this list to select the recipient associated with the
tag.
Label: A unique identifier for the tag. This is only seen by the sender and in the Form Data
for the envelope.
Location
l
l
From left and From top: These fields show the position of the tag on the document and
can be used to manually set the position.
Anchor: Anchors the tag to the specified word(s) in the envelope. See Using Anchor Text
in the DocuSign Service User Guide for more information on using the anchor feature.
Formatting Properties
l
Text Style: These options are used to set the font type, size, and color for the text in this
tag. This allows you to match the text formatting in your documents.
Conditional Fields
221 Main Street, Suite 1000, San Francisco, CA 94105 Ι Tel. 866.219.4318 Ι www.docusign.com Ι © DocuSign, Inc.
DocuSign For Salesforce User Guide
39
See Using Conditional Fields in the DocuSign Service User Guide for more information about
conditional fields.
l
Parent Tab: Selects the Parent Tab for the Conditional Field
l
Parent Value: Sets the value used to activate this field.
Company Tag
Place this tag on the document where you want the recipient’s company name to appear. The
following properties can be edited for this tag:
Basic Properties
l
l
l
Recipient: This shows the recipient associated with the tag. If there are multiple
recipients in the envelope, you can use this list to select the recipient associated with the
tag.
Label: A unique identifier for the tag. This is only seen by the sender and in the Form Data
for the envelope.
Tool Tip: The text a recipient sees when they position their cursor over the tag when
signing a document. You can specify a tool tip for the tag to provide help for your
recipient.
Location
l
l
From left and From top: These fields show the position of the tag on the document and
can be used to manually set the position.
Anchor: Anchors the tag to the specified word(s) in the envelope. See Using Anchor Text
in the DocuSign Service User Guide for more information on using the anchor feature.
Formatting Properties
l
l
l
Characters per line and Lines: This sets the maximum number of characters for the tag.
You can also adjust the length of the tag by clicking and dragging the arrow icon to the
right of the tag.
Text Style: These options are used to set the font type, size, and color for the text in this
tag. This allows you to match the text formatting in your documents.
Required: You can choose to make the tag required or optional for the recipient. The
default is required.
221 Main Street, Suite 1000, San Francisco, CA 94105 Ι Tel. 866.219.4318 Ι www.docusign.com Ι © DocuSign, Inc.
DocuSign For Salesforce User Guide
l
40
Locked: If you provide information for a tag, you can choose to lock the tag, so that the
information cannot be changed, or make it editable by the recipient. The default is
editable (not-locked).
Conditional Fields
See Using Conditional Fields in the DocuSign Service User Guide for more information about
conditional fields.
l
Parent Tab: Selects the Parent Tab for the Conditional Field
l
Parent Value: Sets the value used to activate this field.
Title Tag
Place this tag on the document where you want the recipient’s title to appear. The following
properties can be edited for this tag:
Basic Properties
l
l
l
Recipient: This shows the recipient associated with the tag. If there are multiple
recipients in the envelope, you can use this list to select the recipient associated with the
tag.
Label: A unique identifier for the tag. This is only seen by the sender and in the Form Data
for the envelope.
Tool Tip: The text a recipient sees when they position their cursor over the tag when
signing a document. You can specify a tool tip for the tag to provide help for your
recipient.
Location
l
l
From left and From top: These fields show the position of the tag on the document and
can be used to manually set the position.
Anchor: Anchors the tag to the specified word(s) in the envelope. See Using Anchor Text
in the DocuSign Service User Guide for more information on using the anchor feature.
Formatting Properties
l
l
Characters per line and Lines: This sets the maximum number of characters for the tag.
You can also adjust the length of the tag by clicking and dragging the arrow icon to the
right of the tag.
Text Style: These options are used to set the font type, size, and color for the text in this
tag. This allows you to match the text formatting in your documents.
221 Main Street, Suite 1000, San Francisco, CA 94105 Ι Tel. 866.219.4318 Ι www.docusign.com Ι © DocuSign, Inc.
DocuSign For Salesforce User Guide
l
l
41
Required: You can choose to make the tag required or optional for the recipient. The
default is required.
Locked: If you provide information for a tag, you can choose to lock the tag, so that the
information cannot be changed, or make it editable by the recipient. The default is
editable (not-locked).
Conditional Fields
See Using Conditional Fields in the DocuSign Service User Guide for more information about
conditional fields.
l
Parent Tab: Selects the Parent Tab for the Conditional Field
l
Parent Value: Sets the value used to activate this field.
Date Signed Tag
Place this tag on the document where you want the date the recipient signed the document to
appear. The following properties can be edited for this tag:
Basic Properties
l
l
Recipient: This shows the recipient associated with the tag. If there are multiple
recipients in the envelope, you can use this list to select the recipient associated with the
tag.
Label: A unique identifier for the tag. This is only seen by the sender and in the Form Data
for the envelope.
Location
l
l
From left and From top: These fields show the position of the tag on the document and
can be used to manually set the position.
Anchor: Anchors the tag to the specified word(s) in the envelope. See Using Anchor Text
in the DocuSign Service User Guide for more information on using the anchor feature.
Formatting Properties
l
Text Style: These options are used to set the font type, size, and color for the text in this
tag. This allows you to match the text formatting in your documents.
Conditional Fields
See Using Conditional Fields in the DocuSign Service User Guide for more information about
conditional fields.
221 Main Street, Suite 1000, San Francisco, CA 94105 Ι Tel. 866.219.4318 Ι www.docusign.com Ι © DocuSign, Inc.
DocuSign For Salesforce User Guide
l
Parent Tab: Selects the Parent Tab for the Conditional Field
l
Parent Value: Sets the value used to activate this field.
l
42
Approve Tag: Place this tag on the document where you want the recipient to approve
documents in an envelope without placing a signature or initials on the document. If the
recipient clicks the Approve tag during the signing process, the recipient is considered to
have signed the document. No information is shown on the document for the approval,
but it is recorded as a signature in the envelope history. The following properties can be
edited for this tag:
Basic Properties
l
l
l
Recipient: This shows the recipient associated with the tag. If there are multiple
recipients in the envelope, you can use this list to select the recipient associated with the
tag.
Label: A unique identifier for the tag. This is only seen by the sender and in the Form Data
for the envelope.
Tool Tip: The text a recipient sees when they position their cursor over the tag when
signing a document. You can specify a tool tip for the tag to provide help for your
recipient.
Location
l
l
From left and From top: These fields show the position of the tag on the document and
can be used to manually set the position.
Anchor: Anchors the tag to the specified word(s) in the envelope. See Using Anchor Text
in the DocuSign Service User Guide for more information on using the anchor feature.
Formatting Properties
l
Text Style: These options are used to set the font type, size, and color for the text in this
tag. This allows you to match the text formatting in your documents.
Conditional Fields
See Using Conditional Fields in the DocuSign Service User Guide for more information about
conditional fields.
l
Parent Tab: Selects the Parent Tab for the Conditional Field
l
Parent Value: Sets the value used to activate this field.
Decline Tag
221 Main Street, Suite 1000, San Francisco, CA 94105 Ι Tel. 866.219.4318 Ι www.docusign.com Ι © DocuSign, Inc.
DocuSign For Salesforce User Guide
43
Place this tag on the document where you want to give the recipient the option of declining an
envelope. If the recipient clicks the Decline tag during the signing process, the envelope is
voided. The following properties can be edited for this tag:
Basic Properties
l
l
l
Recipient: This shows the recipient associated with the tag. If there are multiple
recipients in the envelope, you can use this list to select the recipient associated with the
tag.
Label: A unique identifier for the tag. This is only seen by the sender and in the Form Data
for the envelope.
Tool Tip: The text a recipient sees when they position their cursor over the tag when
signing a document. You can specify a tool tip for the tag to provide help for your
recipient.
Location
l
l
From left and From top: These fields show the position of the tag on the document and
can be used to manually set the position.
Anchor: Anchors the tag to the specified word(s) in the envelope. See Using Anchor Text
in the DocuSign Service User Guide for more information on using the anchor feature.
Formatting Properties
l
Text Style: These options are used to set the font type, size, and color for the text in this
tag. This allows you to match the text formatting in your documents.
Conditional Fields
See Using Conditional Fields in the DocuSign Service User Guide for more information about
conditional fields.
l
Parent Tab: Selects the Parent Tab for the Conditional Field
l
Parent Value: Sets the value used to activate this field.
Data Field Tag
This tag is an adaptable field that allows the recipient to enter different information. After
placing a data field, you can edit the properties of the data field. The following properties can
be edited for this tag:
221 Main Street, Suite 1000, San Francisco, CA 94105 Ι Tel. 866.219.4318 Ι www.docusign.com Ι © DocuSign, Inc.
DocuSign For Salesforce User Guide
44
NOTE: You can set up a Data Field tag to act as a link in the document by using the
following settings:
Label = Type #HREF in the Label. If you will have more than one link in an envelope, add
more information after the #HREF, so each Label is different (example: #HREF Link 1).
Tool Tip = Type the URL for the link in the Tool Tip.
Data: Initial Value = Type the text to display for the link.
Formatting Properties: Locked = This must be selected (locked).
Basic Properties
l
l
l
l
Recipient: This shows the recipient associated with the tag. If there are multiple
recipients in the envelope, you can use this list to select the recipient associated with the
tag.
Allow All to Edit*: Select this option to enable Field Markup for this tag. When selected,
Require Initial becomes active and can be selected to require signers that have already
completed signing to review and initial the changes to complete the envelope. If this
option is selected, the Hide value as asterisks *** option cannot be used. See Using the
Field Markup Feature in the DocuSign Service User Guide for more information about
Field Markup.
Label: A unique identifier for the tag. This is only seen by the sender and in the Form Data
for the envelope. Data field tags that share the same label and mask will share the same
data when provided by the signer (i.e. information entered into one tag is automatically
copied into other tags with the same label).
Tool Tip: The text a recipient sees when they position their cursor over the tag when
signing a document. You can specify a tool tip for the tag to provide help for your
recipient.
Data
l
l
Initial Value: This sets the initial information in the data field tag.
Mask: This sets the type of data entered in the field. The default mask is text. The mask
types are:
l
l
l
Text: Text fields accept any characters. The length and height of the field is
adjustable.
Email: Email fields are single-line fields that accept any characters. The length of
the field is adjustable.
Date: Date fields are single-line fields. A date can be entered in any format and the
date will be reformatted to MM/DD/YYYY.
221 Main Street, Suite 1000, San Francisco, CA 94105 Ι Tel. 866.219.4318 Ι www.docusign.com Ι © DocuSign, Inc.
DocuSign For Salesforce User Guide
l
l
l
l
l
l
l
l
45
Number: Number fields are single-line fields that only accept numbers. The length
of the field is adjustable.
SSN: SSN fields are single-line fields that accept numbers. A SSN can be typed with
or without dashes. The length of the field is adjustable.
ZIP5: ZIP5 fields are single-line fields that accept numbers. The length of the field is
adjustable.
ZIP5-4: ZIP5-4 fields are similar to ZIP5 fields. The zip code can be typed with or
without dashes. The length of the field is adjustable.
Hide value as asterisks *** – You can choose to conceal (hide) the information a recipient
types into the field. The information appears normally while the recipient is adding or
modifying the information, but the data is not visible to any other signer or the sender.
See Adding Concealed Fields in the DocuSign Service User Guide for information on
adding the field and see Collecting Envelope Form Data in the DocuSign Service User
Guide for information on how to view and download the concealed field data. If this
option is selected, the Allow All to Edit option cannot be used.
This is a Payment Amount*: This option is designates this tag as a payment tag. See Using
the Payment Processing Feature in the DocuSign Service User Guide for more
information.
Regex Pattern: This option is only available if the Mask type is Text. You can use Regular
Expressions syntax to format the custom text mask. For more information on how to build
a regular expression, we recommend the following resources:
l
Regular-Expressions.info (www.regular-expressions.info/)
l
Wikipedia (wikipedia.org/wiki/Regular_expression)
l
RegExLib.com (http://regexlib.com/)
Validation Error: This option is only available is the Mask type is Text. This is a short
message that appears when a recipient incorrectly completes the data field.
Location
l
l
From left and From top: These fields show the position of the tag on the document and
can be used to manually set the position.
Anchor: Anchors the tag to the specified word(s) in the envelope. See Using Anchor Text
in the DocuSign Service User Guide for more information on using the anchor feature.
Formatting Properties
l
Characters per line and Lines: This sets the maximum number of characters for the tag.
You can also adjust the length of the tag by clicking and dragging the arrow icon to the
221 Main Street, Suite 1000, San Francisco, CA 94105 Ι Tel. 866.219.4318 Ι www.docusign.com Ι © DocuSign, Inc.
DocuSign For Salesforce User Guide
46
right of the tag.
l
l
l
l
l
Fixed Width: Select this option to prevent the Data Field tag from getting any larger on a
document, even if the font type or size changes. This option can prevent a tag from
covering up text on a document if the font type or size is changed.
Maximum number of characters: This sets the maximum number of characters a signer
can enter in the tag.
Text Style: These options are used to set the font type, size, and color for the text in this
tag. This allows you to match the text formatting in your documents.
Required: You can choose to make the tag required or optional for the recipient. The
default is required.
Locked: If you provide information for a tag, you can choose to lock the tag, so that the
information cannot be changed, or make it editable by the recipient. The default is
editable (not-locked).
Conditional Fields
See Using Conditional Fields in the DocuSign Service User Guide for more information about
conditional fields.
l
Parent Tab: Selects the Parent Tab for the Conditional Field
l
Parent Value: Sets the value used to activate this field.
Check Box Tag
Place this tag on the document in a location where the recipient can select an option. See Using
Check Boxes and Radio Buttons in the DocuSign Service User Guide for more information about
when and how to use radio buttons. The following properties can be edited for this tag:
Basic Properties
l
l
Recipient: This shows the recipient associated with the tag. If there are multiple
recipients in the envelope, you can use this list to select the recipient associated with the
tag.
Allow All to Edit*: Select this option to enable Field Markup for this tag. When selected,
Require Initial becomes active and can be selected to require signers that have already
completed signing to review and initial the changes to complete the envelope. See Using
the Field Markup Feature in the DocuSign Service User Guide for more information about
Field Markup.
221 Main Street, Suite 1000, San Francisco, CA 94105 Ι Tel. 866.219.4318 Ι www.docusign.com Ι © DocuSign, Inc.
DocuSign For Salesforce User Guide
l
l
47
Label: A unique identifier for the tag. This is only seen by the sender and in the Form Data
for the envelope. Check Box tags that share the same label will share the same data
when provided by the signer (i.e. a check box that is checked will be automatically copied
to other check boxes with the same label).
Tool Tip: The text a recipient sees when they position their cursor over the tag when
signing a document. You can specify a tool tip for the tag to provide help for your
recipient.
Location
l
l
From left and From top: These fields show the position of the tag on the document and
can be used to manually set the position.
Anchor: Anchors the tag to the specified word(s) in the envelope. See Using Anchor Text
in the DocuSign Service User Guide for more information on using the anchor feature.
Formatting Properties
l
Locked: You can choose to lock the tag, so that the information cannot be changed, or
make it editable by the recipient. The default is editable (not-locked).
Conditional Fields
See Using Conditional Fields in the DocuSign Service User Guide for more information about
conditional fields.
l
Parent Tab: Selects the Parent Tab for the Conditional Field
l
Parent Value: Sets the value used to activate this field.
Radio Button Tag
Place this tag on the document in a location where the recipient can select an option. See Using
Check Boxes and Radio Buttons in the DocuSign Service User Guide for more information about
when and how to use radio buttons. The following properties can be edited for this tag:
Basic Properties
l
l
Recipient: This shows the recipient associated with the tag. If there are multiple
recipients in the envelope, you can use this list to select the recipient associated with the
tag.
Allow All to Edit*: Select this option to enable Field Markup for this tag. When selected,
Require Initial becomes active and can be selected to require signers that have already
completed signing to review and initial the changes to complete the envelope. See Using
221 Main Street, Suite 1000, San Francisco, CA 94105 Ι Tel. 866.219.4318 Ι www.docusign.com Ι © DocuSign, Inc.
DocuSign For Salesforce User Guide
48
the Field Markup Feature in the DocuSign Service User Guide for more information about
Field Markup.
l
l
Group: The name of the radio button group associated with this radio button. The group
name connects multiple radio buttons in the same group. A recipient can only select one
radio button in a group.
Value: This is the value that appears in the form data for the document if the radio button
is selected.
Location
l
l
From left and From top: These fields show the position of the tag on the document and
can be used to manually set the position.
Anchor: Anchors the tag to the specified word(s) in the envelope. See Using Anchor Text
in the DocuSign Service User Guide for more information on using the anchor feature.
Formatting Properties
l
l
Required: You can choose to make one button in the Radio Button group required or
optional for the recipient. The default is required.
Locked: You can choose to lock the tag, so that the information cannot be changed, or
make it editable by the recipient. The default is editable (not-locked).
Conditional Fields
See Using Conditional Fields in the DocuSign Service User Guide for more information about
conditional fields.
l
Parent Tab: Selects the Parent Tab for the Conditional Field
l
Parent Value: Sets the value used to activate this field.
Drop Down Tag
221 Main Street, Suite 1000, San Francisco, CA 94105 Ι Tel. 866.219.4318 Ι www.docusign.com Ι © DocuSign, Inc.
DocuSign For Salesforce User Guide
49
Use this tag to give your recipient a list of options they can select. The following properties can
be edited for this field:
Basic Properties
l
l
l
Recipient: This shows the recipient associated with the tag. If there are multiple
recipients in the envelope, you can use this list to select the recipient associated with the
tag.
Allow All to Edit*: Select this option to enable Field Markup for this tag. When selected,
Require Initial becomes active and can be selected to require signers that have already
completed signing to review and initial the changes to complete the envelope. See Using
the Field Markup Feature in the DocuSign Service User Guide for more information about
Field Markup.
Label: A unique identifier for the tag. This is only seen by the sender and in the Form Data
for the envelope). Drop Down tags that share the same label are set to the same value
when the recipient selects the value for one linked drop down.
Data
l
Drop Down items: These are the items shown in the drop down list. The items must be
separated by semi-colons (;). This field is limited to 2000 characters, including the semicolon separators.
EXAMPLE – if you want a recipient to select from a list of marital status, you would
type “Single;Married;Divorced;Widowed” in the field.
l
Drop down values: These are optional values that relate to the drop down items, but can
be different from the list of drop down items.
EXAMPLE – You want the values for the previous list to have a value of 1 to 4, you
would type “1;2;3;4” in the field and when Single is selected in the list, the value for
the field would be 1.
l
l
Selected Value: You can specify a default value for the drop down list. If you do not
specify a default value, the word ‘select’ appears as the value in the in the list.
This is a Payment Amount*: This option is designates this tag as a payment tag. See Using
the Payment Processing Feature in the DocuSign Service User Guide for more
information.
Location
221 Main Street, Suite 1000, San Francisco, CA 94105 Ι Tel. 866.219.4318 Ι www.docusign.com Ι © DocuSign, Inc.
DocuSign For Salesforce User Guide
l
l
50
From left and From top: These fields show the position of the tag on the document and
can be used to manually set the position.
Anchor: Anchors the tag to the specified word(s) in the envelope. See Using Anchor Text
in the DocuSign Service User Guide for more information on using the anchor feature.
Formatting Properties
l
l
l
Text Style: These options are used to set the font type, size, and color for the text in this
tag. This allows you to match the text formatting in your documents.
Required: You can choose to make the tag required or optional for the recipient. The
default is required.
Locked: If you provide information for a tag, you can choose to lock the tag, so that the
information cannot be changed, or make it editable by the recipient. The default is
editable (not-locked).
Conditional Fields
See Using Conditional Fields in the DocuSign Service User Guide for more information about
conditional fields.
l
Parent Tab: Selects the Parent Tab for the Conditional Field
l
Parent Value: Sets the value used to activate this field.
Note Tag
Place this tag on the document where you want additional information on a document for a
recipient. The following properties can be edited for this tag:
Basic Properties
l
Recipient: This shows the recipient associated with the tag. If there are multiple
recipients in the envelope, you can use this list to select the recipient associated with the
tag.
l
Allow All to View: Select this option to allow all recipients to view the note.
l
Include in email: Select this option to include the note in the email and on the document.
l
Label: A unique identifier for the tag. This is only seen by the sender and in the Form Data
for the envelope.
221 Main Street, Suite 1000, San Francisco, CA 94105 Ι Tel. 866.219.4318 Ι www.docusign.com Ι © DocuSign, Inc.
DocuSign For Salesforce User Guide
l
l
51
Tool Tip: The text a recipient sees when they position their cursor over the tag when
signing a document. You can specify a tool tip for the tag to provide help for your
recipient.
Note: The text of the note for the recipient. You might need to resize the note tag after
typing the text.
Location
l
l
From left and From top: These fields show the position of the tag on the document and
can be used to manually set the position.
Anchor: Anchors the tag to the specified word(s) in the envelope. See Using Anchor Text
in the DocuSign Service User Guide for more information on using the anchor feature.
Formatting Properties
l
Text Style: These options are used to set the font type, size, and color for the text in this
tag. This allows you to match the text formatting in your documents.
Conditional Fields
See Using Conditional Fields in the DocuSign Service User Guide for more information about
conditional fields.
l
Parent Tab: Selects the Parent Tab for the Conditional Field
l
Parent Value: Sets the value used to activate this field.
Formula Tag
Place this tag on the document where you want include a calculation. See Using the Calculated
Fields Feature in the DocuSign Service User Guide for more information. The following
properties can be edited for this tag:
Basic Properties
l
l
l
Recipient: This shows the recipient associated with the tag. If there are multiple
recipients in the envelope, you can use this list to select the recipient associated with the
tag.
Label: A unique identifier for the tag. This is only seen by the sender and in the Form Data
for the envelope.
Tool Tip: The text a recipient sees when they position their cursor over the tag when
signing a document. You can specify a tool tip for the tag to provide help for your
recipient.
221 Main Street, Suite 1000, San Francisco, CA 94105 Ι Tel. 866.219.4318 Ι www.docusign.com Ι © DocuSign, Inc.
DocuSign For Salesforce User Guide
l
l
l
l
52
Formula: This field contains the formula information for the tag.
Insert Tag Name: A selection list used to select the reference tags to insert into the
Formula field.
Round to decimal places: This sets the number of places shown after the decimal point
for the final field value. It can only be set to 2 or 0.
This is a Payment Amount*: This option is designates this tag as a payment tag. See Using
the Payment Processing Feature in the DocuSign Service User Guide for more
information.
Formatting Properties
l
Text Style: These options are used to set the font type, size, and color for the text in this
tag. This allows you to match the text formatting in your documents.
The Tag Toolbar
The Tagging Toolbar allows you to edit your envelope settings, documents and tags from the
Add Tags page. The Tagging Toolbar is on the upper-portion of the Add Tags page, below the
message field.
In general, the buttons on the left portion of the toolbar deal with envelope settings and
documents, while the buttons on the right portion deal with tags.
You usually need to select one or more tags to use the tag buttons on the toolbar. Selected tags
have a blue border to show they are selected.
l
Select single tag by clicking on the tag.
l
Select multiple tags by holding the Ctrl key while clicking on the tags.
l
To select a specific group of tags, place your cursor cross hair near the tags and then
click and drag the cursor over the tags you want to select. You only have to include a
221 Main Street, Suite 1000, San Francisco, CA 94105 Ι Tel. 866.219.4318 Ι www.docusign.com Ι © DocuSign, Inc.
DocuSign For Salesforce User Guide
53
portion of a tag to select it.
Each of the buttons on the toolbar is described below:
l
l
l
l
l
l
l
l
l
Edit Settings
Opens the Envelope Settings section, allowing you to edit recipient options, reminders
and expiration and sender settings
Match Templates
The system checks to see if the document matches a template in your system. If a match
is found, you have the option of applying a template
Remove Page
Removes the current page from the envelope.
Rotate Page left 90o
Rotates the current page left 90o
Rotate Page right 90o
Rotates the current page right 90o.
Identify Recipient Tags
Clicking this button shows the recipient associated with each tag in the envelope.
Edit Tag Properties
Opens the Properties dialog box for the selected tag.
Select All Tags
Selects all the tags on all the documents in the envelope.
Select All Tags on Current Page
Selects all the tags on this page.
221 Main Street, Suite 1000, San Francisco, CA 94105 Ι Tel. 866.219.4318 Ι www.docusign.com Ι © DocuSign, Inc.
DocuSign For Salesforce User Guide
l
l
l
l
54
Copy Selected Tags
Copies the currently selected tags.
Paste Copied Tags
Pastes any copied tags into the current page.
Delete Selected Tags
Removes all the selected tags from the envelope.
Align Selected Tags
These four buttons align the selected tags to the left, right, top or bottom side of the all
the selected tags. 221 Main Street, Suite 1000, San Francisco, CA 94105 Ι Tel. 866.219.4318 Ι www.docusign.com Ι © DocuSign, Inc.
DocuSign For Salesforce User Guide
55
Merge Fields
Merge fields are DocuSign custom tags that are integrated with Salesforce objects. When a
custom tag with merge field settings is added to a document, the Salesforce data is imported
into the tag. In addition to pulling data from Salesforce, merge fields can update data in
Salesforce when the information is changed by a signer (this only happens if the Writeback
option is enabled for the Merge Field).
l
Create Merge Fields
l
Edit Merge Fields
l
Add Custom Tags with Merge Field Settings
Create Merge Fields
Note: In order for the merge fields feature to work correctly, merge fields must be enabled
for your account and DocuSign Connect for Salesforce must be configured and enabled.
1. From the force.com apps drop-down list, select DocuSign for Salesforce.
2. Click the DocuSign Admin tab.
3. Click the DocuSign tab, the DocuSign web application opens in a new browser window.
Note: You might be asked to log in to DocuSign. If you are asked to log in, you can try
closing the new browser window, refresh the DocuSign Admin tab window and then try
clicking the DocuSign tab again.
4. From the DocuSign application, click your profile image at the top of the console and select
Preferences.
The DocuSign Account Preferences page is displayed.
5. In the Navigation Panel on the left side, under the Member Options section, click Custom
Tags. The list of your Merge Fields, custom tags and shared custom tags is shown.
6. Click Add. The Custom Tags page appears.
221 Main Street, Suite 1000, San Francisco, CA 94105 Ι Tel. 866.219.4318 Ι www.docusign.com Ι © DocuSign, Inc.
DocuSign For Salesforce User Guide
56
7. Select the Relate to Salesforce check box. The Salesforce Object lists appear below the
check box.
l
In the top list, select the Salesforce Object (Opportunity, Case, Account, etc.) that
documents will be sent from and then select the field associated with the tag.
If the selected field is a Salesforce Lookup Field type, shown with the word reference
or child relationship in parenthesis after the field title, continue to use the lists below
the Lookup Field to select the final field to associate with the tag.
l
Select the Writeback check box to automatically update the Salesforce data when the
221 Main Street, Suite 1000, San Francisco, CA 94105 Ι Tel. 866.219.4318 Ι www.docusign.com Ι © DocuSign, Inc.
DocuSign For Salesforce User Guide
57
data is changed by a signer.
Note: If Writeback is selected for an email field, the signer that changed the
value must complete the normal email change confirmation process to update the
Salesforce value.
l
Select the Allow Sender to Edit checkbox to let senders modify the value of the
custom tag when the tag is added to a document during the sending process.
Note: If Allow Sender to Edit is selected, the sender can only modify the value
for the tag they have placed on their document. The value of the saved custom
tag is not changed.
8. Type a name for the custom tag in the Label field and review the tag Type. The Type field
is set to the type of Salesforce field selected, but can be changed.
Note: Label and Type are the only required fields for a custom tag. All other fields are
optional and the available fields can change, depending on the type of tag selected.
The Label is a unique identifier for the tag that is only seen by the sender. Tags that share
the same label will share the same data when entered by a recipient (for example: if you
add two data field tags with the labels Address 1, when a recipient types data into the first
data field tag, the information is automatically copied into the second tag).
The Type list sets the type of information entered in the field. Select a type that closely
matches the information in the selected Salesforce field.
Note: Radio Button tags are not supported with the Merge Fields feature. You can use
any other type of DocuSign tag.
The selected tag type can change the active fields for the custom tag. For example, when a
Check Box tag type is selected, the Initial Value, Conceal entered value, Width, Regex
Pattern and Validation Error fields are inactive; while selecting a Drop Down List type adds
the Items field and the Conceal entered value, Regex Pattern and Validation Error fields are
inactive.
9. Optionally, type the Tool Tip for the tag. The tool tip is text the recipient sees when they
position their cursor over the tag when signing a document. 10. The other fields that are active in the window depend on the Type selected. These fields
have the same properties as standard DocuSign tags. General information about these
fields follows:
221 Main Street, Suite 1000, San Francisco, CA 94105 Ι Tel. 866.219.4318 Ι www.docusign.com Ι © DocuSign, Inc.
DocuSign For Salesforce User Guide
58
Note: DocuSign recommends that you add a message in the Initial Value for the tag. This way senders can easily determine if there connection problem between Salesforce
and DocuSign. For example: If you type “NO VALUE” in the Initial Value for the tag,
when the tag is placed in a document “NO VALUE” is displayed in the tag until the
DocuSign system is able to pull the data from Salesforce. If the information does not
change, there is a connect problem.
l
l
l
l
l
Text Styles: These options are used to set the Font, Font Size, Font Style and Font
Color for the text in this tag. This allows you to match the text formatting in your
documents.
If the Conceal entered value as *** characters option is active, you can choose to
conceal (hide) the information a recipient types into the tag. The information
appears normally while the recipient is adding or modifying the information, but the
data is not visible to any other signer or the sender. See Collecting Envelope Form
Data in the DocuSign Service User Guide for information on how to view and
download the concealed tag data. The figure below shows how a concealed tag
appears after information is entered into the tag.
If the Regex Pattern field is active, you can use Regular Expressions syntax to format
a custom text mask. The custom mask checks the information a recipient types in the
field and, if the information does not follow the format, displays the message entered
in the Validation Error field. For more information on how to build a regular
expression, we recommend the following resources:
Regular-Expressions.info — http://www.regular-expressions.info/
Wikipedia — http://en.wikipedia.org/wiki/Regular_expression
RegExLib.com — http://regexlib.com/
If the Validation Error field is active, type a short message that appears when a
recipient incorrectly completes the tag, based on the format of the Regex Pattern
field.
Using the Anchor field you can anchor the custom tag to a word or series of words in
a document. Type a word or words in the Anchor field. The tag is attached to all
occurrences of the words in the documents in an envelope. Note that the word(s)
typed in the Anchor field are case sensitive. See Use Automatic Anchor Tags with
Custom Fields for information about anchoring a custom tag
221 Main Street, Suite 1000, San Francisco, CA 94105 Ι Tel. 866.219.4318 Ι www.docusign.com Ι © DocuSign, Inc.
DocuSign For Salesforce User Guide
l
l
Required option: You can choose to make the tag required or optional for the
recipient.
Locked option: If you provide information for a tag, you can choose to lock the tag, so
that the information cannot be changed, or make it editable by the recipient. The
default is editable (not-locked).
l
Fixed Length option: This sets the maximum number of characters for the tag.
l
Shared option: Select to allow other users to use this custom tag.
l
59
Include Note in Email option: If the tag Type is Note, select this option to have the
note appear in the email sent to the recipient.
11. Click Save to save the custom tag. The custom tag is ready for use as a Merge Field.
If the Shared option is selected, other users in your Salesforce account can use the custom
tag when sending documents with DocuSign.
Edit Merge Field Settings
You can edit the merge field settings for a custom tag from the DocuSign application
Preferences section or from the Custom tag palette while adding tags to a document.
1. Go to the list of custom tags:
l
l
From the DocuSign Admin tab, click the DocuSign tab. From the DocuSign web
application, click the Account Select list and select Preferences. In the Navigation Panel
on the left side, under the Member Options section, click Custom Tags. The list of your
custom tags and shared custom tags is shown.
If you are adding tags, click on the Custom tag palette and click Edit. The list of your
custom tags and shared custom tags is shown.
2. To edit the custom tag, select the check box adjacent to the tag with the merge field
221 Main Street, Suite 1000, San Francisco, CA 94105 Ι Tel. 866.219.4318 Ι www.docusign.com Ι © DocuSign, Inc.
DocuSign For Salesforce User Guide
60
information you want to edit and click Edit at the bottom of the list. The Custom Tags page
for the selected custom tag appears.
Make the changes to the custom tag as needed. Making changes to custom tag is similar to
creating a new custom tag. Refer to steps 6 – 10 of the Create Merge Fields procedure for
more information.
When you have made all of the changes, click Save to save the modified custom tag and
return to the list of custom tags
3. To delete a custom tag, select the check box adjacent to the field you want to delete and
click Delete at the bottom of the list.
Note: If you are not a Customer Account Manager, you can only delete your custom
tags. A Customer Account Manager can delete shared custom tags.
The selected custom tags are removed from the list.
4. When you are finished editing or deleting Merge Fields, click Done. Add Custom Tags with Merge Field Settings
The procedure for adding a custom tag with merge field settings to your document is similar to
adding a standard DocuSign tag.
1. Start an envelope normally. When you are ready to add a custom tag, select the recipient
for the tag, click on the Custom tag palette, your custom tags and any shared custom tags
are shown in the tag palette. Note: The envelope must be started from Salesforce or associated with the Salesforce
object in the Envelope Settings for the merge field information to transfer into the tag.
221 Main Street, Suite 1000, San Francisco, CA 94105 Ι Tel. 866.219.4318 Ι www.docusign.com Ι © DocuSign, Inc.
DocuSign For Salesforce User Guide
61
2. Find the custom tag you want to add to the document, then click and drag the tag onto the
document and drop it.
Custom tags with merge field are differentiated from standard custom tags by icons with a
small cloud and a double-headed arrow (showing Writeback is enabled, so data is pulled
from Salesforce and updates are sent back to Salesforce) or a single-headed arrow (showing
Writeback is not enabled, so data is only pulled from Salesforce).
3. If the merge field settings for the custom tag pull information from a list in Salesforce; the
first time the tag is placed on the document, the first value in the list is displayed and each
subsequent time the tag is placed on the document the next value from this list is displayed.
Example: You have a custom tag with merge field settings that point to a price field for
an Opportunity with a list of product prices. The values in the list of product prices are
$100, $150, and $200. The first time the custom tag is placed on a document, it displays
$100. The second time the tag is placed it displays $150 and a third tag displays $200.
4. Finish adding any other tags and send the envelope normally.
221 Main Street, Suite 1000, San Francisco, CA 94105 Ι Tel. 866.219.4318 Ι www.docusign.com Ι © DocuSign, Inc.
DocuSign For Salesforce User Guide
62
Automatic Anchor Text and Tags
Automatic anchor text is a feature that allows text to be used in documents as a placeholder for
signature, initial and other tags for particular Salesforce Role Names. You can manually place
the text into your documents and then set the roles for recipients when adding the recipients to
an envelope. When you send the document using DocuSign for Salesforce, the appropriate
DocuSign tags for the selected role are placed in the automatic anchor text locations.
By default, your DocuSign for Salesforce installation supports standard automatic anchor text
for up to four recipients (Role Names Signer 1-4, as defined in the DocuSign Admin-Envelopes
Recipient Role Settings). You can extend the standard anchor text feature to support additional
recipients and Salesforce merge field settings using custom tags.
Automatic Anchor Tags and Recipient Signer Roles
The following table shows the default automatic anchor text used for different DocuSign tags,
based on the Role assigned to a signer in Salesforce. This is the text typed in documents when
creating and saving the documents. Salesforce Role Names and Anchor Text
Tag Type
Signer 1
Signer 2
Signer 3
Signer 4
Signature
\s1\
\s2\
\s3\
\s4\
Initial
\i1\
\i2\
\i3\
\i4\
Optional Initial
\oi1\
\oi2\
\oi3\
\oi4\
Name
\n1\
\n2\
\n3\
\n4\
Company
\co1\
\co2\
\co3\
\co4\
Title
\t1\
\t2\
\t3\
\t4\
Date Signed
\d1\
\d2\
\d3\
\d4\
For example, to add:
l
A Signature tag for Salesforce Role Name Signer 2, you would type \s2\ in the document.
l
A Company tag for Salesforce Role Name Signer 3, you would type: \co3\in the document.
l
A Title tag for Salesforce Role Name Signer 1, you would type: \t1\ in the document
221 Main Street, Suite 1000, San Francisco, CA 94105 Ι Tel. 866.219.4318 Ι www.docusign.com Ι © DocuSign, Inc.
DocuSign For Salesforce User Guide
63
Note: The previous table shows the default Role Names in the DocuSign Admin –
Settings tab. If the Salesforce Role Names are modified, the associated information in
the table will change.
Place Automatic Anchor Text in a Document
When creating or editing a document, type the automatic anchor text in the appropriate
location in the document.
l
After typing the anchor text, change the color of the anchor text to white or to the
background color of the document. This way the anchor text does not appear when the
document viewed, making the anchor text invisible to the recipients of the document.
In the example below, anchor text is added to place an initial, signature, name, title and
date signed tags. The text has been highlighted so it can be viewed.
IMPORTANT: You MUST NOT use the automatic anchor text in ANY other location in the
document, unless you want DocuSign to add the tags to the text location.
Use Automatic Anchor Text with Custom Tags
In addition to standard Automatic Anchor Tags, you can use automatic anchor text to place
DocuSign custom tags, including those with merge field settings, in documents. This is done by
using a special macro sequence when defining the custom tag. 1. Create a new custom tag.
For information about creating custom tags, see the Creating Custom Tags Quick Start Guide
or DocuSign Service User Guide.
221 Main Street, Suite 1000, San Francisco, CA 94105 Ι Tel. 866.219.4318 Ι www.docusign.com Ι © DocuSign, Inc.
DocuSign For Salesforce User Guide
64
For information about creating a custom tag with merge field settings, see the Merge Fields
section of this guide.
2. In the Anchor field for the custom tag, type anchor text for the tag. The anchor text must
include the string {r}. The {r} will represent the numbered position in the Salesforce Role
Name list when the anchor text string is added to a document and the {r} is replaced with
the appropriate number in the document.
Example Custom Tag Anchor Text:
Custom
Tag Type
Anchor field text
is …
Document Anchor Text
for Role Name 1
Document Anchor Text
for Role Name 2
Text
\tbx_{r}_text\
\tbx_1_text\
\tbx_2_text\
Check
Box
\cb_{r}_yes\
\cb_1_yes\
\cb_2_yes\
This feature also supports the use of Salesforce related lists as returned by merge field
settings. In this case, the anchor text typed in the Anchor field uses the format {r,startRowendRow}. Example Related List:
Custom Tag Type
Anchor field
text is …
Document Anchor
Text for Role Name
1
Text
The merge field settings are:
\listprice1_1\
\listprice1_2\
\listprice
{r,1-5}\
\listprice1_3\
\listprice1_4\
\listprice1_5\
If the custom tag is created with the merge field settings as shown above and the five
anchor text entries are typed into the document, then five Text tags are automatically
placed with the anchor text when the document is sent from the Opportunity with DocuSign
for Salesforce. The values in the Text tags are the first five values of the Price Book entry
list price for this Opportunity.
221 Main Street, Suite 1000, San Francisco, CA 94105 Ι Tel. 866.219.4318 Ι www.docusign.com Ι © DocuSign, Inc.
DocuSign For Salesforce User Guide
65
Note: Tags are still placed on the document even if the merge field definition is not
provided. This allows multiple unique tabs to be created from a single merge field
definition.
3. To allow others in your organization to use the new custom tag, including your Salesforce1
mobile app users, in the Form Field settings, select Shared.
4. Click Save to save the custom tag.
When creating or editing a document that will use the automatic anchor text for custom
tags, type the automatic anchor text in the appropriate location in the document as
described in the topic Place Automatic Anchor Text in a Document.
Send Documents with Anchor Text
A document with automatic anchor text is sent in the same manner as a normal document, with
the following changes:
1. Add the document with the anchor text to the envelope.
2. When adding or editing the recipients, use the Signer Role list to select the Role Name for
the recipient. This selection tells DocuSign which person to assign the automatic anchor
tags.
221 Main Street, Suite 1000, San Francisco, CA 94105 Ι Tel. 866.219.4318 Ι www.docusign.com Ι © DocuSign, Inc.
DocuSign For Salesforce User Guide
66
Click Save Recipient to add or edit the recipient.
3. Finish preparing your envelope.
4. Click Send Now. Alternately, you can click Next to place additional tags and review the
placement of tags on the documents. DocuSign for Salesforce places the appropriate tags in the document on the anchor text
locations for the selected Signer Role for each recipient and sends the envelope.
5. You have successfully sent a document for signing from DocuSign for Salesforce.
When the recipient receives the document they see the signature, initial and other tabs
showing where and how to sign the document.
Refer to the DocuSign for Salesforce User Guide for a more information about sending
documents with DocuSign for Salesforce.
221 Main Street, Suite 1000, San Francisco, CA 94105 Ι Tel. 866.219.4318 Ι www.docusign.com Ι © DocuSign, Inc.
DocuSign For Salesforce User Guide
67
Free-Form Signing
You can send documents without tags that indicate to your recipients where they should sign,
initial or add information in the document. Signing without the assistance of tags is called FreeForm Signing.
Sending an envelope for free-form signing is done in the same way as sending an envelope for
guided signing, except you do not add any tags to the documents in the envelope. When
recipients open documents sent for free-form signing they can place tags in the document as
needed.
Recipients use the Add menu at the top of the signing page to display the tag palette for adding
tags (a Signature, Initial, My Name, Company, title, Date Signed, Text, or Check box) to the
documents.
The recipient’s free-form signing process is as follows:
1. To add a signature, initial or other information to a document, the recipient clicks the
Add menu.
The tagging palette appears, displaying the various signing tags the recipient can place
on the document.
2. The recipient selects the appropriate tag (a Signature, Initial, My Name, Company, Title,
Date Signed, Text, or Check box) and then clicks the appropriate location in the document
to place the tag.
221 Main Street, Suite 1000, San Francisco, CA 94105 Ι Tel. 866.219.4318 Ι www.docusign.com Ι © DocuSign, Inc.
DocuSign For Salesforce User Guide
l
l
l
l
l
68
When the recipient places a Signature tag, they are asked to adopt their signature
in the same way as guided signing.
The My Name, Company and Title tags use pre-filled recipient information, but can
be modified by the recipient.
The Date Signed tag uses the current date.
In cases where they need to add text into the document, they click and drag a Text
box to the document. After placing the Text box, they can type information directly
into it.
The Check box places a checked box on the document.
3. Recipients can adjust the size and position of a tag:
l
l
l
They can move a tag by clicking on the tag to select it and then dragging it to a
new location.
They can resize a tag by clicking on it to select it and then dragging the corner of
the tag.
They can remove a tag from the document by clicking on the tag and then clicking
the delete icon on the tag.
4. After the recipient has placed all the tags in the document, they click Finish to complete
signing.
The envelope is completed or sent to the next recipient. The recipient has completed
signing and a message stating that they have completed signing and the documents have
been received is displayed. They are given the option of downloading a PDF copy of the
documents, print a copy of the documents or view the completed document.
221 Main Street, Suite 1000, San Francisco, CA 94105 Ι Tel. 866.219.4318 Ι www.docusign.com Ι © DocuSign, Inc.
DocuSign For Salesforce User Guide
69
Viewing Envelope Status
DocuSign for Salesforce has several methods for you to examine the status of selected
envelopes and review detailed status information about individual envelopes.
View the Status of Groups of Envelopes
1. From the force.comapps drop-down list, select DocuSign for Salesforce.
2. Click the DocuSign Status tab.
The DocuSign Status Home page appears with the default view showing the status of all
of your recent viewed envelopes.
3. To change the envelope status displayed:
l
l
Use the Recent DocuSign Status drop down list (at the right side of the list) to
select another view. The choices are Recently Created, Recently Modified and
Recently Viewed.
Use the View drop down list to select another view. The default choices are All, All
Envelopes and All Completed Envelopes.
You can edit or create a new view using the normal Salesforce tools. Refer to the
Salesforce documentation for more information about how views, editing views
and creating new views in Salesforce.
View Detailed Status of Envelopes
1. From the force.com apps drop-down list, select DocuSign for Salesforce.
2. Click the DocuSign Status tab.
221 Main Street, Suite 1000, San Francisco, CA 94105 Ι Tel. 866.219.4318 Ι www.docusign.com Ι © DocuSign, Inc.
DocuSign For Salesforce User Guide
70
The DocuSign Status Home page appears with the default view showing the status of all
of your recently viewed envelopes.
3. Find the envelope you want to view and click on the Envelope # link for the envelope.
IMPORTANT: DO NOT edit any of the status details of an envelope from this page.
Anytime DocuSign updates the envelope’s status, it also updates the envelope’s status
in DocuSign for Salesforce.
The DocuSign Status Detail page appears.
221 Main Street, Suite 1000, San Francisco, CA 94105 Ι Tel. 866.219.4318 Ι www.docusign.com Ι © DocuSign, Inc.
DocuSign For Salesforce User Guide
71
4. This page shows the detailed document status:
l
l
Detailed status information about the state of the envelope in the transaction
process and any related objects.
Status information for the envelope’s recipients, including if they have signed or
declined the envelope.
l
The history of the envelope.
l
Any notes or attachments associated with the envelope.
Depending on how your Salesforce account is set up, you might have the following action
buttons:
Note: If you have questions about the availability of buttons for DocuSign Status,
contact your Salesforce Administrator.
l
View in DocuSign: Clicking this button opens the envelope in the DocuSign
member console, allowing you to view information about the envelope.
221 Main Street, Suite 1000, San Francisco, CA 94105 Ι Tel. 866.219.4318 Ι www.docusign.com Ι © DocuSign, Inc.
DocuSign For Salesforce User Guide
l
72
Correct in DocuSign: If the Status for selected envelope is Sent or Delivered, this
button opens the envelope in the DocuSign Add Tags page. You can make changes
to the document, recipients and tags in the envelope for recipients that have not
signed documents in the envelope. The changes you can take are similar to the
actions taken when sending an envelope.
Note: You must be the sender of the document to use the Correct in DocuSign
action button.
l
l
Resend DocuSign Email: If you click this button from an Envelope status, the
envelope is sent to recipients with a Sent or Delivered status. If you click this button
from a Recipient status, the envelope is sent to that recipient.
Void Envelope: This can only be used if the envelope status is Sent or Delivered.
Clicking this button cancels the envelope and marks it as voided. Once an envelope
is voided, recipients can no longer view or sign the envelope. Recipients that signed
an envelope that is subsequently voided are sent an email informing them that the
envelope was voided and providing the reason it was voided.
View Status Updates in Chatter
To view Chatter updates for envelopes you sent, go to the detail page for the envelope and
select Show Chatter. The enabled Chatter updates are shown in the Chatter list.
The Envelope Events that can be enabled for Chatter updates are:
l
Sent
l
Delivered
l
Completed
l
Declined
l
Voided.
The Recipient Events that can be enabled for Chatter updates are:
l
Sent
l
Delivered
l
Signed
l
Declined
Note: This option might not be active for your account. If you have questions about
DocuSign for Salesforce Chatter updates, contact your Salesforce Administrator.
221 Main Street, Suite 1000, San Francisco, CA 94105 Ι Tel. 866.219.4318 Ι www.docusign.com Ι © DocuSign, Inc.


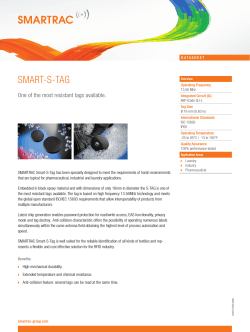


© Copyright 2026