
FRONT PAGE HEADING KNEE, SHOULDER, ANKLE AND CERVICAL SPINE ASSESSMENT
Knee, Shoulder, Ankle and Cervical Spine Assessment
FRONT PAGE HEADING
MAIN HEADING
Sub Headings
Body Copy
Body Copy + Bold
Body Copy + Bold + Italic
Body Copy + Normal + Italic
KNEE,
SHOULDER, ANKLE
STYLE HEADING FOR TABLES
AND CERVICAL SPINE
ASSESSMENT
Style Body for tables
Dr Craig Roberts
SA Rugby and KwaZulu Natal Rugby Union
PO Box 307
Durban
South Africa
4001
sharkdoc@mweb co za
craigr@sarugby co za
0
Copyright BokSmart © 2009
Knee, Shoulder, Ankle and Cervical Spine Assessment
KNEE ASSESSMENT
KNEE HISTORY
MECHANISM OF INJURY:
Record the mechanism of injury
Primary mechanisms and structures usually injured are(1):
Valgus force (± Rotation)
•
MCL
•
Posterior medial capsule
•
Medial meniscus
•
ACL
Hyperextension
ACL ± Meniscal tears
Flexion with posterior translation
PCL
Varus force
LCL
Posterior capsule
PCL
Acceleration
Acceleration
Meniscus
Deceleration
ACL
PCL
Rotation
Meniscus
Cutting
PCL
1
Copyright BokSmart © 2009
Knee, Shoulder, Ankle and Cervical Spine Assessment
PAIN
Record the location and character of the pain(2):
•
Pain at rest;
rest not usually mechanical in origin
•
Pain during activity is usually seen in structural abnormalities::
Subluxation
Patella tracking abnormalities
•
Pain after activities:
activities inflammatory disorders
Plica
Tendonosis
Paratendonosis
Sinding-Larson-Johansen syndrome
SWELLING
Record any swelling or fullness in the joint(2):
•
Immediate swelling usually indicates bleeding into joint:
ACL pathology
•
Delayed swelling 8-24 h after injury indicates:
Instability
Meniscal pathology
Bursa
Inflammation
FUNCTIONALLY
Record any of the following:
“Giving way” this may indicate:
Instability of the knee
Meniscal pathology
Patella subluxation
Patellofemoral pain syndrome (especially when walking uphill or downhill)
Loose body
•
Has the knee ever locked (this usually means the knee cannot fully extend, with flexion being
normal) – usually indicates:
Meniscal pathology
Loose body
2
Copyright BokSmart © 2009
Knee, Shoulder, Ankle and Cervical Spine Assessment
•
Grating or clicking:
clicking this may indicate
Degeneration
One structure snapping over another
Functional limitations related to the players position:
Training limitations
Playing limitations
OBJECTIVE CLINICAL ASSESSMENT
KNEE FLEXION
DEFINITION
Knee flexion
PURPOSE
To assess the active range of knee flexion
EQUIPMENT
Firm bed/plinth
Goniometer
LANDMARKS
Midpoint of lateral joint line
Lateral malleolus
Greater trochanter
PROCEDURE
Player lying supine
Ask the player to actively flex the knee as far as possible
Overpressure may be applied to assess further passive range, and assess the end-feel and note for any
pain
3
Copyright BokSmart © 2009
Knee, Shoulder, Ankle and Cervical Spine Assessment
SCORING
Measure the degree of active knee flexion with the goniometer centered over the lateral knee joint line
Compare with the opposite side(3)
NORMS
Active knee flexion : 0°-135°(4)
COMMENT
Note that the tracking of the patella should be a smooth curve from lateral to medial during flexion
KNEE HYPEREXTENSION
DEFINITION
Knee hyperextension
PURPOSE
To assess the degree of knee hyperextension and laxity of the knee joint
EQUIPMENT
EQUIPMENT
Firm bed/plinth
Goniometer
LANDMARKS
Midpoint of the lateral joint line
Lateral malleolus
Greater trochanter
PROCEDURE
Player lying supine
Examiner stabilizes proximal tibia by applying a posteriorly directed force
Gripping under the distal leg with the other hand, raising the leg into hyperextension
SCORING
4
Copyright BokSmart © 2009
Knee, Shoulder, Ankle and Cervical Spine Assessment
Record the degree of hyperextension
NORMS
Hyperextension: 0°-15°(4)
COMMENT
Knee extension is typically 0° but may be -15° especially in women(4)
TIBIAL ROTATION
DEFINITION
Tibial Internal/External rotation (at 90°)
PURPOSE
To assess the rotational mobility of the tibiofemoral joint
EQUIPMENT
Chair
Goniometer
Paper
Pen
LANDMARKS
Midpoint of posterior aspect of the calcaneus
Medial aspect of first MTPJ
PROCEDURE
Internal rotation
Player sits on chair with hips, ankle, and knees at 90° flexion
Mark neutral position
The foot and tibia is rotated internally around the fixed heel
The knee is maintained parallel to the midline of the body throughout the test
External rotation
5
Copyright BokSmart © 2009
Knee, Shoulder, Ankle and Cervical Spine Assessment
Player sitting as above with both fists clenched and separating the knees
Foot is externally rotated; knees must stay in contact with the fists during the test
SCORING
Mark the full range of internal and external rotation just medial to the MTPJ
Align the goniometer with the stationary arm in the sagittal plane and record degree of rotation
NORMS
Medial rotation of tibia on femur: 20°-30°(4)
Lateral rotation of tibia on femur: 30°-40°(4)
PATELLOFEMORAL GLIDE
DEFINITION
Patellofemoral glide test
PURPOSE
To assess the mobility of the PFJ in a medial and lateral direction
EQUIPMENT
Firm bed/plinth
LANDMARKS
Patella superior and inferior poles
PROCEDURE
Player lying supine with knee extended and quad muscles relaxed
Examiner places thumbs on the lateral border of patella and performs a medial glide noting resistance
and range of movement. The examiners fingers are then placed on the medial border of the patella and a
lateral glide is performed
6
Copyright BokSmart © 2009
Knee, Shoulder, Ankle and Cervical Spine Assessment
SCORING
Comment on whether the glide is restricted or tight and if there is a painful response
Compare to opposite side
Divide patella into four quadrants
NORMS
Hypomobile: less than one quadrant movement on medial or lateral glide
Normal: two quadrants (half width of patella movement)
Hypermobile:
Hypermobile More than two quadrants of movement (5)
COMMENT
Note any rotation of the patella with medial and lateral glides
Can also test at 30° and 45°, which is a more functional position; note presence of pain or
apprehension(5)
ANTERIOR DRAWER TEST
DEFINITION
Anterior drawer test
PURPOSE
To assess the anterior displacement of the tibia on the femur, which may be due to ACL insufficiency
EQUIPMENT
Firm plinth/bed
LANDMARKS
Nil
PROCEDURE
Player lying supine, hip flexed to 45°, knee flexed to 90°, tibia in neutral rotation
Foot remains flat on plinth throughout the test; examiner stabilizes this position by sitting on the foot
Examiner places both hands around upper tibia with thumbs on the joint line anteriorly
Fingers wrap around the leg posteriorly so index fingers can palpate hamstring tendons to ensure
hamstrings remain relaxed throughout the test
7
Copyright BokSmart © 2009
Knee, Shoulder, Ankle and Cervical Spine Assessment
Examiner pulls proximal tibia forward and palpates anterior joint line with thumbs to detect anterior
displacement of the tibial plateau
SCORING
Record palpable anterior or posterior displacement of the tibia on the femur
NORMS
Normal amount of movement is 6mm(4)
COMMENT
A positive finding indicates that further assessment of the integrity of the ACL must be performed
including Lachman and Pivot Shift tests(4)
There are many structures other than the ACL that can influence this test (Capsule, MCL, ITB, popliteus)
It is important to recognize the possibility of a false negative test due to PCL damage allowing the tibia to
fall posteriorly prior to the commencement of the test (look for posterior sag)(4)
LACHMAN TEST
DEFINITION
Lachman test of the knee
PURPOSE
To identify the integrity of the Anterior Cruciate Ligament (ACL)
EQUIPMENT
EQUIPMENT
Firm bed/plinth
LANDMARKS
Anterior joint line
PROCEDURE
Player lying supine
Knee held in approximately 15°-30° of flexion throughout test
Examiner stabilizes distal thigh in one hand and grasps proximal tibia in the other with the fingers
wrapping around posteriorly
8
Copyright BokSmart © 2009
Knee, Shoulder, Ankle and Cervical Spine Assessment
Examiner pulls proximal tibia forward
SCORING
Positive test = excessive anterior displacement of tibia on femur(3;4)
Lack of normal (sudden, firm) end feel also indicative of ACL damage(4)
NORMS
Normal
Firm end feel
5-8mm shift(3)
Abnormal
Mushy end feel
7-9mm shift(3)
Disappearance of infrapatella tendon slope (4)
COMMENT
Displacement must be compared between knees
The Lachman test is claimed to be the most accurate clinical test for the integrity of the ACL but may
also indicate injury to:
1. Posterior oblique ligament(4)
2. Arcuate-popliteus complex(4)
3. False negatives may occur due to bucket handle meniscal tears(4)
PIVOT SHIFT TEST
DEFINITION
Pivot Shift Test
9
Copyright BokSmart © 2009
Knee, Shoulder, Ankle and Cervical Spine Assessment
PURPOSE
To identify anterolateral rotary instability of the tibiofemoral joint
As a test to evaluate ACL integrity
EQUIPMENT
Nil
LANDMARKS
Lateral tibial plateau
PROCEDURE
Player lying supine
Examiner standing at the side of the bed
Examiner places one hand under the athletes heel and passively raises leg 5-10cm off plinth, keeping
knee extended
Examiner places other hand on lateral tibial plateau
Examiner internally rotates the lower leg via the foot and applies a gentle valgus stress to the knee
While maintaining internal rotation and valgus stress examiner slowly flexes knee joint
SCORING
Anterior subluxation of the lateral tibial condyle occurs initially
A positive test results when the lateral tibial plateau is felt/observed to reduce posteriorly (lateral tibial
rotation) sometimes with a clunk at 30-40° of flexion (3)
NORMS
In a positive test there is subluxation of the tibial condyle and then reduction(3;4)
COMMENT
A positive test indicates probable damage to:
ACL
Posterolateral capsule
Arcuate-popliteus complex
LCL
10
Copyright BokSmart © 2009
Knee, Shoulder, Ankle and Cervical Spine Assessment
The ITB must be intact for a positive test(4)
POSTERIOR DRAWER TEST
DEFINITION
Posterior drawer test of the knee
PURPOSE
To assess the posterior displacement of the tibia on the femur, which may be due to PCL insufficiency
EQUIPMENT
Firm plinth/bed
LANDMARKS
Nil
PROCEDURE
Player lying supine, hip flexed to 45°, knee flexed to 90°, tibia in neutral rotation
Foot remains flat on plinth throughout the test; examiner stabilizes this position by sitting on the foot
Examiner places both hands around upper tibia with thumbs on joint line anteriorly. Fingers wrap around
the leg posteriorly so index fingers can palpate hamstring tendons to ensure hamstrings remain relaxed
throughout the test
Examiner pushes proximal tibia posteriorly and palpates anterior joint line with thumbs to detect posterior
displacement of the tibial plateau
SCORING
Record palpable posterior displacement of the tibia on the femur
NORMS
Normally the medial tibial plateau extends 10mm anteriorly beyond the femoral condyle at 90° flexion; if
this step is lost or there is posterior displacement it constitutes a positive test (4)
COMMENT
A positive finding indicates that the following structures may have been injured to some degree:(4)
PCL
11
Copyright BokSmart © 2009
Knee, Shoulder, Ankle and Cervical Spine Assessment
Arcuate-popliteus complex
Posterior oblique ligament
ACL
MEDIAL COLLATERAL (MCL) STRESS TEST
DEFINITION
MCL Valgus stress test of the knee
PURPOSE
To assess the integrity of the medial collateral ligament and medial joint capsule of the knee
EQUIPMENT
Firm bed/plinth
LANDMARKS
Medial joint line
P ROCEDURE
Player lying supine
Examiner passively flexes knee to 30° over side of plinth, thigh remains flat on plinth throughout the test
Examiner grasps distal tibia in one hand and places palm of the other hand on the lateral aspect of the
knee with the fingers over the medial joint line
Examiner applies valgus stress to the knee by pushing the tibia into abduction, while applying a
counterforce to the lateral knee
Test protocol is repeated with knee in full extension
SCORING
Record palpable and observable opening along the medial joint line when valgus stress is applied
Compare to opposite side
NORMS
Grade I: 5mm opening
Grade II: 5-10mm opening
12
Copyright BokSmart © 2009
Knee, Shoulder, Ankle and Cervical Spine Assessment
Grade III: >10mm opening(6;7)
COMMENT
Opening in extension indicates possible damage to the following structures(4):
MCL (superficial and deep fibers)
Posteromedial capsule
ACL
PCL
Medial quadriceps expansion
Semimembranosus
Opening at 30° indicates possible damage to the following structures(4):
MCL
Posterior oblique ligament
PCL
Posterior medial capsule
LATERAL COLLATERAL (LCL) STRESS TEST
DEFINITION
Lateral Collateral Ligament (LCL) varus stress test
PURPOSE
To assess the integrity of the lateral ligament complex of the knee
EQUIPMENT
Firm bed/plinth
LANDMARKS
Lateral joint line
PROCEDURE
Player lying supine
Examiner passively flexes knee to 30° over side of plinth, thigh remains flat on plinth throughout the test
13
Copyright BokSmart © 2009
Knee, Shoulder, Ankle and Cervical Spine Assessment
Examiner grasps distal tibia in one hand and places palm of the other hand on the medial aspect of the
knee with the fingers over the lateral joint line
Examiner applies varus stress to the knee by pushing the tibia into adduction, while applying a
counterforce to the medial knee
Test protocol is repeated with knee in full extension
SCORING
Palpable and observable opening along the lateral joint line when varus stress is applied
Compare with opposite side
Note athletes pain response
NORMS
Grade I: 5mm opening
Grade II: 5-8mm opening
Grade III: >8mm opening (usually painless)(6;7)
COMMENT
A positive test in extension indicates possible damage to the following structures(4)
LCL
Posterior lateral capsule
Arcuate-popliteus complex
Bicep femoris tendon
PCL
ACL
Lateral gastrocnemius muscle
ITB
A positive test in 30° flexion indicates possible damage to(4):
LCL
Posterolateral capsule
Arcuate-popliteus complex
Bicep femoris tendon
ITB
14
Copyright BokSmart © 2009
Knee, Shoulder, Ankle and Cervical Spine Assessment
McMURRAY’S TEST
DEFINITION
McMurray’s test of meniscus
PURPOSE
To assess the posterior horn of the medial and lateral meniscus
EQUIPMENT
Firm bed/plinth
LANDMARKS
Joint line
PROCEDURE
Player lying supine
Examiner passively flexes hip and knee to full knee flexion
Examiner cups one hand around heel and grasps rear foot, palm of other hand is placed on the lateral
aspect of the knee joint, with the fingers over the medial joint line
Examiner laterally rotates lower leg through the rear foot and applies a valgus stress to the knee
While maintaining external rotation and valgus force the examiner slowly extends the knee from a fully
flexed position to a position of 90° flexion
This test is repeated with a combination of internal rotation and varus force
SCORING
Record pain and/or a palpable/audible click in the knee during passive extension(8)
NORMS
Positive test: pain and/or a palpable/audible click in the knee during passive extension
COMMENT
A positive test generally indicates pathology of the meniscus usually the posterior horn (9)
It has been reported that meniscal lesions may be found on the medial side with lateral rotation and on
the lateral side with medial rotation(10)
15
Copyright BokSmart © 2009
Knee, Shoulder, Ankle and Cervical Spine Assessment
This test has been found to have a sensitivity of 26% and a specificity of 85%, thus false positives are
common(11)
Tenderness on palpation of the joint line is positive with meniscal lesions in 85% of cases and is perhaps
considered a more accurate test (12)
SQUAT TEST (DUCK WALK)
DEFINITION
Squat test or Duck Walk Test
PURPOSE
To assess the ability to achieve a full squatting position; to evaluate for meniscal pathology in a weightbearing position
EQUIPMENT
Nil
LANDMARKS
Nil
PROCEDURE
Player stands initially, then squats down on toes slowly as far as possible, keeping the heels elevated
Examiner views the quality of movement, and if the squat position is achieved and maintained without
problems; over pressure is applied downwards through the shoulders of the player
As a more provocative test of the menisci, a “duck walk” can be performed by the player in the full squat
position
SCORING
Record any pain response (and location) elicited with squat and overpressure (3;13) and or duck walk
Limitation of movement if appropriate
NORMS
Painless, ability to duck walk with no difficulty(3;13)
COMMENT
16
Copyright BokSmart © 2009
Knee, Shoulder, Ankle and Cervical Spine Assessment
Pain, snapping or a click is considered positive for a posterior horn lesion of the meniscus (13)
McCONNELL TEST
DEFINITION
McConnell test for patellofemoral pain syndrome (14)
PURPOSE
To determine if knee pain is patellofemoral in origin
EQUIPMENT
Nil
LANDMARKS
Patella
PROCEDURE
Player sitting with femur laterally rotated
Player performs isometric quadriceps contractions at 120°, 90°, 60°, 30° and 0°, with each contraction
held for 10 seconds
If pain is produced during any of the contractions the player’s knee is fully returned to extension by the
examiner; the patient leg is then fully supported on the examiners knee and the examiner pushes the
patella medially
The medial glide is maintained while the knee is returned to the painful angle, and the player performs an
isometric contraction again, with the patella held medially
The test is repeated at each angle
SCORING
If pain is decreased, with medial glide the pain is patellofemoral in origin (4;14)
NORMS
Painless
17
Copyright BokSmart © 2009
Knee, Shoulder, Ankle and Cervical Spine Assessment
ANKLE ASSESSMENTS
ANKLE HISTORY
MECHANISM OF INJURY
Record the position of the foot at the time of injury there may be a combination of positions
Inversion
Eversion
Plantar flexion
Dorsiflexion
Also record the intrinsic mechanism of injury
Acceleration
Deceleration
Cutting
Twist
FUNCTIONALITY
Was the player able to continue with activity? If so it is probably not too severe
Inability to bear weight, severe pain, and rapid swelling indicate a severe injury(15)
Walking is compatible with a second-degree sprain; pain with running usually indicates a first-degree
sprain (16)
SWELLING
Record any swelling or fullness in the joint:(17)
Immediate swelling usually indicates bleeding into joint:
Delayed swelling (8-24h) after injury indicates
Instability
Capsulitis/synovitis
Inflammation
18
Copyright BokSmart © 2009
Knee, Shoulder, Ankle and Cervical Spine Assessment
PAIN
Record the location and character of the pain(17)
•
Pain at rest;
rest not usually mechanical in origin
•
Pain during activity is usually seen in structural abnormalities:
•
Pain after activities:
activities inflammatory disorders
OBJECTIVE CLINICAL ASSESSMENT
NON WEIGHT-BEARING PLANTAR FLEXION
DEFINITION
Non-weight-bearing ankle plantar flexion range of movement
PURPOSE
To assess range of movement of the foot complex into plantar flexion
EQUIPMENT
Goniometer
Firm bed/plinth
LANDMARKS
Tip of medial malleolus
Medial joint line of first MTP joint
PROCEDURE
Player long sitting or supine, feet off end of the bed/plinth
Maintain leg flat and knee extended throughout test
Player actively plantar flexes as far as possible
SCORING
Record angle formed by line joining landmarks relative to the horizontal(3)
Note the limiting factor: muscular or joint tightness
19
Copyright BokSmart © 2009
Knee, Shoulder, Ankle and Cervical Spine Assessment
NORMS
Normal range is 50°(18)
COMMENT
The patient’s heel normally inverts with non-weight-bearing plantar flexion. If inversion does not occur,
the foot is unstable or there is tibialis dysfunction or tightness (19)
The range of plantar flexion may be limited following injury and impair performance(3)
ROM can be tested in weight-bearing to differentiate joint restriction from weak plantar flexion(3)
NON WEIGHT-BEARING DORSIFLEXION
DEFINITION
Non weight-bearing dorsiflexion
PURPOSE
To measure active ankle dorsiflexion range of movement
To assess the length of gastrocnemius and soleus in a non weight-bearing position
EQUIPMENT
Goniometer
Firm bed/plinth
LANDMARKS
Tip of medial malleolus
Medial joint line of first MTP joint
PROCEDURE
Player long sitting or supine, feet off end of the bed/plinth
Maintain leg flat and knee extended throughout test
Subtalar joint maintained in neutral position throughout test
Player actively dorsiflexes as far as possible
20
Copyright BokSmart © 2009
Knee, Shoulder, Ankle and Cervical Spine Assessment
SCORING
Record angle of foot relative to the vertical, axis of goniometer placed over inferior tip of the medial
malleolus
Note the limiting factor: muscular or joint tightness
NORMS
Normal range 20°(17;18)
COMMENT
If restricted perform at 30° of knee flexion to eliminate posterior muscle tightness(4)
WEIGHT-BEARING DORSIFLEXION
DEFINITION
Weight bearing dorsiflexion (extension)
PURPOSE
To assess the range of talocrural dorsiflexion in a functional position for weight-bearing sports
Indirectly measures the length of the gastrocnemius and soleus muscles
EQUIPMENT
Goniometer with spirit level
LANDMARKS
Inferior tip of lateral malleolus
Midline of lateral aspect of the head of the fibula
PROCEDURE
Part I (Soleus)
Player in stride-stand position, no shoes
Maintain heel contact with floor throughout test
Maintain subtalar joint in stable position throughout the test to prevent pronation
Bend knee forward in line with the second toe until heel contact decreases or pain is experienced
21
Copyright BokSmart © 2009
Knee, Shoulder, Ankle and Cervical Spine Assessment
Part II (Gastrocnemius):
Repeat test and maintaining knee extension throughout the test this will indicate the relative length of the
gastrocnemius muscle
SCORING
Record the angle formed by the shaft of the fibula relative to the vertical
NORMS
Soleus: 30°-40°
Gastrocnemius: 20°-30°
The difference between the two measures should be close to 10° (17)
COMMENT
Restriction of dorsiflexion at the talocrural joint may be due to gastrocnemius-soleus complex tightness(18)
Players with restriction of dorsiflexion often compensate by pronating the foot in weight bearing. This can
cause biomechanical changes and predispose to injury(18)
SUPINATION / PRONATION
DEFINITION
Supination and pronation range of motion of the ankle joint
PURPOSE
To identify hypo- and hypermobility of the ankle, which may be sequelae to ankle joint injuries
EQUIPMENT
Firm bed/plinth
Goniometer
LANDMARKS
Nil
PROCEDURE
PR OCEDURE
Player long sitting or supine, feet off end of bed/plinth
22
Copyright BokSmart © 2009
Knee, Shoulder, Ankle and Cervical Spine Assessment
Maintain hip joint in a neutral position, knee joint extended and foot in dorsiflexion throughout test
Starting position of foot in neutral
Player actively supinates the foot as far as possible
After returning to the starting position the player actively pronates the foot as far as possible
SCORING
Record range of movement
Watch for subluxation of tendons
NORMS
Supination: 45°-60°(17)
Pronation: 15°-30°(17)
COMMENT
Supination combines the movements of:
Inversion
Adduction
Plantar flexion
Pronation combines the movements of (17):
Eversion
Abduction
Dorsiflexion
If tibialis anterior is weak supination will be affected(17)
If the peronei are weak or the tendons sublux, pronation will be affected(17)
The range of subtalar movement is generally considered to be 2/3 inversion and 1/3 eversion(18)
TALAR TILT TEST
DEFINITION
Talar tilt test or Lateral ligament stress test
PURPOSE
23
Copyright BokSmart © 2009
Knee, Shoulder, Ankle and Cervical Spine Assessment
To assess the integrity of the calcaneofibular and anterior-posterior talofibular ligaments
EQUIPMENT
Firm bed/ plinth
LANDMARKS
Nil
PROCEDURE
Player lying supine with feet over end of bed/ plinth
Examiner stabilizes the lower leg with one hand and grasps the calcaneus in the palm of the other hand
with the thumb or index finger placed over the calcaneofibular ligament
Examiner applies inversion stress by rolling the calcaneus inwards causing the talus to tilt
SCORING
Positive test: excessive talar tilt or gapping of the joint compared to the other side(17)
NORMS
No gapping of joint, bilaterally similar(17)
COMMENT
At 90° the calcaneofibular ligament is tested(17)
If the foot is plantar flexed the anterior talofibular ligament is more likely to be tested(17)
MEDIAL LIGAMENT STRESS
DEFINITION
Medial (Deltoid) ligament stress test
PURPOSE
To assess the integrity of the medial collateral (deltoid) ligament of the ankle and its stability within the
mortise
24
Copyright BokSmart © 2009
Knee, Shoulder, Ankle and Cervical Spine Assessment
EQUIPMENT
Nil
LANDMARKS
Nil
PROCEDURE
Player lying supine with feet over end of bed/ plinth
Examiner stabilizes the lower leg with one hand and grasps the calcaneus in the palm of the other hand
with the thumb or index finger placed over the medial ligament
Examiner applies eversion stress by rolling the calcaneus outwards
SCORING
Record excessive tilt or gapping of joint compared to the other side
Record medial ankle pain
NORMS
Positive test: excessive moment, pain(17)
ANTERIOR DRAWER TEST
DEFINITION
Anterior drawer test of the ankle joint
PURPOSE
To assess the stability of the anterior talofibular ligament
EQUIPMENT
Firm bed/ plinth
LANDMARKS
Nil
25
Copyright BokSmart © 2009
Knee, Shoulder, Ankle and Cervical Spine Assessment
PROCEDURE
Player lying supine with feet over the end of the bed/plinth
Examiner stabilizes the lower leg with one hand and cups the calcaneus in the palm of the other hand,
holding foot in 20° of plantar flexion
Examiner pulls heel and foot anteriorly while applying a counterforce to the lower leg
SCORING
Record excessive anterior glide compared to the other side
NORMS
Positive test: excessive movement, pain, sulcus
COMMENT
Sometimes a dimple appears over the area of the anterior talofibular ligament on anterior translation
(sulcus sign)(17)
If straight anterior movement or translation occurs the test indicates both medial and lateral ligament
instabilities, indicating damage to(17):
Superficial and deep deltoid ligaments
Anterior talofibular ligament
Anterolateral capsule
If the tear is only on one side the affected side would translate forward resulting in rotation of the talus,
this is increasingly evident with increasing plantar flexion of the foot (20)
DISTAL TIBIOFIBULAR COMPRESSION TEST
DEFINITION
Distal tibiofibular compression test
PURPOSE
To assess the integrity of the syndesmosis
EQUIPMENT
Nil
26
Copyright BokSmart © 2009
Knee, Shoulder, Ankle and Cervical Spine Assessment
LANDMARK
LANDMARKS
ARKS
Nil
PROCEDURE
Player lying supine with feet over the end of the bed/plinth
Examiner grasps the lower leg with both hands and applies pressure over the malleoli and distal tibia and
fibula
SCORING
Record any pain in the lower leg on compression which may indicate a syndesmotic injury(17)
NORMS
Painless
COMMENT
It has been reported that the “length of tenderness” above the lateral malleolus gives an indication of
severity (21)
EXTERNAL ROTATION STRESS TEST
DEFINITION
External rotation stress test of syndesmotic integrity
PURPOSE
To assess the integrity of the ankle syndesmosis
EQUIPMENT
Firm bed/plinth
LANDMARKS
Nil
PROCEDURE
The subject is seated with the leg hanging over the examination table with the knee at 90°
27
Copyright BokSmart © 2009
Knee, Shoulder, Ankle and Cervical Spine Assessment
The examiner faces the leg, holds the foot in plantargrade (90°) and applies a lateral rotation stress to the
foot and ankle
SCORING
Record the pain response, a positive test if pain is produced over the anterior or posterior tibiofibular
ligaments or interosseous membrane(17;22)
NORMS
Painless
POSTERIOR IMPINGEMENT
DEFINITION
Posterior impingement test of the ankle
PURPOSE
To impinge the posterior ankle structures (capsule, synovium, bone) in forced plantar flexion
EQUIPMENT
Nil
LANDMARKS
Nil
PROCEDURE
Player lying prone with knee flexed at 30°
Examiner grasps the dorsal aspect of the forefoot with one hand and the calcaneus with the other
The ankle is forced into full plantar flexion with overpressure given at the end of range
SCORING
Positive test: pain on forced plantar flexion(17)
NORMS
Painless
28
Copyright BokSmart © 2009
Knee, Shoulder, Ankle and Cervical Spine Assessment
ANTERIOR IMPINGEMENT
DEFINITION
Anterior impingement test of the ankle
PURPOSE
To impinge the anterior ankle structures (capsule, synovium, bone) in forced dorsiflexion
EQUIPMENT
Nil
LANDMARKS
Nil
PROCEDURE
Player lying supine with foot resting over the edge of the bed and knee flexed at 30-40° to reduce
Achilles’ tension
Examiner uses the heel of one hand under the metatarsal heads to force the ankle into full dorsiflexion
with overpressure given at the end of range. The other hand may be used to stabilize the tibia
SCORING
Positive test: pain on forced dorsiflexion(17)
NORMS
Painless
PROPRIOCEPTION
DEFINITION
Lower limb proprioception
PURPOSE
To evaluate the balance and proprioception within the lower extremity (foot, ankle, knee and hip)
29
Copyright BokSmart © 2009
Knee, Shoulder, Ankle and Cervical Spine Assessment
EQUIPMENT
Foam block
Wobble board
Stopwatch
LANDMARKS
Nil
PROCEDURE
Stage I
Player stands on one foot, knee bent slightly for 30 s (hands may be used for balance)
Stage II
As above with eyes closed
Stage III
As above with head tilted backwards
Stage IV
Player standing on one foot on a piece of foam, knees bent slightly, and eyes closed
Players are instructed to put the opposite foot down to steady themselves if they begin to lose balance
and not to hop
SCORING
Record the number of touchdowns of the opposite foot during the 30 sec test period(17)
Comments on the quality/stability of ankle/knee/hip movements may be appropriate
NORMS
Compare left and right
COMMENT
If poor proprioception and balance is found then the player may be prone to ankle sprains and
recurrence of these injuries
Poor proprioception may be the result previous ligamentous and joint damage/surgery which has not
been fully rehabilitated
30
Copyright BokSmart © 2009
Knee, Shoulder, Ankle and Cervical Spine Assessment
OTTOWA ANKLE RULES
DEFINITION
DEFINI TION
Ottawa Ankle Rules (23)
PURPOSE
To determine when it is appropriate to X-ray the ankle or foot after injury
EQUIPMENT
X-rays
LANDMARKS
Lateral malleolus
Medial malleolus
Navicula
PROCEDURE
Palpate the following for tenderness
Posterior edge or tip of lateral malleolus
Posterior edge or tip of medial malleolus
Base of the Fifth metatarsal
Navicula
SCORING
If the player is unable to weight-bear or has tenderness at any of the following points a X-ray is warranted
(23)
:
Posterior edge or tip of lateral malleolus
Posterior edge or tip of medial malleolus
Base of the Fifth metatarsal
Navicula
NORMS
Normally painless
31
Copyright BokSmart © 2009
Knee, Shoulder, Ankle and Cervical Spine Assessment
COMMENT
Leddy and associates(22) changed this with the “Buffalo Modification” to include the mid portion of the
malleolus proximal to the ligament attachments in the assessment
The Ottawa ankle rules do not apply to (23):
Players under the age of 18
Multiple painful injuries
Head injury
Intoxication
Neurological deficit
Pregnancy
NECK ASSESSMENTS
NECK HISTORY
MECHANISM OF INJURY
Record the mechanism of injury:
Trauma ( e.g. whiplash) was the player hit from front, back side
Stretching (burners, brachial plexus injury)
Overuse (thoracic outlet syndrome, cervical spondylolisthesis)
Did the head strike anything or did the patient lose consciousness (LOC)?
PAIN
What are the sites and boundaries of the pain?
Cervical radiculopathies (injuries to the nerve roots) are associated with (24):
Unilateral motor and sensory symptoms of upper limb
Muscle weakness
Sensory alteration
Decreased reflexes
Cervical myelopathies (injuries to the spinal cord itself) are usually associated with (25):
32
Copyright BokSmart © 2009
Knee, Shoulder, Ankle and Cervical Spine Assessment
Spastic weakness
Parasthesia
Loss of coordination
May be bilateral
May affect lower limb, bowel function
Record the character of the pain
Deep
Superficial
Shooting
Aching
Radiating
Is the pain affected by coughing, laughing, or straining? If so an increase in intra-abdominal pressure may
be contributing to the problem (26)
Are there any associated
ass ociated headaches, signs of a headache of cervical origin include (26):
Occipital or sub occipital component
Neck movement alters headache
Painful limitation of neck movements
Abnormal head or neck posture
Sub occipital or nuchal tenderness
Abnormal mobility at C0 - C1
Sensory abnormalities at the occipital or sub occipital areas
PARASTHESIA
Record any parathesia (“pins and needles feeling”) or tingling
This sensation is present if pressure is applied to the nerve root (26)
May become evident if pressure is relieved from a nerve trunk (26)
DIZZINESS
Does the patient experience any dizziness, faintness or seizures? This may be related to semicircular
canal or vertebral artery problems (26)
33
Copyright BokSmart © 2009
Knee, Shoulder, Ankle and Cervical Spine Assessment
AGGRAVATING AND RELIEVING FACTORS
Record any aggravating or relieving factors. Are there any neck or head positions that the patient finds
particularly bothersome?
If the symptoms are not relieved by a change in position the problem is not likely to be mechanical in
origin (26)
Lesions of the C3,C4, C5 may affect the diaphragm and therefore affect breathing (26)
OBJECTIVE CLINICAL ASSESSMENT
CERVICAL FLEXION/ EXTENSION
DEFINITION
Cervical flexion and extension
PURPOSE
To assess the flexion and extension range of movement and segmental mobility of the cervical spine
EQUIPMENT
Firm bed/plinth
LANDMARKS
Clavicle
Earlobe
PROCEDURE
Player sitting on the edge of the plinth in an upright posture with knees against the edge, and looking
forward
Player fully flexes neck with the examiner viewing posteriorly and laterally. Good lumbar and thoracic
posture should be maintained during movement
The neck is then fully extended, again with the examiner viewing posteriorly and laterally (27)
SCORING
Record the movement as a fraction /10, as well as any hypo/hyper mobile levels, any pain should be also
recorded
34
Copyright BokSmart © 2009
Knee, Shoulder, Ankle and Cervical Spine Assessment
NORMS
Active flexion : 80° - 90°(26)
Active extension
extensi on:
on 70° (26)
COMMENT
The extreme flexion ROM is found when the chin is able to reach the chest with the mouth closed,
however up to two finger widths is considered normal
At extreme extension ROM the plane of the nose and forehead is nearly horizontal
In flexion(26):
The intervertebral disc widens posteriorly
The intervertebral foramen is 20-30% larger
The vertebrae shift forward
In extension(26):
The intervertebral disc narrows posteriorly
The intervertebral foramen is smaller
The atlas tilts upwards resulting in posterior compression between atlas and the occiput
CERVICAL LATERAL (SIDE) FLEXION
DEFINITION
Cervical lateral (side) flexion
PURPOSE
To assess the lateral flexion movement and segmental mobility of the cervical spine
EQUIPMENT
Firm bed/plinth
LANDMARKS
Clavicle
Earlobe
35
Copyright BokSmart © 2009
Knee, Shoulder, Ankle and Cervical Spine Assessment
PROCEDURE
Player sitting on the edge of the plinth in an upright posture with knees against the edge, and looking
forward
Player laterally flexes neck fully to right and then to left whilst maintaining neutral rotation and neutral
flexion/extension position
The examiner views posteriorly(27)
SCORING
Record the movement as a fraction /10, as well as any hypo/hyper mobile levels, any pain should be also
recorded
NORMS
Lateral flexion : 20°- 45°(26)
COMMENT
Most of the lateral flexion occurs between the occiput and C1, and between C1 and C2(26)
Ensure the ear moves towards the shoulder and not the shoulder towards the ear
CERVICAL ROTATION
DEFINITION
Cervical lateral (side) flexion
PURPOSE
To assess the rotational movement and segmental mobility of the cervical spine
EQUIPMENT
Firm bed/plinth
LANDMARKS
Clavicle
Earlobe
PROCEDURE
36
Copyright BokSmart © 2009
Knee, Shoulder, Ankle and Cervical Spine Assessment
Player sitting on the edge of the plinth in an upright posture with knees against the edge, and looking
forward
Player rotates head and neck fully first to the right and then to the left
SCORING
Record the movement as a fraction /10, as well as any hypo/hyper mobile levels, any pain should be also
recorded
NORMS
Rotation: 70° – 90°(27)
The chin does not quite reach the plane of the shoulder(26)
COMMENT
Rotation and side flexion always occur together in the cervical spine (coupled movement)(26)
CERVICAL RETRACTION
DEFINITION
Cervical retraction
PURPOSE
To assess the upper cervical flexion and segmental mobility of the cervical spine
EQUIPMENT
Firm bed/plinth
LANDMARKS
Clavicle
Earlobe
PROCEDURE
Player sitting on the edge of the plinth in an upright posture with knees against the edge, and looking
forward
Player asked to pull chin in so as to flex upper cervical spine
37
Copyright BokSmart © 2009
Knee, Shoulder, Ankle and Cervical Spine Assessment
Overpressure may be given by the examiner to further assess the motion by stabilizing the lower cervical
spine with one hand and applying a posteriorly directed force to the athletes chin with the other
SCORING
Record the final active position of the earlobe relative to the clavicle: Anterior, level or posterior(27)
Any pain produced is also recorded
NORMS
Painless and in line with clavicle
MUSCLE STRENGTH
DEFINITION
DEFI NITION
Cervical myotome muscle strength test
PURPOSE
To determine the muscle power and possible neurological weakness originating from the cervical nerve
roots
EQUIPMENT
Firm bed/plinth
LANDMARKS
Nil
PROCEDURE
Player seated, instruct the patient “don’t let me move you” so that an isometric contraction is obtained
Hold each contraction for 5 seconds
Test both sides at the same time to provide a comparison as below(27)
38
Copyright BokSmart © 2009
Knee, Shoulder, Ankle and Cervical Spine Assessment
Cervical muscle myotomes and testing procedure(27)
Myotome
Test
Procedure
C1, C2
Neck flexion
Apply pressure to forehead with neck in slight flexion
C3 & CN XI
Neck side flexion
Support shoulder apply pressure above ear
C4 & CN XI
Shoulder elevation
Apply downward force on both shoulders
C5
Shoulder abduction
Ask patient to elevate arms above 75°, elbows flexed, apply
downward force
C6
Elbow flexion
Arms by side, elbows flexed to 90°, apply downward pressure
C7
Elbow extension
Arms by side, elbows flexed to 90°, apply upward pressure
C8
Thumb extension
Athlete extends thumb just short of full range
T1
Finger abduction
Abduct fingers and apply pressure against abduction
SCORING
Record any weakness /5
Compare L and R
Muscle test grading(2)
Grade
Value
Movement
5
Normal (100%)
Complete range of motion against gravity with maximal resistance
4
Good (75%)
Complete range of motion against gravity with some (moderate)
resistance
3+
Fair +
Complete range of motion against gravity with minimal resistance
3
Fair (50%)
Complete range of motion against gravity
3-
Fair -
Some but not complete range of movement against gravity
2+
Poor +
Initiates movement against gravity
2
Poor (25%)
Complete range of movement with gravity eliminated
2-
Poor -
Initiates movement if gravity is eliminated
1
Trace
Evidence of slight contractility but no movement
0
Zero (0%)
No contraction palpated
39
Copyright BokSmart © 2009
Knee, Shoulder, Ankle and Cervical Spine Assessment
NORMS
5
COMMENT
Repetitive tests may be used to fatigue muscle and elicit subtle weakness
CERVICAL REFLEXES
DEFINITION
Cervical reflexes
PURPOSE
To evaluate the cervical reflexes if neurological involvement is suspected
EQUIPMENT
Reflex hammer
LANDMARKS
Biceps tendon
Triceps tendon
PROCEDURE
Biceps (C5(C5-C6)
Examiner places his thumb over the biceps tendon, and then taps the thumb with the reflex hammer to
elicit the reflex
Triceps (C7(C7-C8)
Examiner places elbow in flexion and strikes directly on triceps tendon to elicit reflex
SCORING
SCOR ING
Grade reflex 0-4(2)
0 – absent
1 – Diminished
2 – Average (normal)
40
Copyright BokSmart © 2009
Knee, Shoulder, Ankle and Cervical Spine Assessment
3 – Exaggerated
4 – Clonus, very brisk
NORMS
2
CERVICAL QUADRANT
DEFINITION
Cervical quadrant test
PURPOSE
To assess mobility of, and pain response to the combined cervical movements of extension, lateral
flexion and ipsilateral rotation (closed packed position)
EQUIPMENT
Firm bed/plinth
LANDMARKS
Nil
PROCEDURE
Player sits on the edge of the plinth facing forward with hands resting on sides
Examiner passively moves athletes head and cervical spine first into extension, then right lateral flexion
and finally right rotation
The test is repeated to the left(26)
SCORING
Record gross range of movements as a fraction /10
Record player’s pain response
Examiner must be aware of any dizziness or vertebral artery symptoms
NORMS
Painless
41
Copyright BokSmart © 2009
Knee, Shoulder, Ankle and Cervical Spine Assessment
COMMENT
This test is supposed to be a clearing test of cervical spine
These movements act to fully compress the unilateral facet joints, as well as stretching numerous other
structures
If a painful or apprehensive response is found, further assessment of the cervical spine may be
necessary(26)
SPURLING’S TEST
DEFINITION
Foramina compression (Spurling’s) Test
PURPOSE
To provoke cervical nerve root symptoms, if patient history is indicative of nerve root symptoms
EQUIPMENT
Nil
LANDMARKS
Nil
PROCEDURE
Player sits on the edge of the plinth facing forward with hands resting on sides
The examiner compresses down on the head while the player laterally flexes the neck first to the
unaffected side, then to the affected side (28)
Bradley and colleagues(29) advocate doing this test in three stages, each of which is more provocative; if
symptoms are produced one does not proceed to the next stage
Stage I
Compression with the head in neutral position
Stage II
Compression with the head in extension
Stage III
42
Copyright BokSmart © 2009
Knee, Shoulder, Ankle and Cervical Spine Assessment
Compression with the head in extension and rotation to the unaffected side
SCORING
A test result is classified as positive if pain radiates into the arm toward which the head is laterally
flexed(28)
NORMS
Painless
COMMENT
The test position narrows the intervertebral foramen, which is compounded by other conditions which
also narrow the foramen such as:
Stenosis
Cervical spondylosis
Osteophytes
Trophic facet joints
Herniated disc, which also narrows the foramen; may lead to symptoms(27)
Neck pain with no radiation into the shoulder and arm does not constitute a positive test(27)
The dermatome distribution of the pain and altered sensation can give an indication as to which nerve
root is involved
If pain is felt in the opposite side to which the head is laterally rotated, it is called a reverse Spurling’s sign
and is indicative of muscle spasm in conditions such as tension myalgia and whiplash syndromes(30)
DISTRACTION TEST
DEFINITION
Cervical distraction test
PURPOSE
This test is conducted in patients who have complained of radicular symptoms, or showed radicular
signs on examination. It is used as a diagnostic aid and to alleviate symptoms
EQUIPMENT
Nil
43
Copyright BokSmart © 2009
Knee, Shoulder, Ankle and Cervical Spine Assessment
LANDMARKS
Chin
Occiput
PROCEDURE
The examiner places one hand under the chin and the other hand around the occiput
The examiner then slowly lifts the patients head
SCORING
The test is classified as positive if the pain is relieved or decreased when the head is lifted or distracted(27)
NORMS
Painless
COMMENT
A positive test indicates pressure on the nerve roots(27) (this is relieved during the distraction)
This test may also be used to check if shoulder pain is of cervical origin; if the pain is relieved by
distraction the pain is likely to be cervical in origin and not related to shoulder pathology(27)
UPPER LIMB TENSION TESTS
DEFINITION
Upper limb tension tests (ULTT) or brachial plexus tension tests
PURPOSE
To assess the mobility of the cervical nerve roots, nerve root sheaths and the brachial plexus
EQUIPMENT
Firm bed/plinth
Goniometer
44
Copyright BokSmart © 2009
Knee, Shoulder, Ankle and Cervical Spine Assessment
LANDMARKS
Medial and lateral epicondyle
Wrist
Shoulder
PROCEDURE
This is a progressive test the sequence of events must follow the order described. In can be quite
provocative so the therapist must continually monitor the athlete’s symptoms during the test(26)
Athlete lying supine
See table for order of joint positioning
Upper Limb tension tests showing order of joint positioning and nerve bias(27)
ULTT1
ULTT2
ULTT3
ULTT4
Shoulder
Depression and
abduction (110°)
Depression and
abduction (10°)
Depression and
abduction (10°)
Depression and
abduction (10°-90°),
hand to ear
Elbow
Extension
Extension
Extension
Flexion
Forearm
Supination
Supination
Pronation
Pronation
Wrist
Extension
Extension
Flexion and ulna
deviation
Extension and radial
deviation
Fingers and thumb
Extension
Extension
Flexion
Extension
Shoulder
-
Lateral rotation
Medial rotation
Lateral rotation
Cervical spine
Contra lateral side
flexion
Contra lateral side
flexion
Contra lateral side
flexion
Contra lateral side
flexion
Nerve bias
Median nerve, anterior
interosseous nerve,
Median nerve,
musculocutaneous
nerve, axillary nerve
Radial nerve
Ulna nerve
C5, C6, C7
C8, T1
SCORING
Record pain or discomfort response with ipsilateral and contralateral lateral flexion(26)
45
Copyright BokSmart © 2009
Knee, Shoulder, Ankle and Cervical Spine Assessment
NORMS
Normal response (negative)(27):
Deep ache or stretch in cubital fossa (99%)
Deep ache or stretch into anterior and radial aspect of forearm and radial aspect of hand (80%)
Tingling of the fingers supplied by the appropriate nerve bias
Stretch into the anterior shoulder area
These responses can increase with contralateral cervical lateral flexion (90%)
These responses decrease with ipsilateral cervical side flexion (70%)
Pathological response (positive)(27):
Production of patients symptoms
A sensitizing test in the ipsilateral quadrant alters the symptoms (head and cervical spine taken to
ipsilateral side)
Different symptoms between right and left
C OMMENT
These tests are equivalent to the SLR test in the lower limb
SHOULDER ABDUCTION TEST
DEFINITION
Shoulder abduction (relief) test
PURPOSE
To test for radicular symptoms particularly those involving the C4 and C5 nerve roots
EQUIPMENT
Firm bed/plinth
46
Copyright BokSmart © 2009
Knee, Shoulder, Ankle and Cervical Spine Assessment
LANDMARKS
Nil
PROCEDURE
Player sits or lies down
Examiner passively or the athlete actively elevates the arm through abduction, so that the forearm rests
on top of the head
SCORING
A decrease or relief of symptoms indicates a positive test
N ORMS
Painless
COMMENT
Relief of symptoms indicates a cervical extradural compression problem such as(27):
Herniated disc
Epidural vein compression
Nerve root compression
VERTEBRAL ARTERY TEST
DEFINITION
Vertebral artery (cervical quadrant) test
PURPOSE
To assess possible vertebral artery compression
47
Copyright BokSmart © 2009
Knee, Shoulder, Ankle and Cervical Spine Assessment
EQUIPMENT
Firm bed/plinth
Stopwatch
LANDMARKS
Nil
PROCEDURE
Player supine
Examiner takes the player’s head into extension and lateral flexion stabilizing the head and shoulder
Examiner then rotates the neck to the same side and holds for 30 seconds
Repeat on the opposite side
SCORING
Record any dizziness or nyastagmus; which indicates that the vertebral arteries are being
compressed and constitutes a positive test(27)
NORMS
Asymptomatic
COMMENT
This test must be done with caution
SHOULDER ASSESSMENTS
SHOULDER HISTORY
GENERAL
Record which hand is dominant
Often the shoulder is lower on the non-dominant side, the dominant shoulder often also has less ROM
due to the increased musculature(31)
48
Copyright BokSmart © 2009
Knee, Shoulder, Ankle and Cervical Spine Assessment
MECHANISM OF INJURY
Did the player fall on an outstretched hand (FOOSH), which could indicate a fracture or dislocation of the
glenohumeral joint(31)
Did the player fall or receive a blow to the tip of the shoulder, this mechanism may indicate an
acromioclavicular subluxation or dislocation(32)
What was the direction of force? Anterior, posterior, lateral, superior or inferior; this will give an indication
of which structures may be injured
FUNCTIONALLY
Record what the player is unable to do functionally:
Does the shoulder feel unstable or feel like it is “coming out” during movement? This may indicate gross
or anatomical instability, as a result of recurrent shoulder dislocation, subluxation, or subtle translational
instability (31)
Is the player able to tackle on that shoulder, tackle with outstretched arm, gym, or do overhead
activities?
PAIN
Record what positions produce pain or symptoms:
Lateral rotation may cause pain in patients who have had recurrent dislocations because this movement
is involved in anterior dislocations of the shoulder(31)
Medial rotation may cause pain in recurrent dislocators because at the extreme of medial rotation the
humeral head is tightened against the anterior glenoid(31)
Excessive abduction and lateral rotation may lead to dead arm syndrome in which the patient feels a
sudden paralyzing pain and weakness in the shoulder. This symptom is often an indication of anterior
shoulder instability(33)
Night pain and pain at rest are often related to rotator cuff tears and on occasion, tumors
Record the character of the pain:
Deep, boring toothache-like pain may indicate thoracic outlet syndrome or acute brachial plexus
neuropathy(31)
Dull aching pain that is worse at night usually indicates rotator cuff pathology(31)
Burning pain is usually indicative of acute calcific tendonosis(31)
Record if there are any activities that aggravate or relieve the pain:
This may help indicate which structures are involved (e.g. does reaching or overhead activities aggravate
the pain?)
49
Copyright BokSmart © 2009
Knee, Shoulder, Ankle and Cervical Spine Assessment
Elevation of the arm may relieve symptoms in patients with nerve root pain, but aggravate symptoms in
patients with instability or inflammatory conditions(31)
SYMPTOMS
Does the athlete complain of weakness or heaviness in the shoulder or arm after activity?
This may indicate vascular involvement such as thoracic outlet syndrome(31)
Is there any indication of a nerve injury?
Any history of weakness, pain or parathesia may indicate a possible nerve injury/irritation
OBJECTIVE CLINICAL ASSESSMENT
GENERAL
A shoulder assessment should always include a cervical assessment as well(31)
An understanding of the force couples acting on the shoulder complex and the necessity for balancing
the muscle strength and endurance of these muscles are especially important when assessing the
shoulder. Force couples are groups of counteracting muscles that show obvious action when a
movement is done or loaded quickly. With a particular movement, one group of muscles (the agonists)
act concentrically while the other group (the antagonists) act eccentrically in a controlled, harmonized
fashion to produce smooth movement. They also have a stabilizing effect on the joint(31)
SHOULDER FLEXION
DEFINITION
DEFIN ITION
Shoulder flexion range of movement, elevation of shoulder through forward flexion
PURPOSE
To assess shoulder girdle flexion range of movement, consisting of combined movement of
scapulothoracic, acromioclavicular, sternoclavicular and glenohumeral joints
EQUIPMENT
Long arm goniometer with spirit level
LANDMARKS
50
Copyright BokSmart © 2009
Knee, Shoulder, Ankle and Cervical Spine Assessment
Midpoint of lateral border of acromion process
Superior tip of olecranon process
PROCEDURE
Standing arms by sides, elbows extended
Thumbs forward, the athlete raises both arms forward and above head as far as possible(34)
SCORING
Record the angle formed by the shaft of the humerus relative to vertical(34)
NORMS
Normal ROM of elevation through forward flexion is: 160°-180°(31)
SHOULDER EXTENSION
DEFINITION
Shoulder extension range of movement
PURPOSE
To assess shoulder girdle extension range of movement, consisting of combined movement of
scapulothoracic, acromioclavicular, sternoclavicular and glenohumeral joints
EQUIPMENT
Long arm goniometer with spirit level
LANDMARKS
Midpoint of lateral border of acromion process
Superior tip of olecranon process
PROCEDURE
Standing arms by sides, elbows extended
Thumbs forward, the athlete raises extends both arms backwards as far as possible without bending
forward(34)
51
Copyright BokSmart © 2009
Knee, Shoulder, Ankle and Cervical Spine Assessment
SCORING
SCOR ING
Record the angle formed by the shaft of the humerus relative to vertical(34)
NORMS
Normal ROM of extension: 50°-60°(31)
SHOULDER ABDUCTION
DEFINITION
Shoulder abduction range of movement, elevation through abduction
PURPOSE
To assess active range of shoulder girdle abduction
EQUIPMENT
Long arm goniometer with spirit level
LANDMARKS
Posterior margin of acromion process
Superior tip of olecranon process
PROCEDURE
Standing arms by sides, elbows extended
Whilst keeping palms facing forward, athlete abducts both arms as far as possible(34)
SCORING
Record the angle formed by the shaft of the humerus relative to vertical (34)
NORMS
Normal ROM of elevation through abduction: 170°-180°(31)
COMMENT
As the player elevates the shoulder the examiner should note whether a painful arc is present(35)
52
Copyright BokSmart © 2009
Knee, Shoulder, Ankle and Cervical Spine Assessment
A painful arc may be caused by (31;36)::
Subacromial bursitis
Calcium deposits
Peritendonitis of the rotator cuff muscles
Tendonosis of the rotator cuff muscles
The pain is the result of pinching of inflamed or tender structures under the acromion process and the
coracoacromial ligament(31). Initially the structures are not pinched, so the patient is able to abduct the
arm 45°-60° with little difficulty. As the patient abducts further (60°-120°) the structures become pinched
and the patient is often unable to abduct fully because of pain. If full abduction is possible, the pain
diminishes after 120° because the pinched soft tissues have passed under the acromion process and
are no longer being pinched(31)
Scapulohumeral rhythm:
When evaluating this movement the examiner must also take time to observe the scapulohumeral rhythm
of the shoulder complex. During the 180° of abduction there is roughly a 2:1 ratio of movement of the
humerus to the scapula, with 120° of movement occurring at the glenohumeral joint and 60° at the
scapulothoracic joint. However there is a great deal of variability between individuals and authors(37-39)
SHOULDER ADDUCTION
DEFINITION
Shoulder adduction range of movement
PURPOSE
To assess shoulder girdle adduction range of movement
EQUIPMENT
Long arm goniometer with spirit level
LANDMARKS
Midpoint of lateral border of acromion process
Superior tip of olecranon process
PROCEDURE
Standing arms by sides, elbows extended
53
Copyright BokSmart © 2009
Knee, Shoulder, Ankle and Cervical Spine Assessment
Thumbs forward, the athlete adducts straight arm in front of the body
SCORING
Record the angle formed by the shaft of the humerus relative to vertical(34)
NORMS
Normal ROM of abduction is: 50°-75°(31)
EXTERNAL ROTATION
DEFINITION
Shoulder external rotation in neutral flexion/abduction
PURPOSE
To assess the range of glenohumeral external rotation and anterior muscle and capsule laxity
EQUIPMENT
Goniometer
LANDMARKS
Tip of olecranon process
Ulna styloid process
PROCEDURE
Athlete standing comfortably with elbows bent to 90° and resting at the side
Externally rotate glenohumeral joint as far as possible, keeping elbows at the sides(34)
Align goniometer under the tip of the olecranon process and parallel to the sagittal plane
Align moveable arm with ulna styloid process
SCORING
Record the range of external rotation in degrees from the sagittal plane
NORMS
Normal range external (lateral) rotation: 80°-90°(31)
54
Copyright BokSmart © 2009
Knee, Shoulder, Ankle and Cervical Spine Assessment
INTERNAL ROTATION
DEFINITION
Shoulder internal rotation in neutral flexion/abduction
PURPOSE
To assess the range of glenohumeral internal rotation and posterior muscle and capsule laxity
EQUIPMENT
Goniometer
LANDMARKS
Tip of olecranon process
Ulna styloid process
PROCEDURE
Athlete standing comfortably with elbows bent to 90° and resting at the side
Internally rotate glenohumeral joint as far as possible, keeping elbows at the sides(34)
Align goniometer under the tip of the olecranon process and parallel to the sagittal plane
Align moveable arm with ulna styloid process
SCORING
Record the range of internal rotation in degrees from the sagittal plane
NORMS
Normal range internal (medial) rotation: 60°-100°(31)
COMMENT
Hand behind back test
This test can also be used to test a combination of internal rotation, extension and adduction in a
functional position
The athlete puts his hand behind the back and reaches up the spine as far as possible, the furthest point
reached is marked(34). The distance reached can be measured from the C7 spinous process. The test is
then repeated on the other side
55
Copyright BokSmart © 2009
Knee, Shoulder, Ankle and Cervical Spine Assessment
SUPINE 90° INTERNAL ROTATION
DEFINITION
Supine passive internal rotation at 90° abduction of the shoulder
PURPOSE
To assess the passive flexibility of the glenohumeral external rotators (supraspinatus, infraspinatus, teres
minor) and the posterior joint capsule
EQUIPMENT
Goniometer with spirit level
Firm bed/plinth
Second examiner may be required to achieve accurate measurements
LANDMARKS
Olecranon process of ulna
Ulna styloid process
PROCEDURE
Player lying supine with arm to be tested at 90° abduction and elbow flexed to 90°
Examiner passively internally rotates the elbow via the forearm, ensuring that the posterior aspect of the
shoulder maintains contact with the plinth by stabilizing the shoulder anteriorly
Rotation is performed until either(34):
The athlete complains of pain
The humeral head begins to lift off the bed
No further range can be achieved
SCORING
At the limit of test record the degree of internal rotation relative to the vertical(34)
Record the reason for cessation of the test
NORMS
Normal range internal rotation at 90° abduction: 70-100°(31)
56
Copyright BokSmart © 2009
Knee, Shoulder, Ankle and Cervical Spine Assessment
SUPINE 90° EXTERNAL ROTATION
DEFINITION
Supine passive external rotation at 90° abduction of the shoulder
PURPOSE
To assess the passive flexibility of the glenohumeral internal rotators (pectoralis major, teres major,
subscapularis, latissimus dorsi) and the anterior joint capsule tightness/laxity
EQUIPMENT
Goniometer with spirit level
Firm bed/plinth
Second examiner may be required to achieve accurate measurements/
LANDMARKS
Olecranon process of ulna
Ulna styloid process
PROCEDURE
Player lying supine with arm to be tested at 90° abduction and elbow flexed to 90°
Examiner passively externally rotates the elbow via the forearm, ensuring that the posterior aspect of the
shoulder maintains contact with the plinth by stabilizing the shoulder anteriorly
Rotation is performed until either(34):
The athlete complains of pain or apprehension
The athlete begins to extend their thoracic spine
No further range can be achieved
SCORING
At the limit of test record the degree of internal rotation relative to the vertical(34)
Record the reason for cessation of the test
NORMS
57
Copyright BokSmart © 2009
Knee, Shoulder, Ankle and Cervical Spine Assessment
Normal range external rotation at 90° abduction: 70-100°(31)
COMMENT
Take care with athletes who have had previous shoulder dislocations or instability/laxity as the test
position is quite provocative and possibly unstable in this position(34)
GLENOHUMERAL ANTERIOR DRAWER TEST
DEFINITION
Glenohumeral anterior drawer test/anterior shift test at 0° abduction
PURPOSE
To identify anterior laxity of the glenohumeral joint at 0° abduction
EQUIPMENT
Firm bed/plinth
LANDMARKS
Nil
PROCEDURE
Athlete sitting on plinth with arms resting by side
Examiner stabilizes scapula anteriorly over the clavicle with one hand and grasps around the humeral
head with the other
Anterior glide of the humeral head is produced whilst minimizing scapula/shoulder girdle protraction
Repeat at 45° and 90° of abduction
SCORING
Record the degree of laxity from Grade 0-III(34;40;41):
Grade 0: No anterior translation (0-25%)
Grade I: humeral head rides up slope of glenoid labrum but not over the edge (25-50%)
Grade II: humeral head rides up over edge of labrum but reduces spontaneously when force is removed
(>50%)
Grade III: humeral head rides over edge of labrum and does not reduce once force is removed (>50%)
58
Copyright BokSmart © 2009
Knee, Shoulder, Ankle and Cervical Spine Assessment
NORMS
Translation of 25% or less is considered normal (3-13mm)(34;40)
Up to Grade II anterior laxity may be considered normal in asymptomatic athletes(41)
COMMENT
The primary restraints to anterior translation in this position (0° abduction) are the superior and middle
bands of the anterior glenohumeral ligaments(42). Testing may be carried out in 45° and 90° of abduction
to assess the other anterior ligamentous restraints, and the position of the arm should be recorded
Up to Grade II anterior laxity may be considered normal in asymptomatic athletes(41). No significant
coloration has been shown between the degree of laxity in the glenohumeral joint and the range of
glenohumeral motion or nature of sports participation(34)
If there is anterior subluxation of the humeral head the degree of lateral rotation required to reduce the
translation can be recorded and is an indicator of the functional laxity of the anterior inferior capsular
ligaments(31)
GLENOHUMERAL POSTERIOR DRAWER TEST
DEFINITION
Glenohumeral posterior drawer test/anterior shift test at 0° abduction
PURPOSE
To identify posterior laxity of the glenohumeral joint at 0° abduction
EQUIPMENT
Firm bed/plinth
LANDMARKS
Nil
PROCEDURE
Athletes supine
Examiner passively flexes the shoulder to 90° and elbow to 90°
Examiner places one hand under the shoulder to stabilize the posterior scapula and palpate the posterior
aspect of the glenohumeral joint
59
Copyright BokSmart © 2009
Knee, Shoulder, Ankle and Cervical Spine Assessment
Examiner applies posterior longitudinal force through the elbow to the shaft of the humerus and palpates
posterior subluxation of the glenohumeral joint with the stabilizing hand
SCORING
Posterior translation of the humeral head or apprehension and muscle guarding to prevent subluxation
constitutes a positive test (34)
NORMS
Up to 50% translocation is considered normal (3-20mm)(31;34)
COMMENT
Posterior longitudinal force to the humerus should also be applied in sport position specific or symptomspecific positions of glenohumeral flexion/abduction/rotation
Medial rotation causes the posterior band of the inferior glenohumeral ligament and posterior-inferior
capsule to become increasingly tight so that posterior translation will decrease as medial rotation
increases(43)
GLENOHUMERAL APPREHENSION TEST
DEFINITION
Glenohumeral apprehension (Crank) test for anterior shoulder laxity
PURPOSE
To test for chronic anterior glenohumeral joint instability or previous dislocation
EQUIPMENT
Firm
LANDMARKS
Nil
PROCEDURE
Athletes supine
Passive flexion of elbow to 90°
Passive abduction of humerus to 90°
60
Copyright BokSmart © 2009
Knee, Shoulder, Ankle and Cervical Spine Assessment
Passive external rotation of glenohumeral joint
Repeat at 45°, 120° of abduction
Repeat with the fist/hand under the humeral head to apply an anterior translational force to the humeral
head
SCORING
Positive test: athlete reports a feeling of apprehension, or that the shoulder may sublux or dislocate(34)
(This may also be associated with pain or discomfort in the glenohumeral joint and surrounding muscle
spasm may occur)
NORMS
Painless, no apprehension
COMMENT
This test should not be performed following acute glenohumeral dislocation
Reporting of pain alone is not necessarily a reliable indicator of anterior joint laxity as it may be clouded
by a number of other joint pathologies(34) ( e.g. rotator cuff tears, internal impingement)
Apprehension reported in this position has been shown to have a superior sensitivity, specificity, positive
predictive value or negative predictive value for identifying anterior instability when compared to pain(44)
The use of the more provocative testing position (addition of an anterior translational force) was also
shown to be more reliable in identifying anterior instability(44)
GLENOHUMERAL (JOBES) RELOCATION TEST
DEFINITION
Glenohumeral relocation test following a positive apprehension (Crank) test for anterior shoulder laxity
(Jobes Relocation Test)(45)
PURPOSE
To assess the diminution of pain or apprehension in the glenohumeral joint after a positive apprehension
test
EQUIPMENT
Firm bed/plinth
61
Copyright BokSmart © 2009
Knee, Shoulder, Ankle and Cervical Spine Assessment
LANDMARKS
Nil
PROCEDURE
Perform the apprehension test as previously described
While in the apprehension position, a posteriorly directed force is produced over the proximal humerus
(not the humeral head) and any change in symptoms are noted
SCORING
Positive test: The athletes previous feelings of apprehension and/or pain is reduced or eliminated after
application of the posteriorly directed force(34)
NORMS
Painless, no apprehension
COMMENT
If the patients symptoms decrease or are eliminated when doing the relocation test, consider(34):
Glenohumeral instability,
Subluxation or dislocation
Impingement
If apprehension predominated with the crank test and disappears with the relocation test
consider (34):
Glenohumeral instability
Subluxation or dislocation
relocation
n test the
If pain predominated with the apprehension test and disappeared with the relocatio
(34)
probable diagnosis is :
Anterior instability (either at the glenohumeralor scapulothoracic joint) with secondary impingement
If the arm is
i s released after the relocation test and this produces pain and forward translation is
noted consider(34):
Anterior shoulder instability
Labral lesion
62
Copyright BokSmart © 2009
Knee, Shoulder, Ankle and Cervical Spine Assessment
Bicipital tendonosis or peritendonitis
Patients with primary impingement will show no change in their pain with the relocation test(44)
If when doing the relocation test, posterior pain decreases it is a positive test for posterior internal
impingement(45)
SULCUS SIGN FOR INFERIOR LAXITY
DEFINITION
Sulcus sign test for inferior shoulder instability
PURPOSE
To identify laxity of the superior glenohumeral ligament or a tear of the inferior portion of the glenoid
labrum
EQUIPMENT
Firm bed/plinth or chair
LANDMARKS
Nil
PROCEDURE
Athlete sitting
Examiner grips the athlete’s arm and applies downward traction to the humerus whilst palpating the gap
between the humeral head and the acromion process with the other hand
Repeat at 20° and 50° of abduction
Proceed to the Feagin Test(31):
Patient stands with the arm abducted to 90° elbow extended and forearm resting on examiners shoulder
Examiner clasps hand over humerus and pushes the humeral head downwards (inferiorly). Looking for a
sulcus or apprehension/pain
SCORING
Positive test: the humeral head is displaced inferiorly causing an increased gap between the humeral
head and acromion. This can be palpated or appears as an indentation (sulcus) beneath the acromion(34)
63
Copyright BokSmart © 2009
Knee, Shoulder, Ankle and Cervical Spine Assessment
The degree of inferior displacement should be estimated and graded(46):
1+ : 0.5-1.0cm of inferior displacement
2+ : 1-2cm
3+ : 2-3cm or more,
NORMS
Usually there is no sulcus although if bilateral may be normal(31)
COMMENT
It has been reported that the best position to test for inferior instability is at 20-50° of abduction with
neutral rotation. Thus more than one position should be tested (31)
If the sulcus sign and Feagin test are positive is a strong indicator of multidirectional instability rather than
just laxity(31)
SHOULDER IMPINGEMENT TEST 1 (NEER & WELSH)
DEFINITION
Neer and Walsh posterior impingement test(47)
PURPOSE
To impinge tendons of supraspinatus and long head of biceps as well as the subacromial bursa,
between the head of humerus and acromion process and/or coracoacromial arch
EQUIPMENT
Nil
Firm bed/plinth
LANDMARKS
Nil
PROCEDURE
Player standing, arm in anatomical position. Can also be done with player supine
Whilst maintaining the elbow in extension, the examiner passively flexes the glenohumeral joint to fully
elevate and provides passive overpressure
64
Copyright BokSmart © 2009
Knee, Shoulder, Ankle and Cervical Spine Assessment
SCORING
Record the patient’s response
Positive test: shoulder pain particularly at the end of range of movement
NORMS
Painless
COMMENT
Pain may indicate posterior impingement and/or pathology of one or more of(34):
Supraspinatus
Long head of biceps
Subacromial bursa
Head of humerus
Coracoacromial arch
•
Labrum
If the test is positive with the arm laterally rotated, the examiner should check the acromioclavicular joint
(acromioclavicular differentiation test)(48)
SHOULDER IMPINGEMENT TEST 2 (HAWKINS & KENNEDY)
DEFINITION
Hawkins and Kennedy posterior impingement test(49)
PURPOSE
To impinge tendons of supraspinatus, infraspinatus and long head of biceps between greater tuberosity
of humerus and acromion process and/or coracoacromial arch
EQUIPMENT
Firm bed/plinth
LANDMARKS
Nil
65
Copyright BokSmart © 2009
Knee, Shoulder, Ankle and Cervical Spine Assessment
PROCEDURE
Athlete standing, arm in anatomical position. Can also be done with athlete supine
Examiner passively flexes glenohumeral joint to 90°
Examiner passively flexes elbow to 90°
Examiner passively internally (medially) rotates humerus
The test may also be performed in varying degrees of forward flexion
SCORING
Record the patient’s response
Positive test: internal rotation causes shoulder pain particularly at the end of the range
NORMS
Painless
COMMENT
This test pushes the supraspinatus tendon against the anterior surface of the coracoacromial ligament
and coracoid process(31)
Pain indicates a positive test for supraspinatus paratendonitis/tendonosis or secondary impingement(36)
ACROMIOCLAVICULAR HORIZONTAL ADDUCTION TEST
DEFINITION
Acromioclavicular horizontal adduction test
PURPOSE
To stress the acromioclavicular joint at the end range of glenohumeral motion
EQUIPMENT
Nil
LANDMARKS
Nil
PROCEDURE
66
Copyright BokSmart © 2009
Knee, Shoulder, Ankle and Cervical Spine Assessment
Athlete standing
Athlete actively flexes and adducts the arm across body towards the opposite shoulder
Examiner applies overpressure at end range, looking for any pain response from the athlete
SCORING
Positive test: pain over the Acromioclavicular joint(34)
NORMS
Normally painless
LABRAL CLUNK TEST
DEFINITION
Clunk test of labral integrity
PURPOSE
To test the integrity of the shoulder labrum
EQUIPMENT
Firm bed/plinth
LANDMARKS
Nil
PROCEDURE
Athlete supine
The examiner places one hand on the posterior aspect of the shoulder over the humeral head
The other hand holds the humerus above the elbow
The examiner fully abducts the arm over the patients head
The examiner then pushes anteriorly with the hand over the humeral head (may be facilitated by making a
fist), while the other and rotates the humerus into lateral rotation
SCORING
A clunk or grinding sound indicates a positive test and is usually indicative of a tear of the labrum(31)
67
Copyright BokSmart © 2009
Knee, Shoulder, Ankle and Cervical Spine Assessment
NORMS
Painless no clunk or grind
COMMENT
This test may also cause apprehension if anterior instability is present(31)
LABRAL CRANK TEST
DEFINITION
Crank test of labral integrity(50)
PURPOSE
To test the integrity of the shoulder labrum
EQUIPMENT
Firm bed/plinth/chair
LANDMARKS
Nil
PROCEDURE
Player supine lying or sitting
The examiner elevates the arm to 160° in the scapular plane
An axial load is then applied to the humerus with one hand of the examiner while the other hand rotates
the humerus medially and laterally
SCORING
A positive test is indicated by pain on rotation, especially lateral rotation with or without a click or
reproduction of the patient’s symptoms(50)
NORMS
Painless
68
Copyright BokSmart © 2009
Knee, Shoulder, Ankle and Cervical Spine Assessment
SPEED’S TEST (BICEPS STRAIGHT ARM TEST)
DEFINITION
Biceps straight arm test (Speed’s Test)
PURPOSE
To detect pathology of the long head of biceps tendon and or SLAP lesion
EQUIPMENT
Nil
LANDMARKS
LANDMARKS
Bicipital groove
PROCEDURE
Athlete sitting
Elbow fully extended
The examiner resists forward flexion of the shoulder while the patients forearm is first supinated and then
pronated (elbow maintained fully extended)
SCORING
A positive test elicits increased tenderness over the bicipital groove especially with the arm supinated(31)
NORMS
Painless
COMMENT
A positive test may indicate(31):
Bicipital tendonosis or paratendonitis
SLAP lesion
Partial rupture of the long head of biceps tendon especially if associated with weakness
SUPRASPINATUS TEST (EMPTY CAN TEST/JOBES TEST)
69
Copyright BokSmart © 2009
Knee, Shoulder, Ankle and Cervical Spine Assessment
DEFINITION
Supraspinatus empty can test
PURPOSE
To identify pathology of the rotator cuff, in particular the supraspinatus muscle
EQUIPMENT
Nil
LANDMARKS
Bicipital groove
PROCEDURE
Player standing
Player moves arm to 90° shoulder abduction and 30° horizontal adduction (scapula plane),while
maintaining elbow extension, player internally rotates humerus with thumbs pointing towards the floor; as
if “empting two beer cans”
Examiner applies a downward force to the distal forearm while the player maintains the position
(isometric hold)
SCORING
Positive test: Pain in the anterior aspect of the glenohumeral joint or weakness on the isometric hold(34)
NORMS
Painless
COMMENT
Pain or weakness suggests pathology or impingement of the supraspinatus tendon/rotator cuff and
requires more detailed assessment(34)
Others have said that testing the arm with the thumbs up (full can) position is best for maximum
contraction of supraspinatus(51)
70
Copyright BokSmart © 2009
Knee, Shoulder, Ankle and Cervical Spine Assessment
REFERENCE LIST
1. Tria A.J., Hosea T.M. Ligament and extensor mechanism injuries of the knee: Diagnosis and
Treatment. Clinical diagnosis of knee ligament injuries. St Louis: Mosby-Year Book inc; 1991.
2. Magee D.J. Principles and Concepts. In: Magee D.J., editor. Orthopaedic Physical Assessment
Enhanced Edition. 4th ed. Canada: Elsevier; 2006. p. 1-66.
3. Harvey D., Mansfield C., Grant M. Knee and Shank. In: Harvey D., editor. Screening Test
Protocols Pre-participation screening of athletes. Canberra: Australian Sports Commission,
Australian Institute of Sport; 2000. p. 86-97.
4. Magee D.J. Knee. In: Magee D.J., editor. Orthopaedic Physical Assessment Enhanced Edition.
4th ed. Canada: Elsevier; 2006. p. 661-763.
5. Jackson D.W. The Anterior Cruciate Ligament: Current and Future Concepts. New York: Raven
Press; 1993.
6. Kennedey J.C. The Injured Adolescent Knee. Baltimore: Williams & Wilkins; 1979.
7. Muller W. The knee; Form, Function and Ligament Reconstruction. New York: Springer-Verlag;
1983.
8. McMurray T.P. The semilunar cartilages. British Journal of Surgery 1942;29:407-14.
9. Evans P.J., Bell G.D., Frank C. Prospective evaluation of the McMurray test. Am.J.Sports Med
1996;24:83-7.
10. Kim S.J., Min B.H., Han D.Y. Paradoxical phenomena of the McMurray test: An arthroscopic
examination. American Journal of Sports Med 1996;24:83-7.
11. Stratford P, Binkley J. A review of the McMurray test: Definition, interpretation and clinical
usefulness. Journal of Orthopaedic ad Sports Physical Therapy 1995;22:116-20.
12. Fowler P., Lubliner J. The predictive value of five clinical signs in the evaluation of meniscal
pathology. Arthroscopy 1989;5:184-6.
13. Strobel M., Stedtfeld H.W. Diagnostic Evaluation of the Knee. Berlin: Springer-Verlag; 1990.
14. McConnell J. The management of chondromalacia patellae: A long term solution.
Aust.J.Physiotherapy 1986;32:215-23.
15. Mader R.A. current methods for the evaluation of ankle ligament injuries. J.Bone Joint Surg.Am
1994;76:1103-11.
16. Reid D.C. Sports Injury Assessment and Rehabilitation. New York: Churchill Livingstone; 1992.
17. Harvey D., Mansfield C., Grant M. Ankle and Foot. In: Harvey D., editor. Screening Test
Protocols Pre-participation screening of athletes. Canberra: Australian Sports Commision,
Australian Institute of Sport; 2000. p. 98-108.
18. Magee D.J. Lower Leg, Ankle and Foot. In: Magee D.J., editor. Orthopaedic Physical
Assessment Enhanced Edition. 4th ed. Canada: Elsevier; 2006. p. 765-845.
19. Patla C.E., Abbot J.H. Tibialis posterior myofascial tightness as a source of heel pain: diagnosis
and treatment. J.Orthop.Sports Phys.Ther. 2000;30:624-32.
71
Copyright BokSmart © 2009
Knee, Shoulder, Ankle and Cervical Spine Assessment
20. Rasmussen O., Tovberg-Jensen I. Anteriolateral rotational instability in the ankle joint. Acta
Orthop.Scand 1981;52:99-102.
21. Nussbaum E.D., Hoesa S.D., Siedler S.D. Prospective evaluation of syndesmotic ankle sprains
without diastasis. Am.J.Sports Med 2001;29:31-5.
22. Leddy J.J., Smolinski R.J., Lawrence J. Prospective evaluation of the Ottawa Ankle Rules in a
university sports medicine centre - with a modification to increase specificity for identifying
malleolar fractures. Am.J.Sports Med. 1998;26:158-65.
23. Stiell I.G., McKnight R.D., Greenberg G.H. A Study to develop clinical decision rules for the use
of radiography in acute ankle injuries. Ann Emerg.Med. 1992;21:384-90.
24. Malanga G.A. The diagnosis and treatment of cervical radiculopathy. Med.Sci.Sports Exer.
1997;29:236-45.
25. Tsairis P., Albert T.J., Smoth M.D. Neurological evaluation of cervical spinal disorders. In:
Camins M.B., O'Leary P.F., editors. Disorders of the Cervical Spine. Baltimore: Williams and
Wilkins; 1992.
26. Harvey D., Mansfield C., Grant M. Trunk and Spine. In: Harvey D., editor. Screening Test
Protocols Pre-participation screening of athletes. Canberra: Australian Sports Commision,
Australian Institute of Sport; 2000. p. 6-30.
27. Magee D.J. Cervical Spine. In: Magee D.J., editor. Orthopaedic Physical Assessment Enhanced
Edition. 4th ed. Canada: Elsevier; 2006. p. 121-81.
28. Spurling R.G., Scoville W.B. Lateral rupture of the cervical intervertebral disc.
Surg.Gynec.Obstet. 1944;78:350-8.
29. Bradley J.P., Tibone J.E., Watkins R.G. History, physical examination, and diagnostic tests for
neck and upper extremity problems. In: Watkins R.J., editor. The Spine in Sports. St Lois:
Mosby-Year Book inc; 1996.
30. Kelly J.J. Neurological problems in the athlete's shoulder. In: Pettrone F.A., editor. Athletic
Injuries of the Shoulder. New York: McGraw-Hill; 1995.
31. Magee D.J. Shoulder. In: Magee D.J., editor. Orthopaedic Physical Assessment Enhanced
Edition. 4th ed. Canada: Elsevier; 2006. p. 207-319.
32. Hutchingson M.R., Ahuja C.O. Diagnosis and treating clavical injuries. Phys.Sportsmed
1996;24:26-36.
33. Kvitne R.S., Jobe F.W. The diagnosis and treatment of anterior instablity in the throwing athlete.
Clin.Orthop. 1993;291:107-23.
34. Harvey D., Mansfield C., Grant M. Shoulder Girdle. In: Harvey D., editor. Screening Test
Protocols Pre-participation screening of athletes. Canberra: Australian Sports Commission,
Australian Institute of Sport; 2000. p. 31-49.
35. Kessel L., Watson M. The painful arc syndrome. J.Bone Joint Surg.Br. 1977;59:166-72.
36. Khan K.M, Cook J.E., Taunton J.E., Bonar F. Overuse tendonosis not tendonitis. Part I: a new
paradigm for a difficult clinical problem. Phys.Sportsmed 2000;28:38-48.
37. Boody W.C., Freedman L., Waterland J.C. Shoulder movements during abduction in the scapula
plane. Arch.Phys.Med.Rehabil. 1970;51:595-604.
72
Copyright BokSmart © 2009
Knee, Shoulder, Ankle and Cervical Spine Assessment
38. Reid D.C. The shoulder girdle: Its function as a unit in abduction. Physiotherapy 1969;55:57-9.
39. Saha S.K. Mechanism of shoulder movement and a plea for the recognition of "zero position" of
glenohumeral joint. Clin.Orthop. 1983;173:3-10.
40. Altcheck D.A., Warren R.F., Skyhar M.J., Oritz G. T-Plasty a technique for treating
multidirectional instability in the athlete. J.Bone Joint Surg.Am 1991;73:105-12.
41. Lintner A., Levy A., Ketner K., Speer K. Glenohumeral translation in the asymptomatic athlete's
shoulder and its relationship to other clinically measurable anthropometric variables. The
American Journal of Sports Medicine 1996;24:716-20.
42. Bowen M., Warren R. Ligamentous control of shoulder stability based on selective cutting and
static translation experiments. Clinics in Sports Medicine 1991;10:757-82.
43. Ramsey M.L., Klimkiewicz J.J. Posterior instability: diagnosis and management. In: Iannotti J.P.,
Williams C.R., editors. Disorders of the Shoulder. Philadelphia: Lippincott Williams and Wilkins;
1999.
44. Speer K., Hannafin J., Altcheck D., Warren R. An evaluation of the shoulder relocation test. The
American Journal of Sports Medicine 1994;22:177-83.
45. Jobe C.M. Superor gleniod impingment. Orthop.Clin.North Am 1997;28:137-43.
46. Wilk K., Andrews J., Arrigo C. The physical examination of he glenohumeral joint: emphasis on
the stabalizing strucures. Journal of Orthopaedic and Sports Physical Therapy 1997;25:380-9.
47. Neer C., Welsh R. The Shoulder in Sports. Orthop.Clin.North Am 1977;8:583-91.
48. Buchberger D.J. Introduction of a new physical examination procedure for the differentiation of
acromioclavicular jiont lesions and subacromial impingement. J.Manip.Physio.Ther.
1999;22:316-21.
49. Hawkins R., Kennedy J. Impingement syndrome in athletes. Am.J.Sports Med 1980;8:151-8.
50. Liui S.H., Henry M.H., Nuccion S.L. A prospective evaluation of a new physical examination in
predicting glenoid labral tears. Am.J.Sports Med 1996;24:721-5.
51. Kelly B.T., Kadrmas W.R., Speer K.P. The manual muscle examination for rotator cuff strength an electromyographic investigation. Am.J.Sports Med 1996;24:581-8.
73
Copyright BokSmart © 2009
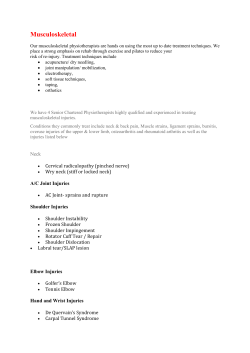
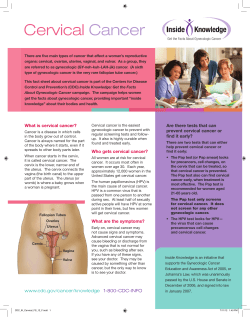


© Copyright 2026