
Leader How-To Book
Leader How-To
Book
THANKS TO YOU,
MILLIONS OF BOYS …
… Become More Confident
… Grow Spiritually
… Are Better Citizens
… Learn Life Skills
… and Have Fun!!
You have our eternal thanks for helping
make this an everyday reality!
The Boy Scouts of America welcomes your comments and suggestions
on how to improve this resource.
Please e-mail your thoughts to [email protected].
LEADER
HOW-TO BOOK
A Word About Youth Protection
Child abuse is a serious problem in our society, and unfortunately, it can occur anywhere,
even in Scouting. Youth safety is of paramount importance to Scouting. For that reason, the
BSA continues to create barriers to abuse beyond what have previously existed in Scouting.
The Boy Scouts of America places the greatest importance on providing the most secure
environment possible for its youth members. To maintain such an environment, the BSA
has developed numerous procedural and leadership selection policies, and provides parents
and leaders with numerous online and print resources for the Cub Scout, Boy Scout, and
Venturing programs.
Effective June 1, 2010, the BSA implemented mandatory Youth Protection training for all
registered volunteers.
New leaders are required to take Youth Protection training before submitting an application
for registration. The certificate of completion for this training should be submitted at the time
the application is made and before volunteer service with youth begins.
Youth Protection training must be taken every two years. If a volunteer does not meet the
BSA’s Youth Protection training requirement at the time of recharter, the volunteer will not
be reregistered.
We encourage all adults to take the BSA’s Youth Protection training.
To find out more about the Youth Protection policies of the Boy Scouts of America and how
to help Scouting keep your family safe, see the Parent’s Guide in any of the Cub Scouting or
Boy Scouting handbooks, or go to http://www.scouting.org/Training/YouthProtection.aspx.
33832
ISBN 978-0-8395-3832-5
© 2001 Boy Scouts of America
2011 Printing
C
CONTENTS
Introduction
1. Accentuate the Positive
How to celebrate achievements, special
events, and boys’ good behavior.
2. Crafts
How to make anything and everything.
3. Games
How to choose and play games of every
shape and kind.
4. Outdoors
How to enjoy the outdoors, from hiking to
campfires.
5. Razzle Dazzle
How to jazz up any meeting.
6. Special Pack Activities
How to organize and host everything from a
blue and gold banquet to a pinewood derby.
7. Cub Scouts With Special Needs
How to help Cub Scouts with special needs
succeed.
Resources
Index
Introduction
• How do I plan a skit for next month’s pack
meeting?
• How do I find a new game—that can be played
indoors?
• How do I make papier-mâché?
• How do I make a hike interesting to my den?
• How do I plan the blue and gold banquet?
• How do I help make my Cub Scout with special needs more successful?
• How do I make pack meetings more upbeat?
You’ll find the answers to these questions and
countless others within the covers of this book.
The Cub Scout Leader How-To Book has been
written for den leaders and Cubmasters across
the country. The tested suggestions you’ll find
for games, crafts, skits, applauses, songs, and
more will add fun and sparkle to all your Cub
Scout meetings and adventures.
Used with Cub Scout Program Helps, the
Webelos Leader Guide, and the Cub Scout Leader
Book, this book will enable you to plan den and
pack programs that will be fun for everyone.
And while boys are having fun, they will be
learning, advancing in rank, and strengthening
relationships with one another. That’s what Cub
Scouting is all about.
1
ACCENTUATE
THE POSITIVE
The Purposes and Methods
of Cub Scouting and
Ideals of Scouting
1-1
Highlighting Advancement
1-2
Den Doodles and Flags
1-3
Special Awards
1-4
Capture the Memories
1-8
In the Public Eye
1-9
Boy Behavior
1-12
This chapter deals with everything that is positive in Cub Scouting: Cub Scout ideals,
advancement, awards, and good behavior. The goal of the chapter is to suggest ways for
you to recognize and reward these things. Rewarding the positive encourages boys and will
ensure the success of the program for both boys and adults.
THE PURPOSES OF CUB SCOUTING
Since 1930, the Boy Scouts of America has helped
younger boys through Cub Scouting. Cub Scouting
is a year-round family-oriented part of the BSA program designed for boys who are in first through fifth
grade (or are 7, 8, 9, and 10 years of age). Families,
leaders, and organizations work together to achieve
the 10 purposes of Cub Scouting:
1. Character Development
2. Spiritual Growth
3. Good Citizenship
4. Sportsmanship and Fitness
5. Family Understanding
6. Respectful Relationships
7. Personal Achievement
8. Friendly Service
9. Fun and Adventure
10. Preparation for Boy Scouts
The Purposes and
Methods of Cub Scouting
and Ideals of Scouting
Every pack and den activity should reflect the 10
purposes of Cub Scouting, which also reflect the ideals and purpose of the overall Scouting movement.
Note that the fifth method of Cub Scouting used to
achieve Scouting’s purpose is “Activities”—which is
what this book is all about.
To emphasize the purposes of Cub Scouting, use
them during the Cubmaster’s minute at the end of
the monthly pack meeting or during the den leader’s
minute at the end of the den meeting.
The den leader’s minute introduces the formal
closing of the meeting. To begin, ask the boys to
arrange themselves in a formation, such as a circle or
a horseshoe, that will signal to them that it is time to
listen. Say something like, “It’s time for us to close
our meeting for today. But before we go, I’d like for
us to think about something important.” This “minute” is to be truly that—it should take only a minute
or two. Then close the meeting with the Cub Scout
Promise, the Law of the Pack, the Cub Scout motto,
or another appropriate closing.
THE METHODS OF CUB SCOUTING
Cub Scouting uses seven specific methods to
achieve Scouting’s purpose of helping boys and
young adults build character, train in the responsibilities of citizenship, and develop personal
fitness. These methods are incorporated into all
aspects of the program. Through these methods,
Cub Scouting happens in the lives of boys and
their families.
1. The Ideals
2. The Den
3. Advancement
4. Family Involvement
5. Activities
6. Home and Neighborhood Centered
7. The Uniform
Cub Scout Program Helps and the Webelos Leader
Guide have suggestions for closings that fit the monthly theme. Here are some additional suggestions:
1. Take one line from the Cub Scout Promise or Law
of the Pack and ask one of the boys to explain
what it means. Help him along as needed, and
then ask another boy how that portion of the Cub
Scout Promise or Law of the Pack was used in the
den meeting that day.
2. Talk about what it means to “Do Your Best.”
3. Talk about the fact that every day we have two
choices: We can choose to do things that are
right and help other people; or we can choose
to do things that are selfish and serve only us.
Our character and what other people think of
us are based on these choices. In the Cub Scout
Promise, we promise to help other people. Ask
boys whether they will keep that promise.
4. Talk about one of our country’s heroes or what
makes our country strong. Here’s an example:
“Meriwether Lewis and William Clark were two
of our country’s great leaders. In the early 1800s,
they and their company, called the Corps of
Discovery, forged the path that linked the east
and west coasts of this land. When they arrived
in what would become Washington State, decisions had to be made about their return. Rather
Accentuate the Positive
1–1
5.
6.
7.
8.
than just deciding themselves and telling their
companions what to do, Lewis and Clark let the
members of the corps vote. It would be nearly
70 years before a black man could vote in the
United States, and yet York, a black slave who
had made the difficult trip, cast his vote with the
others. The Constitution wouldn’t guarantee the
right of women to vote until 1919, but Sacajawea,
an American Indian woman, voted with the men
that day. America has been blessed with many
great leaders like Lewis and Clark. Who will be
next? Will it be you?”
Talk about incidents at school or in the community that showed good citizenship or bravery,
courage, or compassion.
Pick out a familiar saying or song and tie the
meaning into the purposes of Cub Scouting. For
example, Johnny Mercer wrote in his song: “You
got to accentuate the positive, and eliminate the
negative.” Another way to say this might be to
make the most of your blessings and make the
least of your troubles.
Give the boys an opportunity to tell one good
thing that happened to them that day or week.
As a group, talk about what it means to be a
friend, respect others, or share.
Highlighting Advancement
CEREMONY LADDER
White candles
Make ladder of pine and
finish in a natural color.
Materials: Ladder, badge shapes cut from wood
or foam board, candleholders, candles
You can use over and over a pack ceremony ladder
like the one shown. The ladder folds for easy storage.
You can make a ladder from pine and finish it with
varnish or shellac, but any ladder will do. Cut badge
shapes from wood or foam board and fasten them to
the rungs. Burn the badge designs into the wood or
use large Cub Scout insignia stickers adhered to foam
board. Fasten candleholders to each rung and light
each candle as that particular badge is represented in
the ceremony. Be sure the candle flames will not be
under the rungs above them.
AKELA’S TOTEM
Materials:
Insignia posters
Wood or foam board
1-by-2-inch wood
Nails
Coffee can
Plaster
This totem can be either
floor- or tabletop-sized. Use
the Cub Scout Insignia Poster
Set that may be purchased from your
Scouting distributor or local council
service center. Mount them on the
foam board and attach to the main post
of the totem. Nail the crosspieces to
the main post and hammer nails into
them, one for each boy. Hang from these nails small
diamond-shaped posterboard pieces with each boy’s
name on it. A small coffee can filled with plaster can
hold the totem if it is inserted into the plaster just
before it sets.
TWO-WAY CEREMONY BOARD
Cord
or chain
Ranks (bottom to top)
Tiger
Bobcat
Wolf
Bear
Webelos
Arrow of Light
Boy Scout
1–2
Accentuate the Positive
Materials:
1-by-2-inch board
Hardboard
Paint
Drill
1
⁄4-inch plywood
Glue
This ceremony board is
easy to make and can be
used in many ceremonies.
Cover the 1-by-2-inch board with hardboard. Paint
it blue. Drill holes in the top for gold candles. The
front and back sides are identical, with storage space
inside. Cut the Arrow of Light from 1⁄4-inch plywood,
paint it gold, and glue it to the board.
PACK ADVANCEMENT BOARD
1-by-8-by-24-inch wood
Cub Scout
insignia stickers
Cup
hooks
⁄ -inch
wood
1
2
Painted or
wood-burned name
Eye
screws
With the boys’ help, choose a design that “fits” the
den. Den doodles can be made from wood, cardboard,
foam board, or other materials; they can be a tabletop
or floor design; or they can hang on the wall or from
the ceiling. Include the den’s number and a place for
each boy’s name and advancement record or accomplishment. Add something to the den doodle at each
meeting, recognizing attendance, proper uniforming,
and behavior as well as completed achievements
towards rank. Colored beads and shells slipped onto
leather lacing are common items for symbols of progress. Identify each symbol with an achievement or
elective number or activity badge name.
Wooden coat
hanger
Materials:
1-by-8-by-24-inch wood
Cub Scout insignia stickers
1
⁄2-inch wood for name boards—one per boy
Two cup hooks per name board
Two eye screws per name board
10 additional eye screws
Broomstick
Spools
Beads
Boys will look forward to adding their names to
an advancement board. As Cub Scouts earn a rank
and receive their badge, they hang small name boards
under the appropriate rank as a part of the advancement ceremony.
One for
each boy
in den
Ice cream
container or
oatmeal
box
An alternative to this advancement board is to use
PVC pipe to build the frame. PVC pipes and joints
create a frame that is inexpensive, lightweight, and
easy to assemble and transport as well as durable.
DEN ADVANCEMENT CHART
You can purchase Cub Scout and Webelos Scout
den advancement charts from your Scouting distributor or local council service center. Or create one
from posterboard. Place each boy’s name on the chart
and add a sticker to the chart for each achievement as
he completes them. Give the responsibility for updating the chart to the denner or the boy who has earned
the achievement.
Den Doodles and Flags
DEN DOODLES
A den doodle is a clever way to record advancement progress and other accomplishments of the boys
as well as a colorful decoration for the den meeting
place. It can be something as simple as a chart, much
like the den advancement chart, or it can be a simple
structure consisting of a cutout mounted on a stand.
No two den doodles are alike.
Dens may earn simple awards (sometimes called
dingle dangles) for a variety of things, such as perfect
attendance, good behavior, participation in service
projects, or responsibilities at the pack meeting. For
example, the den leading the flag ceremony at the
pack meeting or at school might earn a small flag to
hang on their den doodle; the den that leads a song
might earn a musical note made of felt.
You can find more examples of den doodles in
Cub Scout Ceremonies for Dens and Packs.
DEN FLAGS
Den flags are simple flags that represent each den
and give den members a sense of camaraderie and
identification. The flag is blue and yellow with the
den number on it. Den flags are available from the
BSA Supply Division.
The flag may go home with a different boy after
each meeting or may be the responsibility of the
denner for the month. The flag should be brought
to each pack meeting and mark the place where the
den sits.
Accentuate the Positive
1–3
BASES FOR DEN DOODLE OR DEN FLAG
Nail four boards
to make the base.
Two-pound coffee can
filled with plaster. While
wet, insert flagpole.
Make bases from wood or from a two-pound coffee can filled with plaster, as shown. Cover the end
of the flagpole with aluminum foil and grease with a
thick layer of petroleum jelly so it will slip out easily
after the plaster hardens. Or use a piece of PVC pipe
that has an opening slightly larger than the diameter
of the flagpole. Cover the bottom end of the PVC with
foil and set it into the wet plaster. It should stick several inches out of the plaster. When dry, the pole will
slip easily into the PVC pipe.
Special Awards
CUBBY
The Cubby is a pack trophy awarded each month
for a variety of reasons. Award it to the den with
the largest percentage of parents or guardians at a
pack meeting. Or award the “best-uniformed den” or
“best-behaved den.” The pack committee determines
the award category and keeps it secret until the pack
meeting. Cubby is a “traveling” trophy and should
be returned to the pack meeting each month to be
presented again. The pack might keep a scrapbook
of photographs showing Cubby with the members of
each den and at the various den activities.
This Cubby is approximately 27 inches tall. His size
depends on the tin cans used. (See the “Crafts” chapter of this book for suggestions on working with tin.)
To assemble the Cubby:
1. Cut holes in the bottom of the head and the top of
the body for the neck can. Flange both ends of the
neck can. Insert the neck in the head and body,
and solder in place. If you don’t have a soldering
iron, you can use special contact glues that bond
metal to metal.
2. Assemble the leg parts. Flange to the ends of the
thigh cans. Solder the closed ends of the thigh and
lower leg cans together. Trim to fit the foot cans.
Remove both ends from the foot cans and flatten
to about 2 inches. Solder to the lower legs.
3. Cut holes in the bottom of the body can close
to the outer rim to hold the thighs. Insert thigh
flanges in the body, and solder in place.
4. Cut ears from can tops so the ridges of the tops
form the edges of the ears. Cut flanges and spread
them to fit the head. Solder in place.
5. To make the arms, remove the rims from the cans.
Cut the upper arm cans to fit the body, flatten
slightly, and solder to the body. Remove both
ends from the lower arm cans. Cut off the lower
rims, flatten slightly, and solder to the hands.
Then push the lower arms over the upper arms
and solder.
Head
Ears
Body
Tin Man Cubby
Materials:
A variety of cans for the Cubby parts—
Hat: 59⁄16-inch funnel
Head: 411⁄16-inch-tall can
Neck: 23⁄8-inch-tall can
Ears: Two 21⁄8-inch pieces cut from can
Body: 12-inch-tall can
Upper and lower arms: Four 33⁄4-inch-tall cans
Hands: Two 27⁄8-inch-tall cans
Thighs: Two 415⁄16-inch-tall cans
Lower legs: Two 33⁄4-inch-tall cans
Feet: Two 33⁄4-inch-tall cans
Fabric for neckerchief
Solder
Tin snips
1–4
Accentuate the Positive
Arms
Legs
6. Tilt the funnel and solder it to the head.
7. Sand all rough spots and sharp edges.
8. Paint the Cubby to resemble a Cub Scout, and
add a neckerchief made of fabric.
Bowling Pin Cubby
Materials: Bowling pin, acrylic
paint
Paint an old bowling pin to look
like a Cub Scout. It can be as simple as a head, a painted-on neckerchief, and a blue body. Or you can
make a cap and neckerchief from
fabric and glue them on.
WISE OLD OWL AWARD
Wise is the pack that encourages the boys, the
dens, and the pack to earn the National Summertime
Pack Award. The pack must earn the National
Summertime Pack Award in order for individual
boys and dens to be eligible to earn this award also.
To emphasize this award, a pack might offer the
Wise Old Owl Award to dens and individual boys.
The pack committee sets the criteria for winning
the award. Each den leader keeps track of the den’s
activities and each boy’s participation during the
summer. The records are turned in to the pack committee at the end of the summer, and the awards are
presented at the first fall meeting to each den meeting
the criteria. Awards become more elaborate as the
dens and boys exceed the basic criteria.
Wise Old Owl for Dens
Materials: 3-inch leather rounder (round piece
of leather), hole punch, permanent markers or owl
leather stamp, leather lacing, colored beads or feathers
Punch two holes in the leather rounder at the edges,
across from one another. Draw an owl on the rounder
with permanent markers or use a leather stamp.
Attach leather lacing at both holes. One is for hanging
on the den flag, the other, for adding beads, feathers,
etc., to indicate the involvement of the den during the
summer. The more boys involved, the more den meetings held, the more elaborate the award.
AWARDS FROM THE HEART
Everyone needs a pat on the back to feel appreciated! These awards, suitable for both boys and adults,
are quick and easy. Remember to reward den chiefs,
pack leaders, and family members, too. Be sure to
mention specifically what the person is being recognized for.
• Monu-MINT-al Award: Attach a mint to a note
or certificate stating that the person has made a
monu-mint-al contribution to Scouting.
• Chalk It Up to Another Great Job: Glue pieces
of chalk to wood or foam board that state “Great
Job!”
• You Have Been the Link to Success: Award links
of a chain.
• We Are Not STRETCHING It—We Appreciate
You: Mount rubber bands on foam board or
mat board.
• Smooth Sailing Award: Award a small toy sailboat.
• Good Sport Award: Write “Good Sport” on a
baseball.
• What a Catch: Award a certificate with a fish picture or plastic fish.
• You Are Tops: Award a toy top.
• You Are the Best of the Bunch: Award fresh or
artificial grapes or bananas.
• You Rose to the Occasion: Award a fresh or artificial rose.
• Appreciation From Your Scouting Fans: Award a
handmade paper fan.
• You Are Worth a Million: Award play money or
gold-covered candy coins.
• For the Person Who Can’t Be Licked: Award a
lollipop.
• Top Dog Award: Award a dog chew toy.
• Thanks…
—For Leading Us in the Right Direction:
A compass
—For Sticking to It: Tape or glue
—For Lighting Up Our Meeting: A light bulb
—For Tying Up Loose Ends: Shoelaces
Wise Old Owl for Boys
Materials: Candy mold of owl, ring for neckerchief slide, plaster, acrylic paint
Make plaster owls for neckerchief slides. As the
plaster hardens, place a ring in it for the neckerchief
to go through. When hard, remove from the mold and
paint with acrylic paint.
Accentuate the Positive
1–5
TROPHIES
CARDBOARD MEDAL
Materials:
Two cans of different sizes
Spray paint
Coat hangers
Pipe cleaners or plaster figure
Small square of wood
Stain or paint
Foam board
Materials: thick cardboard; silver, gold, and
bronze wrapping paper; glue; permanent marker;
ribbon
Glue the smaller can to the top of
the larger can. Make two handles out
of coat hanger wire and glue them on the top can.
Spray-paint the trophy. Glue a plaster figure to the
top, or if desired, make a small figure out of pipe
cleaners. Glue the whole thing to a square of wood
that has been stained or painted and sealed. Attach
an appropriate “plate” made from foam board.
WOOD MEDAL
Materials: 3-inch square of wood; stain or paint;
markers; ribbon, leather lacing, or yarn
Cut two rounds from the cardboard 21⁄2 inches
in diameter. Glue them together and wrap with the
wrapping paper, gluing the edges to the back. Punch
a hole at the edge of the circle and thread the ribbon
through it for the necklace. Label the medal first, second, or third place with the permanent marker.
BRIDGES
Bridges are often used in advancement ceremonies
when boys move from one rank to another or from
one level of the Scouting family to another. Use the
Family Talent Survey to find someone in your pack
who likes to build things. You will want the bridge
to be sturdy and safe. Diagrams for three possibilities
are shown here.
Bridge #1
3´ x 6´
Drill a hole in the corner of a wood square. Stain
and seal or paint the square. Use markers to decorate,
indicating first, second, or third place. Attach ribbon,
leather lacing, or yarn to hang around the neck.
Slotted
Rope
METAL LID MEDAL
Materials: Canning jar or frozen juice lid, nail
and hammer, yarn or 1⁄8-inch ribbon, paint
Canning jars or frozen juice lids make good medals.
Begin by making evenly spaced holes around the lid
edge with a nail and hammer. Paint the lids different colors and indicate first, second, or third place.
Weave yarn or ribbon in and out of the holes, making
the yarn long enough to hang around the neck.
Bridge #2
Framework
24˝
24˝
24˝
7˝
7˝
48˝
Post
2˝ x 4˝ x 38˝
1˝ x 6˝
planking
Lock frames
together.
Make evenly spaced
holes around edge.
Weave yarn in and
out of holes.
2˝ x 4˝ or 2˝ x 6˝
Paint lids different colors
for first, second, and third.
1–6
Accentuate the Positive
Self-contained storage
Bridge #3
Hinges
Side pieces
Materials for Bridge #3
• 3⁄4 inch Plywood 4 feet by
4 feet Grade A or B
• Hinges
• Paint
Hinge ramps to deck.
To store, pull hinge pins.
Sides and rails slot together
to form a basic bridge
structure.
Ramp
Deck
Right Side
Left Side
48˝
32˝
28˝
Ramp
24˝
8˝
All Slots:
3
⁄4˝ wide by 3˝ long
4˝
4˝
10˝
2˝
13˝
24˝
48˝
Accentuate the Positive
1–7
Scouting is a series of steps aimed at the highest
achievement: the Eagle Scout Award. The suggestions below are designed to help boys celebrate how
far they have gotten on the road to the Eagle Scout
rank and to capture their Cub Scouting memories.
Bind the four sticks or dowels together with bell
wire to form a rectangle. Be sure to make these joints
as rigid and tight as possible. Cut the piece of vinyl
in the shape of a skin. Punch holes around the edges.
Tie the four corners in place with the four 12-inch
pieces of twine, and then lace around the skin with
the 90-inch piece of twine. Sew, staple, or glue badges to the “skin.”
PATCH BLANKET
WALKING STICK
Materials: Blanket, patches the Cub Scout has
earned
Materials: Large dowel stick long enough and
thick enough for a suitable walking stick, 12 inches
of leather lacing, piece of rope or yarn
Capture the Memories
Patch blankets can display extra badges a Cub
Scout has earned. Use any size of blanket that will fit
on the Cub Scout’s bed, and stitch the patches on it.
SCRAPBOOK
Materials:
Scrapbook, three-ring binder, or cardboard
pieces wrapped in fabric
Acid-free paper
Hole punch
Markers, stickers, rubber stamps, etc.
Pictures, advancement award cards, etc.
Double-stick tape
Punch holes in the paper to fit your scrapbook. If
using cardboard, tie it all together with ribbon, string,
or leather lacing. Use double-stick tape to adhere the
pictures, awards, etc. Decorate the pages and encourage the boys to write something in the book about the
event or award. This is a good project to show off at
the blue and gold banquet.
CAREER ARROW
What better way to recognize the Arrow of Light,
Cub Scouting’s highest honor, than with a decorated
arrow? Purchase arrows at sporting goods stores that
sell archery equipment.
Materials:
28-inch hunting arrow with broadhead point
and blue and yellow feathers
Acrylic paint or auto detailing tape
1-by-2-inch wooden board 30 inches long
Wood stain
Two cup hooks
Picture hanger
TROPHY SKIN
18˝
15˝
Materials: Two 18-inch and two 15-inch sticks or
dowels, four 12-inch pieces and one 90-inch piece
of hemp twine, four 12-inch pieces of bell wire, one
12-by-15-inch piece of thin vinyl
1–8
Drill a hole through the dowel about 4 inches from
the top. Thread the leather lacing through the hole
and secure with a square knot. Encourage boys to
attach something of significance to this loop for each
milestone they wish to remember. These “dingle dangles” can be, for instance, a branded piece of leather,
feathers, or beads and other trinkets. Paint the walking stick, or carve it or wood-burn it.
Accentuate the Positive
Paint or use auto detailing tape to make 3-inchwide stripes on the arrow for each rank the boy has
achieved. Use orange for Tiger Cubs, black for the
Bobcat badge, yellow for the Wolf badge, light blue
for the Bear badge, and red for the Webelos badge.
Add a 1⁄4-inch stripe of gold or silver for each arrow
point or Webelos compass point the boy has earned
on top of the stripe that represents that rank.
Stain the 30-inch wood board and attach two cup
hooks on the front to hold the arrow. Add the boy’s
name using permanent markers. Attach a hanger on
the back.
Feathers, eagle talons, and bear claws can have special significance, such as rank advancement. The Cub
Scout can pick up the beads at the pack meeting to
add to his necklace.
GRADUATION PLAQUE
Add-a-bead necklaces work well for adults and
den chiefs, too. Use the different colors of beads to
represent attendance at pack activities, participation
in training, awards earned in Scouting, tenure, the
den advancing in rank, participation in service projects, leadership for district and council events, etc.
In the Public Eye
11⁄4˝
2˝
11⁄4˝
A strong, active Cub Scout pack has a story to tell,
both within the pack family and to the larger community it serves. And if the pack hopes to remain strong
and active, it’s important that its story be told.
Good communication with the pack’s families is
obviously essential because without their help the
pack is bound to flounder. And telling the pack’s
story to the community—thus keeping it in the public
eye—is an excellent method of attracting recruits.
12˝
2˝
3˝
18˝
Materials:
1
⁄2-inch plywood, 12 by 18 inches
1
⁄4-inch plywood, 5 by 5 inches
Stain
Gold paint
Black paint or permanent marker
Fine steel wool
Picture hanger
Cut a plaque from the 1⁄2-inch plywood using the
pattern shown. Stain and seal with clear lacquer or
varnish. Cut the fleur-de-lis from the 1⁄4-inch plywood
and paint it gold. Tone down with fine steel wool.
Drill or nail small holes for each activity badge the
boy has earned. Glue on only the badges of rank and
arrow points a boy has earned. Glue in the holes the
activity badges the boy has earned. Add the boy’s
name, pack number, and date using black paint or
permanent markers. Attach a hanger on the back.
ADD-A-BEAD NECKLACE
Materials: 30 inches of leather lacing, colored
beads
Give each Cub Scout an add-a-bead necklace to
wear to the pack meeting as a special and immediate recognition to take home with him. Use different
colors of beads to symbolize attendance, advancement, participation in pack and council events, etc.
PACK NEWSLETTER
Ideally, all the pack’s parents and guardians will
attend every pack meeting and keep abreast of what’s
going on and what’s planned. But this isn’t always
the case, so monthly a pack newsletter is a good way
to keep all pack families informed about activities
and plans. You can also use the pack newsletter as
an opportunity for giving boys who have advanced or
done special Good Turns an extra measure of recognition by listing their names.
A pack newsletter doesn’t have to be an elaborate,
printed production—although with computers and
desktop publishing, this is easier than it once was.
But it also may be nothing more than a single typewritten sheet that has been photocopied. Every issue
should include short articles covering coming events
and names of boys who have advanced.
You may want to have dens contribute short
articles on their activities for the month. Assign a
different den member with the job of reporting each
month.
Choose a pack committee member or parent/
guardian to be newsletter editor, another to be typist, and a third to be the production person. Mail the
newsletter to homes, or distribute it to families at
pack or den meetings. (It may not be a good idea to
give copies to boys to take home because they may
lose, misplace, or forget them.)
Accentuate the Positive
1–9
Individual dens may want to have their own occasional newsletter, with all articles and production in
the hands of the boys.
DISPLAYS
Schools, religious institutions, local historical
societies, libraries, and even some businesses will
often allow temporary exhibits and displays. To help
publicize the pack, dens could exhibit pinewood
derby cars, crafts, and photographs of pack activities.
This is also a useful recruiting tool, especially when
displays are shown where other boys can see them
and get excited about Cub Scouting.
NEWS RELEASES
Pack activities are newsworthy. Newspaper editors and news directors of radio and television stations are interested in stories about unusual pack
activities. Most newspapers don’t have the resources
to cover every event in every community, but they do
appreciate getting factual information about especially interesting events. Neighborhood and small-town
newspapers are more likely to print a story of this
type than large city newspapers. But in either case, a
news release, typewritten in the proper form, stands
a better chance of being used than if you merely call
the paper or turn in some haphazard notes.
Community-access cable TV offers another way to
get your pack’s story before the public. Some cable
TV stations will also schedule dens or packs to produce their own TV shows.
Your pack event must compete with all the other
activities that are going on in the community at the
same time. If your activity has a unique angle, it is
more likely that your event/news release will catch an
editor’s attention. Consider writing releases on such
things as special service projects, special anniversaries, visits by well-known individuals, or unusual
outdoor activities. But many newspapers will also
use stories about recruiting drives and monthly pack
meetings, with lists of boys who received awards.
First, check with an editor or broadcast news
director to see whether the paper or station has a special format for news releases that you should follow.
If not, follow these guidelines:
• Timing is essential. Deliver the news release well
before the deadline. If the story is about an event
that has already happened, it isn’t news after a day
or two.
• The first paragraph of a news release should catch
the reader’s attention. It should tell who did what,
when, and where. Subsequent paragraphs should
give further details. The least important informa-
1–10
Accentuate the Positive
tion should be at the end of the story, so it may be
cut if necessary for space.
• Terminology. Use correct titles, with capital letters as indicated: Cub Scout, Webelos Scout, den
chief, Cubmaster, assistant Cubmaster, den leader,
Webelos den leader. Always capitalize the word
Scouting. (Note, however, that some publications
will have their own style and may change your
capitalization.)
• When mentioning the pack for the first time in
the story, identify it as Cub Scout Pack [number],
followed by the name of your chartered organization. In other paragraphs, refer to “the pack” (lowercase) or “Pack 10” (uppercase).
• Always use the full names of any individuals the
first time they are mentioned in the news release.
When only one or two Cub Scouts are mentioned (as for important awards), add the names
of the parents/guardians. It is usually best not
to include addresses, but if more than one town
is involved, name them. Names of adult should
include Scouting titles, if applicable.
• Check with the editor to find out whether you can
use photographs, and if so, what the specifications
are (size and type, etc.). If you furnish photos, try
to get “action” shots, which are much more interesting than “head” shots or shots of people shaking hands. Identify all the people in the photo (left
to right), giving their full names.
SCOUTING SHOWS
Your pack will want to be part of your council’s (or
district’s) Scouting show, Scoutorama, or other exposition featuring Scouting. Getting involved will help
pack families understand that they are part of the
entire Scouting family—which includes Tiger Cubs,
Boy Scouts, Varsity Scouts, and Venturers.
Your Cub Scouts will have a wonderful time participating. Scouting shows demonstrate to the public
how Scouting serves youth and the community.
Some councils hold Scouting shows each year, and
others, every other year. Your pack will be informed
in plenty of time and will probably be asked to provide a demonstration or exhibit. You may be assigned
a booth or asked to make one.
The council will provide you with guidelines and
suggestions. Here are some general tips as you prepare for a Scouting show:
• Boys should be well-trained and thoroughly familiar with the booth subject.
• They should be able to explain what they are
doing, how, and why.
• Boys should be courteous and well-behaved.
• Boys should be in proper uniform (except when
the subject of the booth calls for costumes).
• One boy can act as a barker to attract attention to
your booth and help tell the story.
• Colorful, eye-catching backgrounds and decorations will draw people to your booth.
• Displays on the booth subject made by the boys
add to its appeal and are sometimes an important
factor in judging.
• Giveaways attract interest and attention. Give
inexpensive prizes for participation in booth activities or games. Boys might also make craft items to
give away.
• Don’t sell anything at booths. The pack will earn
profits from ticket sales.
• Action in the booth is important. If the boys are
making a craft item, it should be simple and quickly made while spectators look on. Consider involving spectators in games and other activities.
• Each den is usually assigned a time to cover the
booth. Be sure to let them know when, and what
they are supposed to do.
• The den chief can help Cub Scouts in the booth
while the den leader or other adults are nearby.
Types of Booth Activities
The type of booth activity will depend on the
theme of the Scouting show, the criteria for judging,
and the resources you have. A continuous demonstration, staffed by the boys and with plenty of action, is
better than a static display. Here are some examples
for booth demonstrations and activities:
Pinewood derby
Space derby
Bicycle safety
Costumes
Obstacle course
Musical instruments
Beanbag toss
Woodworking
American Indian crafts
Model building
Wolf, Bear, and Webelos
advancement projects
Cub Scout Academics
and Sports
Puppet show
Kites
Skits
Paper airplanes
Physical fitness
Soap carving
Turtle race
Bird feeders
Neckerchief slides
Block printing
Tossing games
Masks
Leatherwork
Decorating the Booth
Crepe paper is one of the best materials for booth
decoration. (Always use flameproof crepe paper!) It
comes in many colors and can be stretched, twisted,
fringed, crushed, scalloped, fluted, or ruffled. You
can cover booth frames with sheets of crepe paper.
Fold
4˝
Diamond
Fold and
staple
Use colorful crepe paper twists, ruffles, or streamers
to trim the booth.
Brown wrapping paper is also good for covering
frames. Decorate it with paint, crayons, or markers before tacking or stapling it to the booth frame.
Burlap or other inexpensive fabric is another type of
frame covering. Lightweight posters and displays can
be pinned to the fabric.
If sheet cardboard is available, use it to make sturdy
booth sides. It is easily fastened to wooden booth
frames with tacks or a staple gun. It can be painted
with leftover latex wall paint, which adds both color
and strength. Use a roller for painting large pieces. Add
details over the latex with tempera or wide-line felt-tip
markers. Attach signs and other lightweight displays to
cardboard with tape, staples, or straight pins.
Foam board is another lightweight, strong siding
for booths. Although more expensive than cardboard,
it comes in many bright colors and has all the ease
of cardboard. It can be cut into smaller sizes and
mounted for booth signs, etc. Because it has a smooth
surface and bright color, it may be better to use where
there will be writing—the name of the booth or other
display material.
Another alternative to wood for booth construction is PVC pipe, which has the advantage of being
lightweight and easily portable. The joints and poles
eliminate the need for hammer and nails, and the
parts can be reused for other projects fairly easily.
PVC can be painted just like wood, and siding can be
glued or taped to the frame.
Be sure to include a large sign showing your pack
number and the name of your chartered organization
in bold letters. You may wish to post a chart showing
Accentuate the Positive
1–11
the names of pack leaders and a duty roster of times
when various dens staff the booth.
A Simple Booth
This quick-and-easy booth can be used for a pack
circus or fair as well as a Scouting show.
Materials: Table, four sturdy posts or poles (6 to 7
feet long), wire or cord, crepe paper, stapler or tape
Tie or wire a pole to each table leg. Wind crepe
paper strips around the poles. Tie a cord from pole to
pole around the tops and decorate with paper flags or
drapes. Balloons add color and can be tied together
at the tops of the poles. Cover the lower part of the
booth with crepe paper fringes or gathered fabric
(such as an old sheet).
Den leaders should be sure to wear their uniforms to
strengthen a visual connection between the leader
and the boy. The uniform serves as a reminder for
boys to be on their best behavior.
Code of Conduct
A code of conduct is a list of behavioral expectations and consequences if the code is broken. Boys,
with the den leader’s guidance, usually create it
themselves. Three or four points will be sufficient,
and they should be positive; the words no or don’t
have no place in a code of conduct. Include a final
rule such as “Have fun!” Also consider including the
3 R’s: Respect for others, Responsibility for yourself
and your things, and Reasonable behavior. Boys
should sign the code of conduct, and it should be
displayed at every den meeting.
Boy Behavior
Two-Deep Leadership
Positive behavior is a great responsibility and,
sometimes, challenge for the den leader. It isn’t
easy—but it isn’t impossible, either. Remember that
each boy (just like all of us) has emotional needs
that need to be fulfilled. These needs include being
accepted, getting noticed, belonging, receiving praise
and encouraement, feeling safe and sound, letting off
steam, expressing himself, experimenting (and making some mistakes in the process), and having fun.
A minimum of two registered adult leaders, or one
adult and a parent or guardian of a participating Cub
Scout—one of whom must be at least 21 years old or
older—is required for all trips and outings. Two-deep
leadership can also be invaluable in managing boys
and their activities during den meetings. With two
leaders, an energetic den can be divided into two
groups, or one leader can work with a boy who is
having difficulty keeping up or managing his behavior. Furthermore, a second adult provides another
pair of hands when projects require adult help.
How each boy tries to fulfill these needs is what
makes him unique. One boy may be timid and quiet,
and another, loud and rowdy; but both are afraid they
won’t be accepted. Den leaders must plan ahead and
be prepared to make Cub Scouting a positive experience for every boy and his family.
HOW TO ACHIEVE POSITIVE BEHAVIOR
The den meeting is a time when the den leader and
Cub Scouts socialize, practice what they’ve learned
at home, and plan for future activities. For the den
meeting to be productive for everyone, it must run
smoothly. A good atmosphere is essential to managing boys’ behavior. Many times, that simply means
recognizing and rewarding good behavior. Here are
some suggestions for encouraging good behavior.
Expectations
Be sure that every boy and his parent or guardian understand the purposes of Cub Scouting, the
advancement system, the structure of the den and
pack, and the expectations of both boy and parent in
the program. A letter to parents and guardians with
a follow-up face-to-face meeting within a couple of
days of their son joining Cub Scouts will ensure this.
1–12
Accentuate the Positive
The Den Chief
The den chief is a wonderful resource for the success of a den. Although the den chief is not part of
the two-deep leadership because he is not an adult,
he can help manage the den by being prepared with
a game, story, stunt, song, or other brief activity that
provides some variety in the den program. See the
Cub Scout Leader Book and Den Chief Handbook for
more information on den chiefs.
Den Meeting Structure
Following the den meeting structure as outlined in
the Cub Scout Leader Book and Webelos Leader Guide
will go a long way to making a meeting run smoothly.
Also, Cub Scout Program Helps and the Webelos
Leader Guide both have detailed meeting plans for
each month. Every part of the den meeting structure
plays a vital role in the success of the meeting.
Leader/Boy Relationship
The relationship between a leader and the boys is
central to managing the boys’ behavior. For instance,
if the den leader enjoys the den meeting, the boys
will, too. The boys model what they see, so be a good
model by having a positive attitude.
Be consistent and fair in all your dealings with
boys. Treat them the same when they break any rules.
But do this in a manner that allows a boy to keep his
dignity. Give him a chance to tell his side of the story.
Allow him the opportunity to apologize. He will be
aware of and remember your kindness and caring.
Your example of fairness will carry over into other
aspects of the boys’ lives.
Be a good listener. When a boy wants your attention, look him in the eye. If you are busy, look him
in the eye and ask him to wait a minute. Honor his
patient waiting by turning to him with your full
attention as soon as possible.
Give each boy a chance to participate in discussions. To encourage boys to speak one at a time and
to listen carefully, you might try a “talking stick,” an
American Indian tradition. Only the person holding
the talking stick is allowed to speak, and everyone
else must listen respectfully without interrupting.
A talking stick can be a dead branch from a tree, a
dowel rod, or even a shortened broomstick handle.
Let the den members decorate the talking stick so
that it represents them and they value it. Use markers, paints, or stickers to enhance the stick. Boys may
want to hang feathers, beads, or shells on leather
strips from their talking stick.
Talking Stick
Conduct Candle
Use the same candle each week. The denner lights
the candle at the beginning of the den meeting, and
the candle is allowed to burn as long as all den members show good behavior. But if a boy misbehaves or
breaks the code of conduct, the candle must be blown
out for the rest of the meeting. As soon as the candle
burns down, the den is entitled to a special outing or
special treat.
Tickets
Buy tickets at teacher or party supply stores, or
make them yourself by hand or with the use of a
computer. Give boys a ticket when they do something
good. (Try to give each boy an opportunity to receive
a ticket during a meeting.) They write their names on
the back of their tickets. The tickets are placed in a
jar, and a drawing is held at the end of the den meeting for a small treat (gum, candy, stickers, small toy,
etc.). At the end of the month, hold a drawing for a
“big” winner.
Marble Jar
Use a glass jar so it makes lots of noise when you
put a marble in. Draw a line on the jar high enough
so that it will take the boys six weeks or so to earn
enough marbles to fill it to that point. Explain that
when marbles reach the line, the den will get a treat.
Drop a marble in the jar when someone in the den
does something good. Make a production out of it.
Celebrate with the den when they reach their goal.
Stickers and Certificates
Give big flashy stickers to boys for good behavior.
Use them only occasionally, or they lose their appeal.
Make certificates by hand or with a computer. Use
gold seals or other decorative stickers. You can also
purchase certificates at teacher supply stores.
When you notice a boy’s good behavior, comment
on it! Let him and the others in the den know exactly
what you liked. Soon, you’ll have all the den members copying that behavior. Comments such as “I like
the way you did that,” or “Good thinking,” or “Now
you have the hang of it” encourage and build selfesteem. The more specific you are, the more likely
the communication has been effective and the activity will be repeated.
Super Star Pins
Decorate clothespins, one for each boy, with stars.
As you notice a boy’s good behavior, pin one on him.
At the end of the meeting, boys with pins on can pick
something from a “treat bag” filled with food items
(candy, granola bars, popcorn, bags of chips or cookies, etc.) or inexpensive items that appeal to boys
(baseball cards, small toys, pencils). Vary the items
in the treat bag often.
TRACKING BEHAVIOR
Keeping track of behavior helps a boy and his leader
know how he is doing. Here are some suggestions.
Accentuate the Positive
1–13
Super Star Notes
These notes to parents and guardians are good for
praising the boy when he gets back home. You can
make your own by hand or with a computer or buy
them at a teacher supply store. The boy will know
you really appreciate it if you tell his family how
well he did.
Coup Stick
Some American Indian tribes used coup sticks
(“coo sticks”) as a way to display accomplishments.
Items such as beads, feathers, bear claws, or eagle
claws were awarded at tribal meetings for deeds of
note (not unlike badges Cub Scouts earn!). These
were attached to the coup stick for display, bringing
honor to the coup stick owner.
Make a den coup stick by drilling a hole through
a wooden dowel at the top and bottom. Loop a long
piece of heavy-duty string or leather cord through the
holes so it runs the length of the dowel. Award small
items at den meetings for good behavior. Use beads,
feathers, stamped leather pieces, stamps on posterboard pieces, etc., and attach them to the string on
the coup stick. Take the coup stick to pack meetings
to bring honor to your den!
LEADER “SURVIVAL” KIT
At times, even the best plans go awry. A bag
packed as a leader “survival” kit comes in handy
when chaos has erupted, all your planned activities
1–14
Accentuate the Positive
for the meeting have been exhausted, or the den just
needs a change of pace. Your survival kit will grow
as you and your den work together and discover the
things the boys like best—you will base your survival
kit on those activities. The goal is to pack your bag
with lightweight, multiple-use objects—and take it to
every den meeting.
Here are some suggestions for your leader survival
kit. Remember that each item should have multiple
uses. Newspapers, for example, can be rolled and
taped to become bats or batons to pass during a relay;
left flat, they can become a “base” for use during a
game; opened, they can act as a dropcloth for messy
projects; folded, they can become hats. Newspapers
can also be torn and taped and shaped into instant
costumes. Your imagination is the only limit.
• Balls—a couple of tennis balls and at least one
soccer ball
• Blindfolds—at least two
• Safety pins
• Duct tape
• Newspapers
• Markers, pens, pencils, chalk
• Blank paper, various colors
• Lightweight rope
• Scissors
• Balloons
• Empty 16-oz. drink bottles with caps—at least six
• Magic tricks
• Puzzles
• Cub Scout Leader How-To Book
CONCLUSION
A den leader who can effectively manage the
boys in the den is better prepared to help them to
do their best. Every boy gets the opportunity to have
a rewarding Cub Scouting experience filled with
adventure, success, and lots of fun in a safe, positive
environment.
2
CRAFTS
Why We Use Crafts
2-1
Teaching Crafts to Cub Scouts
2-1
Resources for Craft Materials
2-2
How-To Tips
2-4
Theme Crafts
2-5
Safety Rules for the Use of Tools
2-6
Enlarging Patterns
2-6
Managing Den Supplies
2-7
Paper Crafts
2-8
Papier-Mâché
2-13
Printing
2-14
Wire, Bead, and Plastic Crafts
2-16
Clay Crafts and Modeling
2-20
Candle Making
2-23
Plaster Crafts
2-25
Metal and Tin Craft
2-27
Leather Craft
2-30
Wood Craft
2-32
Neckerchief Slides
2-36
2-0
Crafts
This chapter is filled with hours of craft fun for you and your Cub Scouts. Besides craft
ideas and tips, you will find out how crafts can be used to build a boy’s self-esteem, stretch
a boy’s creativity and imagination, and incorporate the purposes of Cub Scouting. These
“boy-tested” crafts have been used successfully by dens and packs across the country.
Why We Use Crafts
As Cub Scouts work on craft projects, they not only
learn to make useful items but also get valuable experience in using and caring for basic tools and materials, learning to follow directions, using their imaginations, and developing coordination and dexterity.
Crafts can help leaders develop the monthly theme
in den and pack meetings and tie the activities of the
whole month together. Craft projects can be used for
advancement requirements or just for fun.
Making his own craft project calls for creativity in
each boy. As he embarks on his project, he may need
to measure, trace a pattern, cut or saw, sand, and
assemble a project with nails, screws, or glue. Crafts
develop boys’ ability to understand and satisfy their
urge to experiment. Furthermore, physical development and mental growth are by-products of the craft
program. Muscle coordination comes from lifting,
moving, sawing, drilling, hammering, and pounding. Painting helps improve arm and hand control.
Folding, cutting, shaping, filing, and sanding craft
materials help develop eye and hand coordination.
As boys work with crafts, they learn to shape
materials into useful articles. While decorating them,
they also learn that useful things can be beautiful art.
They gain confidence to experiment with materials
and tools and learn new ways to do things. A completed craft project enables each boy to shout out “I
did my best!”
Teaching Crafts
to Cub Scouts
The leader’s job is to stimulate each boy’s interest and curiosity and to encourage him to try. It is
important to allow the boy to create and be proud of
his creation. He is making more than just “things”; he
is building his mind, body, and future.
All Cub Scout leaders have different backgrounds
and experiences, so their knowledge of craft techniques and tools will vary. Those with limited experience may enlist parents and other adults to teach
specific techniques or to provide materials and tools.
The Cub Scout Leader Book provides some excellent tips for leaders working with boys on craft
projects. In addition, the following steps will help
leaders teach crafts:
1. Choose a project with the help of the boys. Make
sure the project is something that has a purpose
and that they will enjoy making.
2. Make a pattern, if needed. Have enough pattern
pieces available so that boys don’t have to wait to
trace them.
3. Make a sample to show the boys, but remember:
These are age-appropriate crafts for boys, so don’t
go overboard and make your sample too elaborate.
4. Gather enough materials and tools so everyone
can work at the same time.
5. Teach the craft step by step:
• Cut out parts, as required.
• Put them together.
• Finish it (sand, polish, paint, etc.).
• Clean up.
6. Whenever possible, start a craft in a den meeting
that boys can finish at home with family help.
Be sure, however, that the family is aware of the
responsibility and has any instructions and materials necessary.
7. Display the craft projects at a pack meeting.
Leaders should guard against crafts that are simply “busywork” of the “cut-and-paste” type that are
below the boys’ abilities and interests. Crafts should
be more than mere handwork: They should be a
creative outlet and a form of expression, as well as a
way to learn skills. By relating crafts to the monthly
theme, you give each boy a chance to live a new
dream each month and to create the costumes, props,
and other items to help make that dream a reality.
Sometimes, leaders think they need to have a craft
project at every den meeting. But remember that crafts
are only one of many activities used to accomplish
the purposes of Cub Scouting. Overemphasizing crafts
may discourage boys whose interests and abilities
lean in other directions.
Crafts
2–1
MEASURING RESULTS
Adults judge their own projects differently from
boys. Adults judge the excellence of the workmanship
and the quality of the project. This is because adults
have had more time to develop skills, manual dexterity, and knowledge. A boy does handicrafts for fun.
His effort should be measured by his own standards.
Leaders and family members need to see the boys’
efforts through the eyes of a Cub Scout–age boy. This
requires understanding, patience, and a willingness to
invest time in working with boys. Each boy is expected to do his best, and each boy’s best is different.
To help measure the value and success of den and
pack craft projects, ask yourself the following questions:
• Are the boys learning things that will be helpful to
them later?
• Do the craft projects reflect the interests and abilities of Cub Scout–age boys?
• Do the den and pack craft projects help create the
opportunity for more family activity?
• Do the boys enjoy working on crafts?
• Do they have adequate working space, tools, and
materials?
• Are the boys given an opportunity to use their own
initiative and imagination in planning and making
projects?
HELPING THE BOY
• Encourage the natural creative urge in each boy. If
you don’t, the urge may disappear and be replaced
by lack of confidence in his own abilities.
• Through praise, you can help the boy build selfconfidence in his abilities.
• Learning by doing is important.
• Show enthusiasm for the boy’s progress. Don’t be
overly critical.
• Show him how—but don’t lose patience and take
a tool away from him because you can do it better
or faster. This will discourage him and destroy his
self-confidence.
• Be patient. Remember: Boys may have to be shown
over and over how to use a tool.
• Be tactful. Offer your help during difficult parts of
a job by saying, “Let’s work on this part together.”
2–2
Crafts
Resources for
Craft Materials
Materials for crafts should be simple and inexpensive. In most cases, you can find scrap materials for
crafts around the home.
Most communities have many resources for craft
materials. Although you may have to purchase some
specialized items at craft and hobby stores, you can
acquire most through salvage and surplus or donation. Check telephone directories and begin looking
for places where you might be able to obtain aluminum foil, burlap, canvas, clay, cord, floor covering,
leather and vinyl scraps, nails, paper bags, plastic
rope, sandpaper, spools, etc.
Here’s a “starter” list of possible resources for
craft materials. Most of the sources listed have scrap
that is available for the asking, or at minimal cost.
Keep your eyes and ears open for the endless list
of “beautiful junk” available for recycling into Cub
Scout crafts.
• Lumber Company: Wood scraps, sawdust, and
curls of planed wood may be given away by the
boxload. Make your contact and request, and then
leave a marked box to come back for later.
• Grocery Stores: Check grocery stores for boxes of
all sizes and shapes. Discarded soft drink cartons
are excellent for holding paint cans.
• Telephone Company: Empty cable spools make
great tables; use old telephones as props for skits;
use colorful telephone wire for many different
projects.
• Soft Drink Company: Plastic soft drink crates may
be available at a minimal charge. Use them for
storage or for projects. Also, use plastic six-pack
rings for various projects.
• Ice Cream Stores: Use empty 3-gallon cardboard
containers for wastebaskets and storage.
• Medical Laboratories: Ask for clean paraffin and
tongue depressors.
• Gas Stations and Garages: Tires and bike tubes are
great for games and obstacle courses.
• Wallpaper Stores: You’ll find wallpaper sample
books of discontinued patterns.
• Carpet Stores or Outlets: Discontinued rug samples and soft foam underpadding can add to craft
projects.
• Tile Stores: Use broken mosaic tiles for many craft
projects.
• Appliance Stores and Furniture Stores: Large
packing crates are handy for skit props and puppet
theaters.
• Newspaper Companies: Ask about end rolls of
newsprint.
• Printing Companies: You can never have too much
scrap paper and cardstock.
• Pizza Restaurants: Cardboard circles are good for
making shields and other craft projects.
• Upholstery Shops and Drapery Shops: You’ll find
a wide variety of fabric and vinyl scraps.
• Picture Framing Shops: Leftover mat boards make
great awards or bases for other projects.
USING SALVAGE
Many items that are destined for the trash can be
used for Cub Scout craft projects. Ask families to be
on the lookout for scrap materials. If you live in a
community that has a manufacturing company nearby, you may be surprised at the scrap wood, plywood
cutoffs, and odd pieces of metal, cardboard, leather,
and plastics that you can get just by asking. Ask
families to save things such as tin cans; the cardboard
rolls inside paper towels, toilet paper, and wrapping
paper; boxes; tree branches; plastic bottles; buttons;
cloth; pinecones; and wire hangers.
Here’s a partial list of useable scrap materials:
• Bottle caps—for Christmas tree ornaments, foot
scrapers, wheels, construction projects, markers
for games
• Bottles—for musical instruments, containers
• Broom handles—as dowels for projects
• Cardboard cartons—for construction projects,
stage props, puppet stages, storage
• Catalogs—for decorations, designs, cutouts
• Clothespins—for human figures, fastening items
together, games
• Coat hangers—for wires for mobiles and other constructions, skeletons for papier-mâché work
• Coffee/juice cans—for storage, planters, games
• Coloring books—for patterns for name tags, etc.
Patterns can be enlarged for craft projects.
• Corrugated cardboard—for stage props and scenery, bulletin board, shields, swords
• Ice cream cartons (3-gallon)—for trash cans, drums,
masks
• Ice cream spoons—for mixing paint, spreading
paste, figures
• Jars—for containers for paint, paste, and brushes;
decorate them for gifts.
• Juice-can lids—for tin punch projects, awards
• Leather or vinyl scraps—for key chains, bookmarks, neckerchief slides, coin purses
• Macaroni—for stringing for jewelry, pictures, and
frames
• Margarine tubs—for storing small objects (lids can
be used like flying saucers in games)
• Newsprint—for covering tables, papier-mâché, flip
chart, growth charts, large backgrounds and scenery
• Old shirts or pajama tops—for paint smocks (cut
off the sleeves), costumes
• Paper bags and old socks—for hand puppets
• Paper plates—for plaques, masks, games
• Paper towels—for papier-mâché, clean up
• Pipe cleaners—for simple sculptures
• Plastic water bottles and milk jugs—for planters,
games, costumes
• Shelf paper—for finger painting
• Soap bars—for carving
• Sponges—for painting, printing, clean up
• Straws—for holiday decorations, party favors,
games
• Tin cans—for metal work, storage containers,
planters
• Tongue depressors and craft sticks—for mixing
paint, modeling tools
• Wallpaper—for book covers, paper for painting
• Wrapping paper—for murals, painting
• Yarn—for hair for wigs and puppets, holiday
ornaments
Crafts
2–3
How-To Tips
TIPS FOR PAINTING
Acrylics: Jar acrylic is more economical, but acrylic paint is also available in tubes. It can be thinned
with water. Brushes clean easily with water. Acrylics
are nontoxic, good for painting almost anything, and
don’t need a finishing coat.
Tempera: Water-based paints such as tempera are
great for Cub Scouts. Powdered paint is more economical but messier. Mix powdered tempera with
water and add a little liquid starch, which helps the
paint go further and not run.
Cleaning Brushes: Different paints need different
cleaners. For tempera, poster paint, or acrylics, use
water. The boys can clean up after using these paints;
adults should supervise cleanup for other media. To
clean varnishes, oils, or enamels, use turpentine,
mineral spirits, or kerosene. For shellac, use shellac
thinner. For model paint, use the recommended thinner. For lacquer, use lacquer thinner. These solvents
are flammable and should be used outside and well
away from sparks and flames. Adequate ventilation
is required when working with any of these paints or
solvents.
Finishing Coats: Objects painted with tempera or
poster paint will have a dull finish and will not resist
moisture. For a shiny finish and for protection, spray
with clear plastic or clear varnish, or finish with a
coat of diluted white glue. Acrylic paint does not
need a finishing coat.
Paintbrush Substitutes: For large items such as
scenery, use a sponge dipped in tempera. For small
objects, use cotton swabs.
Painting Plastics: For painting plastic milk containers or bottles, mix powdered tempera with liquid
detergent instead of water or starch. The paint will
adhere better.
Painting Plastic Foam: Some types of paint will
dissolve plastic foam, so only use one that is recommended. Test it first on a scrap.
2–4
Crafts
Painting Wood: It is best to give raw wood a coat of
wood sealer or thin shellac before painting to prevent
the paint from soaking into the wood.
Spray Painting: A spray bottle works well for
spray-painting large items. Use diluted tempera or
poster paint. If using commercial spray paints, be
sure to read the label and follow any instructions.
TIPS FOR ADHESIVES
• To save money, buy white glue in quart sizes and
pour into small glue containers for the boys.
• To make heavy-duty glue, mix cornstarch with
white glue until the mixture is as thick as
desired.
• For small glue jobs, put glue in bottle caps and let
boys use toothpicks or cotton swabs.
• Clear silicone is the best glue for plastic bottles
and milk containers. It is available at hardware
stores and requires adult supervision.
• Egg white is a good adhesive for gluing kite paper.
It is strong and weightless.
• Tacky white glue is the best adhesive for plastic
foam. A little goes a long way.
• Wheat paste (wallpaper paste) is a good paste for
papier-mâché. Flour and water make a good paste
too.
• Masking tape and cellophane tape can be used
successfully in many projects.
MORE TIPS
• Stuffing for Puppets: Use plastic bags or old nylon
stockings.
• Cutting Plastic Foam: Some types can be cut with
a serrated knife or an electric carving knife. Please
note that adults should perform this procedure.
On heavier types, adults might use a coping saw
or jigsaw.
• Punching Holes in Plastic: Use an awl or hole
punch. A leather punch will work on most vinyl.
Adult supervision is mandatory.
with lots of good ideas. And boys will have more fun
making something they thought of themselves.
Theme Crafts
Consider each monthly theme for its craft possibilities. In addition to the ideas found in this book,
Cub Scout Program Helps, the Webelos Leader Guide,
and monthly roundtables are loaded with ideas. If
the projects are fun, the boys will want to do them.
A leader may suggest wide project areas and give
the boys greater freedom of choice and an opportunity to use their imaginations. For example, the
theme “Things That Fly” might produce kites, gliders, planes, boomerangs, or even flying insects. Ask
a boy what knights remind him of and you’ll have
everything from slaying dragons to building castles.
If boys have an opportunity to talk about a theme
and what they would like to make, they will come up
During some months, all boys in the den and pack
may be working on the same things, such as when
the pack is preparing for a pinewood derby, raingutter regatta, or space derby. The cars, boats, and
rockets for those events, however, are youth-adult
projects, and boys don’t work on them during den
meetings. During these times, boys could work on
decorations for the event.
Theme crafts may include costumes, ceremony
boards, game equipment, props for skits, gifts, decorations, toys, inventions, conservation projects,
nature items, and more. The following list will give
you some ideas on general theme topics. You’ll find
details for many of the ideas throughout this book.
FITNESS
WATER/BOATS
PIONEERS
NATURE
• Fitness equipment
• Beanbag toss
• Puddle jumpers
• Fitness chart
• Stilts
• Model boats
• Water wheel
• Waterscope
• Raft
• Costumes
• Homemade soap
• Homemade butter
churn
• Puppets
• Quill pen and ink
• Model fort
• Old-time games
• Birdhouses
• Bird feeders
• Insect net
• Terrariums
• Bird treats
• Box garden
• Collection boxes
• Plaster casts
• Leaf prints
• Ant farm
SPACE/FUTURE
• Rockets
• Space shuttle model
• Flying saucer
• Launching pad
• Robot
• Radarscope
• Space station model
• Star map
TRANSPORTATION
• Pinewood derby car
• Pushmobile
• Airport
• Glider
• Model train
• Cubmobile
• Model cars
• Model planes
• Helicopter
HEALTH/SAFETY
• Posters
• Home fire escape plan
• Emergency road signal
• Traffic signs
• First aid kit
• Nutrition chart or
Food Guide Pyramid
KNIGHTS
• Costumes
• Family crest
• Banners/flags
• Castle model
• Teeterboard jousting
• Dragon
FAIR/CIRCUS
• Midway games
• Performer costumes
• Animal costumes
• Musical instruments
• Masks
• Puppets
• Noisemakers
• Prizes
• Banner/flags
SCIENCE
• Inventions
• Electric games
• Barometer
• Rain gauge
• Science projects
• Telegraph
• Electric buzzers
• Weather vane
COMMUNICATIONS
• Tin can telephone
• Secret codes
• Telephone directory
cover
• Telegraph
• E-mail directories
Crafts
2–5
Safety Rules for
the Use of Tools
What is safe for one Cub Scout may be unsafe
when two or more Cub Scouts are around. Any workshop must have rules governing the use of tools. Den
tools include scissors, markers, low-temperature glue
guns, and other craft items—not just hammers and
saws.
Because accidents are usually caused by the
improper use of tools, take time to teach each boy
the right way to use a tool and how to take care of it.
Remind him that cleaning up and putting away tools
and materials are part of the job. Make sure tools and
materials are easy to reach and replace.
• An adult should be present when a Cub Scout uses
any type of tool.
• Use each tool for the job it is made for and the way
it was intended to be used. (So, for instance, never
use a screwdriver to pry or pound.)
• Never use a tool with a dull cutting edge, dull bit,
or loose part.
• Most accidents occur to the hands, face, or feet.
Protect the eyes. Keep fingers and hands away
from the cutting edges of tools. Secure or clamp
down wood that is being worked on.
• Be patient and never use force. Don’t work with
tools when you are tired; you need to be alert.
• Don’t wear loose clothing or jewelry, which can be
caught in moving parts.
• Keep the work area clean, dry, and well-lit.
• Never use electrical tools (such as a low-temperature glue gun) in damp or wet locations. Note: It
is best to use only simple hand tools and avoid
power equipment when working with Cub Scout–
age boys. Adults, however, might wish to use a
power tool to precut pieces of a project for younger
Cub Scouts.
• Use only heavy-duty extension cords. Don’t use
the type of extension cord that is intended for
small appliances.
• If an electrical cord has a plug with three prongs,
you should plug it into a three-hole receptacle
(outlet). If you use an adapter on a two-hole outlet, you must attach the adapter wire to a known
ground (the screw in the middle of the outlet coverplate).
• Don’t abuse tool cords by carrying tools by the
cord or by pulling a plug by yanking on the cord. If
the cord is frayed, don’t use the tool until the cord
is repaired.
2–6
Crafts
• Adults should unplug all electrical tools when
they are finished and put them out of reach of children. Don’t leave any tool unattended. Remember:
Power tools are not to be used by Cub Scout–age
boys.
• Adults who choose to use power tools should
always unplug electrical tools when changing saw
blades, drill bits, or other attachments.
• Keep tools sharp, clean, and oiled.
Enlarging Patterns
You can enlarge the patterns found in this book
and elsewhere as needed. The easiest way to enlarge
patterns is to make a copy on a commercial copy
machine and enlarge by the desired percentage.
Several types of projectors also will make enlargements. To use an overhead projector, trace over the
design you wish to enlarge, using thin plastic (such
as notebook page protectors) and the special marking
pens designed for use on plastic. Place the plastic
sheet on the overhead projector “bed,” and you can
enlarge it to almost any size. This is especially helpful in making posters and other wall hanging–sized
drawings.
Tracing of original small
drawing on 1-by-1-inch grid
2-by-2-inch block
in larger grid
Copy smaller drawing onto
larger grid block by block.
You can make craft storage boxes out of any material as long as they meet your needs. Sort craft materials by using an egg carton. A heavy-duty cardboard
box that 10 reams of paper come in is also excellent for storage. Cut handholds, and then paint or
cover with colorful adhesive-backed paper if desired.
Another favorite is a plastic fishing tackle box.
HANDY TOTE BOX
This sturdy box will carry a lot of weight. Make it
from two identical cardboard cartons.
Cut one box in half, along
sides and bottom. Turn
pieces so that open sides
are on the outside and
uncut sides are touching.
Tape together.
Portion of larger grid showing
how to sketch block by block
ENLARGING PATTERNS BY HAND
Here’s a good method for enlarging patterns by
hand. Use a ruler, tracing paper, pencil, and these
simple directions:
1. Place tracing paper over the design you want to
enlarge. Mark the design’s outer limits.
2. Using these limits as guides, draw parallel horizontal and vertical lines on the paper to create a
grid. With a ruler, make the lines the same distance apart (depending on the size and detail of
the pattern).
3. Letter each top square; number them down the
left side.
4. Tape the grid over the original design and trace
the pattern onto the grid.
5. Decide how much of an enlargement you need.
Draw another grid with larger squares to the total
width and length of the new pattern. Letter and
number the new grid in the same manner.
6. Copy the lines of the pattern into their exact positions in each square of the larger grid.
Cut out an opening
for handle through
both sections.
Place inside of second
carton. (It will be a tight
fit and may need trimming.) Cut as shown to
shape the sides.
Managing Den Supplies
Boys will take pride in a meeting place that is consistently well-organized. You’ll find that craft tools
and items can easily get out of hand, so a den craft
storage box is a good idea—both for organization and
so that needed craft items are always available. Fill
it with feathers, paper plates, puzzles, table tennis
balls, tennis balls, balloons, assorted buckets and
jars, paper bags, straws, and string. Also keep glue,
scissors, markers, beads, and other craft items on
hand. Make pencil cans from frozen orange juice or
other similarly sized cans and keep them in the den
craft storage box.
Finish cut edges where the two
boxes meet and around handle
hole by covering with masking or
duct tape. Paint or otherwise
decorate as desired.
Crafts
2–7
PERSONAL STORAGE BENCH
Each boy could have his own storage bench for
pencils and crayons, incomplete projects, etc. Make
from 1-inch shelving as shown in the illustration.
Each boy and an adult can build and decorate one
in their own style. This can be the boy’s seat at den
meetings as well as holding his tools and materials.
And these benches will stack for easy storage.
71⁄2˝
20˝
End
(make
two)
9˝
18˝
2˝
Top
(make one)
20˝
71⁄2˝
2˝
Sides
(make two)
24˝
221⁄2˝
2 strap hinges
Bottom
(make one)
71⁄2˝
1˝ x 1˝ x 9˝ braces
Paper Crafts
Paper can be a great medium for simple craft projects. These can be used for gathering times or filler
time, or as a den craft project. They are easy and
inexpensive, and boys will enjoy them.
PINWHEEL
Materials: 5-inch square of heavy paper, long
heavy pin, two wooden beads, two plastic disks,
dowel or pencil
1. On a 5-inch square of heavy paper, draw diagonal
lines from corner to corner as shown.
2. Cut on the lines to within 1⁄4-inch of the center.
3. Punch holes in the center and the corners.
Disk
Disk
Bead
Bead
5˝
1
⁄4˝ uncut
5˝
2–8
Crafts
4. Put the following on the heavy pin (or a thin nail)
in this order: plastic disk, wooden bead, the pinwheel corners in the order they are numbered,
center of pinwheel, plastic disk, and wooden
bead.
5. Push or tap the pin through the dowel or pencil.
BALOO AND KAA PAPER PROJECTS
Make the Baloo finger puppet and Kaa hanger from
heavy cardstock. Enlarge the patterns as needed, and
run off one pattern per boy on a copy machine or
trace on posterboard. Boys can cut out and color and
decorate as they want. Decorate Kaa with stripes,
spots, and diamond patterns. Cut out finger holes for
Baloo’s “legs” (younger boys may need help cutting
out the finger holes).
WINDSOCK
6. Cover the front and back of the mat with clear
contact paper.
PAPER AIRPLANE PROJECTS
Paper airplanes are simple and always fun. An
excellent resource for flying crafts that use no glue
or cutting is The Gliding Flight: 20 Excellent Fold
and Fly Paper Airplanes, by John Collins (Ten Speed
Press, 1989).
Kwanzaa is a nonreligious holiday celebrated at
the end of the year during which African Americans
reflect upon their heritage, families, and communities. One of the symbols of Kwanzaa is the mkeka,
or mat. Although preferably made out of straw, this
woven paper mat will also fulfill its purpose.
Materials: 10 strips of black construction paper,
2 by 24 inches; four strips each of dark yellow, deep
red, and forest green construction paper, 2 by 22
inches; transparent tape; clear contact paper
1. Lay the black paper strips next to each other on a
flat work surface.
2. Run a piece of tape along the edge of the right
side to tape the strips together.
3. Using the colored strips (the traditional colors
of Kwanzaa), weave back and forth through the
black base, one color at a time, alternating colors
in any order.
4. Pull the ends of the color weaves to make the
edges straight.
5. Run a second piece of tape along the left side to
hold the strips in place.
17⁄8˝
Score on
bottom.
Bend up.
15⁄8˝
5˝
3
8
5
15⁄16˝
Aileron
⁄16˝
Cu
t
⁄˝
S
Be core
nd o
do n to
wn p.
.
11⁄4˝
43⁄4˝
Eraser
Fuselage: Use a
six-sided pencil
with an eraser top.
t
23⁄4˝
Cu
KWANZAA MKEKA
Stabilizer
111⁄16˝
ore
Be on bo
nd tt
up. om
.
Materials: 4-by-16-inch paper, crepe paper
streamers cut into 3-foot lengths, four pieces of
string or yarn 12 inches long
1. Boys decorate paper using markers, crayons, or
stickers, leaving a 1⁄4-inch edge.
2. Make a cylinder with the paper, securing with
transparent tape.
3. Tape, glue, or staple streamers around the bottom
edge of the cylinder.
4. Punch four evenly spaced holes around the top.
5. Tie one end of the strings through each hole, and
tie the other ends together to make a hanger for
the windsock.
A Catapult Glider
Sc
Decorate this windsock to fit any theme. Use blue
streamers on gold paper for the blue and gold banquet, or red and white streamers on blue paper for a
patriotic theme.
Wing Pattern
Stabilizer
Dihedral
11⁄16˝
Add nose weight: Wrap
six turns of wire solder.
Wing
Rear view
Notch
Launching Pin: 1⁄2˝-20 wire nail
This glider will take some time to make, but it will
be lots of fun and worth the effort.
Materials:
New six-sided pencil with eraser
Stiff cardboard (cereal box sides or posterboard)
1
⁄2-inch wire nail
7 inches of 3⁄32-inch-diameter wire solder
Model cement or craft glue
5-inch length of another pencil or piece of
dowel
One or two heavy rubber bands
1. Enlarge the pattern to the size indicated and trace
onto the cardboard.
Crafts
2–9
2. Cut out the wing and stabilizer. For more accurate cutting, use a modeler’s knife. Guide the cuts
using a metal ruler as a straight edge.
3. Notch the pencil 2 inches from the end. Score
the bottom of the stabilizer on the centerline
and bend up. Insert the stabilizer into the notch.
Check that the tips of the stabilizer wings are 13⁄16
inches from the bottom edge of the pencil.
4. Insert the launching pin (the 1⁄2-inch wire nail) on
the bottom of the pencil about 11⁄2 inches from the
eraser end.
5. To add weight to the nose, wrap it with about six
turns of wire solder.
6. Cut and score the ailerons at both ends of the
wing. Glue the wing to the top of the fuselage
(pencil).
7. To make a launching rig, notch the small pencil
or piece of dowel to hold the rubber band or
bands.
8. To fly the glider, attach to the launching rig, aim
high, and let it go! If the glider dives out of its
glide, remove some solder. If it stalls (repeatedly
swoops up, dives, and then swoops up again),
add solder. Hold a glider contest to see whose
glider goes the farthest!
Helicopter Wing
Strut
Pattern
17⁄8˝
Wing
47⁄8˝
Paper clip
Materials: Thin cardboard (from file folder
or posterboard), tissue paper, paper
clip, 3⁄4-inch-wide
transparent sticky
tape, rubber band
1. Enlarge the
pattern to the
size indicated.
2. Trace the wing strut on the thin cardboard and
cut it out.
3. Place the strut on the tissue paper. Cover completely with 6-inch strips of sticky tape, overlapping them by 1⁄16 inch. Be sure to press down
firmly to ensure a good bond.
2–10
Crafts
4. Make a pattern for the wing and trace its shape
onto the tissue paper. Cut it out.
5. To fly the helicopter wing, slide a paper clip
onto the wing. You may hand-launch the wing or
shoot it into the sky with a rubber band.
KITE PROJECTS
Besides being fun, successful kite building and
kite flying give boys a feeling of competence. Don’t
worry about flaws in workmanship; in a simple kite,
they won’t make much difference. Refer to Elective
5, “Spare-Time Fun,” in the Wolf Cub Scout Book for
more information about kites. Also see the chapter
“Special Pack Activities” in this book for kite derby
ideas and kite safety rules.
Two-Stick Flat Kite
Materials: Wrapping
paper, strong plastic, or
30˝
cloth; 1⁄8-by-3⁄8-inch stick,
36 inches long; 1⁄2-by3
⁄8-inch stick, 30 inches
long; white glue or rubber cement; at least 100
feet of kite string
1. Notch the sticks in
the ends for fram36˝
ing strings. Tie the
sticks together at right
angles.
2. Run the framing string
around the kite, through
the notches, and tie the
ends together to complete your frame.
3. Measure and cut the frame cover (wrapping
paper, plastic, or cloth) with a 1-inch overlap all
around, except at the sticks, as shown.
4. Lay the frame over the “skin” and fold all the
flaps over the frame. Check for fit. Glue down
one flap at a time.
5. The lengthwise bridle string should be about 40
inches long; the crosswise string, about 34 inches
long.
6. For a tail, tie 4-by-6-inch tissue paper bows about
6 inches apart on an 8-foot string.
7. If the kite dances too much or is too sluggish,
add or reduce the length of the tail to correct the
kite’s flight.
Tissue Paper Kite
1
Fold to
front.
Back
2
Paper
strips
12˝
5˝
2˝
Center
reed
12˝
2˝
3
Fold up.
Paper
reinforcements
4
Arch
reed
other side, holding it taut until it dries. Glue
paper reinforcements over the intersections of
the reeds midway between the center and corners
(illustration 4). Then turn over kite.
6. Tie the bridle string over the intersection of the
bamboo reeds and then over the center reed 2
inches up from the base of the kite. Set the angle
of the bridle by tying a loop in the string, as
shown (illustration 5).
7. To find the correct flying angle, hold the kite by
the bridle over a table. The center reed (spine) of
the kite should be tilted upward at about a 15degree angle from the horizontal. Add the four
crepe paper tails as shown.
Star Kite
A
Two-Stick
B
Three-Stick
5
Front
Bridle
Broken lines
indicate strings.
C
Materials:
12-by-12-inch tissue paper square and scraps
Four 2-inch-by-5-foot strips of crepe paper
Rubber cement (or egg white)
Matchstick-thick bamboo reed
Scissors, pencil, ruler
22-inch lightweight string (bridle)
1. Cut the bamboo reed into two pieces, one 22
inches long and the other 15 inches long.
2. Crease the 12-by-12-inch square of tissue paper
on the broken lines as shown in illustration 1.
3. Glue the 15-inch center reed in place by covering
with a strip of scrap tissue paper. Trim the reed if
necessary. Glue the bottom flap up over the center reed and a narrow strip of paper over the tip,
folding the corners of this strip to the front to act
as reinforcement (see illustration 2).
4. Measure and cut the reed for the arch to fit
as shown in illustration 3. Be sure the reed is
strong, with a good natural curve.
5. Glue the left and right corner flaps over the
arched reed (illustration 4). For best results, glue
on one side first and let it dry, and then glue the
Equal length of
bridle legs
fastened at
A, B, C come together at kite string.
You can make two- and three-stick kites in a star
shape as shown. The sticks are the same length. Tie
them together and use string as shown. Glue on a
paper cover. A tail, attached to one of the star points,
is needed to balance these designs. Use a three-leg
bridle and attach the kite line.
Crafts
2–11
Kite Messenger
3. Make tape ringlets by folding a 2-inch piece of
sticky tape lengthwise, sticky side out. Cut into
1
⁄4-inch rings.
4. Place two ringlets on each of the straws and one
ringlet on the nose piece, as shown. Place the
straws, ringlets down, onto the plastic food wrap.
Cut around the straws as shown using a straight
edge and blade, allowing about 3⁄4 inch extra on
all sides. Fold the extra width over the straws
and tape down.
5. Attach the pilot to the center straw about 2 inches from the nose piece. Fly your kite and watch
your hang glider fly!
Tape
Cut
Cut a small hole in the center of a square of paper,
with a slit to one edge, as shown. Slip the paper over
the kite flying line and tape the slit shut. The wind
will blow the messenger up the kite. To have a kite
messenger race, all players send their kites up to a
specific length of line—perhaps 50 yards. The messenger is then attached to the flying line and allowed
to move up to the kite. The boy whose messenger
reaches his kite first wins.
Nose piece pattern
Pilot pattern
Hang Glider
This hang-gliding guy is easy to make, and boys
will enjoy his antics in the wind.
Nose piece
Straw
Folded pilot
Straws
Tape ringlets
Straws
Materials: Transparent cellophane tape; thin
plastic food wrap; three plastic soda straws, 1⁄8-inch
in diameter; plastic lid from margarine tub; cardstock or heavy paper
1. Trace the shape of the nose piece on the plastic
lid. Cut out the nose piece and insert into three
straws of equal length. The nose piece should fit
tightly for better wing support and better flight.
2. Trace the pattern for the pilot onto heavy paper
and cut it out. Fold the feet forward and the top
down on the dotted lines as shown.
2–12
Crafts
Cutline
Plastic
food
wrap
Papier-Mâché
Papier-mâché is a modeling material made by
mixing wallpaper paste with absorbent paper, such
as newspaper, paper towels, paper napkins, or tissue. Cub Scouts love the messiness of papier-mâché,
and you shouldn’t hesitate to tackle it because boys
can make some useful items—such as trays, bowls,
animals, figures, relief maps, napkin rings, masks,
candleholders, and wastebaskets. Just spread around
lots of newspapers for protection and cover the boys’
uniforms with old shirts.
HOW-TO TIPS FOR PAPIER-MÂCHÉ
• When using papier-mâché on an object that
needs to be removed after the papier-mâché
dries (bowl, vase, etc.), first oil or grease the
object so the dried papier-mâché shell will slip
off easily. Petroleum jelly works very well.
• Count on a papier-mâché project lasting
through several den meetings.
• Let objects air-dry when possible. Heat tends
to make papier-mâché shrink and buckle.
• Sand objects for a smooth finish before
painting. A final finish can also be made
by covering with papier-mâché made from
paper toweling.
• Painting papier-mâché: If using tempera
paint, give the project an undercoat of gesso
or thinned white latex paint first. Temperapainted objects should be sprayed with a
clear plastic finish or clear varnish for a
protective overcoat. Acrylic paint does not
require a base coat. You can also use household enamel or latex paint.
FRAMEWORK FOR PAPIER-MÂCHÉ
You will need some type of framework—such as
chicken wire, cardboard tubes or cartons, coat hangers, or balloons—for working with papier-mâché.
Make a small animal figure from a framework of
newspaper rolls or cardboard rolls taped together. Use
various sizes of balloons to make planets for a model
solar system. Mold larger items over a framework of
chicken wire bent and crushed to the desired shape.
STRIP PAPIER-MÂCHÉ
This method is good for making large masks and
stage props.
1. Mix wallpaper paste according to package directions. (It should be the consistency of pea soup.)
2. Tear (don’t cut!) newspaper strips about 1 to
11⁄2 inches wide. The frayed edges will blend
smoothly. Use wider strips for larger objects.
3. Dip the strips into the paste and run them
through your fingers to remove excess paste.
4. Lay them over the framework, overlapping and in
different directions. It is usually best to let each
layer dry before applying another. You can use
alternate layers of regular newspaper and colored
comic strip paper so missed spots will show easily. The number of layers needed will depend on
what you are making and how strong you need it
to be. A final coat of torn paper towel strips will
give an even textured surface for painting.
5. Place the object in a room where warm air circulates to let it dry.
WASTEBASKET
Materials: 3-gallon cardboard ice cream carton,
waxed paper, newspaper and paste for strip papiermâché, gesso (for undercoat if using tempera paint),
paint
Set the carton on waxed paper. Completely cover
it with papier-mâché strips, as described above. Also
cover the inside of the carton. Only one or two coats
are needed because the carton itself is sturdy. Let
it dry completely. Sand any rough edges. Paint and
decorate as desired.
VOTIVE CANDLE HOLDER
Here’s a simpler version of papier-mâché.
Materials: Small glass jar, pieces of colored tissue
paper, thin paste
Cover the jar with a thin layer of paste. Press layers
of different colored tissue paper to cover the outside
of the jar. Take care to keep the jar translucent so light
can filter through when the candle is lit. Let the jar
dry. Then place a votive candle inside and light it for
soft, colorful light.
Crafts
2–13
MASKS
Simple masks can dress up any skit.
Materials: 16-inch balloon, 36-inch-long heavy
string, newspaper and paper towel strips, wallpaper
paste
1. Inflate the balloon. Tie a knot in the end and
attach a string. Suspend the balloon by tying the
string to an object inside or outside. Be sure it
isn’t near anything that will cause it to burst.
2. Cover the balloon with several layers of newspaper papier-mâché strips. Let it dry.
3. For an animal mask, add a framework for nose or
ears at this time. Use a paper cup or cardboard
roll for the nose, heavy cardboard for the ears.
Use masking tape to fasten these to the papiermâché–covered balloon, and then cover them
with paper towel papier-mâché strips.
4. When the mask is dry, cut out a hole large enough
so the mask fits over the head and remove the balloon. Cut eye holes in the proper position. Cut out
a mouth or nose hole as needed. Also punch some
smaller holes in the back for air.
5. Paint as desired. Add additional decorations,
such as yarn hair, a hat, etc.
PIÑATA
3. Insert a bent clothes hanger as a hanger for the
piñata. Cover with additional layers of papiermâché to hold it in place, and then let it dry.
4. After the piñata is completely dry, cut a hole in
the back to remove the balloon and add wrapped
candy or party favors.
5. If desired, you can add a finishing touch of tissue paper curls. Fold 3-inch strips of colored
tissue paper lengthwise and fringe as shown in
the illustration. Hold several strips together and
cut all at once. Turn the strips wrong side out so
they will fluff up. Wrap these around the piñata,
overlapping each row as you glue it on.
To use the piñata, hang it
from a tree or other object so
it swings freely. Blindfolded boys take turns hitting
at the hanging piñata with a stick until it breaks and
the goodies fall out. For an added challenge, hang
the piñata from a cord or rope that someone can pull
on so that the piñata moves up and down, making it
harder to hit!
Printing
With some simple printing methods, boys can
print holiday cards, party invitations, blue and gold
banquet program covers, flags and banners, T-shirts,
shields, table covers, and pictures. Only a few tools
and materials are required.
Piñatas are usually colorful animal shapes filled
with candy or toys and broken open at holiday or
birthday parties. For an entertaining awards ceremony, make an individual piñata from a 10-inch balloon
for each boy. Put his award inside and let him break
it open.
1. For the basic body, inflate a balloon and follow
the directions above for making a mask. The type
of animal or figure you are making will determine
the size and shape of the balloons. Two or three
layers of papier-mâché are adequate. Let dry.
2. Tape on additional balloons and cardboard pieces for head, legs, ears, wings, etc. Cover with two
layers of papier-mâché.
2–14
Crafts
Printing can be done on paper, paper bags, fabric,
wood, and canvas using linoleum blocks, wood, wax,
sponges, vegetables and fruits, stencils, silkscreen,
crayons, and other items.
HOW-TO TIPS FOR PRINTING
• If the design is to be permanent, such as on a
T-shirt or other fabric that will be laundered,
use a fabric paint, oil-based paint, or ink.
Acrylic paint will also work. Otherwise, use
tempera paint or water-based inks.
• When printing T-shirts or other fabrics, be
sure to place a newspaper pad between the
front and back so the paint won’t run to
other parts of the fabric.
STAMP PAD
Make your own stamp pad by gluing felt to the
bottom of a plastic foam tray (such as the kind cuts
of meat are on when wrapped at the grocery store)
and soaking the felt with vegetable dye or food coloring. Be sure to cover your clothing and work area, as
some dyes stain.
RUBBINGS
3. Cut out the design and glue it to the
wood block. The design will print
the reverse of what you see on
the block, so if
Glue to wood block.
the design has
lettering or a
specific right
Cut from craft
foam or felt.
and left, glue
it to the block
backwards. Let
the glue dry.
4. Press the block
firmly onto an
ink pad. Then press it firmly on paper or fabric.
POTATO PRINTS
You can also use carrots, turnips, lemons, oranges,
and other vegetables and fruits for this simple printing method.
This is one of the simplest printing methods. All
you need is dark crayons, chalk, or pencil and thin
paper
1. Find a surface with an interesting texture, such
as leaves, tombstones, carved monuments, manhole covers, or tree stumps.
2. Hold or tape the paper over the surface and
rub hard with the side of the pencil, crayon, or
chalk.
3. Frame your rubbing with a piece of posterboard
or construction paper, or put it in a scrapbook.
Materials: Large potato, scratching tool (pencil,
nail, toothpick), sharp-edged cutting tool (paring
knife or pocketknife), paper for printing, tempera
paint and paintbrush
1. Cover the work area with newspapers.
2. Cut the potato in half so that each surface is flat.
3. Use the scratching tool to scratch a design on the
potato or the cutting tool to cut out a design. Cut
away all parts that you don’t want to print. Blot the
surface of the potato to remove excess moisture.
4. Brush the design with tempera paint. Stamp on
a newspaper or paper towel to remove
excess paint. If ragged edges appear
on the first imprint, cut away any
uneven parts of the potato that
cause this.
5. Print the design on paper until
it begins to fade, then add
more paint and repeat.
Another good rubbing material is a heavy, black,
waxy mixture called heelball, available from shoe
repair shops.
BLOCK PRINTING
Cub Scouts will enjoy making their own brands or
family crests from these simple materials.
Materials: Piece of craft foam or felt, printing ink
or paint, block of wood, white glue, paper or fabric
to print on
1. Cover the work area with newspapers.
2. Draw a design on paper and trace it on craft foam
or a piece of felt. Be sure that it will fit on the
block of wood.
Crafts
2–15
SPONGE PRINTING
Materials: Flat sponge about 1⁄2 inch thick, felt-tip
marker, scissors, tempera paint, paper for printing
1. Draw a simple design on the sponge with the
marker. Cut the sponge into this shape.
2. Wet the sponge and then squeeze the water out
thoroughly.
3. Dip the damp sponge in thin tempera paint and
press it gently on the paper. The tiny holes on the
surface of the sponge will not print, but the areas
between the holes will leave an unusual design.
STENCILS
Experiment with your stencils on scrap paper
before trying your finished project.
3. The paper or fabric surface to be stenciled should
lie flat. The stencil should also lie flat so the
paint won’t spread under the edges. Fasten the
stencil to the printing surface with tape or pins
so it won’t move.
4. Beginning on the stencil near the cutout edge,
brush the paint, using a stiff brush, onto the fabric or paper. Brush away from the stencil edges so
the paint won’t run underneath.
Wire, Bead, and
Plastic Crafts
FRAYED NERVE
Use this as a neckerchief slide
or pencil topper.
Materials: Cardboard, sharp hobby knife or scissors, thick paint (acrylic, latex, heavy tempera, or
tube oil paint), stiff bristle brush, paper or fabric to
be stenciled
1. To make the stencil more durable, give the cardboard three coats of shellac before using. Or
make your own stencil paper by dipping bond
paper in melted paraffin several times.
2. Trace a design on the cardboard or stencil paper.
Cut it out with a sharp knife or scissors.
2–16
Crafts
Materials: Old telephone wire, wire strippers/
cutters, pencil
1. Strip off the wire cover from the telephone wire
so that you have small wires of different colors.
Cut 12 pieces of 30-inch-long colored wire.
2. Hold the wires together and twist them in the
middle.
3. Wrap the twisted part around your finger and
twist the ends together.
4. Wrap each wire end around a pencil in a tight
coil, and then gently slide the pencil out. Repeat
until all wires are coiled.
HOW-TO TIP FOR WIRE CRAFTS
• Telephone wire comes in many colors. By
stripping off the outer plastic covering,
you’ll find a pliable wire rainbow inside for
your projects.
TRASH BAG APRON
BEAD CRAFT FLAG
This is one of those “Why-didn’t-I-think-of-that?”
crafts. Any time boys are working with messy materials, they can keep their uniforms clean with this easy
apron and still have fun. Use heavy-duty trash bags,
and you can reuse the aprons.
Plastic beads of all kinds have been used in Cub
Scout crafts for years. Many patterns for bead animals and various shapes can be found commercially
and on the Internet. Boys can wear this flag pin with
pride.
Materials: Trash bag, scissors
1. Fold the trash bag in half.
2. Cut a J shape from the closed end of the bag with
the approximate dimensions shown.
3. Make two more cuts in the bag as shown, cutting
from the bottom to make apron ties, and cutting
around the J shape for the arms.
4. Wrap around the Cub Scout to help protect him
from those messy, but fun, projects!
Closed edge
4˝
6˝
Chenille
stem
Cut
2˝
4˝
Fold
Cut
Beads
Open edge
Cut
Materials: 11 No. 2 safety pins, one gold chenille
stem, 27 blue 3-mm “E” beads, 34 white 3-mm “E”
beads, 29 red 3-mm “E” beads
1. Open 10 safety pins and place the beads on them
in the order shown. Close each pin once the
beads are in place.
2. Put the chenille stem through the end loop of the
remaining safety pin. Fold it in half and twist the
tip to lock in place.
3. Feed the end loop of the beaded safety pins onto
the chenille stem in the order shown. Make sure
that the pins are all facing the same direction.
4. Feed the other end of the chenille stem through
the top loop of the single pin as shown, and twist
to lock in place. Pin your bead flag to your shirt
and wear it with pride.
R = red bead; B = blue bead; W = white bead
Pin Pin Pin Pin Pin Pin Pin Pin Pin Pin
1
2
3
4
5
6
7
8
9
10
B
B
B
B
B
W
R
W
R
B
W
B
W
B
W
R
W
R
B
B
W
B
B
W
R
W
R
B
W
B
W
B
W
R
W
R
B
B
W
B
B
W
R
W
R
B
W
B
W
B
W
R
W
R
B
B
B
B
B
W
R
W
R
R
W
R
W
R
W
R
W
R
R
W
R
W
R
W
R
W
R
Crafts
R
W
R
W
R
W
R
W
R
2–17
STAINED “GLASS” SUN CATCHER
Materials: Clear plastic lid and length of ribbon
for each boy, black permanent marker, colored permanent markers
1. Clean and dry the plastic lid.
2. Outline the desired drawing on the lid with the
black marker.
3. On the opposite side, color with colored markers.
4. Punch a hole in the top and attach the ribbon as
a hanger.
MOBILES
A mobile is a sculpture that moves. They are often
made of balanced parts, wires, and cords connected
such they move in the slightest breeze.
Cutout objects to hang on the mobile can fit the
theme of the month, or use keepsakes, toy cars, table
favors, driftwood, fishing lures, sports emblems,
badges, or other items.
6. To assemble the arms, hang the S hook on the
ceiling attachment from which the mobile will
be hung. Hang arm B on the S hook. Then hang
arms C on the ends of B. Hold the C arms steady
while hanging arms D as shown.
7. Tie loops of thread or fishing line to the objects to
be hung from the mobile. Make the loops various
lengths, from 2 to 6 inches to give an interesting
effect.
8. Hook the loops on the arm ends, one at a time.
Hang about the same weight on each end so the
arm will balance.
STRAW WEAVING
Use straw weaving to make neckerchief slides,
belts, or shoulder sashes, depending on the amount
of yarn used. Sucking the yarn through the straw will
be the boys’ favorite part, especially if you use clear
plastic straws.
Tape
A
B
C
D
Yarn ball
Materials: Three wire coat hangers; cutouts
(metal, cardboard, foil, wood, plastic) or other
objects to be hung on the mobile; carpet thread,
strong string, or fishing line; pliers; yardstick
1. Open the coat hangers with pliers. Cut off the
hook part of one hanger and use the pliers to
form an S-shaped hanger (A). Boys will need
adult help for this step.
2. Straighten all the coat hangers and cut a 36-inch
length of wire from each.
3. Make arm B from one 36-inch length. Bend it in
the middle as shown, and curve the ends up. To
get both sides even, draw an outline of one bent
side on a sheet of paper and use it as a pattern for
the other side.
4. Cut a second length of wire into equal pieces and
make arms C.
5. Cut a third length of wire into four equal parts
and form arms D.
2–18
Crafts
Materials: Plastic straws; pieces of yarn, 1 yard
long; small pieces of tape; ball of yarn about 6 yards
long
1. Tie the ends of five pieces of 1-yard-long yarn
together in a knot.
2. Put the other end of each piece of yarn through
a straw by inserting it into the straw and sucking
gently. The yarn will slide through. Fold 1⁄2 inch
of yarn over the end of the straw and tape it to
hold.
3. Hold the straws in one hand as shown, with the
end of the yarn ball tied to the straw on the outside edge.
4. Weave the ball of yarn back and forth through the
straws. When you reach the edge, wrap the yarn
around the last straw and weave back the other
direction. Repeat until the weaving is as long
as you wish. (You can make longer weavings by
tying on additional yarn.)
5. To finish, tie off the weaving yarn to the last
straw. Slide the weaving onto the yarn below the
straws. Cut the yarn and tie the ends in a knot.
A
Fold
C
C
1
2
SUMMERTIME CRAFTS
3
4
5
Summertime is fun time, and these cool summer
crafts will add just the right cool touch.
6
C
7
C
Visor
B
Slit for elastic or glasses
2.
3.
4.
Materials: Heavy craft foam or cardstock, scissors
Enlarge the visor pattern as needed and cut out of
craft foam or heavy cardstock. Decorate as desired.
Make small slits as marked. For regular visors, insert
narrow elastic through the slits and tie the ends
together. Boys with glasses can slide the visor directly onto the arms of the glasses.
Beach Bag
Materials: 15 plastic six-pack holders, 4-inch
pieces of yarn
1. Lay out the plastic six-pack holders as shown.
The three six-pack holders in the center will
make the bottom of the bag. The three holders
above and below the center will make two sides,
and the two holders to the right and left of the
center will make two other sides. Attach yarn
pieces as shown by the solid lines, looping the
5.
Fold
yarn through the plastic holder rings and tying
the ends together so that the open rings are
linked.
Fold pieces A and B in half along the dotted lines
as shown and loop yarn through both plastic
rings and tie to the bag at the points indicated by
the lines.
Fold up the sides to make a basket shape, tying
rings 2 and 3 into ring 6 at the four points C of
the diagram, as well as rings 4 and 7 and rings 1
and 5.
Tie all four corners of the bag together, looping
the yarn through the plastic rings and tying the
ends together with either a square knot or an
overhand knot. Ties should be on the outside of
the bag.
Decorate as desired, such as by attaching an art
foam cutout of a yellow sun wearing orange sunglasses.
Cup Holder
Materials: Art foam, low-temperature glue gun
1. Cut a 4-by-10-inch piece of art foam. Roll in a cylinder shape, overlapping the edges 1⁄2 inch. Glue
together using a low-temperature glue gun.
2. Place the end of the cylinder you just made on
the art foam and draw around it. Cut out the
circle and glue to the bottom of the cylinder.
3. Decorate as desired. (Decorate with the same
art foam cutout you use on your beach bag for a
matching pair.)
Crafts
2–19
Clay Crafts and Modeling
MODELING “CLAY” RECIPES
It’s a thrilling experience for young or old to twist
and mold a pliable mass into a useful and decorative
object. Modeling with clay or other materials gives
Cub Scouts a chance to develop self-expression in
three dimensions. They become aware of symmetry,
texture, curve, and line; they develop a sense of
form and increase their ability to shape and reshape
objects by working with modeling clay.
Salt/Cornstarch Clay
The modeling “clay” recipes included here have
been used successfully by leaders around the country
and can be used to make bowls, vases, ornaments,
animals, figures, candleholders, paperweights, doorstops, napkin rings, and many other useful items.
You’ll find most of the ingredients for these recipes
in the kitchen. You can obtain sawdust from any sawmill or woodworking shop.
Ingredients: 2 C. salt, 2⁄3 C. water, 1 C. cornstarch,
⁄2 C. water
1
Mix the table salt with the water in a saucepan.
Simmer over medium heat, stirring constantly until
the mixture is well-heated (3 to 4 minutes). Remove
from the heat. Mix the cornstarch with the 1⁄2 C. cold
water and add. This will make a thick, stiff dough.
Salt/Flour Clay
Ingredients: 1⁄2 C. salt, 1 C. flour, water
Combine the salt and flour. Add water, a little at a
time, and with your hands, mix and knead until it is
a stiff dough. (By adding 1⁄3 C. water, you can make a
soft clay that is good for making a relief map.)
Basic Clay
HOW-TO TIPS FOR MODELING
• When making ornaments or beads, be sure
to make a hole in the object before it dries
or is baked so that a hanger can be added.
• If the clay begins to dry and crack as you are
working with it, try wetting the cracks with
a finger or sponge and rubbing them away
as they appear.
• Unless a recipe calls for baking, molded
objects should be allowed to air-dry thoroughly. Drying can be hastened by punching tiny pinholes in the object.
• Leftover modeling clay can be stored in a
plastic bag in the refrigerator for later use.
Don’t store for extended periods unless
specified.
• Make a “tool” out of a 1⁄4-inch dowel or
orange stick cut about 6 inches long and
sharpened like a pencil.
• Mixing regular clay with glycerin and then
adding petroleum jelly can make permanently elastic clay. The proportion of clay
to glycerin and jelly varies according to the
desired consistency. For a start, try eight
parts clay to one part glycerin to one part
petroleum jelly. Add more glycerin and
petroleum jelly as needed.
• Powdered alum will keep homemade clays
from getting moldy. Add a tablespoon or
two to your dough.
2–20
Crafts
Ingredients:
1 C. flour
2 t. cream of tartar
2 T. vegetable oil
⁄2 C. salt
1 C. water
8 drops food coloring
1
Mix the flour, salt, and cream of tartar and set
aside. In a saucepan, bring to a boil the water, vegetable oil, and food coloring. Remove from the heat and
add the dry ingredients. Stir until well-mixed. Let
cool and knead a bit to stretch. Stored in an airtight
container, this clay will keep for months.
Sawdust Clay
Ingredients: 4 C. clean, sifted sawdust; 1 C. wallpaper paste; 2 C. water
Mix all ingredients thoroughly to the consistency
of modeling clay. Add 1⁄2 C. plaster to the basic recipe
for added weight to make doorstops or paperweights.
Note: This mixture must be used right away.
Sawdust/Flour Clay
Ingredients: 1 C. flour, 2 C. sawdust, 1 t. salt,
water
Mix the flour, sawdust, and salt together. Add
water until the dough is thick and pliable.
Sawdust/Cornstarch Clay
Ingredients: 3 T. cornstarch, 1 C. cold water, 1 to
2 C. sawdust
Slowly add the cornstarch to the water. Cook the
mixture in a double boiler until thickened. Allow to
cool, and then empty into a large bowl. Add the sawdust, a little at a time, and knead it thoroughly until
you get pliable dough that is thick enough to handle
without cracking apart.
Cornstarch/Baking Soda Clay
Ingredients: 1 C. cornstarch, 2 C. baking soda,
11⁄4 C. water
Mix the cornstarch and baking soda. Add the
water and mix. Bring to a boil over medium heat, stirring constantly. This will thicken to the consistency
of mashed potatoes. Store in the refrigerator. Note:
This clay dries white.
Bread Modeling Clay
Ingredients: Crusts from several slices of white
bread, white glue, lemon juice
Break up the bread crusts into small pieces and
mix with white glue. Add a few drops of lemon juice.
Mix until it is the consistency of clay.
Baker’s Clay
Ingredients: 4 C. flour, 1 C. salt, 11⁄2 C. water
Use your fingers to mix the flour, salt, and water
together in a big bowl. If the clay feels too stiff, add
a little more water. Knead for 5 minutes. This recipe
should not be doubled or halved. After objects are
molded, bake them on a cookie sheet in a 350-degree
oven for 1 hour. Test for doneness with a toothpick.
Peanut Butter Clay
Ingredients: 11⁄2 C. peanut butter, 11⁄2 C. powdered
milk, 3⁄4 C. honey
Mix all ingredients together to the desired consistency.
TWISTED NAPKIN RINGS
Materials: Cardboard roll, aluminum foil, modeling clay, water, shellac or varnish, paint
1. Cover a cardboard roll with foil.
2. Roll pieces of modeling clay into ropes, each
about 1⁄4 inch thick and 12 inches long. Fold each
rope in half and twist as shown.
3. Wrap the clay twist around the foil-covered tube,
dab the ends of the twisted ring with water, and
press to seal.
4. Bake or let air-dry, depending on the type of clay
used.
5. When dry, slip the rings off the tube. Give napkin
rings a coat of clear shellac or varnish, or paint a
bright color.
BUSY HANDS KEEPSAKE
This easy project is best for younger boys.
Materials: 2-pound coffee can lid for each boy,
modeling clay, paint
1. Smooth out a lump of clay onto the coffee can
lid.
2. Boys press their hand into the clay, leaving a distinct impression.
3. Let dry. Paint or decorate as desired, including
the date made and name of the boy.
CLAY MENORAH
Materials: Salt/flour clay, alum, candles, acrylictype paint
1. Make the salt/flour clay above, adding a teaspoon
of alum to prevent the clay from getting moldy.
Mold into a base 9 inches long, 2 inches wide,
and 2 inches high.
2. Coat the ends of nine candles (one larger than the
other eight) lightly with vegetable oil. Insert the
largest candle into the center of the base; then
insert the other eight—four on each side of the
center candle, an equal distance apart. Insert the
candles deep enough so they can stand on their
own.
3. Let dry overnight. Remove the candles and continue to air-dry.
4. Once the clay is dry, paint and decorate the clay
base with acrylic-type paint.
Crafts
2–21
ORNAMENTS
Materials:
Rolling pin
Modeling clay
Waxed paper
Cookie cutters
Toothpick
Paint
Shellac
Ribbon or string
1. With a rolling pin, roll out modeling clay flat
between two pieces of waxed paper.
2. Use cookie cutters to cut out stars, bells, or other
shapes.
3. Use a toothpick to make a hole in the top of each
ornament for a hanger.
4. Let the ornaments dry or bake, depending on the
clay recipe used. Paint with tempera and add a
topcoat of shellac.
5. Tie ribbon or string through the hole for hanging.
MAGNETS
Materials: Modeling clay, paint, craft magnets,
glue
1. Mold modeling clay into desired shapes—animals, flowers, etc. Make the backside as flat as
possible.
2. Let dry. Paint as desired.
3. Glue a craft magnet on the back—and stick them
to your refrigerator!
PINCH POT
Use the recipe
for baker’s clay
above for this
small pot.
1. Roll clay into a solid ball about 11⁄2 inches in
diameter.
2. Place the ball in your palm and slowly push your
thumb into the center to within 1⁄4 inch from the
bottom while rotating the clay ball.
3. Then with both thumbs in the center hole and
your fingers on the outside of the pot, hold the
pot bottom away from you and press the sides
out, revolving the pot in a slow circle.
4. When the sides have been pressed to about 3⁄8
inch in thickness, place the pot on a piece of
waxed paper on a table. Work around the edge in
a pinching motion with the thumbs and fingers
until the sides of the pot are smooth and about 1⁄4
inch thick. Be careful not to strain the pot by forcing or pinching too near the bottom.
5. Work from the bottom up, keeping the top edges
thick until the very last.
6. When the bowl is as even and round as possible,
you can vary the shape by pushing the edges
inward or outward.
7. Bake on a cookie sheet in a 350-degree oven for
about an hour.
8. When the pot has cooled, paint with the designs
of your choice.
CLAY ALIENS
Put the boys’ imaginations to work creating a
friend from another planet. Anything goes for an
extraterrestrial! Once the boys make their alien pal,
they can pick a name and introduce their new friend
to the rest of the den.
Materials: Any type of clay recipe above; miscellaneous craft items and other small materials—
beads, sequins, wiggle eyes, chenille stems, washers,
small screws, wire, etc. Each boy will need a clay
working tool made out of a 1⁄4-inch dowel cut about 6
inches long and sharpened like a pencil.
Make 1-inch balls out of different colors of clay.
Each alien requires at least two or three balls of clay.
Fill egg cartons with different craft materials. Boys
pick assorted colors from the clay balls, take a tool,
and get to work.
2–22
Crafts
Candle Making
DIPPED CANDLES
The first candles were probably made from dried
rushes soaked in grease. The Romans used candles
made out of beeswax. Today, you and your boys can
make beautiful and useful gifts from inexpensive
materials.
In colonial times, every household made a supply of candles in autumn. Candle rods with rows of
wicks were repeatedly dipped into big iron kettles of
melted tallow. Candle dipping is still a tradition in
some towns and villages in Switzerland, where the
public can make candles during a candle dipping
festival at the end of the year.
SAFETY FIRST
Melted wax is hot. Follow these rules so that you
and your Cub Scouts will have a safe craft experience.
• Never leave children alone with melting or melted
wax. Remember: Wax doesn’t boil or steam, so
boys probably won’t realize how hot it is.
• Never leave melting or melted wax alone.
• Use a thermometer. Wax has a flash point of 375
degrees Fahrenheit. There is no need to heat wax
above 200 degrees for any Cub Scout project.
• Don’t let wax have direct contact with a flame.
If an accident occurs, treat it as a grease fire. DO
NOT use water. Smother with baking soda or a pan
lid, or use a dry chemical fire extinguisher.
• Always use a water bath method to melt wax; that
is, use a double boiler or use an old pot filled with
water and brought to a boil, with a second pot or
a small coffee can in or over the water in which to
melt the wax. DO NOT use a microwave. The wax
can splatter, and it will discolor.
• Use pot holders or pliers when handling hot pots
or cans.
• If wax gets on your skin, run it under cold water
immediately—then peel off the wax.
• Don’t pour leftover wax down the drain. It will
block the drain and require a plumber.
HOW-TO TIPS FOR WAX PROJECTS
• Always melt wax in a container over a pot
of hot water, such as a double boiler.
• “Prime” the wick by immersing it in melted
wax for 2 to 3 minutes. Cool slightly and
then pull it straight and lay it flat to dry.
• Use crayon pieces or commercial dies to
color wax. Water-based dyes and paints will
not work.
• If you want to add scent to your candles,
use commercial scents or oils only. Waterbased scents will not work.
Materials:
Wick or thick cotton string in 8- to 10-inch
lengths to make a 6-inch candle
Paraffin or candle wax
Double boiler or large pot with clean empty
coffee can
Long-handled wooden spoon
Second coffee can filled with cold water
Chopsticks, 6-inch lengths of doweling, or
unsharpened pencils for dipping sticks
Drying rack (a clothes drying rack, a narrow
cardboard box, two chairs back to back)
1. Heat water in the bottom of the double boiler. If
you are using a coffee can, place the can in the
heated water.
2. Break the paraffin into pieces and place it in the
top of the double boiler over the water. Stir until
the wax is melted and it reaches a temperature of
160 degrees Fahrenheit.
3. As it melts, you can add crayon or candle dye for
color. Stir gently to distribute the color evenly.
4. Remove the upper pan of wax from the water and
place it on a flat surface. Boys tie a wick onto a
dipping stick and dip it into the wax. Then lift
straight up, holding it for a moment to allow any
large wax drips to fall.
Crafts
2–23
5. Dip the candle in and out of the cold water and
dry with a cloth. Hang on the drying rack to dry
completely between dips.
6. Repeat the process until the candle is the desired
thickness. (You can expect about 25 dips for a
candle 1⁄2 inch in diameter.)
MOLDED CANDLES
You can buy
many candle molds
at hobby and craft
stores. They are easy
to use and come
with instructions.
Or, make homemade
molds from milk
containers, muffin
tins, or boxes from
bar soap. If using a
homemade mold,
you can support the
wick by tying it to a
pencil and lying it
across the top of the
mold.
Pour mold a little less than full so
that candle can be easily removed.
Make wick hole
with hot ice pick.
Stiffen wick by dipping in
hot wax and then cooling.
Poke stiff wick into hole.
CRUSHED ICE CANDLE
This is a candle within a candle. The taper
includes the wick, and the crushed ice makes a lacy
decorative candle.
Materials:
Double boiler
Empty clean pint milk carton
One 4-inch white taper candle
Ice (about 1-inch cubes)
Candle wax or paraffin
Crayon pieces or wax dye for color
1. Heat water in the bottom of the double boiler. If
you are using a coffee can, place the can in the
heated water.
2. Break paraffin into pieces and place in the top
of the double boiler over the water. Stir until the
wax is melted and it reaches a temperature of 160
degrees Fahrenheit.
3. As it melts, you can add crayon or candle dye for
color. Stir gently to distribute the color evenly.
4. Spread newspaper on the work surface. Place the
taper in the center of the milk carton. Surround
the taper with crushed ice to hold it in place.
5. Carefully pour the melted wax up to the top of the
taper, making sure that the candlewick extends
beyond the melted wax. Leave overnight.
2–24
Crafts
6. Pour water from the melted ice out of the milk
carton. Then tear and peel off the milk carton to
expose the square candle. (Use two den meetings, if necessary: one to pour the wax and one
to remove from the mold.)
SAND CANDLES
This candle craft takes a little more work and
requires a lot of adult help, but the finished product
is worth the effort.
Materials:
Sand—natural or colored
Container to hold wet sand
Water
Jar or bottle (It needs to have fairly straight
outward sloping sides at the top so it can be
removed from the sand without having the
sides cave in.)
Wicking or cotton twine
Double boiler
Wax (paraffin)
Stearine (to harden the wax)
Wick tabs (available at craft stores)
Pencil
1. Put sand in the container and add enough water
so when mixed it is moist and packs well.
2. To make the mold, push the jar or bottle into the
wet sand. Then remove it carefully to complete
the mold.
3. Attach a wick tab to one end of the wick. Tie the
other end of the wick to the pencil and suspend
over the cavity of the mold with the wick tab
touching the sand. Make sure that the wick is not
too long and hangs straight by wrapping excess
around the pencil.
4. Heat water in the bottom of the double boiler. If
you are using a coffee can, place the can in the
heated water.
5. Break paraffin into pieces and place in the top
of the double boiler over the water. Stir until the
wax is melted and it reaches a temperature of 160
degrees Fahrenheit. Add 3 T. stearine for each
pound of wax. As the wax melts, add crayon or
candle dye or scents, as desired. Stir gently to
distribute evenly.
6. Carefully pour the melted wax into the mold
cavity. (The sand may sizzle a bit, but this is normal.) Allow the wax to cool completely.
7. Scoop out the sand from around the candle to
remove the candle. Brush off loose sand. Spray
with clear acrylic for a nice finish.
Plaster Crafts
Cub Scouts, families, and leaders will enjoy learning to cast and finish plaster projects. Use plaster to
make casts of animal footprints and leaves, picture
frames, neckerchief slides, plaques, and other items.
Casting plaster can be found at most craft or hobby
stores. Plaster of paris is the most common type, but
casting plaster is not expensive and is more durable.
MOLDS FOR PLASTER
Commercial molds are available in many different
sizes and shapes. Plastic candy molds are great for
neckerchief slides. Plastic or waxed tubs and cartons
make excellent molds for candleholders. Picture
frames and plaques can also be molded in plastic
or waxed cartons. Scoops from dry beverage mixes
make excellent molds for circular objects such as
happy faces or bicycle wheels.
Make a Mold
POURING PLASTER
1. To fill small molds, pour plaster immediately
and work into crevices with a toothpick.
2. Fill larger molds about three-quarters full; flex
the mold with your hands or gently tap against a
table. You may add a layer of gauze to strengthen
the cast at this point. Fill to the top and tap again
to allow any air bubbles to rise to the surface.
3. If the cast needs a ring, such as for a plaque or
neckerchief slide, insert it now.
4. Allow the plaster to set before removing it from
the mold—15 to 30 minutes for small molds and
1 to 2 hours for larger molds.
5. Remove the cast from the mold. It should slip out
easily if the mold was properly prepared.
6. Scrape or sand any rough edges.
7. Allow the cast to dry completely (a day or more)
before painting.
PAINTING PLASTER
You can make your own mold by using a commercial latex molding compound available from most
hobby and craft stores. Almost any nonporous object
can be covered with several coats of latex, which will
produce a mold.
Most paint will soak into plaster, so it is best to
seal the cast with a commercial spray sealer, gesso, or
thinned latex wall paint. After the sealer is dry, apply
any type of paint—tempera, acrylic, oil, or enamel.
Tempera will leave a dull finish unless you give it a
final coat of shellac or varnish.
Preparing the Mold
PLASTER WHITTLING
Molds need to be prepared to prevent sticking and
to help the cast slip out easily. Use vegetable oil for
all molds except latex. Use a soap solution of 1 C.
water to 1 T. liquid detergent for latex molds. Coat
the inside of the mold lightly, as excess oil or soap
solution will cause defects in the cast. You don’t
need to prepare wax carton molds, as the wax already
serves that purpose.
Plaster is an excellent medium to use when teaching boys to whittle. Once they have mastered the
technique, they can go on to wood.
MIXING PLASTER
PLASTER PAPERWEIGHTS
1. Fill the mold with water to determine the amount
of plaster required. Pour this water into a disposable mixing container, such as a paper cup or
small aluminum pan.
2. Sprinkle plaster slowly into the water until a
peak forms above the surface. Allow it to set for
1 minute. Then, using a wooden or plastic spoon,
stir gently to prevent air bubbles. The mixture
should resemble heavy cream.
3. Don’t mix more plaster than you need. It will
harden quickly and can’t be reused.
4. Discard extra plaster in the disposable container.
Don’t pour it down the sink or dump near shrubbery. It will clog drains and kill some types of
shrubbery.
Make small plaster blocks and let them harden.
When ready to whittle, soak the plaster in water for 5
to 10 minutes. The plaster is porous and will absorb
the water, making it easier to work.
Use your imagination to
create novel paperweights
that will make great gifts.
Carve blocks of hardened
plaster or use molds to make
interesting shapes.
Materials: Mold for paperweight, plaster/water,
container and spoon for mixing, felt scraps, paint
1. Use plastic margarine containers as molds for
larger paperweights and paper cups for smaller
ones. Prepare the mold and plaster as described
above.
2. For a turtle paperweight, use a margarine tub for
the body and old measuring spoons for the head
Crafts
2–25
and feet. When the plaster is set, carve the head
and feet into desired shapes and glue to the turtle
body.
3. Glue felt to the bottom of the turtle and paint as
desired.
PLASTER SCRIMSHAW
Sailors and whalers began the art of scrimshaw
in the 1860s to make the time pass more quickly
at sea. They would scratch a design in whalebone
or polished ivory and
then fill in the lines
with ink. Cub Scouts
can use plaster in place
of whalebone to make
carvings that look like
scrimshaw. Wear them
as pendants or use as
paperweights.
Materials:
Plaster
Waxed paper
Dark tempera paint
Shellac
Nail or sharp tool
Thong for pendant
for scratching
1. Mix plaster as described above.
2. Drop globs of plaster on waxed paper. If necessary you can flatten with your fingers.
3. If you are making a pendant, use the nail or a
toothpick to make a hole in the plaster for a
thong.
4. When the plaster is hard, scratch a design in it
with the nail or sharp tool.
5. Thin dark tempera and brush one thin coat over
the plaster. Wipe lightly with a paper towel so
that the dark tempera stays in the scratched
design but not on the rest of your object. When
the paint is dry, apply a shellac finish.
6. For a pendant, add a thong or heavy cord to tie
around neck.
PLASTER CRAFTS IN NATURE
Plaster crafts can be a great way to keep boys interested during a nature hike. By seeking out the materials and possibilities for casts, they will be paying
close attention to what’s going on around them.
Plaster Leaves
Materials: Plastic lid, leaf, vegetable oil, plaster
1. Lightly oil the inside of the lid and the vein side
of the leaf.
2–26
Crafts
2. Place the leaf, vein side up, in the bottom of the lid.
3. Pour plaster gently over the leaf, without spilling
over the top.
4. If making a hanging, press a hanger into the edge
of the plaster.
5. Let set until hard. Remove the cast from the
mold. Remove the leaf. Let it dry thoroughly.
Plaster Casts of Animal Tracks
You’ll find the best tracks for casting near streams,
muddy banks, or beaches.
Materials: Plaster, strip
of cardboard 11⁄2 inches
wide, paper clip, disposable container
for
mixing plaster, disposable plastic
spoon
for
stirring
1. After you have
found the tracks you
want to cast, brush
away any twigs,
stones, or dirt from
around the tracks.
2. Surround the tracks with the cardboard strip
in the shape of a ring and fasten the ends with
the paper clip. Push the cardboard into the mud
around the tracks.
3. Prepare the plaster as described above.
4. Pour the plaster slowly from one side to the other
over the tracks inside the ring. This way, the plaster has time to push the air out, and no bubbles
will be left.
5. After about 15 minutes, the plaster should be
hard enough for the cast to be removed. While
the cast is still damp, scratch the date and the
type of animal in the plaster. When it is thoroughly dry, remove the cardboard ring.
If you will be doing the plaster casting while on
a hike, have each Cub Scout carry a resealable plastic bag with 1⁄3 to 1⁄2 C. of dry plaster. When you find
tracks, boys add a little water from their canteens or
water bottles slowly and gradually into the plastic
bag. Close the bag and knead until smooth. Pour into
the ring as described above and dispose of the plastic
bag properly.
Metal and Tin Craft
Metal is one of the basic craft materials. Have Cub
Scouts begin with aluminum foil to teach the skills
of designing, measuring, cutting, modeling, tooling,
polishing, and finishing. Then move on to tin or aluminum cans and other metals.
TOOLS FOR METAL WORK
• Vise—To hold metal while working or to aid in
bending material.
• Scratch Awl—To mark lines or designs. (You can
also use nails for this.)
• Center Punch—To make dents in the design or to
make holes. (You can also use nails for this.)
• Ball Peen Hammer—To pound nails, punches,
chisels, or whatever you are using to impress
designs in the metal.
• Can Opener—To open both ends of cans.
TOOLING METAL
Use this method to tool metal book covers, belts,
jewelry, and other items.
Stylus
Foil
Newspaper or
magazine stack
1. Sharpen a pencil-sized dowel to a point for the
basic tool (stylus). Sand the other end of the
dowel to a flat slant. (You can also use a ballpoint
pen as the stylus.)
2. The metal piece to be tooled should be flat. Place
it on a soft but firm surface, such as a stack of
newspapers or magazines. Tape it in place.
3. Lay the pattern of your design on the metal and
trace around it with the stylus, including all the
details. Remove the pattern and trace over the
entire design again. This is the underside of the
work.
HOW-TO TIPS FOR WORKING
WITH METAL
• Sharp Edges: When working with tin, aluminum, or other metals, smooth sharp edges
with a file and steel wool or emery cloth.
Protect hands from steel wool by wearing
gloves or holding it in a cloth.
• Painting: Remove any paper labels. Sand
the surface with wet sandpaper to remove
the shine and prepare the surface
for painting. Wipe
off with a wet
sponge. Paint cans
with enamel, latex,
lacquer, or acrylic.
If spray painting,
insert a small paper bag into the opening to
protect the inside of the can from paint, as
shown. Spray three light coats, letting the
paint dry between coats.
• Punching Holes: To
make holes in cans,
place the can on
top of a piece of
scrap wood. Hold
an awl to
the inside of
the can and
punch the
hole with a
hammer as
shown.
• Joining Cans: To join cans, cut the bottom out of one can and place on the top of
another. Secure with strong glue or strapping tape.
• Decorating Cans: Decorate painted cans
with plastic stick-on letters or dots, macaroni or seeds, tiny mosaic tiles, or scrap
wallpaper. You could also cover them with
jute twine or yarn.
• Aluminum Foil Tooling: It is easy to tool
designs in aluminum foil (see “Tooling
Metal” below) from frozen pies or dinners,
or aluminum offset printing plates. Frame
the designs and hang them on a wall.
Crafts
2–27
4. Turn the metal over to the front side and use the
stylus just outside the ridges, pushing the background down and away from the design. Use the
flat end of the stylus for working the background
that isn’t close to the design.
5. Turn the metal to the backside again and work
the design out with the flat end of the dowel.
Continue working both front and back to emphasize details and make the design stand out.
For variation, try hammering lightly on a heavy
straight pin or nail over the background, or use the
coil end of a safety pin to provide a different texture.
TIN FOIL COMET
This foil comet is almost too easy and always too fun.
Materials: One 12-inch-long piece of tin foil from
a standard roll, 12 Mylar strands or curling ribbon
strands of different colors
Lay the foil flat. Place one end of the Mylar strips
in the center of the foil. (You can secure with tape,
but this usually isn’t necessary.) Close the foil around
the strips to make a ball. Toss it to a friend and you
have a tin foil comet.
PINHOLE PLANETARIUMS
Boys can learn to recognize constellations with
these pinhole planetariums made from 12-oz. soda
cans that have pop tops.
Pegasus
Big Dipper
Cepheus
Cassiopeia
Little
Dipper
Orion
Tape
Peep
hole
Materials:
Clean 12-oz. soda cans Pen or dark pencil
Paper
Tape
Nail
Hammer
Adhesive shelf lining
1. Make paper patterns of the constellations shown,
enlarging the pattern to 21⁄2-inch circles using the
grid method (see “Enlarging Patterns” above).
Mark the stars’ positions with a pen or pencil.
2. Tape each pattern upside down on the bottom of
a clean soda can.
2–28
Crafts
3. With the nail and hammer, punch tiny holes at
each star’s position in the constellation.
4. Decorate the can with adhesive shelf lining, and
put the constellation’s name over the “peep hole.”
5. To use your planetarium, hold the bottom of the
can toward a strong light and look through the
peep hole.
TIN CAN LANTERN
Tinsmiths used tin piercing to make items such as
lanterns, charcoal heaters, and cabinets. This craft
requires careful supervision by adults but makes a
“keeper craft” the boys will truly enjoy.
Materials:
Clean tin can, any size
Paper, pencil, scissors
Water
2-by-4 scrap lumber
Duct tape
Hammer
Flathead nails
Small candle and
holder
1. Make a paper pattern that will
fit around the tin can. Draw
a design of dots that will be
punched through the can with a
hammer and nail. Keep the dots
of the design far enough apart so
that the can doesn’t bend during
punching. The spacing will depend on the size of
the can and the age level of the boys.
2. Fill the can almost full with water and freeze
solid.
3. After the water is frozen, wrap the paper pattern
around the can and tape in place.
4. Use two 2-by-4-inch pieces of scrap lumber
slightly longer than the can to make a “frame”
along both sides of the can. Secure the ends of
the frame with duct tape. This frame will brace
the can during punching and still allow it to be
rotated.
5. Use a hammer and sharp flathead nail to punch
holes in the can following the design. The nails
must be sharp or the can will bend. Keep extras
on hand and replace as needed.
6. After the ice melts, dry the can. Place a small
candle and holder in your lantern. Votive candles
work well.
If you want a top for your lantern, you can punch a
design into an aluminum funnel, as shown. The funnels are sturdier than the cans so they won’t need ice
to hold their shape during the punching.
TIN ORNAMENTS
Tin ornaments are popular and traditional in
Mexico. Some possible designs are shown here, but
boys can use their imaginations to create others.
Cut out one end of the cans. Punch a small hole
in the bottoms. Thread the string through the holes
and tie knots in the ends to keep the string from pulling through. Pull the string tight between the two
“phones”; one boy talks into his can and the other
listens.
SIMPLE TELEGRAPH
Materials: Foil or aluminum trays or plates,
emery board, newspapers, orange stick or dry ballpoint pen, permanent markers
1. Cut desired shapes from foil trays or plates. Use an
emery board to file the edges smooth if necessary.
2. Place the ornament on a stack of newspapers.
Use the orange stick or dry ballpoint pen to draw
the details
3. Color the ornament using permanent markers,
and punch a small hole in the top for hanging.
TIN CAN TELEPHONE
Boys love to make and use these telephones to
send important messages, discuss bright ideas and
private plans, and tell deep dark secrets.
Materials: Two small empty tin cans, 20 feet of
sturdy cotton string
Materials:
Two pieces of wood
Three screws
One dry cell (battery)
Two nails
Two metal strips cut
Two wires
from a tin can
1. Cut metal strips from a tin can and bend in the
shapes shown for the “sounder” (the Z shape)
and the key. (Make sure you remove sharp edges
with a file or emery paper.) Screw them to the
blocks of wood.
2. Put one screw underneath the key, with 1⁄4 inch of
clearance to the key.
3. Hammer in the nails for the receiver. (There
should be about 1⁄8 or 1⁄16 inch clearance between
the wrapped nails [see above] and the sounder.)
4. Wire as shown. In wrapping the wire around the
nails, start at the top of one nail and work down.
Then go across to the other nail and work up.
Have at least eight turns on each nail.
5. When you push down on the key and come in
contact with the screw underneath it, the electric current is completed and passes through the
wire. This magnetizes the wrapped nails, which
then pull the sounder down and make a clicking
sound.
Crafts
2–29
NUTS AND BOLTS CHESS SET
Materials:
Two small acorn nuts
Two 3⁄8-inch cap screws
Eight 3⁄8-inch nuts
12 3⁄8-inch flat-head socket cap screws
Four 3⁄8-inch thumb screws
Four 3⁄8-inch castle nuts or castellated nuts
Two external tooth lock washers
16 1⁄4-inch machine screws
16 1⁄4-inch nuts
Epoxy cement
Contrasting paint colors
of scraps at a low price. Scrap leather is suitable for
most Cub Scout projects. You can use heavy scrap
vinyl, such as upholstery vinyl, as a substitute for
leather in some projects. Begin with leather tooling,
one of the simplest types of leather craft. This skill
requires only one tool: a modeler or stylus. Tooling
projects can be completed in a short time.
Assemble and glue the nuts and bolts together as
illustrated to make enough pieces for one chess set.
Paint half the pieces one color and the other half a
contrasting color. Or you might make one set out of
steel and one set out of brass nuts and bolts.
External tooth
lock washer
(cement in place)
Small acorn nut
(cement in place)
3
⁄8˝ cap screw
3
⁄8˝ nut
Two Kings
Four Bishops
3
⁄8˝ thumb
screw
3
⁄8˝ flat head
socket cap screws
1
⁄4˝ machine
screw
Two Queens
Four Knights
3
⁄8˝ wing nut
Four Castles
or Rooks
3
⁄8˝ castle nut
1
⁄4˝ nut
3
⁄8˝ nut
16 Pawns
3
⁄8˝ flat head
socket cap screws
Leather Craft
Working with leather has much to offer Cub
Scouts, including learning new skills as they create
useful and beautiful items. Leather can be decorated
by painting a design on it, dyeing it, tooling it, stamping patterns in it with punches, burning designs on it,
or weaving or braiding through it. Don’t confine your
leatherwork to simply lacing together precut kits!
Leather, however, can be expensive. Look for
stores that will give away leather scraps or sell bags
2–30
Crafts
LEATHER TOOLING
• With a sponge or cloth, dampen the leather on the
rough side with cold water. After a short while the
dampness will reach the finished side of the leather. If it looks wet on the finished side, the leather
is too damp to tool. Wait until it dries slightly and
the natural leather color returns.
• Place your pattern on the front side of the dampened leather. Fasten it in place with tape or a
clamp. Trace the pattern with a stylus. Lift one end
of the pattern to be sure the entire pattern has been
transferred. Remove the pattern.
• Lay the leather on a firm surface. Use the flat end
of your stylus to level around all the outside lines
of your pattern and around the inside of any other
lines. Always draw the tool toward you. Keep an
even pressure on the stylus to prevent making
deep marks in the leather. This technique brings
out a darker, waxed-like color in the leather, and
the depression will produce an attractive design.
If the design is not clear enough, go over it again.
Redampen the leather if necessary.
• When the design is finished and the leather is dry,
apply a final finish of wax, saddle soap, or leather
dressing.
LEATHER
LACING
You can get
leather or plastic lacing at
your local Scout distributor
or a craft or hobby shop. The
spiral or whipstitch, illustrated here, is the simplest lacing stitch. It consists
of running a single lace, spiral fashion, through successive holes. Always make the first and last lace a
double one, to conceal the ends.
LEATHER STAMPING
There are a variety of tools and techniques for
stamping leather, and you can find out more about
them on the Internet or at the library. Along with
your stamping tools and leather, you’ll need a wooden mallet, or maul.
Dampen the leather on the backside as described
above. Don’t soak it. Place it on a hard surface. Hold
the stamping tool in one hand and tap it gently with
the maul. Make sure that you strike the tool carefully
so that you don’t cut through the leather.
BOOKMARK
Choose a design or monogram that will fit on a
piece of 2-by-8-inch leather. Follow the instructions
above for leather tooling or stamping to imprint your
design on the leather. Cut the top and/or the bottom
of the bookmark into a fringe if desired.
HOW-TO TIPS FOR
WORKING WITH LEATHER
• Use a hard surface as a base when tooling
leather. Marble is an excellent base because
it doesn’t absorb moisture. You can also use
laminated countertop scraps (from countertop manufacturers and kitchen remodeling
firms).
• Dampen all leather completely before working on it. Redampen from the backside if it
dries out before you are finished.
• Note: Don’t moisten leather that will have a
burned design. Use a regular wood-burning
set.
• If leather becomes soiled while working
with it, clean it with saddle soap. Apply
with an old sock or other clean rag to the
entire surface and allow it to dry. Do this
before applying any finish coat or wax.
4. Bring the bottom end toward you, and then insert
it through the loop and pull through.
5. Rework with the fingers into a braided strip that
looks like Figure D.
11⁄4˝
6. To make into a neckerchief
slide, use a small stapler
to staple the top and bottom ends together (Figure
E). (Lengthen the pattern to
1
2
3
make a larger slide.)
KEY CHAIN
43⁄8˝
This handy, easy-to-make item is a good gift for
parents. Choose a design or monogram that will fit
on a 11⁄4-by-4-inch piece of leather. Punch a hole near
the top of the leather that is large enough for a beaded
key chain to slip through easily. Tool or stamp your
design, following the instructions above.
BRAIDED TIE SLIDE
1. Cut soft leather (or cloth-backed vinyl) to 11⁄4 by
41⁄2 inches. Cut two slits, as shown, dividing the
leather into equal thirds. Number the thirds 1, 2,
and 3, using a light pencil mark, from left to right
(Figure A).
2. Push the bottom left corner through the slit
between 2 and 3 (Figure B).
3. Put strip 3 on top of strip 2. Then put strip 1 on
top of strip 3, making a sandwich with strip 3 in
the middle. With your fingers, work strip 3 out to
the left, exposing an open loop (Figure C).
Figure C
Figure A
Figure D
1
2
3
Figure B
Staples
Figure E
Crafts
2–31
Wood Craft
The wood craft projects in this section are suitable
for Cub Scouts and leaders who have had little experience working with wood. Use the Family Talent
Survey to find skilled family members who may be
able to help you and your den. Also, you can contact
a hardware store for more tips, tricks, and information regarding wood tools and their uses.
Before you begin, have on hand the materials and
tools needed for the project. Find out what type of
sandpaper is best for your project, what type of nails
or brads. Use scrap wood, which is free of knots.
(Knots can sometimes be dangerous when cutting
wood.) Make a sample of the project before the meeting to check out the directions. Provide step-by-step
instructions for the boys, but also don’t stifle their
creativity and imaginations.
HAND TOOLS FOR WOODWORKING
It is best to use only simple hand tools and avoid
power equipment when working with Cub Scout–age
boys.
• Hammer: An 8- to 10-ounce hammer is the best size
for a Cub Scout to grip and swing. If a nail bends,
pull it out. Use a wooden block when pulling nails
to prevent strain on the hammer handle.
• Screwdriver: Use the longest one convenient for
the job. Make sure the blade fits the screw slot.
Keep the screwdriver and screw aligned.
• Plane: Teach boys to use a block plane to smooth
and square wood. It is the best type to use on their
projects.
• Brace and Bit: Show boys how this drilling tool
works. Explain that a brace holds bits; some have
ratchets to permit partial turns of the handle; and
auger bits are wood bits measured by sixteenths of
an inch. Show them how to start a bit by guiding
it into place with one hand and how to secure a bit
by holding the chuck and turning the handle of the
brace clockwise. Have them learn to finish a hole
from the underside to prevent splitting.
• Hand Saw: Teach Cub Scouts to use a 20-inch saw,
recommended for boys their age. To start a saw
cut, draw a pencil mark on the board where you
want to make the cut. Start the cut by notching on
the mark at the edge of the board. Steady the blade
with your thumb well above the cutting edge and
then draw back gently to create a notch on the
mark. This is called readying the blade. With the
blade ready, remove your thumb and begin saw-
2–32
Crafts
ing down the pencil mark. Be sure to tilt the saw
at approximately a 45-degree angle to the board
when cutting across the grain of the wood. Explain
that you straighten the saw handle to correct the
direction of the cut. Be careful not to pinch the
saw. If this happens, gently work the saw back and
forth to release the blade.
• Ripsaw: Use this saw to cut with the grain of the
wood only. Show boys how to brace the wood
firmly on a sawhorse, bench, or vise. Start sawing gently, changing to light, steady strokes. Don’t
press. Take fairly long strokes and let the saw do
the work.
• Coping Saw: Teach boys to use this simple saw to
cut curves and odd shapes for wood. Saw with the
handle either above or below the wood, setting the
blade to cut on the down stroke. Use a heavy blade
and a long stroke. Clamp the work securely in a
vise or use a bench hook.
• Bench Hook: Make this handy tool for your home
workshop. Use 1-inch pine. Follow the dimensions shown. To use, set the bench hook on your
worktable or a chair. Butt the underside against
the edge of the table or chair. Hold the piece of
wood to be cut against the top block and saw with
a level stroke as directed. The under board protects the table or chair top. Countersink screws or
use dowels to protect the tabletop.
8˝
10˝
1˝ x 12˝
1˝ x 2˝
POWER TOOLS
It is best to use only simple hand tools and avoid
power equipment when working with Cub Scout–age
boys. Adults, however, might wish to use a power
tool to precut pieces of a project for younger Scouts.
See “Safety Rules for the Use of Tools” above for
precautions that adult leadership should take when
using power tools.
FINISHING WOOD PROJECTS
CRAFT STICK PICTURE FRAME
Always sand projects before you finish them.
Make a sander from a 2-by-2-by-3-inch wood block
and wrap sandpaper around it. Always sand with
the grain, never against it or in circles. To get the best
results from sanding, use a filler for scratches and
holes. When dry, sand again.
You can make picture frames out of many different
materials. This craft stick frame is simple and inexpensive and looks great.
CAUTION: Many painting supplies are not
only flammable, but also explosive. Never use
them near an open flame. Be sure windows are
open for circulation. It is best to use them outdoors if possible.
1
2
3
B
Materials: Craft sticks, white glue
1. Lay craft sticks A and B horizontally and line up
enough craft sticks across them to cover them
(the number will depend on the size of craft stick
you are using). Glue in place.
2. Glue two sticks across the vertical sticks directly
on top of sticks A and B.
3. Glue a stick on each side outside edge.
4. Continue alternating top/bottom and right/left
sticks until they are as high as you want. Decorate
as desired.
5. Choose a picture and cut it to fit and glue in your
frame.
CORK HOT PLATE/TRIVET
Family members will love this usable household
item. Note: Corks may vary in size so you may need
to adjust the dimensions of the base or leave spaces
between corks. Be sure boys use natural corks, rather
than cork manufactured from synthetic materials.
Corks (or cork board, if you prefer that) can be purchased at many craft shops.
Materials:
9-inch square of 1⁄8-inch board
Two 9-inch-long pieces of 1 by 1 trim
Two 7-inch-long pieces of 1 by 1 trim
32 1-inch corks
Four panel nails
Wood glue
Hammer
1˝
7˝
1˝
You can use several finishes on wood projects:
acrylics, varnish, shellac, lacquer, enamel, latex
paint, or even wood stains. Apply a clear wax polish
to raw wood to emphasize the beauty of the natural
wood grain. Always use finishes in a well-ventilated
area. Consider the needed adult supervision and
cleanup required before you begin.
• Acrylics: Acrylic paint is nontoxic and good for
painting almost anything, including wood projects. It can be thinned with water and doesn’t need
a finishing coat. Clean brushes with water.
• Varnish: Prepare wood with one or two coats of thin
shellac or wood sealer first, sanding between coats.
This will fill the pores of the wood and prepare it for
varnishing. Thin varnish with turpentine, if necessary. Use shellac thinner or alcohol to clean the shellac brush; turpentine to clean the varnish brush.
• Enamel: Prepare wood in the same manner as for
varnishing. Enamel usually needs thinning with a
small amount of turpentine. If it is too thick, it will
leave ridges. Two thin coats of enamel produce a
colorful finish. Clean the brush with turpentine.
• Wood Stain: To prepare the wood, moisten it with
turpentine before applying the stain. Experiment
on a scrap of wood to make sure the results please
you. Clean the brush with turpentine.
• Varnish Stain: Prepare the wood as for enamel
or varnishing. A shiny varnish may be dulled by
rubbing it lightly with a mixture of oil and a small
amount of powdered pumice stone. Rub gently,
wipe off with a soft rag, and finish with wax.
• Lacquer: Use lacquer the same way as for enamel,
except that the brush must be cleaned with lacquer thinner.
• Tempera: Tempera and poster paints are not as
good for painting wood projects as acrylics. The
wood must be sealed so the paint will not soak in.
Tempera will leave a dull finish, so you may want
to give the project a top coast of clear varnish or
shellac. Clean tempera brushes with water.
A
Nail
9˝
Crafts
2–33
1. Use the 9-inch square of board for a base. If the
base is unfinished, sand it smooth.
2. Form the pieces of trim into a square. Use wood
glue on the joints before you nail them together.
Glue this onto the base.
3. If desired, use a stain and finish coat on the wood
frame.
4. Glue corks into the frame in the desired pattern.
BOOKENDS
stain. Let dry and apply wax over the stain. Paint the
backside as desired so you can hang it on the wall
as a decoration when you aren’t using it for cutting.
SUNDIAL
Many animals and plants use the sun as their natural time teller. Cub Scouts can, too, when they build
their own sundial.
Cut these easy bookends from one piece of wood.
Materials: 1 ⁄2 -by-8-by-18-inch board, nail, paint
or varnish
First, cut a 1-inch long piece from the end of the
board. Then cut pieces from each end of the remaining board according to the illustration. Nail the cutout pieces in an upright position at the ends of the
remaining piece of board. Nail the 1-inch piece under
the middle of the board to privide support. Sand and
finish as desired.
CUTTING BOARDS
Materials: 3⁄4-inch wood (Do not use plywood.),
wood stain and paint, paste wax
Enlarge a pattern and cut out with a coping saw.
Drill a hole for hanging. Sand and then apply wood
2–34
Crafts
Materials: 11-inch square of wood, drawing compass to make a circle, 1⁄8-inch dowel 12 inches long,
4-foot post
1. Use the compass to draw the largest circle that
can fit inside the square of wood. Mark the center
point with a dot.
2. Drill a hole in the center to accommodate the
1
⁄8-inch dowel. This will be the gnomon, or pointer, that casts a shadow on the sundial.
3. Draw a straight line through the center of the circle, perpendicular to the top of the wood block.
This is the 12:00 marking.
4. Nail the sundial to the top of the post, and put
it in a place that gets full sunlight. Set it so the
12:00 mark points north, or at noon (standard
time); rotate the sundial until the shadow of the
gnomon falls on the 12:00 mark.
5. From 6:00 A.M. to 6:00 P.M., make a dot each hour
where the shadow hits the outside circle.
6. Now you can tell the time of day simply by glancing at the sundial to see where the sun casts its
shadow.
COUNTDOWN CHRISTMAS TREE
Pine wood and acrylic paint work best for this
project.
5. Mark X’s lightly with pencil where each of 24
small nails (or tacks) will go on the tree. Hammer
a nail at each X. Nail the 25th nail through the
star into the tree (to hold the 25th candy).
6. Drill two holes through the back of the base as
marked in the center of the pattern to attach the
tree. Put glue on the bottom of the tree before
screwing it in place to hold it securely to the center of the base. Insert the wood screws through
the base, align the tree, and tighten the screws
into the tree.
7. Glue felt on the bottom of the base.
8. Count down to Christmas by hanging a red candy
on the tree each day from December 1 through
December 24. On Christmas day, put the last
candy on the star.
SAILING SHIP
2˝
4˝
2˝
2˝
10˝
Materials:
1-by-10-inch board (large enough to support
the tree pattern)
Small wooden star
25 small nails (or brass tacks with heads)
Two flathead wood screws
25 red circle candies with a hole in the center
Felt scraps
Paint, hammer, wood glue
1. Enlarge the tree and base patterns as needed
and trace them on 1⁄2-inch board. A good size is
a tree about 11 inches tall on a base with an 8inch diameter. When finished, the tree will stand
upright in the center of the circular base.
2. Cut out the tree and base and sand all sides and
edges smooth.
3. Paint the base and tree as desired and let dry. You
can add depth and interest by painting the tree
green and then, when dry, using a natural sponge
dipped in a lighter green paint to add highlights
(“sponge painting”). Then, use an old toothbrush
dipped in white paint to add snowy effects: Hold
the toothbrush over the tree and tap the handle
to spatter small drops on the edges of the tree
(“spatter painting”). Paint the base brown and
when dry, use a fine black marker to add plank
lines and nails as shown.
4. Glue the star to the top of the tree.
1
⁄2˝
3˝
21⁄2˝
1
⁄2˝
1
⁄2˝
Materials:
Two pieces of 1-by-4-inch board
Heavy cardstock
Three 10-inch-long pieces of 1⁄8-inch dowel
Saw
Wood glue
Small hole punch
1. Cut each piece of board as shown. Save the cut
corners to use as additional pieces for stacking.
2. Sand all edges smooth.
3. Drill three holes into the ship about halfway
through the wood as shown: one into the center
of the base, one into the prow block, and one into
the stern block to accommodate dowels for the
masts. (The holes should be large enough so that
the 1⁄8-inch dowels fit into them.)
4. Stack the pieces as shown and glue.
5. Dip one end of the dowels in glue and insert into
the drilled holes for masts.
6. Cut three sails from heavy cardstock and color as
desired. Punch holes where indicated and slide
onto each mast.
Crafts
2–35
Space Shuttle
Top
1
A
3˝
2
3
Side view
Front view
4
Wing
pattern
10˝
Drill
holes
5
Top view
7˝
Rear view
Side view
Bottom
Dotted lines indicate space shuttle placement on wings.
SPACE SHUTTLE
Materials:
One 10-inch square of 1⁄8-inch pressed wood
One 10-inch piece of 2-by-2 wood
Three 1⁄4-inch rubber stoppers
Three flathead screws
Wood glue
Paint
1. Enlarge the wing pattern as needed (7 by 10
inches) and cut from 1⁄8-inch pressed wood. Sand
all edges smooth.
2. With the 10-inch piece of 2-by-2 wood, measure
3 inches back and cut the nose at an angle as
shown in diagram 1.
3. Start at point A of diagram 2 and cut the angles
off the tip to create the shuttle nose. Save the cut
pieces to use for the tail (front view).
4. Drill three holes along the center line of the wing:
one at 21⁄2 inches from the tip, one in the center,
and one at 71⁄2 inches from the tip (diagram 3).
5. From the underside of the wing, screw on the flat
side of the 2-by-2 wood piece, with “nose” ends
touching as shown in diagram 4.
2–36
Crafts
6. Glue together the two pieces saved from the
angle cut of the front view, and then glue them to
the top rear of the 2-by-2 to make the shuttle tail
(top view, diagram 5).
7. Glue the rubber stoppers on the back for jet rockets (rear view, diagram 5).
8. Paint and decorate as desired.
Neckerchief Slides
As part of the worldwide brotherhood of Scouting,
all Cub Scouts wear the official uniform. One part
of that uniform, however, is available for individual
expression: the neckerchief slide. Slides can be used
as incentives, in support of monthly themes, and
for completing achievements, electives, and activity
badges.
You can make slides from almost any material.
Here are a few ideas, but you can find many more
in Boys’ Life magazine, Cub Scout Program Helps,
other BSA publications, pow wow books, and even
on Web sites.
PLASTER SLIDES
WOOD SLIDES
Use poured plaster to make neckerchief slides that
match the monthly theme. Find a suitable mold and
prepare as directed in “Plaster Crafts” above. Small
candy molds work well.
Modeling clay
You can make easy slides using slices from tree
branches. Leave them in their natural state, decorate
with beads or feathers, draw on wolf or bear tracks
with permanent markers, or glue a small leaf to the
center.
Or you might make your own mold, digging your
design in modeling clay in a small box to the depth
of 1⁄2 inch. Remember to put a light coat of grease or
cooking oil on your mold. Insert a plastic ring or 6inch chenille stem bent in half (open side out) into
the middle of the wet plaster. Don’t press it all the
way through, as you don’t want it to show through
your slide face.
Tree
branch
slice
LEATHER, VINYL, AND FELT SLIDES
Leather, vinyl, and felt can be great materials
for slides. (For instance, see the Mystic Braid, page
2–31.) Just cut into the desired shape; glue, staple, or
rivet a loop onto the back; and decorate as desired.
Elephant Neckerchief Slide
Sew buttons here.
Tab
Tab
Leather
cording
Or you may wish to cut shapes from thin wood
with a coping saw. Sand the edges until they are
smooth. Glue or staple a loop of leather or vinyl
to the backside, or use a low-temperature glue gun
to glue on a piece of 1⁄2-inch PVC pipe. Decorate as
desired with markers, paint, stamps, glitter—let your
imagination go!
Slits
Neckerchief slides
through here.
Materials: Scrap leather, vinyl, or felt; scissors;
buttons
Cut the pieces as shown. Sew on the buttons for
eyes. Put the tabs through the slits and glue together.
Crafts
2–37
PLASTIC SLIDES
CLAY SLIDES
You can glue a loop to the back of almost any small
toy (using a low-temperature glue gun) to make an
individualized tie slide of the boy’s choice. Film containers with lids can be particularly useful. Boys can
fill the container with materials that are important to
them—campfire ashes, a small shell from the beach,
meaningful handwritten words—attach a slide, and
have their special memories in a safe place.
Clay is especially versatile for slides, as you can
mold it into millions of different unique shapes.
Here’s one example.
Snake Slide
First Aid Kit Slide
Punch holes
Glue in ring
Paint
1. Roll about 2 T. of clay into an 8-inch-long rope.
2. Coil the rope around a 3⁄4-inch dowel that has a
light coating of vegetable oil on it.
3. Flatten the head and make a point on the tail.
4. When dry, remove from the dowel; paint and
decorate as desired.
1. Remove the lid of a 35-mm film canister and set
aside.
2. Punch two small holes 1⁄4 inch apart on the backside of the film canister. Insert a 6-inch chenille
stem or ring to make a loop.
3. Paint the can white and let dry.
4. Use two 1⁄2-inch pieces of red tape to make a red
cross on the front.
5. Fill the can with first aid items, such as a small
bandage, a small safety pin, change for a phone
call, an alcohol swipe, a small tube of antiseptic ointment, and emergency phone numbers.
Replace the lid.
2–38
Crafts
3
GAMES
Introduction
3-1
Active Games With Equipment
3-3
Active Games Without Equipment
3-7
Ball Games
3-8
Bicycle Games
3-11
Noncompetitive, Cooperative,
and Team-Building Games
3-13
Parachute Games
3-22
Relays and Races
3-23
Physical Fitness Activities
3-28
Quiet Games With Equipment
3-32
Quiet Games Without Equipment
3-36
Homemade Games
3-38
Tire Games
3-41
Water Games
3-42
Winter Games in the Snow
3-44
3-0
Games
Introduction
WHY WE USE GAMES
Games are part of all the fun of Cub Scouting.
Skills and interests boys develop now teach self-confidence, independence, and the ability to get along
with others. Children learn through play.
Some games are selected for their educational
value. Boys’ minds are more receptive to learning
when learning is fun. Their interest and concentration are probably never higher than during play.
Games are a way to help boys learn that rules and
self-discipline are necessary and that doing one’s
best is important. Most Cub Scout games help in
character development because they require teamwork, fair play, and consideration for others.
For these reasons, games are an important part of
Cub Scouting. Games not only help to accomplish
Cub Scouting’s overall objectives of citizenship training, physical fitness, and character development,
they have educational benefits, too. Games teach a
boy to follow rules, to take turns, to respect the rights
of others, to give and take, and to play fair. Some
games help boys to develop skills, body control, and
coordination. Some teach self-confidence and consideration for others. Games stimulate both mental
and physical growth, as well as providing an outlet
for excess “boy energy.”
Whether the game involves group competition with
team winners or individual competition or is just for
fun, the results should be positive and lead to building
character and helping boys grow and develop.
HOW TO CHOOSE GAMES
FITTING GAMES TO THEMES
When choosing a game, you should consider three
things: the physical aspects, mental values, and educational values of the games as they relate to Cub
Scouting.
Games don’t have to fit the monthly theme, but
theme games help tie the month’s program together.
Many of the games included here will fit monthly
themes; others can be easily adapted to themes.
Sometimes, all you need to do to fit a game to a
theme is change the name of the game. For example,
a Cowboy Relay could become a Bareback Rider
Relay to fit a circus theme.
Consider first the physical aspect: the release of
surplus energy. An active game should be satisfying
to the strongest boy and yet not overtax the weakest.
It should stimulate the growth and development of
muscles. Most outdoor games meet this test.
Boys of Cub Scout age are growing rapidly. They
like to run, jump, climb, lift, balance, crawl, bend,
yell, chase, and hide. Generally, long walks or runs
and other exercise involving endurance are not as
suitable for boys of this age. (Also, boys who have
had recent severe illness should not take part in
active games.)
Some games are selected for their mental values because they have an element of excitement
or accomplishment. Games can help boys develop
quick thinking, alertness, and strategy. Many games
offer boys opportunities to express their feelings and
emotions, which is healthy.
Boys need to learn to play fair and to follow the
rules. They also need to learn that they can’t always
be winners. Many boys of Cub Scout age have not yet
learned to lose gracefully. Your task as leader is to
make it clear that losing a game is not the end of the
world and that a loss should be an incentive for the
boy to try to improve his skills.
Consider these factors when choosing games:
• Purpose (physical, mental, educational)
• Space available
• Number of players
• Equipment available
• Skills and abilities of players
SUGGESTIONS FOR LEADING GAMES
Boys will like most games if leaders have fun leading them. Anyone can be a successful games leader
by following these simple suggestions:
• Know the rules of the game and have the necessary
equipment on hand. Plan not only what you are
going to do, but how you are going to do it.
• Start with your best game—one that is easy to
explain and enjoyable to play. In addition to bolstering your own confidence, a successful game
can enhance the morale of the players.
• Make sure the space available is large enough so
everyone can play. Mark off boundaries for active
outdoor games with brightly colored cones.
• Remove potential hazards from the play area.
Follow health and safety rules.
• Get the full attention of the group and then explain
the rules of the game simply, briefly, and in proper
order. Be enthusiastic.
Games
3–1
• For team games and relay races, you must have
equal numbers of players on each team. If the
teams are unequal, one or more boys on the smaller team must compete or race twice.
• As a rule, Webelos Scouts are larger and stronger
than first-grade Tiger Cubs and second- and thirdgrade Cub Scouts. For some pack competitions,
have boys in the same grade compete against each
other, but not against older or younger boys. With
this method, several winners can be recognized.
An alternative is to mix the groups so that each
team has boys from each age or grade.
If you have a boy with special needs, look for additional ideas in Chapter 7 of this book.
• Teach the game by steps or through demonstration.
• Ask for questions after explaining and demonstrating the game.
• Be sure boys follow the rules. Insist on good
sportsmanship and fair play.
• If the game is not going right, stop it and explain
the rules again.
• Don’t wear a game out. Quit while the boys are
still having fun.
• Have enough leaders to handle the group.
• Keep It Simple; Make It Fun (KISMIF).
Teach games to boys with the hope that they will be
able to play and lead these same games independently
in other settings, such as at school or in the neighborhood. Coach your den chief in leading games. This
will enhance his leadership role. Find creative ways
to develop leadership skills among the boys so that
they may soon be able to play on their own without
the assistance of a den leader or den chief.
CHOOSING “IT” AND TEAMS
There are many ways to choose the boy who will
be “It” for any game. Here are some suggestions, but
make up others that work for your group.
• By birthdays, starting with January 1
• By alphabet, using first or last names
• By drawing a name out of an “It” box. After a name
is drawn, it goes into a second box marked “It.”
When all names are in the second “It” box, put
them back in the first box to begin again.
When choosing teams, try one of these ideas:
• Even-numbered birthdays against odd-numbered
birthdays
• First half of the alphabet against the last half
• Drawing names from a box. Each boy decorates a
craft stick with his name on it and any other creative artwork he wishes. When you need teams for
a game, pull out two sticks and put them in separate
3–2
Games
piles. Continue to pull out pairs of sticks, separating them into two piles, which will be your teams.
When you are finished, replace all the sticks so they
will be ready for the next team game.
You can also make a game of choosing sides. Have
boys sit in a circle and then whisper in each boy’s ear
the word “Wolf” or “Bear.” Then they must make the
appropriate animal sound to find the other members
of their team.
REFLECTING AFTER GAMES
What is reflecting? Reflecting is guiding the players to think about what has happened as a result
of the game or activity and try to learn from it. It
is remembering thoughts, feelings, and actions and
their effects. It is making comparisons and contrasts.
Reflecting is making sense of the game or activity
by using a series of questions to fit the needs of the
group. In the section below on “Noncompetitive,
Cooperative, and Team-Building Games,” reflecting
is an integral part of many of the games.
You should ask the boys five important questions
at the end of each activity or game regardless of
whether the game is cooperative or competitive. Be
sure to allow time for these questions:
• Did you do your best?
• Was anyone left out of the game?
• Was anyone physically hurt?
• Did anyone have their feelings hurt?
• How would you make the game different next
time?
Reflecting is a learning experience for you, the
leader, as well. Enjoy this opportunity to help your
Cub Scouts learn by doing.
EQUIPMENT FOR GAMES
The games included in this book require inexpensive equipment or no equipment at all. You can find
most of the needed materials around the house, or
boys can make them during a den meeting. Here is a
list of some useful items for games.
Balloons: Use balloons in the place of balls for
many indoor games. (Be sure to pick up and discard
all the pieces of broken balloons.)
Small Balls: Try softballs, tennis balls, table tennis
balls, foam balls, or beanbags. They can be pitched,
tossed, passed, batted, kicked, bounced, dribbled,
carried, or rolled.
Large Balls: Rubber playground balls, beach balls,
volleyballs, and soccer balls can be kicked, bounced,
thrown, carried, or batted.
Clothespins: Use them as game pieces or to secure
other equipment, such as newspaper or balloons.
Sticks: Broom handles are ideal. They can be used
to jump over, for pushing other objects, or for batting.
(Be sure that sticks won’t give boys splinters.)
Tin Cans: Roll or kick them along a course or
between obstacles; set them up as targets or markers;
or use them to roll objects into. (Make sure that edges
are clean and smooth.)
Rings: Use rubber, metal, or margarine tub lids
with the centers cut out, or rope rings, for tossing
over nails, pegs, hooks, or stakes. Use them to play
shuffleboard or throw them into tin cans, boxes, or
other containers. Curtain rod rings are useful, too.
Paper Bags: Use them for masks or blindfolds, to
blow up and burst, or to wear as hats.
Ropes: Use clothesline or sash cord to jump over,
spin as a lariat, or thrown as a lasso. Try rope as a
marker for start and finish lines or to tie knots. For
tug-of-war, use 3⁄4-inch-diameter or larger rope, and
avoid using nylon or polyethylene rope, which can
more easily cause rope burns.
Newspapers: Use them as stepping stones, markers, or obstacles; roll them to make swatters or balls.
door activities. Active games help boys release excess
energy and prepare them for quieter den activities.
Most of the games in this book are suitable for dens.
Den games may be competitive or noncompetitive.
Remember: Some games are played just for the fun of
it. Most of these games don’t need a winner.
PACK GAMES
Pack games are played with larger groups of boys,
adults, and siblings at pack meetings and activities.
Relay games are a great favorite. Note that shuttle
relays require less space.
Pack games should include as many boys as possible—preferably all boys in the pack. If all cannot
participate, select representatives from each den.
Involve parents and leaders whenever possible. Boys
love to see their parents or guardians participating
in a game.
If you award prizes, keep them simple and inexpensive, such as suckers, bubble gum, balloons, or
stickers.
Remember: Above all, pack games should be fun
for everyone—those who play and those who watch.
Bottle Caps: These can be markers or obstacles,
checkers, small objects to hide, or objects to throw
for accuracy.
Active Games
With Equipment
Beanbags: They don’t roll or bounce. Make them
from old denim in many different sizes.
BALLOON BATTLE ROYAL
Store equipment for games in a den game chest,
which can be as simple as a large cardboard box. It
is helpful for all game materials and equipment to be
stored in one place, easily accessible to the den. Your
game chest can also be useful for those moments
when you find yourself with a little free time and
nothing prepared!
Activity Level: High
Needed: Any number of players, balloons, string
Here are some ideas beyond the items listed above
that you might want to keep in a game chest:
Foil pie pans
Feathers
Chalk
An old umbrella
Toothpicks
Playing cards
Plastic spoons
Washers
Old work gloves
Paper cups
Jars
Marbles
Straws
Checkers
Whistles
A muffin tin
Golf tees
DEN GAMES
Den games are designed for a small group of boys.
Quiet games are helpful when weather prohibits out-
Arrange Cub Scouts in a large circle, each with an
inflated balloon tied to his ankle. On a signal, players
try to break all other balloons by stamping on them,
while not letting their balloon get broken. When a
Games
3–3
balloon is broken, that player leaves the game. The
game continues until only one player is left.
BEANBAG SNATCH
(OR STEAL THE BACON)
Activity Level: High
Needed: Large playing area, even number of
players, beanbag
Form two lines facing each other about 25 feet
apart. Place a beanbag in the center. Count off the
boys in each line from opposite directions. The
leader calls out a number, and the opponents with
that number run to the center. The object of the game
is for a Cub Scout to snatch the beanbag and get back
to his side without being tagged by the one with the
same number from the other side. Score two points
if a player brings the beanbag back without being
tagged. Score one point for the opposing team if the
snatcher is tagged.
BLAST OFF!
Activity Level: Moderate
Needed: Any number of players, chairs
One boy is Mission Control. The others are given
the names of planets and are seated in chairs around
the room. Mission Control walks around the room,
calling out the names of various planets. When a
player’s planet is named, he gets up and follows
Mission Control. When most of the boys are walking,
Mission Control calls “Blast off!” and all players,
including those still sitting, must find a new seat.
The player left standing is the new Mission Control.
CAT’S TAIL
Activity Level: Moderate
Needed: Even number of players; pieces of cloth
or yarn, different colors for each team
Divide the group into two teams. Hide several
pieces of cloth or yarn—a different color for each
team. One boy on each team is a Cat Without a Tail.
On a signal, all players search for “tails” of their
color. As each is found, it is tied to the belt of their
Cat. The winner is the team whose Cat has the longest tail at the end of 5 minutes.
CHANGE CARS
Activity Level: Moderate
Needed: Any number of players, chair for each
player, cards with the names of different cars on
them
3–4
Games
Prepare for the game by fastening to the back of
each chair a card with the name of a different automobile. Each boy checks the car name on his chair
and sits down. One player is “It” and stands in the
center of the circle of chairs. “It” calls the names
of two cars (e.g., Ford and Toyota), and the boys in
those chairs try to exchange seats while “It” tries to
get a chair for himself. The boy left without a chair
becomes “It.”
Variation: Use different types of transportation,
such as car, plane, boat, or train, or names of animals
or states in the United States. Ask the boys for other
ideas of things to use.
COVER THE CHAIR
Activity Level: Moderate
Needed: Any number of players, chair for each
player
Boys are seated in chairs in a circle. One player
is “It” and stands in the center of the circle, leaving
his chair empty. When he commands, “Move to the
right,” all players try to get into the chair to their
right. While this is going on, “It” tries to get a seat. If
he succeeds, the person who should have gotten that
chair becomes “It.” To confuse the players, “It” may
suddenly call, “Move to the left”—and he stands a
good chance of finding a place.
DEFENDERS AND INVADERS
Activity Level: High
Needed: Large playing area, even number of
players, slips of paper, pencils, newspaper
Divide boys into two groups—the Defenders and
the Invaders. One Defender is the Starving Captain,
who sits in the “stockade” (marked with a piece of
newspaper). Give each of the other Defenders a slip
of paper with the name of a food and its allotted playing value: flour, 25; baking powder, 20; dried beef, 15;
hardtack, 10; jam, 10; fruit, 5; sugar, 5; and corn, 5. A
Leader chosen by the Invaders places his men in the
Invaders’ territory, which surrounds the Defenders’
stockade. The Defenders surround the Invaders and
look for ways to break through the Invaders’ lines to
take supplies to their Starving Captain in the stockade.
The Invaders try to capture the Defenders by tagging
them. They search their captives and confiscate any
“food” found on them. After about 15 minutes of play,
tally the score. The Invaders add up the value of the
captured supplies. The Starving Captain figures the
value of the supplies that have been delivered to him.
The side with the highest value of supplies wins.
DISK FOOTBALL
Activity Level: High
Needed: Large playing area, even number of
players for two teams, plastic flying disk
POP OR PROTECT
Activity Level: High
Needed: Large playing area, even number of
players, inflated balloons, neckerchief or similar
piece of fabric to signify Defenders
Divide the group into two teams—the Defenders
and the Invaders. Distinguish the two teams by
having the Defenders tuck their neckerchiefs in
their belts. Toss an inflated balloon between the
two teams. The Invaders try to break the balloon by
grabbing it, clapping their hands on it, or stepping
on it. The Defenders try to protect it by batting it
out of reach. Keep track of the time required for the
Invaders to break the balloon. When it is broken, the
Defenders become the Invaders. Give each team three
turns as Invaders, and then add their times. The team
with the least total time wins.
INDOOR SKI RACE
Activity Level: High
Needed: Large room with a smooth floor, any
number of players, 12-by-18-inch construction paper
for each boy
Divide the group into two teams, which begin play
at opposite ends of a play area. Play begins with one
team “kicking off” (throwing the disk). The receiving
team tries to score a touchdown by passing the disk
and advancing it downfield to the other team’s goal
line. The other team tries to intercept and score a
touchdown. No player may run with the disk and no
player may hold it for more than 5 seconds. Play is
continuous. There are no downs.
FLYING DISKS
Activity Level: Moderate
Needed: Large playing field, any number of players, plastic flying disk for each team, three or more
hula hoops or bicycle tires
Set the hula hoops or other targets up at three different spots, each farther away from the participants.
The object is to throw the plastic flying disk so that
it lands inside the hula hoop or bike tire. The hula
hoop closest could be worth two points; the hoop
in the middle, three points; and the one the farthest
away, five points. Landing on the hoop or tire doesn’t
count.
Variation: Two teams can play against each other
to see which team can score the most points in a specific time period.
Line up boys along a starting line and give each
a sheet of construction paper. On a signal, boys tear
their sheets in half and place a piece of construction
paper under each foot. They then “ski” to the goal
line. This game must be played on a smooth floor so
the “skis” won’t tear.
Variation: Play as a relay, with each team member
skiing to a line and back, and the next boy taking the
“skis” and doing the same.
Games
3–5
LINK PASS
Activity Level: Low
Needed: Even number of players, 20 pebbles (10
for each team)
Divide Cub Scouts into two teams facing each
other. They lock elbows with those next to them
in their line. Place 10 pebbles on the floor near the
first player in each line. On a signal, those two boys
each pick up a pebble and pass it to the next player
in line, who passes it on. The players’ arms must
remain linked throughout the game. If a Cub Scout
drops a pebble, he must retrieve it without breaking
the chain. The first player may start another pebble
right away. The first line to pass the 10 pebbles to the
end wins.
NEWSPAPER SOFTBALL
Activity Level: High
Needed: Large playing area, even number of
players, softball plates, two tin cans, rolled up
newspaper
hands, forming a ring around the quicksand. On a
signal, they all try to pull as many of the other players as possible into the quicksand while keeping out
of it themselves. As soon as a player steps into the
quicksand, he is out of the game. The game continues
until only one player remains.
SLEEPING GUARD
Activity Level: Moderate
Needed: Large room or playing field; any number
of players; blindfold; rock, beanbag, or neckerchief
for precious object
Choose one boy to be the Sleeping Guard. The
others are Stalkers. The Guard sits blindfolded on
the ground, guarding a precious object. The Stalkers
form a ring around the guard about 20 feet away. On
a signal, they advance as quietly as possible, trying
to get close enough to steal the object without waking
up the Guard. When the Guard hears an approaching
Stalker, he points a finger in that direction. If his finger points at the Stalker, the Stalker is out. If a Stalker
succeeds in getting the object without being caught,
he is the Guard for the next game.
SPOT CHECK
Activity Level: Low
Needed: Blindfold; key, button, coin, or other
small object; small pad of paper and pencils; masking tape
This game is like Pin the Tail on the Donkey—but
without a tail and the donkey!
Divide players into two teams. Place two tin cans
on either side of home plate and a rolled newspaper
across the tops of the cans. The first “batter” stands
behind the newspaper and kicks it with his instep,
and the game is on. From that point, follow softball
rules.
QUICKSAND
Activity Level: Moderate
Needed: Any number of players, long piece of
rope
Tie the ends of a long rope together to form a large
rope circle. Mark off another circle (the “quicksand”)
on the floor or ground, about one-third the size of
the rope circle. Boys take hold of the rope with both
3–6
Games
Place a small object in the center of the floor. Each
player writes his name on a small slip of paper and
tapes a piece of masking tape to it. At one end of the
room, mark a starting line with a line of tape. One
by one, players are blindfolded, turned around a few
times, and told to walk to the spot where they think
the object is located without actually touching the
object. As each player reaches his selected spot, he
tapes the slip of paper next to it. The player whose
paper is closest wins.
TAILS
Activity Level: High
Needed: Large playing field, even number of players, neckerchief or piece of cloth for each player
Divide boys into two teams. All players tuck their
neckerchiefs loosely into their belts in back to signify
tails. On a signal, each team rushes toward the other,
trying to capture their tails. Once a boy’s tail is taken,
that boy is out of the game. The capturer ties the tail
to the front of his belt. The team that captures the
most tails wins. This is a good “stalking game” to play
in a place where brush or shrubbery provides cover.
Variation: Set a time limit. If the game is played
outdoors, define a specific area that boys must stay
in and have a signal for them to return when time is
up. Once a tail is taken, the boy who loses it stays
in the game to confuse the other players. Boys without tails should still pretend to “hide” their tails by
keeping their backs to as many players as possible
so others won’t know whether they have a tail. The
team that captures the most tails within the allotted
time wins.
Active Games
Without Equipment
ANIMAL GUESSING GAME
Activity Level: High
Needed: Large playing area, even number of
players
Divide the group into two equal teams. Each team
chooses an animal and thinks up six riddle clues
for that animal (e.g., “I eat flying insects”; “My front
teeth are large and I gnaw a lot”; “My eyes are very
large”). When both teams are ready, they face each
other across a line. Mark a line for each team’s home
base about 15 feet behind the teams. The teams take
turns giving one clue at a time. When one of the
teams guesses correctly, they begin to chase the other
team toward their home base line. Players who are
caught switch teams.
AUTO RACE
Activity Level: Moderate
Needed: Any number of players
Arrange boys in a circle, with the den chief in the
center. He gives each player the name of a car, being
sure to use the same name more than once so that
several players have the same car. To start play, the
den chief calls out the name of a car. The first player
with that car name to touch the den chief and return
to his place wins the race. The game continues as the
den chief calls out another car.
BEAR IN THE PIT
Activity Level: High
Needed: Any number of players
Boys form a circle. One player inside the circle
is the Bear. While the others hold hands tightly, the
Bear tries to get through the ring by force or by dodging under their arms. He may not use his hands to
break the grip of the players in the ring. When he
does break through, the others try to catch him. The
first one to tag him is the next Bear.
CROWS AND CRANES
Activity Level: High
Needed: Even number of players
Divide boys into two teams—the Crows and the
Cranes. The teams line up facing each other about a
yard apart. Mark off a base line 30 to 50 feet behind
each team, or line them up in the center of a room
and use the walls for bases. When the leader calls
“Crows,” the Crows must race to their base without
being tagged by the Cranes. When the leader calls
“Cranes,” they try to get back safely. Players who
are tagged become a member of the opposite team.
The team with the largest number of people at the
end of a given time period wins. The leader can add
suspense by prolonging the commands, “Cr-r-r-rows”
or “Cr-r-ranes.”
FOX AND CHICKENS
Activity Level: High
Needed: Any number of players
Line up the group in single file. Each boy holds
the waist of the player in front of him. The boy at the
head of the line is called the Mother Hen and the others are Chicks. Another boy, the Fox, stands in front
of the line. On a signal, the Fox starts around the line,
trying to catch the last Chick. The Mother Hen flaps
her wings and follows the Fox to prevent him from
catching the Chick. The others turn away from the
Fox as they keep in line with their leader. If the last
Chick is caught, he falls in behind the Fox. The game
continues until all Chicks are caught.
OWLS AND CROWS
Activity Level: High
Needed: Large playing area, even number of
players
Divide the group into two equal teams—the Owls
and the Crows. The teams line up facing each other,
about 2 feet apart. About 15 feet behind each team is
their home base line. The leader makes a statement
that is true or false (it could be related to the monthly
theme). If the statement is true, the Owls chase the
Crows toward their base line. If it is false, the Crows
chase the Owls. Anyone caught must join the other
team.
Games
3–7
RED LIGHT
Activity Level: High
Needed: Large indoor or outdoor playing area,
any number of players
“It” turns his back on the rest of the boys, who are
lined up 30 to 50 feet away from him. The object is
for the boys to walk or run toward “It” while his back
is turned as he counts to 10. At “10,” he shouts “Red
light!” and turns quickly. Any player who is moving
when “It” turns must go back to the starting line. The
first to get to “It” and touch him wins the game.
BALLOON BASKETBALL
Activity Level: Moderate
Needed: Large to medium-sized playing area, any
number of players, inflated balloons, empty cardboard box or wastepaper basket
Use an inflated balloon for the ball, batting it
around from player to player, and boxes or wastepaper baskets for the goals. Score as in basketball,
except that a broken balloon counts five points off for
the side that broke the balloon.
BUCKETBALL
SHERE KHAN (THE TIGER GAME)
Activity Level: High
Needed: Large room or outdoor area, any number
of players
Activity Level: High
Needed: Large room or playing area; even number of players; ball; two baskets, boxes, buckets, etc.,
for goals
One boy is Shere Khan, the tiger, and stands in the
center of the playing area. All others line up against
a wall. The object of the game is to cross to the opposite wall without being tagged. To start the game,
Shere Khan says, “Who’s afraid of Shere Khan?” The
others answer, “No one,” and immediately run across
the open space toward the opposite side. All boys
tagged help Shere Khan tag the remaining players in
the next round. The last one tagged becomes Shere
Khan the next time.
Variation: With a big field and a large number of
players, half can be Shere Khans and half men. This
game is also known as Pom-Pom Pullaway.
Ball Games
BALL OVER
Activity Level: High
Needed: Large playing area, odd number of players, blindfold, whistle, playground ball
Draw a line to divide the area. Divide the group
into two teams—one on each side of the line. Players
must not cross the line. Blindfold one boy and give
him a whistle. When he blows the whistle, the ball
is put into play by throwing it from side to side. The
object of the game is to keep the ball on the opposing
team’s side. One point is counted against the team
that has the ball each time the whistle is blown. The
blindfolded player can blow the whistle whenever he
wishes. The lowest score wins.
3–8
Games
50 to 60 feet
30 to 40
feet
This basketball-type game can be played with
any type of ball that bounces and a couple of large
containers such as laundry baskets, bushel baskets,
or large wastepaper baskets. Place the baskets (goals)
about 60 feet apart (less if necessary because of
space). Divide boys into two teams and play using
basketball rules. No points are scored if the ball
doesn’t remain in the basket or if the basket turns
over.
CALL SOCCER
Activity Level: Moderate
Needed: Large playing area, even number of
players, soccer ball or volleyball
Divide the players into two teams and line them
up facing each other about 30 feet apart. Number the
players on each team from opposite ends of the line.
Place the ball midway between the two lines. The
leader calls a number, and the two players having
that number run to the ball, each trying to kick it
back to his goal line. The player who kicks it to his
goal line scores two points for his team. Then the
leader calls another number, and two more players
begin. The first team with 10 points wins.
CHAIN DODGE BALL
Activity Level: High
Needed: Large playing area, two teams of five or
six players, playground ball
Arrange one team in a single file, with each player
grasping the player in front of him around the waist,
forming a chain. The other team forms a circle around
the chain and tries to hit the player at the end of the
chain with the ball. The players forming the circle
may pass the ball around in any manner while those
in the chain try to keep the player on the end from
being hit. Only the first player in the chain may use
his hands to bat the ball away. When the end player is
hit, he leaves the game. Continue until all players in
the chain are eliminated, and then change sides.
CIRCLE BASEBALL
DODGE BALL
Activity Level: High
Needed: Large playing area, any number of
players to form two teams, playground ball or volleyball
Divide the boys into two groups. One group forms
a large circle, and the other group scatters inside it.
The players in the circle throw the ball at the boys
inside, who try to avoid being hit without leaving
the circle. Boys who have been hit by the ball join
the circle players. The last player in the circle is the
winner. When all have been eliminated, the sides
change places.
FIVE HUNDRED
Activity Level: Moderate
Needed: Large playing area, any number of players, bat, softball
A batter tosses a softball up and bats it to the other
players, who try to catch it. A fielder scores 100
points for catching a fly ball, 75 points for catching
the ball on one bounce, 50 for two bounces, and 25
for fielding a grounder cleanly. When a fielder reaches a score of 500, he exchanges places with the batter.
With each new batter, the scoring starts over.
Activity Level: High
Needed: Large open area with defined boundaries, even number of players, plastic flying disk or a
large playground ball or beach ball
Divide players into two equal teams, with one
team up to bat and the other in the field. Batting team
members line up single file, one behind the next.
Fielding team members scatter in the field. The first
batter throws the disk/ball into the field and runs in
a circle around his teammates as many times as he
can until the other team yells “Stop!” Each time the
batter goes around his team is counted as a “run.”
In the meantime, the players in the field go after
the disk/ball. After a player gets it, all his teammates
quickly line up behind him. The player with the
disk/ball passes it over his head to the next player as
soon as there is someone behind him. This continues
until the last player has the disk/ball. He runs to
the front of the line, and all members of his team sit
down as they yell “Stop!” The batting team can score
no more runs now.
The second person in the batting team now throws
the disk/ball to the fielding team, and the action is
repeated until everyone on the batting team has had a
chance “at bat,” adding the score for each “inning.”
HIT THE BAT
Activity Level: Moderate
Needed: Large paved area or field (the flatter the
better), two to 12 players, softball, bat, gloves
The object of this game is to hit the bat with the
ball—rather than hitting the ball with the bat. A
player throws the ball up and hits it into the field,
where the other players are waiting to catch it. The
batter then places his bat on the ground in front of
him. The player who catches the ball or retrieves it
from the ground then throws or rolls the ball, trying
to strike the bat without moving from the spot where
the ball fell. If the fielder succeeds in striking the bat,
he trades places with the batter. Otherwise, the batter
takes another turn.
KICK BALL
Activity Level: Moderate
Needed: Large playing field; enough players for
two teams; playground ball, soccer ball, or volleyball; bases
The play area is similar to a baseball field, with 45
feet between bases and 30 feet from the pitcher’s box
to home plate. The pitcher rolls the ball to the “batter,” who kicks it. Outs are made when a batter kicks
Games
3–9
three fouls, a fielder catches a fly ball, or the runner
fails to circle the bases ahead of the ball. The runner
must try for a home run. On a fair ball not caught on
the fly, the fielder throws the ball to the pitcher, who
throws to either the first or third baseman, who then
relays it around the bases. Each baseman must be
standing on his base before he can pass the ball to the
next base. If the batter succeeds in beating the ball
around the bases, he scores a run for his team. Three
outs make an inning, and nine innings are a game.
LINE-UP BALL
Activity Level: Moderate
Needed: Large playing area; enough players for
two teams; playground ball, soccer ball, or volleyball; bases
One team takes the field. The pitcher rolls the ball
to the first “batter,” who kicks it into the field and
runs to the far base 80 to 90 feet from home base and
then runs back home. The fielder who retrieves the
ball holds it over his head, and all other fielders line
up behind him in single file. If the runner gets back
home before the line is formed, he scores a run for his
team. If the line forms before he reaches home base,
he is out. Three outs for a team make an inning.
MONKEY IN THE MIDDLE
Activity Level: Moderate
Needed: Medium-sized playing area, three players, playground ball or volleyball
Three players play this game. Choose one to be the
Monkey. The other two players stand about 10 feet
apart while the Monkey stands between them. The
two end players toss the ball back and forth, trying
to keep it high enough or moving fast enough so the
Monkey can’t catch it. If a player fails to catch the
ball, the Monkey can scramble for it, or he can intercept it as it is thrown back and forth. If the Monkey
gets the ball, he changes places with the player who
threw the ball.
ONE O’CAT
Activity Level: Moderate
Needed: Large playing area, any number of players, bat, softball, bases
Set up home plate and a first base. One player
is the batter; the others are the catcher, the pitcher,
and fielders. The batter is out when he makes three
3–10
Games
strikes or when a fly or foul ball is caught. When
he makes a hit, he must run to first base and return
home before the ball is returned to the catcher, who
must touch home plate to put him out. When the batter is out, all players move up in rotation. The batter
moves out to right field. If a player catches a fly ball,
he replaces the batter.
ONE-PITCH SOFTBALL
Activity Level: High
Needed: Regular softball diamond, any number
of players, bat, softball
This is a very fast game that any number of boys
can play. Play it on a regular softball diamond.
• The team in the field has a catcher, four or five
infielders, and any number of outfielders. The
pitcher is a member of the team at bat. He tries to
pitch in such a way that his teammates hit the ball.
He does not field a batted ball.
• Each batter gets only one pitch. The batter runs on
a fair ball; anything else (foul ball, strike, ball, or
whatever) is an out.
• After the third out, the batting team runs to its
fielding positions, running in a counterclockwise
direction to get from “up to bat” position to “in
the field” position. Players must run around the
outside of first and/or third base, and if any player
fails to do so, all players must go back and run
around the bases.
• Here’s the catch: As soon as the pitcher and batter
are in position, they may start play whether or not
the fielders are ready.
• Each team establishes its own batting order.
PASS BALL
Activity Level: High
Needed: Medium-sized playing area, enough
players to form two teams, six playground balls
(three for each team)
Two teams form two circles, one inside the other,
with boys’ backs to one another. Give three balls to
each circle. The object is to pass these balls around
the circles—one circle passing the balls clockwise
and the other counterclockwise—and to keep them
going as fast as possible. If a player drops a ball, he
is out of the game. The team with the most players at
the end of an allotted time wins.
REMOVING COCONUTS
Activity Level: Moderate
Needed: Large room or playing area; four players
for each group (you may have more than one group);
long piece of rope; four hula hoops; five coconuts,
oranges, or balls per group
on the playing area but must touch all bases before
coming home. If he gets a base on balls, he is not
permitted to leave first base until a succeeding batter
hits the ball.
SOCCER BOWLING
Activity Level: Low
Needed: Medium-sized playing area; any number
of players; 10 2-L. plastic bottles, 10 wooden blocks,
or 10 paper milk cartons; soccer ball or basketball
Set up 10 objects like bowling pins. Players kick
the ball at them from a line 25 to 35 feet away. Keep
score as in bowling.
THREE-PIN BOWLING
Activity Level: Low
Needed: Large indoor space or level outdoor playing field; three plastic bottles, milk cartons, tin cans,
or other items for bowling pins; playground ball
This game rarely has a winner; play it for the fun
of it.
With the rope, make a large circle in the middle
of the playing area. Place the four hula hoops evenly
outside of it. Set five coconuts (or balls) in the center
of the large circle. One player starts in each of the
four outside circles (hula hoops). The object of the
game is for each of the four players to try to get three
coconuts into his personal hula hoop. He can carry
only one coconut at a time. Players can take coconuts
from other players. Players cannot guard their coconuts, and they must place—not throw or roll—the
coconuts in their circle. By being aware of the other
players, boys can work together to keep the game
going until everyone decides to stop.
SOAKOUT
Set up three “pins” in a triangle with the two rear
pins a little farther apart than the width of the ball to
be used. Draw a foul line with a stick or chalk 20 to
30 feet from the head pin. It also helps to mark the
spots where the pins are placed.
In scoring, credit the player four points for knocking down the head pin and three points for either of
the back pins. Strikes, spares, and number of frames
played are as in regular 10-pin bowling. All other
bowling rules apply. To speed the game along, it
helps for one of the players to act as pinsetter.
Variation: Use beanbags rather than balls, particularly when playing indoors. Beanbags don’t bounce
and don’t need to be chased.
Bicycle Games
Activity Level: High
Needed: Large playing area; enough players for
two teams; playground ball, soccer ball, or volleyball; bases
This is a variation of kick ball. The pitcher, using
an underhand pitch, rolls the ball to the “batter,”
who kicks it and runs all four bases while members
of the defensive team try to “soak” him by hitting
him with a direct throw. Boys may not relay the ball
from player to player.
Note: All boys must wear a bicycle
helmet whenever they are riding a bicycle! (Since March 1999, all helmets sold in
the United States must be approved by the
Consumer Product Safety Commission [CPSC].
If boys are using older helmets, make sure
they are certified by either ASTM [American
Society for Testing and Materials] or the Snell
Memorial Foundation [Snell].)
The batter is out after three strikes, when a fly
ball or foul tip is caught, or when he is soaked by
a member of the defensive team. After he kicks the
ball, he must try a home run but may run the bases in
any order. He may halt, dodge, or run any direction
Games
3–11
BIKE RELAY
Activity Level: Moderate
Needed: Large paved area, even number of riders, bike and helmet for each rider
Establish a starting line and mark off turning lines
about 50 feet away in opposite directions. Divide the
group into two teams. The teams will ride in opposite
directions. The teams should be about 20 feet apart to
avoid collisions as the riders return to the start-finish
line. On a signal, the first rider on each team races
to his turning line and back. The next rider may not
start until the first rider’s front wheel has crossed the
line. Continue until all have raced.
COASTING RACE
This game requires skill, coordination, timing, and
marksmanship. Set up the containers about 15 feet
apart in a straight line along a 100-foot course. Each
rider has a small object (marble, stone, bottle cap) to
place in each of the cans. Riders follow each other
down the course at an average speed, dropping one
object into each container. This game can be played
in teams, with the winning team the one with the
most hits.
NEWSPAPER RACE
Activity Level: Moderate
Needed: Large paved area, any number of riders,
bike and helmet for each rider, six or eight large
boxes or baskets, folded newspaper for each rider
On a 100-yard racecourse, place six or eight large
boxes or baskets about 15 feet apart. Put the first basket about 10 feet from the starting line. Each player
rides along on a line about 8 feet away from the baskets. As he passes each basket, he tosses in a folded
newspaper. The player who gets the most newspapers in the baskets wins.
OBSTACLE
SLALOM RACE
Activity Level: Moderate
Needed: Large paved area, any number of riders,
bike and helmet for each rider
The object of this race is to see which rider can
coast the longest distance. Each rider pedals as hard
as possible for a set distance (at least 15 feet) to a starting line, and then must stop pedaling and coast as far
as he can. Mark the spot where a rider’s foot touches
the ground. The next rider tries to better that mark.
HITTING THE TARGET
Activity Level: Moderate
Needed: Large paved area; any number of riders;
bike and helmet for each rider; four to six plastic ice
cream containers (or other similarly sized plastic or
cardboard containers); marbles, stones, bottle caps, etc.
3–12
Games
Activity Level: Moderate
Needed: Large paved area, any number of riders,
bike and helmet for each rider, five markers (empty
boxes, cones, or weighted plastic bottles)
Set up the markers slalom style, with the first
marker 20 yards from the starting line and three
additional markers about 10 feet apart. Riders must
follow a course that zigzags from the right of one
marker to the left of the next, and so on. The rider
completing the course in the shortest time wins.
POTATO RACE
Activity Level: Moderate
Needed: Enough riders to form two teams, bike
and helmet for each rider, two empty boxes, 10 to 12
potatoes or beanbags
Teams line up with their bikes in relay style. Place
a box on the starting line in front of each team. At
intervals of 5 yards or more in front of each team,
mark four circles and place a potato or beanbag in
each before the game begins. On a signal, the first
player on each team rides out and picks up the potato
in the first circle, returns to the starting line, and
places it in the box. He then rides for the second,
third, and fourth potatoes, returning each time to put
them into the box. When he has finished, he touches
off the second player, who rides out carrying one of
the potatoes to place it back in the first circle. He
returns for the second, third, and fourth in similar
fashion, replacing them one at a time. Continue in
this way, with one teammate removing the potatoes
and the next player replacing the potatoes, until all
boys have participated.
SNAIL RACE
Activity Level: Low
Needed: Large paved area with predetermined
race course, any number of riders, bike and helmet
for each rider
The object of this race is to see which rider can
travel the slowest without putting a foot on the
ground—which is quite a feat in cycling! If a player
puts his foot down, he is disqualified. The last rider
to cross the finish line wins.
Noncompetitive,
Cooperative, and
Team-Building Games
Children experience a lot of competition in their
lives. Many games reinforce that competition either
because players are eliminated or because boys lose
as individuals or teams, as only one team or player
can win.
The games in this section will help promote cooperation and build self-esteem. No one is a “loser”;
everyone is a “winner.” The only way to accomplish
the goal of these games is to play fairly and, often,
work together. But everyone will have fun in the
process, too, and players will cheer each other on as
they help each other.
Most of these games either require no equipment
or require equipment that you can find easily around
the house or can make from materials on hand. Game
equipment does not have to be expensive. Homemade
equipment has the further benefit of helping to equalize talent; that is, a “ball” made from newspapers
stuffed into a stocking, for instance, is not easy for
anyone to throw.
Consider using beanbags in place of balls in
many games (and not just the games in this section).
Beanbags don’t bounce or roll, so you don’t have to
spend time chasing them. Also, players who might
be afraid of catching a ball usually have no trouble
catching a beanbag.
Cooperative and noncompetitive games have fewer
rules but more directions or possibilities. One of the
many advantages of these games and activities is that
you can change the rules to fit your group. In many
cases, teams are loosely organized; each team need
not have the same number of players.
Another advantage to these activities is that age,
strength, and speed are not important, which means
that the whole family, the whole den, or even the
whole pack can enjoy the activities together.
REFLECTING
Review the section on “Reflecting After Games”
(page 3–2). As a game leader, you are encouraged to
help the group members reflect on what they did,
how they determined what to do, and how they felt
about it. Some specific questions are suggested below
with some of the game descriptions.
P-E-E-P SAFETY CHECKS
The physical and emotional safety of all participants is the most important concern when facilitating team-building and noncompetitive games. You
can ensure safety by doing four checks before you
begin any team-building activity (or any other type
of game). The letters P-E-E-P will help you remember
how to implement the checks.
P—Personal: Are participants personally safe? All
participants should remove their neckerchiefs and
tie slides as well as any jewelry or personal items
that could injure them or someone else.
E—Emotional: Are participants emotionally safe?
Observe participants and check in with them to see
how they are feeling emotionally. If someone is preoccupied, angry, depressed, or overly excited, he or she
might have a difficult time focusing on the challenge
at hand, which therefore might affect his/her personal
safety or the safety of the group. All participants should
agree to stay focused on the challenge presented.
Games
3–13
E—Environmental: Is the group physically safe
in the environment? Remove all potential dangers
from the area being used for the activity. Groups also
need to be aware of everything in their environment
that cannot be removed, such as sun, wet or uneven
ground, insects, trees, noise, other people, etc.
P—Physical: Do participants have the knowledge
needed to be physically safe? That is, all participants
must be aware of any injuries, soreness, or allergies
(such as to bees) of all other group members. By
doing this, participants will be better able to plan
their approach to helping group members complete
the challenge successfully.
CHECKLIST FOR PRESENTING THE
GAMES OR ACTIVITIES
• Choose an activity suited to the ages and physical
abilities of group members. All the games in this
section are appropriate for Tiger Cubs, Cub Scouts,
Webelos Scouts, and adults to play together.
• Choose an area large enough and free from potential hazards to ensure safety.
• Make all ground rules and procedures clear to participants before they try to play the games.
• Present the situation or explain the rules; then
step back and allow the group to work through any
problems that the game presents or communication it requires. Little good will come from interrupting the problem-solving and communication
process by giving hints or indicating to participants a more-efficient or “right” way.
• Stop the group if you see any potentially dangerous situation.
• Stop playing the game while everyone is still having fun. Don’t keep it going until they become
bored with it.
SPOTTING
Although no games in this section require the use
of a spotter, it is important that game leaders know
what a spotter is and how spotting is done.
Spotting is important in any activity where a participant is off the ground. The proper use of spotting
will reduce the chance of injury. The spotter should
keep a balanced stance with knees bent, one foot
placed forward and the other foot back for stability.
The spotter’s hands must be held at chest or shoulder
height and be ready to break a fall. The spotter’s head
must be up, with eyes on the participants. The spotter must be attentive to what participants are doing
3–14
Games
and how. It is the spotter’s responsibility to break
falls—not to help the participant try to complete an
activity.
ALL-ON-ONE-SIDE VOLLEYBALL
(BAT AND SCOOT)
Activity Level: Moderate
Needed: Large room or playing area, six to 10
players, inflated balloons, volleyball net
In this version of volleyball, both teams begin on
the same side of the net. The object is to get your team
members to the other side of the net and back as many
times as possible. Using the balloon for a ball, each
player bats the balloon to another player and then
scoots under the net to the other side. The last player
to touch the balloon taps it over the net and scoots
under. The receiving players try to keep the balloon
in play and repeat the process. As the teams get better,
try putting two balloons into play at one time.
BACK TO BACK
Activity Level: Moderate
Needed: Large playing area, odd number of players
Arrange all boys except one (“It”) in pairs, standing back to back with their elbows locked. Pairs are
scattered randomly over the playing area. When “It”
calls “All change!” each boy must find a new partner
and hook elbows with him. At the same time, “It”
tries to find a partner. The boy left without a partner
becomes the next “It.”
BATTING DOWN THE LINE
Activity Level: Low
Needed: Large indoor or outdoor playing area,
any number of players, inflated balloons
Two or more groups may play this game simultaneously. Arrange groups in parallel lines with members
spaced about 2 feet apart. On a signal, the first player
bats the balloon with either hand toward the person
next to him, who bats it to the next, and so on until
the balloon reaches the end of the line. If the balloon
touches the ground, a group member must take it to
the starting line, and the group members must begin
again. Try varying the spacing between players. Is it
more challenging to play the game with people closer
together or farther apart?
BLANKET BALL
Activity Level: Low
CAR AND
DRIVER
Needed: Indoor or outdoor area, any number of
players, two sheets or blankets, two balls or large
soft objects (even rolls of toilet paper work well)
Form two groups. Group members grab hold of a
blanket’s edges, with a ball in the center of the blanket. Players practice throwing the ball up and catching it by moving the blanket up and down in unison,
trying to get the ball as high as possible. After the
groups have developed some skill in catching their
own ball, they toss the ball toward the other group to
catch on their blanket. Groups continue throwing the
balls back and forth. Group members might reflect on
how they decided to toss the ball to the other team.
Variation: Try using water balloons outdoors on a
hot day.
BODY TAG
Activity Level: High
Needed: Large level playing area, any number of
players
The den leader chooses one of the boys to be “It”
by touching him. “It” must then place his right hand
on the spot where he has been touched (arms, chest,
back, ankle, etc.), and in this position he must tag
another boy, who becomes the new “It.” Play until all
the boys have a chance to be “It.”
CHASER AND RUNNER
Activity Level: High
Needed: Large level playing area, even number
of players
Pair off all boys except two—who are the Chaser
and the Runner. The pairs stand 8 to 10 feet apart. In
each pair, one partner stands behind the other and
grabs him around the waist. The Runner tries to get
in front of one of the pairs so that the front player can
grab him around the waist. If the Runner succeeds,
the rear player of the pair becomes the Runner and
tries to join another pair. Meanwhile, the Chaser is
trying to tag the Runner.
The front player in a pair always tries to help the
Runner join on, while the rear player tries to prevent
this by swinging his partner out of the way. If the
Chaser catches the Runner, they change places.
Activity Level: Low
Needed: Large playing area, any number of players
Each person finds a partner of about the same
height. Partners stand one behind the other, both facing the same direction. The front player is the Car; he
places his bent arms about chest high in front of him
with palms out to act as “bumpers.” The Car closes
his eyes. The back player is the Driver; he places his
hands on the car’s shoulders to act as the “steering
wheel.” No talking is allowed during the game.
Drivers take their Cars for a ride, being careful
that there are no “crashes” (bumping anyone else).
Drivers should use light pressure on the shoulders
to indicate turns and speed. After a short time, ask
everyone to freeze and to reverse the roles, with the
Cars becoming Drivers and the Drivers becoming
Cars. (If you have an odd number of players, have
one group of three make a van or truck. The middle
player is the Driver.)
For reflecting questions, you might ask boys who
were Cars how they felt not to be able to see where
they were going. Did they trust their Drivers?
Games
3–15
CATCH THE DRAGON’S TAIL
Activity Level: High
Needed: Large clear area without holes in the
ground, eight to 10 players, bandanna or neckerchief for each team
Players line up, one behind the other. Everyone
grabs the waist of the person in front of him. The last
person in line tucks a neckerchief or bandanna in
the back of his belt. To work up steam, the “dragon”
might let out a few fearsome roars. On a signal, the
dragon begins chasing its own “tail,” the person at
the head of the line trying to snatch the handkerchief.
The tricky part of this struggle is that the people at
the front and the people at the end are clearly competing, but those in the middle aren’t sure who to
cooperate with. When the “head” finally captures
the tail, the head dons the handkerchief and becomes
the new tail, and the second person from the front
becomes the new head.
Variation: Two dragons try to catch each other’s
tails. The dragon “members” will have to work
together as a team to move effectively and quickly.
Reflecting questions might relate to how those in
the middle felt when they didn’t know which way
the “head” was going, and whether or not they had
to help keep the “tail” from getting caught.
and skip around calling out the name of an article of
clothing. Everyone tries to avoid touching and must
make their item heard. Start with “hand, your name,
tiptoe,” and then try variations such as “foot, farm
animal, jump” or “knee, a country, walk.” Introduce
Scouting items such as “ear, camping item, hop” or
“head, Cub Scout motto, hop.” Boys stop the action
when they see the Cub Scout sign. This is a good
game to play with the den when reviewing a list of
things to bring to the next meeting or den outing.
ELBOW TAG
Activity Level: High
Needed: Large level playing area and large number of players
All players get a partner and link elbows. (If you
have an odd number of players, make one group of
three.) All linked pairs form a circle. One pair is
chosen to run first. One person is “It” and begins to
chase the other person, the Runner, around the outside of the circle. To be considered “safe,” the Runner
must link elbows with a person in another pair before
being tagged. The person in the new threesome who
is not linked with the Runner becomes the new
Runner. If the Runner is tagged before linking with
one of the pairs, he becomes “It” and the former “It”
becomes the Runner.
CHAIN TAG
Activity Level: High
Needed: Large playing area, any number of players
Boys are scattered over the playing area. One
player is “It” and tries to tag another player. The
first boy he tags joins hands with him and helps in
tagging others. Both may use only their free hand
to tag. Each player tagged joins hands with the one
tagging him. The line grows longer as more players
are tagged, but only the players at the two ends of
the chain may do the tagging. Tagging doesn’t count
if the chain is broken. The game continues until all
boys have been tagged.
ELBOW, FRUIT, HOP
FIND THE LEADER
Activity Level: Low
Needed: Small playing area and any number of
players
Boys sit in a circle. One boy is “It” and leaves
the room. The remaining boys choose a leader. “It”
is then called back into the center of the circle and
the leader slyly starts a motion, such as waving his
hands, clapping, making a face, etc. The others in the
circle imitate the leader. “It” keeps a watchful eye on
everyone to find out who is starting the motions. The
leader should change motions frequently. When “It”
discovers who the leader is, the leader becomes “It”
and a new leader is chosen.
Activity Level: Moderate
Needed: Indoor or outdoor playing area, any
number of players
When the leader calls out a phrase such as “nose,
clothing, skip,” boys must touch (or hold) their nose
3–16
Games
FOREHEAD SQUEEZE RELAY
Activity Level: Moderate
Needed: Large playing area, even number of
players, several tennis balls or oranges
Fill a laundry bag with an assortment of old clothing—the more funny looking, the better. Boys stand
in a circle, with one holding the bag. On a signal,
he passes the bag to the player on his left, he to
the next, and so on around the circle. As the bag is
being passed around, the den chief blows a whistle.
Whoever has the bag in his hand when the whistle
sounds must reach inside, take out an article of clothing, and put it on. Play continues until all clothing
is being worn.
GROUP JUGGLE
Activity Level: Low
Needed: Large playing area, any number of players, several beanbags or small stuffed animals that
can be thrown easily (Have as few as half the number of objects as you have players or up to one per
player.)
The object is for two players in each team to carry
a ball or orange across the room and back again by
holding it between their foreheads. If dropped, start
again. When the first pair completes their circuit, the
next pair in that team begins. Hand over the ball or
orange quickly. There is quite an art in moving in
tandem with your partner and gently covering the
distance while hurrying.
GIVEAWAY TAG
Activity Level: High
Needed: Large playing area; any number of players; ball, rolled-up newspaper, or beanbag
One boy is “It.” The others are scattered around
the playing area. One of the players holds an object
such as a ball, rolled newspaper, or beanbag. “It”
tries to tag the boy holding the object, who may run
with it or pass it to another boy. The player tagged
becomes “It.”
LAUNDRY GRAB BAG
Activity Level: Low
Needed: Large room; any number of players;
whistle; pillowcase or laundry bag; old hats, shirts,
shoes, stockings, suspenders, belts, etc.
The leader arranges boys into a circle and asks
everyone to raise one hand. He explains the rules:
(1) Throw the beanbag to someone who has his hand
raised (but not the person beside you); (2) drop your
hand when you catch the beanbag; and (3) if you
drop the beanbag, don’t try to retrieve it—just continue the game. The leader throws a beanbag to a player,
and play continues until everyone has caught the
beanbag and no more hands are raised. Play again,
but each time with more and more beanbags flying at
the same time.
Variation 1: All the items to be tossed might be
related, such as an assortment of balls, or fruit, etc.
The game leader then might introduce an additional
unanticipated, humorous object, such as a rubber
chicken. Watch the groups’ response as this object
goes flying through the air. Expect some missed
catches!
Variation 2: The Name Game
The object of this variation is to learn everyone’s
name. Here are the rules: (1) Call your name when
you catch the beanbag and drop your hand; (2) throw
the beanbag to someone else (not the person beside
you) who has his hand raised; (3) remember the
name of the person who threw you the beanbag and
to whom you throw the beanbag. The leader throws
the beanbag to the first person and continues the pattern until everyone has caught the beanbag. Repeat
the game a few more times as boys remember names.
Then play again, with everyone calling out the name
of the person catching the beanbag.
Games
3–17
GROUP STAND-UP
Activity Level: Low
Needed: Indoor room or grassy outdoor area, 10
to 20 players, long thick rope (about an inch thick)
tied to form a circle
Players sit in a circle holding onto the rope, which
is on the ground in front of their feet. Everyone
grasps the rope and then pulls gently and evenly on
it. If everyone pulls together evenly, the entire group
should be able to come to a standing position. (Use a
shorter rope for a group of six to eight players.)
HARBOR MASTER
Activity Level: Low
Needed: Large room or level playing area, any
number of players, blindfold
One boy is blindfolded and is a Ship; another is
the Harbor Master. The rest of the players spread
themselves throughout the playing area as Buoys.
Buoys may not talk or move, and the Harbor Master
must remain at the finish spot (“port”). Using only
his voice, the Harbor Master must guide the Ship
safely through the harbor to the port. Switch roles
and repeat the game.
Reflecting questions might concern how the Ship
felt being unable to see; how the Harbor Master felt
being able to use only his voice to guide the Ship; or
how the Buoys felt being unable to move or speak.
HOT CHOCOLATE RIVER
Activity Level: Low
Needed: Large level playing area, any number of
players, several boards (fewer than there are players) long enough to step on
The object of this game is to get the entire group
from one “shore” of the “chocolate river” to the other
using only the “marshmallows” (small boards) that
are provided.
The leader establishes where the shores of the
river are (you might mark them off with pieces of
rope). The river should be wide enough to challenge
the group. The group begins on one shore of the river.
The leader explains that the river is made of hot
chocolate. If anyone should fall into the river (step
off a board), he must swim back to the original shore
for “first aid” before trying to cross the river again.
The leader asks what floats in hot chocolate (anticipating the answer “marshmallows”) and shows the
players the boards (the marshmallows). The leader
3–18
Games
points out that for safety, marshmallows must be
placed rather than thrown, and players must step
from marshmallow to marshmallow rather than
jump. The leader places the marshmallows on the
shore, and the players decide together how to get the
group safely to the other shore. More than one person
may occupy a marshmallow at the same time.
There is no one solution to this game. Usually, the
first person places a marshmallow in the river and
puts his foot on it. A second marshmallow is passed
to him, and he places it in the river and puts one foot
on it. He then reaches for the second person in the
line and helps this person move onto the first marshmallow. A third marshmallow is placed in the river,
and players keep moving onto the marshmallows as
they are added to the river.
Note to the game leader: If a marshmallow is
unoccupied, remove it and say that it has melted.
This adds some pressure to the activity but does not
jeopardize the accomplishment of the task.
HOT POTATO
Activity Level: Low
Needed: Small playing area, any number of players, a potato or other object for passing
Boys form a circle, with “It” in the center. One
of the players has the potato for passing. When “It”
calls “Pass the potato,” the player with the potato
starts passing it around the circle. When “It” calls
“Hot potato,” whoever has the potato at that moment
becomes “It.”
HOT STUFF
Activity Level: Moderate
Needed: Large level playing area, any number of
players, ball or potato
This is a variation of Hot Potato. Boys form a
circle. One boy is the Caller and stands outside the
circle. As the players in the circle pass the ball from
player to player, the Caller counts aloud to a number
between 1 and 50 that he chose before play began
and then yells “Hot Stuff!” At that point, the person
with the ball (or if the ball is between players, the
person just about to get the ball) leaves the circle and
joins the Caller. As more and more players leave the
circle, the Caller group becomes larger and larger and
the counting becomes louder and louder. The original Caller tells the new Callers the number to which
the group will count. The game ends when there are
just two players passing the ball back and forth.
IN THE POND
Activity Level: Moderate
Needed: Large paved area with a chalk line
circle, any number of players
Arrange boys in a circle just outside a chalk line.
One boy is “It.” If he orders “In the pond!” all boys
jump forward. When “It” calls “On the bank!” all
boys jump back. If the order “In the pond!” is given
when all players are already in the pond, no one
should move. Boys should ignore orders such as “On
the pond!” or “In the bank!” The first player to make
a mistake becomes the new “It.”
boy grabs the hand of two different players, taking
care that one of the players is not standing adjacent
to him. Then the group “untangles” the knot, the
object being for the group to find itself in one large
circle again, or perhaps two or even interconnected
circles. No player may let go of any other player’s
hand (unless to prevent injury!).
Reflecting questions might be related to who, if
anyone, became the “leader” of the group. Did the
“leadership” change from person to person? How
and why? How did the group decide how to untangle
the knot?
LINE UP
ISLANDS
Activity Level: Low
Needed: Any number of players, large playing
area, several hula hoops (or old T-shirts or open
newspapers), portable tape player with marching
music if music is desired
The leader explains that everyone is a swimmer
in an ocean, that hula hoops represent islands, and
that while the music is playing (or the leader is clapping), swimmers must swim in the ocean. When
the music (or clapping) stops, however, or when the
leader calls “Shark attack!” swimmers should immediately get onto an island because the sharks are near.
(Swimmers should get on an island in a designated
period of time.) The object is to save all the swimmers, not to eliminate any of them.
During the next round, the leader removes one of
the islands. As play continues, the number of islands
gets smaller, so it will be increasingly difficult for
swimmers to stand on an island. Boys may have to
depend on a friend to hold them up so they don’t
loose their balance and fall off the island (outside of
the hoop). All swimmers need to be out of the water
for the group to succeed. Encourage boys to help
each other get on and stay on islands, rather than
shove each other off to make more room.
Reflecting questions could include: How did you
feel as there were fewer and fewer islands? What are
some of the things you saw players do during the
game to help others stay safely on an island? How
did you feel when you helped save others?
KNOTS
Activity Level: Moderate
Needed: Activity room or grassy outdoor area,
eight to 12 players
Activity Level: Low
Needed: Any number of players, one blindfold
per player or “honor blindfolds” (boys close their
eyes)
Players are blindfolded and told that no one may
talk during this activity. The leader asks them to line
up by height. When they feel that they have accomplished this task, they should stand in place and
remove their eye coverings to see how they did. You
can substitute other requirements, such as lining up
by shoe size.
Variation: Try playing this without blindfolds and
with eyes open. Boys still cannot talk but can use
sign language to communicate. This time they line
up by birthday, middle name, last four digits of their
phone number, or any other direction.
MACHINE CHARADES
Activity Level: Low
Needed: Large room, teams of three to eight players
This is a great game for mixing adults and boys.
Try it at a pack meeting. Each den meets in a corner of the room to select a machine that they want
to “build” using all the members of the den. They
practice privately, acting out the movements of that
machine (not the person using it, but the machine
itself in action). Bring all the dens back together to
act out their machines until someone correctly identifies it.
Variation: Can You Be Things Together?
In this variation, the leader assigns the “thing” the
group is to be, asking “Can you be a string of beads [a
canoe, a tent, a donut]?” This game is even suitable
for Tiger Cubs. You can make this game fit many different monthly themes by the “things” you select.
To form a knot, boys stand in a circle, shoulder to
shoulder, extending their hands into the center. Each
Games
3–19
NUMBER CALL-OUT
Activity Level: Low
Needed: Large activity room, lots of players (the
more, the better)
A leader calls out a number, such as “three,” to
the group, and everyone scrambles to get into groups
of three. Quickly, the leader calls another number to
form other sizes of groups, and continues rapidly as
players scramble.
others give you? How did you feel when you realized
that hoops were coming at you from both directions?
How did players help each other?
PERPETUAL MOTION
Activity Level: Moderate
Needed: Large playing area with a smooth surface, any number of players, flying plastic disk or
metal pie plate
Variation 1: The leader tells players that every
new combination must not include players from previous combinations.
Variation 2: The leader asks people to find others
with similar characteristics, for example:
• Find everyone who has the same kind of pet as you.
• Find everyone with the same color of eyes as you.
• Find everyone with the same birthday month as you.
• Find everyone with the same last digit in their
phone number as you.
PASS THE RING
Activity Level: Low
Needed: Indoor or outdoor playing are, any number of players, long rope tied to form a circle, ring or
washer slipped onto the rope
Boys sit in a circle, each holding onto the rope
with both hands. “It” stands in the center. On a signal, the boys start to move the ring or washer around
the rope, trying to conceal its location from “It.” “It”
tries to guess the position of the ring. The boy who
holds the ring when “It” guesses correctly is “It” for
the next game.
PASS THROUGH THE HOOP
Activity Level: Low
Needed: Ten to 20 players, several hula hoops
Everyone stands in a circle and joins hands, with
hula hoops hung over the arms of players at equal
intervals around the circle. (Players hold hands
through the hoops.) Players do not drop hands at any
time. Players who have a hoop on their arm must
step through it and pass the hoop to the person next
to them. The hoops can go in both directions. The
game becomes interesting when one player has to
pass two hoops in different directions.
Reflecting questions might concern how boys
chose to pass through the hoop (some people go
headfirst; others go feetfirst). How much help did
3–20
Games
Players sit in a circle on the floor and count off so
that each person has a number. Place the disk or pie
plate on the floor in the center of the circle. The first
player gets up, turns the disk on edge, and spins it as
you would a coin. As the player sits down, he calls
out the number of another player. That player jumps
up, gets to the disk before it stops spinning, gives it
another spin, and calls out another player’s number
before sitting down. Players continue calling each
other’s numbers and keeping the disk spinning. If
the disk completely stops spinning, a player starts it
again. The object of the game is to cooperate in keeping the disk spinning.
RING CALL BALL
Activity Level: Moderate
Needed: Large playing area, any number of players, volleyball for each group
Boys form a circle, with “It” in the center. “It”
throws the ball in the air while at the same time calling the name of one of the boys in the circle. That boy
must catch the ball. If he catches the ball, he returns to
the circle; if he misses it, he changes places with “It.”
ROPE RING
Activity Level: Low
SPIDER WEB
Activity Level: Low
Needed: Large playing area, any number of players, about 50 feet of clothesline or similar rope
Needed: Room with chairs arranged in a circle,
eight to 10 players, ball of yarn
Tie the ends of the rope together to make a circle.
Players stand outside the rope in a circle, holding it
with both hands. One player is the Ringmaster and
stands in the middle. The Ringmaster tries to tap the
hand of a ringside player holding the rope. The players can let go of the rope to avoid being tapped. The
Ringmaster may try to trick players by pretending to
tap one player and then tap another. When a player is
tapped while holding the rope, he becomes the next
Ringmaster, and the game continues.
Boys sit on the chairs in a tight circle. The den
leader holds the ball of yarn and makes a partial statement, such as, “My favorite game is…; I feel scared
when…; My favorite Scouting activity is…; When I
grow up I want to…,” etc. He then gently tosses the
ball of yarn to a player across the circle, who catches
it and completes the statement (saying, for example,
“My favorite game is tic-tac-toe”). That player then
tosses the yarn to another player, who also completes
the statement. Each person catching the ball holds
onto the yarn so that by the time everyone has caught
the yarn and completed the statement, an interesting
and colorful “spider web” has been created in the
center of the circle. The leader may then say a second
partial statement and invite the boys to reverse the
process, winding up the ball of yarn.
Variation: For large groups, two or three
Ringmasters will keep players off guard and the game
more exciting.
SHAPES
Variation: This is a good introductory game. The
leader could say, “My name is Bobby, and I’m tossing the ball to Michael.” Michael repeats the pattern
of naming himself first and then tossing the ball to a
player across the circle.
SPUD
Activity Level: High
Needed: Large playing area, any number of players, foam ball
Activity Level: Low
Needed: Large playing area, any number of players, 50 feet of clothesline or similar rope, one blindfold per player or “honor blindfolds” (boys close
their eyes)
The object of the game is to form a specified shape
without being able to see. Players are blindfolded
and hold onto the rope with both hands. The leader
directs them to form a circle, a square, a triangle, or
other shapes.
Reflecting questions might relate to how it felt to
be blindfolded. How did you determine that you had
the correct shape? Who became the leader? How was
this determined?
All players stand in a circle. One player starts the
game by throwing a foam ball high and yelling the
name of one of the other players. Everyone scatters
quickly except the boy whose name was called. He
retrieves the ball, and when he gets it, all the other
players must stand still. The boy with the ball throws
it and tries to hit another player. If he misses, the
boys may run again until he recovers the ball, and
then they must freeze and the boy tries to hit someone again with the ball. When a player is hit, the
game starts over. Note: The ball must be thrown from
where it falls.
SQUIRRELS AND FOXES
Activity Level: High
Needed: Large playing area, groups of four players
Have all except two boys—the Fox and the
Homeless Squirrel—form circles of four boys. Each
circle counts off, and the No. 1’s stand in the center
of the circles and become Squirrels. The other boys
form “hollow trees” by holding hands. During the
game, the Fox tries to catch the Homeless Squirrel.
Games
3–21
The Homeless Squirrel can take refuge in any tree,
thereby forcing the Squirrel inside to leave. The
Fox now tries to catch that Squirrel. If caught, the
Squirrel becomes a Fox, and the chase continues.
After a few minutes, have the No. 2’s in each circle
become Squirrels.
TURTLE TAG
STIR THE SOUP
Activity Level: Low
Needed: Room with chairs in a circle (a chair for
each player, less one), any number of players, cane
or broomstick
Players sit in a circle on chairs, with “It” in the
center of the circle holding a cane or stick. The players leave their chairs and walk around “It” in a close
circle, saying, “Stir the soup! Stir the soup! “It” goes
through the motions of stirring the soup with the
cane. Suddenly, when no one is expecting it, “It” taps
the cane three times, drops it, and runs for a seat. All
players run to find a chair. The player left out is the
new “It.”
TACTILE COPIER
Activity Level: Moderate
Needed: Large playing area, any number of players
One Cub Scout is “It” and the others are Turtles.
While “It” counts to 10, Turtles hop up and run at
least 10 steps. “It” tries to tag a Turtle but cannot tag
when the Turtle is on its back with all four “feet” in
the air. Turtles can assume the safe position or keep
moving.
Parachute Games
Activity Level: Low
Needed: Small playing area, any number of players, paper, pencil or pen, index cards or small pieces
of paper with simple picture (such as a house, star,
fish, etc.) drawn on them
The object of the game is to copy the picture correctly. Players arrange themselves in a line, all facing
one direction. A picture is shown to the last person in
line. This person uses his finger to “draw” the picture
on the back of the person in front of him. Each player
in turn “passes” the picture on to the next person
in line by drawing it on his back. The person at the
head of the line draws the picture on a piece of paper
for the group to compare with the original drawing.
Repeat the game after players rotate their positions.
Variations: After passing on the picture, each player draws it on paper, as he perceives it. The group
then compares their individual drawings. Or, trace
words instead of pictures.
THE SNAIL
Activity Level: Low
Needed: Large playing area, large group of players, 50 to 100 feet of clothesline
The group stands in a line, each person holding
the rope in one hand. Starting at one end, the group
makes a large coil, like the shell of a snail. After the
coiling is complete, the group moves slowly together
15 or 20 feet in one direction and then uncoils.
3–22
Games
Some children learn to play parachute games in
school gym classes. Parachutes come in a variety of
sizes, from 12 to 36 feet across. Select the size according to how many players you have. A parachute is an
expensive item. Check with your local school or park
district to see whether they have one that they can
loan to you. Usually, a deposit will be required to
ensure its safe return. You may also find a used military parachute at an army-navy surplus store. Clean
it thoroughly before using it for games.
When holding a parachute, boys should place one
hand on each side of the “rib” of the parachute if
enough “ribs” are available. There are three ways to
grasp a parachute. The three grips are
• Overhand grip: palms down
• Underhand grip: palms up
• Alternating grip: one palm up and one palm
down
Parachute games require a large level area free of
hazards. When the weather doesn’t permit outdoors
play, parachute games can be played indoors in a gym
or in a multipurpose room. The more players available,
the easier it is to manipulate the parachute. Remember
that younger children may find the parachute to be
heavy and awkward until they have had the opportunity to play several games and get used to it.
ALLIGATOR
RIM BALL
Everyone sits in a circle, feet stretched out straight
in front of them with the edge of the parachute pulled
up to their laps, covering their legs and feet. The
leader may tell a story about people sitting around
a pool or swamp in Florida in which there may be
alligators. The leader demonstrates how an alligator nibbles on a boy’s toes before pulling him into
the water (under the parachute). Magically, anyone
pulled into the water turns into an alligator as well.
Choose a volunteer to be the first alligator and play
until everyone is under the parachute. Encourage
silliness and screams from boys being nudged by the
alligator.
Place a small (6- to 10-inch) playground ball in
the middle of the parachute. Players distribute themselves evenly around the rim of the chute. The object
is to get the ball rolling around the rim of the parachute. Players will need to cooperate in producing a
wavelike motion to get the ball moving. Some small
children will try to bounce the parachute, which is
counterproductive to a smooth, wavelike action. Try
to discourage them from doing this. After the players
get the ball rolling around, you might try keeping
score to see how many times they can make it go
around without it falling off the parachute.
THE UMBRELLA
BOUNCE
Bounce a large stuffed animal up and down on the
parachute.
EXCHANGES
Players count off up to three, four, or five (depending on how many groups you want to create) so that
each player has a number. Holding onto the parachute with both hands, boys raise it over their heads
while the leader calls out a number. Players having
that number must let go and run under the parachute
across to the opposite side and grab on. (Ask boys to
run carefully from one side to the other to minimize
the risk of collisions.) You can experiment and make
the game more exciting by calling out more than one
number at a time.
Caution: Players must not bring the parachute
down to trap the players underneath while they are
running.
Variations: Try different activities while crossing
under the parachute, such as hopping, dribbling a
ball, etc. See how long boys can jump rope under the
parachute. Or the boys with specific numbers run
under the parachute to retrieve colored beanbags.
PARACHUTE VOLLEYBALL
Place a small (6- to 10-inch) playground ball in
the middle of the parachute. Players distribute themselves evenly around the rim of the chute, with the
players along one half being team A and the others,
team B. The object is for one team to flip the ball
off the parachute on the other team’s side to score a
point. The high scoring team after a certain time, or
the first team to attain a certain score, wins.
Variation: Keep a running tabulation of the scores
instead of individual team scores. Play several times
to see how low the score can be after a predetermined
length of time.
Players grasp the parachute waist-high using an
overhand grip, making sure the hole of the parachute
is on the ground. On the count of “one,” everyone
flexes his knees to a squatting position. On the count
of “two, three, and UP!” everyone stands and raises
arms overhead, pulling the parachute up and over
their heads. As the chute billows out, the players
will be pulled to their tiptoes and their arms will be
stretched high in the air. The parachute is allowed
to remain aloft and then slowly settle back to the
ground. This can be done from a sitting or kneeling
position—or even from wheelchairs.
WAGON WHEEL
Everyone holds the parachute with their left hand,
walking slowly, then faster, running, slowing down,
stopping, reversing hands, and repeating.
Relays and Races
Relays require a large playing area free of hazards.
They can be played indoors or outdoors, but keep
safety in mind during these action-packed games.
There are four major types of relays in Cub Scout
games:
% In file relays, boys on each team line up one
behind the other. Cub Scout No. 1 goes forward to
the goal line and returns to his team, tagging Cub
Scout No. 2. This continues until all have had a
turn. The team finishing first wins.
% In partner relays, each boy has a partner. Teams
consist of an equal number of partners. The partners stand side by side in file formation. During
the relay, the first set of partners on each team goes
forward to the goal line in whatever manner prescribed by the game, returns to its team, and tags
off the next set of partners.
Games
3–23
% In shuttle relays, the boys on each team number
off. The even numbers line up in file formation
with Cub Scout No. 2 in front. The odd-numbered
boys do likewise, with No. 1 in front. Files face
each other at opposite ends of the relay course.
On a signal, Cub Scout No. 1 runs and hands off
the ball, beanbag, or whatever game equipment is
necessary to Cub Scout No. 2, and then takes his
place at the end of No. 2’s line. Cub Scout No. 2
runs and gives No. 3 the game object and takes
his place at the end of No. 3’s line. This continues
until all players are back in their original places.
8
6
4
2
1
3
5
7
team and acts like a monkey. When a team member
guesses the correct animal, bird, or fish, he runs back
and touches the leader, saying “Monkey!” (or whatever the correct animal, bird, or fish is). The leader
then gives out another animal, bird, or fish and that
player continues the relay race. The first team to get
all the animals correct wins.
BAG OF AIR RELAY
Activity Level: Moderate
Needed: Even number of players, enough small
paper bags for each player
At a goal line about 25 feet from each team is a
stack of small paper bags. Each boy in turn races to
the stack, blows up a paper bag, bursts it with his
hand, and races back to touch off the next player.
BAGGAGE CAR RELAY
Activity Level: High
% Tagging off is a variation of the file relay. Instead of
tagging the next teammate in line, a returning runner goes to the end of the line and “passes the tag”
by touching the shoulder of the person in front of
him, who in turn taps the next person. When the
boy at the front of the line receives his tap on the
shoulder, he heads for the goal line.
OVER AND UNDER RELAY
Activity Level: Low
Needed: Even number of people, suitcase for
each team, hat, adult trousers, large shirt, jacket or
overcoat
Line up the teams for a file relay. Each team has
a suitcase filled with the same amount of clothing.
On a signal, the first boy on each team races with
the suitcase to the center of the room and dons the
clothing. He hurries back with the empty suitcase
to the starting point. There, he removes the clothing
and repacks it in the suitcase. The second boy repeats
these actions, and so on until all have finished.
Needed: Even number of players; paper plates
Each team has a paper plate. The teams form rows
with players one behind the other. The team leaders stand at the front of the line and hold the plates
above their heads with both hands. On a signal, each
leader passes the plate between his/her legs. The
second player passes it over his/her head. The third,
between the legs again, and so on, over and under.
The last player in line runs to the front and starts
again.
BALLOON SWEEPING RELAY
Activity Level: High
Needed: Even number of players, balloons, brooms
Arrange teams in parallel lines. Place an inflated
balloon on the floor in front of each team. Give
the first boy in each team a broom. On a signal, he
sweeps the balloon to a turning line and back and
then hands the broom to the second player, who
repeats this action.
ANIMAL, BIRD, OR FISH
Activity Level: Moderate
Needed: Even number of players; list of animals,
birds, or fish
Divide players into two teams. Teams position
themselves in corners of the room opposite each
other. The leader stands in the middle of the room,
an equal distance from each team. Each team sends
the first player to the leader, who whispers the name
of an animal, bird, or fish to him. If the leader says
“monkey,” for instance, the player runs back to his
3–24
Games
BALLOON BURST RELAY
Activity Level: High
Needed: Even number of players, balloons, chairs
Give each boy an uninflated balloon. On a signal,
the first boy on each team runs to a chair about 20 feet
away, blows up his balloon, ties it, sits on the balloon
to burst it, and then returns to the starting line. The
other players follow until all balloons are burst.
BALLOON
KANGAROO
JUMPING
BALLOON STEEPLECHASE
Activity Level: Moderate
Needed: Any number of players, balloons, objects
for an obstacle course
Lay out an obstacle course (indoors or outdoors)—
the more obstacles the better. Use fences, trees,
chairs, tables, etc. Each boy has an inflated balloon.
On a signal, the boys move to the first obstacle and
begin to follow the course, batting their balloons in
the air with their hands. If a balloon touches the
ground, the player must repeat the previous obstacle.
If a balloon breaks, the player gets a new one and
continues.
BAREFOOT MARBLE RACE
Activity Level: Moderate
Needed: Even number
of players, marbles
Activity Level: High
Needed: Any number of players, balloons
Boys line up side by side, each with an inflated
balloon between his knees. On a signal, boys hop to
the other side of the room and back to the starting
line. The one finishing first wins. If a boy breaks his
balloon, he is out of the race. If a boy drops his balloon, he must replace it between his knees before he
can keep going.
Boys remove their
shoes and socks. Place
two marbles on the
starting line in front
of each team. On a
signal, the first player
on each team grasps a marble with the toes of each
foot and walks to the finish line. When he reaches
the other end of the room, he picks up the marbles
and runs back to give them to the next player in line,
who repeats the action.
BALLOON KICK RELAY
Activity Level: High
Needed: Even number of players, balloons
Give the first boy on each team an inflated balloon.
On a signal, he kicks it across the room to a line and
back to the second player, who repeats the action.
The balloon may be touched only with the feet and
legs. Continue until one team wins.
BALLOON ON A SPOON RELAY
Activity Level: Moderate
Needed: Even number of players, balloons, teaspoons
BEANBAG RELAY
Activity Level: Moderate
Needed: Even number of players, beanbags
Divide teams in half, putting half of each team on
the opposite sides of the room. The first boy on the
first side throws a beanbag to his first teammate on
the other side, who holds the bag until the thrower
has run up and tagged him. Then he in turn throws
the bag to the second player on his team on the other
side of the room, who holds the bag until he is tagged,
etc., until all have had a turn. The thrower moves to
the end of the line after he has tagged his teammate.
The first team with players in reversed position wins.
The first boy on each team has an inflated balloon
balanced on a teaspoon. He hurries to a goal line
about 25 feet away and back, carrying the balloon on
the spoon. If the balloon falls off, he must balance it
on the teaspoon again before he can continue.
Games
3–25
BUCKET BRIGADE RELAY
Activity Level: Moderate
Needed: Even number of players, two buckets for
each team, water
Line up two or more teams for a relay. Each team
has two buckets—one empty and the other half-filled
with water. Place the half-filled buckets at the goal
line. On a signal, the first boy runs to the goal line,
carrying the empty bucket, pours the water from the
half-filled bucket into the empty bucket, leaves the
empty bucket there, and carries the half-filled bucket
back to his team. The next player does the same, and
so on, until all team members have carried both an
empty and a half-filled bucket.
BUNDLE RELAY
Activity Level: Moderate
Needed: Even number of players, ball of twine
or string
The first boy on each team has a ball of twine or
string. On a signal, he passes it to his neighbor but
holds on to the end of the string. The ball is passed
from player to player, unrolling as it goes. When it
gets to the end of the line, it is passed up the line
behind the backs of the players until it reaches the
first player again. The first team to “wrap itself into a
bundle” is the winner.
A sequel to this relay is unwrapping the bundle by
passing the ball back and winding it up as it goes.
CASTING RELAY
Activity Level: Moderate
Needed: Even number of players, fishing rod with
plug, target
Each boy in turn casts a fishing plug at a target. As
soon as he scores a hit, he gives the rod to the player
behind him and goes to the rear position on his team.
The team back in its original order first wins.
CATERPILLAR RACE
Activity Level: Moderate
Needed: Even number of players
Divide boys into two groups. The first boy in each
line places his hands on the ground. Each teammate
behind him bends forward and grasps the ankles of
the player in front of him. On a signal, the “caterpillars” move forward with everyone holding tight
to the ankles. When the last player in the column
crosses the finish line, the team has completed the
race, provided that their caterpillar is still intact.
3–26
Games
CRAB RELAY
Activity Level: Moderate
Needed: Even number of players
Divide the boys into equal teams. The first boy in
each line sits on the floor with his back to the finish
line. On a signal, he “walks” backward on his hands
and feet with his body parallel to the floor. When he
reaches the other end of the room he stands up, runs
back, and touches off the next player, who repeats the
crab walk action.
DUTCH SHOE RELAY
Activity Level: Moderate
Needed: Even number of players, two shoe boxes
per team
Each team has two shoe boxes. On a signal, boys in
turn place their feet in the boxes and shuffle to a goal
line and back to the starting point, where the next
player repeats the action.
FUMBLE FINGERS RELAY
Activity Level: Low
Needed: Even number of players, pair of large
gloves or mittens for each team, fruit jar with lid for
each team, five toothpicks for each team
Each team has a pair of large canvas gloves or mittens. At a goal line is a fruit jar with a lid containing
five toothpicks for each team. On a signal, the first boy
on each team races to the goal line, puts on the gloves,
removes the lid, empties the jar, picks up the toothpicks and puts them back in the jar, and screws on
the lid. He takes off the gloves and races back to hand
them to the next player, who repeats the action.
Variation: Try using individually wrapped hard
candy.
GUM-GLOVE RELAY
Activity Level: Moderate
Needed: Even number of players, paper bag for
each team, pair of large work gloves for each team,
enough pieces of individually wrapped sticks of
gum for each team member
Divide the group into two teams, which line up
facing each other. The first person on each team is
given a paper bag that contains individual sticks
of wrapped chewing gum and a pair of large work
gloves. He must open the bag, put on the gloves, pull
out a stick of gum, unwrap it, and put it in his mouth.
As he starts chewing the gum, he removes the gloves,
places them in the bag, closes the bag, and passes it
to the next person, who repeats the action.
IZZY DIZZY RELAY
Activity Level: High
Needed: Even number of players
Teams line up in relay formation. On a signal, the
first boy on each team runs forward to a line, puts
one finger on the floor, and circles around the finger seven times. His finger must not leave the floor.
When he has made seven turns, he runs back and
touches off the next player on his team.
LEG TUNNEL RELAY
Activity Level: Moderate
RESCUE
Activity Level: Moderate
Needed: Even number of players, ample supply
of newspapers, 50 feet of rope cut in 3-foot pieces
Divide boys into teams. Each team picks one
member as its “victim.” The victim sits on a pile of
newspapers about 12 feet from the team. On a signal,
the rescuers join 3-foot pieces of rope with square
knots to make a rope 15 to 20 feet long. One member
casts the line to the victim, and the team pulls him
to safety. The victim rides on the newspapers, holding the rope with one hand, the newspapers with the
other.
Needed: Even number of players
Teams line up single file and stand with their feet
apart. The last boy in each line crawls through from
one end to the other and stands up with his feet
apart. The players follow in rapid succession, each
standing up when he has crawled through. The first
team to be back in its original order wins.
PAPER CONE DERBY
Activity Level: Moderate
Needed: Even number of players, piece of paper
for each team, 30 feet of string, several chairs to use
to anchor the string
Prepare
a
paper cone for
each team (or
use a coneshaped paper
cup). Put a
30-foot string
through
the
cone, tie each
end of the
string to the back of a chair, and pull it tight. Line
up teams for a relay. On a signal, the first boy in
each team blows his cone along the string. (For best
results, he should keep his head under the string.)
When the cone reaches the end, he slides it back for
the next teammate.
NOSE-A-PEANUT RACE
Activity Level: Moderate
Needed: Even number of players, peanuts in their
shells
SEED-PLANTING RELAY
Activity Level: Moderate
Needed: Even number of players; ample supply
of paper cups or jars; ample supply of seeds, popcorn kernels, or candies
In turn, each boy follows a line drawn on the floor
by placing the heel of one foot against the toe of the
other. About every 3 feet he must stop and place a
seed in a small-mouthed jar set about 11⁄2 feet on each
side of the line. When he reaches the end, he runs
back and touches off the next person, who plants his
seeds in the same manner.
SNOW SHOVEL RELAY
Activity Level: Moderate
Needed: Even number of players, pie tin for each
team, spatula for each team, ample supply of cotton
balls or plastic foam packing peanuts
A “snow drift” (a pile of cotton balls or packing
peanuts) is placed before each team, and a pie tin for
each team is placed at a goal line about 20 feet away.
The first boy on each team has a spatula. On a signal,
he scoops some of the “snowballs” on his “shovel”
and hurries to the goal line, where he deposits the
balls in the pie tin and races back to touch off his
next teammate, who repeats the action. Players who
drop snow along the route aren’t required to stop
to pick it up; however, the following players must
gather it at some point, as the winning team must
have all its snow in the tin.
Variation: Relay teams could carry a snowball (cotton ball) in a teaspoon to a goal line.
Boys roll a peanut across the floor with their noses
for a short distance. They must not touch the peanut
with their hands.
Variation: Use a table tennis ball instead of a peanut.
Games
3–27
THREE-LEGGED RACE
Activity Level: High
Needed: Even number of people, fabric strips or
neckerchiefs
Run this contest on either an individual or team
basis. Tie a boy’s left leg to an adult’s right leg. On a
signal, they make their way to the turning line and
back again.
each team a large shopping bag containing three
or four garments or pieces of cloth and five or six
clothespins. The first player on each team races to
the clothesline, pins up the garments, and runs back
to the starting line. The second player races up and
takes down the clothes and returns them to the third
player, who pins them up again, and so on.
WAY DOWN YONDER RELAY
Activity Level: Moderate
WAGON TRAIN
Activity Level: High
Needed: Large playing area free of hazards, even
number of players, whistle
Mark a circle 50 feet in diameter. Boys stand at
intervals on the circle facing in a clockwise direction. They pretend to be pioneers racing for their
lives from outlaws. All run when the whistle blows.
When one player is passed by another (always pass
on the outside), he is captured and drops out, sitting
in the center of the circle. Sharp, unexpected blasts
of a whistle signal an “attack,” and all players reverse
direction.
WASH ON
THE LINE
Needed: Even number of players, teaspoon for
each player, dish containing popcorn kernels for
each team, empty dish for each team
Boys sit on the floor in two lines that face each
other. A dish containing kernels of corn is placed
in front and to the right of the players at the head of
each line, and an empty dish is at the end of each
line. Each player has a teaspoon. On a signal, the
first player takes a kernel in his spoon, transfers it to
his neighbor’s spoon, and so on down the line. The
first player may start another kernel down the line
right away. As the end player receives the kernel and
drops it in an empty dish, he yells, “Way down yonder!” Any kernel that is dropped must be replaced on
the spoon by the person who dropped it before it can
be passed along.
Physical Fitness Activities
Activity Level: Moderate
Needed: Even number of players, 25 feet of
clothesline, five or six clothespins for each team,
shopping bag for each team, three or four garments
or pieces of cloth for each team
Stretch a clothesline 20 feet from the starting
line. Divide into relay teams. Give the first boy on
3–28
Games
Because many of these contests are tests of strength,
coordination, and agility, the older, stronger boys
will have an advantage. For this reason, it is a good
idea to try to match contestants by size and age, especially for the two-person contests. Consider using
these activities as den meeting fillers when the boys
need to burn off excess energy. Have several games
in mind and ask the boys whether they can do this or
that fitness activity. Change the activities as the boys
show proficiency. Many of these physical fitness
activities meet advancement requirements for Wolf,
Bear, and Webelos Scouts.
ANKLE HOP
Boys stand erect and then take a squatting position, grasp the ankles, and hop forward four times
without breaking the ankle grip. They turn around
and repeat, hopping back to their original places.
ANKLE WALK
BROOMSTICK WRESTLE
Two boys face each other, grasping a broomstick
with their hands about 18 inches apart. On a signal,
each tries to cause the other to move his feet. The
defeated player is the one who first takes a step or
releases the stick.
CIRCLE HOP
Each boy grasps his ankles and walks in a straight
line, keeping his knees stiff.
ARM LOCK WRESTLE
Pair off boys according to height and weight. They
sit on the floor, back to back, with their legs spread
and arms locked at the elbows. On a signal, each tries
to pull his opponent over to the side so that his left
arm or shoulder touches the floor.
BALANCE WITH CLOSED EYES
Boys stand upright, placing their right foot in front
of their left foot, and raise their arms to their sides.
With their eyes closed, they see how long they can
maintain their balance in this position. Alternate the
left and right foot forward.
BICYCLE RIDE
Players lie flat on their backs and raise their feet as
high as possible. Then, placing the hands under the
hips, they support their body weight on the shoulders and elbows. From this position they pump their
feet as if pedaling a bicycle.
BROOMSTICK
TWIST
Two boys of
equal height and
weight grasp a
broomstick (held
horizontally) with
both hands. Each
tries to touch the
stick to the floor on
his right.
Draw a circle about 6 feet in diameter and stand
two boys inside it. They face each other with their
arms folded and one leg extended in front. On a
signal, they try to upset or force each other from the
circle by using the extended leg. They may hook or
lift with the leg but must not touch their opponent
with any other part of the body. Kicking or pushing
with the uplifted leg is not permitted.
CRAB WALK
From a squatting position, boys reach backward
and put their hands on the floor without sitting
down. They walk forward, keeping their heads and
body in a straight line.
DEEP BOW
Boys place both hands on the floor in front of their
left foot and extend their right leg backward. They
touch their head to the floor and then stand erect
without losing their balance. They reverse their feet
and repeat the deep bow.
DIZZY
Boys hold their left ankle in back of their right leg
with their right hand. Then they hop, making three
turns in place without losing their balance. Then they
reverse position and try hopping on the left leg.
FITNESS CIRCLE GAME
Form a circle as large as the room permits, with all
boys facing the same direction. Give instructions for
various activities as follows:
1. Start walking in a circle, and keep walking
between these exercises.
2. Start hopping.
3. Make yourself as small as possible and continue
walking.
4. Make yourself as tall as possible and continue
walking. Now reach your hands high over your
head.
5. Bend your knees slightly, grasp your ankles, and
continue walking.
6. Walk as if the heel of one foot and the toes of the
other were sore.
Games
3–29
7. Walk stiff-legged.
8. Squat down and jump forward from that position.
9. Walk on hands and one foot, with the other leg
held high, imitating a lame dog.
10. Walk forward at a rapid pace (don’t run) while
swinging the arms vigorously.
11. Take giant steps.
12. Walk forward, raising your knees as high as possible with each step.
13. Run, lifting your knees high.
14. Walk on your hands and feet.
FROG HANDSTAND
Boys squat and place their hands flat on the ground
between their legs. They lean forward slowly, shifting
the weight of their bodies onto their hands and elbows
until their feet swing free of the ground. They should
keep their heads up and point their toes backward.
(This is the first step in learning the handstand).
FROG HOP
Boys take a squatting position, with their feet
pointing slightly outward. They place their hands on
the floor with the elbows slightly bent, arms between
the knees. Then they take short hops by putting their
hands just ahead of their feet and bringing their feet
up to their hands.
BACK-TO-BACK GET UP
HAND WRESTLE
Two boys stand facing in opposite directions with
the sides of their right feet touching each other. They
clasp their right hands directly over the center of
their feet. On a signal, the wrestlers try to throw each
other off balance by pushing, pulling, or swinging
their hands. A player loses if either foot moves.
HAWK DIVE
You need plenty of room for this activity. Boys
kneel on one leg with the other leg stretched back,
keeping the foot off the floor. They stretch both arms
sideways, using them for balance. They bend forward
slowly trying to touch their noses to the floor. Then
they return to the starting position without letting
any part of the body touch the floor except the leg
they are kneeling on.
HEEL CLICK
Boys stand with their feet apart. They jump
upward, strike their heels together, and land lightly
with their feet apart again.
HOP AND TURN
Boys hop in the air, make a half turn to the right,
and land lightly on their starting place. They can
vary the stunt by making a full turn. Repeat, turning
the other direction.
HOPPING—CROSS FEET
Boys hop up on both feet, cross the right foot in
front of the left, and land on their toes with heels
together. Then they reverse feet.
HUMAN ROCKER
Boys lie face downward, grasp their ankles, and
rock their bodies backward and forward on their
thighs and chests.
Two boys sit on the floor back to back with their
arms locked. Without letting go, they try to stand
erect. This is done by bringing the feet close to the
body and pushing back against back.
HAND PUSH
Two boys stand facing each other with their toes
touching and their palms together at shoulder height.
In this position each tries to push the other’s hands
until one is forced to step back. The player who
forces his opponent backward wins.
3–30
Games
KNEE DIP
Boys stand on one foot and grasp the other foot
behind their backs with the opposite hand. They try
to touch the bent knee to the floor and return to a
standing position without losing balance.
KNEEL STAND
Boys kneel on both knees and return to a standing
position with arms folded behind their backs. They
must not move their feet or lose balance.
LEG WRESTLE
Two boys lie side by side on their backs with their
heads in opposite directions. They hook right elbows.
When the leader counts “one,” they raise their right
legs and touch them together. At count “two,” this is
repeated. At “three,” they hook their right knees and
try to turn each other over.
INCHWORM
Each boy supports his body on his hands and feet
with his legs extended backward. Keeping his hands
in place and his knees stiff, he walks on his toes
with short steps until his feet are near his hands.
Then, without moving his feet, he walks forward on
his hands with short steps until his original position
is attained. He continues “walking” alternately with
feet and hands.
PEPPER GRINDER
Boys stretch out on the floor and raise themselves
on one hand. They then try to pivot in a complete
circle around the supporting hand, keeping their
bodies in a straight line.
SKIN THE SNAKE
Boys line up single file one behind another. Each
stoops over and places his right hand between his
legs and with his left hand grasps the right hand of
the player in front of him. When all are ready, the last
player in line lies on his back while the line moves
back over him. The next player then lies down and
so on until everyone is lying down. The last one to lie
down rises to his feet and walks forward, each following in turn, until all are back in their original places.
SPARROW SPARRING
NO HANDS
Boys fold their arms, lie down on the floor, and try
to get up without using their elbows or hands.
NOVELTY WALK
Boys walk by swinging their right foot behind
their left leg and then moving it as far forward as possible on the left side. Then they take the same type of
step forward with the left foot and continue to walk
in this manner.
Establish a 6-foot circle. Standing in the circle,
two boys bend forward and grasp their ankles. Each
then tries to upset his opponent or shoulder him
from the circle.
Games
3–31
SQUAT JUMP
The boy does a full squat with his weight on his
toes and, from this position, jumps forward several
times. Then he stands and walks. Alternate these
squatting, jumping, and walking actions.
STORK STAND
The boy stands with his hands on his hips, placing
one foot against the inside of the opposite knee while
bending the raised knee outward. He then counts to
10 without moving from his place.
STORK WRESTLING
Two boys face each other, standing on one foot and
holding their left ankles with their left hands. They
then clasp their right hands and try to push or pull
their opponent off balance or cause him to let go of
his ankle.
THREAD THE NEEDLE
Boys clasp their hands in front of their bodies.
They bend forward and step through the loop formed
by their arms with the right foot, and then the left
foot. They reverse the action by stepping backward
with the left foot, then the right, keeping the hands
clasped. If the hands are clasped near the floor, the
action is easier to perform.
UNDER THE BROOM
Quiet Games
With Equipment
STRINGER
Materials: Chenille stem and buttons or beads for
each team
Each team has a chenille stem and several buttons
or wooden beads. On a signal, the first person strings
a button or bead on the stem and passes it to the next
player, who does the same. Continue until all the buttons or beads are on the stem. The first team to finish
holds its stem in the air and yells, “We did our best!”
CLIP IT
Materials: Small dish with paper clips for each
team
Each team has a small dish filled with paper clips.
On a signal, the first person joins two paper clips
together and passes the dish and beginning of the
chain to the next person. That player adds another
clip to the chain and passes it on. After a set time
(5–8 minutes), the paper clip chains are held high in
the air to see which team has the longest.
This can be a good game to play at a blue and gold
banquet, with each table having a dish with paper
clips.
ART CONSEQUENCES
Materials: Pencil, paper
Build two stacks of books about 3 feet high and 3
feet apart. Lay a broom across them. Each boy crawls
under the broomstick and goes to the end of the line.
When all have done that, remove two or three books
to lower the broom, and have the players try that.
Keep removing more books each round.
Each boy gets a pencil and paper and draws the
head of a man, woman, or child. After he draws the
head, he folds the paper over to the back so nothing shows except two small lines to indicate where
the shoulders should start. He passes the paper to
the next player, who draws the shoulders, folds the
paper back, and passes it on. This continues, with
others adding the waist, hips, legs, and feet. When
the drawings are finished, open and pass around to
see the funny people you’ve created.
BLOWBALL
Materials: Small table or large box, table tennis
balls
Boys sit at a table small enough so they are close
together. Put a table tennis ball in the center of the
table. On a signal, the players, with their chins on
the table and their hands behind them, try to blow
the ball away from their side of the table. If the ball
falls on the floor, return it to the center of the table
and continue.
3–32
Games
CALENDAR PITCH
the puck to the opponent’s back row. The puck carrier may go one square at a time in any direction,
and it may jump any piece. The opponent tries to
jump the checker carrying the puck. When he does,
he takes over the puck and moves one more space
in any direction, but he may not make a jump move.
The puck carrier may not move into any of the four
corner squares.
COOTIE
5´
Materials: Large calendar, checkers or bottle
caps
Place one page from a large calendar on the floor as
the target. Each player tosses three checkers or bottle
caps from a distance of 5 feet and totals his score
according to the numbers on which his checkers land.
Markers on a line don’t count. For added excitement,
score double points for holidays, such as 50 points for
December 25, or 28 points for February 14.
CARD TOSS
Materials: Hat, chair, deck of playing cards
Place a hat on the floor about 6 feet from a chair.
Each boy in turn sits in the chair, takes a deck of
playing cards, and tosses cards one at a time into the
hat. It looks easy, but if a beginner gets more than five
cards in the hat on his first try, he’s doing well.
CELEBRITIES
Materials: Old newspapers or magazines, index
cards, glue
From newspapers or magazines, cut pictures of
famous athletes, politicians, performers, etc., and
paste them on numbered cards for the boys to guess
their names. The player who identifies the most wins
a prize.
Variation: Use pictures of wildlife, trees, or any
category you choose.
CHECKER HOCKEY
Materials: Checkers, checkerboard, button or
other small object
Each boy’s “hockey team” of four checkers is lined
up horizontally on a checkerboard, facing the other
“team” with an empty row between. One red checker
carries the “puck” (a button or other small object that
can sit on a checker). A goal is scored by advancing
Materials: Small cube covered with white paper,
paper and pencils for each player
Each player gets a pencil and paper. Cover a small
cube with plain paper and write one of the following
letters on each side: A for antenna, B for body, T for
tail, L for leg, H for head, and E for eye. Boys throw the
cube and try to draw a complete cootie. (A complete
cootie has one body, one head, eight legs, two eyes,
and two antennae.) If a boy throws a B, he draws a
body on his paper. He may continue to throw as long
as he can add to the cootie he is drawing. If he shakes
a letter for a body part that can’t be added yet (that is,
you can’t add a leg until you have a body) or one he
has already drawn, the next player gets to throw the
cube. No one may begin drawing until he shakes a B
first. The first player to draw a complete cootie wins.
CRAZY ARTIST
Materials: Crayons or marking pens, large pieces
of paper or posterboard
Divide boys into two teams for a relay drawing
contest. Each team gets a crayon or marking pen.
Place two large pieces of paper or posterboard on a
wall or table across the room. The object of the game
is for each team to draw a house, with each boy drawing no more than two straight lines. A player from
each team runs to the paper, draws his two lines,
returns, and hands the crayon to the next player in
line. Use sidewalk chalk for an outdoor game.
CRAZY BONE
Materials: Assortment of objects with various
textures, scorecard, pencil
For this game, boys try to identify objects by touching them only with their elbow. Gather together in
advance such things as an eraser, a ring, a penny, a
pencil, a piece of sandpaper, a grape, a hairpin, etc.
Players should not see these items before the game.
Each player rolls up his sleeve, places his arm on the
back of his chair, and closes his eyes. Move behind
the boys and hold one of the objects against the elbow
of each boy, and let him write down what he thinks
the object is. See who can identify the most.
Games
3–33
UNIFORM GAME
Kim’s Game—Sight
When preparing for a den uniform inspection,
have the denner slip in with his uniform rearranged
in the following manner and ask the boys to tell what
is wrong.
1. Cap on backwards
2. Campaign button on cap
3. Wearing den chief cord
4. Service star on neckerchief
5. Neckerchief twisted into a roll
6. Neckerchief tied around the neck
7. Belt buckle worn to one side
8. One sleeve rolled up
9. Button unbuttoned
10. Pocket turned inside out
Materials: Tray, cloth cover or trash bag, 10 to 20
different common objects, scorecard and pencil for
each player
Arrange 10 to 20 common objects in an orderly
fashion on a tray or table. Keep the objects covered
until the game begins, and then have the players
study the objects silently for one minute. Cover the
objects again, and each boy writes down the names
of as many objects as he can remember. Boys can
compete individually or work as teams.
Kim’s Game—Touch
Materials: Large bag, five to six differently textured items
FIVE DOTS
Place the items in the bag. One-by-one, boys put a
hand in the bag without looking and feel the objects,
trying to identify each only by touch.
Materials: Paper for each player, pencil for each
player
Kim’s Game—Smell
Each boy gets a paper and pencil and places
five dots on the paper wherever he wishes. Players
exchange papers and try to draw a person around the
dots, with the head at one dot, the hands at two, and
the feet at the other two dots.
GRAB IT
Materials: Clothespins, one for each boy
Arrange boys in a circle on the floor. In the center,
place one less clothespin than the number of boys.
One of the boys is the “storyteller.” He starts a story,
and whenever he says the word “and,” all the players grab for a clothespin. Boys get a point for every
clothespin they grab. Change storytellers so all have
a chance.
JUGGLER TOSS
Materials: Ball or orange for each player
Pairs of boys stand about 5 feet apart in two lines
facing each other. Each player has a rubber ball or
orange. They toss their balls simultaneously. Score
one point for the two-boy team when both make the
catch. After each catch, they step back one pace and
repeat. The pair with the most points after a set time
limit wins.
KIM’S GAME
Modeled after the tests of Kim in the Rudyard
Kipling book, this game has many variations, each
of which helps hone boys’ memory and powers of
observation.
3–34
Games
Materials: Five or six 35-mm film canisters, blotting paper or fabric, various smelly substances
Number each film container and place a piece
of blotting paper or fabric in each that is soaked in
or wrapped around a smelly substance (try vanilla
extract or vanilla bean, lemon peel, orange peel, or
spices such as cloves and nutmeg). Boys sniff each
container and try to identify the smells. Be careful
with your selections, as some boys may be allergic to
some odors. (And, of course, don’t use any caustic or
toxic materials.)
LOG CABIN ON A BOTTLE
Materials: 10 flat toothpicks for each boy, bottle
Divide boys into two groups. Each boy has 10 flat
toothpicks. Alternating between teams, players place
a toothpick, one at a time, across the top of the bottle
until the stack falls. That player’s team must take the
toothpicks that were knocked off. The first team to
get rid of all its toothpicks wins.
MARBLE CHOP SUEY
Materials: Supply of marbles or small candies,
several pencils or chopsticks, two dishes for each
team
Put six marbles/candies in a small dish. Using two
pencils as chopsticks, and using only one hand, boys
try to move the marbles/candies into a second dish.
Using pencils with eraser tips can make the game
a little easier for younger boys. Play this as a skill
activity or relay race.
NOAH’S ARK (BARNYARD BABBLE)
Materials: Index cards
Write the names of animals on the cards—two
cards for each animal. If there is an odd number of
boys, write one animal’s name on three cards. There
should be a card for every player. Shuffle the cards
and hand them out. Each player reads his card to
himself but keeps his animal identity a secret. Collect
the cards. On a signal, each player begins acting out
the sounds, shape, and typical movements of his
animal, trying to attract his “partner.” There might be
baying, croaking, screeching, strutting, flapping, and
leaping—but no talking! The game ends when each
player finds his partner.
CLOTHESPIN RING TOSS
TOOTHPICK PICKUP
Materials: Saucer for each player, toothpicks,
beans
Boys sit around a table or kneel in a circle on the
floor. Each has a saucer with two toothpicks and 12
beans. The contest is to see who can be the first to lift
out five beans using only the toothpicks.
WALK THE PLANK
Materials: Six- to 8-foot-long two-by-four, neckerchief for blindfold
Lay the board flat on the ground. One by one, blindfold each boy and have him try to walk the length of
the “plank.” If he steps off at any point, he falls into
shark-infested waters and is out of the game.
Variation: Use two or more boards, side by side,
and form teams for a relay.
BOYS’ LIFE BAGS
Materials: Small paper bags, various small
objects, paper and pencils, prizes
Print one letter of the words Boys’ Life on each
bag. Place an object that begins with that letter in the
appropriate bag. Give each boy paper with the words
Boys’ Life printed vertically so he can write down
what he thinks is in each bag after he feels the objects
without looking at them. Give prizes to those who get
the most correct answers.
WIGGLES
Materials: Pieces of paper and pencils for each
player
Materials: Bucket or wastebasket, clothespins,
jar rings
Clamp clothespins around the rim of a bucket
or wastebasket. Boys try to toss jar rings over the
clothespins from 10 feet away.
SMILE
Materials: Coin for flipping
Two teams line up facing each other about 10 feet
apart. One team is Heads; the other is Tails. Flip a
coin and call it. If “heads” comes up, the Heads team
laughs and smiles while the Tails team members try to
keep a sober face. Any player who laughs at the wrong
time switches teams. Then flip the coin again.
Each boy draws a wavy or zigzag line on a piece of
paper. Boys exchange papers and make the line into a
picture. Boys share the funny pictures with everyone
and tell a story about their picture.
ZOO
Materials: Unshelled peanuts
In advance, hide several peanuts around the room.
Divide the boys into groups of three or four and give
each group the name of an animal. One member of
each group is chosen to be the Keeper. The boys start
to hunt for the peanuts. When a player finds one,
he must not pick it up. Instead, he stands still and
makes a noise like the animal his group represents.
He continues making the noise until the Keeper for
his group comes over and picks up the peanut. The
team with the most peanuts at the end of a designated time wins.
Games
3–35
Quiet Games
Without Equipment
SCOUTING QUIZ
This can be a good game to play during a blue and
gold banquet. Make copies for each boy and adult to
complete.
How much do you know about Scouting? See how
many of the following questions you can answer.
1. How old is Cub Scouting this year?
2. How old is the Boy Scouts of America this year?
3. Who was the founder of the Scouting movement?
4. Who started the Boy Scouts of America?
5. What is the first rank in Cub Scouting?
6. How many achievements are required to earn the
Wolf badge?
7. How many electives are required to earn an
arrow point?
8. How many Webelos activity badges may be
earned?
9. What is your den number?
10. What is our pack number?
11. What chartered organization sponsors our pack?
12. What district are we a part of?
13. What council are we a part of?
14. What is the Cub Scout motto?
Answers: (1) Cub Scouts originated in 1930. To
find the answer to this question, subtract 1930 from
the current year; (2) The BSA originated in 1910. To
find the answer to this question, subtract 1910 from
the current year; (3) Lord Robert Baden-Powell; (4)
William D. Boyce; (5) Bobcat; (6) 12; (7) 10; (8) 20;
(9–13) Check with your pack leadership; (14) Do
Your Best.
ABOVE AND BELOW
Boys stand in a circle. One at a time, call out the
names of things that are found either above or below
the ground. For example, strawberries grow above
the ground; potatoes grow below the ground. When
you call the name of something that is found above
the ground, the players stand; if it is found below the
ground, they sit down. A player is eliminated if he
responds incorrectly. The last player to remain in the
game wins.
Variation: Call out the names of things that fly
and crawl.
3–36
Games
BIRD, BEAST, OR FISH
Boys stand in a circle with a leader in the center.
The leader calls a category—bird, beast, or fish—to
anyone in the circle. That player must name a specific species of that category before the leader counts
to 10. When one of the players fails to name the
required bird, beast, or fish, he becomes the leader.
A player may not use a name of a bird, beast, or fish
that already has been used by any other person until
a new leader begins a new game. For variety, you may
call, “fin, fur, or feathers.”
BUZZ-FIZZ
Boys are seated in a circle. One boy begins counting, and the rest of the group continues counting one
at a time around the circle. When a player comes to
5 or any number with a 5 in it, he says “buzz.” When
a player comes to 7 or a number with 7 in it, he says
“fizz.” For example: 1, 2, 3, 4, buzz, 6, fizz, 8, and
so on; 55 would be “buzz buzz”; 57 would be “buzz
fizz.” When a player misses, he drops out and the
next player starts over at 1.
DETECTIVES
Two boys are Detectives and are sent out of the
room. The others choose an object that the Detectives
will try to discover, such as a piece of furniture,
a book, or a button on someone’s clothing. The
Detectives are called back in and try to solve the
mystery by asking questions. They can ask each of
the other players only three questions. Suggest that
they try to find the location first and then identify
the object.
DO THIS, DO THAT
Boys line up along a goal line. The den chief or
den leader stands in front of the boys and performs
certain movements, preceding each by saying “do
this” or “do that.” Players must immediately copy all
movements after the order “do this.” They must not
move when the leader says “do that.” A player who
makes a mistake moves backward one step. Continue
for a predetermined length of time. The winner is the
player nearest the goal line.
ELECTRIC SQUEEZE
Boys form a circle and hold hands, with “It” in the
center. One player starts the “shock” by squeezing
the hand of one of the boys next to him. That player
passes it on. The shock may move in either direction. “It” watches the faces and hands of the players,
trying to spot the location of the shock. When he
guesses correctly, the player caught becomes “It.”
GARDENING
signal, all turn to face their partners again and try
to determine what changes have been made. Each
change correctly identified counts one point.
PRINCE OF PILSEN
Divide boys into two groups that stand parallel to
one another about 10 feet apart. A leader stands in
front of the groups and calls out the names of vegetables. When “corn” is called, boys grasp their ears;
for “onions,” they hold their noses; for “potatoes,”
they point to their eyes; for “cabbage,” they hold
their heads. Another leader referees to see which line
responds first with the desired action. The first line to
have all its members perform the correct action scores
a point. The line that scores 10 points first wins.
HA, HA, HA
Boys stand in a circle. The first boy says “ha”; the
second, “ha, ha”; the third, “ha, ha, ha”; and so on
around the circle. The “ha-ha’s” must be said without
laughing. Boys who laugh while saying their “ha’s”
are eliminated.
INITIALS
The den chief or den leader is the questioner and
asks a question of each boy in turn. The player must
answer in two words that begin with the initials
of his name. For example: “What is your favorite
snack?” Chuck Parker might answer “cherry pie”;
Jimmy Davis might answer “juicy donuts.” A player
who answers incorrectly or not at all is out of the
game. Encourage boys to give funny answers. To
make the game easier for younger boys, ask for oneword answers, using the initial of the first name.
LOOK SHARP
Divide the group into two teams that stand in lines
facing each other. Boys have one minute to observe
their partners on the opposite team. On a signal, they
turn their backs to each other, and each player makes
three changes in his attire. He may undo a button,
alter the position of an activity badge, exchange
neckerchief slides with a neighbor, etc. At the next
Boys line up facing the leader. They count off consecutively and remember their numbers. The leader
says: “The Prince of Pilsen lost his hat. Number _____
has it.” The player whose number has been called
immediately responds, “No, sir, not I, sir,” before
the leader can say, “Number _____, to the foot.” If
the leader beats the player, the player must go to the
foot (end) of the line, and the leader calls out another
number. If the player beats the leader, the leader says,
“Who then, sir?” and the player questioned gives
any other number, except the number of the boy at
the foot of the line. The game continues as long as
desired. If any player calls the number of the player
at the foot of the line by mistake, he automatically
goes to the foot himself.
REVERSE
The leader calls out instructions to the group,
such as, “Hold your left ear with your right hand.”
All do this. The leader calls out another instruction,
such as, “Rub your stomach with your left hand and
pat the top of your head with your right hand.” In
the midst of the instructions, the leader calls out,
“Reverse,” and the boys must switch hands and
reverse their actions.
RHYMING WORDS
Boys sit in a circle. The first player says a one- or
two-syllable word. The next boy must say a word
that rhymes, and so on around the group. Example:
Pan, can, tan, man, fan. When a boy can’t think of a
rhyming word, one point is scored against him, but
he starts the game over with a new word. When any
player has three points scored against him, he is out
of the game.
THINK FAST
Divide boys into two groups. Ask the following
questions, and after each, score a point for the side
that gives the correct answer first.
• What letter is a beverage? (T)
• What letter is a bird? (J)
• What letter is a vegetable? (P)
• What letter is a question? (Y)
• What letter is a body of water? (C)
Games
3–37
TRAVELERS
The leader tells the boys that they are going on
an imaginary trip. Each player can go anywhere he
wishes, but in playing the game he must use only
words beginning with the first letter of the name
of the place he is going. The leader starts the game
by asking one of the players where he is going. The
reply might be “San Francisco.” “What are you going
to do there?” asks the leader. Correct answers would
include “Sing silly songs” or “Slurp sundaes.” A
player going to Paris might paint palaces, or one
going to Chicago could chase cars. Answers may be
two or three words, and players should be given a
reasonable amount of time to think of them.
1-by-4-inch wood. For hockey or shinny sticks, use a
30-inch length of broom handle.
Two players take part, one on each side of the box.
Set the puck in the top notch of the center board
and have the players “knock off” as in hockey. They
touch their sticks to the bottom of the box, knock
them together above the puck three times, and then
knock off the puck. Each player tries to bat it into his
opponent’s section of the box and then out through
the hole in the end. If the puck is knocked out of the
box, it is returned to the place where it went out and
play resumes. Score a point each time a player gets
the puck through his opponent’s goal. The game is
five points.
FISHPOND GAMES
Homemade Games
These homemade game materials should be constructed with adult supervision. Boys should use
hand tools for the assembly process; only adults
should use power tools. Let the boys do the painting
with easy-to-clean latex paints.
BOX HOCKEY
3´
6˝
6´
4˝
3˝
4˝
1˝
Materials:
For base: half sheet of 3⁄4-inch plywood cut to 3
by 6 feet
For sides and midsection: 8-foot pieces of 1-by-6
For corner pieces: 2 feet of 2-by-2
For the puck: 1-by-4-inch wood
Wood screws
Wood glue
For hockey sticks: 30-inch broom handle for
each stick
This is an all-time Cub Scout favorite. For a good
backyard box hockey game, build a box 3 feet wide
and 6 feet long. Use 1-by-6-inch lumber for the frame
and plywood for the base. Reinforce the corners with
2-by-2-inch blocks glued and fastened with screws.
The centerboard takes a terrific pounding and should
be fastened securely and braced on both sides.
Follow the illustration. Cut the puck from a piece of
3–38
Games
Materials:
Broom handle or dowel for fishing pole
String
Hooks (coat hanger wire, magnets, safety pins,
fence staples, eye hooks, or paper clips)
Fish (cardboard, felt, or thin wood)
Acrylic paints and brushes
Cardboard boxes (ocean bottom or stream)
A hook, line, and a fishing pole can make for
an infinite variety of games. Make hooks from coat
hanger wire, paper clips, open safety pins, or magnets. Attach the hooks to the string, and the string
to the pole. Cut the fish from felt, cardboard, or thin
wood. Each fish needs some type of fastener for the
hook—such as small nails, fence staples, eyehooks,
or magnets—so that players can catch the fish by
hooking them and lifting them from the “water.” Use
a cardboard carton as shown or a piece of corrugated
cardboard laid flat on the floor for the ocean bottom
or trout stream. Boys can paint the fish and the water
with water-based paints. Mark fish with different
“weights” for points, or assign different colors for
different point values.
Variation: Add balloons and mousetraps to the
fish pond.
HAND BADMINTON
2. Bend quills over
and tape down.
1. Insert feathers in three holes
punched in cardboard circle.
Rubber
band
or string
3. Stuff toe of old sock with
cotton. Put feather base
inside and secure with rubber band or string.
Build a rocker box as shown (12 by 36 by 4 inches)
from wood or fiberboard. Place a rocker on one end
and handles on the other end. Divide the box into
compartments with strips of 1-by-1 lumber. The
object of the game is to get the highest score possible
with 15 marbles. As soon as you get a marble in the
“stop” section, your turn is over. Total the score by
multiplying the number of the section by the number
of marbles in it.
MOOSE TOSS
Materials: Old sock, cotton balls or batting, feathers, cardboard, rubber band
Make “poputs” as shown using feathers, a cardboard circle, and a stuffed sock. Pack it firmly so that
it will travel faster. Stretch a rope across the room
for a net. Play as in regular badminton, batting the
poputs with the palm of the hand.
MARBLE ROLL GAME
Cut the moose head
from Masonite, plywood, plastic signboard, or foam core
board. Paint with contrasting colors. Use
rubber or plastic rings
for tossing.
NINEPINS
12˝
Materials: 1-by-12 lumber (3 feet), 2-by-2 lumber
(8 feet), two pieces of 1⁄2 -inch dowel (30 inches long),
wood glue
Drill hole
8˝
36˝
15 marbles
12˝
2˝
Side View
Materials:
1
⁄4-inch plywood or Masonite
1-by-4 lumber (8 feet)
1-by-8 lumber (1 foot)
1-by-1 lumber (4 inches)
Wood glue
Wood screws
Cut the two end pieces
(12 by 18 inches) as shown. 12˝
Drill two 1⁄2-inch holes in
each end piece for the two
dowels. For pins, cut nine
18˝
pieces that are 2 by 2 by 9
End Piece
inches and drill
a 5⁄8-inch hole 3
3˝
inches from the
top of each. Slide
6˝
the pins on a 1⁄2inch dowel rod
that is 30 inches
Pin
long. Insert the
dowel rods into
the end pieces as
shown and fasten
in place. Brace
the end pieces in
the lower back corner with 1-by-2’s. Be sure the pins
swing freely. To play the game, roll a croquet ball or
hardball at the base of the pins. The object is to flip
them onto the front dowel bar. Count the numbers
turned up to determine the score.
Games
3–39
Materials:
String
Wood glue
Wooden paint stirrer
Tongue depressor or craft stick
Scrap piece of 1-by-1 lumber cut into wedges
and blocks
Plastic spray can cap
PUTTING GAME
Make a putting “green” from heavy cardboard or
plywood. Make the putter from a piece of 2-by-2 lumber and a dowel. Cut a hole for the cup; if desired,
insert a tin can to catch the balls.
HOMEMADE RING TOSS
Clothespin
Drill a hole 5 inches from the end of a wooden
paint stirrer. Glue a long wedge of wood 3⁄4 inch wide
to the stirrer, 1⁄2 inch from the hole. Glue a tongue
depressor or craft stick to the top of the wedge. Insert
a 9-inch piece of string into the hole and knot it on
the bottom side of the stirrer 2 inches from the string
end. Make a knot on the other side of the stirrer, too.
Then knot the string 4 inches from its top end. Drill
a hole through the center of a 1⁄2-inch square block
to pull the string through. Knot the string again to
lock the block in position. Stretch the string on the
tongue depressor to find the correct place for the
short wedge. Glue the short wedge (3⁄4 inch) in place.
Tack the plastic spray can cap in position.
To play, place the block on the tongue depressor
behind the short wedge. Depress the stick and try to
flip the block into the cap.
Inverted box
TEETERBOARD JOUSTING
“Plumber’s helper” with a
large, soft ball inserted,
then covered with rags.
Rubber jar rings
Invert a shallow cardboard box and push old-fashioned clothespins (not the spring-type) through the
cardboard. Mark each pin with a number of points.
Boys toss rubber, metal, or plastic rings from a distance away.
Tie string
around rags.
Paint handle.
24˝
TARGET LAUNCHER
24˝
1
⁄2-inch block
Spray
can cap
Tongue depressor
Paint stirrer
3–40
Games
4˝
Make two teeterboards as shown (24 inches in
diameter with 4-inch-high rockers). Make the padded jousting poles from plumber’s suction cups, soft
rubber balls, and squares of cloth. Place the boards so
that the players are just within reach of each other.
Each “knight” tries to push his opponent off his
board. When any part of a knight’s body touches the
floor, he is beaten. Only pushing is permitted; do not
permit swinging or hard thrusting of the poles!
TIC-TAC-TOE
Tire Games
Golf tee
Cut a block of wood so it is 4 by 4 by 1 inch. Mark
evenly spaced holes and drill. Paint golf tees—five of
one color for “X” and five of another color for “O.”
Old tires are usually easy to find, and garages may
be more than happy to donate them to you for tire
games. Play these games on enclosed paved areas
with plenty of adult supervision. When possible, pair
an adult with a boy when playing tire games. Always
take the time to carefully examine all tires used for
these games or for obstacle courses. Some tires, especially steel-belted ones, may have sharp pieces of
metal sticking up through the rubber that can cause
cuts and injuries. When you no longer want to use
your tires, make sure you dispose of them properly.
Ask a garage or check with local solid waste or recycling departments.
MOVING TARGET
Boys take turns rolling a tire parallel to a line of
other players 15 to 20 feet away who try to throw
beanbags or balls through the rolling tire.
TURTLE RACE
ROLL FOR ACCURACY
Tortoise
Each boy rolls his tire as hard and as fast as he
can up to a stopping line, where he must stop while
the tire continues to roll to a target of two sticks set
3 to 4 feet apart about 20 feet from the stopping line.
Assign boys to stop the moving tires and return them
to the starting line.
ROLL FOR DISTANCE
Enlarge the turtle pattern to make the turtles about
8 inches tall. Cut from 1⁄4- or 3⁄8-inch plywood or heavy
cardboard. Make the hole in the turtle slightly larger
than the diameter of the cord you will use. Let the
boys decorate and paint their names on their turtles.
This game is similar to roll for accuracy except
there is no target. Each boy rolls his tire as hard and
as fast as he can up to a stopping line. The player
whose tire rolls the farthest wins.
Attach one end of 15 to 30 feet of twisted cord to
a peg driven in the ground, a chair or table brace,
or other support the same height as the holes in the
turtles. The race begins with the turtles at the far end
of the cord and leaning slightly toward the “jockeys.”
On a signal, boys alternately tighten and relax the
cords so that the turtles move toward them in wormlike fashion.
TIRE OBSTACLE RELAY
This race can be run as a den relay. When the
turtle’s nose has crossed the finish line, the first
player runs the animal back along the string to the
starting line and hands the string to the next player,
who begins racing.
If the race is to be indoors, it will help to add
rubber bumpers to the rear feet to give traction on
smooth floors and to dampen the sound.
Place five tires on their sides in a row, all touching.
Divide the boys into two teams and station the teams
in relay formation about 20 feet from each end of the
row of tires. On a signal, the first player for each team
runs over the tires, stepping inside each one. When
they get past the last tire, they turn right and run back
and touch the next player on their team.
TIRE BOWLING
Use milk cartons, tin cans, or plastic bottles for
pins, set up 20 to 30 feet from the “bowler.” Roll
a tire instead of a ball. Score as in bowling. Assign
players to be “ball boys” to stop the rolling tires and
return them to the starting line.
Variations: Use other critters, such as tortoise and
hare, frog, or crow, or try locomotives and cars, etc.
Games
3–41
TIRE ROLLING RELAY
Frog in the Sea
Form two teams and give the first boy on each
team a tire. Place a stake or chair opposite each team
on a turning line. On a signal, the first player rolls the
tire to the turning line, around the stake or chair, and
back to his team to the next player.
Swimming Ability Level: Beginners and up—
water no deeper than shoulder height
TIRE SPRINT
This is a good shallow-water pack game. Players
form a circle around five “frogs.” The players walk
close to the frogs and try to tap them on the head
as they repeat, “Frog in the sea, can’t catch me.”
The frogs try to tag the players. Any tagged player
changes places with the frog.
Minnow and Catfish
Swimming Ability Level: Nonswimmers and
up—water no deeper than 31⁄2 feet
One boy is the Minnow and tries to keep away
from another, the Catfish. The rest of the boys form
a circle, holding hands. The game begins with the
Minnow inside the circle and the Catfish outside.
The Catfish tries to break through the circle to tag the
Minnow while its members try to keep him out. The
Minnow may dodge in and out of the circle. When
the Catfish finally tags him, two others take their
places and the game continues.
Players line up at a starting line with tires ready
to roll. On a signal, they roll tires to the finish line,
propelling them by hand.
TIRE TAG
Each boy, including “It,” has a tire that he must
roll as he runs. A player is safe if he can balance
astride his upright tire while resting both feet on it.
Water Games
Safety must be a primary concern when Cub
Scouts are in and around water. Always follow Safe
Swim Defense, described in the Cub Scout Leader
Book and Guide to Safe Scouting, and follow all
requirements for swimming ability groups.
GAMES FOR NONSWIMMERS AND UP
Balloon Race
Swimming Ability Level: Beginners and up
Materials: Inflated balloons
Line up boys in chest-deep water. On a signal,
they propel inflated balloons to shore without using
their hands. They can use their heads or blow the
balloons.
3–42
Games
Table Tennis Ball Race
Swimming
Ability
Level: Nonswimmers
and up—water no
deeper than 31⁄2
feet
Materials:
Table tennis
ball for each
player
Boys line
up at a starting line in waist-deep water, each with
a table tennis ball on the water in front of him. On a
signal, each blows his ball to shore. Players should
not touch the ball or move it by making waves.
Touch-Bottom Tag
Swimming Ability Level: Beginners and up
This is a regular tag game played in knee-deep
water, with one boy chosen as “It.” If a player is
touching the bottom of the pool with his hands, he’s
safe from being tagged.
Turtle Float
ACTIVITIES FOR SWIMMERS
Swimming Ability Level: Beginners and up—
water no deeper than shoulder height
For these games, all boys should be of the
“Swimmer” ability level.
Boys pretend to be floating turtles. They start by
standing in a circle in waist-deep water. On a signal,
they take a deep breath, pull their knees up against
their chests, and grasp their arms around their legs so
that they are floating facedown with their backs out
of the water. See who can float the longest!
Up and Under
Swimming Ability Level: Nonswimmers and up
Materials: Playground ball
Dens line up in relay formation in waist-deep
water. The first boy on each team has a large ball. On
a signal, he passes the ball overhead to the second
player, who passes it between his legs to the third,
who passes it overhead, and so on to the end of the
line. The last player runs to the head of the line and
passes it as before.
Cork Retrieve
Materials: Ample supply of corks or wooden
blocks
Scatter a dozen or more corks or blocks of wood
on the far side of the pool. On a signal, boys jump
in and try to retrieve the corks, bringing them back
to the starting point one at a time. The boy with the
most corks wins.
Keep-Away
Materials: Playground ball
Water Dodge Ball
Two teams line up in straight lines parallel to each
other and about 10 feet apart. The leader tosses a
large ball between the teams. The team that gets it
tries to keep it by tossing it back and forth. No player
may walk or swim with the ball, and he must not
hold it more than 5 seconds. Count one point for
each successful pass.
Swimming Ability Level: Nonswimmers and
up—water no deeper than 31⁄2 feet
Leapfrog
Materials: Beach ball
Divide boys into two teams. One team forms a
circle around the other and throws a soft beach ball
at those inside the circle until they’re all eliminated
by being hit. Then the groups switch places.
Water Spud
Swimming Ability Level: Beginners and up—
water no deeper than shoulder height
Materials: Playground or foam ball
A starter throws a soft rubber ball high into the air
and calls out a player’s name. That player recovers the
ball while the others scatter about the pool. He tries
to hit one of the other players with the ball. A player
must stay in the same spot, but he may duck under
water to keep from being hit. If a player is hit, he
picks up the ball and tries to hit someone else. If the
ball goes wild, the thrower has one “spud” counted
against him. The player with the fewest spuds wins.
Play in waist-deep water. Divide players into two
teams and line them up single file with about 4 feet
between team members. Players lean forward and
put their hands on their knees with their feet spread
apart. On a signal, the last player on each team leapfrogs over the boy ahead and then dives down and
swims between the legs of the next. He continues
leaping and diving until he reaches the head of the
line and raises his hand. This is the signal for the last
boy in line to begin leaping and diving.
Games
3–43
Live Log
Establish a goal at one end of the pool. One boy
is the “log.” He floats on his back in the center of
the pool. The others swim around him. At any time
the “log” may roll over and begin chasing the others,
who race for their goal. Any player who is tagged
becomes another “log,” and the game resumes.
Continue until there is only one player left who has
not been tagged.
Marco Polo
All boys stand in waist-deep water. One boy, “It,”
closes his eyes and keeps them shut (honor system).
He calls out “Marco!” All other boys respond with
“Polo!” “It” then tries to tag one of the responders
while they duck under water and/or change locations
to avoid being tagged. “It” should call out “Marco!”
frequently. When a boy is tagged, he becomes the
next “It.”
Save Me!
Materials: Old T-shirt and shorts for each team,
rope or clothesline for each team
Divide players into two teams. In chest-deep water
about 20 feet from each team, weight and sink a Tshirt and pair of shorts. On a signal, each team’s best
swimmer swims to his team’s bundle, retrieves it
from the bottom, and puts on the clothing. He then
calls out, “Save me!” whereupon the others on his
team throw one end of their rope to him. He may
reach for it but he may not swim or walk to get it.
When he grabs the rope, the others pull him to safety.
The first team to rescue its “victim” wins.
Water Basketball
Winter Games in the Snow
FOX AND GEESE
Needed: Freshly fallen snow on an open playground
In a large flat area, make a circle about 30 yards
in diameter in the snow. Inside, make crisscrossing
paths in any direction. Some may be dead ends.
Where the paths cross in the center, make a safe zone.
Make more than one circle, depending on the number
of players, and make sure the circles are connected.
One player (the Fox) chases the others (the Geese),
but all must stay on the snow paths. When the leader
says “go,” the Fox chases the Geese, trying to tag one
of them. A Goose can’t be tagged while standing in the
safe zone, but if another Goose wants to use the safe
zone, the first Goose must give it up. When a Goose
gets caught by the Fox, he becomes the new Fox.
FOX HUNTING
Needed: Plenty of untrodden snow
Two boys are Foxes and start walking from the
middle of an open area. About one or two minutes
later, the others follow their trail in the snow and try
to catch them. The Foxes are not allowed to follow
any existing human tracks (thereby hiding their own
tracks), but they may walk along sidewalks or tread
in each other’s tracks. Boundary limits should be set,
with the Foxes trying to avoid capture for a certain
period of time.
SNOW EXERCISES
Try cartwheels, skipping, leapfrog, hopping, headstands, forward rolls, and racing in the snow. It’s
much different than on dry ground. Look in the Wolf,
Bear, and Webelos Scout handbooks for physical fitness requirements and electives that can be done in
the snow when weather permits.
SNOW HUNT
Materials: 20 or 25 weatherproof objects (plastic
blocks, containers, plastic flying disks, etc.), a scoop
for each player
Materials: Beach ball, two inner tubes or swimming rings
Play in waist-to-chest-deep water. Use a beach ball
of basketball size. Moor two inner tubes or swimming
rings at opposite ends or sides of the pool to serve as
baskets. Divide players into two teams. Use regular
basketball rules, except that a player “dribbles” by
batting the ball ahead of him in the water.
3–44
Games
Hide weatherproof objects around a playground
during a snowfall or immediately after. Leave them
until they are entirely covered, or cover them up
without a trace. Gather players and describe the hidden objects. With their scoops, players dig in the
snow to find the objects.
SNOW TUG-OF-WAR
Materials: Long, heavy rope
Pile up a big mound of snow and put the tug-ofwar rope over this mound. Half the boys grab the
rope on one side of the mound and the other half on
the other side. Everyone pulls. Guess what happens
to the boys on the losing team?
SNOWBALL CONTESTS
To make snowballs, snow should not be too dry or
too powdery. On a signal, boys compete to see who
can make the biggest snowball in one minute, the
most snowballs in three minutes, or the tallest snowball tower in five minutes. Boys can put their heads
together to come up with other snowball contests.
SNOWBALL SHARPSHOOTING
makes a pile of snowballs. Teams line up 5 to 10
yards away from the targets. One player is selected
to reset the objects. One by one, players take a turn
throwing their snowballs (two each). Each time a boy
hits an object, his team gets a point. The team with
the most points after each player has thrown wins.
SNOWBALL SPUD
Boys form a small circle in the snow. One player
stands in the center, armed with a snowball. (Be
sure the snowball is not icy.) He drops the snowball
and calls the name of another player. All the other
players scatter as far and as fast as they can while
the one whose name was called runs to pick up the
snowball. When he has picked it up he calls, “Stop,”
and all players must stop where they are. He throws
the snowball at one of them. If he hits that player, the
player who was hit picks up the snowball and tries to
hit someone else. This goes on until someone misses.
The player who misses scores one “spud.” The play
is repeated, with everyone forming a circle again, and
continues until one player has three spuds.
SNOWMAN-BUILDING CONTEST
Materials: Old sheet or blanket or piece of cardboard, clothespins, scissors
Hang an old sheet or blanket on a clothesline with
plenty of clothespins. Cut three or four holes in the
sheet, each 8 to 12 inches across. Boys stand 12 to
15 feet away and try to throw snowballs through
the holes. Each snowball that goes through a hole is
worth one point. If boys are real sharpshooters, have
them move farther away to throw.
Variation: For Tiger Cubs or younger boys, use a
hula hoop as the target. Suspend it from a tree or
clothesline. A player could hold the hoop and use it
as a moving target, slowly moving up or down as the
other boys aim and shoot.
SNOWBALL THROWING RANGE
Needed: Tin cans, milk jugs, plastic containers,
etc.; open playground after a fresh snowfall
Divide the group into two teams. Set up the throwing range on a table, fence, or wall. Arrange cans and
containers in a stack or across the table. Each team
On days when snow can be packed easily, have a
snowman-building contest. Have some props available for boys to use: hats, scarves, charcoal for buttons
and eyes, carrots for noses, etc. Each boy makes his
own snowman (encourage small-sized snow people).
Award prizes for biggest, smallest, most lopsided,
funniest, and the like. Each builder should get a prize.
Treat all the snow sculptors to a special snack.
Games
3–45
3–46
Games
4
OUTDOORS
Health and Safety
4-1
What to Do If Lost
4-1
Fun on Hikes
4-2
Fun With Hiking Games
4-4
Fun With Plants
4-6
Fun With Trees
4-9
Fun With Soil
4-12
Fun With Water and Aquatic Life
4-14
Fun With Insects
4-17
Fun With Birds
4-20
Fun With Animals
4-23
Fun With the Night Sky
4-25
Fun With Weather
4-27
Family Camping
4-30
Outdoor Cooking
4-32
Outdoor Cooking Recipes
4-36
Fun With Campfires
4-39
4-0
Outdoors
Outdoor activities are an important part of Cub Scouting. Boys learn to appreciate and
care for the beautiful environment all around them as they hike, explore, and investigate the
world. The Cub Scouting outdoor program is a foundation for the outdoor adventure boys
will continue to experience when they move on to a Boy Scout troop.
All Tiger Cubs, Cub Scouts, and Webelos Scouts should have opportunities to enjoy the
outdoors. Remember: You don’t need to go far to share the wonder of nature with children.
There are many opportunities for everyone to have outdoor experiences—even just in the
neighborhood. Also remember that Cub Scouts with special needs can often enjoy outdoor
activities with only minor modifications to the activity.
Health and Safety
What to Do if Lost
The health and safety of boys, leaders, and families
must be one of the first considerations in planning
any outdoor activity. Try to anticipate and eliminate
hazards—or at least warn against them. Most accidents can be prevented. See the Cub Scout Leader
Book for outdoor safety rules, Safe Swim Defense
(swimming), and Safety Afloat (boating).
Have boys learn the following suggestions, which
are part of the Hug-a-Tree and Survive Program and
are recommended by the National Association for
Search and Rescue. They could save a life.
1. “Hug a tree.” As soon as you realize you are lost,
stop walking and “hug” a tree. That is, stay put.
The closer you are to the place you were last
seen, the more quickly you will be found.
2. Carry shelter. It’s easy to carry along a shelter
that folds up and fits into your pocket—that is, a
big plastic leaf or trash bag. Cut or tear a hole in
the closed end for your head to fit through and
slip it on like a poncho. (But be sure to keep your
face uncovered so that you can breathe!)
3. Save body energy. If the weather starts to cool
off, curl up like an animal in the cold, conserving
your body heat and energy. Snuggle against your
tree or anything else that will shield you from the
wind.
4. Make yourself BIG so that searchers in helicopters can see you easily. If possible, find your tree
to hug near a clearing. If you spot a search plane
or helicopter, stretch out on the ground face up
and make slow, sweeping motions with your
arms as if you are making a snow angel. Also,
always carry a whistle when you go hiking so
you can make a BIG noise to attract the attention
of rescuers. Blow your whistle, shout, or pound
rocks together.
5. Remember that people are searching for you.
The longer you are lost, the more people will join
the search. If you hear people, don’t be frightened. They’re exchanging information over wide
areas and doing their best to find you. Searchers
won’t give up. They will find you.
Also, follow these tips when planning and conducting an outdoor activity:
• Always get permission from parents or guardians
for activities that are held away from the regular
den and pack meeting places. Better yet, take the
families with you!
• Be sure to have enough adult leaders for the activity planned. Always follow the policy of two-deep
leadership (see page 1–12).
• Check out the site before the activity. Find out
about gathering places, restroom facilities, and
safe drinking water. Look for hazards such as poison ivy.
• If applicable, get permission from the owner to use
the property.
• Use the buddy system to prevent anyone from getting lost. Coach the boys in advance about what
they should do if they get lost (see below).
• Carry a first aid kit and know how to use it. Know
basic emergency first aid procedures.
• File a Local Tour Permit Application with your
local council service center two weeks before any
pack trip of fewer than 500 miles. Webelos dens
should file a Local Tour Permit Application for
Webelos overnight campouts.
• Have adequate and safe transportation.
• When leaving the site, take everything you brought
with you. Leave the site in its natural condition.
Outdoors
4–1
Fun on Hikes
WEB OF LIFE HIKE
Materials: Pencil, paper
When did you last watch a colony of ants scurrying about as they worked hard? Or investigate a
hollow tree? Or travel an unbeaten path? These are
just a few things that you and the boys can do when
you go hiking. The fun lies in observing everything
around you as you hike, and while observing, talking
about what you see. Enjoy nature—but don’t remove
growing things from their natural habitats.
You can hike in your own neighborhood or a
nearby park, or you can travel to an out-of-the-way
location. Or go to a nature center. Many nature centers include wheelchair-accessible trails so all boys
can participate.
Animals, plants, and habitats rely on each other
and form a “web of life.” The soil nourishes the tree;
the tree shelters the animal; the animal dies and adds
nutrients to the soil. Everything in nature is affected
by the many other things living around it.
Boys draw 12 small circles on paper where the
numbers would be on a clock face. In each circle they
draw or write the name of something they see along
the hike. Encourage them to include different types
of things: rocks, animals, plants, river, etc. Then have
them draw a line from one circle to everything it
affects or is affected by it. Continue doing the same
with the other 11 circles. They have now created
a web of life for this area. Was there anything that
didn’t have lines and didn’t affect anything else?
What would happen if you covered up one of the
circles and it was gone from your area? How many
other things would its absence affect?
TRACKS AND SIGNS HIKE
Be a keen observer whenever you are out in
nature. Look for all types of signs of animals and
birds. Identify bird and animal tracks. Make plaster
casts (see page 2–26 for how to make casts of animal
tracks).
MICRO HIKE
Your outdoor adventure could be a visit to a nature center.
There are many types of nature hikes, some of
which include nature activities. Several nature hikes
are described here. See the Cub Scout Leader Book
for other types of hikes and for hiking safety rules.
Note: Always use the buddy system on hikes
for safety and to prevent anyone from getting lost.
Buddies should remain together at all times.
SEASONS HIKE
Materials: Pencils and crayons, notebooks for
data collection, field guides
Choose a hiking area that you can hike in each
season of the year. Each season, boys make a list of
things they see along the way. Have them draw a
particular area along the trail and how it changes.
Which things remained the same each season? How
many things changed as the seasons changed? (It’s
a good idea to collect and keep the boys’ notebooks
between seasons.)
4–2
Outdoors
Materials: Strings 3 to 5 feet long
Lay strings out along an area to study. Boys cover
the string trail inch by inch on their stomachs, with
their eyes no higher than 1 foot off the ground. They
may see such wonders as grass blades bent by dewdrops, colorful beetles sprinkled with flower pollen,
powerful-jawed eight-eyed spiders, and more. Ask
questions to stimulate their imaginations: “What
kind of world are you traveling through?” “Who are
your nearest neighbors?” “Are they friendly?” “Do
they work hard?” “What would life be like for that
beetle—how would it spend its day?”
NATURE SAFARI HIKE
Materials: Field guides, pencils, paper
This hike will help boys learn to identify animals.
See how many different species each boy can see on
this local safari.
SENSE OF TOUCH HIKE
INCH HIKE
This hike will illustrate the many textures of
nature. Make sure that boys are instructed to examine the objects they find, not take them. Examples of
what the boys may look for:
The
The
The
The
The
hairiest leaf
softest leaf
smoothest rock
roughest rock
roughest twig
Something
Something
Something
Something
cool
dry
warm
bumpy
Ask questions such as: “What did you find that
was dry? Why was it dry?” “How might it be different tonight? Next summer/winter?” “How did it get
there?” “Does it belong there?” “Did people have
anything to do with it being there?” “Has it always
been the way it is?”
Materials: Small rulers
Find as many objects as possible that are 1 inch
high, long, etc. Use the small rulers to measure. This
helps boys notice the small things that they might
otherwise overlook.
A-B-C HIKE
Materials: Pencils, paper
Write the letters of the alphabet vertically on a
piece of paper. On the hike, find an object, sound, or
smell in nature for each letter and write it down.
STRING-ALONG HIKE
NATURE BABIES HIKE
Look for “nature babies”—birds, ferns, leaves,
snails, insects, etc. How are the babies protected?
How are they fed? Do not touch baby birds or animals. Look only from a little distance. Most babies
that seem abandoned by their parents really aren’t.
Mother or father may be nearby.
HEADS-TAILS HIKE
Materials: Coin
Toss a coin each time you reach a crossroads. Turn
left if the coin turns up heads, right if the coin is tails.
Materials: 36-inch piece of string
NATURE NOISES HIKE
This is a great way to help boys notice and enjoy
the sounds around them. Stop along the hike at different points. Boys sit or stand very still and listen.
As they hear a new sound, they raise their hand as a
signal. They can “collect” different sounds on their
fingers, holding up a finger for each sound they hear.
Can you count to 10 in between sounds? Listen for
birds, animals, wind in the trees, falling leaves, or
rushing water.
COUNT THE COLORS HIKE
Materials: Crayons, paper, pencils
Each boy selects five crayons and colors an area
of each on a piece of paper. Take the paper on a hike
and write each object found that matches the colors.
Write them under the colored area on the paper. Ask
boys how many colors they can see without moving
from where they are.
Take the piece of string on your hike. Every now
and then, place the string in a circle on the ground.
See how many different things you can find enclosed
in the circle. Then stretch the string in a line and see
how many different things touch it.
SURPRISE BREAKFAST HIKE
Materials: Breakfast fixings for everyone
Make arrangements ahead of time with the parents
of your boys to go on a “surprise” hike. Pick the boys
up at their homes and head out on an early-morning
hike, cooking (or providing) breakfast outdoors.
NIGHT HIKE
In areas where it is safe to walk at night, try a hike
after dark. See how different things look, smell, and
sound at night. Don’t use flashlights, as they will
lessen your ability to see and reduce your awareness
of what is happening in the dark. Carry flashlights for
emergency use only.
Outdoors
4–3
SILENT HIKE
This hike can be difficult to accomplish but powerful in helping boys appreciate the world around
them. Calm the boys by having them sit alone and
a few feet apart for a short period of time. On the
den leader’s signal, the group begins to move along
the trail tapping shoulders and pointing to share the
sights and sounds of the hike. No talking!
Fun With Hiking Games
the photographer is ready to “take the picture,” he
taps on the camera’s shoulder to signal him to open
and close his eyes. The photographer can “adjust”
his camera to take closeups and wide-angle shots
and to use interesting angles and perspectives. The
camera and photographer should talk as little as
possible to enjoy this experience. The photographer
should also remember to guide his camera safely.
After several pictures have been taken, it will be time
for the photographer and camera to switch positions
and begin again.
NATURE KIM’S GAME
While out on a hike you might want to stop to have
a rest, enjoy lunch, or play a game. Here are some
ideas for activities while taking a hiking break.
KNOW YOUR ROCK
Materials: Tape, pencil, rocks found on your
hike
Each boy finds a fist-sized rock, remembering
where he found it so he can return it after the game.
All sit in a circle with eyes shut, holding their rocks.
Tell them to “get to know” their rocks by its feel,
texture, smell, etc. After a few minutes, collect the
rocks, mix them up, and redistribute them. The boys
pass the rocks around the circle and try to identify
their own rock with their eyes still shut. To help
prevent any disagreements, affix a small piece of
tape to each rock with the owner’s initials. Be sure
to remember to remove the tape when you leave the
rock behind!
Materials: Nature items, towel or jacket
Gather nature items such as pinecones, leaves,
twigs, rocks, etc. Place them in an area for the boys to
study. After a few minutes, cover the items with the
towel or jacket and have the boys try to remember all
the now-hidden items.
CAMOUFLAGE TRAIL
Materials: 15 or 20 human-made objects
This game can open doors to a discussion about
how an animal’s color can help protect it. Along
an area of trail place 15 or 20 human-made objects.
Some objects should stand out and be bright colors.
Some should blend in with the surroundings. Keep
the number of objects a secret. Boys walk along the
section of trail, spotting as many objects as they
can. When they reach the end, they whisper to you
how many they saw. Invite them to go back and see
whether they can spot any that they missed.
KNOW YOUR LEAF
Materials: Leaves
This is similar to Know Your Rock. With eyes
open, each boy gets to know a leaf by its shape, size,
color, veins, etc. Then put all leaves in a pile and let
one boy at a time try to find his, explaining to the
group how he did it and what he looked for.
GRAB BAG
Materials: 15 nature items, 15 small paper bags
Collect 15 nature items, such as pinecones, nuts,
shells, etc., and place each in small paper bag. Pass
the bags around the circle of boys and let them try to
identify the object by feeling the outside of the bag.
NATURE PHOTOGRAPHER
Boys work in buddy pairs, with one boy acting as
the “camera” and the other as the “photographer.”
The photographer guides the camera, who has his
eyes closed, to an interesting nature picture. When
4–4
Outdoors
NATURE SCAVENGER HUNT
This hunt is intended to test the boys’ knowledge
of nature in an exciting competition. It is run like any
scavenger hunt, with each group of boys having a list
of nature objects and finding as many as possible in a
time limit (10 to 20 minutes). Set boundaries for the
hunt and list 20 to 50 objects from nature that boys
can find within the area. They should be common
enough that a Cub Scout can identify most of them.
Make sure that boys are marking these items off their
list and leaving the items themselves undisturbed.
Your list will reflect nature items that can be found
in your locale, but here are some common suggestions:
Anthill
Oak leaf
Maple leaf
Dandelion
Insect
Cocoon
Spider web
Animal track
Bird’s nest
Needle from
an evergreen
Barrel cactus
Acorn
NATURE STATIONS
Station 2: “Within 15 paces of this spot, you’ll see
five different kinds of trees. Write down the names
of two of them. Go south 50 paces and find a small
mound of pebbles.”
Station 3: “Within 20 feet of here, there is a clump
of wildflowers. Write down the name of the flower.
Go east until you come to a tree with a split trunk.
Look around its base.”
Station 4: “Somewhere in this tree is a nest with
young birds. Spot it, but do not disturb the nest or
birds. Try to identify the name of the birds from the
shape of the nest and write down what kind of birds
you think they are. Go north toward the entrance of
the park. Near the gate, look for two rocks, one on top
of the other.”
Materials:
Station cards for each station
Scorecard for each group of boys
Pencils
Chart to mark groups’ scores and winner
Small prize for winning group
Treats
Make up your own nature trail using the features
available in your area. If it is a wooded site, tree
and leaf identification are possible. If the site has a
stream, include a station on spotting marine life or
water insects. Prepare the trail in advance with five
to 10 stations. At each station the group is to find
something, identify something, or otherwise show
knowledge of nature lore. Remind the boys that they
should not disturb the plants and animals they see.
This is a competition to test nature skills. It is
not a race. Groups of boys start at intervals of about
5 minutes. At each station they find a message that
tells them what to do. They have a scorecard on
which they write their findings and then move on to
the next station. It will help to have an adult at each
station to provide help and make sure boys replace
the message where they found it.
The sample nature trail below is suitable for a
small wooded park.
Station 1: “Look for the biggest tree you can see
from here. What direction is it? Write the direction
on your scorecard. Go northwest to a picnic table and
look under it.”
Station 5: “Within five paces of this spot is an
insect’s home. Don’t disturb it, but find it and write
down the name of the insect. [Could be an ant colony,
beehive, wasps’ nest, etc.] Go southeast until you
come to a seesaw. Look under one of the seats.”
Station 6: “Ten paces due east of this spot is an
animal track. What kind of animal made the track?”
[If there isn’t a real animal track, use a plaster cast of
a cat’s track.] “Go due east until you come to a weedy
patch. Look along its edge.”
Station 7: “Pick up a fallen leaf or bit of grass and
toss it in the air. What is the wind direction? Write it
on your card. Go north 30 paces and look under the
pile of rocks.”
Station 8: “Look around you. There is a wooded
area, a small pond, and a grassy lawn. Remember that
animals need different kinds of places to live. Which
of the following animals do you think live near here?:
Deer, bee, squirrel, rabbit, lion, muskrat, dragonfly,
chipmunk, elephant, bear, skunk, frog, mouse, leopard, cricket. Write down the animals that you think
live around here. Then go southwest until you come
to a drinking fountain. Look around its base.”
Station 9: “Within 10 yards of the fountain is a
bush whose berries and seeds are important food for
some birds. Pace off the distance from the fountain.
Write down the number of paces. For an extra point,
write down the name of the bush. Then return to
Station 1 and turn in your scorecard.”
Have judges ready to check scorecards and post
each groups ranking on a chart. Give an inexpensive
prize to the winning group, with treats for everybody.
Outdoors
4–5
Fun With Plants
The wonder of how things grow can be an amazing
thing to share with a child. Cub Scouts and Webelos
Scouts can enjoy watching fast-growing plants and
measuring their progress. They can feel the sense of
accomplishment in growing vegetables in their own
garden and marvel at the simple sprouting of a seed.
GERMINATING SEEDS
Materials: Glass or jar; blotting paper or toilet
tissue; sawdust; seeds, grains of corn, beans, peas;
water
To watch how seeds germinate and begin to grow,
line the glass or jar with the blotting paper or toilet
tissue. Fill the glass with sawdust. Put the seeds,
grains of corn, beans, peas, etc., between the paper
and the glass. Water thoroughly and place the glass in
a light place. Through the glass you can observe how
the seeds germinate and grow from day to day.
TRAVELING SEEDS
Materials: Posterboard, marking pen, glue, seeds
Seeds can be distributed in many ways to start
new plants. Make a chart that shows how seeds are
spread. Divide posterboard into six sections and
label the sections for each method of dispersal below.
Collect seed samples and glue down actual seeds as
you find them. How do you think each seed came to
be in each location?
Helicopters: These winged seeds spiral down from
trees such as maples, elms, and ashes.
Hitchhikers: Seeds of this type have burs that can
hook on to animals (or your pants leg!) and travel
with them. The beggar-tick, cocklebur, and Spanish
needle are examples.
ARE YOU A SEED SPREADER?
Materials: Potting soil, tray, kitchen knife, mud
from your shoe
When you are out for a walk, you might be a seed
spreader. Scrape the mud from your shoes into a
tray of potting soil. Keep it watered and see whether
any plants grow. Make a tray from different parts of
an outdoor area and see what might be the same or
different.
SEED COLLECTIONS
Materials:
Seeds
Self-stick labels
Collecting containers
(small clear jars
or boxes)
Egg cartons
String tags
Marking pen
Collecting tree, flower, vegetable, and plant seeds
can be an interesting hobby. Seeds come in a variety
of sizes, shapes, and colors. To add interest to the collection, also gather seed pods, such as pinecones.
Store your seeds in small clear plastic bottles,
plastic coin tubes, or square and rectangular plastic
boxes. Use egg cartons for larger seeds. Label each jar
or box with a self-sticking label. Use tags with strings
to label pinecones or other larger items.
Catalogue your collection by categories, such as
trees, flowers, vegetables, etc., or group the items
by the way they are dispersed, such as winged seed
helicopters, burred hitchhikers, etc. (see “Traveling
Seeds” above).
ENERGY STORAGE SYSTEMS
Parachutists: On a breezy day you can see these
seeds floating through the air. Look for dandelions,
milkweeds, and thistles.
Delectables: Birds and animals spread some seeds
by eating them; the seeds then go through the animal’s digestive tract. Apples, cherries, and berries are
examples of this type.
Floaters: Some plants produce pods that when
ripe will open and allow the seeds to spread. Some
drop to the ground or are blown a short distance.
Look for lotus, marigold, and sweet william.
Missiles: This type of seed shoots out of its pod.
Exploding pods include impatiens, witch hazel, and
wood sorrel.
4–6
Outdoors
Materials:
Carrot with greens
Cotton
Water
Jar or glass
Knife
Plate
Onion
Plants store food in the roots, stems, and leaves.
The plant may use this reserve of food later for a
variety of reasons, such as to help the plant survive
the winter or to help it form seeds and fruits. You can
show how the stored food can be used to start the
plant growing again by conducting this experiment.
Cut the top off of a carrot that still has leaves and
place it on a plate of wet cotton. Keep the cotton wet.
Watch as new roots and leaves form from the food
stored in the carrot.
Take an onion and rest it on the top of a jar or glass
filled with enough water so that the bottom of the
onion in is the water. Soon, roots will grow from the
bottom, and a shoot will erupt from the top. At the
same time, the layers in the onion will begin to shrivel
as the food in them is used up for the new growth.
Materials: Small jar of water, funnel, bottle to go
over funnel, coins, small pond plant
Place the pond plant in the jar of water under
the funnel, as shown. The funnel should be sitting
on the coins so that it is raised off the bottom of the
jar. Fill the small bottle completely with water so
no air pockets are remaining. (You may want to set
up this experiment under water in a sink.) Set the
experiment in bright light and watch to see whether
bubbles begin forming. The bubbles that are forming are the important gas oxygen. All green leaves
give off oxygen, which we need to stay alive. This is
one of the many reasons plants are so important. If
you move the experiment to a shady place, will the
bubbles appear more or less quickly?
MUSHROOM SPORE PRINTS
HOW PLANTS ABSORB WATER
Materials:
Small jar
Food coloring
Celery stalk with leaves
Water
Spoon
Knife
Fill the jar with water. Add about six drops of food
coloring and stir. Make a fresh cut on the end of the
celery stalk and place the stalk in the jar of colored
water. Observe the celery after a few hours, and then
cut across the bottom and top of the celery. Observe
the cut ends. Compare how the end looked before
and after the experiment.
You can also slice the celery lengthwise halfway
up the stalk and place each end in water jars with
different colors.
OXYGEN MAKERS
Small bottle
Jar of water
Early autumn is a good time to look for mushrooms in the woods. (But never eat a mushroom that
you find in the woods! Some are very poisonous.) A
mushroom sends out hundreds of tiny, fertile bodies
called spores. Like flower seeds, spores are the way
the mushroom reproduces. You can capture these
spores on paper.
Small
oxygen
bubbles
Funnel
Pond plant
Coins
Materials: Mushroom with a flat cap, white
paper, clear glass bowl, hair spray or clear contact
paper
Choose a fresh mushroom with a flat cap. Put the
mushroom cap, bottom down, on white paper and
cover with a clear glass bowl overnight. Tiny spoors
will fall onto the paper, making a colorful pattern. Each
species of mushroom makes a design of its own. You
can set and preserve your print with a fixative, such as
hair spray, or cover it with clear contact paper.
Outdoors
4–7
TERRARIUM FOR PLANTS
MOSS GARDEN
Materials: Fish tank, gravel, decaying plant matter, soil, moss
You can create a miniature garden with mosses.
Look around for soft, velvety moss. Look in dark
corners and remove a small amount, leaving some to
reproduce. (Some mosses are protected and should
not be taken from their natural environment. You
will want to find out which they are; your local
library should be able to help you.)
Materials:
Large wide-mouth glass jar with lid
Horticultural-grade gravel
Charcoal
Soil separator (piece of nylon or other synthetic
material)
Terrarium soil
Plants (ferns, matted mosses, wild strawberry,
violets, evergreen seedlings)
Spoon
Clean and dry the jar and lay it on its side. Spoon 3⁄4
inch of gravel into the bottom for drainage. Sprinkle
in enough charcoal to cover the gravel. This will
absorb odors. Cut the soil separator to fit on top of
the charcoal. This will keep soil out of the drainage
material (the charcoal and the gravel). Spoon 1 inch
of soil on top of the separator. Make a hole in the soil
and add the largest plant. Scoop some soil around
the base to hold it in place. Add the remaining plants
in the same manner. Add more soil, so that the soil
layer and drainage material fills about a quarter of
the container. Tamp down the soil gently with your
fingers. Spray the garden with water, but don’t get
the soil too wet. Put on the lid of the jar and place
your terrarium in bright to medium light, but not in
direct sunlight.
Check the terrarium the next day to be sure that
the moisture balance is correct. It should have a light
mist on the inside of the glass, and the soil should be
medium dark. Too much water will cause a heavy mist
and can be corrected by leaving the cover half open for
a day. If there is too little water, there will be no mist
at all. In this case, add a teaspoon of water every other
day until the terrarium moisture is balanced.
To maintain the terrarium, give it a little fresh air
every week or two by removing the top for 15 minutes at a time. Trim the plants when necessary.
4–8
Outdoors
Put clean gravel at the bottom of the fish tank.
Then add a layer of decaying plant matter and cover
it with a layer of soil. Arrange the gathered moss in
the soil. You might add bark, lichen, rocks, or small
statues for interest.
Try to re-create the shady conditions in which you
found the mosses. Water your garden regularly, or
you can cover your moss garden with a lid and let
condensation do the trick.
INDOOR GARDEN IN A TRAY
Materials: Plastic tray, potting soil, vegetable
seeds (e.g., radish, cress, lettuce)
Fill the tray half full with potting soil and dampen.
Make lines across the soil for seed rows. Cover the
seeds with a thin layer of soil. Leave the tray where
it is warm and light. Keep the soil damp, and watch
your indoor garden grow. Cut the cress with scissors
and add to salads. You may have to thin the young
lettuce and radish plants. Pull a few out and place
them in a similar tray to finish growing.
NYLON NED
Materials:
Old nylon pantyhose
Foam cup
Sawdust
Grass seed
Rubber bands
Scissors
Wiggle eyes
Craft foam
Waterproof glue
Small plate
Cut a 12-inch length
of nylon pantyhose that
includes the toe. Cut the bottom out of the foam
cup and slip it inside the nylon, pushing it down
to the toe. Fold the excess nylon over the top of the
cup. Place about 2 t. grass seed in the bottom of the
cup and spread out fairly evenly. Add sawdust on
top to fill the cup, being careful not to disturb the
grass seed. Unfold the extra ends of the nylon. While
pushing down on the top of the sawdust, pull up and
remove the foam cup. Gather the ends of the nylon
close to the sawdust and close with a rubber band.
Cut off and discard the remaining stocking piece.
Turn the grass seed side up, and you are now
ready to shape and decorate your Ned. Complete his
face by cutting out pieces from craft foam and gluing
them in place. Add wiggle eyes. You can create a
nose and ears by carefully gathering up a small section of sawdust through the nylon and tying with a
rubber band. Let the glue dry.
Fun With Trees
Trees are one of the world’s most important types
of plants. Whether your Cub Scouts are identifying
trees, leaves, and pinecones or just enjoying the wind
rustling through the leaves, trees can be the source of
an interesting outing.
THE SHAPE OF THINGS
Materials: Chart paper, pencils
To grow his hair, soak Nylon Ned in water for a
few minutes to dampen and then place him on a
small plate. Water him daily to keep him damp. Make
sure that you drain any excess water off the plate.
Before you know it, Ned will need a haircut! Style
with scissors.
Trees have distinctive silhouettes. Many times,
you can identify a tree by its shape. In this simple
classification game, you can find trees that have
similar shapes. Some guidebooks include a tiny silhouette that may be helpful. You can use trees with
or without leaves for this activity. It isn’t necessary to
know the names of many trees to participate.
THE BOY WITH GREEN HAIR
Divide the chart paper into sections and draw a
simple shape, such as a circle, oval, rectangle, or
pyramid, in each section. Leave a few blank sections
for the boys to create additional shapes as needed.
Materials:
Egg
Manicure scissors
Grass seed
Egg carton cup
Pin
Soil
Markers
Water
Gently puncture the pointed end of an egg with
a pin. With manicure scissors, carefully cut away
about one-quarter of the pointed end of the shell.
Remove the egg contents. Rinse inside the shell and
let it dry. Fill the shell with dirt and plant ordinary
grass seed. Draw eyes, nose, mouth, and ears on the
shell with permanent markers. Set the shell in an egg
carton cup. Water every day, and soon the boy’s green
hair will begin to grow. In about a week, he will need
a haircut.
THE GREAT PUMPKIN RACE
Materials: Pumpkin seeds, plant markers, prizes
Who can grow the heaviest, fattest, or most unusual
pumpkin? Give each boy the same number of pumpkin seeds. Choose a starting day and a finishing
day (pumpkins average 100 to 110 days to harvest).
Everyone must plant the seeds on the same day. They
can all be planted in one location, with plenty of space
between hills, and markers labeled with the boys’
names. Or each boy can plant his own at home.
Each boy is responsible for watering, weeding, and
caring for his plant. As small pumpkins appear, they
should be picked off the vines to allow all the growing energy to go into the biggest pumpkins.
On the ending date, boys display their best pumpkin. Give prizes for the heaviest, fattest, tallest, most
unusually shaped, etc. Make sure all boys get a prize
for their efforts.
While on your outing, have boys look for trees that
match the basic shapes. Write down their names or
draw a picture of them in the coinciding section.
You can make this a cooperative activity by seeing
whether the whole group can find a certain number
of each shape. Or make it competitive by having
teams compete to find the most.
TREE’S JOB DESCRIPTION
Materials: Paper, pencil
We use trees for many things in our lives, but what
about the different roles trees play in nature? Write
a “Want Ad” for a tree including all the things that a
tree does in the natural world.
Look around at different trees for clues. Roots
help hold the soil together and prevent erosion. They
also help shelter burrowing animals. Look for other
animal homes in trees, such as nests for birds and
holes that squirrels and birds have made. You might
find small holes made by insects. Leaves can also be
homes for insects.
Many animals get their food from trees; nuts, fruits,
twigs, bark, and leaves are all food sources. Leaves
give off oxygen and add moisture to the air. When
leaves fall and decompose, they enrich the soil, as
does the entire tree when it dies and rots. Fallen trees
have great jobs of providing homes and food. Look
for new plants and fungi growing on fallen logs or
stumps. Trees have a big job to fill.
Outdoors
4–9
COUNTING TREE RINGS
Materials: Tree stump, paper, crayon
Find the stump of a tree that has just been cut
down. Count the rings to see how old the tree is.
Each ring represents a growth season of one year. A
wide ring shows a good year of growth for the tree,
with lots of rain and plenty of sunshine. A narrow
ring shows the opposite: not enough rain and a poor
growing season. When a tree is hurt by forest fire, its
growth may be slowed down for several years.
To be able to count these rings at home, make a
stump rubbing. Place the paper over the top of the
stump and rub the crayon carefully across it. Try not
to move the paper and you will be able to clearly see
the annual growth rings of the tree.
HISTORY STUMP
goes out the leaves. The heartbeat of a tree—the water
and sap moving through it—is a wonderful sound.
The best time to hear it is in early spring when
the tree sends the first sap upward to its branches,
preparing them for another season of growth. Some
species of trees have a louder heartbeat than others.
Press the stethoscope firmly against the tree, keeping
it motionless so you won’t hear any interfering noises. You may need to try several different places on
the tree trunk before you find a good listening spot.
BREATHING TREES
Materials: Plastic bag, string, tree with big
leaves
Place a plastic bag over one of the green leaves on a
tree and tie it firmly around the stem. As water enters
the tree through the roots and moves through the
trunk, it heads down the branches and into the tree’s
leaves. Water then passes out through the leaf and
appears as droplets of condensation inside the bag.
This process is called transpiration. Up to 25 gallons
of water can move through a medium-sized tree!
DO LEAVES NEED SUNLIGHT?
Materials: Slice of a tree trunk, pins or nails,
small strips of paper, pens
Have a large slice of a tree trunk that shows the
rings (sanding the slice can help bring the rings out).
Count the rings and calculate what year each ring
represents. Boys write down important events and
the date they happened on small strips of paper.
Attach them to the corresponding rings on the stump
with pins or small nails. You might like to mark the
boys’ birthdays or some dates from Scouting’s history
or the history of your pack along with other historical
events.
LISTENING TO A TREE
Materials: Deciduous tree that is at least 6 inches
in diameter and has thin bark, stethoscope
A tree is a living, growing thing. It eats, rests,
and has circulation just as we do, as water comes in
through the roots, moves through the trunk, and then
4–10
Outdoors
Materials: Tree with green leaves, heavy black
construction paper, paper clips, scissors
Chlorophyll is the pigment that gives leaves their
green color. Plants need it to produce food. Most of
this food production happens in the leaves when
sunlight shines on them. Without light, the plant
won’t be able to produce food.
Cut two hearts the same size from black construction paper. Place them on the top and bottom of a tree
leaf that will be in full sun most of the day. Paper clip
the hearts to the leaves such that no light will peek
through.
After a week of sunny weather, remove the paper
hearts and find out whether sunlight is needed to
produce chlorophyll in leaves.
GET TO KNOW A TREE
Materials: Trees, blindfolds
Have boys work with a buddy. One partner is
blindfolded, and the other partner “introduces” him
to a tree. Carefully, the guide leads his buddy to any
tree. The blindfolded boy tries to get to know every
detail of the tree by feeling it. Can he reach around the
tree? Feel for lumps and bumps and special textures.
When the blindfolded buddy feels that he knows
his tree, he can be led back to the starting place to
remove his blindfold. Now he can see whether he can
find the same tree again by feeling, this time with his
eyes open. Take turns and have the guide become the
blindfolded buddy ready to get to know a tree.
BARK RUBBING IDENTIFICATION
Materials:
Rice
paper or other thin
paper, tape, crayons
Divide boys into two
teams. Each team takes
turns making three or
four bark rubbings of
different trees. (Smoothbark trees work best,
such as birch, slippery
elm, butternut, or wild
cherry.) To make a bark rubbing, tape the paper to the
tree and, using the side of a crayon, gently rub back
and forth. Remind each team to keep track of which
tree each rubbing is from. Have the two teams work
out of sight of the other. When the rubbings are complete, the teams switch drawings and see whether the
other team can guess which trees they came from.
TREE TAGGING
Materials: 40 pieces of 1-inch gauze bandage, 12
inches long; two marking pens of different colors;
paper and pencils
Divide the boys into two teams. Give each team
20 pieces of gauze bandage. Using a different color
marking pen for each team, mark the numbers 1 to 20
on each of the pieces of gauze. The object is to tie the
gauze bandages on as many different types of trees as
possible within 100 feet of a starting point. One team
member keeps a list of the trees tagged. The team tagging the most trees correctly within a time limit wins.
Remember to remove the gauze before you leave!
MUSIC IN THE TREES
If you stop and listen, you can hear music in the
trees. Begin by listening to all the sounds. Listen
to the leaves of a tree fluttering in the wind. Next,
concentrate on the sound made by all the leaves and
branches. Try to focus on the sounds coming from
just one branch. Then try to hear the music of just
one leaf. Can you pick out your tree’s song from all
the other trees?
ID GAME
Materials: Seven to 10 samples of tree leaves or
cones from different trees
This game will help boys learn the names of trees.
In advance, collect seven to 10 small samples of
leaves or cones from different trees. Form two equal
teams and line them up facing each other about 30
feet apart. Put the samples in a row on the ground
between the two teams. The teams count off individually so each player has a number. The leader calls
out the name of a tree and then calls a number. The
player on each team whose number is called races to
the samples and tries to identify the sample from the
name of the tree called. Each player who is successful earns two points for his team. Choosing the wrong
sample deducts two points from the team’s score.
LEAF COLLECTION
Materials:
Leaves
Newspapers
A board the same size as the newspapers
Books or rocks for weight
Glue mounting paper
Clear adhesive paper
By drying and mounting leaves, boys can begin a
leaf collection. Select a leaf that is full-grown and has
not been damaged by insects. Lay the leaf between a
folded sheet of newspaper. Add several more layers
of newspaper underneath and on top. Cover with
the board and weight down the newspaper pad with
books or rocks. Leave to dry for about 10 days, changing the inside layers of newspaper every few days.
To mount the dried leaves, glue the leaf to mounting paper, such as cardboard, large index cards,
construction paper, or a scrapbook page. Label with
the name and location of the tree and the date. Cover
with transparent adhesive paper.
Outdoors
4–11
MAKING A LEAF SKELETON
Materials:
Fresh green leaf with sturdy veins
Felt, soft cloth, or old piece of carpet
Hairbrush or shoe brush
Newspapers
Books for weight
Mounting paper or two pieces of glass
Tape
You can see the delicate veins of a leaf by removing the fleshy part. You’ll be able to clearly see the
network of veins through which the leaf got the raw
materials (minerals and water) needed to make food
that was then carried through the veins to the rest of
the tree.
Place a leaf on an old piece of carpet or a pad made
from several thicknesses of felt or soft cloth. Tap the
leaf with the brush, periodically turning the leaf over
to tap the other side. Continue tapping until only
the veins are left. Dry the leaf skeleton between layers of weighted newspaper. Then mount on paper or
between two pieces of glass held together with tape.
Fun With Soil
To some people it’s just dirt that needs to be
cleaned out of the clothes of active boys, but the soil
of the earth can provide a lot of fun while boys discover interesting facts about it.
SOIL HORIZONS
Materials: Clear jar with a lid, spoon or scoop
You can observe the beautiful layers of soil, called
soil horizons, many places where areas have been
cut away. You can also reproduce them in a jar. At
the bottom of a clear jar, place small rocks about
one-eighth of the way up the jar. These represent the
deepest layers of soil, which are rocky because they
aren’t exposed to wind or much water. Find suitable
rocks along a stream bed or other rocky area.
For the next layer, dig down several feet to the
subsoil. This subsoil layer is broken down rock. It is
usually dry and hard. Place a layer of the subsoil next
in your jar on top of the rock. This layer should reach
about halfway way up your jar.
Topsoil is the layer produced by leaf litter that is
broken down by micro-organisms. This layer produces the nutrients necessary for plant life. Brush
away any leaf litter on the ground and you will find
this soil layer easily. Add this in the next quarter of
the jar.
The last layer on the very top is leaf litter and the
remnants of dead plants and animals. Once this hits
the ground, it begins the process of decaying to make
topsoil. Gather a bit of crumbly leaf litter and add it
to the top of your jar. Add the lid and you will have
your completed jar of soil horizons.
NATURE’S LAYER CAKE
Materials: Jar with tight-fitting lid, scoop of soil,
water
Many layers and different-sized particles make up
our soil. You can separate them to see what soil is
made of. Fill a jar halfway with soil and add water to
the top. Screw the lid on tightly, shake the jar well,
and let the contents settle. Soon, you will see leaf
litter floating on the top. You’ll also see the sand and
clay that provide structure to the soil. Stones, which
will settle on the bottom, help the water drain away
so that the soil doesn’t become waterlogged.
Try taking samples from different areas and see
how the layers differ.
4–12
Outdoors
COMPOSTING IN THE WOODS
Materials: Leaf litter, magnifying glass
As trees lose their leaves and plants and animals
die, they eventually decompose and add nutrients to
the soil. Investigate how this happens. Find a thick
layer of leaf litter. What things are happening to
this layer? Look to see whether it is dry on the top
and moist on the bottom. Some plants and animals
feed on decaying matter. Can you see evidence of
this? Worms break down this dead matter and mix
it through the top layers of soil. Can you find any
worms? Fungi don’t make their own food like many
plants. Instead, they absorb nutrients from dead
things through their roots. Look carefully and you
might see these soil helpers.
ROCKS INTO SOIL
Materials: Two sandstone rocks, paper
To demonstrate how subsoil is formed, rub two
pieces of sandstone rock together. Collect the particles on a piece of paper. How long does it take to
make a teaspoon of soil?
through the layers of soil to lakes and rivers underground, the soil acts as a filter to clean the water.
SOAK IT UP
Materials:
Clay soil
Two clean jars
Marking pen
Water
Pencil and paper
Sandy soil
Masking tape
Small paper cup
Stopwatch
Fill one jar half full with clay soil and the other
with sandy soil; label. Pack down the soil with your
hands. Pour a cupful of water on the soil in each
jar. Record how long it takes for the water to soak
into the soil. Add cupfuls of water to each jar until
the soil can’t soak up any more. Record how many
cupfuls each soil holds. Which soil soaks up water
faster? Which soil soaks up the most water? Which
soil would have the least amount of runoff during a
heavy rain? Why? Which kind of soil would have the
biggest mud puddles after a heavy rain? Why?
EROSION EXPERIMENT
NATURE’S CLEANERS
Materials:
Grape powdered drink mix
Large container
Three foam cups
Pencil
1 C. each of soil, pebbles, and sand
Tape
Four glasses
In a large container, mix the powdered drink
without adding sugar. Poke a hole in the bottom of
each foam cup with a pencil. Fill one cup with soil,
one with sand, and one with pebbles. Label each cup
with its contents. Using tape, mark three glasses with
the same labels, and mark the fourth glass “grape
drink.” Run a glass of water through the cups and
into a sink to remove any particles that may cloud
your experiment. Let them drain completely.
Place each cup over the glass with the matching
label and pour the grape drink in, letting it drip
through the cup into the glass. Stop before the glass
is full. Repeat with all three cups. Fill the fourth
glass with grape drink. Wait several days to let the
particles settle to the bottom of the glass. Then compare the colors of the filtered grape drink.
Which glass has the lightest liquid? Which has the
darkest? How fast did the grape drink travel through
each cup? The grape drink that went through the soil
should be the clearest. This is actually how water
gets cleaned: It drains into soil, and as it drips down
Materials:
Two cardboard boxes
Screening
A square of turf
Two collection buckets
Scissors
Soil
Two watering cans
Vegetation that covers the ground reduces water
runoff and prevents erosion by water. Keeping this
topsoil layer that holds the nutrients for growth is
important.
Cut the end out of two cardboard boxes and make
funnels as shown by stapling the cardboard pieces
onto the cut ends. Put screening across the ends. Fill
the boxes with soil. In one box, cover the soil with
Outdoors
4–13
a square of turf that has been carefully cut so that
you can put it back where it came from when the
experiment is finished. Sprinkle the same amout of
water simultaneously over both boxes and collect the
runoff from each box in collection buckets. Which jar
fills faster? Which has the clearer water running off
it? What does this tell you about the value of plants
in controlling erosion?
ROCK AND MINERAL COLLECTIONS
Materials:
Rocks and minerals
Small cards
Hammer and chisel
Collection bottles,
boxes, or egg cartons
Newspaper
Marking pen
Safety glasses
White paint
Many boys like collecting rocks and minerals. A
good place to find rock specimens is in roadbeds, in
riverbeds, and around construction sites and building excavations. Be sure to ask permission before
entering the property of others. In some areas, mineral collecting may be prohibited, so always check
the regulations in your area first.
• Wrap each specimen in a piece of newspaper with
a card to show where you found it.
• Rocks can be chiseled to a standard size, such as 2
by 3 inches, with a geologist’s hammer or a regular
hammer and a chisel. Be sure to wear protective
glasses when chiseling.
• Label rocks by attaching a small label to the underside with transparent tape or by painting a small
white spot on which you can write an identification number. Your identification should include
the type of rock, where you found it, and the
date.
• Keep small rocks in small bottles such as pill
bottles. Keep larger rocks in sectioned boxes or egg
cartons.
Fun With Water
and Aquatic Life
Our oceans, ponds, and rivers are full of wonders
to explore with boys. Always be careful when water
is involved with any Scouting activity, and follow all
water safety rules.
WATERSCOPE
Materials: Two or three small fruit juice cans,
small plastic or glass jar, 1-inch-wide waterproof
adhesive tape, wire
4–14
Outdoors
With this device, boys can see the world that lives
underwater.
1. Remove both ends from the cans. Punch holes
near the ends of the cans so they can be wired
together.
2. Align the seams of the cans, placing them end to
end, and fasten with wire and waterproof tape.
3. Insert this tin cylinder into a jar and make the
joint watertight by covering with waterproof tape.
Tin can
wired
together
and taped
Waterproof
tape
Plastic or
glass jar
Boys can watch the movements of fish or study
underwater rocks or plants from the water’s edge or
a boat. The waterscope eliminates surface reflection
and allows them to see directly under water.
POND DIPPING
Materials: Kitchen strainer, broomstick, waterproof tape, glass or jar
Tape the kitchen strainer handle to the broomstick. Skim a pond for water creatures. Put small
water animals and fish in a glass or jar for observation. Be sure to add pond water to the container and
handle carefully so you can return them to the pond
after observation.
SEALED WORLD
Materials: Large, wide-mouthed jar, 1-gallon
minimum; sand or sandy soil; water plants; water
from a pond
This project illustrates how everything in nature
depends on something else. You will be making a
self-sufficient world of plants and small animals.
1. Place about 11⁄2 inches of sand or sandy soil in the
bottom of the jar.
2. Plant five or six water plants in the sand, such
as eelgrass and elodea, which you can get from a
tropical fish dealer.
3. Fill the jar with water from a pond to where the
neck narrows. The water may look lifeless, but
it contains plankton—tiny plants and animals.
By the next den meeting, the water will have
cleared, and you will see tiny animals swimming
about.
4. Add a snail and two minnows not more than 1
inch long.
5. Put a screw lid on the jar, and seal it with tape.
6. Keep the jar where it will get indirect sunlight.
With no further attention, the sealed world will
sustain itself. Be sure to return your specimens to
the pond in a few weeks so that they will not die.
What happens? The green plants use light, minerals from the soil, and carbon dioxide exhaled by the
plankton, fish, and snail. The fish eat the plankton,
but the tiny plankton keep multiplying so the food
supply will last a long time. The snail eats plankton,
too, but it is a scavenger that also feeds on the tiny
plants that grow on the glass and on larger plants. This
is an excellent demonstration of the “web of nature.”
WHAT’S IN THE WATER?
Materials: Jar; water from a lake, pond, river, or
sea; magnifying glass; microscope (optional)
Fill a jar with water collected from a lake, pond,
river, or sea. Place the jar in the sun for a few days.
As the water evaporates, add more collected water. In
most cases, small algae and plankton develop. Study
them with the aid of a microscope or magnifying
glass. Note the color and shape.
Algae and plankton are the basic food in the food
chain of many animals that depend on a water environment for their lives—fish, turtles, crabs, clams,
ospreys, herons, etc.
ABOUT FISHING
You don’t have to have fancy tackle to have fun
fishing. You can use a fly rod, but cane poles and
hand lines are also effective when catching fish.
Probably more fish have been caught with an inexpensive cane pole than with all the more expensive
rods made. The real secret is knowing where and
when to fish. Water temperature varies in lakes,
ponds, and streams. Fish are sensitive to water
temperature. If the water is too warm or cold, they
won’t be very active or eager to eat your bait. As the
weather changes, you will find the fish at different
depths of water. It pays to do some experimenting to
find out where to fish.
Another important consideration is the type of
bait to choose. Worms are the best all-around bait for
most fish. Minnows, crayfish, and insects are also
used. The type of bait depends on the kind of fish
you want to attract.
Many kinds of hooks are available, and some are
constructed so as to enable you to release fish easily.
Some hooks will dissolve and fall out if they remain
in the fish’s mouth. Catch-and-release is popular
among people who fish and can offer many hours of
enjoyment for boys and adults.
PRINT A FISH
Materials:
Whole flat fish (one you’ve caught or one from
the market)
Soap
Water
Cotton
Rice paper or other thin paper
Water-soluble printers’ ink
Pane of glass
Brayer (printing ink roller)
For many centuries, the Japanese have used rice
paper to make fish prints. Some are so beautiful, they
are in museums. If you’ve caught a fish for dinner,
you might try making a fish print before you eat it.
1. Wash the fish in mild, soapy solution to remove
any surface slime. Dry the fish thoroughly.
2. Study the parts of the fish you want to print.
Look at its shape, placement of fins, and patterns
of scales. Plug up the gills or any other openings
with cotton so they won’t leak.
3. Squeeze some ink onto the pane of glass. Roll the
brayer over the ink until it sounds “sticky.” Then
roll the ink across the surface of the fish, from head
to tail, so the scales won’t be disturbed. Be sure
that the head, fins, and tail are inked completely.
4. Lay a piece of rice paper over the fish and run
your fingers around the head, over the scales,
and along each fin. Lift the print and examine it.
You may be surprised by its detail.
Continue making prints, using more or less ink
and more or less rubbing until you get the results that
please you. If the scales become clogged with ink,
wash the fish off, pat it dry, and try again.
Before cooking your fish, be sure to wash it well
with soap and water and remove the skin.
Outdoors
4–15
OBSERVING UNDERWATER NIGHT LIFE
COLLECTING SHELLS
Materials:
Soap, water, and old toothbrush for cleaning
shells
Cardboard or shallow box
Glue
Cotton
Paper
Pen
Field guide for shells
As you walk along the beach, sooner or later
you’ll find yourself picking up shells. These beautiful natural objects make great collections. Make sure
shells are empty before you bring them home. Look
for small creatures that sometimes draw their bodies
tightly up into the ends to hide. Leave these homes
where you find them.
Clean the empty shells and then mount them on
a piece of cardboard or the bottom of a shallow box.
Glue them in place. Use a cotton ball under large or
fragile specimens to help keep them from breaking.
You can also keep shells in a box subdivided into
small compartments.
Materials: Two-cell flashlight, watertight plastic
bag, strong twine or light rope
If a stream or lake is nearby, take the boys out to
see what fish do at night. A pier would be ideal. Seal
the flashlight in a watertight plastic bag. Tie strong
twine or a light rope around the center of the flashlight so it hangs level. After dark, slowly lower the
light into 6 to 8 feet of water. Turn the light slowly. It
will attract many fish, crabs, and crayfish. See how
many the boys can identify.
FROG RAFT
Label each specimen. Record the date, location
where you found it, and type of shell. A field guide
will help you identify your shells.
CAN YOU CLEAN THE WATER?
Materials:
Spoon
Cheesecloth
“Pollution”: Dirt, twigs,
plastic bag or wrap,
olive oil, pebbles,
food coloring
Water
Strainer
Tongs
5-gallon bucket
Stick
To understand what happens when humans pollute water, try this activity and see just how hard it is
to clean up water. Fill the 5-gallon bucket with water.
Drop some dirt, twigs, plastic bag or wrap, olive oil,
pebbles, and food coloring into the water. Stir with
a stick. Using the strainer, spoon, tongs, and cheesecloth, try to take the “pollution” out of the water. Can
you remove any of the pollution? Some of it? All of
it? Which tools worked best?
Materials: Candle, 1-foot length of 1-inch board,
rope or twine, nail, hammer
Fasten a candle to the middle of a 1-foot length
of 1-inch board with candle drippings. Pound a nail
in one end of the board, and tie a rope or twine to
the board so you can retrieve it. After dark, light the
candle and float the raft into the water and watch for
passengers who might get on board.
4–16
Outdoors
Fun With Insects
Who needs insects, anyway? We do! Although
sometimes it’s hard to live with them, we can’t live
without them. Insects sting and bite, they invade our
food, devour our crops, and carry disease. But they
are also a food source for many animals—and even for
people. They pollinate crops and plants and are used
to treat diseases and help scientists make new discoveries. Insects also produce honey, wax, shellac, and
silk and help to clean up dead animals and plants.
Insects are attracted by food. They have a very
strong sense of smell, usually through their antennae.
Some can even sense food miles away. Insects are
also attracted by light.
COLLECTING INSECTS
Hunting for insects depends
partly on what kind of insect
you want to find.
• You can find crawling
bugs almost anyplace—
even in your home.
Outdoors, look under
rocks, where it is moist
and dark and where
they like to hide.
• Catch bugs that live
in tall grass
by sweeping
a net back
and forth near
the top of the
grass as you
walk forward.
• Hold
an
umbrella, sheet, or cloth under a bush or shrub.
Gently shake the branches. The insects will fall
onto the umbrella and can easily be collected.
• At night, many insects may fall to the ground
under street lights.
After you observe your insect visitors, always
return them to where you found them.
Dig a hole in the ground just a little larger than
the container. Sink the container in the ground, making sure the edges don’t stick up. Place a few scraps
of food such as fruit, lettuce, cheese, or cereal in
the container. Add some leaf litter and earth with
the food scraps for the creatures to shelter in. Place
stones around the edge of the container and cover
with wood. The cover will keep your catch from
drowning if it rains. The stones allow a small space
between the wood and the edge of the container for
the insects to enter.
Check your container in a day or two. How many
insects have been attracted to the food in your pit?
Be sure to free the insects, remove the container, and
refill the hole you dug after you are finished.
BUG TRAP
Materials:
Three small bottle tops (about 1⁄2 inch high)
Quart-sized glass jar
Cap from a 1-gallon plastic milk jug
Disposable dinner plate
1
⁄2 t. honey
Double-sided tape
Arrange the three bottle tops upside down on
the plate in a triangle so that they will support the
inverted glass jar. Use the double-sided tape to stick
the bottle tops to the plate. Tape the milk cap upside
down in the center of the bottle tops, and place a dollop of honey on the milk cap. Set the plate in a place
where it will not be disturbed, and place the jar upside
down onto the bottle tops. Insects will be attracted to
the honey and fly up inside the jar, becoming trapped.
Check the jar frequently, and free the trapped insects
after you have observed them for awhile.
BUG PIT
Materials:
Container (margarine tub, glass jar, tin can, etc.)
Stones about 1⁄2 inch wide
Piece of wood or cardboard a little larger than
the container
Trowel
Food scraps
Leaf litter and dirt
Outdoors
4–17
Remind the boys that when they capture an insect
alive and keep it for observation, they must keep it
alive by adding water and food. Encourage them to
find out what type of food the insect prefers. A few
days later the insect should be released.
ATTRACTING INSECTS AT NIGHT
INSECT AQUARIUM
Materials: White sheet, bright light
Tie a white sheet between two trees. Shine a bright
light on it. Many insects will be attracted to the light.
Move the light around and see what happens. The
insects will probably follow the light.
MIDNIGHT SNACK FOR MOTHS
Materials: Fruit pulp, sugar, tennis ball, string
Many beautiful moths can be attracted with a
nightly treat. Mix together fruit pulp and sugar. Tie a
tennis ball to a length of string and dip the ball into
the sticky, sweet mixture. Hang it from the top of an
open window or outdoors. Soon, you should have
attracted some lovely, hungry visitors. Try hanging
balls in different locations. Are the same types of
moths attracted at all locations?
INSECT HOUSE
Materials:
Two 6-oz. tuna or cat
food cans
6-by-12-inch metal
screen mesh or plastic
canvas
Pop bottle cap
Three round-head
brass paper fasteners
Stick or branch
Plaster
Paint
Outdoors
Take along jars to bring insects home to your
aquarium. Put sand, rocks, and plants on the bottom of the aquarium as you would for fish. Cover
the aquarium with wire screening. Feed the aquatic
insects flies, mosquitoes, mosquito wrigglers, ants,
or grasshoppers by dropping them on the surface of
the water. After enjoying your aquarium, return the
insects to their natural environment.
MAKE AN ANT FARM
Materials:
Quart canning jar
Skinny olive jar
Square nylon net
or screen
Black construction
paper
Brass
fasteners
Remove one end from each can and paint the cans
as desired. Roll the wire or plastic canvas into a
tube 12 inches long and as big around as the inside
of a can. Fasten the screen together with the paper
fasteners. Mix enough plaster to fill a can to within
1
⁄4 inch from the top. Set the screen down into the wet
plaster. While the plaster is wet, push in a small stick
or branch (for the insect to climb on) and the bottle
cap, open side up, as a “watering hole.” The second
can acts as the top.
4–18
Brooks, ponds, lakes, and swamps are alive with
insects. The water strider walks and runs on spiderlike legs across the water’s surface. A beetle called
the back swimmer clings to the underside of the surface while his hind legs propel him along. Whirligig
beetles skate over the surface of the water chasing
one another in a crazy patch of circles. A scuba diver
called the water boatman keeps the air supply in a
bubble between his front legs and moves through
the water with his oarlike hind legs. Nymphs and
naiads swim through the water, catching and eating
smaller insects, and then finally crawl onto a log or
rock above the surface and turn into dragonflies and
damselflies. All of these aquatic insects are common
and can be easily caught.
Canning jar ring
Rubber band
Ants
Crumbs of food
Soil
To make an ant farm, place a small skinny olive jar
in the center of a quart canning jar. Fill in all around
it with moist soil. Wrap black construction paper
around the jar and secure it with a rubber band. Look
for a group of ants. Be careful when choosing your
ants. Watch out for ants that sting! Remember not to
disturb any anthill that you find.
Place your ants in the soil and screw the jar ring
down over the net or screen square and set somewhere
out of the sun. When you peek under the black paper
in a few days, you can see the ants busy building their
tunnels. Feed the ants by putting different kinds of
food on top of the soil. Try bread, bits of meat, honey,
small pieces of vegetables. Always remove unused
food before adding any more. After a short period of
time, return the ants to their original habitat.
WATCHING WOOD LICE
Materials:
Wood lice (sow bugs or pill bugs)
Paper cup
Sand
Peat moss
Plastic container
Cardboard
Plastic or cardboard container about 12
inches deep
Moist sponge
Raw potato
Three large jar tops
Black construction paper
You can find wood lice in damp places. Look
under stones, logs, and leaves where they feed on
decaying plants. Collect some wood lice in a paper
cup. Keep them in a plastic container in which you
have placed a mixture of sand and damp peat moss.
Add a moist sponge to the container, and put a cardboard cover over it. About once a week, add a piece
of raw potato.
To find out what kind of environment that wood
lice prefer, cover the bottom of a plastic or cardboard
container with sand. Push three large jar tops into the
sand with their open sides up. The open tops should
be level with the sand, but empty. Place dry peat
moss in one jar top, moist peat moss in the second
jar top, and wet peat moss in the third. Cover half
of each jar top with black construction paper. Place
about 20 wood lice on the sand, and put the container in a lighted but not hot place. A day later, look
for the wood lice. Are they on the sand, or have they
chosen one of the three peat moss environments? Do
they prefer light or darkness?
WATCH A BUTTERFLY GROW
Watching a cocoon turn into a butterfly is one
of nature’s greatest shows. It begins with moth
or butterfly eggs, which hatch into a caterpillar,
which becomes a cocoon or chrysalis. The caterpillar
emerges and becomes a moth or butterfly, which lays
eggs and starts the whole process again.
Look for cocoons/chrysalises before trees and
shrubs leaf out. They can be easily spotted hanging
from branches and twigs. Cut away part of the twig to
which the cocoon is attached, taking note of the kind
of tree or shrub. Once the butterfly or moth emerges,
it will need food—leaves from the same plant on
which you found it. Shake the cocoon gently. If you
hear a rattling sound, discard it. The pupa inside is
probably dead.
Keep the cocoon in a clean can or jar with a tight
cover. Punch a few holes in the cover to provide
ventilation. Put it in a cool place. When the trees are
fully clothed with leaves, make a suitable home for
the cocoon. A half-gallon jar with a 1-inch layer of
dirt or moss and a couple of sticks inserted is good.
The emerged adult will need a place to crawl to dry
and spread its wings. Sprinkle the cocoon and dirt
with water about once a week to keep them from drying out. Once the butterfly has emerged, release it.
MAKE A BEE FEEDER
Materials:
Glass jar with lid
Small nail
Hammer
Tape
String
Honey or sugar and water
Knot
Tiny holes
Bees can dine right at
your window with this simple feeder. Using a small
nail and hammer, punch
tiny holes in the lid of a
glass jar. Tape a bridle of
string to the jar, as shown,
and fill the jar with honey
or thick, well-mixed sugar
water. Hang the jar upside down in front of a secondstory window, and watch who comes to eat.
OBSERVING FRUIT FLIES
Materials: Ripe fruit, small glass jar, paper, cotton
Because they multiply rapidly, fruit flies make a
good exhibit for boys to watch. A new generation will
be born every few days. To catch fruit flies, place a
piece of ripe fruit in the bottom of a small glass jar.
Fit a paper funnel to the top to make it harder for the
flies to escape. Put the jar out in the open.
When six to 10 flies have entered, remove the
funnel and plug the opening with loose cotton.
There should be both males and females; the males
are smaller and have black-tipped abdomens. Soon,
Outdoors
4–19
some eggs will be deposited. Within two or three
days, larvae will hatch, which will soon pupate. The
adult insects will come from the pupae. Take the
young, adult insects out and start a new colony in
another jar. After a few days, release them outside.
Fun With Birds
• How often does the bird drink?
• How does the bird react to animals?
• Which animals does it fear?
FEEDING BIRDS
Coffee can or
coconut shell
Metal feeding
basket with suet
Birds are one of the most interesting of all wild
creatures in nature. Whether you are identifying species, listening to their cheerful songs, or just watching them fluttering at your feeder, birds can be a great
source of enjoyment.
BE A BIRD DETECTIVE
Materials: Notebook, pencil, bird guidebook
You can answer many questions about birds through
observation. Observe birds in the woods, in a park, or
in your own backyard. Even city bird-watchers can
learn many things about the birds they see.
Choose a spot near your home. It can be a bird
feeder in your yard or a quiet spot in a park. Visit that
spot every day at the same time. Leave birdseed or
suet, and then sit down a little distance away where
you can watch without disturbing your visitors.
Keep a pad of paper or notebook handy so you can
write short descriptions of the birds you see. Write
down how big they are, what colors they are, and the
shapes of their heads, tails, beaks, and wings.
In a bird guidebook, find the birds that fit your
descriptions. Read about them to find out their nesting habits, their migration patterns, and their diets.
After you identify all the birds, keep track of when
you see them. If you live in a cold climate, which
birds stay around all year? Which are the first to
return after a long winter?
Here are some good things to find out about:
• What are the differences in appearance between
males and females?
• Do they both build the nest?
• What is the nest made of?
• Does the male or female hunt for food?
• How much of the day does the birds spend looking
for food?
• What kind of food do they like best?
• How many eggs does the species lay?
• When do the young birds leave the nest?
• What sounds does the bird make?
• How much time does the bird spend preening?
4–20
Outdoors
Milk carton
with dowels
Pinecone stuffed with suet
Dowel pole and plastic container
Plastic
container
• Once you start feeding birds, continue. They will
get used to coming and finding food in your feeders. Don’t disappoint them.
• Birds need water, too. If you don’t have a regular
bird bath, us an old hubcap, disk, or shallow pan
on top of an overturned trash can. If the temperature is freezing, boil water every morning and pour
it over the pan, melting any ice. The remaining
water will cool quickly for the birds to use.
• Feed the birds early every day. This is when they
eat.
• Cracked corn is a good all-purpose bird food. Ask
for “fine” or “chick cracked corn” at a poultry
supply store or garden center. Sunflower seeds are
popular with cardinals, finches, grosbeaks, woodpeckers, and other seed- and grain-eating birds.
• Birds like nuts, in or out of the shell, but only
birds with strong bills, such as blue jays and titmice, can crack the shells. For other birds, shell
the nuts and chop them.
• Beef suet gives energy that helps birds stay warm
in winter and is a good substitute for the insects
they can no longer find. Ask a butcher for beef suet
for birds. Use it only during cold weather and in a
special container so other animals can’t eat it.
• Some birds like fruit, such as cut-up apple, banana,
or pear.
Keep Your Feeder Safe
• Cover anything sharp on any bird feeder you
might make. This protects the person handling the
food as well as the bird. Cover wire ends and sharp
edges of plastic and metal with tape. Sand smooth
all rough edges of wood.
• Never use thread anywhere on a feeder. Birds can
easily become entangled in it.
• Never give birds moldy bread or any other moldy
or spoiled foods. Use only fresh, clean grain and
seeds. A deadly fungus sometimes grows in moldy
food.
• Be sure the container used to make the bird feeder
has never held anything poisonous. Even a tiny
amount of a harmful substance can affect a bird.
• Leave the feeder unpainted, or if you must paint,
use exterior latex paint.
• Do not use plain peanut butter or raw rice to feed
birds.
BIRD CAKE
Materials:
Wild birdseed
Piece of mesh vegetable sack (such as potatoes
or onions come in)
12-oz. juice can
1
⁄2 pound suet
Double boiler
Long piece of wire
1. Cut the vegetable sack to fit inside the can, with
the extra sticking up above the can top.
2. Cut the suet into small pieces and heat in the
double boiler (so it won’t burn). Let it cool and
harden. Remove any pieces of meat.
3. Reheat the suet and mix in 1 C. birdseed. Pour
the mixture into the can. Set in the refrigerator to
harden.
4. Set the can in warm water and carefully run a
knife around the inside to loosen the sack. Pull
out the sack.
5. Tie the ends of the sack with wire, leaving
enough to tie it to a tree limb.
This same mixture can be molded in a cut-down
cardboard milk carton, small foil dishes, or half a
grapefruit shell and the cakes set on a fence post or
in a feeder.
BIRD’S DELIGHT
Ingredients:
1 C. melted suet
11⁄4 C. peanut butter
1
⁄4 C. cracked corn
3 T. cornmeal
3 T. butter
1
⁄4 C. raisins
Melt the suet as described for the Bird Cake, adding the peanut butter during the second heating.
After the suet has cooled the second time, add the
other ingredients. Pour into containers and set in the
refrigerator to harden.
BIRD TREAT TOWER
Materials:
Two mesh bags from
fruit or onions
Shelled peanuts
Sunflower seeds
Plastic wire or string
Maize
Plastic lid
Scissors
Place one mesh bag inside of the other to reduce
the size of the holes. Place sunflower seeds in the bag
about a third of the way up and tie together. Next,
add a layer of maize in the middle third of the bag
and tie together. Add the final layer of peanuts and
tie the bag closed. Punch a hole in the center of the
plastic lid and pull the end of the bag through it. The
lid will protect the food from the weather. Make a
hanger from the wire or string, attach it to the end of
the mesh bag, and hang it in a suitable place.
PINECONE TREATS
Materials: Peanut butter, cornmeal, pinecone, wire
Mix together equal amounts of peanut butter and
cornmeal, about 2 T. of each. The cornmeal keeps the
peanut butter from being sticky and is safer for birds
to eat. Tie a piece of wire around a large pinecone for
hanging from a tree. Spoon the mixture in between
the pinecone petals. The birds will love it.
BIRD BRUSH
Materials: Old scrub brush, bacon rind or lard,
birdseed mixture
Melt the bacon rind or lard in a pot and dip the
brush into the fat. Sprinkle the seed mixture onto it
and as the fat congeals, the seeds will be fixed to it.
Tie the brush to a tree in a safe spot.
SUET LOG BIRD FEEDER
Materials:
16-inch-long log about
Sandpaper
4 inches in diameter (or
Varnish
use 4-by-4-inch lumber)
Suet
Drill
Knife or ax
Heavy screw eye
1. Drill six to 10 1-inch holes halfway through the log.
2. Have an adult taper the top of the log with an ax
or knife and apply varnish to prevent the wood
from cracking.
3. Insert the screw eye at the point and attach a wire
for hanging to a low branch.
4. Force suet into the holes and hang the feeder from
a tree in the yard where it can be observed from
the house. Hang it low enough for easy refilling
but out of reach of dogs and cats. Woodpeckers,
chickadees, titmice, and other suet-feeding birds
will enjoy your creation.
Outdoors
4–21
MILK CARTON BIRD FEEDER
Materials:
Half-gallon milk
carton (cardboard or plastic)
Paper clip
Two brass paper
fasteners
Wire coat hanger
Marker
Scissors
1. Mark cutting lines
for the opening with
a marker. The bottom of the feeder should be 11⁄4 inch deep. Cut out
the opening, leaving the top to be folded back for
a roof.
2. Straighten the paper clip and push it through the
carton about 11⁄4 inch from the gable. Bend the
clip inside the carton to secure it. Insert the other
end of the clip through the feeder roof and bend
back to hold.
3. Push the paper fasteners through the peak to seal
the top of the feeder. Punch a hole in the peak to
hold the coat hanger hook.
4. Punch a few small holes in the bottom of the
feeder to let out moisture. Hang your feeder from
a branch.
DECORATED TREE HOTEL
Materials:
Small evergreen tree in the yard
Bird Cakes, stale donuts, stale bread
Strings of popcorn, cranberries, or raisins
Orange or grapefruit shells
Bread
Cookie cutters
Shortening or butter
Seeds
A small evergreen tree in your yard makes a good
shelter and feeder for birds. It will provide protection
during the coldest part of the winter. Trim the tree
with Bird Cakes (see above), stale donuts, or very
stale bread tied on with a string of popcorn, cranberries, or raisins. Fill orange or grapefruit shells with
Bird’s Delight (see 4–21). You can cut bread shapes
out with cookie cutters and then spread them with
shortening or butter and sprinkle with seeds.
4–22
Outdoors
BIRD FEEDER SNOWMAN
Materials:
Snowman
Pinecone with suet and birdseed mixture
Dates, raisins, apple pieces
String of cranberries
Straw beach hat with wide brim
Birdseed, sunflower seed
Two thick branches
Pail of water
Make a snowman. For a nose, give it a pinecone
stuffed with suet and birdseed mixture. Use dates for
eyes, a line of raisins for the mouth, and apple pieces
for buttons. String cranberries on strong string to
make a belt. Add the beach hat and sprinkle birdseed
and sunflower seeds on the brim. Make arms for the
snowman from thick branches so the birds will have
a place to perch while they are eating. Set a pail of
water nearby to give them something to drink.
EXAMINE A BIRD FEATHER
As you hike through the woods and across fields
in late summer and early fall, you may find quite a
few bird feathers on the path or in the grass. This is
the time when birds molt, or lose their old feathers
and grow new ones.
When you take a good look at a bird feather, you’ll
see that it has a stiff shaft in the middle. The lower
part of this shaft, the quill, is hollow. On each side
of the shaft is a flat vane. When you look at this vane
through a magnifying glass, you’ll discover that it
has hundreds of separate barbs held together by tiny
hooks.
Most birds have three types of feathers. The flight
feather of the wings has a curved shaft, and the vane
along one side is narrower than the vane on the other
side. The steering feathers of the tail have an almost
straight shaft, and the vanes on each side are about
the same width. The contour feathers that cover the
bird’s body are much smaller than the others and are
usually curved.
The color of the feathers will give a clue to the
type of bird. A bright red feather might have come
from a scarlet tanager or cardinal. A banded lightblue feather may have come from a blue jay. A solid
black feather may come from a crow.
Don’t collect feathers. Only the feathers of gregarious birds (ducks, geese, chickens, etc.), English
sparrows, starlings, and pigeons may be in the possession of non-native Americans. All other birds are
classified as migratory and are protected under the
Migratory Bird Treaty Act, and it is against federal
law to be in possession of their feathers.
NESTING MATERIALS BASKET
than the screw eye. You can also use a piece of an old
hammer or ax handle for this project. Turn the screw
eye into the hole and then unscrew it and take it out.
Put a little resin powder in the hole and screw the
eye back in the hole. As you twist the screw eye back
and forth in the hole, it will make a squeaky sound
that will attract birds. With practice, you can make
several different bird noises.
Fun With Animals
Materials: Mesh bags; scrap lumber; fine mesh
hardware cloth; short lengths of yarn, string, and
raffia; string hanger
In the spring, help birds collect nesting material
by providing an assortment for them to use. Fill a
mesh bag of the sort that onions and potatoes are sold
in with yarn, string, or rope fibers cut to about 6 to
10 inches. Or, build a simple frame from scrap wood
and overlay with fine mesh hardware cloth. Make a
string hanger and place your nesting materials in a
tree. Look around your neighborhood to see whether
you can notice any nests with your special materials
woven through them.
CALLING BIRDS
You can do a birdcall easily with no other equipment than your mouth. It attracts many smaller species: sparrows, warblers, jays, chickadees, nuthatches, wrens, and others. The call consists of a series
of rhythmically repeated “psssh” sounds. Different
rhythms work with different birds.
Try these rhythms:
Pssh…pssh…pssh…
Pssh…pssh…pssh-pssh…pssh…pssh
Each of these series should last about three seconds. Experiment to find the rhythms that work best
for the birds in your area. For the best results when
you use this call, wait until you hear birds nearby,
and then stay motionless by shrubs or trees that will
partially hide you and give the birds something to
land on. Begin calling in a series, pausing after three
or four rounds to listen for the incoming birds.
BIRD CALLER
Materials:
2-by-1-inch
hardwood, drill, screw eye,
resin powder
Drill a hole in the end of
the hardwood slightly smaller
On one of your hikes, you may be lucky enough
to see some animals. In an open field, a rabbit may
jump in front of you and scurry off with its fluffy tail
bobbing. A woodchuck may sit up for a quick look
around and then scurry back into its borrow. As you
walk in the woods, a deer may bound past you and
then quickly disappear into the brush. You may spot
some squirrels playing in the leaves. When they see
you, they will probably rush to the nearest tree, run
up the trunk, and hide among the branches. They
might even scold you for bothering them!
Even if you don’t see any of these animals, you
can look for their homes and hiding places. Look
up. You may see squirrel nests or raccoon or opossum dens in hollow trees. Look around. You may
discover a muskrat house made of reeds and twigs or
a beaver den of branches and mud. Look down. You
may see where rabbits bed down or spot the entrance
to a fox’s den or a skunk’s hiding place. Stay a safe
distance from these animal homes and the animals
themselves; do not disturb their habitats.
Chewed-off twigs may indicate where deer have
been feeding. You may see shells of nuts left behind
after a mouse party. Look for the remains of pinecones where squirrels have bitten off the petals to get
to the seeds.
Animal tracks show where they have walked
slowly to their feeding places or have hurried off at
full speed to get away from an enemy.
Keep your eyes open and you will learn a lot about
animals.
ANIMAL SCRAMBLE
Materials: One index card per player, pencil or
pictures of animals, tape or pins
Write the names of common animals on index
cards or place a picture of the animal on each card.
Pictures will allow younger children to give more
accurate answers. Pin or tape a card on the back of
each player’s shirt. Players ask questions of other
players to get clues to their own identities. They
Outdoors
4–23
should ask only one question of each person and
have that person ask one question of them so they can
mingle with the other players. Answers are limited to
“yes,” “no,” “maybe,” and “I don’t know.” Players
continue to ask questions to discover characteristics
about their animal until they are able to guess who
they are. A player might ask questions such as: “Am I
a predator?” “Do I have a tail?” “Do I have four legs?”
“Am I active at night?” “Do I live in the forest?”
circle tap him twice. Stress the need for silence while
the game is in progress. Boys can imitate the animals
they’ve chosen to be. You can experiment with different numbers of predators and prey or put bells on
some of the animals, thereby making them modify
their strategies.
SQUIRREL FEEDER
WHO’S GONE THERE?
Materials: Three or four 3- or 4-inch nails, 1-by4-by-12-inch board, two 1-by-4-by-2-inch boards,
2-inch nails, corncobs
Materials: Paper; ink pads; stamps of animal
tracks make from erasers, craft foam and wood
blocks, or cut potatoes; mammal guidebooks
Make animal track stamps using your favorite craft
method and a guidebook for patterns. Boys study a bit
about the animals and their tracks before the game.
Divide the group into teams. Using the ink pads and
half of the animal print stamps, each team prints a set
of animal tracks for each animal on a separate sheet
of paper. Then the other team tries to guess which
prints belong to which animal. On your next hike,
look for these animals’ real prints in the wild.
PREDATOR
Materials: Two blindfolds
This game helps boys think about food chains in
nature. Boys form a circle about 15 feet across. Two
blindfolded boys stand in the center of the circle. One
is the Predator, and he calls out the kind of predator
he is. The other is the Prey and calls out the kind of
animal that is the Predator’s prey. The Predator tries
to catch his Prey by listening for him and tracking
him down and tagging him. If either “animal” goes
too near the edge of the circle, the boys that form the
4–24
Outdoors
Using the 2-inch nails, nail the short boards onto
the 12-inch board toward the ends for “feet.” Nail
three or four longer nails up from the bottom to spear
corncobs. Along with squirrels, birds might also
come to dine at this feeder.
SNIFF OUT A NUT
Materials: Three small cups; potting soil; two
peanuts, walnuts, or other nuts
Squirrels bury nuts in the ground to store for a
later meal. Many people think that squirrels remember where they left their nuts, but actually, they
find them again using their keen sense of smell. To
see whether you would make a good squirrel, place
potting soil in three small cups. Bury a nut with the
shell on in the first cup. In the second, bury a nut
without the shell. Leave the third cup with just plain
potting soil. After several days, see whether you can
tell which cups the nuts are in by sniffing.
EAT LIKE A SQUIRREL
Materials: Masking tape, peanuts in the shell
To find out how squirrels eat without thumbs, tape
your thumbs to your palms with masking tape. Try
to crack open some unshelled peanuts for a snack. It
won’t be long before you’ll find yourself doing it the
squirrel way—with your teeth!
HATCH A BATCH OF EGGS
Frog
Before legs appear
Hind legs
developed
Materials: Bucket, aquarium with sloping rock or
floating log, aquarium cover
Eggs of amphibians, such as frogs and toads, are
ready to view in the spring. Look for frogs’ eggs
bunched together in a clump; toads’ eggs are generally
arranged in long strings. You might even find salamander eggs, which are larger that frogs’ eggs but found in
smaller bunches. If you have permission, bring a few
home in a pail, along with plenty of pond water and
some algae and pond plants for the tadpoles to eat.
Don’t mix eggs from different species. They develop at
different rates and may feed on each other.
Frogs’ eggs will grow and change into tiny tadpoles within a week or so. Keep only one or two
tadpoles, returning the others and any unhatched
eggs to the pond. Tadpoles will eat algae and plants
in the bucket, but soon they will need more nutrients. When they are big enough, hang a piece of raw
meat in the bucket for them to eat. A tadpole soon
develops hind legs and then tiny front legs where
the gills were. Lungs also replace the gills at this
stage, although you can’t see this. Gradually, the tail
disappears, during which time the tadpole doesn’t
eat. Transfer your frog to an aquarium now, one with
a sloping rock or a floating log, and cover. Frogs are
great jumpers. Adult frogs require live food and lots
of it, so soon it will be time to return your frog friend
to its natural habitat.
WONDERFUL WORMERY
Materials:
2 C. dark-colored soil
10 to 12 earthworms
Quart-sized widemouth jar
Cheesecloth or piece
of nylon stocking
Dark-colored
construction paper
Large bowl
Spoon
1 T. oats
Rubber bands
Sand
Water
Pour the soil into a bowl. Slowly add water while
stirring until the soil is slightly moist. Pour half of
the moistened soil into the jar. Pour the sand over
the soil and then add the remaining soil. Sprinkle the
oats over the soil.
Put the worms in the jar and cover it with cheesecloth or a piece of nylon, securing it with a rubber
band. Wrap the dark paper around the jar and secure
it with a rubber band also. Place the jar in a cool
place. Every day for a week, remove the paper and
observe the jar for a few minutes. Then, put the paper
back over the jar and put the jar away. At the end of
the week, release the worms where you found them.
Your worms will wiggle and burrow into the
soil, and after a few days you’ll be able to see their
tunnels. Soon, the light sand and dark soil become
mixed. The worm gets nourishment from the remains
of plants in the soil. The worm’s movements loosen
the soil so that the water and air plants need can
more easily pass through it.
Fun With the Night Sky
On a clear night when the stars are out, the sky is
transformed into a twinkling show—one of nature’s
most beautiful displays. Whether you are following
the moon’s path or locating the Big Dipper, the time
you spend gazing upward can be a peaceful outdoor
experience.
STARGAZING
Billions of stars shine in the sky. Although they
are millions of miles away, we can see many of them.
Check out your library for guides on stargazing.
Choose a clear night. A night with no moon is best
for beginners because constellations are easier to see.
Find a place that is dark, away from street and house
lights. City lights, as well as moonlight, will obscure
the fainter stars. Take a flashlight covered with red
cellophane to help you read your star guide. (Red
light won’t blind your eyes as white light will.)
Lie on your back on a blanket and enjoy the entire
display of stars before looking for specific ones. If
it is very dark, you’ll easily see the Milky Way, our
galaxy, stretching across the sky.
Start with a star group you already recognize, such
as the Big Dipper, and use it to star-hop. Move to the
Little Dipper, nearby. The star at the very end of the
curved handle is Polaris, the North Star. It is almost
directly above the north geographic pole of the earth.
Sailors and travelers have used it for centuries to tell
which way is north.
Cassiopeia is easy to find and remember because
of its shape: a W formed by five bright stars. To find
Cassiopeia, draw an imaginary line from the star
where the handle joins the Big Dipper’s bowl through
the North Star and beyond. Cassiopeia and the Big
Outdoors
4–25
Dipper are on opposite sides of the North Star and
rotate around it. In the northern hemisphere, they are
always above the horizon and can be seen any time of
the year.
In winter months (in the northern hemisphere),
look for Orion, the mighty hunter. You will recognize
him by his belt—a row of three bright stars. Try to
locate the bright star Betelgeuse that marks Orion’s
right shoulder. Follow the belt stars upward and
you’ll find the constellation Taurus.
With these as a beginning, continue to locate other
constellations. Work your way around the night sky,
using a star guide to help you find and identify stars,
planets, and constellations. You’ll probably be able
to see Venus. Except for the sun and the moon, it
is the brightest object in the sky. Mars has a steady,
reddish light. Jupiter is steady and whiter than stars.
Saturn has a yellowish light.
If you see a “star” moving, it’s probably a satellite
or plane instead of a star.
CONSTELLATION PICTURES
Materials:
Black construction
paper
Glow-in-the-dark
star stickers or
glow-in-the-dark
paint and brushes
Tagboard
Pencil
White chalk
Star guidebook
Scissors
Make this glowing project to help your Cub Scouts
and Webelos Scouts remember star placements and
constellation shapes. Using a star guidebook, make
patterns of the constellation you would like to use for
this project. Poke holes in the pattern to represent the
stars, and draw lines to connect them properly. Boys
place the pattern over the black construction paper
and mark the star placement. Remove the pattern
and complete the stars by placing the glow-in-thedark star stickers over the star markings or painting a
small dot with the glow-in-the-dark paint. Boys connect the stars by drawing the lines with white chalk.
Write the name of each constellation on the papers.
Boys can hang these on their bedroom ceiling. Before
they go to sleep, they can enjoy their own star show
and prepare to identify the constellation patterns in
the night sky.
STAR COLOR
Materials: Telescope
To the naked eye, stars don’t look like they have
much color, but they actually range in hue from red
to bluish white. You can detect these differences
with a telescope. Some stars appear red or orange,
4–26
Outdoors
others are definitely yellow, and some are yellowish
white and bluish white.
These colors correspond to the temperatures of the
stars. As the size of the star increases, usually so does
its temperature. The small red stars are the coolest.
Orange stars are the next in line. Medium in size and
heat are the yellow stars (like our sun). And then
come the larger white stars. The blue-white ones are
the hottest and largest. If you look at logs burning in
a fireplace, you can see the same color variations in
the flames.
See whether you can detect the colors of the stars
with your telescope. No matter what their color,
they generate their own light and shine all night and
all day long. We just can’t see them during the day
because the light from the sun is too bright.
MOON WATCH
Materials: Binoculars or a telescope
Use binoculars or a telescope to look at the moon.
Can you see the pockmarks where meteoroids have
hit the surface? Try to observe the moon when it is
not full. Look at the part of the moon that is close to
the line dividing the light part of the moon from the
dark part. The shadows there are long. Shadows on
the earth are long when the sun is rising or setting.
The shadows along the dividing line on the moon are
long for the same reason. If you were standing on that
dividing line, you would see the sun setting or rising
on the moon’s horizon.
Watch the moon with binoculars or a telescope
during all of its phases. Watch it as it waxes (gets bigger) from new crescent to first quarter to full. Then
watch it as it wanes (gets smaller) from full to third
quarter to old crescent.
If you looked at the moon month after month, you
would find that it always looks the same. We see only
one side of the moon. This means that the moon rotates
at the same rate that it revolves about the earth.
MOON FLIP BOOK
Materials: 30 index cards, quarter, pencil, stapler
Track the changing phases of the moon, which
completes a cycle every 291⁄2 days. The moon doesn’t
generate its own light so we see only the portion that
is lit by the sun. When there is a full moon, the sun
is shining directly on the moon; at the other times,
Earth gets in the way, shadowing the moon so that
only part of it is visible.
Make a flip book of the moon’s phases. On the
right-hand side of the index cards, trace around a
quarter. Make sure the tracing is on the identical
place on each card. Number the cards from 1 to 30.
For the next 30 nights, check the moon and draw
what you see on the corresponding card. Keep the
cards in order. When you have completed the last
card, staple them all together on the left-hand side.
Flip the pages for a fast-forward look at the moon’s
changing face for the previous month.
KITCHEN SOLAR SYSTEM
Fun With Weather
The weather can provide Cub Scouts with an everchanging show. From blue skies with puffy clouds
that look like animals to the excitement of a menacing
storm, our changing weather provides much to see,
experience, and learn. Whether your weather fun is for
advancement or just plain fun, you’ll discover many
great weather-related activities to enjoy with boys.
PREDICTING THE WEATHER
Materials:
27-inch beach ball (the sun)
One tiny 3⁄32-inch pea (Mercury)
Two 1⁄8-inch peas (Pluto and Mars)
Two 1⁄4-inch peas (Earth and Venus)
Two 1-inch walnuts (Uranus and Neptune)
One 21⁄4-inch tangerine (Saturn)
One 23⁄4-inch orange (Jupiter)
Sheet
Book about the planets
It’s fun to learn about the nine planets that circle
our sun. Here’s a way to make a planet display and
estimate the relative sizes using items from your
kitchen.
Place a sheet on the ground or a table. Tell your
boys a few fun facts about each planet as you place
their corresponding models on the sheet around the
sun. Have the boys study this model for a short time.
Then mix up the items, and either as a cooperative
group or by teams, have them try to place them back
in the proper planet order.
You can color the smaller planets different colors
to make them easier to remember. You can also roll
small bits of colored clay into balls that match the
sizes shown.
People have been watching the skies for millennia
to help them predict the weather. Check the following folklore predictions with your own observations
to see how many might be true.
• Red sky at sunset is a sign of a fair tomorrow. (The
sky you see at sunset is air that will reach you
tomorrow. Dry air produces a red glow, whereas
wet air produces a yellow-gray sky color.)
• Dull moon and stars foretell a rainy tomorrow.
• Lightning from the westerly sky is from a storm
that is on its way toward you.
• Towering, ragged clouds predict a rain squall and
wind.
• A sky full of webby cirrus clouds foretells a rainy
spell on its way.
• A halo around the sun or moon means a warm
front is on its way, with rain.
• Dark clouds against a lighter ceiling foretell a
windy rainstorm.
• The higher the clouds, the finer the weather.
Lowering clouds foretell rain.
• When swallows fly high, it will be dry.
• If the cows are lying down, it will rain.
• A good fall for fruit means a hard winter to come.
Wind direction also helps forecast the weather:
• The west wind generally brings clear weather,
except when it blows off the ocean.
• The north wind brings clear, cold weather.
• The south wind brings heat and sometimes showers.
• The east wind brings rain east of the Rockies.
When rain is near, nature gets excited. Look for
these signals:
• Tree frogs cry.
• Fish swim near the surface.
• Flies sting.
• Low clouds move swiftly.
• Gone-to-seed dandelions close up like an umbrella.
• Cloverleaves fold together.
Outdoors
4–27
RAIN GAUGE
N
Materials: Plastic pop bottle, colored tape, scissors, ruler, pencil
1. Cut off the top of the bottle where the curved top
meets the straight sides.
2. Turn the top upside down and fit it into the base.
This will stop the water inside the bottle from
evaporating.
3. Cut thin strips of tape and use them to mark 1⁄4inch divisions along the straight part of the base.
Write the level on the tape. Pour water up to the
lowest division.
4. Place your rain gauge outside, away from any
buildings and trees. Record the amount of rain
each day for a week, and remember to pour out the
water down to the lowest division each morning.
WEATHER VANE
Materials:
Wooden block
Sewing spool
Glue
Plastic straw
Plastic bottle
Tape
Coat hanger wire
Coat hanger wire
Triangle cut from
plastic bottle
Cold
and wet
E
W
Warm
and wet
Cold
and dry
Warm
and dry
SE
SW
S
a wind rose like the illustration. On each leg of the
chart, keep track of the date and weather conditions
for that day. Use patterned boxes as shown to indicate weather conditions, or color the squares beside
the dates different colors to show weather conditions
each day: yellow for sun, blue for cold and dry, red
for warm and dry, etc.
4˝ x 6˝
piece of tin
staples
Tape
WIND ROSE
Materials: Paper, colored pencils
This is a good way to keep track of the wind’s
direction and weather conditions over a month. Draw
Outdoors
NE
ANEMOMETER
Plastic straw
A weather vane can
tell you which direction
the wind is blowing.
Use the wooden block
for a base marked with
Spool
compass
directions.
Glue the spool in the
Wood
center of the block. Cut
block
a triangle out of the flat
area on the plastic bottle
and tape it to the middle
of the straw. Place the
straw in the hole in the
spool. Place a straight
piece of coat hanger wire in the center of the straw.
The wire should be long enough to stick out of the
top of the straw. Place the vane outdoors with the
“North” mark facing north. Record wind direction
at the same time every day. Remember that the wind
direction is where wind is blowing from.
4–28
NW
plywood
Weight with
lead sinkers
to control
degree of
swing.
Materials:
Paper plate
Four paper cups with handles
Stapler
Marker
Stick or dowel
Nail
Hammer
This device measures wind velocity. Staple the
cup handles to the rim of the plate. Drive a small nail
into the end of a stick or dowel and punch through
the center of the plate so that the plate turns freely.
Use a marker to make a stripe on one of the cups; this
will make it easier to count the number of revolutions and thus estimate the wind’s speed.
LIQUID BAROMETER
Materials: Glass or clear plastic quart bottle, saucer, water, marker
This device shows
atmospheric
pressure. Fill the quart
bottle with water. Put
the saucer over the
top, and turn it over
quickly. Allow a little
water to escape into
the saucer. With the
marker, draw eight or
10 scale marks 1⁄8 inch
apart. The middle
mark should be even
with the water level.
Check your barometer each day. If the
water level has risen,
the atmospheric pressure is higher and fair weather is coming. If the level
is lower, look for unsettled weather.
HUMIDITY CONE
Materials: Pinecone
A pinecone is a good tester to find out how much
water vapor is in the air. When the air is dry, the
cone’s scales open wide. When the air has high
humidity and rain is probably on the way, the scales
close up.
MAKE A RAINBOW
On a sunny day, falling rain or fog may split the
sun’s rays into a rainbow. You can make a rainbow if
the sun is shining on a windowsill. Fill a glass with
water and put it on the sill with a piece of white
paper behind it. The water refracts, or bends, the
light, and the sunlight will show on the paper as a
spectrum of colors.
SUN DAPPLES
Materials: Sunny day, leafy tree, two file cards,
pin, pegboard
On a sunny day, find a leafy tree that provides
shade. If you look under the tree, you will see many
small circles. These circles are called sun dapples.
To see what causes sun dapples, use a pin to make a
small hole through the center of one of the file cards.
Hold both cards in the sunlight. The card with the
pinhole should be between the sun and the other file
card. Look at the lower card carefully. It serves as a
screen on which you can see an image of the sun.
What happens to the size of the image if you move
the screen farther from the pinhole? What about
closer to the pinhole?
Use the pin to make a second pinhole in the upper
card. How many images of the sun do you see on the
screen now? If you add more pinholes what will you
see?
Hold a piece of pegboard in sunlight. Look at the
shadow of the pegboard. What do you think causes
all the bright circles you see?
Note: Never look directly at the sun. It can damage
your eyes!
SHADOW CLOCK
Materials:
Hammer
Scissors
Paper
Tape
Pencil
Watch
12-inch-square board
2- or 3-inch finishing nail
Tape a sheet of paper over the board. Drive the
nail a short distance into the board near the middle
of one end of the board about 2 inches from the edge.
Place it in a sunny, level place outdoors early in the
morning. Be sure that the nail is on the south side of
the paper.
Materials: Clear glass of water, white paper,
sunshine
Use a pencil to mark the position of the nail’s
shadow on the paper at one-hour intervals throughout the day. Label each line you draw with the time
you read on a watch.
Mark the position of the board so you can put it
in exactly the same place several days, weeks, or
Outdoors
4–29
months later. Compare the times on the shadow clock
with times on your watch during a day several days
after you make the shadow clock. Do the same thing a
week later. Do it again a month later. Do the times on
your shadow clock still agree with the times on your
watch after several days?
CAPTURE A SNOWFLAKE
Materials: Sheet of black construction paper,
magnifying glass, pane of glass, hair spray or artist’s
fixative
Because snowflakes melt so quickly when they
land on a warm surface, catching them requires some
planning. Chill a sheet of black construction paper
outdoors or in the freezer. Examine snowflakes with
a magnifying glass as they land on the paper before
they melt.
You can make a permanent impression of snowflakes by catching falling flakes on a chilled pane of
glass that has been sprayed with chilled hair spray
or artist’s fixative. Store supplies in the freezer until
you are ready to use them. Keeping the sprayed
glass as cold as possible, take it outdoors and allow
some flakes to settle on it. When you have collected
enough, take the glass indoors and let it dry at room
temperature for about 15 minutes. You’ll have a
permanent record of some of nature’s most amazing
designs.
TAKING THE SNOW’S TEMPERATURE
Materials: Outdoor thermometer, yardstick, tape
Tape an old outdoor thermometer to the end of a
yardstick. Don’t tape over the bulb. Gently push the
thermometer end into a snowdrift. It will take a little
time for the thermometer to adjust to the snow’s temperature, so leave it there for a few minutes. Measure
the temperature in deep snow and shallow snow, in
shady spots and in sunny spots. What is the difference? Is snow always colder than air? To find out,
hold the thermometer in the air for a few minutes
and then read it.
MEASURING A SNOWDRIFT
Materials: Yardstick
Push a yardstick into a snowdrift until the end
touches the ground. Measure the drift next to trees,
up against buildings, next to fences, on driveways,
and in other spots. Find the deepest drift. Is it in a
shady, sunny, or windy spot?
4–30
Outdoors
MAKE A SNOW GAUGE
Materials: 3-pound coffee can, ruler, permanent
marker
Use a snow gauge to measure how much snow
falls in your yard. With a ruler and permanent marker, mark lines on the inside of a coffee can. Make
a line for each inch and label from the bottom up.
When it starts to snow, put the can on the ground in
an open spot away from trees and buildings. Check
to see how many inches have fallen when the snow
stops falling.
Does 1 inch of snow make 1 inch of water? To find
out, let the snow melt in the can. Does the water measure to the same mark as the snow? Different kinds of
snow contain different amounts of water. Loose snow
has less water than wet, tightly packed snow.
WHO MELTS FIRST?
Make five snowballs that are about the same size.
Place each in a different location—one on a snowy
rock, one on the ground, one under a bush, one on
the hood of a car, etc. Try to guess which will melt
first and why. Keep checking until one of them has
melted. Were you right?
Family Camping
Cub Scout family camping is an overnight camping experience other than a resident camp program.
A family camping trip can be rewarding for boys and
every member of the family. There are three categories of Cub Scout family camping:
• Council-organized Cub Scout family camping
is an overnight camping event involving more
than one pack. The council usually provides food
service, staff, and an activity program based on a
theme.
• Pack-organized Cub Scout family camping is an
overnight event involving more than one family.
Pack members plan an enjoyable and safe outing
for all pack family members. Adults giving leadership to a pack campout must complete Basic
Adult Leader Outdoor Orientation (BALOO) and
must attend the campout. Only Webelos dens
may schedule den campouts. All camping for Cub
Scouts and Tiger Cubs should be pack-organized
family camping.
• Family-organized recreational camping is an
opportunity for a family to camp together. Whether
you camp in your own backyard or at the top of a
mountain, family camping experiences will provide great fun and memories.
WHERE TO CAMP
Cub Scout pack-organized camping should be
conducted only at sites approved by the local council. Approved sites might include federal, state, or
local parks in addition to BSA property. Check with
your council service center for locally approved sites
before planning your trip.
Selecting a Campsite
Look for the following when selecting a campsite:
• Try to camp with a south or southeast exposure.
• Your campsite should be protected from wind.
• Camp on level and reasonably smooth ground
(even a shallow depression can collect water in a
heavy rain).
• Avoid nearby gullies and ravines; they can be dangerous during flash flooding.
• Avoid camping near trees with dead or dying
branches.
• Make sure you have a water supply nearby.
• Don’t camp near swamps, tall grasses, or watery
meadows.
SETTING UP CAMP
• Pitch a tent on smooth and level ground with the
tent back to prevailing winds. The slope of the
stakes will depend on the condition and texture
of the ground. Usually, stakes driven at an angle
toward the line of pull will hold in either hard
or soft ground. Use a tautline hitch on guy lines.
Directions for tying this hitch can be found in the
Webelos Handbook and in Knots and How to Tie
Them, both available at your local Scout shop.
• A door mat of plywood or heavy cardboard will
help keep the inside of the tent clean. When possible, leave shoes outside the tent.
• Many campers take along a large tarp or dining fly
and set it up as a shelter to provide a covered area
for cooking, eating, and other activities outside the
tent.
• Keep an adequate supply of drinking water on
hand. It’s a good idea to keep several bottles full of
water in the tent at night, especially for children.
• Always gather firewood during daylight and stack
it under shelter. Don’t count on firewood being
available. Bring wood, charcoal, or stoves. Many
state parks do not allow the gathering of wood for
fires. Check local regulations about fires as you are
planning your trip.
• Before turning in for the night, be sure everything
is secure and covered for protection from rain and
animals. Be sure food is well-covered or hung out
of reach. Don’t leave open containers of food in the
car. The food may be safe, but animals may scratch
the car. Don’t store food in tents.
TENTS
Living in a tent is enjoyable if you prepare for it,
have the right tent, and follow safety precautions.
Here are some pointers.
• Allow about 20 square feet per person for tent living. Straight-walled tents provide more living area.
All-cotton or cotton/polyester canvas and ducks
are durable and water-resistant but are prone to
mildew. Synthetics are strong, lightweight, and
mildew-resistant.
• Many states have mandated the use of flameresistant tents. Remember, however, that a flameresistant tent is not flameproof, so use fire safety
precautions. Keep all flames away from the tent.
Never use liquid fuel stoves, heaters, charcoal,
lanterns, lighted candles, matches, or other flame
sources in or near tents.
• Some tent features that are helpful are a floor of
plastic-coated fabric, heavy-duty zippers, reinforced stitching at stress points, double-stitched
seams, and screened windows with inner-zipper
flaps.
• Tent ropes should be clean, strong, and securely
attached to the tent. Keep extra ropes available for
quick storm rigging.
• Canvas and rope shrink when wet. Tight ropes can
rip your tent in a storm. If it rains, loosen the tent
ropes a little.
• Never pile dirt and leaves against the lower walls
of a tent.
• Never use flammable chemicals, charcoal lighter,
spray paint, or insect repellent near tents. These
may remove the waterproofing.
• Clean and dry the tent thoroughly before storing it.
Carry and store the tent in a bag, if possible.
SLEEPING BAGS
Sleeping outdoors is half the fun of camping.
Sleeping bags make it easy, and air mattresses add
to comfort. Foam pads keep you warmer and don’t
deflate. Some campers use a sleeping bag on a cot.
Choose a sleeping bag that suits the season and
area. Down bags are the warmest and lightest but the
most expensive, and they do not insulate when wet.
Several other types are available. Be sure the fabric
covering the bag is sturdy.
Outdoors
4–31
OTHER EQUIPMENT
If you are not an experienced camper, someone
who is can give you helpful hints on what to take
and how to use it. In addition to a tent and sleeping
bags, your camping list will include cooking and eating equipment, food and food containers, some tools,
and personal equipment. Nearby Boy Scout troops
will be glad to help with advice and suggestions.
Some families borrow or rent larger equipment until
they know what purchases they need to make.
• Using paper plates and cups can solve the dishwashing problem, leaving only the cooking utensils to be cleaned. Do not burn disposable tableware. If a trash receptacle isn’t available, carry the
used dinnerware home for disposal.
• Always bring plastic garbage bags. They serve
many useful purposes, in addition to holding
trash.
• Don’t forget to include a first aid kit.
• If there are garbage disposal facilities at the campsite, use them. Otherwise, pack your garbage
out—that is, take it home with you and dispose of
it there.
• Recycle whenever possible. Wash bottles and flatten tin cans for recycling.
Outdoor Cooking
Cub Scouts and Webelos Scouts love a cookout.
No matter which kind of cooking method you use or
which recipes you try, boys will enjoy this outdoor
experience. Remember to have safety equipment
handy: a bucket of water and shovel or a fire extinguisher. Also nearby should be your cleanup station
for washing hands before cooking and eating, doing
the dishes, and disposing of your garbage. And, of
course, extinguish all fires when you leave the area.
WATERPROOF MATCH HOLDER
FIRES
• Always be careful when building a fire. Build fires
only in designated fire rings provided by the landowner or with permission in off-the-ground fire
pits, such as a metal barrel cut down to one-third
its size with legs welded on. (You can also try the
Fire in a Lid, 4–34.)
• Always break burnt matches before throwing them
away, and be sure the matches are cold out.
• Never leave a fire unattended. A breeze may come
up while you’re gone and spread the fire. Keep a
bucket of water, dirt, or sand handy for emergency
use. An unattended campfire or sparks from a fire
can cause an entire forest to burn.
• Be sure fires are out—dead out—before breaking
camp. Spread the coals and ashes and drench the
fire and ground around it with plenty of water.
Or mix soil and sand with the embers so the fire
will go out. Continue adding and stirring until
all material is cold enough to feel with your bare
hand. Don’t just bury the fire; it may smolder and
break out again.
Materials: Plastic film canister, stick matches,
scissors
A plastic film canister makes a useful match
holder. Cut the ends of the matches so that they fit
in the film canister. If you are not using strike-anywhere matches, cut a piece of the striker off a kitchen
matchbox and roll it up to fit into the canister.
TRENCH CANDLE
FIRE STARTER
DISPOSING OF TRASH
• Dispose of trash, including food scraps and paper
products, properly in a trash receptacle. Do not
burn it.
• Don’t put plastic or plastic foam in a fire; burning
plastic can release toxic gases into the air.
• Don’t bury leftovers or scatter them in the woods.
Animals will find them, and it is not healthy for
them to eat leftover food from humans.
4–32
Outdoors
Materials: Newspaper, string, paraffin, double
boiler, tongs
These fire starters are also called paraffin logs
or fire bugs and are useful in building fires in wet
weather. Tear several thickness of newspaper into
2-inch strips. Roll to make a log about 1 inch thick
and tie with a string. Melt paraffin in a double boiler.
Holding the newspaper roll with tongs, dip it into the
melted paraffin. The saturated string becomes a wick.
Trench candles produce a high, steady flame to help
get a fire going.
Another way to make a fire bug is to roll up four
newspaper sheets, beginning at the short side. Tie
strings 2 inches apart. Cut between the strings to make
2-inch “bugs.” Soak in paraffin as directed above.
To provide a little more burning area, create a
candle effect with the fire bug by using your finger to
push out some of the middle. When completed, you
can use the string for a wick and also light the small
“top” end of the candle.
Cut a long strip of corrugated cardboard. The
width should be slightly less than the height of the
tuna can. Remove the paper from one side. Roll the
cardboard in a tight coil and place on edge in the
tuna can. The tighter the cardboard is rolled, the longer it will burn. Insert a piece of string in the center
for the wick. Melt the paraffin in a clean can set in a
pan of water. Pour the melted paraffin over the cardboard in the can until the can is three-quarters full.
Let the wax harden.
TIN CAN STOVE
Cut
EGG CUP FIRE STARTER
Materials: 3⁄4 C. sawdust, melted paraffin, 3-oz.
paper cup or cup from a cardboard egg carton,
string
Mix the sawdust with enough melted paraffin to
saturate it. Put in the 3-oz. cup or the cup cut from
a cardboard egg carton. Insert a string in the center
for a wick.
Materials: No. 10 can, can opener, tin shears
Tie six to eight kitchen matches together with a
string, and dip the whole bundle into melted paraffin
while holding on to one end of the string. Let it dry
on a bit of newspaper or wax paper. Put the bundle at
the bottom of your fire and light the string.
Cut one end out of the tin can. Use tin shears to
cut a hinged opening at the bottom end of the can.
This door can be folded up or to one side. It allows a
way to light the Buddy Burner and provides airflow.
Smooth all sharp edges. Use a can opener to punch
out triangular openings around the side of the can
near the closed end. Before using the stove, spray
the stop with non-stick cooking spray. Set your stove
over a Buddy Burner, light the wick, and you’re in
business!
BUDDY BURNER
CHARCOAL CHIMNEY
MATCH BUNDLE FIRE STARTER
Materials: Kitchen matches, melted paraffin,
string
Materials: 2-pound coffee can, beverage can
opener, screwdriver or other hard implement, heavy
gloves
String wick
Rolled-up corrugated
cardboard
Melted
paraffin
Materials:
6-oz. tuna can
Paraffin
String
Pan of water
Can for melting paraffin
Strip of corrugated cardboard
This fire starter can be used with a Tin Can Stove
(this page) or as an emergency road flare.
Use this handy tin can gadget to help get all the
pieces of charcoal in a charcoal fire equally hot at the
same time. It’s great for a backyard cookout.
Remove one end from the coffee can. Use a beverage can opener to punch rows of triangular holes all
around the sides of the can (as in the Tin Can Stove,
above). Protect your hands with heavy gloves. Use a
screwdriver to flatten down the metal inside the can.
Cut out the other end of the can, and the chimney is
ready to use. Put crumpled newspaper in the bottom
of the chimney. Add pieces of charcoal and light the
newspaper at the bottom. The chimney helps the
charcoal start with an even heat and more quickly
than it would otherwise.
Outdoors
4–33
Once your fire has started, remove the charcoal
chimney with tongs and spread your coals to cook.
bricks for cooking. When briquettes are completely
cool, you can gather up the
ends of the foil for easy
Grill
cleanup and disposal.
Bend 1 inch
at end.
COOKING FIRES
The first and most important requirement for outdoor cooking is fire safety. Follow fire safety rules
and heed the flammability warning found in the Cub
Scout Leader Book. Careless use of fire can cause a
disaster.
Start with crumpled paper, shavings, or small dry
sticks. In wet weather, split a log and cut slivers from
the dry, inside part. Or, use one of the fire starters
described above. Use dry hardwoods, oak, maple,
walnut, or birch for the fire rather than evergreen
branches. Keep the cooking fire small. A good bed of
coals with a low flame, surrounded by rocks, gives
plenty of heat for cooking. Tamp the coals flat with a
stick if you want to make it level. Make the fire only
large enough to serve its purpose.
Be sure to build the fire out of the wind. And
remember to start the fire early because it will take a
while to burn down to coals.
In some areas, wood for cooking fires is not plentiful, so use packaged briquettes to make fairly fast
coals. Find out whether fires are allowed at your outing destination and use established fire rings. Cooking
fires can char the ground, and vegetation can have a
hard time growing again where a fire has been.
OUTDOOR COOKING UTENSILS
Skewer
Wrap with plasticcoated tape.
Coat hanger wire
Make loop.
Clothespin
Materials: Coat hangers, pliers, clothespins (not
the spring-type), plastic-coated tape
You can use coat hangers to make some simple
cooking utensils. Bend the coat hangers with pliers
to make a grill and a skewer as shown. Sand or burn
off any paint. On the grill, bend up a 1-inch point
in the center to help hold the meat. For handles,
make a narrow loop at the end of your utensil, slip
a clothespin over the loop, and wrap with plasticcoated tape.
Fire in a Lid
To make a fork for roasting, twist two wires together so that you have two fork points. Add a handle,
and again, sand or burn the paint off the wire.
Materials: Metal garbage can lid, bricks, charcoal
briquettes
ALUMINUM FOIL COOKING
To protect the ground from having a fire built
directly on it, you can use a metal garbage can lid for
a fire pit. Turn the lid upside down and steady it by
balancing it on bricks placed on the ground along the
outer edges of the lid. Light briquettes in your new
fireplace. You can also place a grill across the top for
grilling.
Aluminum foil cooking is simple and fast, and the
food retains its juices. Preparation is easy because
you can do it at home. Foil cooking also helps cut
down on dishwashing because the meal is cooked in
the foil and eaten from it.
Grill on the Ground
Always do foil cooking over a bed of hot coals,
never a flaming fire. Start the fire well ahead of the
scheduled eating time and allow it to die down to
glowing embers.
Materials: Heavy-duty foil, briquettes, bricks or
rocks, grid from kitchen range or barbecue grill
Tasty Stew
Lay foil on the ground in the cooking area. Set up
bricks or rock on ends so that the cooking grid will
be supported and level. Place briquettes on the foil
and light. When coals are ready, place the grid on the
4–34
Outdoors
Materials: Heavy-duty foil; potatoes, carrots,
onion, celery, stew meat, or hamburger patty; 1 to
2 T. tomato juice or other liquid; seasonings; bed of
hot coals
Whether you’re using an open fire or a stove, put
on a pot of water to heat before you serve a meal.
That way, you’ll have hot dishwater by the time you
finish eating.
Cook a tasty stew in foil. Cut up potatoes, carrots,
onion, and celery. Add stew meat, a thin hamburger
patty, or crumbled hamburger. Sprinkle with tomato
juice or other liquid. Season as desired. Use heavyduty foil or a double thickness of lightweight foil and
fold the food in a “drugstore wrap.” Place the food in
the center of the foil and fold up both sides to make
a “tent” over the food. Fold the edges together down
over the food, and then fold in each side about three
times to make an airtight container. Place the packet
on the coals and cook about 15 minutes on each
side. Because different fires cook at different speeds,
timing the meat can be a little tricky until you have
experience.
To begin cleanup, set out three pots. To the first
pot, add hot water with a few drops of soap for the
wash pot. In the second, place cold water with a few
drops of bleach to kill bacteria for a cold-rinse pot. To
the third, add just hot water for a hot-rinse pot.
Use the drugstore wrap with foil to cook a fresh
fish fillet, chicken, baked potatoes, corn on the cob,
and many other types of foods.
THE HANDY PLASTIC BAG
Heavy-duty resealable plastic bags will save dishwashing time. Use them as substitutes for mixing
bowls when you make cakes, biscuits, or instant
pudding. Carry the mixed dry ingredients in the bags.
When you’re ready to mix, add the necessary liquids
and press down on the bag to expel excess air. Reseal
the bag and “mix” by squeezing the bag firmly.
You can also use these bags to carry prepared
salads or other dishes. When you’re ready to serve,
simply place the bag in an appropriately sized empty
can, open the bag, pull the top over the outside edges
of the can, and serve from your simple “bowl.”
OUTDOOR CLEANUP
Materials: Squeeze bottle, plastic milk jug, golf tee
For easy cleanup while cooking outdoors, bring a
squeeze bottle filled with water and a few drops of
liquid detergent. Use to clean hands before, during,
and after food preparation.
For easy access to a flow of water, poke a hole in
the side of a milk jug near the bottom. Place a golf tee
in the whole as a stopper. Fill the jug with water and
set on a table or stump. To wash hands, remove the
golf tee and allow the small stream of water to pour
over your hands. Replace the golf tee when you’re
finished.
DISHWASHING
Materials: Three pots, heat source, dishwashing
soap, bleach, tongs
Scrape dishes and wash them in the wash pot.
Dip them in the cold-rinse pot and then using tongs
dip them in the hot rinse. Place dishes on a plastic
ground cloth to air-dry.
FOOD PACKING TIPS
Materials: Cardboard box, newspapers, resealable plastic bags, milk cartons
Keeping hot food hot and cold food cold can be a
problem on a trip, but it’s important to do to prevent
spoilage. Commercial insulated thermal bottle containers, plastic foam containers, and hot boxes come
in handy.
• Before packing your cooler, chill the food in the
refrigerator.
• If you don’t have a thermal container to keep
foods warm, make a “hot box.” Use a Dutch oven
or heavy aluminum pan to bring a one-pot meal
to a boil. Cook to a point just short of the last 10
to 20 minutes of the recommended cooking time.
Remove from the heat and place in a large cardboard box lined with 2 to 3 inches of newspapers.
Pack newspapers around the Dutch oven or pan
on all sides and the top and bottom of the box to
prevent heat loss. The food will continue to cook
in the box and stay hot for hours.
• Commercial coolers will keep drinks and salad
cool for a longer time if you use a large block of ice
rather than ice cubes. Freeze water in half-gallon
or gallon cardboard or plastic milk cartons.
• For meats to be cooked later, freeze them in resealable
plastic bags and carry them in a cooler. They will keep
other foods cold and will thaw without leaking.
• You can also carry well-sealed hot or cold foods
wrapped in a sleeping bag to keep a constant temperature longer.
PLANNING A COOKOUT
• Plan menus carefully and write them down.
• Make a list of the foods and equipment you need
for the number of people you are serving.
• Pack the food carefully so it won’t spoil or spill.
• Store food properly before and after cooking.
Outdoors
4–35
• Keep food preparation simple.
• Be safety conscious at all times when working
around fire. Have a container of water handy to
use in case of an emergency, and extinguish any
fires completely when you are through.
Outdoor Cooking Recipes
HEARTY HOT DOG SPECIAL
Materials: Thermal bottle, soup, string, hot dog,
hot dog bun, condiments
Fill a thermal bottle three-quarters full with your
favorite hot soup. Tie a string around a heated hot
dog and drop it in the soup, leaving the end of the
string outside the bottle. Cap the bottle. For a quick
meal on the road, open the bottle, pull out the hot
dog, place it on a bun, and spread with your favorite
fixings. Serve it with the hot soup, a drink, and cookies or cupcakes.
INSTANT TACOS
Ingredients: Taco mixture in a thermal container,
small bag of corn or taco chips, grated cheese
Put your favorite taco mixture in a thermal container. At mealtime, open the chips and pour the taco
mixture into the bag to mix. Sprinkle with grated
cheese and eat from the bag.
SUBMARINES IN FOIL
Ingredients:
Hard rolls
Canned luncheon meat, corned beef, or
minced ham
Pickle relish
Diced boiled egg
Grated cheddar cheese
Salad dressing or undiluted cream of
chicken soup
Scoop out a “bowl” in the center of the hard rolls.
Mix together the meat, diced boiled egg, and grated
cheese. Moisten with salad dressing or undiluted
cream of chicken soup. Fill the rolls with the mixture
and wrap each individually in a double thickness of
foil. Cook 20 to 25 minutes over hot coals.
KABOBS
Ingredients: Skewer or stick, cubed pieces of
meat (luncheon meat, precooked ham, quartered
wieners, or beef chunks), cut vegetables (onion,
potatoes, green peppers, mushrooms, or cherry
tomatoes), melted butter, barbecue sauce
4–36
Outdoors
On a skewer or stick, place bite-sized pieces of
meat and vegetables, alternating them. Brush the
skewered food with melted butter and barbecue
sauce. Broil over hot coals. Turn the kabobs occasionally as they cook.
PIZZA BOMBS
Ingredients: Can of flaky biscuits, pizza sauce,
sliced pepperoni, grated cheese
Fold up a square of foil into a bowl shape. Separate
flaky biscuits into four or five layers. Spread the layers onto the foil and pat together. Layer pizza sauce,
sliced pepperoni, and cheese on the biscuits. Place
over hot coals and cook.
GRILLED CORN ON THE COB
Ingredients: Corn on the cob, cold salted water,
butter
Strip the husks back over the end of the cob but
don’t tear them off. Remove all silk and soak the corn
in cold salted water for 15 minutes. Then smooth
on some butter. Bring the husks back over the corn,
wrap each ear in a piece of foil, and twist the ends
tightly. Lay on hot coals and cook for 15 to 20 minutes, turning once.
HUNTER’S STEW
Ingredients:
1
⁄2 lb. beef, veal, or lamb 1 T. cooking oil
1 C. water
Carrots
Celery
Onions
Potatoes
Salt and pepper
Cut the meat in 1-inch chunks. Place the oil in a
pan (a skillet or Dutch oven) and brown the meat. Add
the water and diced vegetables. Simmer for 30 minutes over hot coals. Season with salt and pepper.
WALKING SALAD
Ingredients: Apple, peanut butter, raisins
Cut the top off an apple and remove the core. Take
care not to cut all the way through to the bottom of
the apple. Fill the cavity with peanut butter mixed
with raisins. Replace the top of the apple and wrap in
plastic wrap. Take along for a quick snack on a hike.
Create your own filling using your favorites, such as
cheese, nuts, marshmallows, dried fruit, etc.
ANTS ON A LOG
Ingredients: Celery, peanut butter, raisins
Spread 4-inch-long celery sticks with peanut butter.
Dot raisins along the peanut butter for your “ants.”
PIGS IN A BLANKET
Ingredients: Biscuit mix, water or milk, wiener
For extra flavor, make a depression in the dough
and fill with jam, jelly, or cheese.
For pizza, flatten the dough. Spread on some
tomato sauce and a sprinkle of oregano. Add thin
slices of cheese and pepperoni. Wrap in foil and bake
in hot coals.
FOIL-CUP EGG
Ingredients: Egg, 7-inch square of foil, 16-oz. can
For each egg, make a cup by molding the square of
foil around the bottom of the can. Slide the cup off
the can and break an egg into it. Place the cup on a
grill and cook 10 minutes, or place directly on coals
and cook 2 to 3 minutes.
Twixer: Clean
pronged stick
Ball of dough
after stirring
Pour a little water into the
depression and stir twixer
into the moist mix.
EGGS ON A RAFT
Ingredients: Oil, slice of bread, egg, seasonings
Grease the cooking surface of a Tin Can Stove (see
page 4–33). Cut a hole 2 to 21⁄2 inches in diameter in the
center of a slice of bread. Place the bread on the stove
and break an egg into the hole. Season as desired. Turn
over once and cook to your satisfaction.
Clean
preheated stick.
Wrap dough
around a stick.
Bake over hot coals.
OMELET IN A BAG
Ingredients: Eggs, milk, cubed cheese, cubed
ham, chopped onions, seasonings
Materials: 1-quart heavy-duty resealable freezer
bags, marker, pot of boiling water
Add water or milk to biscuit mix until you have a
stiff dough. Mold the dough around a wiener that is
on a clean roasting stick. Pinch the ends of the dough
to hold. Roast over coals.
TWIXER BISCUITS
Ingredients: Biscuit mix, water
Optional: Jam, jelly, or cheese
For pizza: Tomato sauce, oregano, cheese, and
pepperoni
Open a box of biscuit mix and make a depression
in the contents so you can pour a little water into the
hole. Stir it gently with a clean, pronged stick (your
“twixer”) until it forms an egg-sized ball on the stick.
Remove the ball from the stick, flatten it, and wrap
it around a clean, preheated stick to bake as twisted
over coals. Or, form it into a biscuit shape and bake
in aluminum foil, leaving space for the biscuit to rise.
Crack one or two eggs into a bag and add a splash
of milk and other ingredients as desired. Carefully
press the air out of the bag and seal. Gently knead the
mixture to combine ingredients. Write the boy’s name
on the bag with a marker. Place the bag in boiling
water and cook until done. Eat right out of the bag.
BREAKFAST IN AN ORANGE
Ingredients: Orange, egg, muffin batter
Cut an orange in half and carefully remove the
pulp without tearing the cup-shaped peeling. Break
an egg into one orange cup and fill the other with
your favorite muffin batter mixed in a resealable
Outdoors
4–37
plastic bag. Place each cup on its own square of double-thickness foil, and then bring the four corners of
the foil to the top and twist securely to seal. Be sure
to leave enough room for the muffin to rise. Set the
foil-enclosed cups on hot coals for 10 to 15 minutes,
and then enjoy your delicious breakfast.
Variations: Try butterscotch, butter brickle, or
peanut butter chips. For a tropical treat, fill the
banana cavity with crushed pineapple, coconut, a
little brown sugar, and a dab of butter. Bake 5 to 10
minutes on hot coals.
SHAGGY DOGS
POPCORN ON A STRING
Ingredients: Chocolate syrup, marshmallows,
coconut or chopped pecans
Open a can of chocolate syrup and heat it over
coals until the syrup is runny. Toast a marshmallow
on a stick until just golden. Dip the marshmallow in
the syrup and roll it in coconut or chopped pecans.
BAKED APPLE
Ingredients: Apple, raisins, brown sugar, cinnamon, butter
Core an apple and place it on a square of foil. Fill
the core with raisins, brown sugar, a dash of cinnamon, and a pat of butter. Seal with a drugstore wrap
and place on hot coals. Cook until the apple is soft.
FRUIT KABOBS
Ingredients: Banana, pineapple, cherries, marshmallows
Ingredients: 1 t. cooking oil, 1 T. popcorn, butter,
salt
In the center of a piece of 6-inch-square foil, place
the oil and popcorn. Bring the foil corners together
to make a pouch. Seal the edges by folding, but leave
room for the corn to pop. Tie each pouch to a long stick
with a string and hold the pouch over hot coals. Shake
constantly until all the corn has popped. Season with
butter and salt. Make one for each person.
BANANA BOATS
Ingredients: Banana, chocolate chips, miniature
marshmallows, nuts
Optional tropical treat: Crushed pineapple, coconut, brown sugar, butter
Strip back one section of a banana peel but don’t
remove it. Cut lengthwise a triangle-shaped wedge
from the banana to make a cavity running the
length of the banana. Fill the cavity with a mixture
of chocolate chips, miniature marshmallows, and
nuts. Replace the banana peeling. Wrap the banana
securely in foil and place it in hot coals for about 10
minutes so the chocolate melts and the marshmallows puff up. Unwrap and enjoy!
4–38
Outdoors
Follow the instructions for regular kabobs above
(page 4–36), using chunks of banana, pineapple,
cherries, etc., alternating with large marshmallows.
Toast over hot coals using a skewer or stick until the
marshmallows are golden brown.
HIKER’S GORP
Ingredients:
Salted nuts
Chopped dates
Raisins
Semisweet chocolate bits
Dried fruit pieces
Cubes of hard cheese
Cocktail-sized
miniature crackers
Mix all the ingredients together and divide into
individual bags to send along with hikers.
HIKER’S BIRDSEED
Ingredients: Two individual packages of sugared
breakfast cereals, two small bags of coated chocolate candies, handful of raisins, half handful of dry
roasted peanuts
Mix all the ingredients together to provide energy
on hikes.
TIN CAN ICE CREAM
Ingredients: 33⁄4-oz. package instant pudding mix,
13-oz. can evaporated milk, regular milk
Materials: 1-pound coffee can with lid, 3-pound
coffee can with lid, duct tape, crushed ice, rock salt
1. Place the package of instant pudding mix and the
evaporated milk in a clean 1-pound coffee can.
Add enough regular milk to fill the can threequarters full. Mix well. Cover with a plastic lid.
Tape the lid on securely with duct tape so the can
is airtight.
2. Place the 1-pound can inside the 3-pound can.
Add layers of crushed ice and rock salt around
the smaller can until the ice and salt surround it
on all sides. Put the lid on the larger can. Tape
with duct tape.
3. Roll the can back and forth on a table or the
ground for 20 to 25 minutes. The boys can form
two lines or sit in a circle to do this, rolling it
back and forth to each other.
4. Carefully untape the large can and remove the
smaller one to check the ice cream. Wipe off all
salt before removing the lid from the smaller can.
Scrape the ice cream from the insides of the can.
Put the lid back on and tape securely.
5. Place the smaller can back in the larger can and
add more ice and salt. Tape the lid on the large can
and continue to roll for about 10 more minutes. By
then, the ice cream should be ready to eat.
sang songs enthusiastically and laughed uproariously (or groaned painfully) at skits. Then the tone
and pace of the program slowed to the calming closing thought. As the dying campfire embers crumbled
into ashes, boys reluctantly drifted off to bed with
their new memories. You stood before the glowing
embers, soaking in their fading warmth and knowing
that everything was just right. You’ve been touched
by campfire magic.
Campfires like this are special, but you may think
they are rare. They need not be! With careful thought
and preparation, the campfire described above can
become the rule rather than the exception. What follows are some hints and ideas to help you plan a campfire program, deliver it smoothly, and bring that special
campfire magic to it and to everyone attending.
PLANNING
Start with the BSA Campfire Program Planner.
This helpful resource sheet prompts you to include
all of the elements necessary for a successful campfire. Think of your campfire as flowing along a curve.
The campfire has a serious start, working upward
along the curve to peak excitement, and then slowing
down as the fire dies and the evening ends with an
inspirational closing.
BUILDING THE FIRE
Council Fire Lay
ICE CREAM IN A BAG
Ingredients: 1⁄2 C. milk or cream, 3 T. sugar,
1 t. vanilla
Materials: Quart-sized resealable freezer bag,
gallon-sized resealable freezer bag, crushed ice,
rock salt
Mix the milk, sugar, and vanilla in the quart-sized
bag. Carefully push the air out of the bag and seal.
Place this bag into the gallon-sized bag. Add crushed
ice and several spoons of rock salt to the gallon-sized
freezer bag. Remove any excess air and seal. While
holding the sealed edge, shake and roll the bag for 10
or 15 minutes. Once the ice cream freezes, open the
large bag and remove the ice cream bag. Enjoy your
treat right from the bag.
Fun With Campfires
Campfire magic! You’ve experienced it. You chose
the songs, practiced skits, and organized everything
into a program. Then people came together and you
began. Everything went without a hitch. Participants
Have your fire site ready before you begin. Make
sure you are using a designated fire ring with permission of the landowner. Have plenty of tinder, kindling, and the fuelwood that you will need.
Begin with a small tepee fire lay. Place big, loose
handfuls of tinder in the middle of your fire site.
(Dry pine needles, grasses, and shredded bark work
well for tinder.) Mound plenty of small kindling over
the tinder. Arrange small and medium-sized sticks
of fuelwood around the kindling as if they were the
Outdoors
4–39
poles of a tepee. Leave an opening in the tepee on the
side the wind is blowing against so that air can reach
the middle of the fire. This foundation fire must be
a sure thing; the trick is to have plenty of tinder and
small kindling and a place to insert the first light. For
campfires, it is better to use extra tinder to assure the
fire will light than to have the fire lighting not go as
planned. Crisscross larger fuelwood log cabin style
around the tepee foundation fire. Place wood across
the top of the log cabin to form a roof. Form another
smaller tepee fire lay on top of this roof.
Showmanship. Use showmanship to give sparkle
and life to the campfire. Dress up the setting and
plan for costumes when appropriate. Plan an opening ceremony that sets the right tone for the campfire
program. Vary the pace and timing of activities to
keep interest high—plan for lots of pep when the fire
leaps high. Make sure everyone participates; encourage enthusiasm, but maintain discipline at all times.
Plan for a closing ceremony that will be quiet and
inspirational as the embers of the campfire die.
Backlog Fire
Leave No Trace
Awareness Award
For a smaller group, use a backlog fire lay. Begin
with a big, seasoned log for the back. Mound your
tinder in front of the large log. Lean the kindling up
against the seasoned log and add fuelwood as needed.
THE FOUR S’S FOR A
SUCCESSFUL CAMPFIRE
Songs. You can quickly change the mood at a
campfire by choosing one of these song categories:
Tiger Cub/Cub Scouting/Webelos Scouting songs,
peppy songs, action songs, special-occasion songs,
novelty songs, quiet songs.
Stunts. A stunt can be the main event of the campfire, or it can be used to build on the theme of the
main event. Types of stunts that can be used include
action stunts, physical or mental contests, humorous
stunts, mixers, “magic,” and special mechanical and
chemical firelighting (careful—firelighting can be
dangerous if precautions are not taken).
Stories. Adventure stories, hero stories (biographical), nature stories, science fiction, ghost stories (use
common sense)—all are popular at campfires. The
Cubmaster’s Minute can be inspiring.
4–40
Outdoors
Tiger Cubs, Wolf and Bear Cub Scouts,
and Webelos Scouts all can have fun
while they earn the Leave No
Trace Awareness Award. Leave
No Trace applies in a backyard or local park (frontcountry) as much as it does
in the wilderness (backcountry).
Here are some ideas for Leave No
Trace fun; you may think of others:
Requirement 1. Discuss with your leader or parent/guardian the importance of the Leave No Trace
frontcountry guidelines. After discussing this in the
den, play a game in which small prizes are awarded
for each new idea of how they can follow the Leave
No Trace guidelines.
Requirement 2. On three separate outings, practice the frontcountry guidelines of Leave No Trace.
On any hike, at day camp, or when overnight camping, make it a game for everyone to pick up after
themselves, with extra points for picking up trash left
by others who were there before you. Award prizes.
Requirement 6. Draw a poster to illustrate the
Leave No Trace frontcountry guidelines and display
it at a pack meeting. The fun is already built into this
requirement!
5
RAZZLE DAZZLE
Audience Participation Stories
5-1
Mixers, Icebreakers,
and Pack Meeting Games
5-8
Cheers and Applause Stunts
5-10
Puppets
5-12
Puzzles
5-25
Skits
5-27
Songs
5-37
Musical Instruments
5-41
Stories
5-43
Jokes
5-48
Tricks and Magic
5-49
5-0
Razzle Dazzle
Razzle dazzle? This chapter presents activities that will impress, astonish, surprise, and
entertain your den or pack. Dip into each section to discover ways to add razzle dazzle to
your meetings: from audience participation stories to skits, jokes, and tricks. Never worked
with puppets or told a story? Now is the time to try something new!
THE IMPORTANCE OF GROUP
PARTICIPATION (A POEM)
The pack meeting seemed to drag that night,
And people were tiring fast;
The Cubmaster sensed the sleepy feeling
And hoped through the meeting he’d last.
Then came a lull in the evening’s action;
The Cubmaster wiped his brow;
If only he could perk things up—
He sure wished that he knew how!
Then suddenly quite like some kind of magic,
His assistant appeared on the stage;
She held up a book called Group Meeting Sparklers,
And opened it to a page.
Eagerly she made the announcement
That the audience would help out.
She divided them into several groups
And tested each one for their shout.
Before they knew what had happened to them,
They had all joined in the fun;
Each group was doing its very best
To out-do the other one!
Right then and there the meeting perked up;
Things moved along in style,
And the Cubmaster heard the people say,
“Best meeting we’ve had in a while!”
So remember the words “group participation”—
A very special key,
And all your meetings will be filled with fun,
The way they ought to be!
Audience
Participation Stories
Audience participation stories add variety, action,
and fun to den and pack meetings. Some get people
on their feet, going through motions under the directions of a leader. For others, the audience is divided
into groups that respond to a key word in a story read
by a leader. Here are several examples. The key words
are listed first, with the appropriate words or actions
defined. It’s a good idea to let groups practice their
motions or phrases first. This also might help “loosen”
everyone up a little before the story is read.
THE THREE TREES
BIG TREE: Plunk! (in a deep voice)
MIDDLE-SIZED TREE: Plank!
BABY TREE: Plink! (in high voice)
BABBLING BROOK: Gurgle gurgle
RABBIT: Clippety-clip, clippety-clop
HUNTERS: (Make a bugle call)
GUN: Bang!
NARRATOR: Once upon a time in the deep, dark
woods, there stood three trees—the BIG TREE, the
MIDDLE-SIZED TREE, and the wee BABY TREE.
And through the trees ran the BABBLING BROOK
and hopped the little RABBIT.
One day, a group of HUNTERS came into the forest in which stood the three trees—the BIG TREE, the
MIDDLE-SIZED TREE, and the little BABY TREE—
and through the trees ran the BABBLING BROOK
and hopped the little RABBIT. As the HUNTERS
wandered through the forest, one of the HUNTERS
spied the little RABBIT. He raised his GUN and
shot at the little RABBIT—and sadness reigned
in the forest, in which stood the three trees—the
BIG TREE, the MIDDLE-SIZED TREE, and the little
BABY TREE—and through which ran the BABBLING
BROOK, but no longer hopped the little RABBIT.
Razzle Dazzle
5–1
The BIG TREE, the MIDDLE-SIZED TREE, and
the little BABY TREE were all very sad. Even the
BABBLING BROOK was sad. But all of a sudden,
out from the thicket hopped the little RABBIT! The
HUNTER’S GUN had missed! And once again happiness reigned in the forest in which lived the three
trees—the BIG TREE, the MIDDLE-SIZED TREE, and
the little BABY TREE—and through which ran the
BABBLING BROOK … and hopped the little RABBIT.
Bobby said, “Thank you” to the BEAR. Then he
ran back past the WOLF, past the BOBCAT, and past
the TIGER and his partner. He ran right out of the
woods and straight home. He wanted to tell his parents that he wanted to join Cub Scouting so he could
become a TIGER Cub, a BOBCAT, then a WOLF, then
a BEAR, and then a WEBELOS Scout—and maybe
even earn the ARROW OF LIGHT!
CAR TROUBLE
BOBBY WANTS TO BE A CUB SCOUT
TIGER: Ro-arrrr!
BOBCAT: Mee-ooooow
WOLF: Ahhhh-ooooo!
BEAR: Grrrrrrr!
WEBELOS: We’ll be loyal Scouts!
ARROW OF LIGHT: (Everyone clap)
Bobby was out for a walk one day near his home.
As he walked along, he met a TIGER who, along
with a partner, seemed to be searching for something. Bobby asked the TIGER what they were doing.
“We are in search of the BOBCAT trail,” the TIGER
replied. “I need to find the way so that I can become
a BOBCAT.”
That’s odd, thought Bobby. A TIGER becoming
a BOBCAT? What an imagination the TIGER had!
Bobby continued on his walk. In a few minutes, he
came upon a BOBCAT. The BOBCAT appeared to be
reading a book. Bobby asked the BOBCAT what he
was doing. The BOBCAT said that he was trying to
become a WOLF.
Bobby laughed. Who ever heard of a BOBCAT
changing into a WOLF? He continued on along the
way. Soon he met a WOLF. The WOLF was working
on a woodworking project. “What are you trying to
become?” laughed Bobby. “I’m going to become a
BEAR,” the WOLF said.
How strange, thought Bobby. A TIGER who wants
to be a BOBCAT, a BOBCAT who wants to be a WOLF,
and a WOLF who wants to be a BEAR. Maybe I can
find a BEAR who wants to be something else, too!
Sure enough, soon he met a BEAR who was busy
packing for a camping trip with his family. “And
what are you trying to become, big BEAR?” The
BEAR said, “I’m going to be a WEBELOS.”
“What’s a WEBELOS?” Bobby asked. So the BEAR
explained to Bobby how he could become a Cub Scout.
First, he could be a TIGER Cub, then a BOBCAT, then
a WOLF, then a BEAR, and then a WEBELOS Scout.
He might be able to earn the ARROW OF LIGHT, the
highest award in Cub Scouting.
5–2
Razzle Dazzle
For a small group, write several of the items below
on 3-by-5 cards and give each person one or more
cards. For a large group, write only one item on each
card, so more people can participate. The narrator
reads the story, pausing at the blanks. In turn, players
read one item on their cards to fill in the blank words.
A loose tooth
Three boiled eggs
A tall pine tree
A fat onion
A green tomato
Two snowballs
A can of tar
A telephone
A bald eagle
A limping dinosaur
A bar of soap
A purple crayon
A cat’s meow
A butterfly net
A rattlesnake
Four hot rocks
Three raisins
A bike horn
A short pencil
Four sour pickles
A juicy watermelon
A swarm of bees
A can of dog food
An ice cream bar
Six plump skeletons
A can of worms
A ferocious lion
A dog’s footprint
Seven pounds of feathers
A used firecracker
A red kite
NARRATOR: One fine day, two elderly women—
Alice and Maud—decided to drive out of town for a
picnic. Alice loaded a basket with _______________,
_______________, and _______________, and other
tasty things. They took their lunch and drove off in
Maud’s old car. The radiator cap was decorated with
_______________, and the holes in the roof had been
patched with _______________ and _______________.
As they drove along, Alice pointed to the side of
the road and said, “Oh, look at that bush with the
_______________ growing on it.” “Let’s stop here,”
Maud said.
They carried their picnic basket to some shade
cast by ______________ and spread out _____________
to sit on. Nearby, _______________ sang gaily in a tree.
They went to the low bushes they had noticed and
picked the _______________ that was growing on
them. The two friends had a wonderful picnic.
A streetcar
A loud noise
A swarm of bees
A hunk of cheese
A heap of pancakes
A high-toned hobo
“There’s nothing as delicious as _____________
__ with mustard and pickles,” Maud said, as she
brushed the crumbs off her lap with _______________.
“Yes,” Alice sighed. “But it’s getting late. We’d better
start for home.”
A bathtub
A tiny speck
A beautiful sunset
A wise old owl
A bobtailed bunny
A wet kitten
A toothbrush
Some hot pepper
A loud sneeze
A black mustache
A wall-eyed fish
A sinking tea kettle
An old radio
An old shoe
A bug bite on the nose
Some pattering rain
An old hay rack
A red necktie
A pushcart
A rattlesnake
A rhinoceros
A secondhand sponge
A young earthquake
A glass eye
A sourpuss
A battleship
A roaring lion
A bent hairpin
An exclamation point
A runaway kitty cat
A shovel full of coal
A black cloud
A can of red paint
A trolley car
A snapping turtle
A rusty horseshoe
A broken umbrella
A cake of soap
A silly giggle
A bunch of posies
A litter of puppies
An inquisitive ostrich
A puff of smoke
A monkey-faced baboon
A bucket of slop
A bucking horse
A purple cow
A red barn
A crazy bedbug
A carload of fish
A leaky pail
A barrel of tar
Three blind mice
Somebody’s Scout shorts
A squeaky wheel
An old egg
A cross-eyed cat
My polka dot belt
A yellow parrot
A pile of peach fuzz
A blue hen
An elderly porcupine
A freezing farmer
A green pair of stockings
A keg of nails
A barrel stove
A pink ghost
A three-legged stove
A dish of beans
A green-eyed monster
A hot dog
A set of false teeth
A tall hat
A stuffed apple
An energetic turtle
A ton of bricks
A merry widow
Mary’s little lamb
A frowzy bird
A green snake
A pan of milk
A bean shooter
A prickly thistle
Your old shirt
A flashlight
A prickly cactus
Some red ants
A derby hat
A country bumpkin
A crying baby
Unfortunately, the car refused to start. The motor
made a noise like _______________ and then stopped
altogether. “Oh dear!” Maud said, looking under the
hood. “I think I see _____________ and ___________
__ caught in the fan belt.” “Impossible!” Alice said.
“Could the gas tank be empty? Are you sure you put
enough ____________ in it before we left home?”
“Of course, I did!” Maud said. “It must be the
wheels. We’ll jack them up with _______________
and then replace them with _______________.” She
covered her clothes with _______________ and took
_______________ to loosen the bolts.
Just then Farmer Jones drove up and asked whether he could help. “Looks like _______________ in
the engine,” he said, tightening a bolt with ______
_______. He turned the key and the car started. “I
just connected the _____________ to _____________,
which had come loose.” Alice and Maud looked in
their picnic basket and gave Farmer Jones the rest of
their _______________ to thank him. Then they drove
happily home.
JOHNNY MIX-UP
Prepare a set of 3-by-5 cards with each of the threephrase sets below written on them; you should have
54 cards in all. Deal all of the cards to the boys and
adults, who keep them facedown. (Each person may
get more than one card.) Then read the story. When
you come to a space, pause and let each player in
turn read one of the lines on his or her top card. The
crazier the better, although sometimes it’s just as
much fun when one of the objects on the card happens to fit perfectly.
Some dirty dishwater
A rusty nail
A jar of jam
A pig’s tail
A wild donkey
An old horn
A banana skin
A bad dream
Some axle grease
Pink lemonade
A bundle of shingles
A bag of rags
A toadstool
A pumpkin vine
A skyscraper
A camel’s hump
A rubber chicken
A black cat
Razzle Dazzle
5–3
A Model T Ford
A buggy bumper
A gas stove
A cross-eyed potato
A stick of dynamite
A big fat worm
A piece of ribbon
A rainy day
A race horse
Two fat skeletons
A peanut roaster
A Spanish onion
An ear of corn
A chunk of wood
A spare tire
A military haircut
A brass monkey
A second-hand car
A tin can
The hot sun
A Border collie
A juicy watermelon
A flat can
A blow-out
A skittish kitten
A ripped road map
Some ink spots
A crowing rooster
A laughing pony
Your red nose
A broken umbrella
A pair of suspenders
A spinning wheel
A rip in your pants
A slice of cold ham
A pain in the neck
A scrub brush
A head of old cabbage
A corncob pipe
A crawling lizard
A polka-dot frog
An old crab
A cross-eyed peanut
A windy day
A bow-legged horse
Mickey Mouse
Some Limburger cheese A pair of bee’s knees
NARRATOR: Once upon a time there was a little
boy named Johnny who lived in Mix-Up Town. His
home was indeed very strange, for it had _________
_______ on the roof and _________________ on each
window sill and _______________ with ___________
____ on it planted on each side of the front door to
make the house beautiful. The house was painted
so that it looked like _______________. Instead of
having flowers and vegetables growing in the garden, Johnny’s family planted _______________ and
_______________, and over in a corner was a tree with
_______________ growing on it.
Johnny’s father had a pet that was _____________
__, and he would go for long walks with it, leading
it with a chain while it hopped about merrily like
_______________. Johnny went with his father on
these walks, but he always had to dress up nicely like
all the other boys in Mix-Up Town whenever he went
out. This is how he dressed: On his head he wore
_______________, on one foot he had _____________,
and on the other was ______________. Instead of a
necktie, he wore _______________.
One morning Johnny’s father told him they were
going to the zoo to see _______________ and the other
things there. So Johnny dressed quickly and washed
himself with _______________ and dried himself on
_______________, which was hanging on the towel
rack. He brushed his teeth with _______________ and
5–4
Razzle Dazzle
combed his hair with _______________, and he was
ready for breakfast. He was very hungry that morning, so he took _______________ and _______________
and put it on his plate and mixed them with _______
________ and ate it all up.
At the zoo Johnny’s father had to buy tickets, so
he reached into his pocket and pulled out _______
________ and gave it to the ticket seller, who gave
Johnny’s father his tickets and his change, which
was _______________. They went inside, and the first
thing they saw was _______________, which was pacing to and fro and roaring loudly at _____________,
which was standing on _____________ and making
faces at Johnny and his father.
That morning the monkeys were very playful. One
of them was hanging by its feet on the trapeze and
holding _______________ with its hands and tickling
another monkey with it. Another monkey with _____
__________ on its head was throwing ______________
_ up like a ball and letting it bounce. A little monkey
close by saw _______________ buzzing around in the
cage and tried to catch it, but it made a noise like
_______________ and frightened the little monkey,
which ran away like _____________ was after him.
Then they went to see the elephants, which were
walking around in a pen just large enough for _____
__________. Johnny reached into a paper bag he was
carrying and pulled out _______________ and gave it
to the biggest elephant. The elephant was so pleased
that it shot water through its trunk and then reached
out and gave Johnny _______________.
When Johnny tired of seeing the zoo, he and his
father went to the aquarium, where they saw _____
________ swimming around like ______________ and
singing as happily as _______________. Now, across
the street was a sideshow where a band was playing
music that sounded like _______________ running
after _______________. High up on a platform was
a very strange-looking man. His head was shaped
like _______________ and his body was shaped
like _______________. And one ear was as long as
_______________. As the man puffed on his pipe,
great clouds of smoke came out of his ear. Just as he
took an extra deep puff on his pipe, a man slapped
him with _______________ and out of his ear jumped
_______________.
By this time it was time for Johnny and his father
to go home, so they went to the corner and climbed
on top of _______________ and rode home feeling as
tired as _______________.
The next day Johnny, who was an unusual sort
of a Cub Scout, went to his den meeting. First of
all, the Cub Scouts had to sign their names on the
back of __________________. Instead of a pencil they
used _________________. Their uniforms were indeed
strange ones. They were the color of _______________.
They had _______________ wrapped around each leg.
And on their heads they each had _______________,
and their neckerchiefs looked like _______________.
When they went into their den, they were each given
a puzzle that was _______________ cut up into several pieces, and they all tried to put it together with
_______________.
They sang a song about _______________; then they
worked on crafts. One Cub Scout was hammering on
_______________. Their den chief was helping the
denner to earn his knots achievement. This is what
they were doing: The den chief was holding ______
_________ on the table while the denner was trying
to tie it up with _______________. When they had
finished, he showed him how to jump over ________
_______. Then they all played a game in which each
Cub Scout threw _______________ as far as he could
while he carried _______________ in his left hand.
As the meeting came to a close, the den chief
lit _______________ and told the Cub Scouts that it
resembled _______________ and that all good Cub
Scouts should grow up to be like that, too. Then
they all went home as happy as _______________,
throwing _______________ at each other as they
sang a beautiful song about _______________, which
sounded like _______________ that had fallen into a
washing machine.
FIRE SAFETY STORY
Setting: This story is full of mistakes often made in
fire safety. Two adults should lead it. One will read
the story, and the other will hold up a sign that says
“Oh, no—not that.” The person with the sign should
hold it up when a mistake is read so that the audience can shout “Oh, no—not that!” The sign holder
should then correct the story reader with the correct
information. If the story reader and the sign holder
have a little ad lib give-and-take, the message will
have more of an effect.
NARRATOR: Once upon a time a group of boys
and some adults went camping. The boys were excited because they would be spending the whole weekend outdoors. They would get to set up tents, play
games, eat food outdoors, have a campfire program,
and return home tired but happy campers.
As soon as they got to their campsite, two of them
set up their tent next to where the fire would be
because they wanted to be close to the cooking and
warm at night. (“Oh, no—not that!” You can’t do that.
Sparks from the fire might catch the tent on fire.)
The next two boys set up their tent a little bit
away from where the cooking fire would be; they had
learned their lesson from the first group. They began
gathering sticks and piling them inside their tent,
because they wanted to be warm all night, too. (“Oh,
no—not that!” You can’t do that. Never have an open
flame inside of a tent.)
Two more boys set up their tent and hung their
liquid fuel lantern in the center of it. They knew
how dark it could be inside a tent at night, and they
wanted to read in bed. (“Oh, no—not that!” You can’t
do that. NO open flames inside a tent, even if it is a
lantern. Only flashlights.)
Finally, everyone got the idea and set up their
tents in a semicircle well away from the fire with all
the lanterns outside and the kindling laid neatly by
the designated fire area. The area was in an established fire ring well away from overhanging branches. It was time to begin the cooking fire. All the boys
helped collect firewood. One of the adults told them
to arrange the wood by size, but the boys thought that
was stupid so they just dumped it by the fire. (“Oh,
no—not that!” You can’t do that. It is best to arrange
firewood by size so that the correct pieces are close at
hand and easy to get to when building the fire.)
After rearranging all the firewood, the boys were
told they could build the fire. They did it exactly like
they had been taught. And it was a beautiful fire lay.
They started to light the fire… (“Oh, no—not that!”
You can’t do that. Don’t light the fire until a shovel
and a bucket of water are close by in case the fire gets
out of hand or for when you are ready to put it out.)
After they had the bucket and shovel nearby, they
lit the fire. But after a while, it started to go out. They
were reaching toward the lantern fuel to pour it on
the fire… (“Oh, no—not that!” You can’t do that.
Never use liquid flammable substances around a fire.
It might make the fire flame up and burn somebody.)
Finally, the fire was burning correctly, but it
would be some time before the coals were ready for
cooking. One of the boys grabbed a stick from the fire
and began writing his name in smoke in the air. (“Oh,
no—not that!” You can’t do that. What goes in the
fire, stays in the fire.)
As the fire burned down, one of the boys decided
to see whether he could jump over it. (“Oh, no—not
that!” You can’t do that. No running or playing near
the fire.)
The fire burned down, the boys cooked and ate
their foil dinners, and things quieted down. The
adults breathed a sigh of relief. It looked like everything was going to be OK and that the boys had
learned their lessons.
Razzle Dazzle
5–5
After dinner, the adults stoked up the fire again
and had a wonderful campfire—singing songs and
telling stories and, as the flames grew low again,
giving the boys something to think about. When it
was time for bed, the boys wanted to put the fire
out. They poured the bucket of water on the fire and
turned to go to bed… (“Oh, no—not that!” You can’t
do that. You must stir the fire and be sure that all the
embers are out and cold to the touch.)
With the fire out, completely out, the day was
done and sleeping bags unrolled. Now the adults
were sure that the boys knew that even though a
fire is a wonderful thing with many uses, it must be
treated carefully or it can become harmful.
CLANCY TO THE RESCUE
CLANCY: Feel your muscles, like a strong man.
HORSES: Slap thighs.
YELL: Shout “Hey, Guys!” with hands cupped around
your mouth.
FIRE ENGINE: High-pitched siren sound.
BELL: Swing arm like a clapper, saying, “Clangclang, clang.”
HOSE: Shh-sh-sh sound like water from a hose.
STEAM: Hissing s-s-s-s sound.
NARRATOR: If you like HORSES, you would have
enjoyed living back in the 1800s when HORSES
pulled old-fashioned steam-type FIRE ENGINES.
One of these FIRE ENGINES was driven by the a
great hero, CLANCY. Yes sir! CLANCY was a real
hero! Every day when there was no fire, he would
take the HORSES out for exercise, trotting them up
and down the streets. If children were playing along
the way, CLANCY would always stop and let them
pet the HORSES.
Sometimes, the fire alarms happened during the
daytime, but sometimes they happened at night.
When the alarm sounded at night, one person would
YELL up to the firefighters above, and they would
wake up and slide down the pole as fast as they
could. Then they would run to the FIRE ENGINE
where the STEAM was up, and away they would go
to the fire, clanging the BELL, with CLANCY driving
the HORSES.
One night most of the firefighters were in bed and
the others were playing checkers when the alarm
sounded. Where was the fire? At the mayor’s big
two-story house! Quick as a flash they were there.
CLANCY stopped the HORSES and YELLED, “Keep
the STEAM up, men!” They started the fire HOSE
and began to squirt water on the fire.
5–6
Razzle Dazzle
CLANCY strained to see upstairs where the mayor
and his wife were trapped. Flames were everywhere!
CLANCY YELLED, “You’ll have to jump!” The
firefighters held a net out to cushion their fall. The
mayor and his wife were afraid, but CLANCY encouraged them, and as the flames licked their heels, they
jumped and came right down into the middle of the
net.
The firefighters kept battling the fire. They put
the HOSE on it and kept up the STEAM in the FIRE
ENGINE. Before long, the fire was out, so they turned
off the HOSE, got back on the FIRE ENGINE, and
returned to the firehouse, clanging the BELL all the
way. To CLANCY and the other firefighters, it was all
in a day’s work—but to the mayor and his wife, they
were heroes.
THE HOUSE WHERE SANTA CLAUS
LIVES
HOUSE: Hands over head in an inverted V.
SHED: Hands in front of chest in an inverted V.
SLED: Hands together in a waving motion from left
to right.
REINDEER: Hands on sides of head, palms out.
PACK: Both hands over a shoulder as if carrying a
pack.
LITTLE GIRLS: Females, young and old, stand.
LITTLE BOYS: Males, young and old, stand.
DOLL: Hands with palms together on cheek, with
head slightly bent.
BOX: Both hands outline the three dimensions of a
box.
LION: Extend both hands and give a deep growl.
SOLDIER: Stand at attention; give the Cub Scout
salute.
TRAIN: Make a figure 8 with a hand.
SANTA CLAUS: Pat stomach with both hands and
say “Ho, ho, ho.”
NARRATOR: This is the HOUSE where SANTA
CLAUS lives. This is the SHED behind the HOUSE
where SANTA CLAUS lives.
This is the SLED that is kept in the SHED behind
the HOUSE where SANTA CLAUS lives.
These are the REINDEER that pull the SLED that is
kept in the SHED behind the HOUSE where SANTA
CLAUS lives.
This is SANTA CLAUS who guides the REINDEER
that pull the SLED that’s kept in the SHED behind the
HOUSE where SANTA CLAUS lives.
This is the PACK all filled with toys for good
LITTLE GIRLS and good LITTLE BOYS that is carried
by old SANTA CLAUS who guides the REINDEER
that pull the SLED that is kept in the SHED behind
the HOUSE where SANTA CLAUS lives.
This is the BOX that is kept in the PACK all filled
with toys for good LITTLE GIRLS and good LITTLE
BOYS that is carried by SANTA CLAUS who guides the
REINDEER that pull the SLED that is kept in the SHED
behind the HOUSE where SANTA CLAUS lives.
This is the DOLL that is in the BOX that is in the
PACK all filled with toys for good LITTLE GIRLS and
good LITTLE BOYS that is carried by SANTA CLAUS
who guides the REINDEER that pull the SLED that is
kept in the SHED behind the HOUSE where SANTA
CLAUS lives.
This is the LION that frightened the DOLL that is
in the BOX that is in the PACK all filled with toys for
good LITTLE GIRLS and good LITTLE BOYS that is
carried by SANTA CLAUS who guides the REINDEER
that pull the SLED that is kept in the SHED behind
the HOUSE where SANTA CLAUS lives.
This is the SOLDIER that captured the LION that
frightened the DOLL that is in the BOX that is in the
PACK all filled with toys for good LITTLE GIRLS and
good LITTLE BOYS that is carried by SANTA CLAUS
who guides the REINDEER that pull the SLED that is
kept in the SHED behind the HOUSE where SANTA
CLAUS lives.
This is the TRAIN that runs on the track and carries the SOLDIER forward and back, who captured
the LION that frightened the DOLL that is in the
BOX that is in the PACK all filled with toys for good
LITTLE GIRLS and good LITTLE BOYS that is carried by SANTA CLAUS who guides the REINDEER
that pull the SLED that is kept in the SHED behind
the HOUSE where SANTA CLAUS lives.
THE BIG TURKEY HUNT
PILGRIM: (Whistle)
TURKEY: Gobble, gobble
FISH: Bubble, bubble
BEAR: Growl, growl
SQUIRREL: Chatter, chatter
BEE: Buzz, buzz
DUCK: Quack, quack
HUNT: (All sounds at once)
Once upon a time, there was a PILGRIM who
decided to go out and HUNT for a TURKEY. As he
walked along through the forest, he met a DUCK.
The PILGRIM asked the DUCK, “Have you seen
the TURKEY? I’m on a big HUNT for him.” “No,”
the DUCK said, with a sly wink. So the PILGRIM
marched along until he spied a SQUIRREL playing in
the tree tops. “Good day, SQUIRREL,” the PILGRIM
said. “Have you seen the TURKEY? I’m on a big
HUNT for him.” “No, no,” the SQUIRREL said, smiling behind his paw.
As the PILGRIM crossed the brook, he bent toward
the water and saw a FISH swimming near the surface.
“Oh, FISH,” said he, “has the TURKEY been down to
the water for a drink today?” “No, not for a long time,”
the FISH said, diving deep to hide his laughter. The
poor PILGRIM continued down the shady path and
suddenly came face to face with a big, brown BEAR.
“Hello, B-B-BEAR,” said the PILGRIM. “H-h-have
you s-s-s-een the TURKEY? I’m on a big HUNT for
him.” “No,” the BEAR said. “I don’t even know what
a TURKEY is.” But he gave a rumbling laugh.
The PILGRIM was feeling quite depressed by now,
for he thought that he would never find the TURKEY.
Finally, he saw a BEE buzzing by. “Stop a minute,
BEE,” he said. “You fly just about everywhere. Is the
TURKEY near? I’m on a big HUNT for him.” “No,”
buzzed the BEE. “Nowhere around here,” and he
flew away, buzzing hard to hide his chuckles.
Soon the PILGRIM saw ahead of him a clump of
bushes and small trees. As he neared it, there suddenly rang out of them the most deafening noise
you ever heard! It was the most ferocious growl of
the BEAR, the loudest buzz of the BEE, the biggest
bubbles of the FISH, and the deepest gobble of the
TURKEY. Mr. TURKEY had hidden himself In the
midst or the thicket, and all of his animal friends had
gathered together to try to scare the PILGRIM out of
his boots and away from the TURKEY.
But the joke was on them, because guess what?
All the PILGRIM had wanted to do was invite the
TURKEY to help him eat his bountiful Thanksgiving
harvest! As the poor misunderstood PILGRIM let
out a loud yell and took off for home, all heard him
exclaim as he went out of sight, “That’s the last
HUNT I’ll go on—so good night, good night!”
Razzle Dazzle
5–7
Mixers, Icebreakers,
and Pack Meeting Games
Getting a meeting off to a good start often depends
on little things—the greeting at the door, the activity
involving people as they arrive, or the opening song
or icebreaker. These little things add sparkle and
punch (the razzle dazzle) to meetings—and add to
everyone’s enjoyment. If you allow “ice” to form at
the beginning of a meeting, you’ll have to spend valuable time and effort thawing it out. Icebreakers help
solve this problem.
WHAT’S MY NAME?
As people arrive at a pack meeting, pin the name
of a person or object on their backs. For a circus
theme, it could be a circus performer or animal
(clown, tall man, lion, etc.). For a citizenship theme,
it could be the name of a president or politician
(George Washington, the name of your mayor, etc.).
People move around the room, asking other people
questions about themselves to try to find out who
they are. Answers must be “yes” or “no” only. When
a person guesses his/her name, the card from the
back is pinned on the lapel.
Also important are mixers—activities that help
visitors get acquainted with others and feel at ease
in the meeting. Icebreakers and mixers are used for
this purpose, and also for a change of pace during a
meeting to prevent audience members from becoming restless or bored.
LAUGHING TUNES
If your mixers have winners, you can recognize
them early in the meeting with simple, inexpensive,
humorous prizes or with applause stunts. Several
examples of mixers and icebreakers follow.
YOU NEVER SAW IT
Everyone in the audience laughs to a familiar tune,
such as “Yankee Doodle” or “Row, Row, Row Your
Boat.” Use the same rhythm and tune; just sing “ha,
ha” instead of the words.
Occasionally, you will want to lighten up a pack
meeting with a game. This chapter also presents several that will help you do that.
Tell the group, “I have something in my pocket
that you never saw before, and you will never see
again.” Then take a peanut out of your pocket, crack
the shell, show it to the audience—and then eat it.
Say, “You never saw it before, and you’ll never see
it again!”
NAME ACROSTICS
DARK, ISN’T IT?
As people arrive, hand them a pencil and 4-by6-inch card. Ask them to print their full name in
capitals vertically at the left of the card. They move
about, trying to find people whose last names begin
with those letters. For variation, use the monthly
theme or other word along the left of the card.
Tell the audience that this is a test of intelligence,
coordination, and the ability to follow directions.
Have each person raise his/her left hand and point
the left index finger to the right, parallel to the floor.
Then have them raise the right hand and hold the
right index finger on a level with the left finger,
pointing in the opposite direction. Then raise the
left hand 2 inches and lower the right hand 2 inches.
Now ask them to close their eyes. After a moment,
remark innocently, “Dark, isn’t it?”
PAPER HEADS
As people arrive, give them a numbered slip, pin,
pencil, card, and large paper bag. Each person pins
the numbered slip on his/her chest, tears eye holes in
the bag, slips it over his/her head, and moves about
the room trying to recognize other people. Write the
numbers and names on the card.
WHO ARE YOU?
This is a good icebreaker for a den meeting. Hang
a sign on the door that reads, “Who are You?” The
lower part of the sign, which can be changed, has the
subject or theme for that meeting, such as planets,
cars, birds, etc. As each boy arrives, he must say,
“Today, I am Mars” (or a Ford, or a bluebird, depending on the subject).
5–8
Razzle Dazzle
WHO’S WHO?
As people arrive at the meeting, hand them a sheet
of paper with the following descriptions printed on
it. They are to move around the room and find someone who fits each of the descriptions. That person
writes his/her name beside the description. You may
want to give a prize to the person who has the most
blanks filled in.
• Someone who wears size 81⁄2 shoes
• Someone with blue eyes
• Someone who has a birthday in January
• Someone who plays a musical instrument
• Someone
• Someone
• Someone
• Someone
• Someone
• Someone
with red hair
with a younger sister
who likes to eat liver
who speaks a foreign language
who was born in another country
who was a Cub Scout as a boy
one string through the loop on the inside of the other
person’s wrist, bring this new loop back over that
person’s hand, and draw it back through the wrist
loop. (See the illustrations.)
1
By necessity, some of the descriptions must be
answered by an adult, which will encourage boys
and adults to interact.
2
SPELLING MIXER
Print a large letter on 5-by-8 cards—one letter for
a card. Do not use the letters J, K, Q, V, X or Z. Make
several cards with vowels on them. Have a card for
each person in the group. Three adults act as judges.
On a signal, people hold up their cards and rush
around to find two letters that will make a three-letter word when added to the card they are holding.
The three people lock arms and race to the judge,
who writes the word on the back of their cards. Then
they separate and rush back to find two more letters.
Continue the activity for 5 or 10 minutes. The person
with the most words on his/her card wins.
STAND BY SIXES
Audience members—boys and adults—stand in a
large open area. They respond as the leader shouts
instructions: “Stand by sixes!” “Stand by threes!”
“Stand by fours!” Everyone quickly forms groups of
sixes, threes, fours, etc., and stand together holding
hands. People who can’t find a group to join are eliminated from the game. The action is fast and exciting.
Just as soon as groups are formed, the leader shouts
another command. Eventually, most of the players
will be eliminated. When there is only one group of
six left, the command “Stand by fours!” will eliminate two more players, and so on.
4
3
THE MOON IS BIG AND ROUND
This is a good campfire icebreaker. The leader
says: “The moon is big and round. It has two eyes,
a nose, and a mouth.” As he/she says these words,
he/she makes a sweeping circle with the left hand
to indicate that the moon is big and round, makes
dots in the air with the forefinger for the eyes and
nose, and makes a small semicircular motion for the
mouth. Then the leader invites the audience to do
exactly the same thing. Most everyone will fail and
wonder why. The secret is that the motions are made
with the left hand. Most people will use their right.
LUCKY HANDSHAKE
Three or four people are secretly given pennies before the meeting. As people arrive, they are
encouraged to shake hands with everyone else. The
tenth person to shake hands with someone holding
a penny receives the penny. This goes on for a predetermined time; then those holding pennies get to
keep them.
PRISONER’S ESCAPE
This is a good icebreaker for a den or pack meeting. As people arrive, tie a piece of string around the
wrists of one person; loop another piece of string
over that person’s string and tie the ends to another
person’s wrists. They are now tied together. Challenge
them to get away without breaking a string or untying any knots. The solution is to push the center of
POCKETS
Ask people to compare the contents of their pockets, discovering who has pocket items in common. Try
to determine what the most common pocket item is.
Razzle Dazzle
5–9
Cheers and
Applause Stunts
Applause stunts are short, snappy, and lots of
fun for both boys and adults. They are a good way
to involve the audience and are often used to recognize a person or den for an accomplishment. A den
or pack may have its favorite applauses and cheers
that they use frequently. Many cheers and applauses
fit monthly themes. Boys can also create their own
cheers and applauses. (Always emphasize the importance of keeping them positive.) Following are some
examples.
Applaud and Cheer: Announce to the group
that when you raise your right hand, everyone is to
applaud. When you raise your left hand, everyone
is to cheer. When you raise both hands, they are to
applaud and cheer. You can vary this by telling them
that the higher you raise your hand, the louder they
should applaud and/or cheer. As you lower your
hand, the volume goes down.
Baseball Applause: Get out your pretend bat, take
a couple of practice swings, pretend to throw a ball
up into the air, swing at the ball, and yell, “It’s a
home run!”
Bravissimo Applause:
Bravo,
Bravo,
Bravo,
Bravo,
bravo, bravo, bravissimo,
bravo, jolly well done!
bravissimo, bravo, bravissimo,
bravissimo, jolly well done!
A Big Hand: The leader says, “Let’s give them a big
hand!” Everyone holds up one hand with the palm
open. But they say nothing!
Bow and Arrow Applause: Pretend you have a
bow and quiver of arrows. Take an arrow from the
quiver, place it in the bow, pretend to draw back
the bowstring, aim, and let the bowstring go. Watch
as the arrow flies through the air, and then yell, “A
bull’s-eye!”
Champion Applause: To the count of four, do the
following: stomp, stomp, clap, pause. To the beat say,
“We do, we do, thank you!”
Cheese Grater Applause: Pick up your cheese
grater and a chunk of cheese. Pretend to pass the
cheese over the grater, each time yelling, “Grate,
grate, grate!”
Compass Applause: Take your compass out of your
pocket. Hold it in front of you to get your bearings.
With your other hand, point to the person/group you
are recognizing and shout, “Way to go!”
5–10
Razzle Dazzle
Cookie Applause: Hold your pretend cookie and
then take a bite. Rub your tummy in a circular
motion while saying, “Yum, yum!”
Cow Chorus Cheer (for a humorous song/skit):
“Very a-MOOOOO-sing!”
Coyote Applause: The group stands, cups their
hands around their mouths, and says, “Yip, yip, yippeeee!”
Flapjack Applause: Pretend to push a spatula
under a pancake. Then throw it up in the air and nod
three times as if watching the flapjack flip in the air;
catch it on the spatula as you bring your other hand
down with a loud clap.
Frankfurter Applause: Hold up a frankfurter on a
bun, squeeze on ketchup, take a big bite. Then say:
“Hot dog! That was good!”
Giant Beehive Cheer: The group buzzes like a hive
of bees. When the leader raises a hand, the volume
increases. When the hand is lowered, the volume
decreases.
Giraffe Applause: Stand on tiptoes and yell,
“Outta sight!”
Good Turn Applause: Stand up and turn around
in circles as you applaud.
Grand Salute Applause: Stamp your feet four
counts, slap your knees four counts, clap your hands
four counts, and then stand and give a salute.
Handkerchief Applause: Throw a handkerchief
into the air, telling the audience to applaud until
you catch it or it falls to the floor. Vary the length of
applause—long throw, short, no throw at all. You can
also do this with a ball, a neckerchief, or other item.
Ice Cube Applause: Pick up an ice cube and say,
“C-O-O-O-O-L!”
Ice Water Applause: Pretend to wipe sweat from
your brow with a bandanna. Pick up a pitcher and
pour yourself a glass of ice water. Throw your head
back as you drink the water and then say, “Ahh…that
was cool!”
Knee Slapping Applause: Slap your knees.
Lion Applause: “A R-O-A-R-R-R-R-I-N-G success!”
Motorcycle Applause: Raise your foot and kick
down three times. Make a noise like a sputtering
motor. Hold your hands out as if gripping handlebars. On the third try, the engine starts. Say, “Varroo-omm!”
Owl Applause (for a humorous skit or song): Open
your eyes as wide as possible, flap your arms as if they
were wings, and say, “What a hoot, hoot, hoot!”
Paper Bag Applause: Make motions to simulate
opening a paper bag, forming a neck, and blowing it
up; then pop it, saying, “Pop!”
action, and so on down the line. When “the wave”
reaches the last person, it can come back the other
way, beginning with the person next to him/her.
Popcorn Applause: Close one hand and cover it
with the other hand. Let the closed hand “grow”
larger as the other hand moves up. Then spring your
fingers open and say, “Pop! Pop! Pop!” quickly.
Thumbs Up Applause: Hold your hand in front
of you. Make a fist, hold your thumb up, and say,
“Great job!”
Rainstorm Applause: Extend one hand palm up.
Using your other hand, start by tapping one finger at
a time, then adding the number of fingers you tap,
increasing the sound to simulate a rainstorm starting
and building to all hands clapping. Then decrease
the storm by slowing down the action one finger at
a time.
Roller Coaster Applause: Lean back in your chair,
holding onto an imaginary bar, making an “Achhchh-chh” sound. As the roller coaster reaches the top
of the hill, throw your arms up into the air and yell,
“Wheeee!”
Round of Applause: Audience members clap
while moving their hands in a large circular, clockwise motion.
Rudolph Applause: Put your thumbs to your
head with the fingers pointing up to form “antlers.”
Wrinkle your nose and say, “Blink, blink, blink!”
Seal of Approval Applause: Put your elbows
together, open and close your forearms and hands,
and bark a high-pitched “Arf, Arf, Arf!”
Soda Cheer: Pretend to pull the tab from a soda
can, gulp it down, and then say, “Give me more,
more, more!”
Tiger Applause: “That was G-R-R-R-R-R-R-E-A-T!”
Whittling Stick Applause: Pick a tall stick up off the
ground, take out your pocket knife, and start making
notches in the stick, going higher and higher. When
you get as far as you can reach, say “Top notch!”
Zebra Applause: “Zee-bra, zee-bra, ZEEEEE-BEST!”
DEN YELLS
Den yells help build den spirit and enthusiasm
and also can help boys let off steam at den and pack
meetings.
Den yells are usually simple and rhythmic and
often end on a word or phrase that the boys can
shout. You can adapt many high school and college
cheers for den yells. When the boys help develop the
den yell, they feel it is “theirs” and will enjoy using
it even more. Here are some sample den yells:
Den 1! Den 1!
Is there a better den? None!
What den has the most fun? One!
Den 1! Den 1!
We’ll do our best for the gold and blue!
We ARE the best! Den 2! Den 2!
Soup Applause: Pick up a spoon and slurp a spoonful of soup. Rub your tummy and say, “Mmmmm,
Mmmmmm, good!”
We’re the Cub Scouts from Den 3,
and no Cubs could be prouder!
If you can’t hear us now, we’ll yell a little louder!
(Repeat twice, louder each time.)
Stamp of Approval 1: Pound your left fist on your
right palm several times rapidly.
One, two, three, four,
Which den do you cheer for?
Stamp of Approval 2: Throw a handkerchief into
the air. Audience members stamp their feet until it
hits the ground.
Which den can you hear more?
Den 4! Den 4! Den 4!
Stirring Round of Applause: Clap your hands in a
BIG circle, waist level, as if you were stirring or mixing a big pot.
Tank Applause: Put your hand over your eyes as if
looking off into the distance and say, “Tanks, tanks,
tanks a lot!”
The Wave Applause: For a SWELL job! People on
the end of each row stand up, raise their arms, and
promptly sit back down. As the first person stands,
the person next to him/her follows suit with the same
Which den is really alive?
Which den has all the drive?
Den 5! Den 5!
We’re the den that is alive!
We’re the den that has the drive!
Den 5! Den 5!
T-H-R-E-E—
The den that’s best for you and me!
Watch us go and you will see!
It’s T-H-R-E-E!
Den 3! Den 3!
Razzle Dazzle
5–11
Puppets
Puppetry is an ancient art that appeals to boys of
all ages, perhaps more to boys of Cub Scout age than
any other. No one knows when or where puppets first
appeared. They have been found in Egyptian tombs,
in China, and in India in very early history. They
were used widely during the Middle Ages for teaching Bible stories. Puppets have acted before royalty.
They have been made and enjoyed by scholars, poets,
and artists.
You can use puppets in connection with several
achievements and electives and with many of the
monthly themes. Webelos Scouts may expand their
knowledge of puppetry while earning the Showman
activity badge.
WHY PUPPETS?
Puppetry can help Cub Scouts to
• Improve enunciation and voice projection.
• Develop coordination and a sense of timing.
• Gain self-confidence and personal satisfaction.
• Release fears and frustrations in an acceptable way.
• Recognize the importance of teamwork and cooperation.
• Develop creativity.
• Improve listening habits.
• Learn lessons of everyday living, such as getting
along with others and good sportsmanship.
• Learn and appreciate the effects of light, sound,
and movement.
• Experience the enjoyment of entertaining others.
In addition, teachers and leaders of boys with
special needs find puppets useful in helping boys
to overcome stuttering and emotional inhibitions,
relieve tensions, strengthen weak muscles, and
develop coordination.
TIPS FOR PUPPETEERS
Let the boys decide on the play they wish to present and the type of puppets they will use. They can
plan the dialogue themselves and say their lines
informally, even if it comes out a little differently
each time. It is difficult for some boys to manipulate
a puppet and recite memorized lines at the same
time. An alternative is to have a reader backstage so
the boys only have to operate the puppets.
• Keep the theater and the puppets in proper scale.
Small puppets on a big stage lose their appeal.
• Be sure that all puppeteers have plenty of room
behind the scenes.
5–12
Razzle Dazzle
• Plan frequent exits and entrances of puppets to
hold interest and to avoid having too many puppets on the stage at one time.
• Keep actions clear, simple, and exaggerated. An
excited puppet should be wildly excited, whereas
a tired puppet should groan and sag so wearily that
the audience knows immediately how tired it is.
• The puppet should speak and act according to the
kind of person, animal, or object it represents.
• Sometimes it’s good for puppets to speak aloud
to themselves as they go about their actions. For
example, a puppet might say while looking for
something, “I’ll look under this tree for the treasure.”
• Avoid hiding one puppet behind another.
• Hold the puppets vertically.
• Let the puppets walk off the stage, not sink out of
sight.
• Remember to wait for laughs to die down so that
the audience doesn’t miss any lines.
• Use music during the production, if possible.
• Keep It Simple, Make It Fun (KISMIF).
PUPPET PLAYWRITING
It is usually best to decide on a story or situation to
act out and let the boys develop their own lines, rather than having a written script with dialogue. They
may run into difficulty if they try to read a script or
remember lines while they are operating puppets.
• A simple comic story is best for Cub Scout–age
boys. Consider adapting a familiar children’s story
for a puppet play.
• Exaggerated actions and slapstick comedy are fun
for both the audience and the puppeteers. A few
misplaced lines or mistaken actions may help
rather than hinder the play.
• Lots of grunting, groaning, sniffing, wheezing, and
coughing adds to the value of a funny play.
• Music adds much to a play. It sets the mood for
the characters and adds a professional touch. A CD
player or tape recorder will come in handy.
When making assignments for your puppet play,
select someone to act as stage manager to be responsible for the props, scenery, music, and lighting. This
could be the den chief, one of the Cub Scouts, or a
parent or guardian.
Follow these simple steps in developing your puppet play:
1. Read the play or story carefully. Pick out the
important parts—or develop your own story.
2. With the boys’ help, develop an outline.
3. Keep the play short—3 to 5 minutes at the most.
4. Keep the puppets in mind. How many will there
be? Where do they fit into each scene? What will
they be doing and saying?
5. Plan entrances and exits carefully, so the puppeteers won’t be climbing over each other.
6. Keep dialogue short and simple, or use a reader
offstage.
7. In adapting a play, change the number of characters to fit the number of boys in the den by giving
some boys more or fewer lines.
Table Stage
Blanket Theater
Choose scenes that
• Sustain action and further the plot.
• Build up an important character.
• Have comedic possibilities.
• Add suspense.
• Offer unusual effects, such as with scenery or
lighting.
• Have fast action and good dialogue.
• A doorway can serve as a temporary puppet stage.
Hang a twin-sized bed sheet from a curtain tension
rod, adjusting its height so boys can stand behind the
sheet and operate the puppets above their heads.
• Make a simple portable stage by putting together
several pieces of display posterboard (three panels
like the ones used in science fairs). You can place
this stage on a table or the floor, and boys can use
their imaginations to decorate the front.
HAND PUPPET STAGES AND THEATERS
SCENERY FOR PUPPET PLAYS
Hand puppet theaters may be as simple or complex
as desired, but for Cub Scout–age boys, a simple stage
is best. The simplest stage consists of a table set on
edge. A cardboard carton with a window cut in one
side works well also. A large piece of foam board with
an opening for the puppets is an excellent stage.
Scenery not only makes a puppet play more
believable, it also helps set the time and place of
the story. It can be as simple as a single flower, or as
complex as a jungle. It is best, however, to use only
enough scenery to suggest the setting, letting the
audience imagine the details. Elaborate scenery may
detract from the puppets.
You can use many things as temporary puppet
stages so the boys can practice during den meetings.
Several hand-puppet stages are described and illustrated here.
Box Theater
Front
Slip puppets up
through this hole.
Cut out
back
portion
of box.
Backdrops are recommended, and often a solidcolor backdrop is all you need. Scenes can also be
painted on backdrops, or scenery pieces cut out and
pinned on them. Cloth or paper backdrops are easily
rolled up for storing or transporting.
When making a backdrop, it is best to first draw a
miniature sketch. Then make an enlarged pattern of the
desired size and transfer it to the backdrop. When using
color on backdrops, keep in mind the mood of the play,
the color of the puppet costumes, and the lighting.
The simplest way to add scenery to your play is
to cut small scenery pieces—such as trees, bushes,
fences, boats, houses, tables, chairs, or even bathtubs—out of cardboard and attach them to a dowel or
stick. Boys can hold a piece of scenery with one hand
and their puppet with the other.
Razzle Dazzle
5–13
Prop Board
Make sure that all light cords are located where
no one will trip over them. If cords are on the floor,
tape them down.
SPECIAL EFFECTS FOR PUPPET PLAYS
Sound effects and other special effects make a
puppet production more lively and vivid. The audience always remembers the scene where something
unusual happened, such as when the soup burned
and smoke billowed everywhere.
1
⁄2-by-2-inch wood strip
1
⁄2-by-1-inch square blocks
This device holds furniture, scenery, and other
props on the stage without a platform. Glue and nail
four 1⁄2-by-1-inch square blocks to the inside of the
crosspiece at the bottom of your stage opening. To
these, attach a 1⁄2-by-2-inch wood strip the length of
the opening. This makes a channel the entire width
of the stage opening. The props will slide into and
out of place quickly for scenery changes, or the puppets can pick up, carry, and set down a variety of
objects on the prop board.
LIGHTING FOR PUPPET PLAYS
Darkening a room and illuminating the puppets
with spotlights or stage lights helps the audience see
the show and adds a theatrical atmosphere. Let boys
experiment with lighting in different ways and from
different angles—above, below, in front, and to the
sides of the puppet stage opening—to find out which
type of lighting throws unwanted shadows and
which kind gives the desired illumination. The best
way to learn how to use lighting properly is by trial
and error, during practice, before the actual show.
Strong flashlights, goose-necked lamps, light sockets
with clamps, electric lanterns, shaded bulbs, light
bars, and small spotlights can all be good sources of
lighting for puppet plays.
You can obtain special lighting effects by using
black lights, colored cellophane over lights, dimmer
switches, flickering Christmas lights, etc. Make housings for lights from tin cans.
Remember that the lights must be on the front of
the stage and directed toward the puppets. Too much
light will wipe out the puppets’ features. They will
lose their shape and look flat. Also remember that
lights should not be set so they shine in the eyes of
the audience members.
5–14
Razzle Dazzle
Boys will enjoy inventing ways to make special
effects for puppet plays. Use a cassette recorder
to record needed sounds such as street noises and
animal sounds. In addition to the suggestions that
follow, see the sound effects described in “Skits and
Costumes” below.
Smoke, Steam, Fog, Magic Dust: Blow excess powder off a powder puff.
Snow: Throw white confetti.
Mist, Rain: Spray water from an atomizer bottle.
Wind: Blow a fan on the set.
Lightning: Flick lights off and on quickly, or use a
camera flash.
Door Slam: Slam two books together.
Crickets Chirping: Run a fingernail over a small piece
of fine-toothed comb (near a microphone, if available).
Rustling in Underbrush: Crush broom straws (near
a microphone, if available).
Gurgling Stream or Boiling Liquid: Put a straw in
a cup of water and blow hard (near a microphone, if
available).
Fire: Create dancing shadows by placing something that moves in front of a red light.
Wilting Flower: Make a flower stem from a curtain
spring; insert a rod and then, when wilting is to happen, pull the rod out.
MAKING HAND PUPPETS
Most of the puppets Cub Scout–age boys will use
will be hand puppets, which are worn on the hand
and manipulated by one finger that guides the head
and two other fingers that guide the puppet’s hands.
Boys will enjoy making their own hand puppets.
Materials
Before starting to construct puppets or build scenery
or props, it helps to be familiar with a wide range of
possible construction materials. Have a place for orga-
nizing and storing odds and ends. The list below is just
a beginning of items that you might collect.
• Old bottle brushes, scouring pads, steel wool, fly
swatters, wooden and plastic spoons, hair curlers.
• Broom handles, dowels, wooden craft sticks, coat
hangers, umbrella parts, bicycle spokes, chopsticks.
• Plastic containers, small boxes such as egg cartons, plastic and wood baskets and trays, rubber
balls, table tennis balls, tennis balls.
• Buttons, beads, sequins, glitter, costume jewelry,
bits of glass.
• Corks, sponges, lids and caps, spools, weights,
fishing floats.
• Socks, stockings, gloves and mittens, felt and
other fabric scraps, cotton, materials for stuffing,
such as old nylon stockings.
• Lace, fringe, pom-poms, trimmings, fur pieces,
feathers, raffia, ribbon, string, shoelaces, yarn,
rope.
• Pipe cleaners, chenille, toothpicks, wire, tinsel.
• Plastic foam balls and pieces, wood scraps, sponges, leather scraps.
• Doll clothes, dollhouse furnishings, stuffed toys.
• Construction paper, crepe paper, cardboard, cellophane, paper plates, bags and cups, cardboard and
plastic tubes.
• Polyfoam: Cut and form 1⁄2- or 3⁄4-inch sheets into
any shape; use heavy-duty glue or contact cement
to join.
• Cloth: Use felt, muslin, and fake fur. Stuff to shape.
Consider how the puppet’s head will be attached
to its body. In some cases a rod or finger hole can be
poked into the head; in others, a sturdy cardboard
tube neck band should be attached to permit good
control of the puppet’s head.
Some puppet heads must be painted; others, because
of the material from which they are made, can be used
as is. To make skin tones, vary the amount of white,
red, brown, black, and yellow paint to get the desired
results. After the base coat dries, touch up the cheeks
and lips with pink. Use gray or blue for eye shadow.
Some paint will need an overcoat of shellac, varnish,
or clear nail polish for protection.
Hair and Eyes
The most effective puppets have simple, clearly
defined, and exaggerated features. The size and position of the features will help develop the character of
the puppet. Look at the sample eyes and facial hair in
the illustration and imagine the different characters
each might express.
Heads
More than any other part of the puppet, the head
must express personality. Because the audience
won’t notice small details, this should be done simply. It is usually best to keep the facial expression
neutral and let the voice and movements of the puppet show emotions. If you use removable features,
however, you can change the facial expression as
often as desired.
The puppet head should be no smaller than onesixth the body size. Try puppet heads made from
paper plates, paper cups, fly swatters, blocks of
wood, boxes, craft sticks, and plastic containers.
Here are some other ideas for puppet heads:
• Ball or Egg: Use a plastic foam ball, rubber ball, or
plastic egg shape.
• Papier-Mâché: Cover a crinkled-up newspaper
ball, plastic foam ball, balloon, or a clay model
with papier-mâché.
• Sock: Stuff a sock and decorate it, or pull it over
another shape such as a ball or plastic bottle.
• Sponge: Shape sponges with scissors.
Hair in the form of wigs, beards, mustaches, and
eyebrows can be pinned, taped, glued, stapled, or
sewn onto a puppet head. Narrow streamers of crepe
paper, strips of scrub pads and steel wool, fur pieces,
wood shavings, feathers, string, and yarn can all be
used for hair, depending on the effect you want.
Razzle Dazzle
5–15
Nothing helps a puppet’s face and character more
than sparkling eyes. Use a touch of glitter, the head
of a pin or tack, a sequin, or a shiny button for the
puppet’s pupils. Also make eyes from stick-on dots
available in various sizes and colors at office supply
stores, or cut them from paper or felt. You can use a
black felt-tip pen to make a dot for the pupil.
Hand Positions
1
2
For some puppets, loosely attached moveable
plastic eyes will be effective. These are available at
hobby and craft stores. Eyes made from buttons and
table tennis balls can be attached so they will move
when the puppet moves.
Pinned-on eyes, eyebrows, and mouths can be
changed during a puppet performance to show different expressions.
Hands/Paws
Hands or paws add to the versatility of the puppet
if they allow the puppet to pick up items. Make hands
from leather, wood, heavy cardboard, felt, or other
fabric. They can be an extension of the costume sleeve
or made separately and attached. Some puppet hands
are stuffed, others aren’t. Above all, like the facial features, the hands or paws should be exaggerated.
Costumes and Bodies
You can make puppets of everything—people, animals, a musical instrument, a tool, or even a tooth!
The simplest hand puppets have a handkerchief,
piece of shirtsleeve, or other piece of cloth for a costume. You can also use baby or doll clothes. You can
use one basic costume along with interchangeable
heads and removable accessories.
Remember these important points about puppet
costumes:
• Make the costume long enough to extend to the
end of the puppeteer’s forearm.
• Use a material that hangs well when the puppet is
still and that moves easily without restricting the
puppeteer’s hands.
• Select a texture and color that suits the puppet’s
personality.
• Hats, vests, sashes, scarves, bandannas, and eyeglasses can be added and removed.
OPERATING HAND PUPPETS
Operating puppets is called manipulation. The
basic movements are simple. Puppets can nod, shake
or scratch their heads, clap, bow, twist, sit down,
walk, jump, limp, climb, dance, and perform many
other actions.
5–16
Razzle Dazzle
Two basic ways of holding your hand inside a
puppet are shown here. The first position gives the
puppet arms a longer reach and better grip on props,
but it tends to tilt the puppet to one side. The second
position results in better balance, but the little finger
may restrict the arm movement and make it more difficult to hold props. The first position is usually best
for small hands.
Puppet Actions
It is important to move puppets every time they
speak or react to what another puppet says and keep
them still the rest of the time. If you move your puppet too much or at the wrong time, the movements
will detract from other puppets and make your
puppet’s own movements less effective.
The best way to learn how to manipulate a puppet
is by going through the various movements in front
of a mirror. Try some of the following:
Walking: Puppets shouldn’t pop out of thin air but
should enter at the side of the stage or come upstairs
or downstairs in view of the audience. Raise and lower
the entire arm slightly, and at the same time, turn the
wrist from left to right. Make your wrist motion slower
or faster depending on how fast you want your puppet
to walk. Try to avoid jerky movements.
Talking: If the mouth is moveable, it is simple to
indicate talking. Otherwise, move the head up and
down rhythmically when the puppet is talking. Like
people, puppets should look at whomever they are
speaking to.
Listening: Puppets should have good listening
manners, again like people, and face the puppet that
is speaking.
Sitting: Bend the wrist forward and drop your arm
a little. This pushes the back of the puppet out and
looks as if he or she is about to sit down.
Climbing: Slowly lower whatever the puppet is
climbing—tree, beanstalk, fence, ladder—while the
puppet remains at stage level. Its only movement
would be grasping the tree branches or beanstalk at
intervals.
Piano Playing: Use a toy piano that has been muffled
so that it doesn’t make any sound. The puppet pretends
to play the piano as a tape recording plays offstage.
Dancing: Two puppets can dance together or make
kicking movements by using the index finger of the opposite hand to make kicks underneath a full costume.
Clapping Hands: Bring the thumb and second finger together. Practice touching the puppet’s mouth,
ears, and forehead with its hand.
Kneeling: Drop your arm down and allow the legs
or skirt of the costume to fold under the puppet.
Standing: Let the puppet place its hands on a
nearby table or chair and pull itself erect.
• Hopping like a rabbit
• Coughing, hiccuping, sneezing
• Walking with a limp
TYPES OF HAND PUPPETS
Several types of hand puppets are suitable for Cub
Scout–age boys, including those made from paper
bags, socks, cardboard cylinders, and boxes. Jointed
puppets, or marionettes, require more detailed construction and operation and are not covered here.
Talking Paper Bag Puppet
Paper bag puppets are the easiest, least expensive,
and fastest type of puppets for Cub Scouts to make.
Use small paper bags (lunch bag size). You’ll need
crayons, felt-tip pens or paint, scissors, and a pencil
to make faces and decorate them. You can also use
additional materials, such as felt, construction paper,
yarn, buttons, etc.
1
Lying Down: Drop the puppet to a kneeling position and place the puppet hand on stage, as if bracing
itself. Turn your wrist slowly around until the puppet is on its back. Move your entire hand as if the
puppet is settling itself in bed or on the floor.
2
Yawning: Place the puppet’s hand over its mouth.
Picking Up: Grasp the object firmly between the
fingers operating the puppet’s hands. To pick up an
object, first look at it, then touch it, and finally pick
it up.
A puppet can show feelings and personality by the
tone of voice you use or through its actions. Here are
some emotions and the actions that might show the
emotions:
• Excited: Clasping hands and jumping up and down
• Sad: Putting hand to the face and drooping the head
• Angry: Banging hands or clenching them together;
beating the head with a hand
• Afraid: Trembling and clasping the hands to the body
• Tired: Making slow, languid movements
• Old: Making shaky, slow movements
3
4
Just for fun, let the boys try these actions with
their puppets:
• Marching to music
• Leading an orchestra
• Sweeping or scrubbing a floor
• Stacking blocks
• Washing dishes
Razzle Dazzle
5–17
Leave the bag folded (with the fold on top) and
mark lightly where the features will go. The eyes,
nose, and top of the mouth should be on the bottom
of the bag; the bottom of mouth, on the front of the
bag, as shown. Glue on or decorate with hair, ears,
clothing, etc. Manipulate the puppet by placing your
hand in the bag with your fingers over the fold in the
bottom. Open and close your hand to make the puppet talk or sing.
Sock Puppets
Two types of sock puppets are shown here—the
first where the entire sock is used to form an elongated animal head, and the second where only the
heel or toe of a sock is stuffed to form a round puppet
head. Any old sock will do, but a fleecy or wool one
will work best.
Use the Entire Sock
You can use this same technique to make a puppet
that opens and closes its eyes.
Flap down
Flap up
Stuffed Bag Puppet
1. Stuff a small paper
bag with newspaper to
form the head. Tie the
head to a small dowel
or rod. Add features
as desired—eyes, nose,
mouth, ears, hair, etc.
2. Make a costume from a
square of fabric. Make
a hole in the center so
you can slide the dowel
with the head into the
fabric. Tie or glue the
fabric just under the
puppet’s head.
3. Hold the puppet dowel
in your hand to find
the proper places to
make slits in the fabric for your thumb and
index finger to slip
through.
4. Manipulate the puppet by holding the dowel
with three fingers and slipping your thumb and
index finger through the slits to act as the puppet’s hands.
1. Spread the sock out flat so the heel is facing up.
Cut around the edge of the toe and back, about 2
inches, as shown.
2. Use a small piece of red, pink, or orange felt or
cloth, folded in half, for the inside of the mouth.
Insert the cloth in the open part of the sock toe so
that the folded edge fits all the way back against
the edge of the opening. Mark the cloth to fit,
and then cut it to the proper shape. Turn the
sock wrong side out and sew or glue the red cloth
inside the opening. When the glue is dry, turn the
sock right side out.
3. Glue or sew on features. Glue a pad of cotton on
the inside heel of the sock to give shape to the
animal’s head.
4. Operate the puppet with the thumb in the lower
lip and all the fingers in the upper lip.
Use the Heel or Toe
Toe or heel of sock
Draw
string
Wrap thread
around the nose.
Stuffing material
Cardboard tube
5–18
Razzle Dazzle
1. Make a cardboard tube 3⁄4 inch across and 2 inches
long. Fasten with tape.
2. Cut the heel or toe from an old sock (white or tan
is usually the best color). Place a ball of stuffing
material (cotton, piece of nylon stocking, or tissue
paper) over the end of the cardboard tube and slip
the sock toe or heel over the stuffing. Pull it down
and tie securely near the bottom end of the tube.
3. Make a nose by pulling out a small piece of
the sock and stuffing and tying it with a strong
thread. Or you can glue on buttons or beads for
the nose, eyes, and ears.
4. Make a puppet costume out of fabric and attach it
to the head with a draw string. Put your finger in
the cardboard tube to manipulate the head, and
make arms as shown with your fingers.
Cardboard Cylinder Puppets
Hand puppet
position
Cardboard
Cotton
Yarn
Stick
These small puppets, made from toilet tissue cores,
are best suited to a small tabletop theater. Cut the
cardboard core to the desired length. Cover the top
with construction paper or crepe paper and decorate
or paint as desired. Glue on a fabric skirt or costume
to cover the puppeteer’s hand. To operate, insert two
fingers in the bottom of the core, or tape a stick on the
back of the puppet for the operator to hold.
Cardboard Box Puppets
Plastic Foam Cup Puppets
Boxes are a good material for making puppets. For
small puppets, use gelatin boxes; for large ones, cereal boxes work well. But any box can be a puppet.
Use a whole cup to make the puppet’s head, cutting the cup lengthwise to make the upper and lower
parts of the head. (The upper section should be a
little bigger than the lower section.) Cut mouth linings to fit from cardboard and glue them in place, as
shown. (Tape will hold these in place until the glue
Draw your features on with felt-tip pens, paint
them on, or glue on felt or paper cutouts. If boxes
have a waxy surface, add a small amount of liquid
soap to tempera before painting them. Scratch the surface lightly before gluing on trim. Or cover the boxes
with construction paper or adhesive-backed paper.
1. Cut cup
lengthwise.
3. Tape at
back for hinge.
2. Cut cardboard lining
and glue inside mouth.
Hinge with tape.
Horn
Yarn
2˝
Use two boxes—
the same size or
different
sizes,
depending on the
puppet. Or cut one
large box (such as a
cereal box) in half.
Tape the boxes
together, as shown,
so the backside of the puppet is open and hinged.
Add features and decorate as desired. Operate by
inserting the thumb in the lower box and fingers in
the upper box. You can add a fabric skirt to cover the
puppeteer’s hand.
11⁄2˝
Nose
Ear
3
⁄4˝
Cut from cup and glue in slit.
Nose is cut from
bottom of cup
and glued on.
Cut nose
from cup.
Felt
Paper napkin
or fabric.
Razzle Dazzle
5–19
dries.) Tape the upper and lower parts together at the
back, making a hinge. Paint and decorate as desired.
For the body, cut a hole in the center of a paper napkin or square of fabric. Slip the napkin or fabric over
the hand and forearm, and then put the puppet head
on the hand. To operate, insert your fingers in the top
of the head and your thumb in the bottom part.
Glove and Mitten Puppets
on button eyes and a felt nose and pipe cleaners or
broom straws for whiskers. A second glove is the
bunny’s body. Stuff the two fingers cut from the first
glove and sew them onto the bottom of this glove for
the bunny’s feet. To manipulate your glove bunny,
put the body glove on your hand and put three fingers in the bunny’s head.
Shadow Puppets
Making puppets out of worn-out or outgrown
gloves and mittens is a good way to put them to use.
Mitten Mutt. Sew or glue button eyes and felt ears
on an old mitten as shown. When you are wearing
the mitten, your thumb is the lower jaw and the rest
of your fingers the upper jaw of your mitten mutt.
Move your fingers to make your mutt talk or bark.
Mitten Duck Puppet. Stuff a mitten with stuffing
material. Turn the mitten so
the thumb becomes a beak.
Glue on button eyes. Tie a
string or ribbon around the
duck’s neck. To manipulate,
put your index finger into the
head and make a fist with your
other fingers.
Glove Bunny. Turn an old
glove inside out. Cut off the index and smallest finger (but save to use as feet) and sew up the openings.
Turn the glove right side out, except for the thumb.
Leave it turned inside for the bunny’s mouth. Glue
Shadow puppets are easy to make, fun to use, and
lend themselves to the telling of tall stories. Figures
and scenery are cut from lightweight cardboard and
held next to a screen, which is lighted from the rear.
The story can be narrated offstage while the shadow
puppets perform, or they can perform to a song that
the boys sing, such as “Old MacDonald’s Farm” or
“The Twelve Days of Christmas.”
Shadow Puppet Figures
Choose patterns for figures, props, and scenery
that will fit the story. Children’s coloring books are a
good source for such patterns. About 12 inches is a
good height for figures. You don’t need many details
because only the outline of the puppet will show.
Cut the figures from lightweight cardboard or
black posterboard, which will eliminate all reflected
light, making a sharper shadow. Mount each cutout
on the end of a pencil or dowel with a thumbtack.
The shadow puppet is a rigid figure, held straight up
against the screen by the handle at its base.
Shadow puppet figures grow large or small as they
move toward and away from the screen. They can
vanish quickly or make an instantaneous appearance
5–20
Razzle Dazzle
on the screen. They can be transformed from humans
to animals or the reverse by pulling one puppet back
out of the light while another is put in its place. You
can use various types of hinges at body joints to
enable them to move independently. Attach another
dowel or rod to each limb to control its movement.
for use in den meetings, at home, or during hikes or
for entertaining in a children’s hospital or long-term
care facility. They are easy to transport, require little
equipment, and can even be used without a stage.
Follow these easy steps to make a simple finger
puppet:
Scenery can be changed quickly and easily. A car,
bicycle, wagon, or other prop can be pushed or pulled
across the screen. Scenery that won’t be moved during the show can be attached to the screen with cellophane tape or fitted between the frame and screen.
Shadow Puppet Screen
The screen material can be white cotton sheeting,
glazed chintz, or oiled paper (butcher paper or newsprint oiled with linseed oil or vegetable oil, which
makes the screen translucent). Attach the material to
a light wood frame made from 1-by-2-inch lumber or
to a large cardboard carton with a window cut in one
side. For 12-inch puppets, the screen should measure
about 24 by 26 inches. Hang a curtain below to conceal the puppeteers, or lash the frame to a card table
on its side, as shown.
Whatever type of frame you use, it’s a good idea
to include footing for the figures. This can be a ledge
1 to 2 inches wide fastened across the bottom of the
screen on the inside. This provides something for the
shadow puppets’ feet to touch so they won’t seem to
be floating in air.
Shadow Puppet Lighting
The lighting in a shadow puppet play is very
important. Place a light source behind and slightly
above the puppet screen about 3 to 4 feet away. The
source may be a 150-watt unshaded bulb, a 300- to
400-watt reflector spotlight, or special stage lights.
These lights can be placed on a dimmer and the illumination varied for special effects.
The room should be as dark as possible during a
shadow puppet show, and the puppeteers should be
cautioned to keep their heads below the screen so
their shadows won’t show. Two or three rehearsals
before the performance will ensure that the lighting
is properly situated.
FINGER PUPPETS
Even the youngest and most inexperienced puppeteers can easily manipulate finger puppets. The
index and middle fingers serve as the legs and feet of
the puppet, so the body is small. Because these puppets are so small, they are not suitable for a production at a large pack meeting; however, they are ideal
1. Place your index and
middle fingers on a
piece of posterboard
and trace around them.
This will be where the
legs (your fingers) will
be located on the puppet and will help determine the size of the rest
of the puppet. Turn the picture around and finish
the drawing, adding a head, body, and arms.
2. Color or paint the figure. Cut holes near the
base of the puppet’s body for your fingers to fit
through. Add yarn hair, if desired.
3. Cut out the puppet, insert two fingers, and practice walking forward and backward, kneeling,
jumping, and kicking.
4. Make shoes or boots if appropriate from small
cylinders of cardboard to fit over your fingertips.
Glove Finger Puppets
Cut the fingers off an old glove; glue on button or
bead eyes and a nose; cut ears, mouths, tails, etc.,
from felt and
glue on; glue
on yarn or fur
for hair—and
you have a
handful
of
easy puppets!
Front
Back
Razzle Dazzle
5–21
SAMPLE PUPPET PLAYS
YOU WERE THERE
Characters: Three Pilgrim puppets and two American
Indian puppets. Narrator and sponsor offstage.
NARRATOR (offstage): Good evening, ladies and
gentlemen of the television audience. Den [number]
of Pack [number] presents, “You Were There.” Now,
here’s a word from our sponsor.
SPONSOR (offstage): Friends, this program is being
brought to you by Mother Fletcher, who is famous for
such products as Rattlesnake Oil Shampoo, Corn
Pone Corn Sticks Mix, and Dainty Doggie Biscuits. Be
sure to look for these products in your neighborhood
store. And now, back to “You Were There.”
Scene 1: Early New England coast with a ship and
trees in the background.
NARRATOR: We’d like to take you back to the year
1621 and the first Thanksgiving. Several events of
great importance have led up to this momentous day.
Last year, in 1620, the Pilgrims landed at Plymouth
Rock. Let’s look in on this scene and talk to some
of the people who were there. (Three Pilgrims come
on stage.) Sir! You look like the leader of the group.
What is your name?
FIRST PILGRIM: William Bradford, your servant, sir!
NARRATOR: And how was your voyage, Mr. Bradford?
FIRST PILGRIM: Rough, very rough!
NARRATOR (turning to another Pilgrim): And
you, sir. Did you find the Mayflower comfortable?
SECOND PILGRIM: Are you kidding? It wasn’t
exactly the Queen Mary, you know!
NARRATOR: And how was your first year in the
New World?
FIRST PILGRIM: Very hard! Our crops failed and
many of us got sick. (The other two Pilgrims lie down
as if sick.) The snows came early and stayed late.
(Throw confetti for snow.)
(First Act curtain)
NARRATOR: What’s going to happen in this sad
scene? Sorry, but we have to interrupt the show to
bring you a word from our sponsor.
NARRATOR: The harsh winter passed and things
looked brighter for our little band of Pilgrims. How
did they do it? (American Indians enter.)
FIRST AMERICAN INDIAN: I’m Squanto. I helped
teach my new Pilgrim friends to fish and plant corn
so that they didn’t starve.
SECOND AMERICAN INDIAN: I’m Chief Massasoit.
I signed a treaty with these new people that established peace.
FIRST PILGRIM (stepping forward): Friends!
Friends! Let us celebrate our survival, our harvest,
and our peace with a feast! Hurry! Let us prepare!
(Everyone begins rushing around in preparation.)
(Second Act curtain)
NARRATOR: Before we begin the last act of our
show, here’s a word from next week’s sponsor, the
Boy Scouts of America.
SPONSOR: Cub Scouting is a family program,
designed to get boys and their families working and
playing together. Just try it! You’ll like it! Back now
to the final act.
Scene 3: American Indians and Pilgrims seated at
a table.
NARRATOR: With the help of the American
Indians, the Pilgrims survived. To celebrate their first
harvest and to thank God for their good fortune, they
had a feast—the first Thanksgiving. And they invited
those who had helped them so much. Let’s listen to
their prayer of thanks.
THIRD PILGRIM: Dear God, we are grateful for
these good things. Help us to be worthy in the years
to come. Amen.
NARRATOR: What kind of a day was it? A day, like
all days, filled with those events that alter the course
of human destiny…and you were there! (Curtain)
LITTERBUGS BEWARE
Puppets: Any number of Litterbug and Tidy Bug
bag puppets
Setting: Park or countryside backdrop. Litterbug
puppets come onstage and begin littering the stage
area with pieces of paper, candy wrappers, etc.
NARRATOR:
SPONSOR: Friends, are you bothered with bad
teeth that are falling out of your mouth? Try Mother
Fletcher’s Guaranteed Gum Glue for the tightest teeth
in town. It’s on sale right now at your neighborhood
pet shop! And now, back to our program.
We are Litterbugs, it is true,
And oh, what we Litterbugs can do!
Scene 2: Background with cabins and trees.
Pilgrims are onstage as the curtain opens.
The roadsides and parks are scenes of our folly.
We really enjoy it and think it’s quite jolly
5–22
Razzle Dazzle
We clutter the country with papers and trash.
At making a mess, we’re really a smash.
To leave behind garbage, bottles, and paper
As little mementos of our daily labor.
(Litterbug puppets exit and Tidy Bug puppets
enter and begin to clean up the litter.)
NARRATOR:
We are Tidy Bugs of the Tidy Bug clan.
We work to keep everything spic-and-span.
We pick up the litter wherever we are
And always carry litter bags in our car.
We’ll squash the Litterbugs as fast as we can
And make America a beautiful land,
Free of litter, clutter, and trash.
If you will help us, we’ll be a smash! (Curtain)
SERVANT (from side of stage): No! You may not
enter! (Black Knight rushes onstage with sword drawn.)
SIR TRUEBLOOD (fearfully): It’s the Black Knight!
(The knights fight. The Black Knight is knocked down.)
SIR GALAHAD: We have fought a good fight.
Before we go our separate ways, let us promise to
use our swords to fight only the battle for truth and
honor. (All Friendly Knights point swords upward.)
ALL: For truth and honor! (Curtain)
THE PIRATES’ BIG DECISION
Puppets: Any number of pirates, one Cub Scout
Setting: A pirate ship. Pirates are onstage when the
curtain opens.
KNIGHTS OF YORE
NARRATOR:
Puppets: Sir Galahad, Sir Trueblood, Servant, the
Black Night, and any number of Friendly Knights
carrying swords
Here are some pirates, brave and bold.
Many times you’ve heard their story told.
They sail the seas on their homemade raft.
Listen now, and you’ll hear them laugh.
(Pirates laugh heartily.)
Setting: Inside a medieval castle. The Servant is
onstage. A knock at the door is heard. The Servant
goes to one side of the stage to answer the door.
SIR TRUEBLOOD: Kind sir, pray let me spend the
night. I am weary and long for rest. (Droops wearily.)
SERVANT (motions Trueblood to come in): Enter
and rest thyself. Pray tell me, sir, why do you travel
so late at night?
SIR TRUEBLOOD: I am the King’s messenger and I
must take a message to Sir Galahad in a far country.
SERVANT: You are in luck, sir. Sir Galahad is at
this very moment resting in this castle!
SIR TRUEBLOOD: Will you please call him? I
must speak with him right away. (Servant exits to get
Sir Galahad.)
SIR GALAHAD (coming onstage with Servant):
You wish to speak to me, sir?
SIR TRUEBLOOD: I have a message from the King,
sir. You have an enemy who is trying to do you harm.
SIR GALAHAD (surprised): Impossible! I have
no enemies.
SIR TRUEBLOOD: But you do! and he is looking
for you right now. He plans to slay you! (A knock is
heard at the door.)
SIR GALAHAD (urgently): Arise! Arise, Knights of
Galahad! Make ready to do battle! (Friendly Knights
come onstage in armor, ready to fight.)
Let’s sneak in closer,
And what do we see?
They seem to be happy—
Listen to their glee.
(Pirates laugh again and say “ho-ho-ho” in pirate
fashion. Cub Scout comes onstage and stands in the
center of the pirates.)
Oh dear, a Cub Scout.
I can’t see his rank.
What if those Pirates
Make him walk the plank?
(Pirates draw closer to Cub Scout.)
Wait just a minute:
Something’s not right.
Look at that Cub Scout—
There’s no sign of fright!
(Cub Scout begins shaking hands with pirates and
talking to them.)
What we see here leaves us no doubts.
Our Cub Scout is asking
The pirates to become Scouts.
(Cub Scout motions to pirates and leads them
offstage.)
So with this happy ending,
We’ll drift out of sight.
For our brave Cub Scout
This was a happy night! (Curtain)
Razzle Dazzle
5–23
WONDERFUL WILFRED, THE WOODY
WOODPECKER
This is a narrated play with lots of special effects.
Use two boys for the sounds and actions. A microphone will be helpful.
Puppets: Woody Woodpecker family: Mother
Woodpecker and four young woodpeckers, one with
a huge beak
Setting: Forest backdrop; big nest in the foreground with loose strips of newspaper hanging that
will blow in the wind. The young woodpeckers are
in the nest.
NARRATOR: Once upon a time many years ago,
there lived in the deep forest a very famous family of Woody Woodpeckers. Down through the ages,
this family increased in numbers, in strength, and
in wisdom…until we come to the day when we find
the hero of our story—Wonderful Wilfred! (Fanfare
sounds offstage. Wilfred takes a bow from the nest.)
Now, Wonderful Wilfred was no ordinary woodpecker. (Sound-effects boys shout, “No!”) He was
smart—in fact, he was the wisest of all the woodpeckers. While the soft breezes blew outside…(blowing or
fanning movement offstage causes nest and trees to
rustle)…you could hear Wilfred’s brothers and sisters tapping away. (Offstage two wooden blocks are
tapped to together. Three woodpeckers make tapping
motions on a nearby tree.) But not Wilred! He just sat
there and rubbed his beak back and forth. (Rubbing
sound made offstage by rubbing blocks together as
Wilfred rubs his beak on a nearby tree.)
At last came the day for them to leave their nest,
and you could hear Wilfred’s brothers and sisters
take their last peck at the tree before they left home.
(Sharp tap with woodblock offstage as each brother
and sister makes a final tap on the tree and exits.
Wilfred remains in the nest.) Wilfred looked around
and picked the biggest tree in the forest and flew
directly to it. He didn’t waste any time. Once more,
he rubbed his beak back and forth—until it shone so
it could be seen for miles around. (Rubbing sound
offstage.) He reared back, and with one mighty
swipe of his beautiful beak, he cut the huge tree in
two! (Boys offstage yell, “Timber!” as tree collapses.
Wilfred takes a final bow and exits. Curtain.)
THE ANIMALS’ CHRISTMAS STORY
This is a shadow puppet play. Cut out the 25 figures listed in the play and attach them to rods. As
the Narrator mentions each, a boy holds it up to the
screen.
NARRATOR: Everyone has Christmas wishes. We
all dream about the packages we find under the tree.
Did you know that animals dream too? Den [number]
will show you what I mean.
“I want a CANTALOUPE,” said the ANTELOPE.
“I want a FISHING LINE,” said the PORCUPINE.
“I want a WAGON,” said the DRAGON,
“Underneath the CHRISTMAS TREE.”
“I want an OVERCOAT,” said the BILLY GOAT.
“I want a NEW FRONT DOOR,” said the DINOSAUR.
And when the winds blew…(blowing or fanning
movement again)…and the rains rained…(gentle
hand-clapping offstage)…and the owls hooted…
(hooting noise offstage)…you could hear the brothers
and sisters tapping (same as above). But not Wilfred.
(Boys offstage shout, “No!”) He’d just sit there and
rub his beak back and forth. (Same as above.)
“I want a VIDEO GAME,” said the GREAT DANE,
When their mother would bring them food, you
could hear Wonderful Wilfred’s brothers and sisters close their beaks hard on the food. (Mother
Woodpecker comes onstage pretending to give food
to her young. Offstage, hands are clapped together
sharply as young woodpeckers close their beaks.)
But not Wilfred. (Offstage, “No!”) He would close his
beak quietly…(offstage, “Shhh”)…and then sit there
and rub his beak back and forth. (Same as above.)
“To rock all winter long.”
5–24
Razzle Dazzle
“Oh, how happy I would be!”
“I want a BARBECUE,” said the KANGAROO.
“I want a PHONOGRAPH,” said the BIG GIRAFFE.
“I want a ROCKING CHAIR,” said the GRIZZLY BEAR,
“I want a PRETTY HAT,” said the KITTY CAT.
“I want some MISTLETOE,” said the BUFFALO.
“I want a HAPPY TUNE,” said the BIG BABOON,
“To sing all winter long.”
As you can see, each animal has its own special
wish—just like you do. Merry Christmas to all, and
to all a good night!
Puzzles
The den leader or den chief will want to have a
new trick or puzzle to show boys at almost every den
meeting. These are good preopening activities that
boys enjoy. They should be simple enough for boys
to perform, however, because boys will want to show
them to family members and friends.
The puzzles below are mystifying at first but are
easy to learn and fun to do. You can find the necessary materials around the house.
Make two parallel cuts in the center of a strip of
flexible leather or vinyl, as shown. Just below this,
cut a hole the same width. Pass a heavy string under
the slit and through the hole. Tie the buttons to the
loose ends of the string.
Puzzle: Remove the string without taking off
the buttons.
Solution: This can be easily done by bending the
leather and drawing the narrow leather strip through
the hole.
BLOCK PUZZLES
TANGRAM PUZZLE
Materials: Cardboard, scissors
In this ancient puzzle from China, you cut seven
shapes from one square of cardboard, as shown. Then
using the pieces, you can make silhouettes of hundreds of animals, people, and geometric figures.
STRAP AND BUTTON PUZZLE
Boys can draw a puzzle design on light cardboard
and separate into pieces, as shown. Mix up the pieces
of each individual puzzle and see who can be the
first to put one together.
HOLIDAY JIGSAW PUZZLE
Cut up several old greeting cards into jigsaw pieces. Put each in a separate envelope. Boys can work
these individually, or divide the den into teams to
see who can finish a puzzle first.
YOKE PUZZLE
Materials: 1-by-6-inch piece of thin board (a
tongue depressor or craft stick is excellent), string,
two washers
Materials: Strip of pliable leather or vinyl, knife
or scissors, heavy string, two large buttons
Puzzle: Challenge boys to get the washers together, hanging from the same loop, without untying
any knots, breaking the stick, or pulling the knots
through the holes.
Razzle Dazzle
5–25
Puzzle: Remove the string from the heart without
untying the washer.
Solution: Draw in all the free string from the
washer end up to the loop end at the upper center
hole. Now, thread the loop back through the center
top hole to the lower right hole, lower left hole, and
lower center hole. Don’t twist the string. Then slip
the washer through the loop, thread the loop back
again through the hole, and it will come off.
Solution: Loosen the string slightly and pull the
loop at the center hole straight out about 2 inches.
Slide the left washer up the string and through the
center loop. Then pull the rest of the center loop
through the center hole. Slide the washer along the
string through the center loop onto the opposite side.
Pull the center loop back through the hole to its
original position. The washer is now hanging on the
opposite loop. Reverse this procedure to separate the
washers again.
HEART PUZZLE
SLIDING BLOCK
PUZZLE
An adult who likes to work with wood can make
these puzzles for boys.
1. Make a box with inside measurements of 35⁄8
inches.
2. All puzzle blocks are made from 3⁄8-inch wood.
Cut the following:
• Four blocks 7⁄8 inch square (D, E, F, G)
• Three blocks 13⁄4 by 7⁄8 inch (B, C, H)
• One block 13⁄4 inches square (A)
3. Sand all blocks and stain or paint.
Puzzle: Slide the blocks and move the largest one
(A) to the diagonally opposite corner and back.
Materials: Board, string, washer or bead
Make a heart-shaped board 31⁄2 inches high and 31⁄2
inches wide. Bore six holes in it, as shown. Lace a
30-inch string to the heart in this manner:
1. Fold the string in the center and thread the loop
from the back through the upper left hole. Hold
it in place with your thumb while you thread the
two free ends through the upper right hole and
then across the front and through the loop and
the upper center hole.
2. Next, thread the two free ends from the back
through the lower right hole, across the front to
the lower right hole, and from the back through
the lower center hole.
3. Tie a washer or bead that is too large to slip
through the holes at least 6 inches below the bottom hole.
5–26
Razzle Dazzle
Solution: To
1. A right
2. B up
3. C left
4. DE left
5. H Left
6. FG down
move block A to the opposite corner:
7. A right, DE up, H left, FG left
8. F right and down
9. A down
10. D right, E up and right, H up
11. G left and up, F left, A down
1
2
3
4
5
6
7
8
9
10
11
Skits
WHY WE USE SKITS
Skits appeal to Cub Scout–age boys. Acting comes
naturally to many boys, and often they make little
distinction between make-believe and the world of
reality. Skits help channel a boy’s imagination. He
doesn’t just pretend he’s a pirate; he is one, sailing the high seas. Or he is an astronaut, flying into
space. Play-acting is important in the growth of a boy
because it
• Gives him an outlet for the “let’s pretend” part of
his character.
• Gives him a chance for creative expression rather
than imitation.
• Develops his powers of observation, coordination,
and timing.
• Helps him gain self-confidence and personal
satisfaction.
• Allows him to play the parts he has always
dreamed of.
• Shows the importance of teamwork and cooperation.
• Improves speech and voice projection.
• Helps him develop an appreciation for other people and their abilities.
You may come across a shy boy who would prefer
not to take part in skits. Sometimes, a costume or
mask will help him with his shyness; or try giving
him other important responsibilities, such as handling sound effects or lighting offstage. Each boy
should be recognized as an important member of the
group, and everyone should take part in some way.
To get boys interested in dramatics, try these
things:
• Describe a situation that a boy might find himself
in and let the boys take turns acting it out. Lead a
discussion, asking questions such as: Which was
the best solution? Are there other solutions?
• Suggest that the boys watch people during the
week and come to the next den meeting with an
idea to role-play (see below).
• With the boys’ help, make up a short story, weaving together the characters the boys act out.
• Ask the boys to act out the story in pantomime
(see below).
• With the boys’ help, add words to the story. Decide
how the characters would look and behave in
that situation.
• Ask the boys to act out the story using their own
words to fit the situation.
Role-playing, pantomime, and charades help boys
gain self-confidence and build enthusiasm for dramatics. These are a good foundation for planning and
presenting den skits at pack meetings.
ROLE-PLAYING
Role-playing is the spontaneous, unrehearsed acting out of a situation with words and gestures. It is
putting one’s self in another person’s place to try to
understand that person better.
Role-playing lets a boy show how he would handle
a situation rather than just telling how it should be
done. It can help him develop an appreciation for
other people and how they make decisions.
Avoid these things:
• Role-playing undesirable characters
• Allowing a boy to role-play a character that is too
difficult for him, causing him to be discouraged
• Unfair criticism of people or events, with no attempt
to show a better way or to recognize improvement
PANTOMIME
Pantomime is acting without using words. Facial
expressions, hand gestures, and body movements tell
the story. Long, memorized dialogue is discouraged in
Cub Scout skits, so pantomime is an especially good
method to use. To show the boys how to pantomime
effectively, let them try some of the following:
How would you act if
• You had a nail in your shoe?
• You were scared?
• You slipped on ice?
• Someone pinched you?
How would you lift
• A baby?
• Something very fragile?
• Something very hot?
• Something heavy?
• Something big and bulky?
How would you look if
• You saw a ferocious lion?
• Someone gave you a surprise?
• Your report card was all A’s?
• You smelled something bad?
• You
• You
• You
• You
heard a strange sound?
were watching an exciting game?
tasted bitter medicine?
heard a sudden crash?
Razzle Dazzle
5–27
Another way to use pantomime in the den is to fill
a Cub Scout cap with slips of paper that have written
instructions. Each boy draws a slip and pantomimes
the instructions. Here are some suggestions:
• Crawl through a jungle full of hanging vines and
branches.
• Walk a tightrope in the air.
• Follow a buzzing fly around the room and finally
swat it.
• Pretend you are a cat, waking up from a nap.
• Pretend you are a dog, sitting up and begging.
Or, put several things into a paper bag, one for
each boy—a pencil, a clothespin, an eraser, an empty
chewing gum wrapper, a paint brush, etc. One by
one, the boys remove something from the bag and
pantomime a short scene using the item as a prop.
The others try to guess what he is doing.
CHARADES
Boys enjoy both the acting and the guessing of
charades. The game can provide them with an opportunity to use their imaginations.
To play charades, divide the group into two teams.
Give one team a piece of paper that has a word or title
(of a movie, book, TV show, etc.) written on it. They
leave the room and plan their action. After a quick
rehearsal, they return and put on their act for the
second team, in pantomime.
Each word or each syllable can be acted out
separately. Two-syllable words are good for Cub
Scout–age boys. Try the following list, and let them
suggest others:
Billboard
Birdcall
Basketball
Football
Mousetrap
Downpour
Cattail
Checkbook
Fullback
Garter snake
Bookend
WRITING YOUR OWN SKIT
Sometimes it’s hard to find a written skit that fits
the monthly theme and your den of boys. If that’s the
case, the best thing to do is to adapt a skit to fit your
needs, or to write one of your own. You already know
two of the most important things: (1) the facilities
available, and (2) the number of boys in your den.
Now, jot down the following information:
• The subject of the plot
• The title (It can be serious or funny.)
• The number of actors
• The kind of actors (boys or puppets?)
5–28
Razzle Dazzle
• The amount of time allowed (Write a skit timed for
20 minutes, and then boil it down to 5 minutes,
saving only the best lines.)
• Your stage (Is it an open floor, a platform at one
end of the room, or a real stage?)
Remember: The audience must like your skit, too,
so write it to “fit” them. Keep the action moving, so
keep scene-changing to a minimum.
Start by making an outline of your skit. Follow
these simple steps:
• Boy wants something (friendship, a gold mine, a
prize, to find a lost planet, etc.).
• Boy starts to get it (by canoe, plane, horseback,
foot, etc.).
• Obstacles stop boy (a secret enemy, a crocodile,
false friend, weather, etc.).
• Boy achieves goal (through an act of kindness,
bravery, wisdom, magic, unexpected help, etc.).
Things to Remember
• Keep it simple.
• Keep it short (3 to 5 minutes at the most).
• Avoid long memorized dialogue. Pantomimes are
good for Cub Scouts. (If more explanation is necessary, the den chief may be narrator while the boys
pantomime the action.)
• Scenery, props, and costumes should be simple, if
used at all.
• Let every boy take part.
• Use stage directions liberally—tell who goes where
and does what.
• Stimulate interest and surprises as you go along.
A “walk-on” (someone hunting a rabbit or bird,
blowing up a balloon, or engaging in some other
nonsense) in each scene sparks interest.
• Be sure the audience can hear. Boys should be
coached to speak slowly, clearly, and loudly. If
the audience laughs or claps, actors should pause
before continuing their lines.
• Let the boys help write the skit. They will have
some great ideas, and that’s part of the fun.
• Avoid skits that ridicule anybody or anything.
They are in bad taste.
MAKING YOUR OWN SCENERY
Making scenery for skits can be a good den project.
Scenery can add to the mood of the skit and make
it more believable. It doesn’t have to be detailed or
complicated; it only has to provide an idea or suggestion of what it represents. Scenery isn’t necessary
for every skit. Use it only if you and the boys think it
will add to the interest.
You can make scenery from large pieces of corrugated cardboard. Check with furniture stores, appliance stores, grocery stores, or warehouses for large
furniture and appliance cartons. You can use cardboard for mountain ranges, bushes, trees, lampposts,
forest outlines, picket fences, houses, tents, cabins,
or even a sun, moon, or stars that you can suspend
overhead. Wooden laths nailed to the back of the
scenery will make it more sturdy and keep painted
cardboard from curling.
Here are some tips to help you make simple but
effective scenery:
• An adult should cut heavy cardboard.
• Boys can do the painting after guidelines are drawn
with heavy pencil to show what colors go where.
• Latex wall paint or tempera is good for painting
scenery. Use tempera to tint latex paint to a different color.
• When painting large areas, use a roller.
• Paint on the blank side so any printing on the
cardboard won’t bleed through.
• Boys can use felt-tip marking pens to emphasize details or to outline a design on the painted
cardboard.
• Create moods with color. Paint scenery in grays if
the skit is spooky or sad; use bright colors if the
skit is happy or funny.
• Children’s coloring books are a good source for
patterns for simple cutout scenery. Just enlarge
them to the desired size, using the instructions for
enlarging patterns found in the “Crafts” chapter of
this book.
• Always keep in mind that the audience will see
the scenery from a distance, so they won’t be able
to see fine lines or details.
• To give the appearance of distance, make scenery
small.
Knock at the Door: Hit a half-gallon plastic bottle
sharply on the end with a rubber spatula.
Thunder: Grasp a metal cookie sheet at one end,
placing your thumb on the underside. Shake the
sheet so that it vibrates. Bang it against the knee for
an occasional loud thunderclap.
Lightning: Flash a white light off and on, or use a
camera flash, along with the sound of thunder.
Hail: Pour rice on a pane of glass (near a microphone if you have one).
Rain: Fill a tin can full of dry peas or beans.
Rotate the can slowly (in front of a microphone, if
you have one).
Train: Place small wire nails inside a small flat
box, such as a bandage box. Move it back and forth
in rhythm…chug, chug, chug…chug.
Creaking Door or Animal Roar: Use a coffee can or
two foil pans taped together. Tie a string in the center
of a pencil and rub the string with resin. Punch a hole
in the container, place the pencil inside, and pull the
string out through the hole. Drag fingernails along the
string to produce noise into a microphone.
Hoof Beats: Clap two coconut half-shells on a
wooden board to produce the sound of horses walking or galloping on a hard road.
Auto Brakes: Slide a drinking glass across a pane
of glass (in front of a microphone, if possible).
Sword Fight: Hold an aluminum cookie sheet in
one hand and hit it with a metal spoon for each clash
of swords.
Fire: Crumple and twist cellophane into a ball and
then release it (near a microphone, if possible).
Campfire: Cover a flashlight with red cellophane
or tissue paper, with wood piled on top to create a
red glow, and use the fire sound above.
See other special effects described in the “Puppets” section above.
SOUND EFFECTS
A flash of lightning, a loud crash, a train chugging down the track—boys can create all of these
and many other special effects for their den skits
with a few simple preparations. Bells, drums, gongs,
cymbals, castanets, whistles, horns, rattles, coconut
shells, and even pots and pans can create unusual
and comical sounds.
Sound effects can add to the appeal of some Cub
Scout skits. One of the Cub Scouts or the den chief
could be the person in charge of sound effects and
stand offstage to make the sounds at the appropriate
time. Another alternative is to prerecord sounds on a
cassette recorder.
COSTUMES
Costumes can help set the theme or mood for the
skit. They also have an almost magical ability to help
transform a boy into a creature from outer space, an
astronaut, a magician, a Pilgrim, an exotic animal—or
anything else his imagination suggests.
Keep costumes for Cub Scout skits simple and
inexpensive. More than likely, you will use them
only once. Sometimes, a sign to identify a character
is all you might need. A sign can turn a boy into
anything—a tree, a lamppost, an animal. Simple
props, such as a cardboard mustache, an eye patch,
a bandanna, and a cardboard sword for a pirate, will
be sufficient to set your mood.
Razzle Dazzle
5–29
Pipe cleaners
Silver
jacket
Glue on
paper
cups.
Ice cream
container with face
area cut out and
piece of plastic
glued in place.
Ski pants
Oversized
boots
You can find most of the materials for simple costumes around the house.
Old Clothes: Discarded clothing items are probably
the most important thing for making easy costumes:
old tights, T-shirts, robes, pajamas, hats, and jackets.
Use them as-is, or cut them up and use them as parts
of costumes.
Old soft hat with crown
pushed out, creased in
front, dimples on the sides
Cub Scout
neckerchief
Make chaps
from vinyl
scraps or
heavy cloth.
Fasten behind
the leg with
string. Add
buttons with
hanging fringe
for decoration.
Cut cuffs from light
cardboard or construction paper;
decorate with
paper fringe.
Old rope
for lariat
Cardboard
Boxes: With a
simple box, you
can be a clown,
an animal, a
vegetable,
a
robot, or a musical instrument!
Cut holes for the
head and arms,
and then let the
boys paint boxes
with latex paint,
using
felt-tip
marking pens for
highlights.
“Robert Robot” can be
easily put together with
cardboard boxes,
paper cups, pipe
cleaners, wire, old
gears, button,
screening—
or whatever
else a boy
can find.
Plastic Trash Bags: Large plastic garbage bags can
be an excellent basis for quick costumes. Cut holes
for head and arms and decorate as desired:
• Staple cardboard or construction paper wings or
legs onto the bag.
• Stick colored masking tape on the bag to create
designs.
• Thread ribbons or streamers through small holes
punched into the back of the bag.
• Cut adhesive-backed paper into shapes and stick
them to the bag.
After placing the costume on a boy, you can
“plump up” the costume by stuffing the bag with
loosely crumpled newspaper. Tape or staple the bag
around the bottom to hold the stuffing in place.
Note: Take an opportunity to instruct boys on the
dangers of plastic bags and the potential for suffocation.
For spurs, cut straps
from vinyl or leather
scraps. Cover with
aluminum foil. Flatten
a bottle cap for the
wheel and glue on.
T-Shirt Costumes: You can decorate T-shirts with
fabric paint, material, ribbon, and many other items
to set the mood for any song or skit. They are easy
to store and can be adapted for use again and again.
And best of all—one size fits all! (Make sure you use
extra large sizes that will fit over a boy’s uniform.)
For example, if your skit has cows in it, use black Tshirts and cut out white felt circles. Velcro or glue the
circles randomly over the T-shirt. Make a tail for the
cow with white clothesline, and pin it on the T-shirt.
(For the cow’s head, use paper bag masks or an inexpensive animal nose available at most toy stores.)
5–30
Razzle Dazzle
For the basic garb of a knight of King Arthur’s Round
Table, use old pajamas (without designs) or thermal
underwear. Cut tunics from crepe paper or use an old
pillowcase with slits cut for the arms and head. Paint
on emblems. Cover an old belt with aluminum foil.
Paper Bags: Use grocery bags and brown wrapping
paper for both costumes and masks. Paint them with
latex paint (to add strength) or tempera. For a leatherlike appearance, crush and recrush brown paper
bags or brown wrapping paper until it is soft and
wrinkled. Then press with a lukewarm iron.
STAGE MAKEUP
The skit is written, the parts assigned, some simple
scenery and costumes are made, and the boys have
been busy practicing. What’s left? How about makeup?
Makeup can help show the audience what a character is like. It also makes the character more real to
the other actors, and as a result, everyone plays their
roles better. It can hide an actor’s features, make him
larger or smaller, younger or older, or change his
appearance completely.
How to Age a Character
Have the actor frown and wrinkle his forehead.
Use gray eyebrow pencil to mark in the creases of
the wrinkles. More lines add more years. (You can
also have the actor smile and fill wrinkles in at the
cheeks and eyes.) Powder the hair with cornstarch,
or use a wig. For a bald head, use an old swimming
cap to cover the hair. Glue on pieces of yarn hair for
a fringe just above the ears.
Classic
Clown
Theatrical makeup is expensive, and most Cub
Scout leaders work on a limited budget. Following
are some inexpensive substitutes and some tricks for
using makeup to its best advantage.
Makeup Bases
A base for makeup that can color large areas is
easy to make. Combine equal parts of liquid cleansing cream and sifted confectioner’s sugar. Mix well.
This results in a white base, which you can use for
clown white. Tint it with a few drops of green food
coloring or tempera paint for monster makeup, or tint
with a mixture of red and blue for a purple Martian.
Here’s another base that gives a soft skinlike texture and is easily removed: Mix together 2 t. white
vegetable shortening, 5 t. cornstarch, 1 t. flour, a few
drops of glycerin, and any food coloring desired. For
brown, add 2 T. unsweetened cocoa.
You can also use tempera paint as a makeup base,
without fear of allergy problems. It can be washed off.
Added Touches and Suggestions
• Use lipstick for both lip and cheek color.
• Use eyebrow pencil to darken or change the shape
of eyebrows, to line the eyes, and to make freckles,
mustaches, sideburns, and wrinkles.
• Cornstarch powdered into the hair helps age characters. Hair usually begins to gray at the temples
first, and in streaks.
• The more light on stage, the more makeup you’ll
need.
• Apply makeup after the character is in costume,
using a makeup cape or towel to protect the costume. This way, the makeup won’t get smeared
while boys are putting on the costume.
• Keep plenty of tissues and cleansing cream handy
for makeup removal.
Apply clown white base all over the face from the
hairline to the neck. If you want to attach artificial
eyebrows, clean off the white makeup from the eyebrows. Spirit gum will hold the eyebrows in place.
Use an old white swimming cap with holes cut for
the ears to cover the head for a bald clown, or use a
wild wig (see below). Use bright red lipstick to paint
long triangles or circles on the cheeks. Apply red
lipstick around the mouth, about 1 inch wide. Then
use a black eyebrow pencil to outline an oval mouth
shape. Cut a red rubber ball to fit the nose, and attach
a rubber band that slips around the head to hold it
in place.
Wigs
White Hair: Pull an old nylon stocking over the
hair and ears. Tie it off at the top and cut off the
excess. Use cellophane tape or glue to fasten white
cotton balls all over the stocking.
Curls: Cut pieces of paper in strips. Curl each
strip by holding one end between your thumb and
a long pencil. Press lightly with the thumb and pull
the strip over the pencil with the other hand. Repeat
several times for a stiff curl. Glue curls to a stocking
cap base.
Razzle Dazzle
5–31
Braids: Stretch about three strips of 3⁄4-inch-wide
crepe paper. Twist each strip around and around and
then braid the three strips together.
Stuff paper bag
with newspaper.
Fold on dotted
lines.
Scarecrow’s Wig: Glue uneven lengths of heavy
cotton rug yarn or crepe paper to a stocking cap base,
or glue to the inside of an old hat.
Also try using untwisted wool or rope for wigs, or
use an old mop dyed any color.
MASKS
You can make masks from almost any container
and any type of material. Let your imagination be
your guide. Try cardboard cartons, paper bags, foil
pie pans, posterboard, and plastic bottles. Use masks
for many Cub Scout themes—American Indian, circus, space, holiday, nature, or historic.
Decorating Masks
You can paint most mask materials with tempera
paint and draw features with colored marking pens.
Use heavy, bold lines and splashes of color. The
brighter and funnier the colors are, the better. You
can also make features from the following materials:
Hair: String, yarn, rope, fabric strips, paper
curls, kinky wire, cotton balls, an old mop, or even
soda straws
Cut holes
for eyes.
or crayon. Cut out eye
and mouth holes as needed.
3. Glue on noses, antlers, ears, horns, false eyebrows, eyelashes, lips, etc. made from colored
paper, felt, or other materials.
4. Roll the cardboard into a cylinder and fasten
with staples, glue, or tape. Add rope or yarn
hair to cover the seam and give the mask more
depth.
Paper Bag Masks
Noses: Rubber balls, cardboard, paper cups, plastic containers, egg carton cups, spools
Ears: Paper cups, plastic containers, spools,
cardboard
Cardboard Cylinder Masks
Use a rolled-up section of
posterboard or cardboard for a
simple and effective mask.
1. Wrap a rectangular piece
of cardboard around the
boy’s head to determine
the size of the cylinder.
Cut out curved slots in
the bottom so the cylinder will fit on the boy’s
shoulders.
2. Sketch and paint the
details of the masks
while the cardboard
is laid out flat.
Sketch your designs
With a very long cardwith pencil and
board cylinder and a
then decorate with
stuffed paper bag on
tempera paint, coltop, you can be a giraffe!
ored marking pens,
5–32
Razzle Dazzle
Paper bag masks are fun and inexpensive to make.
Use grocery-sized paper bags large enough to fit over
a boy’s head. Add construction paper or felt ears,
noses, eyebrows, or horns and hair made from yarn,
paper, or even soda straws. Experiment with markers, paint, and crayons.
Craft Foam Masks
THE BIG CATCH
Craft foam is an excellent material for boys to use
in creating masks. This material cuts easily with a
pair of scissors yet is much more durable than paper
bags and cardboard. It comes in a variety of colors,
which can be enhanced with permanent markers. Cut
pieces can be easily glued together.
Characters and Setting: Four boys at a movie, eating popcorn or other movie treats
SAMPLE SKITS
CUB SCOUT 1: Too bad Joe isn’t with us.
CUB SCOUT 2: Yeah.
CUB SCOUT 3: Bummer.
CUB SCOUT 4: Why isn’t he here anyway?
CUB SCOUT 2: You didn’t hear about that?
ROBOT INVENTORS
Scene: A table covered with an old sheet or other
cover reaching to the floor at the front. A fishbowl or
other glass bowl, test tubes, flasks, and a black top
hat are on the table.
Characters: Six boys posing as scientists.
Setting: The six scientists in lab jackets (men’s
shirts, collars turned inside, put on backwards) stand
at both ends and behind the table. Scientist 2 is reading a large book, plainly titled How to Invent a Robot.
Scientist 3 is looking over his shoulder. Scientist 4
is stirring liquid in a bowl with a wooden spoon.
Another boy, a robot with a bunny tail, is hidden
behind the table.
(Note: If seven boys aren’t available, some could
take more lines.)
SCIENTIST 1: It doesn’t seem to be working.
SCIENTIST 2: I can’t understand it!
SCIENTIST 3: We’ll have to change the formula.
(Scientist 4 adds soda to vinegar water in the bowl
The mixture fizzes.)
SCIENTIST 4: Wait a minute. What did you say
your friend’s name was?
SCIENTIST 5: Magisto the Magician. He says he’s
pulled a robot out of a hat lots of times.
SCIENTIST 4: That’s rabbit, not robot!
(Scientist 2 raises his book; Scientist 4 raises his
spoon; Scientists 1, 2, 3, and 4 chase Scientist 5 offstage left. Scientist 6 starts to follow, stops, and looks
at the hat.)
SCIENTIST 6 (shrugging his shoulders): It might
work! Abracadabra 1-2-3! (Takes hold of the hat with
his left hand, tips it toward himself at the edge of the
table, reaches “in” behind the table—grabs and pulls
the robot out of the hat).
SCIENTIST 6: Hey! It worked! Now I’ll just push
this button. (Pushes button on robot. Robot drops to
all fours, hops offstage, showing bunny tail bobbing
at the back).
CUB SCOUT 4: Hear what?
CUB SCOUT 1: Remember that new fishing pole
he got for his birthday?
CUB SCOUT 4: Yeah, so?
CUB SCOUT 1: Well, he got some lures for bass, too.
CUB SCOUT 4: Yeah?
CUB SCOUT 2: Yeah. And he got some lures for
catfish, too.
CUB SCOUT 4: Sounds good.
CUB SCOUT 1: Well, he decided to take a big
fishing trip. He went down to the stream behind the
house and was planning to fish until he caught a big
mess of fish. He didn’t care what kind.
CUB SCOUT 4: Did he catch anything?
CUB SCOUT 2: He caught something all right!
CUB SCOUT 3: He fell in the stream and caught
a cold!
“AH” SKIT
An “ah” skit is a great one to use because of the
limited dialogue; the only word spoken during the
entire skit is “ah.” Pantomime, facial expression, and
tone of voice convey all the meanings. The repetition
of the word “ah” adds humor to the skit. It’s important to really “ham it up.”
Actors: Announcer, a parent or two, Cub Scout,
thief, police officer, and friends of Cub Scout (optional)
Setting: The announcer comes onstage and says
that a Cub Scout is working in his room on a robot
that is 12 inches high.
A Cub Scout is in his room busily creating a robot. He
adds something to the robot and tests it; it doesn’t work
and, with disgust, he says, “Ah!” He tries again and this
time is successful. He says “Ah!” with satisfaction.
He gets his parents to show them his robot with
pride. Pointing toward his room, he excitedly says
“Ah” to encourage them to follow him. They question him to ask whether he is finished by saying,
“Ah?” and then follow him to his room.
Razzle Dazzle
5–33
There he proudly shows his robot and, pointing to
it, exclaims, “Ah!” In return, they proudly say “Ah”
and show delight over the boy and his robot.
CUB SCOUT 3: I hold the title of the fastest one of
all. I’m always first in line for the refreshment call.
(Pulls out a bag of cookies and begins eating them.)
(If you are short on actors, this part can be deleted.)
He goes to get some of his friends. He tells them that
he has accomplished his goal by excitedly saying,
“Ah! Ah!” Some of them eagerly and some of them
skeptically say “Ah” and follow him back to his
room. Again, the Cub Scout points to his robot and
proudly says “Ah.” The other boys express amazement at the completed robot by exclaiming “Ah!” The
boys go home waving and calling “Ah” as they leave.
CUB SCOUT 4: I’m known as the champion of the
high jump. One time I missed and got a big lump.
(Rubs his head with a painful expression on his face.)
His parents remind him that it is bedtime by pointing to their watch, pantomiming sleep, and saying
“Ah.” The boy agrees to go to bed, saying reluctantly,
“Ah.” His parents leave; the boy opens his window,
leans out and breaths in and says, “Ah.” Then, with
pride, he takes his robot and puts it on the open windowsill and says “Ah.” The boy goes to bed near the
open window.
During the night a thief comes to the window and
steals the robot. The boy wakes up as this is happening and shouts with alarm, “Ah!” His parents come
in, shouting “Ah?” to ask what is wrong. The boy
points at the windowsill and shouts, “Ah!” The parents dial 9-1-1, saying “Ah! Ah!” to report the crime
and then soothe their son with gentle “Ah’s”.
A police officer catches the thief, saying a firm
“Ah!” The thief disgustedly says “Ah” and hands
over the robot. The two then come to the house, and
the officer hands over the robot with a satisfied “Ah!”
The thief expresses his disappointment, saying “Ah,”
and is taken off to jail. The Cub Scout expresses his
joy at having his robot returned, saying “Ah!”
The announcer comes onstage, wipes his brow, and
says “Ah,” as if to say that all is now done. All bow.
FITNESS CHAMPS
Characters: Six Cub Scouts in uniform, holding
props as described below
ALL: We all excel in fitness. We’re champs as you
can see. Just listen to our stories, and I’m sure that
you’ll agree.
CUB SCOUT 1: I hold the title of the strongest in
our den. Do you suppose that it’s because of my friend?
(Holds up toy skunk, while others hold their noses.)
CUB SCOUT 2: I’m known as the den’s muscle
man of the year. But most of my muscles are between
my ears. (Pulls out a too-small hat and tries desperately to put it on his head.)
5–34
Razzle Dazzle
CUB SCOUT 5: To keep in good shape, I exercise
each day. I wonder why my muscles turned out this
way. (Removes his shirt to show colorful padding on
his arms.)
CUB SCOUT 6: I’m the champion at making things
disappear, you see. Watch us all disappear as I count to
three. (Slowly counts 1—2—3…as the curtain closes.)
BASIC INGREDIENTS
Characters: Five boys and a narrator
Setting: The narrator (den leader or den chief)
reads the script while the boys act out the parts.
NARRATOR: Cub Scout packs are made up of
6-, 7-, 8-, 9-, and 10-year-old boys. (Enter five Cub
Scouts, each stating their age.)
Some are solemn and wide-eyed. (One Cub Scout
says, “I’m solemn”; another says, “I’m wide-eyed.”)
Some are wiggly and giggly. (Two Cub Scouts say
“I’m wiggly” and “I’m giggly.”)
They come in three varieties: Tiger Cubs, Cub
Scouts, and Webelos Scouts. (I’m a…)
Cub Scouts like making noise (all boys howl),
competition (boys pair up and arm wrestle), getting
awards (boys proudly point to the badges on their
uniforms), and singing silly songs (sing one line of a
favorite song).
Cub Scouts like to play games (do a crab race), to
make things (pretend to hammer and saw), and just
to get together (boys huddle around each other).
Cub Scouts are fastest at voting for field trips
(boys jump up and down, raising their hands), eating
refreshments (boys pretend to eat), and getting to the
head of the line (boys all try to get in line first).
Cub Scouts are quietest at a flag ceremony (boys
turn and salute) and during a prayer (they bow their
heads).
Cub Scouts are most helpful while doing good
deeds (show Scouting for Food bags) and community
service (show a poster of the latest project).
Cub Scouts are the basic ingredient for two important things: The time a volunteer leader gives and…
Boy Scouts!
BACKYARD PICNIC
Characters: Six to eight Cub Scouts (Adapt parts
for the number of boys in the den.)
Equipment: Paper bags
Setting: Skit opens with boys standing together in
a backyard.
CUB SCOUT 1: Gee, there’s nothing to do.
CUB SCOUT 2: Yeah, I know. I’m bored.
CUB SCOUT 3: Me too. Hey! Let’s have a backyard
picnic!
ALL: Yeah!
CUB SCOUT 1: I’ll bring the potato chips.
CUB SCOUT 2: I’ll bring the hot dogs.
CUB SCOUT 3: I’ll bring the hot dog buns.
CUB SCOUT 4: I’ll bring the drinks.
CUB SCOUT 5: I’ll bring cookies.
CUB SCOUT 6: I’ll bring something special. (All
walk offstage and return carrying bags.)
CUB SCOUT 1: Here are the chips. (Other boys
announce similarly what they have.)
CUB SCOUT 6: Oh no!
CUB SCOUT 4: What’s the matter?
CUB SCOUT 6: I brought the ants! (All run offstage.)
ENERGY SAVERS
Characters: Six Cub Scouts in uniform; one den
leader in uniform
Setting: Den meeting place, decorated as desired.
The den leader sits at a table. As the skit opens, all
Cub Scouts arrive together and sit down.
DEN LEADER: Today, let’s take turns and tell how
we can help to conserve energy in our homes.
CUB SCOUT 1: I know a good way. My family
doesn’t use our clothes dryer as much as we used to.
We use a new solar energy device called a clothesline and hang our laundry outside to dry in the
sunshine.
CUB SCOUT 2: Did you know that if you take a
shower, you use a lot less water than if you take a
bath?
CUB SCOUT 3: My Mom even uses a timer, and we
have learned to take 3-minute showers at our house.
CUB SCOUT 4: We keep the drapes closed on summer days to keep the hot sun out of the house and then
keep them open for light and warmth in the winter.
CUB SCOUT 5: We keep the damper in our fireplace closed whenever we aren’t using it. If it’s left
open in the winter, the warm air in the house escapes
up the chimney, and that’s a waste.
DEN LEADER (to the last Cub Scout): Johnny, do
you have anything to add about saving energy? (The
den leader turns to see that Johnny is fast asleep.)
I guess Johnny is the best energy saver of us all!
(Curtain)
THE OPERATION
Characters: Narrator, one boy in Cub Scout uniform, a boy in a white lab coat, two leaders in uniform,
two other adults in ordinary clothes. Additional boys
could be dressed in lab coats and assist in surgery.
Setting: This is a pantomime skit that involves
leaders and other adults. The uniformed Cub Scout
lies on a large table, covered with a sheet. The props
indicated below are taped to the back of the table out
of sight. The doctor holds a large cardboard knife and
stands behind the table. His assistants stand at both
ends and behind the table.
NARRATOR: We’re going to show you how to
make a new Cub Scout in one easy operation. To do
this, we need a boy…(doctor points to the boy on the
table)…a den leader…(uniformed den leader enters
and stands near the table)…a Cubmaster…(other
uniformed leader enters)…and a family (two adults
in ordinary clothes enter).
First, the boy needs to be covered with fun and
good times. (The doctor and assistant raise the sheet,
taking care not to reveal the boy on the table. In
large letters on the sheet is written “FUN AND GOOD
TIMES.”) We use laughing gas for anesthetic. (One of
the assistants uses a tire pump or suction cup labeled
“Laughing Gas.”) We take out bad feelings and put
in love. (The doctor removes a big rock from under
the sheet and puts in a big red paper heart labeled
“LOVE,” which an assistant hands him.) We take
out selfishness and put in cooperation. (The doctor removes a sign marked “ME” and puts in a sign
marked “WE.”) We put in some good citizenship.
(The doctor puts in a cutout of the U.S. flag.) And
we add some reverence. (The doctor adds a cutout
of a church.)
Our operation has been a great success! Just look
at the results! (The uniformed Cub Scout throws off
the sheet, gets off the table, stands at attention, and
gives the Cub Scout salute. The Cubmaster holds up
a sign labeled “SUCCESS.”) (Curtain)
Razzle Dazzle
5–35
LAMPPOST
Characters: Any number of uniformed Cub Scouts;
one boy playing the part of a lamppost
Setting: A boy stands onstage holding a lighted
flashlight. He wears a sign marked “Lamppost.”
The stage lights are dimmed. As the skit opens, the
first Cub Scout comes onstage and begins to look for
something near the lamppost.
CUB SCOUT 2 (entering): What are you looking for?
CUB SCOUT 1: I’ve lost a dollar and have to find
it. (Cub Scout 2 helps look, as Cub Scout 3 enters).
CUB SCOUT 3: What are you looking for?
CUB SCOUT 1: I’ve lost a dollar and I have to find
it. (Cub Scout 3 begins to look as the next boy enters.
Continue this procedure until the last boy enters.)
LAST CUB SCOUT: What are you looking for?
CUB SCOUT 1: I’ve lost a dollar and have to find it.
LAST CUB SCOUT: Where did you lose it?
CUB SCOUT 1: Down the street.
ALL (looking disgusted): Then why are we looking here?
CUB SCOUT 1: Because this is where the light is!
(Others chase Cub Scout 1 offstage.) (Curtain)
SHIP AHOY
Characters: Narrator plus two Cub Scouts
Setting: The narrator stands in the middle with the
two Cub Scouts facing each other at opposite sides of
the room.
NARRATOR: Through the pitch-black night, the
captain sees a light straight ahead on a collision
course with his ship. He sends a signal—
CUB SCOUT 1: Change your course 10 degrees east!
NARRATOR: The light signals back—
CUB SCOUT 2: Change yours, 10 degrees west.
NARRATOR: Angry, the captain sends—
CUB SCOUT 1: I’m a navy captain! Change your
course, sir!
NARRATOR: Comes the reply—
CUB SCOUT 2: I’m a seaman, second class, Change
your course sir!
NARRATOR: Now the captain is furious and he
signals—
5–36
Razzle Dazzle
CUB SCOUT 1: I’m a battleship! I’m not changing course!
NARRATOR: To which there’s one last reply—
CUB SCOUT 2: I’m a lighthouse. Your call.
SHOP, SHOP
Characters: Shopkeeper, one boy as a duck, as
many others as are in the den
Setting: The shopkeeper is dusting the counter,
and a duck walks in.
DUCK: Quack! Got any duck food?
SHOPKEEPER (annoyed): Get out of here. We
don’t have any duck food. (One or two boys enter
shopping for [anything that fits the theme]; the shopkeeper smiles and sells them what they want.)
DUCK (walking in again): Quack! Got any duck food?
SHOPKEEPER (more annoyed): Get out! I told
you—we don’t have duck food, and if you come back
I’m gonna nail your tail to the counter! (One boy buys
nails; the shopkeeper smiles and sells them to him.)
DUCK (sneaking in again): Quack! Got any nails?
SHOPKEEPER: Nope—just sold the last of ’em.
DUCK: Quack! Got any duck food? (The shopkeeper pulls at his hair and runs off, screaming.)
SHERLOCK AND DR. WATSON
Characters: Two Cub Scouts as Dr. Watson and
Sherlock Holmes
Setting: The setting can be theme-related, and
the skit can be done in a series, with any number of
things missing.
DR. WATSON: Isn’t it great—sleeping here in the
great outdoors?
SHERLOCK: Yes, but don’t you notice something?
DR. WATSON: Why, yes—it’s a fine night with the
stars above.
SHERLOCK: But isn’t there something more?
DR. WATSON: Well, there’s the shining moon and
the sound of the wind.
SHERLOCK: Nothing more?
DR. WATSON: What, Sherlock, what?
SHERLOCK: Watson, someone has stolen our tent!
THE MUSIC MAKERS
Characters: A violin, cello, drum, cymbals, clarinet, and flute. Cub Scouts can wear costumes made
from boxes, with instruments painted on the front—
or they can hold up simple signs identifying themselves.
Setting: A cluttered room with chairs, sheet music,
and music stands scattered around. The instruments
walk onstage, mumbling and grumbling to each other.
(This skit can also be performed with hand puppets.)
VIOLIN: Well, everyone knows the importance of
strings! As first violin, my lovely tone rings.
CELLO: Really, my friend! Your strings are a
riddle! You call yourself a violin, but to us you’re
just a fiddle!
DRUM: Now, now, all you strings—just go take a
seat. For without my rhythm, you’d not have a beat!
CYMBALS: As a kettledrum, you’re more kettle
than not. And what’s a kettle but an empty pot?
DRUM: If I were you, Cymbals, I think I’d keep
hid, or else we’ll replace you with garbage can lids.
CLARINET Honestly, Drum, I’d really rather that
all of us just learned to play together!
FLUTE: Well, what about flutes? Or don’t we matter? I’ve never heard such endless chatter!
DRUM: You know, I’ve been thinking…
CYMBALS (interrupting): Where would you get
a thought? We know you’re as hollow as when you
were bought.
VIOLIN: Cymbals, Cymbals, I do declare! For ugly
manners, there’s none to compare!
CELLO: Now listen to me…and maybe you’ll see
that we’re all important and necessary.
CLARINET: It’s true that we all are necessary. But
without players, not a tune could we carry!
ALL: He’s right! It’s true! Without the boys, we
wouldn’t know what to do!
DRUM: Let’s all learn a lesson from this little fuss.
The boys are what’s important…and then comes us!
(If additional boys are available, two or three uniformed Cub Scouts could enter and pretend to play
the instruments as the curtain closes.)
Songs
For many boys, singing is as natural as talking. Most
boys and adults have a sense of basic rhythm—they will
often respond to a lively song or the beating of a drum
by tapping a foot, humming to themselves, or even
gently swaying. Singing helps people relax, improves
attitudes, and sets the tone for what is to come.
Most den and pack meetings will include at least
one song. The secret to good singing in the den and
pack is fun: If the songs are ones the boys enjoy and
can sing with a smile, singing can become one of the
important regular elements of a den or pack meeting.
The Cub Scout Songbook contains a variety of
songs and good tips for song leaders, and many packs
have enough copies of it to pass out at den and pack
meetings. Anyone can lead songs, but the proven
methods found in that book and in the Cub Scout
Leader Book will guarantee your success.
SONGS IN DEN OR PACK MEETINGS
A lively song can provide a change of pace in den
or pack meeting activities and helps boys release
stored-up energy. A quiet or patriotic song helps to
set the mood for more serious activities.
The den leader, assistant den leader, or den chief
might be the regular song leader, but don’t overlook
the possibility of a potential song leader among the
boys. The song leader at pack meetings should be
someone who can start a song on the right pitch and
with a proper tempo. This person needs enough contagious enthusiasm to get the adults to sing along with
the boys. A guitar will help enhance singing so find
out whether anyone in the den or pack can play one.
The boys may know some of the old familiar songs
such as “Old MacDonald Had a Farm,” “Row, Row,
Row Your Boat,” and “She’ll Be Comin’ ’Round the
Mountain.” The Cub Scout Songbook contains many
other songs that the boys can easily learn.
The choice of songs depends on the mood and
theme of the meeting. A patriotic song is good at
the beginning or end. During the meeting, use lively
action songs to lift spirits and build enthusiasm.
When teaching new songs, it will help if the boys
practice during den meetings. Then, at the pack meeting, have the words written large on a blackboard or
big sheet of paper, or use an overhead projector if
available, so everyone can see. This will encourage
adults to join in.
Razzle Dazzle
5–37
USING SONGS CREATIVELY
“Give My Regards to Broadway”—copyright 1904
You can use songs in various ways. Try some of
these ideas at pack meetings:
• Divide the pack into two groups and have one
group sing the first line, the other group the second, and so on. Or have one group sing while the
other group claps or hums.
• Leave some words out and use hand claps instead.
For example, when singing “The More We Get
Together,” have the audience clap hands each time
the word “together” would be sung. Or ask them to
stand on a certain word in the song.
• Add musical instruments or rhythm instruments.
• Sing “contra songs,” where two or more different
songs are sung together with a pleasing effect. For
example, “Row, Row, Row Your Boat” with “Frère
Jacques,” or “Little Tommy Tucker” with “Three
Blind Mice.”
• Make up your own songs to fit the theme or special
occasion, using familiar melodies such as “Yankee
Doodle” or “Clementine.”
• Check out Cub Scout Program Helps for songs.
New songs may also be introduced at your district
roundtable and the annual pow wow.
“Home on the Range”—copyright 1873
WRITING YOUR OWN SONGS AND THE
PUBLIC DOMAIN
Some extra ideas:
• Underwater: Chant with fingers dribbling against
your lips.
• Loud: Chant as loud as you can.
• Slow: Chant as slowly and drawn out as possible.
• Monster style: Chant like Frankenstein’s monster.
• Janitor style:
I said a broom.
I said a broom-pusha-broom.
I said a broom-pusha-mopa-pusha-mopa-pushabroom.
• Barnyard style:
I said a moo.
I said a moo-chicka-moo.
I said a moo chicka-bocka-chicka-bocka-chickamoo.
• Flower style:
I said a bloom.
I said a bloom-chica-bloom.
I said a bloom-chica-blossom-chica-blossomchica-bloom.
• Race car style:
I said a vroom.
I said a vroom-shifta-vroom.
I said a vroom-shifta-grind-a-shifta-grind-ashifta-vroom.
It isn’t necessary to be a professional songwriter
to write your own songs. Just fit your own words
to the tune and rhythm of a familiar song. But be
careful when printing songbooks because copyright
laws may apply. If you want to print a songbook, you
should familiarize yourself with copyright law and
the public domain. A good place to start is on the
World Wide Web at www.pdinfo.com.
Here are two basic guidelines about public domain
music:
• Works written and published in the United States
in 1904 or earlier are probably in the public
domain throughout the world.
• Works written and published in the United States
1904 to 1922 are probably in the public domain in
the United States.
Here are some familiar songs in the public domain
(although be aware that some arrangements of these
songs may still be under copyright protection).
“A-Hunting We Will Go”—Traditional
“Battle Hymn of the Republic”—copyright 1862
“Down By the Riverside”—copyright 1865
“For He’s a Jolly Good Fellow”—1783
5–38
Razzle Dazzle
“I’ve Been Working on the Railroad”—copyright
1894
“Rock-a-Bye Baby”—1765
“Skip to My Lou”—copyright 1844
“Yankee Doodle Boy”—copyright 1904
ECHO SONGS/CHANTS
Echo songs/chants are the best to start a group
singing. The group will “echo” what you sing or say
first, making the art of teaching a new song much
easier. Here’s an example of a rousing chant.
“BOOM CHICKA BOOM”
(Leader says a line, and everyone repeats.)
I said boom!
I said boom chicka-boom!
I said booma-chicka-rocka-chicka-rockachicka-boom!
Uh huh!
Oh yeah!
One more time…
ACTION SONGS
Songs with movement are fun for boys and adults.
They are harder to learn and the leader must know
the song well to teach others—but don’t let that stop
you from all the fun to be had! If you find a song
that everyone enjoys, repeat it at all your meetings,
and soon everyone will catch on to the words and
actions. These are great songs to do at the beginning
of a meeting to get everyone ready for the activities.
“Dino Drama”
Tune: “Frère Jacques”
Stegosaurus, stegosaurus (open hand at the back of
the neck)
Triceratops, triceratops (thumb, index, and middle
finger pointing forward; back of hand on the
bridge of the nose)
Flying pterodactyl, flying pterodactyl (flap your
arms)
Tyrannosaurus rex, tyrannosaurus rex (curve the
fingers and move the arms in front like snapping
jaws)
“Stop, Drop, and Roll”
Tune: “John Brown’s Body”
Actions:
• Stop: Hold hands out in front, palms forward.
• Drop: Bend the knees.
• Roll: Rotate the hands around each other in a rolling motion.
If your coattails catch on fire you should stop, drop,
and roll.
If your coattails catch on fire you should stop, drop,
and roll.
If your coattails catch on fire you should stop, drop,
and roll.
It might just save your life!
“A Ram Sam Sam”
Actions:
• Ram sam sam: Make fists with both hands. Place
one on top of the other on “ram,” and then reverse
the position on “sam,” and then reverse back to
the original position.
• Gooli gooli: Hands open, facing out. On each
“gooli,” clinch the fingers down toward the palm—
like a lion flexing its claws!
• A rafi: Wave arms in the air.
A ram sam sam, a ram sam sam
Gooli gooli gooli gooli ram sam sam
A ram sam sam, a ram sam sam
Gooli gooli gooli gooli ram sam sam
A rafi a rafi
Gooli gooli gooli gooli ram sam sam
A rafi a rafi
Gooli gooli gooli gooli ram sam sam
(Repeat the chant a number of times, getting faster
and faster. Or alternatively, do the chant as a fourpart round.)
“Frog Chant”
Actions:
• Frog: Mmmm—make a big deliberate blink; la-deeda-dee-da—hands in front of you, one palm up,
one down; wiggle fingers, then switch.
• Bear: Grrr!—claws like a bear in front of you;
huggy-huggy—hug your neighbors (first the right
and then the left).
• Fish: splish-splash—hold your nose like you’re
diving into water; na-nee-na-nee-na—twirl around
to the left and then to the right.
Mmmm, mmmm, went the little green frog one day,
Mmmm, mmmm, went the little green frog.
Mmmm, mmmm, went the little green frog one day,
So we all went mmmm, mmmm, ahh!
But we all know frogs go la-dee-da-dee-da, la-dee-dadee-da, la-dee-da-dee-da,
We all know frogs go la-dee-da-dee-da,
They don’t go mmmm, mmmm, ahh!
Grrr! Grrr! Went the big brown bear one day,
Grrr! Grrr! Went the big brown bear.
Grrr! Grrr! Went the big brown bear one day,
So we all went Grrr! Grrr! Grrr!
But we all know bears go huggy-huggy-huggy, huggyhuggy-huggy, huggy-huggy-huggy,
We all know bears go huggy-huggy-huggy,
They don’t go Grrr! Grrr! Grrr!
Splish, splash, went the little blue fish one day,
Splish, splash, went the little blue fish.
Splish, splash, went the little blue fish one day,
So we all went splish, splash, splish!
But we all know fish go na-nee-na-nee-na! na-nee-nanee-na! na-nee-na-nee-na!
We all know fish go na-nee-na-nee-na!
They don’t go splish, splash, splish!
CAMPFIRE SONGS
Echo and action songs can be fun around the campfire, but traditional songs around every campfire can be
uplifting and have special meaning. Don’t forget those
familiar folk songs and spirituals, such as “Michael
Row the Boat Ashore,” “Puff the Magic Dragon,” and
“He’s Got the Whole World in His Hands.”
Razzle Dazzle
5–39
“Make New Friends”
Here’s a new twist to an old round. Sing the
original, if you know the tune, or sing to the tune
of “Twinkle, Twinkle Little Star.” This is a good
example of how you can “mix and match” tunes and
words!
Make new friends, but keep the old,
One is silver and the other gold.
A circle is round, it has no end,
That’s how long I want to be your friend.
The fire burns bright, it warms the heart,
We’ve been friends from the very start.
“CLEMENTINE” VARIATIONS
Often, a group enjoys singing, knows the tune, but
can’t remember all the words. One solution is to sing
the same words to several different tunes. That adds
some challenge and humor to the singing.
For instance, the words to “Clementine” can be
sung to numerous tunes. Here are the traditional
words to “Clementine” with a listing of a few tunes
that you can mix and match with the words. This list
is by no means complete—you’ll have fun trying out
some of your own!
In a canyon, in a cavern,
Excavating for a mine,
Lived a miner, forty-niner,
And his daughter Clementine.
Oh my darling, oh my darling,
Oh my darling Clementine.
You are lost and gone forever,
Dreadful sorry, Clementine.
Alternative tunes: “The Marine Hymn,” “Take
Me Out to the Ball Game,” “Yellow Rose of Texas,”
“Yankee Doodle,” “Ghost Riders in the Sky,” “La
Cucaracha.”
“FIVE DAYS OF CAMP”
Three squirts of bug spray,
Two kinds of sunscreen,
And a brand-new Cub Scout T-shirt.
On the fifth day of day camp my mommie sent with me
Five water guns,
Four sack lunches,
Three squirts of bug spray,
Two kinds of sunscreen,
And a brand-new Cub Scout T-shirt.
“FUN IN SCOUTING”
Tune: “Alouette”
Chorus:
Fun in Scouting,
Lots of fun in Scouting.
Fun in Scouting,
Changing boys to men.
First verse:
Tiger Cubs are first in line,
Bobcat, Wolf, and Bears are fine.
So come have fun,
Come have fun,
OHHHH…
Chorus
Second verse:
Webelos is Cub to Scout,
Finding out what it’s all about.
To advance,
What a chance.
OHHHH…
Chorus
Third verse:
Scout to Life, a mighty test,
Makes an Eagle, very best!
For a Scout,
So let’s shout!
OHHHH…
Tune: “12 Days of Christmas”
Chorus
On the first day of day camp my mommie sent with me
A brand-new Cub Scout T-shirt.
“OH, GIVE ME A PACK”
On the second day of day camp my mommie sent
with me
Two kinds of sunscreen,
And a brand new Cub Scout T-shirt.
Oh, give me a pack
Full of Webelos tracks,
That will lead on to Boy Scouts someday.
Where we all tie our knots
And pitch tents for our cots,
And then eat everything that we cooked!
Scouts, Scouts all are we,
Where we play while we learn constantly.
Obey the Scout Law; a friend to one and all,
And we all like to do a Good Turn!
On the third day of day camp my mommie sent with me
Three squirts of bug spray,
Two kinds of sunscreen,
And a brand-new Cub Scout T-shirt.
On the fourth day of day camp my mommie sent with me
Four sack lunches,
5–40
Razzle Dazzle
Tune: “Home on the Range”
Musical Instruments
3.
4.
5.
6.
tub bottom. Wrap the broomstick just above the
notch with heavy wire to prevent the stick from
splitting.
Hammer a nail in the top of the broomstick so that
the top end of the wire can be fastened to it.
Drill a hole for the eye bolt in the center of the
tub bottom. Thread on a washer, insert the bolt
in the tub, add the other washer and the nut, and
tighten, as shown.
Fasten one end of the wire to the eye bolt on the
tub. Fit the notched stick over the tub rim, holding the stick straight up, and stretch the wire
tight. Fasten the other end of the wire to the nail
at the top of the broomstick. Cut off any excess
wire.
To play the bass, stand and rest the tub against
the legs. Hold the stick at the top with one hand
and pluck the wire with the other hand.
MUSICAL POGO STICK
Boys have fun making musical instruments that
really work. Your den might like to form its own
band and learn to play a simple tune on homemade
instruments. The instruments will come in handy at
a Cub Scout circus or fair, a pack or den entertainment night, or just for fun in den meetings.
You can find most of the materials required for
these instruments around the house.
ONE-STRING BASS
Materials: Old
washtub or paper
barrel; broomstick;
wire; nail, washers,
nut, eye bolt
1. Use sandpaper
on the broomstick so the player won’t pick up
a splinter as he
runs his hand
up and down
the stick while
playing the bass.
2. Cut or file a
notch about 1⁄2
inch deep in the
bottom of the
broomstick so
it will fit over
the rim of the
Nail
Wire
Materials: 5-foot dowel or
broomstick; homemade drum
and other noisemakers; two
tin pie plates; screw; rubber
foot
1. Fasten the various noisemakers to the dowel or
broomstick. (You can
make a drum out of a hat
box, as shown.)
2. Using a screw, fasten the
two pie plates loosely to
the top.
3. The player uses one hand
to thump the stick on the
floor for rhythm, and with
his other hand he beats
the drum and sounds the
noisemakers.
SAND BLOCKS
Washer
Eye
bolt
Tub
Nut
Notch
Old washtub or
paper barrel
Screw to attach
pie plates to dowel.
Pie plates
Sleigh bells
Plastic cover
Hat box
Masking
tape
Rubber foot
Materials: Two 1-by-2-by-4-inch pieces of wood,
sandpaper, thumbtacks
1. Cut pieces of sandpaper the same width as the
wood blocks and about 4 inches longer.
2. Turn the sandpaper over the block ends, with the
rough sides out, and tack in place.
3. To play, brush the two sandpaper surfaces together briskly for a pleasant shuffling rhythm.
Razzle Dazzle
5–41
CYMBALS
Materials: Two tin (not
foil!) pie plates, two spools,
15 inches of heavy cord
1. Punch two holes near the
center of each pie plate.
2. Run the cord through the
holes, tying a spool tightly to the bottom of each
pan for a handle.
KAZOO
Materials: Comb, tissue paper or waxed paper
Hold a piece of tissue paper or waxed paper
against a comb. Place your mouth against the paper
and hum a tune through the paper and comb.
COCONUT CLAPPERS
Materials: Coconut, sharp saw, paint or shellac
1. Cut a coconut in half with a sharp saw. Drain the
milk, pry out the meat, and clean the inside out.
2. Sand the edges of the coconut. Paint or shellac
inside and out.
3. Experiment with different sounds and rhythms
by clapping the shells together, tapping them on
a board, or rubbing them together with a paper
between them.
MUSICAL BOTTLES
Materials: Assortment of variously sized and
shaped bottles, water
Line up the bottles and blow gently across the top
of each to hear its tone. By adding a little water to a
bottle, you can change the tone. The more water, the
higher the tone.
Use a straw to add and take out a little water at a
time to tune the bottles. Insert a straw in water, place
a finger over the open end of the straw, and lift the
water out of the glass in the straw.
For more accurate tones, use eight 10-oz. bottles.
Fill them to the following depths in inches: 13⁄8, 2, 23⁄8,
3, 33⁄8, 4, 43⁄8. Leave one empty. This should produce a
fairly accurate musical scale, and with some practice,
you can play a tune.
SODA STRAW PIPE ORGAN
Materials: Corrugated cardboard (with large corrugations), 11⁄2 by 8 inches; eight straws
1. Cut the straws in the following lengths in inches:
81⁄2, 73⁄4, 7, 63⁄4, 6, 51⁄4, 41⁄2, 41⁄4.
5–42
Razzle Dazzle
2. Push the straws between the corrugations of
the cardboard, beginning about 11⁄2 inches from
one end and leaving four empty corrugations
between each straw.
3. Flatten the top ends of the straws and cut off
the corners. Blow into the instrument with your
lips lightly around the straws—like a harmonica.
Slide the instrument across your lips as you blow
and hear the unique sounds you can make!
PADDLE RATTLE
Materials: Wooden paddle, 12 bottle caps, nails
1. Remove the liners from 12 bottle caps and hammer the caps flat. Punch a hole in the circle of
each cap.
2. Nail the caps loosely to the wooden paddle,
using three caps per nail.
3. Shake the paddle for a clattering rhythm.
SOUP CAN MARACAS
Materials: Two soup cans; pebbles, dried beans,
or rice (or an assortment of nails, screws, and washers); adhesive or strapping tape; paint
1. Open the soup cans just enough to empty and
wash them.
2. Put a few pebbles or dried beans in each can, or
use an assortment of nails and screws. Reclose
each can and seal with tape.
3. Fasten the two cans together at the ends that were
opened using adhesive or strapping tape. Paint or
cover with colorful adhesive-backed paper.
PAPIER-MÂCHÉ MARACAS
Materials: Small round balloon; newspaper
strips; wallpaper paste; pebbles,
dried beans, rice, etc.; 1⁄2inch dowel about 12
inches long
1. Inflate the balloon to about the
⁄ -inch dowel
size of a grapefruit.
Papiermâché
2. Cover with strip
ball
papier-mâché as
described in the
“Crafts” chapter.
Let it dry.
3. Punch two 1⁄2-inch holes in the papier-mâché on
opposite sides of the ball. Insert a few pebbles,
beans, or some rice. Glue a 1⁄2-inch dowel handle
through the holes. Let the glue dry, and then
paint and decorate as desired.
1
2
Stories
Of all the tools a Cub Scout leader can use, none
can compare with the art of storytelling. Stories are a
lead-in to many other parts of the program. You can
tell a story
• To introduce the monthly theme.
• To explain a game.
• To introduce a craft session.
• While on a hike.
• To explain advancement requirements.
• To emphasize a point.
• For a change of pace in activities.
• For enjoyment and fun.
Stories may help boys develop a love of reading.
Scouting’s founder, Lord Baden-Powell, said, “If you
can hand on something of the love of books to your
Scouts, you will be giving them friends which will
never fail them.”
Cub Scout–age boys are curious. They have been
introduced to books and reading in school, but not
always as a source of entertainment or pure enjoyment. A leader can take a book in hand, read a few
well-chosen sentences, put the book down, and then
tell the story so it will come alive for the boys.
TYPES OF STORIES
• Fun stories can be enjoyed by both the teller and
the listener. Nonsensical stories lend themselves
to the use of actions and sounds. They help everyone relax and enjoy themselves.
• Adventure stories always appeal to boys. They
include such things as science fiction, fantasy, and
true-life adventure.
• Teaching stories can describe a moment in history,
an invention or discovery, or a character-building
attribute. Stories with a moral can help discipline
boys without actually pointing fingers.
• Animated stories can be used to help boys learn
pantomime. The leader tells the story while the
boys act it out.
• “What Would You Do?” stories are action tales
where the leader describes a dilemma and the
boys provide solutions.
• Mystery stories appeal to boys and challenge them
to solve the mystery before the story ends. (But
avoid things that are gruesome or gory.)
Be sure to use only stories that are in good taste and
appropriate for Cub Scout–age boys and families.
STORYTELLING HINTS
In addition to the tips on storytelling found in the
Cub Scout Leader Book, these suggestions will help
you be a good storyteller:
• Know the story.
• Be completely at ease.
• Help put the listeners at ease. Make sure they are
comfortable.
• Arouse interest by having a catchy or exciting
beginning.
• Create a setting or mood through descriptions.
• Make the story move. Maintain suspense.
• Match the speed and pitch of your voice to the
action in the story.
• Keep the listeners’ attention by varying the speed
and tone of your voice and by using gestures
where appropriate.
• Don’t prolong a story unnecessarily. Decide beforehand how and when to end the story. A good ending is essential.
• Make the story short and to the point.
SAMPLE STORIES
THE ORIGIN OF THE PLEIADES:
A CHEROKEE LEGEND
Long, long ago seven boys who lived in a village
belonging to the Cherokee became famous because
they were more interested in bowling stone hoops on
the ground than in tending the cornfields. These boys
were very skilled at bowling the hoops. But their
mothers thought hoop bowling was a useless pastime
and forgot that by bowling hoops the boys learned
many useful things.
In fact, the mothers were so sure that it was a useless pastime that they decided to cure their boys of
laziness. They collected several stones, like those the
boys used as hoops, and boiled them for their sons’
supper instead of the usual corn. Then when mealtime came, the mothers said, “Since you like bowling
stone hoops better than working the cornfields, you
may eat stones or go hungry!”
The boys didn’t like this treatment at all, so
instead of being sorry and promising to spend more
time working in the fields, they decided they would
play all the time. They got together and began to
dance around the village. They danced and danced
and danced until their mothers noticed that the
boys’ feet were whirling through space in a circle.
As their mothers watched in desperate fear, the boys
rose higher and higher. Up, up they went until they
reached the sky.
Razzle Dazzle
5–43
Now, when you look at the sky on a clear night,
you will see those seven boys. We know them as a
constellation called the Pleiades. But the Cherokee
call them “Ani’tsutã,” which means “the boys.”
(Show a chart of the sky and stars and point out the
constellation, or if telling the story outdoors on a
clear night, point it out in the sky.)
BENNY THE FROG
Benny was a big bullfrog who lived in a swamp.
This swamp was just an ordinary swamp, with nice
big lily pads, nice houses for the frogs to live in, running water, televisions, and a rowboat parked in front
of every house. It was just like any other swamp.
One day Benny decided he needed to have something special that would make all the other swamp
creatures envy him. He thought and thought and
finally decided he would like to have a beautiful,
long, white beard. He wished so hard that one day
the Fairy Frogmother appeared and said: “Benny, I
will grant your wish. But if I give you a beard, you
must promise never, never to shave it off. For if you
do, I will turn you into an urn!”
Benny promised he would never shave it off, so
the Fairy Frogmother waved her magic wand, and…
Poof!…a big, long, beautiful white beard appeared on
Benny’s chin.
After a while, Benny’s neighbors heard about the
beard and came to see it. Everyone came: the alligators, the muskrats, the snakes, the raccoons, the
turtles, and even the dragonflies. Benny was very
proud of his beard. For days and days the creatures
came from everywhere in the swamp. And then after
a while, fewer and fewer came to see his beard, until
finally, no one came at all. Benny wasn’t as proud of
his beard now as he had been at first. He was always
tripping over it.
Finally, Benny just couldn’t stand it any longer.
He shaved! Suddenly, the Fairy Frogmother appeared
and said: “Benny, I warned you about what would
happen if you shaved your beard. Now I’m going to
turn you into an urn!” So she waved her magic wand
and…Poof!…Benny was turned into an urn.
And that just goes to show you that a Benny
shaved is a Benny urned!
THE GIFT OF TREES
The American Indians believe that the secret of happiness comes from giving to others. Many, many moons
ago, the Great Spirit first put people on the earth and
they were frightened. “Where will we find food and
water?” they asked. The trees laughed softly. “We are
your brothers,” they said. “We will help you.”
5–44
Razzle Dazzle
The maple tree spoke: “I will give you sweet
water to drink and make into sugar.” The elm tree
said, “Use my soft bark to make your baskets and tie
them together with my tough muscles.” The hickory
tree said, “My cousins and I will fill your baskets
with sweet nuts.” And the hickory called the chestnut, beech, and walnut to help. The great pine tree
whispered softly: “When you get tired, brothers and
sisters, I will make you a bed. My cousins the balsam
and cedar will help me.”
The people’s hearts were filled with sunshine as
they set out to explore this new world. But soon
they came to a deep, wide river. “How will we ever
cross the river?” they asked. The trees laughed and
laughed. “Take my white skin,” the birch said. “Sew
it together with the muscles of the elm tree, and you
can make a boat that will carry you across the widest
river.”
When the sun crossed the sky to the lodge in the
west, the people felt cold. Then the balsam fir tree
whispered to them: “Little brothers and sisters, there
is much sunfire in my heart. Rub my branches together and you will make a fire.” So the people made fire.
And that night they slept soundly on the branches of
the great pine tree. The north wind blew cold, but the
people’s hearts were filled with sunshine.
Now when American Indian children ask how
they can repay their friends the trees, wise people
answer: “They do not ask for payment. But you can
give them care and attention. You can give love and
care to every plant and flower that makes your life
beautiful.”
THE ADVENTURES OF ICKY CRANE
(Long rhyming poems make especially good stories, as listeners enjoy the rhythms and rhymes.)
’Twas a dark and gloomy Halloween in Sleepy
Hollow Land.
The moon cast eerie shadows that fell across the
sand.
This Cub Scout’s name is Icky Crane, and he is not
afraid
Of witches, ghosts, and goblins, whether alive or dead.
Wait! What’s that I hear? Hoofbeats drawing near—
Surely it is just a friend; there’s not a thing to fear.
But since he’s not so sure of what it might or might
not be,
Icky decides to wait behind the most convenient tree.
The thing is coming closer now, the hoofbeats
louder still,
And Icky trembles in the dark, as even Cub Scouts will.
Then the horseman comes in view, a figure all in
black,
And Icky wishes he were home, tucked safely in the
sack.
But there is one thing very wrong; what kind of man
is he?
For there is nothing on his neck where his head
ought to be!
The mighty stallion rears up high; the horseman
gives a shout,
“Who is the crook who stole my head? Where is that
thieving lout?”
The rider spots our brave Cub Scout, crouching in
the night,
And Icky knows he must stand tall; he tries with all
his might.
He rises up on shaking legs to meet this gruesome foe,
With a heart so full of courage, a Cub Scout head to toe.
The horseman points a finger at him, shouts, “Are
you the rotten heel?”
And Icky answers strong and true, “A Cub Scout
would never steal!”
The rider stomps and shakes his fist, acts like a
spoiled kid;
Our Cub Scout cannot help but laugh at this nut
who’s lost his lid.
“Could it be it was your temper, sir? Good manners
aren’t a bother,
And if some patience you could learn, perhaps you’d
grow another.”
The rider climbed back on his steed, rode quickly
through the night,
And Icky sighed with great relief that he was still all
right.
So all you Cub Scouts far and wide, remember what
I’ve said:
Be patient and have good manners—or you just
might lose your head!
THE SKUNK MONKEY
(This is a good story to tell around a campfire.)
Joey, a brave Webelos Scout, had heard many stories around the campfire about the mysterious creature that lived in the Cascade mountain range. The
Skunk Monkey was a large, hairy creature believed
to be related to Bigfoot, but it was mostly renowned
for its fierce temper and foul smell. Many people had
claimed to have seen it, and others told of the many
people who had disappeared after encounters with
the creature. Yes, Joey had heard the stories, but he
knew they were only tall tales and legends. So it was
that one day, Joey decided to prove to his den that the
Skunk Monkey was just a story.
Joey left the campsite shortly after lights out,
under the bright light of a full moon. He traveled by
foot for a while until he reached the horse stables.
Joey picked a large, strong horse to ride. Soon he was
on his way, riding through snow-covered Cascades.
It didn’t take long before Joey came upon a lake.
He noticed a canoe to his left. Joey dismounted the
horse and tied it securely to a small tree. He got into
the canoe and paddled across the lake. When he
reached the opposite shore, he walked farther into
Sasquatch territory.
As he walked, Joey noticed that the trees were
closer together and larger on this side of the lake. It
was hard to see where he was going, and he walked
carefully with his walking stick toward the area
renowned for Skunk Monkey sightings. Then it happened! (Pause for effect.)
(In a whisper) Joey heard a sound to his right and
froze in midstep. The sound was getting closer and
closer. The trees were packed so tightly together, Joey
couldn’t see what was coming toward him. Perhaps
it was a wild pig…perhaps it was a harmless deer…
perhaps… (Pause)
(Loudly) Then he smelled it. It was the worst
smell that he had ever smelled. It was stronger than
20 smelly skunks. It was worse than the smell at the
garbage landfill. It was putrid and foul and rotten.
The noise got closer and closer, and before Joey could
turn and run away, two great trees were torn down in
front of him and he found himself face to face with—
the Skunk Monkey!
The creature gave a loud howl and banged its massive chest with powerful arms. Joey scrambled away
and ran as quickly as he could. (Pick up the pace of
the story.)
He ran through the close trees as hard as he could,
but he heard the creature only steps behind him, its
foul breath huffing. He wasted no time when he got
to the lake, scrambling into the canoe and paddling
swiftly away from the shore with all the strength he
could muster. He then heard another loud howl, followed by KERSPLASH!…The creature had jumped
into the lake and was swimming hard behind him!
Razzle Dazzle
5–45
Joey paddled with all his might and reached the
other side of the lake in no time at all. He looked
behind him, only to see the fangs of the Skunk
Monkey as it got closer and closer! He jumped on the
horse, striking it hard with his feet as he urged it to
run for all it was worth.
The horse was powerful and galloped away in a
flash. But all the while, Joey could hear the gruntings
and howlings of the Skunk Monkey as it followed
behind. Joey then saw the lights of a ranger’s cabin
and headed straight to it. He jumped off the horse and
ran in the front door, banging the door shut behind
him. He dashed up the stairs into the bedroom, but
the ranger was nowhere to be seen. He slammed the
bedroom door and wondered what to do next.
Joey heard a loud crash as the Skunk Monkey
broke through the cabin’s door. Joey heard the creature puffing up the stairs. He ran into the closet and
shut the door behind him, crouching low in the
clothes. But then he heard the bedroom door being
smashed…and then a horrifying howl as the creature
tore open the closet door, looked straight into Joey’s
eyes, and said…“Tag, you’re it!”
I REMEMBER DAVY
(Sometimes stories can be enhanced with a few
simple props or costumes. This story might be told
by an old-timer dressed in frontier clothing, speaking
slowly with a drawl.)
I was a friend of ol’ Davy Crockett. He was quite a
man. Why, I remember Davy when he was knee-high
to a milk cow. ’Course, that was Davy when he was
a baby—lyin’ down! His cradle was 14 feet long. His
ma had to put it up in a tree so the wind would rock
little Davy to sleep.
I remember the day I was tryin’ to drive some
fence posts. Ground was frozen. Young Davy, he
jumped along the tops of the posts, poundin’ ’em
with his feet. He kept goin’ in one direction, ’cause
if he jumped on ’em comin’ back, those fence posts
woulda gone clean under the frozen ground!
I remember Davy’s tame bear, Ol’ Death Hug. That
was some bear! One day he and Davy were ridin’ in
a log Davy had whittled out, racing a steamboat up
the river. Davy was paddlin’ and Ol’ Death Hug was
sittin’ in the back, steerin’ with his tail. Shame about
that bear! Davy taught him to close doors and churn
butter and the like. Blamed thing got so civilized that
he caught the whoopin’ cough and died.
One day Miz Crockett said Davy couldn’t go huntin’ ’til he finished grindin’ a hun’red bushels of corn.
Davy saw a hurricane comin’ so he grabbed holda
5–46
Razzle Dazzle
that hurricane and hitched it up to his grindin’ mill
in nothin’ flat. Why that cornmeal was so fine, Miz
Crockett had to nail the corncakes to the table so they
wouldn’t float away!
I remember Davy the mornin’ daybreak was frozen. Everything was frozen! That mornin’ was dark
as midnight. Davy climbed to the top of Daybreak
Mountain and he saw that the whole world was frozen on its axis. Just wouldn’t turn. Now Davy just
happened to be carryin’ a ton o’ bear grease along,
and he blew on that bear grease and melted it. Then
he poured it on the earth’s axis, and sure enough, the
world started turnin’ again and we got daybreak!
Then there was the time Davy ran fer Congress. We
were all fixin’ to vote fer him. Even the four-legged
critters hoped he would go to Washin’ton. When we
counted the votes, Davy was elected unanimously—
plus 463 votes!
Yeah, I sure remember ol’ Davy. He stood mighty
tall for a man!
MEMORIES
A long time ago was a small, peaceful kingdom
that had been ruled for many years by a beloved
king. Everyone in the kingdom had always had
enough food to eat, and the people worked together
to make life comfortable. All the people worked hard,
but they took pleasure in their work. The children
played, dreaming of the day when they, too, would
be old enough to contribute to the happiness and
prosperity of the kingdom.
The time came when the old king knew he should
pass the crown on to a younger person. He gathered
his people together and told them that he could no
longer rule them in the manner in which he felt they
should be guided. It was time for a new monarch. But
the king had no children, so the succession could not
move automatically to a worthy prince or princess.
And so the old king asked the people whether
there were any among them who considered themselves worthy of this honor. Such people were asked
to stand before the king and before the people of the
kingdom.
Now, you might think that everyone would rush
forward at such a chance. But the people in the
kingdom knew what a responsibility this was, and
they knew how special a new monarch had to be. So
only three young people ventured forward. All were
upstanding, well-respected citizens. All were strong,
hard workers and were eager to guide the kingdom in
the years to come.
The king was proud of these young people and
knew and respected each one. But he admitted that
he could not choose among them. And so he gave
them this challenge: “Travel to the mountains in the
north and bring back to the kingdom the most precious thing that you can find. When you have all
returned, I will decide which one of you is the worthiest by how you measure what is most precious for
the people of the kingdom.”
The first young person knew immediately what he
wanted to do. He ran to his home, grabbed some provisions, and strode confidently into the wilderness
toward the mountains.
The second young person was a bit slower. He
went to his home, reflected carefully a few moments,
and then gathered some belongings. He didn’t know
how long he might be, so he took food and blankets
for a camp.
The third young person was even slower. She
went to her home, built a warm fire, and looked
deeply into the flames as she reflected on the challenge. When morning came, she also gathered provisions and set out for a long journey.
Soon the first young man returned. The king
called the people together, and the young man presented him with a perfect red rose. “This is the most
precious thing I found on the mountain,” he told the
king. “It is a perfect red and a perfect bloom. It will
remind the people to strive for perfection and beauty
and do only their best.”
The old king took the rose and nodded slowly. He laid
it beside him and waited for the other young seekers.
He didn’t have long to wait for the second young
man’s return, who sought out the king early the next
morning. He presented the king with a beautiful blue
stone, saying that not only was it precious because it
was beautiful, but it was also useful. “It can help grind
the cornmeal so that the people of this kingdom will
never go hungry,” he told the king. The old king nodded and laid the stone beside the flower. He then settled back to wait for the return of the young woman.
A day passed. And two. Then a third. It was not
until the fourth day that the young woman returned
to the kingdom. She walked slowly, with her head
down, as she came before the king and the people.
For in her hands was nothing.
Then she spoke: “My king, I have returned empty
handed. For four days and nights I have sat in the
mountains, searching for the most precious thing.
And I saw many things that I thought were beauti-
ful, but I thought they were beautiful only in the
mountains. If I were to bring them back to you, they
would lose their beauty. I saw a perfect bird building
a nest in a mountain ash to start her gentle family. I
saw a perfect butterfly of many colors, floating on the
mountain breezes. And I sat awake all night, hoping
that a thought would come to me—a thought of what
I might bring home to this precious kingdom. And as
I sat, I saw a huge, perfect red ball of fire rise above
the horizon. It shone with colors more beautiful than
I have ever seen. The yellows and golds and shades
of red told me that a new day had begun. The rising
of the sun was the most beautiful and precious thing
I saw in the mountains, but I could not bring it back
with me. I have only the memories of these things.”
The old king nodded slowly and spent the night
pondering over what he had heard, wondering who
would make the best ruler for the people. Finally, at
the end of the fifth day, he stood before the people
with his decision. He called the three young seekers
to stand before him and spoke.
To the first young man he said: “Your flower was
indeed beautiful when you first brought it to me, but
look: It has withered and died and is no longer precious or beautiful. It is a temporal thing. Inspiration is
often like that, withering without the hard work and
good decisions needed to help one reach the goal.”
To the second young man he said: “Your stone
is a beautiful stone, and it is useful, too. But what
happens when we grind the cornmeal and the stone
wears down and disappears over time? The stone is
then gone forever, and is no longer precious. Hard
work alone is like that. It takes a wise person to plan
for many possibilities over many years.”
To the young woman he said: “You should not
be ashamed that you had nothing to bring back. For
in fact you brought back the most precious thing
anyone can have. You brought back the memories
that touched you deeply, and you shall carry your
precious memories with you always. Memories keep
us warm through long nights, but they are more
than that. When you share your memories, all who
listen, learn. The happiness of the people depends
on wise leaders who make good decisions. A good
decision comes from our memories of what we have
already seen and learned. It is your memories that
will give you wisdom to be a fair and just queen to
the people.”
With that, he passed his crown to the young
woman, who guided the people wisely as their queen
for many years.
Razzle Dazzle
5–47
Jokes
Jokes help achieve one of Cub Scouting’s important purposes—fun! Use them to add sparkle to meetings and put the group in a happy, lively frame of
mind. Or use them as icebreakers or to help change
the pace during a meeting.
RUN-ONS
Run-ons are similar to skits but are much shorter
and require only one or two people. Run-ons are
good for a change of pace during a pack meeting—
something to make everyone laugh and relax. They
come in handy during pack shows and circuses as
fill-ins between acts. Also use them at campfires to
fill dead time or to enliven the program.
Stiff Neck: The first person enters the room, looking up. Another person enters, looks at the first, and
also looks up in the air. Repeat with as many others
as desired. Finally, the last person enters and asks,
“What are you looking at?” Each person down the
line asks the next person the same question, until the
first person answers, “I don’t know about you, but I
have a stiff neck!”
Wrong Feet: One person enters the room with
shoes on the wrong feet. Another person enters,
looks at the first, who is groaning, and says, “What’s
wrong?” “My feet are killing me!” the first replies.
“Do you have bunions?” “No.” “Oh, I see. You have
your shoes on the wrong feet!” The first person
replies, “But they’re the only feet I have!”
It’s All Around Me: The first person runs into the
room yelling, “It’s all around me! It’s all around me!”
Someone asks, “What’s all around you?” The reply:
“My belt!”
Loose Rope: A person enters the room pulling
a rope. The leader asks, “Why are you pulling that
rope?” The person replies, “Did you ever try pushing one?” (The stunt can end here, or later in the
meeting the same person can come back, pushing a
rope to the delight of the audience. Just push a wire
through the rope so it will be stiff and straight and
can be pushed.)
You Don’t Say! The first person pretends to pick
up a ringing telephone. He says, “You don’t say…you
don’t say…you don’t say!” (with more emphasis each
time). Another person says, “Who was that?” The
first person replies: “I don’t know. He didn’t say!”
It’s in the Bag: A person comes into the room carrying an inflated paper bag that he holds tightly by
the top. Another person says, “What are you carrying
in that bag?” “Milk,” he replies. “You can’t carry milk
in a bag!” “A cow does!”
5–48
Razzle Dazzle
The Redcoats Are Coming: Several people run
into the room during the meeting at different times,
with frightened expressions. Each shouts, “The redcoats are coming! The redcoats are coming!” Later,
toward the end of the meeting, two or three adults
enter wearing red Scout jackets and say calmly,
“We’re the redcoats.”
I’ve Got a Cold: Several people enter the room
tiptoeing cautiously. The first one in line whispers,
“That’s where I saw the ghost!” and points. This message is passed down the line in loud stage whispers.
The last person says, “Where?” This is passed back
up the line in whispers. The first one whispers back,
“About 20 feet away.” (Message goes down line.)
“How big was he?” (Message comes back up line and
so on, with each additional statement.) “About 10
feet tall.” “When did you see it?” “About two months
ago.” “Then why are we whispering?” The first person says loudly, “I’ve got a cold!”
There’s a Fly in My Soup: The customer says to the
waiter, “Waiter, what’s this fly doing in my soup?”
The waiter comes to the table, looks in the bowl, and
answers, “I believe it’s doing the backstroke, sir!”
An Appealing Stunt: A person enters the room
carrying a suitcase and states, “I’m taking my case to
court!” A little later he enters again carrying a ladder
and says, “I’m taking my case to a higher court!” A
stranger runs through carrying a suit on a hanger. The
first person enters, saying, “I lost my suit.” He carries
a banana or orange that he begins to peel as he makes
his last statement, “I’m appealing my case!”
Wrap at the Door: One person says, “Say, wasn’t
that a rap at the door?” Another person says, “No, I
don’t think so.” First person: “Yes, I’m sure I heard a
rap at the door!” “I don’t think so.” The first one goes
to the door and brings back a coat or jacket, saying, “I
just knew there was a wrap at the door!”
The Viper: Periodically during the meeting, people
run in the room with frightened expressions, shouting, “The viper is coming! The viper is coming!”
Each time, the audience becomes more curious until
finally, toward the end of the meeting, someone walks
in carrying a pail and wiping cloths and announces:
“I am de viper. I come to vipe de vindows.”
Rock Concert: Several boys walk onstage clacking rocks together. Another person enters and asks,
“What are you boys doing?” They reply, “Having a
rock concert!”
Sun Fishing: One boy, wearing sunglasses, walks
out with a fishing pole. He keeps tossing his fishing
line into the air. Another person enters and asks:
“What are you doing with that fishing pole? There’s
no water around here.” The first person tosses the
line into the air again and says: “That’s OK. I’m trying to catch a sun fish.”
Tricks and Magic
Spelling Champ: Two boys enter. The first says he
just won the school spelling bee. The second says,
“Then I guess you can tell me how many i’s are in
Mississippi.” The first boy replies, “That’s easy—
four.” The second boy says, “I can spell Mississippi
with only one eye.” When the first boy asks him how,
the second boy covers one eye with his hand and
begins to spell.
Magic and mystery are two surefire ways to capture a boy’s imagination. Almost everyone enjoys
magic, and no one more than a Cub Scout–age boy.
The Painter: A person wearing two coats enters
the room with a bucket of paint and a paintbrush.
He pretends to “paint” the walls of the room. When
asked why he is dressed for winter, he replies that he
was told to paint the room with two coats.
KNOCK-KNOCK JOKES
This series of knock-knock jokes can be done all
at once or called out from the audience at various
times.
Knock, knock
Who’s there?
Repeat.
Repeat, who?
Who, who, who.
Along with puzzles (see 5–25 and 5–26), the den
leader or den chief will want to have a new trick to
demonstrate at almost every den meeting. You can
also use tricks during pack meetings, where the boys
and their families can enjoy them together.
One of the most important secrets to doing a trick
is to practice until you can do it perfectly several
times in a row. It is boring and a little embarrassing
to watch someone try to do a trick and barely fumble
through it. The tricks included here are mystifying at
first but are easy to learn and fun to do. You can find
the necessary materials around the house.
TRICKS WITH COINS
The Expanding
Hole
Knock, knock.
Who’s there?
Ima.
Ima, who?
Ima still hungry—when do we get s’mores?
Knock, knock.
Who’s there?
Issue.
Issue, who?
Issue through yet?
Materials: Sheet of paper, scissors, a quarter
In the center of a piece of paper, cut a round hole
about the size of a dime. Hand the paper and quarter to a friend and ask him whether he can pass the
quarter through the hole without tearing the paper or
touching the coin. He won’t be able to do it.
Solution: Fold the paper in half so the fold bisects
the hole. Slip the quarter between the folds. Hold the
extreme ends of the paper where the fold is. Raise
them upward and toward each other. Shake the paper
gently and the quarter will slip through the hole.
Stack of Coins
Materials: Six or more pennies, smooth table, one
dime
Make a neat stack of five or more pennies on a
smooth table. With a finger and thumb, flick a dime
along the table so that it hits the bottom penny of the
stack. It will fly out, leaving the rest of the pennies in
the stack. You can repeat this, removing the bottom
pennies one at a time.
Razzle Dazzle
5–49
Explain what is happening to the boys. The
momentum of the moving dime is transferred to the
bottom penny only because that is the only coin it
hits. The rest of the pennies tend to stay in place
because of the principle of inertia, and the stack just
drops down. Notice that the dime bounces back a
little. Also notice that if you push the bottom penny
slowly with the dime, the whole stack will slide
along. The bottom coin must be hit sharply.
Materials: Two identical coins, a clear drinking
glass with a flat bottom
Turntable
Trick: Use a clear drinking glass with a flat bottom. When you “drop” the coin in the glass, you only
pretend, “plinking” the glass with a ring you have on
your finger. When you show the audience the coin
in the glass, it is really under the glass in your hand.
While the audience is looking at the empty glass in
amazement, you can secretly hide the coin.
Materials: Two coins, table
Take a coin in each hand and stretch out your arms
far as possible. Tell everyone that you will make both
coins pass into one hand without throwing the coin
or bringing your arms together.
With your arms still outstretched, turn your body
and place one coin on a table. Then turn your body
around again until the hand with the other coin
comes to where the first coin lies. You can easily pick
up the coin, and both will be in one hand while your
arms are still wide apart.
The Disappearing Coin
1. Pretend to drop a coin
in a glass. “Plink” the
glass with your ring.
2. The coin is really
under the glass in
your hand.
Coin Through the Head
Materials: A dime
Show a dime in your right hand. Bend your left
arm and put the left hand near your left ear. Put the
coin on your left elbow and rub it with a circular
motion of your right hand, keeping up a patter about
making the coin grow smaller and smaller until it
disappears. “Accidentally” drop the coin and pick
it up with your left hand. Now pretend to transfer it
back to the right hand, but actually keep the coin in
your left hand.
Go back to the original position with your left
hand near your right ear. Resume rubbing the left
elbow and keep talking about the coin growing
smaller while you put it in your left ear. Now you are
ready to show that the coin has disappeared by showing your empty hands. Then say that although it has
disappeared, you can make it pass right through your
head. Stick the phantom dime in your right ear, and
presto! The real dime comes out the left ear.
“Plink”
3. Cover the glass
with a handkerchief
and hide the coin.
4. The coin will
be gone!
Tell your audience that you will make a coin
disappear. You will drop a coin into a glass you are
holding and show them the coin in the bottom of the
glass. Cover the glass with a handkerchief and say
some magic words. Then hand the covered glass to
someone else to uncover. When the glass is uncovered, the coin will be gone.
Snap the Card
Materials: Playing card, one coin, a drinking
glass
Lay a playing card on a glass and place a coin on
top of the card. Ask whether anyone can put the coin
in the glass without picking up the card.
Trick: It’s easy! Snap your finger against the card’s
edge, sending it flying parallel off the rim of the
glass. The coin will drop into the glass.
5–50
Razzle Dazzle
TRICKS WITH TOOTHPICKS
Strong Paper
Remove Five Trick
Materials: Three glasses, a sheet of paper
Lay toothpicks in the arrangement shown.
Rearrange them to make only three squares by removing only five toothpicks.
Remove Three Trick
Ask whether anyone has seen the new strong
paper that will support a glass. Show an ordinary
piece of paper and lay it as a bridge between two
glasses. Naturally, it won’t support a glass. Then
make 1⁄2-inch pleats in the paper and lay it on the two
glasses again. Now it will support another glass.
Step-Through Postcard
Lay toothpicks in the arrangement shown.
Rearrange them to make three squares by removing
only three toothpicks.
Remove Eight Trick
Materials: Postcard, scissors
Lay toothpicks in the arrangement shown. Remove
eight toothpicks so there are only two squares left.
Would you believe that you can crawl through an
ordinary postcard? The answer is “yes,” if you know
how. Fold the card lengthwise and make cuts on the
folded side, as shown by the dotted lines in the illustration. Then turn the card around and make cuts in
the other direction, almost to the folded edge. Open
the card and cut along line a–b. Carefully open out
the card, and you will have a ring large enough to
step through.
Newspaper Ladder
TRICKS WITH PAPER
Tear the Rope
Follow the instructions and pictures to make a
newspaper ladder.
Materials: Paper napkin, water
Twist a paper napkin into a rope and dare everyone to tear it apart. They can’t, and yet you can.
Solution: Merely wet your fingers. When you tear
the paper rope, touch the center with the water on
your fingers, and the napkin will tear easily.
1. Roll together several thicknesses of newspaper.
Overlap about 5 inches.
Razzle Dazzle
5–51
2. Secure the ends with rubber bands. Flatten the
tube. Tear or cut out a section from the center.
3. Put a couple of fingers
in the opening and gradually pull the strips out from
the top until you have a
finished tree.
3. Fold back the two ends.
4. Gradually work
the centers out of
the rolled ends,
and there’s
your ladder!
4. Your finished tree.
Möbius Strip
Materials: Newspaper, glue, scissors
Take a long piece of newspaper about one column
wide. Give it a half-turn and glue the ends together.
Cut the loop lengthwise and what do you have? Two
loops? Surprise! You have one big loop.
Cut
in half
Twist
Glue
1. Make a roll of
newspaper, as for the
Newspaper Ladder.
Flatten half the tube
and tear it down the
center about halfway,
as shown.
5–52
Razzle Dazzle
2. Flatten the torn strips
together and tear again
down to about halfway.
The four torn sections
consist of several strips
each. Press them down
toward the rolled end of
the paper so you can see
an opening in the top.
This looks like magic, but it really isn’t. The
Möbius strip stays together when cut in half because
it has only one continuous surface. A German mathematician discovered this principle in the 1800s. You
can prove for yourself that it is one continuous strip
by drawing a line the length of the strip (before you
cut it in half) without raising your pencil. You will
come back to the starting point and will have covered
both “sides” of the paper.
MAGIC TRICKS
Magic Straw
Materials: Straw,
string, razor blade
Cut a slit in the
middle of a straw with
a razor blade. Thread
a string through it. Tell the audience you can cut the
straw in half without cutting the string.
Solution: Bend the straw, pull the string out of the
slit, and cut the straw. Show the audience that the
string isn’t cut, but the straw is!
Magic Number
Think of a number. Double it, add 10, and divide
by 2. Then subtract the first number. Regardless of the
number you start with, the answer will always be 5.
Magic Seed
Materials: Clear glass with seltzer water, grape
seed
Drop a grape seed into a glass of water. It drops to
the bottom. But at your command the seed will rise
to the top and then sink to the bottom again.
Solution: What the audience doesn’t know is that
you are using seltzer water, not ordinary water. The
gas in the seltzer clings to the seed and causes it to
rise up. When the gas frees itself, the seed sinks.
This will continue as long as gas is still in the water.
Watch the seed carefully, and when you see it starting to rise or sink, give it your magic command.
Magic Hat
Materials: Three pieces of candy, three hats
Put three pieces of candy on a table and cover each
with a hat. Lift the first hat, eat the candy, and put the
hat back where it was. Do the same with the second
and third hats. Now say: “You have seen me eat the
candy under all three hats, but I can use magic so that
all three pieces of candy are under one hat. Which
hat do you choose?”
After audience members choose a hat, pick it up,
put it on your head, and announce, “Now the candy
is under the hat!”
Ask the guardian to hand you one of the papers.
Gravely close your eyes, place the folded paper
against your forehead, and remain a moment in
deep thought. Then call out any sentence and ask
who wrote it. The boy who is the accomplice, and
did not write a sentence, claims authorship. Unfold
the paper, as if to verify it, and read the sentence to
yourself. Place this paper in your left hand and ask
the guardian for another.
Repeat the same procedure, calling out the sentence you just read. This will be a correct answer,
which one of the boys will have to admit writing.
Keep this up until all players’ slips have been read.
The accomplice must keep your secret.
Reading Temples
Choose an accomplice and send him from the
room. Tell the group that thoughts can be transmitted by feeling a person’s head. Have the group select
a number between 1 and 10 and call the accomplice
back in. Tell him to place his hands on your temples,
and after “serious concentration,” name the number.
Solution: You can “transmit” the number by tightening and relaxing your jaw the required number of
times, making your temples move in a way that can
be felt but not seen.
Baffling Banana
Run a needle and
thread under the skin
and parallel to one side.
Pull out
the same
hole.
The Mystifying Paper
Materials: Paper for everyone, same size and shape;
pencils/pens; a boy who will be an accomplice
This is a good trick for a den meeting and requires
an accomplice. Give everyone a slip of paper the
same size and shape. Ask them to write a short
sentence of four or five words. The words should
be written plainly and not shown to anyone else.
Everyone folds their papers and gives them to a person acting as “guardian.” No one should try to read
the papers.
Banana will fall out
in slices.
Materials: A needle, thread, a banana
Run a needle and thread under the skin and parallel to one side of a banana. Repeat on each side until
Razzle Dazzle
5–53
a circle of thread is made around the fruit. Hold the
needle and end of the thread together and pull out
the same hole. A cut will have been made through
the fruit. Repeat this several times to cut the banana
in several slices under the skin. The small needle
holes will not be apparent, but when you peel the
banana, it will fall out in slices.
Trick: You name the correct object immediately
after you name one that is black. This is the accomplice’s signal that the next one named will be right.
Magnetized
Spoon
Audience view
Mysterious Money
Materials: Dollar bill, paper bag, scissors
Ask someone in the audience to give you a dollar bill. Place it in a bag and cut the bag in half. It
appears that the dollar bill is cut in half, too, but then
return the uncut bill to the surprised owner!
Cut slit in
small bag.
Slide bill into
slit and fold
back.
Back view
Materials: Spoon
Cut bag in half;
give uncut bill to
surprised owner.
Solution: Cut a slit in a small paper bag long
enough for the bill to fit through. As you slide the bill
into the bag, make sure that half of it goes through the
slit. While you distract the audience with conversation, fold the bill over so it won’t be seen or cut.
Immovable
Tell a friend you will hypnotize him so he can’t
raise a foot. He will be skeptical. Ask him to stand
with his right side close to a wall that has no ledges
or handles to hold. His right foot must be parallel
to and touching the wall, while his left foot is at a
natural standing distance from the right. Then “hypnotize” your friend, telling him that he can’t lift the
left foot slowly from the ground and keep it up. He
will find that he can’t!
Mind Reader
Your accomplice boasts that he can leave the room
and, when he returns, name any object that the players have selected in his absence. The accomplice
leaves, the players select an object, and the accomplice returns. You name one object after another, saying, “Is it [name an object]?” The answer is always,
“No.” You finally name the selected object and the
accomplice says, “Yes, that’s it!”
5–54
Razzle Dazzle
Rub a spoon vigorously, telling the audience that
you are magnetizing it. Say some magic words. Hold
the spoon as shown, showing it to the audience, who
will think that it is sticking to your hand.
Balancing Egg
Materials:
Blown egg shell
Tissue paper
Sheet of paper
Salt
Hard-boiled egg
Teaspoon
This magic egg will stand upright when you hold
it on the outstretched palm of your hand. It will balance in many weird ways on any flat surface.
Trick: The egg is a blown egg that contains some
salt. To prepare it, pierce an egg at both ends and
blow the contents out into a dish. Let the inside of
the shell dry. Seal one end by pasting a tiny piece of
tissue paper over it. Make a small funnel from paper
and pour 2 t. salt into the shell. Seal the other end.
At the end of your balancing act, place the egg out
of sight.
Pick someone from the audience to try to balance
the egg as you did, but give him a hard-boiled egg
to use. Of course, he can’t do it. Then you take the
hard-boiled egg and give it a little smack as you set it
on the table. The shell will break slightly and allow
the egg to balance.
Money Has Power
Windmill
Materials: Wooden pencil, dollar bill
Have someone hold a wooden pencil at both ends
and parallel to the floor. After folding a dollar bill
lengthwise, announce to the group that you will
break the pencil in half with the dollar bill, and ask
them to give you three chances to do so. On the first
two tries, use only the dollar bill, but on the third,
put your index finger in the fold of the bill and hit
the pencil with your finger. The pencil will break if
it is held firmly.
Magic Dust
Materials: Glass of water, ice cube, 10-inch piece
of thread, salt
Place a glass of water containing an ice cube on a
table. Tell your friends you can lift the ice cube using
a 10-inch piece of thread. They can try, but it won’t
work. Lay the thread across the top of the ice cube,
sprinkle some magic dust (salt) on it, and lift the
thread—cube and all.
Trick: The salt makes the ice melt, but it freezes
again quickly, freezing the thread to the cube.
MISCELLANEOUS TRICKS
Balancing Bat
Materials: Notched stick or dowel, propeller, pin
or nail, pencil
This windmill will amaze your friends. You can
make the propeller revolve, stop, and reverse directions without being observed, and people will think
you’re doing it through your willpower. To make
the windmill, fasten a light propeller to the end of
a notched stick or dowel with a pin or nail. Rub a
pencil along the notches of the stick to set up a vibration that will cause the propeller to revolve rapidly.
You can control the direction by applying light pressure with the thumb or forefinger on one side of the
notched stick or the other.
It Can’t Be Done
Tell your friends that you can jump backward farther than they can jump forward, if they do exactly
as you do. Prove it by grasping your toes and hopping
backward a few inches. When your friends assume
the same position, they’ll find they can’t budge when
they try to jump forward.
Magic Colored Pencil
Materials: Pencil, paper
Materials: Black posterboard, scissors, tape, two
pennies
Here’s a balancing act to mystify your friends. The
bat will balance on the tip of your finger, the edge
of a table, or the rim of a glass. Enlarge the pattern
and trace onto black posterboard. Cut out the bat and
tape a penny to the underside of each wing tip. With
a little practice, you can make it appear to fly by
balancing it on your finger and raising and lowering
your hand.
Pick up an ordinary pencil. Tell your audience
that this ordinary pencil will write any color they can
think of. Ask someone to name a color. Then write
the color down (R-E-D, B-L-U-E, etc.) and show them.
Out of Reach
Challenge your friend to place his right hand
where his left hand can’t reach. When he looks perplexed, place your right hand on your left elbow.
Razzle Dazzle
5–55
Leaping Salt
Materials: Salt, comb
Put a small amount of salt on a table. Run a comb
through your hair. Then hold the comb 1 inch above
the salt. It will leap up and stick to the comb.
Red or Green?
Candle Blow
Materials: Candle, matches, card
Tell your friends that you can make a candle flame
move toward you.
Solution: Hold a card between yourself and the
candle and blow against the card. The flame will be
drawn toward you.
Materials: Red paper, white paper, scissors, a light
Cut out a pig or other animal from bright red paper
about 4 inches in size. Mount it on a piece of white
paper. Hang the picture on the wall. Next to it, hang
a large piece of white paper. With the light to your
back and shining on the pig and the blank paper, look
the animal steadily in the eye and count to 20. Then
look directly at the large sheet of white paper. There,
you’ll see a green animal!
Floating Ball
Materials: Tennis ball, soda straw
Hold a soda straw in your mouth and tip your
head back. Hold a table tennis ball over the end of
the straw and blow softly. Release the ball. It will stay
suspended above the straw as long as you blow.
Pinhole Illusion
Materials: Two business cards, pin
Punch three small holes in a business card with
the point of a pin. These holes should be close
together, and they must not cover an area larger than
the pupil of an eye. In another business card, punch
a single hole. Hold the card with the three holes as
close to your eye as possible, and hold the other card
about 2 to 3 inches in front of the first. When you
look at a light, it will appear as if the far card has
three holes in it, also.
Handkerchief Trick
Materials: Two white
handkerchiefs, one colored handkerchief
Tie two white handkerchiefs together, and
then tie a colored handkerchief to one of the
white ones. Ask someone
to put the colored handkerchief between the two
white ones without untying any of the knots.
Solution: Simply tie a third knot, making a circle
of the three.
5–56
Razzle Dazzle
Disappearing Knot
Materials: 18-inch
piece of string
Tie an 18-inch piece
of string so there is a
loose, open, overhand
knot in the center. Now
tie the ends together
with several knots so
the string makes a loop.
Let someone examine
the string and explain
that you are going to
remove the overhand
knot without untying
Pull open.
the other knots. Place
the string behind your
back for an instant, and then bring it forward and
show the audience that the overhand knot has disappeared from the loop.
Solution: While the string is behind your back,
open the overhand knot out wide, and move it up
to join with all the other knots, where it won’t be
noticeable.
Super-Breath
Materials: Three small pieces of paper
Place three small bits of paper on the back of your
hand. Let anyone select one of the pieces. Claim that
you can control your breath so as to blow away only
the chosen one. It sounds impossible.
Solution: Place two fingers on the other two bits of
paper and then blow the chosen one away.
Obedient Straw
Materials: Straw, table
Tell the audience that you can make an ordinary
straw obey your command. Put the straw on a table
with your forefinger 6 inches in front of it. As you
move your finger away from the straw, it follows.
Trick: As you move your finger, blow softly on
the straw.
Disappearing Pencil
Materials: Pencil
1. Hold the hands together, fingers extended, with a
short pencil crosswise under the thumbs.
2. Rotate the hands a quarter-turn (right fingers up,
left fingers down), bending the right fingers over
the left half of the pencil and the left hand.
3. Bring the right thumb under the left thumb and
palm, and continue the rotation, allowing the
hands to turn over so both palms are down.
4. The pencil has disappeared!
2
1
Materials:
Small
key-ring
flashlight,
frosted light bulb
A den chief can
master this trick with
a little practice. When
he’s ready to perform,
he tells the boys he can
light up a bulb in his
hand with the electricity from his body.
Trick: Hold a frosted
light bulb by the base,
at the same time holding a small key-ring
flashlight behind the frosted light bulb with the third
and fourth fingers of the hand. The frosted bulb will
hide the flashlight from the boys. Exert a twist with
the fourth finger to turn on the flashlight and make it
appear that the frosted bulb has lit.
Flip That Cup
Materials: Three glasses, table
4
Stand three glasses on a table in a row, with the
middle one upside down. Ask someone to turn all
the glasses bottom up, using three moves and picking up two glasses at a time, turning them over with
each move.
3
To make the pencil reappear, reverse the motion
by putting the right thumb over the left thumb and
pencil and rotating the right thumb toward the left
wrist, along the outside of the left thumb. Bring the
hands together as in the beginning, with the pencil
again under the thumbs.
Disappearing Water
Materials: Napkin, glass of water, table
Put a glass of water on a table and cover it with
a napkin. Tell a friend that you can drink the water
without touching the napkin. Walk around the table,
say some magic words, and then ask your friend to
lift the napkin to see if the water is still there. When
he lifts the napkin, quickly take the glass and drink
the water. You didn’t touch the napkin, did you?
Solution: First move: turn over the second and
third glasses; second move: turn over the first and
third; third move: turn over second and third again.
Electric Den Chief
Razzle Dazzle
5–57
Mysterious Ice Cube
Materials: Ice cube, ruler, two tall cans, wire,
unopened soup can
You may not be able to saw a person in half, but
you can do a similar trick with an ice cube. Balance
a ruler between two tall cans. Put an ice cube on the
ruler. Twist an end of a long piece of wire around
an unopened soup can or other heavy object. Run
the wire over the ice and fasten it to the can so it
is suspended. Soon the wire will pass through the
ice cube. Has it been split in half or is it still in one
piece?
5–58
Razzle Dazzle
6
SPECIAL PACK
ACTIVITIES
Planning Special Events
Anniversary Week Activities
The Blue and Gold Banquet
Autumn Harvest Festival
Bicycle Safety Day
Conservation Day
Disabilities Awareness Day
Water Carnival
Cub Scout Field Day
Cub-anapolis 400
Summer Celebration
Welcome to the Midway
Family Cake Bake
Pack Picnic
Western Rodeo Roundup
and Pioneer Day
Derbies and Regattas
Pinewood Derby
Space Derby
Raingutter Regatta
Cubmobile Derby
All-Derby Race Day
Fishing Derby
Kite Derby
6-1
6-2
6-3
6-10
6-11
6-12
6-14
6-14
6-15
6-18
6-18
6-20
6-21
6-22
6-23
6-26
6-26
6-29
6-32
6-33
6-37
6-37
6-38
6-0
Special Pack Activities
In this chapter you’ll find a broad assortment of time-tested special events that dens and
packs have used successfully. Some are indoor activities, others are outdoor activities; some
are suitable for the summer, some for winter, and others can be used any time of the year.
Many of the activities offer possibilities for Cub Scout advancement. It is important that
you take advantage of these opportunities so that boys will not only have fun but also have
a chance to learn and advance in rank.
Most of the activities require a minimum of materials and equipment. Even though they
are simple and within the capabilities of Cub Scout–age boys, all require some advanced
preparation on your part to be completely successful.
Planning Special Events
When planning a special activity, consider the task
at hand and follow these guidelines as you evaluate
your needs and resources:
Objective: Why are we having the activity? Does it
help to achieve the purposes of Cub Scouting?
Leadership: Adequate adult leadership is a “must.”
For major pack activities, the pack committee usually
appoints a chair and recruits members of an event
committee to carry out the various responsibilities.
Judging and Awards: Any special pack activity
that takes the place of a regular pack meeting should
include advancement awards so that boys are recognized promptly. If it is a competitive activity, be
sure that each boy receives something for participating. You should ask: “How and when should these
awards be given and what type of awards will be
used? Who will do the judging?” Answer these questions ahead of time.
Facility: What type of facility is needed? Can the
event be held in the regular pack meeting place? Is it
an outdoor activity? Are reservations necessary? Will
there be a charge for the facility?
Health and Safety: The plan should include
adequate supervision and ensure the proper use of
equipment. A harmless object can become dangerous when used in the wrong way. Take the necessary
measures to ensure the health and safety of the boys
and others taking part. Read the BSA publication
Guide to Safe Scouting and keep it on hand for all
events.
Physical Arrangements: What type of seating
arrangement is needed? How much space is available? If it is outdoors, what is available, and what do
we need to provide?
Materials and Equipment: What materials and
equipment are needed? Who will provide them? Can
you get donations? Check the Family Talent Surveys
for resources among family members.
Schedule: A written schedule or program will
help the event run smoothly. When will the activity
be held? What time does it begin? Who does what
and when? What time does it end? And of course, let
all pack families know the schedule.
Finances: Estimate the cost of the activity, if any.
Will the pack budget cover the expenses? If not, how
will costs be covered?
Alternatives: Plan for backup leadership to fill in
for emergencies. If it is an outdoor activity, have a
backup plan in case of adverse weather conditions.
Public Relations: Be sure that all pack families
know about the activity. Use word of mouth in your
den meetings, and put an article in your pack/den
newsletter. Could the event be publicized in local
newspapers and other media?
Registration and Check-In Procedure: Most competitive events require some type of check-in procedure. How will it be done, and who is responsible?
Transportation: Will transportation be needed?
Will each family provide its own transportation? If
not, what arrangements need to be made? Are tour
permits or site licenses needed?
Countdown: Does everyone involved know what
is expected? Remember the secret word of Cub
Scouting: KISMIF—Keep It Simple, Make It Fun.
Rules: For competitive events, establish clear and
simple rules that everyone can understand. Be sure
everyone knows the rules in advance. This will save
many disagreements and help prevent hard feelings.
Special Pack Activities
6–1
BACK-DATED PLANNING CALENDAR
To ensure that nothing important is overlooked,
you should develop a backdated planning calendar
for each special event, such as the one shown here.
List all of the steps that need to be completed before
the activity, with a target date for the completion of
each phase of the planning.
Six months before
Select event chair and
cochair.
Five months before
Recruit event committee.
Four months before
Make a detailed, written
plan with specific assignments.
Three months before
Order materials and awards.
Make arrangements for the
facility.
Two months before
Begin publicizing in the pack.
Contact media for publicity.
One month before
Make announcement at a
pack meeting, and contact
other pack families. Contact
media for publicity again.
Two weeks before
Make a last-minute check on
materials, equipment, and
the facility.
Event
Arrive early and set up if
necessary. Hold the event.
Have fun!
One week after
Evaluate the success of the
event. Thank everyone who
helped.
CALL ON THE SECOND TEAM
When planning and conducting special pack activities, don’t forget to use your second team, that is,
Cub Scout parents and other adults. This is a good
way to get pack families to participate, to strengthen
the pack, and to build spirit.
Anniversary Week Activities
Every February, beginning on Sunday of the week
that includes February 8, the Boy Scouts of America
celebrates its anniversary. BSA was incorporated
February 8, 1910. February is also the birth month
of Scouting’s founder Lord Robert Baden-Powell.
During anniversary week, Scouting units are encouraged to conduct rededication ceremonies and to
demonstrate Scouting’s purposeful activities.
Religious Services: Many packs attend church
or synagogue in uniform on Scout Sunday or Scout
Sabbath. In some churches and synagogues, Cub
Scouts take part in the services.
Civic Activities: Often, local government, school
districts, and fraternal organizations will allow Cub
Scout packs to present a flag ceremony at the openings of their meetings. This is especially appropriate
during anniversary week.
Wear the Uniform: Encourage your Cub Scouts
to wear their uniforms to school one day during
Scouting Anniversary Week. This might be on their
regular den meeting day or any other day during the
week.
Cub Scouting Demonstrations: One of the best
ways to mark Scouting Anniversary Week is with a
live demonstration. This could be held after school or
all day Saturday wherever there is plenty of pedestrian traffic (e.g., a shopping center, vacant lot, centrally
located park, library, or even a large store display
window). Show Cub Scouting in action—boys racing
pinewood derby cars, playing games, staging skits or
puppet shows. Webelos Scouts could have displays
and give demonstrations of activity badge projects.
Be sure to have a big sign and handouts identifying
your chartered organization and unit. Include the
name and phone number of a leader who can be contacted for information about joining.
At the pack’s annual planning conference, select
a chair and cochair for each special activity, and
identify other adults who would like to help. This
way, the leadership is identified early so planning
can begin early. The chair and cochair work together,
so if the chair is unexpectedly out of town, the plans
can continue uninterrupted.
Stage a skit for a Cub Scouting demonstration during
Scouting Anniversary Week. Cub Scout clowns could
perform various feats of skill (Wolf Achievement 1).
6–2
Special Pack Activities
Good Turns: Do a Good Turn for the pack’s chartered organization—or for your community. Think of
a worthwhile project that involves parents and other
family members as well as Cub Scouts.
Displays: Window displays will attract attention
to your pack. Make arrangements early with a public
library, your chartered organization, or a store to use
a display area. A window display might be tied to
a particular Cub Scouting theme, or it could cover
the pack’s activities for a whole year. Decorate with
banners, flags, streamers, etc. to make the display
colorful and attractive. Be sure to have a sign identifying the pack and its chartered organization, with
the name and phone number of a leader who can be
contacted for more information. Put your display up
on time and remove it on time. Be sure to send a letter of thanks.
World Friendship Fund: Plan and get approval
from your council and pack committee for a pack
money-earning project to raise funds to donate to
the World Friendship Fund. This BSA-administered
fund provides material help to Scouts and Scouters
around the world. Ask your local district or council
for more information.
The Blue and Gold Banquet
Most Cub Scouts celebrate Scouting Anniversary
Week with a birthday party called the blue and gold
banquet. In nearly all packs, the annual blue and
gold banquet, which is often the pack meeting for
February, is the highlight of the year. It brings families together for an evening of fun and inspiration.
The purpose of the blue and gold banquet is to celebrate, recognize, and inspire. Recognize Cub Scouts,
pack leaders, and other adults involved in Scouting
at this event by presenting advancement awards,
honors, certificates—or with just a hearty round of
applause for service to the pack.
PLANNING THE PROGRAM
Early planning is necessary if the program is to
be successful. The pack committee should recruit a
banquet chair, who in turn selects others to carry out
the responsibilities of the program. The committee
reserves the location, makes arrangements for the
banquet, sends out special invitations, decides on
the theme, and takes care of the housekeeping. The
committee should try to include as many people as
possible in the planning. The committee should also
keep in touch with the pack committee by attending
the monthly pack committee meetings. Good communication is essential for a successful blue and gold
banquet.
Suggested Timetable
Four months before: Select blue and gold chair
and committee. Decide on the date, time, place,
theme, and type of meal for the event. Reserve the
location.
Three months before: Plan the program. The banquet committee reports progress and details to the
pack committee.
Two months before: Determine the guest list, and
mail invitations. (Include an RSVP card in the invitations so you can accurately plan for the amount of
food and space required.) Boys begin work on decorations and presentations. The banquet committee
reports progress to pack committee.
One month before: Boys continue work on decorations and presentations; recheck facilities; print the
program. The banquet committee reports to the pack
committee.
Two weeks before: Turn in award applications,
complete decorations, verify RSVP counts and food
preparation.
Banquet day: Set up the room, ENJOY THE
BANQUET, clean up—and then relax after a job well
done!
During the days after: Blue and gold committee
writes a report that includes suggestions to help make
the next year’s blue and gold banquet even better.
Special Pack Activities
6–3
THE BANQUET
FINANCING
The banquet may be served in a variety of ways.
Your pack might choose to have dinner catered or
in a restaurant. Many packs have a blue and gold
dessert or ice cream social. Most often, the blue and
gold banquet is a family potluck. Surprising as it may
seem, the type of dinner isn’t very important; it is
the Cub Scouting that happens in making the event a
time of family and fellowship that really counts.
How will the pack pay for the banquet? Most packs
include it in their annual budget and cover any costs
through their regular money-earning projects. Your
pack may charge for dinner, especially if it is catered
(be absolutely certain every family feels it can afford
to attend), or the chartered organization might be
able to provide it as a gift to the pack. If there are any
costs for the family, collect the money in advance.
If your pack decides to have a meal, ask yourself
what type of meal best serves your pack. If your plan
includes a potluck, be sure to have a variety of foods.
One way to do this is to assign types of food by last
name, for instance, A–E: salads and vegetable dishes;
F–K: appetizers and breads; L–P: main dishes; Q–T:
plates, beverages, and condiments; and R–Z: desserts. Another way is to divide food responsibilities
by den, such that Den 1 brings salads, Den 2 brings
main dishes, etc. Sometimes, the pack will provide
the paper products and utensils or a large sheet cake
for dessert.
It’s important to make sure there is enough food
for everyone. A good guideline for your potluck dish
is to bring enough to serve your family plus two.
Finally, since this is a banquet for the boys, try to
serve foods that will please them—the kind of things
they enjoy and would choose themselves.
Blue and Gold Mints
Ingredients:
6 T. margarine or butter
2 t. peppermint extract
3 lb. powdered sugar
7 T. water (color half with blue and the other
half with yellow food coloring)
Dash of salt
Granulated sugar
1. Cream the margarine or butter. Add flavoring and
salt.
2. Divide into two batches. Add colored water to
each batch.
3. Add 1 lb. powdered sugar to each batch. Blend
with a mixer, and then knead another half-pound
of sugar into each batch.
4. Shape into small balls and roll in granulated
sugar.
5. Press into molds or roll out to desired thickness
and cut or shape mints. Let the mints dry on a
cookie sheet in the refrigerator. Store in a covered
tin or airtight box to prevent hardening.
6–4
Special Pack Activities
THE FACILITY
Secure a suitable facility at least six weeks in
advance—the earlier, the better. The number of
people attending and the serving arrangement will
determine the space you need. A good way to estimate the number attending is to multiply the number
of boys by three. This will help you decide how large
the facility should be. The location could be a school
cafeteria, church meeting room, or large room at a
civic center, town hall, restaurant, or cafeteria.
Consider these things: rental fee, if any; seating
capacity and number of tables available; kitchen
availability, if needed; adequate parking space; convenient restrooms; and accessibility for people with
disabilities. You will need to find out whether special equipment is available, such as a public-address
system, speaker’s stand, etc., and whether you need
to secure permission to use any special equipment.
OTHER CONSIDERATIONS AND IDEAS
• Be sure that boys are involved in the banquet preparations. For instance, dens can provide their own
table decorations. Boys can make a centerpiece,
place mats, place cards, napkin rings, and nut
cups.
Place Cards: Cut heads
from colored construction
paper, mark features
with felt-tip pens, and
glue to folded cards. Or,
use stickers.
• Enlist the help of extra family members specifically for the event. For instance, a parent who enjoys
computers could make the programs. Use the
Family Talent Survey to find adults with “hidden”
talents.
• Invite the boys and their families, of course. You
may also to wish to include some of the following
special guests:
—Head of your chartered organization
—Chartered organization representative
—Mayor or other local political figures
—Police or fire department members
—School principal
—Scoutmaster of local Boy Scout troop
—District executive
—District committee members
—Cub Scout roundtable staff
—Unit commissioner
Webelos Place Mat
Light blue
Dark blue
Cut activity badges from gray construction paper
and glue on.
Glue an 11-by-17-inch piece of dark blue construction paper on top of a 12-by-18-inch piece of light
blue construction paper. Glue on construction paper
activity badges. Cut the Arrow of Light from yellow
construction paper.
Banner Invitations: Use
blue or gold construction paper, and write with
a blue or yellow marker.
Glue or tape a dowel to
make a double banner.
Neckerchief Invitation
Cut a triangle from yellow construction paper. Outline
with blue marking pen and write the date, time, and
place of the banquet. Fold as shown.
• Include a flag ceremony in your blue and gold
banquet. One of the purposes of Cub Scouting is to
help boys develop habits and attitudes of good citizenship. You can find many flag ceremony ideas
in the BSA publication Cub Scout Ceremonies for
Dens and Packs.
Napkin Ring
Cut a diamond from
yellow construction paper
and print “Help Others”
across the center. Add the
guest’s name, if you want.
Glue the diamond to a ring
of cardboard covered with
blue construction paper.
Blue
Yellow
Open flaps to read invitation.
Den Cake Centerpiece
Use hat boxes and ice cream
containers to build the tiers
of the cake. Cover the tiers
with white or yellow construction paper and add the Cub
Scouting ranks with blue felttip markers. Place a real birthday cake on top, big enough to
feed the den’s families. Make
the Cub Scout climbers from
pipe cleaners with plastic foam
balls for their heads. Make the
hats and neckerchiefs from
bits of blue and yellow construction paper. Don’t forget to
make an Arrow of Light to put
on the top of the cake!
Special Pack Activities
6–5
THE PROGRAM
One thing that can help guide you in your program
planning is having a theme for your blue and gold
banquet. A theme gives the boys an emphasis around
which they can build their invitations and decorations. For instance, a “Back to the Future” theme
could include place cards shaped like spaceships;
an “Under the Big Top” theme invites the possibility of animal cookies decorating the dessert. Check
Cub Scout Program Helps, where you will find the
monthly theme suggested by the BSA. You will also
find many program ideas to help make your blue and
gold banquet special.
The banquet program must appeal to boys as well
as adults. The evening can be conducted as a regular
pack meeting (with songs, skits, stunts, and awards),
or it can be something different and a little more
special. Your pack may choose to bring in outside
entertainment, such as a magician or storyteller, or
have a video or slide presentation of the activities the
pack participated in over the previous year. Choose
a master of ceremonies who will keep the evening
moving and enjoyable for all.
Include the following agenda items in the program. Move them around to suit the needs of your
pack, and be sure to include applauses and stunts to
fill in the gaps. Try to keep the program time to no
more than 11⁄2 hours, not including mealtime.
Preopening or Gathering Period: Have displays
and exhibits, as well as games or other activities to
keep younger children and the Cub Scouts busy until
the meal is served.
Opening Ceremony: This doesn’t need to be lengthy
or elaborate, but it does need to include the boys.
Invocation: This is one way to incorporate duty to
God into the program. The Cub Scouts, a pack leader,
a religious leader, or someone from your chartered
organization can give an opening prayer or thought.
Be sure the invocation is nonsectarian.
Dinner: Allow sufficient time for everyone to
enjoy the meal. If it is served as a buffet or potluck,
try multiple service lines with food in the middle of
the tables. Tiger Cubs usually eat the least so you may
want to let them eat first after honored guests. Let the
others eat by ranks—Wolf, Bear, Webelos—or randomly from a drawing or a set rotation. Some packs
put numbers on the tables and draw out one or two
tables every time the serving line gets small.
Welcome and Introductions: The master of ceremonies for the night, often the Cubmaster, should
recognize pack leaders and special guests.
6–6
Special Pack Activities
Greeting for the Head of the Chartered Organization:
Give the chartered organization head and/or representative a moment to tell who he/she is and why he/she
helps the pack. This is an ideal time to present the
pack charter renewal certificate, if available.
Songs: Keep songs light, simple, lively, and not
overly long. Provide song sheets so everyone can
participate. Familiar tunes work best.
Skits, Stunts, and Entertainment: Entertainment
from within the pack can’t go wrong. The dens
will have had plenty of time to rehearse. If you use
entertainment from outside the pack, make sure it
is suited to the crowd and is family entertainment
appropriate for all ages.
Advancement Award Ceremony: Make this a
memorable moment. This is often the most important part of the evening for many of the boys and
families.
Webelos Graduation Ceremony: If possible,
involve Boy Scouts and Scouters from the troops the
Webelos Scouts are joining. If your boys are bridging
and/or receiving the Arrow of Light, consider inviting an Order of the Arrow ceremony team to participate (contact your district executive for details).
Recognition of Adult Leaders: Present certificates
and awards to all the people who have helped make
the pack “go.” Include pack leaders, parents, and
special guests. Make sure the awards are positive and
appropriate. This is the time to make everyone feel
good about his/her service to the pack and inspire
others to volunteer.
Friends of Scouting Presentation: Many packs use
the blue and gold banquet as an opportunity to kick
off the annual Friends of Scouting (FOS) fund-raiser.
This council fund-raiser helps provide money for
your council’s annual operating budget. Check with
your local district or council to schedule a Friends of
Scouting presentation.
Closing Ceremony: Be a little more serious with the
closing ceremony, but don’t put a damper on the evening. Try using an inspirational or patriotic closing.
Announcements, Thank You, and Good-bye: This
is the time to mention upcoming events and to thank
all the families and friends for attending. Most people will be ready to leave so keep comments short
and to the point. Wish everyone a good night and a
safe journey home.
Cleanup: Cleanup is a job for everyone. A Scout
always leaves a place as clean as or cleaner than the
way he found it!
BLUE AND GOLD GRACE AND
INVOCATIONS
BLUE AND GOLD CEREMONIES
The Light of Scouting’s History
Health and Strength
(Sing grace)
For health and strength
And daily bread
We praise thy name, O Lord.
Singing Grace
Tune: “Michael Row the Boat Ashore”
God is great and God is good,
Al-le-lu-ia.
Let us thank him for our food,
Al-le-lu-ia.
By his hand, we all are fed,
Al-le-lu-ia.
Thank you, Lord, for our daily bread,
Al-le-lu-ia.
Simple Grace
Tune: “Frère Jacques”
Our Creator, Our Creator,
Once again, once again,
We shall ask your blessing,
We shall ask your blessing,
Amen. Amen.
Philmont Grace
(Spoken)
For food, for raiment,
For life, for opportunity
For friendship and fellowship,
We thank thee, O Lord.
Cub Scout Prayer
(Spoken)
O Lord, that I will do my best,
I come to you in prayer.
Help me to help others every day,
And teach me to be fair.
To honor my mother and father,
And to obey the Cub Scout Law, too.
This I ask that I may be
A loyal Cub Scout true. Amen.
Personnel: Four readers (or prerecord narration on
tape)
Equipment: Flashlight, four candles on a table
Setting: The room is completely darkened except
for the flashlight held by the first reader, who passes
it to the next reader, etc.
FIRST READER: In 1907, when Lord Robert BadenPowell conducted an experimental camp for boys on
Brownsea Island in England, the Scouting movement
began as a tiny spark of light. (Lights the first candle.)
SECOND READER: On February 8, 1910, the
Boy Scouts of America was born when William D.
Boyce filed incorporation papers in Washington, D.C.
(Lights the second candle with the first.)
THIRD READER: On June 15, 1916, the Boy Scouts
of America was granted a federal charter by Congress.
This was also the year when Baden-Powell introduced Wolf Cubbing in Europe. Fourteen years later,
Cub Scouting began officially in the United States.
(Lights the third candle with the second.)
FOURTH READER (lighting the fourth candle with
the third): Just as the light in this room has grown
as it was passed from one candle to the next, so the
Scouting movement grew throughout the world.
Today, it has millions of members in hundreds of
countries. Let us take this light and spread it outward
to others through our goodwill.
Will all Cub Scouts and former Cub Scouts please
rise and repeat with me the Cub Scout Promise?
(Lead the Promise.) Will everyone now please rise
and repeat the Pledge of Allegiance?
The Story of the Blue and Gold
Personnel: Eight Cub Scouts
Equipment: Blue flannel board, cards for flannel board (TRUTH, STEADFAST LOYALTY,
SPIRITUALITY, WARM SUNLIGHT, GOOD CHEER,
HAPPINESS), yellow sun for flannel board
CUB SCOUT 1: Back in the good ol’ days, the waving of school colors gave people a feeling of school
pride and loyalty. Today, the blue and gold of Cub
Scouting helps to build this spirit among Cub Scouts.
Special Pack Activities
6–7
CUB SCOUT 2 (pointing to blue flannel board):
The blue reminds us of the sky above. It stands for
truth, spirituality, and steadfast loyalty.
CUB SCOUT 3 (placing the “Truth” card in the
upper left corner of the board): Truth means we must
always be honest.
CUB SCOUT 4 (placing the “Spirituality” card in
the upper right corner): Spirituality means being concerned with and sensitive to religious values.
CUB SCOUT 5 (placing the “Steadfast Loyalty”
card across the bottom): Steadfast loyalty means
being faithful and loyal to God, country, and your
fellow human beings.
CUB SCOUT 6 (placing the sun in the center of
the board): The gold stands for the warm sunlight.
(Places the “Warm Sunlight” card across the top of
the sun.)
Closing Thought
NARRATOR: Lord Baden-Powell, the founder of
Scouting, wrote: “While you are living your life on
earth, try to do something good which may remain
after you.
“One writer says: ‘I often think that when the
sun goes down the world is hidden by a big blanket
from the light of heaven, but the stars are little holes
pierced in that blanket by those who have done good
deeds in this world. The stars are not all the same
size; some are big, some are little, and some men
have done great deeds and others have done small
deeds, but they have made their hole in the blanket
by doing good before they went to heaven.’
“Try to make your hole in the blanket by good
work while you are on earth. It is something to be
good, but it is far better to do good.”
CUB SCOUT 7: Gold also stands for good cheer
and happiness. We always feel better when the sun is
shining, and so will those to whom we give goodwill.
(Places the “Good Cheer” and “Happiness” cards on
each side of the sun.)
Think of Baden-Powell’s words when you promise
to help other people.
CUB SCOUT 8: May the meaning of the blue and
gold colors make us remember our Cub Scout ideals:
the Cub Scout Promise and the Law of the Pack.
A is for ANNIVERSARY—Cub Scouting’s [number]
year.
• Make a large papier-mâché birthday cake. (See
“Crafts.”) Use whipped soapsuds to ice the cake.
Before soapsuds harden, insert candles (one for
each year). Candles can be lit before the awards
presentation and blown out after the ceremony.
• Insert boys’ award into birthday balloons (orange
for Tiger Cubs, yellow for Wolves, blue for Bears,
and red for Webelos Scouts) before blowing them
up. Write each boy’s name on the outside of his balloon with a marker. All boys pop them at once.
• Package individual awards in small boxes wrapped
in blue paper and tied with gold ribbons. Ask
boys to wait until all awards have been presented
before opening their package. Then, while boys
open their packages, the rest of the pack sings
“Happy Birthday.”
• For more ceremony ideas, see Cub Scout
Ceremonies for Dens and Packs.
N is for NEIGHBORHOOD—Where Cub Scout dens
meet each week.
BLUE AND GOLD SKITS
D is for DEN CHIEFS—Boy Scouts who help us in
many ways.
The Unknown Scout
G is for GOALS—For which Cub Scouting stands.
Personnel: Cub Scout dressed as William D. Boyce,
Cub Scout dressed as old-style Boy Scout, narrator
Blue and Gold Opening Ceremony
Print in large bold letters, one letter per sheet, B-LU-E A-N-D G-O-L-D. Print the following script on the
back of each card per page for Cub Scouts to read.
B is for BOYS—Tiger Cubs, Bobcats, Wolves, Bears,
and Webelos Scouts.
L is for LEADER—The Cubmaster who guides us.
U is for UNDERSTANDING—We learn to help others.
E is for EXCELLENCE—We try to Do Our Best.
O is for OPPORTUNITY—For boys to learn and do
fun and exciting new things.
L is for LIBERTY—In our country’s great past and in
the years to come.
D is for DEN LEADERS—Who love us and help us.
6–8
Special Pack Activities
Ideas for Banquet
Advancement Ceremonies
NARRATOR: It’s a foggy night in London. The
year is 1909. Mr. William D. Boyce, an American
publisher and philanthropist, is lost. (As the curtain
opens, Boyce is onstage. He wanders around stage as
if looking for a house number. He comes to a street
light and peers at a slip of paper in his hand.)
BOYCE: I don’t
think I can find my
way in this fog. (A
Scout comes onstage.)
SCOUT: May I help
you, sir?
BOYCE: I’m looking for this address.
Can you tell me where
to find it? (Shows him
the slip of paper.)
SCOUT: Yes, I can.
I’ll take you there
(They walk to the other
side of the stage.)
SCOUT (pointing):
There you are, sir.
BOYCE: Thank you
very much! And here you go, for helping me.
(Pretends to offer him money.)
SCOUT: Thank you, sir. But I can’t accept money.
I’m a Scout, and this is my Good Turn. (The Scout
waves, walks across stage, and exits. Boyce exits on
other side.)
CUB SCOUT 4: It’s not mine. (Other boys shake
their heads.)
CUB SCOUT 5: Who cares? Here’s a big cake, so at
least we’ll all get lots of it!
CUB SCOUT 1: No kidding! It’s big enough to feed
an army!
CUB SCOUT 2: Not with you around! I’ve seen
you eat snacks at our den meetings!
CUB SCOUT 1: I can’t help it—I’m a growing boy.
The Law of the Pack says we should grow.
CUB SCOUT 3: Yeah, but I think we’re supposed
to grow up, not out!
CUB SCOUT 4: Hey look! Here’s a note. (Picks up
the note.)
CUB SCOUT 5: Read it—maybe it will explain
what this is all about.
CUB SCOUT 4 (reading note): We’re a group of
Cub Scouts true, it’s anniversary week, so let’s all
sing…
HIDDEN CUB SCOUT (jumping out of the cake):
HAPPY BIRTHDAY TO US! (Everybody joins in singing “Happy birthday to us, Happy birthday to us,
Happy birthday to Scouting, Happy birthday to us!”)
NARRATOR: Mr. Boyce was so impressed with
this Scout that he found out more about the Scouting
movement in England. He brought back to America
a suitcase full of ideas and information. He incorporated the Boy Scouts of America on February 8,
1910. The Boy Scouts of America grew by leaps and
bounds. Congress granted a federal charter in 1916—
an honor given to only a few organizations. Today,
Scouting is a world brotherhood, bound together by
common ideals. Please stand and repeat with me the
Cub Scout Promise.
Happy Birthday to Us!
Equipment: “Birthday cake” made out of a cardboard box big enough for a small boy to hide inside,
a note of paper on the top
Personnel: Six Cub Scouts, one hidden in the cake
Setting: Five Cub Scouts come onstage and gather
around the huge cake.
CUB SCOUT 1: Well, here we are, but where’s
Matt?
CUB SCOUT 2: It’s just like him to invite us to a
surprise party and then not be here!
CUB SCOUT 3: Does anybody know who’s birthday it is anyway?
Special Pack Activities
6–9
Autumn Harvest Festival
Plan a full day of fall family fun down on the farm
with an autumn harvest festival. Although everyone
will have a great time, it will be especially enjoyable
for Cub Scouts and families who are accustomed to
city living.
In preparing for this fall frolic, follow the guidelines for planning special pack activities (see page
6–1). If you know someone who owns an operating
farm or ranch, you have a head start on this activity. If not, contact the county agricultural extension
office for help in locating a farm that you might be
able to visit. If your area doesn’t have access to a
working farm, you can carry out your autumn harvest
activities at a public park.
The resources available to you will determine
your activities. Several suggestions are included
here. The pack committee chosen to oversee the
event will be able to come up with lots more. Involve
as many parents and other adults as possible in planning and leading the events. If the group is large, you
may need to run several activities at the same time. If
your pack needs to travel for the event, be sure to file
the appropriate tour permit. You will also find that
carpooling can help cut down on costs.
Suggested Activities
• Take a tour of the farm and learn about the daily
activities of the people who live there.
• Carve pumpkins or draw faces on them or apples.
• Bob for apples. (If you have safety concerns, try
tying the fruit on strings and suspending them
from above rather than having a traditional apple
bob in a washtub.)
• Run a turkey feather relay.
• Have a pie-eating contest.
• Have a corn-shucking contest.
• Call some hogs.
• Run a three-legged race.
• Play tug-of-war.
• Take a hayride.
• Have a wiener and corn roast or a barbecue.
• Make homemade ice cream with old-fashioned
hand-cranked freezers.
Don’t forget to write thank-you notes to the farm’s
owners, and send along some pictures of your event
if you took some.
PUMPKIN-CARVING
OR -DRAWING CONTEST
Provide a pumpkin for each child. If carving,
children should use utensils made for carving pumpkins. Carving utensils may have a special handle for
smaller hands to grip, but even so, adequate supervision is required.
Here are some carving tips:
1. Cut a hole in the top of the pumpkin angled
inward so you can use the cutout as a lid.
2. Make the hole large enough to scoop out all the
pulp and seeds.
3. Draw a face on the pumpkin with a pencil for
cutting.
4. As you cut out features, smaller pieces such as
teeth or ears can be held on with toothpicks.
If carving is inappropriate for your pack, boys can
draw faces on pumpkins or apples with markers. If
appropriate, award prizes for the scariest, funniest,
most unusual, looks most like the Cubmaster, etc.
TURKEY FEATHER RELAY
Divide the group into teams. The first player on
each team holds a long turkey feather. On a signal,
each throws his feather
javelin style toward a
finish line. As soon as
it lands, he runs to it,
picks it up, and throws
it again. When the
feather crosses the finish line, he picks it up,
runs back, and hands it
to his next teammate,
who repeats the action.
6–10
Special Pack Activities
CORN-SHUCKING CONTEST
Have an ear of corn for everyone eating. Boys peel
the husks and silk off each ear, seeing who can shuck
the most, and the cleanest, corn. Since this food will
be eaten, make sure boys’ hands are clean. Also,
handle all trash appropriately.
HOG-CALLING CONTEST
Boys and adults try to “call in the hogs” with
their best “Sou-e-e-e-e-e-e-e-e-e—here pig, pig, pig.”
Select a winner on the basis of applause from the
audience.
Bicycle Safety Day
This event will help make all the families in the
pack more aware of bicycle safety. Adults will need
enough time to set up each area before the boys arrive.
If possible, ask a Boy Scout troop to help set up and
run activities. You will need a large flat area, and
chalk, flour, or powdered lime to set up the events.
• Every boy should bring his own bicycle. (But it is
a good idea to have one or two spare bicycles for
boys who may not have one.)
• All boys must wear a helmet whenever they are
riding a bicycle.
• Plan for the event to take most of a morning or
afternoon.
• The event committee should follow all guidelines
for planning and running a special pack activity
(see page 6–1).
BRAKES: Check the brakes before you ride. They
should brake evenly, with no slippage. Inspect
them regularly and maintain them. Make sure
the brake pads don’t rub on the wheels.
HANDLEBARS AND GRIPS: Adjust handlebars
as needed for comfort and growth. Replace
worn grips as needed.
BELL OR HORN: It should be loud and clear.
LIGHT: Always use a light if riding at dusk or night! The headlight
should be visible from 500 feet.
• If your group is large, you may want the dens to
have staggered starting times. This will allow each
boy to attend the safety inspection station before
beginning the course.
BICYCLE INSPECTION
If possible, include the local police department in
your bicycle inspection, with a representative demonstrating the parts of a bike and how they work.
Each boy should have a safety check before starting
the safety course. Boys must show that they know
proper hand signals and basic safety requirements
before they get their “license” to ride in the bicycle
safety event.
BICYCLE SAFETY COURSE
A sample bicycle safety course is shown, and the
possible events described below.
Start: Mount the bike and coast, while turning
your head to the left and right—but not the bike.
Intersection: Use arm signals. Obey traffic lights
and signs. Make stop signs from cardboard cut into
an octagon and painted for realism. Make signal
lights from holiday lights or lamps with colored cellophane coverings.
Steering Course: This tests your ability to hold a
straight course. Ride at a comfortable speed.
Circle Riding Area: Ride the Figure 8 11⁄2 times.
Steering Control/Zigzag Course: Tests your ability
to shift balance while changing direction.
SADDLE: Adjust for comfort and growth.
Always tighten nuts securely, leaving at least
21⁄2 inches of seat post in the frame.
REFLECTORS: You should have reflectors at the front
and rear and in the spokes of both wheels. Replace
damaged or lost reflectors immediately for safety.
TIRES: Inspect frequently for wear and tear.
Remove imbedded stones, nails, glass, etc.
Keep inflated to the correct pressure, which is
stamped on the sidewall.
WHEELS: Wheels should rotate smoothly
without wobbling from side to side. Realign
if necessary. Axle nuts should be tight.
SPOKES: Replace broken
spokes immediately.
PEDALS: Pedals should have reflectors for safety
at dusk and night. The shoulder of the pedal axle
must be securely tightened against the crank arm.
CHAIN: Check the chain frequently for damage
and stretch. Lubricate it often with light oil.
Special Pack Activities
6–11
Turtle Speed Area
Mounting
Area
Start
30˝
Flags
12´
3´
Steering
Control
Area
Braking Area
Empty
cans
Riding the Spiral
Zigzag
Course
Dismounting Area
10´
Finish
Empty cans
Traffic light
30´
26˝
4´
6´
29˝
6´
Cartons
Make a figure
8 11⁄2 times.
Stop sign
Steering Course
Intersection
Circle Riding Area
Riding the Spiral: Ride at any speed, trying not to
touch the lines. Place your foot down at the “X.”
Braking Area: Keep pedaling at a comfortable
speed until a whistle blows. Then stop without skidding. The leader should blow the whistle when the
rider is even with any flag. The rider should stop
before the next flag.
conserving the soil by removing potential pollutants
and practicing good soil conservation by planting
desirable plants that will reduce erosion.
Turtle Speed Area: Ride as slowly as possible,
keeping your balance on the bike.
Conservation Day
The highlight of a conservation day could be a
conservation project or Good Turn. Such a project
will provide Cub Scouts with an opportunity to help
other people and our country, as well as show good
citizenship by protecting our planet and giving something back to the community.
CONSERVATION GOOD TURN
Boys should understand why and how a conservation project is important. If, for example, the Good
Turn is cleaning up and planting flowers in a park,
the boys should understand that they are doing more
than merely making the park attractive. They are also
6–12
Special Pack Activities
A conservation Good Turn, such as cleaning up litter
at a park or planting trees and shrubs, will show Cub
Scout good citizenship in action, as well as help the
community and our planet.
Consider several factors when choosing a Good
Turn.
• What needs doing? Seek help from local authorities such as city and county park departments,
school officials, or perhaps the head of your char-
tered organization. Also check with local offices of
the state conservation or fish and wildlife services,
soil conservation district, U.S. Forest Service, or
other agencies that have conservation among their
purposes. These agencies may be able to suggest
projects and also will have ideas for carrying them
out.
• Will the project be meaningful to the boys? Will
they see the project as more than just busywork?
• Consider the number and ages of boys available to
do the project. Can you complete the project within, say, a couple of hours? Can most of the work be
done by boys? If adults do most of the work, the
boys will learn little. Remember that projects need
to be suitable for boys ages 6 to 10.
resources of your community. Recycling not only
beautifies the community by removing trash, it
conserves energy because it takes less energy to
recycle items than to make them from raw materials. It also saves valuable space in landfills.
• With advice from a conservation agency, build
brush piles to provide cover for birds and small
mammals in a wild area.
• With advice from a conservation agency, plant
shrubs that produce food and cover for birds and
mammals.
• With advice from a conservation agency, plant
wildflowers or ground cover to stop erosion on
sloping ground.
Good Turn Ideas
OUTDOOR CODE RESPONSIVE
READING CEREMONY
• Clean up a neighborhood park, empty lot, school
yard, or cemetery. (Note: When cleaning up litter
and garbage, always wear protective gloves.) Plant
shrubs, flowers, or grass seed to reduce erosion.
• Plant tree seedlings for shade, landscaping, or
ground cover.
• Make litter bags for the cars of pack families and
neighbors.
Equipment: U.S. flag, copy of the Outdoor Code for
each participant
The Cubmaster speaks briefly about the importance to our nation of taking good care of our natural
resources and then uses the Outdoor Code as a responsive reading, with boys reading the responses.
CUBMASTER: As an American, I will do my best
to be clean in my outdoor manners—
BOYS: I will treat the outdoors as a heritage. I will
take care of it for myself and others. I will keep my
trash and garbage out of lakes, streams, fields, woods,
and roadways.
CUBMASTER: Be careful with fire—
BOYS: I will prevent wildfire. I will build my
fires only where they are appropriate. When I have
finished using fire, I will make sure it is cold-out. I
will leave a clean fire ring or remove all evidence of
my fire.
CUBMASTER: Be considerate in the outdoors—
Litter Bag: Use pliers to bend a coat hanger as
shown. Fold the top of a paper or plastic bag over the
wire frame and fasten with paper clips or staples. If
you use a paper bag, you may want to protect it from
wet trash by putting a plastic bag inside of it. Decorate
as desired.
• Clean out trash from a section of a stream or lakefront.
• Collect newspaper, glass, aluminum, tin, or plastic for recycling, depending on the needs and
BOYS: I will treat public and private property
with respect. I will use low-impact methods of hiking
and camping.
CUBMASTER: Be conservation-minded—
BOYS: I will learn how to practice good conservation of soil, waters, forests, minerals, grasslands,
wildlife, and energy. I will urge others to do the
same.
CUBMASTER: Let us close by singing “God Bless
America.”
Special Pack Activities
6–13
Disabilities Awareness Day
Most Cub Scouts are in good health and are physically strong and mentally alert. But according to the
Bureau of the Census (1997), one in eight children
between the ages of 6 and 14 has some kind of disability. A disabilities awareness day will help boys
understand that some people have special needs different from their own. Through activities, the boys
will be able to see some of the challenges people with
special needs might face, and they may ask questions.
Be prepared to answer and explore their questions.
• Station 3: Boys peel an orange and eat it. Then
they must place the peels in a trash can.
• Station 4: Boys pour a glass of water from a small
pitcher and drink it.
WHEELCHAIR MANEUVERING
Borrow or rent a manually operated wheelchair.
Set up a course that includes a left and right turn, a
bump to negotiate over, and a transfer point for boys
to move from the wheelchair to a bench and back
without using their legs. Tie boys’ legs together for
added realism.
LIFE WITHOUT SOUND
Use heavy-duty headphones to cover the ears of
each participant. Show each boy a written message
that he must convey to another individual some distance away who also has his ears covered.
I CAN’T USE THIS HAND
Each boy writes his name first right-handed and
then left-handed. Have him put his dominant hand
behind his back and make a peanut butter and jelly
sandwich with only one hand.
CUBMASTER’S MINUTE CLOSING
A disabilities awareness day will help boys understand
that some people have special needs different from
their own.
Review the guidelines for planning special pack
6–1). You should also preview information in the
Cub Scout Leader Book as well as the “Cub Scouts
With Special Needs” chapter of this book.
BLINDFOLDED OBSTACLE COURSE
Set up a course along a string guideline with stations every 20 feet. Run the string guideline between
posts, with the string 30 inches off the ground for
the boys to hold on to as they go. (Make posts from
PVC pipe set in No. 10 cans filled with plaster. Drill
holes through the PVC pipe at 30 inches from the
bottom of the can to run the string through the pipe.)
Remind the boys that they need to move slowly for
safety reasons. Have adults at each station to direct
the activities. Boys are blindfolded and move along
the string from station to station.
• Station 1: Boys must find a chair, sit on it, stand
up, and then continue.
• Station 2: Boys must pick up wads of paper on the
ground and put them in a trash can. Tell boys how
many wads of paper there are so that they can try
to find all of them.
6–14
Special Pack Activities
CUBMASTER: How many of you had fun today?
Well, for many people, activities like these aren’t so
much fun. They are a necessity every day of their
lives. You have had the opportunity to experience
some of the challenges that other people face day
to day. So now you have an idea of what might be
helpful to someone in that situation. But always
remember that people who have special needs aren’t
necessarily incapable. In most ways, they may be just
like you. They might not want or require any help.
So always ask whether someone wants help—don’t
assume he or she needs it.
Water Carnival
When the weather gets hot, Cub Scouts and their
families will want to head for the water—so why not
have a water carnival? Swimming and other activities in and on the water are fun and excellent for
improving physical fitness.
For all activities in or near water, always follow the
principles of Safe Swim Defense (found in the Cub
Scout Leader Book), which include having qualified
supervision and lifeguards on duty, separating boys
into swimming ability groups, and maintaining the
buddy system. If swimming in a home pool, follow the
additional safeguards in the Cub Scout Leader Book.
Opening: Call everyone out of the water and have
the song leader lead a lively “watery” song such as
“Be Kind to Your Web-Footed Friends” (sung to the
tune of “Stars and Stripes Forever”):
Be kind to your web-footed friends,
For a duck may be somebody’s mother.
Be kind to your friends in the swamp,
Where the weather is very dark and damp.
You may think that this is the end,
Well, it is!—
Along with the procedures for special events at the
beginning of this chapter (page 6–1), the water carnival committee should follow these added guidelines:
• Before the event, all committee members should
attend Safe Swim Defense training provided by
the BSA. Check with your local council for the
availability of this training.
• On the day of the event, everybody should register
as they arrive. Before leaving the registration area,
each child should be paired with a buddy. Hold
buddy checks regularly throughout the event.
• Consider having a family picnic once everyone is
out of the water and hungry!
Any public swimming area—pool or lakefront—
can be suitable for your water carnival, as long as a
section of it can be marked off for your pack and it
follows the requirements of Safe Swim Defense. (If
the site is unguarded and unsupervised, water carnival committee members should arrive early to set
up the required elements, including a marked swimming area cleared of obstacles and the appointment
of lifeguards and a lookout.) Other possible sites are
pools at schools or colleges and universities, a local
YMCA, or even a local motel.
Water Carnival: Choose water games from the
“Games” chapter of this book. Water games and
relays should include everyone. If there are nonswimmers in the group, some activities may not be
suitable. Webelos Scout dens may demonstrate water
rescues or how to use a mask, fins, and snorkel. End
the carnival with a game of Watermelon Scramble,
with enough watermelon for everybody to enjoy a
slice!
Watermelon Scramble
Put a watermelon in a large plastic bag. Tape it
shut so that if the melon breaks, it won’t mess up the
water. Toss the melon into waist- to chest-deep water.
On a signal, teams jump in and try to bring the melon
to a designated point.
Cub Scout Field Day
The pack field day is an afternoon of fun for Cub
Scouts and their families. Allow all boys and family members to participate in this day of fun. Events
can be competitive, or participants can be measured
against their own abilities.
A pack field day might include
energy-burning and fun dashes,
relays, and sprints.
For all events, health and safety come first. Be sure
to review and have on hand the BSA publication
Guide to Safe Scouting before beginning this and any
Cub Scout activity.
SAMPLE PROGRAM
Gathering Time: Registration and pairing of buddies.
Preopening: Have a free swim time for pack families. This will also allow all ability groups to have
fun at their own level. (You might prefer to have free
swim after events.)
Special Pack Activities
6–15
For a special recognition,
make an olive leaf crown like
the kind winning athletes
received at the Olympics in
ancient Greece. Make crowns
from green construction paper,
wire, and masking tape. The
masking tape holds the leaves and
covers the wire, which is the frame
of the crown.
In preparing for the field day, the event committee should follow the guidelines for planning special
events (page 6–1). Consider such things as location,
promotion, sign making, instructions for events,
equipment, stop watches, marking game areas, scoreboards, decorations, and prizes. Make a final check
about two weeks before the event to make sure that
plans are progressing smoothly. When the big day
comes, the committee should arrive early to decorate
and set up the games. Prepare large signs to tell families where each event is taking place and where to
store their picnic suppers.
Along with a chair and the event committee members, a field day may also require a physical arrangements committee (for signs, permits, equipment
setup); an awards committee; a refreshment committee; and starters, judges, and scorekeepers.
end of the tune. If necessary, supply a song sheet so
judges can follow the tune.
30-Yard Dash: This is a timed event. Prepare a
straight course with starting and stopping lines 30
yards apart.
100-Yard Relay: This is a timed den event. Lay out
a course for 100 yards. Four-boy teams run the relay.
The first boy begins at the starting line; the second
boy begins at 25 yards, the third at 50 yards, and the
forth at 75 yards. The first boy begins to run from the
starting line holding a small object or baton, which
he hands off to the next boy as they meet. The next
boy runs the next segment of the race, and so on.
Standing and Running Long Jump: To score these
events, measure from the starting line to the part of
the body closest to the starting line. For the standing
long jump, the boy begins with both feet on the starting line and then jumps forward as far as possible.
For the running long jump, mark a running line 10
feet before the starting line. Boys run from the running line and then leap forward at the starting line
in one continuous motion. This event must have a
landing area on a soft surface or long jump pit made
especially for this purpose, as the jumper will naturally fall forward.
SAMPLE PROGRAM
Committee members must arrive early to set up
the events, registration table, decorations, etc.
1:00–1:30
Registration and gathering time
1:30–2:00
Opening ceremonies: Each den
marches in parade-style, carrying
its den flag.
2:00–4:00
Events
4:00–4:30
Recognition ceremonies and closing
4:30–5:30
Picnic supper
After supper
Cleanup
EVENTS
Foot-Put: Players remove one shoe. Then lying on
their backs, place the shoe loosely over their toes.
With a kicking motion over their head, players see
how far they can propel the loose shoe behind them.
Starting Whistle: This is a timed event. Starting
at the word “Go,” the boy eats two saltine crackers
and tries to whistle a simple tune such as “Yankee
Doodle.” Measure time from the word “go” to the
6–16
Special Pack Activities
Softball Throw: Each boy throws a softball as far
as he can from a designated starting line.
Discus or Shot Put: Use lightweight equipment
or make your own. Make a discus from two sturdy
paper plates or use a commercial plastic flying disk.
The shot put could be a rock, beanbag, or sandbag.
Each boy throws as far as he can from a designated
starting line. Someone who understands the correct
throwing style of each sport could teach the boys.
Javelin Throw: Make a javelin from a broom
handle or 1-inch dowel rod. Measure the distance
thrown from a designated throwing line to the part
of the javelin closest to the starting line. You must
have a large open area for this event and take extra
care for safety.
Water Bottle Relay: This is a timed team event.
You will need a plastic water bottle and two buckets,
one filled with water and one empty but marked with
a fill line. Punch a number of small holes at random
in the sides of the water bottle. In teams of equal
numbers, boys fill the bottle from the full bucket,
hand it off fire-brigade style, and dump it into the
marked bucket. Measure the time required to fill the
container to the line.
Make a winners’ stand like the one they use in the
Olympic Games. Use wooden boxes and make simple
medals to hang around the boys’ necks.
RAINY-DAY FIELD DAY
Here’s a pack event that you can schedule ahead
of time or use to provide a fun-filled substitute program on a day when the pack has an outdoor activity
that has been rained out. You can store most of the
needed items in a rainy-day box and keep for use as
needed. Your rainy-day box could include feathers,
uncooked beans, paper plates, table tennis balls, tennis balls, balloons, assorted buckets and jars, paper
bags, straws, and string. Boys can run these events as
individuals or teams, as straight races or as relays. If
this activity is to be used as a backup plan, all chairs
running an outdoor event should be aware of the
program possibilities.
Straw and Ball Blow: Boys are given a straw and
take positions around a table (a card table works
well). Each boy kneels so his face is level with the
tabletop. He places the straw in his mouth and his
hands behind his back. A table tennis ball is placed
in the middle of the table. By blowing through the
straw, each boy tries to keep the ball from rolling off
his area of the table. This is a good gathering activity, and play can begin as soon as two boys arrive.
Additional boys join the others as they arrive.
Standing Broad Grin: Judges measure the width of
grins. The widest grin wins.
Paper Plate Discus Throw: Boys throw a paper plate
from a chalk line. The plate must be held flat in the
hand, against the palm, with the fingers wrapped over
from the top and not sailed with thumb and fingers.
Giant Shot Put: Boys toss an inflated paper bag, or
a bag filled with crumpled newspaper with a string
tied around the end to seal it, for distance. Boys make
the throw from the shoulder as if it were a shot put.
Heel-to-Toe Foot Race: Boys walk 10 feet moving
heel-to-toe as fast as possible.
Running Whistle: The boy who holds a whistled
note the longest wins.
Feather Blow Relay: Blow a feather 25 feet and
return, tagging the next player. A straw can be used
to direct the airflow.
50-Yard Cup Hop: Each boy hops on one foot carrying a paper cup of water. The boy who gets over the finish line first with the most water still in his cup wins.
Feather Race: With one hand, boys carry five
feathers on a paper plate for a certain distance. They
must pick up any that drop before continuing.
Eggroll Relay: Relay teams use a stick to roll plastic eggs down a course and back.
Turtleneck Pass: The first player on each team
places a tennis ball or small inflated balloon under
his chin. Players pass the ball or balloon from
chin-to-chin using no hands until all players have
received the object.
Events
Mini Shot Put: Each boy tries to throw 10 navy
beans into a quart jar from a chalk line on the floor.
Balloon Volleyball: Divide boys into teams. Use
string on the floor or tied between two chairs for a
net. You could mark boundaries with masking tape.
Balloon Hammer Throw: Tie an inflated balloon
to the end of a string. Each boy throws the “hammer”
by the end of the string.
Special Pack Activities
6–17
Cub-anapolis 400
The exciting Cub-anapolis 400 allows boys and their
families to be more personally involved in a car race than
the ever-popular pinewood derby—because the boys are
the cars, and family members are the pit crew!
• During the second lap, the car will need fuel. The
boy pulls into his pit area while his family holds
out a small cup of juice or water that he must
drink through a straw. (Make sure that each boy
drinks the same amount of “fuel.”)
• During the third lap, the car will need to have its
tires changed. Each boy pulls into the pit area, and
the pit crew removes his shoes and socks. They
put the socks back on inside out, and then put on
and tie his shoes—and he is off for the final lap.
• Cars don’t stop during the last lap. Now it’s a race
for the finish and the checkered flag!
Award prizes as with any derby. Consider special
prizes—for largest or smallest car, fanciest socks,
best-looking car, or most organized pit crew.
Summer Celebration
The fun begins when boys and their families make
the cars together. Choose an appropriately sized
cardboard box for the boy to hold around him as
shown. Look for one that is 24 to 36 inches long, 12
to 18 inches wide, and 12 inches deep (if a box is too
deep, a boy might have trouble holding onto it). Cut
holes for the head and arms—about a 9- to 10-inch
hole for the head and 4-inch holes for the arms. Make
a windshield if you want, folding cardboard into a
triangular shape and gluing it to the box. Make four
cardboard wheels with about a 4- to 5-inch radius
and glue them to the box, also. Then paint and decorate as desired. Let your imaginations go wild!
Each driver must wear either glasses or goggles
and a pair of lace-up shoes (such as sneakers) with
socks (you’ll see why in a minute…).
Lay out a racecourse as large as the meeting area
can provide. An outdoor racecourse is the best, in
any large, open, grassy area where the track can have
turns and straightaways. The race will involve four
laps around the track. You might find it easiest (and
the least crowded) to run the race in heats of three
cars at a time.
Just as in any long car race, cars will need pit
stops. The boys’ families set up their pit areas at any
point along the track, but they must be far enough
away from the track so they don’t interfere with the
other racers.
• During the first lap, the car will need to have its
windshields washed. A family member washes the
boy’s glasses or goggles, perhaps squirting them
with a spray bottle to add to the fun.
6–18
Special Pack Activities
Summer is a great time for celebration and
includes many holiday opportunities for fun: Flag
Day, Independence Day, and Labor Day, for instance.
A summer celebration is a great way for the pack to
participate in activities that will help them achieve
the National Summertime Pack Award and keep
them on the road to the National Quality Unit Award.
Choose a theme for your celebration that will help
guide your decorations and games. “Fun Across
America,” presented here, is an example.
The program committee needs to find a suitable
(preferably outdoors) location, arrange seating, and
prepare all materials. One member of the committee
should coordinate an area for games and assign each
den to help set up the events. The committee should
follow the guidelines for planning special pack activities found at the beginning of this chapter (see page
6–1) and include lots of adult participation.
One adult should be assigned to each event. That
person can choose to run the event or enlist the aid
of other adults. Or the program committee can assign
dens to run each event along with an adult sponsor.
SAMPLE PROGRAM
9:00
Set up events.
9:30
Opening ceremony. Choose a patriotic opening or have all dens participate in a flag
salute and sing “America.”
9:35
The Cubmaster or master of ceremonies welcomes all the families and asks for a moment
of silence while the pack remembers those
who made our country free.
9:40
9:45
The cheermaster leads off with the Sea to
Shining Sea Cheer: Divide the group in half.
When the cheermaster raises his/her right
hand, the group on the right yells “Atlantic!”
When he/she raises the left hand, the group
on the left yells “Pacific!” When he/she
raises both hands, everybody yells “Gulf of
Mexico!”
The summer celebration chair gives directions for maneuvering the celebration games
course. This will be determined by the size
of the pack. For large packs, each den may
be directed to a specific station at a specific
time. For smaller packs, dens may choose to
move in a clockwise direction. The chair also
tells the pack what time the games will end
and the awards ceremony will take place.
9:50
Let the celebration begin!
11:30
Recognition ceremony, advancement awards
11:45
Closing ceremony
AWARDS
bell, rings it, and runs back to tag the next runner.
The relay continues until all players participate.
Cajun Crab Walk
Each player crab walks for 30 feet. You can run
this as a relay, or time each team member individually and figure the team average by dividing the entire
time by the number of members.
Georgia Peanut Relay
Materials: One unshelled peanut per person,
bowl, one wooden spoon per team, jar
Place all peanuts in a bowl and place an empty
jar 30 feet away from the bowl. In relay style, each
player, with one hand behind his back, scoops up
one peanut from the bowl onto a wooden spoon. He
then runs to the jar, drops the peanut into it, returns
to the team, and hands the spoon to the next player.
Chicago Windy City Blow
Materials: Table tennis ball, soda straw for each
boy
You can score the following events or just play
them for fun. Match awards to games, when possible;
for example, award a plastic orange for the Florida
Orange Peel or a carton of milk for the Wisconsin
Dairy Draw. Each participant could receive a small
flag or flag pin as a participation remembrance.
Players, on their hands and knees, place a table
tennis ball on a starting line on the ground and propel it to the finish line by blowing on it through the
straw.
CARNIVAL GAMES
Materials: For each participant, a rubber glove
filled with water and suspended or held over a
bucket or measuring cup
All timed events require a stopwatch or watch
with a second hand; relays can be timed on an individual basis. If the players won’t or can’t eat food
items for events, substitute nonedible items. For
example, metal nuts could replace raisins, and coins
or washers could replace cookies.
Florida Orange Peel
Materials: One orange for each participant, supplies for cleaning hands, bags for disposing of the
peels
Time players on how long it takes them to peel an
orange using their fingers only. If a player removes
the peel in one piece, he gets bonus points. After the
contest, the reward is eating the orange.
Philadelphia Liberty Bell Relay
Materials: Bell
Place a bell 30 feet from the starting line, where
dens line up. On a signal, the first in line runs to the
Wisconsin Dairy Draw
Poke a small hole in two fingers of the rubber
glove. Each participant “milks” into a bucket for 1
minute. Score the contest by how much milk a player
gets into the bucket. For extra fun, suspend the glove
from cardboard cutouts of a cow.
Denver Mile High Cookie Stack
Materials: Lots of cookies
Participants count how many cookies they can
stack in 30 seconds. If their stack falls over, they are
disqualified.
Idaho Potato Toss
Materials: Water balloon for each pair of players
Partners toss a balloon filled with water back and
forth, taking a step back after each toss. If the balloon
hits the ground and breaks, the pair is disqualified.
Special Pack Activities
6–19
Texas Rope the Steer
Materials: Sawhorse,
ropes
Each player has
five tries to lasso a
sawhorse or a cutout
of a steer.
California Raisin Toss
Materials: Paper plates decorated with California
scenes from magazines or travel brochures, raisins
Count how many raisins each participant can toss
onto a plate in 1 minute from a specified location.
Seattle Space Needle Ring Toss
Materials: Quart milk carton, rocks or marbles,
paper plate, pipe cleaners
Make a “space needle” as shown. See how many
rings players can toss over the needle in a given number of turns.
Quart milk carton
Paper plate
• Toss beanbags at a target on the floor or through
holes in a tossing board.
• Turn a chair upside down. Make rings from plastic
lids with the centers cut out and toss them over
the legs.
• Mark a target on the floor. Pitch painted jar lids at
the target.
• Mark a shuffleboard on the floor. Use a broom to
push plaster-filled jar lids onto the board.
• Snap tiddlywinks disks into shallow cups or muffin tins.
• Bounce table tennis balls on a table into small
bowls.
• Bounce tennis balls into a target of No. 10 cans
tied together.
• Roll balls to knock down a child’s bowling pins,
quart milk containers, or water bottles set in a row
or triangle.
• Throw an inflated paper bag for distance.
• Toss cards into a hat.
• Guess the number of beans in a jar.
• Take three tries to toss a hat onto a hat rack.
• Drive a 1-inch nail into a 2-by-4 board in five
swings.
• Glue numbered paper cups onto a cardboard box.
Toss checkers and give prizes according to the
points scored.
OTHER MIDWAY ACTIVITIES
Hat-Making Booth: Have a good supply of paper
hats and old felt hats along with plenty of buttons, ribbons, feathers, and other items to decorate hats. Have
needles, thread, and glue on hand for the decorating.
Portrait Gallery: Draw life-sized folklore or comic
figures on a piece of 6-by-10-foot wall board, such as
shown. Cut out circles for the customers’ heads. Use
an instant camera to take pictures.
Rocks or
marbles
Ring made from pipe cleaners with twisted ends
Welcome to the Midway
The Cub Scout midway is a series of simple games
that can be played for small prizes—or just for fun.
Use the midway activities described below for a Cub
Scout fair, circus, festival, or any other special event.
With a few balloons and some crepe paper you can
make each activity into a midway spectacular.
• Bounce a ball into a wastebasket.
6–20
Special Pack Activities
Paint or
sketch figures on wood
backdrop
using the grid
method to
enlarge them.
Splash ’em: Toss wet sponges at an agreeable
volunteer.
Lookie Loos: Cut a small hole in one end of several
shoe boxes. Make a slot about 1⁄2 inch wide on the
top near the other end of the box. Paint or decorate
the boxes. Put an “attraction” in each box near the
slot and arrange along a table so the end holes are
at eye level. String Christmas lights into the slots to
illuminate the attractions. Add a sign to identify each
attraction. Examples:
• A Diamond in the Rough (a lump of coal)
• A Tear Jerker (an onion)
• A Real American Hero (a hero sandwich)
• Ancient Ruins (a broken dish)
• The Amazing Aquanaut (a rope overhand knot
floating in a glass of water)
• The World’s Smallest Dog (a cocktail frank)
• The Best Cub Scout on Earth (a mirror)
• Rare Invisible Fish (bowl of clear water)
Family Cake Bake
Everyone seems to love this special pack activity—because after all, at the end of it everybody gets
to eat cake! Run the activity any time of year, but in
February, you can use the cakes for blue and gold
banquet desserts. Or you can auction the cakes and
use the proceeds for pack needs or a donation to the
World Friendship Fund. (If you are using this or any
event as a unit money-earning project, be sure to
get council approval. Complete and submit the Unit
Money-Earning Application for approval well before
the event.)
Just as in any other special pack activity, follow
the guidelines found in the beginning of this chapter
to ensure an enjoyable and well-organized activity
(page 6–1).
Lookie Loos
Marble Golf: For golf holes, bury baby food jars in
the soil to the brim. Mark the holes with flags made
from tiny paper triangles glued to craft sticks and
numbered. Add water hazards and sand traps if you
wish. Make “golf shots” in the approved knucklesdown way as for regular marbles. The winner is the
player who takes the fewest shots to go around the
course. This game can be played outdoors or indoors,
filling a large box with 4 or 5 inches of potting soil.
The event chair makes sure that families are furnished with the rules, recruits judges, and procures
prizes.
RULES
• Cakes should be delivered to a specified location
by a specified time and date.
• Cakes must be decorated according to specified
guidelines (such as the monthly theme).
• Cakes must be baked and decorated by a Cub
Scout or Webelos Scout and as many family members as possible.
• All the parts of the cake must be edible, including
the decorations.
• Cake mixes and canned icing may be used.
Special Pack Activities
6–21
• All cakes should have a title or name, either as part
of the decoration or on a card attached to the cake.
Cakes should be numbered for judging purposes.
• Cakes should be placed on a disposable plate or
tray.
JUDGING
Cakes will be judged and prizes awarded at the
pack meeting. Here are some suggested categories for
judging.
• Judge’s Choice (Best of Show)
• Most Original Creation
• Best Representation of the Monthly Theme
• Most Suitably Named
• Biggest
• Smallest
• Flattest
• Yummiest Looking
Pack Picnic
On a beautiful day in the spring, summer, or fall,
what better family activity than a picnic? And if you
hold it in late afternoon, you could add a campfire to
the program, too. The pack picnic should be an informal family affair. This doesn’t mean, however, that
planning is unnecessary. The location, meal arrangements, games, equipment, transportation, and other
details must be thought through ahead of time.
Consider using the monthly theme for your picnic. A
pirate theme brings to mind a treasure hunt rather than
a scavenger hunt. A birdwatching theme might include
counting how many different birds boys can find in
the picnic area. Check Cub Scout Program Helps and
attend monthly roundtables for more ideas to add spark
to your pack program and special events.
SAMPLE PROGRAM
Each family could be asked to bring hot dogs and
buns for their family and a salad or chips to share.
The pack could provide the paper plates, utensils,
drinks, dessert, and charcoal/lighter. You might also
assign dens to bring certain items.
4:00–4:30
Families arrive at the picnic site. Have
a gathering time activity.
4:30–6:00
Organized games and play. One adult
from each den reports for fire building
and food preparation.
6:00–6:30
The meal
6:30–7:00
Cleanup and campfire preparation
7:00–8:00
Campfire program
“Outdoors” chapter)
8:00–8:30
Final cleanup
(refer
to
the
PICNIC ACTIVITIES
These activities have been successfully used at
Cub Scout picnics. Choose activities that require
lots of interaction and fun for the whole family. For
instance, you can never go wrong with softball or
soccer at a picnic.
Relays
For relays, the first person in each team performs
a designated task, after which the next in line competes. The relay continues until all players participate. Teams could be den against den, family against
family, or adults against boys. Relays are a great
way to incorporate themes; for instance, a “Race for
Space” theme could include throwing a paper plate
flying saucer at a target. See the section on “Relays
and Races” in the “Games” chapter of this book.
Miniature Golf Course
You can play this miniature golf game almost
anywhere. Competition can be individual, by family, or by den. Set up a course using No. 10 cans or
any straight-sided receptacle with a large opening for
“holes.” Place cans on their sides and shoot balls into
them. Use natural hazards in your area or make your
own from cardboard cutouts. Don’t make the course
too long. At a picnic there is lots to do, and you want
to keep the boys’ attention.
• Shoot balls (a rubber ball or tennis ball) underhand toward the “hole.”
Picnic activities should include lots of fun and activity
for the entire family. You’ll never go wrong with soccer
and softball.
6–22
Special Pack Activities
• Take succeeding shots from where the ball stops.
In den or team play, number each player and rotate
each shot by player throughout the course.
• Keep score by awarding one point for each toss.
The goal is to have the lowest score.
Earth Ball
Earth balls are giant blown-up balls, typically 4 to
6 feet high, that are available at recreational supply
stores. These balls create a natural activity for team
play, as it usually takes more than one person to
move the ball. Try earth ball relays or earth ball toss.
Here’s an example of an earth ball game.
everyone come in Western attire. An easy way to
dress up your uniform is to wear a cowboy hat and
replace your neckerchief with a bandanna.
No Stopping Here: You’ll need one earth ball, two
hula hoops, and a large playing area free of hazards.
Each of two teams gets a hula hoop to use as a goal
and decides where they want to place their goal.
(Goal placement is an important point of strategy
because a small rise can make a big difference.) To
begin the game, center the ball between the goals. At
a signal, players try to move the ball into the opposing team’s goal.
Parachute Toss
Equipment: Parachute, soccer ball or volleyball
Like earth ball games, parachute games require a
lot of cooperation. Try a parachute toss. Boys surround and stretch out the parachute and see how
high or how far they can toss a ball with the parachute. See the “Games” chapter of this book for other
parachute games.
Capture the Flag
Equipment: Flag for each team
Each of two teams places their flag at a designated
spot. The object of the game is to take the opposing
team’s flag and return it to your home base first without being tagged. If tagged while holding the flag, a
player can drop it to be picked up by a player from
either team, and play continues. Another variation is
that the tagged flag holder must return the flag to its
“home.”
Western Rodeo Roundup
and Pioneer Day
For a fun-filled Western rodeo roundup or pioneer
day, the event committee will select a suitable indoor
or outdoor location and follow the guidelines for the
successful planning and carrying out of special pack
activities found in the beginning of this chapter (page
6–1). Please remember to exclude Western gunfights
and negative images of American Indians!
WESTERN RODEO ROUNDUP
A Western festival is a fun way to give Cub Scouts
a taste of the Old West. For extra fun, suggest that
Wagons Ho! can be the call for your Western rodeo
roundup or pioneer day.
If you are having a meal, have chuck wagon chow,
such as beans, cornbread, and barbecue served from
a table decorated to look like a chuck wagon.
Sample Program
6:00–6:15
Gathering time activities (preopening)
6:15–6:25
Opening ceremony
6:25–7:10
Chuck wagon meal
7:10–8:00
Contests and games
8:00–8:30
Recognition and closing
8:30
Final cleanup
Activities
Opening Ceremony: The Cubmaster or cheermaster can lead off with a loud “Howdy!”—followed
by a tall story. For example: “Howdy partners! My
name’s Bill—the roughest, toughest cowpoke in the
county. I had to travel 5,000 miles over the roughest
country—full of sky-high mountains, ocean-sized
rivers, mile-long rattlesnakes, and bone-dry deserts
filled with hungry varmints. But it didn’t take me no
time at all ’cause my horse Paint was bigger ’n those
mountains and could jump over the Grand Canyon
in one leap. Yep, I got here on Paint. He got me here
just in time although now he’s all lathered up and
sweaty. Ya know, I’d bring him out here and let ya’ll
pet him, but ya know yer not supposed ta touch ‘Wet
Paint.’ Ya know, I thought I left them hungry varmints behind, but looks like there’s a bunch of ’em
right here—lookin’ like hungry Cub Scouts. So let’s
say grace and set to eatin’.”
Special Pack Activities
6–23
“Johnny Appleseed”
(Sing grace)
Bronco Riding: Using a heavy fiber drum or barrel for the body of your bronc, bolt on wooden legs,
rockers, head, and stirrups as shown. If possible, surround the riding area with loose hay.
Length of
rope with
frayed end.
Use drum
bottom for front;
leave rear
open, or
close if you
have the cover.
Cut rockers from
1-inch scrap wood.
Cut head from 1-inch
plywood; fasten to drum
with screws.
6–24
Special Pack Activities
Sew together.
Make stirrups
out of a canvas
strip or scrap
leather.
Buffalo Wheel: Fasten an old bicycle wheel to a
post that will allow the wheel to spin. Remove half
of the spokes and mark scores on the remaining ones
with small sheets of paper. Make a “buffalo” by filling the toes of two socks with nuts or small pieces
of wood and then tying the socks together. To score,
throw the buffalo into the spinning wheel and count
the score of the numbered spokes it wraps around.
For safety reasons, be sure to have an adult oversee
the spinning wheel used in this activity.
Ten-Gallon Hat: See how many playing cards each
player can toss into a 10-gallon hat from a given distance in 30 seconds.
Pony Express Relay: Divide the group into equal
relay teams. Divide each team in half and station
members in lines 30 to 40 feet apart. The first player
on each team is given a stick horse and a pony
express bag. On a signal, he rides to his teammate in
the opposite line, carrying the bag over his shoulder.
He transfers the horse and bag to the new rider, who
gallops back. Play continues until all players have
participated. For safety purposes, stick horses may be
constructed using lengths of foam pipe insulation.
Chuck Wagon Contest: Each team has a chuck
wagon. This can be an unadorned coaster wagon or a
wagon decorated with a cloth cover on a wire frame
(see illustration). Two den members are designated as
horses (horses could wear paper bag masks). Behind
the wagon are a number of pots, pans, and tin cans.
On a signal, all team members except the horses load
the cans into the wagon. When they are finished, they
yell, “Wagons ho!” and the horses dash off pulling
the wagon around a designated course. If an imple-
ment falls off, the horses must stop and the other den
members put it back in the wagon. If you have only
one chuck wagon, this can be a timed event.
Chuck Wagon: Build a wooden frame that will fit
inside the box of a coaster
wagon. For the wagon
cover’s frame, cut four
6-foot lengths of heavy
wire. Drill matching holes
in the wooden frame and
fit the wire loops into
them. Brace the wires
lengthwise with wire or heavy
cord. Use an old sheet for the cover. Decorate
as desired.
PIONEER DAY
Remember our ancestors seeking a better place to
live? Families moved westward with hopes of finding
their destiny. Many were their trials and tribulations,
but great was their celebration when they reached
their destination. The Santa Fe Trail or Oregon Trail
can be themes for a fun event filled with history and
celebration. Pioneer costumes and props will add to
the enjoyment of this special pack activity.
Old shirt dyed
and fringed
Broomstick
Powder horn cone
of heavy paper
Rodeo Clown Face Painting: Set up a face-painting area using water-soluble makeup for rodeo clown
face painting.
Spino-Lariat: Paste a 13-foot strip of colorful crepe
paper to a cardboard leader. Punch a hole through a
sponge rubber ball with an ice pick to attach a string.
Hold the string, and try some spino-lariat moves!
Old brown
slacks
Moccasins
-
Fold 6-by-2-inch cardboard.
2-inch-wide
crepe paper
strip
Pioneer day can be part of your regular pack meeting or run as a stand-alone activity. Either way, be
sure to include awards and recognition.
11⁄2-inch sponge
rubber ball
Follow the sample program above for the Western
rodeo roundup and adapt it as needed.
3-foot string
-
Obstacle Course
Set up an obstacle course with any or all of these
ideas. Start the dens at different stations to keep
things moving.
• Broken Wheel: Roll a bicycle wheel around an
obstacle.
• Ox in the Mud: Use this as a cooperative teambuilding event. Have the pack work in dens or by
family to move a heavy object several feet. If used
as a competitive activity, time how long it takes to
move the object.
-
• Dust Storm: Set up a waist-high track of string
around a series of trees or poles. Boys follow the
string while blindfolded.
Special Pack Activities
6–25
• Beaver Trap: Use a child’s wading pool. Place four
cutouts of beavers in the “beaver pond.” Let the
boys toss beanbags to “trap” the beavers. Count the
number of beavers each boy traps.
• The Narrow Pass: Use duct tape to fasten three
or four cardboard boxes together. Each boy crawls
through the pass.
• Repair Harness: Each player joins two ropes
together with a square knot.
• Derby Wagon Races: Set up the pinewood derby
track or just a plywood board on a slant. Each boy
races a self-made Conestoga derby wagon.
Conestoga Derby Wagon
You can turn a regular pinewood derby kit into a
covered wagon.
• Provide each pack family with a set of simple,
uncomplicated rules, including a time schedule.
• Plan and carry out appropriate opening, award,
and closing ceremonies.
• Handle all aspects of awards. Every boy should
receive an award for his participation in the derby.
• Plan for crowd control.
• Devise a fair method of judging.
• Plan and provide appropriate decorations with
lots of boy participation.
• Secure a public-address system, if needed.
You can find more information on pinewood
derbies, raingutter regattas, and space derbies in the
BSA publication Cub Scout Grand Prix Pinewood
Derby Guidebook.
You can use this double elimination bracket with
any derby.
PINEWOOD DERBY
--
Materials: Pinewood derby kit, 6 ⁄2-by-10-inch
piece of white fabric, two 10-inch pieces of coat
hanger or other wire
1
See the illustration for the outline of the wooden
block. When finished, make holes in the wood and
glue in the wire. Cover the wire frame with fabric, turning back the edges and gluing the fabric securely to the
wire frame. Attach wheels, and it’s westward ho!
Derbies and Regattas
All derbies and regattas have several things in
common: They all require planning and preparation;
they all involve competition and prizes; they all help
Cub Scouts learn how to use various tools; and they
all provide fun for boys and their families. Always
remember that in Cub Scouting, it is more important
to “Do Your Best” than to come in first. Emphasizing
winning too much can demoralize a young Cub Scout
who does his best but doesn’t win.
The program committee for every derby will need to
• Follow the guidelines for planning special pack
activities found at the beginning of this chapter (page
6–1) so that nothing important will be overlooked.
6–26
Special Pack Activities
Ask any adult male who was a Cub Scout what he
remembers most about being a Cub Scout, and he will
probably reply, “Racing those little wooden cars!”
The pinewood derby is one of the most popular and
memorable special events in Cub Scouting. Like all
successful events, it requires planning and preparation, but its value in promoting fun and positive family interaction has been proved over the years.
Pinewood derby cars are small models of specified
dimensions, created, carved, and assembled by the
boys under the guidance of an adult family member.
The cars are gravity powered and run down a regulation track.
You can buy pinewood derby kits, with building
instructions, individually or in packs from a local
Scouting distributor. Often, the derby committee
purchases derby kits in quantity and distributes them
to pack families. The Scouting distributor also will
have many derby “extras,” such as spare wheels, ribbons, trophies, decals, and more.
Personnel and Procedures
every boy will receive an award for his participation in the derby, no one will feel left out.
Registration Team, Before the Race Begins:
• Mark unique numbers on the bottom of each car.
• Enter the number and names of each entry on a
preliminary heat sheet.
Sample Program
1:00
Registration Team, Once the Race Begins:
• Enter the names and numbers of heat winners on
semifinal sheets.
• Determine the final standing of each winning car
and report the results to the awards committee.
Preinspection allows boys and their families
time to correct any problems before derby
time. (If feasible, cars can be inspected the
night before the derby.)
2:00
Final inspection and registration
2:30
Opening ceremony. Let the races begin! Some
packs may want to award ribbons and heat
winner prizes during the running of the
derby.
4:00
Recognition ceremony; be sure to recognize
adult committee members.
4:15
Closing ceremony
Inspection Team, Before the Race Begins:
• Weigh the cars with an accurate scale.
• Check the overall dimensions. One easy method is
to construct a small box measuring 21⁄2 by 7 by 11⁄2
inches. If the car fits in the box, it passes inspection.
• Act as judges for prerace craftsmanship awards,
such as Most Colorful, Best Looking, Best Paint
Job, Most Scouting Spirit, etc. Report results to the
awards committee.
Inspection Team, Once the Race Begins:
• Help at the starter’s table.
Track Operations Team:
• Set up and maintain derby track or tracks. Larger
packs may find that multiple tracks make the
event move more quickly and smoothly.
• Have a starter’s table where cars are placed until
their turn to race.
• Have a starter at the beginning of each track.
• Have two or three judges at the end of each track
(two for determining first and second places, three
for determining first, second, and third places).
• Have two or more gatekeepers to line up the boys.
• Report winners to the registration team.
Sample Rules
• The car can’t be wider than 21⁄2 inches and longer
than 7 inches.
• The car can’t weigh more than 5 ounces.
• The axles, wheels, and body of the car should be
made from materials provided in the kit.
• Wheel bearings, washers, and bushings are
prohibited.
• Only powdered graphite or silicone may be used
for lubrication of the axles.
• The car must stand alone, not riding on any kind
of spring or other device.
• The car must be freewheeling, with no starting devices.
• No loose materials of any kind are allowed in the car.
Interim Event Crew:
• Have planned activities for boys and siblings during the preopening, while registration and inspection are taking place.
• Make paper racing flags to mark off the race area.
• Have planned activities for boys and siblings between
heats and during the final awards ceremony.
Awards Committee:
• Make sure enough awards are on hand for the size
of the pack.
• Inform the master of ceremonies of the name of
and award for each recipient. Large packs might
consider having each den come forward and present all awards to the den leader. Smaller packs
might consider calling each boy in alphabetical
order and presenting any and all awards won. As
Boys can test their derby cars on a
simple inclined plane. Use a heavy
piece of cardboard tilted up on
books or boxes. Anchor the bottom
edge to the floor with masking tape.
Special Pack Activities
6–27
Running the Derby
finish line wins. In case of a tie, or if judges are
unsure, the race will be run again.
• After the race, cars are returned to the starter’s
table, in the event of additional heats.
• If a car leaves the track, runs out of its lane, interferes with another car, jumps the track, or loses
an axle or any other part, it is judged as finishing
last. If a car interferes with another car and negatively affects that car’s result, the race should be
run again. In the case of lost parts, if the car can
be repaired quickly, it can be run in additional
heats.
• Judges’ decisions are final.
• Each boy takes his car to the registration table to
have his name and number entered onto the heat
sheets.
• After registration, each boy takes his car to the
inspection table to have it pass final inspection
and be placed, by den, on the starter’s table.
• As each heat is announced, drivers retrieve their
own car from the starter’s table and place it at the
starting gate. The starter releases the gate.
• Judges at the finish line will determine the results
of the race. The car whose nose is first over the
Pinewood Derby Track
Brace block, 3⁄4˝ x 4˝ x 4˝
11⁄2˝ x 2˝ hinge
Brace, 3⁄4˝ x 4˝ x 70˝
1
⁄2˝ x 3˝ slots
Leg unit
8˝
Brace block
Starting bar
3
⁄4˝ x 13⁄4˝ x 18˝
Hinge
Starting posts(s)
1
⁄4˝ x 31⁄2˝ dowels
Screw eye
Heavy rubber band
Leg unit
Bottom view with legs
and brace in folded positions
Brace
Brace end detail
1
1
1 ⁄2˝ x 1 ⁄2˝ hinges
Handle
1
⁄2˝ x 6˝ dowel
8˝
13˝
Starting posts
Car guides: 1⁄4˝ x 15⁄8˝ x 96˝
pine lattice strips
spaced on 31⁄2˝ centers
11⁄2˝ x 11⁄2˝ hinge
each side
Legs
3
⁄4˝ x 13⁄4˝ x 43˝
Base: 1⁄2˝ plywood (4)
12˝ x 96˝
1
⁄4˝ x 2˝ F.H. stove
bolts and wing nuts
Cleat (2)
3
⁄4˝ x 4˝ x 12˝
11⁄2˝ No. 10 F.H.
wood screws
1
11⁄2˝ x 11⁄2˝ hinges
Both sides
Legs: 3⁄4˝ x 4 x 12˝
Section cleats
⁄4˝ x 2˝ R.H. stove
bolts and wing nuts
Cleat: 3⁄4˝ x 4 x 12˝
Removable stabilizer
⁄4˝ x 4˝ x 36˝
3
Use 1⁄4˝ x 2˝ F.H. stove bolts at this
joint to fasten track to cleats.
Finish line
36˝
Use 11⁄2˝ No. 10 FH screws at these
joints to fasten track to cleats.
Slip a 1⁄2˝ block of wood under track
guide ends to make a friction brake.
End cleat: 3⁄4˝ x 13⁄4˝ x 12˝
6–28
Special Pack Activities
Sections are held together by two
⁄4˝ x 13⁄4˝ x 16˝ pine cleats centered
under outer track guides.
3
11˝
9˝
48˝
The Track
Many packs build their own tracks for use year
after year. In many cases, packs work together, sharing tracks as needed. In any case, be sure to inspect
each track after use and make needed repairs before
storage. Equally important is inspecting each track
well enough before race day to correct any problems
that may have occurred during storage.
Space derby kits with building instructions can be
bought individually or in packs from a local Scouting
distributor. Often, the derby committee purchases
derby kits in quantity and distributes them to pack
families. The local Scouting distributor also will
have many derby “extras,” such as space derby carriers, accessory kits, extra rubber bands, ribbons,
trophies, decals, and more.
The track illustrated will allow three cars to race
at one time. It can be built with ordinary workshop
tools. The use of loose pin hinges makes it easy to
take apart for storage.
Lane strips should be 1⁄4 inch high. The bottom of
the grand prix derby car is designed to be just 1⁄8 inch
above the lane strip. If the lane strip is too high, the
racer will drag.
Block sand all track surfaces, particularly where
sections are joined. For extra strength, use white
glue on all joints before fastening with screws. Also,
a good grade of hard enamel paint is recommended
for finishing the track.
Tips for Racer Construction
Personnel and Procedures
Boys should build their own racers with guidance
and minimal assistance from an adult. Many packs
have a separate division for cars built by adults to help
share the fun and allow boys to work alongside adults.
• Paint the body parts before assembling the car to
avoid getting paint on the axles.
• To remove burrs on the nail axles before adding
wheels, use sandpaper or emery paper.
• If there is a mold seam on the wheels, sand very
lightly. The wheels are hollow and break easily if too
heavily sanded. Another danger of too much sanding
is that the car will “high center” on the track.
• Use white glue or model cement to hold the pin
axle in the body. Measure the distance between
axles before securing.
• Fishing sinkers or other weights may be incorporated into the body to add weight, but the total
weight cannot exceed 5 ounces.
Registration Team, Before the Race Begins:
• Mark unique numbers on the bottom of each rocket.
• Enter the number and name of each entry on a
preliminary heat sheet.
SPACE DERBY
The space derby is similar to the pinewood derby
only it uses miniature rockets. These propeller-driven rockets are powered by three rubber bands and
travel along a monofilament fishing line. Boys carve
and assemble the rockets themselves under the guidance of an adult family member.
Registration Team, Once the Race Begins:
• Enter the names and numbers of heat winners on
semifinal sheets.
• Determine the final standing of each winning rocket and report the results to the awards committee.
Inspection Team, Before the Race Begins:
• Check entries for use of official materials.
• Act as judges for prerace craftsmanship awards,
such as Most Colorful, Best Looking, etc. Report
results to the awards committee.
Inspection Team, During the Race:
• Have extra boxes of rubber bands on hand. It takes
three rubber bands to fly each ship properly.
• Have small hand drills for winding rubber bands.
This will help speed up the event. Check the
ratio of the drill by making one revolution of the
crank handle and counting the number of times
the chuck turns. Most drills average a one-to-four
ratio; thus, 40 turns equal 160 winds on a rubberband motor (150 to 170 winds are sufficient).
Special Pack Activities
6–29
• Help boys by stretching the rubber bands 12 to 15
inches beyond the tail. One person holds the rocket
while the other winds the rubber band. This is especially helpful when using a hand drill as the winder.
Launch Operations Team
• Set up and maintain launcher. Larger packs may
find multiple launchers make the event move
along more quickly.
• Have a starter’s table where rockets are placed
until it is time to race.
• Have a starter at the beginning of each track.
• Have two judges at the end of each track.
• Have two or more gatekeepers to line up the boys.
• Report winners to the registration team.
Interim Event Crew:
• Have planned activities for boys and siblings for
preopening, while registration and inspection are
taking place, and between heats. Boys could make
paper airplanes and have target or distance throws.
Awards Committee:
• Make sure enough awards are on hand for the size
of the pack.
• Inform the master of ceremonies of the name and
award for each recipient. Large packs might consider having each den come forward and present
all awards to the den leader. Smaller packs might
consider calling each boy in alphabetical order
and presenting any and all awards won. As every
boy will receive an award for his participation in
the derby, no one will feel left out.
Sample Program
7:00
Inspection and registration of rockets
7:30
Opening ceremony
7:40
Let the races begin! Some packs may want to
award ribbons and heat winner prizes during
the running of the derby.
8:30
Recognition ceremony, advancement awards,
derby committee recognition
8:45
Closing ceremony
Sample Rules
• Only basic materials supplied in the kit may be
used for rocket construction.
• The rocket body may be no longer than 7 inches,
not including propeller and fins.
• There are no restrictions on the weight or design of
the rocket.
6–30
Special Pack Activities
Running the Derby
• Each boy takes his rocket to the registration table
to have his name and number entered onto the
heat sheets.
• Contestants report to the gatekeepers, who line
them up in the order in which they will compete.
At this point each boy starts to wind up the rubber
band motor of his rocketship.
• As his name is called, the boy hooks his rocket in
the guideline assigned to him. He must center it
between the vertical dowels and lock the propeller
behind the horizontal dowel on the starting gate.
• The gatekeeper starts the countdown and fires at
zero by lifting the rear of the starting gate frame,
which releases the rockets.
• Each race is run in heats with up to four contestants at a time. Each boy gets to try at least twice.
For example, in a den of six boys, try heats of three
boys each.
• The rocket whose nose is over the finish line
first or travels the farthest if none passes the finish
line wins.
• The winner takes his rocket to the registration
table for recording.
• Judges’ decisions are final.
Rocket Construction and Operation
The official kit includes all necessary materials
and instructions for building your rocket. Decorate
the rocket with bright colors, and apply decals.
Tips for Rocket Builders:
• Reduce air friction or drag by making all surfaces
as smooth as possible. A blunt, rounded nose
causes less drag than a sharp nose. A good design
has all leading edges rounded and trailing edges
tapered to reduce drag.
• Rubber bands should be lubricated. They are the
“motor,” and this will help them stay strong and
flexible. Soak them overnight in castor oil. Or mix
two parts green soap with one part glycerin and
one part water; rub the mixture on the rubber band
about an hour before race time.
• Use a sharp knife for cutting the grooves for the
hanger fitting and fins. A dull knife will crush and
splinter the balsa wood or foam.
• When you start a curve, remember that the end
with the small hole is the rocket nose.
• A potato peeler is good for carving the shape.
The Rocket Launcher
Guideline
Start gate;
only 1 required
Rocket
Starting gate
front
Starting gate
2˝
Dowels hold prop
and rocket until
gate is dropped.
3˝
10˝
10˝
6˝
31⁄2˝
Guidelines
8˝
101⁄4˝
8˝
3
⁄4˝
21˝
51⁄2˝
23⁄4˝
29˝
72˝
Rocket launcher
horse, 2 required
40˝
33˝
Rockets are flown on
guidelines of 50-lb. test
monofilament fishing
line. Suggested length
is 40 feet, stretched as
tightly as possible. Lines
can be lengthened at
your discretion.
42˝
Side view
52˝
Floor
1
3 ⁄2˝
26˝
26˝
Fishing line
40˝
• To help increase rocket speed, reduce the wall
thickness to a minimum of 1⁄8 inch. Don’t weaken
the area around the hanger (carrier) or carve away
the nose button circle.
• Don’t apply too much paint to the outside unless
you sand between each coat.
• Be careful not to get glue on the plastic carrier,
especially in the holes through which the monofilament line runs. Glue can interfere with smooth
operation.
• Make the propeller shaft as short as possible by
bending it close to the prop. Cut off excess wire
with wire cutters.
• Test rocket balance by hanging it from a string
through the hole of the hanger fitting. If the rocket
is nose-heavy, carve or sand a little bit off that end.
If it is tail-heavy, remove excess from the tail area.
Dens may wish to secure a 50-foot length of 50pound monofilament fishing line for test runs before
the derby. Secure the line at just less than 100 feet,
as tight as possible.
Brakes: Three or four cloth strips
hung over line, spaced 2 feet apart.
Sandbags or other weight over
lower bar helps anchor horses.
Stretch 12 to 15 inches; then
wind as you gradually reduce.
Balance Dry
point
lubrication
Drill
chuck
1
⁄8-inch wall
13⁄8˝
Maximum length.
Cut off excess wire.
Use handmade
coat hanger wire
fitting (made to
fit over the end
of rocket) or
provide plastic
dowel for winding.
10-inch handmade wire coat hanger
hook for inserting rubber bands.
Special Pack Activities
6–31
RAINGUTTER REGATTA
6:40
Opening ceremony. Let the races begin! Some
packs may want to award ribbons and heat
winner prizes during the running of the
derby.
7:40
Recognition ceremony, including recognition
of adult committee members
7:45
Closing ceremony
Sample Rules
• The hull cannot be longer than 7 inches or shorter
than 61⁄2 inches.
• The mast should measure 61⁄2 inches from deck to top.
• The keel and rudder supplied in the kit must be
used with no alterations.
• The sail should be no larger than the material supplied in the kit.
• There are no restrictions on color or design.
Ahoy mates! This could be the sailing regatta
of the century! Although the seas are only 10-foot
lengths of raingutter filled with water, and ships are
a mere 6 inches long, the race is an exciting event.
Each boy builds his own boat with the help and guidance of an adult. He also provides the “wind” for his
sail with his own lung power.
The regatta boat kit with building instructions can
be purchased individually or in packs from a local
Scouting distributor. Often, the derby committee purchases derby kits in quantity and distributes them to
pack families along with rules, tips on construction,
and any other helpful hints. The local Scouting distributor also has many derby “extras,” such as decals,
ribbons, trophies, and more. The kit includes a preshaped hull, metal keel, mast, and sail. Or the pack
can choose to run the regatta with rubber band–powered boats. Just be sure that the depth of the boats
chosen doesn’t exceed the depth of the raceway.
The personnel needed is similar to any derby
event (see “Personnel and Procedures” above for
the pinewood derby or space derby). The inspection
team needs to measure the keel to make sure it will
not drag on the bottom.
Sample Program
6:00
Preinspection allows boys and their families
time to correct any problems before derby
time. If feasible, inspect boats the night
before the race.
6:30
Final inspection and registration
6–32
Special Pack Activities
Running the Regatta
• Boys take their boats to the registration table to
be checked and numbered and have their names
entered on the heat sheet.
• They then take the boats to the inspection table to
make sure they meet specifications.
• The race is run in heats. Boats are powered by
each boy blowing into the sail of his own boat.
• Boats start with the stern touching the end of the
gutter. The starter stands at the opposite end, and on
a signal the boys begin to blow. With a double raceway, two boys compete at the same time. The first
boat to reach the end of the raingutter wins. Once
the race has started, the boys may not touch the
boats with their hands. Should a boat snag, a judge
will right the boat and then the boy may continue.
• Watch the boys carefully, as hyperventilation can
occur.
• On courses other than a raingutter, boats must be
held by the pilots at the starting line and released
on a signal. Once again, the use of hands is not
allowed, and boats cannot be pushed. If any boat
runs afoul, the heat is considered a no-contest and
is run again.
The Course
This practice raingutter regatta
course can be set up in
almost any backyard.
18˝
12´
2 =6
inches
Large pin
Tin
Canvas or plastic liner
Block
Small sinker
Mounting
stand can
be made
of milk
container;
cut slots for
rudder
and keel.
Stake
4 inches of water
Plastic
sail
One popular course is simply a standard 10-footlong raingutter set in groves on wooden supports (see
illustration). Another method is to place the 10-foot
lengths of raingutter at either side of a long table.
Once the raingutters are in place, put a small amount
of water into each gutter to make sure it is level. Even
on the most level ground, some adjustment may be
necessary. Two 10-foot lengths of raingutter will hold
approximately 8 gallons of water, so once full, they
are difficult to move without causing a minor flood.
After making any adjustments, fill the gutter to about
1
⁄2 inch from the top.
Round
off edge.
Cement
Rudder
Keel
Cement keel and rudder in slots where indicated on
hull bottom.
Regattas may also be held in small inflatable
pools, swimming pools, or lakes, as long as Safe
Swim Defense is followed and appropriate health
and safety regulations are met.
• Give the boat two coats of sanding sealer.
• Paint the boat with two coats of colored lacquer
or acrylic paint. Don’t use water-based or tempera
paints.
Construction Tips
CUBMOBILE DERBY
• Sandpaper the hull to the desired shape, adhering
to the specifications required. First use a mediumgrade sandpaper, then finish with a fine-grain
sandpaper.
The Cubmobile derby is a thrilling pack activity
that is fun for the entire family. Planning for the
derby should begin several months in advance so Cub
Scouts and adults from each den can build a racer.
That’s right! Each den builds its own Cubmobile,
with plenty of adults to help supervise construction.
There is no engine; the Cubmobile runs by gravity.
Standard 10-foot-long
aluminum or plastic raingutter
Personnel and Procedures
Gutter
supports:
1 x4 x36
inches
Glue on end caps.
Seal inside joints
with bathtub
sealing compound
or gutter sealant.
Diagonal braces:
1 x 2 x 72 inches
End braces:
1 x 4 x 23 inches
Legs: 2 x 2 x 34 inches
Cut to fit
bottom
of gutter.
Program Committee: Besides the general responsibilities of the program committee noted above (page
6–1), the program committee for a Cubmobile derby
should make arrangements for a rescue squad of first
aiders to be on hand for emergencies. Remember:
Boys are the drivers. The committee chair is responsible for getting any required city permits for use
of public streets or right-of-ways and for securing
approval from the appropriate city, county, or park
authority to close off the street to traffic.
Gutter support
Special Pack Activities
6–33
Inspection and Registration Team:
• Make a cutout of cardboard or wood to check the
overall dimensions of the Cubmobile.
• Check for correct attachments of safety requirements, paying special attention to the brake system and seat belts.
• Make sure that a bicycle helmet is available for
each driver.
• Number each car.
• Act as judges for craftsmanship awards. Report
winners to the program committee.
• Register each boy and give him a number within
his den.
• Enter each car and driver for each run on a tally
sheet, to keep track of who runs each heat.
• Get times from timekeepers at the finish line and
record them.
• Determine the final standing of each den car and
report the results to the program committee for
presentation of awards.
Track Operations Team:
• Assign at least two gatekeepers to line up cars.
• Have at least two starters to operate the starting
ramp (one for each lane).
• Have official timers with stopwatches at the finish
line (one for each lane).
• Mark lanes with chalk, and rope off racing area as
necessary.
• Provide hay bales or sand pits at the end of the
track to make sure Cubmobiles stop.
• Report official times to the registration team.
Sample Program
(This is designed for a Saturday.)
9:00
Registration and gathering time
9:30
Opening ceremonies
9:45
Events
11:15
Recognition ceremonies and closing
11:45
Cleanup
6–34
Special Pack Activities
Running the Derby
• The derby is run in heats. Each den has one
Cubmobile, and each boy in the den races the car
one time. The den with the lowest average racing
time wins.
• Each den reports with its Cubmobile to the
inspection station, where the car is inspected
and numbered.
• Cub Scouts bring the Cubmobile to the registration table where boys’ names are listed on the heat
schedule.
• As the master of ceremonies calls his name, each
boy reports to the starting gate. He is helped into
the car. An adult checks to see that his seat belt is
fastened and helmet is secure.
• All drivers should wear protective gear, including
a helmet and knee and elbow pads.
• When cars are released from the starting gate, drivers should try to stay in their own lane.
• No pumping or pushing with the feet is allowed.
• After driving, each boy should join the spectators’
section to cheer his den on.
The Track
The track should be a smooth-surfaced street with
a gradual slope that is neither too long nor too steep.
The suggested track length is 150 feet, plus additional stopping space. The lanes should be marked with
chalk. Crossing over from one lane to another will
happen, especially with inexperienced drivers, but
boys should be instructed to stay within their own
lanes. Judges should observe the race for any fouls. If
a driver is fouled, he should be given another run.
The Starting Ramp
Usually, a ramp is set up to start the cars.
Cubmobiles start from a standstill, rolling down the
ramp and the slope to the finish line because of gravity. The starting ramp may be as simple or elaborate
as the derby committee wishes. Sheets of heavy
plywood are effective and can usually be rented.
These can be elevated from the backside with cement
blocks. Another type of starting ramp is shown here.
Consider safety factors when determining the angle
of the starting ramp. The ramp should allow room for
the number of cars starting at one time.
Cubmobile Derby Ramp
When rope is pulled, it
releases retaining board.
Board falls; car rolls.
Back wheels are held by
bar until released.
Hinge
Bar falls into space,
allowing car to roll.
Retainer
4˝
Ramp: 3⁄4-inch plywood
12˝
Cubmobile Specs and Parts
• See the illustration for building materials and
hardware.
• Wheels may not exceed 12 inches in diameter.
• All wheels must be equipped with rubber tires.
• The car frame is made from 2-by-4-inch construction lumber.
• The overall length of the car is a minimum of 5
feet; the wheelbase is a maximum of 4 feet. The
outside circumference of the wheel may vary from
30 to 36 inches.
• Use roundhead 1⁄2-inch bolts to hold the frame.
Screws are a second choice. Nails are NOT suitable, because they may work loose.
• All cars must have a seat with a braced backrest so
the boy can comfortably steer with his feet.
• Cars must be equipped with an adequate safety
belt securely fastened to the frame of the car.
Raise platform in
rear 18 to 24 inches.
• Steering is done with the feet, placed on the front
axle, and by the hands holding a rope fastened to
the front axle.
• If threaded axles are used, the nuts must be
secured with cotter pins or wire.
• Cars must be equipped with a hand brake. Its rubbing surface must be faced with a rubber material
such as a strip of an old tire. This will stop the car
when dragged on the ground.
• During the race the two 2-by-4-inch blocks fastened 1⁄2 inch from the centerboard will limit the
turning radius. See illustration.
Publicity
A Cubmobile derby will have considerable appeal
to the general public. Invite photographers from local
newspapers to take pictures. Make sure the boys are
properly uniformed in either full uniform or matching T-shirts. Use this event as a recruiting opportunity, but a boy must be registered with the pack to
race a Cubmobile.
Special Pack Activities
6–35
Cubmobile Specs and Parts
7–10˝ Diameter wheels from
lawnmower, wagon, tricycle,
barbecue, etc.
Post: 2˝ x 4˝
Seat back: 83⁄4˝ x 20˝
3
⁄8˝ plywood
Use these type fasteners—
nails will not hold.
Carriage bolt (Square
section prevents turning.)
Seat: 15˝ x 20˝
3
⁄8˝ plywood
Lag screw
Machine bolt
Wheel
Lag screw
Frame: 2 x 4
52˝ long
Steering bridle:
⁄4˝ nylon rope
Axle
1
Flat
washer
Flat
washer
Axles: 2 x 4
28˝ long
Use safety belts
and helmets.
Safety blocks to
limit steering angle.
Flat
washer
Drill holes
Machine
bolt: 1⁄4˝,
4˝ long
Frame
Plywood brace:
one each side
2 Flat washers
Front axle
Washer
151⁄2˝
Nut
12˝
Second nut
tightened against
first to lock
Nail strip of old
tire to brake.
Brake
48˝ Wheelbase
6–36
Special Pack Activities
2 Carriage bolts
⁄4˝, 4˝ long
1
ALL-DERBY RACE DAY
1:30
Opening ceremony
If it has wings, wheels, or rudders, it can happen
on all-derby race day. This event may include as
many of the derby activities as there are adults to
staff the events. It requires lots of hands-on participation, so you may consider combining with other
packs or holding it as a district- or council-level
event. As with all derbies, the purpose is not to win
or lose but to have fun.
2:00
Let the races begin! Packs may choose to
award ribbons and heat winner prizes during
the running of each derby.
4:00
Recognition ceremony, including recognition
of adult committee members
4:15
Closing ceremony and cleanup
Preplanning is a must for this special event.
Follow the guidelines from the beginning of this
chapter so that nothing will be overlooked (page
6–1). Boys and their families are invited to bring any
Cub Scouting–recommended derby car, rocket, or
boat and race against each other for fun. This is also
a great opportunity for dad to dust off his own derby
car from when he was a Cub Scout—or to make a
new one.
Personnel
• The race-day chair will oversee and coordinate
the race-day events, secure the site, and provide
necessary information to the families.
• The deputy chairs for each event are responsible for
securing tracks or equipment needed for their area.
• The adult assistants for each event are recruited
by the deputy chairs.
• The registration committee will register each participant and help with crowd control. A registration
sheet is filled in for each activity a boy wishes to
enter. The sheets are given to the area deputy, who
will call the names of participants for each race.
FISHING DERBY
There are two kinds of Cub Scout pack fishing
derbies, and both are fun for boys and adults. One
is a joint Cub Scout and adult partner fishing trip
to a nearby lake or river where adults and boys can
fish off the banks. Prizes are awarded for such things
as the biggest fish, first fish, most fish caught, and
most total inches of fish caught. Unless the fish are
to be eaten, fishing should be done under the catchand-release plan. The other type of fishing derby is
a family outing with games and contests related to
fishing.
Events
Include pinewood derbies, Cubmobile races, space
derbies, and raingutter regattas as your resources
and personnel permit. For recognition, you can use
ministickers or gummed stars in gold (first), silver
(second), and blue (third) and place them on the bottom of the cars, sides of rockets, or tops of boats to
indicate place. But the primary idea of race day is to
have fun.
To run an event, call names in the order they
appear on the registration sheets. If someone is at
another event, move his name to the bottom of the
list until all racers have participated.
Sample Program
1:00
Registration. Complete a sheet for each event
a boy wishes to enter. Any weighing or measuring is done at this time. After registering,
the car, boat, etc., is turned over to that committee and stored until that race is called.
The fishing derby committee should follow the
guidelines for planning special events (see page 6–1).
Planning for either type of fishing derby includes
securing a site, arranging transportation, and coordinating activities. The committee must be aware
of and obtain any required licenses or permits. The
committee duties also include providing prizes and
making sure there is enough fishing gear for every
child to participate. If a meal is included, arrangements must be made to assure enough nutritional
food for everyone. The committee might try some
special promotional ideas, such as sending fishshaped invitations or inviting local anglers to help.
For the family outing derby, make signs for each
contest area. Use ropes, posts, or colored streamers
to mark game areas. Fishing areas should also be
marked off and watched, as many families will have
small children attending. Consider the need for a
public-address system and always remember safety.
Special Pack Activities
6–37
Sample Program
The activities and schedule below pertain to a
family fishing derby with games and contests.
10:00–11:00
Committee arrives ahead of time to
set up activities.
11:00–12:30
Free time for fishing. As the boys
arrive, set up adult and boy with
fishing gear and get them started. It
is a good idea to have experienced
anglers available to help those who
are new to the sport.
12:30–1:30
Lunch and cleanup. Roast corn and
fried fish might be prepared by the
fishing derby committee; or have a
picnic of hot dogs, baked beans, and
watermelon; or have a family potluck.
1:30–2:30
Special contests
2:30–3:00
Awards ceremony
3:00–3:15
Final camp cleanup
the pond and return. Mark off or designate a 10- to
15-foot strip of ground as the “pond.” Place the paper
rocks in the pond a few inches apart. The first boy
steps from the “bank” onto the first rock, then the
second. Since this leaves no rocks to step on, he must
turn around and pick up the rock from behind him
and place it in front of him to make the next step
without falling into the pond. If a participant falls
into the water, he must start back from the bank he
just left.
KITE DERBY
A pack kite derby can be one of the best spring
or summer activities. It may include various kite
demonstrations and contests and may also include
a picnic lunch or supper. Some kite derbies are held
just for fun, with no special contests or prizes. Others
include contests with prizes for each participant.
Contests
Guessing Game: How many fish eggs are in the
jar? Fill a jar with miniature red jellybeans (count as
you fill the jar). Have slips of paper and a drop box so
players can write down their names, write their guess
on the paper, and drop it in the box. Whoever guesses
closest to the actual number of “fish eggs” gets the jar
and the jellybeans as a prize.
Just Fishin’: Fill several 2-L. bottles with water and
reclose. (The more water, the greater the challenge.)
Use a 1⁄2-inch dowel and attach a 30-inch string that
has a 3-inch ring tied to the end for a pole. Place the
filled bottles or “fish” on their sides. Catch a fish by
standing the bottle upright.
Are They Biting? Cut out cardboard fish. Mark
the underside of the fish with a point value. Apply
a piece of magnet to the tail of each one. Use poles
with magnet strips on the end to catch a fish.
(Opposite polarity magnets will attract each other.)
Add up point totals after a set time.
Cross the Pond: Have a den relay where each boy
wades barefoot through six pans of water. Or cut out
two large circles of paper for each team. These are
the team’s “rocks,” which they must step on to cross
6–38
Special Pack Activities
Follow the guidelines for planning special activities found in the beginning of this chapter (page
6–1). The kite derby committee must consider the
location (an open field), the layout of the field, and
the meal if any. If contests are to be included, decide
on entry requirements, which events will be held,
and the rules and prizes for each. You will need an
announcer, a starter, and one or two judges.
The kite derby plan should be developed far
enough in advance so the boys and families will
know the types of events and rules before they begin
making kites. The “Crafts” chapter of this book contains information on making several types of kites.
The den meetings leading up to the derby would be a
good time to discuss kite-flying safety rules with the
boys (see below).
Sample Program
10:00
Registration, exhibits, display and judging of
kites
11:00
Opening ceremony
11:15
Kite contests
12:30
Picnic time!
1:00
Recognition
1:15
Closing ceremony
• Largest
• Most comical
• Most beautiful
• Best craftsmanship
• Most original
• Most Cub Scout–ish
During flight, kites could
• First in the air
• Highest after 5 minutes
• Highest after 15 minutes
be judged for
• Most stable flier
• Most graceful in the air
• Fastest climbing
You could also judge boys for
• Best sportsmanship
• Most persistent flier
Entry Requirements
Kite-Flying Safety Rules
The kite derby committee will want to set some
rules beforehand to help prevent any misunderstanding or disappointment. Here are a few suggestions:
• All kites must be made by boys and adult partners.
• Boys may enter only one kite.
• Each kite must be numbered.
• Each boy may have his adult partner help him get
his kite into the air and help him catch it when it
comes down.
• Only wood, fabric, or plastic may be used to make
kites. No fighting kites are allowed; glass, razor
blades, and metals are not permitted.
• No wire kite lines are permitted.
• Kites caught in power lines are considered lost
and may not be retrieved.
• Kites may be adjusted and modified any time during the derby.
• Always fly a kite far away from electric or power
lines, transmission towers, TV and radio antennas,
and ponds.
• Don’t fly kites on rainy days; never fly a kite in a
thunderstorm.
• Use wood, fabric, or plastic to make the kite. Never
use metal.
• Always use dry string. Never use wire for a kite
line.
• When flying a kite, avoid public streets, highways,
and airline or railroad right-of-ways.
• If your kite gets snagged in a power line, treetop,
roof, or high pole, never try to remove it.
You may want to measure the kite cords before
the competition and mark them at 100 yards to aid
judges in determining how high they are flying. Or
the kite derby committee could provide premeasured
standard cords.
Judging
Kites should be divided into three groups for
competition:
• Bowed or tailless kites
• Flat kites or those with tails
• Box kites or combination kites
You may wish to establish a point system for judging in order to make it easier to determine the winners of some of the awards. Preflight judging can be
done for design, workmanship, and creativity. Prizes
could be awarded for
• Smallest
• Most unusual
Kite Contests
100-Yard Dash: The contest starts on a signal, with
launching in any manner. Kites must be flown to the
end of a 100-yard cord and then wound back to the
hand of the flier. An assistant may remain under the
kite as it is wound in to catch it before it falls to the
ground. The race ends when the flier has rewound
his cord. At the finish, the flier must be on the starting line with his kite and cord wound back into his
hand.
Altitude Race: Fliers start on a signal and run out
from the flying line, working the kite up to its highest
possible altitude. At the end of five minutes, judges
determine which kite is flying the highest.
Messenger Race: All players send their kites up
to a specific length of line—about 50 yards. A paper
messenger is attached to the flying lines and allowed
to blow up the kite. (See the “Crafts” chapter for making kite messengers.) The boy whose messenger first
reaches his kite wins the race.
Special Pack Activities
6–39
6–40
Special Pack Activities
7
CUB SCOUTS WITH
SPECIAL NEEDS
Feeling Accepted in the Den
7-1
Feeling Accepted in the Pack
7-3
Feeling of Competence
7-3
Feeling of Self-Satisfaction
7-5
Special Activities
7-5
7-0
Cub Scouts With Special Needs
Every boy has needs. Three important ones are to feel accepted by a group, to feel a sense
of competence as he approaches a task, and to feel a sense of self-satisfaction at its completion. For some boys, these needs are easily met. For others, it takes a little more thought and
planning on the part of leaders to help the boys. That’s what this chapter is about.
The parents or guardians of a boy with special needs will be the best resource for information about their son’s abilities, limits, and goals. Other resources include the boy’s teachers
and the Cub Scout Leader Book.
Feeling Accepted
in the Den
Many people wonder how a boy who is different
from other members of the den will be accepted. You
will find that with proper preparation of the den,
these boys are accepted into the fellowship of the
den easily.
Before a boy with special needs joins the den, the
den leader should plan some time to prepare the boys
to meet their new member. During the two meetings
before the new boy’s joining the den, devote part
of the regular meeting time to activities that will
prepare everyone. The assistant den leader and den
chief will need to take part in planning these activities and will need to understand the needs of the new
Cub Scout.
FIRST DEN ORIENTATION
Materials: Chalkboard, chalk, appropriate simulation items (blindfolds, newspapers, rope, etc.) to
simulate the new boy’s disabilities
Announce that you are having a “rap session.”
Tell the boys that a new member is joining the den.
If they don’t already know, tell the den his name
and tell them that he is a little different from them.
Don’t mention the boy’s disability yet. Ask the boys
to name all the things they can all do (run, jump, see,
ride bikes, hear, etc.).
If the den does know the new boy, have them share
any experiences they have had with him. Ask the
boys whether they have already helped him in some
way. List these on the board. Also list the ways the
new boy is just like the boys in the den.
• Point out that no one can do everything. Each of
us needs help at certain times. Identify things the
individual members of the den and the leaders
need help with.
• Describe the disability in simple terms, explaining
that the new boy may do some things differently
from other boys. Use the Cub Scout motto “Do
Your Best” to explain that everyone does his best
in everything he undertakes and that each den
member’s “best” is different.
Simulation Game: After a discussion of the boy’s
condition, ask the den members whether they have
an idea of what it would be like not to be able to do
something they enjoy or take for granted. Suggest a
game to find out. For example, if the new Cub Scout
is blind, blindfold each boy in turn and ask him to
bring you a specified object. If the new Cub Scout is
deaf, have boys communicate without talking. If the
new boy has trouble focusing on a task or performing tasks at a normal pace, play a version of “Simon
Says.” In this version, all commands are to be followed. Begin slowly, allowing time for each boy to
complete the command. Then speed up the game
until the commands are coming at so rapidly that no
one can keep up.
SECOND DEN ORIENTATION
With the den, plan the next meeting when the
new Cub Scout will attend for the first time. Learn a
welcome song such as “We’re Glad to See You Here”
from the Cub Scout Songbook. Have everyone make
suggestions for activities for the day. Follow the
meeting structure outlined in the Cub Scout Leader
Book. You may want to plan for special refreshments
during this welcome meeting so that it seems more
like a party.
With some boys with special needs, a “buddy system” can be very effective. If it is appropriate for the
new Cub Scout, explain the system to the den. Each
week, a different den member will be responsible
for helping the new Cub Scout during the meeting. Emphasize that the important factor is to “Do
Your Best” and that the boy who is helping must be
patient—not only because of the special needs of the
Cub Scout but because the new boy is new to Cub
Scouting. Practice the planned activities, with each
boy taking a turn at helping and being helped. Often,
boys learn more about helping others when they
themselves are helped.
Cub Scouts With Special Needs
7–1
FIRST DEN MEETING WITH
THE NEW CUB SCOUT
The process described here is a good one for planning all den meetings. Consult Cub Scout Program
Helps and the Webelos Leader Guide for weekly
den meeting ideas that follow the monthly theme or
activity badge.
(keeping in mind everyone’s abilities), or adapt a
game so that everyone can play. Information on
how to adapt games is provided in the “Feeling of
Competence” section below.
Activity Period
The purpose of this first den meeting is to introduce the new Cub Scout to the members of the den.
Use a ceremony from Cub Scout Ceremonies for Dens
and Packs to welcome the new boy.
The activity period should include only things
that all the boys can easily do. Choose from one of
the many projects in the “Crafts” chapter, keeping in
mind everyone’s abilities, or use the one suggested
below. (Most Cub Scouts can do this with a little
help.)
Icebreaker
Scout Calendar
Choose an icebreaker or two to help everyone get
to know one another. You can use a simple one from
Group Meeting Sparklers or use one suggested here.
Have You Ever?: Visit with the parents of the new
Cub Scout to find out what his interests are. Find out
about things he has done that he especially enjoyed.
Armed with that information and similar knowledge
about the den members, devise a list of questions.
Direct the boys to raise their hands when the answer
is “I have.” The questions should demonstrate that
not all members of the den have done everything and
that the new Cub Scout has something in common
with other members of the den. Consider questions
such as the following:
• Have you ever been to the circus?
• Have you ever found a snail?
• Have you ever eaten a snail?
• Have you ever caught a fish?
• Have you ever traveled out of the state?
• Have you ever spent the night in a tent?
• Have you ever cooked your own breakfast?
• Have you ever cooked breakfast for someone else?
• Have you ever been to a ball game?
• Have you ever talked to the mail carrier?
Who Am I?: Ask den members to line up in two
rows facing each other about 6 feet apart. Ask the
new boy to stand at the head of the two lines and
throw a ball to the boy whose name the leader calls
at random. The boy whose name is called should be
encouraged to act silly, wave his hand, or in another
way attract the attention of the new Cub Scout. This
should reveal personalities and help the new Cub
Scout learn the names of the den members.
Game
Choose a game from the ones at the end of this
chapter (they are arranged by specific disability),
choose one from the “Games” chapter of this book
7–2
Cub Scouts With Special Needs
Materials:
11-by-17-inch piece of heavy paper or cardstock
9-by-13-inch piece of paper with calendar for
the month printed on it
Tempera paint
Sponges cut into small pieces
Stickers to designate den meeting days and
pack meeting
Clothespins
Glue
Wet the sponges with water and squeeze the water
completely out of them. Using the clothespins to
hold the sponges, dip the sponges into the tempera
and press onto the 11-by-17 paper, leaving a print.
This should be repeated in a haphazard manner,
using different colors of tempera if desired. When
dry, glue the calendar in place, leaving a border of the
sponge print around it. Attach stickers to the days for
den meetings and pack meetings. Write the time and
place down on those days.
Closing
For the closing of the meeting, the den leader
should give a brief talk on what is expected of each
den member—that he do his best. Then tell boys
what they will be doing at the next meeting. If the
new Cub Scout’s abilities are such that familiarity
with the activities before den meetings is helpful,
be sure that his parent or guardian is aware of this.
A den take-home note or newsletter for all the boys
could be a subtle way of communicating with them.
Close with a Living Circle (see Cub Scout Ceremonies
for Dens and Packs).
DEN DISCIPLINE
A boy knows that he is cared for when he knows
that others care about his behavior. A boy’s parent
will be the best resource for understanding what a
boy is able to do and how strict the code of conduct
should be. If it is necessary to relax the rules for one
Cub Scout, it will be necessary to relax them for all
den members. The “Accentuate the Positive” chapter
of this book has several helpful ideas for monitoring
boy behavior in the den. Clear communication about
what is expected and appreciated is a key to a boy’s
developing self-discipline.
For instance, instead of the usual “Good job!” try
saying something like this: “I felt __________________
when you __________________ and it made me want
to __________________.” When encouraging (or discouraging) particular behavior, it is helpful to fill in
these blanks as specifically as possible. It isn’t necessary to have them in this order. Other examples: “I
was so happy when you shared your special ball with
Matt that it made me want to shout”; “I just wanted
to tell you how proud I was when you helped Matt
with his project”; “When you asked Matt to sit next
to you so he would feel welcome, it made me so
pleased that I want to shake your hand.”
conversation with, “Is it fair that some boys don’t
have all the abilities that others do?”
• Replay the simulation game that you played in the
preparation meeting for the new Cub Scout. Now
that everyone is familiar with the limits of the boy
with special needs, this game may have more significance.
• Redo the rap session from the first den orientation
meeting. This time, focus on what each of the boys
can do, including the boy with special needs, and
then focus on who is the best at different activities.
The den leader may have to suggest several things
at which each boy is the best.
Feeling Accepted
in the Pack
For the first pack meeting with a boy with special
needs, the Cubmaster should consider these suggestions:
1. Have the den introduce their new member to the
pack and do a cheer.
2. Use the normal induction ceremony, including
the induction of the boy’s parents, but emphasize
the Law of the Pack and the Cub Scout motto,
particularly “to help other people.”
3. Be sensitive: Try not to embarrass the new Cub
Scout or his family in any way.
Feeling of Competence
“IT’S NOT FAIR!”
It isn’t uncommon for boys or adults to notice
when one boy is getting special treatment. Then, you
might hear the phrase, “It’s not fair!” First, be sure
that all boys are being treated equally—that no one is
being corrected for something that others are not. If
all the boys are being treated equally, then it may be
time for you to choose one or more of the following
activities to do with the individual who is complaining or with the den as a whole.
• Discuss the concepts of fair versus equal. “Fair”
means that the needs of everyone in the den are
being met. Because those needs are not the same,
treatment is not the same. Ask whether adults in
their family get more on their plates at dinner than
they do. Why is that? Would it be fair to expect
everyone to eat as much as the adults do? When
someone is sick in the family and has to have supper in bed instead of with the family, would it be
fair to make everyone have supper in bed? Ask the
boys to come up with another example. End the
Every boy should feel “I can do that!” when each
project is presented to him. Often, a boy with special
needs hasn’t had that feeling before. Because the Cub
Scout program is flexible and based on the idea of a
boy doing his best, it is important to consider every
boy’s abilities and modify activities or advancement
requirements when necessary. Each boy should feel
challenged but not feel that anything is beyond his
capabilities. Meeting the challenge will build a sense
of competence.
It is important for all concerned to consider how
complete the activity is rather than how incomplete
it is. No boy’s level of achievement should be used
as a measuring stick for any other boy. Celebration
needs to occur when improvement has been made
or when it has been determined that a boy has done
his best.
Cub Scouts With Special Needs
7–3
ADAPTING ACHIEVEMENTS
The Cub Scout Leader Book has directions for the
Cubmaster and pack committee on how to substitute
requirements for an achievement. When modifying
an achievement, consider these things:
• It is imperative that boys feel that they are working and earning achievements. An achievement
should not be modified so much that boys feel it
is being given to them.
• Consider reducing the number of repetitions of a
particular activity.
• Substitute an activity that will be a stretch for the
boy but still within his capabilities.
• If the boy can’t physically do the activity itself, can
he teach or lead someone else through the activity?
• If applicable, consider substituting dictation for writing.
• Allow for extra time for completion.
or for a “personal best” rather than competing against
other boys can be a good way to enable everyone to
be a winner.
There are many ways to adapt games. For example, if a game involves throwing a paper airplane but
making the airplane is too complicated, substitute
throwing a piece of paper wadded up into a ball. If a
game involves running a short distance and one boy
can’t run, perhaps he can use his arms to move from
one point to another, much like a soldier in the field.
Perhaps all the boys could do this. Consider ways,
for instance, that a boy in a wheelchair can mimic
the actions of a boy on a bike or running. Choosing
games carefully and adapting them can make this
part of Cub Scouting fun for all.
ADAPTING CRAFTS
In addition to altering achievements, you may
have to adapt some crafts.
• Some part of the project may need to be precut for
ease of construction. For some boys it is best to put
“their” materials in a bag so that they know whose
is whose. If that is the case, use bags for every boy
in the den. This can be a subtle way to ensure that
some boys get a bag with more of the preconstruction done for them.
• Keeping instructions simple and few in number
will help those boys who have trouble focusing or
retaining information. Crafts that take a long time
to complete should be divided up into several
short tasks for such boys.
• It may be necessary to allow additional time for
some boys to finish a project (perhaps at home or
after the meeting) while the rest of the den moves
on to something else.
• Some crafts may require an adult to help the Cub
Scout with special needs in addition to the help he
will receive from his “buddy of the week.”
ADAPTING GAMES
Games can be a problem for boys with special
needs, but you can adapt them with great success.
Sometimes, helping a boy merely means clarifying
directions. Perhaps the rules need to be simplified
so that all boys can easily understand them. Often,
a “practice game” helps clarify the rules and cement
the order of play for boys who have trouble with
retaining auditory directions. Some boys will need
to see written directions. Competing against a clock
7–4
Cub Scouts With Special Needs
ADAPTING SKITS
Skits should include everyone. When planning
them, be sure that everyone in the den has a significant part. Remind boys that announcers and narrators are important. So are the people who do special
effects, sounds, and lighting. Make sure that everyone rotates through these positions so that everyone
has his time behind and on stage.
When writing skits, don’t overlook the contributions that can be made by boys who have trouble
maintaining focus. Because they pay attention to
everything at once, they often associate two things
that are wildly different from each other—which can
be the basis for skit humor.
ADAPTING THE DEN MEETING
Structuring the den meeting with the Cub Scout
with special needs in mind may help him be more
successful in the den. Boys who have trouble paying
attention thrive when activities change frequent-
ly—particularly when an “active” game or activity
follows a “quiet” one. If a boy still needs additional
activity, ask him to run little errands—go and get
the glue, etc. A den leader should always have an
extra activity ready for those days when the planned
activities have been exhausted.
Feeling of Self-Satisfaction
Every boy wants to be proud of his achievement.
Advancement and achievement may be especially
important to the boy with special needs—he wants to
feel he did it just like everyone else. Often, these boys
are not able to master an activity at the same level of
others in the den, but they are able to improve. The
best way for them and the den leader to see improvement is to measure it.
When introducing a new activity, ask all the boys
to do their best to accomplish it without any instruction. Make a chart. Measure the activity in some
way. Maybe there is a written comment, a picture is
taken, or a number of repetitions is noted. Then give
the instruction and set goals for each boy based on
their ability. Do the activity again. Measure again.
Celebrate improvement with a cheer, a pat on the
back, or something tangible. Reevaluate the goals:
Were they set too high for some? Too low for others?
Repeat the activity. Measure. Celebrate any improvement. When the boys have reached their goal, or
when it has been determined that a boy has done his
best, declare the activity completed and celebrate
immediately. Advancement recognition for all boys
should occur as soon as possible.
Kim’s Game
Materials: Bag, variety of objects familiar to the
boys
Place all the objects into the bag out of sight of
the boys. Allow each of them to place their hand in
the bag without looking and feel each of the objects.
They should then write down or whisper to the game
leader all the things they can remember.
Don’t Eat Pete
Materials: Sheet of construction paper divided
into nine equal spaces, nine wrapped candies that
will fit in the game spaces
Each boy takes a turn leaving the room while the
rest decide which candy will be “Pete.” When the
Cub Scout returns, he chooses a candy, by touching
it, to eat—hoping it isn’t “Pete.” If it is, the rest of the
den will shout, “Don’t eat Pete!” If it isn’t “Pete,” he
is allowed to eat the candy.
What Is That Sound?
This is a good game to play outdoors or as a night
hike. All members of the den should close their eyes
and be silent for 2 minutes. At the end of that time,
they should write down or whisper to a leader all
that they heard and could identify.
Ball Wrestle
Special Activities
Careful planning, choosing appropriate activities,
and adapting them when necessary should create
an atmosphere in the den in which all members are
successful. The following activities are grouped by
specific disabilities, but consider using one from a
different category if you know your boys and think it
will work. It is hoped that these suggestions will help
you learn how to create and adapt other games and
crafts to introduce to the den. These tested activities
have been enjoyed by all boys—not just those with
disabilities.
FOR BOYS WHO HAVE
VISION IMPAIRMENTS
Choose activities that don’t require sight. Since
every boy likes a mystery, why not try one of these?
Materials: Basketball, blindfold
Two boys kneel facing each other with a basketball
between them. (The boy whose vision is not impaired
should wear a blindfold.) They place one hand on the
ball and the other behind their backs. The object of
the game is to wrestle the ball away from the opponent and stand with the ball held overhead in one
hand. If no one wins in 2 minutes, declare the game
a draw.
Cub Scouts With Special Needs
7–5
FOR BOYS WHO ARE
EMOTIONALLY DISTURBED
Making a Paper Airplane
Fold 81⁄2˝ x 11˝ paper lengthwise
Choose one of the noncompetitive games found
in the “Games” chapter of this book, or have boys
compete for a personal best rather than against one
another. Choose crafts that are process-oriented rather than achievement-oriented.
Fold both front edges
Flying Bat
Then both again
Materials: Box, black paper for paper airplanes
Cut a hole in a box and decorate the exterior as
a cave. Each boy makes a paper airplane out of the
black paper and then throws his “bat” into the bat
cave. Allow each contestant as many turns as time
allows.
Line up edges
Roll the Marble
Then fold again
Materials: Shoe box, five marbles per boy
Take the lid off a shoe box and turn it upside
down. Cut two or three “doors” in one of the long
sides. Boys shoot their marbles through the doors.
Allow as many turns as time permits.
Variation: Increase the distance, reduce the number of doors, or use marbles of different sizes.
FOR BOYS WHO ARE AUTISTIC
• Choose games and activities that have simple
directions and can be completed in a short amount
of time.
• Clearly and simply state the directions several
times.
• Many autistic children are very artistic and can
complete detailed artwork.
• Present all the steps to a project as an overview,
and then allow the den to work on the project one
step at a time. It is important to the autistic boy to
know what is coming next.
Ring Toss
Materials: Washers or plastic rings, pan for the
target
Toss the washer or plastic ring into the target.
Score one point for each successful attempt.
FOR BOYS WHO HAVE LIMITED
MOVEMENT
Choose activities that keep participants in a small
area.
Tin Can Bowling
Fly the Airplane
Materials: Wire coat hanger, paper for paper
airplanes
Each boy makes a paper airplane. Create a target
for the airplanes by stretching the hanger into a circle
and hanging it at the boys’ chest level. The object is
to throw the airplane through the hoop. To vary the
game, change the height or swing the target from side
to side.
Materials: 48-oz. empty can with lid cut off, one
per team; rubber ball, one per team
Place the empty can against a wall on its side with
the open side toward the players. Two teams stand
12 to 15 feet away from the can. Each team member
7–6
Cub Scouts With Special Needs
bowls or rolls the ball toward the can. The object
is to get the ball to stay inside the can rather than
bouncing back out. Score one point for each successful attempt.
Pass It
Materials: One lemon per team, small paper cup
per player
FOR BOYS WHO HAVE BREATHING
DIFFICULTIES
Choose indoor activities involving little or no
physical activity.
Bean Jacks
Materials: 20 dried beans per boy
Balance the lemon on the small paper cup. Without
dropping the lemon, transfer it to the next boy’s paper
cup. If dropped, pick up the lemon at that place in
line. The first team to transfer the lemon to the back
of the line wins.
Arrange the beans in a single layer on a table or the
floor. Each boy picks up one bean with his left hand,
transfers it to his right hand, and with his right hand,
places the bean on the back of his left hand. Repeat
until one bean falls off.
FOR BOYS WHO HAVE DOWN
SYNDROME
Toothpicks and Peanuts
Choose games that don’t require
much coordination or energy.
Clothespins in a Bottle
Materials: Narrow-mouthed
jar, five clothespins per team
Place a narrow-mouthed
jar on the floor. Boys hold
a clothespin at chin level
and drop it into the bottle. It
looks like it won’t fit, but it
will! The team with the most
clothespins making it into
the bottle wins. The leader
keeps the cumulative score.
As this is not a race, each boy
can have the time he needs.
Leaf Prints
Materials: Variety of leaves,
thin paper, crayons or soft pencils
Place thin paper on top of a leaf that has been
placed vein side up. Using a crayon or soft pencil,
color over the leaf so that the veins of the leaf are visible. Repeat using other leaves and colors.
Materials: Toothpicks, plastic foam peanut packing material
Using toothpicks to join the peanuts, allow the
boys to make anything they want. This makes a mess,
but boys love it. To make this craft a game, challenge
boys to create an animal, an invention, or whatever
fits the monthly theme. Judge the entries and give
prizes. Every boy should get a prize. To vary the
activity, use glue and craft sticks.
FOR BOYS WHO HAVE ATTENTION
DEFICIT DISORDER
Most of the time boys with attention deficit disorder merely need more time to process the directions
to a game or art project. Demonstrating the game or
art project can be very helpful because of the additional processing time that demonstration allows.
Divide the directions up into steps and let each step
“register” before moving on. Limit the number of
directions given at one time.
Egg Carton Paper Clip Drop
Materials: Egg carton per team, paper clip per boy
Open the egg carton and write a number at the bottom of each cup so that it is visible. Give each boy a
paper clip and line the teams up at the opposite side
of the room. Each boy runs to the egg carton, holds
the paper clip at nose level, and drops it into one of
the egg carton cups. If the paper clip bounces out, he
should pick it up and try again until the paper clip
stays in a cup. The leader records his score. The boy
then runs back to his team and tags the next player.
Cub Scouts With Special Needs
7–7
Splatter Painting
Materials: Tempera or acrylic paint, old toothbrush per boy, plastic gloves, paper or object to be
painted
This is a great way to decorate many things: a
painted box or bookshelf, paper to be folded for note
cards or invitations, etc. The boy dips the bristles of
the toothbrush in the paint and rubs his thumb across
the bristles (wearing the gloves) so that the paint
splatters onto the object. Use single colors or lots of
colors for different effects.
FOR BOYS WHO HAVE
ATTENTION DEFICIT DISORDER
WITH HYPERACTIVITY
In addition to having the problems that boys with
attention deficit disorder have, these boys are unusually active. The key to helping them is switching
activities often.
Cup Stacking
Materials: Lots of small paper
cups per boy
Challenge the boys to build a
tower of paper cups with only one
cup as the base. The tallest standing tower wins. The trick is to place
cups alternately on their top and
then their bottom.
Give the boys several cardboard tubes to make
a marble maze with. They will need to tape them
together or cut some of the longer ones for corner
pieces. When their maze is completed, they can use
the chair and several books for support so that the
beginning of the maze can be elevated. Then let the
good times roll!
FOR BOYS WHO HAVE
HEARING IMPAIRMENTS
Boys with hearing impairments can play most
games. Depending on the severity of the impairment,
however, the leader may have to help them keep
track of the game.
Hat Pantomime
Materials: Slips of paper with directions written
on them, hat
Write directions on slips of paper such as “Wash
the dog,” “Buckle your seat belt,” “Take out the
garbage,” or “Do your homework.” Place them in a
hat. Boys take turns drawing one out of the hat and
pantomiming the action for the rest of the group.
The player who guesses first what the boy is doing
is next.
Doughnuts on a String
Fill the Basket
Materials: Large basket or other
container, as many balls as possible
This is a den–against–den leader game. Boys unite
and try to fill the basket by throwing the balls into
it. The leader tries to keep the container empty by
tossing the balls as far away as possible. The winner
is determined by where the majority of the balls are
located after a given time period.
FOR BOYS WHO ARE
GIFTED AND TALENTED
These boys will need enrichment activities to keep
them interested because they finish projects quickly.
Marble Mazes
Materials: Assorted cardboard tubes (from toilet
paper or paper towels, etc.), tape, chair, several
books, marbles
7–8
Cub Scouts With Special Needs
Materials: Doughnut, string, broom, two chairs
Tie a doughnut onto a string. Suspend it from a
broom handle and attach the broom handle across
the backs of two chairs. With their hands behind
their backs, boys must get down on their knees and
try to eat the doughnut.
FOR BOYS WHO HAVE
MEMORY PROBLEMS
FOR BOYS WHO HAVE
LIMITED VITALITY
Be sure to write down directions to all activities
so that boys with memory problems can refer back
to them.
Boys with limited vitality do best with short activities and need frequent breaks.
Marble Croquet
Alphabet Scavenger Hunt
Materials: Paper with alphabet listed vertically,
pencils
Materials: Paper clip for each boy, marble for
each boy (preferably different colors), plastic centers from pizza delivery boxes
Each boy has a pencil and specially prepared
paper. Assign them a designated area of the room or
outdoor area. Ask them to write down the names of
things they see next to the appropriate first letter of
the object. Example: A—apple.
Each boy bends his paper clip to form a miniature croquet club. Use the plastic centers from pizza
delivery boxes to make wickets for the course. Each
boy can use his club to move the marble through the
course.
Leather Neckerchief Slide
Earth, Water, Air, and Fire
Materials:
Scraps of leather
Hammer
Plastic ring
Materials: Beanbag
Leather stamps
Glue
Markers or leather stain
Provide several leather stamps for boys. Let them
choose a piece of leather and stamp their desired
design on it. They can color it with markers or stain
it with leather stain. When finished, they can attach
a ring to the back with glue.
Boys sit in a circle with one boy in the center
holding a beanbag. He throws the bag at someone
and shouts “earth,” “water,” “air,” or “fire.” If it is
“earth,” the chosen boy must reply with the name of
an animal before the boy in the center can count to
10. If it is “water,” he must think of a fish; if “air,”
a bird; and if “fire,” he must whistle for the fire
engine. Once a creature has been named, it may not
be named again. If a boy can’t reply with a new item
in time, he changes places with the thrower.
Cub Scouts With Special Needs
7–9
7–10
Cub Scouts With Special Needs
R
RESOURCES
Resources–0
RESOURCES, FORMS,
AND APPLICATIONS
* Items with an asterisk are available at www.scouting.org/cubscouts.
† Items with a dagger symbol are available at www.scoutstuff.org or at your local Scout shop.
( Items with a star are available at www.myscouting.org or through local council training.
Den and Pack Management
Training
Annual Health and Medical Record, No. 680-001WB *
BALOO (Basic Adult Leader Outdoor Orientation),
No. 34162 (
Cub Scout Den Record, No. 33828 *
Cub Scout Leader Book, No. 33221 †
Den Chief Handbook, No. 33211 †
Individual Cub Scout Record, No. 33827 *
Cub Scout Fast Start (
Cub Scout Leader Specific Training, No. 34875 †(
Cub Scout Leader Training Poster Set, No. 34876 †
Individual Tiger Cub Record *
Cub Scout/Boy Scout Fast Start Training DVD,
AV-01DVD22 †
Meeting Place Inspection Checklist, No. 6140 *
Den Chief Training Conference, No. 34450 †
Monthly Den Dues Envelope, No. 34209 †
How Do I Rate as an Effective Leader? *
Pack Overnighter Site Approval Form, No. 13-508 *
Safe Swim Defense, No. 34370 †(
Pack Record Book, No. 33819 †
This Is Scouting, No. 36118 *†(
Tiger Cub Attendance and Dues *
Youth Protection Guidelines: Training for Volunteer
Leaders and Parents, No. 36121 *†(
Tiger Cub Den Record *
Webelos Den Record, No. 33850 *
Uniforming
Adult Leader Uniform Inspection Sheet, No. 34048 *†
Cub Scout Leader Specific Training, No. 34875 †
Cub Scout Leader Training Poster Set, No. 34876 †
Membership Recruiting
and Leadership Selection
Adult Registration Application, No. 524-501; in
Spanish, No. 524-502 *†
Cub Scouting and Your Family, No. 34362 *
Family Talent Survey Sheet *
Cub Scout Leader Specific Training Video,
AV01-V013 (
Family Information Letter Samples (5) *
Insignia Guide, No. 33066 †
Leadership Transfer Notice, No. 28-401 *
Tiger Cub Scout, Wolf Cub Scout, and Bear Cub
Scout Uniform Inspection Sheet, No. 34282 *†
Selecting Cub Scout Leadership, No. 522-500 *
Webelos Scout Uniform Inspection Sheet, No. 34635 *†
Youth Application, No. 524-406; in Spanish,
No. 28-110 *
Resources–1
Advancement
Cub Scout Grand Prix Pinewood Derby Guidebook,
No. 33721 †
Activity Badge Pocket Certificate, No. 33423 †
Cub Scouting’s Leave No Trace Awareness Award *
Advancement Report, No. 34403 *†
Cub Scout Leader How-To Book, No. 33832 †
Arrow of Light Pocket Certificate, No. 34219 †
Cub Scout Magic, No. 33210 †
Arrow Point Pocket Certificate, No. 34233 †
Cub Scout Outdoor Activity Award *
Bear Cub Scout Pocket Certificate, No. 34221 †
Cub Scout Songbook, No. 33222 †
Bear Handbook, No. 33451 †
Cub Scout/Webelos Scout Outdoor Program Guide *†
Bobcat Pocket Certificate, No. 34218 †
Cub Scouting’s BSA Family Activity Book, No. 33012 †
Cub Scout (Den) Advancement Chart, No. 34192 †
Den & Pack Meeting Resource Guide, No. 33490 †
Cub Scout Cycle, No. 13-027 *
Den Chief Handbook, No. 33211 †
Cub Scout Immediate Recognition Kit, No. 17018 †
Den Chief Training Conference, No. 33450 †
Cub Scout Insignia Stickers—Large, No. 34650 †
Fun for the Family, No. 33012 †
Den Advancement Report, No. 33847 *
Group Meeting Sparklers, No. 33122 †
Pack Graduation Certificate, No. 609233 †
Guide to Safe Scouting, No. 34416 *†
Tiger Cub Den Advancement Report *
Individual Campout Checklist for Pack Overnighter *
Tiger Cub Handbook, No. 34713 †
Informed Consent Agreement (Permission Slip) *
Tiger Cub Advancement Chart, No. 34715 †
National Den Award *
Tiger Cub Individual Advancement Record *
National Standards for Cub Scout/Boy Scout
Resident Camps, No. 430-108 *
Webelos Compass Points Patch, No. 458 †
Webelos Handbook, No. 33452 †
Webelos Scout (Den) Advancement Chart, No. 34187 †
Wolf Handbook, No. 33450 †
Wolf Cub Scout Pocket Certificate, No. 34220 †
National Standards for Local Council Accreditation
of Cub Scout/Webelos Scout Day Camps for Precamp
and Operational Accreditation, No. 430-109 *
National Standards for Council-Organized Family
Camps, No. 430-408 *
National Summertime Pack Award, No. 33748 *†
Program Planning
Outdoor Code Poster (big prints), No. 33689 †
Pack Meeting Planning Sheet *
BALOO (Basic Adult Leader Outdoor Orientation),
No. 34162 †H
Pack Program Planning Chart, No. 26-004 *
BSA Cub Scout World Conservation Award *
Resident Camping for Cub Scouts, Webelos Scouts,
and Parents, No. 13-33814 *
Buddy Tags, No. 1595 †
Campfire Program Planner, No. 33696 *†
Centennial Quality Unit Award, No. 14-190 *
Climb On Safely, No. 430-099 *†(
Cub Scout Academics and Sports Program Guide,
No. 34299 †
Cub Scout Ceremonies for Dens and Packs, No. 33212 †
Cub Scout Day Camp, No. 13-33815 *
Cub Scout Den Meeting Program, No. 33826 *
Safe Swim Defense, No. 34370 †
Tiger Cub Den Meeting Program *
Tiger Cub Handbook, No. 34713 †
Tour Planning Checklist, No. 680-014 *
Unit Money-Earning Application, No. 34427 *†
Webelos Den Meeting Program, No. 33852 *
Webelos Leader Guide, No. 33853 †
Webelos Scout Overnight Checklist *
Your Flag, No. 33188 †
Resources–2
Recognition
Assistant Denner Shoulder Cord, No. 385 †
Cub Scouting for Boys
With Disabilities
BSA Family Award, No. 33710 †
Cub Scout Leader How-To Book, No. 33832 †
BSA Family Award Patch, No. 978 †
A Guide to Working With Scouts With Disabilties,
No. 33056 †
BSA Family Award pins:
Facing Family Challenges, No. 14352 †
Connecting With Your Community, No. 14353 †
Shaping Your Family Identity, No. 14354 †
Developing Personal Skills, No. 14355 †
Building a Family Team, No. 14356 †
Scouting for Youth With Disabilities, No. 34059 *
Cub Scout Academics and Sports Pocket Certificate,
No. 33711 †
Den Chief Badge of Office (cloth), No. 387 †
Den Chief Service Award (certificate), No. 33726 †
Den Chief Service Award (shoulder cord), No. 389 †
Den Chief Shoulder Cord, No. 388 †
Denner Shoulder Cord, No. 368 †
National Den Award Ribbon, No. 17631 †
National Summertime Pack Award pins:
Tiger Cub National Summertime Award pin,
No. 14332 †
Wolf National Summertime Award pin,
No. 14333 †
Bear National Summertime Award pin,
No. 14334 †
Webelos National Summertime Award pin,
No. 14335 †
Pack Leader Appreciation Certificate, No. 33755 †
Progress Record for the Cub Scout Den Leader Award *
Progress Record for the Cub Scouter *
Progress Record for the Cubmaster Award *
Progress Record for the Tiger Cub Den Leader Award *
Progress Record for the Webelos Den Leader Award *
Progress Record for the Pack Trainer *
Safe Swim Defense Certificate, No. 34243 †
Troop Junior Leader Certificate (for den chiefs),
No. 33745 †
Webelos Den Chief Shoulder Cord, No. 457 †
Whittling Chip Certificate, No. 34223 †
Resources–3
I
INDEX
Index
A
“A Ram Sam Sam” (song), 5-39
A-B-C Hike, 4-3
Above and Below, 3-36
Action songs, 5-39
Active games
with equipment, 3-3
without equipment, 3-7
Adaptations for boys with special needs
achievements, 7-4
crafts, 7-4
games, 7-4
skits, 7-4
structuring the den meeting, 7-4
Add-a-Bead Necklace, 1-9
Adhesives, tips for using, 2-4
Advancement aids, 1-2
Advancement board, pack, 1-3
Advancement ceremonies for blue and gold banquet, 6-8
Advancement chart, den, 1-3
“The Adventures of Icky Crane” (story), 5-44
“Ah’ Skit,” 5-33
Akela’s Totem, 1-2
All-derby race day, 6-37
events, 6-37
personnel, 6-37
sample program, 6-37
Alligator, 3-23
All-on-One-Side Volleyball (Bat and Scoot), 3-14
Alphabet Scavenger Hunt, 7-9
Altitude Race, 6-39
Aluminum foil cooking, 4-34
An Appealing Stunt (run-on), 5-48
Anemometer, 4-28
Animal Guessing Game, 3-7
Animal Scramble, 4-23
Animal tracks, plaster casts of, 2-26
Animal, Bird, or Fish, 3-24
Animals, fun with, 4-23
“The Animals’ Christmas Story” (puppet play), 5-24
Ankle Hop, 3-28
Ankle Walk, 3-29
Index–1
Anniversary week activities, 6-2
Ant Farm, Make an, 4-18
Ants on a Log, 4-36
Applaud and Cheer, 5-10
Applause stunts, 5-10
Aquarium, for insects, 4-18
Are They Biting?, 6-38
Are You a Seed Spreader?, 4-6
Arm Lock Wrestle, 3-29
Art Consequences, 3-32
Attracting insects at night, 4-18
Audience participation stories, 5-1
Auto Race, 3-7
Autumn harvest festival, 6-10
Awards From the Heart, 1-5
B
Back to Back, 3-14
Back-to-Back Get Up, 3-30
Backlog Fire, 4-40
Backyard Picnic (skit), 5-35
Baffling Banana, 5-53
Bag of Air Relay, 3-24
Baggage Car Relay, 3-24
Baked Apple, 4-38
Baker’s Clay, 2-21
Balance With Closed Eyes, 3-29
Balancing Bat, 5-55
Balancing Egg, 5-54
Ball games, 3-8
Ball Over, 3-8
Ball Wrestle, 7-5
Balloon Basketball, 3-8
Balloon Battle Royal, 3-3
Balloon Burst Relay, 3-24
Balloon Hammer Throw, 6-17
Balloon Kangaroo Jumping, 3-25
Balloon Kick Relay, 3-25
Balloon on a Spoon Relay, 3-25
Balloon Race, 3-42
Balloon Steeplechase, 3-25
Balloon Sweeping Relay, 3-24
Balloon Volleyball, 6-17
Baloo Finger Puppet, 2-8
Banana Boats, 4-38
Banner Invitation, 6-5
Barefoot Marble Race, 3-25
Bark Rubbing Identification, 4-11
Barnyard Babble. See Noah’s Ark
Base for den doodle or den flag, 1-4
Baseball Applause, 5-10
Basic clay, 2-20
Basic Ingredients (skit), 5-34
Bat and Scoot. See All-on-One-Side Volleyball
Batting Down the Line, 3-14
Be a Bird Detective, 4-20
“Be Kind to Your Web-Footed Friends” (song), 6-15
Beach Bag, 2-19
Bead Craft Flag, 2-27
Bean Jacks, 7-7
Beanbag Relay, 3-25
Beanbag Snatch (or Steal the Bacon), 3-4
Bear in the Pit, 3-7
Bee Feeder, Make a, 4-19
“Benny the Frog” (story), 5-44
Bicycle games, 3-11
Bicycle inspection, 6-11
Bicycle Ride, 3-29
Bicycle safety course, 6-11
Bicycle safety day, 6-11
The Big Catch (skit), 5-33
A Big Hand, 5-10
“The Big Turkey Hunt”
(audience participation), 5-7
Bike Relay, 3-12
Bird Brush, 4-21
Bird Cake, 4-21
Bird Caller, 4-23
Bird feather, examining, 4-22
Bird Feeder Snowman, 4-22
Bird feeders
keeping them safe, 4-20
pictured, 4-20
Bird Treat Tower, 4-21
Bird, Beast, or Fish, 3-36
Bird’s Delight, 4-21
Birds
calling, 4-23
feeding, 4-20
fun with, 4-20
identifying, 4-20
Blanket Ball, 3-15
Blast Off!, 3-4
Blindfolded Obstacle Course, 6-14
Block Printing, 2-15
Block Puzzles, 5-25
Blowball, 3-32
Blue and gold banquet, 6-3
Blue and Gold Ceremonies, 6-7
Blue and Gold Grace and Invocations, 6-7
Blue and Gold Mints, 6-4
Blue and Gold Opening Ceremony, 6-8
Blue and Gold Skits, 6-8
“Bobby Wants to Be a Cub Scout”
(audience participation), 5-2
Body Tag, 3-15
Bookends, 2-34
Bookmark (leather), 2-31
“Boom Chicka Boom” (song), 5-38
Bounce, 3-23
Bow and Arrow Applause, 5-10
Bowling Pin Cubby, 1-5
Box Hockey, 3-38
Boy behavior, 1-12
and boys with special needs, 7-3
two-deep leadership, 1-12
The Boy With Green Hair, 4-9
Boys’ Life Bags, 3-35
Braided Tie Slide, 2-31
Bravissimo Applause, 5-10
Bread Modeling Clay, 2-21
Breakfast in an Orange, 4-37
Breathing Trees, 4-10
Bridges, 1-6
Bronco Riding, 6-24
Broomstick Twist, 3-29
Broomstick Wrestle, 3-29
Bucket Brigade Relay, 3-26
Bucketball, 3-8
Buddy Burner, 4-33
Buffalo Wheel, 6-24
Bug Pit, 4-17
Bug Trap, 4-17
Bugs. See insects
Bundle Relay, 3-26
Busy Hands Keepsake, 2-21
Butterfly, watch it grow, 4-19
Buzz-Fizz, 3-36
Index–2
C
Cajun Crab Walk, 6-19
Calendar Pitch, 3-33
California Raisin Toss, 6-20
Call Soccer, 3-8
Calling birds, 4-23
Camouflage Trail, 4-4
Campfire songs, 5-39
Campfires
building, 4-39
fun with, 4-39
Four S’s for Successful, 4-40
planning, 4-39
Camping equipment
other equipment, 4-31
sleeping bags, 4-31
tents, 4-31
Camping, 4-30
setting up camp, 4-31
where to camp, 4-31
Campsite, selecting, 4-31
Can You Be Things Together?, 3-19
Can You Clean the Water?, 4-16
Candle Blow, 5-56
Candle Making, 2-23
safety rules, 2-23
Capture the Flag, 6-23
Car and Driver, 3-15
“Car Trouble” (audience participation), 5-2
Card Toss, 3-33
Cardboard box puppets, 5-19
Cardboard cylinder
masks, 5-32
puppets, 5-19
Cardboard medal, 1-6
Career Arrow, 1-8
Carnival Games, 6-19
Casting Relay, 3-26
Cat’s Tail, 3-4
Catapult Glider, 2-9
Catch the Dragon’s Tail, 3-16
Caterpillar Race, 3-26
Celebrities, 3-33
Ceremony Board, Two-Way, 1-2
Ceremony Ladder, 1-2
Certificates, 1-13
Index–3
Chain Dodge Ball, 3-9
Chain Tag, 3-16
Champion Applause, 5-10
Change Cars, 3-4
Chants, 5-38
Charades, 5-28
Charcoal Chimney, 4-33
Chaser and Runner, 3-15
Checker Hockey, 3-33
Cheers, 5-10
Cheese Grater Applause, 5-10
Chess Set, Nuts and Bolts, 2-30
Chicago Windy City Blow, 6-19
Chuck Wagon Contest, 6-24
Circle Baseball, 3-9
Circle Hop, 3-29
“Clancy to the Rescue” (audience participation), 5-6
Clay
Aliens, 2-22
Magnets, 2-22
Menorah, 2-21
Neckerchief slides, 2-38
ornaments, 2-22
Clay Crafts and Modeling, 2-20
Clay Snake Neckerchief Tie Slide, 2-38
“Clementine” variations, 5-40
Clip It, 3-32
Closing Thought (blue and gold), 6-8
Clothespin Ring Toss, 3-35
Clothespins in a Bottle, 7-7
Coasting Race, 3-12
Coconut Clappers, 5-42
Code of Conduct, 1-12
Coin Through the Head, 5-50
Collecting
insects, 4-17
leaves, 4-11
rocks and minerals, 4-14
seeds, 4-16
shells, 4-16
Compass Applause, 5-10
Composting in the woods, 4-13
Conduct Candle, 1-13
Conestoga Derby Wagon, 6-26
Conservation day, 6-12
Conservation Good Turn, 6-12
Constellation Pictures, 4-26
Cookie Applause, 5-10
Cooking fires, 4-34
Cookout, planning, 4-35
Cootie, 3-33
Cork Hot Plate/Trivet, 2-33
Cork Retrieve, 3-43
Corn-Shucking Contest, 6-11
Cornstarch/Baking Soda Clay, 2-21
Costumes for skits, 5-29
Costumes
cowboy, 5-30
space suit, 5-30
robot, 5-30
Council Fire Lay, 4-39
Cub-anapolis 400, 6-18
Cubbys, 1-4–5
Cubmaster’s minute, 1-1
Cubmaster’s Minute Closing (disabilities awareness
day), 6-14
Cubmobile derby, 6-33
Cubmobile specs and parts, 6-35
personnel and procedures, 6-33
publicity for, 6-35
running, 6-34
sample program, 6-34
starting ramp for, 6-34
track for, 6-34
Cup Holder, 2-19
Cup Stacking, 7-8
Count the Colors Hike, 4-3
Countdown Christmas Tree, 2-35
Counting Tree Rings, 4-10
Coup Stick, 1-14
Cover the Chair, 3-4
Cow Chorus Cheer, 5-10
Coyote Applause, 5-10
Crab Relay, 3-26
Crab Walk, 3-29
Craft foam masks, 5-33
Craft Stick Picture Frame, 2-33
Crafts
helping boys with, 2-1
paper, 2-8
resources, 2-2
safety rules, 2-6
teaching to Cub Scouts, 2-1
theme, 2-5
using salvage for, 2-3
why we use, 2-1
wire, bead, and plastic, 2-16
Crazy Artist, 3-33
Crazy Bone, 3-33
Cross the Pond, 6-38
Crows and Cranes, 3-7
Crushed Ice Candle, 2-24
Cub Scout field day, 6-15
events for, 6-16
rainy-day field day, 6-17
sample program for, 6-15
Cub Scout Prayer, 6-7
Cutting Board, 2-34
Cymbals, 5-42
D
Dark, Isn’t It?, 5-8
Decorated Tree Hotel, 4-22
Deep Bow, 3-29
Defenders and Invaders, 3-4
Den advancement chart, 7-3
Den Cake Centerpiece (blue and gold), 6-5
Den Chief, 1-12
Den doodles, 1-3
base for, 1-4
Den flags, 1-3
base for, 1-4
Den games, 3-3
Den leader’s minute
definition of, 1-1
examples of, 1-1
Den meeting structure, 1-12
Den yells, 5-11
Derbies and Regattas, 6-26
Denver Mile High Cookie Stack, 6-19
Detectives, 3-36
“Dino Drama” (song), 5-39
Dipped Candles, 2-23
Disabilities awareness day, 6-14
Index–4
Disabilities. See special needs
The Disappearing Coin, 5-50
Disappearing Knot, 5-56
Disappearing Pencil, 5-57
Disappearing Water, 5-57
Discipline. See boy behavior
Discus, 6-16
Dishwashing (outdoors), 4-35
Disk Football, 3-5
Dizzy, 3-29
Do Leaves Need Sunlight?, 4-10
Do This, Do That, 3-36
Dodge Ball, 3-9
Don’t Eat Pete, 7-5
Doughnuts on a String, 7-8
Drugstore wrap for foil cooking, 4-34
Dutch Shoe Relay, 3-26
E
Earth Ball, 6-23
Earth, Water, Air, and Fire, 7-9
Eat Like a Squirrel, 4-24
Echo songs, 5-38
Egg Carton Paper Clip Drop, 7-7
Egg Cup Fire Starter, 4-33
Eggroll Relay, 6-17
Eggs on a Raft, 4-37
Elbow Tag, 3-16
Elbow, Fruit, Hop, 3-16
Electric Den Chief, 5-57
Electric Squeeze, 3-36
Elephant Neckerchief Slide, 2-37
Energy Savers (skit), 5-35
Energy Storage Systems, 4-6
Enlarging patterns, 2-6
Equipment for games, 3-2
Erosion Experiment, 4-13
Exchanges, 3-23
The Expanding Hole, 5-49
Expectations and boy behavior, 1-12
F
Family cake bake, 6-21
judging, 6-22
rules for, 6-21
Family camping, defined, 4-30
Index–5
Feather Blow Relay, 6-17
Feather Race, 6-17
Feeding birds, 4-20
50-Yard Cup Hop, 6-17
Fill the Basket, 7-8
Find the Leader, 3-16
Finger Puppets, 5-21
Finishing wood projects, 2-33
Fire Bug. See Trench Candle Fire Starter
Fire in a Lid, 4-34
Fire lays, 4-39
“Fire Safety Story” (audience participation), 5-5
Fire starters
Buddy Burner, 4-33
Egg Cup, 4-33
Match Bundle, 4-33
Trench Candle, 4-32
Fires
cooking, 4-34
outdoor, 4-32
campfires, 4-39
building, 4-32
First Aid Kit Neckerchief Slide, 2-38
First Den Orientation, 7-1
Fishing derby, 6-37
contests for, 6-38
sample program, 6-38
Fishing, about, 4-15
Fishpond Games, 38
Fitness Champs (skit), 5-34
Fitness Circle Game, 3-29
“Five Days of Camp” (song), 5-40
Five Dots, 3-34
Five Hundred, 3-9
Flapjack Applause, 5-10
Flip That Cup, 5-57
Floating Ball, 5-56
Florida Orange Peel, 6-19
Fly the Airplane, 7-6
Flying Bat, 7-6
Flying Disks, 3-5
Foil-Cup Egg, 4-37
Food packing tips, 4-35
Foot-Put, 6-16
Forehead Squeeze Relay, 3-16
Fox and Chickens, 3-7
Fox and Geese, 3-44
Fox Hunting, 3-44
Frankfurter Applause, 5-10
Frayed Nerve, 2-16
“Frog Chant,” 5-39
Frog Handstand, 3-30
Frog Hop, 3-30
Frog in the Sea, 3-42
Frog Raft, 4-16
Fruit flies, observing, 4-19
Fruit Kabobs, 4-38
Fumble Fingers Relay, 3-26
“Fun in Scouting” (song), 5-40
G
Games
checklist, 3-11
choosing “It” and teams, 3-1
den games, 3-1
equipment for, 3-1
fitting to themes, 3-1
how to choose, 3-1
pack games, 3-3
reflecting after, 3-1
suggestions for leading, 3-1
why we use them, 3-1
Gardening, 3-37
Georgia Peanut Relay, 6-19
Germinating Seeds, 4-6
Get to Know a Tree, 4-11
Giant Beehive Cheer, 5-10
Giant Shot Put, 6-17
“The Gift of Trees” (story), 5-44
Giraffe Applause, 5-10
Giveaway Tag, 3-17
Glove and mitten puppets, 5-20
Glove Bunny Puppet, 5-20
Glove Finger Puppets, 5-21
Good Turn Applause, 5-10
Good Turn ideas for conservation day, 6-13
Grab Bag, 4-4
Grab It, 3-34
Grace and invocations for
blue and gold banquet, 6-7
Graduation Plaque, 1-9
Grand Salute Applause, 5-10
The Great Pumpkin Race, 4-9
Grill on the Ground, 4-34
Grilled Corn on the Cob, 4-36
Group Juggle, 3-17
Group participation, importance of (a poem), 5-1
Group Stand-Up, 3-18
Guessing Game, 6-38
Gum-Glove Relay, 3-26
H
Ha, Ha, Ha, 3-37
Hand Badminton, 3-39
Hand Puppet Stages and Theaters, 5-13
Hand Push, 3-30
Hand Tools for Woodworking, 2-32
Hand Wrestle, 3-30
Handkerchief Applause, 5-10
Handkerchief Trick, 5-56
The Handy Plastic Bag, 4-35
Handy Tote Box, 2-7
Hang Glider, 2-12
“Happy Birthday to Us!” (blue and gold skit), 6-9
Harbor Master, 3-18
Hat Pantomime, 7-8
Hatch a Batch of Eggs, 4-25
Hat-Making Booth, 6-20
Hawk Dive, 3-30
Heads-Tails Hike, 4-3
Health and safety, outdoors, 4-1
Health and Strength (grace), 6-7
Heart Puzzle, 5-26
Hearty Hot Dog Special, 4-36
Heel Click, 3-30
Heel-to-Toe Foot Race, 6-17
Helicopter Wing, 2-10
Helping boys with crafts, 2-1
Hiker’s Birdseed, 4-38
Hiker’s Gorp, 4-38
Hiking games, 4-4
History Stump, 4-10
Hit the Bat, 3-9
Hitting the Target, 3-12
Hog-Calling Contest, 6-11
Holiday Jigsaw Puzzle, 5-25
Homemade games, 3-38
Homemade Ring Toss, 3-40
Index–6
Hop and Turn, 3-30
Hopping—Cross Feet, 3-30
Hot Chocolate River, 3-18
Hot Potato, 3-18
Hot Stuff, 3-18
“The House Where Santa Claus Lives” (audience
participation), 5-6
How Plants Absorb Water, 4-7
How-To Tips
for adhesives, 2-4
for modeling with clay, 2-20
for painting, 2-4
for papier-mâché, 2-13
for printing, 2-14
for wax projects, 2-23
for wire crafts, 2-16
for working with leather, 2-31
for working with metal, 2-27
Human Rocker, 3-30
Humidity Cone, 4-29
Hunter’s Stew, 4-36
I
I Can’t Use This Hand, 6-14
“I Remember Davy” (story), 5-46
I’ve Got a Cold (run-on), 5-48
Ice Cream in a Bag, 4-39
Ice Cube Applause, 5-10
Ice Water Applause, 5-10
Icebreakers, 5-8
ID Game, 4-11
Idaho Potato Toss, 6-19
Immovable, 5-54
In the Pond, 3-19
In the Public Eye, 1-9
Inch Hike, 4-3
Inchworm, 3-31
Indoor Garden in a Tray, 4-8
Indoor Ski Race, 3-5
Initials, 3-37
Insect Aquarium, 4-18
Insect House, 4-18
Insects, fun with, 4-17
Instant Tacos, 4-36
Index–7
Islands, 3-19
It Can’t Be Done, 5-35
It’s All Around Me (run-on), 5-48
It’s in the Bag (run-on), 5-48
Izzy Dizzy Relay, 3-27
J
Javelin Throw, 6-16
“Johnny Appleseed” (grace), 6-24
“Johnny Mix-Up” (audience participation), 5-3
Jokes, 5-48
Juggler Toss, 3-34
Just Fishin’, 6-38
K
Kaa Paper Hanger, 2-8
Kabobs, 4-36
Kazoo, 5-42
Keep-Away, 3-43
Key Chain (leather), 2-31
Kick Ball, 3-9
Kim’s Game, 3-34, 7-5
for boys with vision impairment, 7-5
Nature, 4-4
Sight, 3-34
Smell, 3-34
Touch, 3-34
Kitchen Solar System, 4-27
Kite derby, 6-38
contests for, 6-39
entry requirements, 6-39
judging, 6-39
sample program, 6-39
Kite Messenger, 2-12
Kite-flying safety rules, 2-10
Knee Dip, 3-30
Knee Slapping Applause, 5-10
Kneel Stand, 3-31
“Knights of Yore” (puppet play), 5-23
Knock-Knock Jokes, 5-49
Knots, 3-19
Know Your Leaf, 4-4
Know Your Rock, 4-4
Kwanzaa Mkeka, 2-9
L
M
Lacing leather, 2-31
Lamppost (skit), 5-36
Lantern, Tin Can, 2-28
Laughing Tunes, 5-8
Laundry Grab Bag, 3-17
Leader “Survival” Kit, 1-14
Leader/Boy Relationship, 1-12
Leading games, suggestions for, 3-1
Leaf Collection, 4-11
Leaf Prints, 7-7
Leaf Skeleton, Making a, 4-12
Leapfrog, 3-43
Leaping Salt, 5-56
Leather Neckerchief Slide, 7-9
Leather, vinyl, and felt slides, 2-37
Leather
lacing, 2-31
stamping, 2-31
tooling, 2-30
working with, 2-30
Leaves (plaster), 2-26
Leg Tunnel Relay, 3-27
Leg Wrestle, 3-31
Life Without Sound, 6-14
The Light of Scouting’s History
(blue and gold ceremony), 6-7
Lighting for puppet plays, 5-14
Line Up, 3-19
Line-Up Ball, 3-10
Link Pass, 3-6
Lion Applause, 5-10
Liquid Barometer, 4-29
Listening to a Tree, 4-10
Litter Bag, 6-13
“Litterbugs Beware” (puppet play), 5-22
Live Log, 3-44
Log Cabin on a Bottle, 3-34
Look Sharp, 3-37
Lookie Loos, 6-21
Loose Rope (run-on), 5-48
Lost, what to do if, 4-1
Lucky Handshake, 5-9
Machine Charades, 3-19
Magic Colored Pencil, 5-55
Magic Dust, 5-55
Magic Hat, 5-53
Magic Number, 5-53
Magic Seed, 5-53
Magic Straw, 5-52
Magic tricks, 5-52
Magnetized Spoon, 5-54
Magnets (clay), 2-22
Make a Rainbow, 4-29
“Make New Friends” (song), 5-40
Makeup
aging a character, 5-31
bases, 5-31
classic clown, 5-31
for skits, 5-31
Making a Leaf Skeleton, 4-12
Marble Chop Suey, 3-34
Marble Croquet, 7-9
Marble Golf, 6-21
Marble Jar, 1-13
Marble Mazes, 7-8
Marble Roll Game, 3-39
Marco Polo, 3-44
Masks
cardboard cylinder, 5-32
craft foam, 5-33
decorating, 5-32
paper bag, 5-32
papier-mâché, 2-14
Match Bundle Fire Starter, 4-33
Medals
cardboard, 1-6
metal lid, 1-6
wood, 1-6
“Memories” (story), 5-46
Messenger Race, 6-39
Metal lid medal, 1-6
Metal work, tools for, 2-27
Micro Hike, 4-2
Midnight Snack for Moths, 4-18
Midway activities, 6-20
Milk Carton Bird Feeder, 4-22
Mind Reader, 5-54
Index–8
Mini Shot Put, 6-17
Miniature Golf Course, 6-22
Minnow and Catfish, 3-42
Mitten Duck Puppet, 5-20
Mitten Mutt Puppet, 5-20
Mixer, 5-9
Mixing Plaster, 2-25
Mobiles, 2-18
Möbius Strip, 5-52
Modeling clay recipes, 2-20
Molded Candles, 2-24
Molds for plaster casts
making, 2-25
preparing, 2-25
Money Has Power, 5-55
Monkey in the Middle, 3-10
Moon Flip Book, 4-26
The Moon Is Big and Round, 5-9
Moon Watch, 4-26
Moose Toss, 3-39
Moss Garden, 4-8
Motorcycle Applause, 5-10
Moving Target, 3-41
Mushroom Spore Prints, 4-7
Music in the Trees, 4-11
The Music Makers (skit), 5-37
Musical Bottles, 5-42
Musical instruments, 5-41
Musical Pogo Stick, 5-41
Mysterious Ice Cube, 5-58
Mysterious Money, 5-54
The Mystifying Paper, 5-53
N
Name Acrostics, 5-8
The Name Game, 3-17
Napkin Ring (blue and gold), 6-5
Napkin Rings, Twisted, 2-21
Nature Babies Hike, 4-3
Nature Kim’s Game, 4-4
Nature Noises Hike, 4-3
Nature Photographer, 4-4
Nature Safari Hike, 4-2
Nature Scavenger Hunt, 4-4
Nature Stations, 4-5
Nature’s Cleaners, 4-13
Index–9
Nature’s Layer Cake, 4-12
Neckerchief Invitation (blue and gold), 6-5
Neckerchief Slides, 2-36
Nesting Materials Basket, 4-23
News releases, 1-10
Newsletter, pack, 1-9
Newspaper Ladder, 5-51
Newspaper Race, 3-12
Newspaper Softball, 3-6
Newspaper Tree, 5-52
Night Hike, 4-3
Night sky, fun with the, 4-25
Ninepins, 3-39
No Hands, 3-31
Noah’s Ark (Barnyard Babble), 3-35
Noncompetitive, cooperative,
and team-building games, 3-13
Nose-a-Peanut Race, 3-27
Novelty Walk, 3-31
Number Call-Out, 3-20
Nuts and Bolts Chess Set, 2-30
Nylon Ned, 4-8
O
Obedient Straw, 5-56
Obstacle Slalom Race, 3-12
“Oh, Give Me a Pack” (song), 5-40
Olive Leaf Crown, 6-16
Omelet in a Bag, 4-37
One o’Cat, 3-10
100-Yard Dash (kite-flying contest), 6-39
100-Yard Relay, 6-16
One-Pitch Softball, 3-10
One-String Bass, 5-41
The Operation (skit), 5-35
“The Origin of the Pleiades:
A Cherokee Legend” (story), 5-43
Ornaments
clay, 2-22
tin, 2-29
Out of Reach, 5-55
Outdoor Code Responsive Reading Ceremony, 6-13
Outdoor cooking, 4-32
cleanup after, 4-35
recipes for, 4-36
utensils for, 4-34
Over and Under Relay, 3-24
Owl Applause, 5-10
Owls and Crows, 3-7
Oxygen Makers, 4-7
P
Pack advancement board, 1-3
Pack games, 3-3
Pack Newsletter, 1-9
Pack picnic, 6-22
activities for, 6-22
sample program for, 6-22
Paddle Rattle, 5-42
The Painter (run-on), 5-49
Pantomime, 5-27
Paper airplane, making, 7-6
Paper airplane projects
Catapult Glider, 2-9
Helicopter Wing, 2-10
Paper Bag Applause, 5-11
Paper Bag Masks, 5-32
Paper Cone Derby, 3-27
Paper Crafts, 2-8
Paper Heads, 5-8
Paper Plate Discus Throw, 6-17
Paperweights (plaster), 2-25
Papier-Mâché Maracas, 5-42
Papier-Mâché, 2-13
framework for, 2-13
strip papier-mâché, 2-13
Parachute games, 3-22
Parachute Toss, 6-23
Parachute Volleyball, 3-23
Pass Ball, 3-10
Pass It, 7-7
Pass the Ring, 3-20
Pass Through the Hoop, 3-20
Patch Blanket, 1-8
Patterns, enlarging, 2-6
Peanut Butter Clay, 2-21
P-E-E-P Safety Checks, 3-13
Pepper Grinder, 3-31
Perpetual Motion, 3-20
Personal Storage Bench, 2-8
Philadelphia Liberty Bell Relay, 6-19
Philmont Grace, 6-7
Physical fitness activities, 3-28
Pigs in a Blanket, 4-37
Piñata, 2-14
Pinch Pot, 2-22
Pinecone Treats, 4-21
Pinewood derby, 6-26
personnel and procedures, 6-27
sample program, 6-27
sample rules, 6-27
tips for racer construction, 6-29
track for, 6-29
Pinhole Illusion, 5-56
Pinhole Planetariums, 2-28
Pinwheel, 2-8
Pioneer Day Obstacle Course, 6-25
“The Pirates’ Big Decision” (puppet play), 5-23
Pizza Bombs, 4-36
Place Card (blue and gold), 6-4
Planning calendar for special events, 6-1
Plants, fun with, 4-6
Plaster
animal tracks, 2-26
leaves, 2-26
mixing, 2-25
neckerchief slides, 2-37
painting, 2-25
paper weights, 2-25
pouring, 2-25
slides, 2-37
whittling, 2-25
Plastic Foam Cup Puppets, 5-19
Pockets, 5-9
Pom-Pom Pullaway.
See Shere Khan (The Tiger Game)
Pond Dipping, 4-14
Pony Express Relay, 6-24
Pop or Protect, 3-5
Popcorn Applause, 5-11
Popcorn on a String, 4-38
Poput. See Hand Badminton
Portrait Gallery, 6-20
Positive boy behavior, how to achieve, 1-12
Potato Prints, 2-15
Potato Race, 3-13
Power tools, 2-32
Predator, 4-24
Index–10
Prince of Pilsen, 3-37
Print a Fish, 4-15
Printing, 2-14
Prisoner’s Escape, 5-9
Prop Board, 5-14
Public domain songs, 5-38
Pumpkin-Carving or -Drawing Contest, 6-10
Puppet plays
lighting for, 5-14
samples of, 5-22
scenery for, 5-13
special effects for, 5-14
writing, 5-12
Puppets
actions of, 5-16
making, 5-14
stages for, 5-13
tips for puppeteers, 5-12
Why puppets?, 5-12
Purposes of Cub Scouting, 1-1
Putting Game, 3-10
Puzzles, 5-25
Q
Quicksand, 3-6
Quiet games
with equipment, 3-32
without equipment, 3-36
R
Rain Gauge, 4-28
Raingutter regatta, 6-32
construction tips, 6-33
course for, 6-33
running, 6-32
sample program, 6-32
sample rules, 6-32
Rainstorm Applause, 5-11
Rainy-day field day, 6-17
Reading Temples, 5-53
Red Light, 3-8
Red or Green?, 5-56
The Redcoats Are Coming (run-on), 5-48
Reflecting, 3-2, 3-13
Relays and races, 3-23
Relays for pack picnic, 6-22
Index–11
Removing Coconuts, 3-11
Rescue, 3-27
Resources, BSA, Resources-1
Resources, Craft Materials, 2-2
Reverse, 3-37
Rhyming Words, 3-37
Rim Ball, 3-23
Ring Call Ball, 3-20
Ring Toss, 7-6
Clothespin, 7-7
for boys with autism, 7-6
Homemade, 3-40
“Robot Inventors” (skit), 5-33
Rock and mineral collections, 4-14
Rock Concert (run-on), 5-48
Rodeo Clown Face Painting, 6-25
Role-playing, 5-27
Roll for Accuracy, 3-41
Roll for Distance, 3-41
Roll the Marble, 7-6
Roller Coaster Applause, 5-11
Rope Ring, 3-21
Rope the Steer, Texas, 6-20
Round of Applause, 5-11
Rubbings, 2-15
Rudolph Applause, 5-11
Running Long Jump, 6-16
Running Whistle, 6-17
Run-Ons, 5-48
S
Safety rules
for use of tools, 2-6
kite-flying, 6-39
with candles, 2-23
Safety
“Fire Safety Story,” 5-5
P-E-E-P Safety Checks, 3-13
Sailing Ship (wood), 2-35
Salt/Cornstarch Clay, 2-20
Salt/Flour Clay, 2-20
Sand Blocks, 5-41
Sand Candles, 2-24
Save Me!, 3-44
Sawdust Clay, 2-20
Sawdust/Cornstarch Clay, 2-21
Sawdust/Flour Clay, 2-20
Scenery
for puppet plays, 5-13
for skits, 5-27
Scout Calendar, 7-2
Scouting Anniversary Week activities, 6-2
Scouting show
activities for, 1-10
booth for, 1-11
Scrapbook, 1-8
Scrimshaw (plaster), 2-26
Seal of Approval Applause, 5-11
Sealed World, 4-14
Seasons Hike, 4-2
Seattle Space Needle Ring Toss, 6-20
writing, 5-28
“The Skunk Monkey” (story), 5-45
Sleeping bags, 4-31
Sleeping Guard, 3-6
Sliding Block Puzzle, 5-26
Smile, 3-35
The Snail, 3-22
Snail Race, 3-13
Snake Neckerchief Slide, 2-38
Snap the Card, 5-50
Sniff Out a Nut, 4-24
Snow exercises, 3-44
Snow Gauge, Make a, 4-30
Snow Hunt, 3-44
Snow Shovel Relay, 3-27
Second Den Orientation, 7-1
Seed Collections, 4-6
Seed-Planting Relay, 3-27
Sense of Touch Hike, 4-3
Shadow Clock, 4-29
Shadow puppets
figures, 5-20
lighting for, 5-21
screen for, 5-21
Shaggy Dogs, 4-38
The Shape of Things, 4-9
Shapes, 3-21
Shell collections, 4-16
Shere Khan (The Tiger Game), 3-8
Sherlock and Dr. Watson (skit), 5-36
Ship Ahoy (skit), 5-36
Shop, Shop (skit)5-36
Shot put, 6-16
Silent Hike, 4-4
Simple Grace, 6-7
Simple Telegraph, 2-29
Simulation game to prepare
for boy with special needs, 7-1
Singing Grace, 6-7
Skin the Snake, 3-31
Skits, 4-41
costumes for, 5-29
sample, 5-33
scenery for, 5-28
sound effects for, 5-29
why we use, 5-27
Snow Tug-of-War, 3-45
Snow’s temperature, taking, 4-30
Snowball contests, 3-45
Snowball Sharpshooting, 3-45
Snowball Spud, 3-45
Snowball Throwing Range, 3-45
Snowdrift, measuring, 4-30
Snowflake, Capture a, 4-30
Snowman-Building Contest, 3-45
Soak It Up, 4-13
Soakout, 3-11
Soccer Bowling, 3-11
Sock Puppets, 5-18
Soda Cheer, 5-11
Soda Straw Pipe Organ, 5-42
Softball Throw, 6-16
Soil Horizons, 4-12
Soil, fun with, 4-12
Songs
action, 5-39
campfire songs, 4-40
in den and pack meetings, 5-37
echo songs/chants, 5-38
using creatively, 5-38
writing, 5-38
Soup Applause, 5-11
Soup Can Maracas, 5-42
Space derby, 6-29
Space Shuttle, 2-36
Sparrow Sparring, 3-31
Special awards, 1-4
Index–12
Special effects for puppet plays, 5-14
Special events
back-dated calendar for, 6-2
guidelines for, 6-6
planning, 6-1
Special needs
activities for boys with, 7-5
adaptations for boys with, 7-4
den discipline for boys with, 7-3
fairness and boys with, 7-3
preparing den for boy with, 7-1
Spelling Champ (run-on), 5-49
Spelling Mixer, 5-9
Spider Web, 3-21
Spino-Lariat, 6-25
samples of, 5-43
types of, 5-43
Stork Stand, 3-32
Stork Wrestling, 3-32
The Story of the Blue and Gold, 6-7
Storytelling Hints, 5-43
Strap and Button Puzzle, 5-25
Straw and Ball Blow, 6-17
Straw Weaving, 2-18
String-Along Hike, 4-3
Stringer, 3-32
Strong Paper, 5-51
Stuffed Bag Puppet, 5-18
Submarines in Foil, 4-36
Successful Campfire, Four S’s for, 4-40
Splash ’em, 6-21
Splatter Painting, 7-8
Sponge Printing, 2-16
Spot Check, 3-6
Spotting (for activities), 3-11
Spud, 3-21
Squat Jump, 3-32
Squirrel Feeder, 4-24
Squirrels and Foxes, 3-21
Stack of Coins, 5-49
Stages and theaters for hand puppets, 5-13
Stained “Glass” Sun Catchers, 2-18
Stamp of Approval 1, 5-11
Stamp of Approval 2, 5-11
Stamp Pad, 2-15
Stand By Sixes, 5-9
Standing Broad Grin, 6-17
Standing Long Jump, 6-16
Star Color, 4-26
Star Kite, 2-11
Stargazing, 4-25
Starting Whistle, 6-16
Steal the Bacon. See Beanbag Snatch
Stencils, 2-16
Stew, tasty, 4-34
Stickers (for tracking boy behavior), 1-13
Stiff Neck (run-on), 5-48
Stir the Soup, 3-22
Stirring Round of Applause, 5-11
“Stop, Drop, and Roll” (song), 5-39
Stories
Suet Log Bird Feeder, 4-21
Summer celebration, 6-18
Summertime Crafts, 2-19
Sun Dapples, 4-29
Sun Fishing (run-on), 5-48
Sundial, 2-34
Super Star
pins, 1-13
notes, 1-14
Super-Breath, 5-56
Supplies
den, 2-7
managing, 2-7
Surprise Breakfast Hike, 4-3
Index–13
T
Table Tennis Ball Race, 3-42
Tactile Copier, 3-22
Tails, 3-6
Talking Paper Bag Puppet, 5-17
Talking Stick, 1-13
Tangram Puzzle, 5-25
Tank Applause, 5-11
Target Launcher, 3-40
Teeterboard Jousting, 3-40
Telegraph, simple, 2-29
Ten-Gallon Hat, 6-24
Tents, 4-31
Terrarium for Plants, 4-8
Texas Rope the Steer, 6-20
Theme crafts, 2-5
Themes, fitting games to, 3-1
There’s a Fly in My Soup (run-on), 5-48
Think Fast, 3-37
30-Yard Dash, 6-16
Thread the Needle, 3-32
“The Three Trees” (audience participation), 5-1
Three-Legged Race, 3-28
Three-Pin Bowling, 3-11
Three-stick Flat Kite, 2-11
Thumbs Up Applause, 5-11
Tickets (for tracking boy behavior), 1-13
Tic-Tac-Toe, 3-41
Tiger Applause, 5-11
The Tiger Game. See Shere Khan
Tin Can Bowling, 7-6
Travelers, 3-38
Traveling Seeds, 4-6
Tree Rings, Counting, 4-10
Tree Tagging, 4-11
Tree’s Job Description, 4-9
Trees, fun with, 4-9
Trench Candle Fire Starter, 4-32
Tricks
with coins, 5-49
with paper, 5-51
with toothpicks, 5-51
Trophies, 1-6
Trophy Skin, 1-8
Turkey Feather Relay, 6-10
Turntable, 5-50
Tin Can Ice Cream, 4-38
Tin Can Lantern, 2-28
Tin Can Stove, 4-33
Tin Can Telephone, 2-29
Tin Foil Comet, 2-28
Tin Man Cubby, 1-4
Tin ornaments, 2-29
Tips. See How-To Tips
Tire Bowling, 3-41
Tire games, 3-41
Tire Obstacle Relay, 3-41
Tire Rolling Relay, 3-42
Tire Sprint, 3-42
Tire Tag, 3-42
Tissue Paper Kite, 2-11
Tooling
metal, 2-27
leather, 2-30
Tools
hand tools for woodworking, 2-32
for metal work, 2-27
power, 2-32
safety rules, 2-6
Toothpick Pickup, 3-35
Toothpicks and Peanuts, 7-7
Tote Box, Handy, 2-7
Touch-Bottom Tag, 3-42
Tracking Behavior, 1-13
Tracks and Signs Hike, 4-2
Trash Bag Apron, 2-17
Trash, disposing of, 4-32
Turtle Float, 3-43
Turtle Race, 3-41
Turtle Tag, 3-22
Turtleneck Pass, 6-17
Twisted Napkin Rings, 2-21
Twixer Biscuits, 4-37
Two-Deep Leadership, 1-12
Two-Stick Flat Kite, 2-10, 2-11
Two-Way Ceremony Board, 1-2
U
The Umbrella, 3-23
Under the Broom, 3-32
Underwater Night Life, Observing, 4-16
Uniform Game, 3-34
“The Unknown Scout” (blue and gold skit), 6-8
Up and Under, 3-43
V
The Viper (run-on), 5-48
Votive Candle Holder, 2-13
W
Wagon Train, 3-28
Wagon Wheel, 3-23
Walk the Plank, 3-35
Walking Salad, 4-36
Walking Stick, 1-8
Wash on the Line, 3-28
Wastebasket, 2-13
Water and aquatic life, fun with, 4-14
Water Basketball, 3-44
Index–14
Water Bottle Relay, 6-17
Water carnival, 6-14
sample program for, 6-15
Water Dodge Ball, 3-43
Water games, 3-42
Water Spud, 3-43
Watermelon Scramble, 6-15
Waterproof Match Holder, 4-32
Waterscope, 4-14
The Wave Applause, 5-11
Way Down Yonder Relay, 3-28
Weather Vane, 4-28
Weather
fun with, 4-27
predicting, 4-27
Web of Life Hike, 4-2
Webelos Place Mat (blue and gold), 6-5
Welcome to the Midway, 6-20
Western rodeo roundup, 6-23
activities for, 6-23
sample program for, 6-23
What Is That Sound?, 7-5
What’s in the Water?, 4-15
What’s My Name?, 5-8
Wheelchair Maneuvering, 6-14
Whittling Stick Applause, 5-11
Who Am I?, 7-2
Who Are You?, 5-8
Who Melts First?, 4-30
Who’s Gone There?, 4-24
Who’s Who?, 5-8
Wiggles, 3-35
Wigs, 5-31
Wind Rose, 4-28
Windmill, 5-55
Windsock, 2-9
Winners’ Stand, 6-17
Winter games in the snow, 3-44
Wisconsin Dairy Draw, 6-19
Wise Old Owl Award, 1-5
“Wonderful Wilfred, the Woody Woodpecker”
(puppet play), 5-24
Wonderful Wormery, 4-25
Wood Lice, Watching, 4-19
Wood Metal, 1-6
Wood neckerchief slides, 2-37
Index–15
World Friendship Fund, 6-3
Wrap at the Door (run-on), 5-48
Writing
puppet plays, 5-12
songs, 5-39
Wrong Feet (run-on), 5-48
Y
Yoke Puzzle, 5-25
You Don’t Say! (run-on), 5-48
You Never Saw It, 5-8
“You Were There” (puppet play), 5-22
Z
Zebra Applause, 5-11
Zoo, 3-35
Do Your Best: What does it mean for a
Be Prepared
(with the right leader resources at the right time)
Den & Pack Meeting Resource Guide
Be Trained
Youth
Protection*
Cub Scout
Fast Start*
Immediately
(before your first
meeting with boys)
This Is
Scouting*
As You Advance
(within 2–3 months)
LEADER?
CUB SCOUT
Leader Position-Specific Training
Leader Book
Webelos Leader Guide
As Needed
By Den and
Pack Plans
Basic Adult Leader
Outdoor Orientation
Leader How-To Book
Academics and Sports
*Offered through the Online Learning Center at http://olc.scouting.org
CUBCAST
Need a great idea
for your den or pack that really works?
Want to share a great idea
that worked in your den or pack?
Then, check out CubCast at
www.scouting.org/ScoutCast
SKU 33832
BOY SCOUTS OF AMERICA
1325 West Walnut Hill Lane
P.O. Box 152079
Irving, Texas 75015-2079
http://www.scouting.org
33832
2010 Second Printing

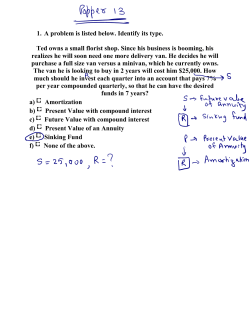


© Copyright 2026