
The Key Skills Approach to an Easy Research Paper Name:
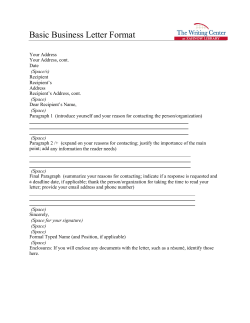
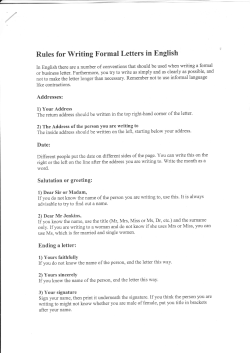
Name:
Date:
Class:
Subject:
The Key Skills Approach to
an Easy Research Paper
Boss & Switzer 2006
Introduction
The research paper is often a frightening assignment to students because of
its length (usually 500 words or more) and the fact that it contains research
and, therefore, does not come from the student’s imagination. Writing a
research paper is a test of a student’s ability to search out, recognize,
accumulate, organize, and interpret a set of facts on a given topic. The main
goal of the research paper is to teach the student how to gather necessary
information from the library and other media sources.
The main objective of this unit is to make the research paper seem less
intimidating, and to provide you with an understanding of the process of
writing the research paper from beginning to end. You have been provided
with an evaluation chart and assigned dates to assist in time management.
The unit has been divided chronologically into 13 sections:
1)
2)
3)
4)
5)
6)
7)
8)
9)
10)
11)
12)
13)
Selecting a Topic
Selecting Resources and Materials
Recording Resource Materials Used
Writing the Preliminary Outline (Power Thinking)
Extracting Information from Text (Bookmark, Selective
Underlining)
Taking Notes and Organizing Information (Selective
Underlining, Power Notes, Power Piling)
Documenting your Sources
Writing the Final Outline (Power Notes Revised)
Writing the First Draft (Spool Papers, Power Paragraph)
Revising and Rewriting the First Draft
Writing and Typing the Final Paper
Evaluating the Research Paper
Presenting your Research Material
It is our hope that this unit will help you understand the research process
more easily…Let’s get started!
Boss & Switzer 2006
1
Table of Contents
Introduction ……………………...…………………………….1
Table of Contents………………...…………………………….2
Evaluation and Deadline Chart for Research Project ………3
Selecting a Topic………………………………………………. 4
Section 1
Selecting Resources and Materials……………………………6
Section 2
Recording Materials Used……………………………………. 8
Section 3
Writing the Preliminary Outline……………………………..11
(Power Thinking)
Section 4
Extracting Information from Text…………………………...13
(Bookmark, Selective Underlining)
Section 5
Taking Notes and Organizing Information………………….14
(Power Piling)
Section 6
Documenting Sources……….…………………………….…..16
Section 7
Writing the Final Outline……………………………………..18
(Power Notes Revised)
Section 8
Writing the First Draft………………………………………..20
(Spool Papers)
Section 9
Revising and Rewriting the First Draft……………………... 23
Section 10
Writing or Typing the Final Paper…………………………...25
Section 11
Evaluating the Research Paper ……………………………....26
Section 12
Presenting the Topic…………………………...........................30
Section 13
Conclusion………………………………………………………31
Boss & Switzer 2006
2
Evaluation and Deadline Chart for Research Project
Topic/Task
Section Date Assigned
Selecting a Topic
1
Selecting Resources
2
Recording Materials Used
3
Writing the Preliminary
Outline
4
Extracting Information from
Text
5
Taking Notes and Organizing
Information
6
Documenting Sources
7
Writing the Final Outline
8
Writing the First Draft
9
Revising and Rewriting the
First Draft
10
Writing and Typing the Final
Paper
11
Date Due Value Mark
Evaluating the Research Paper
12
Presenting the Topic
Boss & Switzer 2006
13
3
Section 1
Selecting a Topic
What is a Research Paper?
A research paper is an investigative, written report based upon information
collected from a variety of resources. (Your school or local library will
contain most of the resources and materials you will need for the research
paper, such as encyclopedias, dictionaries, periodicals or magazines,
newspapers, vertical files, and the internet.)
As teachers, we are concerned not only with the finished product but also
with the process involved in obtaining the information.
Selecting a Topic
An important part of choosing a topic for a research paper is selecting one
that is interesting to you –a subject about which you have always wanted to
learn more about, a theory you would like to prove or disprove, or a
phenomenon that you would like to test (scientific experiment).
Students are sometimes tempted to describe or narrate their personal
experiences (for example, “a week at the beach” or “your life as a young
sister or brother”) for their research paper. However, it must be remembered
that a research paper is based on facts or theories. It is possible to write a
factual paper on a subject in which you are genuinely interested. For
example, you may write your research paper on dinosaurs and incorporate
information from the movie Jurassic Park.
If you will be doing a Historica Fair Project, you must complete a research
paper about the persons, places and events of Canadian History, Culture &
Heritage.
Boss & Switzer 2006
4
Once you have selected a topic and you begin collecting resources and
materials, you may find that your topic is too broad (a lot of information) or
too narrow (not enough information can be found). You may need to alter
your focus slightly, or change your topic entirely.
The next two activities will help you determine whether or not your topic is
acceptable.
Activity One
Some of the following topics are acceptable for a factual paper; others are
not. With a partner, write A beside the topics that are acceptable (specific
topics) and U beside those that are unacceptable (too broad). You must be
able to explain your choices.
___ 1. The role of Canadian woman in politics
___ 2. Recycling
___ 3. Shakespeare and his love of poetry
___ 4. The Halifax Explosion
___ 5. The theory of why dinosaurs disappeared
___ 6. The history of chewing gum
___ 7. The decline of rain forests and its relationship to climate change
___ 8. The life and times of Nelly McClung
Activity Two
1. Think about what topic you would like to focus on. As you are
thinking consider the following question:
a. How long is my paper supposed to be? (I must make sure that
my topic is limited enough to be covered well)
2. State your topic on the line below:
___________________________________________________________
3. Do you like your chosen topic? Which features of the general subject
interest you the most?
___________________________________________________________
___________________________________________________________
4. Have your topic approved by your advisor.
Boss & Switzer 2006
5
Section 2
Selecting Resources and Materials
Now that you have selected your subject, your next step is to search for a
variety or resources. Use any of the following: encyclopedias, dictionaries,
newspapers, magazines, almanacs, and books listed in the card catalog. Be
sure there are enough resources for you to use.
We will be visiting the school library. The librarian will be giving us an
orientation on how to use the card catalogue and find resources. Once she
has finished, you will need to browse in the library and find several
resources on your topic. IF you have not yet chosen a topic, use the first part
of this time to select a topic and then start looking for resources.
ENCYCLOPEDIAS
There are many different sets of encyclopedias, so take time to
browse through and become acquainted with all of them. An
encyclopedia offers a variety of articles (usually brief) on many
different subjects. When starting your research, it is a good idea to
check the encyclopedia first for a ''bird's eye view" of your subject
before moving on to more detailed sources. Most Canadian information
will be found in The Canadian Encyclopedia.
DICTIONARIES
The most commonly used dictionary in the library is the Oxford
English Dictionary (OED), which provides easy reference to spelling,
syllabication, word origin, parts of speech, as well as definition.
Another commonly used dictionary is the biographical dictionary,
which supplies information about famous people's lives.
ATLASES
There are many types of atlases, but they all share some similarities.
Some people think of an atlas as only a book of maps, but it is much
more. An atlas contains information and facts about climate, industries,
natural wonders, resources, population, history, imports, and exports.
ALMANACS
Almanacs, which are published annually, are ideal sources for up-todate, miscellaneous information on current events. Do not hesitate to
ask the librarian for assistance when using the almanacs.
Boss & Switzer 2006
6
AUDIOS/VIDEOS
Have you thought about using cassette tapes, CDs, videos, and films as
references in your research paper? There are many situations in which
this is a good idea.
In the spaces provided, find and record 3-6 resources that you find on your
subject (one resource must be an encyclopedia, unless approved by advisor).
SUBJECT: ___________________________________________________
RESOURCES
PAGE OR VOLUME
1.
2.
3.
4.
5.
6.
Question: Do you feel that there is enough valuable information on your
topic? At this point, do you feel you need to narrow or broaden your
subject? Please show revisions to your topic choice below:
_____________________________________________________________
_____________________________________________________________
_____________________________________________________________
_____________________________________________________________
Boss & Switzer 2006
7
Section 3
Recording Materials Used
Writing Bibliography Cards
If you plan to use the information from a particular book, encyclopedia,
magazine, or any other source (like the internet), you must record and keep
certain information to be used in your paper’s bibliography. In addition to
these more traditional resources, you may use television programs, lectures,
interviews, letters, or surveys to provide references for your research paper.
You will record reference information on resource cards (Index Cards) so
that they can easily be placed in alphabetical order. This format will also
make it easier for you to add or delete resources without having to recopy
your alphabetically-ordered list.
When you write your bibliography cards, provide each card with a
number in the top right hand corner of the card. As you begin taking
notes, use the number of the bibliography card to identify each note
card.
Depending on what type of resources you are using, you will need to record
different information on your bibliography cards. Use the guidelines on the
following pages to help you with the format for each card.
1. Books
If you use a book, you should record the following information:
a. Name of the Author (last name first)
b. Title of the book (underlined)
c. Place of publication (city)
d. Name of publisher
e. Year of publication (most recent year)
Your card should look like this:
Hacker, Carlotta. The Book of Canadians. Edmonton: Hurtig Publishers,
1983.
*Note the punctuation that must be used between your information.
Boss & Switzer 2006
8
2. Encyclopedia
If you are using an encyclopedia, record the following information:
a. Name of the author of the article (if there is one)
b. Title of the article (in quotation marks)
c. Title of the encyclopedia (underlined)
d. Year of publication (edition)
Your card should look like this:
“Nellie McClung.” Canadian Encyclopedia, 1990 ed.
*Note the punctuation between each piece of information. If there is no
author’s name listed, begin the card with the article’s title.
3. Magazine or Newspaper
If you use a magazine or newspaper, record the following
information:
a. Name of the author (if there is one)
b. Title of the article (in quotation marks)
c. Name of the magazine or newspaper (underlined)
d. Date of the magazine or newspaper
e. Page number(s) of the article
Your card should look like this:
Hallett, Mary. “The Fight that Never Ends” Horizon Canada
Magazine. 1984: 230-235.
*Note the punctuation between each piece of information. If there is no
author, begin with the article title.
4. Computer Reference
If you use a computer reference instead of the actual book,
encyclopedia, or magazine to find information, you must still use the
appropriate format to write your bibliography card.
Boss & Switzer 2006
9
5. Website
If you use a website, record the following information:
a. Name of the author (if there is one)
b. Date of the article/site (in brackets)
c. Title of the article (underlined)
d. URL address (in V-shaped brackets)
e. Date that you accessed the site (in brackets)
Your card should look like this:
Unknown. (2005). Nellie McClung
<http://en.wikipedia.org/wiki.Nellie_McClung> (1/15/2006).
Boss & Switzer 2006
10
Section 4
Writing the Preliminary Outline
In this step, you will use a Power Thinking Map to create an outline for
your research paper.
Power 2: Sub-topics, represented by rectangles
Power 3: Supporting details underneath each sub-topic, represented by
triangles
Power 1
Boss & Switzer 2006
11
Putting your Power Thinking into an Outline Format
You are ready to take you power thinking map and place your information
into an outline format
Example:
Power 1: Nellie McClung
Power 2: The Childhood of a Feminist
Power 3: Born in Chatsworth, Ontario, Oct 20, 1873
Power 3: Moved to Manitoba in 1880
Power 3: Did not begin school until she was ten
Power 4: Could not read
Power 3: Received her teaching certificate at age sixteen
Power 2: Conditions of the Working Woman
Power 3:
Insert your information into an outline using the space below
_____________________________________________________________
_____________________________________________________________
_____________________________________________________________
_____________________________________________________________
_____________________________________________________________
_____________________________________________________________
_____________________________________________________________
_____________________________________________________________
_____________________________________________________________
_____________________________________________________________
_____________________________________________________________
_____________________________________________________________
_____________________________________________________________
_____________________________________________________________
_____________________________________________________________
_____________________________________________________________
_____________________________________________________________
_____________________________________________________________
_____________________________________________________________
_____________________________________________________________
_____________________________________________________________
_____________________________________________________________
_____________________________________________________________
_____________________________________________________________
_____________________________________________________________
_____________________________________________________________
_____________________________________________________________
Boss & Switzer 2006
12
Section 5
Extracting Information from Text
As you discover resources and begin reading, there are a couple of key
strategies that will help you to pull out information that will be useful to you.
Key Strategy #1: Bookmark
This strategy should be used when working with resources where you are
unable to underline in the actual resource (e.g. encyclopedias and other
books)
Description of the Strategy:
Students place a marker(s) or use yellow stickies to show relevant passages
in a book or text. These stickies might highlight questions, vocabulary or
answers. They may jot notes down to refer back to at a later date.
Key Strategy #2: Selective Underlining
This strategy should be used when working with photocopied materials that
will not be harmed by writing directly on the resource (e.g. internet
resources)
Description of the Strategy:
When using underlining, you need to be selective in order for the
underlining to be valuable. You must have a purpose in mind before reading
(know what you are looking for)
Here are the steps to use when selectively underlining:
1) Skim or read through the selection first.
2) Reread one paragraph at a time and begin underlining.
3) Underline selectively, never whole sentences.
4) Choose key words or phrase from the sentences to highlight.
5) Organize main ideas and details by Powers.
6) Note main ideas with M or I, or other types of notations.
7) Generate topics or categories for ideas and write them in the margins.
8) Justify underlined information with a partner.
9) Underline main ideas (Power 1) and details (Power 2 and 3) with
different colored markers.
Boss & Switzer 2006
13
Section 6
Taking Notes and Organizing Information
As you discover resources and begin to read about your research topic, you
will also begin the process of taking notes. Taking notes is a very important
part of the research paper process. One cannot expect to remember all that is
read. Many writers decide to take notes on index cards, using a different
card for each note. The strategy that we would like to teach you as well is:
Power Piling
*Students who are researching an event or person will use power piling.
Key Strategy : Power Piling
Description of Strategy:
While reading, when you find a fact that relates to one of your power 2 ideas
and you would like to record it, write it on a form as power 3 or power 4
piece of information. The power piling forms are then piled into groups
according to power 2’s.
The form you will use is shown below:
Power 2 (P2):
____________________________
Source #:___
Pg. #: ____
Power 3 (P3):
___________________________________________
___________________________________________
___________________________________________
_______________
Power 4 (P4): (if needed)
_________________________________
_________________________________
Boss & Switzer 2006
14
Boss & Switzer 2006
15
___________________________________________
___________________________________________
Pg. #: ______
Pg. #: ______
___________________________________________
___________________________________________
___________________________________________
___________________________________________
___________________________________________
___________________________________________
___________________________________________
___________________________________________
Fact
___________________________________________
Power #_______
____________________________________
Fact
___________________________________________
Power #_______
____________________________________
Source #:______
___________________________________________
___________________________________________
Power #______
___________________________________________
___________________________________________
Source #:______
___________________________________________
___________________________________________
Power #______
Fact
___________________________________________
Power #_______
Pg. #: ______
Source #:______
____________________________________
Power #______
Fact
___________________________________________
Power #_______
Pg. #: ______
Source #:______
____________________________________
Power #______
Section 7
Documenting Sources
The most common practice in most middle and high schools and colleges, is
to site your sources using parenthetical documentation –citing resources
directly in your paper, using brackets. Documentation means that you have
made a reference to your source and are giving credit to that source. In
parenthetical documentation, you state the author’s last name and the page
number on which you found your information within parentheses, following
the sentence that contains the sited information. For example, (Burgess 208).
Guidelines for Documenting Sources (Giving Credit)
1. If you “borrow” (copy) information directly from a source, you must
place the information within quotation marks. You then follow the
quote with the author’s last name and the page number on which you
found the information within parentheses, followed by a period.
“If a man does not keep pace with his companions…perhaps he
steps to the beat of a different drummer” (Thoreau 124).
2. If you write information in your own words (paraphrase), and the
information contains important ideas and facts that you didn’t know,
do not place the info in quotation marks, but do follow the
information with the author’s name and page reference in parentheses.
Since 1954, more than 50 ships and aircraft have vanished in or
near the Bermuda Triangle (Burgess 208).
3. Do not place a comma or anything else between the author’s last name
and the page number.
4. If you use the author’s name in a paraphrase or quotation, don’t place
the last name in parentheses at the end of the sentence.
Burgess stated that since 1954 more than 50 ships and aircraft
have vanished at or near the Bermuda Triangle (208).
5. When there is no stated author, place the name of the source and page
number within parentheses.
When she was young, she was a political activist for the
Republican Party (Academic American Encyclopedia 99)
Boss & Switzer 2006
16
6. When there are two authors, state both last names separated by “and”.
For example, (Graham and Ledbetter 46). If there are three authors,
give each last name, with the final name preceded by “and”. For
example, (Witting, Barry, and Harvey, 125).
7. If there are more than three authors, state the first author, followed by
“et al” (Latin for “and others”). For example, (Brandes et al. 32).
8. If your sources have two or more authors with the same last names,
write both the first and last names of the authors in the parentheses to
distinguish between them. For example, (Robert Burgess 208).
9. If you are citing two or more works by the same author, put a comma
after the last name of the author followed by the title of the work and
the page number. For example, (Burgess, “The Bermuda Triangle”
208).
10. When you are citing the title of a magazine article with no author
given, it is okay to shorten the title to a key word (or words) for the
documentation. Remember you must give the full title on the
bibliography page. For example, if the title of the article is “Artificial
Hip Goes Pro With Bo,” your citation may read (“Artificial Hip”
10).
Activity #1
1. Write a parenthetical documentation for the article “The Bermuda
Triangle” by Robert Burgess from page 208 of World Book
Encyclopedia.
The first recorded disappearance of a U.S. ship in the Bermuda
Triangle occurred in March, 1918, when the U.S.S. Cyclops
vanished. On December 5, 1045, a squadron of five U.S. bombers
disappeared, and a seaplane vanished while looking for the
aircraft (
).
2. Read the following passage written by Keith Cooley. He has
paraphrased information taken from the article “Artificial Hip Goes
Pro with Bo” with no author from Sports Illustrated. (Observe how he
has included a direct quote in quotation marks.)
Write the
parenthetical documentation for Keith’s passage from page 10.
In 1993, he returned to professional baseball with the Chicago
White Sox. In his first time at bat in the regular season, he hit a
home run. Sports Illustrated called it “the greatest comeback of
them all” (
).
Boss & Switzer 2006
17
Section 8
Writing the Final Outline
Read each line of your preliminary outline and your power piling forms to
determine of there are any power 2’s or power 3’s that lack enough
supporting details or information. If you found some information that you
would really like to include, but it doesn’t fit into a power 2, you may want
to alter your preliminary outline to include another sub topic, or power 2.
Make a list below of the power 2’s or power 3’s that you think may need
more research (they lack detail).
_____________________________________________________________
_____________________________________________________________
_____________________________________________________________
_____________________________________________________________
Guidelines for Writing the Final Outline
Remember, if your final outline is well organized, your whole paper will be
organized to.
1. When writing your final outline, you will include your power 2’s, 3’s
and 4’s.
2. A thesis statement (your Power 1) is always included in the
introductory paragraph. Often it is the last sentence.
3. The introductory paragraph (the first power 2 of your outline) states
the main objective for writing the research paper.
4. The body of your paper reflects your power 2’s on your outline. The
body presents information which supports your thesis and is presented
in paragraph form.
5. A conclusion (the last power 2 on your outline) summarizes the main
points that were discussed in the body of your paper.
Your final outline will look just like your preliminary outline, except it will
include power 3’s and 4’s and any new power 2’s you have added.
Boss & Switzer 2006
18
Final Outline –Use this template to complete your final outline on a lined
sheet of paper.
Power 1(P1) (Main Topic):_______________________________________
Power 2 (P2):_____________________________________________
Power 3 (P3): _______________________________________
Power 3 (P3):________________________________________
Power 2 (P2): ____________________________________________
Power 3 (P3): _______________________________________
Power 3 (P3): _______________________________________
Power 4 (P4): __________________________________
Power 3 (P3): _______________________________________
Power 2 (P2): ____________________________________________
Power 3 (P3): _______________________________________
Power 4 (P4): __________________________________
Power 3 (P3): _______________________________________
Power 4 (P4): __________________________________
Power 2 (P2): ____________________________________________
Power 3 (P3): _______________________________________
Power 4 (P4): __________________________________
Power 4 (P4): __________________________________
Power 2 (P2): ____________________________________________
Power 3 (P3): _______________________________________
Boss & Switzer 2006
19
Section 9
Writing the First Draft
Using your power piling forms and your final outline as references, you are
now ready to write the first draft of your research paper. Concentrate only
on putting your ideas on paper. Do not worry about spelling, grammar, or
punctuation. Schedule your time wisely so that you will have time to
reexamine your work to determine what needs to be revised or deleted.
Students who are researching a person or an event, will use a key strategy
called “Spool Papers” to write their first draft. Students who are doing a
scientific experiment will use a writing template to write their first draft.
Key Strategy # 1: Spool Papers
What comes to mind when you hear the word spool? Were you thinking of a
spool of thread or perhaps the big phone cable spools that some people use
for picnic tables? Although spools come in lots of sizes and shapes, they are
all used to organize and transport stuff-from threads to cables. The size and
shape of the spool is determined by its purpose. In a similar way, the spool
paper is a template used to organize and communicate ideas. The design of
the spool paper depends on the purpose of the writing.
Description of Strategy:
The spool paper generally consists of at least four paragraphs, but has no
upper limit. The first paragraph is called the introductory paragraph. It
explains what the paper will be about(Power 1 Idea). The rest of the
paragraphs, except for the last one, provide all the details and support(Power
2’s and 3’s). We call this part of the spool paper the body. Each
section/paragraph is a separate Power 2 idea. These power 2 sections will be
supported with lots of power 3s and 4s. The last paragraph of the spool is
called the concluding paragraph. It summarizes the main ideas presented in
the paper.
The outline on the next page is a format for planning a paper that clearly
develops several main points.
Boss & Switzer 2006
20
Boss & Switzer 2006
21
Steps for Completing your First Draft Using the Spool Paper Strategy
1. Be sure to complete your first draft on lined paper, skipping lines
2. Think about your topic, your audience, and you purpose for writing
this piece.
3. First Paragraph –Introduction
Develop a lead or introductory statement (Power 0). A lead might be a
question, an interesting fact, a quotation, or a dialogue that will catch
the reader's attention. Include a thesis statement as the last sentence in
the introduction (This is your power 1). A thesis is a controlling idea
that contains the main ideas developed in the paper.
4. Middle Paragraphs–Body
Starting with your first power 2, write a paragraph that includes your
power 3’s and 4’s. Don’t forget to use proper documentation
procedures. Then repeat this process for each of your power 2’s. If
you have 3 power 2’s, the body of your paragraph will be 3
paragraphs in length.
5. Last Paragraph –Conclusion
Draft a conclusion and restate the main points of the thesis.
Once you have finished writing your first draft, ask yourself:
1. Does the lead make you want to read the rest of the paper?
2. Does the first paragraph contain a thesis statement? (Underline this
statement in your first paragraph)
3. Do each of the paragraphs contain a main idea statement (power 2)?
(Underline your power 2 sentence in each paragraph.)
4. Do each of your paragraphs contain Power 3 and 4 ideas to develop
the main idea?
Reflection: Did the spool paper format help you organize your writing?
Or, did you find it too constraining? Did the checklist help you analyze
your own paper?
___________________________________________________________
___________________________________________________________
___________________________________________________________
___________________________________________________________
___________________________________________________________
___________________________________________________________
Boss & Switzer 2006
22
Section 10
Revising and Rewriting the First Draft
Revising and rewriting the research paper are the final stages of the writing
process. This is the time for you to make any changes to improve the ideas
expressed in your paper. (Keep in mind that even the best writers hardly ever
create a masterpiece in writing their first draft!) As you begin to revise and
rewrite your first draft, think of ways you can improve your choice of words,
transitions, and structure (sentences and paragraphs). Review the following
guidelines before revising your first draft.
Guidelines for Revising and Rewriting the First Draft
1. Let it rest for awhile. Give yourself time to write the first draft and
then put it aside for a few days. During this time, you can reflect on
what you have written. Students often find that after a few days, their
thoughts become more organized.
2. Grab the reader’s attention. Make sure that your introductory
paragraph catches the reader’s attention and introduces your thesis
statement (main topic and purpose for discussing it).
3. Reread your draft aloud. Are there any sentences or paragraphs that
sound out of place or poorly written? If so, indicate these in the
margins of your paper.
4. Develop a system for making corrections. Mark through words,
phrases, and sentences that need revising. Do not eliminate anything
yet as you may be able to use the information later.
5. Make sure your writing is easy to follow. Each paragraph should
contain a topic sentence (Power 2), with supporting details (Power 3’s
and 4’s). Each power 3 and 4 should relate to the power 2 at the
beginning of each paragraph.
6. Check to make sure your sentences are clearly written and easy to
read. Add transition words (while, after, since, although, first, next,
further, also, finally, in addition) to show how ideas are related to one
another.
7. Check your paper for accuracy. Check punctuation, spelling, word
usage and capitalization. Use the editor’s marks on the following
page to highlight any editing changes that need to be made.
Boss & Switzer 2006
23
8. Be sure your sources are properly documented. If sections of the
paper are not written in our own words, make sure that you have given
proper credit for “borrowing” the writer’s words. Place quotation
marks around another writer’s exact words.
9. Proofread your research paper carefully. Your final copy should
be error-free and neat
10. Check to make sure you have restated your thesis in the
concluding paragraph. Check to see that you have reworded your
main idea for the final thesis in the concluding paragraph.
11. Once you have completed your own revisions, exchange your
paper with a peer, and do the same for one another.
12. Pass your first draft into your advisor for review.
Boss & Switzer 2006
24
Section 11
Writing or Typing the Final Paper
You are now in the final stages of writing your research paper. What do you
do next? Before you begin hand-writing or typing your paper, keep in mind
that your final paper should be neat as well as complete. Proofreading in
this near-final stage is really important because you are able to check your
final draft one last time for organization, clarity, structure, spelling,
punctuation, and word choice. You may find that using a computer will save
time. This will allow you to make changes or edit your paper instantly
without retyping or rewriting the whole paper.
Here are some guidelines to follow when preparing the final paper.
Guidelines for Writing or Typing your Final Paper
If you are writing your paper
1. Use lined paper.
2. Use black or blue pen.
3. Do not skip lines.
4. Indent one inch from the top, left, right, and bottom margins.
5. Always indent the beginning of each paragraph.
6. Construct a bibliography.
7. Do not throw out any of your rough work because your advisor may
ask for it.
If you are typing your paper
1. Double space.
2. Indent the beginning of each paragraph.
3. Construct a bibliography.
4. Do not throw out any of your rough work because your advisor may
ask for it.
Boss & Switzer 2006
25
Section 12
Evaluating the Research Paper
After you have finished your paper, and before it is ready to be turned into
your teacher, proofread the paper carefully. Remember that YOU ARE
TOTALLY RESPONSIBLE for any mistakes in your paper, whether it was
handwritten by you, typed by you, or typed by some else. Before you hand
in your paper, complete this checklist.
1. I have carefully proofread my entire research paper and made
necessary corrections.
2. I have handwritten (in blue or black ink) or typed (double-spaced) my
paper.
3. I have checked for misspelled words and incorrect punctuation.
4. I have looked at my paper carefully and made changes to improve
word choice (using a thesaurus when appropriate).
5. I have checked my paper for errors in sentence structure.
6. I have checked to make sure that my parenthetical documentation is
written and punctuated correctly.
7. I have checked for accuracy in my direct quotations and paraphrased
material.
8. I have checked for organization and transition in my paragraphs.
9. I have checked my bibliography to make sure that the sources are
listed in alphabetical order (according to the authors’ last names, if
given). All sources used in the text of my paper are listed on the
bibliography. Each source is written correctly and punctuated.
10. I have neatly attached the sections of my paper to a presentation
board, and I have included maps, pictures, graphs, and result tables as
they relate to my paper.
Boss & Switzer 2006
26
Boss & Switzer 2006
27
Boss & Switzer 2006
28
Boss & Switzer 2006
29
Section 13
Presenting the Topic
When it is necessary to present your research paper, consider the following
points as you make your presentation:
Boss & Switzer 2006
30
Conclusion
It is hoped that after “taking on” the research paper, step by step, it no longer
seems the fearful and intimidating monster that it once did. You now know
the “ins and outs” of the research paper process and the next time you are
asked to write a research paper, you will probably find the task to be less
confusing.
You also know about the topic you chose to research, and your expertise in
this area will most certainly serve you well in the rest of your time in school
as well as your personal life. After all, that is what true learning is all
about!!
Boss & Switzer 2006
31


© Copyright 2026