
Document 187357
How to Master CCNA All contents copyright C 2002-2013 by René Molenaar. All rights reserved. No part of this document or the related files may be reproduced or transmitted in any form, by any means (electronic, photocopying, recording, or otherwise) without the prior written permission of the publisher. Limit of Liability and Disclaimer of Warranty: The publisher has used its best efforts in preparing this book, and the information provided herein is provided "as is." René Molenaar. makes no representation or warranties with respect to the accuracy or completeness of the contents of this book and specifically disclaims any implied warranties of merchantability or fitness for any particular purpose and shall in no event be liable for any loss of profit or any other commercial damage, including but not limited to special, incidental, consequential, or other damages. Trademarks: This book identifies product names and services known to be trademarks, registered trademarks, or service marks of their respective holders. They are used throughout this book in an editorial fashion only. In addition, terms suspected of being trademarks, registered trademarks, or service marks have been appropriately capitalized, although René Molenaar cannot attest to the accuracy of this information. Use of a term in this book should not be regarded as affecting the validity of any trademark, registered trademark, or service mark. René Molenaar is not associated with any product or vendor mentioned in this book. GNS3Vault.com – René Molenaar Page 2 of 466 How to Master CCNA Introduction One of the things I do in life is work as a Cisco Certified System Instructor (CCSI) and after teaching CCNA for a few years I‟ve learned which topics people find difficult to understand. This is the reason I created http://gns3vault.com where I offer free Cisco labs and videos to help people learn networking. The problem with networking is that you need to know what you are doing before you can configure anything. Even if you have all the commands you still need to understand what and why you are typing these commands. I created this book to give you a compact guide which will provide you the answer to what and why to help you master the CCNA exam. I have tried to put all the important keywords in bold. If you see a term or concept in bold it‟s something you should remember / write down and make sure you understand it since its core knowledge for your CCNA! One last thing before we get started. When I‟m teaching I always advise students to create mindmaps instead of notes. Notes are just lists with random information while mindmaps show the relationship between the different items. If you are reading this book on your computer I highly suggest you download “Xmind” which you can get for free here: http://xmind.net If you are new to mindmapping, check out “Appendix A – How to create mindmaps” at the end of this book where I show you how I do it. I also highly recommend you to follow me along when I‟m demonstrating the configuration examples. Boot up GNS3 and/or your switches and configure the examples I‟m showing you by yourself. You‟ll learn more by actively working on the equipment compared to just passive reading. Enjoy reading my book and good luck getting your CCNA certification! P.S. If you have any questions or comments about this book, please let me know: E-mail: Website: Facebook: Twitter: Youtube: [email protected] gns3vault.com facebook.com/gns3vault twitter.com/gns3vault youtube.com/gns3vault GNS3Vault.com – René Molenaar Page 3 of 466 How to Master CCNA Index Introduction .............................................................................................................. 3 1. Lab Equipment ....................................................................................................... 5 2. Basics of networking ............................................................................................. 10 3. The OSI-Model ..................................................................................................... 16 4. The network layer: IP Protocol ............................................................................... 24 5. The Transport Layer: TCP and UDP ......................................................................... 40 6. Ethernet: Dominating your LAN for over 30 years ..................................................... 48 7. Introduction to Cisco IOS ...................................................................................... 58 8. Hubs, Bridges and Switches ................................................................................... 87 9. Virtual LANs (VLANs), Trunks and VTP .................................................................. 102 10. Etherchannel (Link Aggregation) ......................................................................... 143 11. Spanning-Tree (STP) ......................................................................................... 152 12. Binary, Subnetting and Summarization. ............................................................... 183 13. IP Routing ....................................................................................................... 208 14. FHRP (First Hop Redundancy Protocols) ............................................................... 229 15. Distance Vector Routing Protocols ....................................................................... 249 16. OSPF – Link-state routing protocol ...................................................................... 264 17. EIGRP – Cisco‟s Hybrid Routing Protocol .............................................................. 294 18. Security: Keeping the bad guys out. ................................................................... 312 19. Network and Port address Translation (NAT & PAT) ............................................... 330 20. Wide area networks .......................................................................................... 342 21. Introduction to IPv6 .......................................................................................... 379 22. IPv6 NPD and Host Configuration ........................................................................ 400 23. IPv6 Routing .................................................................................................... 409 24. Virtual Private Networks .................................................................................... 425 25. Network Management ....................................................................................... 433 26. IOS Licensing ................................................................................................... 457 27. Final Thoughts.................................................................................................. 464 Appendix A – How to create mindmaps ..................................................................... 465 GNS3Vault.com – René Molenaar Page 4 of 466 How to Master CCNA 1. Lab Equipment “If I had eight hours to chop down a tree, I'd spend six hours sharpening my ax” ~Abraham Lincoln Before we are going to start on our networking journey we will take a look at the networking equipment that you will need. If you want to master the CCNA exam you‟ll have to do two things: Read this book so you learn about all the different protocols and understand the theory. Implement your knowledge by configuring these protocols on our routers and switches. So what equipment should you get? For most of the labs you can use GNS3. This is an emulator that runs the Cisco IOS software but you can only emulate routers…no switches. You can download GNS3 for free from http://gns3.net but you‟ll have to supply the IOS image yourself. Cisco owns the copyright on IOS so it can‟t be shared freely. I suggest using the 3640 or 3725 router in GNS3. Courtesy of Cisco Systems, Inc. Unauthorized use not permitted. The closest you can get to emulate a switch in GNS3 is inserting this NM16-ESW Etherswitch module in your virtual router. It adds 16 switch ports to your virtual router and supports basic switching features. Unfortunately this module is very limited and I don‟t recommend using it for CCNA. GNS3 isn‟t very difficult to work with but there is one thing you need to be aware of. Most people complain that whenever they start an emulated router that they see their CPU jump to 100%. You can fix this by setting a correct IDLEPC value. If you are configuring GNS3 you need to check this video where I explain you how to do it: https://www.youtube.com/watch?v=NkEv6v6rqlA GNS3Vault.com – René Molenaar Page 5 of 466 How to Master CCNA So what do we need? My advice is to use GNS3 for all your routing labs and buy some real physical switches for the switching labs. Don‟t be scared…I‟m not going to advise you to buy ultra-high tech brand new switches! We are going to buy used Cisco switches that are easy to find and they won‟t burn a hole in your wallet… Without further ado…here are our candidates: Courtesy of Cisco Systems, Inc. Unauthorized use not permitted. Cisco Catalyst 2950: This is a layer 2 switch that does everything you need for CCNA. If you look at eBay you can find the Cisco Catalyst 2950 for around $30. It doesn‟t matter if you buy the 8, 24 or 48 port model. Not too bad right? Keep in mind you can sell them once you are done with CCNA without losing (much) money. This switch is cheap and perfect for CCNA! Once you have your switches you should connect them like this: 16 17 0/ /14 /13 Fa0 14 Fa0/16 Fa0/17 2950 SwitchB 13 0/ Fa 0/ Fa Fa0 0/ Fa Fa Fa0 / Fa0 13 /14 2950 SwitchA Fa0/16 Fa0/17 2950 SwitchC If you plan to study CCNP after completing CCNA I can highly recommend swapping one Cisco Catalyst 2950 for a Cisco Catalyst 3550. GNS3Vault.com – René Molenaar Page 6 of 466 How to Master CCNA Courtesy of Cisco Systems, Inc. Unauthorized use not permitted. Cisco Catalyst 3550: It offers pretty much the same features as the 2950 but it also supports routing which we require for CCNP. What about other switch models? Anything else we can use for CCNA? The Cisco Catalyst 2960 is the successor of the Cisco Catalyst 2950, it‟s a great layer 2 switch but more expensive. The Cisco Catalyst 3560 is the successor of the Cisco Catalyst 3550, it also offers routing features but it‟s quite more expensive…around $300 on eBay. The Cisco Catalyst 3750 is also a switch that can do routing but it‟s very expensive. My advice is to get the 3x Cisco Catalyst 2950 or 2x Cisco Catalyst 2950 and 1x Cisco Catalyst 3550 if you want to study CCNP after your CCNA. Are there any switches that you should NOT buy? Don‟t buy the Cisco Catalyst 2900XL switch; you‟ll need at least the Cisco Catalyst 2950 switch. Many features are not supported on the Cisco Catalyst 2900XL switch. Don‟t buy the Cisco Catalyst 3500XL switch, same problem as the one above. You also have to buy some cables: GNS3Vault.com – René Molenaar Page 7 of 466 How to Master CCNA Above you see the blue Cisco console cable. It probably comes with the switch but make sure you have at least one. You‟ll need this to configure your switches. If your computer doesn‟t have any serial ports to connect your blue Cisco console cable you need to get one of these. It‟s a USB to serial port converter. Courtesy of König Electronic Inc. Unauthorized use not permitted. I also like to use one of these. It‟s a USB connector with 4x RS-232 serial connectors you can use for your blue Cisco console cables to connect to your switches. It saves the hassle of plugging and unplugging your console cable between your switches. The one I‟m using is from KÖNIG and costs around $30. Google for “USB 4x RS-232” and you should be able to find something similar. Between the switches you‟ll require UTP cables. There‟s a difference between straight through and crossover cables (we‟ll talk about that later in the book). Modern switches and network cards support auto-sensing so it really doesn‟t matter what kind of cable you use. If you are going to connect your 2950 switches to each other make sure you buy crossover cables since they don‟t support auto-sensing! GNS3Vault.com – René Molenaar Page 8 of 466 How to Master CCNA It will be useful if you have one old extra computer or laptop that you can use to connect to your switches. Now you know the equipment that you need, it‟s time to dive into networking! GNS3Vault.com – René Molenaar Page 9 of 466 Do you enjoy reading this sample of How to Master CCNA ? Click on the link below to get the full version. Get How to Master CCNA Today How to Master CCNA 2. Basics of networking Before we start digging into complex stuff we‟ll have a little talk about networks. What is a network anyway? A network is just a collection of devices and end systems connected to each other and able to communicate with each other. These could be computers, servers, smartphones, routers etc. A network could be as large as the internet or as small as your two computers at home sharing files and a printer. Some of the components that make up a network: Personal Computers (PC): These are the endpoint of your network, sending and receiving data. Interconnections: These are components that make sure data can travel from one device to another, you need to think about: o Network Cards: they translate data from your computer in a readable format for the network. o Media: network cables, perhaps wireless. o Connectors: the plug you plug in your network card. Switches: These boxes are network devices which provide a network connection for your end devices like PC‟s. Routers: Routers interconnect networks and choose the best path to each network destination. If you are going to work with Cisco you‟ll have to get used to some network diagrams like the one below: Fa0/1 Fa0/24 Fa0/0 Fa0 Switch /1 Router /1 Internet Fa1 S0/0 Router So what do we see in the network diagram above? First of all we see a computer connected to a switch. On the switch side you see “Fa0/1” which means the computer is connected to the FastEthernet 0/1 interface on the switch side. The 0 is the controller number (usually 0 on smaller switches) and the 1 is the port number. Our switch is connected to a router using its FastEthernet 0/24 interface. Our routers are connected using FastEthernet as well. The router at the bottom has a connection to the Internet using a Serial connection. GNS3Vault.com – René Molenaar Page 10 of 466 How to Master CCNA Don‟t worry about what a switch or router is and the difference between them; we‟ll get to that later! So why do we use networks? I think this one is obvious since you are using networks on a daily basis but let‟s sum up what we use networks for: Applications: Sending data between computers, sharing files. Resources: Network printers, network cameras. Storage: Using a NAS (Network attached storage) will make your storage available on the network. Many people use one at home nowadays to share files, videos and pictures between computers. Backup: Using a central backup server where all computers send their data to for backup. VoIP: Voice over IP is becoming more important and every day and replacing analog telephony. We are all using applications on a daily basis but if we look at them with a network-minded view we can divide them in 3 different categories: Batch applications File transfers like FTP, TFTP, perhaps a HTTP download. Could be a backup at night. No direct human interaction. High bandwidth is important but not critical. A batch application is something you just let run and you don‟t care if it takes a minute more or less since nobody is “waiting” for a response. This could be a backup job overnight. It doesn‟t matter if it takes an hour or more; however, if it takes days then it‟s a problem. TFTP is like a „stripped down‟ version of FTP and is used sometimes to copy files from and to a Cisco router or switch. Interactive applications Human-to-Human interaction Someone is waiting for a response, so response time (delay) is important. With interactive applications you need to think about someone who is working on a database server and sending commands. Once your press enter you want it to respond fast but a second more or less is perhaps not THAT annoying. Another example is two users who are using a chat application, you don‟t want to wait 20 seconds before you receive the message from another user but a second more or less doesn‟t matter. Real-time applications Also Human-to-Human interaction VoIP (Voice over IP) or live Video conferencing. End-to-end delay is critical. Imagine you are talking to someone on the phone using Voice over IP and you need to wait 2 seconds before you hear a reply…this is VERY annoying and it‟s hard to have a GNS3Vault.com – René Molenaar Page 11 of 466 How to Master CCNA conversation like that. Everything above 300ms of delay (1000ms is a second) you will have a hard time having a good conversation since it‟ll be more like a “walkie-talkie” conversation. Latency is critical when using VoIP or live Video. A delay above 150ms (1/8 of a second) is noticeable. When we look at networks we have different types of “Topologies” and we have two different topologies: Physical topology Logical topology There‟s an important difference between the two. The physical topology is what the network looks like and how all the cables and devices are connected to each other. The logical topology is the path our data signals take through the physical topology. There are multiple types of physical topologies: Bus topology: One of the first networks was based on coax-cables. This was basically just one long cable and every device was connected to it. At the end of the cable you had to place a terminator. If the cable breaks then your network is down. Ring topology: All computers and network devices are connected on a cable and the last two devices are connected to each other to form a “ring”. If the cable breaks your network is down. There‟s also a “dual-ring” setup for redundancy, this is just another cable to make sure if one cable breaks your network isn‟t going down. GNS3Vault.com – René Molenaar Page 12 of 466 How to Master CCNA Star topology: All our end devices (computers) are connected to a central device creating a star model. This is what we use nowadays on local area networks (LAN) with a switch in the middle. The physical connections we normally use is UTP (Unshielded twisted pair) cable. Of course when your switch goes down your network is down as well. GNS3Vault.com – René Molenaar Page 13 of 466 How to Master CCNA The example above is what we normally use on our local area networks (LAN). Now let‟s take a look at the following picture where we have a company with multiple sites in different cities. Boston NewYork Amsterdam Paris In the example above every router is connected to every other router. This, of course, is very resistant to failure since a single link failure will not bring our network down. The downside of this setup is that it‟s very expensive. You need multiple links between the sites and each router needs extra interfaces. This is what we call full-mesh. Another option is to make sure the important sites have connections to all other sites like in the following picture. Boston NewYork Amsterdam Paris GNS3Vault.com – René Molenaar Page 14 of 466 How to Master CCNA Here you can see router New York has a connection to all other routers, Boston is only connected to New York and Amsterdam has a connection to New York and Paris. This is a trade-off between fault tolerance and cost (it‟s always about money right?). We call this partial-Mesh. In the next chapter we‟ll dive deeper into the basics of networking. GNS3Vault.com – René Molenaar Page 15 of 466 How to Master CCNA 3. The OSI-Model In the beginning the development of networks was chaotic. Each vendor had its own proprietary solution. The bad part was that one vendor‟s solution was not compatible with another vendor‟s solution. This is where the idea for the OSI-model was born, having a layered approach to networks our hardware vendors would design hardware for the network, and others could develop software for the application layer. Using an open model which everyone agrees on means we can build networks that are compatible with each other. To fix this problem the International Organization for Standardization (ISO) researched different network models and the result is the OSI-model which was released in 1984. Nowadays most vendors build networks based on the OSI model and hardware from different vendors is compatible….excellent! The OSI-model isn‟t just a model to make networks compatible; it‟s also one of the BEST ways to teach people about networks. Keep this in mind since I‟ll be referring a lot to the OSI-model, it‟s very useful! Layer 7 Application Layer 6 Presentation Layer 5 Session Layer 4 Transport Layer 3 Network Layer 2 Data Link Layer 1 Physical “All People Seem To Need Data Processing” This is the OSI-model which has seven layers; we are working our way from the bottom to the top. GNS3Vault.com – René Molenaar Page 16 of 466 How to Master CCNA Let‟s start at the physical layer: Physical Layer: This layer describes stuff like voltage levels, timing, physical data rates, physical connectors and so on. Everything you can “touch” since it‟s physical. Data Link: This layer makes sure data is formatted the correct way, takes care of error detection and makes sure data is delivered reliably. This might sound a bit vague now, for now try to remember this is where “Ethernet” lives. MAC Addresses and Ethernet frames are on the Data Link layer. Network: This layer takes care of connectivity and path selection (routing). This is where IPv4 and IPv6 live. Every network device needs a unique address on the network. Transport: The transport layer takes care of transport, when you downloaded this book from the Internet the file was sent in segments and transported to your computer. o TCP lives here; it‟s a protocol which send data in a reliable way. o UDP lives here; it‟s a protocol which sends data in an unreliable way. I‟m taking a short break here, these four layers that I just described are important for networking, and the upper three layers are about applications. Session: The session layer takes care of establishing, managing and termination of sessions between two hosts. When you are browsing a website on the internet you are probably not the only user of the webserver hosting that website. This webserver needs to keep track of all the different “sessions”. Presentation: This one will make sure that information is readable for the application layer by formatting and structuring the data. Most computers use the ASCII table for characters. If another computer would use another character like EBCDIC than the presentation layer needs to “reformat” the data so both computers agree on the same characters. Application: Here are your applications. E-mail, browsing the web (HTTP), FTP and many more. “People Do Need To See Pamela Anderson” This one normally gives me more smiles when I‟m teaching CCNA in class and it‟s another way to remember the OSI-Model. P = Physical D = Data Link N = Network T = Transport S = Session P = Presentation A = Application GNS3Vault.com – René Molenaar Page 17 of 466 How to Master CCNA Remember that you can‟t skip any layers in the OSI-model, it‟s impossible to jump from the Application layer directly to the Network layer. You always need to go through all the layers to send data over the network. Let‟s take a look at a real life example of data transmission. 1. You are sitting behind your computer and want to download some files of a local webserver. You start up your web browser and type in the URL of your favorite website. Your computer will send a message to the web server requesting a certain web page. You are now using the HTTP protocol which lives on the application layer. 2. The presentation layer will structure the information of the application in a certain format. 3. The session layer will make sure to separate all the different sessions. 4. Depending on the application you want a reliable (TCP) or unreliable (UDP) protocol to transfer data towards the web server, in this case it‟ll choose TCP since you want to make sure the webpage makes it to your computer. We‟ll discuss TCP and UDP later. 5. Your computer has a unique IP address (for example 192.168.1.1) and it will build an IP packet. This IP packet will contain all the data of the application, presentation and session layer. It also specifies which transport protocol it‟s using (TCP in this case) and the source IP address (your computer 192.168.1.1) and the destination (the web server‟s IP address). 6. The IP packet will be put into an Ethernet Frame. The Ethernet frame has a source MAC address (your computer) and the destination MAC address (web server). More about Ethernet and MAC addresses later. 7. Finally everything is converted into bits and sent down the cable using electric signals. Once again, you are unable to “skip” any layers of the OSI model. You always have to work your way through ALL layers. If you want a real life story converted to networking land just think about the postal service: 1. 2. 3. 4. 5. First you write a letter. You put the letter in an envelope. You write your name and the name of the receiver on the envelope. You put the envelope in the mailbox. The content of the mailbox will go to the central processing office of the postal service. 6. Your envelope will be delivered to the receiver. 7. They open the envelope and read its contents. If you put your letter directly in the mailbox it won‟t be delivered. Unless someone at the postal office is friendly enough to deliver it anyway, in network-land it doesn‟t work this way! Going from the application layer all the way down to the physical layer is what we call encapsulation. Going from the physical layer and working your way up to the application layer is called de-encapsulation. GNS3Vault.com – René Molenaar Page 18 of 466 How to Master CCNA Now you know about the OSI-model, the different layers and the function of each layer. During peer-to-peer communication each layer has „packets of information‟. We call these protocol data units (PDU). Now every unit has a different name on the different layers: Transport layer: Segments; For example we talk about TCP segments. Network layer: Packets; For example we talk about IP packets here. Data link layer: Frames; For example we talk about Ethernet frames here. This is just terminology but don‟t mix up talking about IP frames and Ethernet packets… Excellent so now you know everything you need about the OSI-model and the different layers. We‟ll be looking at the different layers throughout this book so you‟ll get some more “practice” remembering them. Besides the OSI-model there was another organization that created a similar model which never became quite as popular. However for your CCNA you‟ll need to know what it looks like. It‟s called the TCP/IP stack and it‟s similar except some of the layers are combined and have different names. TCP/IP Stack Application Transport Internet Network Access As you can see the upper three layers are now combined to the “Application layer”. The network layer is called the “Internet” layer and the bottom 2 layers are combined into the “Network Access” layer. GNS3Vault.com – René Molenaar Page 19 of 466 How to Master CCNA Here‟s a comparison between the two models: OSI Model TCP/IP Stack Application Presentation Application Session Transport Transport Network Internet Data Link Network Access Physical Basically it‟s the same idea, same model except with some layers combined and different names. The physical and data link layer are combined into the network access layer. The network layer is now the internet layer and the session, presentation and application layer are combined into a single application layer. I want to show you an example of what this looks like on a “live” network and the best way to do this is by using wireshark. Wireshark is a protocol sniffer which will show you all the data that is being sent and received on your network card. You can download wireshark (it‟s free) from http://wireshark.org. GNS3Vault.com – René Molenaar Page 20 of 466 How to Master CCNA The example in the picture above is a capture of a computer requesting a webpage from a webserver. I didn‟t capture this one myself since the Wireshark website has a lot of good example captures. If you want to look at this capture on your own computer you can download it here: http://wiki.wireshark.org/SampleCaptures?action=AttachFile&do=view&target=http_gzip.ca p You can see there are ten IP packets here, with the source IP address and the destination IP address. It also shows you which protocol this IP packet is carrying. GNS3Vault.com – René Molenaar Page 21 of 466 How to Master CCNA Here you see one of the Ethernet frames. Do you see the different layers of the OSI-model? Frame 1 / Ethernet II: This is the Data Link layer. Internet Protocol: This is the Network layer. Transmission Control Protocol: This is the Transport layer. If we click on the arrows we can see its contents. I just clicked on the arrows and you can see the contents of the Ethernet Frame. Don‟t worry if you have no idea what you see here we‟ll talk about it later. What I want to show you here is the last line, it says “Type: IP (0x0800)”. What it means is that this computer is carrying an IP packet. Let‟s see if we can see the contents of this IP packet. GNS3Vault.com – René Molenaar Page 22 of 466 How to Master CCNA Interesting…we can see the source IP and destination IP address. If you look closely you see there‟s a line which says “Protocol: TCP (6)”. This is how the IP packet specifies which transport protocol it is carrying, in this case TCP. Let‟s take a look at that TCP segment: Don‟t let all this information get to you, I only want to show you the field that says “Destination port: http (80)”. This is how the transport layer tells us for which application this information is meant, we are using port numbers to do so. In this case port 80 for HTTP traffic. Pretty neat huh? If you feel like it play around a bit with wireshark and look at some of the packets. If you want to see some pre-captures packets check out the wireshark website: http://wiki.wireshark.org/SampleCaptures We are now at the end of this chapter, you have learned about the OSI-model and it‟s different layers and seen some wireshark captures to see the different layers in action. If you want a visual representation of the OSI-model and how a network functions you should check out the “Warriors of the Net” movie. It‟s a 13 minute free movie which shows you how IP packets make their way to their destination; I think it‟s a great watch so grab a snack and let this information sink in: http://www.warriorsofthe.net/movie.html GNS3Vault.com – René Molenaar Page 23 of 466 Do you enjoy reading this sample of How to Master CCNA ? Click on the link below to get the full version. Get How to Master CCNA Today How to Master CCNA 4. The network layer: IP Protocol Let‟s talk about IP! IP (Internet Protocol) determines where we are going to send packets to by looking at the destination IP address. How we determine where to send them is up to the routing protocol, we‟ll talk more about routing later. IP uses Packets called IP packets to carry information. Every IP packet is a single unit of information and besides data it carries information to determine where to send the packet. Let‟s take a look at some of its characteristics: Operates at the network layer of the OSI model. Connectionless protocol: IP itself does not setup a connection, in order to transport data you need the “transport” layer and use TCP or UDP. Every packet is treated independently; there is no order in which the packets are arriving at their destination. Hierarchical: IP addresses have a hierarchy; we‟ll discuss this a bit more in depth when we talk about subnetting and subnet masks. We need an IP address to uniquely identify each network device on the network. An IP address is just like a phone number (I‟m talking about regular phone numbers, no cellphones). Everyone in a city who has a phone at home has a unique phone number where you can reach them. An IP address is 32-bit and consists of 2 parts, the network part and the host part: 32-bit Network Host The IP address is 32-bit but we write it down in 4 blocks of 8 bits. 8 bits is what we call a “byte”. So the IP address will look like this: 8-bit 8-bit 8-bit 8-bit Network Network Network Host The network part will tell us to which “network” the IP address will belong, you can compare this to the city or area code of a phone number. The “host” part uniquely identifies the network device; these are like the last digits of your phone number. GNS3Vault.com – René Molenaar Page 24 of 466 How to Master CCNA Take a look at this IP address which you might have seen before since it‟s a common IP address on local area networks: 192.168.1.1 For this IP address the first 3 bytes are the “network” address and the last byte is the “host” address: 192 168 1 1 Network Network Network Host Ok awesome…but why are the first 3 bytes the “network” part and why is the last byte the “host” part? Good question! I only gave you the IP address but you might remember that if you configure an IP address you also have to specify the subnet mask. Our IP address 192.168.1.1 would come along with the subnet mask 255.255.255.0. The subnet mask tells your computer which part is the “network” part and which part is the “host” part. Despite the name it does not “hide” or “mask” anything. We‟ll talk about binary and subnetting calculations later on, for now just hold the thought that your subnet mask tells us which part of the IP address is the “network” part and which part is for “hosts”. GNS3Vault.com – René Molenaar Page 25 of 466 How to Master CCNA Let‟s take a look at an actual IP packet: Ver IHL TOS Identification Time to Live Packet Length Flags Protocol Fragment Offset Header Checksum Source Address Destination Address Options Padding Data There are a lot of fields there! Now don‟t go look over them and feel puzzled that you have no idea what they are about. For now there are only a few fields that are interesting to us. The fields we don‟t care about are in gray, I want to focus on the red and blue fields. Protocol: Here you will find which protocol we are using on top of IP, this is how we specify which transport layer protocol we are using. So you‟ll find TCP, UDP or perhaps something else in here. Source Address: Here you will find the IP address of the device that created this IP packet. Destination Address: This is the IP address of the device that should receive the IP packet. Data: this is the actual data that we are trying to get to the other side. GNS3Vault.com – René Molenaar Page 26 of 466 How to Master CCNA That wasn‟t so bad right? No need to worry about the other fields for your CCNA. Let me show you the screenshot of wireshark from a few pages ago again: Do you recognize all the fields? You can see it‟s not just theoretical stuff we are talking about…you can actually see what is going on and check out the content of an IP packet. Let‟s take another look at an IP address: 192.168.1.1 What do we know about this IP address? First of all we know it‟s a 32-bit value, so in binary it will look like this: 1100000010101000000000100000001 Now this is a number that is not very human-friendly so to make our life easier we can at least put this number into “blocks” of 8 bits. 8 bits is also called a byte or an octet. 11000000 10101000 00000001 00000001 Now we can convert each byte into decimal, let‟s take the first block and convert it from binary to decimal using the following table: Bits 128 0 64 0 32 0 GNS3Vault.com – René Molenaar 16 0 8 0 4 0 2 0 1 0 Page 27 of 466 How to Master CCNA First block: 11000000 Bits 0 128 1 64 1 32 0 16 0 8 0 4 0 2 0 1 0 128 + 64 = 192 Second block: 10101000 Bits 0 128 1 64 0 32 1 16 0 8 1 4 0 2 0 1 0 64 0 32 0 16 0 8 0 4 0 2 0 1 1 32 0 16 0 8 0 4 0 2 0 1 1 128 + 32 + 8 = 168 Third block: 00000001 Bits 0 128 0 Only the last bit, so that‟s 1. Fourth block: 00000001 Bits 0 128 0 64 0 Same as the third block, the decimal number 1. Gives us the IP address: 192 168 GNS3Vault.com – René Molenaar 1 1 Page 28 of 466 How to Master CCNA Excellent so now you know why IP addresses look like this and why we write them down like this, we even did some basic binary to decimal calculations. One last thing to look at and that‟s the different classes that we have for networks. Maybe you have heard of class A,B or C networks before. Our IP address that we just used (192.168.1.1) is an example of a class C network. We have 3 different classes to work with: - Class A Class B Class C So what‟s the difference between them? The difference between them is how many hosts you can fit in each network, let me show you an example: 192 168 1 1 Network Network Network Host The first 3 octets which are in blue are the “network” part of this IP address. The red part is for “hosts”. So we can use the last octet (octet or byte is the same thing) for our hosts to give them an unique IP address. The following computers will be in the same network: 192.168.1.1 192.168.1.2 192.168.1.3 As you can see their “network” part is the same. A computer with 192.168.2.1 is not in the same network since it‟s “network” part is different, it‟s 192.168.2.X compared to 192.168.1.X. What do you think your computer will do when it wants to send an IP packet to another network? You can find the answer on your own computer: If you are using Windows just hit the start button, type CMD and press enter. Use the ipconfig command to lookup the IP information: C:\Documents and Settings\Computer>ipconfig Windows IP Configuration Ethernet adapter Local Area Connection: Connection-specific IP Address. . . . . Subnet Mask . . . . Default Gateway . . GNS3Vault.com – René Molenaar DNS . . . . . . Suffix . . . . . . . . . . . . . . . . : : 192.168.1.1 : 255.255.255.0 : 192.168.1.254 Page 29 of 466 How to Master CCNA The computer above is in network 192.168.1.X. When it wants to send something to another network it will use its default gateway. This will be your router; in the example above the router has IP address 192.168.1.254. Back to our classes; let me start off by showing you the difference between the classes: Class A Network Host Host Host If you use a class A network you can have a LOT of hosts in each network that you create. Class B Network Network Host Host If you use a class B you can build more networks, but fewer hosts per network. Class C Network Network Network Host And with class C you can build a LOT of networks but only with a few hosts in each network. I just told you 192.168.1.1 is a class C IP address. How do I know this? It‟s because the first bits are “fixed” for the different classes, let me show you this: Class A 0xxxxxxx Host Host Host Class B 10xxxxxx Network Host Host Class C 110xxxxx Network Network Host - Class A: The first bit always has to be 0. Class B: The first 2 bits always have to be 10. Class C: The first 3 bits always have to be 110. So if you calculate this from binary to decimal you‟ll get the following ranges: - Class A starts at 0.0.0.0 Class B starts at 128.0.0.0 Class C starts at 192.0.0.0 So what are the exact ranges that we have? GNS3Vault.com – René Molenaar Page 30 of 466 How to Master CCNA - Class A: Class B: Class C: 0.0.0.0 – 126.255.255.255 128.0.0.0 – 191.255.255.255 192.0.0.0 – 223.255.255.255 Hmm now this raises 2 questions: - If you look closely, do you see a 127.0.0.0 subnet? It‟s not in the class A range so what happened to it? Why does Class C stop at 223.255.255.255? To answer the first question: Go to your command prompt of your computer and type in “ping 127.0.0.1” and you‟ll get a response. This network range is being used as “loopback”. Your loopback interface is something to check if your IP stack is OK. To answer the second question I have to tell you that there‟s actually a class D range, we don‟t use those IP addresses to assign to computers but it‟s being used for “multicast”. We‟ll get back to multicast later in the book; it starts with the 224.0.0.0 range. The last thing I need to tell you about classes is the difference between “private” and “public” IP addresses. - Public IP addresses are used on the Internet. Private IP addresses are used on your local area network and should not be used on the Internet. These are the Private IP address ranges: Class A: Class B: Class C: 10.0.0.0 – 10.255.255.255 172.16.0.0 – 172.31.255.255 192.168.0.0 – 192.168.255.255 Do you see our 192.168.1.1 example IP address falls within class C and is a private IP address? I like to use this IP address since it‟s most common to people, it‟s used a lot on home networks and SOHO (small office home office) routers. Is there anything else we need to know about IP addresses? Well yes, one last thing! There are 2 IP addresses we cannot use on our network. - Network address. Broadcast address. The network address cannot be used on a computer as an IP address because it‟s being used to “define” the network. Routers will use the network address as you will discover later in the book. The broadcast address cannot be used on a computer as an IP address because it‟s used by broadcast applications. A broadcast is an IP packet that will be received by all devices in your network. GNS3Vault.com – René Molenaar Page 31 of 466 How to Master CCNA So how do we recognize these two IP addresses that we cannot use? Let me give you an example for this: Class C Network Network Network Host Let‟s use the Class C range and our IP address 192.168.1.1. 192 168 1 1 Network Network Network Host We need to look at the last octet which is being used for hosts. If we set all the bits to 0 in our “host” part then we have the network address: 192 168 1 0 Network Network Network 00000000 So 192.168.1.0 is the network address in this case and we are unable to use this IP address for computers. If we set all the bits to 1 we‟ll have a broadcast IP address and we also cannot use this for computers. 192 168 1 255 Network Network Network 11111111 So in summary: - Set all the host bits to 0 gives you the network address. Set all the host bits to 1 gives you the broadcast address. These 2 IP addresses we cannot use for computers. IP addresses can be configured statically or dynamically. If you go the static way you have to configure the IP address yourself on your computer, router or switch. Dynamic means we use DHCP (Dynamic Host Configuration Protocol). DHCP is a server process that assigns IP addresses from a “pool” to network devices. A cisco router can be used as a DHCP server but you will also see this often on Microsoft or Linux servers. Here‟s how it works: GNS3Vault.com – René Molenaar Page 32 of 466 How to Master CCNA DHCP Pool: 192.168.1.1 192.168.1.20 DHCP Server 192.168.1.254 Computer On the left side we see a computer without an IP address, on the right side is a DHCP server with IP address 192.168.1.254. A DHCP pool has been configured with IP address 192.168.1.1 – 192.168.1.20. Once the computer boots it will request an IP address by broadcasting a DHCP discover message: DHCP Pool: 192.168.1.1 192.168.1.20 Computer DHCP Discover DHCP Server 192.168.1.254 The computer has no IP address so it will broadcast this DHCP discover message. The DHCP server will hear this message and respond as following: DHCP Pool: 192.168.1.1 192.168.1.20 Computer DHCP Offer DHCP Server 192.168.1.254 The DHCP server will send a DHCP offer message which contains the IP address that the computer can use. Besides giving an IP address we can also supply a default gateway, a DNS server IP address and some other options. We are not done now…there are two more steps: GNS3Vault.com – René Molenaar Page 33 of 466 How to Master CCNA DHCP Pool: 192.168.1.1 192.168.1.20 Computer DHCP Request DHCP Server 192.168.1.254 After receiving the DHCP offer our computer will send a DHCP request to ask if it‟s OK to use this information… DHCP Pool: 192.168.1.1 192.168.1.20 Computer DHCP ACK DHCP Server 192.168.1.254 And the final step in this process will be a DHCP ACK from the DHCP server to “acknowledge” the request from the computer. Here‟s what it looks like in wireshark: GNS3Vault.com – René Molenaar Page 34 of 466 How to Master CCNA Above you see the DHCP Discover, Offer, Request and ACK messages. GNS3Vault.com – René Molenaar Page 35 of 466 How to Master CCNA Let‟s take a closer look: Above you see the DHCP discover message from the computer. As you can see it‟s a broadcast (destination MAC address FF:FF:FF:FF:FF:FF). The protocol that DHCP uses is the bootstrap protocol, you can see it at the bottom of the capture. GNS3Vault.com – René Molenaar Page 36 of 466 How to Master CCNA The DHCP server will respond with the DHCP offer message. You can see this because the source IP address is 192.168.1.254 (the DHCP server) and when we look at the packet you can see that it is giving IP address 192.168.1.1 to the computer. GNS3Vault.com – René Molenaar Page 37 of 466 How to Master CCNA The computer will respond with a DHCP request to ask if it‟s ok to use this information… GNS3Vault.com – René Molenaar Page 38 of 466 How to Master CCNA And last but not least, here‟s the DHCP ACK telling the computer it‟s ok to use the information. That‟s all I wanted to show you about DHCP for now. And that‟s the end of this chapter; you should now have a basic understanding of IP. In the “Binary, Subnetting and Summarization” chapter we will dive deeper into IP and in the “IP Routing” chapter we will look at routers and how they “route” IP packets. GNS3Vault.com – René Molenaar Page 39 of 466 How to Master CCNA 5. The Transport Layer: TCP and UDP Let‟s work our way up the OSI-model, we just covered IP and now it‟s time to pick a “transport” protocol. Keep in mind IP is “nothing more” but a number (ok that‟s very simplistic) but I want to make sure you understand we need a transport protocol for actually setting up the connection and sending data between our computers. In this chapter I want to focus on the transport protocols that are used most of the time: TCP (Transmission Control Protocol) UDP (User Datagram Protocol) So why do we have 2 different transport protocols here, why do we care and when do we need one over another? The short answer is: TCP is a reliable protocol. UDP is a unreliable or best-effort protocol. Unreliable you might think? Why do I want data transport which is unreliable? Does that make any sense? Let me tell you a little story to explain the difference between the two protocols. You are sitting behind your computer and downloading the latest greatest movie in 1080P HD with 7.1 surround super sound directly from Universal studio‟s brand new “download on demand” service (hey you never know…it might happen one day…). This file is 20GB and after downloading 10GB there‟s something going wrong and a couple of IP packets don‟t make it to your computer, as soon as the entire download is done you try to play the movie and you get all kind of errors. Unable to watch the movie you are frustrated and head for the local dvd rental place to watch some low-quality movie… Ok maybe I exaggerate a bit but I think you get the idea; you want to make sure the transport of your download to your computer is reliable which is why we use TCP. In case some of the IP packets don‟t make it to your computer you want to make sure this data will be retransmitted to your computer! In our second story you are the network engineer for a major company and you just told your boss how awesome this brand new open source Voice over IP solution is. You decide to implement this new VoIP solution and to get rid of all the analog phones but your users are now complaining big time that their phone call quality is horrible. You contact the open source VoIP solution provider and you find out that they thought it would be a good idea to use a reliable transport protocol like TCP since well, we want phone calls to be reliable right? Wrong thinking! TCP does error correction which means that data that didn‟t make it to your computer will be retransmitted. How weird will your phone call sound if you are talking to someone and you hear something that they said a few seconds ago? It‟s real-time so we don‟t want retransmission. It‟s better to send VoIP packets and lose a few than retransmitting them afterwards, your VoIP codec can also fix packet loss up to a certain degree. In this example we‟ll want to use a best effort or unreliable protocol which is UDP. GNS3Vault.com – René Molenaar Page 40 of 466 How to Master CCNA Connection Type: Sequencing: Usage: TCP Connection-oriented Yes Downloads File Sharing Printing UDP Connectionless No VoIP Video (streaming) What do we have in the table above? First of all you see “connection type”. TCP is connection-oriented which means it will “setup” a connection and then start transferring data. UDP is connectionless which means it will just start sending and doesn‟t care if it arrives yes or not. The connection that TCP will setup is called the “3 way handshake” which I will show you in a minute. Sequencing means that we use a sequence number, if you download a big file you need to make sure that you can put all those packets back in the right order. As you can see UDP does not offer this feature, there‟s no sequence number there. So what about VoIP? Don‟t we need to put those packets back in order at the receiver side? Well actually yes we do otherwise we get some strange conversations. UDP does not offer this “sequencing” feature though…let me tell you a little secret: for VoIP it‟s not just UDP that we use but we also use RTP which does offer sequencing! (And some other cool features we need for VoIP). Let‟s take a look at an UDP header: 16-bit source port 16-bit destination port 16-bit UDP length 16-bit UDP checksum Data You can see how simple it is, it has the source and destination port number (this is how we know for which application the data is meant), there‟s a checksum and the length. Let‟s sum up what we now know about UDP: It operates on the transport layer of the OSI model. Is a connectionless protocol, does not setup a connection…just sends data. Limited error correction because we have a checksum. Best-effort or unreliable protocol. No data-recovery features. GNS3Vault.com – René Molenaar Page 41 of 466 How to Master CCNA Now let‟s see what TCP can offer us. First of all since TCP is a reliable protocol it will “setup” a connection before we start sending any data. This connection is called the “3 way handshake”. Computer A Computer B Computer A wants to send data to computer B in a reliable way, so we are going to use TCP to accomplish this. First we will setup the connection by using a 3-way handshake, let me walk you through the process: Computer A Computer B 1. SYN, SEQ=1 First our computer A will send a TCP SYN, telling computer B that it wants to setup a connection. There‟s also a sequence number and to keep things simple I picked number 1. Computer A Computer B 1. SYN, SEQ=1 2. SYN, ACK. SEQ=100 ACK=2 Computer B will respond to computer A by sending a SYN,ACK message back. You can see it picks its own sequence number 100 (I just picked a random number) and it sends ACK=2. GNS3Vault.com – René Molenaar Page 42 of 466 How to Master CCNA ACK=2 means that it acknowledges that it has received the TCP SYN from computer A which had sequence number 1 and that it is ready for the next message with sequence number 2. Computer A Computer B 1. SYN, SEQ=1 2. SYN, ACK. SEQ=100 ACK=2 3. ACK, SEQ=2 ACK=101 The last step is that computer A will send an acknowledgement towards computer B in response of the SYN that computer B sent towards computer A. You can see it sends ACK=101 which means it acknowledges the SEQ=100 from computer B. Since computer B sent a ACK=2 towards computer A, computer A now knows it can send the next message with sequence number 2. To simplify things a little bit, it looks like this: Computer A Computer B want to talk Computer A sends a TCP SYN. (I want to talk to you) sends a TCP SYN,ACK. (I accept that you want to talk to me, and I to you as well) sends a TCP ACK. ( I accept that you want to talk to me) Let me show you an example in Wireshark what this looks like on a real network: In this example computer with IP address 192.168.1.2 wants to setup a connection with 174.143.213.184 and it‟s sending a TCP SYN. 174.143.213.184 is responding by sending a TCP SYN,ACK in return. Finally 192.168.1.2 sends a TCP ACK to finish the 3 way handshake. GNS3Vault.com – René Molenaar Page 43 of 466 How to Master CCNA Let‟s see those packets in detail, first we look at the TCP SYN: You can see in the “Flags” section that the SYN-bit has been set. On the top right you can see “Seq: 0” which is the sequence number. In this example you see that in the “Flags” section both the SYN and ACK bit are set, also on the top you can see “Seq :0” and “Ack:1”. This computer is acknowledging the SYN-bit from the other computer. This is the final step in the process where our computer that that started the 3 way handshake sets the ACK-bit and acknowledges the SYN from the other side. Are you following me so far? If you want to play a bit just start up Wireshark and see if you can capture a 3 way handshake yourself on your computer. Take a look at the different TCP packets and see if you can find the SYN, SYN-ACK and ACK‟s. Also check the different sequence numbers and see if you can find a pattern. Phew so we have setup a connection using the 3 way handshake! Now we can start sending data…what else does TCP offer us? One of the things is “flow control”. Imagine you have a fast computer transmitting data to a smartphone, obviously the computer could overburden the smartphone with traffic which is why we have flow control. In each TCP segment the receiver can specify in the “receive window” field how much data in bytes it wants to receive. GNS3Vault.com – René Molenaar Page 44 of 466 How to Master CCNA Our sending computer can only send data up to this size so the smartphone doesn‟t get overburdened. The more data you can send each time the higher your throughput will be. Let‟s look at an example of how this all fits together: Computer A Computer B SEQ=10: 10 bytes of Data Computer A has setup a connection with Computer B by using the 3 way handshake. We are sending 10 bytes of Data which means our “window size” is 10 bytes. The sequence number is 10. Computer A Computer B SEQ=10: 10 bytes of Data ACK=11 Computer B is going to respond by sending “ACK=11” which means “thanks I received your 10 bytes, now send me #11 and the rest”. TCP is a reliable protocol which is why we have to acknowledge everything we are receiving. The larger your window size, the higher your throughput will be. This makes sense because you are sending fewer ACK‟s compared to the data you are sending. GNS3Vault.com – René Molenaar Page 45 of 466 How to Master CCNA TCP is a fairly complex protocol and if we look at the header you‟ll see it has a lot more fields than UDP has: 16-bit source port 16-bit destination port 32-bit sequence number 32-bit acknowledgment number D.O RSV Flags 16-bit window size 16-bit TCP checksum 16-bit urgent pointer Options Data The fields in gray are not important for us; everything in red is what I would like to tell you about. As you can see there‟s a 16-bit source and destination port, port numbers are used to determine for which application this data is meant (This is how we go from the transport layer up to the higher layers in the OSI-model). You can see we have 32-bits that are used for our sequence numbers, and there‟s also 32bits for the acknowledgment (ACK) reserved. The “Flags” field is where TCP sets the different message types like “SYN” or “ACK”. Window size has a 16-bit field which specifies how many bytes of data you will send before you want an acknowledgment from the other side. Finally there‟s a checksum and of course our data, the stuff we are actually trying to send to the other side. GNS3Vault.com – René Molenaar Page 46 of 466 How to Master CCNA Let‟s sum up what we have learned about TCP: It‟s a reliable protocol. Before you send data you will setup the connection by using the 3 way handshake. After sending X amount of bytes you will receive an acknowledgment (ACK) from the other side. How many bytes you send before you get an ACK is controlled by using the “window size”. TCP can do retransmissions. That‟s the end of this chapter. If you want to see TCP in action the best way to do it by using Wireshark and capturing some traffic of your computer while you are browsing the Internet. See if you can track the sequence numbers, 3 way handshake etc. GNS3Vault.com – René Molenaar Page 47 of 466 How to Master CCNA 6. Ethernet: Dominating your LAN for over 30 years The title of this chapter might sound like something from a movie but in a sense it‟s true. On our Local area networks (LAN) we basically only run Ethernet, there‟s nothing else that we do. So let‟s talk a bit about Ethernet and LANS. What is a LAN anyway? The term is a bit vague but roughly you can say that a network which is in a single building or perhaps a campus area with multiple buildings is what we call “local” area network or LAN. If you would have a connection to an ISP or perhaps a leased line to connect your headquarters network to a branch office, that‟s where we talk about a WAN (Wide area network). LAN doesn‟t have anything to do with size, so a network with 2 computers is just as good a LAN as having 2,000 computers in a building. Ethernet is the protocol that we are running on our LAN. So what layer(s) of the OSI model do you think Ethernet will describe? If you are thinking “Data link” layer you got it right but it also describes the physical layer. Data Link Physical Now here things will get a bit funky, Ethernet describes the Data link layer but it has been split up in two pieces, so it looks like this: LLC Sublayer MAC Sublayer Physical So there are sublayers called “LLC” which stands for Logical Link Control and “MAC” which stands for “Media Access Control”. You have probably seen or heard about MAC addresses before. The logical link control layer does a couple of things like error correction. We don‟t care about this as much nowadays because we use TCP which does error correction on the transport layer. Keep in mind that Ethernet was invented a long time ago and we used to have a lot of other network protocols besides IP like IPX, AppleTalk, Novell etc. The MAC sublayer is more interesting to us; let me describe its functions and why we need it. First of all every device on our LAN has a unique identifier on the data link layer, this is our “MAC address”. Just as an IP address is a unique identifier on the network layer (layer 3) we have the MAC address as a unique identifier on the data link layer (layer 2). One of the other things that our MAC sublayer does is taking care of channel access. This makes it possible so computers connected to the same physical medium can access and share it. What do I mean by “same physical medium”? We have to take a little history lesson here. GNS3Vault.com – René Molenaar Page 48 of 466 How to Master CCNA Do you remember those network cables? If you don‟t…good for you! I have to be honest I never worked with these networks on a “professional” level but I did use them for home networks at the time (of course to play games over the LAN…not to build websites about networking like I do nowadays…). All computers in the network were connected to a single long black coax cable (our physical medium) and were sharing the network. A network like this was half-duplex which means that only 1 computer was able to send traffic and the others had to wait. Nowadays we have full-duplex which means all devices can send and receive at the same time! Remember the first chapter where I talked about bus, ring and star topologies? This is our bus topology right here! What do you think would happen if two computers would start sending data at the exact same moment? That‟s right…you get a collision! Electrical signals bouncing into each other and no data transmission at all… Maybe you also remember our old friend the “Hub”: GNS3Vault.com – René Molenaar Page 49 of 466 How to Master CCNA Courtesy of Netgear Inc. Unauthorized use not permitted That‟s right, that‟s about the first star topology network we had. The problem with our hub is that it‟s nothing more but an electrical repeater. If you use a hub for your network, its running half-duplex which means you can get collisions as well! A hub is not the same as a switch, and there‟s no such thing as a “hub switch”. More about this in the “Hubs, Bridges and Switches” chapter! Back to our MAC sublayer, if you are running a half-duplex network we need to make sure that whenever there‟s a collision on the network we have a solution. There is one and this protocol is called CSMA/CD. CS = Carrier Sense MA = Multi Access CD = Collision Detection Carrier sense means we can “listen” on the cable to hear if anything is going on, in other words if another computer is sending data at this moment. Multi access means everyone can access our physical medium but it has to be clear…no other computer should be sending at that moment. In case 2 computers send at the same time we have a collision, since we can detect this (its carrier sense right) CSMA/CD will solve this as following: 1. The two computers that had the collision will start jamming the physical medium; this will ensure nobody else can transmit at that moment. 2. The two computers each start a random clock. 3. When the time of the random clock elapses they retransmit. Since the clock is random, both computers will have a different timer and one of them will send its data before the other. By jamming the physical medium we will be certain that no other computer will get a chance to send data before them. GNS3Vault.com – René Molenaar Page 50 of 466 How to Master CCNA Enough about the MAC sublayer. Let me give you an example of an Ethernet Frame: Preamble Dest SOF Source Length 802.2 Header/Data FCS The most important fields for us are “Dest” which stands for destination and the source address; this is where the MAC addresses fit in. Just for fun let me describe the other fields a bit. Preamble and SOF “Start of Frame delimiter” are a string of alternating 0‟s and 1‟s to tell the receiver that an Ethernet frame is incoming. Length is of course the size of our Ethernet Frame, 802.2 Header/Data is where the LLC sublayer or data fits in. At the end you‟ll find a FCS (Frame Check Sequence) to see if the frame is OK or corrupted. So what does a MAC address look like? Let‟s have a look: 1 1 22 24 BC Local OUI Vendor A MAC address is 48-bits and consists of a couple of fields: 1. BC which stands for broadcast; If your Ethernet frame is a broadcast than you have to set this bit to 1. 2. Local: this bit has to be set when you change your MAC address. Normally a MAC address is unique on the planet; if you change it it‟s only locally unique within your network. 3. OUI which stands for Organization Unique Identifier; every network vendor has received 22 bits that identifies them. 4. The last 24 bits are Vendor Assigned; the network vendor will use these bits to give each network device a unique MAC address. We write down MAC addresses in hexadecimal so it will look like something like this: 00:00:0C:52:31:04 Any idea who‟s MAC address this is? Take a wild guess….Cisco of course! There‟s one last thing I want to show you about LAN and Ethernet, not the most exotic topic but something you need to know if you want to pass your CCNA. It‟s about the different cables that we have. You have probably familiar seen UTP (Unshielded Twisted Pair) cabling but did you know we have two different types of cables? Straight-through Crossover GNS3Vault.com – René Molenaar Page 51 of 466 How to Master CCNA The plug on the left side is straight-through and the one on the right side is crossover. The difference is how the wires are connected in the RJ-45 plug. A straight-through cable has the same wire layout on both sides. Crossover cables have the crossover wire layout on one side and the straight-through on the other side. Why do we care about this? Nowadays it doesn‟t matter much which cable you use since most computers, laptops and networking hardware is auto-sensing (it‟s called Auto-MDIX) which means it will automatically detect how the wires are connected in the RJ-45 plug and it‟ll work. If you are using Cisco routers or switches you need to make sure you use the correct cables though. When and where do we need which cable? Hubs and switches are seen as “network devices”. Computers, servers and routers are seen as “host devices”. Why do we call a router a host device and not a network device? Well try to think of it this way…if you don‟t configure a Cisco router it‟s not going to route anything for you and it‟s nothing more but a “computer”. We need to enable a routing protocol ourselves…besides it will help you remember which cable you need to use. More about routing later! Network device <-> Host device: straight-through cable. Host device <->Host device: crossover cable. Network device <- -> Network device: crossover cable. So between a computer and a switch you will use a straight-through cable. Connect 2 switches to each other and you‟ll need a crossover cable, the same applies if you connect to routers to each other. Router to computer (both host devices) you need a crossover cable as well. Now we are talking about cables…do you know what the official name is for the blue Cisco console cable? You need this cable to configure your switch or router from your computer. GNS3Vault.com – René Molenaar Page 52 of 466 How to Master CCNA It‟s called a rollover cable. I didn‟t make up the name but this is CCNA material. You have now learned about Ethernet, IP, TCP, UDP or in other words layer 1 up to 4 of the OSI-model. There is one more thing I‟d like to explain to you: Computer A 192.168.1.1 MAC: AAA Computer B 192.168.1.2 MAC: BBB In the picture above we have two computers, computer A and computer B and you can see their IP addresses and their MAC addresses. We are sitting behind computer A, open up a command prompt and type: C:\Users\vmware>ping 192.168.1.2 Pinging 192.168.1.2 with 32 bytes of data: Reply from 192.168.1.2: bytes=32 time=15ms Reply from 192.168.1.2: bytes=32 time=15ms Reply from 192.168.1.2: bytes=32 time=14ms Reply from 192.168.1.2: bytes=32 time=17ms TTL=57 TTL=57 TTL=57 TTL=57 Ping statistics for 192.168.1.2: Packets: Sent = 4, Received = 4, Lost = 0 (0% loss), Approximate round trip times in milli-seconds: Minimum = 14ms, Maximum = 17ms, Average = 15ms You know about the OSI-model and also know we have to go through all the layers. Ping uses the ICMP protocol and IP uses the network layer (layer 3). Our IP packet will have a source IP address of 192.168.1.1 and a destination IP address of 192.168.1.2. Next step will be to put our IP packet in an Ethernet frame where we set our source MAC address AAA and destination MAC address BBB. Now wait a second…how does computer A know about the MAC address of computer B? We know the IP address because we typed it but there is no way for computer A to know the MAC address of computer B. There is another protocol we have that will solve this problem for us, it‟s called ARP (Address Resolution Protocol). GNS3Vault.com – René Molenaar Page 53 of 466 How to Master CCNA Let me show you how it works: C:\Users\ComputerA>arp -a Interface: 192.168.1.1 --- 0xb Internet Address Physical Address 192.168.1.2 00-0c-29-63-af-d0 192.168.1.255 ff-ff-ff-ff-ff-ff 224.0.0.22 01-00-5e-00-00-16 224.0.0.252 01-00-5e-00-00-fc Type dynamic static static static In the example above you see an example of an ARP table on a Computer A. As you can see there is only one entry, this computer has learned that the IP address 192.168.1.2 has been mapped to the MAC address 00:0C:29:63:AF:D0. GNS3Vault.com – René Molenaar Page 54 of 466 Do you enjoy reading this sample of How to Master CCNA ? Click on the link below to get the full version. Get How to Master CCNA Today How to Master CCNA Let‟s take a more detailed look at ARP and how it functions: ARP Request Destination MAC: FF:FF:FF:FF:FF:FF Computer A 192.168.1.1 MAC: AAA Computer B 192.168.1.2 MAC: BBB In this example we have two computers and you can see their IP address and MAC address. We are sitting behind computer A and we want to send a ping to computer B. The ARP table is empty so we have no clue what the MAC address of computer B is. The first thing that will happen is that computer A will send an ARP Request. This message basically says “Who has 192.168.1.2 and what is your MAC address?” Since we don‟t know the MAC address we will use the broadcast MAC address for the destination (FF:FF:FF:FF:FF:FF). This message will reach all computers in the network. ARP Reply Source MAC: BBB Destination MAC: AAA Computer A 192.168.1.1 MAC: AAA Computer B 192.168.1.2 MAC: BBB Computer B will reply with a message ARP Reply and is basically saying “that‟s me! And this is my MAC address”. Computer A can now add the MAC address to its ARP table and start forwarding data towards computer B. GNS3Vault.com – René Molenaar Page 55 of 466 How to Master CCNA If you want to see this in action you can look at it in Wireshark: Above you see the ARP request for Computer A that is looking for the IP address of Computer B. The source MAC address is the MAC address of computer A, the destination MAC address is “Broadcast” so it will be flooded on the network. The second packet is the ARP reply. Computer B will send its MAC address to Computer A. Here‟s a detailed look: Above you can see the ARP request. GNS3Vault.com – René Molenaar Page 56 of 466 How to Master CCNA And here‟s the ARP reply: You can see that Computer B sends its MAC address in the ARP reply to Computer A. Enough about ARP and Ethernet, in the next chapter we‟ll discuss the difference between hubs, bridges and switches. GNS3Vault.com – René Molenaar Page 57 of 466 How to Master CCNA 7. Introduction to Cisco IOS In this chapter I‟m going to show you how Cisco IOS works and how to create a basic configuration. Just like a computer a switch or router requires an operating system to support the hardware. Cisco IOS is the operating system that you will find on the switches and routers and some other devices like wireless access points. When you work with Cisco routers and switches you will do most of the configuration using the CLI (Command Line Interface). For some of you this might prove challenging in the beginning and it will take some time to become familiar with the CLI, however once you get used to it I promise that it‟s the fastest and most convenient method to configure routers or switches. The CLI can be accesses by using the blue Cisco console cable (it‟s called a rollover cable) or remotely using telnet or SSH. I‟ll show you how to do this later in this chapter. Cisco also offers a GUI (Graphical User Interface): CNA (Cisco Network Assistant) for switches. SDM (Security and Device Manager) or CCP (Cisco Configuration Professional) for routers. SDM was the first version of the GUI but now it has been replaced by CCP. Since Cisco updated the CCNA exam(s) in 2013, they completely removed SDM and CCP from the CCNA blueprint. You will only have to work with the CLI. The advantage of a GUI is that it has wizards that let you configure complex things with a few clicks. The downside however is that A) you might have no idea what you are doing and B) when you need to troubleshoot you‟ll need the CLI 9 out of 10 times. I‟m not a big fan of the GUI but it‟s best to see for yourself. We will start with the basic configuration of a cisco device. First I will use a switch to demonstrate the CLI but the same commands work on a router. Secondly I will demonstrate CCP on a router. This is the topology that I am using: Fa0/2 Computer GNS3Vault.com – René Molenaar Fa0/1 Switch Fa0/0 Router Page 58 of 466 How to Master CCNA Let‟s take a switch out of the box and start it, see what it does shall we? I‟ll be using the following items: Courtesy of Cisco Systems, Inc. Unauthorized use not permitted. First of all we need to have a switch. I have a Cisco Catalyst 3560 that I‟ll use for my demonstration. Secondly we‟ll need one of those Cisco console cables or we can‟t connect our computer to the switch. If you don‟t have a COM / serial port on your computer or laptop, use your USB to serial cable. The last thing you require is an application to connect to your serial port. Putty is a good free application to start with, you can download it here: http://www.chiark.greenend.org.uk/~sgtatham/putty/download.html When you start putty it looks like this: GNS3Vault.com – René Molenaar Page 59 of 466 How to Master CCNA Make sure you select serial and type in the correct COM port number. If you don‟t know the COM port number you can look it up in the windows device manager. You need to leave speed at 9600. Click on open and you will have access to your switch. When you start a switch for the first time its initial configuration is enough to make it work and “switch” traffic for the computers connected to it. As soon as you power on the switch this is what it will do: 1. Check the hardware. 2. Locate the Cisco IOS image. 3. Locate and apply configuration (if available). This is what it looks like on a real switch: Boot Sector Filesystem (bs) installed, fsid: 2 Base ethernet MAC Address: 00:11:bb:0b:36:00 Xmodem file system is available. The password-recovery mechanism is enabled. Initializing Flash... flashfs[0]: 8 files, 4 directories flashfs[0]: 0 orphaned files, 0 orphaned directories flashfs[0]: Total bytes: 15998976 flashfs[0]: Bytes used: 10424320 flashfs[0]: Bytes available: 5574656 flashfs[0]: flashfs fsck took 9 seconds. ...done Initializing Flash. Above you see that it‟s checking the flash drive of the switch. Next step is to load the IOS image that it found on the flash drive: GNS3Vault.com – René Molenaar Page 60 of 466 How to Master CCNA Loading "flash:c3560-advipservicesk9-mz.122-46.SE.bin" Interrupt within 5 seconds to abort boot process. Loading "flash:/c3560-advipservicesk9-mz.12244.SE1.bin"...@@@@@@@@@@@@@@@@@@@@@@@@@@@@@@@@@@@@@@@@@@@@@@@@@@@@@@@@@@@@@@@ @@@@@@@@@@@@@@@@@@@@@@@@@@@@@@@@@@@@@@@@@@@@@@@@@@@@@@@@@@@@@@@@@@@@@@@@@ File "flash:/c3560-advipservicesk9-mz.122-44.SE1.bin" uncompressed and installed, entry point: 0x3000 executing... IOS images are stored on the flash drive in a compress format, it will be uncompressed and copied to the RAM of the switch. Now IOS is loaded you will see something like this: Restricted Rights Legend Use, duplication, or disclosure by the Government is subject to restrictions as set forth in subparagraph (c) of the Commercial Computer Software - Restricted Rights clause at FAR sec. 52.227-19 and subparagraph (c) (1) (ii) of the Rights in Technical Data and Computer Software clause at DFARS sec. 252.227-7013. cisco Systems, Inc. 170 West Tasman Drive San Jose, California 95134-1706 Cisco IOS Software, C3560 Software (C3560-ADVIPSERVICESK9-M), Version 12.2(44)SE1, RELEASE SOFTWARE (fc1) Copyright (c) 1986-2008 by Cisco Systems, Inc. Compiled Fri 07-Mar-08 00:10 by weiliu Image text-base: 0x00003000, data-base: 0x01900000 Above you see this banner and the IOS version that I‟m running. This is a Cisco 3560 switch. Next step is that IOS will check the flash drive: Initializing flashfs... flashfs[1]: flashfs[1]: flashfs[1]: flashfs[1]: flashfs[1]: flashfs[1]: flashfs[1]: 8 files, 4 directories 0 orphaned files, 0 orphaned directories Total bytes: 15998976 Bytes used: 10424320 Bytes available: 5574656 flashfs fsck took 10 seconds. Initialization complete....done Initializing flashfs. GNS3Vault.com – René Molenaar Page 61 of 466 How to Master CCNA And once it‟s done it will do a POST (Power On Self-Test): POST: CPU MIC register Tests : Begin POST: CPU MIC register Tests : End, Status Passed POST: PortASIC Memory Tests : Begin POST: PortASIC Memory Tests : End, Status Passed POST: CPU MIC interface Loopback Tests : Begin POST: CPU MIC interface Loopback Tests : End, Status Passed POST: PortASIC RingLoopback Tests : Begin POST: PortASIC RingLoopback Tests : End, Status Passed POST: Inline Power Controller Tests : Begin POST: Inline Power Controller Tests : End, Status Passed POST: PortASIC CAM Subsystem Tests : Begin POST: PortASIC CAM Subsystem Tests : End, Status Passed POST: PortASIC Port Loopback Tests : Begin POST: PortASIC Port Loopback Tests : End, Status Passed Waiting for Port download...Complete Once the POST is done we‟ll get a final warning: This product contains cryptographic features and is subject to United States and local country laws governing import, export, transfer and use. Delivery of Cisco cryptographic products does not imply third-party authority to import, export, distribute or use encryption. Importers, exporters, distributors and users are responsible for compliance with U.S. and local country laws. By using this product you agree to comply with applicable laws and regulations. If you are unable to comply with U.S. and local laws, return this product immediately. A summary of U.S. laws governing Cisco cryptographic products may be found at: http://www.cisco.com/wwl/export/crypto/tool/stqrg.html If you require further assistance please contact us by sending email to [email protected]. GNS3Vault.com – René Molenaar Page 62 of 466 How to Master CCNA And finally you‟ll see an overview of the hardware that this switch offers: cisco WS-C3560-24PS (PowerPC405) processor (revision G0) with 122880K/8184K bytes of memory. Processor board ID CAT0832N0G3 Last reset from power-on 1 Virtual Ethernet interface 24 FastEthernet interfaces 2 Gigabit Ethernet interfaces The password-recovery mechanism is enabled. 512K bytes of flash-simulated non-volatile configuration memory. Base ethernet MAC Address : 00:11:BB:0B:36:00 Motherboard assembly number : 73-9299-01 Power supply part number : 341-0029-03 Motherboard serial number : CATXXXXXX Power supply serial number : DTHXXXXXX Model revision number : G0 Motherboard revision number : E0 Model number : WS-C3560-24PS-S System serial number : CATXXXXXXX Top Assembly Part Number : 800-24791-01 Top Assembly Revision Number : K0 Version ID : N/A Hardware Board Revision Number : 0x09 Switch Ports Model ------ ----- ----* 1 26 WS-C3560-24PS SW Version ---------12.2(44)SE1 SW Image ---------C3560-ADVIPSERVICESK9-M Once the switch is done you finally get to see this message: Press RETURN to get started! If the switch does not have a configuration, you‟ll see the following: --- System Configuration Dialog --Would you like to enter the initial configuration dialog? [yes/no]: If you type yes and press enter it will walk you through a wizard where you can configure some basic settings. Even without a configuration our switch will work just like any other “unmanaged” switch. If you connect computers to it they will be able to communicate with each other. I‟m going to skip it since we‟ll configure everything ourselves. You‟ll end up with this after skipping the wizard: Switch> GNS3Vault.com – René Molenaar Page 63 of 466 How to Master CCNA Right now you are in user mode and you can recognize it because of the > symbol. When you are in user mode you don‟t have full access to the device. What we want is privileged mode which is also known as enable mode. This is how we do it: Switch>enable Switch# That‟s it! We are now in privileged mode where we have full access to our device. You can recognize it because of the # symbol. If I want to return back to user mode I can do this: Switch#disable Switch> You‟ll probably never use it but you can type disable to get back to user mode. So you have full access to your device…now what? Welcome to the marvelous world of typing commands to get things done. Let‟s start with a simple example. We‟ll configure the clock on our switch so I can demonstrate how the CLI works: Switch#cl? clear clock Whenever I partially type a command I can use the ? to see my options. I typed in “cl?” and the CLI tells me that there are two commands that start with the letters “cl”. There‟s the “clear” command and the “clock” command. Let‟s try the clock: Switch#clock % Incomplete command. When you see % incomplete command the CLI is expecting more information. What does it want from us? Let‟s find out: Switch#clock ? set Set the time and date It wants us to type “set” so we can set the time and date. Let‟s obey and do it: Switch#clock set % Incomplete command. It‟s still incomplete…let‟s see why: Switch#clock set ? hh:mm:ss Current Time Now we are getting somewhere. I need to type in the time…let‟s do it: GNS3Vault.com – René Molenaar Page 64 of 466 How to Master CCNA Switch#clock set 14:51:50 % Incomplete command. The time is right but it IOS tells us it‟s expecting something more …oh CLI what do you want from me? Switch#clock set 14:51:50 ? <1-31> Day of the month MONTH Month of the year It wants a day and month so let‟s give it what it wants: Switch#clock set 14:51:50 25 1 ^ % Invalid input detected at '^' marker. When I try to type the month something goes wrong. This means that it‟s expecting a different input and what I did is not acceptable. The ^ symbol tells us what is invalid. I should have typed “January” instead of the number “1”. Let‟s finish the clock: Switch#clock set 14:51:50 25 January 2013 Switch# Once you type in a command that is correct and press enter you won‟t see anything like “command accepted”. Only a fresh new empty line proves to us that the command has been accepted. The cool thing about the command line is that you don‟t have to fully type commands. Let me give you an example: Switch#clo ? set Set the time and date Typing the letters “clo” is enough for IOS to understand that I meant the clock command. This works everywhere: Switch#clo s ? hh:mm:ss Current Time Just typing “s” is enough for IOS to understand that I meant “set”. If you don‟t type enough letters you will see this: Switch#cl % Ambiguous command: "cl" Your switch will tell you ambigious command which means it doesn‟t know what you mean, here‟s why: Switch#cl? clear clock GNS3Vault.com – René Molenaar Page 65 of 466 How to Master CCNA Both “clear” and “clock” start with “cl” so IOS doesn‟t know which of the two commands you want to use. The CLI offers a couple of useful shortcuts for us to use: 1. You can press the TAB button to auto-complete a command or keyword. This is VERY useful. If you type “clo” and then press TAB it will auto-complete “clo” to “clock”. 2. CTRL-A brings your cursor to the beginning of the line. This is faster than pressing the left arrow. 3. CTRL-E brings your cursors to the end of the line. This is faster than pressing the right arrow. 4. CTRL-SHIFT-6 interrupts processes like a PING. 5. CTRL-C aborts the current command that you were typing and exits configuration mode. 6. CTRL-Z ends configuration mode. Cisco IOS keeps a history of all the commands you previously typed in. You can view them with the following command: Switch#show history enable show history Above you see an overview with the commands I have used so far. By default it will only save the last 10 typed commands but we can increase the history size: Switch#terminal history size 30 Use the terminal history size command to change it. I‟ve set it to 30 commands. By pressing the UP or DOWN arrow you can browse through commands you have previously used. GNS3Vault.com – René Molenaar Page 66 of 466 How to Master CCNA If you want to see an overview of your device‟s capabilities you can use the following command: Godzilla#show version Cisco IOS Software, C3560 Software (C3560-ADVIPSERVICESK9-M), Version 12.2(44)SE1, RELEASE SOFTWARE (fc1) Copyright (c) 1986-2008 by Cisco Systems, Inc. Compiled Fri 07-Mar-08 00:10 by weiliu Image text-base: 0x00003000, data-base: 0x01900000 ROM: Bootstrap program is C3560 boot loader BOOTLDR: C3560 Boot Loader (C3560-HBOOT-M) Version 12.2(44)SE5, RELEASE SOFTWARE (fc1) Godzilla uptime is 1 hour, 41 minutes System returned to ROM by power-on System restarted at 14:24:00 UTC Fri Jan 25 2013 System image file is "flash:/c3560-advipservicesk9-mz.122-44.SE1.bin" This product contains cryptographic features and is subject to United States and local country laws governing import, export, transfer and use. Delivery of Cisco cryptographic products does not imply third-party authority to import, export, distribute or use encryption. Importers, exporters, distributors and users are responsible for compliance with U.S. and local country laws. By using this product you agree to comply with applicable laws and regulations. If you are unable to comply with U.S. and local laws, return this product immediately. A summary of U.S. laws governing Cisco cryptographic products may be found at: http://www.cisco.com/wwl/export/crypto/tool/stqrg.html If you require further assistance please contact us by sending email to [email protected]. cisco WS-C3560-24PS (PowerPC405) processor (revision G0) with 122880K/8184K bytes of memory. Processor board ID CAT0832N0G3 Last reset from power-on 1 Virtual Ethernet interface 24 FastEthernet interfaces 2 Gigabit Ethernet interfaces The password-recovery mechanism is enabled. 512K bytes of flash-simulated non-volatile configuration memory. Base ethernet MAC Address : 00:11:BB:0B:36:00 Motherboard assembly number : 73-9299-01 Power supply part number : 341-0029-03 Motherboard serial number : CATXXXXXXXX Power supply serial number : DTHXXXXXXXX Model revision number : G0 Motherboard revision number : E0 GNS3Vault.com – René Molenaar Page 67 of 466 How to Master CCNA Show version will display our model, hardware, interfaces and more. We also saw this output when we just started the switch. Let‟s take a closer look at the interfaces that this switch has: Godzilla#show ip interface brief Interface IP-Address Vlan1 unassigned FastEthernet0/1 unassigned FastEthernet0/2 unassigned FastEthernet0/3 unassigned FastEthernet0/4 unassigned FastEthernet0/5 unassigned FastEthernet0/6 unassigned FastEthernet0/7 unassigned FastEthernet0/8 unassigned FastEthernet0/9 unassigned FastEthernet0/10 unassigned FastEthernet0/11 unassigned FastEthernet0/12 unassigned FastEthernet0/13 unassigned FastEthernet0/14 unassigned FastEthernet0/15 unassigned FastEthernet0/16 unassigned FastEthernet0/17 unassigned FastEthernet0/18 unassigned FastEthernet0/19 unassigned FastEthernet0/20 unassigned FastEthernet0/21 unassigned FastEthernet0/22 unassigned FastEthernet0/23 unassigned FastEthernet0/24 unassigned GigabitEthernet0/1 unassigned GigabitEthernet0/2 unassigned OK? YES YES YES YES YES YES YES YES YES YES YES YES YES YES YES YES YES YES YES YES YES YES YES YES YES YES YES Method unset unset unset unset unset unset unset unset unset unset unset unset unset unset unset unset unset unset unset unset unset unset unset unset unset unset unset Status up down up down up down up down down down down down down up up up up up up up up up down down up down down Protocol up down up down up down up down down down down down down up up up up up up up up up down down up down down The show ip interface brief is a very useful command. It shows us all the interfaces and their status. This switch has 24x FastEthernet interfaces and 2x Gigabit Interfaces. The keyword status tells us whether the interface is up or down. This is the physical status so it means whether there is a cable connected to the interface or not. The keyword protocol tells us if the interface is operational or not. It‟s possible that the status shows an interface as up but that the protocol is down because of a security violation. GNS3Vault.com – René Molenaar Page 68 of 466 How to Master CCNA If we want we can take a closer look at one of the interfaces: Godzilla#show interfaces fastEthernet 0/2 FastEthernet0/2 is up, line protocol is up (connected) Hardware is Fast Ethernet, address is 0019.569d.5704 (bia 0019.569d.5704) MTU 1900 bytes, BW 100000 Kbit, DLY 100 usec, reliability 255/255, txload 1/255, rxload 1/255 Encapsulation ARPA, loopback not set Keepalive set (10 sec) Full-duplex, 100Mb/s, media type is 10/100BaseTX input flow-control is off, output flow-control is unsupported ARP type: ARPA, ARP Timeout 04:00:00 Last input never, output 00:00:01, output hang never Last clearing of "show interface" counters never Input queue: 0/75/0/0 (size/max/drops/flushes); Total output drops: 0 Queueing strategy: fifo Output queue: 0/40 (size/max) 5 minute input rate 0 bits/sec, 0 packets/sec 5 minute output rate 5000 bits/sec, 2 packets/sec 0 packets input, 0 bytes, 0 no buffer Received 0 broadcasts (0 multicasts) 0 runts, 0 giants, 0 throttles 0 input errors, 0 CRC, 0 frame, 0 overrun, 0 ignored 0 watchdog, 0 multicast, 0 pause input 0 input packets with dribble condition detected 3777 packets output, 1296328 bytes, 0 underruns 0 output errors, 0 collisions, 1 interface resets 0 babbles, 0 late collision, 0 deferred 0 lost carrier, 0 no carrier, 0 PAUSE output 0 output buffer failures, 0 output buffers swapped out Use the show interface command and specify the interface that you want to look at. Above you can see an example of the FastEthernet 0/2 interface. Some of the things that we see are the status, the speed (100Mbit) and the duplex settings (full-duplex). You can also see the number of incoming and outgoing packets. So now you have an idea how the CLI works, let‟s continue by creating a basic configuration for our device. Most of the things we want to configure on a Cisco switch or router have to be done from the configuration mode: Switch#configure terminal Enter configuration commands, one per line. Switch(config)# End with CNTL/Z. Use the configure terminal command to get into the configuration mode. You can recognize the configuration mode because it now says (config)#. GNS3Vault.com – René Molenaar Page 69 of 466 How to Master CCNA If you try to run a show command from the configuration mode you will get an error like this: Switch(config)#show interfaces fastEthernet 0/2 ^ % Invalid input detected at '^' marker. This is because you are running a “global” command from the “configuration mode”. It might be annoying to switch between “global” mode and “configuration mode” all the time so there is a workaround for this: Switch(config)#do show interfaces fastEthernet 0/2 FastEthernet0/2 is up, line protocol is up (connected) ... Type do in front of the show command and it will work anyway. Let‟s give my switch another name. If you have a large network it‟s useful to give all of your devices a unique name: Switch(config)#hostname Godzilla Godzilla(config)# Use the hostname command to change it to whatever you like. If we want to change the configuration of an interface we need to access the interface configuration. You can do it like this: Godzilla(config)#interface fastEthernet 0/2 Godzilla(config-if)# Type the interface command and the interface number you want to configure. You can see we are in the interface configuration because it says (config-if)#. If we want we can change the duplex and/or speed settings: Godzilla(config-if)#duplex full Godzilla(config-if)#speed 100 Use the duplex and speed command to change them. In my example I changed duplex to full and speed to 100Mbit. If you have many interfaces it might be useful to configure a description so you know which interface connects to which device: Godzilla(config)#interface fastEthernet 0/2 Godzilla(config-if)#description Connects to Rene's Computer By typing interface I can access the configuration for a specific interface. You can recognize this because the terminal now says (config-if)#. The description command lets us set a description. GNS3Vault.com – René Molenaar Page 70 of 466 How to Master CCNA If you want to configure a lot of interface it might be time-consuming to configure them one at a time. We can also select a range of interfaces and configure all of them at the same, here‟s how to do it: Godzilla(config)#interface range fa0/3 - 10 Godzilla(config-if-range)# The interface range commands lets us select multiple interfaces. I used it to select interface FastEthernet 0/3,4,5,6,7,8,9 and 10. Whenever you want to go back from the interface configuration to the global configuration mode you can do it like this: Godzilla(config-if-range)#exit Godzilla(config)# Just type exit and you‟ll be back in the global configuration mode. Right now everyone can connect to our switch and configure whatever you like. It‟s a good idea to protect it by setting some passwords. One of the things we can do is protect the console port: Godzilla(config)#line console 0 Godzilla(config-line)#password mypassword Godzilla(config-line)#login First I use the password command to set a password. I also need to supply the login command otherwise the switch won‟t ask for the password. Now every time I connect the blue Cisco console cable this will happen: Godzilla con0 is now available Press RETURN to get started. User Access Verification Password: Before I get to the user mode I have to type in a console password. This will ensure that not just anyone can connect a console cable and configure our switch. I can also protect the privileged (enable) mode. Right now it works like this: Godzilla>enable Godzilla# We type in “enable” and you have full access to the switch. It‟s wise to configure our switch so it will prompt for a password every time someone wants to access the privileged mode. We can do it like this: GNS3Vault.com – René Molenaar Page 71 of 466 How to Master CCNA Godzilla(config)#enable password mypassword Use the enable password command to set a password. Now whenever I want to access the privilege mode this will happen: Godzilla>enable Password: Godzilla# Besides setting passwords it might be a good idea to configure a banner with a warning message: Godzilla(config)#banner login % Authorized Users Only! % The banner command lets us configure a banner. You need to use a symbol to tell the switch when the banner begins and ends. I used the % symbol but you can use any symbol you like. Now whenever someone wants to log into our switch this is what they will see: Godzilla con0 is now available Press RETURN to get started. Authorized Users Only! Above you see the banner that I configured. Right now we are still connected to the switch using the blue console cable. We can also connect to it remotely using telnet or SSH. We will have to configure an IP address on our device first if we want this. This is how you do it on a switch: Godzilla(config)#interface vlan 1 Godzilla(config-if)#ip address 192.168.1.1 255.255.255.0 Godzilla(config-if)#no shutdown The VLAN 1 interface can be used for management. I need to type in an IP address and subnet mask. This interface is disabled by default so I need to type no shutdown to activate it. If you have a router you can configure an IP address like this: Router(config)#interface fastEthernet 0/0 Router(config-if)#ip address 192.168.1.2 255.255.255.0 On a router you have to configure an IP address on one of the interfaces. I‟ll use the Fastethernet 0/0 interface. GNS3Vault.com – René Molenaar Page 72 of 466 How to Master CCNA Let‟s configure telnet so that we can access the device remotely: Godzilla(config)#line vty 0 4 Godzilla(config-line)#password mypassword Godzilla(config-line)#login A switch or router has a number of virtual lines that you can use for remote access. These are called VTY (Virtual Terminal) lines. I can configure these using the line vty command. In my example I‟m selecting VTY line 0 up to 4 so that‟s 5 virtual lines total. I have configured a password and the login command is required otherwise the switch won‟t ask for the password. Now you can connect a UTP cable from your computer to the switch and use putty to telnet to the switch: Just select telnet and type in the IP address of your switch. Click on Open and it will connect to it. Telnet is convenient and easy to configure but it‟s also insecure because everything is sent in clear-text. It‟s better to configure SSH. SSH can also be used to connect remotely to your switch (or router) but all traffic will be encrypted. GNS3Vault.com – René Molenaar Page 73 of 466 How to Master CCNA Not all IOS versions offer SSH by default. Check your IOS version to see if it‟s possible to configure SSH. Here‟s how to configure SSH: Godzilla(config)#username rene password mypassword SSH works with usernames. I‟ll create an account for myself and a password. Godzilla(config)#ip domain-name gns3vault.local We need to configure a domain name because SSH requires certificates. You can pick anything you like. Now we can generate the keys that SSH requires: Godzilla(config)#crypto key generate rsa The name for the keys will be: Godzilla.gns3vault.local Choose the size of the key modulus in the range of 360 to 2048 for your General Purpose Keys. Choosing a key modulus greater than 512 may take a few minutes. How many bits in the modulus [512]: 1024 % Generating 1024 bit RSA keys, keys will be non-exportable...[OK] Godzilla(config)# Jan 25 17:23:27.109: %SSH-5-ENABLED: SSH 1.99 has been enabled Use crypto key generate to generate some RSA keys for SSH. The key should be at least 1024 bits. By default it will enable SSH version 1.99 but for security reasons it‟s better to use version 2: Godzilla(config)#ip ssh version 2 Use ip ssh version 2 to switch to version 2. Last step is to configure the VTY lines: Godzilla(config)#line vty 0 4 Godzilla(config-line)#login local Godzilla(config-line)#transport input ssh First we use login local to tell the switch to use the local database with the username that I configured. We also require the transport input command so that we only allow SSH and no telnet. GNS3Vault.com – René Molenaar Page 74 of 466 How to Master CCNA We can test our configuration with putty: Click on the SSH button and type in the IP address of the device. Click on Open and you‟ll be able to connect. Everything that you configure on a switch or router is stored in a configuration file called the running-configuration. GNS3Vault.com – René Molenaar Page 75 of 466 How to Master CCNA You can take a look at the running configuration like this: Godzilla#show running-config Building configuration... Current configuration : 1587 bytes ! ! Last configuration change at 16:58:25 UTC Fri Jan 25 2013 ! NVRAM config last updated at 15:51:32 UTC Fri Jan 25 2013 ! version 12.2 no service pad service timestamps debug datetime msec service timestamps log datetime msec no service password-encryption ! hostname Godzilla ! boot-start-marker boot-end-marker ! enable password mypassword ! username rene password 7 011E1F145A1815182E5E4A ! ! spanning-tree mode pvst spanning-tree extend system-id ! vlan internal allocation policy ascending interface FastEthernet0/1 ! interface FastEthernet0/2 description Connects to Rene's Computer ! interface FastEthernet0/3 ! interface Vlan1 ip address 192.168.1.1 255.255.255.0 ! ip default-gateway 192.168.1.254 ip classless ip http server ip http secure-server ! control-plane ! banner login ^C Authorized Users Only! ^C ! line con 0 password mypassword login line vty 0 4 password mypassword login local transport input ssh line vty 5 15 login ! end GNS3Vault.com – René Molenaar Page 76 of 466 How to Master CCNA Use the show running-config command to take a look at the running configuration. This is the configuration that is active at the moment. If you want to remove something from the running-config you can use the no keyword in front of it. For example: Godzilla(config)#no hostname Godzilla Switch(config)# Typing no hostname Godzilla would remove this line from the running-config. The running-config is active in RAM which means that if you power off your device, your configuration is gone. Of course we can save our running-config in a permanent location; this is how we do it: Godzilla#copy running-config startup-config Destination filename [startup-config]? Building configuration... [OK] We need to use the copy command to copy the running-config to the startup-config. The startup-config is saved in NVRAM. Whenever you power on your device, it will look for the startup-config in the NVRAM and copy it to the running-config in our RAM. If you want to remove your configuration we can delete the startup-config: Godzilla#erase startup-config Erasing the nvram filesystem will remove all configuration files! Continue? [confirm] [OK] Erase of nvram: complete Type erase startup-config to delete it from the NVRAM. You will have to reload your switch or router before this will take effect: Godzilla#reload Proceed with reload? [confirm] You can do this with the reload command. If you looked closely at the output of the show running-config command you could see that all passwords are there in clear-text. This doesn‟t sound like a very good idea right? Anyone that has access to our configuration file will have the passwords. There is a command that lets us encrypt all the passwords in the configuration. GNS3Vault.com – René Molenaar Page 77 of 466 How to Master CCNA Here‟s how to do it: Godzilla(config)#service password-encryption The service password-encryption command will encrypt all passwords in the configuration. Let‟s take a look at the difference: Godzilla#show running-config ! enable password 7 0941571918160405041E00 ! line con 0 password 7 12141C0713181F13253920 login line vty 0 4 password 7 12141C0713181F13253920 login local transport input ssh I didn‟t include everything from the running-config, just the passwords to keep it readable. You can see that the passwords have been encrypted and that there‟s a “7” in front of the password. This encryption type is called type 7 that‟s why you see it. Now this looks great but in reality it‟s a bad idea to use this form of encryption since it‟s really weak. There are a couple of websites on the Internet that let you decipher these encrypted passwords with a couple of mouse clicks, here‟s an example: http://www.ibeast.com/content/tools/CiscoPassword/index.asp Just copy and paste the encrypted password from the running-config and a few seconds later you‟ll have the decrypted version…OUCH! Of course Cisco has a solution for this. Instead of the poor type 7 encryption we can use MD5 hashes for most of our passwords. This is far more secure so let me show you how to do this for your “enable” password: Godzilla(config)#enable secret mypassword Instead of the keyword “password” you should use secret. This will create a MD5 hash of the password and save it in the running-config. GNS3Vault.com – René Molenaar Page 78 of 466 How to Master CCNA Let‟s take a look: Godzilla#show running-config Building configuration... Current configuration : 1673 bytes ! ! Last configuration change at 17:12:56 UTC Fri Jan 25 2013 ! NVRAM config last updated at 15:51:32 UTC Fri Jan 25 2013 ! version 12.2 no service pad service timestamps debug datetime msec service timestamps log datetime msec service password-encryption ! hostname Godzilla ! boot-start-marker boot-end-marker ! enable secret 5 $1$RpKB$.lDXl8JBZpgNogeS0mAs40 Above you see the MD5 hash of the password, not the actual password that is encrypted. It might become annoying to browse through the entire running-config everytime you want to check just one item. Cisco IOS has a couple of “operators” that we can use to make our lives easier: Godzilla#show running-config | include secret enable secret 5 $1$RpKB$.lDXl8JBZpgNogeS0mAs40 Instead of just typing “show running-config” and hitting enter I can use the | include operator so it shows me only the lines that have the word “secret” in them. Godzilla#show running-config | begin line con 0 line con 0 password 7 12141C0713181F13253920 login line vty 0 4 password 7 12141C0713181F13253920 login line vty 5 15 login ! end I can also use | begin and it will not start at the beginning of the config but at the section that I request. Above I‟m using it to show the “line con 0” configuration and everything below. GNS3Vault.com – René Molenaar Page 79 of 466 How to Master CCNA Any other useful commands? One of the annoying things of the CLI is that whenever you type in a wrong command you‟ll see something like this: Godzilla#clockk Translating "clockk"...domain server (255.255.255.255) % Unknown command or computer name, or unable to find computer address By accident I type “clockk” but this command doesn‟t exist. What Cisco IOS thinks is that you typed in the hostname of a device you want to telnet to. As a result it will do a DNS lookup for the hostname “clockk” but of course it will never get a response. This can take 1 or 2 seconds and you can‟t abort it. We can solve this by using the following command: Godzilla(config)#no ip domain-lookup The no ip domain-lookup command will tell our switch that it shouldn‟t try any DNS lookups. Now whenever you type in a wrong command you don‟t have to wait for a DNS lookup that will never be successful. Sometimes the CLI will show you notification messages like this one: Godzilla(config)#hostn%LINK-5-CHANGED: Interface FastEthernet0/1, changed state to down It can be useful to see these kind of messages but the annoying part is that when you are typing a command, the CLI will output these notifications on top of whatever you are typing. You can see it in my example above, I was trying the hostname command while suddenly an interface went down. Now I can‟t see what I was typing… There‟s a command to prevent this: Godzilla(config)#line console 0 Godzilla(config-line)#logging synchronous Godzilla(config)#line vty 0 4 Godzilla(config-line)#logging synchronous Use the logging synchronous command to keep the last line readable. I have to do this for the console and the VTY lines (telnet or SSH) separately. Let me show you the difference: %LINK-3-UPDOWN: Interface FastEthernet0/1, changed state to down Godzilla(config)#hostname GodzillaTheSecond Above you see that the command line is now at the bottom and the notification appeared above it. When you are taking a break from playing with your device you‟ll notice that Cisco IOS will kick you out of the CLI after a while and you‟ll have to login again. GNS3Vault.com – René Molenaar Page 80 of 466 How to Master CCNA We can prevent this: Godzilla(config)#line console 0 Godzilla(config-line)#exec-timeout 0 0 Setting it to 0 with the exec-timeout command means the console will never kick you out. This is useful for our lab environment but in a production network I wouldn‟t recommend this for security reasons. Besides the CLI we can use the GUI to configure our switches or routers. CCP is no longer on the CCNA exam so if you want, you can skip the upcoming part. I decided to leave it in the book so you can see what the GUI looks like… If you want to use CCP you have two options: You can install CCP on the flash memory of your router. You can run it from your PC. You can download CCP from the Cisco website: http://software.cisco.com/download/release.html?mdfid=281795035&softwareid=28215985 4&release=2.7&relind=AVAILABLE&rellifecycle=&reltype=latest I downloaded the “PC based” version and release 2.6. You also need to make sure you are using the latest version of java and the adobe flash player. The following part will be configured on a router, not on a switch! If you want to use the GUI you first have to prepare your router: Router>enable Router#configure terminal Router(config)#interface fastEthernet 0/0 Router(config-if)#ip address 192.168.1.2 255.255.255.0 Router(config-if)#no shutdown First I will configure an IP address on the FastEthernet 0/0 interface. Unlike a switch we can configure an IP address on each interface of a router. Secondly I need to enable the HTTP server: Router(config)#ip http server First you need to enable the HTTP in the router. You can do this with the ip http server command. Enabling HTTP server is the “quick and dirty” way to prepare the router for CCP. For a lab environment this is fine. If you plan to use CCP in a production network GNS3Vault.com – René Molenaar Page 81 of 466 Do you enjoy reading this sample of How to Master CCNA ? Click on the link below to get the full version. Get How to Master CCNA Today How to Master CCNA it‟s better to use HTTPS. HTTP sends everything in clear-text while HTTPS is encrypted. Let‟s create a username: Router(config)#username CCP secret MYROUTER The command above will create a username called “CCP” and I‟m using password “MYROUTER”. Note that I‟m using “secret” so not the actual password but a MD5 hash will be stored. After the installation of CCP you will find a shortcut on your desktop. Click on it and if your java version and flash player are up-to-date it will launch CCP. CCP will greet you with the following screen when you start it for the first time: Here you are supposed to configure the routers that you want to manage. I typed in the IP address of my router and the username/password. Click OK and you will return to the main screen: GNS3Vault.com – René Molenaar Page 82 of 466 How to Master CCNA The router now shows up at the main screen but CCP hasn‟t communicated yet with the router. Click on the discover button and CCP will check if the router is present. Now we can monitor or configure the router… After the discovery you can select the IP address of your router at the select your community member button. You can then choose to monitor or configure your router. Let‟s click on monitor! GNS3Vault.com – René Molenaar Page 83 of 466 How to Master CCNA When you click on monitor you will see an overview of the CPU and memory usage, your interface statuses, available flash memory and some other things. Let‟s see if we can configure our router using CCP: When you click on configure you will be able to make changes to your router. GNS3Vault.com – René Molenaar Page 84 of 466 How to Master CCNA For example I can configure the clock using CCP: Just click on the Time dropdown and select Date and Time to configure the clock. Here‟s another example for SSH: GNS3Vault.com – René Molenaar Page 85 of 466 How to Master CCNA If you want some exercise with CCP. See if you can create a basic configuration for your router using CCP instead of the command-line. In the rest of the book I will only use the CLI, even in the Cisco exams the focus is on the CLI, not the GUI. Right now you might think “CCP looks pretty good” and configuring the clock or SSH looks easier with the GUI than the CLI. This is probably true but when we get to more complex configurations, the CLI will be your friend. If you don‟t know how to configure something CCP can be useful. Use one of its wizards and then do a “show run-config” on the CLI to see what configuration it created for you. This is the end of the chapter and you have now seen the basics of how to configure a router or switch. In the upcoming chapters I will show you plenty of commands to use. You will notice that the more you work with the CLI, the faster you become. GNS3Vault.com – René Molenaar Page 86 of 466 How to Master CCNA 8. Hubs, Bridges and Switches In the beginning of the book I talked a little bit about collisions and hubs. In this chapter we‟ll talk about those topics a bit more and the difference between hubs, bridges and switches. A hub is nothing more than a physical repeater, if it receives an electrical signal on one interface it will repeat it by sending it on all its interfaces except the one it originated from. There is no intelligence in a hub and it only operates on the physical layer of the OSI model (layer 1 device). Since we are sharing the physical medium, computers are running in half-duplex and we can get collisions. If we get a collision we can solve this by using the CSMA/CD protocol. The more computers in your network, the bigger the chance you get collisions. More collisions means your throughput will go down. In this example we have a hub in the middle, pay attention to the icon I‟m using since this is the “original” Cisco icon they use for hubs. If one of our computers sends some data, the hub will just repeat the electric signal on all other ports which means everyone will receive GNS3Vault.com – René Molenaar Page 87 of 466 How to Master CCNA this data whether they need it or not. The network is running half-duplex which means we can get collisions here. Since we can get collisions everywhere because of the hub, we call this a single “collision domain”. Collision Domain As networks grew larger we also got more collisions, effectively decreasing our throughput. GNS3Vault.com – René Molenaar Page 88 of 466 How to Master CCNA If you look at the example above, where do you think we will encounter collisions? It‟s all hubs so we get collisions everywhere! It‟s still one big collision domain. GNS3Vault.com – René Molenaar Page 89 of 466 How to Master CCNA Collision Domain This is where some smart people started to think, there had to be a way to decrease these collisions so throughput wouldn‟t be affected. The answer was a device which had more intelligence than the hub, thus the bridge was born. A bridge has “intelligence” and operates at the data link layer (layer 2) of the OSI model, let‟s see what it can do: Make decisions where to send Ethernet frames by looking at the MAC addresses. Forward Ethernet frames on ports where they are needed. Filter Ethernet frames (discard them). Flood Ethernet frames (send them everywhere). They only have a few ports. They are slow. GNS3Vault.com – René Molenaar Page 90 of 466 How to Master CCNA Let‟s take the previous picture and replace the hub in the middle with a bridge: Collision Domain 1 Collision Domain 2 You can see we now have 2 collision domains. The bridge has intelligence and will not forward Ethernet frames if it‟s not required. If the computer on the top left would send an Ethernet frame meant for the computer at the bottom left, the bridge will receive this Ethernet frame on its left interface but won‟t forward it to the other computers. That‟s great so bridges break up collision domains. Enough history lessons now, we don‟t use hubs or bridges nowadays. We do use switches however! A switch is a bridge on steroids! Switches have many ports. Switches can have different port speeds like FastEthernet or Gigabit. Fast Internet switching. Large buffers. Different switching modes: o Cut-through o Store-and-forward o Fragment-free GNS3Vault.com – René Molenaar Page 91 of 466 How to Master CCNA Basically a bridge and switch is the same thing, it‟s just that the switch is the evolved version of the bridge. We have dedicated chips called ASICS (Application Specified Integrated Circuit) that take care of switching which makes them lightning-fast. Switches come in many sizes, the smaller ones like the Cisco 2960: Courtesy of Cisco Systems, Inc. Unauthorized use not permitted Or the really large switches like the 6500 series: Courtesy of Cisco Systems, Inc. Unauthorized use not permitted Managed switches like the ones from Cisco have many more features but the “core” of switching is the same of bridging. Switches generally have 3 different switching modes: Cut-through switching: The switch will start forwarding the frame before the whole frame has entered the switch. The switch only needs to know the destination MAC address so as soon as it reads it it can start forwarding. This is fast but less reliable if you have corrupt frames. Store-and-forward: The switch will receive the complete frame, check if it‟s errors free and then forward it. If it‟s corrupt it will be discarded. GNS3Vault.com – René Molenaar Page 92 of 466 How to Master CCNA Fragment-free: The switch will check if the first 64 bytes are OK, basically this is a trade-off between cut-through and store-and-forward switching. Nowadays all Cisco catalyst switches use store-and-forward except for the high-end Nexus switches which can also do an adapted version of cut-through (you can forget about that for your CCNA). How does a bridge or switch work? I told you that it has some intelligence compared to a hub and that it operates on the data link layer of the OSI-model (layer 2) but I didn‟t explain yet how it works. Let‟s look at an example and see what‟s going on: 2 1 ComputerA MAC: AAA 3 ComputerB MAC: BBB ComputerC MAC: CCC There‟s a switch in the middle and we have 3 computers. All computers have a MAC address but I‟ve simplified them. Our switch has a MAC address table and it will learn where all the MAC addresses are in the network. Question for you: how many collision domains do we have here? Since we are running full-duplex we can‟t get any collisions in a switched network. Every interface on a switch is a separate collision domain! So why do we call each interface a separate collision domain if we can‟t get any collisions? Well if you connect a hub to one of our switch interfaces we can still get collisions there… Since we are running full-duplex and we can‟t get any collisions anymore, our CSMA/CD protocol we talked about before is disabled. GNS3Vault.com – René Molenaar Page 93 of 466 How to Master CCNA Ethernet Frame Dest: Source: BBB AAA 2 1 ComputerA MAC: AAA 3 ComputerB MAC: BBB ComputerC MAC: CCC Computer A is going to send some data meant for computer B, thus it will create an Ethernet frame which has a source MAC address (AAA) and a destination MAC address (BBB). GNS3Vault.com – René Molenaar Page 94 of 466 How to Master CCNA Ethernet Frame Dest: Source: BBB AAA 2 1 ComputerA MAC: AAA 3 ComputerB MAC: BBB MAC Address Table: 1: AAA 2: BBB 3: CCC ComputerC MAC: CCC Our switch will build a MAC address table and only learns from source MAC addresses. At this moment it just learned that the MAC address of computer A is on interface 1. It will now add this information in its MAC address table. GNS3Vault.com – René Molenaar Page 95 of 466 How to Master CCNA 2 1 ComputerA MAC: AAA ComputerB MAC: BBB 3 MAC Address Table: 1: AAA 2: 3: ComputerC MAC: CCC As you can see our switch currently has no information where computer B is located. There‟s only one option left….flood this frame out of all its interfaces except the one where it came from. computer B and computer C will receive this Ethernet frame. 2 1 ComputerA MAC: AAA 3 ComputerB MAC: BBB MAC Address Table: 1: AAA 2: BBB 3: ComputerC MAC: CCC GNS3Vault.com – René Molenaar Page 96 of 466 How to Master CCNA Since computer B sees its MAC address as the destination of this Ethernet frame it knows it‟s meant for him, computer C will discard it. Computer B is going to respond to computer A, build an Ethernet frame and send it towards our switch. At this moment the switch will learn the MAC address of computer B. That‟s the end of our story, the switch now knows both MAC addresses and the next time it can “switch” instead of flooding Ethernet frames. Computer C will never see any frames between computer A and B except for the first one which was flooded. Let me show you what this looks like on a real Cisco switch: Switch Fa0/1 Fa0/2 ComputerB ComputerA Fa0/3 ComputerC This is the topology I‟ll use, it‟s the same as the previous example but I have added some interface numbers. Switch#show mac address-table dynamic Mac Address Table ------------------------------------------Vlan ---1 1 1 Mac Address ----------000c.2928.5c6c 000c.29e2.03ba 000c.2944.0343 Type -------DYNAMIC DYNAMIC DYNAMIC Ports ----Fa0/1 Fa0/2 Fa0/3 Use the show mac address-table dynamic command to see all the MAC addresses that the switch has learned. You can see that it has learned the MAC addresses of ComputerA,B and C. By default there is no limit to the number of MAC addresses a switch can learn on an interface and all MAC addresses are allowed. If we want we can change this behavior with port-security. GNS3Vault.com – René Molenaar Page 97 of 466 How to Master CCNA Let‟s take a look at the following situation: ComputerA Fa0/1 Cheap Switch Cisco Switch ComputerB In the topology above someone connected a cheap switch that they brought from home to the FastEthernet 0/1 interface of our Cisco switch. Sometimes people like to bring an extra switch from home to the office. As a result our Cisco switch will learn the MAC address of ComputerA and ComputerB on its FastEthernet 0/1 interface. Of course we don‟t want people to bring their own switches and connect it to our network so we want to prevent this from happening. This is how we can do it: Switch(config)#interface fa0/1 Switch(config-if)#switchport port-security Switch(config-if)#switchport port-security maximum 1 Use the switchport port-security command to enable port-security. I have configured port-security so only one MAC address is allowed. Once the switch sees another MAC address on the interface it will be in violation and something will happen. I‟ll show you what happens in a bit… Besides setting a maximum on the number of MAC addresses we can also use port security to filter MAC addresses. You can use this to only allow certain MAC addresses. In the example above I configured port security so it only allows MAC address aaaa.bbbb.cccc. This is not the MAC address of my computer so it‟s perfect to demonstrate a violation. Switch(config)#interface fa0/1 Switch(config-if)#switchport port-security mac-address aaaa.bbbb.cccc Use the switchport port-security mac-address command to define the MAC address that you want to allow. Now we‟ll generate some traffic to cause a violation: C:\Documents and Settings\ComputerA>ping 1.2.3.4 I‟m pinging to some bogus IP address…there is nothing that has IP address 1.2.3.4; I just want to generate some traffic. GNS3Vault.com – René Molenaar Page 98 of 466 How to Master CCNA Here‟s what you will see: SwitcA# %PM-4-ERR_DISABLE: psecure-violation error detected on Fa0/1, putting Fa0/1 in err-disable state %PORT_SECURITY-2-PSECURE_VIOLATION: Security violation occurred, caused by MAC address 0090.cc0e.5023 on port FastEthernet0/1. %LINEPROTO-5-UPDOWN: Line protocol on Interface FastEthernet0/1, changed state to down %LINK-3-UPDOWN: Interface FastEthernet0/1, changed state to down Banzai! We have a security violation and as a result the port goes in err-disable state. As you can see it is now down. Let‟s take a closer look at port-security: Switch#show port-security interface fa0/1 Port Security : Enabled Port Status : Secure-shutdown Violation Mode : Shutdown Aging Time : 0 mins Aging Type : Absolute SecureStatic Address Aging : Disabled Maximum MAC Addresses : 1 Total MAC Addresses : 1 Configured MAC Addresses : 1 Sticky MAC Addresses : 0 Last Source Address:Vlan : 0090.cc0e.5023:1 Security Violation Count : 1 Here is a useful command to check your port security configuration. Use show portsecurity interface to see the port security details per interface. You can see the violation mode is shutdown and that the last violation was caused by MAC address 0090.cc0e.5023 (ComputerA). The aging time is 0 mins which means it will stay in err-disable state forever. Switch#show interfaces fa0/1 FastEthernet0/1 is down, line protocol is down (err-disabled) Shutting the interface after a security violation is a good idea (security-wise) but the problem is that the interface will stay in err-disable state. This probably means another call to the helpdesk and you bringing the interface back to the land of the living! Let‟s activate it again: Switch(config)#interface fa0/1 Switch(config-if)#shutdown Switch(config-if)#no shutdown To get the interface out of err-disable state you need to type “shutdown” followed by “no shutdown”. Only typing “no shutdown” is not enough! GNS3Vault.com – René Molenaar Page 99 of 466 How to Master CCNA It might be easier if the interface could recover itself after a certain time: Switch(config)#errdisable recovery cause psecure-violation Switch(config)#interface fa0/1 Switch(config-if)#switchport port-security aging time 10 You can change the aging time from 0 to whatever value you like with the switchport port-security aging time command. After 10 minutes it will automatically recover from err-disable state. Make sure you solve the problem though because otherwise it will just have another violation and end up in errdisable state again. Make sure you don‟t forget to enable automatic recovery with the errdisable recovery cause psecure-violation command. Instead of typing in the MAC address ourselves we can also make the switch learn a MAC address for port-security: Switch(config-if)#no switchport port-security mac-address aaaa.bbbb.cccc Switch(config-if)#switchport port-security mac-address sticky The sticky keyword will make sure that the switch uses the first MAC address that it learns on the interface for port-security. Let‟s verify it: Switch#show run interface fa0/1 Building configuration... Current configuration : 228 bytes ! interface FastEthernet0/1 switchport mode access switchport port-security switchport port-security aging time 10 switchport port-security mac-address sticky switchport port-security mac-address sticky 000c.2928.5c6c You can see that it will save the MAC address of ComputerA in the running-configuration by itself. Shutting the interface in case of a violation might be a bit too much. There are other options, here‟s what you can do: Switch(config-if)#switchport port-security violation ? protect Security violation protect mode restrict Security violation restrict mode shutdown Security violation shutdown mode There are other options like protect and restrict. Protect: Ethernet frames from MAC addresses that are not allowed will be dropped but you won‟t receive any logging information. Restrict: Ethernet frames from MAC addresses that are not allowed will be dropped but you will see logging information and a SNMP trap is sent. GNS3Vault.com – René Molenaar Page 100 of 466 How to Master CCNA Shutdown: Ethernet frames from MAC addresses that are not allowed will cause the interface to go to err-disable state. You will see logging information and a SNMP trap is sent. For recovery you have two options: o Manual: The default aging time is 0 mins so you‟ll have to enable the interface yourself. o Automatic: Configure the aging time to another value. That‟s all I wanted to show you about port-security. Are you having fun yet? There‟s more to switching…we‟ll talk about VLANS (Virtual LANs), Trunks and spanning tree later in the next chapter! GNS3Vault.com – René Molenaar Page 101 of 466 Do you enjoy reading this sample of How to Master CCNA ? Click on the link below to get the full version. Get How to Master CCNA Today

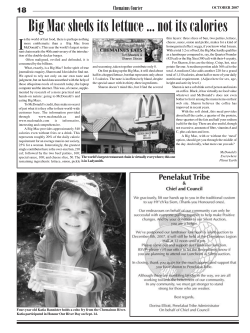


© Copyright 2026