
How to Build the Perfect Home
How to Build the Perfect Home
H
o
w
o
B
u
d
h
e
P
e
e
c
H
o
m
e
2 .H
Ho
ow
w ttto
oB
Bu
uiiillld
d ttth
he
eP
Pe
errrfffe
ec
cttt H
Ho
om
me
e
Table of contents
How does the Perfect Home look like?.......................................................................................... 4
Planning everything............................................................................................................................ 5
Organizing and preparing................................................................................................................. 7
How long will it take?....................................................................................................................... 10
Choosing a property......................................................................................................................... 10
Determining the style of your home........................................................................................... 13
Designing your Home...................................................................................................................... 17
How big should it be?....................................................................................................................... 20
Size planning considerations........................................................................................................ 21
Make your home Energy efficient............................................................................................... 23
The construction process.............................................................................................................. 24
Get the place ready for work........................................................................................................ 27
Drainage issues............................................................................................................................. 28
Marking the place......................................................................................................................... 29
Preparing for the Utilities......................................................................................................... 30
Connecting water......................................................................................................................... 31
Hooking up to the sewer............................................................................................................ 32
Installing septic systems............................................................................................................ 32
Bring the electricity..................................................................................................................... 33
Pipe in the gas................................................................................................................................ 33
Foundation for your home........................................................................................................... 34
Get your house dressed................................................................................................................. 37
2
H
o
w
o
B
u
d
h
e
P
e
e
c
H
o
m
e
3 .H
Ho
ow
w ttto
oB
Bu
uiiillld
d ttth
he
eP
Pe
errrfffe
ec
cttt H
Ho
om
me
e
Time for Mechanical Systems Installation............................................................................. 43
Water supply installation......................................................................................................... 46
Sewer system installation........................................................................................................ 48
Air system installation............................................................................................................... 49
HVAC................................................................................................................................................. 49
Installing your thermostats...................................................................................................... 51
Electrical works............................................................................................................................... 51
Sheathing, Flashing and Insulation........................................................................................... 55
Making it pretty - wall coverings............................................................................................... 58
Roofing issues.................................................................................................................................. 60
Installing your shingles................................................................................................................ 62
Proper drainage.............................................................................................................................. 64
Driveway and sidewalks.............................................................................................................. 65
Exterior lighting.............................................................................................................................. 67
Get Fireplaces.................................................................................................................................. 68
Consider Drywalls.......................................................................................................................... 69
The work of the Carpenters........................................................................................................ 71
Doors and windows....................................................................................................................... 73
Kitchen and bathroom design.................................................................................................... 76
Painting your home........................................................................................................................79
Flooring installation and options............................................................................................. 83
What if not all goes well?............................................................................................................. 86
Conclusion........................................................................................................................................ 87
3
H
o
w
o
B
u
d
h
e
P
e
e
c
H
o
m
e
4 .H
Ho
ow
w ttto
oB
Bu
uiiillld
d ttth
he
eP
Pe
errrfffe
ec
cttt H
Ho
om
me
e
How does the Perfect Home look like?
Actually, there’s no such thing as the Perfect Home, but the Perfect
Home for each and every one of you. People have different needs
and expectations, depending on their taste and of course, budget.
You can make your home as simple or as complex as you’d like.
Some people want to be able to dim the lights in their bedroom
without having to get out of bed, while others prefer a simple,
maybe country-style home. No matter how you put it, it’s not going
to be easy. It requires a lot of work and dedication, but after all, this
is the place where you’ll live and share this beautiful life with your
family.
You may feel overwhelmed at times, but if you trust our
experienced professionals that contributed to writing this
invaluable book, you can rest assured that your project WILL
deliver the Perfect Home you have been dreaming of.
Being committed to changing your life for the better, we have
gathered the best information that you can get for building a
beautiful, safe and efficient home.
So no, we are not going to show you a picture of the Perfect Home.
Instead, we’ll give you the basics, along with the expert advice and
recommendations and let you decide on that particular detail that
makes it perfect for you.
4
H
o
w
o
B
u
d
h
e
P
e
e
c
H
o
m
e
5 .H
Ho
ow
w ttto
oB
Bu
uiiillld
d ttth
he
eP
Pe
errrfffe
ec
cttt H
Ho
om
me
e
Planning everything
When you start this, the first thing you need to do is look at all the
pieces and how they go together. Your new home has a number of
individual projects necessary to complete it. Your new home also
needs an army of people with their expert work and services. This
section breaks down in an approximate order each person required
to get through the process. By reading this book, you will see how it
all goes from land to landscaping.
Nothing is going to work without a plan, especially if the project is
building a home. So, here are a few steps that we have prepared for
you. You don’t have to respect them strictly, but they will take you
through the whole process, so you can always have things
organized. We recommend you keep this list close to you at all times
throughout the project.
1. Decide you’re ready to start the home building process.
2. Meet with financial experts and get organized.
3. Prepare cash flow with financing on your existing house.
4. Find land and make an offer.
5. Close escrow on the lot.
6. Get surveys and soil reports.
7. Get well and septic approvals if required.
8. Interview and pick an architect, if applicable.
9. Create the house’s preliminary design.
10. Get zoning and design review approval.
11. Pick all your fixtures and materials.
12. Submit the plans for building approval.
13. Make the required plan changes.
5
H
o
w
o
B
u
d
h
e
P
e
e
c
H
o
m
e
6 .H
Ho
ow
w ttto
oB
Bu
uiiillld
d ttth
he
eP
Pe
errrfffe
ec
cttt H
Ho
om
me
e
14. Put the plans out to bid with contractors.
15. Interview and choose a contractor.
16. Get final approval for permits and pay fees.
17. Set up disbursement account.
18. Set up communications with contractor and subs.
19. Prepare the building site for work.
20. Grade and/or excavate the property.
21. Trench for foundation, water, and sewer.
22. Pour the concrete for foundation and let cure.
23. Frame the exterior.
24. Frame the interior.
25. Install the windows.
26. Install the fireplaces.
27. Install the rough HVAC.
28. Install the rough plumbing.
29. Install the rough electrical.
30. Install the roof.
31. Install the outer sheathing.
32. Apply the exterior siding or stucco and paint.
33. Install the drywall.
34. Install the cabinetry and millwork.
35. Install tile, counters, moldings, and finish carpentry.
36. Install the doors.
37. Paint the interior and finish woodwork.
38. Install the plumbing fixtures.
39. Install the electrical fixtures and hardware.
40. Install the flooring.
41. Request final inspection and receive certificate of occupancy.
42. Install the landscaping, including deck, pool, spa, and so on.
43. Move in.
6
H
o
w
o
B
u
d
h
e
P
e
e
c
H
o
m
e
7 .H
Ho
ow
w ttto
oB
Bu
uiiillld
d ttth
he
eP
Pe
errrfffe
ec
cttt H
Ho
om
me
e
Organizing and preparing
When starting a difficult project like you’re thinking of undertaking,
you need a central place to store all the original paperwork you’re
about to accumulate. Because each transaction creates its own set of
paperwork, you want to get organized or else you’ll end up
drowning in all that paper.
A typical construction project usually generates a lot of paperwork.
You not only need to store all this paperwork, but you’ll also need to
easily retrieve it throughout the process. Use the following
suggestions for setting up categories for your filing system:
•
•
•
•
•
•
•
•
•
•
•
Architecture and design
Contractor communication
Contracts
Financing
Invoices
Land purchase
Materials information
Paid receipts
Permits and approvals
Subcontractor communication
Warrantees
Keeping your project on schedule is a major project in itself. You and
your contractor need to coordinate all the actions in a construction
project. For example, your electrical systems can’t be installed until
the framing is complete, and the house can’t be framed until the
7
H
o
w
o
B
u
d
h
e
P
e
e
c
H
o
m
e
8 .H
Ho
ow
w ttto
oB
Bu
uiiillld
d ttth
he
eP
Pe
errrfffe
ec
cttt H
Ho
om
me
e
foundation is installed. With so many people dependent upon the
time frame of others, you need a simple way to keep track of
everything, even if your contractor is managing the schedule.
Proactive communication is probably the single most important
factor for a successful home building. Make yourself easily available
with a mobile phone so your contractor or architect can reach you
when she needs you.
Even though you may have a contractor and bank involved,
ultimately, the job of managing the finances falls on you. You need to
keep track of every dollar spent as you go, or you could have a very
unpleasant surprise — running out of money in the middle of the
project.
Our recommendation is setting up a separate bank account early on
for everything construction related. Setting up this account can help
remove confusion and allow for easier record keeping. Keeping a file
for each vendor and tacking down invoices and receipts in
chronological order also makes life easier when looking for
something later.
Many people find great comfort in having someone with experience
manage the job while they earn the money to pay for the project. But
you can also choose to be an owner-builder and not using a
contractor, depending on your abilities.
Every contractor has a standard contract and practices she uses
with her business. Remember that you have the right to negotiate
and compromise on issues before entering into any contract. Of
course, the contractor also has the right to decline the job.
8
H
o
w
o
B
u
d
h
e
P
e
e
c
H
o
m
e
9 .H
Ho
ow
w ttto
oB
Bu
uiiillld
d ttth
he
eP
Pe
errrfffe
ec
cttt H
Ho
om
me
e
There is no set time to engage your contractor as long as it’s a
minimum of 60 days before you start construction so she has time to
get everything ready for the build. Many people opt to engage a
contractor much earlier in the process so that the contractor is
actively involved during the design process.
Although some contractors may participate in parts of the actual
construction, his primary job is to manage the workflow and project
materials and make sure everything is happening in a timely and
workmanship-type manner. The following list includes your
contractor’s major responsibilities:
•
•
•
•
•
•
•
•
•
•
Obtain the final permits
Manage the production schedule
Source and buy the materials
Hire and manage the subs
Keep the site safe and clean
Manage the inspections
Manage the budget
Keep the consumer informed
Effect quality control
Problem solve
Not every contractor will handle all these items. When you hire your
contractor, discuss with her how much you’ll handle yourself
directly and what she’ll handle. Good communication is the key to
making sure that you don’t waste any time or effort doubling up on
tasks.
9
H
o
w
o
B
u
d
h
e
P
e
e
c
H
o
m
e
10 . H
Ho
ow
w ttto
oB
Bu
uiiillld
d ttth
he
eP
Pe
errrfffe
ec
cttt H
Ho
om
me
e
How long will it take?
You build your house to last decades, right? You don’t want to rush a
complex process, such as design or construction, to the point where
corners are being cut. An extra month or so may cause
inconvenience and may even cost a little money, but in the end you’ll
have a better-constructed home and you’ll have forgotten about that
delay after you’ve lived in the house for a year or two.
So, use your best judgment and apply pressure only when it’s
necessary. Your project is a working environment filled with plenty
of stress. Overreaction and constant pressure on the workers can
make them less likely to help your project move along smoothly.
Many craftsman and artisans participate in the building of your
home. If you’ve carefully hired everyone, you need to put your trust
in these skilled workers. Many processes are multistage.
Unfortunately, some people will make mistakes or leave some items
partially finished. Don’t panic; this process is normal. Your
contractor and the subs can fix or replace most everything during
the building process and your contractor and subs do double-check
their work as they go.
Choosing a property
If you want a home, you’re going to need a place to put it. The entire
process of searching for and finding the perfect site can be difficult
sometimes. But not to worry, we provide you with the very best
evaluation tips.
10
H
o
w
o
B
u
d
h
e
P
e
e
c
H
o
m
e
11 . H
Ho
ow
w ttto
oB
Bu
uiiillld
d ttth
he
eP
Pe
errrfffe
ec
cttt H
Ho
om
me
e
You need to decide how you want to live in your home — these
elements are a matter of personal taste. Many of the lifestyle items
in the following list may be important to some of you and
unimportant to others:
•
•
•
•
•
•
•
•
•
You want an urban, suburban, or rural area?
You want the lot flat or sloped?
You want the lot to have much usable land?
Will the lot require significant ongoing maintenance?
You want the lot to be in close proximity to the neighbors?
You want to afford privacy?
You want it to be sunny or shady?
You want the lot to have natural vegetation?
You want the lot to have available on-street parking?
There is a variety of factors that impact value and you need to use
these factors when evaluating a lot to purchase. Keep in mind that
you may have to sacrifice some of these factors, however, to meet
your budget.
•
•
•
•
•
What kind of view does the lot have?
Does it have waterfront access?
What is the proximity to power lines?
Is it next to or near commercial buildings or apartments?
What’s the noise factor? How close is it to planes, trains, and
automobiles?
• Is it on or near an earthquake fault or in a flood plain?
• Are there good schools in the area?
• What type of power, water, and sewage is available?
11
H
o
w
o
B
u
d
h
e
P
e
e
c
H
o
m
e
12 . H
Ho
ow
w ttto
oB
Bu
uiiillld
d ttth
he
eP
Pe
errrfffe
ec
cttt H
Ho
om
me
e
• What does city planning have in mind for this neighborhood?
The Internet is one of the best ways to start looking for your lot.
Here are some great Web sites for discovering your dream lot:
_ www.realtor.com: Owned by the National Association of Realtors,
this site can show you every piece of land listed on the real estate
bible: the Multiple Listing Service (MLS).
_ www.land.net: This site has listings for large parcels of
agricultural and residential land as well as individual lots.
Make sure you also consider the fact that land value has other
factors to consider when determining its ultimate usefulness for
building a home. You need to pay attention to the cost of getting the
land ready for the build. You also must factor in limitations on the
size of the home.
The relationship between utilities and your lot can have a significant
impact on the lot’s value. A lot requiring a septic system can add
costs (which may decrease its value). The need to drill a well or to
add offsite additions, such as sidewalks and parkways, can also
negatively impact a lot’s value. Be sure to explore the cost of
installing utilities and amenities before you buy any lot.
Many people get so caught up in the dream of building a house that
they sell themselves into impractical situations. Keep your cool and
do your homework. Buying a piece of land without researching all
the issues and costs can leave you with a crushed dream and a
useless piece of land.
12
H
o
w
o
B
u
d
h
e
P
e
e
c
H
o
m
e
13 . H
Ho
ow
w ttto
oB
Bu
uiiillld
d ttth
he
eP
Pe
errrfffe
ec
cttt H
Ho
om
me
e
Determining the style of your home
Your ideal home should usually have a clear picture in your mind.
If an image of the perfect house doesn’t immediately come to you,
get off the sofa, find your camera, and get ready to go hunting.
If you can’t find a variety of homes nearby to photograph or aren’t
impressed by the homes you come across, head to your local
bookstore to stock up on a variety of magazines and books for
inspiration. Look for:
• General Home magazines, such as Architectural Digest, Better
Homes & Gardens, House & Garden, Home, Country Home, and
Country Living
• Specialty home magazines, such as Natural Home, American
Bungalow, Old House Journal, Dwell, log home magazines,
timber frame home magazines, and Victorian-style magazines
• Regional magazines that cover your area, such as Sunset,
Southern Living, Down East, Midwest Living, or Coastal Living
• Books that help you identify architectural styles, such as What
Style Is It? A Guide to American Architecture by John C.
Poppeliers (Wiley) or A Field Guide to American Houses by
Virginia McAlester and Lee McAlester (Knopf)
While searching through your new library of magazines and books,
rip, clip, or photocopy photos that illustrate exterior details you like.
Take note of what inspires you: Is it a particular color or material?
Window size, shape, or grouping? Shutters? Dormers or roof shape?
Collect your clippings in a three-ring notebook or expanding file
folder. Soon you can define your own personal style.
13
H
o
w
o
B
u
d
h
e
P
e
e
c
H
o
m
e
14 . H
Ho
ow
w ttto
oB
Bu
uiiillld
d ttth
he
eP
Pe
errrfffe
ec
cttt H
Ho
om
me
e
Remember also to take a reality check. Maybe you’ve fallen for an
Asian-inspired pagoda-style home with a flat roof. It may not be
your best choice, however, if you plan to build in an area with heavy
snowfalls (that is, unless you enjoy the thought of several tons of
wet snow crashing through your roof).
If you’re moving to a new area to build your home, seek out the oldtimers. In New England, for instance, the compact Cape Cod style
home with its steep-pitched roof sheds snow and provides a snug
second story under the roofline. These buildings offered warm
shelter for early Americans living through harsh winters.
Down south, in hotter climates, high ceilings in sprawling plantation
homes lured warm air up and out of the way. Their wide porches
gave folks a place to sit, eat, and often, sleep, outside.
Learning from years of building experience can help make your
home easier to maintain and much more pleasant to live in.
Even if you want your custom home to be unique and make a boldstyle statement, you don’t want to own the neighborhood
laughingstock either, and, at some point, you (or your heirs) will
want to sell it. Then, your home’s classic good looks will be a
valuable asset.
By far, the most popular home construction technique is
conventional construction, which uses vertical studs to create the
home’s skeletal system of both exterior and interior walls. Choosing
conventional construction allows for a wide range of styles; the
studs are simply the basic ingredient. The studs in your walls will be
either dimensional wood lumber (lumber that has been cut to
specific, standard sizes) or steel.
14
H
o
w
o
B
u
d
h
e
P
e
e
c
H
o
m
e
15 . H
Ho
ow
w ttto
oB
Bu
uiiillld
d ttth
he
eP
Pe
errrfffe
ec
cttt H
Ho
om
me
e
More than likely your house will be stick-built: It will use good oldfashioned wooden studs — long, thin boards used throughout the
framing process. Wooden studs are popular because:
• Most framers have the necessary tools (hammer, nail gun, saw,
and so on) to work with wood.
• Wood is mass-produced and costs up to 30 percent less than
steel.
• Most subcontractors and laborers know how to work with
wood.
• You can alter wood-framed walls relatively easily in the future.
A second option — steel framing — has been in use for office
buildings for some time now. For a variety of reasons, steel is finding
its way into more residential construction projects. Although steel
isn’t for everybody, it does have a few advantages over wood:
• It offers the greatest strength for the lowest price of any
building material.
• It’s inorganic. Galvanized steel doesn’t burn, warp, rot, split,
crack, creep, or get eaten by termites and other creepy
crawlers.
• It’s dimensionally stable. It doesn’t expand or contract due to
moisture.
• With steel, you have less scrap and waste (2 percent for steel
versus 20 percent for lumber).
15
H
o
w
o
B
u
d
h
e
P
e
e
c
H
o
m
e
16 . H
Ho
ow
w ttto
oB
Bu
uiiillld
d ttth
he
eP
Pe
errrfffe
ec
cttt H
Ho
om
me
e
The benefits and disadvantages of steel and wood seem about equal,
so it comes down to what makes the most sense to you and your
contractor, the price, the climate, and other considerations.
If you’re not sure what design works best for you, our advice is to
study each manufacturer’s stock designs and then ask if the
manufacturer has the ability to customize the plans. To determine
the quality of a manufacturer’s homes, ask to see the company’s
specifications. Some areas to take note of include:
• Insulation: The manufacturer builds your home to meet the
insulation level required by your local building codes. If you
want greater insulation, talk to your manufacturer, and expect
to pay more.
• Pitch of the roof: A flat pitch makes the home look more like a
trailer park model and less like a custom home. Steeper pitches
look richer.
• Roofing and siding materials: If a manufacturer can’t provide
a certain type of shingle or exterior finish for your walls, you
can have your builder apply the shingles after the home is onsite.
• Stairs: The standard stairs may be carpet-grade. In other
words, you need to cover the stairs with carpet. If you want
exposed wood on your stairs, ask what options are available.
Again, be prepared to pay for an upgrade.
• Types of appliances: Can the manufacturer accommodate
your lifelong desire for a commercial-size range in the kitchen
and a high-end, built-in refrigerator? Some can, but be
prepared to pay extra.
16
H
o
w
o
B
u
d
h
e
P
e
e
c
H
o
m
e
17 . H
Ho
ow
w ttto
oB
Bu
uiiillld
d ttth
he
eP
Pe
errrfffe
ec
cttt H
Ho
om
me
e
• Windows: Ask about your options for windows, and be sure to
see the window units firsthand. Be sure the windows are easy
to open, close, lock, and tilt for cleaning (if that’s a feature you
prefer). For more in depth information on comparing window
quality and energy-efficiency, visit the EnergyStar program’s
Web site at
www.energystar.gov/index.cfm?c=windows_doors.pr_window
s.
Designing your Home
You’re designing your home project. Do it with an open mind! Be
prepared to take extensive notes during the process because it
occurs over an extended period of time, and you may need to refer
back to what you were talking about six months ago.
Do you need an architect for your project? It depends on two
elements: time and experience. If you’re in no hurry to move your
project forward and are willing to invest the time to figure out all
the ins and outs of the process and make the right choices, then an
architect may be unnecessary.
But if you have a job, raising a family or don’t have the slightest
inclination to take the time to figure out design, construction, and
building codes, then an architect will be a welcome addition to your
team of professionals.
Despite their seemingly high cost, architects can save you time and
money by bringing their experience to the table. Their insights on
17
H
o
w
o
B
u
d
h
e
P
e
e
c
H
o
m
e
18 . H
Ho
ow
w ttto
oB
Bu
uiiillld
d ttth
he
eP
Pe
errrfffe
ec
cttt H
Ho
om
me
e
functionality and government bureaucracy can save you months of
time and thousands of dollars.
Not everyone uses an architect when building a home for several
reasons. For example, aside from money being a factor, you may
have design skills yourself that you wish to exercise. No problem!
Technology has improved the choices for designing a custom home.
You can also utilize alternative consultants if you want to save on
architecture fees.
Thousands of plans from magazines and online resources are
available — many of them quite good. The choice is endless. The
magazine shelves at bookstores are stocked with more than ten new
magazines every month; these plan books have houses to fit every
size and budget. You can buy the preliminary floor plan and
elevations for a few hundred dollars. You can also purchase
complete building plans including the structural drawings from
these sources for a few hundred to a few thousand dollars.
Even if you don’t buy the full set of plans, the magazines and online
sites make for good conversation starters with your family and
architect. Here are a few of our favorite Internet resources for plans:
• www.familyhomeplans.com
• www.eplans.com
• www.dreamhomesource.com
A number of software programs exist for people wishing to design
their own home on a computer. Many of these software tools make it
easy with templates for rooms and architecture choices. For less
than a few hundred dollars, these programs can be excellent tools
18
H
o
w
o
B
u
d
h
e
P
e
e
c
H
o
m
e
19 . H
Ho
ow
w ttto
oB
Bu
uiiillld
d ttth
he
eP
Pe
errrfffe
ec
cttt H
Ho
om
me
e
for discovering the basics of home design — saving you time and
money with your architect even if you don’t design the entire home.
If you find yourself with the time and skill to design the whole
project, you can save significant money. Here are our favorite
software choices available online or at any computer store:
• www.smartdraw.com
• Better Homes and Gardens Designer Suite
• 3D Home Architect
The same issues apply when designing your home using software as
with store-bought plans — the need for foundational engineering
and structural drawings. However, in this case you’re now
responsible for all the structural elements of the house construction.
Make sure to find a structural engineer you can work with before
heading down this path.
Regarding direction placement for your home, well, it’s a matter of
preference. Some people like the sun in the morning and some in the
afternoon. If you’re building in Seattle or Vancouver, the sun may
not be a factor at all.
In North America, the sun shines from the south so a southern
exposure means that the sun will shine on the front of your home for
most of the day. A south-facing house also means your backyard
may get little sun until midday, when the sun is high enough in the
sky to shine over your house.
Too little sun can make the house seem dark and dank. Too much
sun can be energy inefficient and weather the house prematurely.
You need to consider other directional factors, such as wind, noise,
and city lights, that can negatively impact your home.
19
H
o
w
o
B
u
d
h
e
P
e
e
c
H
o
m
e
20 . H
Ho
ow
w ttto
oB
Bu
uiiillld
d ttth
he
eP
Pe
errrfffe
ec
cttt H
Ho
om
me
e
How big should it be?
Three major factors decide the appropriate square footage for your
home:
Your family’s needs. For example, do you have elderly parents
living with you who need a downstairs bedroom or does your wife
want her own separate walk-in closet in the master bedroom?
Zoning limitations or covenants (neighborhood guidelines).
Many design rules set limits on how big and how small of a house
can be built on a particular lot. You may also encounter limits on the
house’s ground floor. These guidelines may impact other decisions
such as the need for more than one story to meet your square
footage needs.
Your need to keep in line with your budget. You’ll need to design
a house that not only fits your family and the lot but also fits your
budget as well. Start with the house you want and see if it fits based
upon local estimates for building costs, which you can get by talking
to a few contractors.
The more square footage you build, the more the house will cost, so
efficiency is important. At the same time, skimping on rooms can
reduce utility and make for unpleasant living. Here are some
minimum recommendations for typical room sizes to give you a
general idea of what you need:
• Bedroom: 100 to 200 square feet
• Dining room: 100 to 300 square feet
• Family room: 300 to 800 square feet
• Full bathroom: 60 to 150 square feet
20
H
o
w
o
B
u
d
h
e
P
e
e
c
H
o
m
e
21 . H
Ho
ow
w ttto
oB
Bu
uiiillld
d ttth
he
eP
Pe
errrfffe
ec
cttt H
Ho
om
me
e
•
•
•
•
•
Great room: 400 to 1,000 square feet
Kitchen: 150 to 350 square feet
Living room: 300 to 800 square feet
Master bedroom: 200 to 600 square feet
Staircases: 100 square feet per story
Calculate the total square feet of the rooms you have picked. You can
figure on adding another 10 percent to account for hallways,
cabinets, and closets.
This total can give you a basis from which to start your estimate.
Other factors to consider may include unfinished space like
basements and garages. Garages can vary based upon size, but each
car needs roughly 200 square feet. Generally, a basement matches
the square footage of the first floor.
If you’re not going to finish the walls and flooring in your basement
or garage, then you don’t count it in your livable square footage, but
you’ll need to reconcile the cost when you get your estimates from
contractors. You can estimate its cost now by multiplying the square
footage by the dollars per square foot and dividing by 2.
Size planning considerations
Lifestyle: You can get tens of recommendations from many people,
but remember that your home has to fit your lifestyle. Not every
home works for every family. Are you a family living in a formal
style? If so, then maybe you need a formal living room and dining
room. Do you gather around the kitchen? Do you entertain a lot?
21
H
o
w
o
B
u
d
h
e
P
e
e
c
H
o
m
e
22 . H
Ho
ow
w ttto
oB
Bu
uiiillld
d ttth
he
eP
Pe
errrfffe
ec
cttt H
Ho
om
me
e
Then a home with a big family room open to the kitchen may work
for you.
Foot traffic: Try to imagine how people move through the house on
a daily basis. Look for problems in the traffic patterns. Some
problems may include issues like tight hallways and people crossing
through work areas of the kitchen, formal areas, or TV-viewing
areas.
Noise: This factor can be huge in multilevel houses. Remember that
bedrooms are for sleeping, so any noise above, below, or next to a
bedroom can make for a restless night. Consider carefully the
placement of noise-generating rooms like the garage, home office,
laundry room, and bathrooms.
Storage: You can never have enough storage space in any house.
The longer you live somewhere, the more stuff you acquire. What
you really need is plenty of useful places to put it. Create ample-size
closets, pantries, and cabinet areas. And make sure your storage
areas are convenient without being obtrusive.
Door placement: Every room needs a door, but it needs to open in
such a way that it doesn’t bang against walls, obstruct other
doorways, or block closets or windows. Consider the placement and
opening space necessary for each door in the house.
Window placement: What’s the point of having a view if your
windows don’t take advantage of it? Other window considerations
include privacy, not being blocked by doors, or looking out on the
garbage area.
22
H
o
w
o
B
u
d
h
e
P
e
e
c
H
o
m
e
23 . H
Ho
ow
w ttto
oB
Bu
uiiillld
d ttth
he
eP
Pe
errrfffe
ec
cttt H
Ho
om
me
e
Accessibility: Can you get to the outside from everywhere that
makes sense? Are bedrooms and bathrooms easy to access from
common areas? Make sure you can easily access important rooms
without creating unnecessary obstacles.
Convenience: We can think of nothing worse than having to traipse
halfway across the house with food from the kitchen to serve in the
formal dining room. Think about where you may be unloading your
groceries or how to get the food from your barbecue. Bathroom
placement is another major convenience consideration.
Utility: Many homes have nooks and cubbies that serve no useful
purpose. You’ll pay to build any square footage whether or not it’s
useable space. Make sure all areas serve a purpose.
Future expansion: Perhaps your new house is perfect for all your
needs at this time, but someday your needs may change. Think
about how you might expand the house should that occur.
Make your home Energy efficient
Doors and windows: Advancements with double-pane windows
and gas-filled panels reduce the ability of glass to transfer energy.
Insulation: A tight house is an efficient house (but keep in mind that
a house that is too airtight can be an unhealthy house). Houses need
proper ventilation so the air stays fresh and you don’t breathe your
own carbon dioxide. You can research or discuss with your architect
methods and materials that provide maximum insulation at a
23
H
o
w
o
B
u
d
h
e
P
e
e
c
H
o
m
e
24 . H
Ho
ow
w ttto
oB
Bu
uiiillld
d ttth
he
eP
Pe
errrfffe
ec
cttt H
Ho
om
me
e
reasonable cost. In extreme environments, insulation will be the No.
1 factor for energy savings.
Energy-efficient appliances: Many manufacturers make lines that
focus specifically on energy savings. Many local utility companies
offer rebates for choosing appliances with lower energy ratings.
Solar power: Many people have saved money by supplementing
their energy with solar panels. The technology has improved since
people started using solar power in the 1970s. Panels have become
smaller and lower profile. Many options are available through
sources on the Internet.
Heating, ventilating, and air-conditioning (HVAC) system:
Overestimating the cost of HVAC happens often because everyone
wants a more efficient air system, a reduction in noise, and comfort,
especially when the weather is extreme. Larger systems may cost
more, but you typically can make up the extra cost in savings when
the energy bill comes around.
The construction process
Aside from your contractor, you work with many other people on
the project. Your contractor has the primary communication with
subs, suppliers, and inspectors, but you’ll be involved in many of the
conversations. If you decide to be an owner-builder, you’ll have to
manage all the communication.
How about suppliers?
24
H
o
w
o
B
u
d
h
e
P
e
e
c
H
o
m
e
25 . H
Ho
ow
w ttto
oB
Bu
uiiillld
d ttth
he
eP
Pe
errrfffe
ec
cttt H
Ho
om
me
e
Suppliers can range from a Home Depot store, a specialty materials
store that caters to builders, and even individual artisans that make
fixtures for homes.
Each one has its own terms for deposits, payments, and delivery. If
you’re working with a contractor, he’ll probably arrange for most of
the basic materials from a supplier with whom he has an established
business relationship.
Even though your contractor provides the suppliers, you can still
look to buy fixtures and items. You may find unique items or save
money if you have some connections. The Internet is a great place to
shop, and stores like Lowe’s or Home Depot Expo can be great
resources to buy exactly what you like. If you buy items, then don’t
make anything more difficult for your contractor.
Suppliers often need deposits to hold materials and for large items
ordered in advance. Make sure you have plenty of cash available for
deposits and to keep the suppliers happy.
Next up: subcontractors
Subcontractors are contractors too. They may not have all the
credentials of a general contractor, but they’re experts in their
specialized fields. They’re referred to as subcontractors or subs on
your site because they work for the general contractor. Which subs
your contractor hires depends on your project.
The following is a list of subs probably necessary for your project in
the approximate order they will work on your project:
• Grading sub or excavator
25
H
o
w
o
B
u
d
h
e
P
e
e
c
H
o
m
e
26 . H
Ho
ow
w ttto
oB
Bu
uiiillld
d ttth
he
eP
Pe
errrfffe
ec
cttt H
Ho
om
me
e
•
•
•
•
•
•
•
•
•
Foundation sub
Concrete sub
Framing sub
Plumbing sub
Electrical sub
Mechanical/HVAC sub
Roofing sub
Drywall sub
Painting sub
Your project may require other specialty subs. Subs may also handle
items, such as tile, masonry, millwork, stucco, insulation,
sewer/septic, and carpentry. Most of these subs have licensing in
their specific area. Ask your contractor to verify their licensing
before they start work on the project.
Make yourself available to walk through the property with the
primary subs with whom you may have some input, such as:
• The plumbing sub
• The electrical sub
• The HVAC sub
• The roofing sub
By walking through with the subs before and after their work, you
can make sure you clearly communicate about everything important
to you, such as the locations of vents, fixtures, and switches. The
finish work requires many more individual walk-throughs and
meetings to be assured that everything is fine.
26
H
o
w
o
B
u
d
h
e
P
e
e
c
H
o
m
e
27 . H
Ho
ow
w ttto
oB
Bu
uiiillld
d ttth
he
eP
Pe
errrfffe
ec
cttt H
Ho
om
me
e
Get the place ready for work
You want to make sure everything is ready, and you need to take
several steps before anyone digs out the first shovelful of dirt. You
and your contractor need to discuss the benefits and costs for the
following suggestions before you implement them:
Depending on where you decide to build, your lot may need to be
cleared of brush and shrubs. Your contractor can arrange for the
clearing. This removal can usually be done with a bulldozer at a
reasonably low cost.
After the lot has been cleared, grading can take place. Grading is
scraping the land to move dirt from one place on the lot to another.
Your contractor brings in a grading subcontractor to do the job.
Tractors, bulldozers, and other heavy equipment often grade the
land, although small grading projects are done by hand. The grading
is completed in two stages:
Rough grading redistributes dirt on a lot to create level ground at
the building site (which is important, if you want to have a level
house!). Any leftover topsoil may be pushed to a corner of the lot for
later use in landscaping.
Finish grading contours the yard in a way that is both aesthetically
pleasing, and that moves water away from the house instead of
toward it.
When grading, make sure your contractor or sub extends the
grading work at least 3 feet beyond the expected perimeter of the
house and garage.
27
H
o
w
o
B
u
d
h
e
P
e
e
c
H
o
m
e
28 . H
Ho
ow
w ttto
oB
Bu
uiiillld
d ttth
he
eP
Pe
errrfffe
ec
cttt H
Ho
om
me
e
If your lot is rocky or has boulders, your contractor may have to
arrange for blasting, a process that (at least in our minds) conjures
up early morning cartoon images of a crazy coyote and some
dynamite. Actually, those images aren’t far off. Blasting can be
dangerous and expensive, but it may be necessary to make the lot
usable.
If your lot is on a slope or hill, it may require some serious grading
to create a flat building pad. A building pad is the flat ground where
your foundation will sit. Your engineer has calculated the best
structure for the particular needs of your slope. For example, one
alternative includes building several retaining walls in succession to
create multiple flat pads for the house and yard, which is called
terracing. The ground will be terraced or cut flat into the hillside.
Drainage issues
Drainage is a very important part of the build process. In fact,
approximately 80 percent of foundation problems (leaks, cracks,
uneven settling) in houses can be later traced back to poor drainage.
So, to avoid these kinds of problems (and to ensure your front yard
doesn’t turn into one big puddle every time it rains), your contractor
needs to follow the engineer’s recommended plan for proper
drainage on the property.
To create good drainage, parts of your property will be graded with
a slight slope (away from your home), encouraging water to run off
the property. If your house is going to have a basement, the
contractor may need to install a French drain system. A French drain
28
H
o
w
o
B
u
d
h
e
P
e
e
c
H
o
m
e
29 . H
Ho
ow
w ttto
oB
Bu
uiiillld
d ttth
he
eP
Pe
errrfffe
ec
cttt H
Ho
om
me
e
is a series of trenches dug around the house’s perimeter, designed to
direct water away from the foundation.
To work properly, the trench must be located deeper than the
desired depth of the basement. After the trench is dug, a polyvinyl
chloride (PVC) pipe with holes in the top — run at a slight, downhill
angle — is placed at the bottom of the trench and covered with
gravel and then dirt. If desired, water from the drains can be
directed to a collecting area where an electric sump pump moves
the excess water to a surface drainage channel.
On some properties, PVC pipe, galvanized pipe, or corrugated plastic
tile may be installed to direct water from specific areas on the
property and toward other areas of the property away from the
house. Most homes today are designed with a closed system, where
all the water runoff from the house is channeled directly into these
pipes and carried off the property.
Marking the place
The next step is to clearly mark the building site. Using tape
measures and the survey, your contractor marks the exact points for
the edge of the house and garage. Depending on the type of
foundation to be installed, your contractor may mark the perimeter
with wooden stakes and boards called batter boards.
The batter boards may only be a few feet long, but they’ll clearly
mark the corners as well as the height of the foundation to be
installed. The contractor then attaches string between the batter
29
H
o
w
o
B
u
d
h
e
P
e
e
c
H
o
m
e
30 . H
Ho
ow
w ttto
oB
Bu
uiiillld
d ttth
he
eP
Pe
errrfffe
ec
cttt H
Ho
om
me
e
boards to represent the sides of the foundation and ensure straight
lines and square angles.
When the foundation area is clearly marked, then the contractor can
start lining up utility hookups and getting ready for excavation. Your
contractor will also need to stake out all the utility hookups before
construction begins.
Preparing for the Utilities
You don’t really appreciate utilities — electricity, gas, telephone,
cable television, and sewer and water — until they’re gone. And,
although some people are generating their own energy (through
solar, hydro, and wind power), pumping their own water out of the
ground, or having their utilities delivered by truck (propane and fuel
oil), most people rely on utilities that are provided by their local
communities.
Some utilities come into your house underground (such as water
and sewer) and some overhead (such as electricity and cable
television, except in communities where these utilities are also
underground for aesthetic reasons).
Whatever the case, your contractor marks where all these different
connections are coming from and going to according to the plans.
You and your contractor connect with all the appropriate parties so
that you and your construction crew can have the benefit of modern
utilities during the building process — and beyond.
30
H
o
w
o
B
u
d
h
e
P
e
e
c
H
o
m
e
31 . H
Ho
ow
w ttto
oB
Bu
uiiillld
d ttth
he
eP
Pe
errrfffe
ec
cttt H
Ho
om
me
e
Connecting water
Depending on where your lot is located, you’ll either connect to
public water or have to put in a well if no public water is readily
available. Public water is generally more cost effective and reliable,
but rarely available in rural areas.
If you’re connecting to public water, your contractor will have
laborers dig a trench to the water supply, connecting to the main
water pipe at the street.
Your contractor installs a temporary meter so the water company
can measure your water usage during the construction process. If
the main pipe has a pressure of 80 pounds per square inch (PSI) or
higher, you’ll later need to install a regulator to reduce the pressure,
avoiding excess wear and tear on the pipes (or unscheduled bursts!)
in your house.
If you’re installing a well, you or your contractor will arrange for a
well company to install the well. The well company drills down into
the water table until it can find clean ground water. After the well
company digs the hole, it installs an electric pump to bring the water
to the surface for home use.
You’ll also have a water storage tank so that your pump doesn’t have
to run every time someone flushes the toilet or takes a drink.
Regardless of whether you’re using well water or public water,
because water is generally used during construction, your
contractor needs to install a temporary spigot for almost immediate
access.
31
H
o
w
o
B
u
d
h
e
P
e
e
c
H
o
m
e
32 . H
Ho
ow
w ttto
oB
Bu
uiiillld
d ttth
he
eP
Pe
errrfffe
ec
cttt H
Ho
om
me
e
Hooking up to the sewer
If you’re connecting to a public sewer system, your contractor will
have laborers dig trenches to lay the drainpipes — generally made
from cast iron or PVC — leading away from the house. These pipes
need to be installed prior to any concrete being laid, and your site
plan will determine the most effective route. Your sewer pipes need
to slope downwards so that water drains toward the public sewer
system.
Be sure that your sewer system has an antireturn valve to protect
you from sewage flowing back into the house if your local sewer
system overflows in a rain storm. Kevin’s 1912 house had this
problem and, besides creating a smelly mess that only the Creature
from the Dark Lagoon could love, it was very costly to clean up.
Installing septic systems
If your property calls for a septic system, then you need to install
one now. Your contractor consults the plans to determine the exact
location of the septic tank for collecting waste, and then she
arranges for trenches to be dug for placing the pipe in the leech field
where the waste water drains. You’ll need to have a septic company
inspect this system before work can continue.
Every septic tank worth its salt has an access port to facilitate
cleaning. Make sure the opening to pump out the tank is located in a
convenient location and is clearly marked so you can find it later.
You may want to put a stake by it so it doesn’t get covered with dirt
when excavation takes place.
32
H
o
w
o
B
u
d
h
e
P
e
e
c
H
o
m
e
33 . H
Ho
ow
w ttto
oB
Bu
uiiillld
d ttth
he
eP
Pe
errrfffe
ec
cttt H
Ho
om
me
e
Bring the electricity
Assuming your property is on the public electric grid system, you’ll
need to tie into it to get electricity into your home. The power either
comes in underground or from a pole. Your power company
generally gives you between 25 and 60 feet of wire — from the
power pole to your home — at no charge; anything after that costs
extra.
Needless to say, even considering the free wiring you’ll
automatically get credit for, if you have a big lot, running power to
your home can get costly.
You may want to check with your contractor about having his
laborers do the trenching work to see if it saves any cost. If you do,
don’t forget that all the work must meet the electrical code.
Your contractor sets up a temporary post with a circuit breaker and
a meter so the utility company can start measuring your usage
immediately. Your building inspector needs to inspect this
temporary meter before the electric company will connect the
power.
Pipe in the gas
If you’re connecting to a public gas system, then your contractor will
arrange for the pipes to be trenched that will run from the gas line
under your street into your home. Details for this routing need to be
noted on your site plan.
33
H
o
w
o
B
u
d
h
e
P
e
e
c
H
o
m
e
34 . H
Ho
ow
w ttto
oB
Bu
uiiillld
d ttth
he
eP
Pe
errrfffe
ec
cttt H
Ho
om
me
e
If you’re running propane gas, your supply company will usually
handle the entire installation process, including delivering and
securing of your propane storage tank. However, you don’t need to
turn on either the gas or propane prior to the installation of
appliances later in the project. You and your contractor need to
decide together the best time to install this system.
Foundation for your home
Your foundation is the base of the house. It’s responsible for
supporting all the weight of the walls, the roof, and, of course, the
people who live in it.
Your architect and engineers will create specific foundation plans
and calculations for your subs. These plans let them know where
everything goes and how much dirt needs to be moved to make
room for the foundation.
Your engineer plays a big part in figuring out which type of
foundation is appropriate for the kind of home you’ve decided to
build and the characteristics of the lot on which you plan to build it.
You can choose from a variety of foundation types, and every local
government has different requirements. Although we explain the
basic types in this chapter, you need to discuss any variations with
your contractor so that you understand what needs to be built on
your property.
Regardless of the type of foundation, scheduling is critical. Some
cities and counties don’t allow any grading during the winter, so
coordinating the schedule with your contractor is important. Also,
weather can play a big role in delays during the foundation
34
H
o
w
o
B
u
d
h
e
P
e
e
c
H
o
m
e
35 . H
Ho
ow
w ttto
oB
Bu
uiiillld
d ttth
he
eP
Pe
errrfffe
ec
cttt H
Ho
om
me
e
construction process (which will lead to delays in your overall
schedule). Excessive rain, for example, can cause erosion problems,
and concrete — which plays a large role in most foundation work —
requires six to eight hours of dry weather before being poured.
Excavating process
Before your contractor and the specific sub pour the foundation,
they’ll need to first dig out all the dirt from where the house will be.
During the excavating stage, your lot may look like a playground
filled with bulldozers, diggers, and trucks, ready to make pits, holes,
and trenches.
The first step in excavation is removing the topsoil from the
foundation area. Then, the sub digs holes for the footings (reinforced
sections at the base of the foundation) if required. These holes will
be several feet deep in cold climates so that they’re below the frost
line (the maximum depth that the ground will freeze in winter). The
type of foundation you install determines how much dirt to remove.
If you’re building a basement, for example, you may have to dig
down as much as 8 feet, which is a lot of dirt that will soon need a
new home. (The excavator can pile some of the dirt in a corner of
your lot so you can use it during landscaping.)
Foundation options
1.The most common variety of foundation, built on relatively flat or
gently sloped soil, is the perimeter footing foundation. It’s called the
35
H
o
w
o
B
u
d
h
e
P
e
e
c
H
o
m
e
36 . H
Ho
ow
w ttto
oB
Bu
uiiillld
d ttth
he
eP
Pe
errrfffe
ec
cttt H
Ho
om
me
e
perimeter footing foundation because it comprises concrete footings
that go around the house’s outer perimeter.
After the concrete is completely cured or hardened (a process that
may take several days), the sub removes the forms. In the case of the
perimeter footing foundation, walls are built primarily on the
house’s perimeter; however the engineer may have specified certain
places where an interior wall needs to be built to support extra
weight. Additionally, the contractor may install intermediate
support bearing posts to help carry the weight of long stretches of
flooring. These posts are set in concrete in the middle of rooms.
Other than California — which has to worry about earthquakes —
many states allow the construction of cinderblock foundation walls
around the perimeter. These types of walls are hollow cement
blocks that can be stacked and filled with rebar and cement. Your
architect and engineer can determine the best approach for your
particular home.
2.If you’re building a slab foundation, then it will be made entirely of
concrete. Slab foundations are less popular for custom homes
because they don’t allow for any sort of a basement, and they make
the first floor feel very rigid.
However, on the plus side, slab foundations are fairly cost effective
compared with other options. If your house is small and relatively
inexpensive, your architect may have chosen a slab foundation.
Regardless of what kind of foundation your house has, your garage
is likely to have a slab foundation due to its ruggedness and
relatively low cost. When the concrete is allowed to set, make sure
36
H
o
w
o
B
u
d
h
e
P
e
e
c
H
o
m
e
37 . H
Ho
ow
w ttto
oB
Bu
uiiillld
d ttth
he
eP
Pe
errrfffe
ec
cttt H
Ho
om
me
e
you put in a handprint or two with names to record the moment for
posterity.
3.A very popular form of foundation today is the pier-and-grade
beam foundation. This foundation is versatile because it requires
little or no excavation. It’s often used for hillside application because
it secures the house deep into bedrock, preventing potential slide
and settling issues. It’s also popular in seismically active places such
as California due to its earthquake resistance.
Some contractors like to use pier-and-grade beam foundations, even
on flatlots, because they can require less concrete and less
excavation, resulting in lower costs.
Get your house dressed
That is to say: framing. Most people think that framing refers only to
putting up walls. Framing actually refers to the entire structural
skeleton of a house, not just its walls. The framing process consists
of the following phases, generally done in this order:
Subfloor: The base floor is built below your carpeting or finished
flooring and on top of the foundation. A subfloor isn’t always
required for a slab foundation but is necessary if the house has a
basement.
Load-bearing walls: These walls are added to support weight on
top of the subfloor.
Interior walls: These walls are erected, along with spaces for doors,
windows, fireplaces, and architectural structures, such as dormers
and soffits.
37
H
o
w
o
B
u
d
h
e
P
e
e
c
H
o
m
e
38 . H
Ho
ow
w ttto
oB
Bu
uiiillld
d ttth
he
eP
Pe
errrfffe
ec
cttt H
Ho
om
me
e
Second story: The framing sub repeats the previous three bullets to
create an additional story if required.
Roof framing: The roof’s frame is put into place.
Subflooring
After finishing the foundation, the first step in the framing process is
putting in a subfloor, which serves as a platform for building walls
and creates a base to attach flooring. Putting the subfloor in is
mostly a wood-based process, and the framer, carpenter, or general
contractor generally build it.
Subfloors aren’t always necessary, however. If you’re building your
house on a concrete slab foundation, for example, you don’t need a
subfloor because your entire house is supported directly by the slab.
The following list gives you the instances when you need a subfloor:
If you build the house on raised or pier-grade beam foundations:
• For the upper floors of multistory houses
• As a base floor underneath hardwood floors (even if you’ve
built the house on a concrete slab foundation)
Here is a brief list of parts in the anatomy of the subfloor:
Girders: A long heavy piece of wood that spans the floor and
provides support.
Joists: Long narrow boards set in place on their edge resting on sills
and girders. The outer joists are the header and stringer joists, and
the inside joists are called lap joists.
38
H
o
w
o
B
u
d
h
e
P
e
e
c
H
o
m
e
39 . H
Ho
ow
w ttto
oB
Bu
uiiillld
d ttth
he
eP
Pe
errrfffe
ec
cttt H
Ho
om
me
e
Seal: A metal strip or layer of sealing material called caulk designed
to protect the wood framing from moisture and bugs. It sits between
the footing and the sill.
Sill or sill plate: A piece of pressure-treated wood anchored to the
foundation.
Subfloor: Plywood lies flat over the joists usually at a perpendicular
angle to direction of the floor joists.
To avoid squeaky floors, be sure that your flooring sub glues down
the plywood when building the subfloor, and that she uses a ring
shank nail to secure the plywood. The nail has screw threads that
hold tight.
And, while you’re at it, make sure that your sub is using flooring
plywood graded CD exterior or CDX, which is more durable to
weather during construction because manufacturers make it with
waterproof glue. You can identify CDX plywood by inspecting the
identification stamp found on each sheet.
Be sure that the subfloor has access for all the heating, ventilation,
and air conditioning (HVAC) ducting and plumbing work that you
need to complete under any flooring before it’s sealed up! Work
with your contractor to stage the process so that you don’t have to
tear out work that the builders have already completed. Going back
to do work again can cost money and delay the entire project.
Load-bearing walls
After the subfloor is in place, the next step is to put up the walls.
Framed walls have a very simple structure. Whether you’re building
39
H
o
w
o
B
u
d
h
e
P
e
e
c
H
o
m
e
40 . H
Ho
ow
w ttto
oB
Bu
uiiillld
d ttth
he
eP
Pe
errrfffe
ec
cttt H
Ho
om
me
e
with 2 x 4 or 2 x 6 studs based on your plans, you use the same basic
elements.
A bottom plank, called a sole plate, is the base for a series of studs
(usually 925⁄8 inches in height) set 16 inches apart. Contractors
take most measurements for spacing from the center of any given
stud to the center of the next one. They usually note the
measurements as “16 inches O.C.” (or On Center).
Sometimes to save material in nonload-bearing walls, they may
place studs 24 inches O.C. A piece of lumber matching the sole plate
caps these studs and is called a top plate. A tie plate above the top
plates ties the walls together at the junctions. The entire structure
measures 8 feet 11⁄8 inches from top to bottom for a standard 8foot ceiling. Note that custom homes vary greatly and your plans
may call for taller ceilings. Exterior walls are generally framed first.
They will be braced in place and then attached to each other moving
around the house’s perimeter. The framing sub creates spaces for
windows and doorways that don’t detract from the structural
integrity of the wall in the framing.
The sub does this job with a header. A header is a large, strong piece
of lumber designed to distribute the wall’s weight away from the
opening for the door or window. Trimmers are side supports that
transfer the weight from the header to the sole plate. Cripples are
small pieces of wood that secure narrow gaps and make up wall
height.
40
H
o
w
o
B
u
d
h
e
P
e
e
c
H
o
m
e
41 . H
Ho
ow
w ttto
oB
Bu
uiiillld
d ttth
he
eP
Pe
errrfffe
ec
cttt H
Ho
om
me
e
If assembling a log home, your contractor will be given specific
instructions on how to stack the logs. If the logs are milled in a
factory, they’ll likely interlock with a sealer inserted in between, but
if the logs are handcrafted, then extra shaping may take place on-site
and an insulating gooey material called chinking will need to be
applied between the logs. In either case, the logs will be bolted
together as they’re stacked.
Other kit homes, such as panelized, cedar, or timber frame, have
their own individual methods of assembly, but in most cases, the
materials have been precut and possibly preassembled at one time
before being disassembled and shipped to your site, which means
that doors, windows, and other architectural elements have been
placed and accounted for before framing starts.
The plumbing sub may need to install large plumbing fixtures, such
as bathtubs and Jacuzzis, before you finish the framing so they can
fit them into their locations. If building materials — especially
expensive building materials — in your community have a habit of
sprouting legs and walking away, you can chain them to the studs to
prevent theft.
Framing the second story
Currently, contractors use two different methods of framing for
multistory residences:
Platform framing (also known as stick framing) is the most
common framing method and allows for multiple levels with unique
architectural choices.
41
H
o
w
o
B
u
d
h
e
P
e
e
c
H
o
m
e
42 . H
Ho
ow
w ttto
oB
Bu
uiiillld
d ttth
he
eP
Pe
errrfffe
ec
cttt H
Ho
om
me
e
In platform framing, the framing sub builds the first walls attached
to the subfloor. The ceiling joists, or supports, then serve as floor
supports or joists for the next story. After installing a new subfloor,
the framing sub builds the second story walls on the subfloor
platform, just like he did on the story below. The sub needs to
construct stairways to allow workers to access upper build sites at
minimal risk.
Balloon framing uses continuous studs running from the sole plate
at the base of the house up to the roof.
This method allows for the transfer of the weight of the roof and
second story directly to the foundation. Because this method
requires a uniform outer shell of the house, balloon framing can be
architecturally restrictive and is used much less than platform
framing.
Finishing the architecture
The next step is to frame out all those wonderful architectural
pieces you had designed for the house. If you worked with an
architect, all the time and money you spent will pay off for you here
as long as you stick to the plan.
If you chose to work without an architect, you’ll now find out if you
made the right choice. During this stage is your last chance to make
any structural changes to the shape of the house, and expect
additional costs even if you change at this stage.
Next, the framing sub builds the interior walls, and your home’s
interior architecture begins to take shape. Your sub frames your
fireplace(s) at this time, too. Your subcontractor may need to
42
H
o
w
o
B
u
d
h
e
P
e
e
c
H
o
m
e
43 . H
Ho
ow
w ttto
oB
Bu
uiiillld
d ttth
he
eP
Pe
errrfffe
ec
cttt H
Ho
om
me
e
construct brick and stone fireplaces before closing in the floors and
walls.
Dormers, decks, and soffits are built out in an almost sculpturelike
fashion, using the same spacing and support structures as the walls
and subfloors. All external structures, such as attached decks,
require pressure-treated wood and galvanized nails and hardware
to make them weather resistant. Scientists are continually creating
new chemical advances to prevent rust and deterioration, so talk to
your contractor about using the latest and greatest materials.
Framing the roof
The roofing subcontractor installs the roof using either individual
rafters or prebuilt trusses or I-beams (see the section “Trusses and
I-beams: Yes or no?” earlier in this chapter). Because you can find
multiple roof styles and types of roofing materials, the structural
design varies according to the span and weight requirements of the
different materials. For example, clay tile and slate are heavy,
requiring stronger framing support than a lighter asphalt shingle.
While the house is being framed, you can spend time with your
contractor examining the roofing plan in your working drawings.
Your contractor uses those plans to determine the materials, labor,
and amount of time necessary to finish the roof framing.
Time for Mechanical Systems Installation
Now that the framing is done, it’s time to add the mechanical
elements that make a house livable. Where would you be without
43
H
o
w
o
B
u
d
h
e
P
e
e
c
H
o
m
e
44 . H
Ho
ow
w ttto
oB
Bu
uiiillld
d ttth
he
eP
Pe
errrfffe
ec
cttt H
Ho
om
me
e
water, hot (or cool) air, and power? The working drawings for your
home have specific plans for plumbing, HVAC, and electrical
systems. Another meeting with your contractor can go a long way in
clarifying the schedule as well as the materials used by the subs.
You and your contractor need to check your lighting and plumbing
fixture orders while going through the process of roughing out your
plumbing and electrical systems. Many suppliers don’t store large
quantities of expensive fixtures, and you may be unpleasantly
surprised to find out that your pieces are on back order on the day
you want them delivered. Checking now can save you a lot of wasted
time (and money!).
When the construction crew is done with the rough work, pull out
your camera and take extensive photographs of your home’s rough
systems. You may also consider using a video camera to get more
perspective. By documenting your home’s inner workings, you can
locate important structures long after you’ve finished the walls. This
documentation can be helpful for repairs and renovations decades
from now.
Rough plumbing
Plumbing — all those steel, copper, and plastic pipes that route
water into, through, and out of your home — is actually composed of
three separate but interrelated systems: the water supply, the sewer
system, and the vent system. The supply brings water to different
places in your home, and the sewage system takes it away. The vent
system is necessary so that the water can move in a steady flow
without bubbles or spurts.
44
H
o
w
o
B
u
d
h
e
P
e
e
c
H
o
m
e
45 . H
Ho
ow
w ttto
oB
Bu
uiiillld
d ttth
he
eP
Pe
errrfffe
ec
cttt H
Ho
om
me
e
At this point, your contractor marks the location of all plumbing
fixtures on your home’s framing, according to the working drawings.
You probably want to discuss and mark where plumbing should not
go at this time because of planned light fixtures, built-in cabinets, or
for sound insulation reasons (nothing’s much worse than having a
regularly flushed toilet located only two or three feet away from
your head when you’re trying to get a little extra sleep on a Saturday
morning!).
You need to walk through the house with your contractor now to
discuss material choices, fixture choices, and any special needs or
conflicts that have developed since you’ve framed the house.
For reference, here’s a brief checklist of common plumbing fixtures
that you need for your home:
•
•
•
•
•
•
•
•
•
•
•
Bathtubs and faucets
Exterior water spigots
Garbage disposal
Refrigerator or icemaker
Sauna or steamroom (mandatory for our Finnish readers!)
Septic tank, if applicable
Shower fixtures
Sinks and faucets — bathroom, kitchen, utility, wet bar
Toilets, toilet seats, and bidets
Water heater
Water softener or conditioner
45
H
o
w
o
B
u
d
h
e
P
e
e
c
H
o
m
e
46 . H
Ho
ow
w ttto
oB
Bu
uiiillld
d ttth
he
eP
Pe
errrfffe
ec
cttt H
Ho
om
me
e
Water supply installation
In most cases, you can have water piped into your home from a
public utility (the water company) or from a well on your property
Chances are, your contractor has already installed a meter and
spigot for his use during construction, so your house gets hooked up
now. For the next step, your plumbing sub installs the infrastructure
necessary to distribute this water supply from its primary source to
every place within your home where you need it.
During installation, the plumbing subcontractor lays both hot and
cold water lines in the framed walls and crawl spaces. To help keep
it safe from stray nails or other pointy objects — both during and
after the construction process — pipe should be run through drilled
holes in the studs rather than notches, which by nature put the pipe
up against the wallboard. Your plumbing sub installs pipe supports
and further protects the pipe from being pierced by nails by using
protective 11⁄2 inch metal strips with holes called FHA straps or
nail guards.
Although galvanized steel pipe was once the material of choice for
plumbing homes, most people today choose copper tubing. Why?
Copper tubing is durable, readily available, easy to work with, and
relatively compact. On the other hand, even though copper tubing
can cost twice as much as steel pipe, the labor savings have made
steel virtually obsolete.
Because of the high cost of copper tubing, builders have been
searching for a less expensive substitute. Plastics, such as
chlorinated poly vinyl chloride (CPVC), have gained some measure
46
H
o
w
o
B
u
d
h
e
P
e
e
c
H
o
m
e
47 . H
Ho
ow
w ttto
oB
Bu
uiiillld
d ttth
he
eP
Pe
errrfffe
ec
cttt H
Ho
om
me
e
of popularity because they’re easy to use and cost a lot less. Some
people, however, believe plastic piping leaves an aftertaste in the
water.
A relatively new plastic, called polybutylene, has gained some
popularity due to its flexibility. It allows for less joints and
connections, reducing the cost of installation, even though the
material may cost more on a piece-by-piece basis. It’s virtually
freeze-proof, however, which can be a big plus in cold-climate areas.
Plastic plumbing isn’t yet approved in all cities, so discuss your
specific needs and requirements with your contractor and plumber.
Generally, before you turn on your water supply, the plumbing sub
conducts a test to check for leaks or blockages in your water pipes,
first using air pressure and then using water. This test checks the
time and water volume it takes to fill the system. The contractor can
rework any leaks or blockages before connecting the system to the
water supply.
A home isn’t complete without a water heater, and you need to
install it in a place where leakage or failure won’t likely destroy
interior flooring — maybe a closet on the exterior of your home or
in the garage. Some people put it in an unfinished basement if one
exists, but placing it there doesn’t provide easy cleanup if it were to
burst (and water heaters do burst, from time to time). At the very
least, be sure that you’ve installed a protective pan underneath the
water heater and that you use adequate bracing to support it
particularly in earthquake-prone areas.
47
H
o
w
o
B
u
d
h
e
P
e
e
c
H
o
m
e
48 . H
Ho
ow
w ttto
oB
Bu
uiiillld
d ttth
he
eP
Pe
errrfffe
ec
cttt H
Ho
om
me
e
Sewer system installation
Gravity powers your sewer and waste systems, so your lowest sink,
toilet, and drain must be higher than the sewer line that leaves your
home. If they’re lower than the sewer line leaving your home, you’re
going to be in a major world of hurt soon. The sewer line must have
at least a 1⁄4-inch drop per foot in order to operate properly. When
properly installed, your sewer line efficiently delivers waste from
your home to the city hookup (where it eventually find its way to a
sewage treatment plant) or possibly to a septic tank on your
property.
Your primary choices for sewer materials are cast iron or poly vinyl
chloride (PVC) pipe. Although PVC is cheaper and easier to work
with, it has a tendency to be noisy when water flows through it. If
you decide to use PVC, take care to position the pipe in walls
isolated from bedrooms and media rooms where the sound could be
annoying. The drainpipes have occasional openings to the outside of
the house, called cleanouts. These openings have removable caps so
that you can snake out difficult clogs and roots in the future.
If building a basement, discuss the placement of your home’s main
sewer line with your contractor. Make sure the sewer line doesn’t
intrude on the living space, or your carpenter may have to frame a
post, breaking up the useable area. Your plumber also cuts holes in
the framing for all the drain lines that meet with the sewer system.
Make sure the plumbers don’t cut any I-joists when installing
bathtub and toilet drains. They’re notorious for doing this!
48
H
o
w
o
B
u
d
h
e
P
e
e
c
H
o
m
e
49 . H
Ho
ow
w ttto
oB
Bu
uiiillld
d ttth
he
eP
Pe
errrfffe
ec
cttt H
Ho
om
me
e
Air system installation
It allows your home’s plumbing system to breathe. Without this
venting system, the plumbing would be ineffective due to problems
like siphoning and backpressure, which can stop the water flow.
Think of this vent system like the way water burbles slowly out of an
open bottle when you turn it upside down. If you look at the outside
of a house, you notice narrow vent pipes extending from the roof. All
the drains in the home attach to one of these vents, allowing air (and
all those smelly gases) to escape.
In addition to installing the water systems, either your plumber or
your HVAC sub installs pipes for the natural gas or propane system
if you have gas service to your property. The process is similar to
the water-supply plumbing.
Additionally, the contractor installs the pipes for radiant heating.
Make sure that pipes remain uncovered until the county or city
building inspector has signed off on the plumbing. You need to be
available to walk through your home with the inspector so that you
can be aware of any issues as they arise.
HVAC
Your house may require multiple HVAC units for efficiency. You
need to make these choices in the design phase. When you install the
units, whether in the attic, crawlspace, or closet, be sure to discuss
noise-reduction options, such as vibration absorbers and insulation,
with your HVAC subs.
49
H
o
w
o
B
u
d
h
e
P
e
e
c
H
o
m
e
50 . H
Ho
ow
w ttto
oB
Bu
uiiillld
d ttth
he
eP
Pe
errrfffe
ec
cttt H
Ho
om
me
e
The ductwork for your HVAC creates passageways for air delivery
and return throughout your home. The ducts are usually made of
two materials, cut and fit at the build site. The two materials are
Insulated fiberglass: Fiberglass ducting is becoming more popular
because you can cut it with a knife, and it has greater insulation,
making for lower installation cost and quieter airflow.
Sheet metal: Sheet metal ducting can develop noise over time
because of temperature changes causing the metal to expand and
contract. Sheet metal is becoming less popular because it’s more
expensive and harder to work with.
The openings in the wall for air supply and air return are called
registers. Correct placement of registers is critical to the efficiency of
your HVAC system. By putting registers near doors and windows,
the conditioned air compensates for the heat or cold loss generated
by these openings.
Each room needs to have at least one supply duct and one return
duct. For heat, which rises to the top of the room, you need to place
the supply low and the return high. The opposite is true for the cold
air system. Discuss convenience and efficiency of register placement
and quantity with your contractor and the HVAC sub.
In addition to ducting for the climate system, you need to install
power ventilation ducts for bathroom and kitchen exhaust fans.
These ducts require electricity as well as ventilation to the outside.
Discuss these ducts with your contractor and mark them for
placement.
50
H
o
w
o
B
u
d
h
e
P
e
e
c
H
o
m
e
51 . H
Ho
ow
w ttto
oB
Bu
uiiillld
d ttth
he
eP
Pe
errrfffe
ec
cttt H
Ho
om
me
e
Installing your thermostats
Although your contractor won’t permanently install HVAC
thermostats until you finish putting up the drywall, you must decide
with your contractor on the best locations. (The location of your
thermostats probably won’t be designated on the working papers.
You need to revisit their locations with your contractor during the
rough work stage.) Here are some factors to consider:
• Don’t place the thermostat within 6 feet of a register or on the
opposite wall.
• Interior walls work better because outside walls can absorb
outside temperature.
• Don’t place thermostats in rooms with a fireplace.
• Hallways make for great thermostat placement.
If building in cold weather, consider getting your heating signed off
by the inspector right away. Running the heat during the building
process may make for more productive subs, allowing them to
spend less time warming up in front of space heaters that you’re
paying for. The more temperate climate your heating system creates
also helps with the drying process of the drywall and paint. You can
also ask your contractor about installing a temporary furnace if
you’re in a cold area and the HVAC system is taking a long time to
install.
Electrical works
Before the electrical work starts, your electrical sub reviews the
electrical plan in the working drawings with you and your
51
H
o
w
o
B
u
d
h
e
P
e
e
c
H
o
m
e
52 . H
Ho
ow
w ttto
oB
Bu
uiiillld
d ttth
he
eP
Pe
errrfffe
ec
cttt H
Ho
om
me
e
contractor to see if you need to make changes. Your sub is a licensed
electrician, and it’s her job to make sure that she gets all electrical
choices installed to code.
Building departments most often use the National Electrical Code
(or NEC, for short). The NEC is available through a number of
different sources on the Internet for about $75; one good source is
the National Fire Protection Association Web site (www.nfpa.org).
Simply pay your money, and enjoy the light reading.
You may want to walk the house with your contractor and
electrician now to mark where all your switches and receptacles
(outlets) will go. Although your electrical plan addresses the
minimum number of switches and receptacles required by code, you
need to decide where, specifically, you want to have them placed on
the walls. You also may decide to have more switches and
receptacles installed for your convenience.
Some additions you may want to consider include
• Additional outlets around kitchen counters and breakfast areas
• Dimmer switches for more romantic lighting
• Extra outlets in the home theater areas, hobby rooms, and
home office
• Switched exterior outlets at the patio and in the soffit for
holiday lighting
• Switched outlets in the attic and basement
• Switches at the top and bottom for stairway lighting
• Three-way switching in bedrooms near headboards so you
don’t have to get up to turn off the lights
52
H
o
w
o
B
u
d
h
e
P
e
e
c
H
o
m
e
53 . H
Ho
ow
w ttto
oB
Bu
uiiillld
d ttth
he
eP
Pe
errrfffe
ec
cttt H
Ho
om
me
e
Wiring your home for electric power
Your local building code specifies the gauge and type of wiring that
you have to use. You can discuss with your contractor and
electrician which materials give you the best protection regarding
age, corrosion, and fire. Some contractors also install metal conduit
(pipe) as further protection against damage.
Your electrical sub runs cable or conduit throughout the house in
different loops, or circuits. These circuits distribute the electrical
load and tie back into protective circuit breakers at the main panel.
Your electrical sub can install subpanels — which further divide key
circuits — for your convenience. He needs to mark each of these
circuits on the service panel so that you can identify which breaker
goes to which outlet.
This attention to detail saves time when you’re trying to make
repairs in the future. You want your sub to mount panels in
unobtrusive but convenient locations, such as in the kitchen, or by
your garage door so that you can easily locate them if and when a
breaker trips. The main service panel has a safety switch and a wire
connecting it to ground, which is a water pipe or metal stake going
into the ground.
Many people typically take for granted how much of life depends on
electricity. To make sure that you haven’t neglected an electrical
must-have, use this checklist of items that require power in specific
locations:
• Attic fans _ HVAC
• Bathroom heater _ Interior lighting
53
H
o
w
o
B
u
d
h
e
P
e
e
c
H
o
m
e
54 . H
Ho
ow
w ttto
oB
Bu
uiiillld
d ttth
he
eP
Pe
errrfffe
ec
cttt H
Ho
om
me
e
•
•
•
•
•
•
•
Bath vent fans _ Kitchen fan
Ceiling fans _ Light switches: One- and two-way
Dishwasher _ Microwave
Doorbell _ Sprinkler system
Exterior lighting _ Stove and oven
Garage door opener _ Sump pump
Garbage disposal _ Washer and dryer
Wiring your home for technology
In addition to wiring your home for electric, you want to address
wiring your home for technology at the same time. Because
technology is constantly changing, wiring your house in a way that
can last 20 years or more can be very difficult. Until recently, you
absolutely needed to install CAT-5 computer network wiring if you
wanted Internet access throughout your home. Today, however,
wireless systems are all the rage, and CAT-5 may soon be obsolete.
Allow for future innovations, regardless of the onward march of
technology, by running open conduit throughout the house with an
outlet in every room.
That way, you can pull wires anytime you need them. Doing so
requires a pullwire system. A firm but flexible wire is fed through the
conduit and remains there until you decide to pull cable. By
attaching the cable to the end of the wire, you can pull the cable
through the conduit. Attaching and pulling an additional pullwire
through before you seal everything up is best so you can add new
cable in the future.
54
H
o
w
o
B
u
d
h
e
P
e
e
c
H
o
m
e
55 . H
Ho
ow
w ttto
oB
Bu
uiiillld
d ttth
he
eP
Pe
errrfffe
ec
cttt H
Ho
om
me
e
This open conduit may add some additional upfront costs, but it
saves you money five years down the road when you need to install
the latest and greatest technogadget that requires different wiring
than currently exists in the house.
Keep these additional systems in mind when wiring:
Computer: Wireless is gaining popularity, but CAT-5 wiring and
Ethernet jacks provide added security.
Security system: Common practice is to wire every door and
window.
Smoke alarm: Hardwiring systems to your electrical system
prevents constant battery changes.
Sound system: Pipe that music everywhere without tripping over
speaker wires.
Telephone: You may want to put a jack in every room.
TV/Cable: Like phone jacks, you may want to put a coaxial outlet in
every room.
Vacuum: Central vacuum systems are popular in big houses,
requiring special pipes and outlets in every room.
Sheathing, Flashing and Insulation
Normally, sheathing, flashing, and insulating are the last stages of
buttoning up the house before moving on to the finish work.
However, depending on the time of year and the climate in your
area, your contractor may choose to sheath the house before
installing the electrical, plumbing, and HVAC systems.
(For example, if you’re building your house in Seattle, then your
contractor may want to button up the house quickly to protect it
from the constant rain.)
55
H
o
w
o
B
u
d
h
e
P
e
e
c
H
o
m
e
56 . H
Ho
ow
w ttto
oB
Bu
uiiillld
d ttth
he
eP
Pe
errrfffe
ec
cttt H
Ho
om
me
e
Your construction crew encloses the house during the sheathing
process. In this process the crew applies a covering material to the
outside of the framing.
Your sheathing serves several purposes:
• It adds shear strength to the walls.
• It provides backing for the siding.
• It stabilizes the studs from bending under the load and
warping with the weather.
Most sheathing today is asphalt-soaked fiberboard. A composite
material commonly referred to by its brand name Built-rite, this
fiberboard is the most common and cheapest insulator for
sheathing. Other newer and more expensive materials may be
available for sheathing. Discuss these options with your contractor
as well as the timing of sheathing in your project.
Your contractor uses special nails with protective plates to keep
from puncturing the outer skin of the sheathing when attaching to
the studs. The crew nails wall sheathing to the stud vertically about
every foot. Over the top of the sheathing, a permeable vapor barrier
is applied, underneath the siding. This barrier keeps moisture out
but allows air to pass. Make sure all seams are taped, and windows
wrapped with window wrap.
Your roofing sub needs to secure roof sheathing along the rafters or
trusses every 8 inches. When sheathing the roof, the crew needs to
allow for whatever type of roof ventilation that you plan to use. The
crew may need to leave spaces at the ridges and cut holes for
extruding vents and skylights. Any items punched through your roof
56
H
o
w
o
B
u
d
h
e
P
e
e
c
H
o
m
e
57 . H
Ho
ow
w ttto
oB
Bu
uiiillld
d ttth
he
eP
Pe
errrfffe
ec
cttt H
Ho
om
me
e
need to have flashing, a metal stripping nailed in place and sealed or
caulked to prevent water from leaking into your home.
After you have the roof sheathed, contractors commonly stack the
roofing material on it in preparation for the next phase of
construction. These stacks of material provide the appropriate
weight to the roof sheathing, preventing unnecessary expansion and
warping.
Insulation matters
Now that everything is enclosed, your contractor needs to make
your house warm and cozy. You and your architect should have
already discussed the type of insulation for your house during the
design phase. Now it’s time to put your plans to work. Your
construction crew can easily roll the commonly used blanket
insulation out into the walls and ceilings.
If your supplier delivers the insulation to the site early, make sure
that you keep it dry and loosely stacked. Wet, damp, or compressed
insulation loses its insulative qualities and may become moldy or
dirty. Be careful to use work gloves when handling the insulation
because the fiberglass strands can irritate your skin.
Walk the house with your contractor and discuss which areas can
handle hand-packed insulation and additional soundproofing. Make
sure that you have the plumbing and ductwork completely covered
and that the insulation doesn’t cover any vent holes.
57
H
o
w
o
B
u
d
h
e
P
e
e
c
H
o
m
e
58 . H
Ho
ow
w ttto
oB
Bu
uiiillld
d ttth
he
eP
Pe
errrfffe
ec
cttt H
Ho
om
me
e
You may want to take this time to have your contractor soundproof
those trouble areas. Soundproofing material comes in 4-x-8-foot
sheets, and the crew can apply it to kitchens, bathrooms, HVAC
areas, home theater rooms, and kids’ rooms to provide muchneeded peace and quiet throughout the house.
Making it pretty - wall coverings
You basically have three choices for outside wall coverings:
• Siding
• Stone
• Stucco
The following sections give you information about each choice.
Ultimately, your decision will be made based upon your personal
taste along with any guidelines imposed by your community.
Siding
Siding is popular in areas with older-style homes, but you’ll find it
used most anyplace. Your siding sub has four major types of siding
to choose from (assuming your architect didn’t already specify a
particular material):
9 Wood
9 Vinyl
9 Aluminum
9 Cement board
Our advice is to choose wood if aesthetics are your primary concern.
Unfortunately, although wood is the most beautiful siding material,
it’s the most expensive and requires ongoing maintenance in the
form of painting, and can suffer damage from sun, rain, insects, and
58
H
o
w
o
B
u
d
h
e
P
e
e
c
H
o
m
e
59 . H
Ho
ow
w ttto
oB
Bu
uiiillld
d ttth
he
eP
Pe
errrfffe
ec
cttt H
Ho
om
me
e
rot. Vinyl and aluminum — which can be purchased in a wide
variety of colors — are the more durable types of siding, but they
don’t look as good as wood and vinyl doesn’t protect as efficiently
against moisture as other materials.
The latest thing in siding and a favorite with contractors is cement
board. It’s sometimes referred to as hardi board or Hardie Board,
because it’s manufactured by James Hardie. You can check out this
siding material at www.hardie.com. This siding is very cost effective.
It goes on easily, is relatively inexpensive, and is impervious to
insects, rot, fire, and birds. It holds paint up to 15 years because of
its thermal stability, it looks like wood, and comes in several styles
including a cedar shake. The biggest advantage to this siding is it’s
fire resistant. Any type of siding is installed relatively quickly
because it’s premanufactured and uniform.
Stone
If you have chosen a house with a stone or brick exterior, your
subcontractor has two choices:
Real brick or stone: Brick or stone is a fairly expensive proposition
and requires special craftsmen called masons to assemble it
correctly. It provides great beauty but can have difficulties decades
later if the mortar starts to fail.
Masonry veneer: Masonry veneer is a covering — made to look like
stone, brick, or possibly adobe — that is far less expensive to
purchase and install than the real thing. Imagine bricks or rocks that
are up to 8 inches wide but only 21⁄2 inches thick. (In states like
California where earthquakes are prominent, masonry veneer is the
only brick home you can have because of seismic requirements.)
59
H
o
w
o
B
u
d
h
e
P
e
e
c
H
o
m
e
60 . H
Ho
ow
w ttto
oB
Bu
uiiillld
d ttth
he
eP
Pe
errrfffe
ec
cttt H
Ho
om
me
e
Stucco
In addition to siding and masonry, you can choose one more
commonly used exterior finish — stucco. Stucco is a thick, concretebased substance — similar to the mortar applied between bricks
when building a wall — applied to your home’s exterior. To install,
the stucco sub first mounts wire lath (think chicken wire) to your
house’s exterior walls to give the stucco something to stick to and to
help hold its shape. The first coat of stucco will be about 3⁄4-inch
thick.
After the first coat dries sufficiently, the sub applies a brown coat (a
smoothing layer that may or may not be brown) to smooth out any
uneven surfaces.
Finally, after the brown coat dries, a final color coat is applied. A
good stucco sub can offer a variety of different textures (and even
colors, premixed into the coating) to suit your taste — conservative,
wild, or something in between.
Roofing issues
You and your contractor should have ordered your roofing materials
back in the framing stage and hopefully by now they have arrived
on-site and are sitting up on your roof, waiting to be installed. If the
materials are here, sit down with your contractor and pull out the
roofing plan. The roof plan serves as a guide for making sure the
roof looks exactly as you dreamed and as your architect intended.
The roof plan specifies the types of materials as well as the
quantities of materials necessary to finish the job. You’ll likely hear
60
H
o
w
o
B
u
d
h
e
P
e
e
c
H
o
m
e
61 . H
Ho
ow
w ttto
oB
Bu
uiiillld
d ttth
he
eP
Pe
errrfffe
ec
cttt H
Ho
om
me
e
your contractor and subs refer to the amount of roofing material to
be used in terms of “squares.”
One square of roofing material equals the amount necessary to
cover 100 square feet of roof, a 10-foot by 10-foot area. The plans
should call for enough material to cover the total square footage of
the roof as well as an additional 10 percent for waste because pieces
will have to be cut to fit the edges of the roof.
When you and your contractor order the roofing material, having a
little too much is far better than not enough. If you run out and
order more, the shingles may not match. Different dye lots of
shingles may sometimes vary in their appearance — even if they’re
marked with the same color on the package.
Your roof will look better if the shingles match. The roofing sub and
laborers attach the materials to your new roof’s sheathing, generally,
a layer of plywood covered with a layer of tarpaper, and cover the
metal stripping (called flashing) installed around the chimney and
extruding vent pipes (from furnaces, plumbing, ventilation fans, and
other sources).
Although flashing is most commonly used to seal areas around
chimneys and vents, your roofing sub may use additional flashing to
cover seams and valley sections of the roof in order to provide
further protection from moisture. If your roofing sub makes this
suggestion, we advise that you agree to it.
Your roofing sub will also finish the cornice, which is the area
between the roof edge and the exterior wall also sometimes called
61
H
o
w
o
B
u
d
h
e
P
e
e
c
H
o
m
e
62 . H
Ho
ow
w ttto
oB
Bu
uiiillld
d ttth
he
eP
Pe
errrfffe
ec
cttt H
Ho
om
me
e
the eave, the part of the roof that hangs over the wall. (Your
architect already specified the type of cornice to be installed in the
roofing plan.)
Depending upon your local building department requirements, an
inspection of the roof may be required after sheathing and flashing.
After the roof has been sheathed, flashed, and inspected, the roofers
will put down tarpaper with staples. They’ll roll out a protective
roofing felt and attach it to the roof for further protection. The next
step is installation of the roofing materials, generally, either shingles
or tiles.
Installing your shingles
If you’re still deciding on materials, we break down the benefits of
various shingle types in the following list:
Asphalt shingles: These are the least expensive and most common in
housing. These thin shingles are made from fiberglass and asphalt.
The lifespan of an asphalt roof is generally 15 to 20 years.
Clay tile: Although beautiful, clay tile is a heavy roofing material and
requires a reinforced roof to support it. Clay tile is usually terra
cotta in color and comes in different shapes. Newer clay tiles are
sometimes made from plastic or synthetic materials and are lighter.
Tile is very popular in the West because of its fire-retardant
properties. Clay tiles can cost 30 times the price of an asphalt roof,
but last 50 or more years.
Laminated fiberglass shingles: These shingles contain the same
materials as asphalt; however, they’re thicker and can be fashioned
62
H
o
w
o
B
u
d
h
e
P
e
e
c
H
o
m
e
63 . H
Ho
ow
w ttto
oB
Bu
uiiillld
d ttth
he
eP
Pe
errrfffe
ec
cttt H
Ho
om
me
e
with different textures to give the roof different looks. They cost
twice as much as asphalt shingles, but last 10 to 15 years longer.
Sheet metal: Metal roofing isn’t actually a tile but large rolled plates
of metal. It’s lightweight, fairly easy to install, and comes in a variety
of colors. Sheet metal is very popular in snow areas because it
allows for snow to slide off the roof more easily. It’s ten times the
cost of asphalt shingles but lasts two to three times as long.
Slate: Slate roofing is a stone material that is durable and elegant.
Like tile, slate is extremely heavy and requires roof reinforcement.
Slate is also pricey, costing 30 times that of an asphalt roof;
however, it lasts more than 100 years.
Wood shake shingles: Some people still prefer wood shake shingles
for their custom home projects because they look great. These
shingles cost five times the cost of asphalt shingles but have the
same life span.
Wood shingles are much less fire retardant than the other shingle
types and have been banned in high fire danger areas such as
Southern California.
To install shingles, your roofing sub and laborers lay a 9-inch-wide
starter strip of roofing material across the eave or edge of the roof.
In colder, harsher climates, at least one or two rows of ice and water
shield are required on the edge of the roof.
Then, just as in the case of tile roofs, the sub and his laborers layer
the shingles in overlapping rows from the bottom of the roof to the
top and fasten them into place with galvanized roofing nails. Sheet
63
H
o
w
o
B
u
d
h
e
P
e
e
c
H
o
m
e
64 . H
Ho
ow
w ttto
oB
Bu
uiiillld
d ttth
he
eP
Pe
errrfffe
ec
cttt H
Ho
om
me
e
metal roofs will be rolled out or have premanufactured interlocking
seams on the edge of their panels, which make for easy installation.
Tile and slate are more difficult to install than regular shingles and
they’re subject to breakage if walked on after installation, or if some
errant space junk hits your roof.
Most tile roofing pieces are designed to interlock with one another
so that their own weight holds them in place. Your roofing sub and
laborers first fasten small strips of wood called battens to the roof to
provide spacing and support. They then set the tiles in place,
starting at the bottom of the roof and working up.
As the roofers work toward the top of the roof, they layer each level
so that it overlaps the lower one. Artful cutting is necessary at seams
and around chimneys and vents. At the top, special “peak” tiles are
installed, which hang over both sides of the top of the roof. This
layering forces water to stay above the tile surface and run over the
roof rather than under it.
Proper drainage
Whatever your roof size or style, creating proper drainage is
absolutely essential. If water backs up on your roof, it will soon find
its way under your roofing material — and into your home. No
matter what type of drainage system is installed, walk the property
with your contractor to make sure the system is installed in a way
that looks good on the house and works efficiently to remove water.
The latter can be tested with a hose run on the roof to watch water
drainage patterns.
64
H
o
w
o
B
u
d
h
e
P
e
e
c
H
o
m
e
65 . H
Ho
ow
w ttto
oB
Bu
uiiillld
d ttth
he
eP
Pe
errrfffe
ec
cttt H
Ho
om
me
e
To accomplish the goal of getting water off your roof quickly and
efficiently, your roofers will flash your roof’s valleys and angle your
roof to channel water down the surface and toward the edge. If
water is allowed to flow down to the ground directly from your roof,
however, it will likely settle around the foundation, which can create
settling problems in the foundation or moisture problems with the
wood at your home’s base. You don’t want either of these outcomes
to occur, and that’s where guttering comes into play.
Gutters are channels — most often made of aluminum, plastic, or
fiberglass — that collect the water that runs down your roof’s
surface and channel it into drainpipes at the corners of the house.
Gutter subcontractors (who, by the way, generally charge by the
foot) install the gutters with long, galvanized steel nails placed
roughly every five feet. When installed correctly, gutters should be
sloped down toward the drainpipe at a rate of 1 inch for every 12
inches of lineal feet. Your contractor can help you figure out the
number of downspouts necessary and the methods of drainage at
the foundation.
Drainpipes connect to underground tubing that leads the water to
your storm drain, or sometimes just to a concrete or plastic splash
block that leads the water away from the house.
Driveway and sidewalks
Depending on your project’s location and your contractor’s
preference, your driveway and sidewalks will generally be installed
in the latter stages of your project. In rural areas, your driveway
may simply be a gravel road; it may need to be created first so your
65
H
o
w
o
B
u
d
h
e
P
e
e
c
H
o
m
e
66 . H
Ho
ow
w ttto
oB
Bu
uiiillld
d ttth
he
eP
Pe
errrfffe
ec
cttt H
Ho
om
me
e
subs can access the building site. In more urban areas, your choices
can range from simple asphalt, which is a blend of tar and gravel, to
luxurious stamped concrete — concrete that may be colored and
that has patterns stamped into it while it’s still wet.
Which material you choose for your driveway may depend, in part,
on your neighbors. If you build in a rural area where houses are few
and far between with no homeowner association restrictions, you
may choose a less-expensive material for your driveway, like loose
gravel. But if you build in a development, your community’s codes
may require you to choose the more finished look of asphalt,
concrete, or even some type of decorative paver. Other choices of
materials may depend upon cost and climate.
If you and your architect have designed a fancy driveway, keep this
advice in mind: You may want to request that your contractor make
the driveway the last thing installed before project completion so
that construction traffic (those bulldozers, cranes, and heavy trucks
can leave quite an impression!) doesn’t destroy any of its beauty.
Concrete has become the most popular driveway material due to its
durability and beauty.
When installing concrete driveways and walkways, first the
concrete sub builds wooden forms (wood boards that keep concrete
within a certain area) in the shape of the driveway. The sub next
sets in place metal rebar (reinforcing steel bar) on small blocks. The
installed rebar looks like a net and it reinforces the concrete after it
is poured.
66
H
o
w
o
B
u
d
h
e
P
e
e
c
H
o
m
e
67 . H
Ho
ow
w ttto
oB
Bu
uiiillld
d ttth
he
eP
Pe
errrfffe
ec
cttt H
Ho
om
me
e
The sub then installs expansion joints (gaps between the slabs) to
allow concrete slabs to move without cracking due to heat or cold
(or earthquakes, in California). Before the concrete pour, the sub
places and compacts a base of crushed limestone or recycled
concrete to give the concrete a longer life. Your concrete sub takes
into account the current temperature and humidity — vital
elements in deciding exactly what concrete mixture to use — to
assure the pouring of a clean slab. The driveway will be finished
with a slight slope away from the house to allow for drainage.
Cosmetic stamping, if desired, occurs soon after the concrete is
poured.
Exterior lighting
After your home’s exterior is finished, your electrician installs the
outdoor lighting that is attached to the house. You and your
architect selected lighting fixtures when you created your detailed
materials list.
No magic to finishing this part — the electrician simply turns off the
juice and fastens those puppies in place. Because this task is fairly
easy work, you do-it-yourselfers may want to participate in some of
this installation process if your electrician is willing to let you help.
Make sure you don’t have any standing water around when you turn
on the power or you could get shocked! If you’re installing halogen
lighting, be sure to use gloves or plastic when installing the bulb.
You don’t want to touch it; otherwise the natural oil from your skin
will significantly reduce the life of the bulb.
67
H
o
w
o
B
u
d
h
e
P
e
e
c
H
o
m
e
68 . H
Ho
ow
w ttto
oB
Bu
uiiillld
d ttth
he
eP
Pe
errrfffe
ec
cttt H
Ho
om
me
e
Get Fireplaces
Most fireplaces today are prefabricated boxes that are readily
installed in a space framed for this purpose by your carpenter. With
insulated chimney shafts, there is little need for brick or stone other
than for outside decorative or architectural considerations. A
fireplace is best considered early in the building process because
9 You need to order materials well ahead of installation.
9 Your community may have restrictions on the type of fireplace,
such as wood-burning or gas.
9 If your house has gas and you decide to run a gas line to it (to
fuel gas logs or to use as a fire starter), you’ll have to run the
required plumbing long before you get to this point in your
build.
A custom masonry fireplace requires a proper draft (airflow from
inside your home, up through the flue, and out of the top of the
chimney) to function. A poor-breathing chimney can cause smoke to
enter your house (causing your smoke detectors no end of trouble);
too much breathing, on the other hand, makes keeping a fire lit
difficult. Prefab fireplaces make life easy because they rarely have
these problems.
Other considerations in a custom fireplace may be building a raised
hearth to make access easier and an ash dump if the fireplace is on
the ground floor.
Some masons build in a fresh air vent allowing the fireplace to suck
air from the outside of your home without sacrificing the warm air
inside.
68
H
o
w
o
B
u
d
h
e
P
e
e
c
H
o
m
e
69 . H
Ho
ow
w ttto
oB
Bu
uiiillld
d ttth
he
eP
Pe
errrfffe
ec
cttt H
Ho
om
me
e
The last piece to be added to your fireplace is the mantel, that
(usually) wooden shelf installed over your fireplace opening. A
mantel can be custom built or bought prefabricated — many people
acquire antique mantels from older demolished houses that can look
quite nice. Make sure the mantel is firmly secured with fasteners
before hanging your Christmas stockings.
Consider Drywalls
Drywall is a kind of wall covering made of plaster or gypsum
sandwiched between two layers of heavy gauge paper.
Homebuilders commonly use it today to cover interior walls
because it is uniform and easy to install. A few artists can still lay the
old lath and plaster method of wall finishing (using wood strips and
real plaster), but that method is generally too expensive compared
to drywall, and doesn’t provide any great benefit for the additional
time and cost.
Drywall comes in two common thicknesses: 3⁄8 inch and 5⁄8 inch.
The thicker board — 5⁄8 inch — is more commonly used to prevent
warpage, or rippling of the finished surface. Warpage can occur in
moist climates if you have studs spaced far apart, say 24 inches. You
definitely want to avoid warpage. (Moisture is bad for drywall
period, so make sure you store the drywall in a dry place on the site
until it’s installed — not out in your backyard in the pouring rain.)
Drywall is generally available in sheets of either 4 x 8 feet, 4 x 10
feet, or 4 x 12 feet. Drywall sheets have tapered edges on the long
side and full edges on the short side. This way, when two tapered
sides are put together, it creates a channel for drywall tape and mud
69
H
o
w
o
B
u
d
h
e
P
e
e
c
H
o
m
e
70 . H
Ho
ow
w ttto
oB
Bu
uiiillld
d ttth
he
eP
Pe
errrfffe
ec
cttt H
Ho
om
me
e
to be applied, which are used to cover up and hide the joints
between adjoining pieces of drywall. The result is a smooth, flat
wall.
Your drywall sub is one the most crucial players in making your
house look good. Discuss with your contractor about getting the best
drywall sub you can afford, and you’ll thank yourself a thousand
times over when your custom home is complete. You can tell you
have a good sub if she cuts pieces in place ensuring a tight smooth
fit, if finishing coats are thin and feathered, and if the first two coats
are so smooth that sanding is unnecessary.
Whether you want to hear it or not, a good drywall sub will likely
tell you whether or not your framer did a good job. Knots, warped
lumber, and out-of-square walls make her job more difficult, and
your drywaller won’t be shy letting you know about it. If the
problems are significant, you may need the framer to fix them
before the drywall sub can start.
You may have some additional choices to make at this stage that can
cost additional funds. Discuss the following options with your
contractor and drywall sub before work on these tasks begins:
Fancy textures: Texture can add depth to a room, and the sub will
have a selection available.
Unstippled ceilings: Standard ceilings have a standard texture, but
creating a smooth ceiling takes work and skill, which means
additional cost.
Water-resistant drywall: Over time, this drywall will hold up
better in a humid climate or in the dreaded event of water damage
from a leak.
70
H
o
w
o
B
u
d
h
e
P
e
e
c
H
o
m
e
71 . H
Ho
ow
w ttto
oB
Bu
uiiillld
d ttth
he
eP
Pe
errrfffe
ec
cttt H
Ho
om
me
e
When your drywall sub starts to work, she’ll generally install the
drywall horizontally, with the full sides joining at the studs. Doing so
reduces the amount of joints to be taped and places the strongest
area of the panel across the studs. At the outside corners she’ll
install a metal strip with a beaded edge where the panels meet.
Your drywall sub covers ceilings in the same way as walls, except
that if you desire a rougher (stippled) texture, she won’t have to
repeat the application of joint compound and sanding steps.
Application needs to be done in moderate temperatures to ensure a
quality job.
The work of the Carpenters
They are responsible for the finest details in your home, which
determine whether your home is ordinary or extraordinary because
you (and your friends, business associates, and relatives) can see
their work everywhere.
Your contractor will likely have long-established carpentry subs, but
if you have a choice in selecting carpenters, choosing this
subcontractor should entail a very deliberate process of examining
your candidates’ skills and workmanship before you even think
about making a hire. Make sure you see as many previous samples
of this person’s work as you can before you and your contractor
decide to give him the job.
When you and your contractor select the finishing carpenters,
remembering what types of jobs each sub will perform on your
house can make the decision easier. The following is a list of jobs
typically completed by your finish carpenters:
71
H
o
w
o
B
u
d
h
e
P
e
e
c
H
o
m
e
72 . H
Ho
ow
w ttto
oB
Bu
uiiillld
d ttth
he
eP
Pe
errrfffe
ec
cttt H
Ho
om
me
e
•
•
•
•
•
•
•
Hang interior and exterior doors
Set door sills
Set windows and window sills
Install closet and pantry shelving
Install stairway trim and decorative railing
Install base and crown molding
Install decorative molding such as chair and picture rails and
wainscoting
When working with your contractor to select your finish carpenters,
keep in mind that they may figure their bids in different ways. Some
calculate their job by the number of openings cut into the wall (for
example, the number of windows and doors) or the number of cuts
they have to make. Others charge on a time basis by the hour or by
the day. You can save money by having your contractor negotiate for
the whole job and then work to make as few changes as possible.
After your contractor has selected the finish carpenters, make sure
you and your contractor have planned your finish completely.
Ideally, all your materials need to come from the same suppliers —
this way, everything matches. If you run out of trim during the
course of the build process and have to order from a different
supplier, you may find slight variations in the color, grain, weight, or
other aspects of the materials.
After you’ve ordered your materials and they’ve arrived, remember
that you’ll be storing a lot of trim material at the site, including
moldings, rails, doors, and more. Make sure the material is stacked
72
H
o
w
o
B
u
d
h
e
P
e
e
c
H
o
m
e
73 . H
Ho
ow
w ttto
oB
Bu
uiiillld
d ttth
he
eP
Pe
errrfffe
ec
cttt H
Ho
om
me
e
in a dry, out-of-the-way place where it won’t be damaged from foot
traffic or by the outside elements during the construction process.
Scratches, nicks, and broken glass can cost you extra money due to
repair or increased waste and material cost.
Doors and windows
Here’s a bit of advice from someone who has hung a lot of doors:
Doors must always be hung level or plumb, and the door trim should
also be level and square. If your sub fails to take this essential step,
then we can almost guarantee that you’ll have problems closing
your doors at some time in the future — hardware may not match
up and the door simply won’t work properly. Make sure your sub
takes special care when creating the correct clearance at the bottom.
If doors are installed incorrectly, they can stick — taking a lot of
effort to fix.
Your exterior doors will be solid and in many cases decorative.
Weather stripping is an essential add-on for exterior doors because
it saves energy. Discuss with your contractor who will be providing
the weather stripping because it may not be the finishing sub.
You have choices with interior doors that depend upon price and the
look you desire. At the bottom of the price barrel are hollow-core
masonite doors. These doors have an outer frame with a sheet of
masonite on either side.
They’re light, inexpensive, and easy to hang but must be painted and
don’t provide any real aesthetic benefit.
73
H
o
w
o
B
u
d
h
e
P
e
e
c
H
o
m
e
74 . H
Ho
ow
w ttto
oB
Bu
uiiillld
d ttth
he
eP
Pe
errrfffe
ec
cttt H
Ho
om
me
e
Alternatively, you can choose from many prefabricated hollow-core
doors today with imprinted three dimensional patterns and
simulated wood grain.
These doors still require painting, but can add a nice decorative flair
and are simple to install. You can also purchase some hollow-core
doors with wood veneer that can be stained.
Custom doors will set you back in price. These doors can be
beautiful, but solid-core doors are heavy and need expert hanging.
Furthermore, they need to be ordered far in advance to make sure
they’re at the house in time for the finishing sub. Your door
decisions are best made during the architecture phase. Doing so
allows your contractor and finishing sub to make appropriate
arrangements in advance.
Prehung door and window frames can make life much easier and
can be easily fit into place. Most of today’s windows are made from
metal, wood, or vinyl and are completely self-contained units. If your
windows weren’t installed immediately after framing, your
carpenter now secures the door or window unit in place and then
levels it with small flat wedges of wood called shims. When the unit
is level and secure, he installs flat or decorative trim called casing
around the window or door to hide all the framing and make it look
uniform.
Baseboards and moldings
Baseboards (molding that runs along the corner of the wall and
floor) are relatively simple for your finishing carpenter to install. He
simply seats the measured and cut boards against the floor and
secures them onto the wall with a nail gun. The corners of the
74
H
o
w
o
B
u
d
h
e
P
e
e
c
H
o
m
e
75 . H
Ho
ow
w ttto
oB
Bu
uiiillld
d ttth
he
eP
Pe
errrfffe
ec
cttt H
Ho
om
me
e
baseboard will likely be mitered, meaning they’re cut at angles so
they fit smoothly and cleanly into place.
You have other finish molding options to consider, such as:
Chair or picture rails are decorative molding strips that run
somewhere along the middle of the wall.
Crown molding runs along the corner of the ceiling and the wall or
sometimes just below the ceiling. Crown molding is more difficult to
apply because most decorative crown sits at an angle to the wall,
which can make negotiating corners and angles difficult.
These options require a little more expertise to install and will
require additional costs.
Keep in mind that, because these moldings are in direct sight, critical
neighbors and mothers-in-law will probably scrutinize them more.
The almost-lost art of coping is the solution. Although most finishing
subs can miter joints in their sleep, it takes real talent to hand carve
molding with a coping saw to fit perfectly. If your trim is finished
wood rather than painted, finding a finishing sub capable of this skill
is critical.
Another challenge with moldings (which are generally flat) is
dealing with curved walls. A good carpenter can work angles almost
into curves — an absolute necessity for wood grain trim. Custom
warped pieces can be made but are very expensive. If the trim is
being painted, new flexible moldings are available today that can
bend around complex curves. Discuss these choices with your
architect in the planning stages so there will be fewer surprises
when you’re so close to moving in.
75
H
o
w
o
B
u
d
h
e
P
e
e
c
H
o
m
e
76 . H
Ho
ow
w ttto
oB
Bu
uiiillld
d ttth
he
eP
Pe
errrfffe
ec
cttt H
Ho
om
me
e
After the trim is in place, your finishing carpenter fills in any nail
holes with putty. After the putty dries, the carpenter sands and then
stains or paints the nail holes.
Your finishing carpenter and laborers also complete railings and
spindles (the individual spokes) on your staircase. They work
painstakingly to secure each piece before applying the banister (the
top of the railing), and sanding and finishing the railing. Your
carpenter also finishes the steps and risers (the facing pieces of your
stairs).
Kitchen and bathroom design
Cabinets and counters are installed in the most expensive rooms of
the house — the kitchen and bathrooms.
The bad news? You’ll sink a lot of money into these functional
decorative elements.
The good news? You can derive great value by investing in good
quality and pleasing design. Prefabricated cabinets are common
today, and they can be made in excellent quality and accommodate
custom sizes and needs.
Buying prefab cabinets can be significantly cheaper than having a
carpenter build your cabinets from scratch, but depending on the
look you want and taking into account the intricacy of the cabinet
areas, custom may be necessary or desirable. Discuss your options
with your architect when making choices about wall shapes and
areas.
You’ll have many choices to make before ordering, including shapes,
styles, and colors of your new cabinets. You can also choose from a
variety of options including inserts, pull-out drawers, lazy susans,
76
H
o
w
o
B
u
d
h
e
P
e
e
c
H
o
m
e
77 . H
Ho
ow
w ttto
oB
Bu
uiiillld
d ttth
he
eP
Pe
errrfffe
ec
cttt H
Ho
om
me
e
dish and spice racks, trays, and more. Are you having fun yet? If
using prefabricated cabinets, most of these specifications are chosen
early in the process with your architect or contractor.
When ordering prefabricated cabinets, you may get a significant
discount from your sub if you order all the house cabinets from one
manufacturer. If you have chosen relatively simple stock designs,
some bathroom cabinets may come with preinstalled counters
affording you savings in time and money. Discuss these options with
your contractor and sub. Just as you have an almost unlimited
number of options available for cabinets, you also have an almost
unlimited number of options available for countertops.
For years, the kitchen countertop of choice was Formica. Today,
however, those old Formica tops are looking pretty dated, and many
custom home owners are instead opting for the long-lasting beauty
of granite, marble, or tile. You can also choose from several synthetic
choices such as Corian and Silestone. Your budget and taste
generally determine which one you select.
In your regular meeting with your contractor, make sure that the
appropriate subs have been scheduled correctly so that, for
example, your tile sub starts work after the cabinets have been
installed instead of before.
Reconfirm the measurements and layout of your kitchen and
bathrooms with your cabinet sub. Make sure he has the dimensions
of the appliances as well as the placement of windows and doors.
This information insures that everything fits in all the right places.
Walk through all the cabinet areas with your contractor and sub
immediately after framing to make sure everyone is in agreement on
77
H
o
w
o
B
u
d
h
e
P
e
e
c
H
o
m
e
78 . H
Ho
ow
w ttto
oB
Bu
uiiillld
d ttth
he
eP
Pe
errrfffe
ec
cttt H
Ho
om
me
e
the plan. You can mark on the floor or studs with chalk. Your
contractor makes sure the appliances are installed correctly so that
your carpenter can finish the areas around them.
The following list provides some typical dimensions to remember as
reference.
These are standard dimensions. Any variations on these
measurements require custom ordering and installation (which
costs you a lot more money).
Try to avoid them if possible.
• 36 inches: The countertop height from the floor
• 32 inches: The optimum height for built-in desks and writing
tables
• 24 inches: The knee space required underneath desks
• 24 inches: The standard countertop depth
• 3 to 4 inches: The standard back-splash height behind sinks
If you schedule your walk-through before the drywall is installed,
you need to remember to account for the thickness of the drywall as
well as the width of molding to be added when measuring for
cabinetry. Check these numbers with your contractor carefully.
Some contractors feel cabinets should be installed and then stained
or painted for the best look. Others believe before any of the
cabinets are actually set in place, they need to be stained, painted, or
otherwise finished.
Doing so makes sure that otherwise hard-to-reach areas are fully
covered and will keep stain or paint from getting onto unwanted
surfaces. Discuss the options with your contractor.
78
H
o
w
o
B
u
d
h
e
P
e
e
c
H
o
m
e
79 . H
Ho
ow
w ttto
oB
Bu
uiiillld
d ttth
he
eP
Pe
errrfffe
ec
cttt H
Ho
om
me
e
Upper cabinets for the kitchen are installed first. Why? Because
putting them up without the base cabinets in the way is easier. After
the base cabinets have been installed, the carpenter can cut
countertops and fasten them securely in their proper positions.
Next, the carpenter cuts appliance holes (but make sure your
finishing carpenter cuts the holes when the appliances are actually
on-site, so you can double-check the dimensions). After the
carpenter adds the back splashes, he caulks all seams and joints,
adds drawers, and attaches pull knobs. He also repairs any scratches
or marks. Sometime during this phase of your project, the finishing
carpenter also installs bathroom vanities. Check with your
contractor to schedule the plumber so he can connect the sinks,
drainpipes, and faucets after installation.
Painting your home
Many people like to consider doing the painting themselves.
Unfortunately, not everyone is truly Van Gogh, and it takes a lot of
time to paint a house.
Consider the following:
9 Do you have the skill?
9 Do you have the time?
9 Do you have the physical ability?
If you can comfortably say yes to all three of these questions, then
you can certainly have some fun doing the painting while saving a
little money in the process. If you’re busy with work, or if the last
time you painted was with your fingers or little Susie’s pigtails, then
this work is probably best left to professionals.
79
H
o
w
o
B
u
d
h
e
P
e
e
c
H
o
m
e
80 . H
Ho
ow
w ttto
oB
Bu
uiiillld
d ttth
he
eP
Pe
errrfffe
ec
cttt H
Ho
om
me
e
If you decide to hire a painting sub, discuss with your contractor the
need for hiring the best painter with great references and insurance.
Try to see samples of his or her work on other home projects if you
can. Remember: Your walls are the finished surface that everyone
will see. Don’t be cheap about the artist or the materials.
Your new house has additional needs because it has never been
painted before. For example, new drywall needs a coat of primer
and two coats of paint to seal and cover the first time — even with
guaranteed one-coat paint.
Your painter needs to be a true professional to be able to anticipate
and deal with these special needs.
Different surfaces have different finish requirements. Here are
standard surface and finish choices:
Walls in bedrooms and living areas — Flat finish
Doors, trim, and woodwork — Gloss or semigloss because they repel
fingerprints
Kitchens and bathrooms — Gloss and semigloss because they’re
easier to clean and repel moisture
Another common question for the happy homeowner is what type of
paint to use. You basically have two choices in materials. Both can be
obtained with a variety of finishes. Discuss the best choice with your
contractor and your painter.
Oil: Oil used to be the paint of choice because of its durability. It
bonds well to wood and metals and works well on oily or dirty
surfaces.
Oil can be a problem in damp climates, however, because the
moisture repels the oil base during application. Other disadvantages
of oil are that brushes and spills can only be cleaned with thinner,
80
H
o
w
o
B
u
d
h
e
P
e
e
c
H
o
m
e
81 . H
Ho
ow
w ttto
oB
Bu
uiiillld
d ttth
he
eP
Pe
errrfffe
ec
cttt H
Ho
om
me
e
and it smells bad until it dries. Oil is generally considered the best
choice for the exterior, but not for the interior.
Water-based paints, such as acrylic latex: Acrylic latexes have
become extremely popular due to their ease of use. They are durable
and safe, and cleaning up brushes and spills during the application
process is easier. And because these water-based paints dry much
faster than oilbased paints and produce no fumes, they can be the
best choice for interior walls.
When considering water-based paint for exterior use, be aware that
it is a porous paint, meaning that moisture can penetrate it when
applied poorly over wood without an oil-based primer. If you have a
stucco exterior, acrylic latex may be a good option because the
stucco acts as its own sealer.
If you’re looking to have specifically designed colors throughout the
house, or are considering murals or faux finishes, you may need the
help of a designer before engaging your painting sub. If you want to
make the decorating decisions when everything else is done, you
can have your painting sub finish everything in white for now;
however, you’ll find it much cheaper and easier to have all your
painting done (including the custom work) before you finish
flooring and move in furniture.
Hardware and fixtures
People take for granted all the hardware and fixtures that must be
installed after everything else is put together. Now, during the
finishing process, is the time for your subs to put them in their
81
H
o
w
o
B
u
d
h
e
P
e
e
c
H
o
m
e
82 . H
Ho
ow
w ttto
oB
Bu
uiiillld
d ttth
he
eP
Pe
errrfffe
ec
cttt H
Ho
om
me
e
permanent place. Here’s a to-do list for your hardware and fixtures.
Some of these you may want to do yourself.
•
•
•
•
•
•
•
•
•
•
•
•
•
•
•
•
Install hinges on all doors.
Install doorknobs on all interior doors.
Install matching deadbolt and lockset on front and back doors.
Install light switch and electrical cover plates.
Install all lighting fixtures and ceiling fans.
Secure and attach thermostats and alarm controls.
Install all exhaust fans.
Install toilets and toilet roll holders.
Install towel racks and soap dishes.
Install medicine cabinets and mirrors.
Install shower rods and doors.
Install faucets and connect stoppers.
Install window locks.
Install doorbell.
Install door knocker.
Attach all cabinet knobs and appliance knobs.
If you’re installing lighting fixtures yourself, be sure that the circuit
breakers have been shut off first. This installation is simple because
most light fixtures come with clearly marked wires and printed
instructions. Be sure to use only recommended wattages because
creating an over-wattage lighting system can generate excess heat
and even cause a fire. At the very least, it will cost you more money
on your monthly energy bills.
82
H
o
w
o
B
u
d
h
e
P
e
e
c
H
o
m
e
83 . H
Ho
ow
w ttto
oB
Bu
uiiillld
d ttth
he
eP
Pe
errrfffe
ec
cttt H
Ho
om
me
e
Flooring installation
For you do-it-yourselfers, flooring installation is a task where you
may want to have some fun. Decide with your contractor and
flooring sub how you might participate in the process.
Install the flooring after the painting has been finished. Before any
flooring is laid, however, your contractor makes sure the job site has
been cleaned with set traffic pathways to avoid dirtying the new
floors. To prepare for flooring installation, the subfloors should be
cleaned of any rough spots or plaster.
Depending on the type of flooring and location of the subfloor, your
sub may install a waterproof vapor barrier. Here are some insights
on installing common flooring materials.
Wood and laminate
Many people love the natural beauty of wood floors, and the
installation process is fortunately relatively simple. Your flooring
sub will move briskly through the process. Your flooring sub first
measures and cuts straight planks, and then either glues or nails
them into place — or both. Tongue-and-groove flooring gets its name
from the protruding wood on one side of the board that fits into the
slot on the other side of the board.
If you’re using this type of flooring, your flooring sub insets piece by
piece and allows 1⁄4-inch space alongside walls to allow for
moisture expansion. If you’re using parquet flooring (flooring with
an inlaid design), the flooring sub usually lays it down in 6-inch
squares, which allows for the same breathing room.
83
H
o
w
o
B
u
d
h
e
P
e
e
c
H
o
m
e
84 . H
Ho
ow
w ttto
oB
Bu
uiiillld
d ttth
he
eP
Pe
errrfffe
ec
cttt H
Ho
om
me
e
To avoid major headaches, subs will try not to lay hardwood floors
in humid weather, which can create gaps in the boards when the
weather dries out and the flooring contracts. Most contractors have
the flooring delivered to the house a few weeks early to give it time
to dry out. You can then store the flooring in the actual rooms in
which it will be laid to let the moisture content stabilize.
After the flooring has been laid, sanding may be required before its
final finish. Laminate floors like Pergo and WilsonArt have gained
popularity due to their ease of installation, their durability, and their
versatility of style. Some are completely waterproof and have
lifetime guarantees, and some are amazingly accurate in their
representations of wood and stone materials.
Many laminate floor products are available today for do-ityourselfers. The material the manufacturer is imitating (wood or
slate, for example) determines the size and shape of the panels. Most
stone imitations are square, while the wood may imitate planking.
Panels are generally designed to interlock and can be applied with
glue directly to the slab or subfloor.
Vinyl
Like laminates, vinyl floors have great versatility of style and
durability. Vinyl floors can come in rolls or squares and are very
easy to install. If you’re installing the floor yourself, make sure you
have planned out your patterns so they make sense with the angles
of walls and placement of doorways. Also, be sure to follow specific
directions supplied with the flooring so you don’t void the
manufacturer’s warranties. Vinyl floors are generally installed using
84
H
o
w
o
B
u
d
h
e
P
e
e
c
H
o
m
e
85 . H
Ho
ow
w ttto
oB
Bu
uiiillld
d ttth
he
eP
Pe
errrfffe
ec
cttt H
Ho
om
me
e
a special adhesive made specifically for this purpose, although some
products may be nailed in place or may even be self-adhesive.
Tile
Tile flooring can be beautiful if done right, but it takes talent — and
a lot of patience. You seriously need to consider your craftsmanship
skills before embarking on a tile mission yourself. If you have any
reservations, then by all means use a pro.
Tile first needs to be properly cut and spaced when being applied.
After you approve the pattern design, the sub applies a thick sticky
glue, sometimes to a special, inflexible concrete-impregnated
surface called Wonderboard (used to firm up a flexible wood floor).
The sub then sets the tiles in place with small plastic spacers to fix
their position. After the tiles are secure, the sub fills the space in
between the tile with a gritty colored material called grout.
Darker colors of grout show dirt more than lighter colors, so be sure
to discuss the color options with your tile sub. Your tile sub may
recommend a sealer to protect the grout and make it easier to clean.
Carpet
Carpeting may also not be the best job for doing yourself — chances
are that a professional will do a much better job. Something to
remember: Buy the best padding you can afford. It keeps your
carpet feeling good and helps it last longer.
85
H
o
w
o
B
u
d
h
e
P
e
e
c
H
o
m
e
86 . H
Ho
ow
w ttto
oB
Bu
uiiillld
d ttth
he
eP
Pe
errrfffe
ec
cttt H
Ho
om
me
e
Carpet is sold in 12-foot-wide rolls. To save money when carpeting
small areas, ask about remnants (pieces left over from large
carpeting jobs, sold at a discount). Carpet is stretched upon
installation by attaching it at the walls to a wood strip filled with
tacks called a stretcher strip. After a few months, it may need to be
stretched again. Make sure your carpet company arranges for this
without an additional charge.
Appliances
Some of your appliances will be built-in appliances as opposed to
free-standing and should be installed at the same time as your
cabinets. The free-standing appliances can wait until all the painting
is finished and flooring is installed.
Spend time with your contractor to determine the proper time for
delivery and installation of the appliances. Having them delivered
too early risks damage and can create obstacles to work around.
Having them delivered too late can delay your move-in schedule, or
worse, the completion of your construction loan. Make sure upon
delivery that the measurements are as specified in your building
plans.
What if not all goes well?
Okay, so not every contractor is perfect, and your house may have
some accidental (or in rare cases, intentional) defects in
workmanship. Sometimes you don’t catch these defects in the final
walk-through. In fact, they may not show up for years. A perfect
example is a cracked foundation that doesn’t become apparent until
86
H
o
w
o
B
u
d
h
e
P
e
e
c
H
o
m
e
87 . H
Ho
ow
w ttto
oB
Bu
uiiillld
d ttth
he
eP
Pe
errrfffe
ec
cttt H
Ho
om
me
e
years after the home is completed, or drainage or roofing issues that
don’t materialize until the first big rain. These types of construction
defects are a big nightmare for the homeowner, and resenting the
contractor for his negligence is only natural.
Just take it slow. If you find yourself in a construction-defects
situation, you don’t want to escalate things unnecessarily.
Remember that your objective is to solve the problem with the least
hassle and expense.
Even though ultimately you may win a war with the contractor, it
could come at the expense of costly emotional and financial battles.
Often the contractor’s contract covers issues of this nature. Make
sure you discuss these issues when you’re hiring the contractor.
Conclusion
Congratulations! You’ve managed to build your own home. You
should realize that this might be one of the biggest accomplishments
of your life, so be proud of yourself!
Maybe it’s not yet entirely finished. You may always think of
something to add or to improve, but we have given you the basic
information and advice which otherwise would have taken you
months of research. We hope this proved to be a great adventure at
the end of which you are pleased with the result.
We also want to reassure you that we are here for any help you
might need and constantly trying to make your life better.
Enjoy your Home Sweet Home!
87
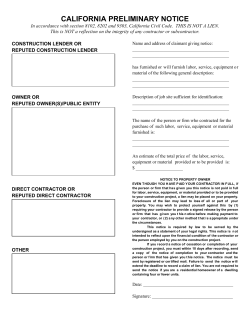
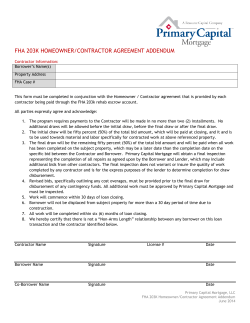

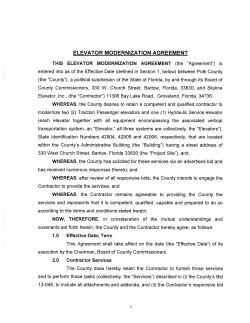
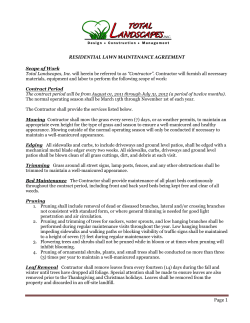


© Copyright 2026