
Movie Maker “How To’s”
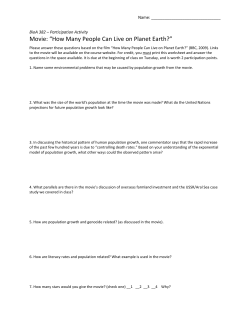
Writing a Research Paper with Movie Maker - Bridget Schimara-Robinson & Kelly Glos TCEA 2008 Movie Maker “How To’s” Finding the program: Start/ All Programs/ Accessories/ Entertainment/ Windows Movie Maker Task Pane: • Movie Tasks Save often when using Movie Maker!! • Movie Collections Views: • Storyboard – for sequence of pictures • Timeline – for timing of pictures/music/transitions/etc… Projects, Movies, Source Files • Source Files - Videos, pictures, music – must be saved on the hard drive where Movie Maker has access to at all times when working on your project • Source files are NOT contained in a project – Movie Maker only has access to these files while in your project – Thin of the project as a design mode – where you can plan what you want your movie to look like – but it does not actually contain all the files. • When you save a project as a movie, then all files will be contained within the movie – but are still NOT in the project. Tool/Options before beginning • Set the timing for how long each picture will be when you import it – the default is 5 seconds – if you need for all pictures to have a longer timing – you need to change it here before you import the pictures – you may also select a different duration for transitions and if you would rather have wide screen or regular aspect when showing movie. Default 5 seconds for duration of viewing of each imported picture Duration of any transition you put on a picture Normal Aspect Wide Screen 12/11/07 - Directions Document Modified from Sue Witt - CCISD Technology Integration Specialist Leave this as is – it just means you are using conventional North America formatting (PAL is for Europe) Page 1 Writing a Research Paper with Movie Maker - Bridget Schimara-Robinson & Kelly Glos TCEA 2008 Adding Collections • There are already several collections loaded into Movie Maker. They are: o Video Effect o Transitions o Collections – To add your own collections, right click on Collections and choose new collection, then type in the name of your collection. o This is useful if you are organizing pictures and editing some of the same pictures for different projects. It takes up very little hard drive space, as it is only accessing the original picture – not storing the actual file Getting Ready o Create a project folder on your C drive (your desktop is fine) or on a pen drive to organize your media (pictures/sound/videos) – This folder must be available whenever you are working on this project o Move all of the files you want to use into this one folder on your hard drive/Pen drive (make sure NOT to save on your H drive – it will fill it up in no time!) Let’s get started! 1. 2. 3. 4. Create a folder on your desktop named “Practice Project” Select 4 pictures and place them in your folder. Copy them and paste them into your practice project folder Open Movie Maker: Start/All Programs/Accessories/Entertainment/Windows Movie Maker 5. Go to Tools/Options/Advanced • Select 6 seconds for the duration of the picture • Leave the other options as they are and click ok 6. Create Collections for Practice Right Click here and choose “New Project collection” Click on Collections, then right Type in Practice Project for the name of the click on Collections and choose new collection and hit “Enter” “New collection” 7. To import pictures, go to File/ Import into collections (make sure that you see Practice Project in the Collections Window) 12/11/07 - Directions Document Modified from Sue Witt - CCISD Technology Integration Specialist Page 2 Writing a Research Paper with Movie Maker - Bridget Schimara-Robinson & Kelly Glos TCEA 2008 8. Navigate to the desktop where you have your practice folder saved. You will need to select the pictures you wish to have in the project and then click on “Import” Select the pictures you wish to use – hold down the control key to select more than one Click on Import after you have selected all the pictures you want 9. Click and drag the pictures down to the storyboard in the sequence you want. You can click and drag them into a different order if you like when they are on the storyboard also. 10. Save your project by going to file/save project as – and type in Practice Project – you will want to save it in the folder you created on your desktop (or on your pen drive). 11. Now that you have the pictures in the order you wish, we can begin to create the movie by adding in title slides, music, transitions, and effects. Adding Title Slides: • Click on Tasks in the shortcut tool bar and click on the arrow by Edit Movie • Then click on Make Title or Credits 12/11/07 - Directions Document Modified from Sue Witt - CCISD Technology Integration Specialist Page 3 Writing a Research Paper with Movie Maker - Bridget Schimara-Robinson & Kelly Glos TCEA 2008 • You will get a window that asks where you want the title/credit – click on “Title at the Beginning” • Type in “A Day at Clear Lake Intermediate School” and click “Done, add title to movie” Type title here You can play with formatting the title by clicking on one of these two links • You will see your title slide at the beginning of your storyboard now. Remember to save often! 12/11/07 - Directions Document Modified from Sue Witt - CCISD Technology Integration Specialist Page 4 Writing a Research Paper with Movie Maker - Bridget Schimara-Robinson & Kelly Glos TCEA 2008 To Add Video Effects to Pictures • Click on Collections and Video Effects • Choose the effect you like – for this practice, choose “Fade In, From Black” You will need to click and drag the effect down to the picture you wish to add the effect. You will see a Blue Star in the bottom left corner of the picture. This picture does NOT have an This picture had effect added – an effect added – the star is gray. the star is blue Remember to save often! 12/11/07 - Directions Document Modified from Sue Witt - CCISD Technology Integration Specialist Page 5 Writing a Research Paper with Movie Maker - Bridget Schimara-Robinson & Kelly Glos • TCEA 2008 To delete an effect, right click on the picture and choose video effects, highlight the effect you wish to remove and click on the “Remove Button” and click OK For practice, add an effect to each slide in the storyboard Adding Transitions • Click on collections in the shortcut task bar and click on Video Transitions • Select Circle and then hit PLAY in the viewing window in the top right of your screen to see what this transition looks like. Play button 12/11/07 - Directions Document Modified from Sue Witt - CCISD Technology Integration Specialist Page 6 Writing a Research Paper with Movie Maker - Bridget Schimara-Robinson & Kelly Glos • TCEA 2008 To add this transition, click on the Circle transition and drag it down to the rectangle between the two slides where you want the transition. • Click and drag to the rectangle between slides • To delete the transition, just right click on the rectangle and choose delete The more transitions you add to your project the larger the project becomes. Every scene DOES NOT need a transition; however, no transition is boring. Basic transitions are FADES, WIPES, and DISSOLVES. Other transitions tend to distract from the content. Try not to use too many special transitions, unless there is a purpose for it. Remember to save often! 12/11/07 - Directions Document Modified from Sue Witt - CCISD Technology Integration Specialist Page 7 Writing a Research Paper with Movie Maker - Bridget Schimara-Robinson & Kelly Glos TCEA 2008 Importing Music/Sound files • Movie Maker will accept the following audio file types: .aif, .aifc, .aiff .asf, .au, .mp2, .mp3, .mpa, .snd, .wav, and .wma • Click on Tasks and Import Audio or Music • Navigate to your Practice Project Folder, select the sound file and click on “Import” • Now, you need to change to the TIMELINE view – do this by clicking on the “Show Timeline” button. • Your view will change to this: 12/11/07 - Directions Document Modified from Sue Witt - CCISD Technology Integration Specialist Page 8 Writing a Research Paper with Movie Maker - Bridget Schimara-Robinson & Kelly Glos TCEA 2008 • Expand the timeline view by clicking on the magnifying glass with the + -- this makes it easier to work with changing times/durations of pictures and transitions. • Click and drag the sound/music file down to the timeline. • Now, comes the hard part – you might want to play with the timing of the pictures/transitions/sound files by clicking and dragging them shorter or longer. You can click and drag using the double-sided arrow to trim the sound or picture file (make it shorter) Now, play your movie and adjust the timings on whatever needs adjusting. You may also want to change some of the video effects and transitions at this time. Depending upon your personal OCD factor, this could take a long or short amount of time! Remember to save often! 12/11/07 - Directions Document Modified from Sue Witt - CCISD Technology Integration Specialist Page 9 Writing a Research Paper with Movie Maker - Bridget Schimara-Robinson & Kelly Glos TCEA 2008 Saving your Project to a Movie Format: • File/Save Movie File Then choose where you want to save your movie and select “NEXT” it is suggested that you save the final product on CD so that you know you have enough. Type your movie name here Browse to where you want to save the file 12/11/07 - Directions Document Modified from Sue Witt - CCISD Technology Integration Specialist Page 10 Writing a Research Paper with Movie Maker - Bridget Schimara-Robinson & Kelly Glos Click OK TCEA 2008 -- Notice how much space this requires and how much space is available. Click Finish and you are done! WOOHOO!!! 12/11/07 - Directions Document Modified from Sue Witt - CCISD Technology Integration Specialist Page 11 Writing a Research Paper with Movie Maker - Bridget Schimara-Robinson & Kelly Glos TCEA 2008 MovieMaker Tips, Tricks, and Information Three important MovieMaker Terms COLLECTION – The collection window inside the program is the place to store and organize media material. This is actually like a bookmark file in that it stores the location of media material and does not actually make a copy of the material. This means if you movie and sound, picture, or movie to a new folder you will have to tell the collection where it has moved. It is like a bookmark file. The data file for collections is stored on that computer and will not appear if you move to another computer. PROJECT – The file saved by the program MovieMaker. This is the file in which is stored what media pieces are in your movie, what order, what transitions, what titles, what effects, in other words all your directions to the program for creating the movie. This is the file you will work with in the creation process. MOVIE – the final film, show, or movie. This is what is created when you have put the entire show together on the timeline. If this were Hollywood, this would be the process of creating the film reel that would be used in theaters across the nation. Special note: you might create a movie file and then re-import it into the program in order to add more sounds, narration, or music. MovieMaker currently only has one extra audio track for adding narration or music. This is the file you will show your friends. Collection Window Like a bookmark file or folders on desktop, it helps organize your media. You can create additional folders to organize material. Movies (like AfricaFalls) are their own collection icon. Sounds, pictures, and video or other movie files can be put into any collection folder. You can import many different file types into Movie Maker 2, including: Video files with an .asf, .avi, or .wmv file extension. Movie files with an .mpeg, .mpg, .m1v, .mp2, .mpa, or .mpe file extension. Audio files with a .wav, .snd, .au, .aif, .aifc, .aiff, .wma, or .mp3 file extension. Windows Media-based files with an .asf, .wm, .wma, or .wmv file extension. Still images with a .bmp, .jpg, .jpeg, .jpe, .jfif, .gif, or .dib file extension. To get narration and music background – save movie with one or other, create a new movie and import your “saved movie” and then add your music or narration. OR you can with a little manipulation make sounds overlap in audio timeline. Move two sounds next to each other. Then grab one and start dragging over the other. Takes a little work and you have to play around with the volumes. 12/11/07 - Directions Document Modified from Sue Witt - CCISD Technology Integration Specialist Page 12 Writing a Research Paper with Movie Maker - Bridget Schimara-Robinson & Kelly Glos TCEA 2008 Finding Missing Files If you move media files to another location on a disk, the program will show a “X” icon for that piece of material in the collection window or in a project file on the timeline. To tell the program the new location: 1. Double click on one of the “X” icons 2. It will ask if you want to tell it the new location – click yes 3. Browse to the location of the missing file 4. When you get to the folder containing the file it will show only that file you are looking for. 5. You may have to do each video or movie clip. Most of the time when one graphic or one sound clip is located again the 6. rest of the graphics or rest of the sounds will be “found.” Remember to save often! 12/11/07 - Directions Document Modified from Sue Witt - CCISD Technology Integration Specialist Page 13 Writing a Research Paper with Movie Maker - Bridget Schimara-Robinson & Kelly Glos 12/11/07 - Directions Document Modified from Sue Witt - CCISD Technology Integration Specialist TCEA 2008 Page 14


© Copyright 2026