
How to Configure WPS Features in DSR Series Configuration Guide Overview
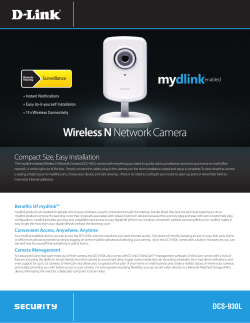
Configuration Guide
How to Configure WPS Features in
DSR Series
Overview
This document describes how to configure D-Link DSR-1000N to enable WPS (Wi-Fi
Protected Setup) feature. Basically, DSR router series doesn’t allow to enable WPS feature when
wireless security setting is Non-Encryption or WEP due to security concern in SMB environment.
This document will lead you to create a secure enough wireless setting with WPA enabled in
DSR-1000N.
How to Configure WPS Features in DSR Series
Situation note
WPS feature is an ideal solution which allow administrators to quickly make connection between
DSR routers and PC/NB. In this scenario, it uses D-Link DWA-160 USB adapter plugged in PC for
wireless connectivity. If you use other wireless network interface cards, please make sure that
it can support WPS feature in advance. In this condition, configuration steps will probably have
some difference.
Wireless LAN
WAN
PC
DWA-160
DSR-1000N
Configuration Step for DSR-1000N
1. Under the SETUP->Network Settings-> Profile, click Profiles.
Internet
Firmware version
1.03B09_WW
2
How to Configure WPS Features in DSR Series
2. Select a profile of access point and click the Edit button.
3. Please make sure that the security setting must be WPA or WPA2 for the access point.
3
How to Configure WPS Features in DSR Series
4
4. Under ADVANCED->Wireless Settings->WPS, click Add.
Note: If the wireless
security setting is Not
WPA or WPA2, it will
show following warning
message and all WPS
options are grayed out.
5. Select Enable from WPS Status drop-down menu then click Save Settings.
How to Configure WPS Features in DSR Series
5
Note: Please leave the
Station PIN as blank
since we don’t use PIN
(Personal Identification
Number) to connect
wireless network in this
scenario.
You have finished all necessary configuration for WPS feature in DSR-1000N side. Following section will go
through how to configure DWA-160 for WPS connection.
Configuration Step for DWA-160
We supposed that the D-Link DWA-160 has been successfully installed in your PC/Notebook. If your
DWA-160 is still not installed yet, please refer to the User Manual of DWA-160 for more detail information.
1. Double click the Wireless Connection Manager icon on your desktop.
How to Configure WPS Features in DSR Series
2. The wireless network (Site Survey) page will display all wireless networks that are available in your area. To
connect a network, simply highlight the SSID with DSR-1000N_1 wireless network and click WPS button
on Wireless Connection Manager. This Virtual button in the utility that connects you to WPS-enabled
DSR-1000N router. Please select PBC (Push Button Configuration) then click Next.
In this step, DWA-160 is connecting to an available wireless router. You should press the WPS button
located on front panel of DSR-1000N router to continue.
6
How to Configure WPS Features in DSR Series
3. When this screen appears, you have successfully connected to your wireless network between DSR-1000N
and DWA-160. Click Next to complete your setup.
7
Visit our website for more information
www.dlink.com
D-Link, D-Link logo, D-Link sub brand logos and D-Link product trademarks are trademarks or registered trademarks of D-Link Corporation and its subsidiaries.
All other third party marks mentioned herein are trademarks of the respective owners.
Copyright © 2011 D-Link Corporation. All Rights Reserved.


© Copyright 2026