
HOW TO BUILD W2IK'S LIGHT WEIGHT TELESCOPING "J POLE" ANTENNA
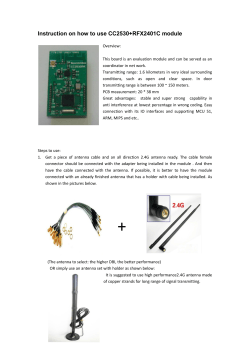
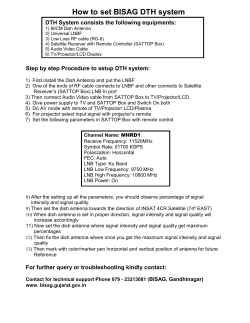
HOW TO BUILD W2IK'S LIGHT WEIGHT
TELESCOPING "J POLE" ANTENNA
FOR EMERGENCY OR FIELD USE
by Bob Hejl - W2IK
c 2005 all rights reserved
Building a telescoping "J Pole" antenna for emergency or field use is
much easier than you might think. Every serious emergency
communicator should have one. It basically involves building a "rollup" type two meter "J Pole" using 300 ohm TV twin lead and
then inserting it into a length of 1/2 inch PVC tubing. There's more to it
than that, so for proper construction and tuning let's go over the
construction process from start to finish. When you're done you'll have
an antenna that can be telescoped up to 17 feet, yet stores down to
about 5 feet, weighs only 4 pounds including coax cable and is a
wonderful product.
"Bob, one of your J-Pole antennas is what we're using at the Kelly USA ICP
(Incident Command Post). They originally tried to simply use a mag mount
antenna, but had marginal signal at best into local repeaters. I had a "W2IK JPole" and it is now being deployed at the ICP for the duration, with full signal
into the repeaters." -edited email from a ham in Texas - Hurricane Rita
Six of these antennas were also sent to New Orleans to help with
emergency communications in that area.
FIRST: BUILD A ROLL UP "J POLE"
(HERE'S HOW TO DO IT THE RIGHT WAY)
Take one length (55 inches) of 300 ohm twin lead (buy this from your
local Radio Shack) This is the old type of TV twin lead we had on our
TVs as kids. USE A NEW LENGTH, not an old run of wire ripped off
from your house!!
On one end, strip off about 1/2 inch of the insulation, exposing the
parallel wires. Bend them towards each other so they TOUCH or
overlap. Solder them together, making a nice, neat, tight connection.
This is the bottom of your antenna.
Next, measure exactly 16 1/2 inches from the end that you shorted
together and cut a notch in ONE of the wires in the twin lead. The notch
should be about 1/4 of an inch.
Next, measure exactly 1 1/2 inches from the same bottom of the shorted
ends and strip the insulation exposing about 1/4 of an inch of the wires
on BOTH sides of the twin leads. At these two points, CAREFULLY
solder in place a 25 foot length of RG 8X (mini) cable, with the center
conductor soldered to the long run (un-notched side of the twin lead)
and the shield side soldered to the notched side. (Trust me on this. It
should NOT be the other way around no matter whatever you've read or
been told).
Make a nice tight seal
where the coax is attached
to the twin-lead. extend the
tape to cover the entire
lower section of the twinlead as shown
Left: Bottom of twin-lead shorted as per text.
Below: Notch on ONE conductor 16 1/2 inches from the bottom
Double check all your connections and then carefully use electrical tape
to cover the bottom 3 inches of the twin lead while holding the coax
cable tightly against it so it makes a solid seal. Make sure that the coax
connections to the twin lead aren't shorting together. Continue taping it
until it seals all the connections you have made including the shorted
bottom of the twin lead and beyond to just the coax cable for about 2
inches. This will seal all of the connections and add strength to your
antenna/coax connection. Add a PL-259 connector to the end of the
coax. Have an adapter handy so you can use this antenna with either your
mobile radio or your HT.
At this point, due to variations in twin lead construction, you will need to
"tune" the antenna by slipping it into a 60 inch piece of 1/2 inch PVC
tubing, and hang it vertically, keeping it away from metal objects. Use a
fellow ham's antenna analyzer to make adjustments as explained next. It
will probably be a bit long, so the resonant frequency measured will be
low (like around 138 MHz). Slide the twin lead out from the pvc and trim
the top of the twin lead, by removing 1/4 of an inch from the top of the
twin lead AND on the side that has the notch: for each 1/4 inch you have
cut from the top of the twin lead notch out an additional 1/32 of an inch
enlarging the original notch from the bottom of the notched area... like
you'd be increasing the original notch length (but not really, just
trimming the "short" side of the parallel lead). Do this until it tunes
lowest SWR on 146 MHZ when it is back in the pvc. (If you do not
adjust it in this manner, you'll never get the lowest SWR or widest
bandwidth.)
SECOND: NOW TO MAKE IT TELESCOPING
Take a 60 inch piece of 1/2 inch PVC pipe and on one end cut a 1 1/2 inch long slot
about 1/4 inch wide. Snake the twin lead "J Pole" down into the pipe from this same
end. When you see the twin lead appear at the other end, stop. By this time, the entire
antenna has made its way into the pvc along with several inches of the coax cable.
Now fit the coax into that slot you've cut so the coax comes out from the side. Using
the proper pvc "glue", cement a pvc end cap to the top of the antenna, where the twin
lead was starting to come out. There is no need to secure the antenna into the pvc as it
will not collapse down. You do, however, have to put a small amount of epoxy where
the coax has come out of the slot by stuffing a bit of paper into the pvc just near the
coax and then dripping the epoxy into the pipe. This will prevent the coax, along with
the antenna, from being pulled down.
Next, take a 1/2 inch PVC coupler and cement it on to the end of the pvc tubing that has the
coax coming out the side. Take an additional 9 inch piece of pvc pipe and cement it into the
other end of the coupler.
When you are done, it should look like this at the coax end:
The antenna is not quite finished. For any antenna to properly work, you need height. This is easily
done by buying a telescoping "pool pole" at a place like "Lowe's" (item # 102924 model # PO15)
for about 13 bucks. This model is blue colored and telescopes up to about 12 feet and down to
about 4 feet. It is light weight, yet strong. On the smallest diameter of the pole there is a vinyl
handle. Remove the handle and you will see that the short (bottom) shank of your pvc antenna fits
in there quite nicely. The pvc coupler acts as a stop. Once you have it inserted, drill a hole through
the masting about 4 inches down until the drill goes through both the telescoping section and the
short shank of the pvc. I drilled a 1/4 inch hole so it will accommodate a 1 1/2 inch, 1/4-20 bolt
that I secure with a wing nut. This keeps the antenna in place. Thus, by extending the telescoping
pole all the way out and either finding a base to place it on or lashing the pole to a tree, if indoors
any available short vertical section, you now have a useful antenna that combines the height
needed to communicate and the portability to use anywhere without having to search for a place to
hang a "J Pole" and the entire system breaks down into two short (about 5 feet each), light weight
pieces yet can be telescoped up to 17 feet tall. You need no tools for in-the-field setup.
Field testing:
Hitting a
repeater
almost two
counties away
Using a wing
nut to hold
the bolt in
place allows
for no-tools
setup
See the
antenna
"shoot-out"
(below, with
chart) where
my
telescoping
"J Pole"
competed
with a
commercially
built
antenna.
(upper left photo) The two components side-by-side. Notice the bolt on the
bottom of the pvc antenna assembly below the pvc coupler. If you wish,
you can skip installing the end cap on the top of the antenna and just seal
the top end with hot glue or epoxy (after putting a piece of paper in about
1/4 inch to stop the glue from running). This will allow you the ability to
slip the antenna (up-side down) into the telescoping mast for storage.
A side-by-side field test (using the same radio) of this antenna vs. a good
mobile antenna on my truck yielded dramatic results. With the mobile
antenna I reached a repeater with the received signal being recorded just
under half-scale. Switching to the telescoping "J Pole" it showed a fullscale reading of the same repeater. Using the ability to telescope higher or
lower will allow you to put this antenna up indoors, such as in a gym that
is being used as a shelter, and have maximum height. A used, outdoor
umbrella stand can act as a base to support the mast.
+++++++++++++++++++++++++++++++
A RECENT FIELD TEST OF THIS ANTENNA
COMPARED TO A BASE STATION ANTENNA
A recent field test (March 26, 2005) pitted the "W2IK J-Pole"
antenna's field strength vs. that of a well-known 2 meter/ 70 cm base
station vertical. Taking several comparison measurements (using a
professional, frequency tuned-response field strength meter... not
some cheapie consumer p.o.s.) at increasing distances from the
antennas did yield some interesting results. In each case the measured
field strength of the "W2IK Telescoping J-Pole" was at least double
that measured from the commercially made vertical antenna. Both
antennas were each at a "top height" of 15 feet and were switched
back and forth to use the same 2 meter, 25 watt, FM radio.
Using a Western Electric I-106A
Magnetic Field Strength Indicator tuned to 146.3 MHz
FM transmitter power 25 watts:
(Measured in Microamperes)
Mean distances were not measured
distance
"A"
"B"
"C"
W2IK "J Pole"
Cushcraft AR 270
200
100
12
microamperes
Approx. building cost: $ 25.00
104.99
(with telescoping mast and coax)
coax)
98
48
5
AES Listed price: $
(supply your own mast and
This makes a strong case for building this antenna to have for
deployment
During any emergency communications field work. If you are serious
about emergency communications support, you need a good portable
antenna which can be set up (without tools) in just a minute.
++++++++++++++++++++++++++++++++
NEW: TAKE A LOOK AT W2IK's TWO METER "MAN
PACK SYSTEM" FOR SEARCH AND RESCUE
COMMUNICATIONS INCLUDING W2IK's NEW UNIQUE
"JIFFY POLE" 2-PIECE SUPER-FLEX ANTENNA
DESIGNED ESPECIALLY FOR ROUGH-TERRAIN SEARCH
AND RESCUE DEPLOYMENT.
TO BUILD IT, CLICK BELOW:


© Copyright 2026