
Web User Study New users
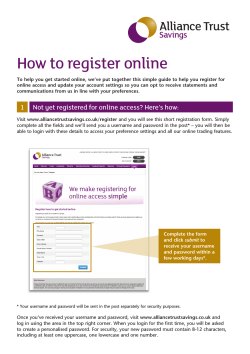
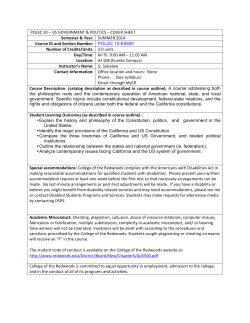
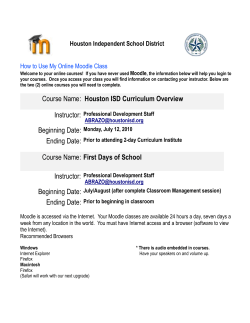
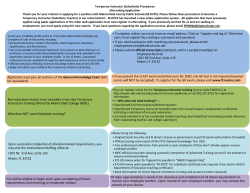
How to Create a New WebStudy User
Hover your mouse over Administration and click User on the line below.
New users
Click the
button to the left of “Create ONE user” to create an individual user. This opens the
Create a new user page:
Create a new user
Please see “How To Upload or Select an Avatar” for details
on this option.
Login Credentials
! Login ID: Required. This is what the user will use as the Username: when logging on to WebStudy.
Usually this conforms to a pattern, determined by the institution. The username is CRITICAL and it is
recommended that the school student ID be used as the username. It MUST be unique across the
entire WebStudy environment (all institutions).
! Password: Required. The institution assigns a default password for each account. The default
password generally conforms to a pattern as well. The user can then change it after logging on for the
first time, using the Personal shared tool.
IMPORTANT – Username and Password are influenced by the setting for case sensitivity in Institutional
Preferences – Enable case sensitive passwords and Enable case sensitive usernames – options can be
“Disabled” or “Enabled” individually.
! Confirm Password: Required. The password is retyped here to verify it. What is entered here must
match what was entered in the Password option above. Note: When private data like passwords are
entered, the characters are not displayed. Each character is replaced by a dot.
Password Reminder: Optional. If the user changes their password, they can store a hint here to remind
them if they cannot remember if later. Or, a reminder can be added for a default password to help
students initially logging on.
! User Type: Required. Choose Student, Instructor, Assistant Instructor, or Institutional Administrator
from the drop down list.
How to Create a New User
Revised August 2012 © WebStudy, Inc.
Page 1 of 4
! User Status: Required. Choose Active, Temporarily Deactivated, or Deleted from the drop down list.
! Working email address: Required. A valid email address is needed here for a confirmation email to
be automatically sent and optionally to be displayed in the course. Most commonly, the student’s or
instructor’s institution email address is used.
! If student or instructor - needs to verify email: Required. If set to YES user will receive a message
where they will be required to confirm the working email address as a valid address.
! Show the email address to other users in your course: Required. Choose Yes, make it public, or No,
hide it from the drop down list. If public it will display on the About page for instructors, and the
Students tab for students.
Name
Name Prefix: Ms., Mr., Dr., Prof. or Professor for example.
! First Name: Required. First name as this user will be known in WebStudy. The name might be:
formal – David, informal – Dave, or nickname – Duke.
Note: Formal name is assumed when Technical Support personnel are searching for users, otherwise
wildcard searches can be used. If possible, the administrator(s) who set up the user accounts using a
naming convention when possible (using formal name for first name for example) will make supporting
those users easier.
Middle Name: Optional. Middle initial or name can by entered.
! Last Name: Required. Many last names have hyphenation and/or punctuation marks like apostrophes
in them, or consist of more than one word. It is helpful, if possible, to enter the names the way they are
entered in the institution’s records for consistency.
Name Suffix: PhD., Esq., Professor Emeritus, for example.
Gender: Choose Female or Male from the drop down list.
Gender is reflected in the default avatars in Forum posts, WebStudy Mail and the Students tab.
Social Security #: Optional.
JID # (if applicable): JID number was a special number used only by one institution.
Courses in which enrolled (students only): Optional. This is where a student could be manually added
to a WebStudy course. The drop down list will include all courses at your institution. This option applies
to Active Student accounts only. Note: An subsequent XML upload file will remove this student from the
course unless their record is included in the XML file.
How to Create a New User
Revised August 2012 © WebStudy, Inc.
Page 2 of 4
Address
Address 1st Line: Optional. Text entered here, if public (see below), will be displayed on the About
page if the User is an Instructor, and the Students tab if the User is a Student.
Address 2nd Line: Optional. Text entered here, if public (see below), will be displayed on the About
page if the User is an Instructor, and the Students tab if the User is a Student.
City: Optional. Text entered here, if public (see below), will be displayed on the About page if the User
is an Instructor, and the Students tab if the User is a Student.
State: Optional. Text entered here, if public (see below), will be displayed on the About page if the
User is an Instructor, and the Students tab if the User is a Student.
Zip Code or country information: Optional. Text entered here, if public (see below), will be displayed
on the About page if the User is an Instructor, and the Students tab if the User is a Student.
Show the address to other users in your course: Choose “Yes, make it public” or “No, hide it” from the
drop down list. If public it will display on the About page if the User is an Instructor, and the Students
tab if the User is a Student.
Other Contact Information
Home phone: Optional, but It is suggested that this is entered because it facilitates WebStudy
support personnel being able to contact the user. If entered, will be displayed on the About page if
the User is an Instructor.
Office phone or another contact phone : Optional, but It is suggested that this is entered because it
facilitates WebStudy support personnel being able to contact the user. If entered, will be
displayed on the About page as a Work number if the User is an Instructor.
Homepage URL: Optional. This is a webpage outside WebStudy and must include “http://” in the URL.
Optional Demographic Information
Show the contact phone to other users in your course: Choose “Yes, make it public” or “No, hide it”
from the drop down list. If public it will display on the About page if the User is an Instructors, and the
Students tab if the User is a Student.
How to Create a New User
Revised August 2012 © WebStudy, Inc.
Page 3 of 4
Turnitin
Turnitin login: If your institution has a license for Turnitin and this option is enabled in the “Edit Course
Data” settings for any of an Instructor’s courses, then the Instructor’s Turnitin login ID MUST be entered
here in order for Assignments to be automatically submitted to Turnitin.
Turnitin password: As above, the Instructor’s Turnitin password MUST be entered here for
Assignments to be automatically submitted to Turnitin.
Other Information
Office Location: Instructor’s Office location (usually a campus, building, room number) can be entered
here and will display on the About page in their courses if made public in the Course setup.
Office Hours: Instructor’s Office hours , if entered here and will display on the About page with Office
location in their courses if made public in the Course setup.
Any other information: Type or use the
Paste from Word icon to copy & paste from Word or a
wordprocessor into the RTF Editor box. It will appear on the About page if the User is an Instructor.
Note: This is editable by the Instructor on their Administration shared tool menu in each course.
Internal mail signature: Type the name and title and any other information the user would like to
appear as the signature on their internal WebStudy Mail email messages. Note: This is editable by the
Instructor on their Administration shared tool menu in each course.
After you have made all your choices and settings for the user, click the Submit button to create the
user account. If any required data is missing, an error message will appear so you can enter it.
How to Create a New User
Revised August 2012 © WebStudy, Inc.
Page 4 of 4


© Copyright 2026