
How to Submit New Items Updated 2/2013 for Phase 4 Release
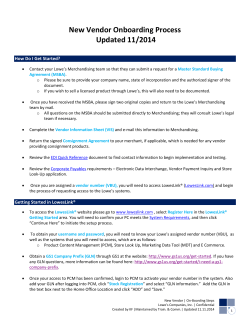
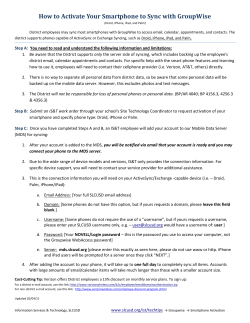
How to Submit New Items Updated 2/2013 for Phase 4 Release PI Builder -Phase 4 was released on February 22, 2013. This release includes collection of item restriction data via the Marketing Data Spreadsheet (MDS). Marketing Data Tool (MDT) is a Lowe’s data collection portal for new and existing items. These instructions are for submitting items to PCM that do not currently have item setup or marketing data in PCM. If you have items that only need the item setup or marketing data updated in PCM, use the instructions How to Submit Existing Items document within the LowesLink® Marketing Data Tool application. NOTE: all ISSs and MDSs must be submitted via FootPrints to Product Information. Members of Product Information will submit needed information to the appropriate Merchandising Specialist (MS) for approval. The following sections will be discussed in detail throughout this document: How to Initiate Data Synchronization & Publication How to Submit New Items at a Glance Locating PI Builder File Overview Completing the File Marketing Data Spreadsheet (MDS) Specific Reviewing the MDS Reviewing the Item Setup Sheets Uploading Images and PDFs to PCM Submitting the File How to Initiate Data Synchronization & Publication 1. Obtain your digital certificate or EDI Web form from LowesLink®: http://www.loweslink.com/llmain/edi_webforms.htm 2. Obtain a GLN through GS1 at the Web site: www.gs1us.org/standards/barcodes/ean_upc. NOTE: if you have any other GLN questions, more information can be found here: www.gs1us.org/standards/identification_numbers/global_location_number. 3. Login to PCM to activate your Vendor Number. 4. Determine your GDSN Solution Provider and contact them register. Lowe’s preferred GDSN Solution Provider is 1SYNC. The Solution Provider/Third Party Contact List document details recommended parties to assist with your GDSN services. 5. Determine if you are a Data Pool or Web vendor. For Data Pool vendors, product data is shared electronically with Lowe’s through the Global Data Synchronization Network (GDSN). This is preferred and ideal for vendors supplying data to more than one retailer in the GDSN, and/or vendors supplying multiple products to Lowe’s. For Web vendors, product data is manually entered directly into Lowe’s PCM application for Lowe’s use only. This is an acceptable approach for small suppliers providing very few products exclusively to Lowe’s. Utilize either the Data Pool or Web vendor sections below to complete data synchronization. 6. Make sure your brand name is on the Lowe’s Controlled Brand List. If not, you need to submit it to be added. Please see the Lowe’s Controlled Brand List where you can view the list and learn about submitting a new brand. For more information on Lowe’s brand process and how to troubleshoot, please see the How to Add or Update a Brand Name. 7. Once you are registered with your Solution Provider, you will publish your data into their Data Pool. LowesLink Marketing Data Tool Website Lowe's Companies, Inc. | Confidential Created by LMB | Updated 2.25.2013 1 8. Request that your Solution Provider assist you with pulling a Publication Report, a report that Lowe’s requires to validate that you have published your data. How to Submit New Items at a Glance 1. 2. 3. 4. 5. 6. 7. 8. Login to LowesLink® using your digital certificate. Select Marketing Data Tool from your list of LowesLink® applications. Save the PI Builder to your desktop Create an ISS and MDS for your product category. Complete the file using a single GLN per file. Review your file for accuracy and completeness using the Mandatory Data Validation Checker. Upload your images and PDFs to PCM prior to submitting your MDS. Submit your file, which contains your ISS and MDS, via FootPrints to Product Information. Locating PI Builder You will need to utilize the PI Builder to create both an ISS and MDS, and complete a file for each product category Lowe’s buys and/or carries from you. Each time you need to submit data, you must return to LowesLink® and utilize the PI Builder, which houses all of the templates. 1. Login into LowesLink® with your digital certificate. 2. Select Marketing Data Tool from your list of LowesLink® applications. NOTE: If you do not have the Marketing Data Tool link, send an email to [email protected] and request access to the application, providing your vendor number. You do not need to apply for a new digital certificate. 3. Select PI Builder. You must have macros enabled on your Excel to use this application. Reference the document How to Enable Macros for more information. It is also recommended to close any Excel documents you have open before running the Builder. NOTE: Live Goods will still utilize the separate ISS located on the Marketing Data Tool homepage until a future release of PI Builder. However, you must continue to utilize PI Builder for the MDS. LowesLink Marketing Data Tool Website Lowe's Companies, Inc. | Confidential Created by LMB | Updated 2.25.2013 2 UPDATE ! 4. On prompt, click Save to store the PI Builder on your desktop. Do not run off LowesLink®. It will take longer for the tool to load and create files. NOTE: PI Builder features an expiration feature that will prompt you to download a new PI Builder 14 days after download. 5. 6. 7. 8. Locate the saved PI Builder on your desktop and Open the file. Select New data to Lowe’s. (For additional information on this screen, select the “?” on the right side.) Check the confidentially box to proceed. Select Continue. LowesLink Marketing Data Tool Website Lowe's Companies, Inc. | Confidential Created by LMB | Updated 2.25.2013 3 9. The next screen will prompt you to select which country your item(s) will be sold in. Your choices are USA or Canada. The country on the sheets created will default to the country selected here. NOTE: Selecting Canada will generate the tab Import Item Classification. 10. The next screen will prompt you to determine your item type. Your choices are Stock Items Only, Special Order (SOS) Items Only, or Both Stock & SOS. The number of tabs generated for your file will be based on your response here. Utilize the “?” for explanations on each choice. LowesLink Marketing Data Tool Website Lowe's Companies, Inc. | Confidential Created by LMB | Updated 2.25.2013 4 NOTE: If you need to submit data for a set of GTINs where some are exclusively Stock and others are exclusively SOS, you can select both check boxes for Stock Items Only and Special Order (SOS) Items Only. Doing so will generate two separate files. You will receive the following message after you select your product category. You will have a file labeled “SOS” and “Stock” on your computer, and will need to complete and submit both. 11. The next screen allows you to choose the appropriate product category for your items. You can locate your product category through the following methods: a. Choose a Merchandising Division and Choose a Category b. Enter Keyword LowesLink Marketing Data Tool Website Lowe's Companies, Inc. | Confidential Created by LMB | Updated 2.25.2013 5 NOTE: Utilize the Related Product Category and Product Category Description fields to ensure your product category is the best match. If you are unable to find the appropriate category, please contact [email protected]. Do not force your information into a category. NOTE: You cannot export a master category list from this screen. In order to do so, select Go Back to Main Menu and select Research Categories or export current category list. 12. Enter the Lowe’s Home Office Vendor Number (VBU) 13. Select Create File. 14. The file will prompt you to save it somewhere on your desktop. The builder will automatically save your file in the following naming convention: VBU_Category_MoDateYr.xlsm (Example: 111_Hammers_01-0113.xlsm) 15. When the file is generated, you will receive a message asking if you would like to create another file based on another product category. NOTE: The file will be defaulted to save as a 2007 Excel platform. In order to maintain the functionality of the file, do not save this as a different file type. LowesLink Marketing Data Tool Website Lowe's Companies, Inc. | Confidential Created by LMB | Updated 2.25.2013 6 16. You will receive a final message reminding you to utilize Paste Special > Values or Paste Special > Text when working within the file. This is critical to maintain functionality within the smart spreadsheet. File Overview The numbers of tabs/worksheets present within your file is determined based on the options selected throughout the introductory questions. The tabs are listed in the following order based on selection: Stock Items Only: Marketing Data (MDS); MDS Snapshot; Stock; Quantities & Dimensions; Logistics; Import Item Classification SOS Items Only: Marketing Data (MDS); MDS Snapshot; SOS; eCat Cost Information; Logistics; Import Item Classification Both Stock & SOS: Marketing Data (MDS); MDS Snapshot; Stock; Quantities & Dimensions; SOS; eCat Cost Information; Logistics; Import Item Classification NOTE: Import Item Classification is only present when you have identified these items will be sold in Canada. The MDS Snapshot tab is just for reference; no data population is required here. Contact Information is present on the following tabs: Marketing Data (MDS); Stock; Quantities & Dimensions; SOS; eCat Cost Information; Logistics; Import Item Classification. o The Contact Information button is located on row two of all of the tabs, and within the Mandatory Tasks menu on the Marketing Data (MDS). Make it a best practice to complete the Contact Information tab immediately before beginning. Attributes in red are required. The contact information only needs to be completed on one tab, can be entered on any tab, and will be transferred from tab to tab. LowesLink Marketing Data Tool Website Lowe's Companies, Inc. | Confidential Created by LMB | Updated 2.25.2013 7 NOTE: Data Pool Vendors can select the Solution Provider Name from the selection list or enter in the blank field. Also, if the same vendor contact is responsible for completing the Marketing Data, GDSN Data, and Sales, select the Copy this information to both GDSN and Sales area button to populate the GDSN and Sales sections after the Marketing contact has been entered to avoid duplicate entry. Completing the File When completing your file, keep the following details in mind: 1. Detailed instructions for each attribute are displayed by clicking on an individual cell. 2. All columns with a red header are required attributes that must be populated. 3. Headers in black are optional attributes that you may choose to populate. If you complete these columns, your data must be accurate and product specific. N/A is unacceptable unless specifically told otherwise by a detailed instructions note within the workbook. 4. Gray columns are informational only. No data population is required. 5. Data can be entered cell-by-cell, or by cutting and pasting special > values/text groups of cells one column at a time. 6. The number of items per file is limited to 1,000. 7. Some attributes are pre-populated for you immediately (e.g. Category). The formula-based cells are unable to be modified and will not accept the cut and paste feature. 8. Some fields will cross-populate between tabs as you enter information (e.g. GTIN, GLN, Model). 9. Drop-down text and drop-down Unit of Measure (UOM) fields are available for each attribute requiring a response from a list of parameters. LowesLink Marketing Data Tool Website Lowe's Companies, Inc. | Confidential Created by LMB | Updated 2.25.2013 8 9. Free text fields allow you to enter data without response parameters. Reference the notes on each column for limitations to these cells (e.g. character limitation, number versus character.) Do not create excessive gaps when populating these cells. Your information must be compact to the typical sentence/paragraph form. NOTE: If the field is not required and you do not have an applicable answer, do not populate. N/A is unacceptable in category-specific attribute fields. 10. Unit of Measure (UOM) fields exist on the Marketing Data Spreadsheet. These fields require a specific type of numerical response. The UOM code is located in the attribute’s header. Additional information is found in the note for that particular column/attribute. Do not enter fractions in these cells; only numerical responses are allowed. Example: If an attribute’s UOM code is in inches, do not provide data in feet. NOTE: If your product has a limited lifetime warranty and your MDS template has the attribute Base Warranty Parts and Base Warranty Labor, enter the code 9999 in the cell. If it does not have a warranty, enter 0 in the cell. If you need to expand on your warranty, use the next available Supplier Bullet. Marketing Data Spreadsheet (MDS) Specific Remember, the MDS Snapshot is a reference tab. It does not require data population. Utilize this tab to see a vertical display of the attributes listed on your MDS. LowesLink Marketing Data Tool Website Lowe's Companies, Inc. | Confidential Created by LMB | Updated 2.25.2013 9 1. The category-specific attributes are at the beginning of the file. 2. Supplier Bullets 1-9 are at the end of the category-specific attributes. Only two Supplier Bullets are required. However, Lowes.com now features three supplier bullets on the product landing page so we encourage you to submit multiple Supplier Bullets. 3. The Image Disclaimer field is after the Supplier Bullets, before the digital asset (image and PDF) information. 4. Asset view/Type 1 is specifically for the Front-Facing Image, which is the Lowes.com display image. This image must be in color. 5. Asset view/Types #2-15 should be utilized to submit additional images and your PDFs to support MyLowe’s. The PDFs can be submitted in the following types: ENERGY STAR Guide, Installation Manual, Warranty Guide, Dimensions Guide, Use and Care Manual, Consumer Facing Packaging Label, Assembly Instructions, Product Certifications, MSDS (Material Safety Data Sheet) and Swatch. NOTE: Reference the Lowe’s Marketing Data & Image Standards for detailed instructions specific to images and PDFs. a. When saving images and PDFs, make it a best practice to save and uploaded to PCM using the GTIN’s barcode with an uppercase file extension (.JPG, .PDF, etc.). Additional images and PDFs should include an underscore and a sequential character. Example: Front-Facing Image: 098767876545.JPG; Logo: 098767876545_1.JPG b. Images must be saved as .JPG. Logos may be saved as .JPG or .GIF. Guides must be saved as .PDF. c. If you choose to submit additional images and/or PDFs, you need to complete the applicable fields pertaining to this asset. You do not need to complete the attributes Package View or Color Type for any digital assets that are not images. Reviewing the MDS Before submitting, you must utilize the Mandatory Validation Check feature on the MDS. This process will highlight any errors and require you to fix these fields before submitting to Lowe’s. When your MDS has passed validations, you will receive a pop-up box and a green comment box indicating you can now submit your MDS to Lowe’s. 1. When you have completed your MDS, select the Data Validation Checker within the Mandatory Tasks Menu in the upper left-hand corner of the MDS. This functionality is a mandatory vendor-action prior to submitting your MDS. LowesLink Marketing Data Tool Website Lowe's Companies, Inc. | Confidential Created by LMB | Updated 2.25.2013 10 2. If your MDS has errors, you will receive a message indicating the number of errors on your MDS. Each individual cell containing an error will be highlighted in red or yellow. a. Click on the column header to view attribute’s instruction box (yellow). b. Hover your cursor over the cell in question (red or yellow highlighted cell). c. Review the validation error listed in the green comment box. If the error is red: correct the information in question, adhering to Lowe’s standards given in the attribute’s instruction box. If the error is yellow, complete one of the following: 1. Correct the questionable yellow error according to the Lowe’s standards. LowesLink Marketing Data Tool Website Lowe's Companies, Inc. | Confidential Created by LMB | Updated 2.25.2013 11 2. Approve a cell as is by clicking the yellow check mark button. For more information on the Approve As Is functionality, see here: Approve As Is. 3. Add word(s) to the Exceptions Utility. For more information on the Exceptions Utility, see here: Exceptions Utility. d. Run Mandatory Validation Check again to see if the cell in question passed validation. e. Repeat this process for all unacceptable errors. 3. If you indicated your item(s) have selling restrictions, you will now be required to provide the restriction type. Refer to the Restrictions Collections Tool Instructions to complete this section of the builder. NOTE: You must utilize the Mandatory Validation Check until you receive a pop-up message indicating you can submit your file. A message will also appear at the top of your MDS indicating your validation is complete. Reviewing the Item Setup Sheets Before submitting, you must utilize the Data Validation Checker feature on each tab. This process will highlight any errors and require you to fix these fields before submitting to Lowe’s. When all sheets have passed validations, you will receive a green comment box indicating you can now submit your file to Lowe’s. 1. When you have completed your item setup sheet (Stock, SOS, Quantities & Dimensions, Logistics, and/or eCat Cost File), select the Mandatory Tasks gray box in the upper left-hand corner, then select Data Validation Checker. NOTE: This functionality is a mandatory vendor-action prior to submitting your file. LowesLink Marketing Data Tool Website Lowe's Companies, Inc. | Confidential Created by LMB | Updated 2.25.2013 12 2. If your sheet has errors, you will receive a message indicating the number of errors. Each individual cell containing an error will be highlighted in red. a. Click on the column header to view attribute’s instruction box (yellow). b. Hover your cursor over the cell in question (red highlighted cell). c. Review the validation error listed in the green comment box. d. Correct the information in question, adhering to Lowe’s standards given in the attribute’s instruction box. e. Run Data Validation Checker again to see if the cell in question passed validation. f. Repeat this process for all unacceptable errors. LowesLink Marketing Data Tool Website Lowe's Companies, Inc. | Confidential Created by LMB | Updated 2.25.2013 13 NOTE: You must utilize the Data Validation Checker until a message appears at the top of your sheet indicating your validation is complete. Reference the Utilities & Help menu on each sheet for detailed explanation of Lowe’s expectations. Uploading Images and PDFs to PCM Digital assets are considered images and PDFs. These assets must be uploaded in PCM before the file is returned to Lowe’s. When entering your images and PDFs into PCM, your file names must be saved EXACTLY as you populated them on your MDS. Digital assets can be uploaded individually or zipped together. The size limit of a zipped file or an individual file is 7.99 MB. If your digital assets exceed 7.99 MB, your data upload will fail. If you are uploading a PDF, select the radio button for “minimum size (publishing online)” for the “Optimize for:” option when publishing your document as a PDF. NOTE: Reference the Lowe’s Marketing Data & Image Standards from Utilities & Help menu of PI Builder for a detailed explanation of Lowe’s image expectations. Unacceptable digital assets and images will result in a delay in processing. How to Upload Digital Assets: 1. Login to PCM. 2. If applicable, click the Select Vendor radio button and select the vendor/vendor number combination that matches the information populated on your MDS. LowesLink Marketing Data Tool Website Lowe's Companies, Inc. | Confidential Created by LMB | Updated 2.25.2013 14 3. Select the radio button next to Upload Digital Assets in the left navigational menu. 4. Select your GLN from the drop-down box. If multiple GLNs are available, you must select the same GLN as populated on your MDS. NOTE: You must also select the country (Canada = CAN or United States = US) when uploading digital assets. If the product data is shared between the United States and Canada, please select US here. 5. 6. 7. 8. 9. Browse to your individual digital asset or zipped file. Click on file. Select OK. Repeat as needed for up to five files per upload. Click Upload. PCM returns a message with a total number of digital assets being uploaded. Click Confirm Request. (You will not be able to view the images you uploaded until the MDS is uploaded in PCM and approved by Lowe’s.) LowesLink Marketing Data Tool Website Lowe's Companies, Inc. | Confidential Created by LMB | Updated 2.25.2013 15 NOTE: Before submitting your file to Lowe’s, it is highly recommended that you review your digital assets within your MDS with the Review Digital Assets feature found in the Utilities & Help menu. By taking the time to review your digital assets in your MDS, you are eliminating potential problems within your MDS by identifying inconsistencies between your marketing data and images/supporting documents. However, all digital assets must be removed prior to submitting your MDS. For more information on how to review digital assets, see here: Review Digital Assets. For more information on how to remove digital assets, see here: Remove Digital Assets. Submitting the File 1. All completed files must be submitted via FootPrints to Product Information. Utilize the “Login to FootPrints” link in the top row of the file to submit your file. 2. Your data will undergo Lowe’s validations and processing once received. If your data fails validations, you will be contacted by a member of Product Information. You must correct any issues on the file and resubmit to Lowe’s. LowesLink Marketing Data Tool Website Lowe's Companies, Inc. | Confidential Created by LMB | Updated 2.25.2013 16


© Copyright 2026